News
DIY: Building a diorama with my supercar scale models
I spent an average of almost 6 hours for 4 days on this, primarily because you keep improvising and keep trying to get it as close as possible to the real deal.
BHPian abhisheksircar recently shared this with other enthusiasts.

It's been almost 10 years that I worked for an organization and I thought of trying out some new challenges in a new organization. I got just 5 days in between to give time to myself. I started planning for a break which is almost therapeutic in nature. I looked around and found meditation centres, healing centres and what not and then I came across this term, 'Diorama'. I watched some videos and decided, THIS IS IT!!
It started with ordering two models from Scale Arts India.
I started looking at it and imagined various dioramas that could be built around it but then since I was absolutely new to this, I thought of keeping it simple - a garage.
I took a quick course on it suggested by my neighbour who is an Art Director and is an artist too. 'Techniques to Create Scale Models' in Domestika. This sure helped me learn some very basic but very helpful steps to get this done. Things which would have been a learning through mistakes if I got into it directly.
After doing the course, I was all pumped up to get this right. Immediately picked up what was required for the build.
- 3 mm Foam Boards
- A1 size cutting mat
- Pen Knife
- Paper Cutter
- FeviQuick
- Fevicol
- LED Strips
- LED connectors
- Acrylic Sheets
- Acrylic Cutter
- Some wires
- Soldering kit
- Loads of creativity
Along with these I also picked up a diorama accessory kit.
And then began the work. I spent almost 6 hours average for 4 days to get this and primarily because you keep improvising and keep trying to get as close as possible to the real deal. It was fun working on it, reliving the engineering days although after almost 20 years of tapping the keyboard, the mortar skills and intuition have gone for a toss and I was going all over. Thanks to my neighbour, Paul, who being an artist guided me very well to remind me even how to hold a pen knife properly for good cuts.

The planning stage

The mock frame
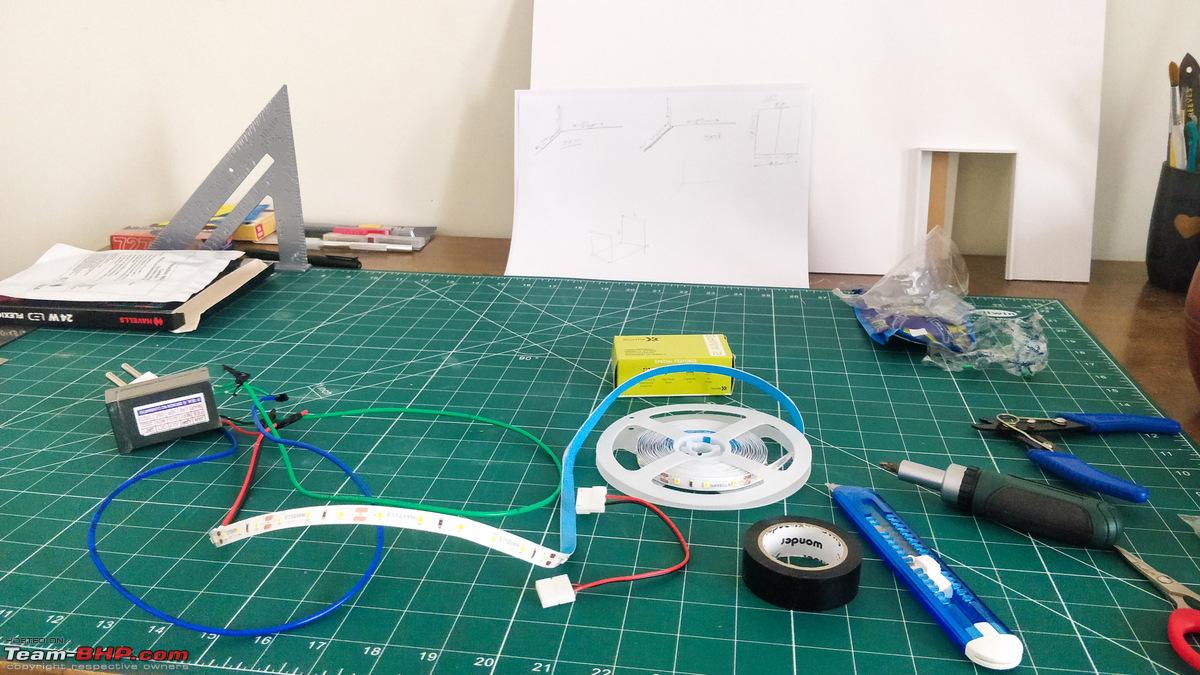
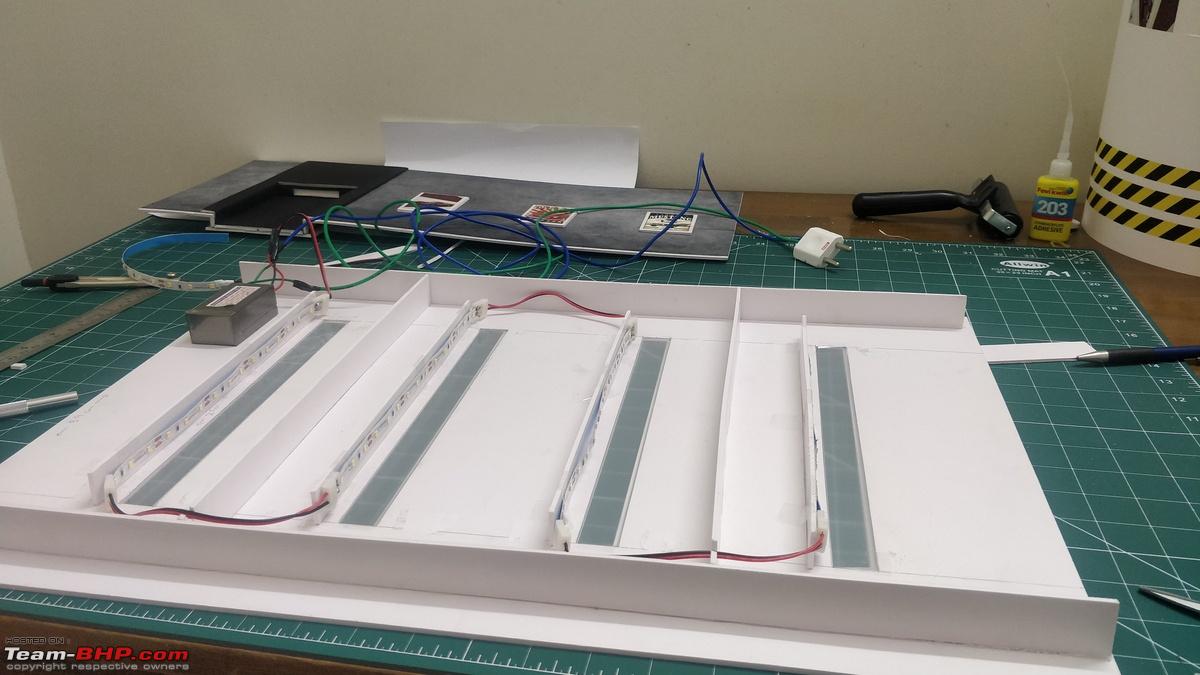
The electricals

The digital prints
The whole process was really fun as you visualize something in your thoughts and then you see it building up in the 3 dimensional space with elements which needs attention.
The highlights
- The lifts space with working lights
- The vintage posters
- The flushed roof lamps which are formed off LED strips vertical to the roof and then photo-paper facing down to give that clean diffused flushed lights through acrylic sheets
- The beading on the floor which looks simple but it complicated
- The marble flooring which is a print on photo paper
- And the textured wall and roof
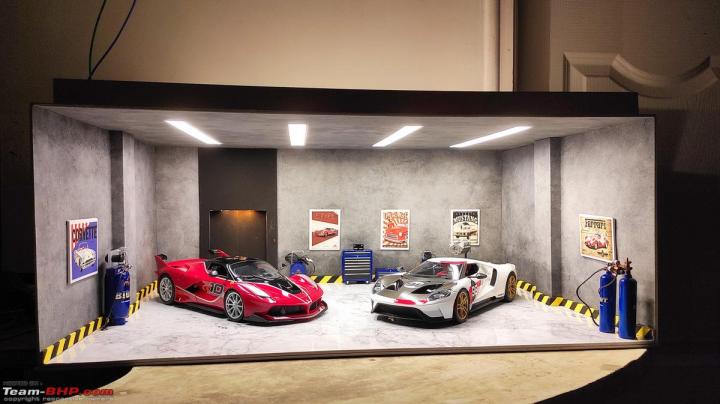
And this is the final bit

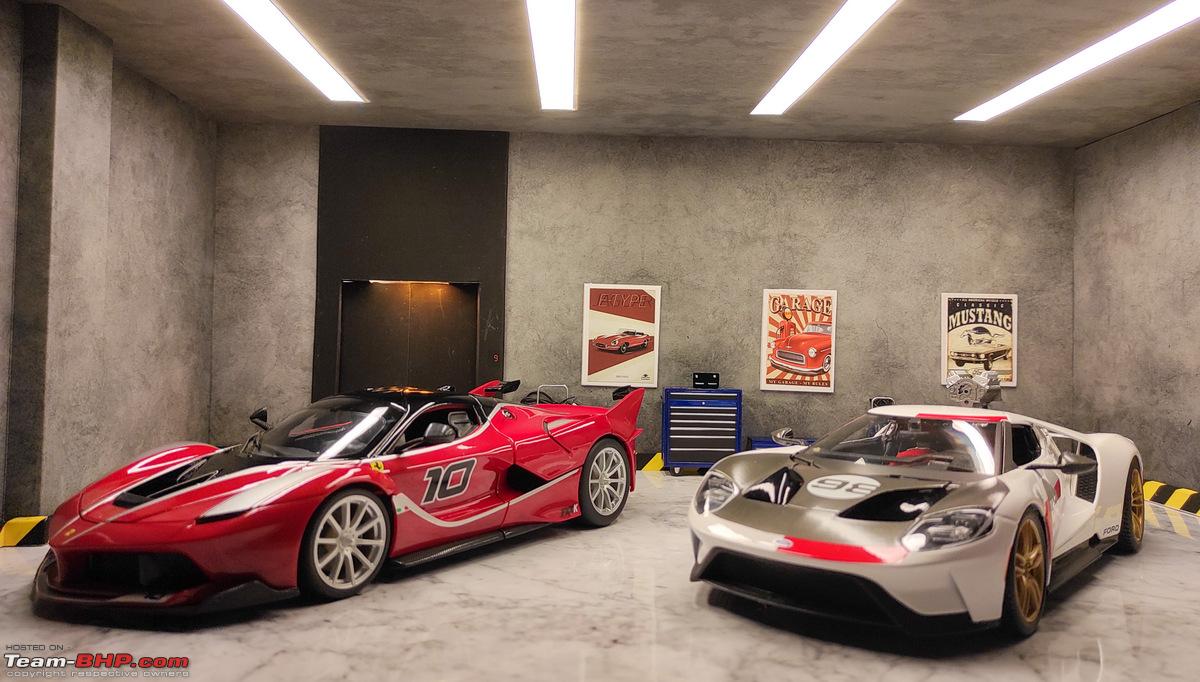
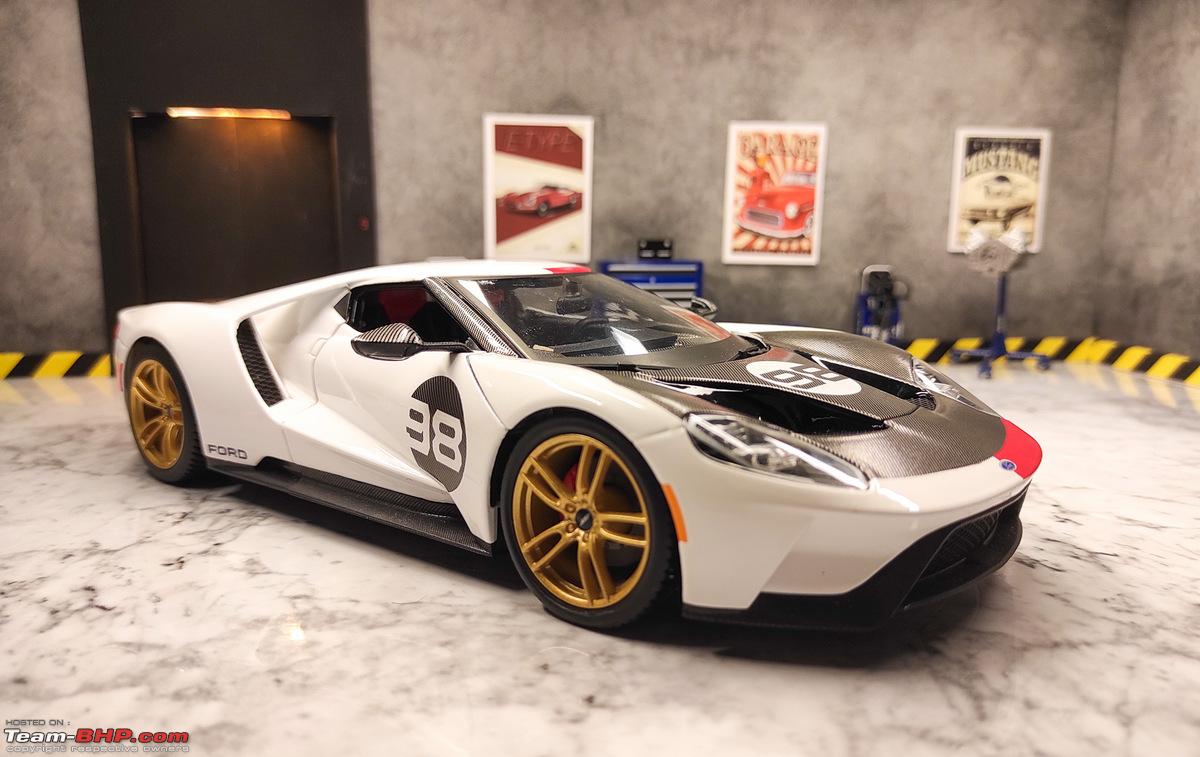

And the model together from a distance

This was my first attempt and hence not perfect but it ended up to be way better than what I imagined. A big shout out to my neighbour, Paul, who kept pushing me to get this right.
Hope this inspires few other petrolheads out here to work on something creative, the next time they get some time! Have fun.
Check out BHPian comments for more insights and information.
- Tags:
- Indian
- Member Content
- Scale Models
Find Car News
Just News


.jpg)


About Us

Buy & Sell
USED CARS