News
DIY: How to replace the exhaust of a 2004 Maruti Esteem
The OEM exhaust costs almost twice the price of an aftermarket exhaust but it's worth the extra money.
BHPian stanjohn123 recently shared this with other enthusiasts.
How I replaced the exhaust at home
After several cancellations on boodmo, I luckily got an OEM exhaust shipped to me. I don't think Esteem owners will be lucky enough to find OEM spares in the next 2-3 years so just buy it now when it is possible. It is almost twice the price of the after-market exhaust but definitely worth the price and the quality of material and life is also much higher. The previous aftermarket exhaust I purchased lasted only for 6 years, but the OEM one lasted for 11 years.
The video for this DIY can be found above.
The rest can continue reading below.
Things Required
- Mid Pipe Exhaust - got it from Boodmo
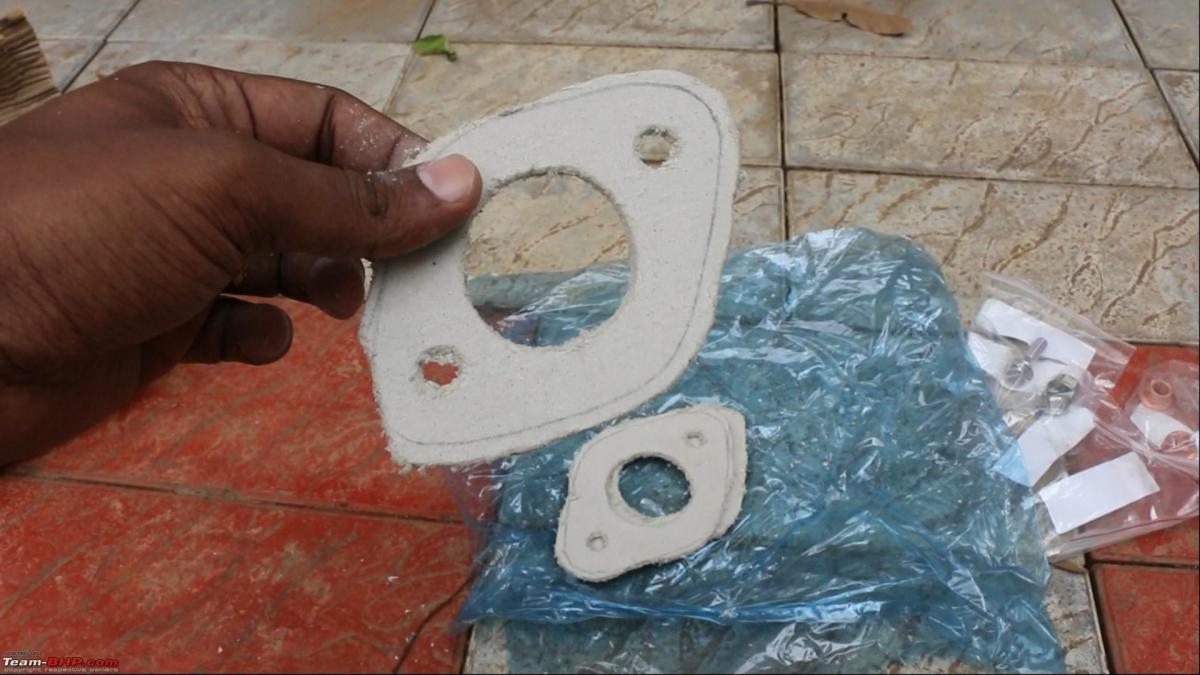
- 4 Exhaust gasket - got it tailor-made by my mechanic. It's made up of some cardboard material.
- Socket Wrench and spanner - sizes 12mm, 13 mm and 9/16 mm.
- Rubber bush Mounting Muffler

12mm nuts - These are not necessary, you can also clean and reuse your old ones if you want.
Now let's get to the DIY.
STEP 1
Raise your car and place it on jack stands. You need to be very careful here because an old car like the Esteem is extremely rusty below. Make sure you place the jack stand as well as the hydraulic jack on a strong iron piece free from rust. There are chances the car may fall on you if you placed the stands on a rusty spot. I placed it on the car's suspension arms.
STEP 2
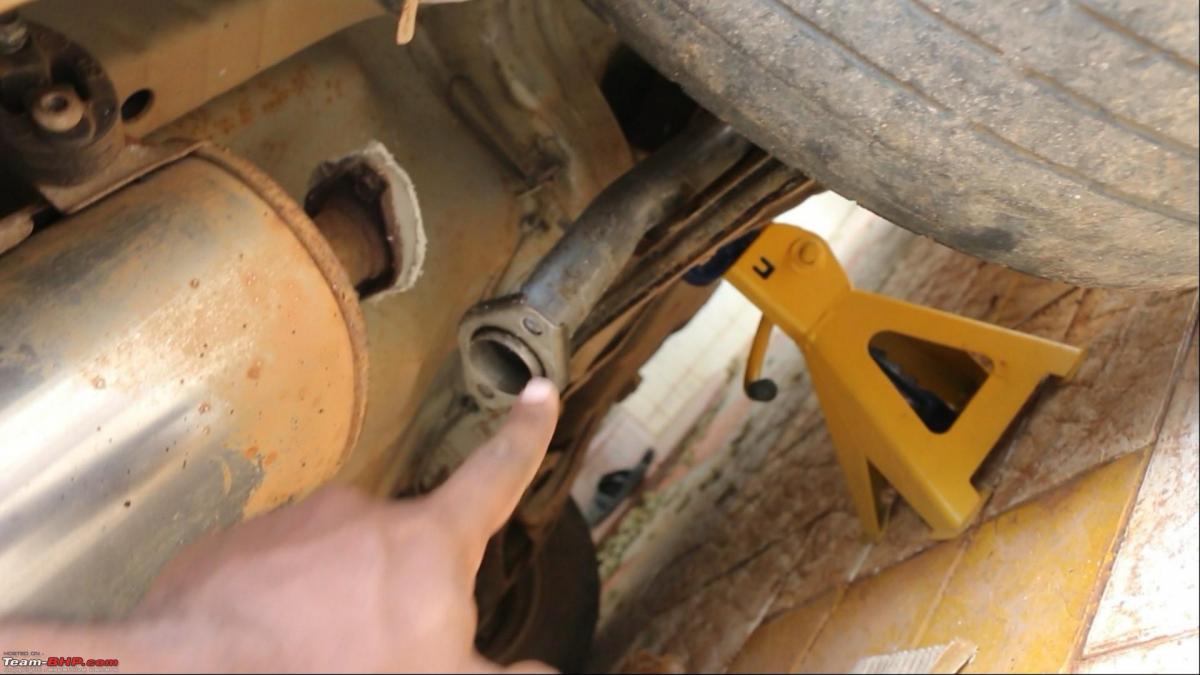
Remove the old Exhaust. First Using the 9/16 mm socket wrench, remove the 2 nuts marked in the below pic.

Secondly, Remove the bolt holding the exhaust pipe to the rubber bush. Use 12 mm socket wrench for this.

Then remove the bush from the body of the vehicle by using the 13 mm wrench. This step is not necessary if you feel that the bush is in good condition.
Thirdly , remove the 12mm nuts from holding the exhaust to the Muffler.
STEP 3
Add the gaskets to the new Exhaust. You may need to add 1 or 2 gaskets on either sides of the exhaust depending on the fitting and gaps. This is to prevent Exhaust leaks.

STEP 4
Fit the new Exhaust in place. Just do the exhaust removal steps in reverse.
That's it. Now just start your engine and try to hear for any exhaust leaks. If you did all the steps correctly, you shouldn't get any leaks.
Hope you guys enjoyed this DIY.
Check out BHPian comments for more insights and information.
Find Car News
Just News


About Us