News
DIY: Installing auto glovebox light in Tata Nexon without cutting wires


Since glovebox lights make your life convenient, it is a feature in the top model of almost all cars now.
BHPian KarDIY recently shared this with other enthusiasts.
DIY Install: Automatic glovebox light in TATA Nexon without cutting wires:
If you have ever tried taking out something from your glovebox specially in a dark place like parking or at night, you must have realized how hard it is to do that sometimes. Even the cabin light feels less.
Since glovebox lights make your life convenient, it is a feature in the top model of almost all cars now. But I have a TATA Nexon XM(S) and the glovebox light is not available in it. But the best part is, you can easily install a glovebox light on your own.
This glovebox really makes things convenient. And all the efforts to do this was worth it.
Tools required:
- Pry tools.
- Screwdriver set.
- Spanner set.
- Knife.
- Wires.
- Thimble.
- Pliers.
- Glove box light.
- Switch.
- Soldering kit.
- JST Terminals.
Procedure:
- Using pry tools open the panel on the left side of left AC vent. Open it from bottom to top:

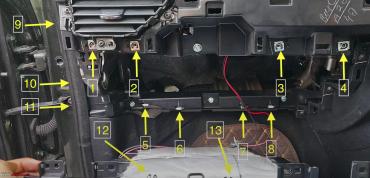
- There are 3 Phillips head screw, unscrew them and keep them aside safely. (Note: There is a bolt too but we don't need to open it):
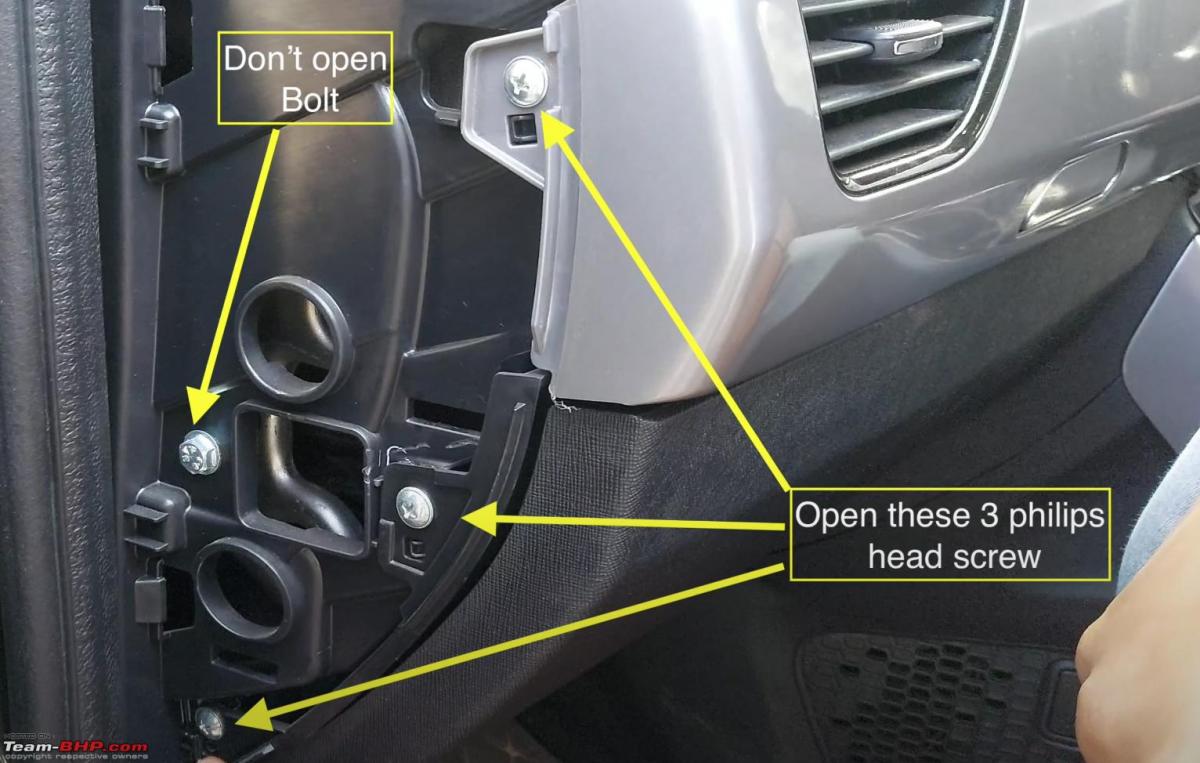

This picture shows all the screws you will need to open in this DIY.
- Open the glovebox, there would be a 10 number bolt at the back of the glovebox. Open the bolt and keep it aside.
- There are two phillips screw on the top of the glovebox. Open them and keep them separately.
- Now remove the silver panel. Before you begin let me tell you this is the hardest part of this DIY as it has a lot of locks which you can see. We have to make sure the panel doesn't break. Start opening the panel from the left side. Check the lock in the picture and open it from there so that it will be a little easier for you to open the panel. Also before removing the panel completely, remove the wire connecting the buttons of infotainment system. With patience and determination you can open it:

- Under the panel, there are 4 phillips screws. Open them and keep them aside.
- Under the glovebox there are 4 phillips screws. Open them and keep them aside.
- There are 4 locks in the front under the panel. Disengage them using the pry tools.
- There are 2 locks on the left side of AC vent under the first panel. Disengage them.
- Now, pull the glovebox to disengage the locks on the either side of the glovebox.
- Use a hot knife to cut the space given for the glovebox light:

- Install the light from inside the glovebox. (You won't need to use any additional glue or anything because the locks will automatically fit themselves perfectly).
- Install the switch on the side. (It also has a locking mechanism so need to of glue).
- Take a small wire thimble and connect it to the wire using pliers. Connect this thimble to the light. (Pro tip: You can use head shrink tube to make sure the thimbles/wires don't touch each other):

- Take a little big thimble according to the size of the switch. Connect it to the wire using pliers and then plug it in the switch. (You can use heat shrink tube here too. Make sure you connect the wire according to the diagram. One wire directly connects from light to switch):

- Connect the other two wires to the two wires of one part of JST terminal. (Pro tip: You can solder the wire together and cover it with a heat shrink tube to have a strong bond).
- Extend the other part of JST terminal by soldering a wire to it.
- Now, for power source, there are two ways you can do this. You can either take it from the glove box or from the socket under the panel. I chose the second option.
- To open the panel, remove the weather strip along the panel. Pull the panel to remove it.
- This socket provides 12 V all the time even without key. Open the socket and check which port provides the 12V supply. To check this, you can take a light bulb. Insert the positive wire in the port and touch the negative wire to the body. When you have found the correct port, it will glow up:
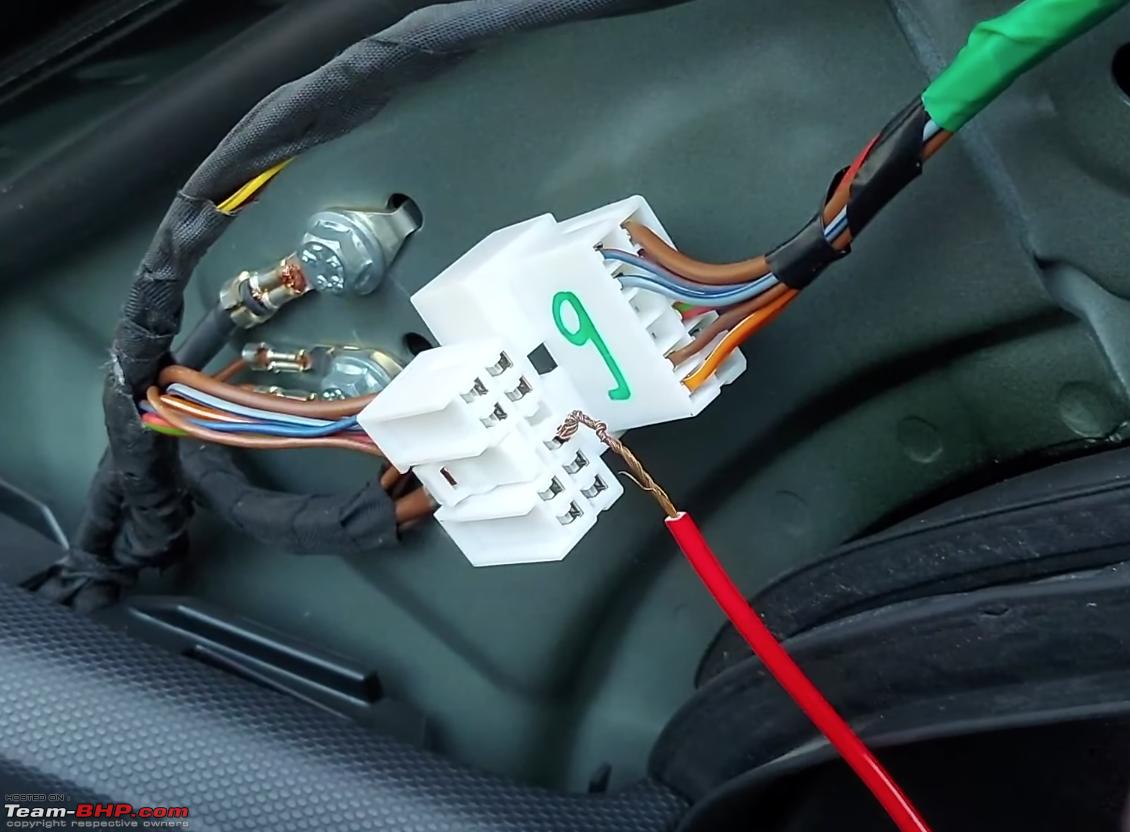
- Insert the wire to the next port from the back. And insert it to the right port. For negative just unscrew a nearby bolt a little, place the wire under it and screw the bolt back.
- Insert the wire through the hole and pass it to the passenger side from the hole in the middle near the foot pedals. (Pro tip: Use cable ties to make sure the wire stays where it is supposed to stay).
- Connect the JST terminals.
- Put back the glovebox in its place so that the locks get engaged.
- Put back the screws and bolts on the back of the glove box and in the front under the panel.
- Connect the socket of the infotainment buttons. (Putting back panel along the button is hard and risky. So, this is better).
- Put back the panel back and start from under the switches.
- Screw back all the screws and bolts.
With this your glovebox light is good to go.
If you are someone who understands better by watching video or if you get stuck somewhere you can watch this video.
Check out BHPian comments for more insights and information.
Find Car News
Just News


.jpg)


About Us