News
DIY: Tata Nexon gets LED fog lamps installed without cutting any wires

In the top model, you get halogen fog lamps but I was looking for a fancier option.
BHPian KarDIY recently shared this with other enthusiasts.
I own a Tata Nexon XM(S). In this model, you don’t get fog lamps which are necessary for winter, especially in Delhi NCR. Moreover, it helps in better lighting the road while driving and gives better visibility. Now, I had a few options while choosing which type of fog lamps to choose. In the top model, you get halogen fog lamps but I was looking for a fancier option. I had the option to either choose projector fog lamps or LED fog lamps. After some thinking and research, I settled on LED fog lamps. In this post, I will show you how you can install fog lamps in your Nexon without cutting any wire. I installed DLAA LED Fog Lamps. The part number is 542754400123.
If you are someone who understands better by watching a video you can watch this video.
Tools Required
- Screw Driver Set
- Pry Tools
- Wire Set
- Fuse Tap
- Switch
- Front Fog Lamps
- Knife/Blade
- Filer
- Switch
Note: In the beginning, I first removed the whole front bumper to get proper access to the fog lamps' bezel. But later on, I realized it is much better to just take the bezel out using pry tools. You can still go and remove the bumper to access the bezel but I would suggest simply removing the bezel as it is more convenient.
In the procedure, I will use the same bezel-removing approach but if you choose the other option you can use the given link to check the other post where I have shown how to remove the front bumper in detail.
Wiring Diagram

Procedure
1. Insert the pry tool in the bezel and carefully move it along the edge to make sure all of the locks get unlocked and then you can pull it out.
Note: Don’t use screwdrivers, use pry tools only. Using pry tools might scratch the bumper.


2. Take a hot knife and cut the fog lamp portion along the edges. Push it a little.
Note: Using a filer, smooth the rough edges after the cutting.

3. Take out the lamps and install mounting on them. The mounts will have L1 and L2 mentioned to help you mount the correct one. You can also see if the holes in the mounting bracket and lamp match or not.
4. Take a washer, put it on the lamp and install the mounting bracket on it using two screws.
5. Put the U-clip on the housing area of the bumper.

6. Put the lamp on the housing and use screws to mount it there.
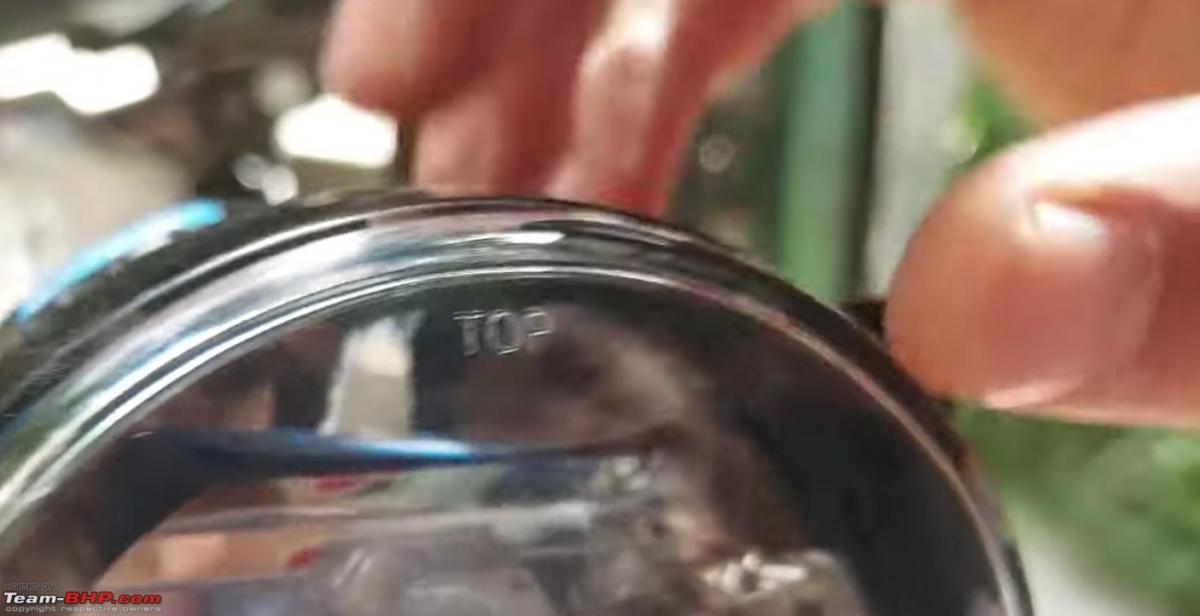
Note: The lamp has the top mentioned on it so you know which side is the top.
7. Put the bezel back.
Note: Now, since it is not company-fitted, there will be some gap between the bezel and the lamp. But it would be fine, no need to panic.
8. Two wires with connectors will be connected to the fog lamps. Use cable ties to secure their position.
9. Open the panel under the glove box by opening the 5 screws on it. This will give you access to the firewall grommet.
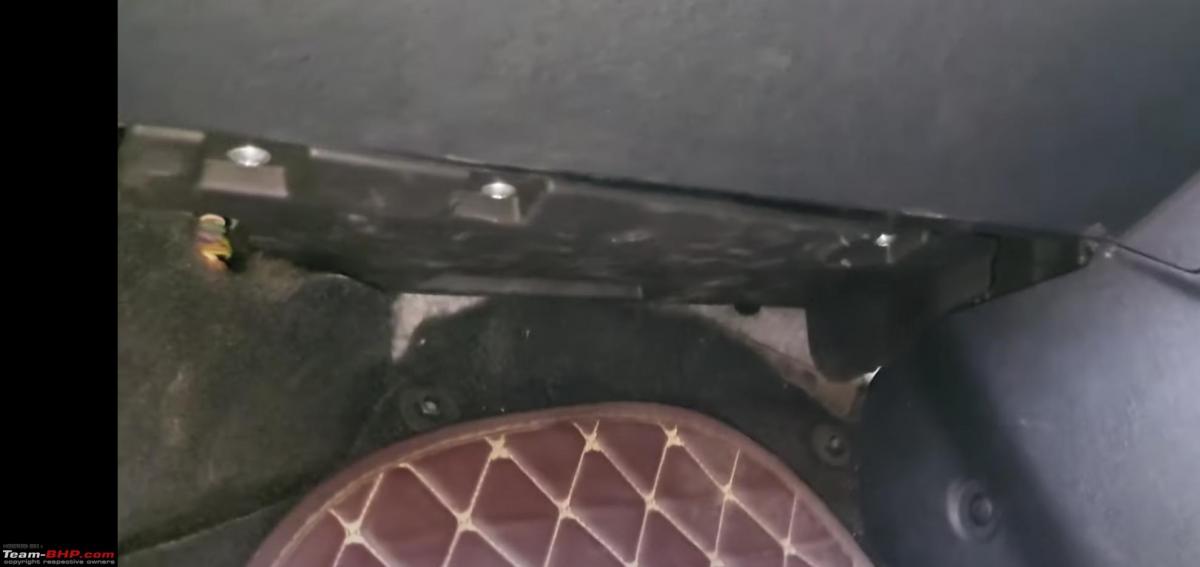

10. Using a firewall grommet, push the wire with the switch inside the car on the passenger side.

11. Mount your relay somewhere nearby in the car. I mounted it here.

12. One wire with the fuse on it will be connected to the positive terminal of the battery.
13. Black one would be connected to the negative terminal of the battery.
14. The wire with a red scotch lock will be connected to the parking lamp wire of the headlamp socket. This will be the white wire. First, remove the socket with the help of a pry tool, pull it out and then connect the wires.
15. Open the fuse box under the bonnet. Now, I have the diesel variant of Nexon, so I plugged in the fuse tap in the 20A Front Wiper Motor fuse. If you have a petrol Nexon you need to plug it into the 10 A Reverse Lamp fuse.
Note: Use the diagram on the inside of the fuse box cover to find the correct fuse.
16, Using the pry tools, remove the driver-side coin box.
17. Using a drill machine, make a hole in it according to the size of the switch.

18. Push the button from the inside of the box.
19. Connect the negative wire to the golden pin.
20. Connect the blue wire to the middle pin.
21. Connect the red wire to the last pin.
22. Put the driver-side coin box back again.
With this, your fog lamps have been installed.
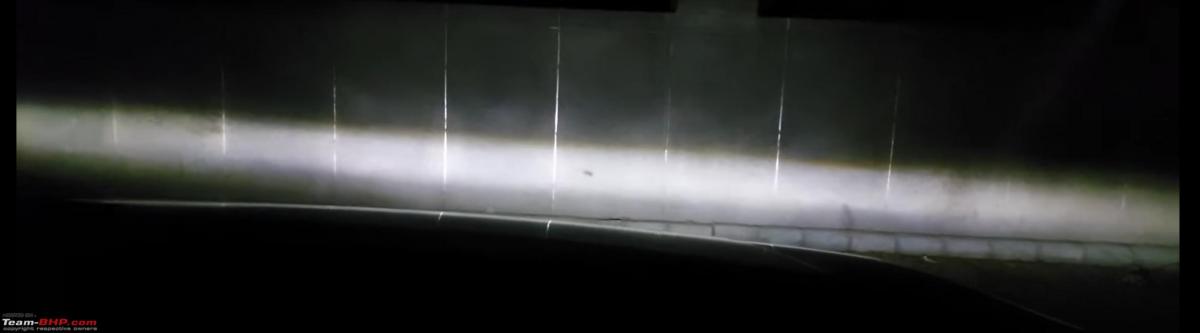
This is how the beam looks. It’s bright and like a continuous bar from side to side.
Check out BHPian comments for more insights and information.
Find Car News
Just News


.jpg)


About Us


Buy & Sell
USED CARS