News
Learnt a lot while fixing an old Jaguar's malfunctioned Xenon headlight


When we checked the fuse, it was fine and this was bad news because it meant there was a wiring problem somewhere else.
BHPian Jeroen recently shared this with other enthusiasts.
Does your car have Xenon lights, or would you like to understand what makes Xenon lights? Well, my spanner mate Peter's Jaguar has Xenon lights. And one of them was not working. Peter had already checked the bulb and the fuse, but they were both fine. Which usually means the so-called ballast might be short.
If you want to know a bit more about Xenon lights, have a look here.
Compared to traditional halogen lights, xenon lights are very different from halogens and can be recognised on the road thanks to the blue hue they give off. They use an electric arc between two electrodes rather than a filament to produce light and are often referred to as high-intensity discharge (HID) lights. Xenon gas is used as it helps establish an arc between the electrodes (and hence creates light) at lower temperatures, but becomes less important when the bulb is up to temperature.
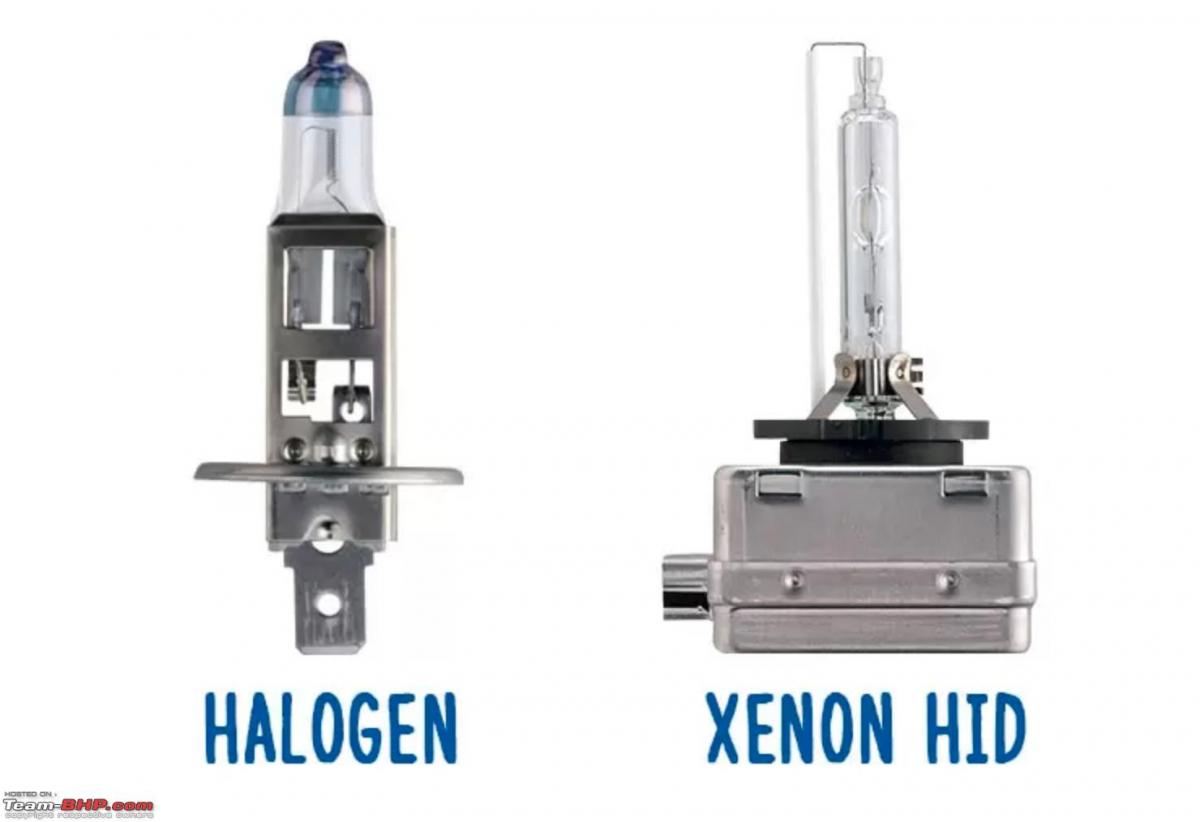
A big advantage of Xenon lights is Lifespan. Xenon bulbs can last up to 10 years, making for a good piece of mind. Brightness - As high-intensity discharge would suggest, xenon lights are brighter than their halogen counterparts.
A downside is the cost associated with it. If you are buying a used car which has xenon lights and is coming up on 10 years old, good replacement units aren’t nearly as cheap as you would hope.
It's not only that the bulb is so much more expensive, but all the other parts associated with a Xenon light are expensive too. You need the aforementioned ballast (more about that later) and the headlight unit, needs auto-height adjustment for the beams as well. (At least here in the West they do). Those bits are ridiculously expensive!
So Peter had done a bit of research trying to determine what kind of ballast he needed and where it was located. The latter was simple, underneath the light unit. Which ballast was a bit more problematic? Different sources gave different parts. The difference is that it is either a 4 or 12-pin connector. Whereas the 12-pin version is still available the 4-pin is not. Even tracing the part by VIN did not provide any further clarity. Eventually, Peter ordered a 12-pin connector from a specialised Xenos light shop in Breda. They told him if anything he could swap the 12 pins for a second-hand 4 pin they happened to have in stock as well.
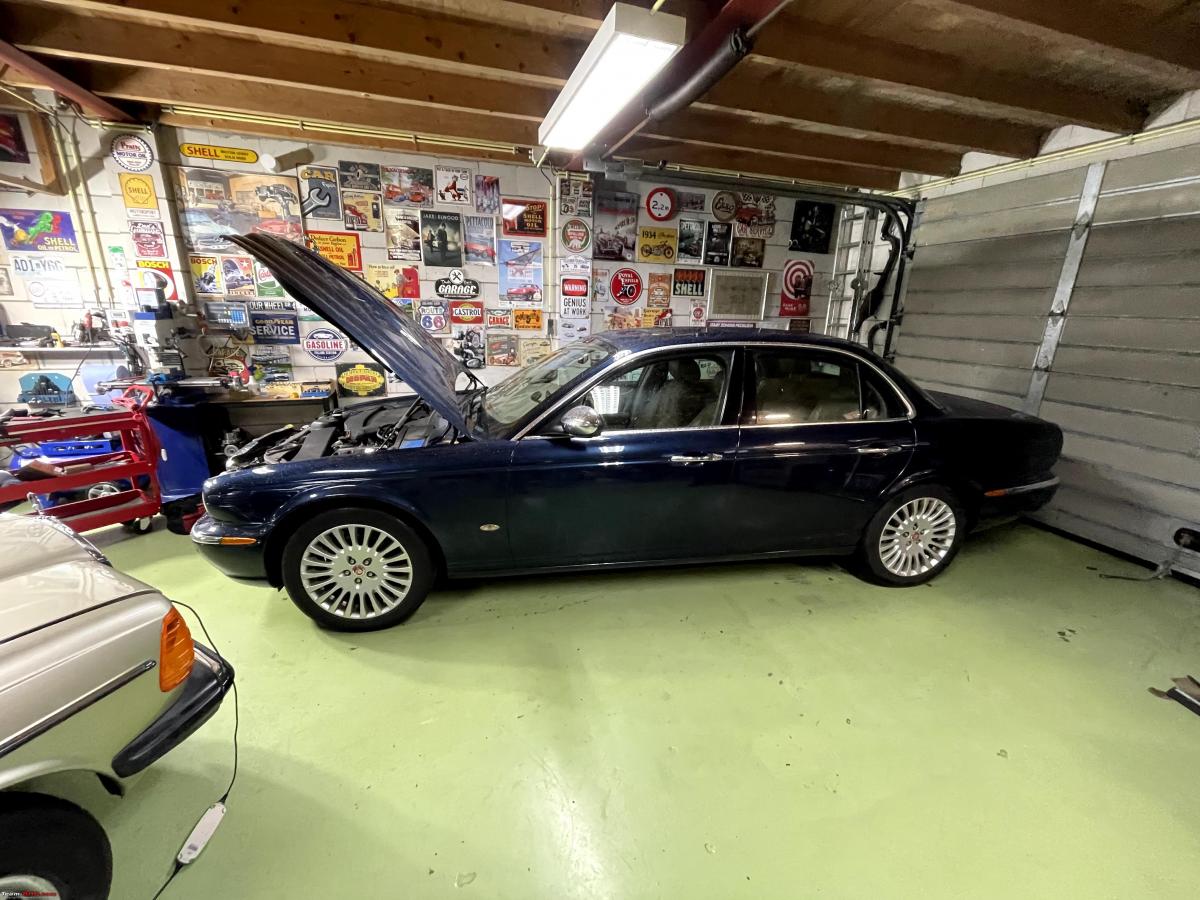
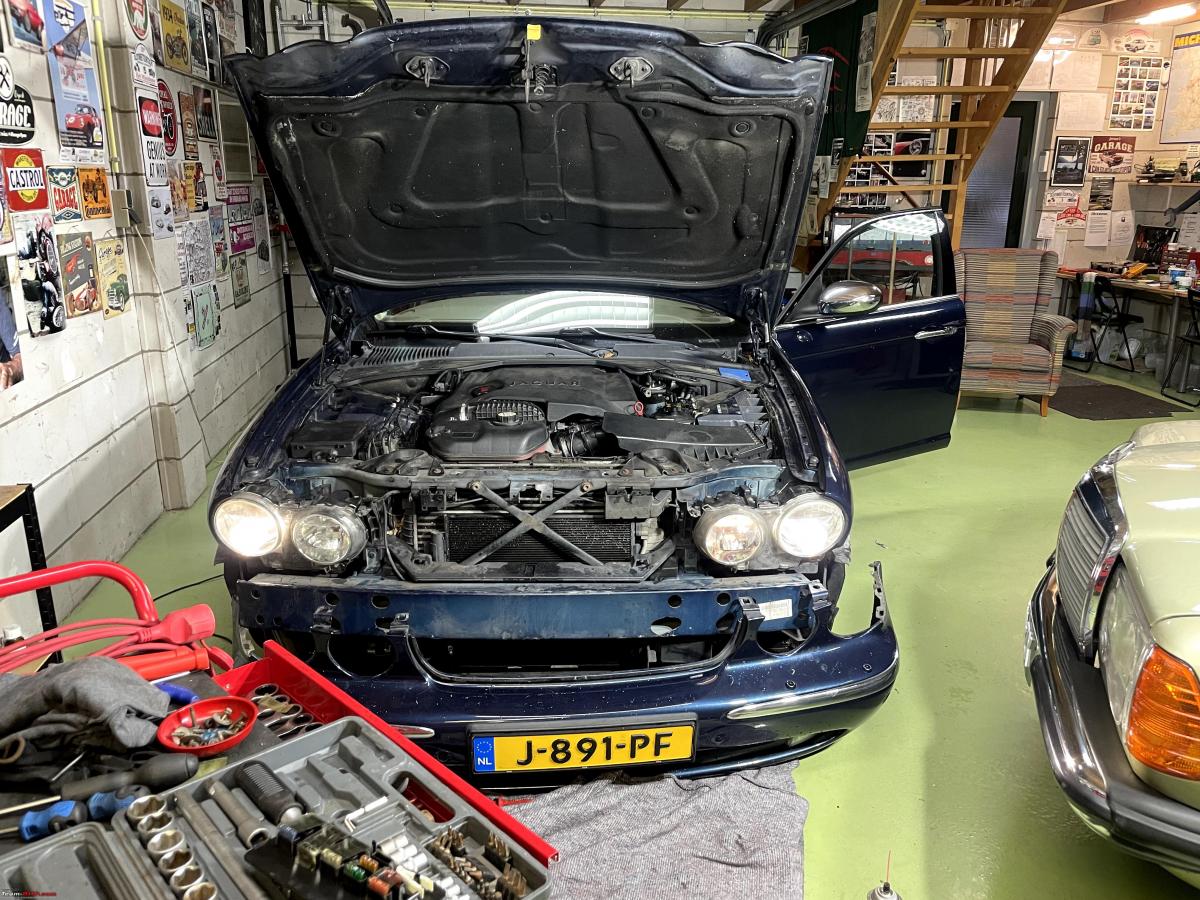
So we decided to pull the headlight unit and see what was installed to start with.
Always practice removing the battery connection when working on electrical bits!

Peter had checked the Jaguar workshop manual on how to remove the headlight unit. It meant lots of plastic bits had to come off!
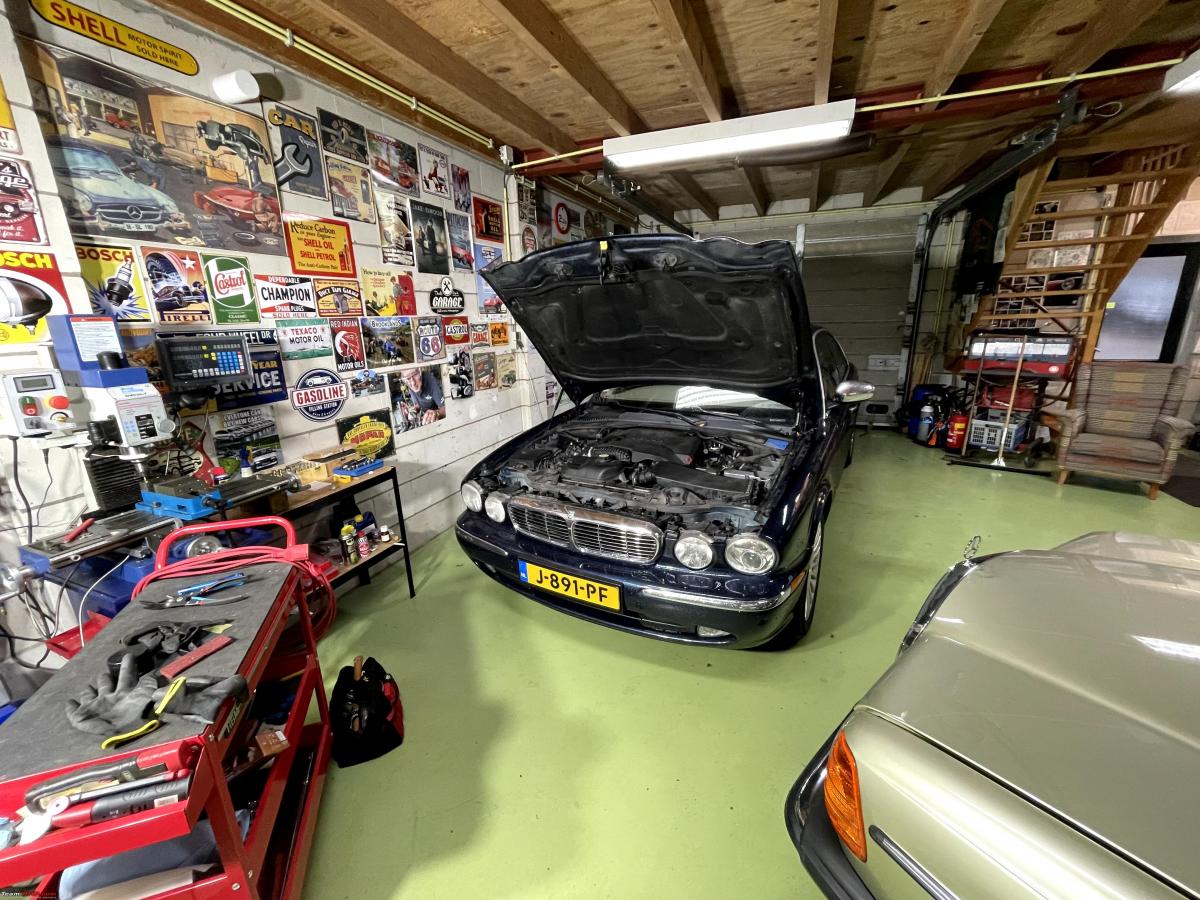
There is a large plastic cover plate on top of the engine/radiator. A couple of plastic plugs and off it comes. Underneath the car, we had to undo the so-called splash guard. Next, the bumper had to come off, or rather the plastic skirt.
Always a bit tricky. The workshop manual tells you to just pull on the side. But a bumper is very expensive and we wanted to make sure. We found a couple of good videos on YouTube. The bumper popped off without any problems, but it did need quite a bit of force. Which is always pretty nerve-wracking! What if you break it?
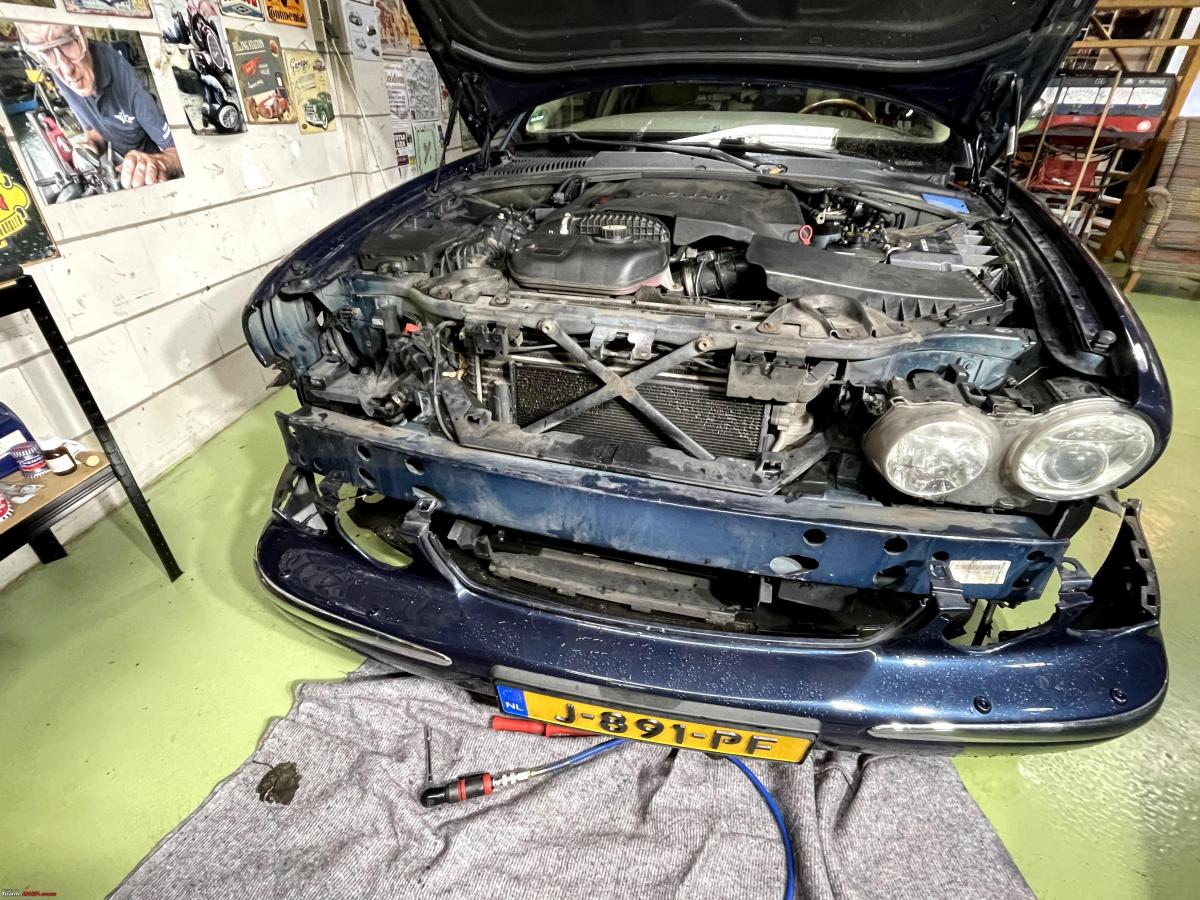
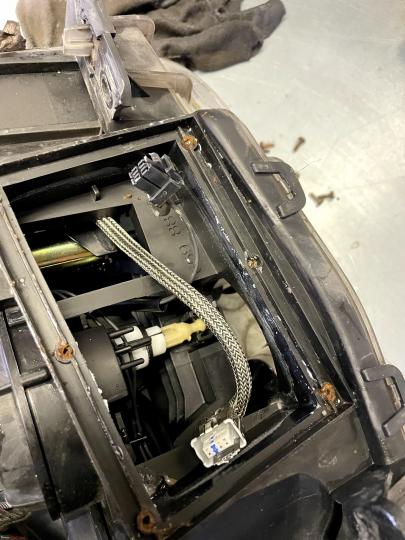
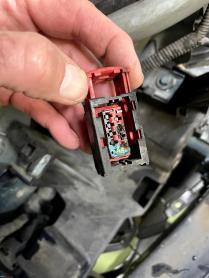
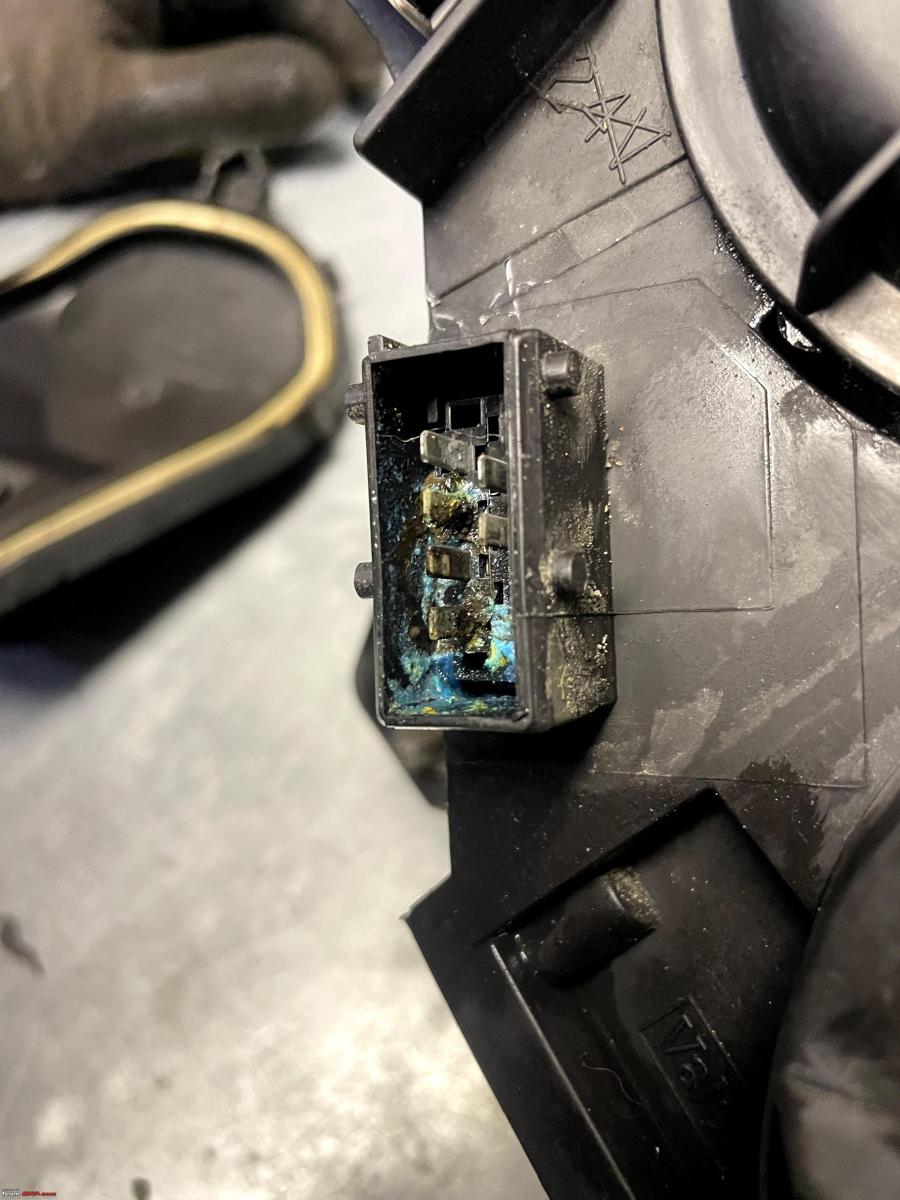
The complete headlight unit was removed. Notice that connector?

I had a good look at that connector.

Similar situation on the headlight unit counterpart of the connector.
So we felt pretty sure we had found the problem. We were not sure, whether we needed a new ballast after all.
We took the ballast of the headlight unit as well.
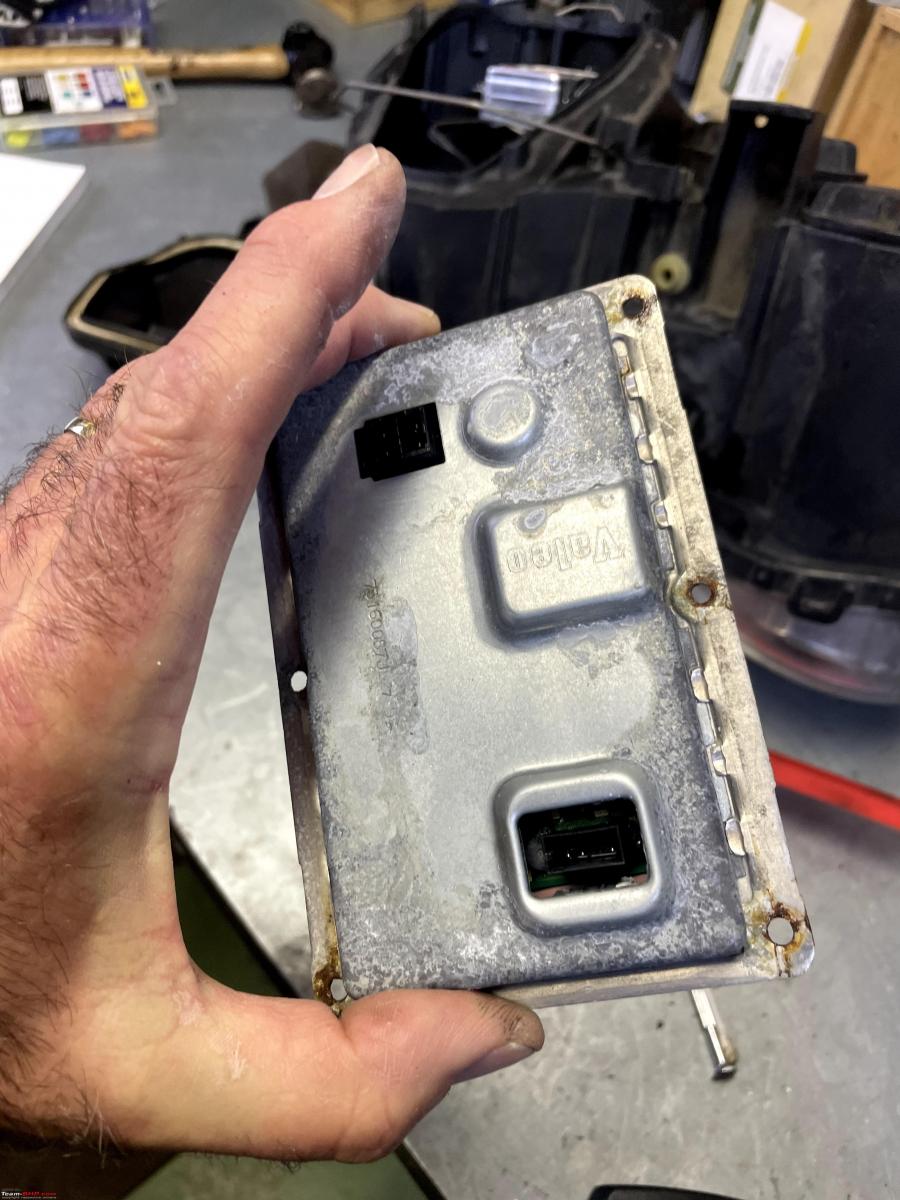
Here you see the insight of the headlight unit and the two cables attaching to the ballast. If you look carefully you can also see part of the self-levelling adjustment mechanism.

It was also clear this was a 4 pin ballast. The Ballast had some water damage as well. So we decided to hop into my Mini and drive to Breda and swap the brand new 12-pin ballast for a second-hand 4-pin ballast. Peter got two second-hand 4-pin ballast, just so he had another one in stock.
The guy from the shop told us the difference between the two versions is related to the self-levelling functioning of the headlight units. The 12-pin version has the self-levelling electronic bits built in. On the 4-pin version, self-levelling electronics are controlled via the BCM.
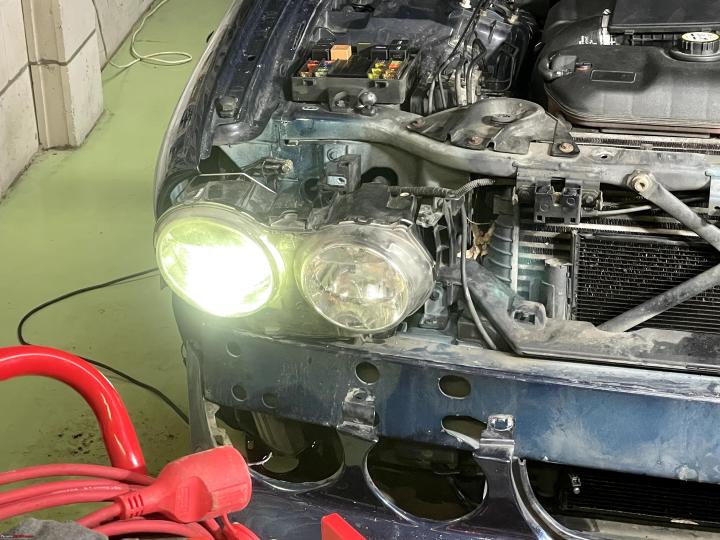
When we got back to my garage we replaced the ballast, connected the headlight unit to the connector in the car and turned on the light, just to see if it worked. Before putting everything back together completely. But it did not!
So we swapped the left headlight unit, to the right-hand side of the car. This would give us a clear indication of whether the problem was still within the right-hand headlight unit or the right-hand headlight wiring. Good thing we did, because the left unit did not work either when hooked up to the right side wiring.
Back to the drawing board!
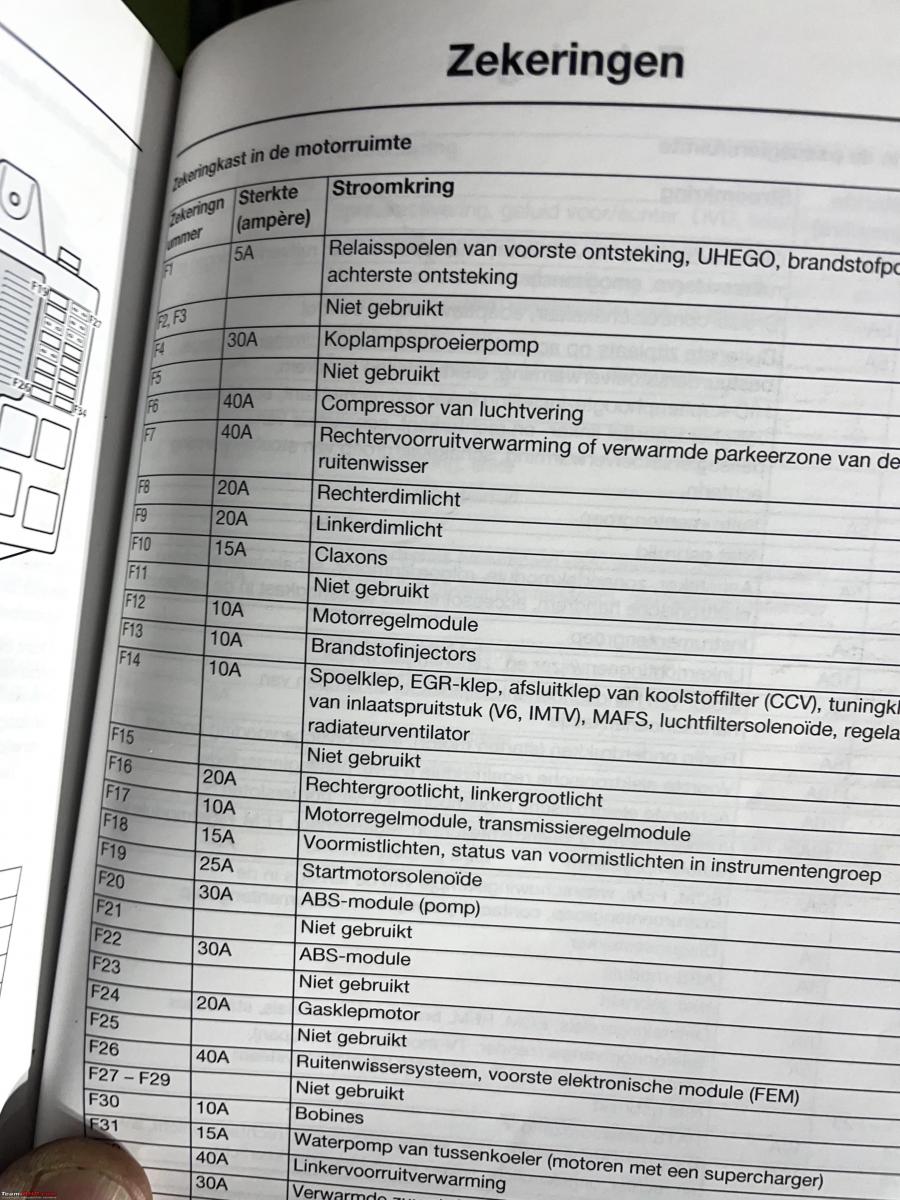
The first thing we did was check the fuse again. Simple enough. Peter's Jaguar has only three (!?) fuse boxes. The owner manual will tell you which fuse box sits where and identify each fuse.
The location of the fuse box as per the manual should be under the hood.

Fuse box under the hood:

According to the manual, the right headlight is fuse F8. That is the yellow 20A fuse, the second one from the top, right-hand row.
When we checked the fuse, it was fine. Which was bad news, because it meant there was a wiring problem somewhere else. Tracing these sorts of wiring issues is usually a real PITA!
Luckily I decided just to check all fuses, for good measure. I had a good look and even before I started pulling fuses, I could see, with the fuse still in place, a problem with the 20A fuse in the second row from the right, bottom position. F10. It had popped!!

As you can see in the owner manual, F10 is supposed to be the horn (claxon) and it is also supposed to be a different rating. Nevertheless, we put a new 20A fuse in, hooked up the right-hand headlight unit and presto. Bright Light!!

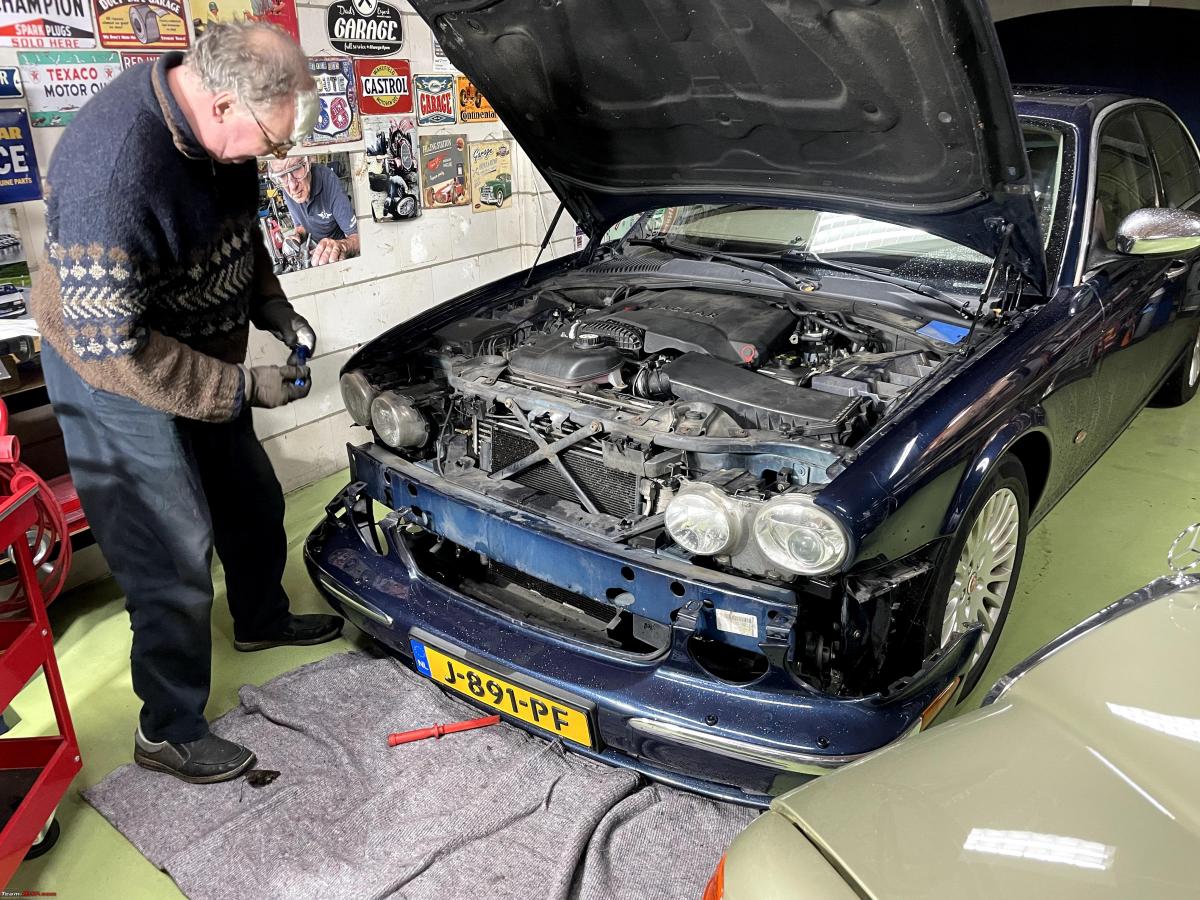
So we felt confident we had found the problem and fixed it, so we put both headlights back in and started bolting everything back on.
Peter doing the finishing touches on his car.

Peter did some checking afterwards in the full workshop manual and came up with these drawings. On the 2005 version, the fuse for the right main headlight is F8 (and F9 for the left unit)

However, for the 2006 version, the right main headlight fuse is F10!
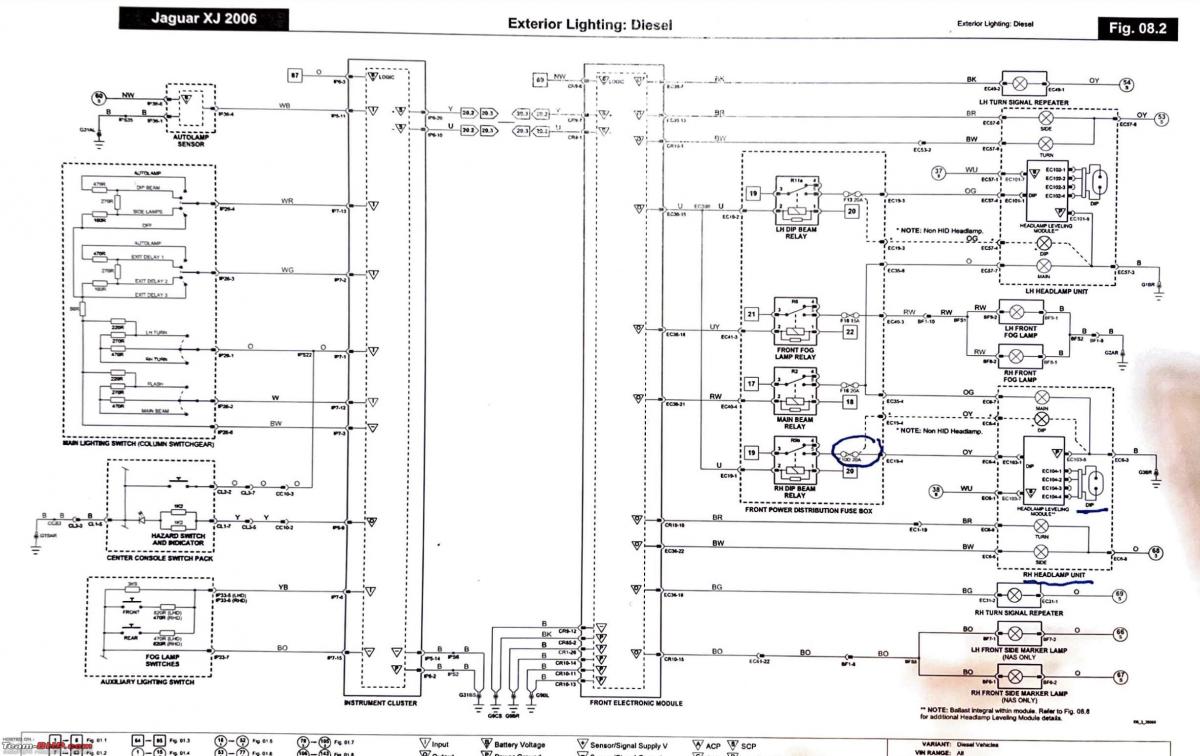
So it appears the owner manual of Peter Jaguar is a 2005 version and not a 2006 version!! Peter bought this 2006 Jaguar second-hand. Jaguars come with a lot of documentation. The complete set was with the car, brand new. So we felt, the dealer probably ordered a new documentation set as the old one had gone missing. Apparently, lots of cars get traded in, without the car documentation.
The root cause of all the problems was probably water ingress in the connector. I have come across many corroded connectors during many years of spannering, but this one was particularly bad. There was some evidence of soot even. So it probably short-circuited, which caused the fuse to pop. There was also water inside the headlight unit.
All in all, quite an interesting job. Learned a lot. Check the documentation of your car for the correct year/version!
Check out BHPian comments for more insights and information.
Find Car News
Just News


About Us


Buy & Sell
USED CARS