Team-BHP > 4x4 & Off-Roading > 4x4 Vehicles
Register New Topics New Posts Top Thanked Team-BHP FAQ


Reply
  Search this Thread
57,668 views
Old 7th May 2013, 11:52   #16
Senior - BHPian
 
Shubhendra's Avatar
 
Join Date: Apr 2009
Location: Poona
Posts: 1,274
Thanked: 2,237 Times
Re: CJ3B Mix and Match – DIY Learning

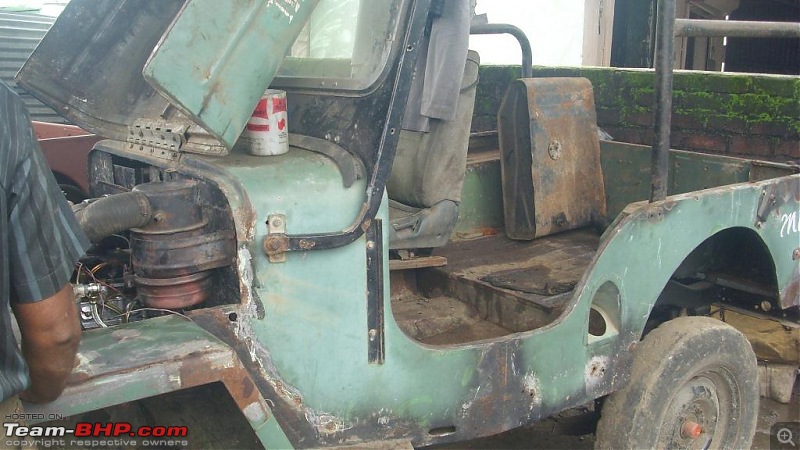
Important decision has been made. After discussing with Arka, Fazal Ji and Sandeep (Frankenstein). It was decided to put KMT-90 GB, front diffs with disc brakes, rear diffs with LSD.
Initially i was confused to put 4+1 GB from Isuzu which has better gearing and butter smooth shift, but parts availability and limited exposure of my mech to this GB forced me to stick to M&M GB. All parts have been oredered from Mayapuri (Delhi) knowing their proven track record of duping customers. Keeping my fingers crossed to see what i get from them.

In the meanwhile tinker is finishing tinkering work on body. Once we get all spares at our disposal, I forecast this Jeep to be ready by June end.

CJ3B Mix and Match – DIY Learning-img00234201302231410.jpg

CJ3B Mix and Match – DIY Learning-img00228201302231409.jpg

CJ3B Mix and Match – DIY Learning-img00235201302231411.jpg

Shubhendra
Shubhendra is offline  
Old 20th May 2013, 13:52   #17
Senior - BHPian
 
Shubhendra's Avatar
 
Join Date: Apr 2009
Location: Poona
Posts: 1,274
Thanked: 2,237 Times
Re: CJ3B Mix and Match – DIY Learning

Update:
Work was stalled from last one and half months as got too occupied in professional life and it took me some time to decide and implement on what I wanted to do with brakes, GB etc.

After discussing with many experts, it was decided to have KMT-90 GB with T-18 transfer case. As mentioned earlier by me, brakes were our top most priority and while calculating cost for doing conversion for brake, it clicked to me – why not go for 550 front and rear diffs and LSD on rear diffs. Few calls here and there and got in touch with one shop owner in Mayapuri from whom I have bought spares few times. I know many people may yell at on getting parts from Mayapuri but I had no other option as I checked prices at Mumbai, Poona and Chennai but prices were at least 40% more than what I paid in Mayapuri. I even paid 20 % extra on Mayapuri prices to this guy on assurance of quality. I am keeping my fingers crossed on quality of parts I got.
It took him 15 days to find one good set, pack it and ship to Poona. Another 15 days for transportation etc.
I have procured:
1) Front differential with tie rods, free wheeling hubs, disk, rotor etc.
2) Rear diff with LSD
3) Gearbox, transfer case and skid plate
4) Pedal assembly
Rest all parts (master cylinder, booster, pipes etc) would be procured brand new and installed.

Help required:
Need help in identifying LSD differential. How to identify one ? I made below observation on diffs which I have received:
1) A big R is embossed on top of diff which I heard is only embossed on LSD diffs
2) LSD diffs were always SFRA (someone told me this long time back)
We are yet to open, fit tyres and rotate both ends to check whether what I got is what I paid for or not.

Thanks in advance.

Shubhendra Singh
Shubhendra is offline  
Old 21st May 2013, 12:24   #18
Senior - BHPian
 
Shubhendra's Avatar
 
Join Date: Apr 2009
Location: Poona
Posts: 1,274
Thanked: 2,237 Times
Re: CJ3B Mix and Match – DIY Learning

A big shout to experts to help me identify whether i have got rear diff with LSD or without......


Shubhendra
Shubhendra is offline  
Old 8th July 2013, 18:47   #19
Senior - BHPian
 
Shubhendra's Avatar
 
Join Date: Apr 2009
Location: Poona
Posts: 1,274
Thanked: 2,237 Times
Re: CJ3B Mix and Match – DIY Learning

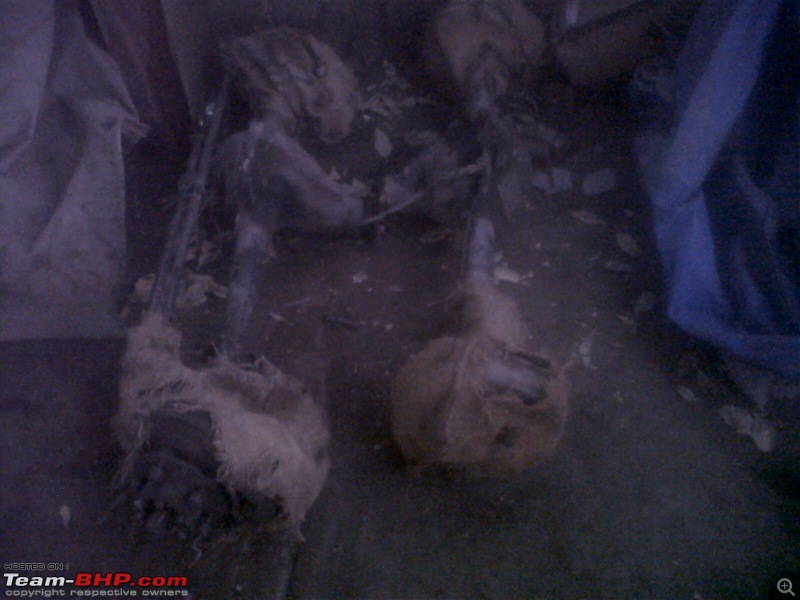
This weekend fun project was on hold for almost a month as I was busy during weekends in some other activities (offroading included), finally started work on it after a month of hibernation. As mentioned in my last post, I procured diffs, gearbox, FWHs etc from Mayapuri. Though we have not tested them yet but preliminary inspection is pretty positive. Best part is the guy who sent me these spares have not touched them at all, meaning front diffs have tie rods, discs, rotors and even brake pipes, same goes to rear diff.
Package received
Gearbox and pedal assembly
CJ3B Mix and Match – DIY Learning-img00248201305141912.jpg

differentials
CJ3B Mix and Match – DIY Learning-img00249201305141912.jpg

Once we unpacked the material which we received, it took us an hour and half to remove front diff and fit 550s diff as it was straight forward.

Front differential removed and stored for my next jeep
CJ3B Mix and Match – DIY Learning-img00250201305181758.jpg

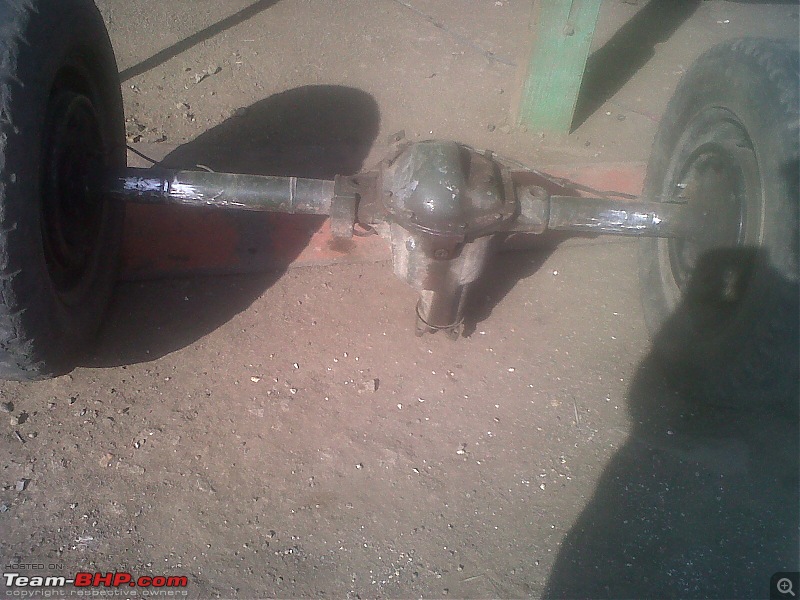
front differential of 550 with tie rods
CJ3B Mix and Match – DIY Learning-img00252201305181759.jpg

For rear diff as suggested by Arka, we decided to move perch of diff to match alignment of existing leaf set. Although my mechanic and few of my offroad buddies insisted me to change leaf mounting similar to 550 instead of fiddling with perch. But I didn’t want to play with chassis as it was easy to remove/cut old perches, buy new perch from shop and simply weld them on differential after aligning them with leaf set.
Chassis without differentials
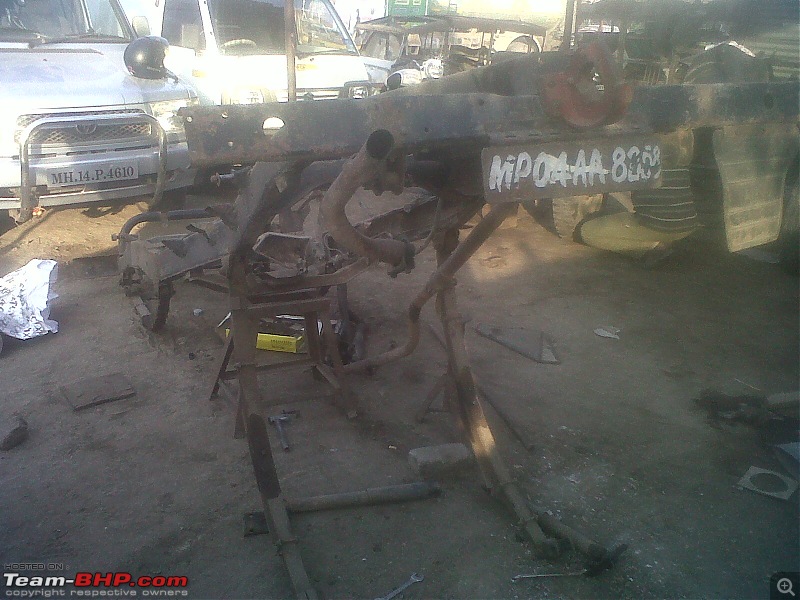
CJ3B Mix and Match – DIY Learning-img00251201305181759.jpg

Rear diff of 550 with perch removed
CJ3B Mix and Match – DIY Learning-img00253201305281621.jpg

CJ3B Mix and Match – DIY Learning-img00254201305281621.jpg
Once rear differential has been put in place, our leaf spring guy swung into action and started work with rear leaf set. I had to change almost everything except leafs it included base plate, shackles, mountings, clips, center bolt, brass bushes etc. everything and I mean everything in suspension was screwed and misaligned. I don’t know how previous owner was driving this jeep, it had 12 leafs in rear and 13 in front  which now have been reduced to 9 front and 8 rear. We also changed all shock-up mountings as they all were bent,
Body with temporary anti rust coat, it would be re-tinkered, primered and coated once we move vehicle to Shetty's garage
CJ3B Mix and Match – DIY Learning-img00255201307031536.jpg

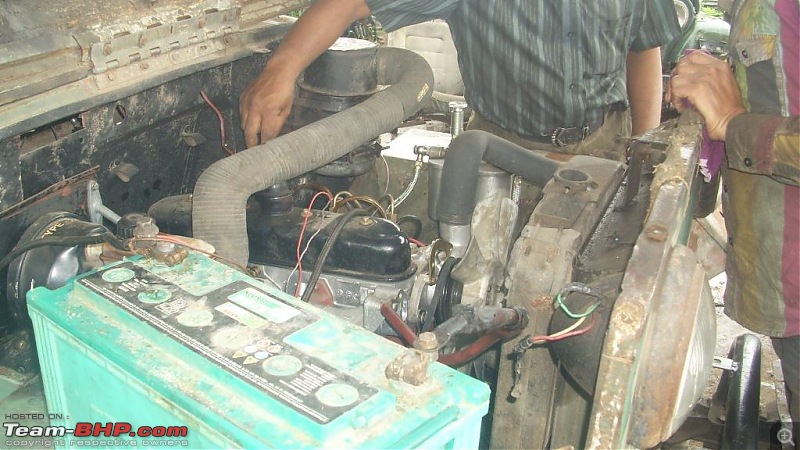
Next was to mount engine. Previous engine mountings were literally twisted, initially I thought to realign them but I was not sure whether alignment would be done accurately by welder. Thus I went ahead and procured new mountings, we also bought new body mountings.

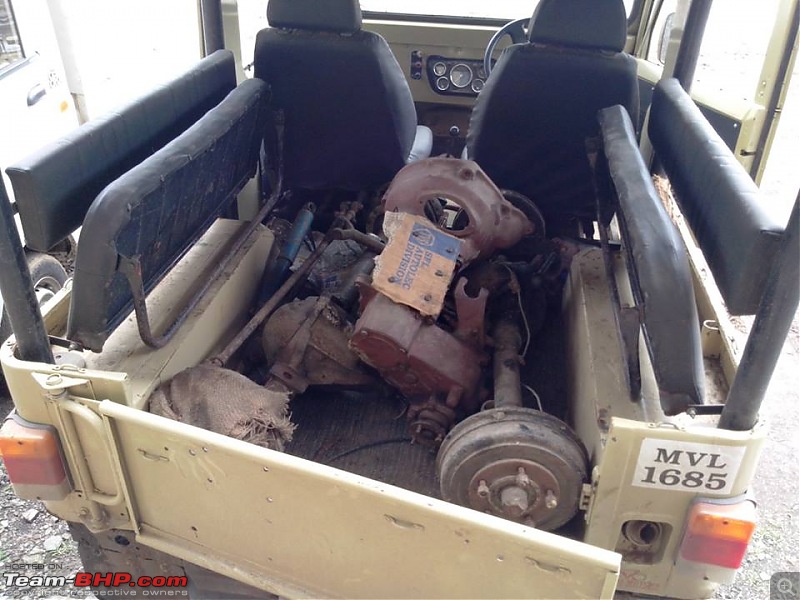
Now came the number for gearbox. We had to push back cross member by few inches to accommodate new gearbox, this also resulted in new setup for clutch which included new holes, bracket rod etc. we put new pressure plate, clutch plate, bearing etc. previously this had XDP engine which has been overhauled but they didn’t put slant wedge between cross member and gear box, instead they put flat piece of metal. As I am writing this I couldn’t find that wedge yet, might get them in a week’s time by a scrap dealer who promised me to give them within a week. New gear box and transfer case mounting had been put. Rear shaft had been cut to accommodate bigger gearbox.
New pipeline for brake has been bought and installed. I now need to buy break booster, cylinder and alternator with vacuum pump.

Chassis fitted with differential, gearbox, engine etc

CJ3B Mix and Match – DIY Learning-img00256201307031536.jpg

CJ3B Mix and Match – DIY Learning-img00257201307071233.jpg

CJ3B Mix and Match – DIY Learning-img00258201307081736.jpg

CJ3B Mix and Match – DIY Learning-img00261201307081737.jpg

body put on chassis temporarily to install hanging pedal system
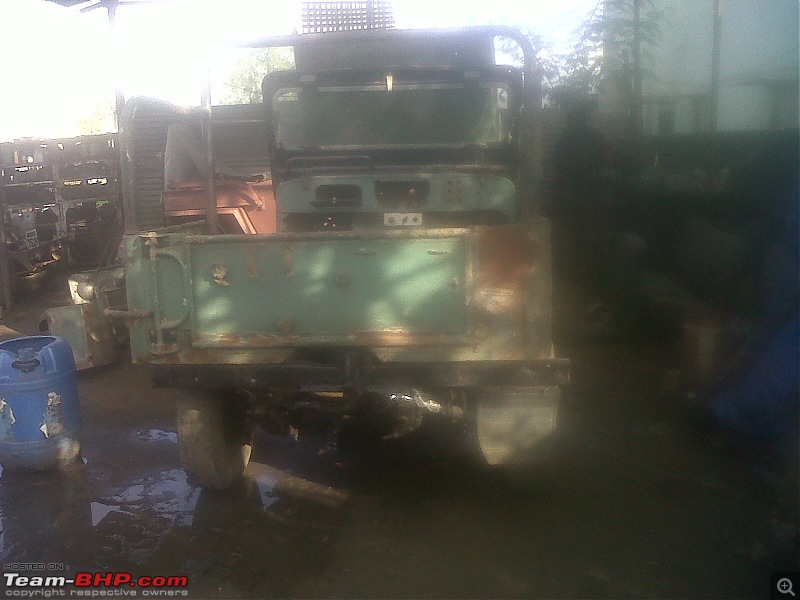
CJ3B Mix and Match – DIY Learning-img00260201307081736.jpg
We have not changed radiator yet, as we want to change it once painting etc is done. I am hoping to fit everything mechanical in a place by next week. After that vehicle would be shifted to Shetty’s garage where remaining tinkering work will be completed along with painting, wiring, cushioning and final touch ups.
Earlier I wanted to finish all work at current garage but bad weather coupled with my mech’s staff crunch desisted me to continue work. At the same time after meeting/interacting Mr Shetty and inspecting his workshops (he has 3 workshops in Poona), I convinced to use their services. They have paint booth and covered garage which is lacking here , they also have everything at one place, right from welder to wiring man. This means that I have to no longer run around different mechanics.

Shubhendra
Shubhendra is offline   (6) Thanks
Old 9th July 2013, 15:48   #20
Senior - BHPian
 
ex670c's Avatar
 
Join Date: Nov 2004
Location: Chennai
Posts: 2,470
Thanked: 1,950 Times
Re: CJ3B Mix and Match – DIY Learning

Quote:
Originally Posted by Shubhendra View Post
A big shout to experts to help me identify whether i have got rear diff with LSD or without.....
Hi Shubendra,

The LSD diffs will have SPRIAX 90 Tag on the diff-cover bolt.

Actually Spirax 90 which is the recommended Diff-Oil for the LSD.

Another method is to rotate the pinion, both the hubs/drums will rotate in the same direction (initially/Partially/ultimately) indicating LSD action.

Or rotate one drum and the other will rotate in the same direction, indicating LSD action.

Regards,

Arka
ex670c is offline   (5) Thanks
Old 9th July 2013, 17:36   #21
Senior - BHPian
 
Shubhendra's Avatar
 
Join Date: Apr 2009
Location: Poona
Posts: 1,274
Thanked: 2,237 Times
Re: CJ3B Mix and Match – DIY Learning

Quote:
Originally Posted by ex670c View Post
rotate one drum and the other will rotate in the same direction, indicating LSD action.
Thanks arka,
I followed above step which you wrote sometime back in another thread.

Thank you

Last edited by Shubhendra : 9th July 2013 at 17:41. Reason: punctuation
Shubhendra is offline  
Old 9th July 2013, 18:36   #22
Team-BHP Support
 
Jaggu's Avatar
 
Join Date: May 2004
Location: Bangalore
Posts: 20,215
Thanked: 15,907 Times
Re: CJ3B Mix and Match – DIY Learning

Great project Shubhendra! and thread ofcourse. Nothing like building your own jeep. Hope you are planning to do a complete clean up of chassis and then painting it also with proper rust protection?
Jaggu is offline   (1) Thanks
Old 9th July 2013, 21:56   #23
Senior - BHPian
 
fazalaliadil's Avatar
 
Join Date: Oct 2008
Location: Hyderabad
Posts: 2,022
Thanked: 672 Times
Re: CJ3B Mix and Match – DIY Learning

Shubhendra,

Nice to see the progress on your Jeep.

Since you were re doing the perches at the rear, it would be better if you would go for the rear side chassis beds as on the 540/50, the springs would extend outward by 4" each side and give the ride much stability and reduce body roll to a great extent. I have done it on the Lynx and know the difference.

One more thing, since you moved the perch of the diff and repositioned it and welded it to make it 3B compatible. You should have done it after fitting the engine first followed by the GB on the cross member with slant aluminum wedges and then the propeller shaft connected to the rear diff, to define the length and angle. That way you would know and can manipulate the exact slant of the propeller shaft and then weld the diff perches. Possibly you would need to slightly tilt the rear diff slightly upwards so that it is in line with the propeller shaft and does not (put load on the joint cross) and then weld the diff perches.

The drive line needs to be very perfectly aligned for the Jeep to drive smooth and without vibrations at low or high speeds. Usually you will see many complaining about vibrations resulting in a rough ride when they exceed speeds in excess of 50-60kmph.

Also, how are you determining the position of the radiator and its gap between the fan? It should be about 2" or ( as in your pic) else the blades will hit the radiator when off roading.

550 diffs on SWB are a dream come true, if they are done properly and mated with a XD3P it is almost unstoppable.

Thanks to Arka for planting this initial jugad idea when I started project Lynx.
Regards,
fazalaliadil is offline   (3) Thanks
Old 24th July 2013, 15:47   #24
Senior - BHPian
 
Shubhendra's Avatar
 
Join Date: Apr 2009
Location: Poona
Posts: 1,274
Thanked: 2,237 Times
Re: CJ3B Mix and Match – DIY Learning

Quote:
Originally Posted by Jaggu View Post
Great project Shubhendra! and thread ofcourse. Nothing like building your own jeep. Hope you are planning to do a complete clean up of chassis and then painting it also with proper rust protection?
Thanks Jaggu, yes its fun to work during weekend at your own pace. this reminds me that 7 months have been passed and Jeep is yet to touch the road. chassis has been cleaned now and painted with rust protective paint. Once mechanicals are completed, body would be stripped, retinekred wherever required and painted.
Hope to complete all this in 2013 !

Quote:
Originally Posted by fazalaliadil View Post
Shubhendra,

Nice to see the progress on your Jeep.

Since you were re doing the perches at the rear, it would be better if you would go for the rear side chassis beds as on the 540/50, the springs would extend outward by 4" each side and give the ride much stability and reduce body roll to a great extent. I have done it on the Lynx and know the difference.
Even my mech wanted to implement what you are suggesting, but I refrained as Arka suggested to move perch instead of chassis beds. I am yet to drive a CJ3B with mod suggested by you, i would implement it in my other CJ3B if i find it useful enough (may come to H'bad to drive your jeep or you can come to Poona for offroading in western ghats we have found few damn good trails in and around Poona)

The drive line needs to be very perfectly aligned for the Jeep to drive smooth and without vibrations at low or high speeds. Usually you will see many complaining about vibrations resulting in a rough ride when they exceed speeds in excess of 50-60kmph.
Fazal Ji, its too late now but everything has been put in place systematically including slant aluminium wedges, keeping my fingers crossed


Also, how are you determining the position of the radiator and its gap between the fan? It should be about 2" or ( as in your pic) else the blades will hit the radiator when off roading.
I am buying a new radiator, which radiator should i go for? In my Classic i have fitted aluminium radiator with extra coolant box (sealed system) and till now i didnt face any issue, rest of my Jeeps have usual brass radiators and they are good as well, i am confused


Thanks to Arka for planting this initial jugad idea when I started project Lynx.
Arka needs credit for so many things he did/doing for offroad community. he is my google for Jeeps
Shubhendra is offline  
Old 25th July 2013, 16:55   #25
Senior - BHPian
 
Shubhendra's Avatar
 
Join Date: Apr 2009
Location: Poona
Posts: 1,274
Thanked: 2,237 Times
Re: CJ3B Mix and Match – DIY Learning

Progress report: Mechanical work is almost completed, took hell lot of time to properly aling diffs, transfercase, prop shaft etc. My mech has overtaken and he is doing all mechanical work now. Its really a mix and match project, we had to buy variety of brake pipes (more than 14-15) and fan belt (5-6) to do the setup right.

Old diffs, gearbox and transfercase, shafts, brake, tie rods etc is being transported to my home town, where CJ-5 is waiting for it.
Friend's (Ritesh) 540 came to my rescue to deliver it to warehouse of transport agency.


CJ3B Mix and Match – DIY Learning-217332_669310566428500_802181356_n.jpg

CJ3B Mix and Match – DIY Learning-942372_669311519761738_275860979_n.jpg

CJ3B Mix and Match – DIY Learning-1011947_669306289762261_1214416600_n.jpg

Soon i will share next set of picture and update.

Shubhendra Singh
Shubhendra is offline  
Old 26th July 2013, 16:44   #26
Senior - BHPian
 
Shubhendra's Avatar
 
Join Date: Apr 2009
Location: Poona
Posts: 1,274
Thanked: 2,237 Times
Re: CJ3B Mix and Match – DIY Learning

One query to all experts/experienced owners:
I am buying a new radiator, which radiator should i go for? In my Classic i have fitted aluminium radiator with extra coolant box (sealed system) and till now i didnt face any issue, rest of my Jeeps have usual brass radiators and they are good as well, i am confused.
Should i go for 4 core brass radiator or aluminium one with extra fan in front of the radiator on for 'emergency' purpose?

Shubhendra
Shubhendra is offline  
Old 27th July 2013, 11:19   #27
Senior - BHPian
 
ex670c's Avatar
 
Join Date: Nov 2004
Location: Chennai
Posts: 2,470
Thanked: 1,950 Times
Re: CJ3B Mix and Match – DIY Learning

Quote:
Originally Posted by Shubhendra View Post
One query to all experts/experienced owners:
I am buying a new radiator, which radiator should i go for? In my Classic i have fitted aluminium radiator with extra coolant box (sealed system) and till now i didnt face any issue, rest of my Jeeps have usual brass radiators and they are good as well, i am confused.
Should i go for 4 core brass radiator or aluminium one with extra fan in front of the radiator on for 'emergency' purpose?
Hi Shubhendra,

Get a radiator which fits the CJ3B Radiator Grille (Front Grille).
And you can make the system with a de-gassing tank as suggested by Behram Dhabar (Fazal Ali's lynx thread), or with a overflow tank.

Regards,

Arka
ex670c is offline   (2) Thanks
Old 27th July 2013, 18:40   #28
Senior - BHPian
 
fazalaliadil's Avatar
 
Join Date: Oct 2008
Location: Hyderabad
Posts: 2,022
Thanked: 672 Times
Re: CJ3B Mix and Match – DIY Learning

Shubhendra,

What I have on the Lynx is a aluminum radiator from Mahindra, Maxx pickup.
I needed a radiator which would perform better than the older brass one, on a bigger diesel engine.
Went around window shopping until I got one that fits (just as Arka mentioned) the front grille.
The degassing tank was my mechanic Taj's indigenous, initiative and execution which not only added liquid to a small radiator but also which circulates and cools.

Never had heating problems with this set up.

Reference pic of my engine bay.
Regards,
CJ3B Mix and Match – DIY Learning-jeep-002.jpg
fazalaliadil is offline   (1) Thanks
Old 29th July 2013, 20:24   #29
Senior - BHPian
 
Shubhendra's Avatar
 
Join Date: Apr 2009
Location: Poona
Posts: 1,274
Thanked: 2,237 Times
Re: CJ3B Mix and Match – DIY Learning

small but significant update:
We finally started Jeep, it was an amazing feeling to hear the sound of engine which you built it (obviously with the help of Rahul and my mech). I still can not forget, how difficult it was for me to convince my mech and to an extent Rahul as well on why i wanted all nuts and bolts to be polished, why all parts to be enamel coated and painted separately. we rebuilt this engine 4 months back and i was kind of apprehensive of its state as it was being kept in cover since then.
But as suggested by Sudarshan Ji, we first rotated it by hand (one day prior to starting) and put small dosage of oil.Next day, we put engine oil, hand rotated it (it was damn hard), connected diesel line (diesel put in 5 liter can), pumped the diesel and it started in first crank. opened bolt on engine to see oil circulation and it was fine.

CJ3B Mix and Match – DIY Learning-dsci0046.jpg

CJ3B Mix and Match – DIY Learning-dsci0045.jpg

CJ3B Mix and Match – DIY Learning-dsci0047.jpg

CJ3B Mix and Match – DIY Learning-dsci0048.jpg

CJ3B Mix and Match – DIY Learning-dsci0049.jpg

soon we realized that one nozzle is leaking and there was a leak from diesel filter assembly. we again stopped engine rectified issues and restarted it. leaking radiator helped us put fresh water continuously and cooling of engine .
We kept it started for 30 minutes and then stopped to to cool the engine and re-torque the head.

we followed process explained by Arka in a separate thread :
http://www.team-bhp.com/forum/4x4-ve...nd-4wd-12.html

I am also copy pasting the content from that link to reiterate what Arka suggested because i found that most of us are not aware of it. we spend thousand of rupees on rebuilding an engine but lack of awareness lead to spoiling our newly built engine in long term. another shocking fact i found out that 90% (remaining 10% - benefit of doubt) of mechs dont know about it, Its so sad. My mech has worked in Mahindra for decades and even he was not aware neither he got convinced. I had to convince him unbendingly and then he followed it half heartedly. I am planning to change engine oil and oil filter once i complete 500 kms (going by current progress rate, i dont think its possible in 2013).
Here is excerpts from another page:

Assemble the engine, with cooling system (including coolant, over-flow bottle & thermostat)in the vehicle.

2) Start engine, fluctuate the throttle to raise the rpm to 2000-3000rpm till water temp reached 80degrees i.e running temp.

3) Hold this engine speed for 5-10 mins.

or jump to step no. 7

4) Allow the engine to cool down for 6-8hrs.

5) Drain cooling system and re-torque the head to 49ft/lbs and unlock 1/4 turn (90degrees)

6) Re-fill cooling system and drive the vehicle on road.

7) Rapidly accelerate and FULLY release throttle, to allow the piston rings i.e compression to slow down the vehicle. do this for a 10-15 cycles gradually increasing the speed, and then releasing the throttle.

8) Change engine oil & oil filter

or

Change engine oil & oil filter after 500 or 2500 kms.

Thanks Arka for sharing.

Regards,
Shubhendra Singh
Shubhendra is offline  
Old 29th July 2013, 22:43   #30
Senior - BHPian
 
fazalaliadil's Avatar
 
Join Date: Oct 2008
Location: Hyderabad
Posts: 2,022
Thanked: 672 Times
Re: CJ3B Mix and Match – DIY Learning

Shubhendra,

In response to your query, did you see the radiator post and details I sent exclusively for you?
Hope I am not wasting our time.
Regards,

Last edited by fazalaliadil : 29th July 2013 at 22:44.
fazalaliadil is offline   (1) Thanks
Reply

Most Viewed


Copyright ©2000 - 2024, Team-BHP.com
Proudly powered by E2E Networks