Team-BHP > Technical Stuff > DIY - Do it yourself
Register New Topics New Posts Top Thanked Team-BHP FAQ


Reply
  Search this Thread
95,357 views
Old 19th June 2014, 14:01   #16
Distinguished - BHPian
 
Join Date: May 2013
Location: Bengaluru
Posts: 1,796
Thanked: 7,792 Times
re: DIY: Additional 12V accessory socket for the Ertiga. EDIT, added one more!

Quote:
Originally Posted by paragsachania View Post
Incidentally, I will install it on my friend's SX4 (alokgunhal)sometime soon too. Have ordered the Fuse Tap cables and soon after they reach I will do the DIY and of course share the pictures. You can simply refer that post when I am done with it in days to come.
Thank you saar! Looking forward to it.

And yes the conversion of AC-DC is a bigger thing one must note.

Quote:
Originally Posted by paragsachania View Post
Yes I have and here is the link of that Install - Arm Rest Install

I have already installed Armrest for another friend (ACS) and will again do this for alokgunhal's SX4.

So when it comes to SX4 I am sure you just need to wait and watch as I work on these DIYs. Will try to PM you the album for the SX4 Armrest installation that's somewhere on FB.
Thanks again - I got the pictures in my FB and inbox as well
abirnale is offline   (1) Thanks
Old 19th June 2014, 14:08   #17
BHPian
 
alokgunhal's Avatar
 
Join Date: Apr 2013
Location: Bangalore
Posts: 64
Thanked: 114 Times
re: DIY: Additional 12V accessory socket for the Ertiga. EDIT, added one more!

As always a masterstroke from the DIY man @paragsachania. This is a problem we all face on long journeys where one has to depend only on the single 12V socket for mobile, tab, gps devices to be charged. Having used Belkin for sometime now I can say that although it serves the purpose it is kind of messy as it needs to be placed on the floor and sometimes can fail also as in my case. Using the simple DIY I think we can have this additional source of power to charge the ever hungry devices. I am also in line for the arm rest and this 12V socket DIY for my SX4 as Parag has mentioned.

More than anything the DIY Is executed so neatly that anyone unaware of this being DIY might confuse the additional socket as a OEM from Maruti.

With the rate at which DIYs are being done on Parag's Ertiga I am sure this will be one of a kind Ertiga and a textbook for other Current and Prospective Ertiga owners and may be Maruti as well ;-)
alokgunhal is offline   (1) Thanks
Old 19th June 2014, 14:30   #18
BANNED
 
Join Date: Oct 2011
Location: Hyderabad
Posts: 12,350
Thanked: 21,411 Times
re: DIY: Additional 12V accessory socket for the Ertiga. EDIT, added one more!

Now that is another DIY in your cap.

Clean and pretty un-suspecting install and I don't think the ASC will even catch it unless they do some interior cleaning.

OT:

Can we what more is following the DIY way?!

Anurag.
a4anurag is offline   (1) Thanks
Old 19th June 2014, 14:30   #19
Senior - BHPian
 
abhishek46's Avatar
 
Join Date: Oct 2010
Location: Bangalore
Posts: 1,813
Thanked: 5,864 Times
re: DIY: Additional 12V accessory socket for the Ertiga. EDIT, added one more!

This is a very useful DIY, you have done a very clean installation job here.

I have one question though. Have you connected an additional fuse for this extra socket set up in your fuse box?
abhishek46 is offline   (1) Thanks
Old 19th June 2014, 15:24   #20
Senior - BHPian
 
arnabchak's Avatar
 
Join Date: Sep 2009
Location: MH-04
Posts: 1,346
Thanked: 1,162 Times
re: DIY: Additional 12V accessory socket for the Ertiga. EDIT, added one more!

Parag,

Genius stuff. And it doesn't look easy(though you have given a great step by step process).

Very clean stuff and a great DIY. What was the total investment in terms of money and time?
arnabchak is offline   (1) Thanks
Old 19th June 2014, 15:25   #21
Distinguished - BHPian
 
paragsachania's Avatar
 
Join Date: Nov 2007
Location: Belur/Bangalore
Posts: 7,148
Thanked: 27,140 Times
re: DIY: Additional 12V accessory socket for the Ertiga. EDIT, added one more!

Quote:
Originally Posted by abhishek46 View Post
This is a very useful DIY, you have done a very clean installation job here.

I have one question though. Have you connected an additional fuse for this extra socket set up in your fuse box?
Quoting myself that should answer you:
Quote:
Originally Posted by paragsachania View Post
The Fuse Tap cable comes with 2 Fuses - One fuse holder to protect existing circuit, and a second fuse holder to protect new circuit.
The new Circuit here is nothing but the load on the socket.

Quote:
Originally Posted by arnabchak View Post
Parag,

Genius stuff. And it doesn't look easy(though you have given a great step by step process).
Trust me its easy. Its only how and where you route the wires and how you ensure these don't hang around loose.

Quote:
Very clean stuff and a great DIY. What was the total investment in terms of money and time?
I spent on the following:

1. Accessory Socket - 248/- (Includes Shipping)
2. Fuse Tap Cable - Depending on Dollar value, it cost me 150-170 bucks
3. Automotive Wire - Had this at home from my previous DIYs but otherwise should cost not more than 50 bucks

Last edited by paragsachania : 19th June 2014 at 15:31.
paragsachania is offline  
Old 19th June 2014, 18:21   #22
BHPian
 
timj's Avatar
 
Join Date: Jun 2004
Location: chennai
Posts: 34
Thanked: 2 Times
re: DIY: Additional 12V accessory socket for the Ertiga. EDIT, added one more!

@paragsachania Like your Nexus 7. I've (my son) got the same N7 2012 with same Amzer case. It rocks!
timj is offline  
Old 19th June 2014, 18:29   #23
Distinguished - BHPian
 
paragsachania's Avatar
 
Join Date: Nov 2007
Location: Belur/Bangalore
Posts: 7,148
Thanked: 27,140 Times

Quote:
Originally Posted by timj View Post
@paragsachania Like your Nexus 7. I've (my son) got the same N7 2012 with same Amzer case. It rocks!
You guessed it right. Its Nexus 7 and spot on with the Amzer case too.
My daughter's favorite (only) color is orange and I picked this case.
paragsachania is offline  
Old 20th June 2014, 20:06   #24
Distinguished - BHPian
 
Join Date: Sep 2008
Location: --
Posts: 3,552
Thanked: 7,262 Times
re: DIY: Additional 12V accessory socket for the Ertiga. EDIT, added one more!

Awesome work there! I have been thinking about adding some footwell lights as well. But don't want to do it at any accessory shop as they will invariably tap somewhere on the circuit to get the power. Let me just wait till you put them and then I can follow suit maybe!
Dry Ice is online now   (1) Thanks
Old 20th June 2014, 20:17   #25
Distinguished - BHPian
 
paragsachania's Avatar
 
Join Date: Nov 2007
Location: Belur/Bangalore
Posts: 7,148
Thanked: 27,140 Times
re: DIY: Additional 12V accessory socket for the Ertiga. EDIT, added one more!

Quote:
Originally Posted by Dry Ice View Post
Awesome work there! I have been thinking about adding some footwell lights as well. But don't want to do it at any accessory shop as they will invariably tap somewhere on the circuit to get the power. Let me just wait till you put them and then I can follow suit maybe!
Thank you! In fact for Cabin lights I am planning installation (Read sourcing power) in similar fashion and have some cleaner thought on how not to just paste the LED strips to illuminate the floor.

Will share the entire process through a thread when I accomplish that over coming weeks!
paragsachania is offline   (1) Thanks
Old 27th June 2014, 20:22   #26
BHPian
 
Mighty_Lothar's Avatar
 
Join Date: Nov 2012
Location: Bangalore
Posts: 62
Thanked: 105 Times
re: DIY: Additional 12V accessory socket for the Ertiga. EDIT, added one more!

As always, a deftly narrated brilliant work Parag. Indeed a very useful one. Looking forward to your next DIY – Cruise Control and Temperature sensor installation. Call me, I wish to be a spectator next time

Cheers,
LOTHAR
Mighty_Lothar is offline   (1) Thanks
Old 27th June 2014, 20:25   #27
Distinguished - BHPian
 
paragsachania's Avatar
 
Join Date: Nov 2007
Location: Belur/Bangalore
Posts: 7,148
Thanked: 27,140 Times
re: DIY: Additional 12V accessory socket for the Ertiga. EDIT, added one more!

Quote:
Originally Posted by Mighty_Lothar View Post
As always, a deftly narrated brilliant work Parag. Indeed a very useful one. Looking forward to your next DIY – Cruise Control and Temperature sensor installation. Call me, I wish to be a spectator next time

Cheers,
LOTHAR
Firstly, welcome back to Team-Bhp after a long break. I am sure I can now wait for your owner's review to come up soon.

On DIYs - There are aplenty on my mind. Got hold of the essential element called the Parts Catalog today & spent a lot of time reading and gazing at a lot of stuff that helped increase my DIY Wishlist .

Wait for a few days/weeks for more of these tasks to get accomplished and I shall post them all here.
paragsachania is offline  
Old 7th July 2014, 21:57   #28
BHPian
 
Join Date: Aug 2013
Location: Mumbai
Posts: 96
Thanked: 71 Times
re: DIY: Additional 12V accessory socket for the Ertiga. EDIT, added one more!

Parag Anna, neat and precise as always. Whenever I read a DIY of yours I feel like doing the list I have too but then don't get the confidence due to my poor knowledge of electricals. But hopefully someday I will do such wonders too

Look forward to more such DIY's

Best,
G2
TheG2 is offline   (1) Thanks
Old 11th July 2014, 13:26   #29
BHPian
 
4k_jz's Avatar
 
Join Date: Apr 2014
Location: delhi
Posts: 54
Thanked: 65 Times
re: DIY: Additional 12V accessory socket for the Ertiga. EDIT, added one more!

Cool DIY sir! I am waiting for the warranty period to end soon so that I can install the same looking at your pictorial notes. Your DIYs are neat and well planned. Looking forward to see more of them soon. It makes me feel happy knowing that its an Ertiga being modded and I can do the same in mine(long time for warranty to get over though)
I hope the temperature sensor can be sourced from Maruti Suzuki itself.

All the best!
4k_jz is offline  
Old 23rd March 2015, 19:50   #30
Distinguished - BHPian
 
paragsachania's Avatar
 
Join Date: Nov 2007
Location: Belur/Bangalore
Posts: 7,148
Thanked: 27,140 Times
re: DIY: Additional 12V accessory socket for the Ertiga. EDIT, added one more!

Usual trips spanning over and above 12 hours, mostly 3 co-passengers with now so usual battery draining phones, Navigation device and Dashcam running throughout the journey and the fact that I had very little modification to add one more socket to the front made sure I added the 3rd socket today morning.

Location - This was never a difficult choice and should give you hints on what follows next:

DIY: Additional 12V accessory socket for the Ertiga. EDIT, added one more!-1-location.jpg

So I begin removing the side panel of the center waterfall console to gain access for fitment:

DIY: Additional 12V accessory socket for the Ertiga. EDIT, added one more!-2-side-panel-01.jpg
What lies behind:

DIY: Additional 12V accessory socket for the Ertiga. EDIT, added one more!-2-side-panel-02.jpg
By accessing the black cap from behind and pushing the notch, I remove it:

DIY: Additional 12V accessory socket for the Ertiga. EDIT, added one more!-3-cap-removal.jpg

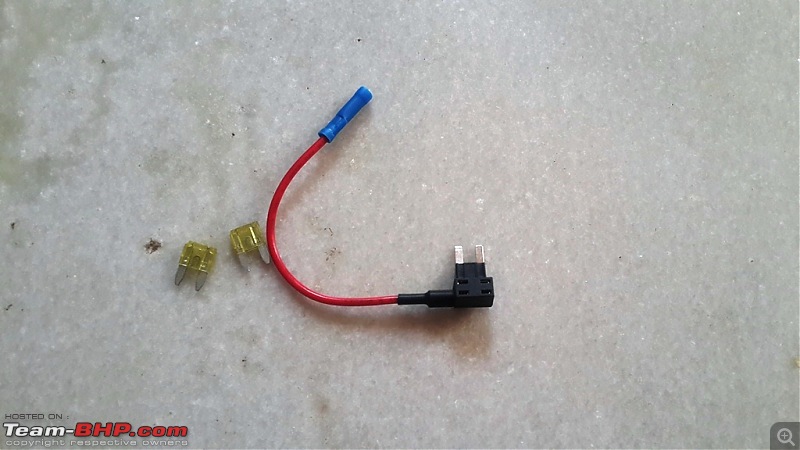
Fuse Tap again coming to great use:

DIY: Additional 12V accessory socket for the Ertiga. EDIT, added one more!-4-fuse-tap.jpg

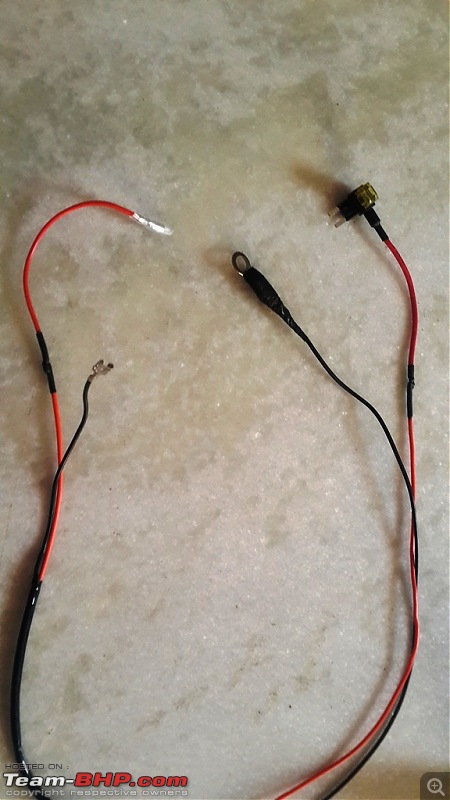
Wires getting ready, soldering the joins, Ring terminal, heat shrink tubing 'et al:

DIY: Additional 12V accessory socket for the Ertiga. EDIT, added one more!-5-wires-01.jpg

DIY: Additional 12V accessory socket for the Ertiga. EDIT, added one more!-06-wires-02.jpg

This is exactly where the new socket will go:

DIY: Additional 12V accessory socket for the Ertiga. EDIT, added one more!-07-ready-fit.jpg

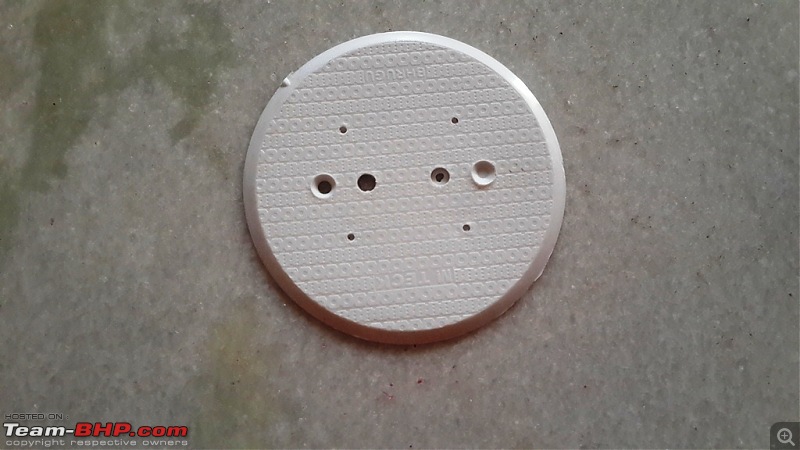
The Challenge:
The exposed hole was bigger in diameter and couldn't accommodate the socket. This meant I had to add a packing to ensure the diameter is reduced.


Thought of using the most commonly used item as this one!

DIY: Additional 12V accessory socket for the Ertiga. EDIT, added one more!-10-packing-01.jpg

So, finally I had to make use of the drill even when I never wanted to this time:

DIY: Additional 12V accessory socket for the Ertiga. EDIT, added one more!-08-drill-bits.jpg

DIY: Additional 12V accessory socket for the Ertiga. EDIT, added one more!-09-drill.jpg

Drilled the hole onto this plate to exactly match the diameter of the Accessory socket:

DIY: Additional 12V accessory socket for the Ertiga. EDIT, added one more!-11-packing-02.jpg

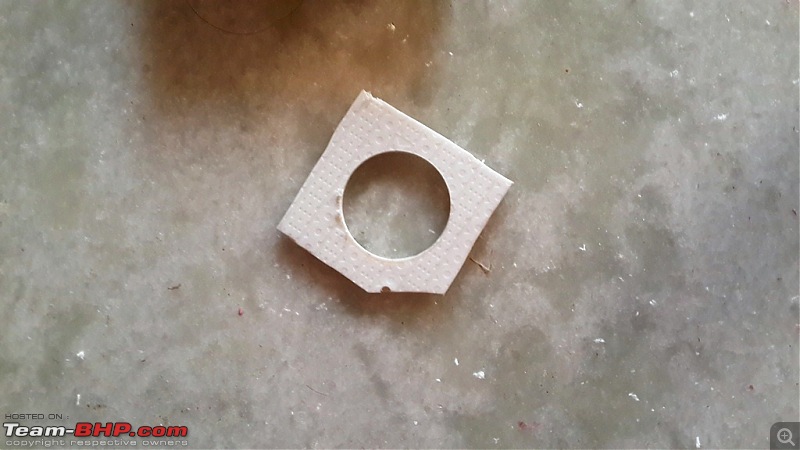
Cut the rest of the part and retained only what was necessary:

DIY: Additional 12V accessory socket for the Ertiga. EDIT, added one more!-12-packing-03.jpg

Locating the point for grounding was never an issue this time too:

DIY: Additional 12V accessory socket for the Ertiga. EDIT, added one more!-13-ground.jpg

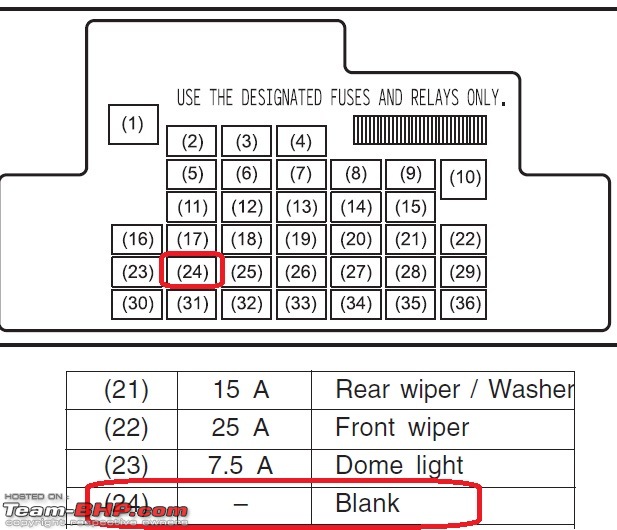
Plenty of empty fuses as per the manual and I ended up using 23 here:

DIY: Additional 12V accessory socket for the Ertiga. EDIT, added one more!-14-fuse-diagram.jpg

There goes the fuse tap cable:

DIY: Additional 12V accessory socket for the Ertiga. EDIT, added one more!-14-fuse-box.jpg

The final fitment of the 3rd socket in the Ertiga:

DIY: Additional 12V accessory socket for the Ertiga. EDIT, added one more!-15-final-fitting.jpg

Ready to get charged:

DIY: Additional 12V accessory socket for the Ertiga. EDIT, added one more!-16-charging-01.jpg

DIY: Additional 12V accessory socket for the Ertiga. EDIT, added one more!-17-charging-02.jpg
paragsachania is offline   (14) Thanks
Reply

Most Viewed


Copyright ©2000 - 2024, Team-BHP.com
Proudly powered by E2E Networks