| |||||||

| Search Forums |
| Advanced Search |
| Go to Page... |
 |
| Search this Thread |  121,716 views |
 11th November 2014, 14:52
| #1 |
| Team-BHP Support  Join Date: Apr 2013 Location: Madras
Posts: 7,174
Thanked: 20,220 Times
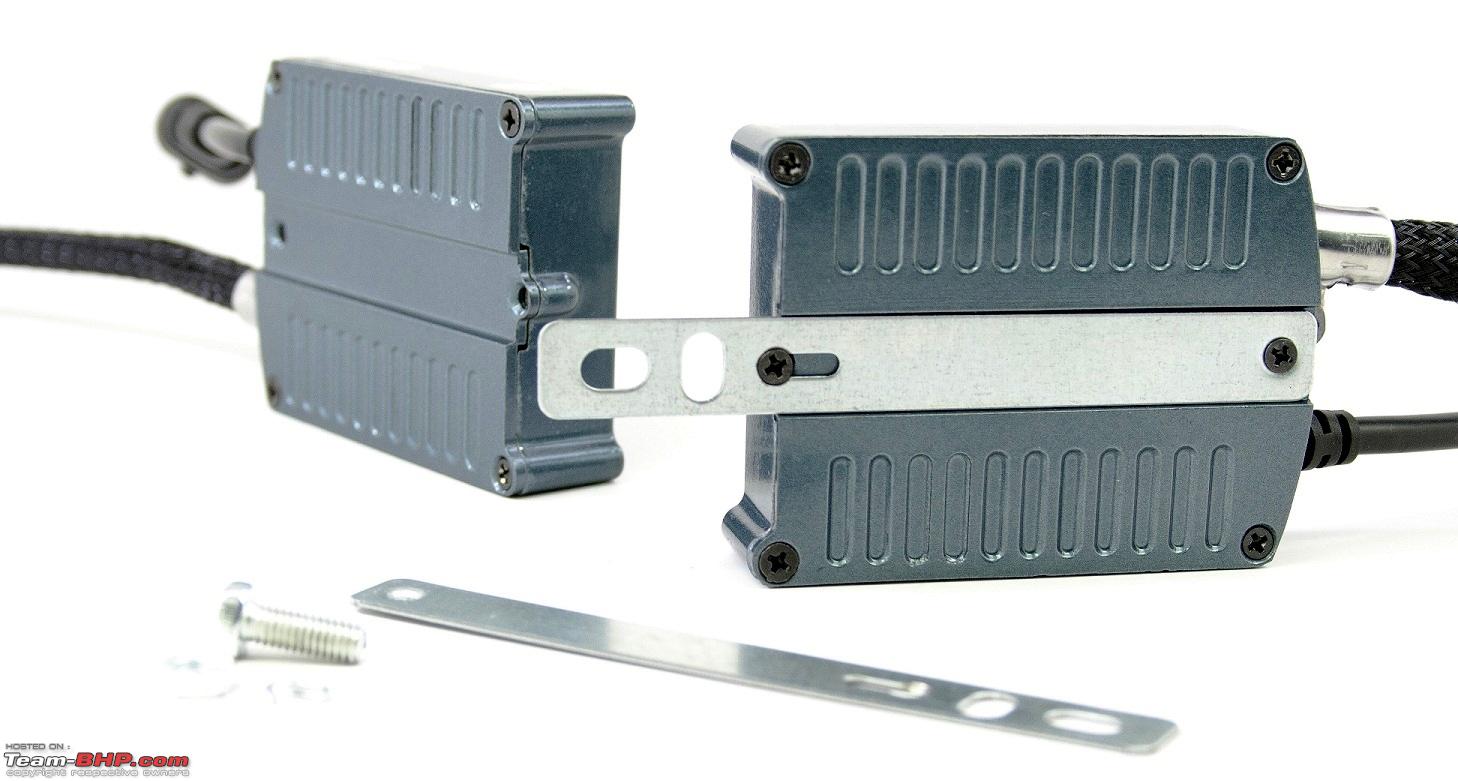
| DIY: VW Polo Bi-Xenon Projectors. Morimoto Mini D2S Stage III Installation I had replaced the halogen bulbs on my GTs stock headlamps and retrofitted a pair of Morimoto bi-xenon projectors last week. 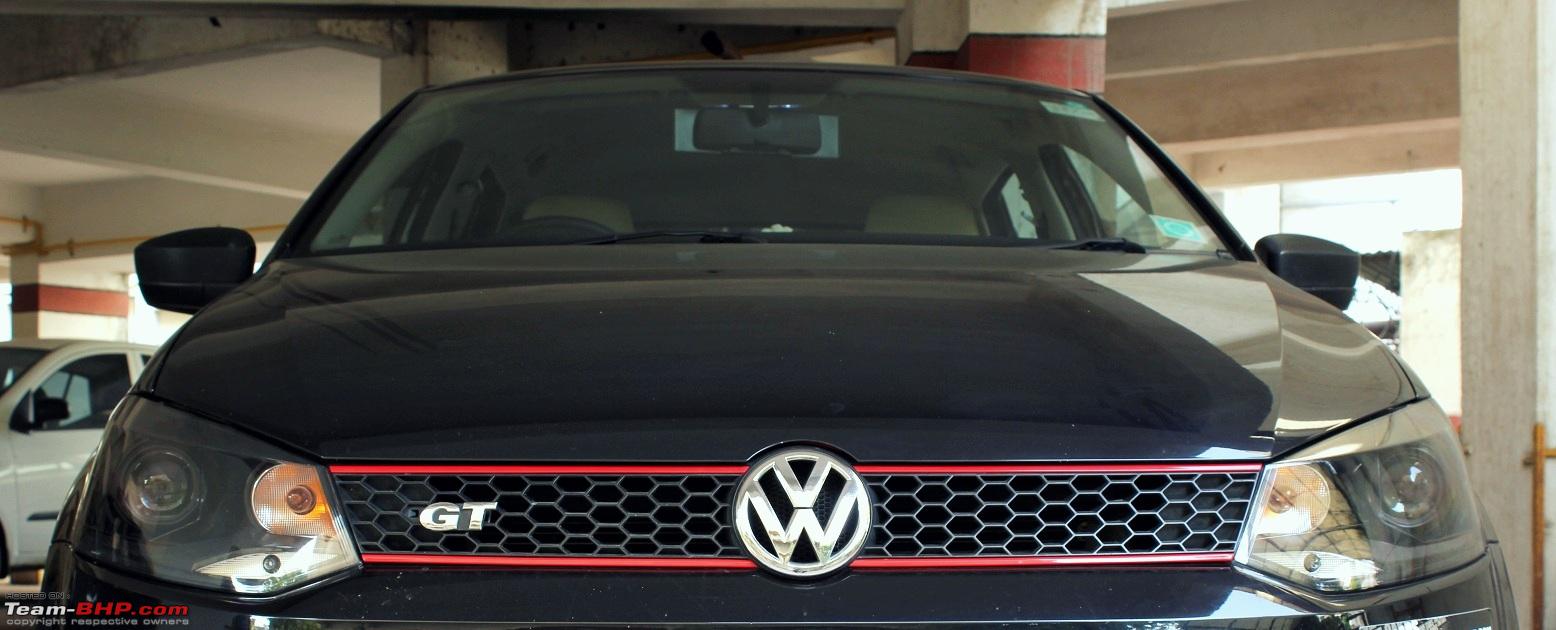 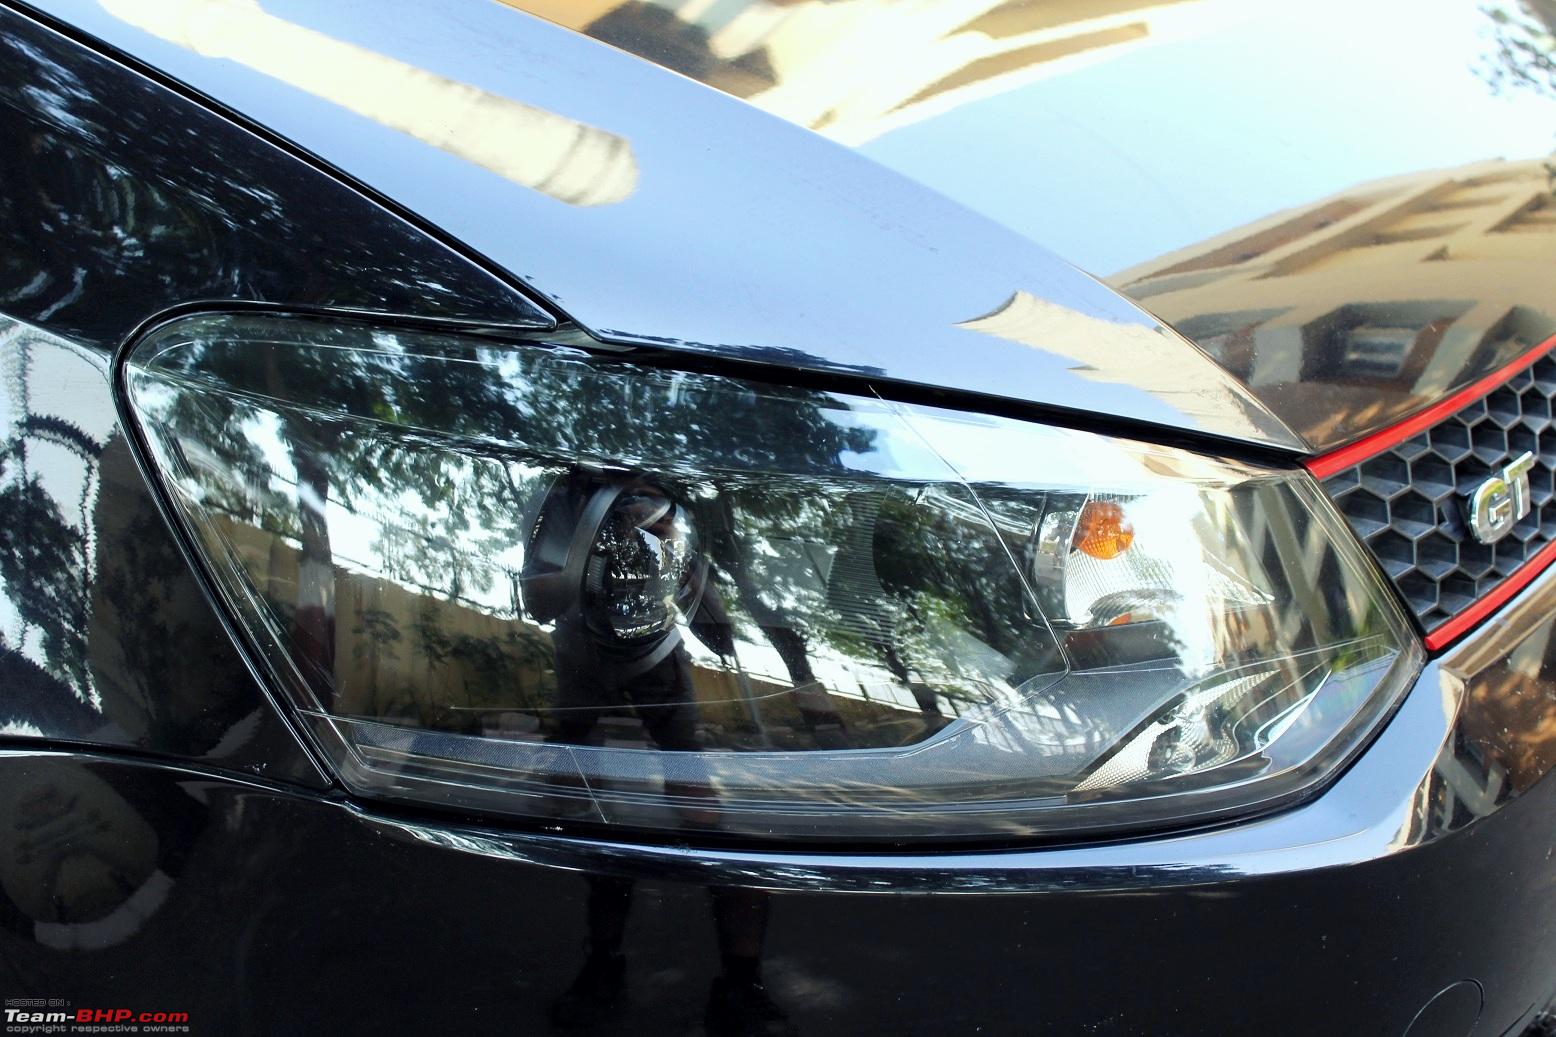 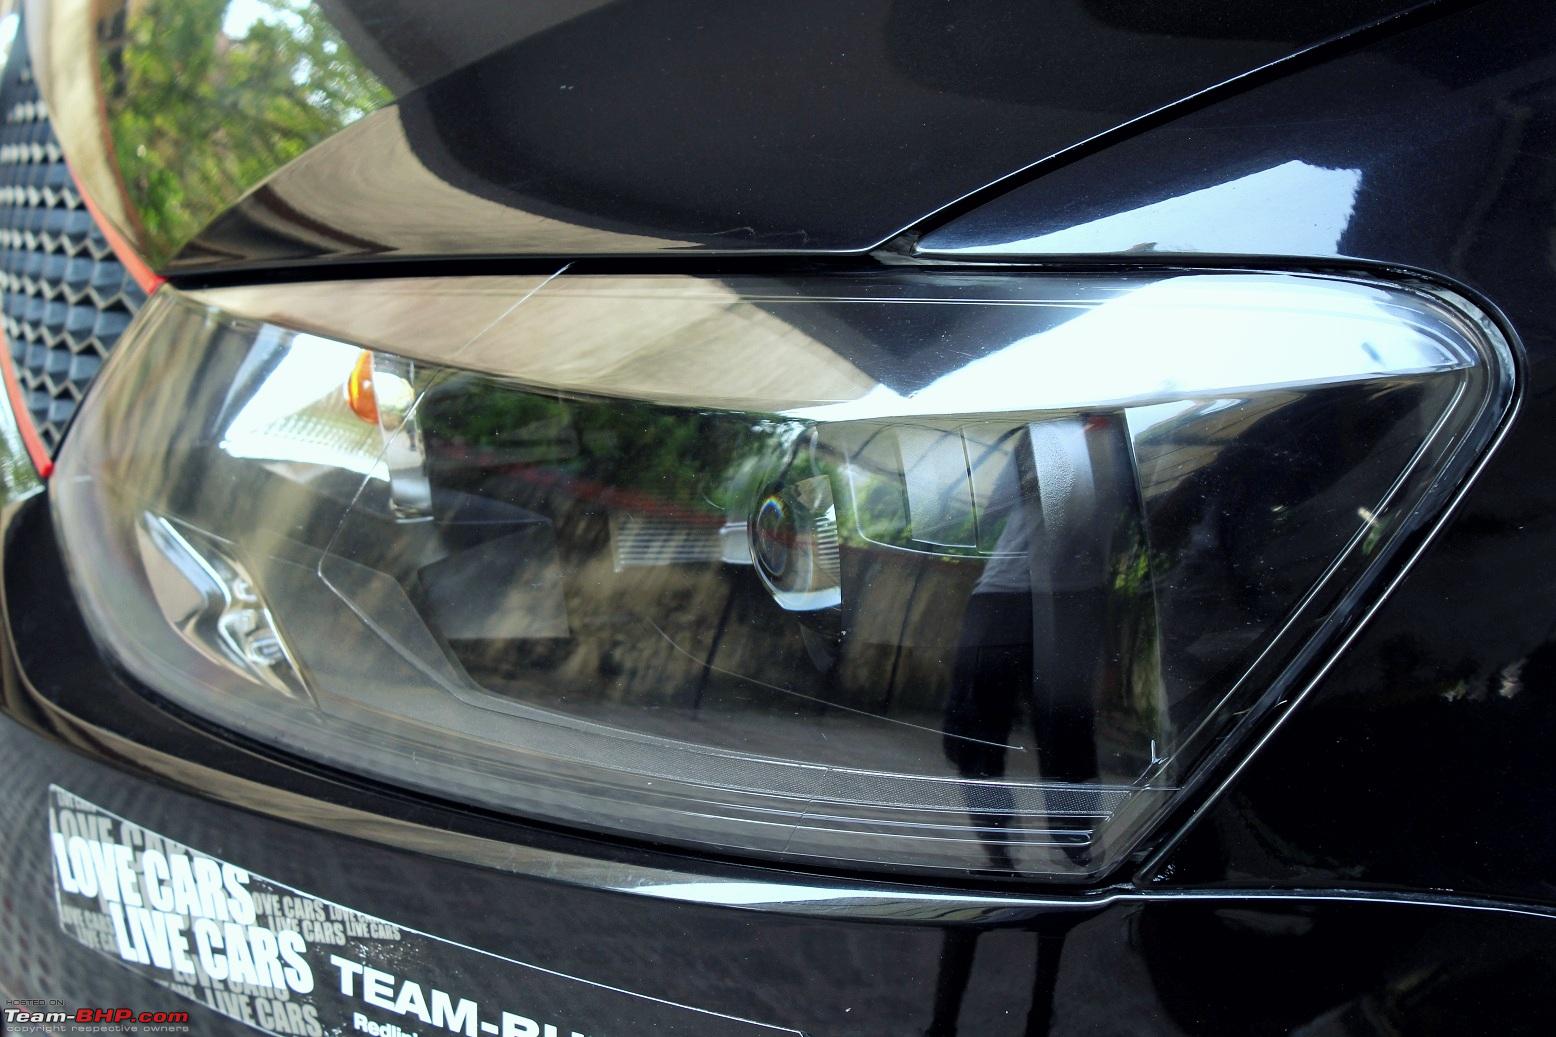  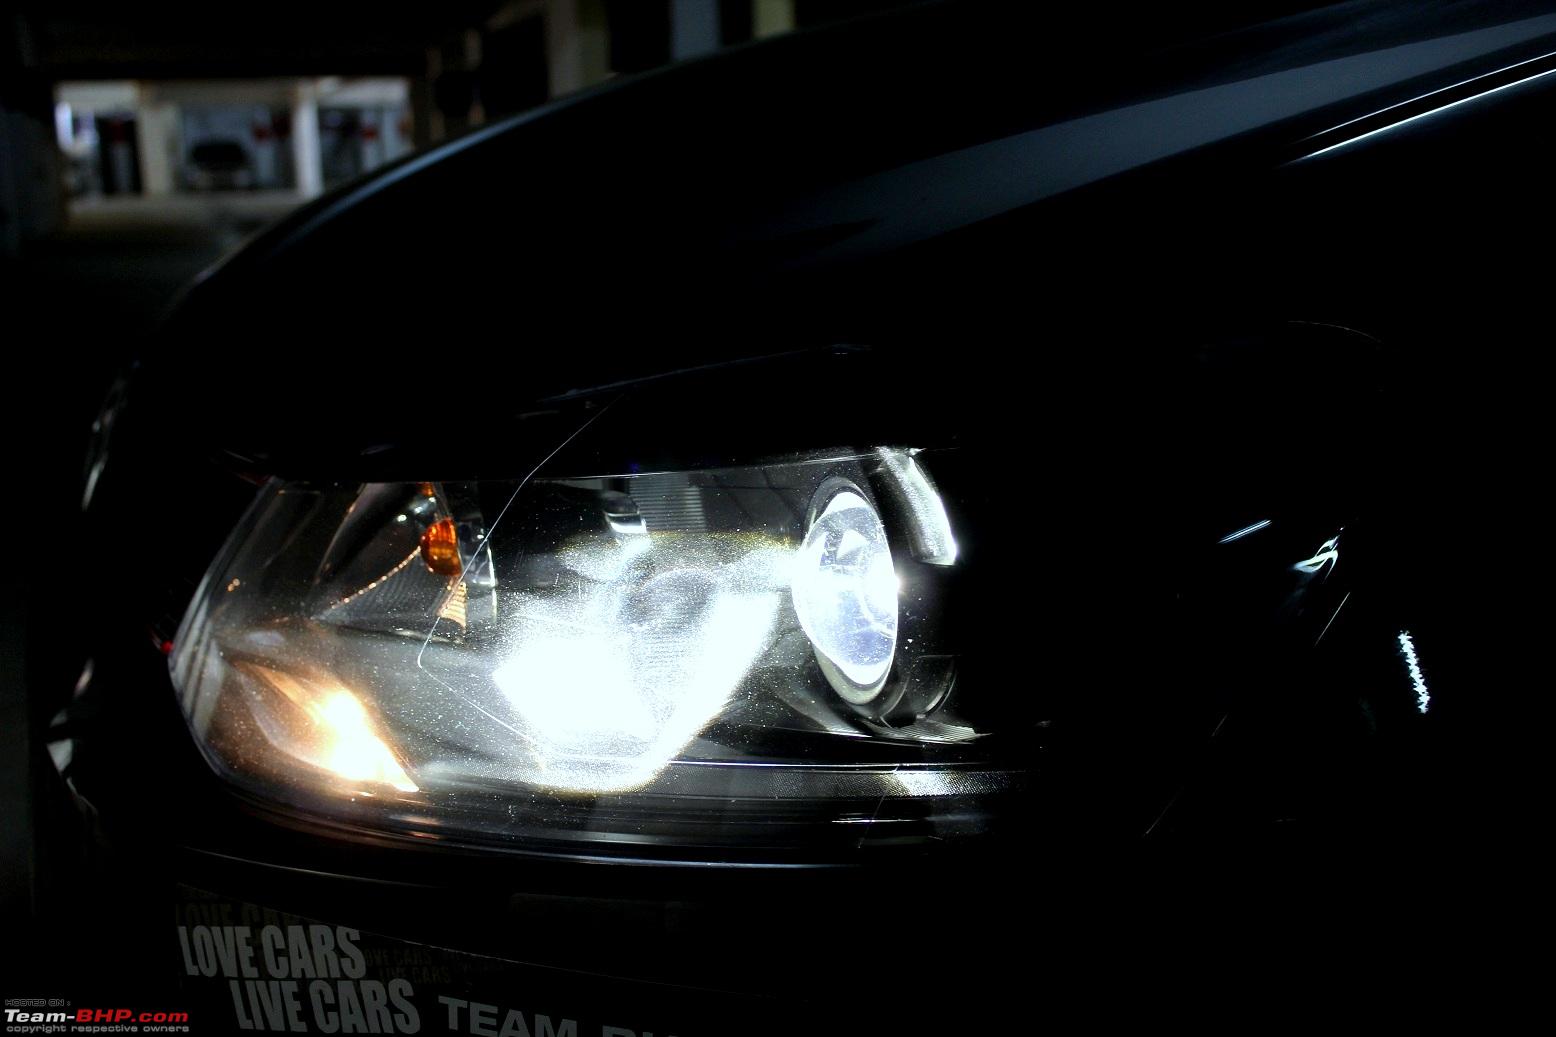 This was one hell of an experience! Lasted almost 3 weeks, we met a few roadblocks, solved them as we progressed and as always, Ive clicked some WIP snaps and have documented everything here. Those who are planning to install Morimoto Mini D2S 3.0 projectors on their cars, look no further! Specifications: The Morimoto Mini Stage III kit was customized and sourced from The Retrofit Source, US (link). Here are the specifications of the kit I had customized: Projectors: D2S 3.0 O Lens/RHD Bulbs: Osram Xenarc 66240 Ballasts: Morimoto 3Five DSP Long Cord Wire harness: MotoControl Bixenon H4/9003 Shrouds: Apollo 2.0 Flat Sealant: OCI butyl rubber strip 4.57 m Epoxy glue: JB Weld QwikWeld epoxy I am not a big fan of halos, angel eyes or DRLs and prefer clean no-nonsense setups, so skipped them. More on The Retrofit Source and their amazing customer support towards the end. Before we begin, just to let you guys know - no stock cables or harnesses were cut/spliced/taped during this DIY. Once the projectors are retrofitted on the stock headlights, they cannot be replaced with the H4 bulbs. A new pair of headlamp assemblies will be required to return back to the stock state. As far as this DIY goes, this will be time consuming, will require some efforts and may leave a room or two in your house in shambles. Be advised, this is a long thread - extremely detailed on all counts! But rest assured, all the info you will EVER need for a Mini D2S 3.0 retrofit on your car - everything is posted on this thread.  Last edited by Gannu_1 : 27th November 2014 at 15:49. |

|  (54)
Thanks (54)
Thanks
 |
| The following 54 BHPians Thank Gannu_1 for this useful post: | .anshuman, ajaypjayaraj, anilntny, Arun.K, ashpalio, Ashtoncastelino, AviG, Avikbrio, avinash_clt, Chethan B G, Crazy_cars_guy, deepfusion, Divya Sharan, dr.kushagra, DWC, el lobo 6061, FireFoot, fluidicjoy, frankmehta, fusionbang, Gaboonviper04, gotcha797, graaja, GTO, Immix, iwanderer, jaunthead, johannskaria, john doe, johy, JoseVijay, kutts, Leoshashi, Lobogris, manjubp, man_of_steel, Myth_sx, nishantdlv, paragsachania, planet_rocker, Rehaan, rshanker, sai_ace, sanjaymugur, shetty_rohan, suhaas307, the13thtee, themonster, Viju, Vik0728, Vitalstatistiks, wheelguy, wilful, yogiii |
| |
|
11th November 2014, 15:03
| #2 |
| Team-BHP Support Join Date: Apr 2013 Location: Madras
Posts: 7,174
Thanked: 20,220 Times
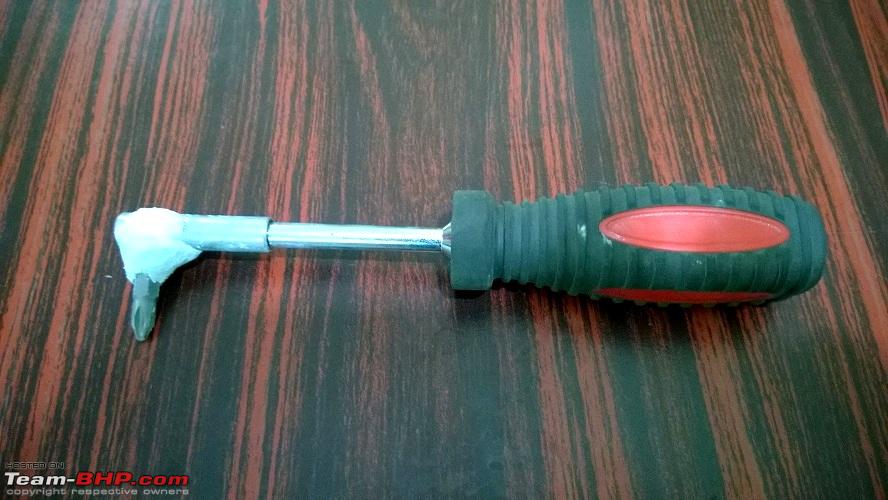
| re: DIY: VW Polo Bi-Xenon Projectors. Morimoto Mini D2S Stage III Installation Tools/Stuff Required: There is a long list of tools required for the retrofit but most of these are pretty common and can be found in your stash:
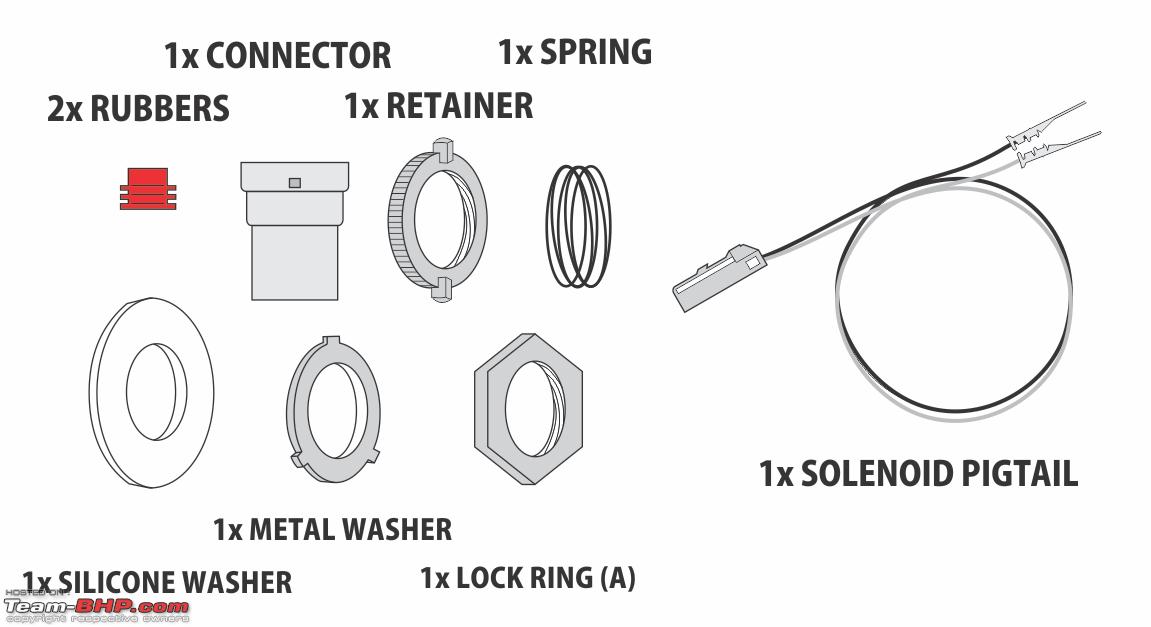
Parts Required:
All said and done, there is one must-have for this DIY - PATIENCE! And tonnes of it. I am not kidding! This is not a DIY that can be completed within a day’s time (not definitely when you are a married man) and consumes a lot of time. It is also possible that you run into a bad/defective component and you will have to wait for a replacement. The car cannot be used at this stage and will be in the garage/parking lot until the entire DIY is completed and the headlights are in. Lastly, with the help of a friend this DIY will end up being a whole lot simpler. A pair of extra hands always helps for holding the job, tools, tightening/unscrewing fasteners etc. Last edited by Gannu_1 : 27th November 2014 at 13:30. |
|
| (20)
Thanks
|
| The following 20 BHPians Thank Gannu_1 for this useful post: | ajaypjayaraj, Ashir, ashpalio, deepfusion, Divya Sharan, dr.kushagra, FireFoot, Gaboonviper04, GTO, Immix, jaunthead, JoseVijay, laferrari, Myth_sx, paragsachania, Rehaan, themonster, vaisakhr, wheelguy, yesyeswe |
|
11th November 2014, 15:16
| #3 |
| Team-BHP Support Join Date: Apr 2013 Location: Madras
Posts: 7,174
Thanked: 20,220 Times
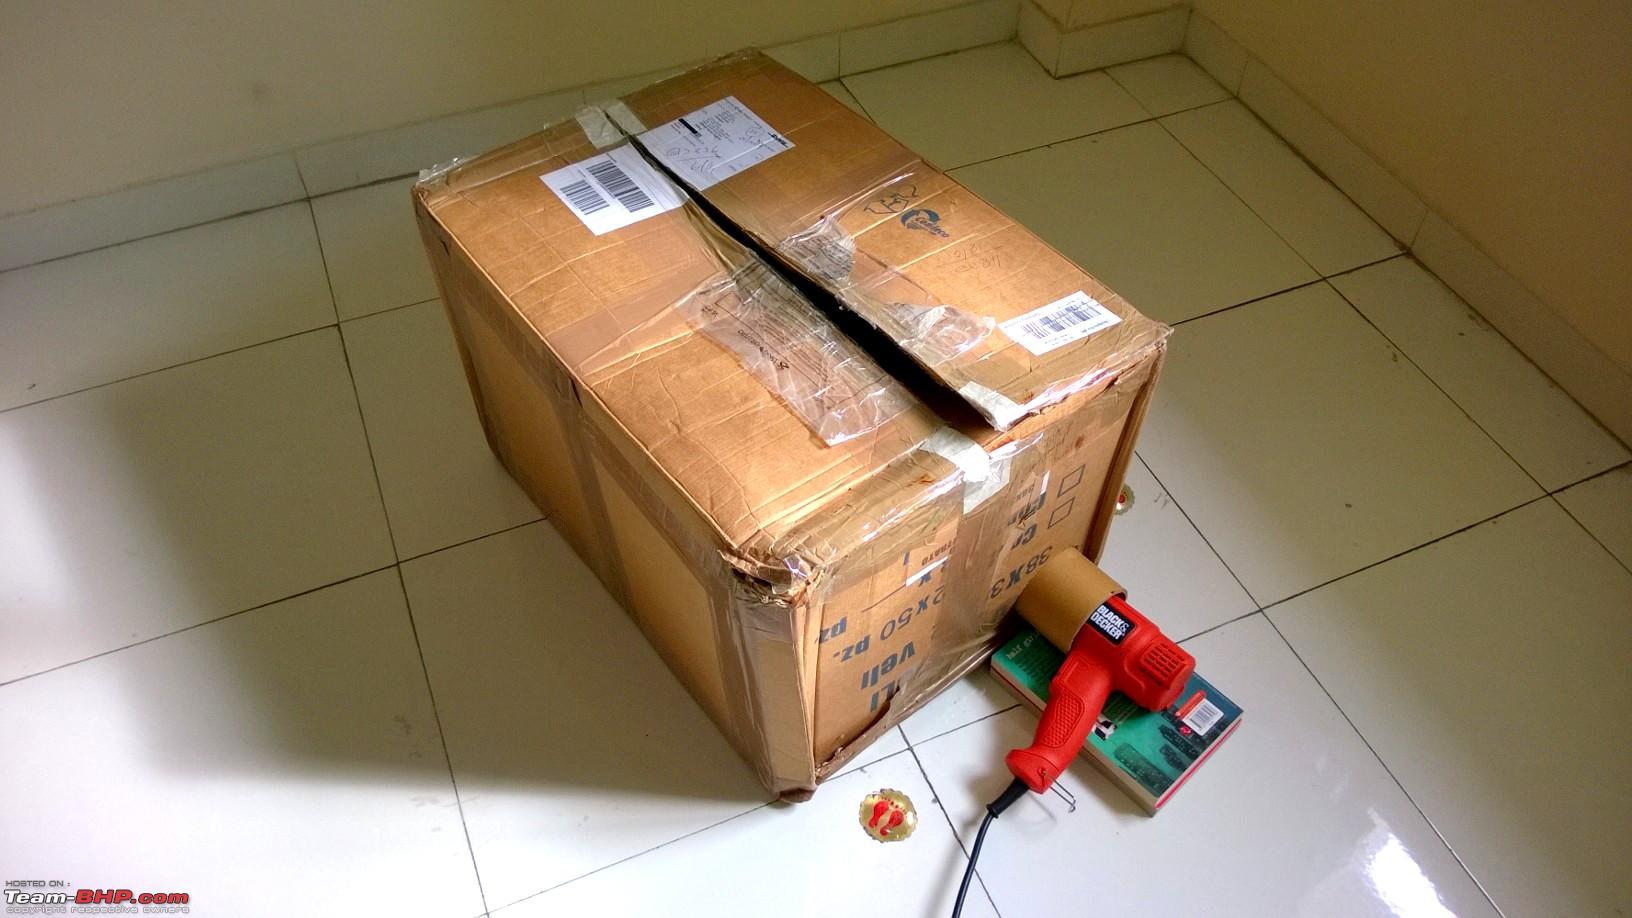
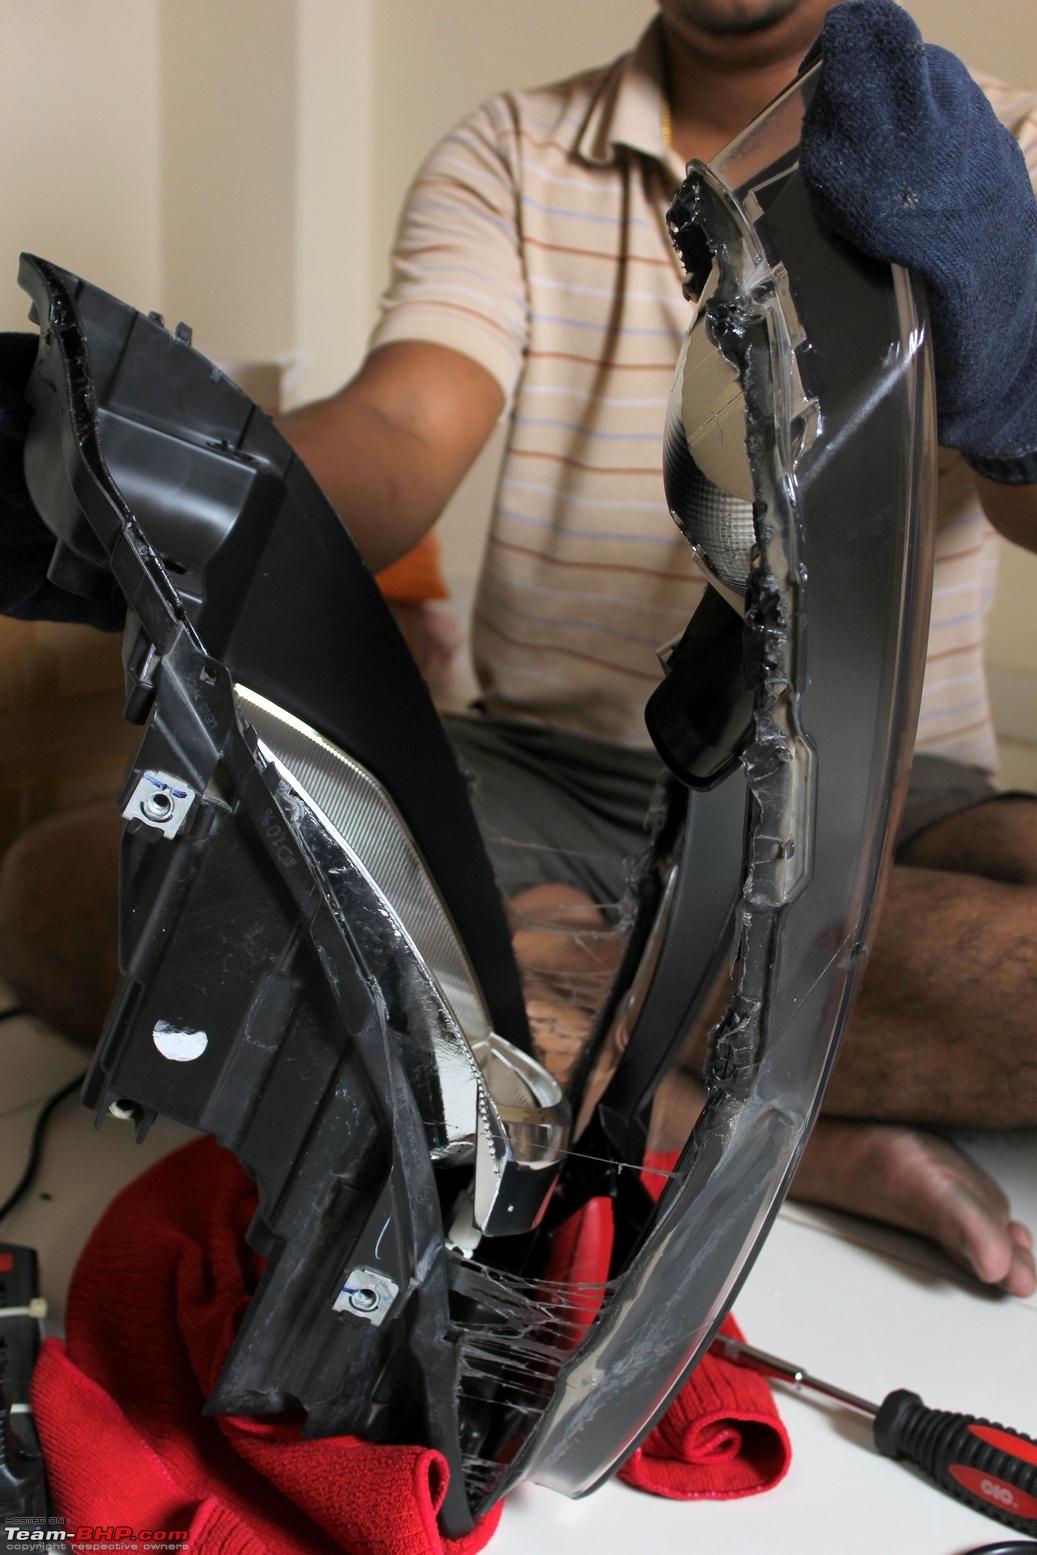
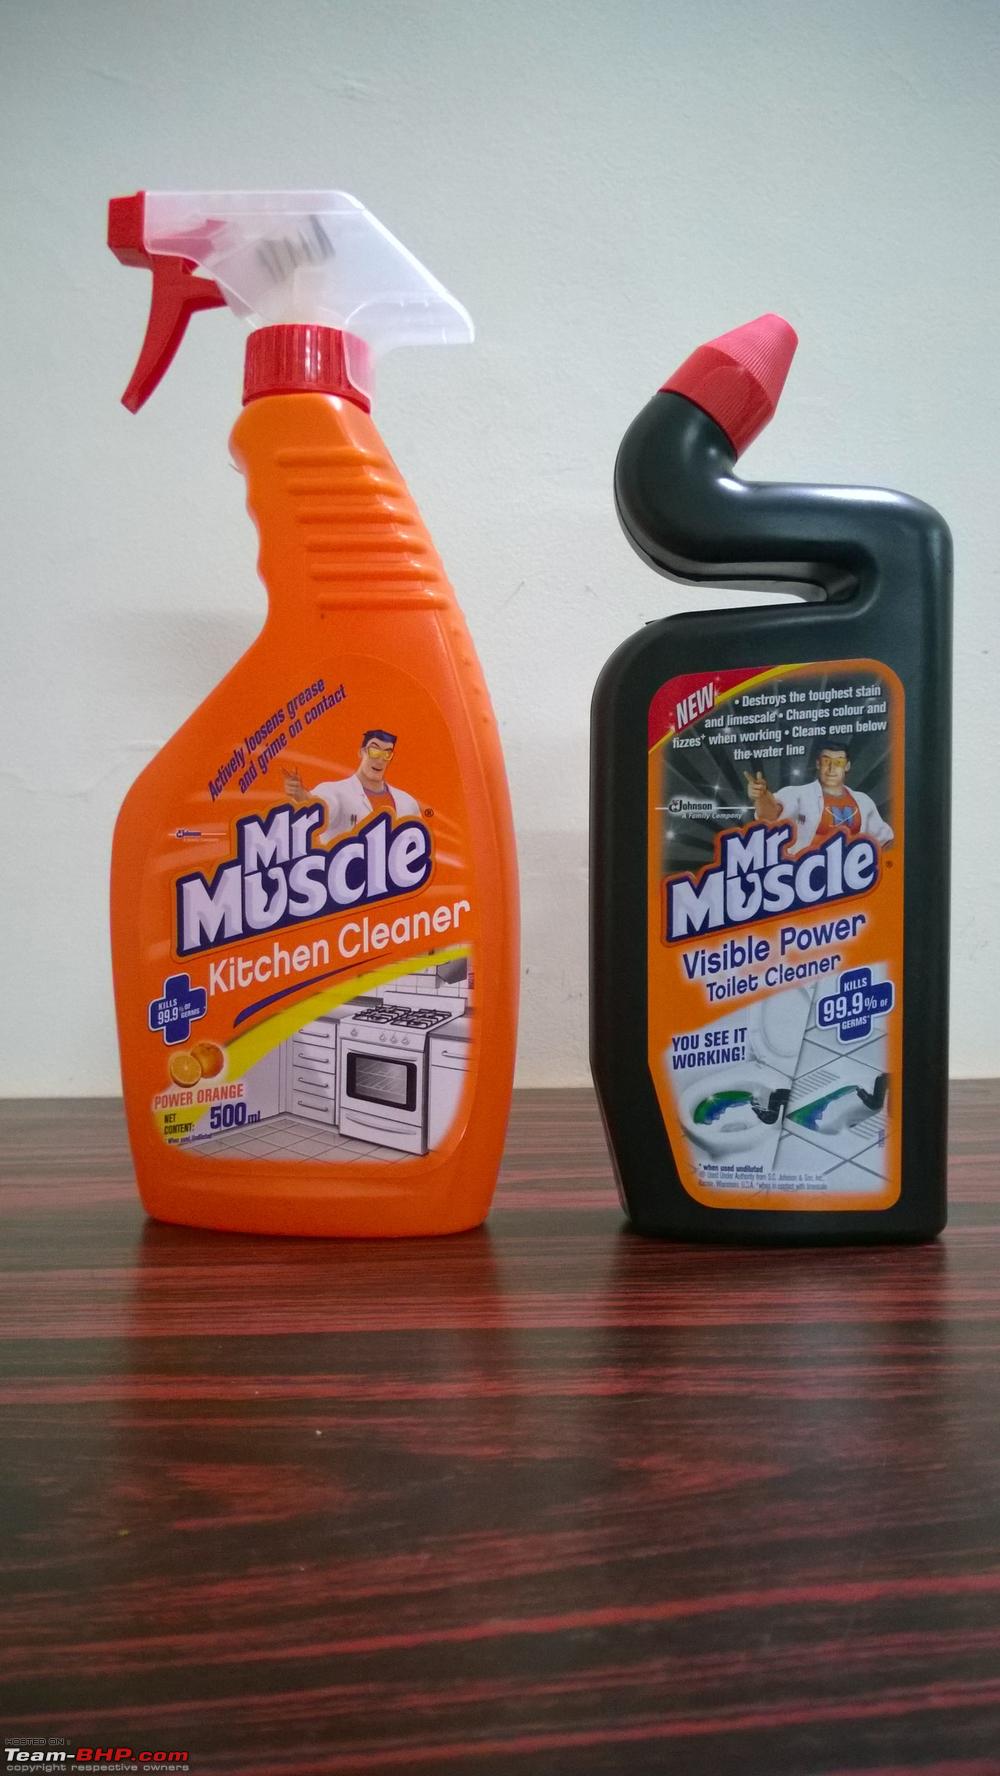
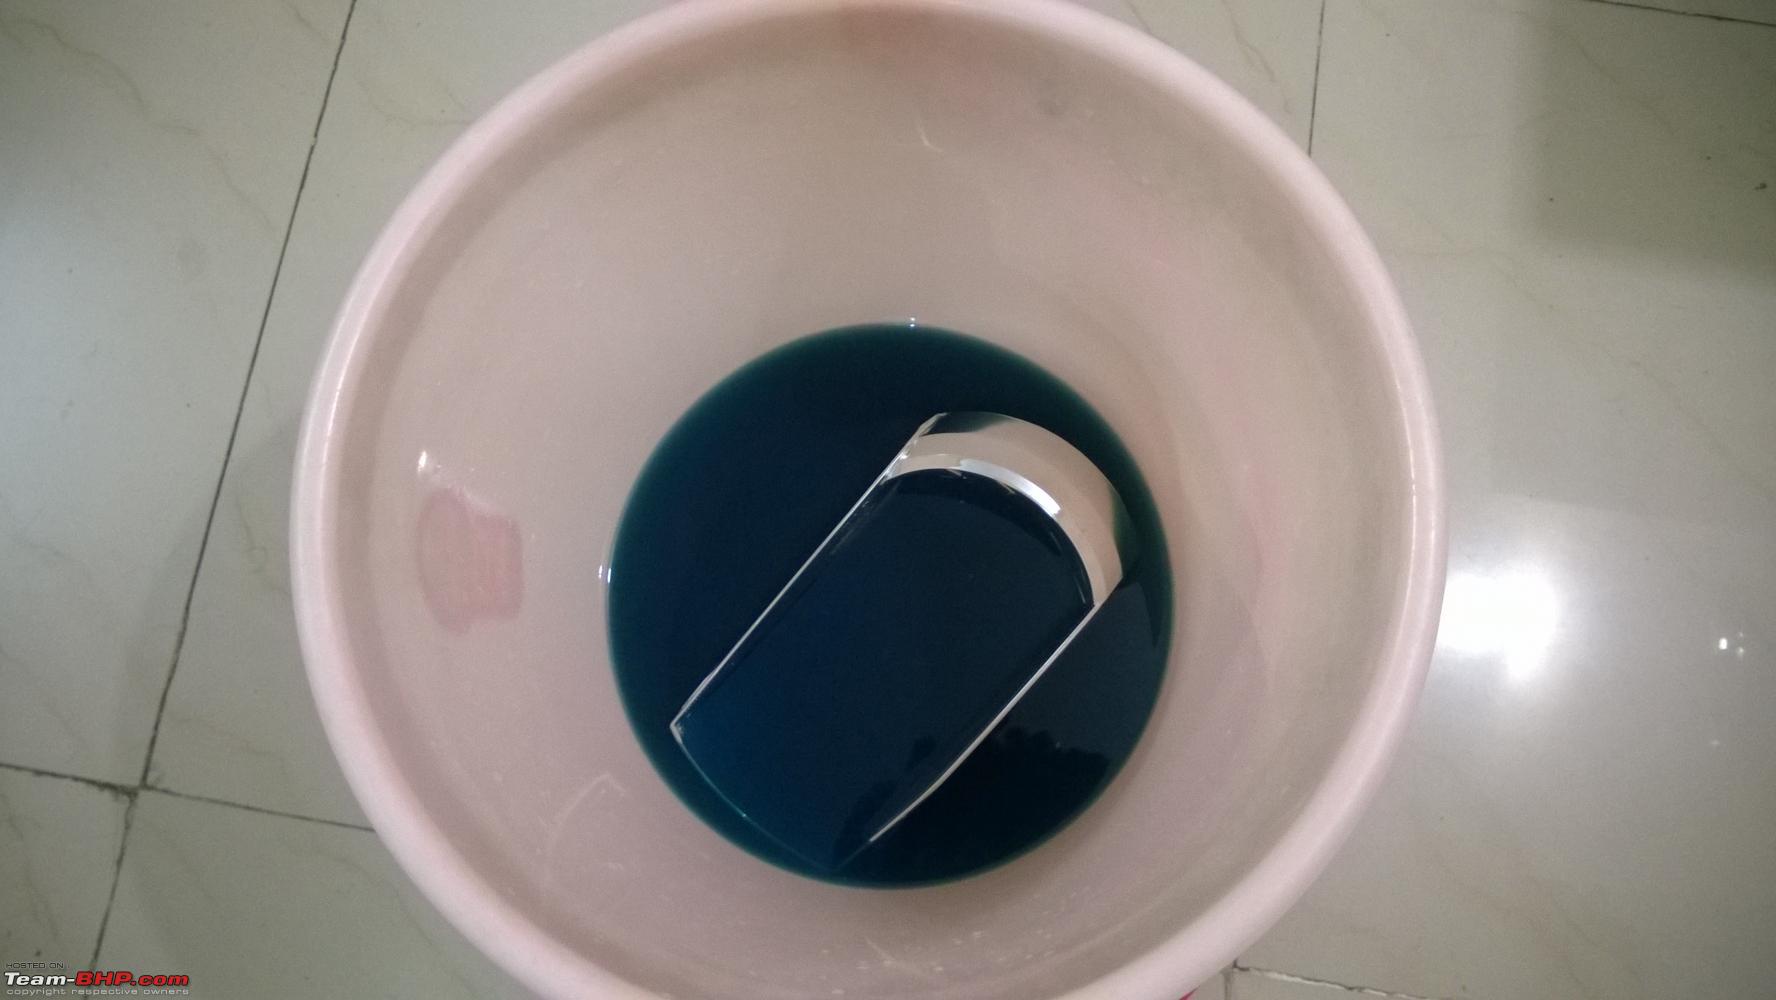
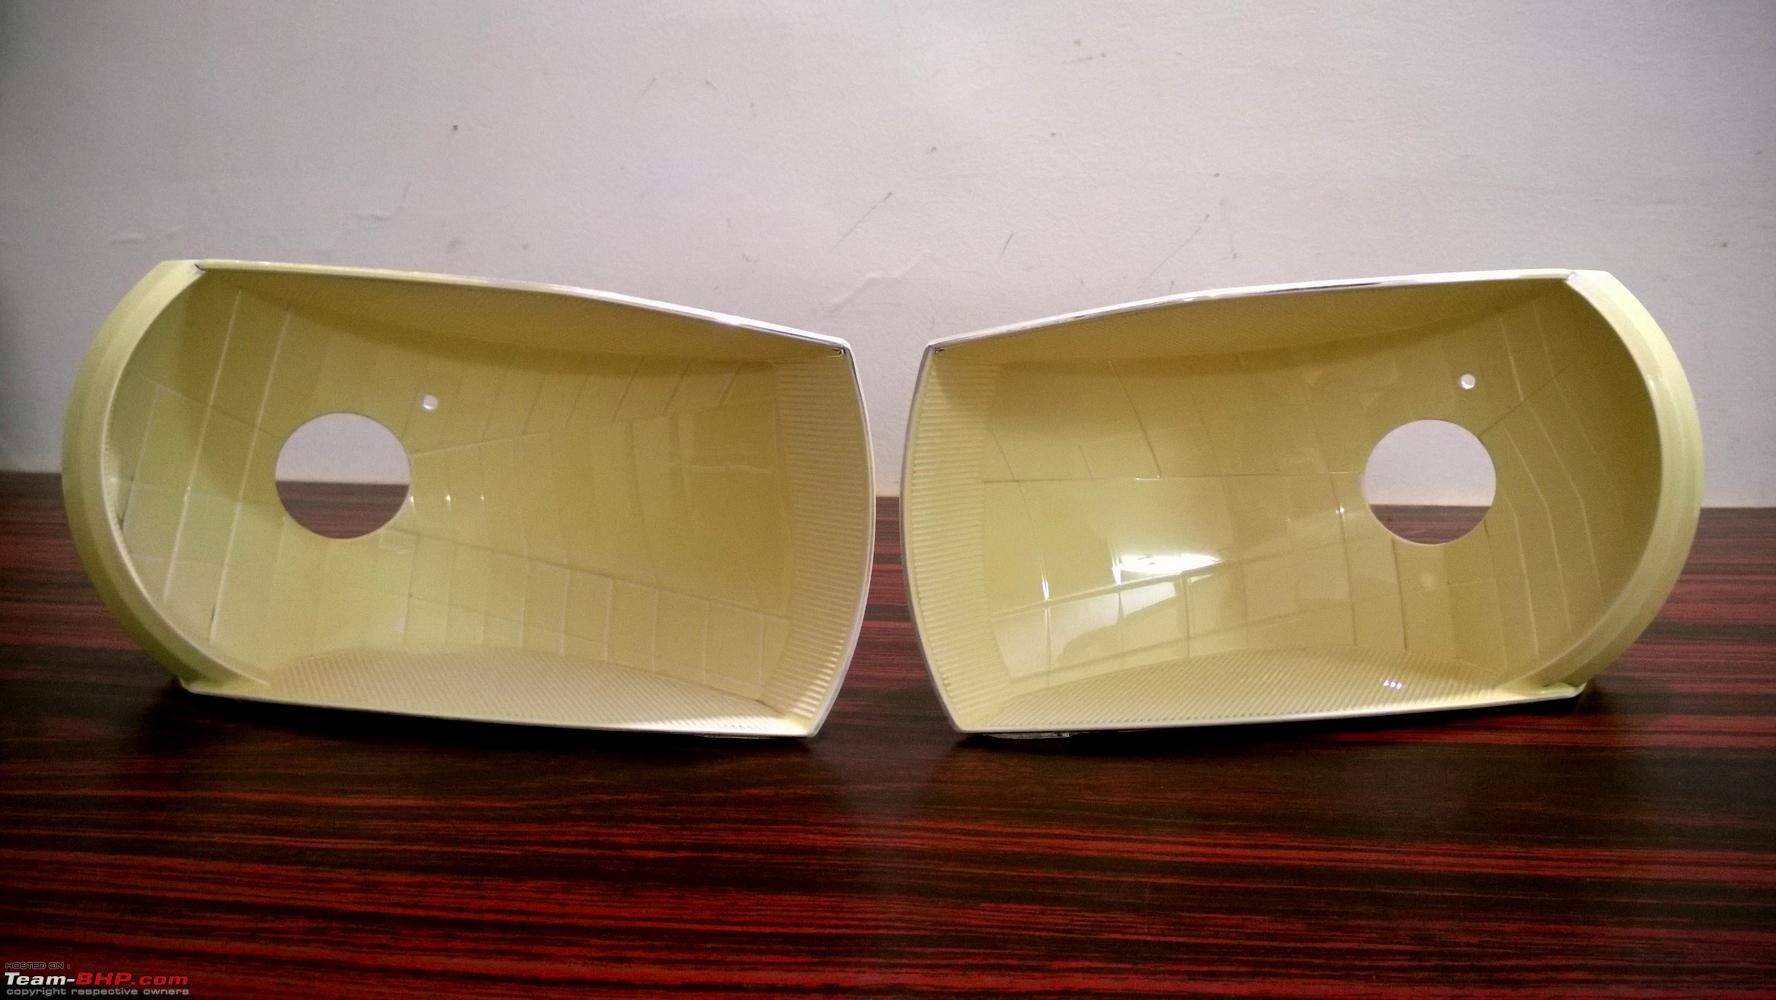
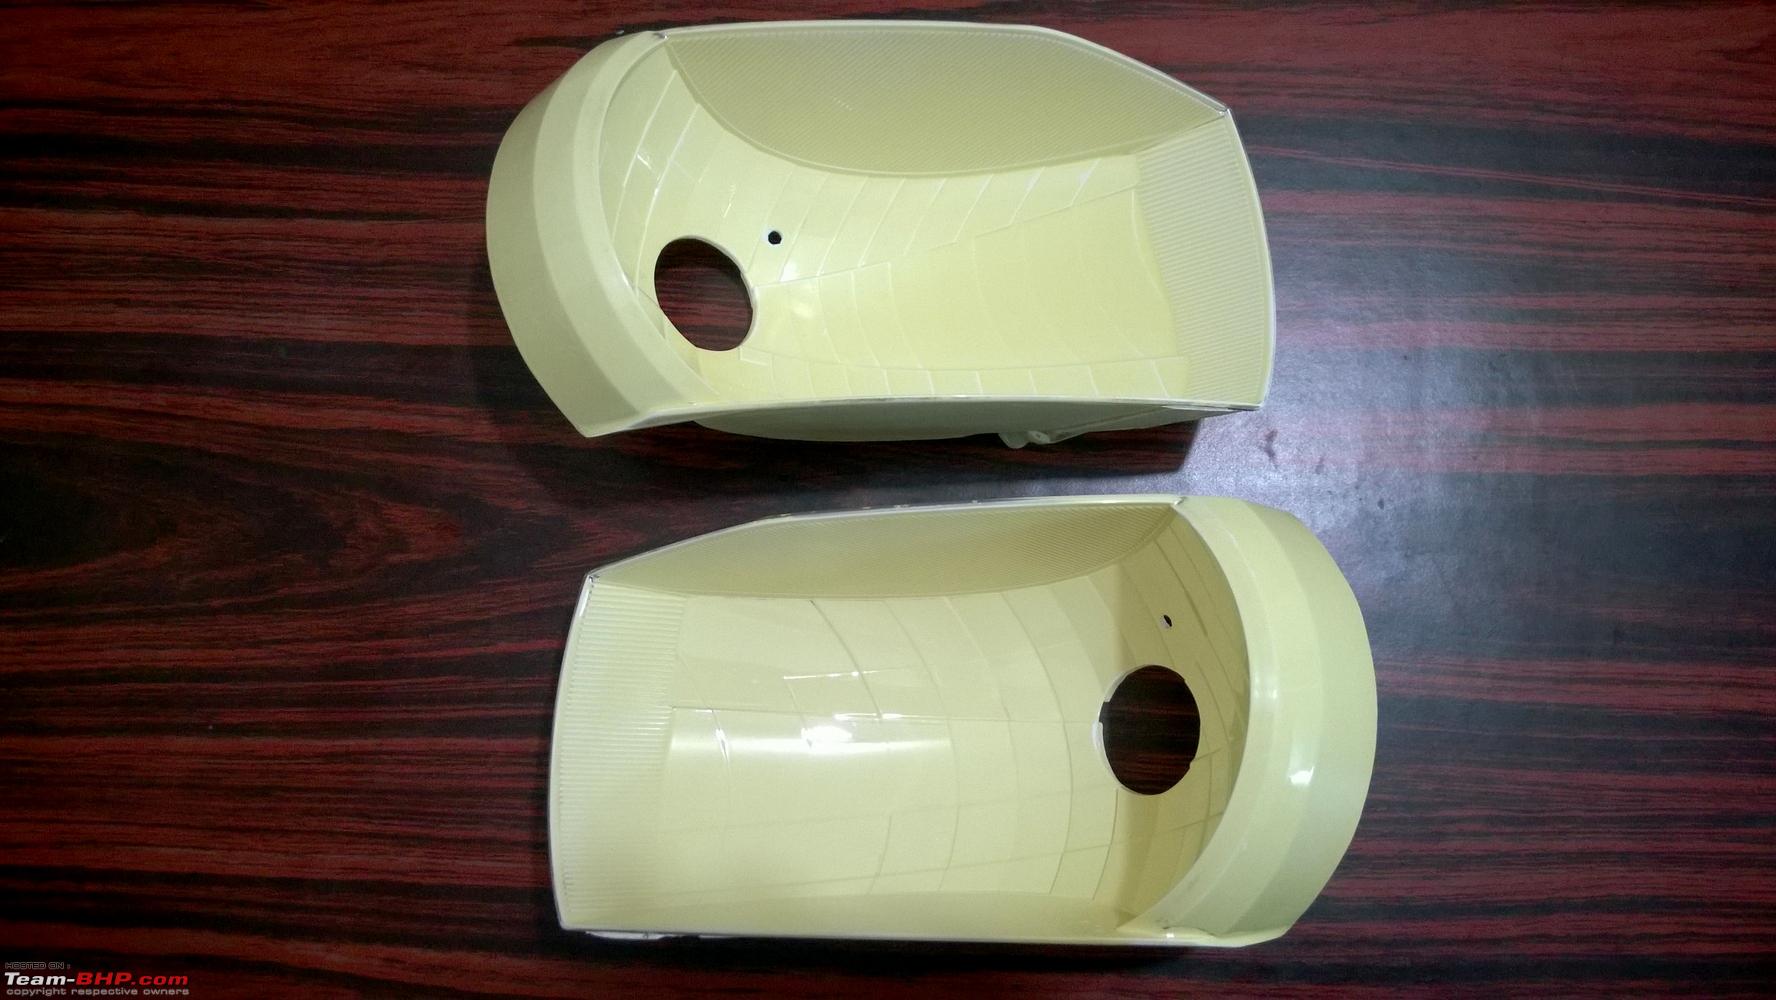
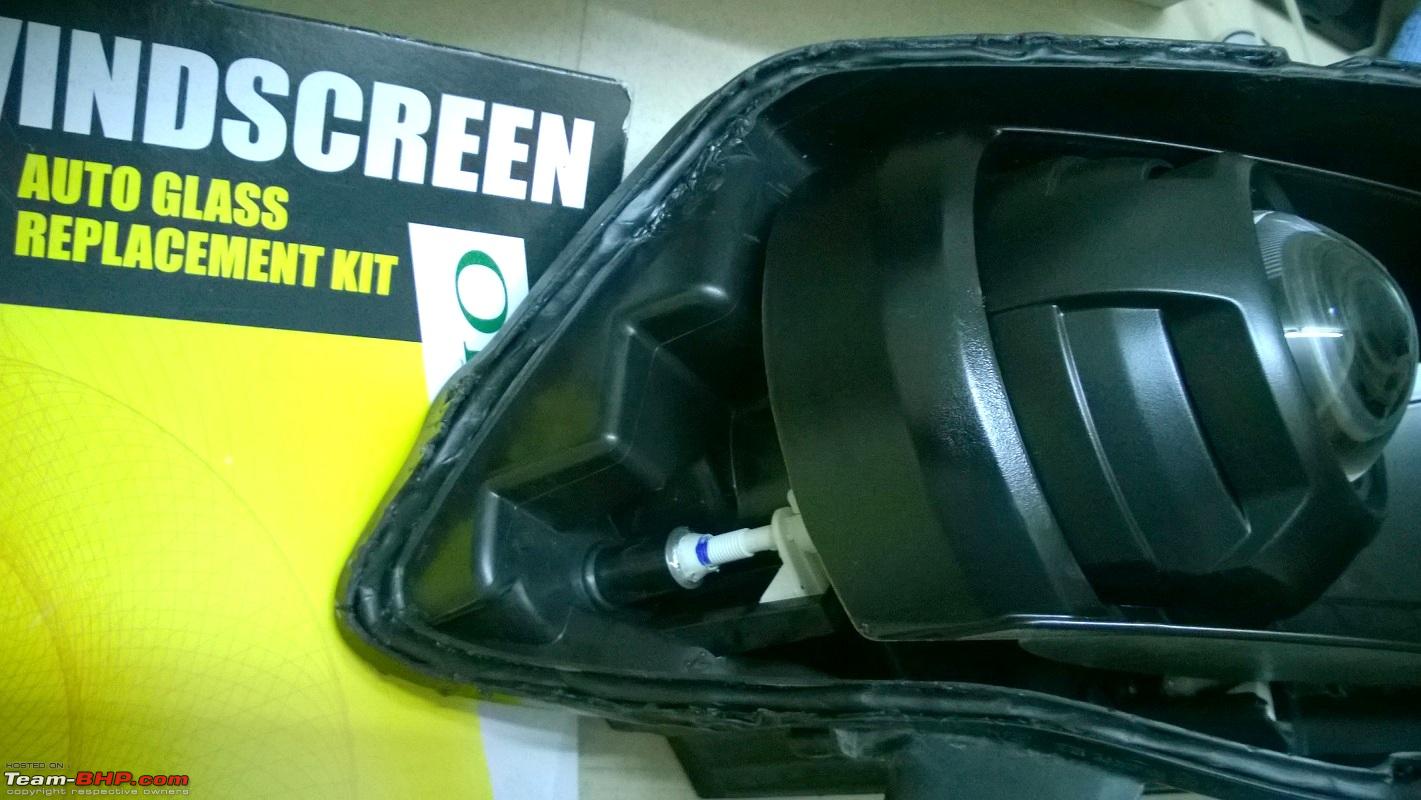
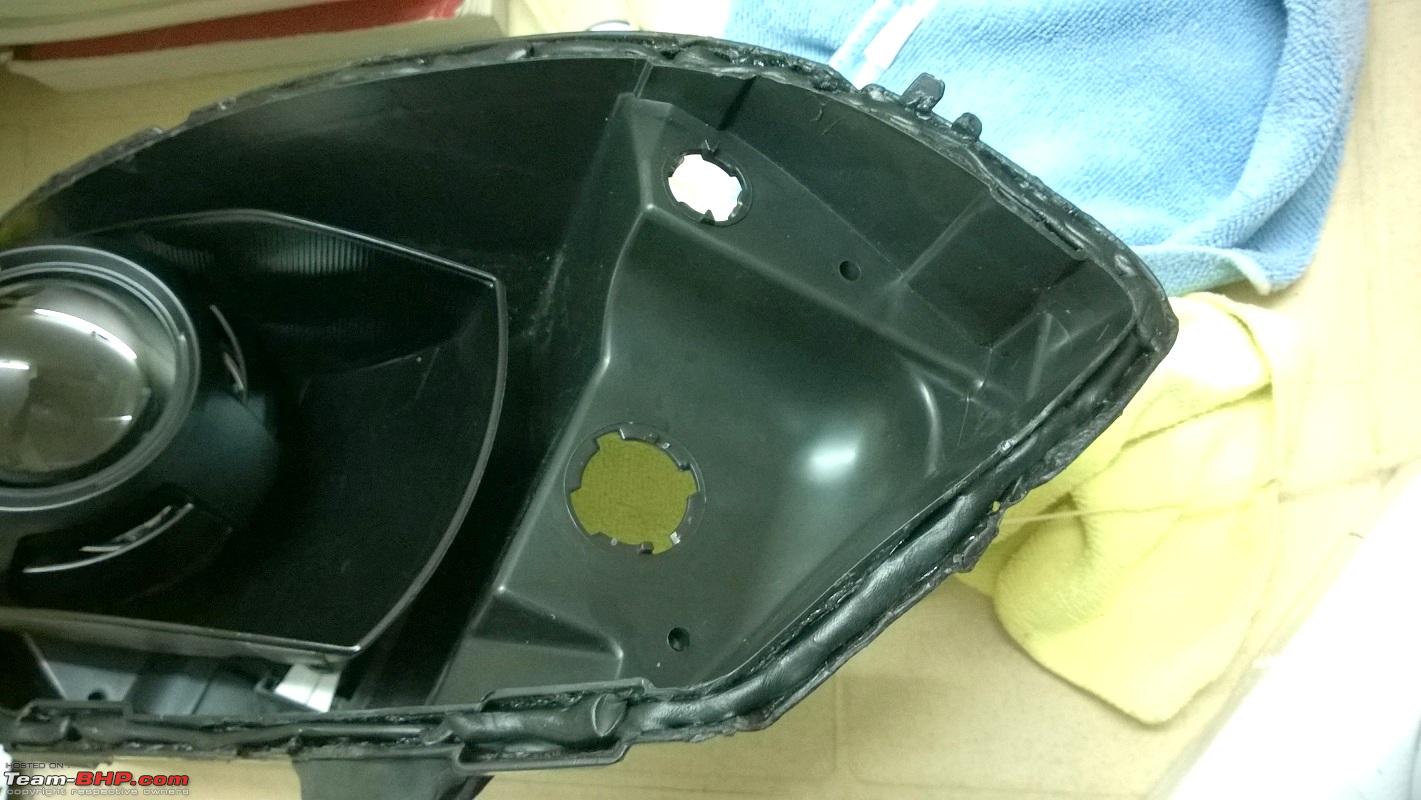
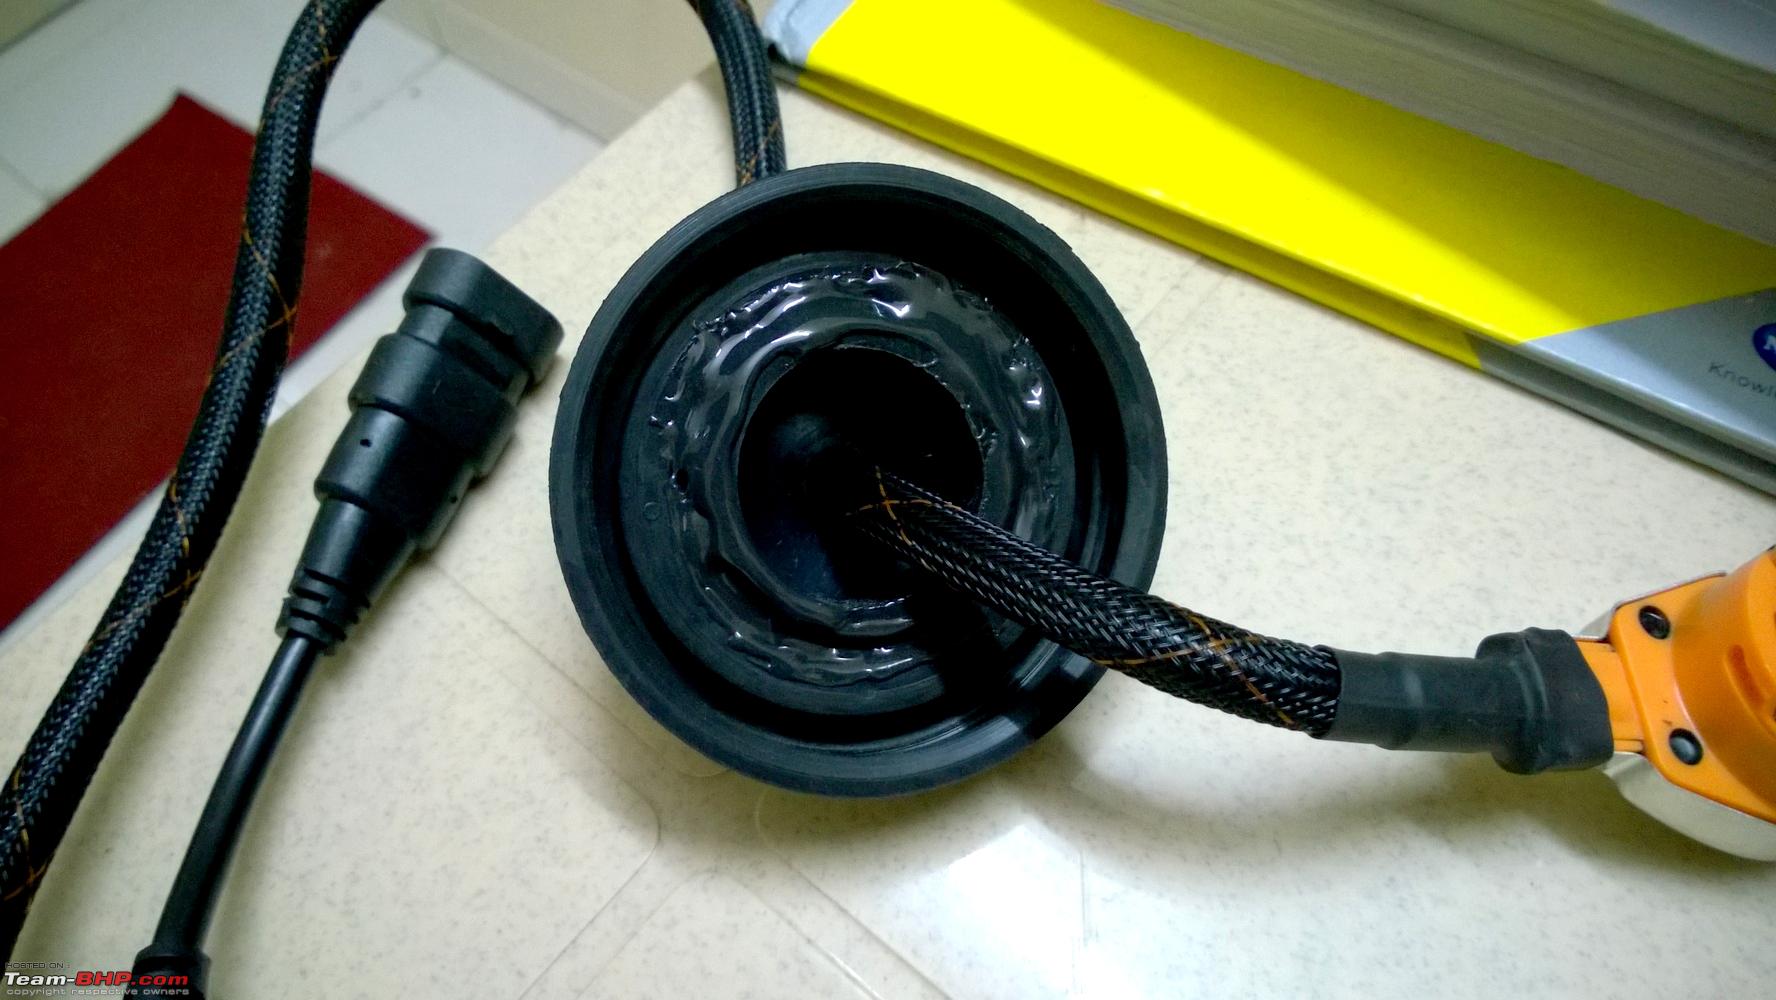
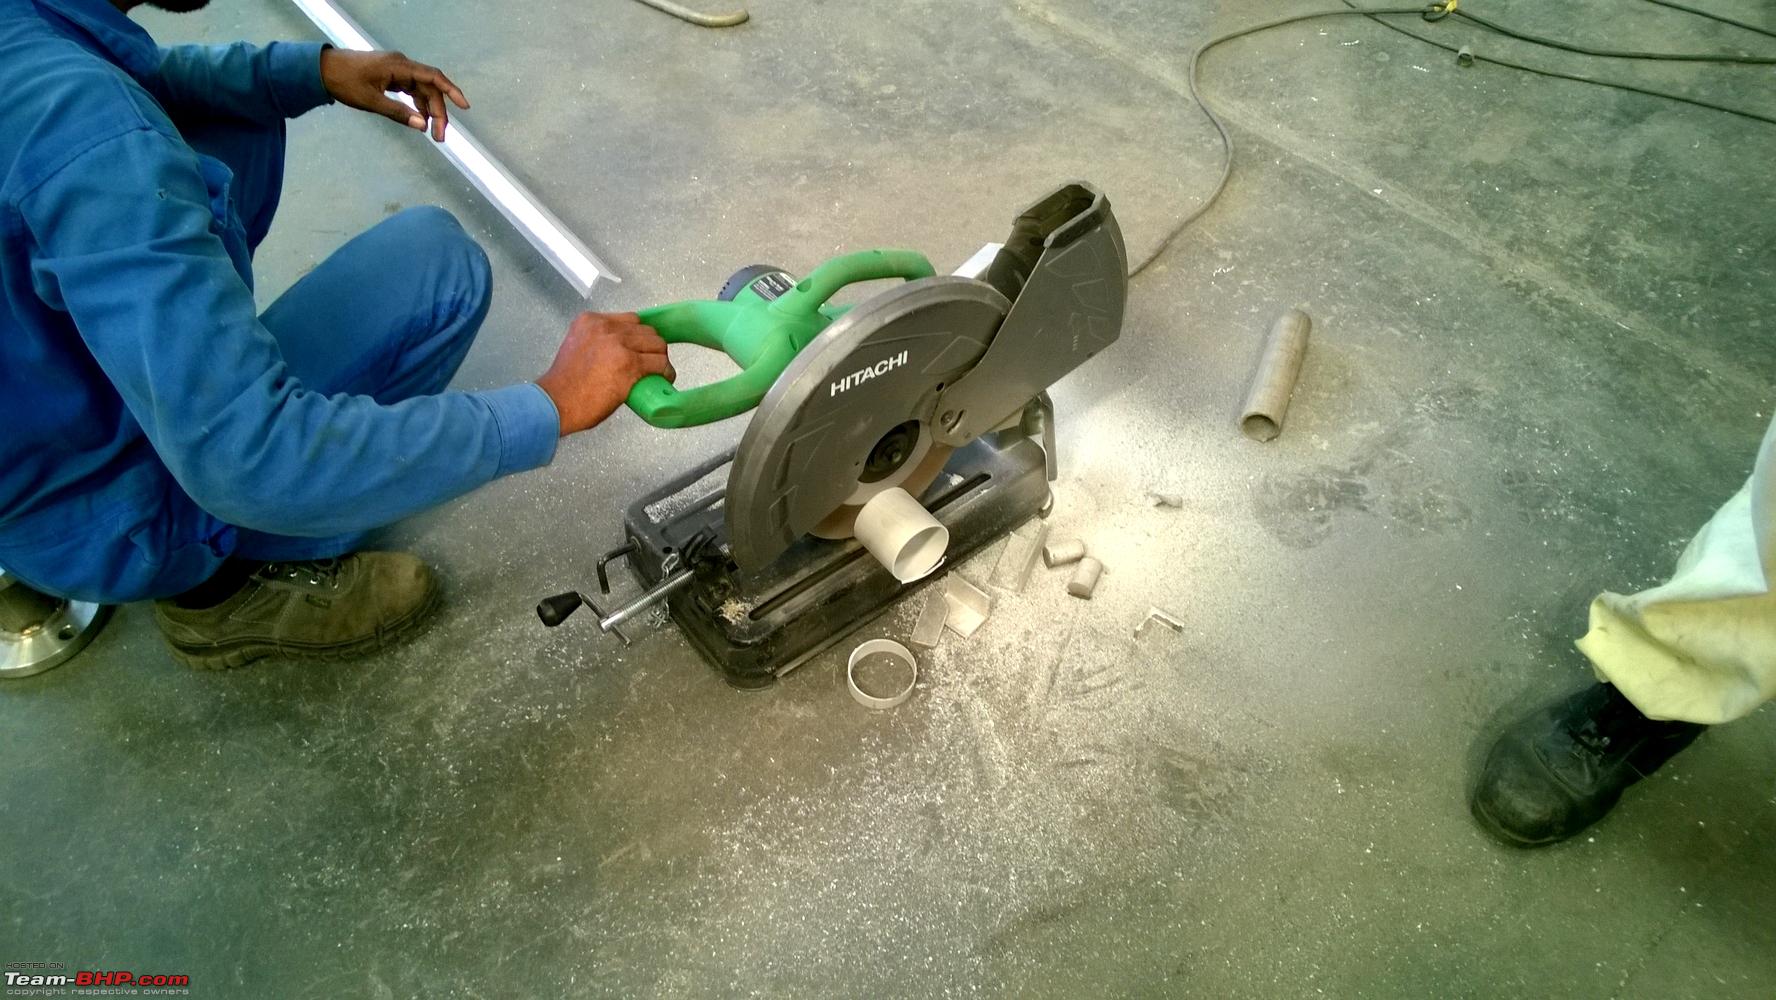
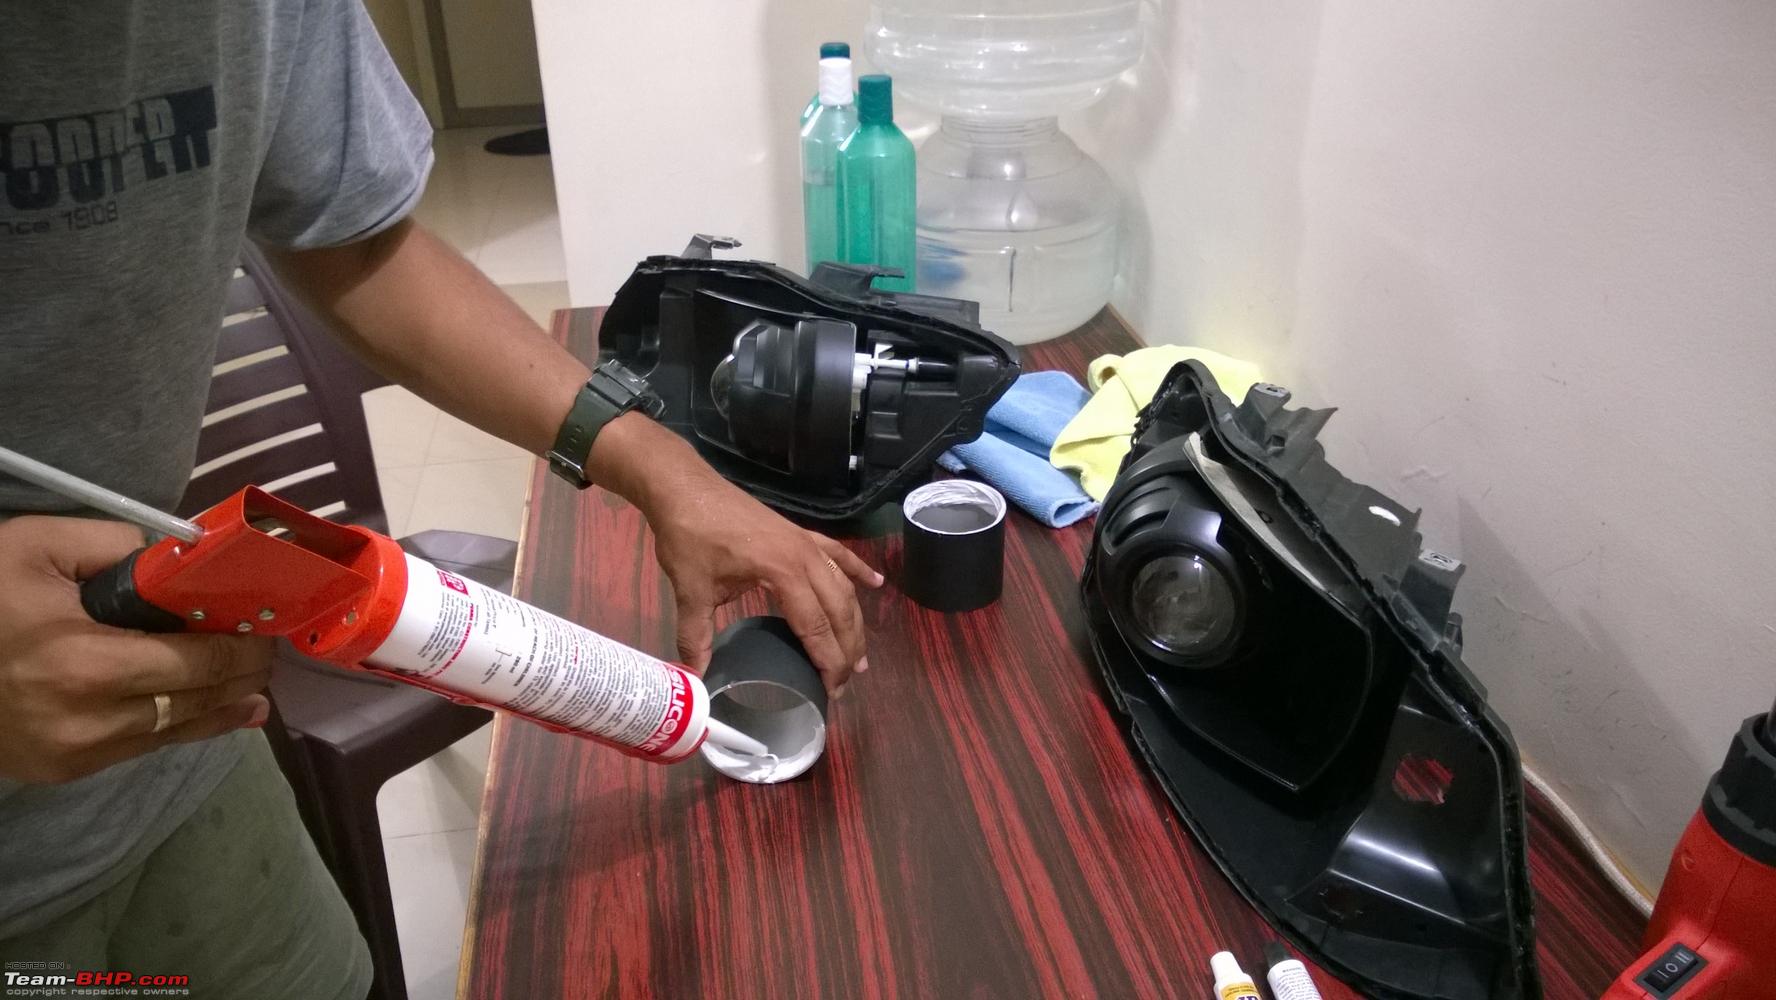
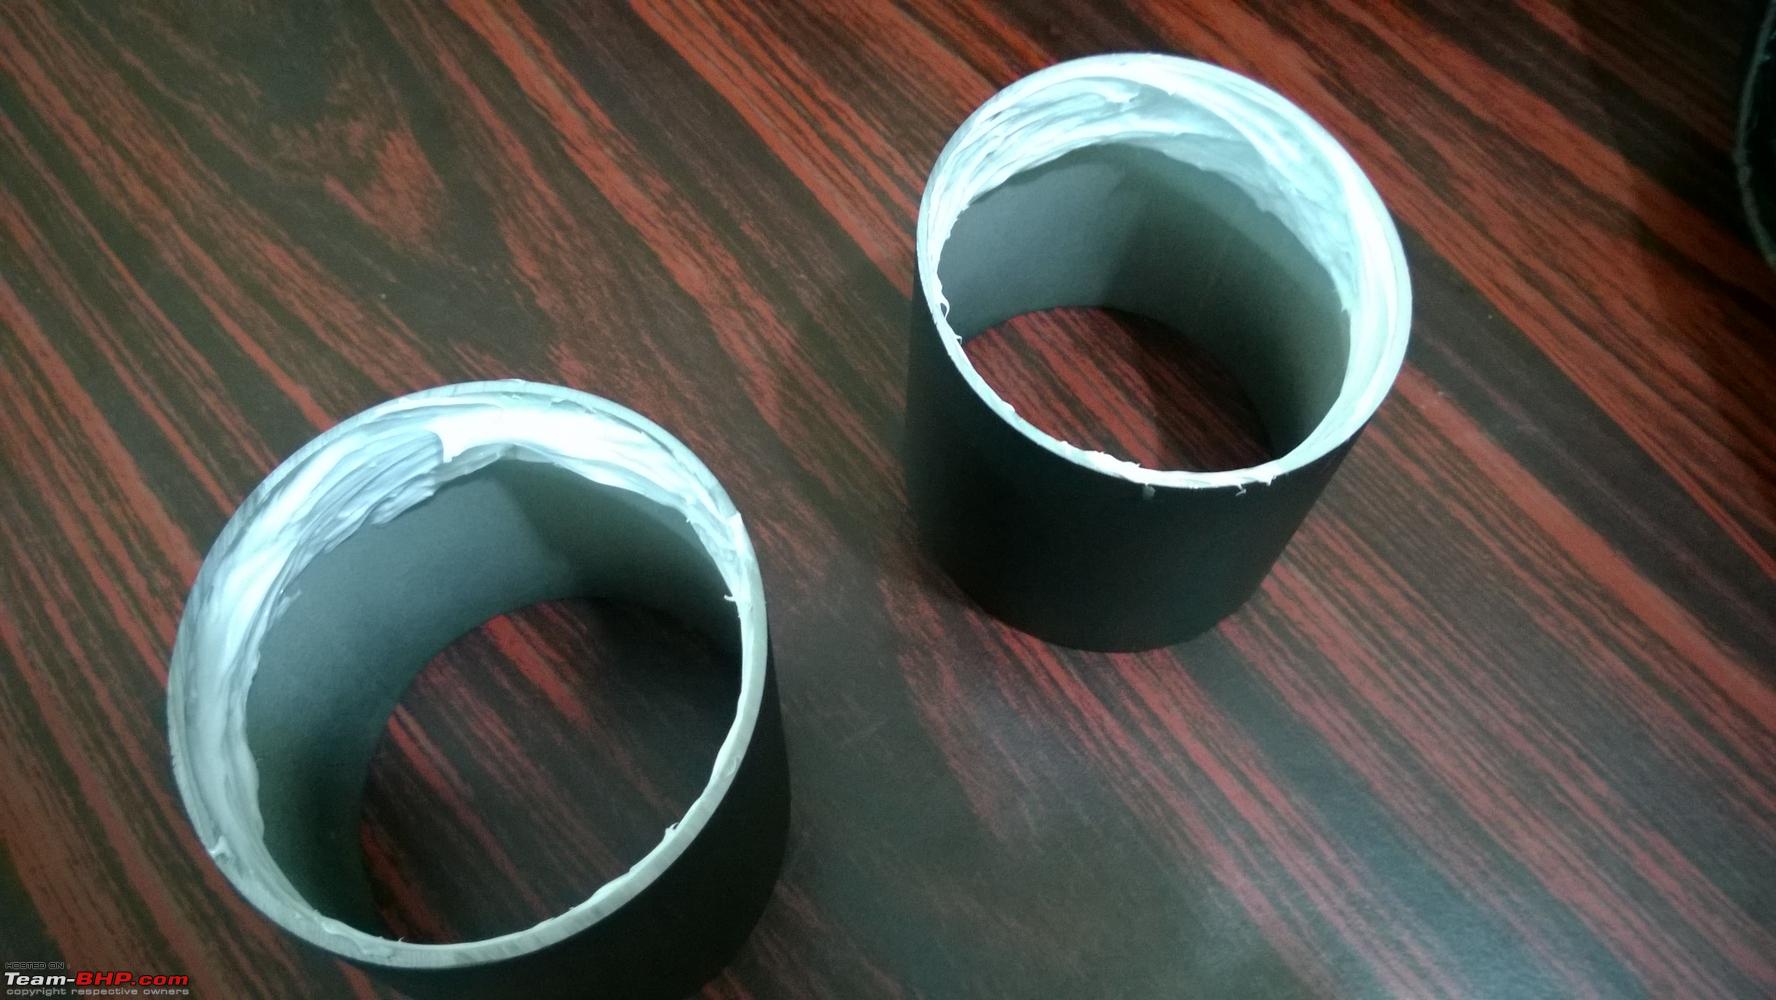
| re: DIY: VW Polo Bi-Xenon Projectors. Morimoto Mini D2S Stage III Installation The DIY oven: Well, why do we need an oven? To bake the headlights of course! The clear lens is glued to the headlight casing using molten butyl glue to prevent moisture and dust ingress. To pry open the lens, the headlight is exposed to heat by baking it in a large oven or by using a heat gun. Most households today have microwave ovens but these may not accommodate a headlight assembly owing to its large size. There are some ovens built into a cooking range which are larger and may just be able to squeeze a headlight. Since I didnt have access to an oven like this, the easiest and the cheapest solution was to build one using a cardboard box and using a heat gun as a source of heat. Full credits to Retrofitlab and their Youtube channel which inspired me to make this DIY oven. The cardboard box:  The heat gun: 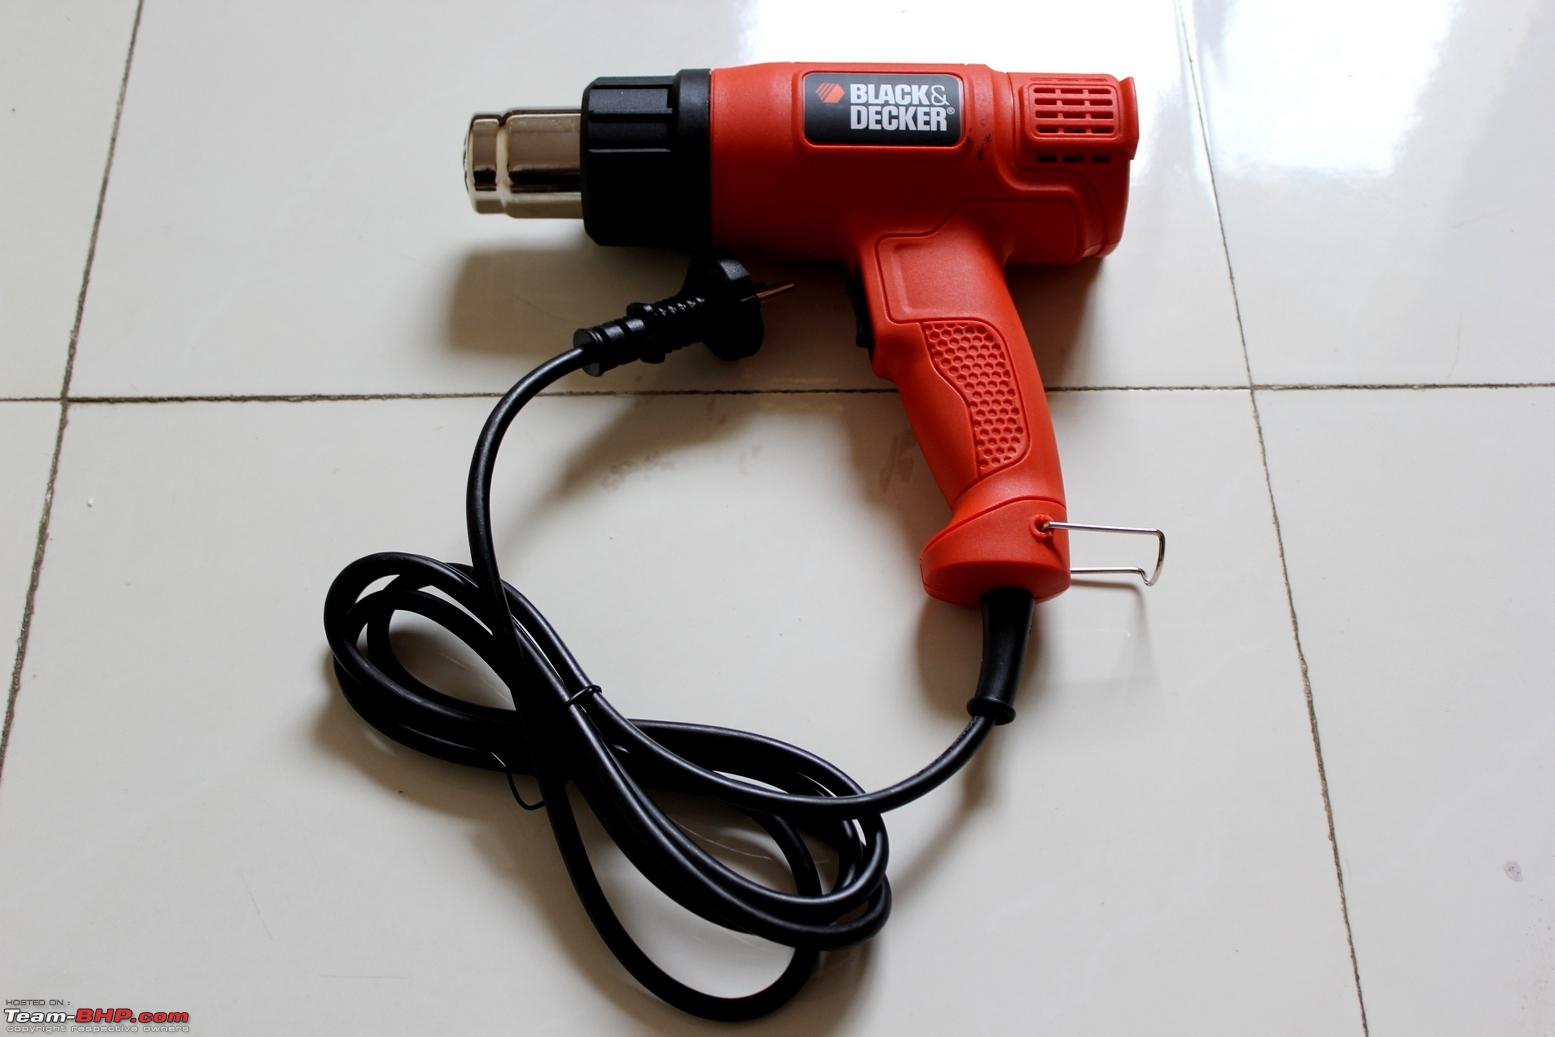 Mark a hole at the bottom-corner of the short width side of the box, cut it using the utility knife and insert the cardboard tube into it. The tube should be a snug fit through this hole. 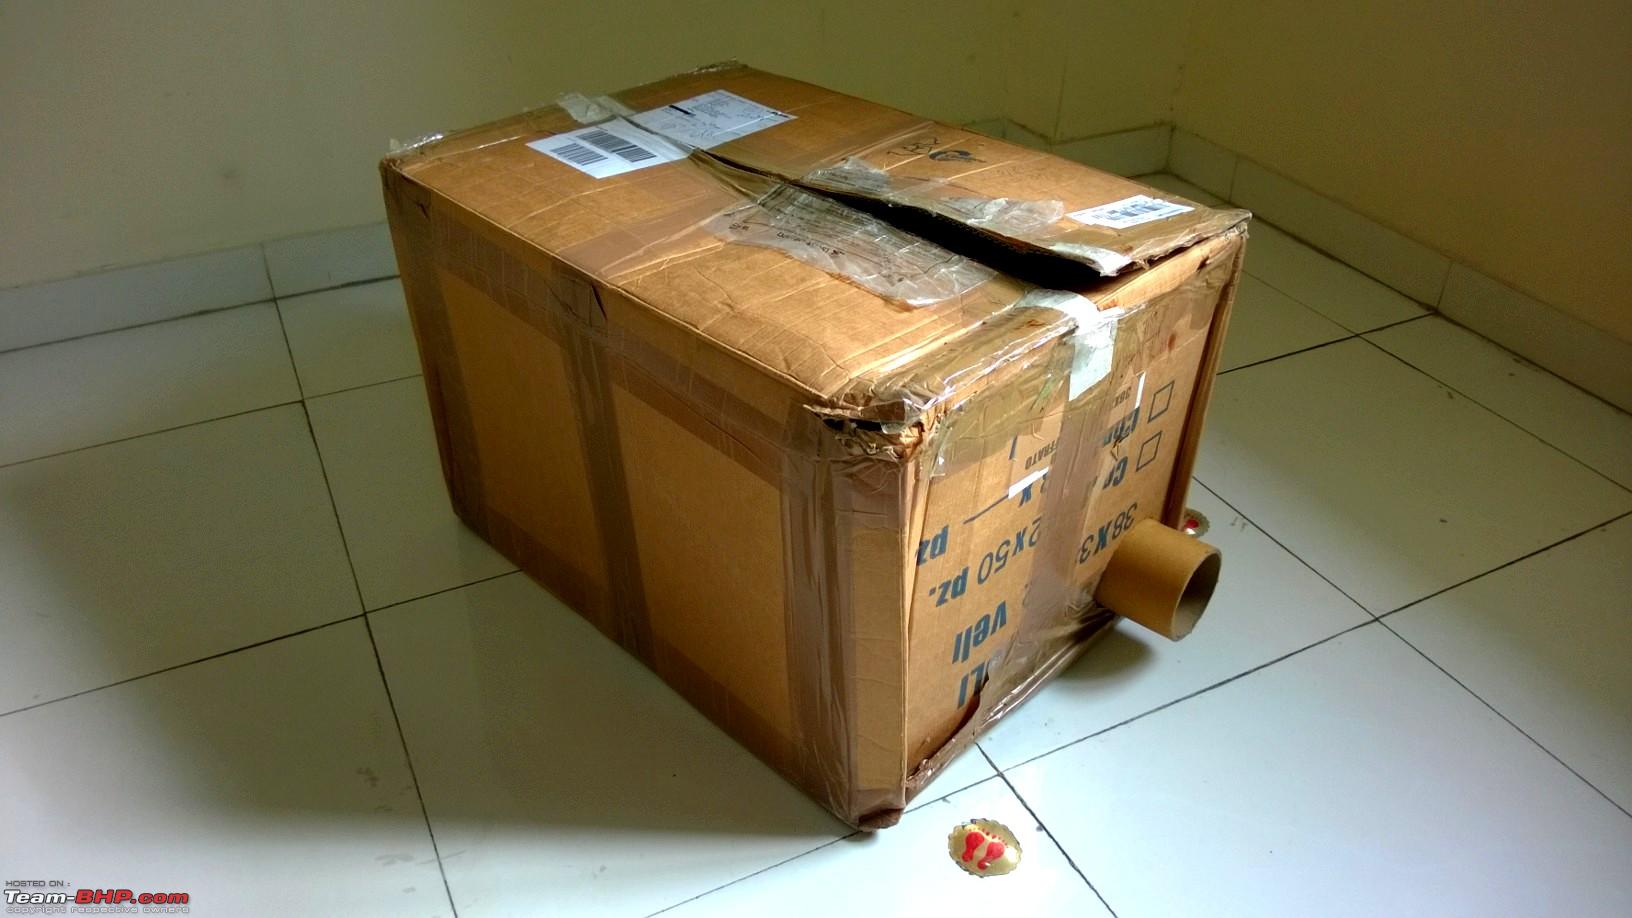 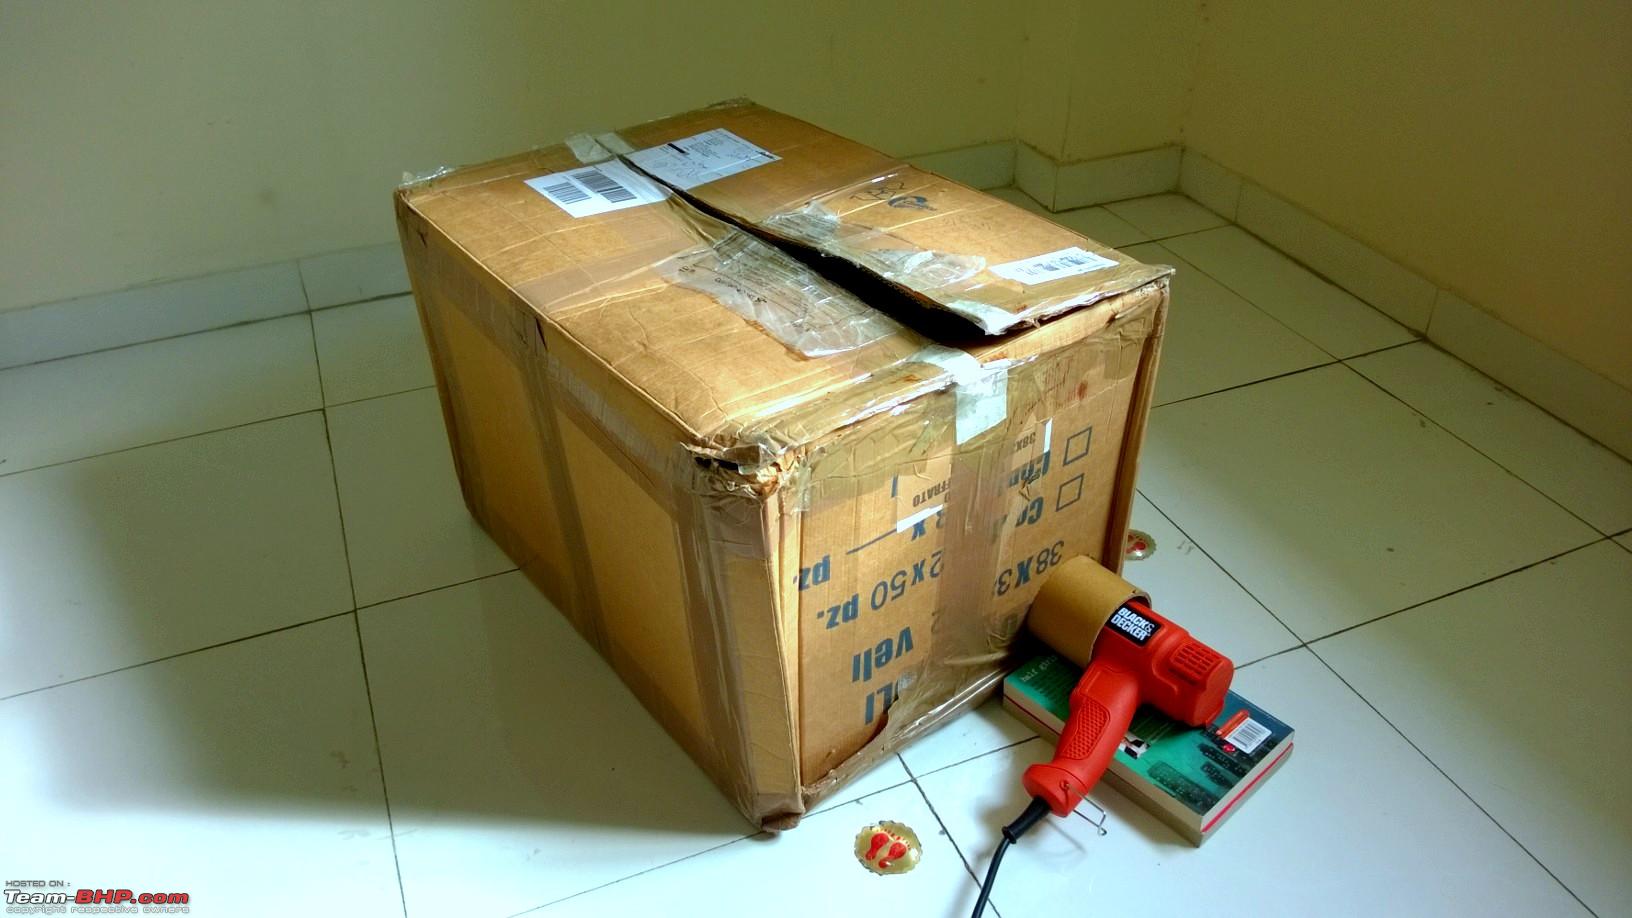 Keep the 2 smaller boxes on diagonally opposite ends - the headlight is going to be supported by these boxes: 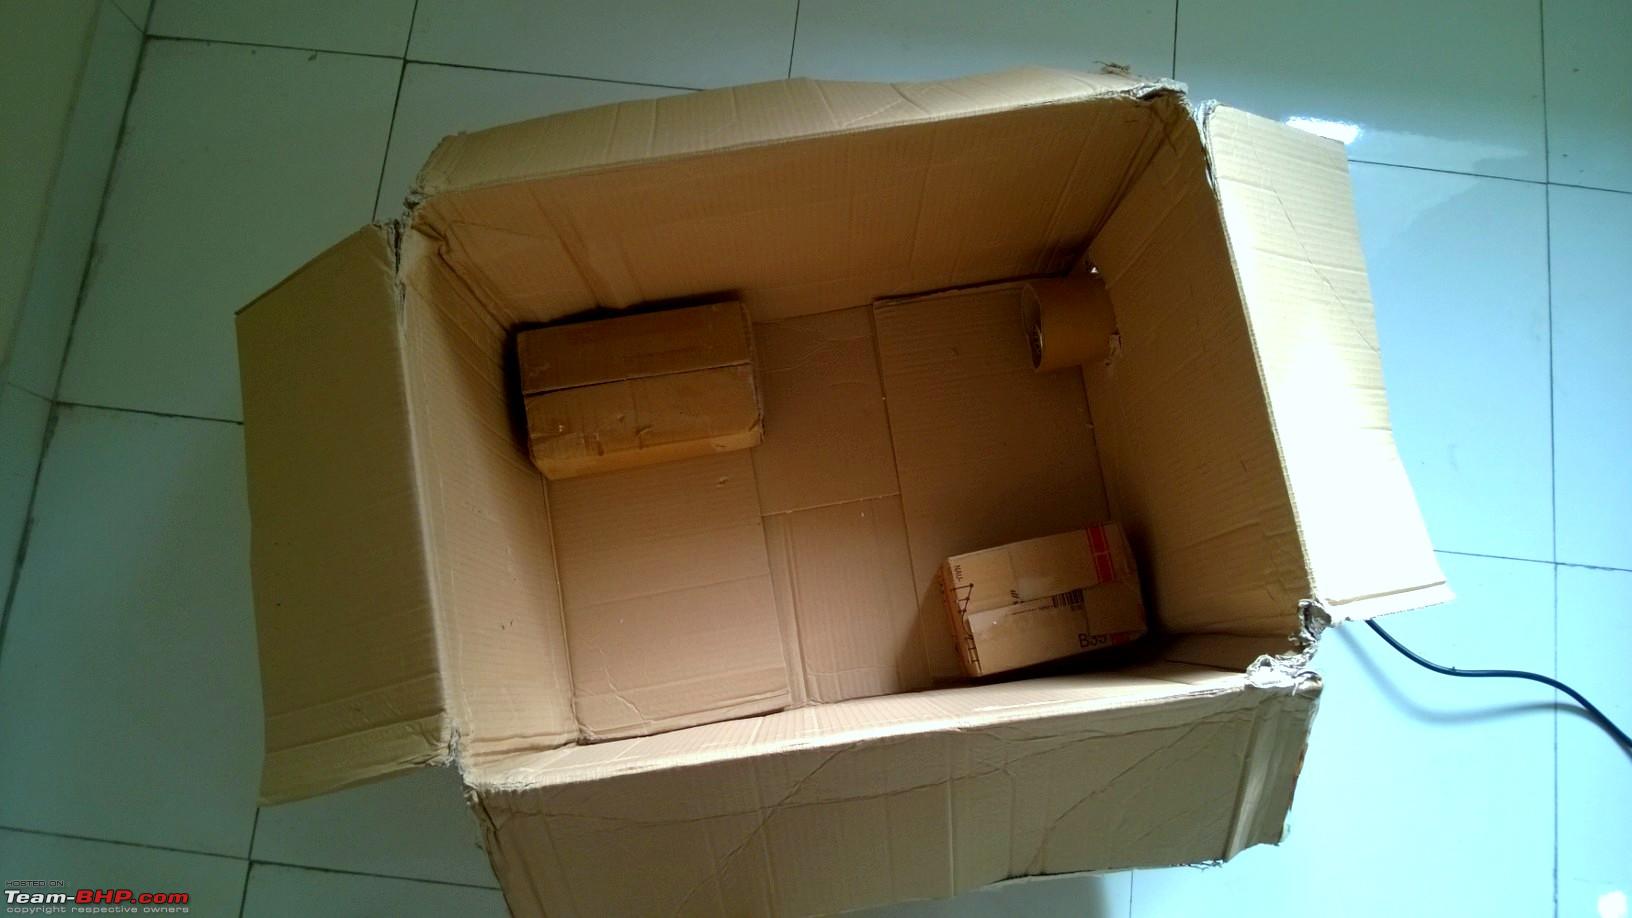 Thats all. Last edited by Gannu_1 : 22nd November 2014 at 12:32. |
|
| (22)
Thanks
|
| The following 22 BHPians Thank Gannu_1 for this useful post: | ajaypjayaraj, anilntny, ashpalio, audioholic, AviG, deepfusion, dr.kushagra, FireFoot, fluidicjoy, frankmehta, fusionbang, GTO, Immix, jaunthead, JoseVijay, motorpsycho, Myth_sx, Rehaan, sudeepg, themonster, vaisakhr, wheelguy |
|
11th November 2014, 15:19
| #4 |
| Team-BHP Support Join Date: Apr 2013 Location: Madras
Posts: 7,174
Thanked: 20,220 Times
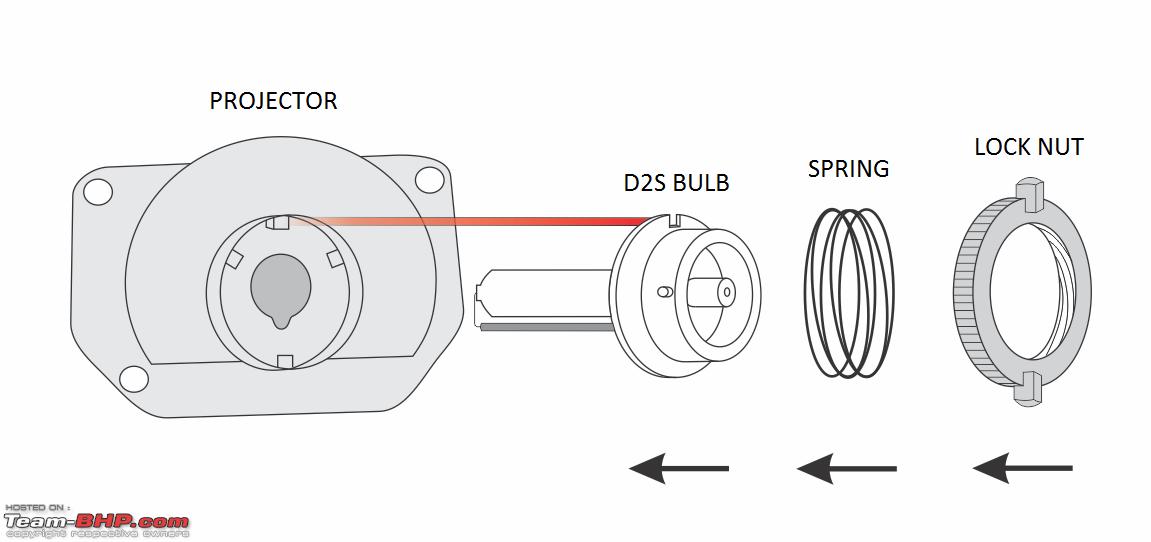
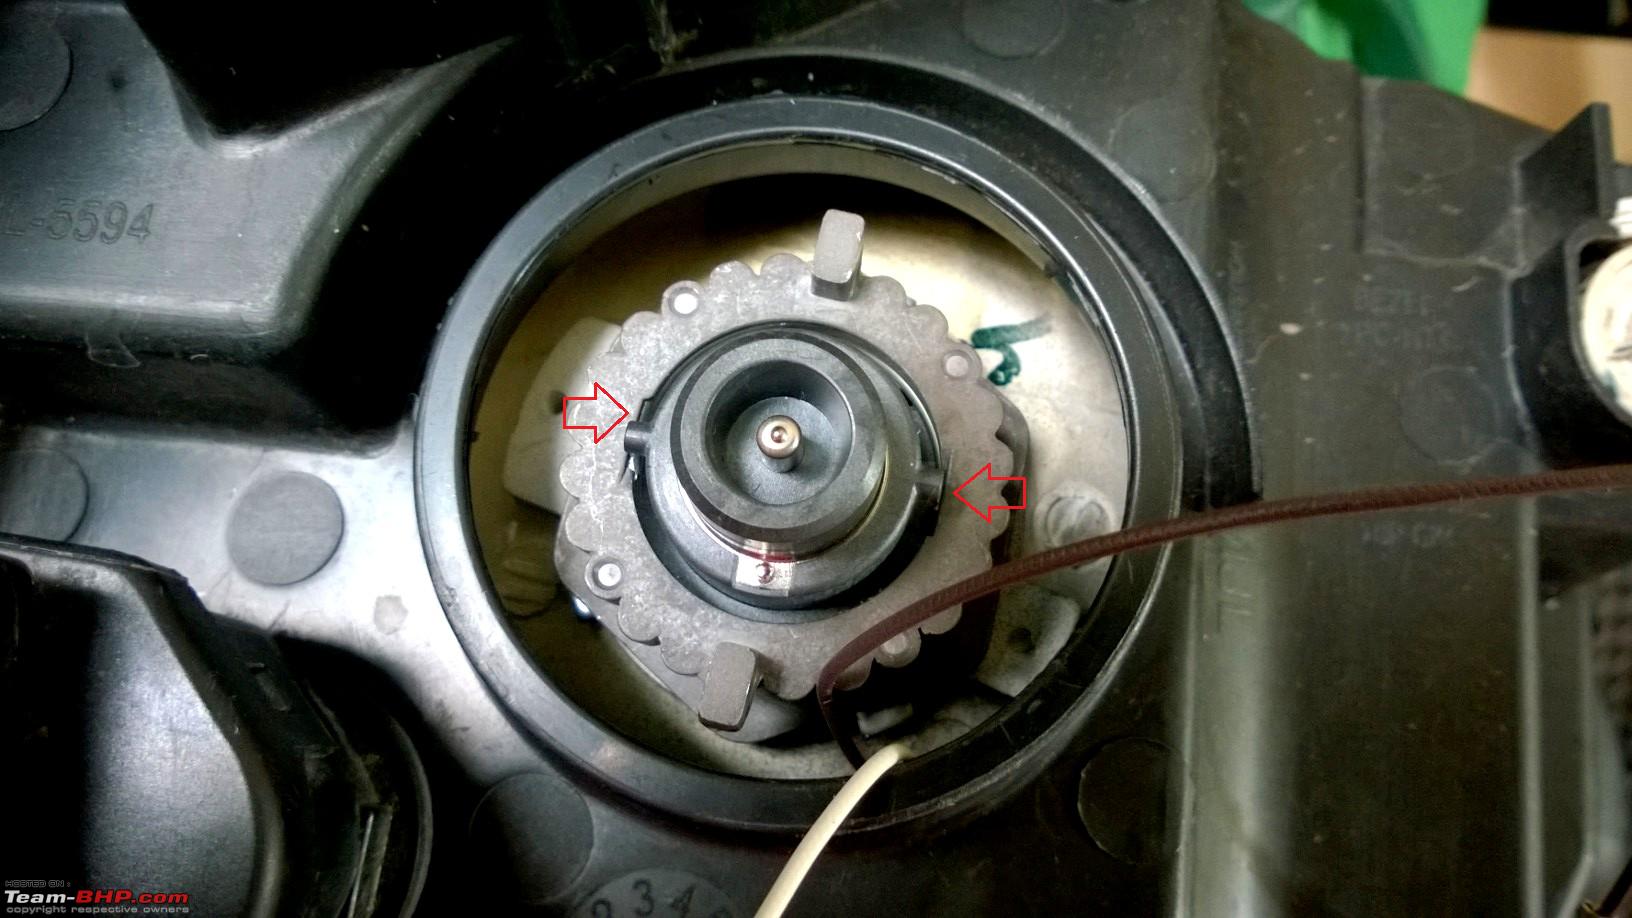
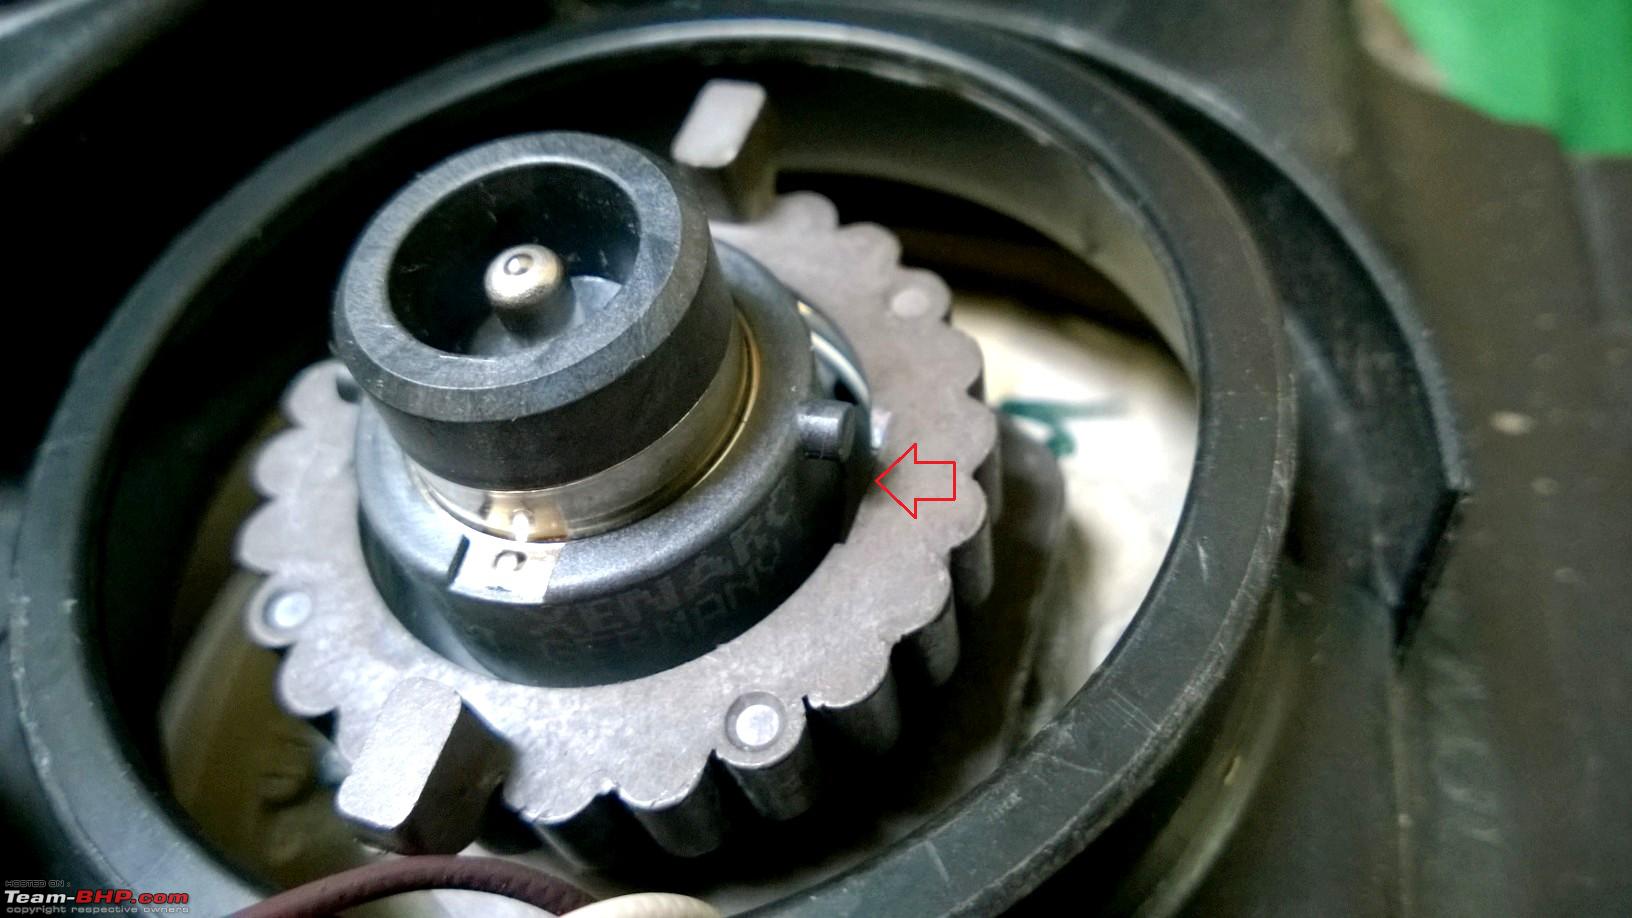
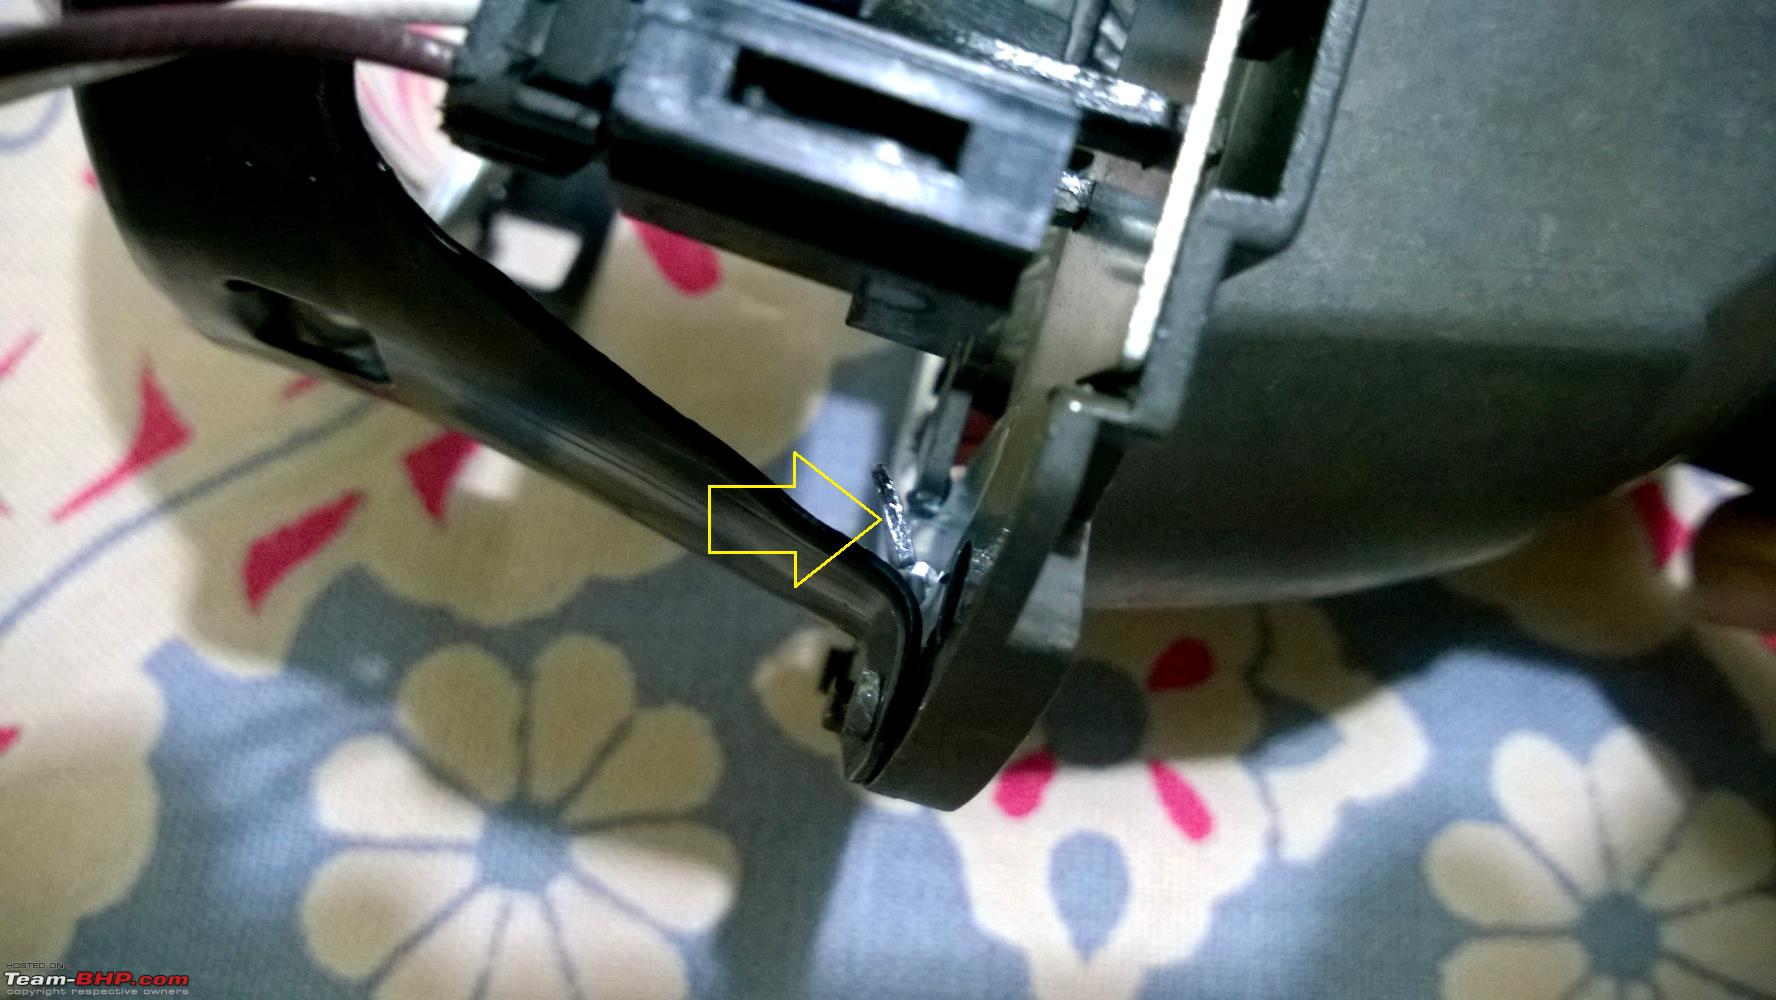
| re: DIY: VW Polo Bi-Xenon Projectors. Morimoto Mini D2S Stage III Installation Precautionary Measure: Before beginning to attempt the retrofit, it would be a good idea to test the proper working of the projector solenoids using a 12 V battery source. A 9 V battery (Hi-Watt types) is usually sufficient but sometimes it will run out of juice quickly. Use a 9 V battery and a couple of 1.5 V AA/AAA batteries in series, connect the leads to the battery (and a switch for the ease, if need be) and switch it on and off in succession at least 40-50 times: 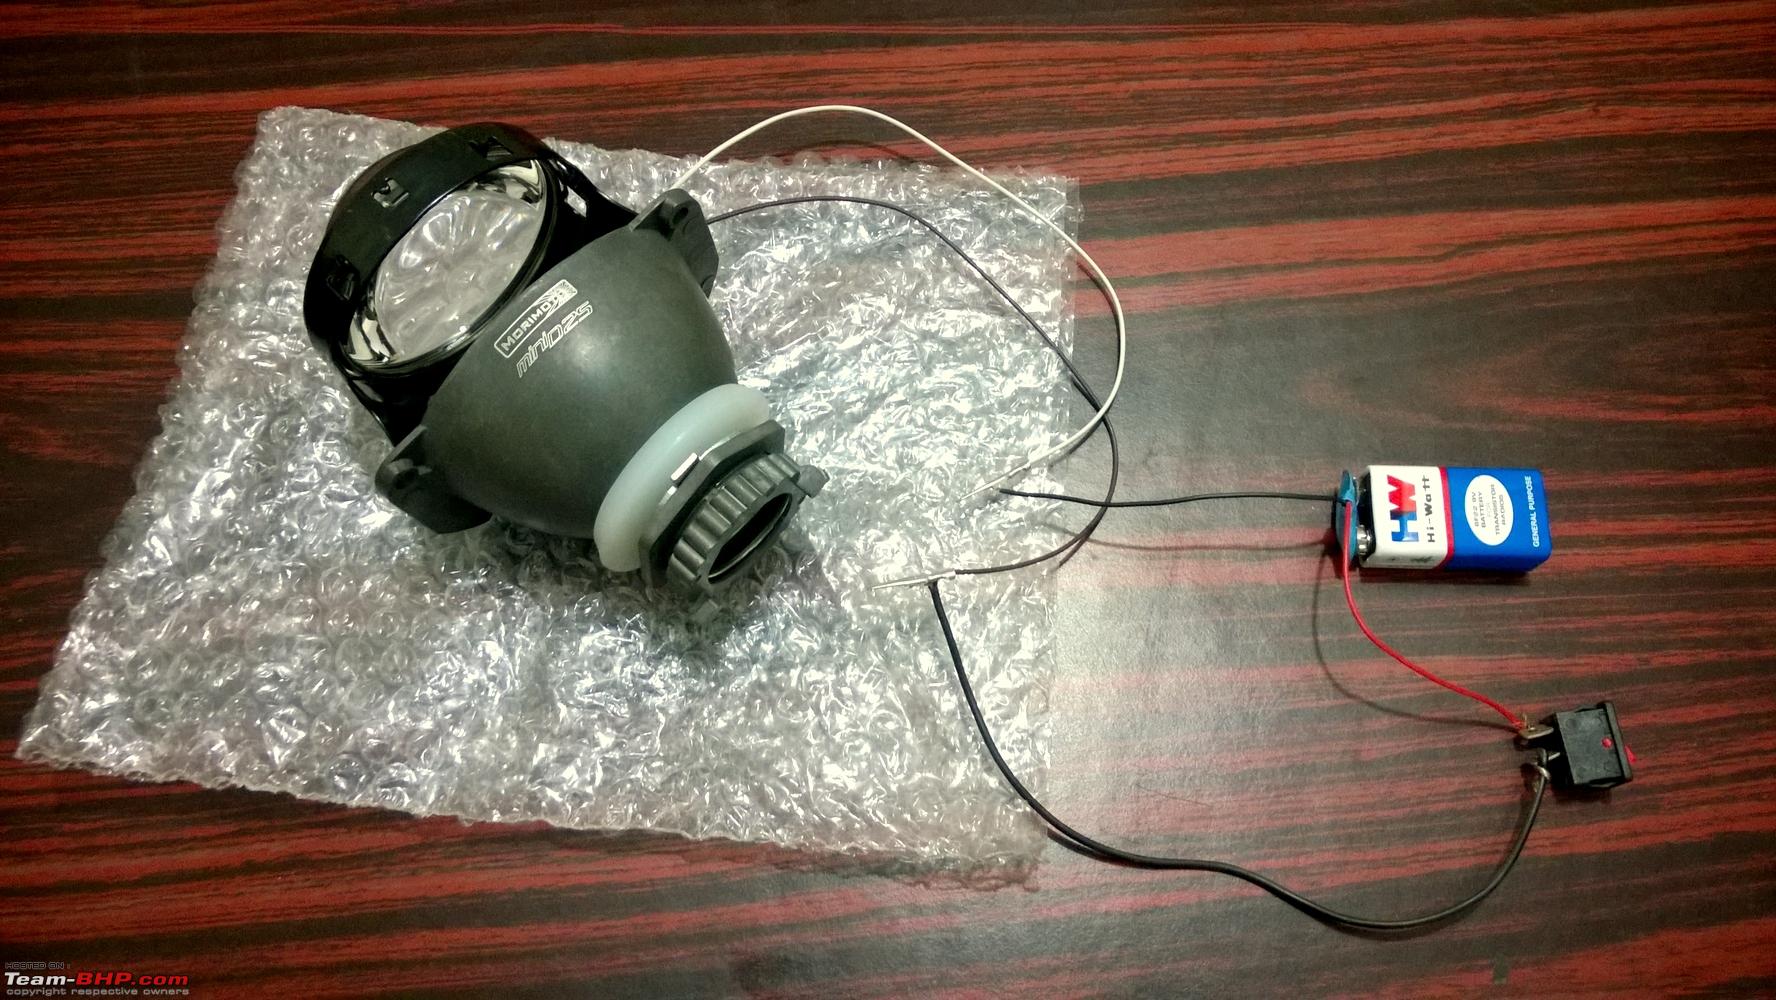 When the solenoid is energized by the battery source, it pulls the shield down which in turn activates the high beam. When this test is done, the shield must move up and down without absolutely any problems. Ensure that it does! Sometimes the shield plate may experience some friction and may hesitate to move. In such a case, analyse the movement very carefully and find out what is causing the shield plate to get stuck. Most probably, it is this channel that causes it: 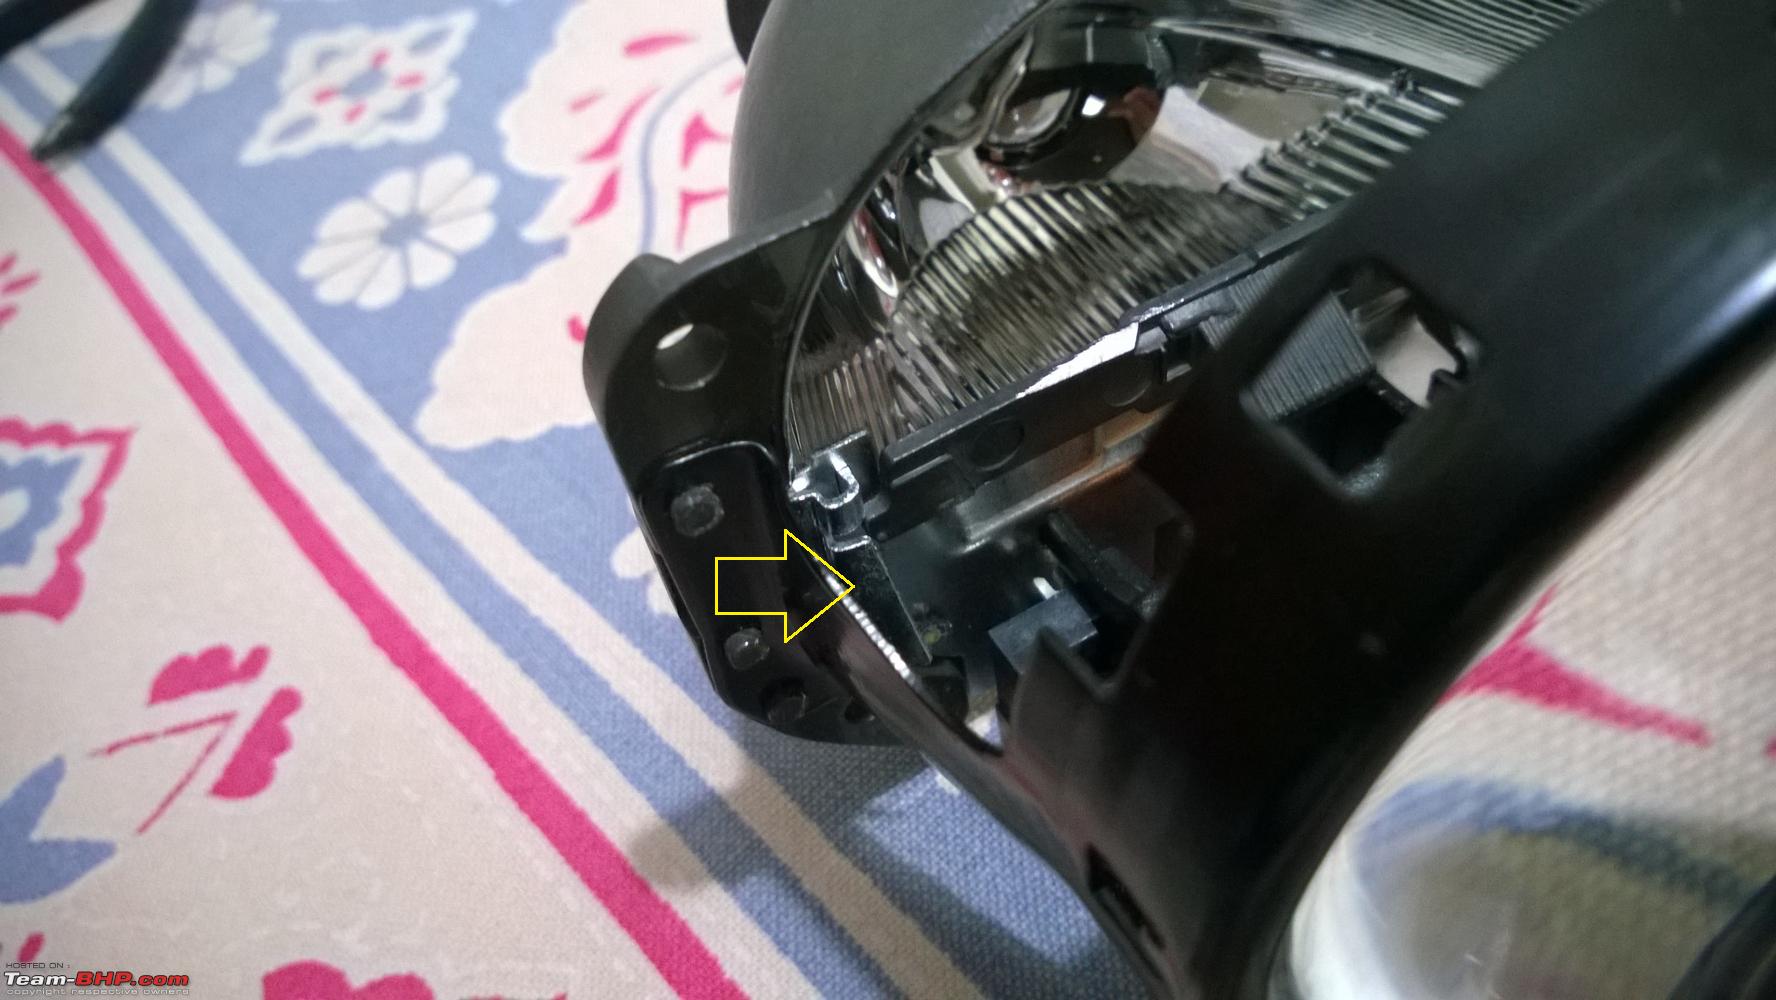 In that case, use a nose plier to gently open the channel so the plate can move freely:  Test the solenoid multiple times to be absolutely sure there aren’t any problems. TRS insists that their solenoids are usually built to last and very rarely, do they face DOA (dead-on-arrival) instances. Wiring Schematic: Here is a custom schematic I had prepared by clubbing the schematics from TRS and using MS Paint to edit them to include everything in one place. The wiring is pretty simple as evident below: 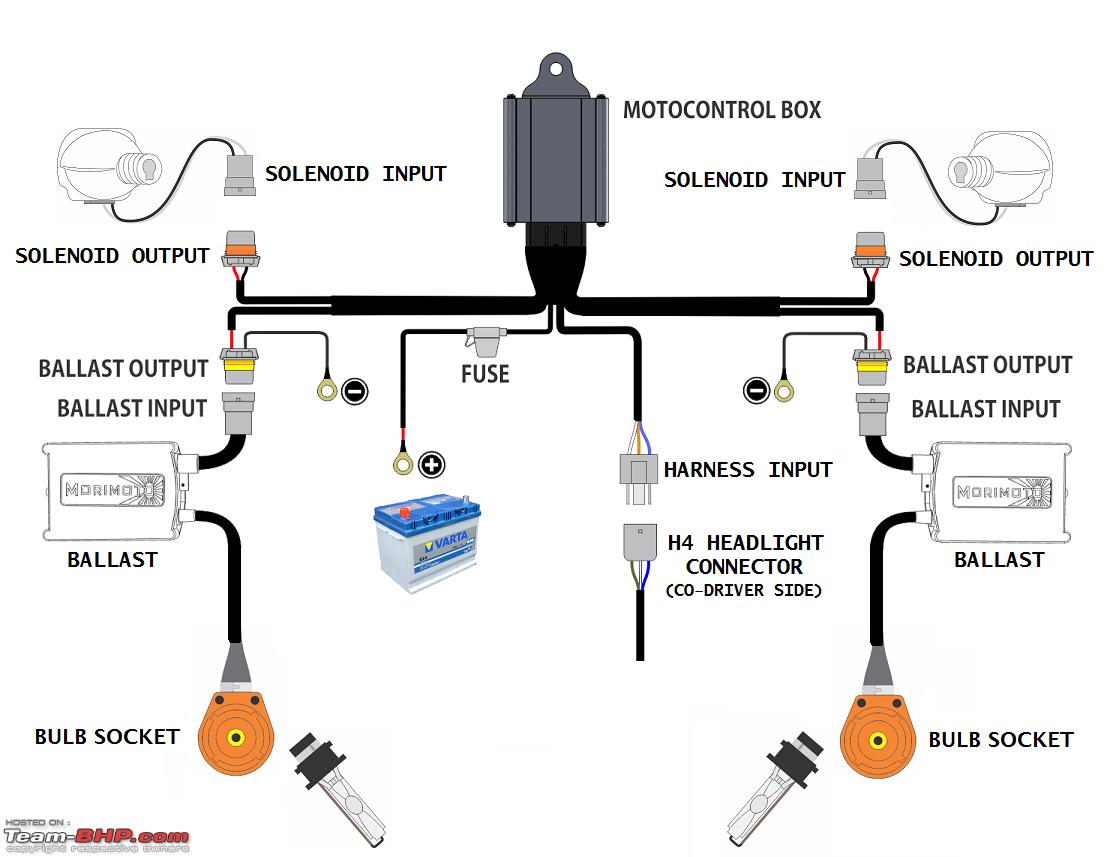 The driver side H4 female connector/harness will be the lone one that remains unused and can be taped. As I had mentioned in the opening post, no cables are cut, spliced or taped. Last edited by Gannu_1 : 24th November 2014 at 11:13. |
|
| (24)
Thanks
|
| The following 24 BHPians Thank Gannu_1 for this useful post: | ampere, ashpalio, Chethan B G, deepfusion, Divya Sharan, djoel99, dr.kushagra, FireFoot, fusionbang, gearhead_mait, GTO, Immix, jaunthead, john doe, JoseVijay, Myth_sx, paragsachania, Rehaan, Sankar, themonster, vaisakhr, viXit, wheelguy, yesyeswe |
|
11th November 2014, 15:46
| #5 |
| Team-BHP Support Join Date: Apr 2013 Location: Madras
Posts: 7,174
Thanked: 20,220 Times
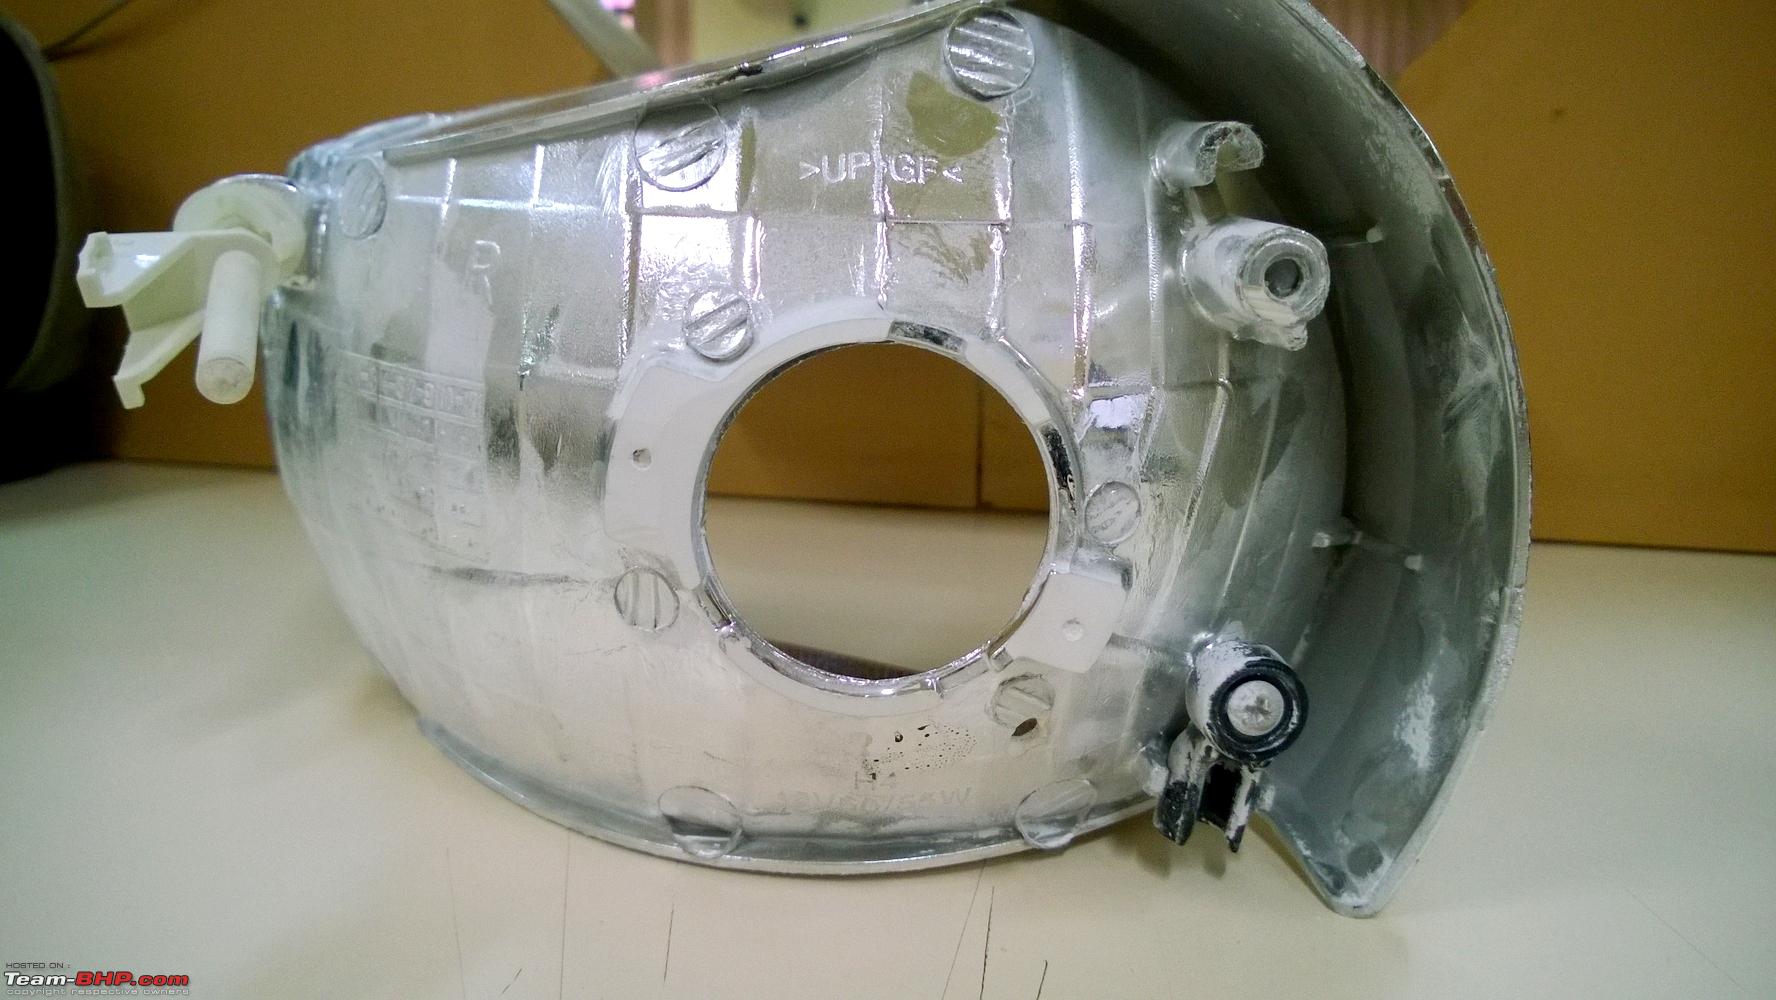
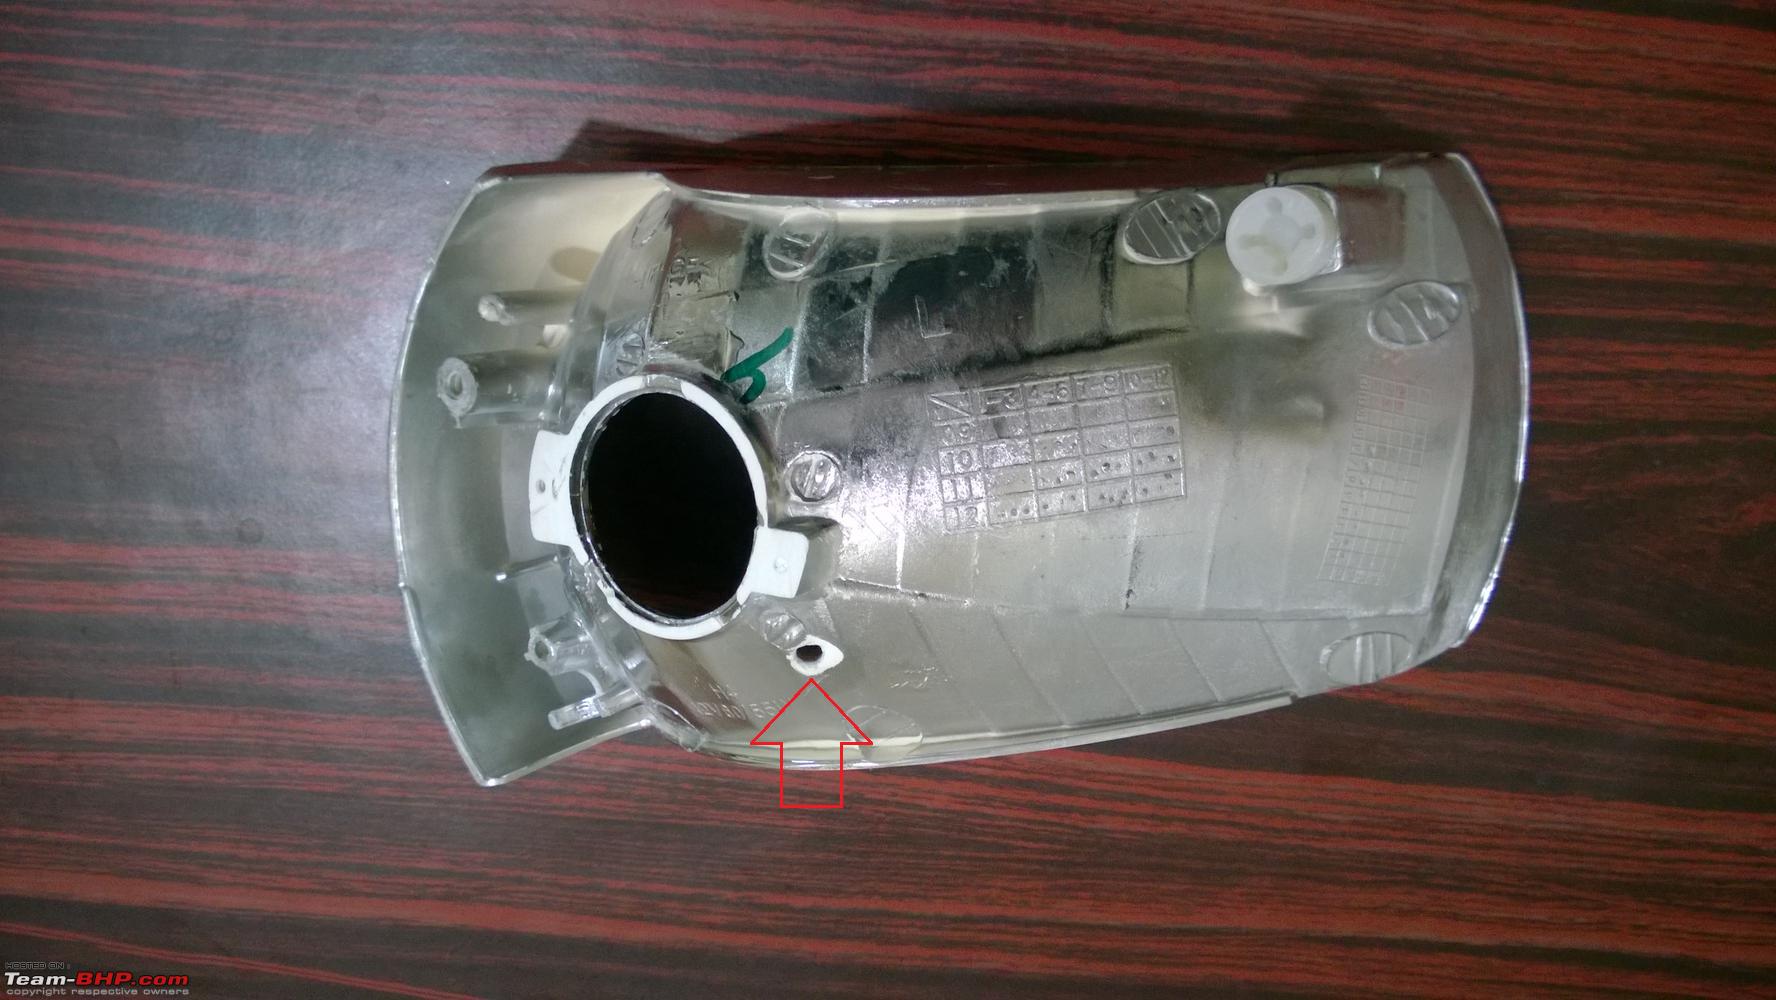
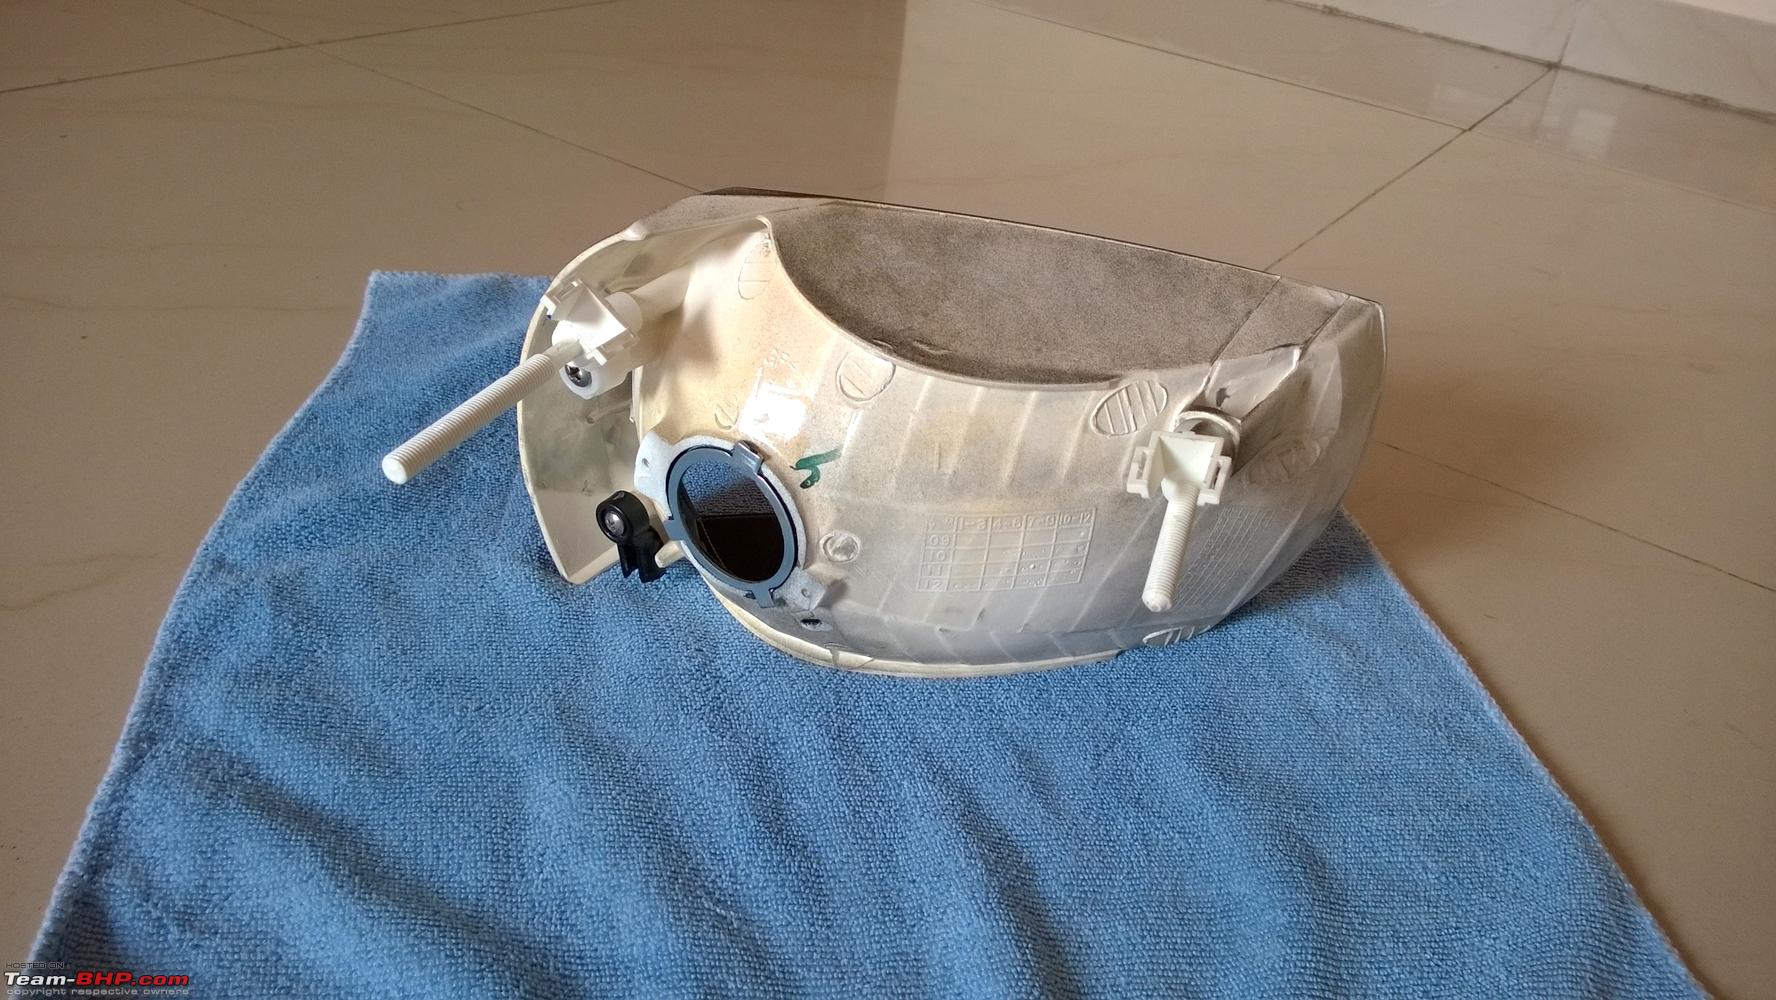
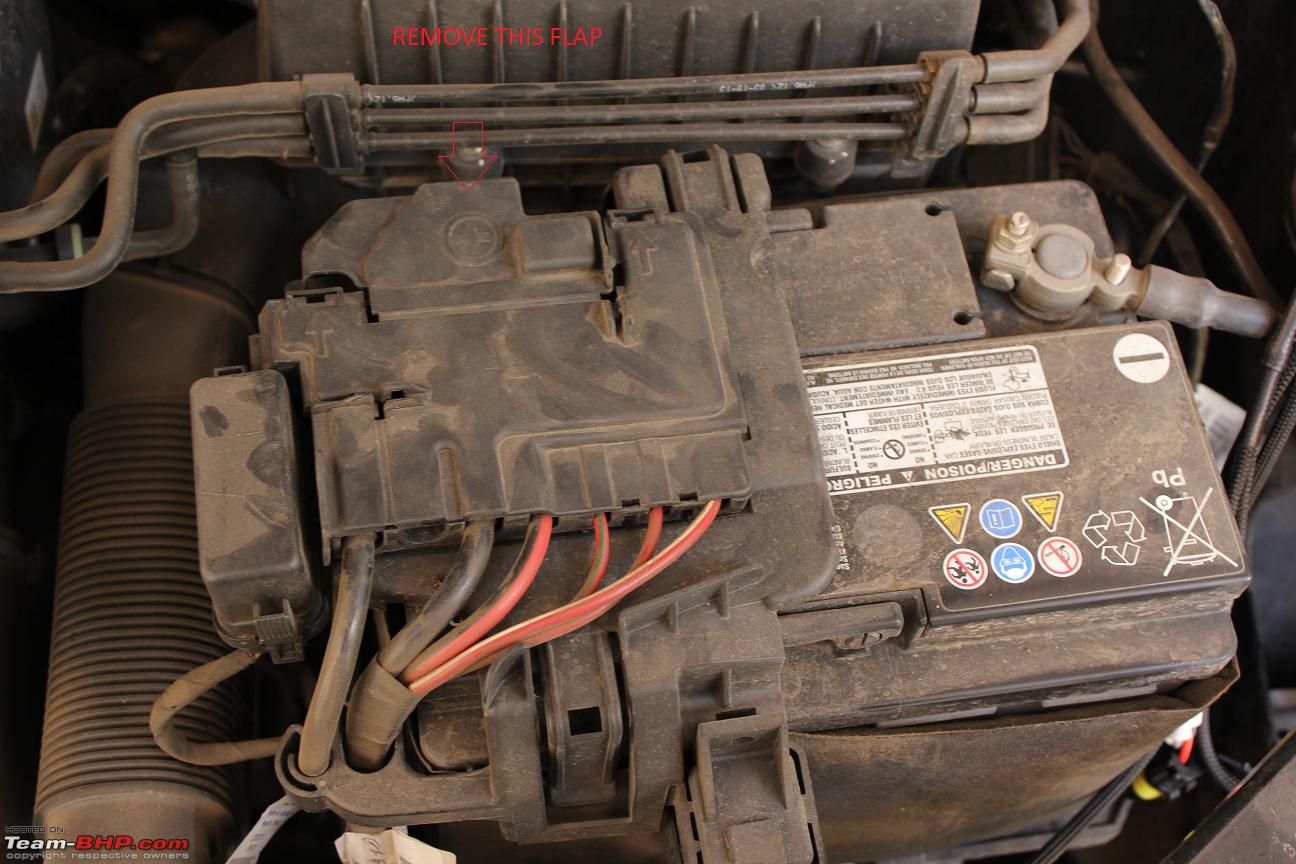
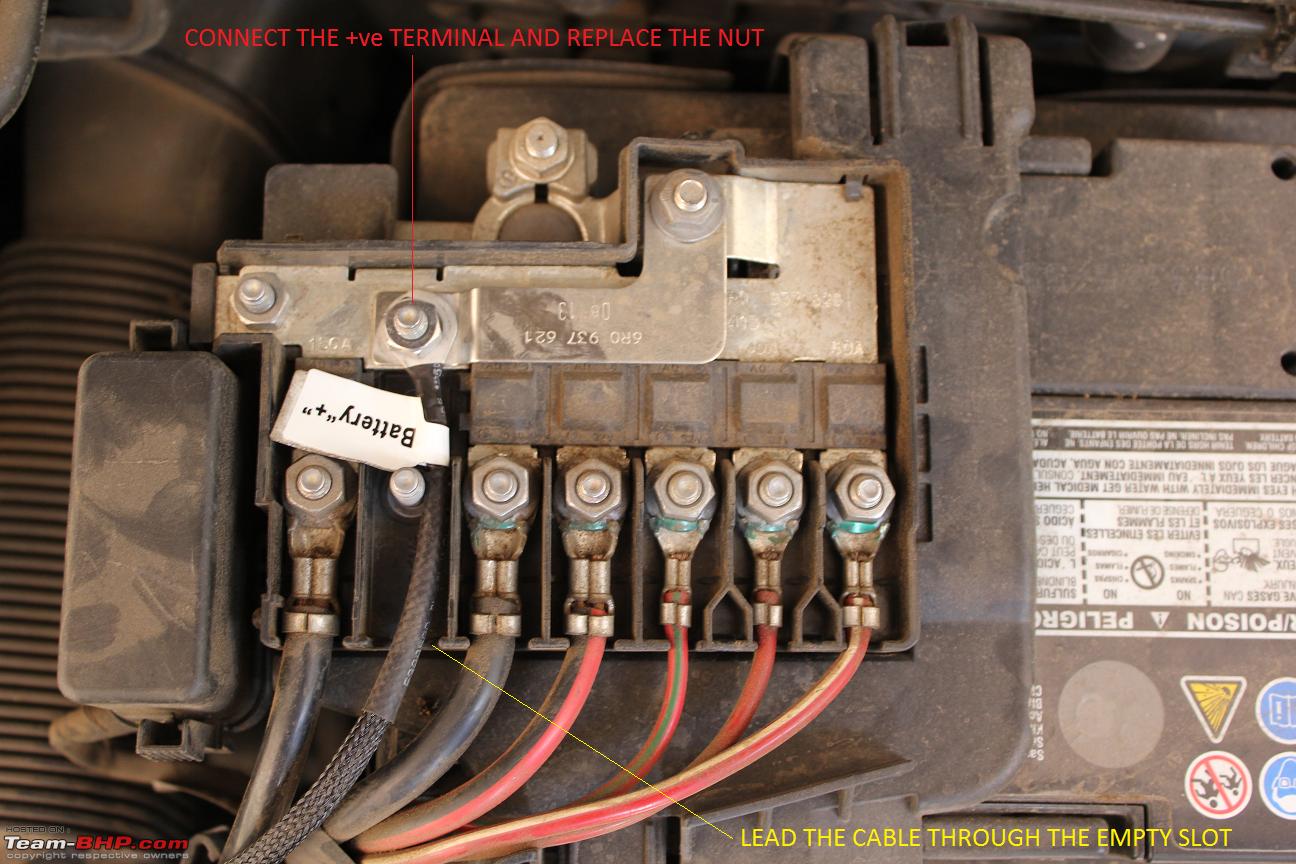
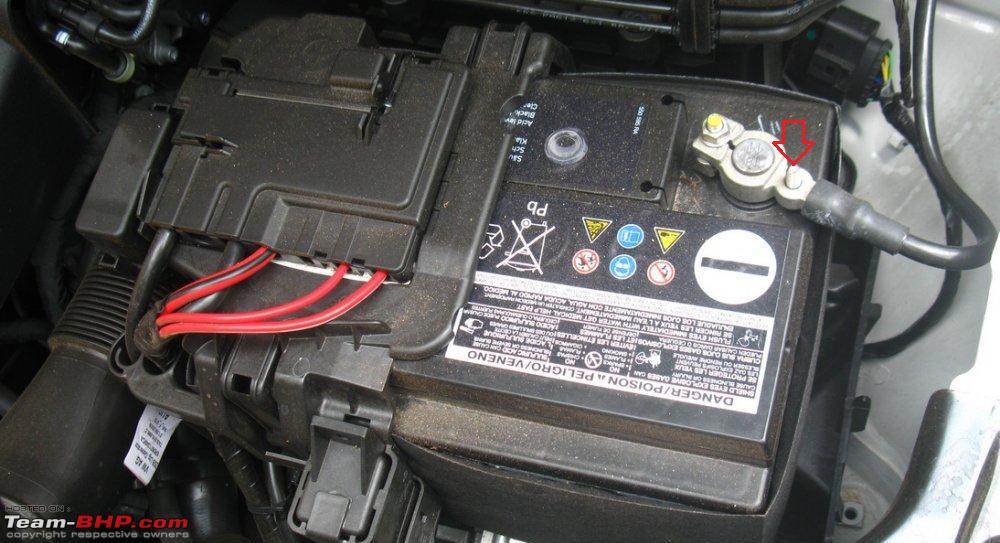
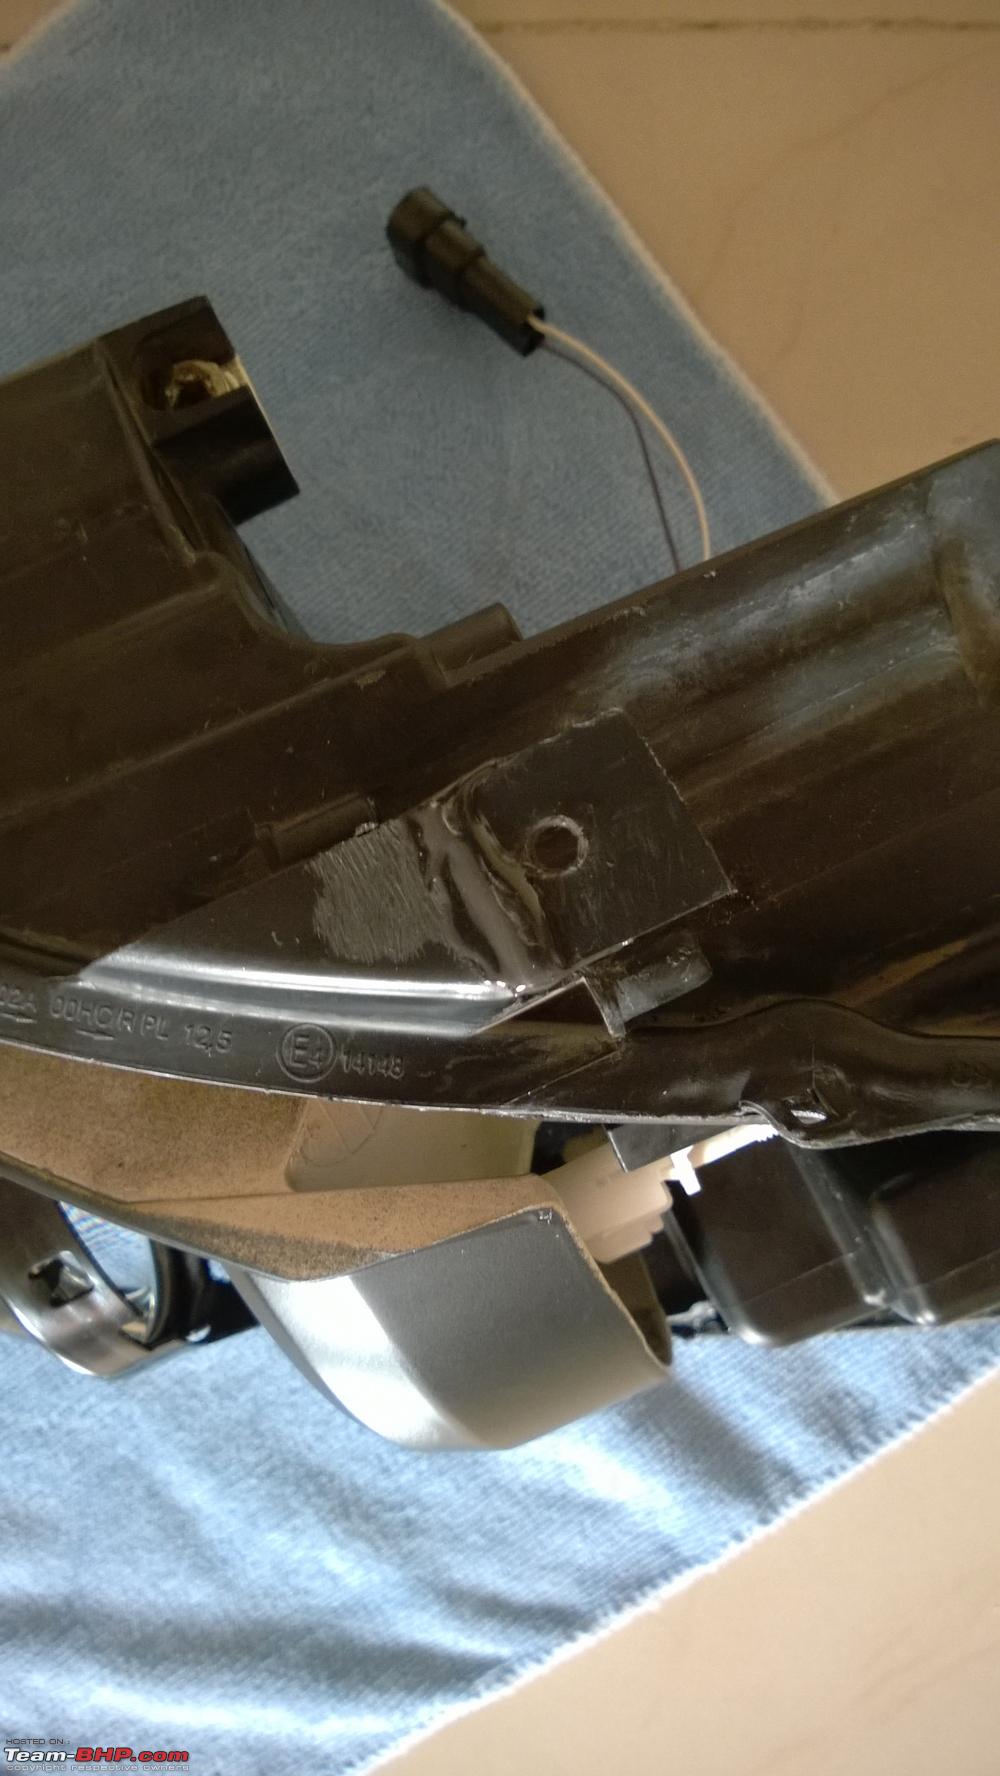
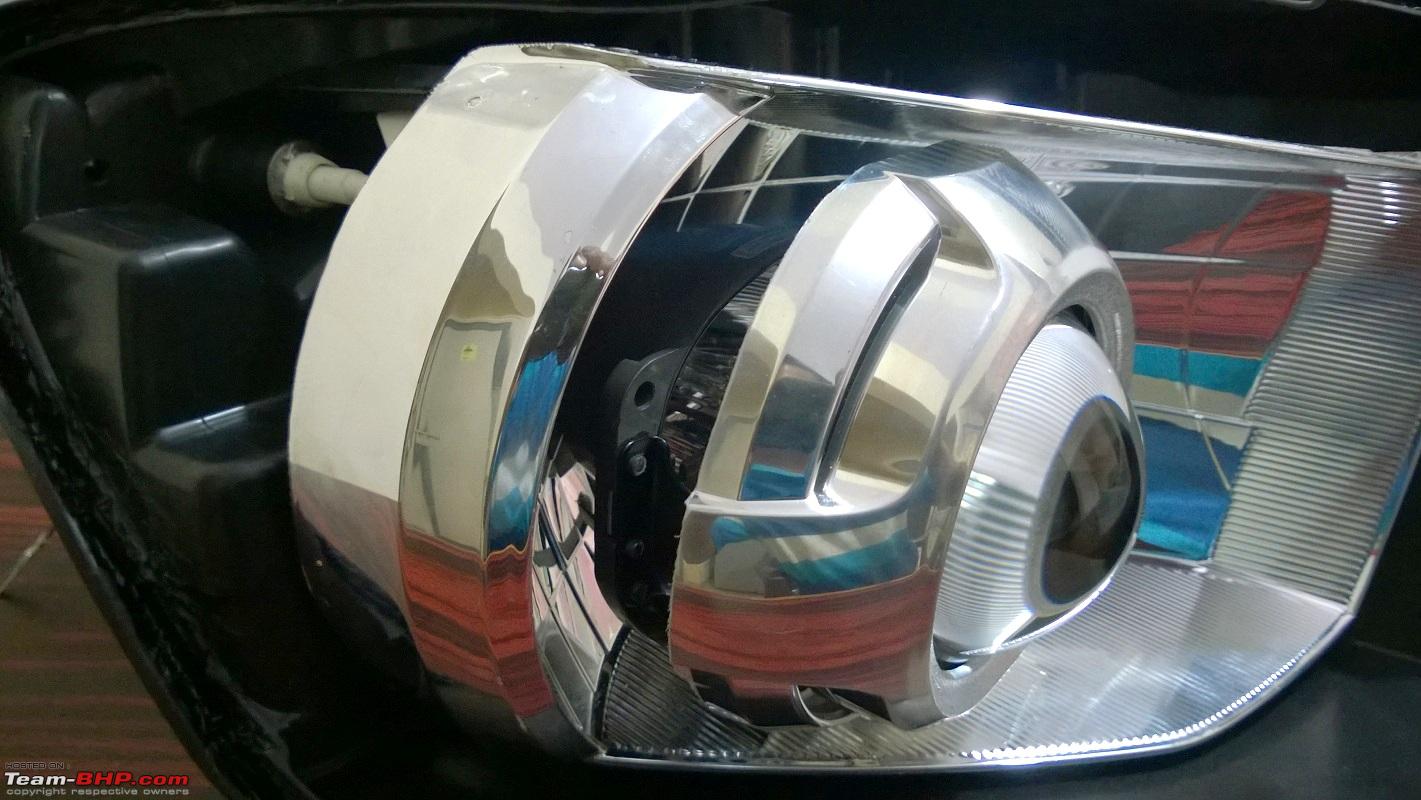
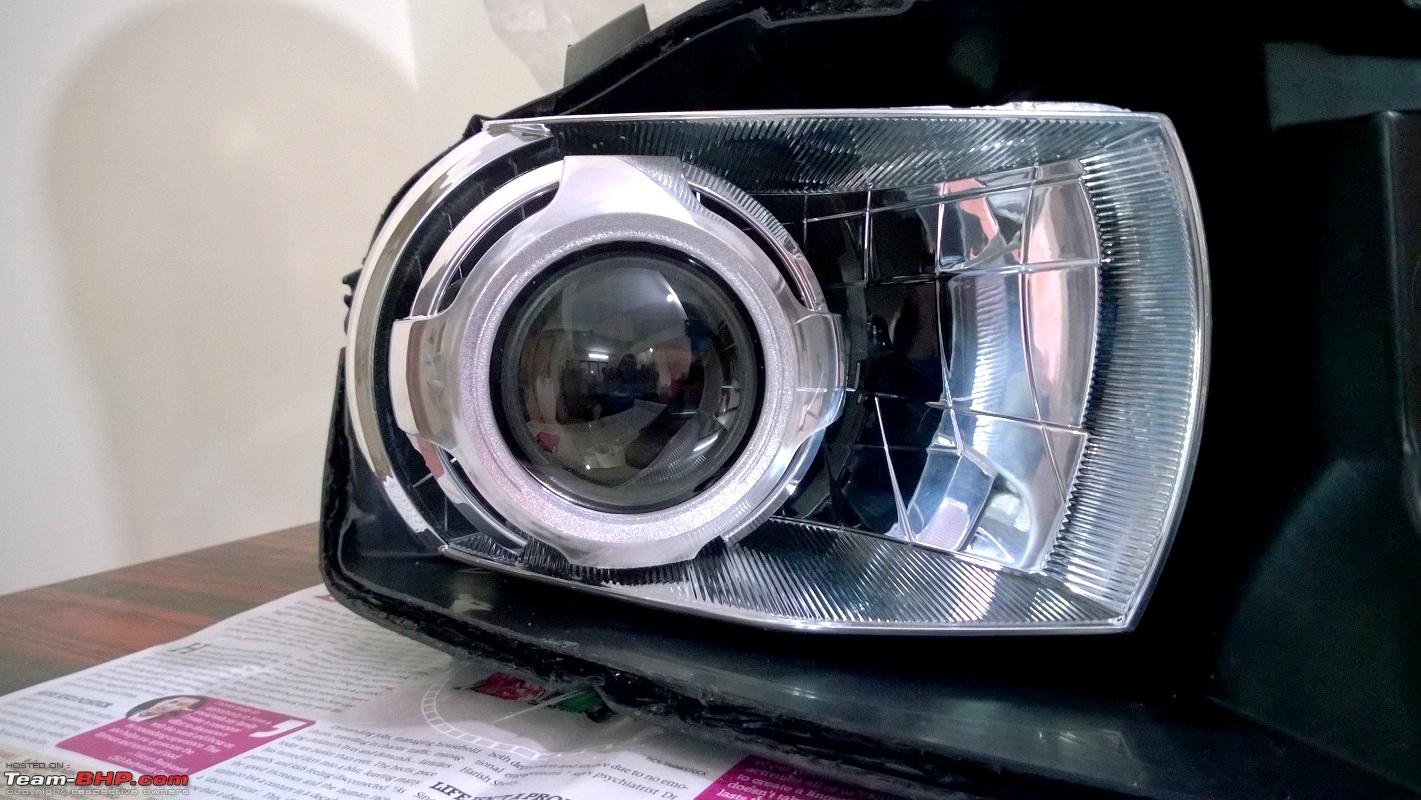
| re: DIY: VW Polo Bi-Xenon Projectors. Morimoto Mini D2S Stage III Installation Procedure:
Last edited by Gannu_1 : 27th November 2014 at 17:19. |
|
| (32)
Thanks
|


| The following 32 BHPians Thank Gannu_1 for this useful post: | ajaypjayaraj, anilntny, ashpalio, AviG, deepfusion, dr.kushagra, FireFoot, frankmehta, fusionbang, Gaboonviper04, graaja, Grand Drive, grandkruizer, GTO, Immix, jaunthead, JoseVijay, Leoshashi, moralfibre, Myth_sx, NOX, paragsachania, Rehaan, Sankar, sudeepg, SunnyBoi, themonster, vaisakhr, Viju, Vik0728, wheelguy, yogiii |
|
12th November 2014, 09:15
| #6 |
| Team-BHP Support Join Date: Apr 2013 Location: Madras
Posts: 7,174
Thanked: 20,220 Times
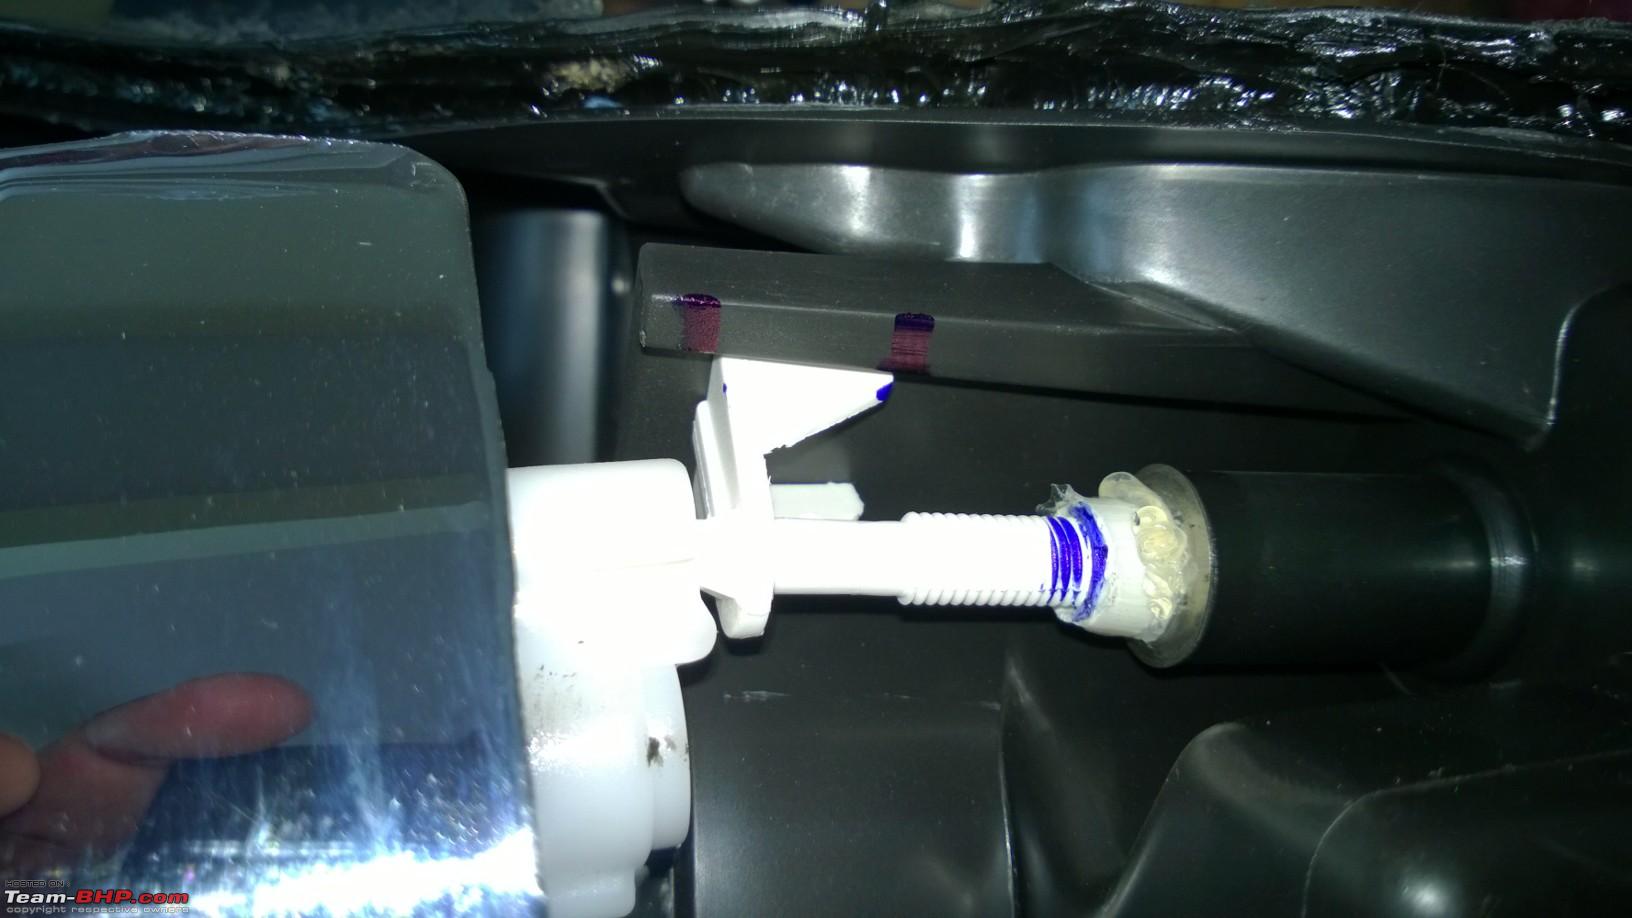
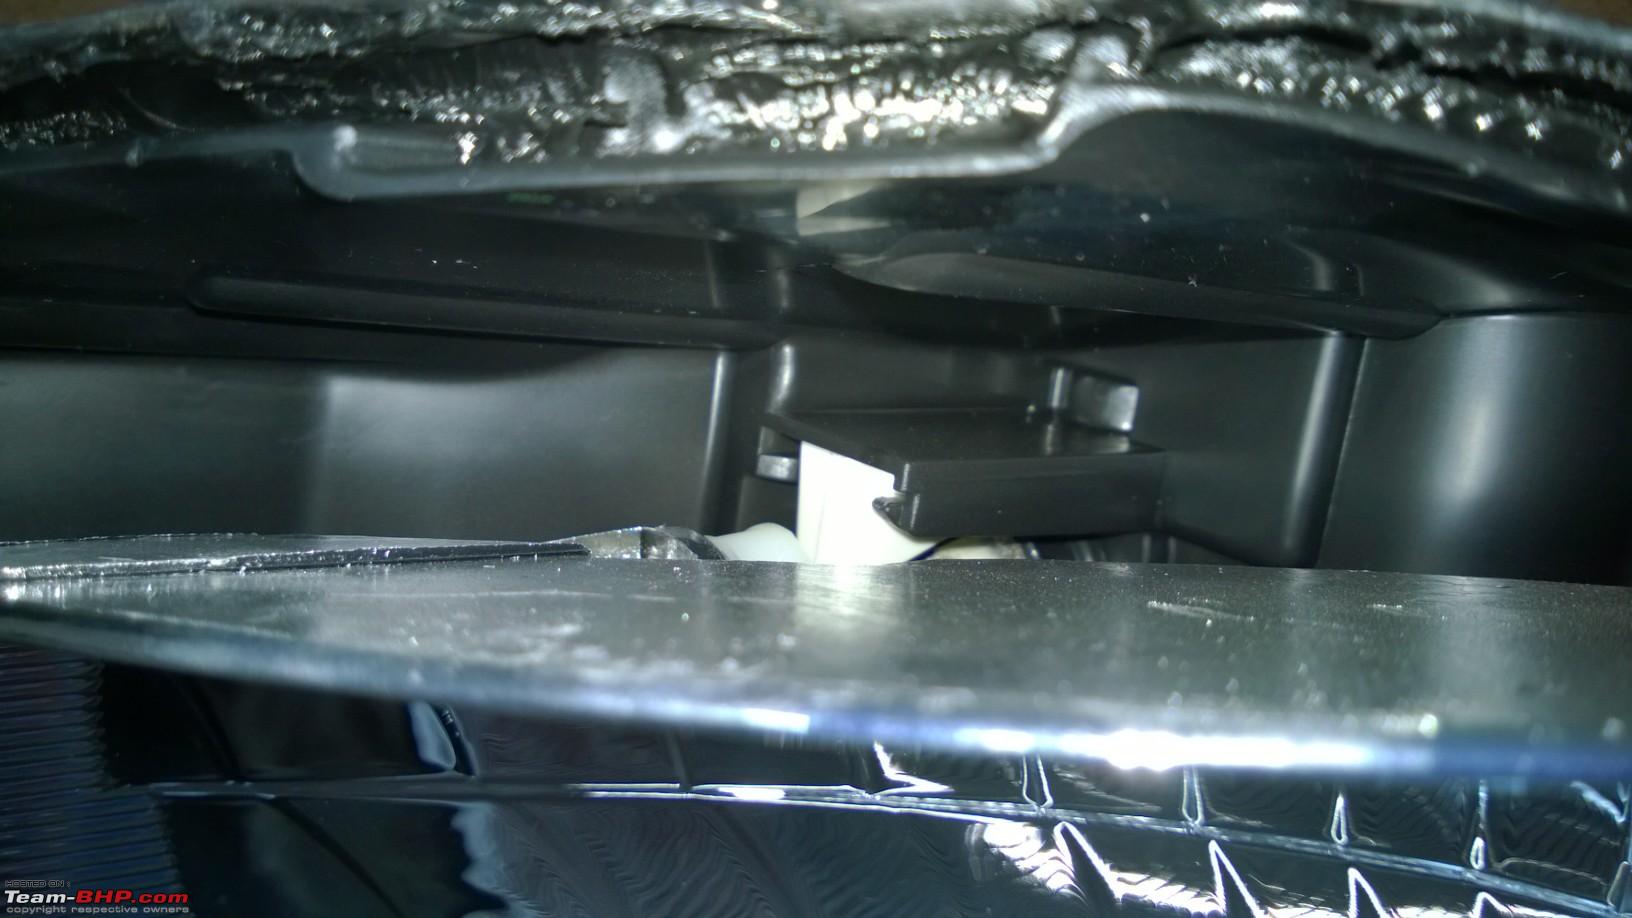
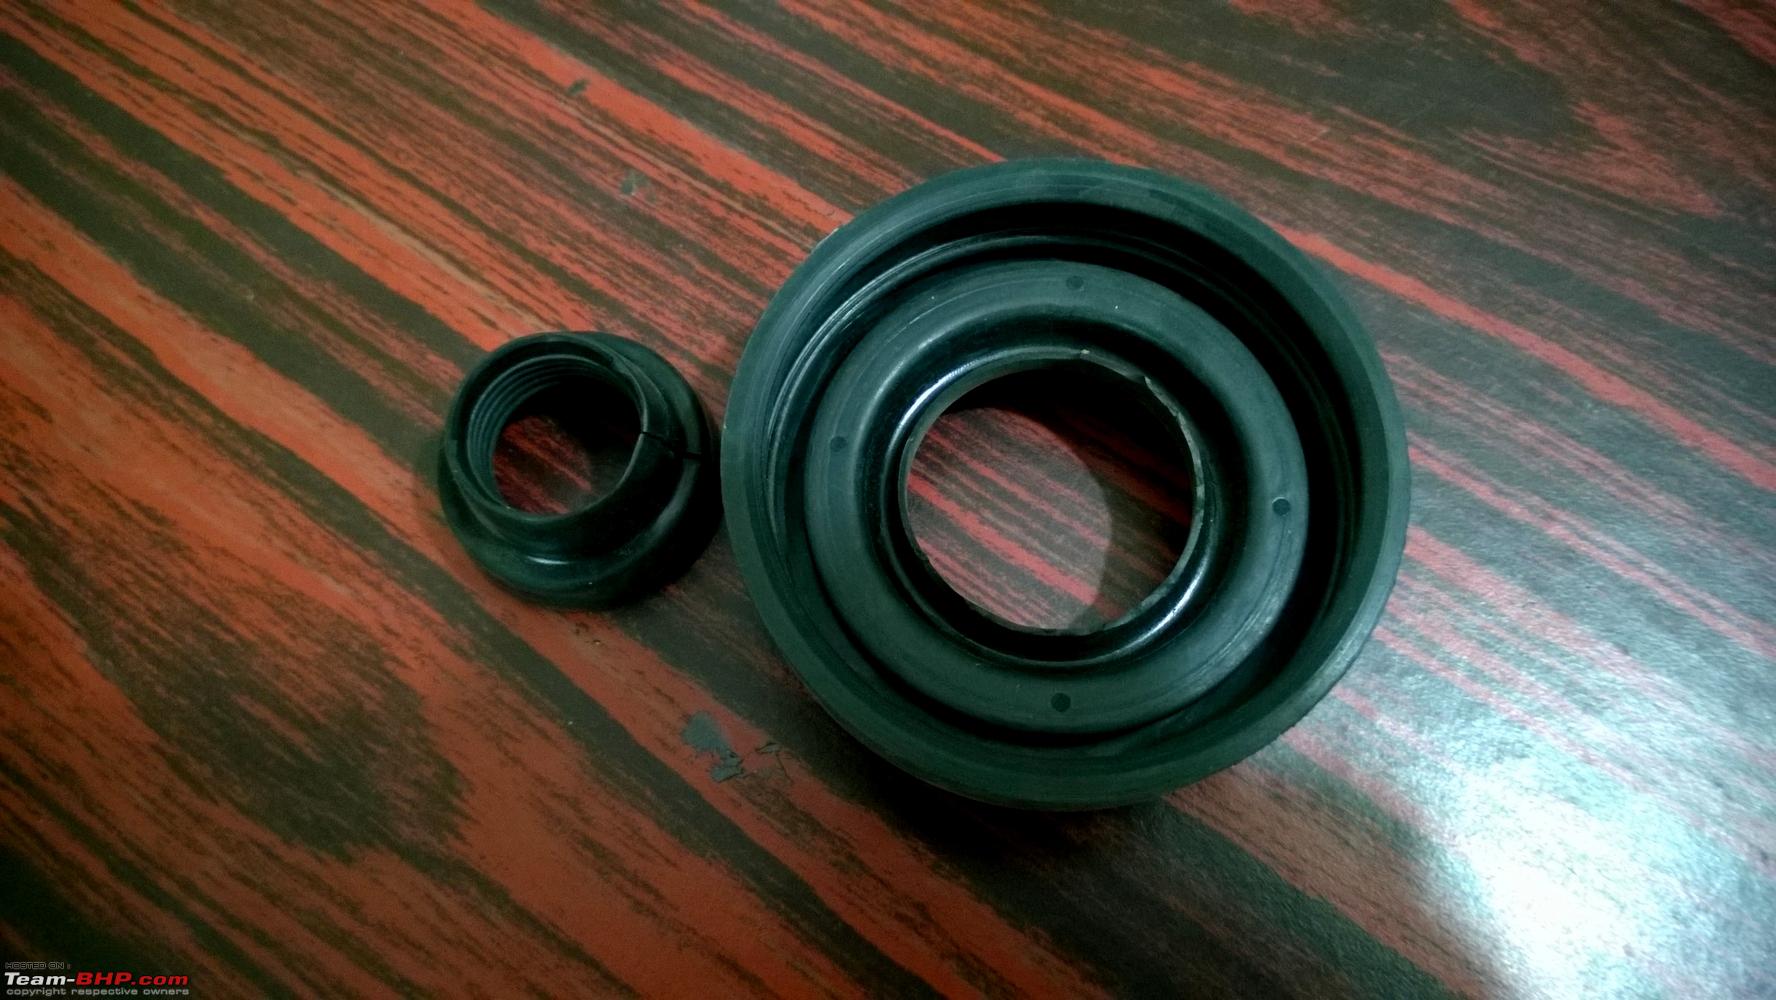
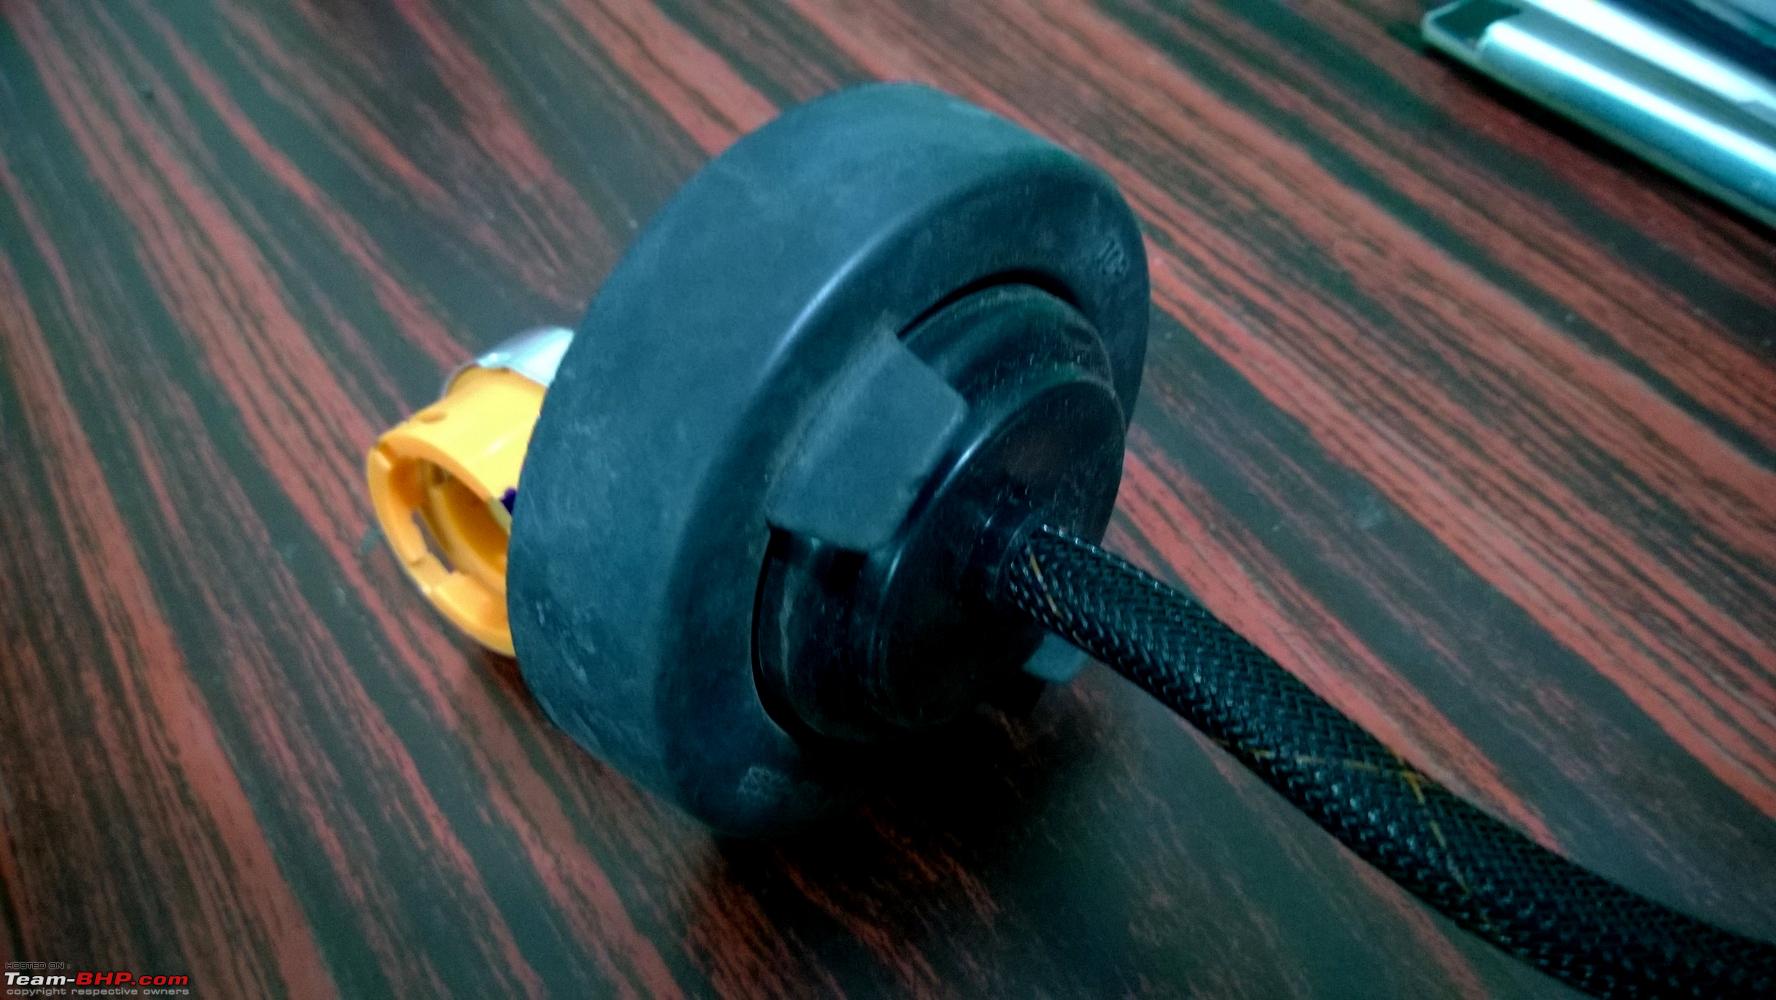
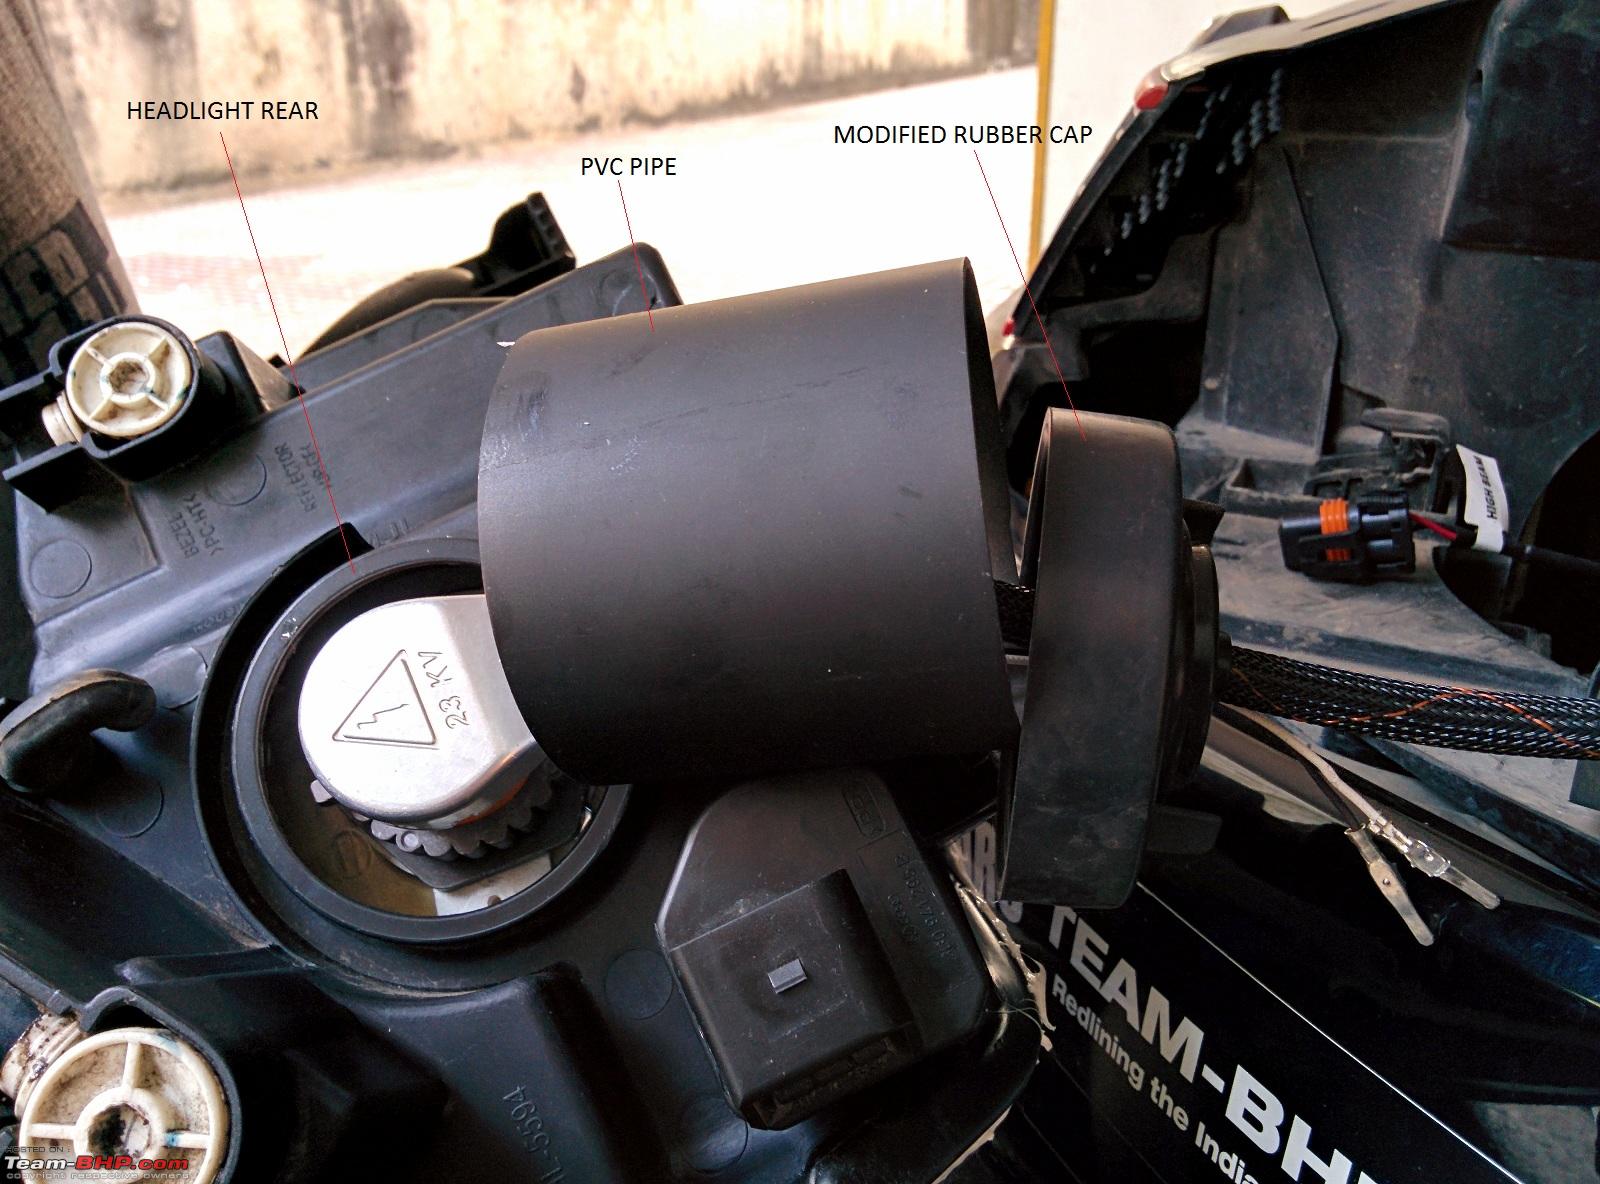
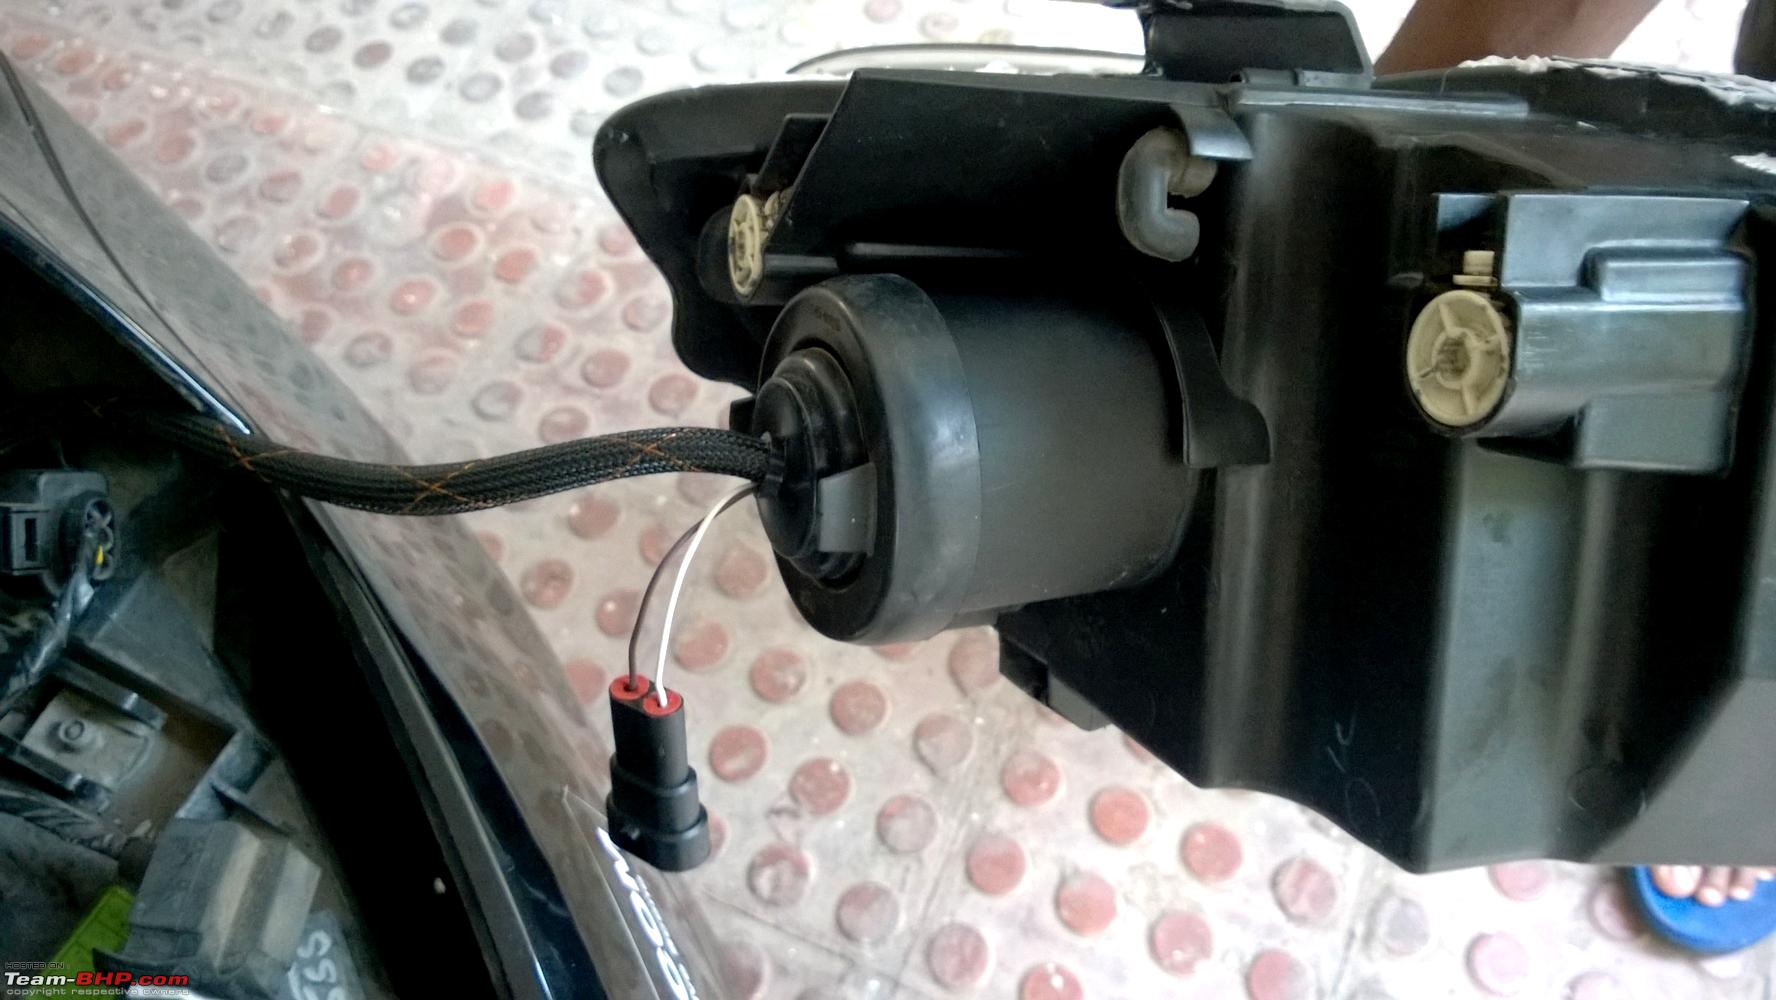
| re: DIY: VW Polo Bi-Xenon Projectors. Morimoto Mini D2S Stage III Installation Procedure: (Contd.)
Last edited by Gannu_1 : 27th November 2014 at 17:32. |
|
| (24)
Thanks
|


| The following 24 BHPians Thank Gannu_1 for this useful post: | ajaypjayaraj, anilntny, AviG, deepfusion, dr.kushagra, extreme_torque, FireFoot, GTO, Immix, JoseVijay, Leoshashi, paragsachania, Rehaan, rejeen, Sankar, sonil.luthra, sudeepg, themonster, vaisakhr, Viju, Vik0728, wheelguy, yesyeswe, yogiii |
|
13th November 2014, 15:04
| #7 |
| Team-BHP Support Join Date: Apr 2013 Location: Madras
Posts: 7,174
Thanked: 20,220 Times
| re: DIY: VW Polo Bi-Xenon Projectors. Morimoto Mini D2S Stage III Installation End Results: Well, after all the things we did, I think the results paid off pretty well. To be brutally honest, I had zero expectations of how well these HID projectors would fare compared to halogen bulbs and I guess that helped a bit. On a dark stretch of road, the headlights did a brilliant job. Unfortunately the comparison snaps do not do justice. We felt every penny we had spent and every drop of sweat we had shed was totally worth it. 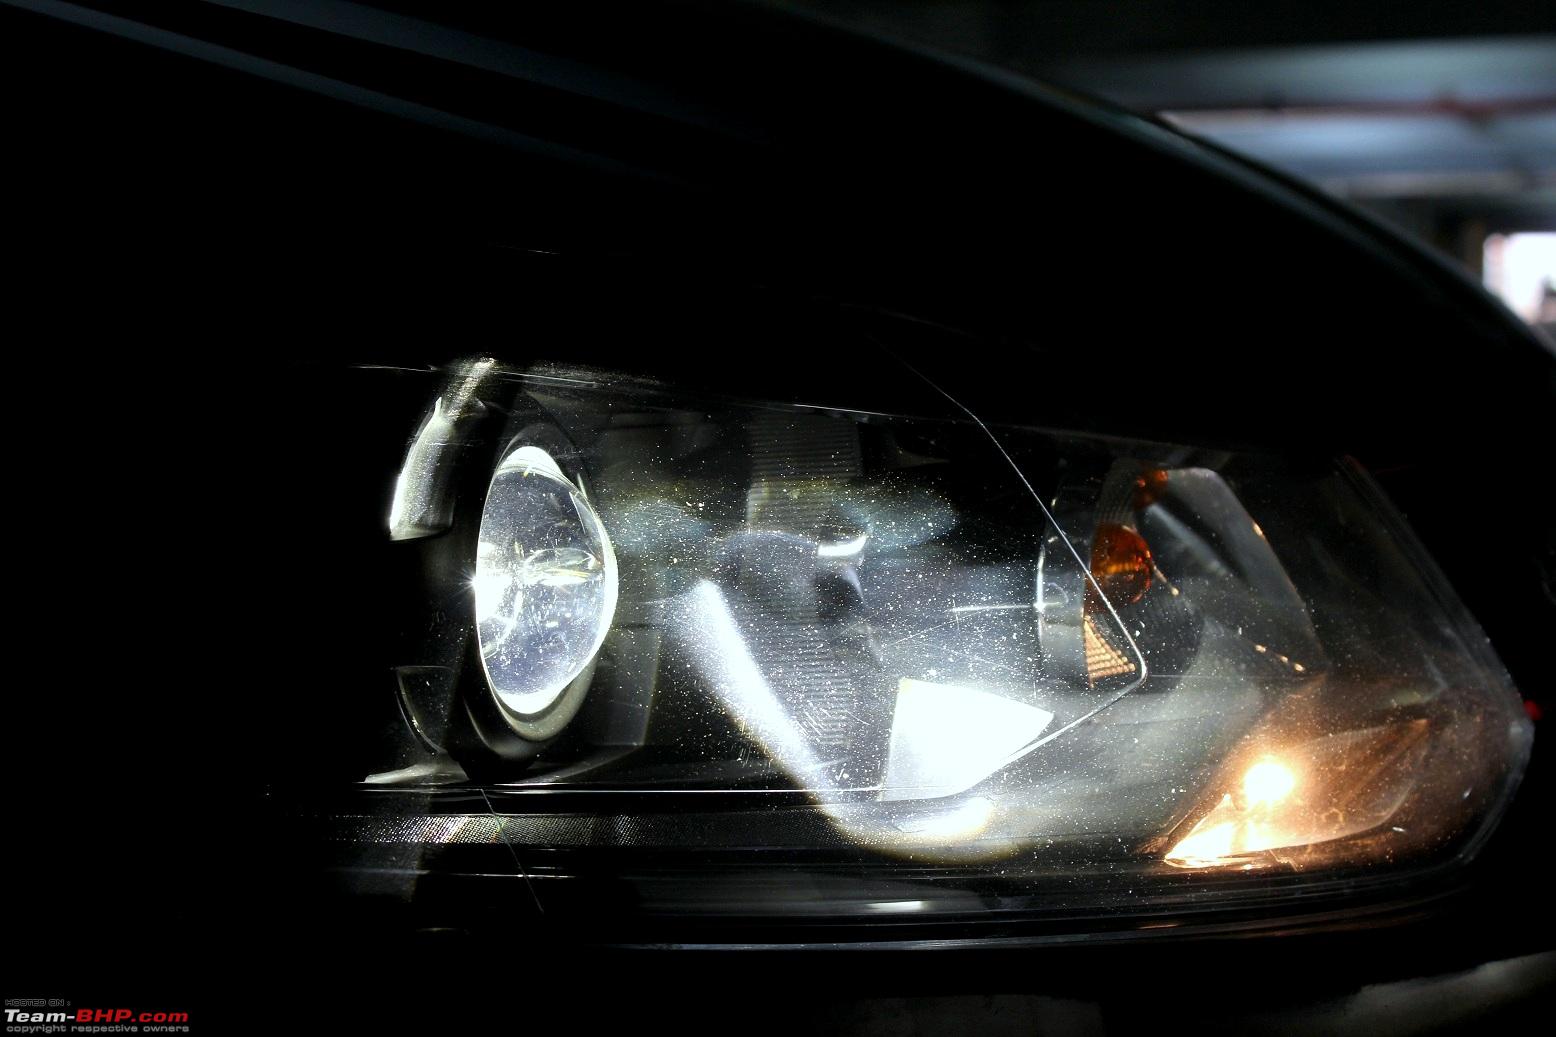  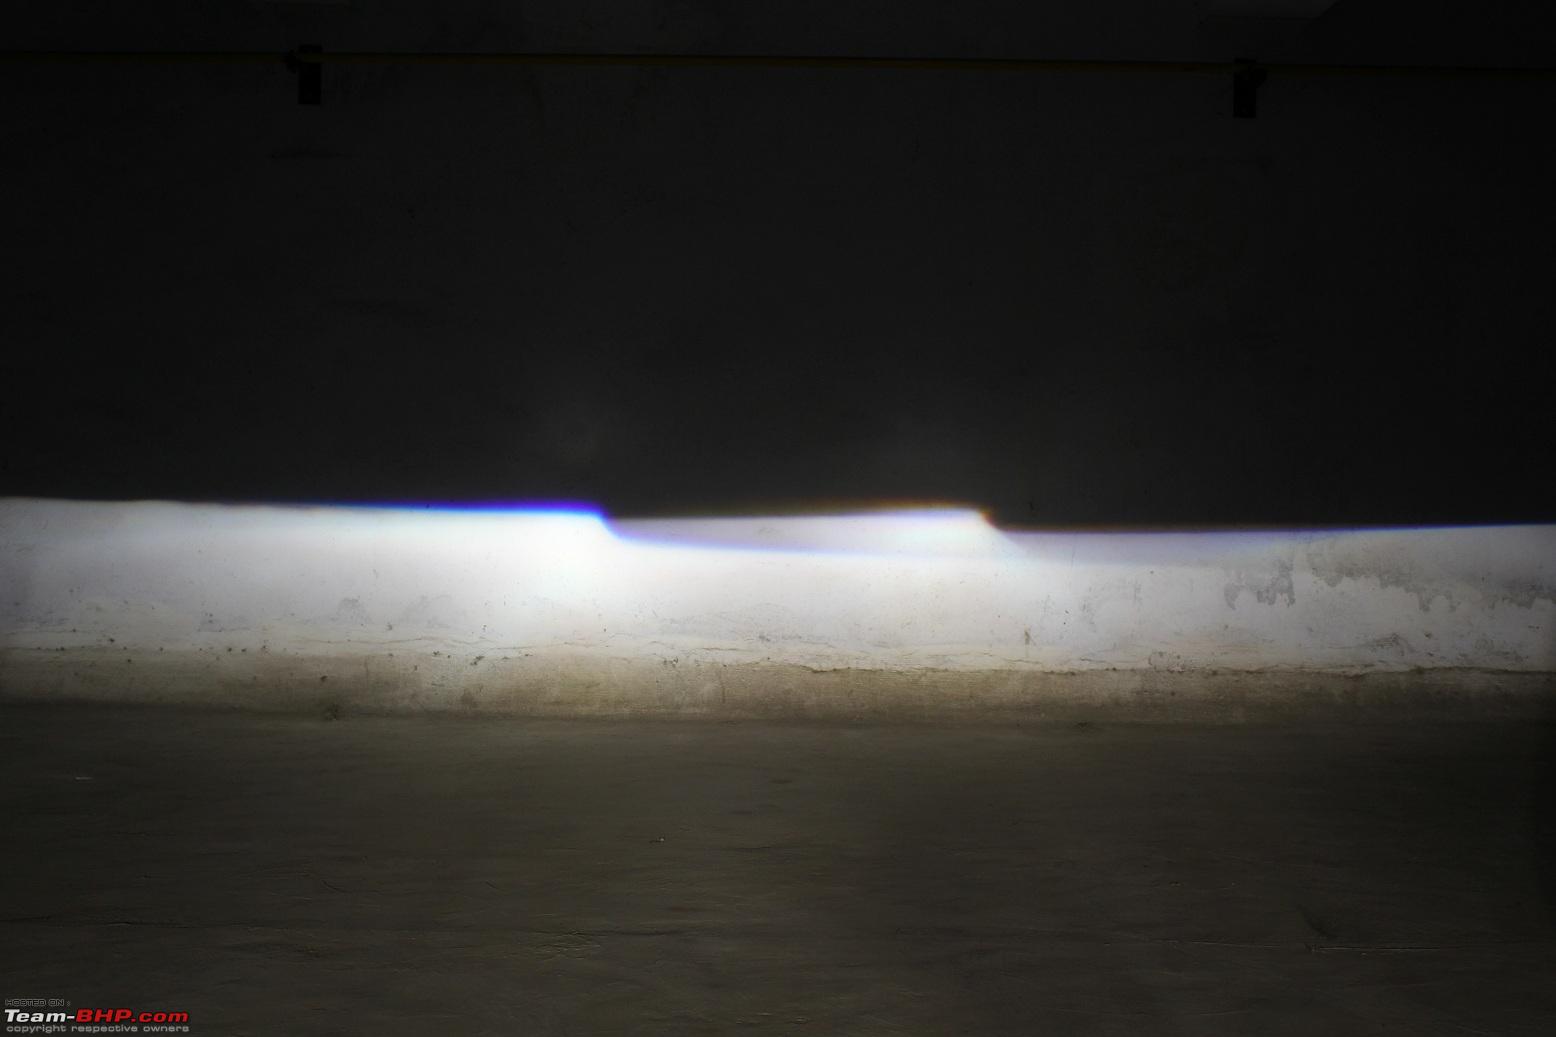 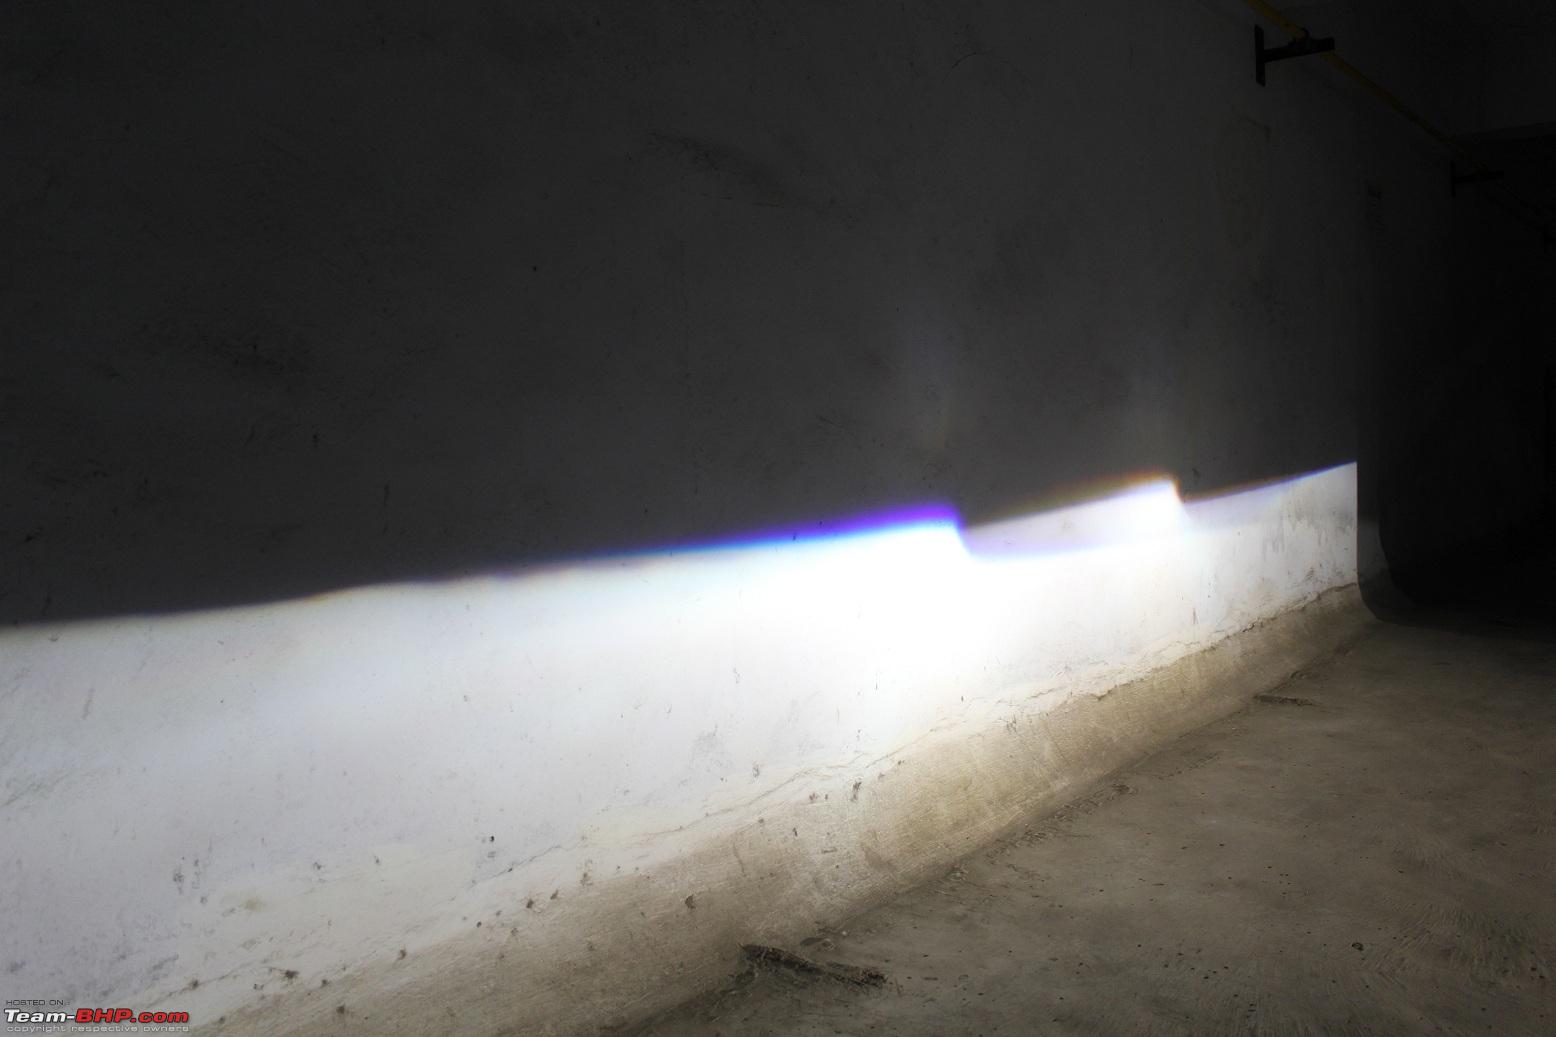 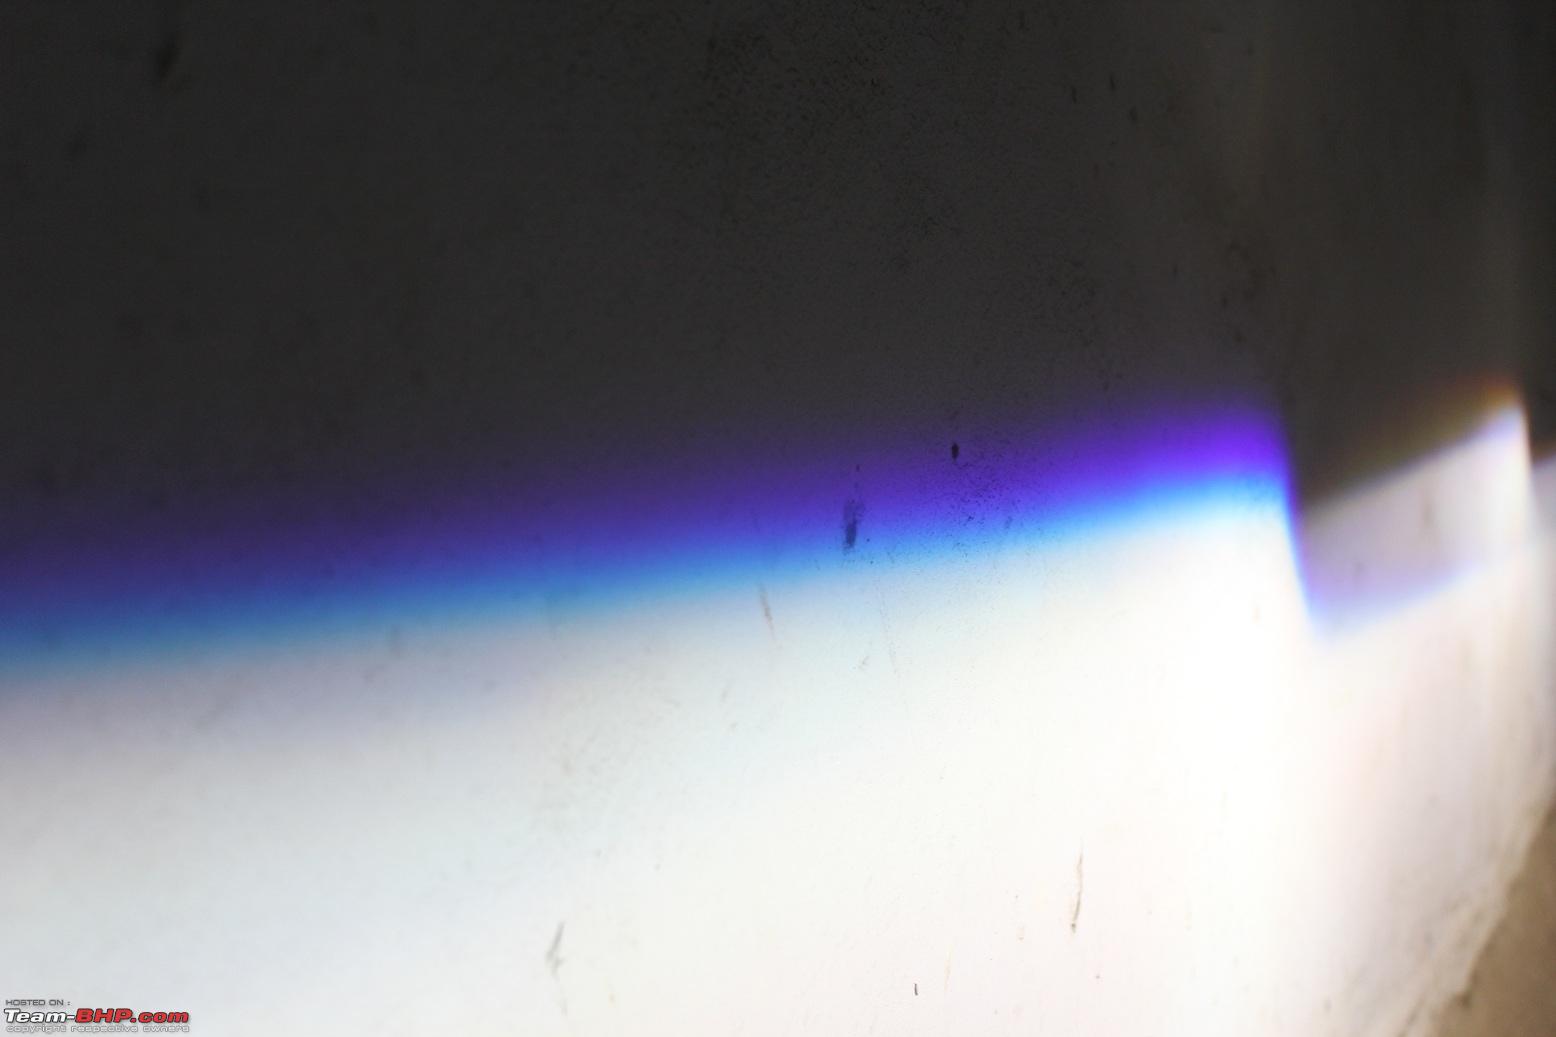 Comparison shots: Osram Nightbreaker Unlimited H4 55/60 halogen bulbs: Low beam: 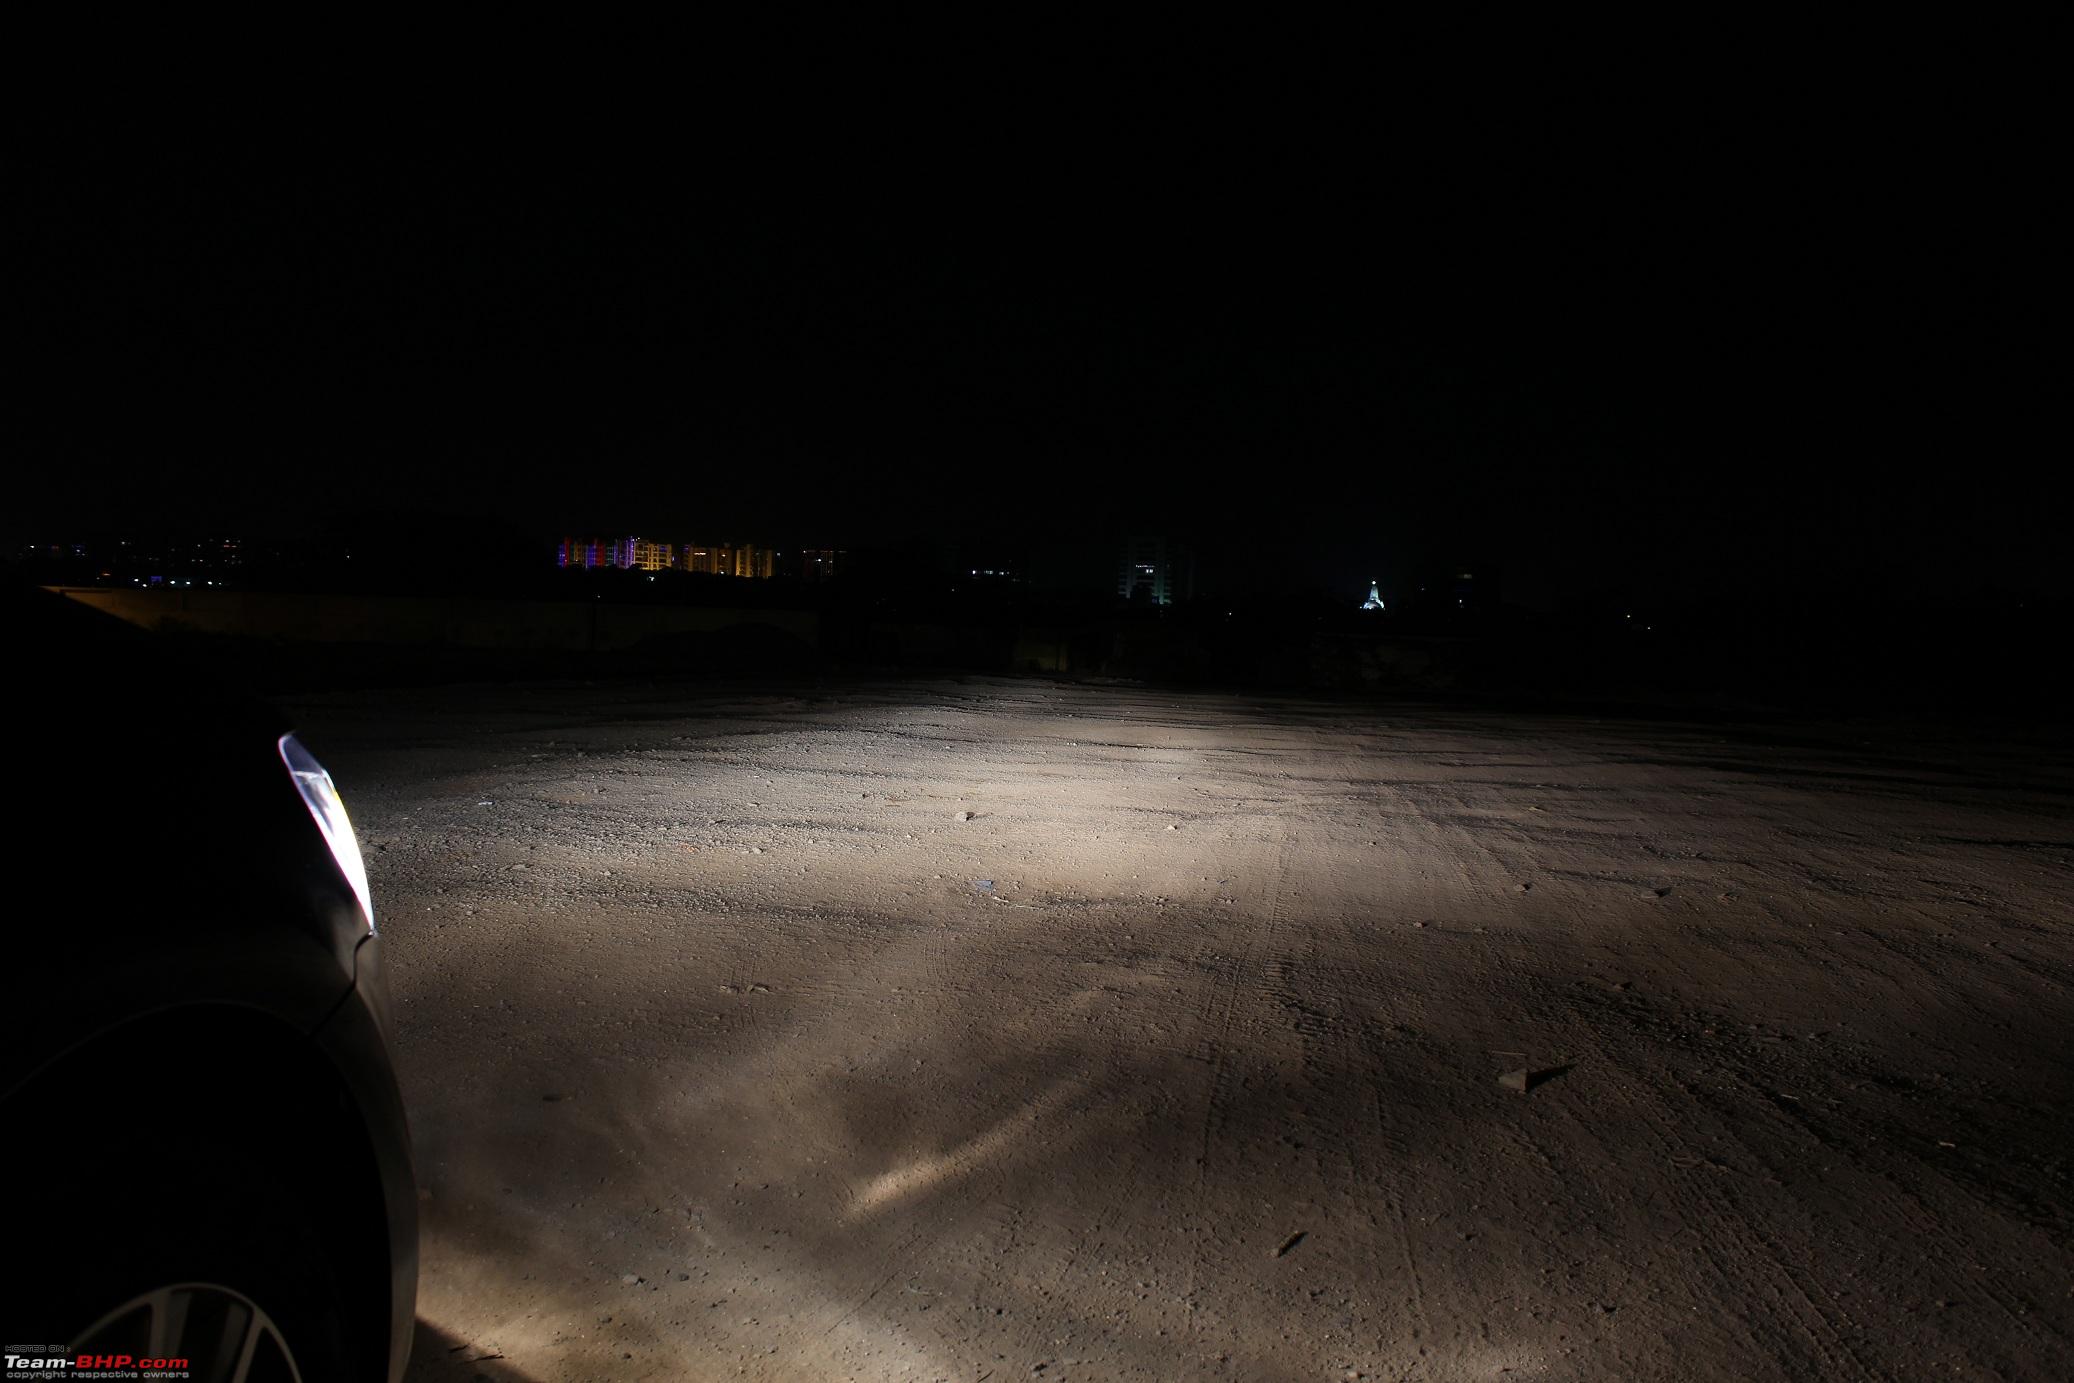 High beam:  Morimoto Mini D2S 3.0 xenon HIDs: Low beam: 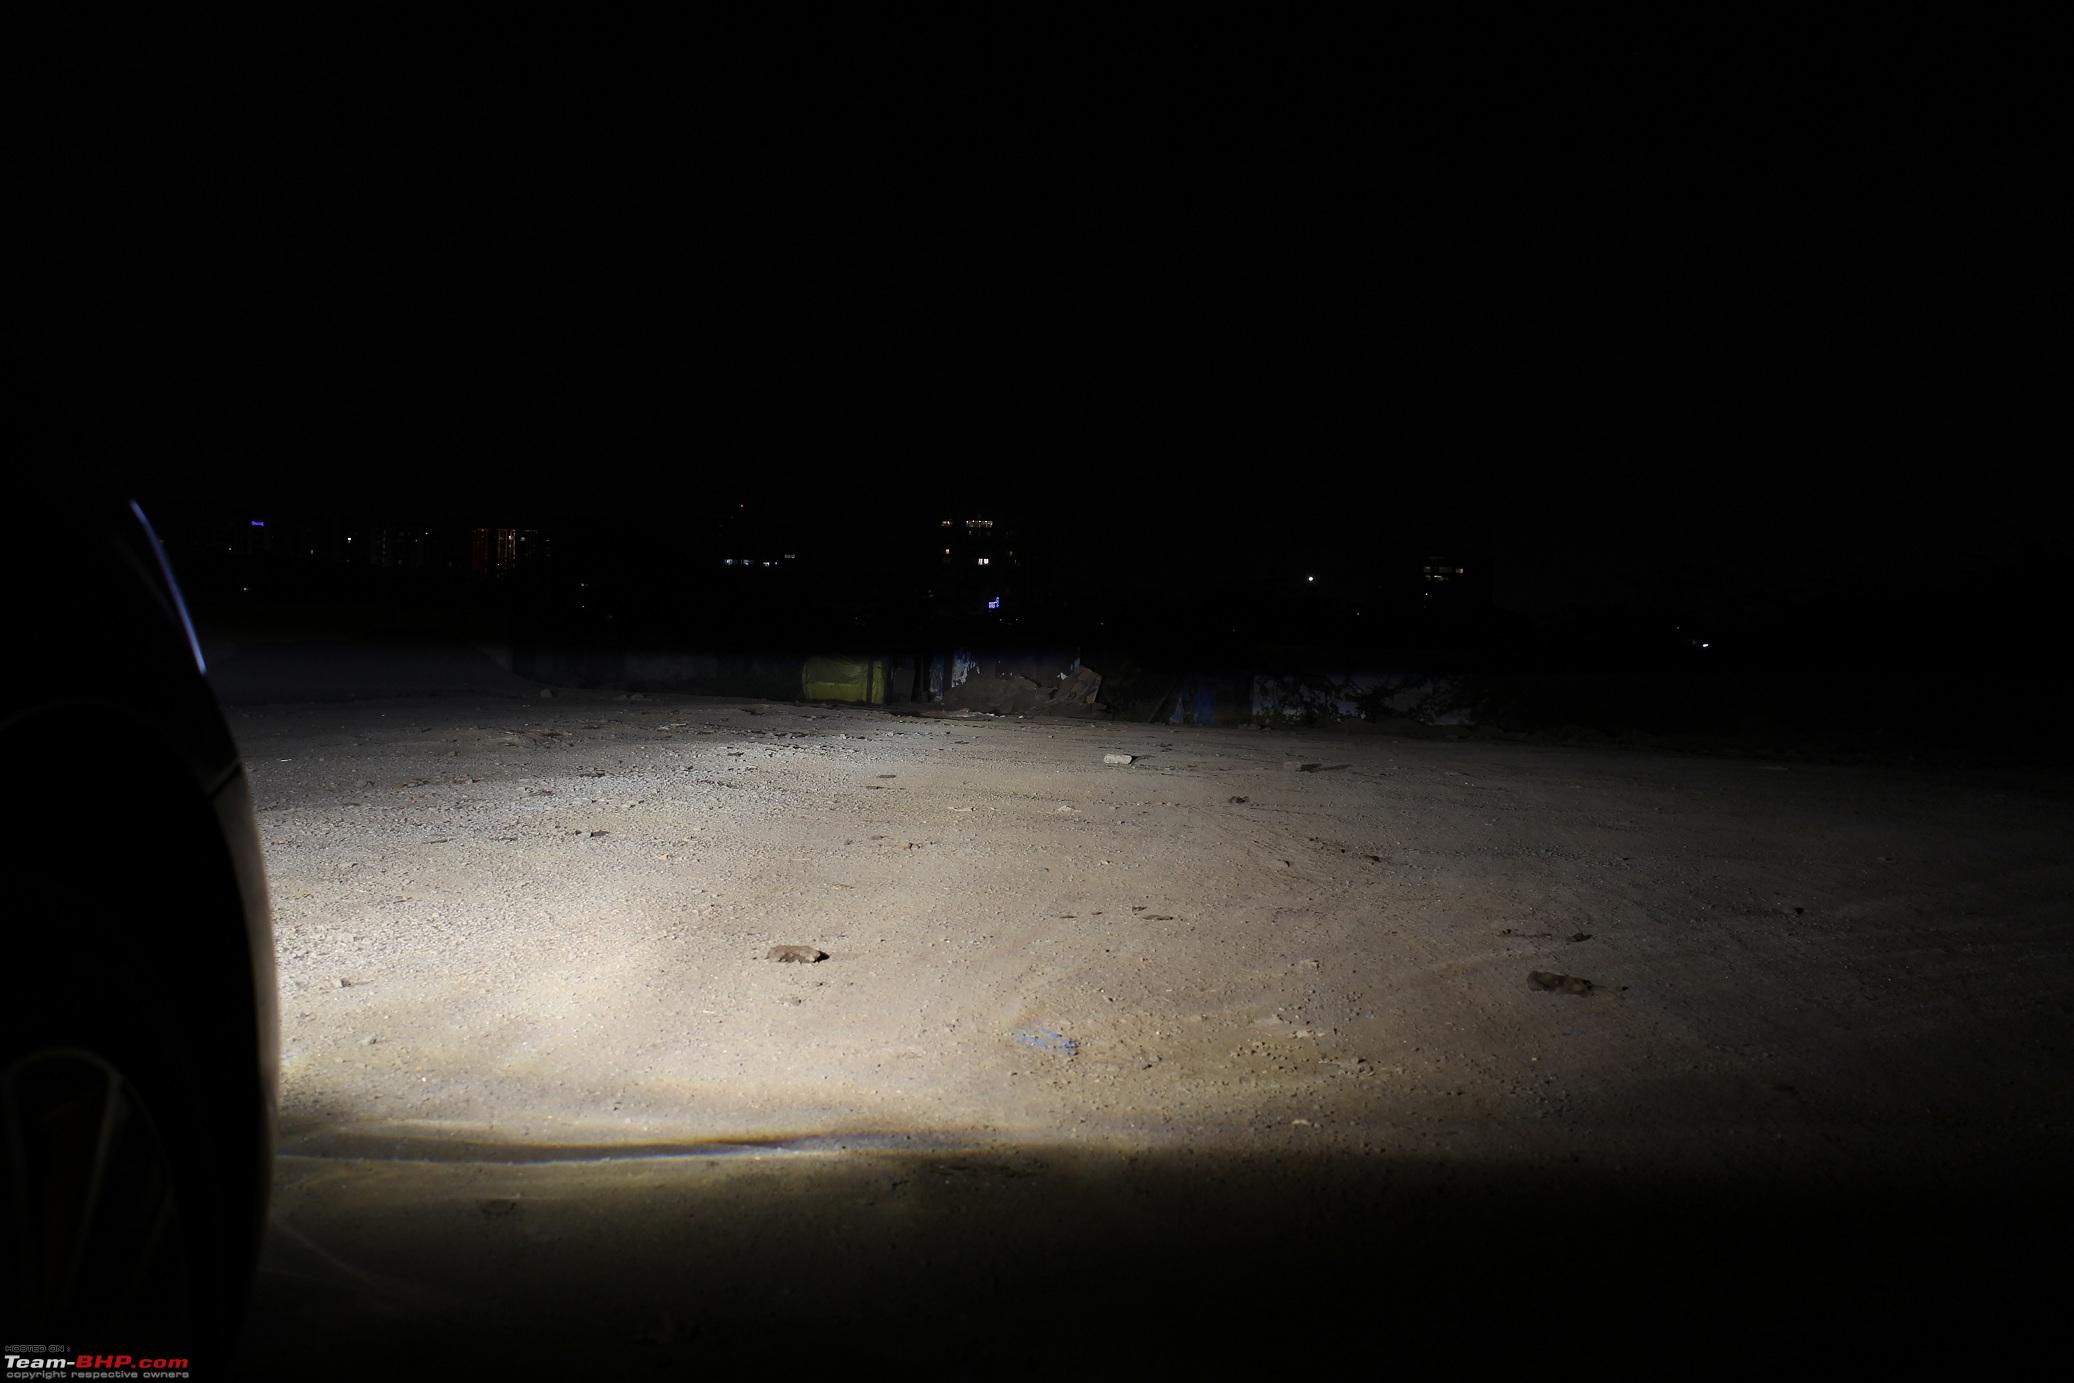 High beam: 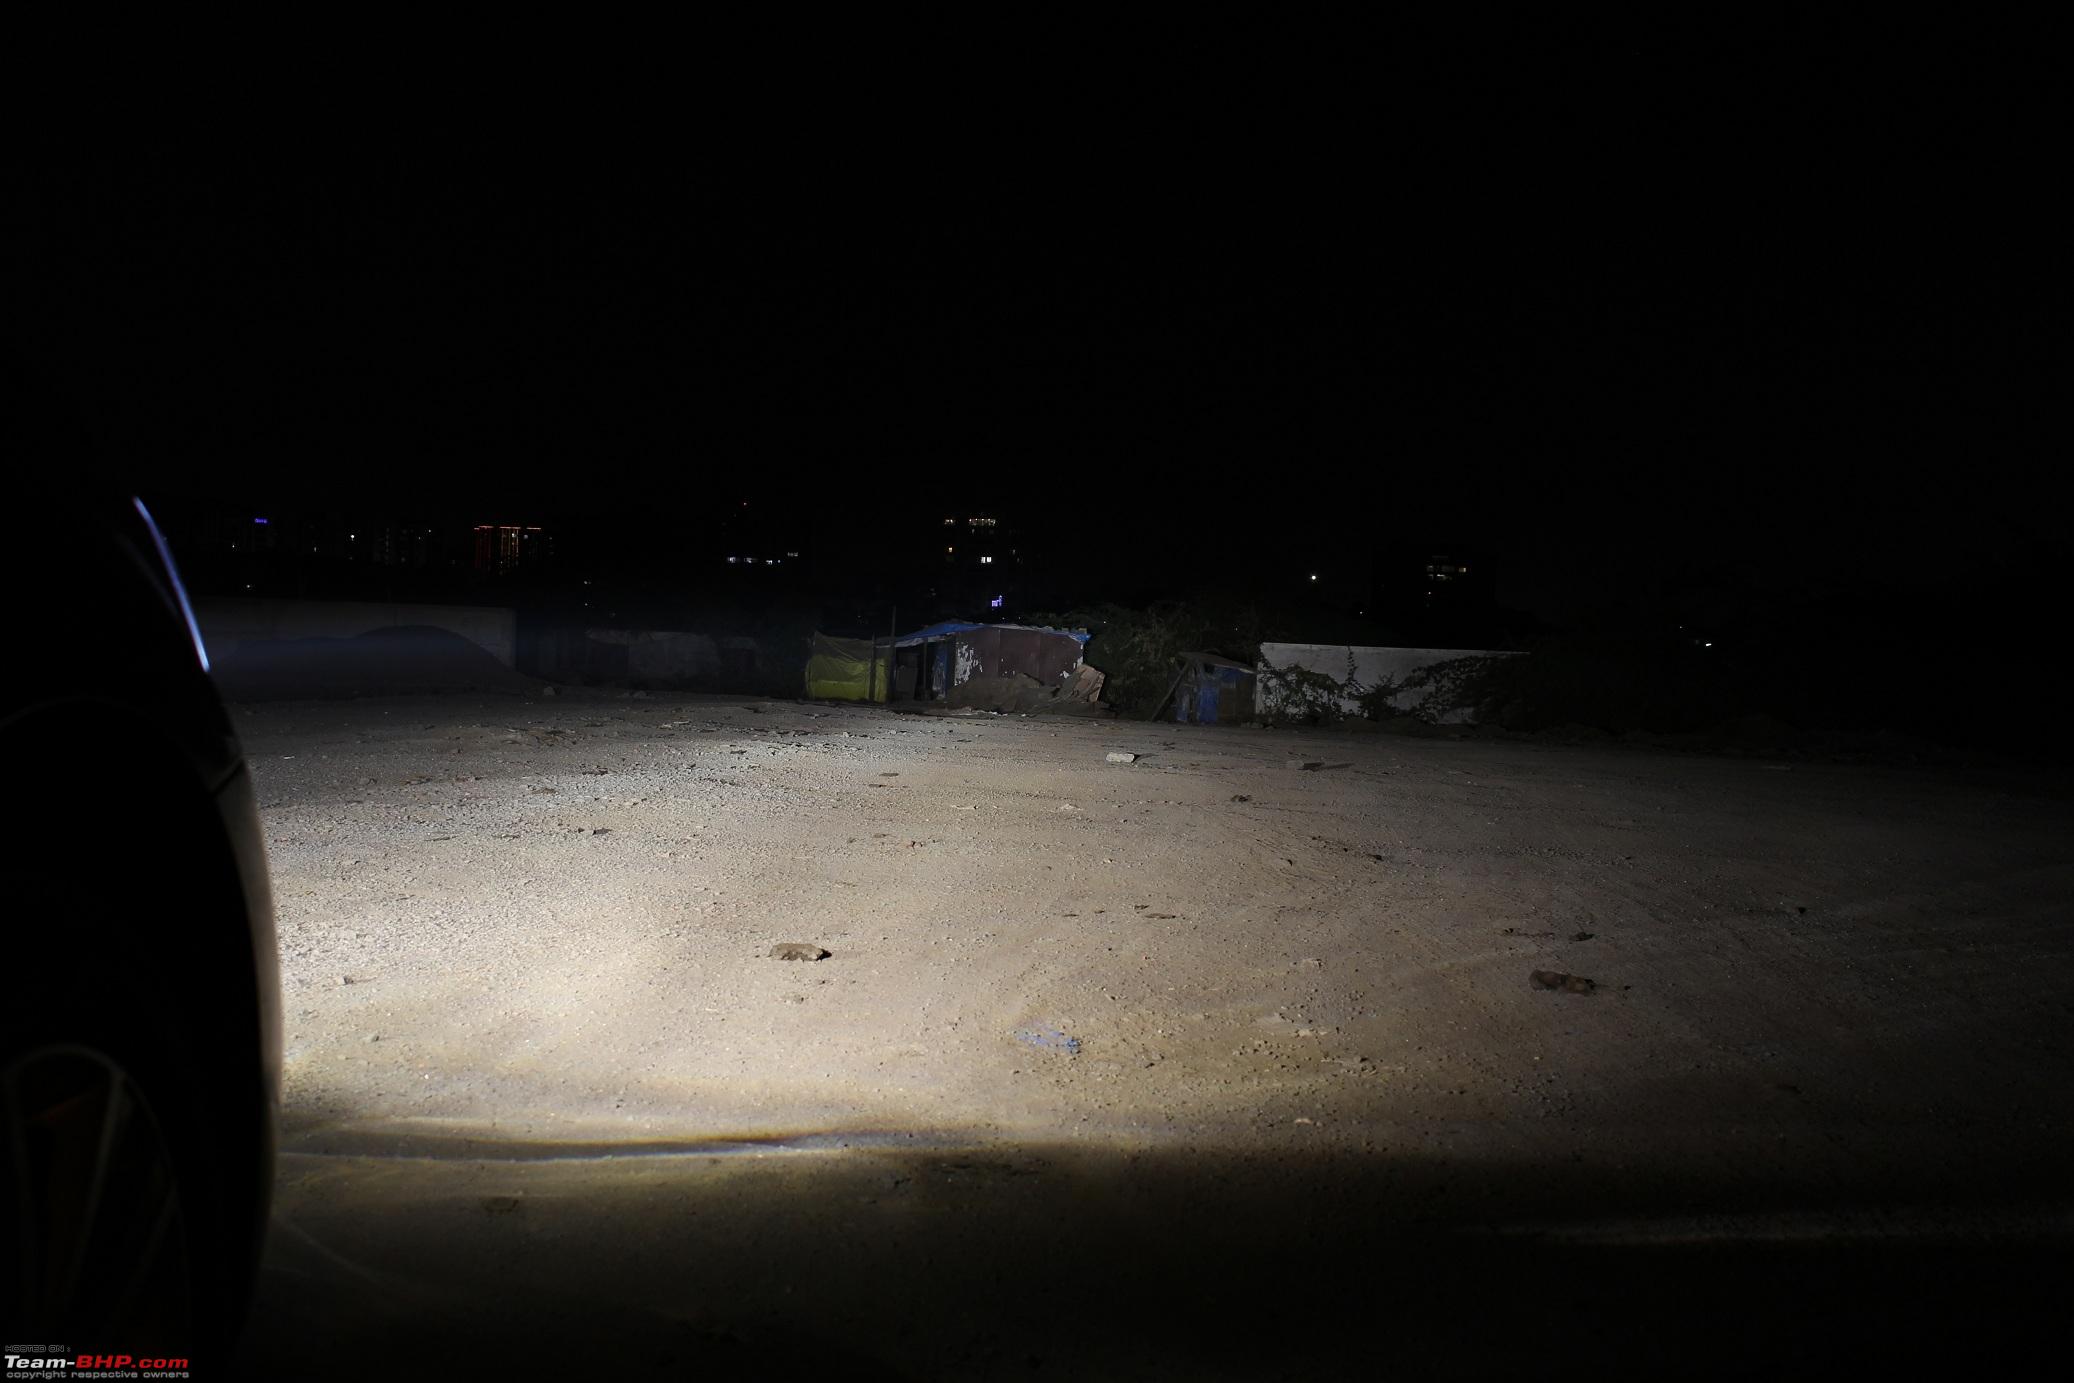 A short clip: The driver side projector does not have the blue hue on the cutoff - possibly a bulb reseat may resolve it but for the moment, I’ve left it as such. Will fiddle with it when I get some free time. Last edited by Gannu_1 : 27th November 2014 at 16:56. |
|
| (33)
Thanks
|
| The following 33 BHPians Thank Gannu_1 for this useful post: | ajaypjayaraj, AlphaKilo, anilntny, ashpalio, AviG, Chethan B G, deepfusion, dr.kushagra, drhoneycake, FireFoot, Gaboonviper04, GTO, Immix, itsashishsharma, john doe, JoseVijay, Leoshashi, Lobogris, motorpsycho, NOX, rbp, Rehaan, rshanker, Rshreyansh, shashank.nk, SnS_12, sudeepg, Sunsh!nes, themonster, toms_2191, vaisakhr, wheelguy, yogiii |
|
13th November 2014, 15:35
| #8 |
| Team-BHP Support Join Date: Apr 2013 Location: Madras
Posts: 7,174
Thanked: 20,220 Times
| re: DIY: VW Polo Bi-Xenon Projectors. Morimoto Mini D2S Stage III Installation The DIY experience: This is perhaps the best part of the whole thing. I am sure a lot of us can relate to it. Building/fixing something by ourselves, taking it apart because something did not work as expected, fiddling with it and reassembling everything to finally see it work - that feeling and level of satisfaction is unmatched. This DIY had its fair share of worries and issues as well because this was the first time we were attempting a projector retrofit and had no clue about it. And team work works the best. Sometimes, an idea that may not have clicked you might come up from your partner.
Last edited by Gannu_1 : 27th November 2014 at 15:23. |
|
| (34)
Thanks
|


| The following 34 BHPians Thank Gannu_1 for this useful post: | ajaypjayaraj, AlphaKilo, ashpalio, AviG, Chethan B G, deepfusion, Divya Sharan, dr.kushagra, ecosport rules, FireFoot, Gaboonviper04, GTO, Immix, InControl, jaunthead, johannskaria, JoseVijay, laferrari, Leoshashi, mac187, moralfibre, motorpsycho, NOX, paragsachania, Rehaan, shashank.nk, sonil.luthra, sudeepg, themonster, vaisakhr, Viju, wheelguy, yesyeswe, yogiii |
|
13th November 2014, 17:17
| #9 |
| Team-BHP Support Join Date: Apr 2013 Location: Madras
Posts: 7,174
Thanked: 20,220 Times
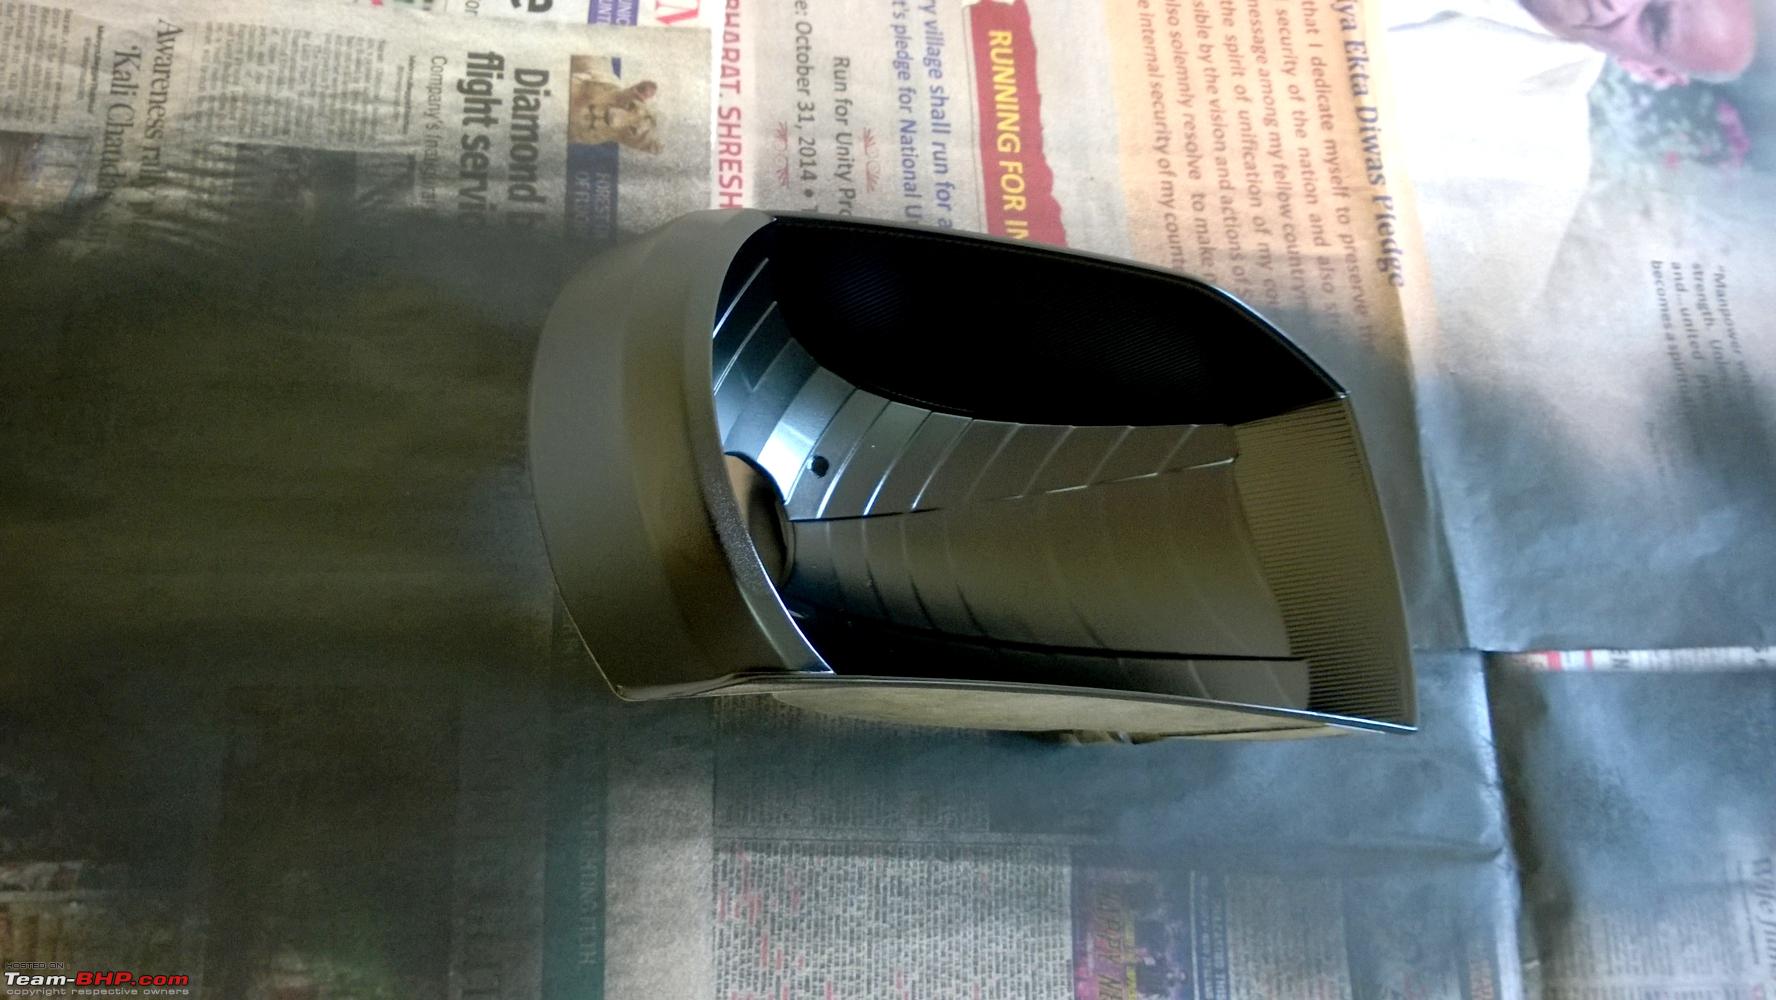
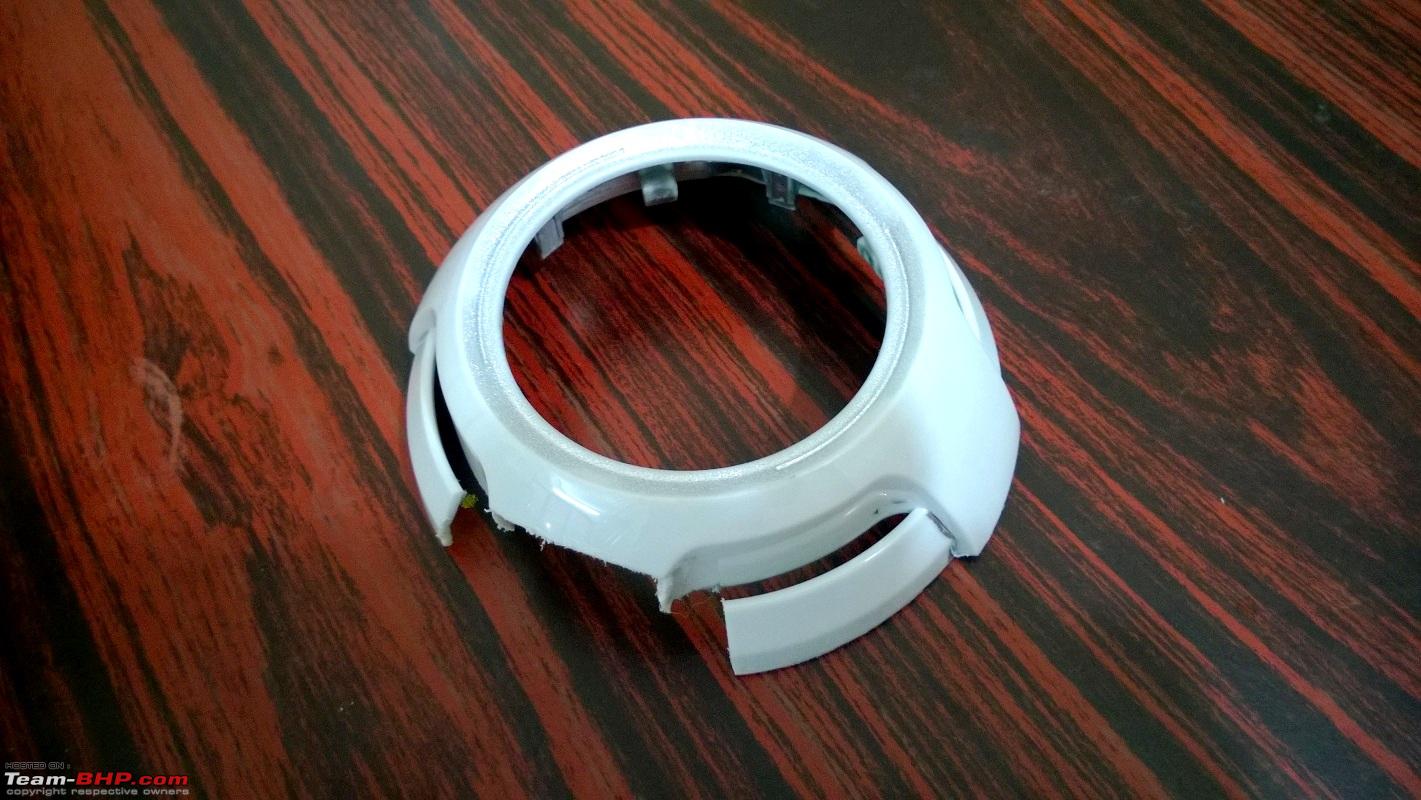
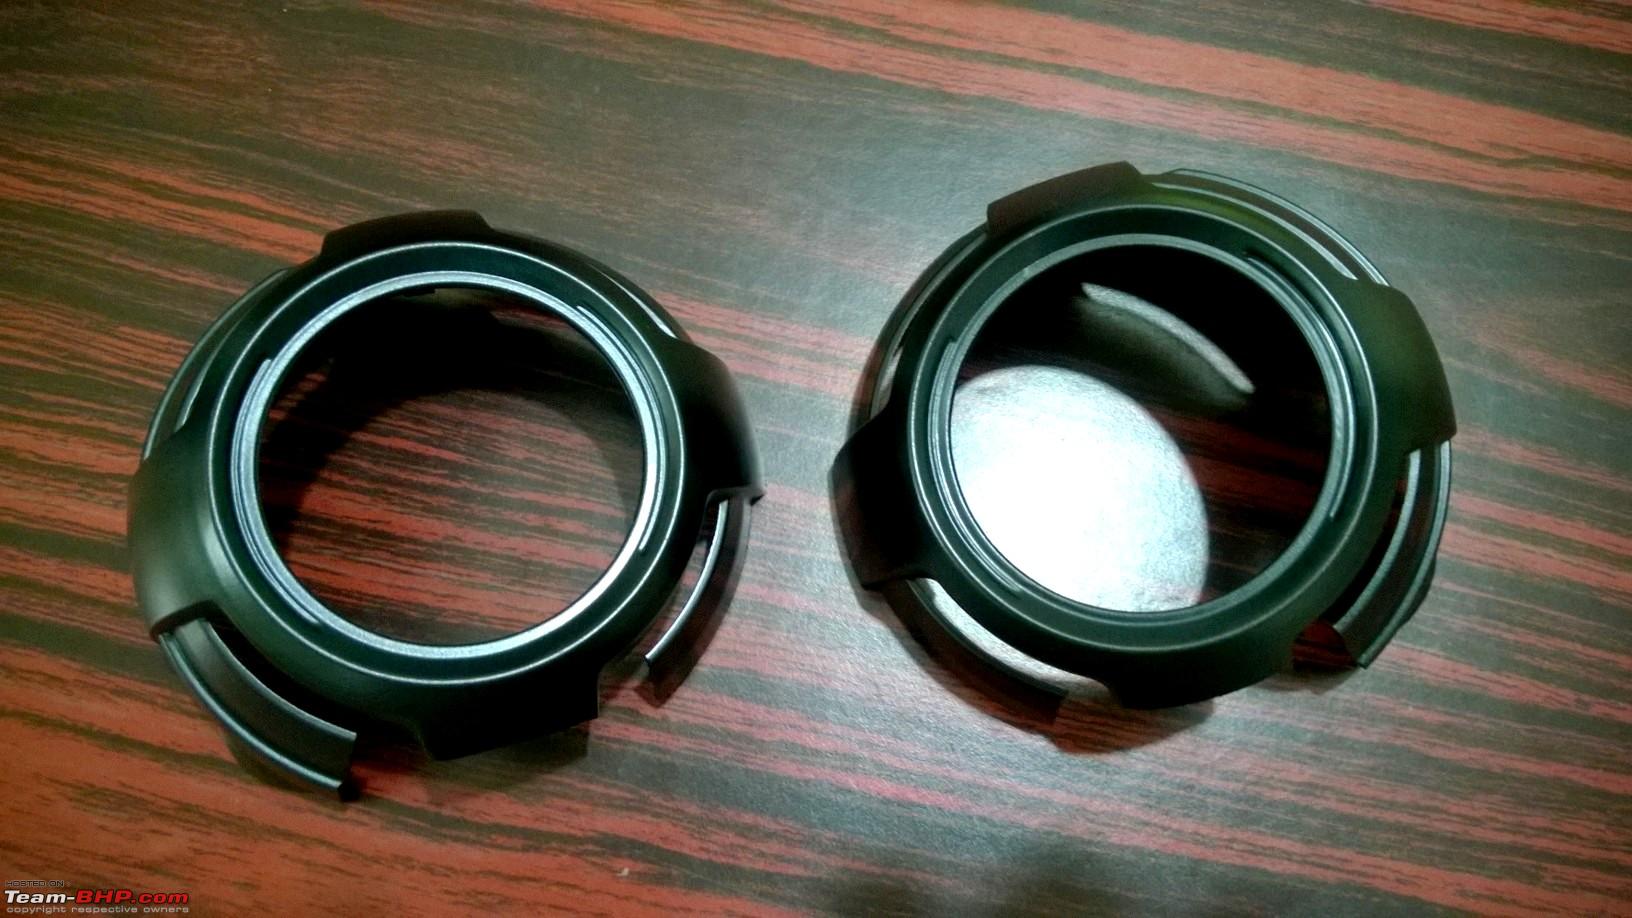
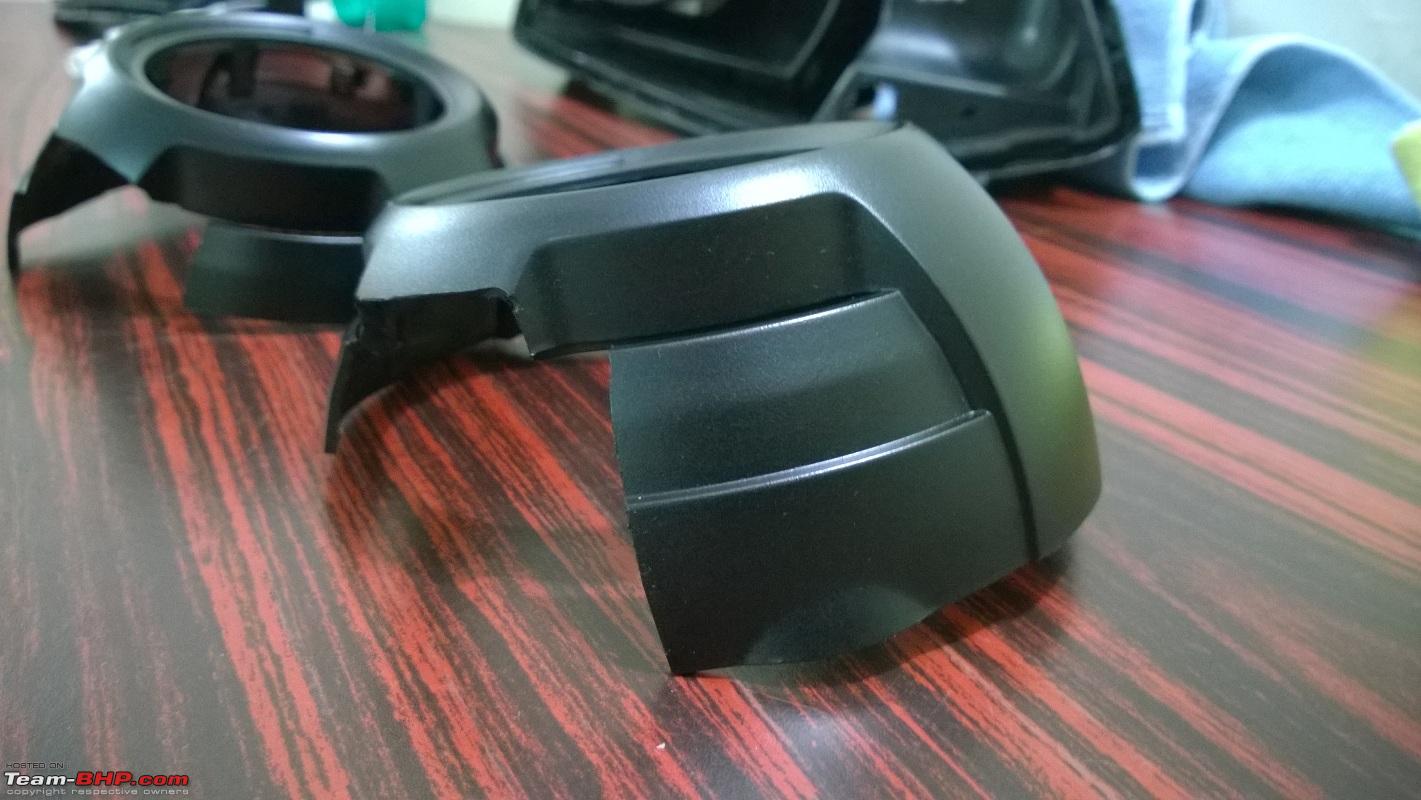
| re: DIY: VW Polo Bi-Xenon Projectors. Morimoto Mini D2S Stage III Installation Shopping Experience from TRS: Mandatory disclaimer applies - I am in no way related to TRS and am not promoting TRS in any manner. Whatever I post below is purely based on my experience. Their website suggests that they are a company based in Atlanta, Georgia state, US. They ship worldwide and offer some very good prices for their retrofit kits and individual components. Sometimes, they come up with lucrative discounts (through their Facebook page) and closeouts. I happened to stumble upon TRS while doing my research for the upgrade and decided to contact the customer support explaining my requirements. I was completely floored by the level of customer support these guys offered! I had put forth all my requirements on the Contact Us page and a support personnel promptly responded in less than 24 hours to my query. A lot of mail exchanges followed and all the responses were contained in a single mail so it was easy to track them. The best part was, the same guy was in charge right from the start (when I had not even thought of this deal) till the end (when the consignment was shipped). The level of support offered was impeccable and consistent - no delays in responses and to-the-point, in a very customer-friendly tone. Since the Polo doesn’t retail in the US, he did not have an idea about the type of wire harness which was best suited for my car so going by the Golf that retails there, he suggested a CANBUS based harness to avoid any errors. But further research (and help from a friend) yielded that the CANBUS based harness wasn’t really required and I chose to get the Motocontrol H4 harness instead. Shipping prices to India were approx. 75 USD via UPS which is a good price for a consignment weighing in at about 2.2 kg and arrives in approx. 3-4 days from the US. Fortunately for me, I had a good friend (and an ex-colleague) who was visiting Michigan for a period of 20 days as a part of his MBA program. Looks like I hit an instant 75$ discount! I asked him if he could carry it with him while he returned and he was absolutely cool with it. He wanted me to confirm the dimensions of the consignment box and the overall weight just to be sure. TRS suggested that the box would measure 12” x 12” x 8” and weigh less than 3 kg. All the components were finalized by then and it was just a matter of making the payment now. The time difference between Atlanta, GA and India is about 9 hours and 30 minutes. Taking that into account, I filled the relevant details, chose the TRS free shipping option (using USPS ground), made the payment around 9:30 PM and dropped them a mail since they had insisted me to because the shipping address (US based) and billing address (India based) were different. They promptly dispatched the consignment within 2 hours! That was blazing fast. And the best part? They shipped it via UPS Ground not USPS! That was a friendly gesture from their side I wasn’t quite expecting! My friend received the consignment within 3 days of dispatch and sent me a few snaps over WhatsApp. He disposed the consignment box, dumped the contents inside his suit case and lugged them to India when he returned. He handed them over to me when we met. Total price paid inclusive of shipping: 385 USD (Rs. 24,232 charged to the credit card). No customs duties had to be paid so all-in-all this turned out to be a good deal. All-in-all the experience was fantastic! Shopping Experience from AVS Tuning: Since I had to order 2 new shrouds for the projectors, I contacted AVS Tuning, Mumbai (link) over the e-mail address posted on their website. I got a response by the same day evening from Mr. Vishesh Agarwal. Paid the amount via NEFT the next day morning and sent a screenshot of the payment receipt. Vishesh confirmed the payment almost immediately and dispatched the shrouds the same day using FedEx’s Priority Overnight service. Now, here comes the saddest part of the whole deal. FedEx did not deliver the consignment for over a week and despite multiple follow-ups with them over the toll free number, all I could gather was that the consignment landed in Surat on the second day but was not delivered. Reason? FedEx does not have their delivery service in Surat and relies on a 3rd party courier service to deliver the consignments. This was a shady courier service located close to the railway station, about 10 km from my residence and I had to pick up the shipment from their office. I could not drop a mail to FedEx’s senior guys either. Despite my best attempts to hunt for the mail addresses, I couldn’t find one on their website. The shrouds were well packed in a box with bubble wrap - safe and secure but somehow the build quality of the shrouds were different from those sent by TRS. The shrouds appeared a bit flimsy in construction and the chrome coating was not even compared to TRS’ shrouds and the overall quality was bad. I suspected these shrouds originated from China (or elsewhere) and not definitely TRS. I sent a mail to Vishesh the next day informing him about my findings but AVS Tuning suggests that all the parts were received from TRS. They also said, ”It could be that your shroud had a defect or went bad due to some reaction.” I couldn’t be bothered about the shrouds since I had decided to strip the chrome off and spray paint them in matte black. Total price paid inclusive of shipping: Rs. 2100 The overall experience was good. And before I wind up, my heartfelt thanks to:
That would be all guys. Let me know if you have any queries or feedback. Would be happy to help! PS: Few images were sourced from TRS and results from Google Images. All copyrights belong to their respective owners. Last edited by Gannu_1 : 27th November 2014 at 16:47. |
|
| (52)
Thanks
|
| The following 52 BHPians Thank Gannu_1 for this useful post: | 9thsphinx, ajaypjayaraj, anilntny, arjithin, ashpalio, AviG, Chethan B G, deepfusion, djoel99, dr.kushagra, DRIVE_ADDICT, FireFoot, fluidicjoy, frankmehta, GTO, InControl, jaunthead, johannskaria, john doe, JoseVijay, keeru, kunaldhami, Leoshashi, MaddyCrew, maheshramaling, mallumowgli, mishraak, moralfibre, motorpsycho, myavu, Myth_sx, paragsachania, rbp, Rehaan, rnkaushal, rshanker, S2!!!, SDP, shashank.nk, shetty_rohan, sonil.luthra, SS-Traveller, sudeepg, themonster, toothless, vaisakhr, vhharan1, Viju, Vik0728, wheelguy, yesyeswe, yogiii |
|
27th November 2014, 18:12
| #10 |
| Team-BHP Support Join Date: Feb 2004 Location: Bombay
Posts: 24,046
Thanked: 34,078 Times
| re: DIY: VW Polo Bi-Xenon Projectors. Morimoto Mini D2S Stage III Installation Thread moved out from the Assembly Line section. Thanks for sharing! |
|
| (1)
Thanks
|
| The following BHPian Thanks Rehaan for this useful post: | Gannu_1 |
|
27th November 2014, 19:06
| #11 |
| BHPian Join Date: Jun 2014 Location: KL 11
Posts: 930
Thanked: 1,162 Times
| re: DIY: VW Polo Bi-Xenon Projectors. Morimoto Mini D2S Stage III Installation That is one detailed DIY thread Gannu  Appreciate your effort in making it in such detail! Lots of nice and simple ideas and inspiration for those who wanna try something like this. DIY oven - NICE! Appreciate your effort in making it in such detail! Lots of nice and simple ideas and inspiration for those who wanna try something like this. DIY oven - NICE!Was good reading through the whole thing. And I should have guessed since it is a retrofit kit, but I really din't know that attaching the projector would be as straight forward as this. Since I did not use a kit meant for retrofit, there was so much more fine work involved in just getting the projector fitted that I would think a lot before doing it again. Needs a lot of patience. These types of retrofit kits are a dream come true for DIYers. Makes life much more easier. Well Gannu, Thanks for sharing. Keep them coming! Cheers. |
|
| (1)
Thanks
|
| The following BHPian Thanks ajaypjayaraj for this useful post: | Gannu_1 |
| |
|
27th November 2014, 19:30
| #12 |
| Senior - BHPian Join Date: Jan 2010 Location: Bangalore
Posts: 1,696
Thanked: 1,048 Times
| re: DIY: VW Polo Bi-Xenon Projectors. Morimoto Mini D2S Stage III Installation Thank you for painstakingly documenting every possible step involved in retrofitting these projectors. It gives me a good idea of all the work involved, from start to end and how difficult it is. Brilliant idea on DIY oven! It must be much easier than using a heat gun. I hope you'll upload a few pics after the bulbs break-in, to see how the beam looks and are able to capture it well. |
|
| (1)
Thanks
|
| The following BHPian Thanks shashank.nk for this useful post: | Gannu_1 |
|
28th November 2014, 10:25
| #13 |
| BHPian Join Date: Nov 2009 Location: Bangalore
Posts: 503
Thanked: 518 Times
| re: DIY: VW Polo Bi-Xenon Projectors. Morimoto Mini D2S Stage III Installation Brilliant work there, rated this thread 5 star, a must watch for people who want to do a retrofit. Just one question, why didn't you go for the FXR? Last edited by rbp : 28th November 2014 at 10:26. |
|
| (1)
Thanks
|
| The following BHPian Thanks rbp for this useful post: | Gannu_1 |
|
28th November 2014, 10:51
| #14 |
| BHPian Join Date: Sep 2013 Location: Munich
Posts: 350
Thanked: 242 Times
| re: DIY: VW Polo Bi-Xenon Projectors. Morimoto Mini D2S Stage III Installation Thanks Gannu. The best DIY ever seen with minute details. Rated 5 stars Though, I am contemplating about this, I have no courage to do it on my own. Last edited by shetty_rohan : 28th November 2014 at 10:53. |
|
| (1)
Thanks
|
| The following BHPian Thanks shetty_rohan for this useful post: | Gannu_1 |
|
28th November 2014, 11:10
| #15 |
| Senior - BHPian Join Date: Feb 2005 Location: Melbourne
Posts: 4,377
Thanked: 5,105 Times
| re: DIY: VW Polo Bi-Xenon Projectors. Morimoto Mini D2S Stage III Installation Thanks a lot for the detailed write up and painstakingly taking the pictures of the whole procedure in preparing the DIY for us. That itself is quite an effort. Can we have a day time frontal shot of the car without the headlights on? |
|
| (1)
Thanks
|
| The following BHPian Thanks extreme_torque for this useful post: | Gannu_1 |
|