| |||||||

| Search Forums |
| Advanced Search |
| Go to Page... |
 |
| Search this Thread |  63,481 views |
 8th June 2020, 02:00
| #1 |
| BHPian Join Date: Dec 2017 Location: Guwahati
Posts: 562
Thanked: 4,745 Times
| DIY: HID Bi-Xenon projector foglamps in our EcoSport  Special thanks to Bhpian Ashubhrah, Audioholic, Dr. Naren, Kero1099 & Leoshashi. Without you guys, I couldn't have completed this project. The need for more light The pre facelift Ecosport's headlights are really weak, almost like candles. Every time I hit the highway at night, I used to curse the useless HLs. At around the 25k km mark I fitted 100/90W bulb (with a relay harness), improvement in lighting was good enough for me & I was a happy man. Though as the car neared the 50k km mark, I started noticing that the inside of the reflector was starting to fade. I guess this was due to the heat generated by the 100/90W bulbs, which was too much for the plastic HL of Ecosport. Finally I removed the 100/90W bulbs, the relay harness & fitted back the stock lights. The need for better lighting was always on my mind, though this time I wasn't willing to experiment with the headlights. The safe option was to go with premium bulbs in stock 60/55W, but from what I know the improvement in lighting isn't that noticeable (especially in Ecosport where the reflector design is bad). I generally don't like to drive on our unpredictable highways after dusk, but sometimes I am left with no choice. Auxiliary lights were never under consideration as I believe they don't look good on modern cars like the Ecopsort. In recent times there were many who had put Bi-Xenon HID projectors in the fog light slot. The improvement in lighting was huge, these would overpower the stock HLs by a big margin. The fog lights in the Ecosport are placed on the higher side as well (higher than HLs of many low slung cars), so it seemed Ecosport was a good candidate to fit these projector fogs. The only issue was the cost (around 7k) & the fact that all these were rebranded Chinese products. Since I am getting 1 year warranty from the seller, I have decided to take the risk. Next up was from where to order the projector & HID bulbs. The cheapest option was to order from Aliexpress, though this option was out due to the current Covid-19 situation. Next option was to buy from sellers like Blaze India, MotorBasket, added bonus was that they give 1 year warranty as well. BHPian Dr. Naren gave me the contact number of Blaze India, I contacted him over Whatsapp. He answered all my queries properly & seemed like a genuine guy (except one slight issue, more on that later). There is only one type of Bi-Xenon projector sold by these guys, but there were few options with regards to the 55W HID kit (HID bulb & ballast). The HID bulb was available in 4300K, 5500K, 6000K configurations. I decided to go with 4300K bulbs, since warmer light is better for illumination & also due to the fact that these will match with the stock Halogen HLs better. There is one more option (though a bit costly) of buying a 35W OSRAM HID kit (around 7k) & projector separately from Blaze India. Blaze India sells the Bi-xenon projectors & the HID kit for 6.9k (including shipping). I decided to go with Blaze India & informed him that I want 4300K bulbs (he was advising me to go with 5500k bulbs). The projector is available in 2 sizes, 2.5" or 3.0". For the Ecosport the seller recommended 3.0" projectors. Though in TeamBHP there are a few who have had difficulty in fitting the 3.0" projector in the OE slot, the chrome bezel would need some cutting or filling. Some had the issue where the mounting point of the projector won't align with the OE slot. BHPian & good friend Ashubhrah came to the rescue, he showed me photos of projector fog installation in his Ecosport. The projector fit in the OE slot without any issue, even the chrome bezel didn't need any alteration. His Ecosport is also 2016 make like mine. Next confusion was regarding how to power the projector fogs. There were 2 ways, one was to directly plug in the OE H11 connector or the second way was to fit a relay kit. The issue with the relay kit is that fog lights would turn on with the headlights (the seller told me this), which I didn't want. There was an option of fitting an extra switch to turn on the fogs, but that needed some more wiring (& skill). I decided to go with the simple method i.e power the projector fogs with the OE H11 connector, which meant I could use the OE fog light switch to operate them. Ecosport comes with 55W H11 foglights from the factory & HID kit is rated at 55W, so I thought the stock wiring should be sufficient. Photo from the user manual:  There was one more issue, specific to the Titanium + variant. In the 2015 update, Ford introduced these stupid DRLs in the top end Titanium + variant. The DRLs are housed inside the fog lights & are yellow in color  . On close inspection, I could see that there are two bulbs inside the fog light housing. Since the DRLs functioning was independent of the fog light, I assumed that the DRL bulb should have a separate coupler. . On close inspection, I could see that there are two bulbs inside the fog light housing. Since the DRLs functioning was independent of the fog light, I assumed that the DRL bulb should have a separate coupler. DRL on:  Fog light on:  Last edited by chiranjitp : 20th June 2020 at 21:08. |

|  (22)
Thanks (22)
Thanks
|
| The following 22 BHPians Thank chiranjitp for this useful post: | 2himanshu, Ashtoncastelino, audioholic, basuk, Fordlover88, GTO, InControl, jithin23, JoeTheWanderer, keroo1099, Leem, Leoshashi, LONG_TOURER, paragsachania, Reinhard, Rigid Rotor, SaiSW, samabhi, Simat, swapnil.awate, Tanveer02, The Rationalist |
| |
|
8th June 2020, 12:43
| #2 |
| BHPian Join Date: Dec 2017 Location: Guwahati
Posts: 562
Thanked: 4,745 Times
| re: DIY: HID Bi-Xenon projector foglamps in our EcoSport The DIY The courier arrived during the lockdown & the last thing I wanted to do during the lockdown, was to go to a garage to fit the projector fogs. That's when I thought why not a DIY, the wiring part seemed simple enough. I am simply not a DIY guy, the most complicated DIY that I had done till date was replacement of the accelerator cable in my ex Zen  . This seemed way more complicated & it was a DIY related to an electric part. I am someone who is very afraid to fiddle with anything that's related to electricity, as I have this fear of blowing up some fuse. . This seemed way more complicated & it was a DIY related to an electric part. I am someone who is very afraid to fiddle with anything that's related to electricity, as I have this fear of blowing up some fuse. Bhpian Audioholic, Kero1099 & Leoshashi assured me that there was no chance of blowing up anything as the wiring was plug & play. So, finally I decided to go the DIY way. The packing as it arrived:  Blaze India sends some cable ties, 3M double side tape & a pair of scotch lock (to tap in the high beam) to help in the installation. The HID bulbs came mounted in the projector, which is good since there have been some cases where the bulb didn't fit properly in the projector housing. Then I noticed something strange, the bulb wiring had a 5500k label. I had specifically mentioned the seller that I want 4300K bulbs, not 5500K bulbs. I immediately shared him the photos & asked for an explanation, to which he confirmed that they accidentally shipped 5500K bulbs. He requested me to fit the 5500K bulbs first & if I was not satisfied with the light output, he would send me 4300K bulbs. I am satisfied with the 5500K bulbs, but I still believe that 4300K bulbs would have been better. The seller is still giving lame excuses as to why he isn't able to ship the 4300K bulbs till date. I haven't pressed the issue that much as I am satisfied with the lighting output. It seems the behavior of sending 5500K (in place of 4300K) bulbs is common with most sellers, apparently they mostly import 5500K bulbs from China (which sells more in India). I am otherwise happy with Blaze India, just that this small issue shouldn't have happened. 5500K HID bulb:  Bi-Xenon projector: 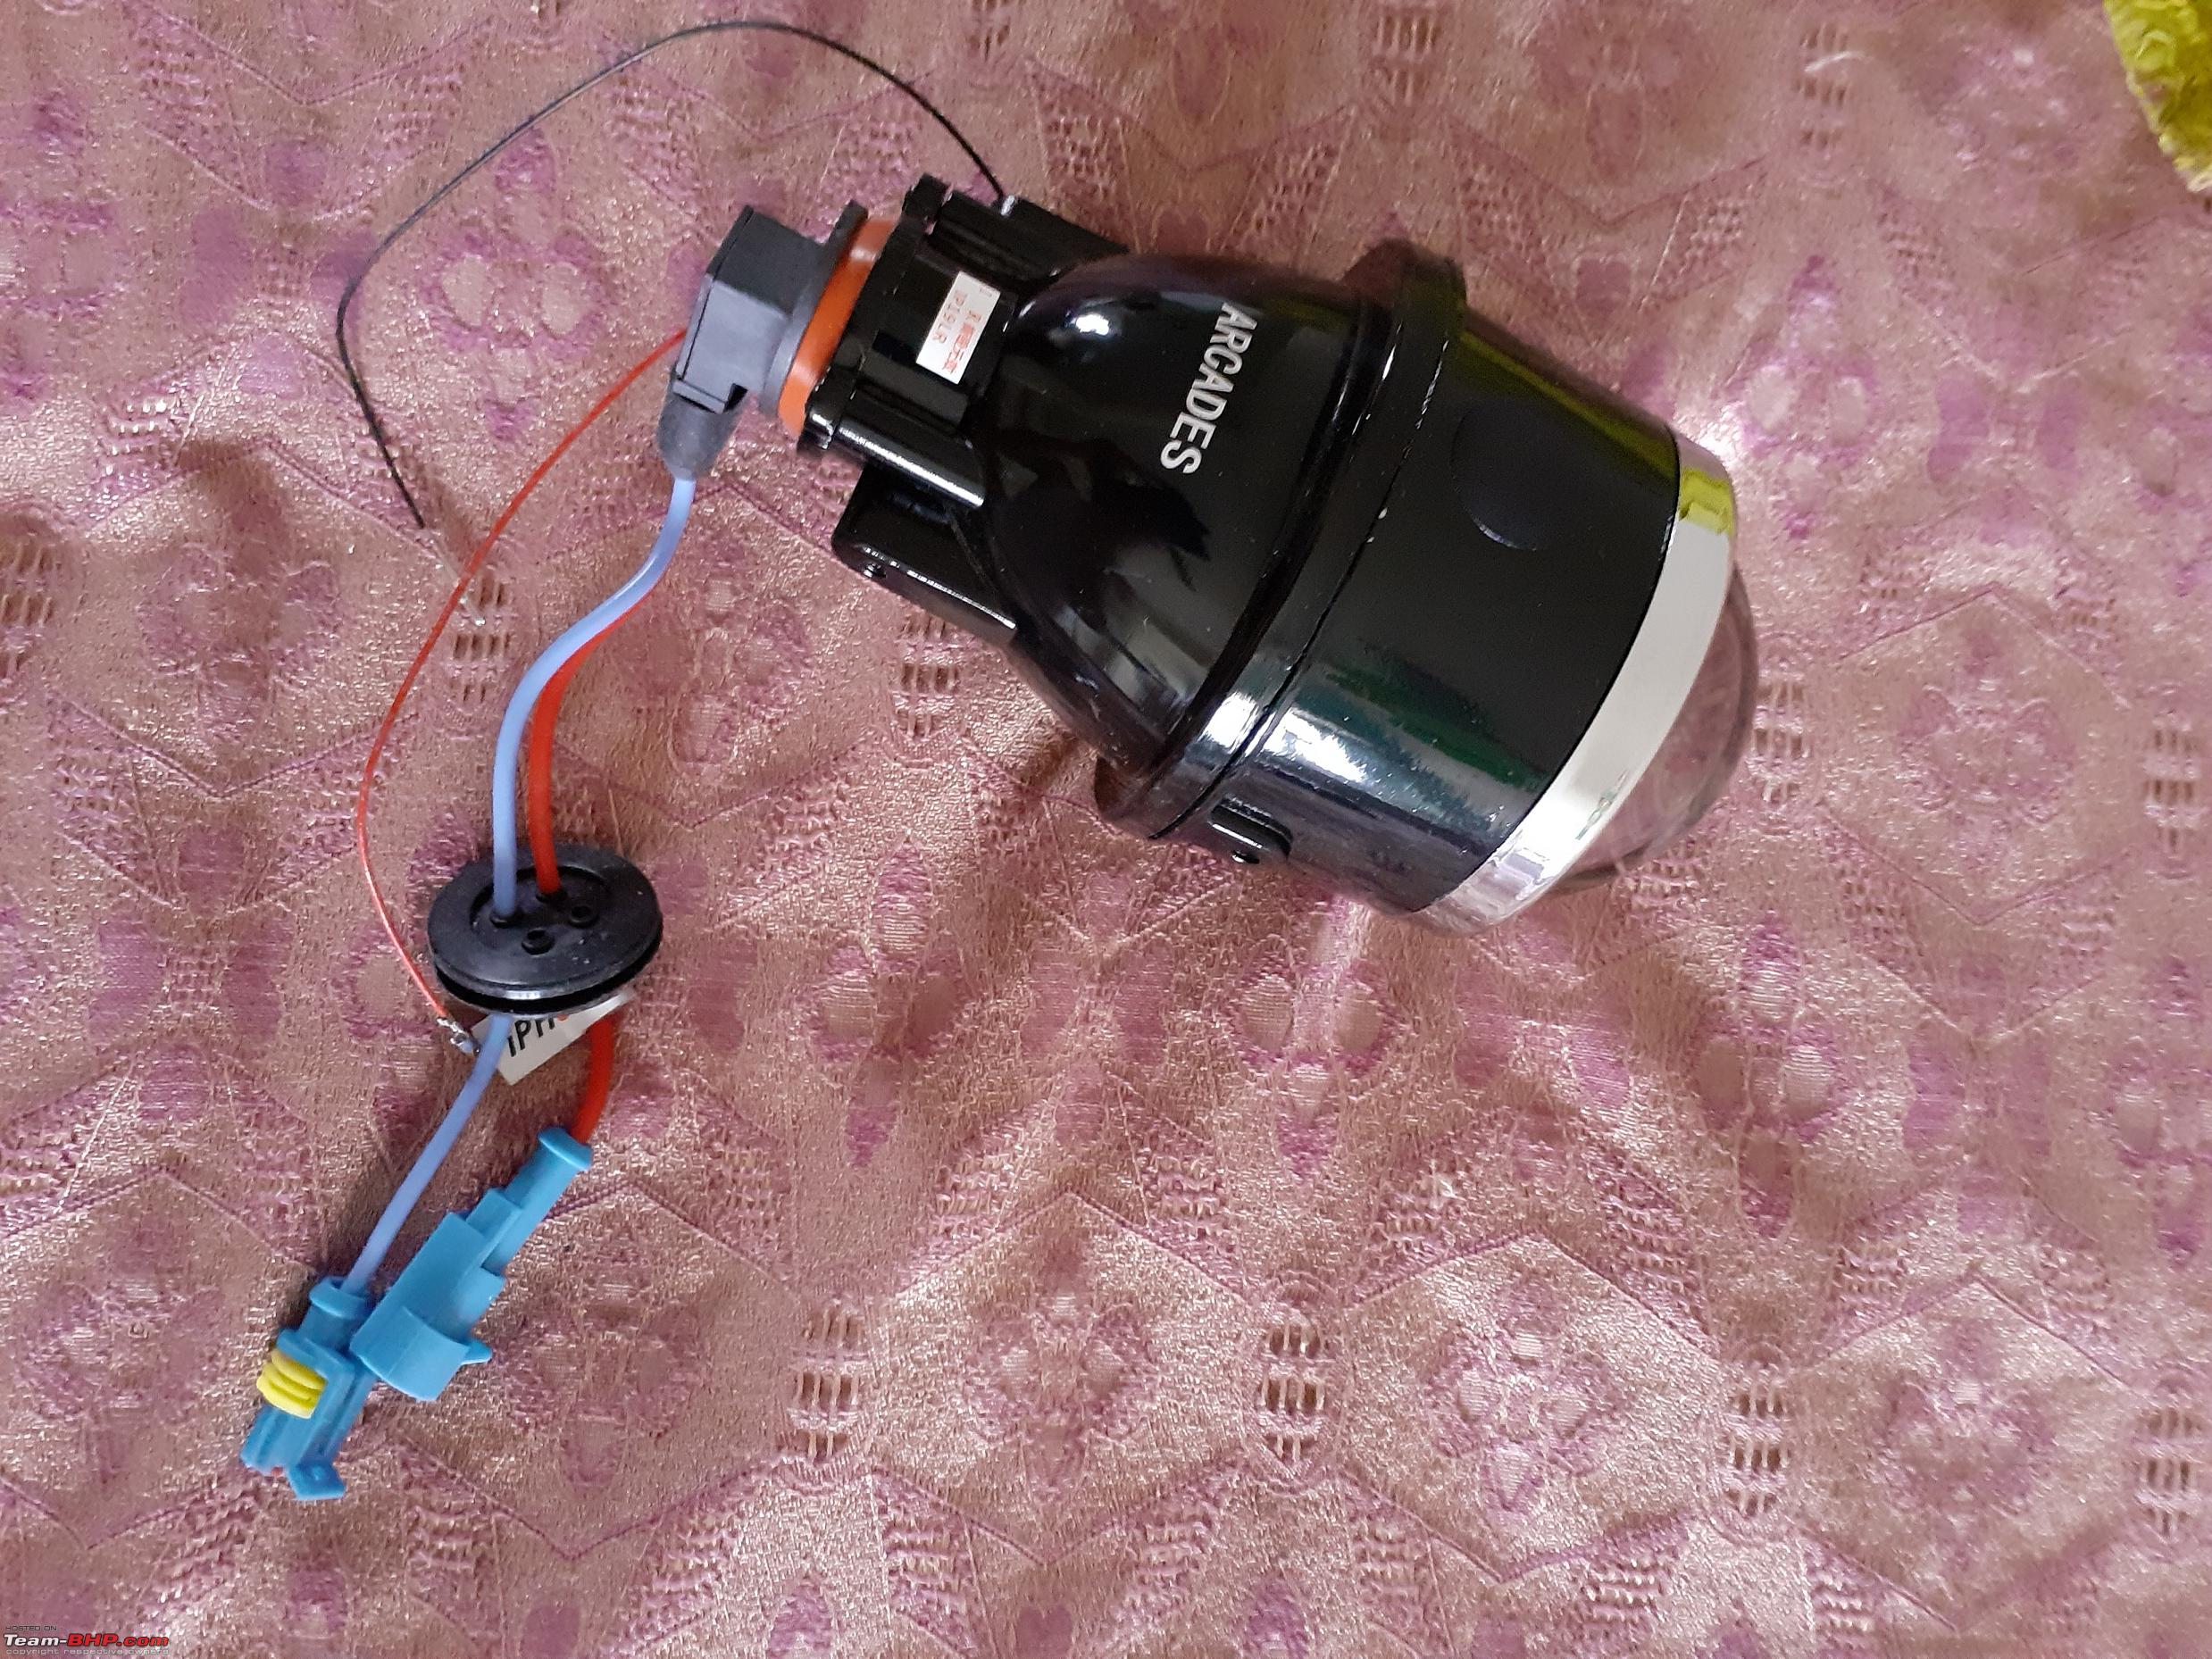 HID bulb ballast:  H11 connector:  All the components separately:  All the components wired up: 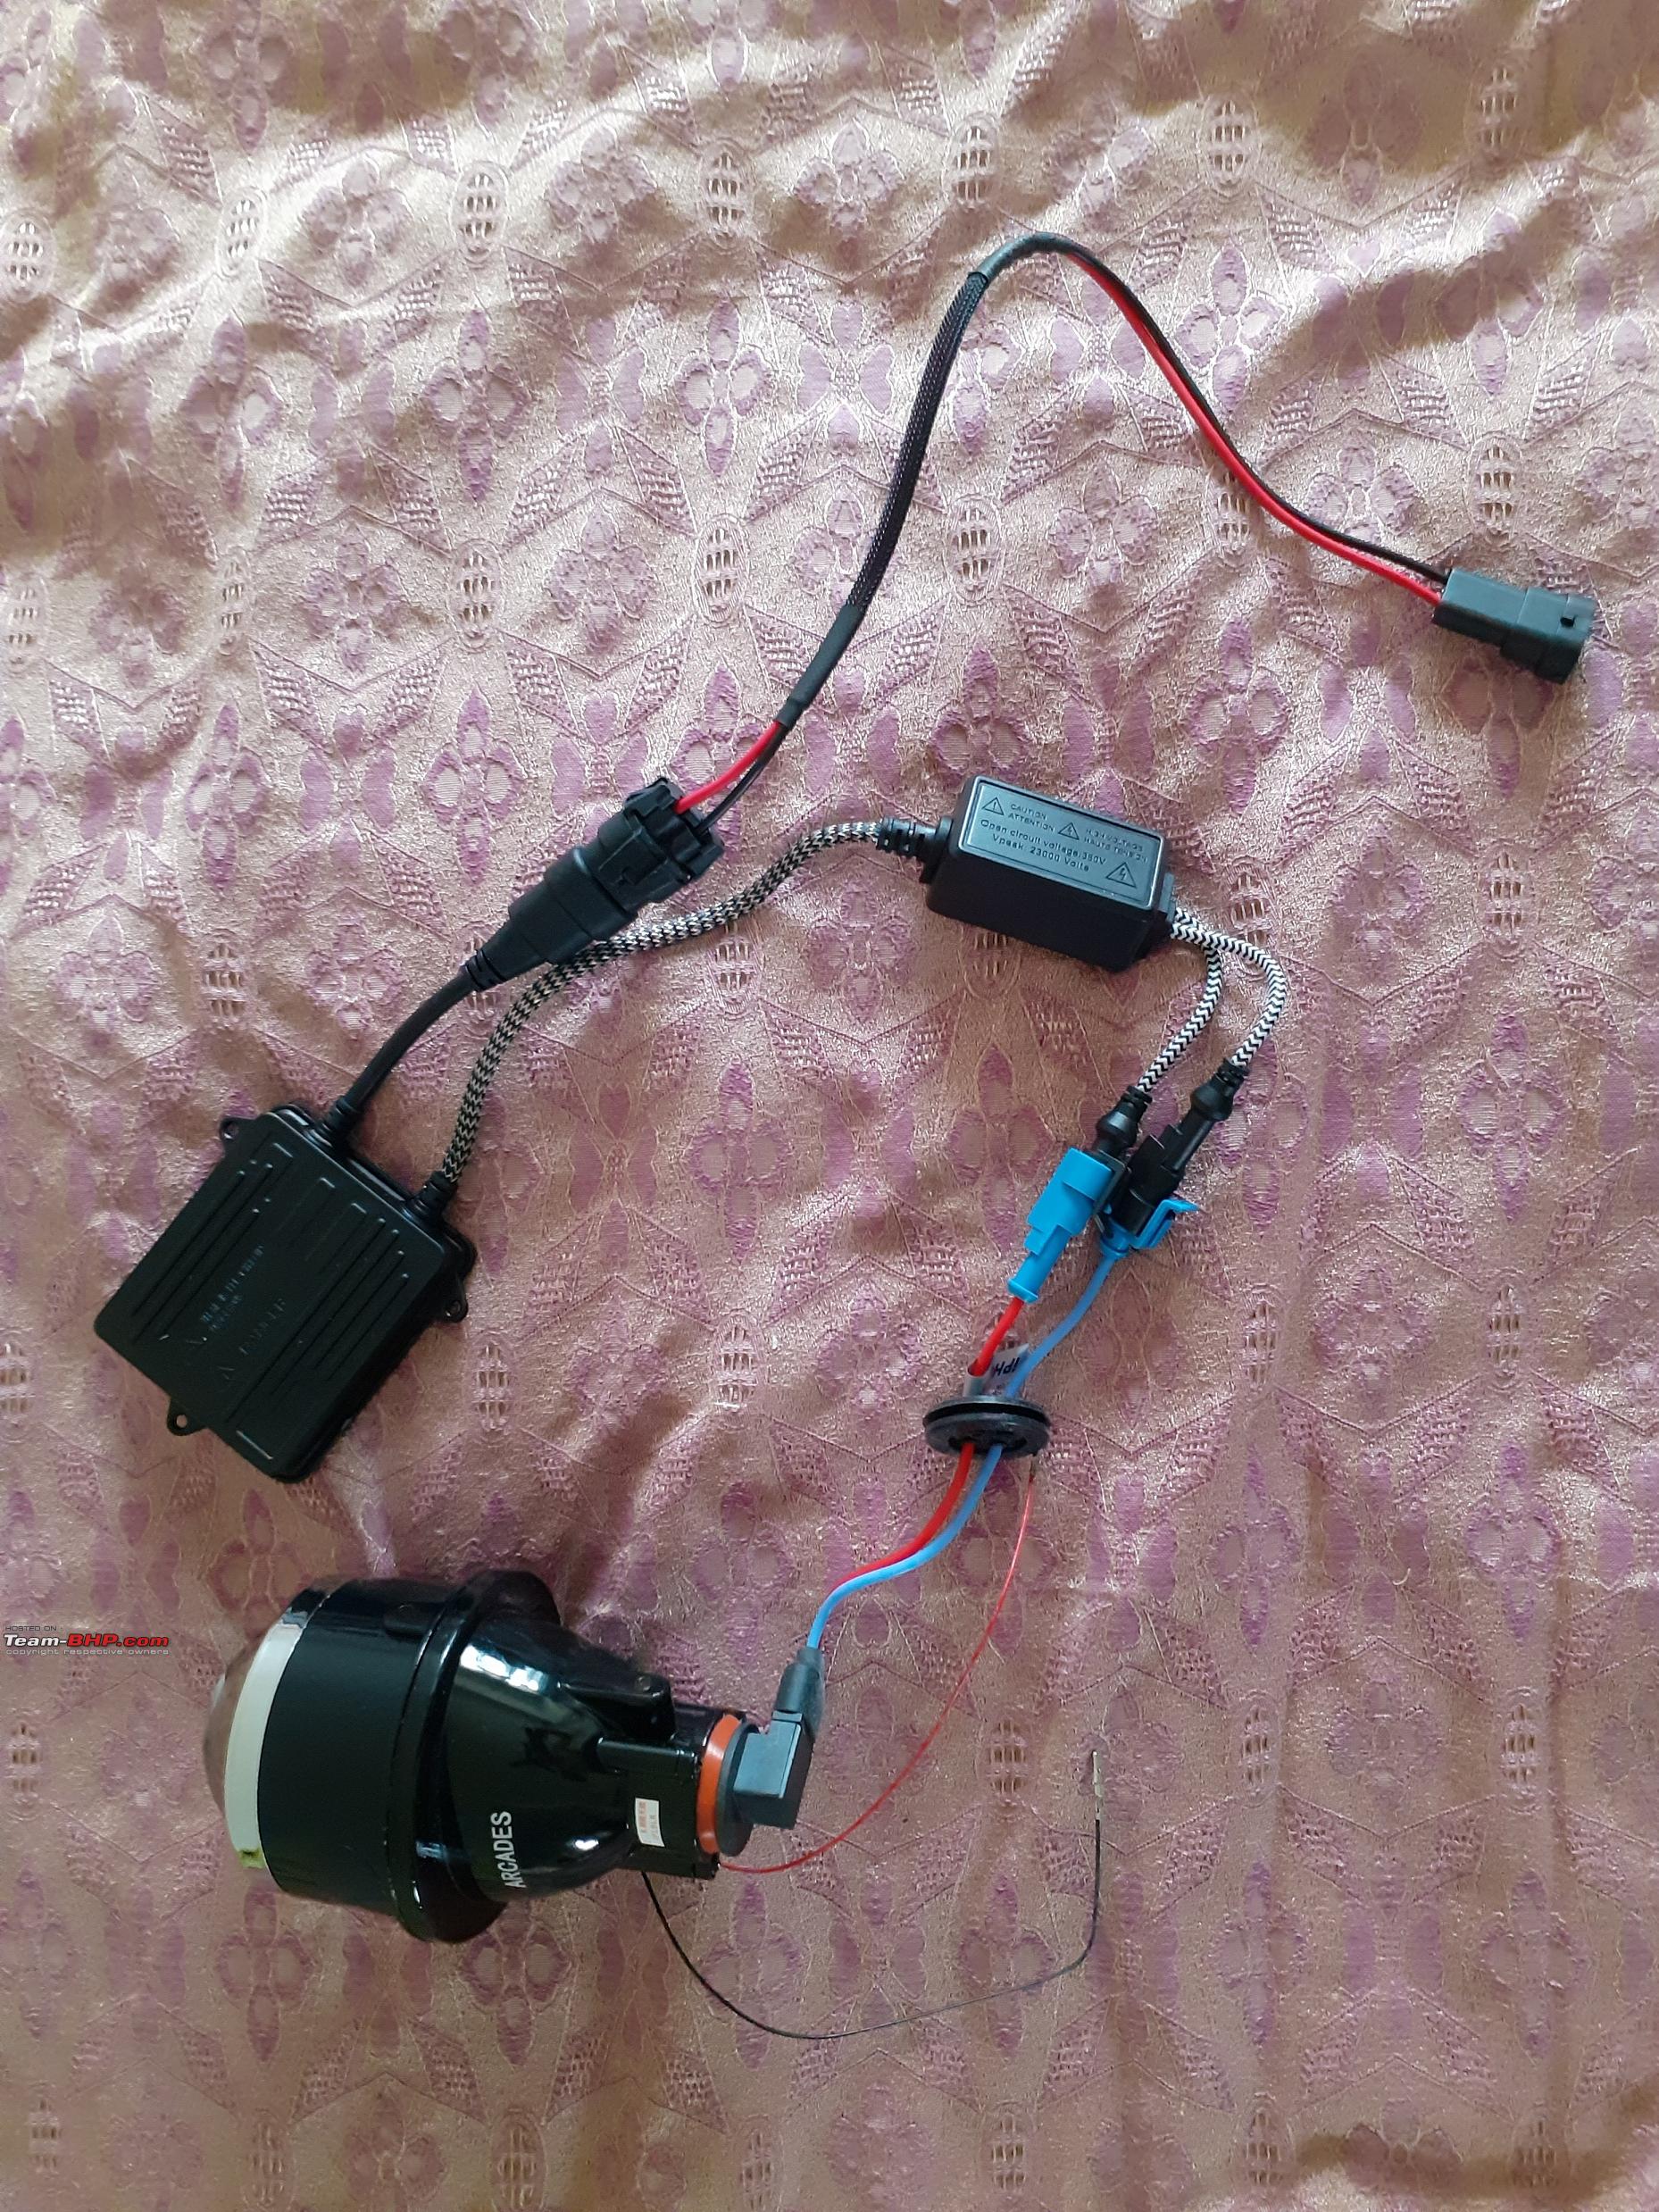 In the Ecosport fog light mounting is accessed from the front, so there was no issue of opening the front bumper (which was beyond my skill level). Simply pop out the fog light bezel & you will have access to the screws. A slight pull is enough to remove the fog light bezel. Fog light bezel, I didn't have to cut or trim the chrome part:  OE fog light:  Size comparison with the OE fog light:  The OE foglight in the Ecosport are screw mounted. Remove the screws, carefully pull out the fog light & finally remove the couplers (2 in my case). Ecosport has a two point mounting arrangement, the rest two slots are just to give support. I would have preferred a 3 or 4 point mounting point for a more strong fit. Some cars like the Nexon has a 4 point mounting arrangement, Marutis have a 3 point mounting arrangement. Honda City has a similar 2 point mounting arrangement like the Ecosport. Nexon mounting arrangement: 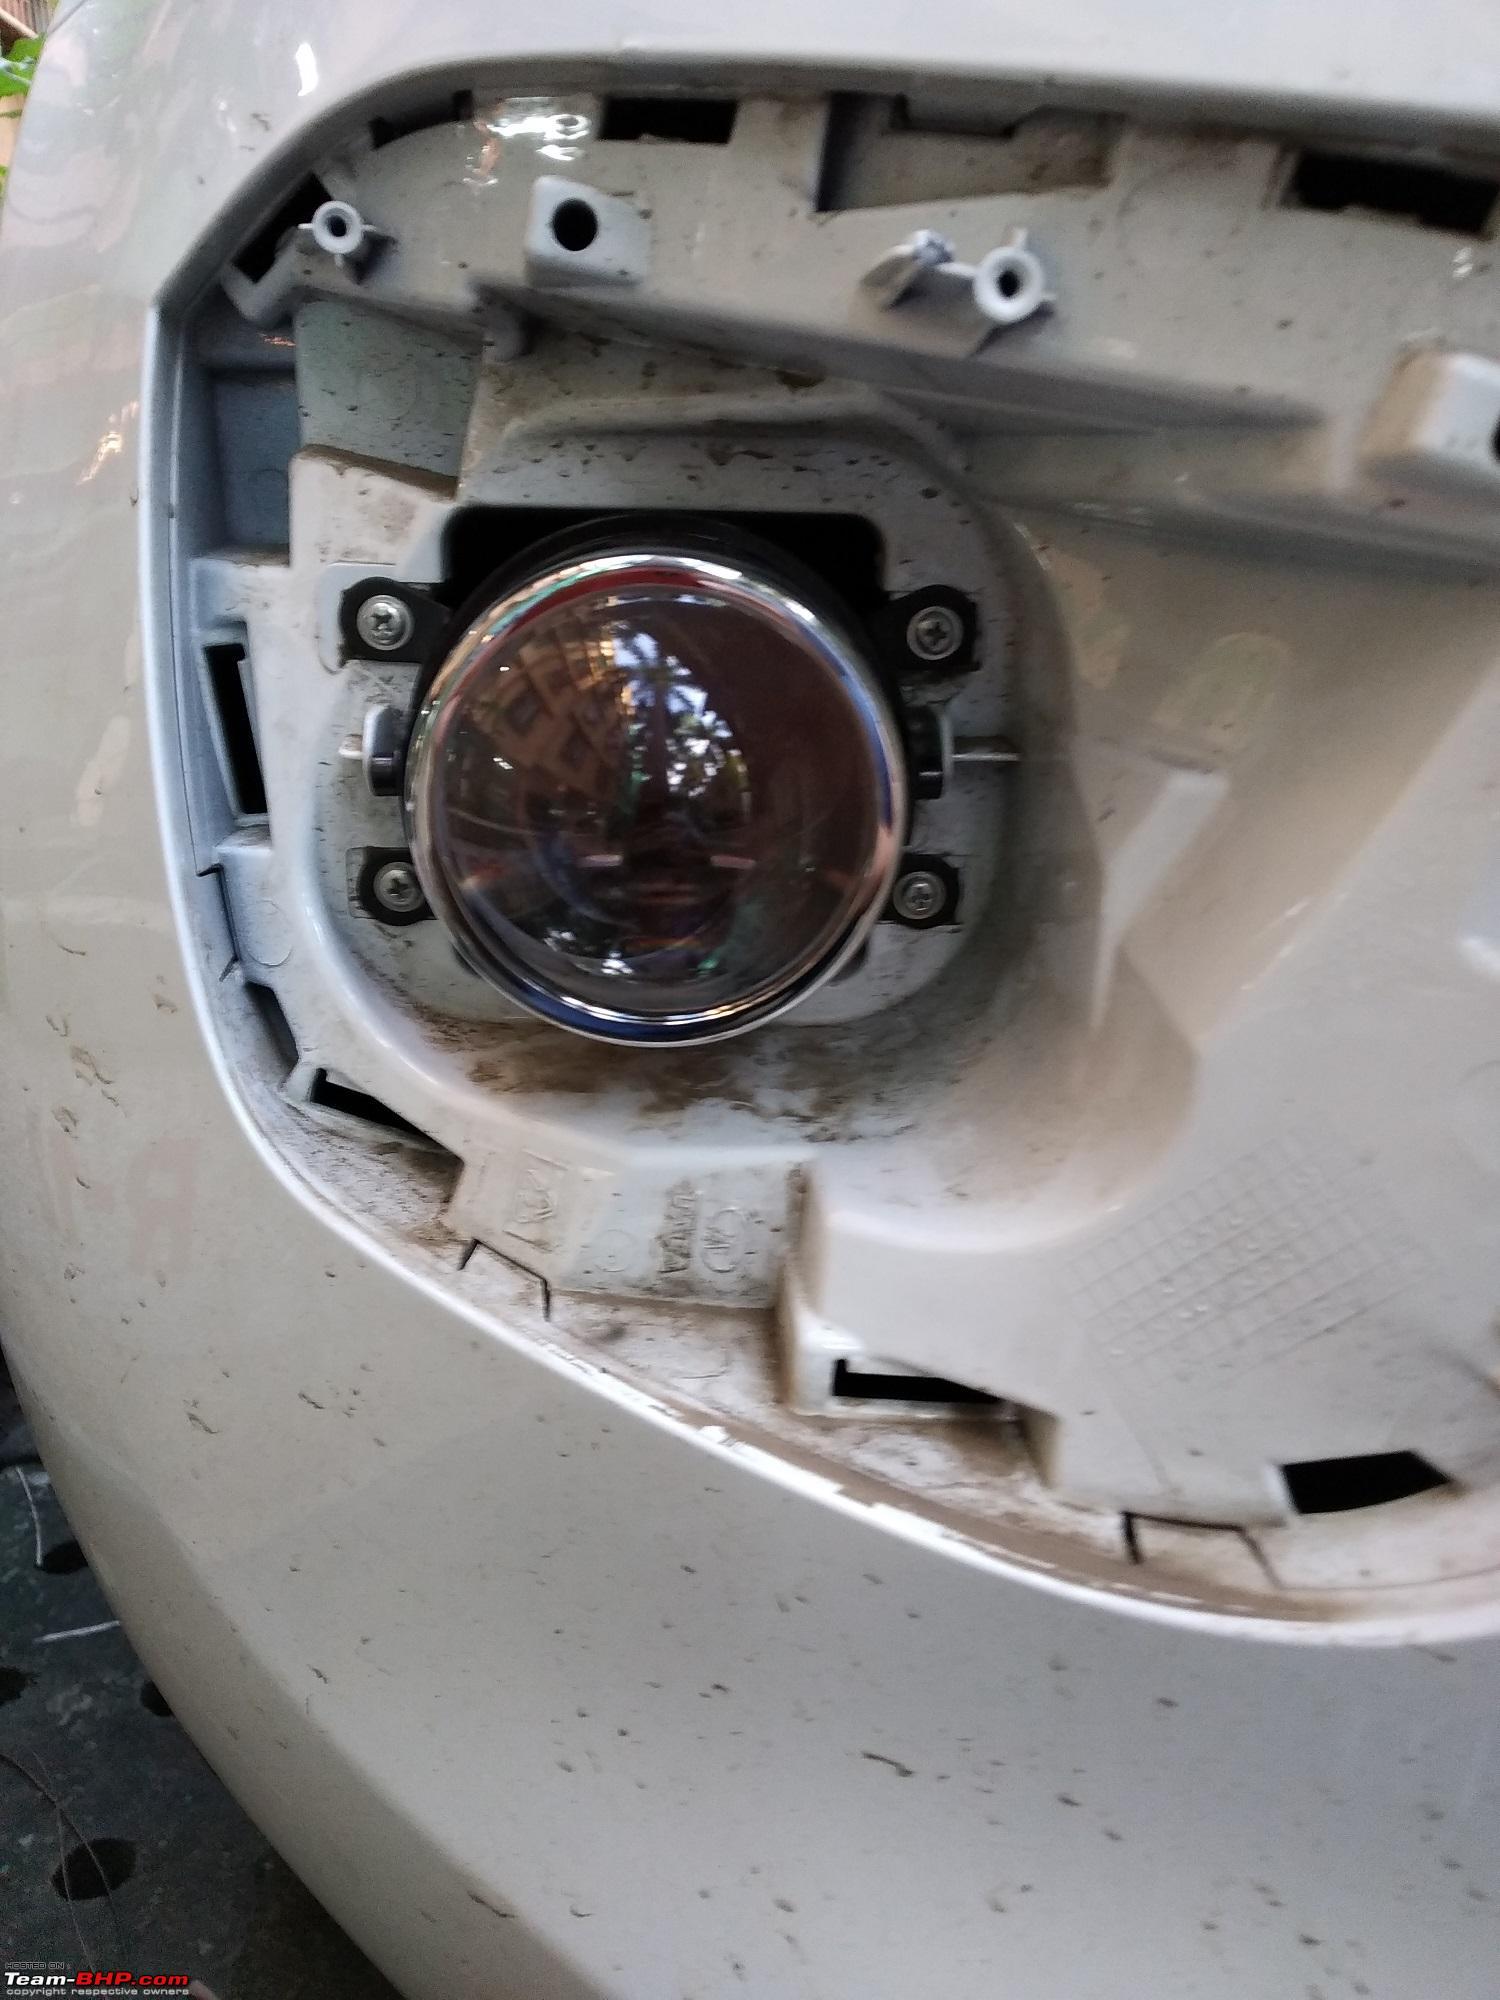 S-cross mounting arrangement:  City mounting arrangement (exact as Ecosport): 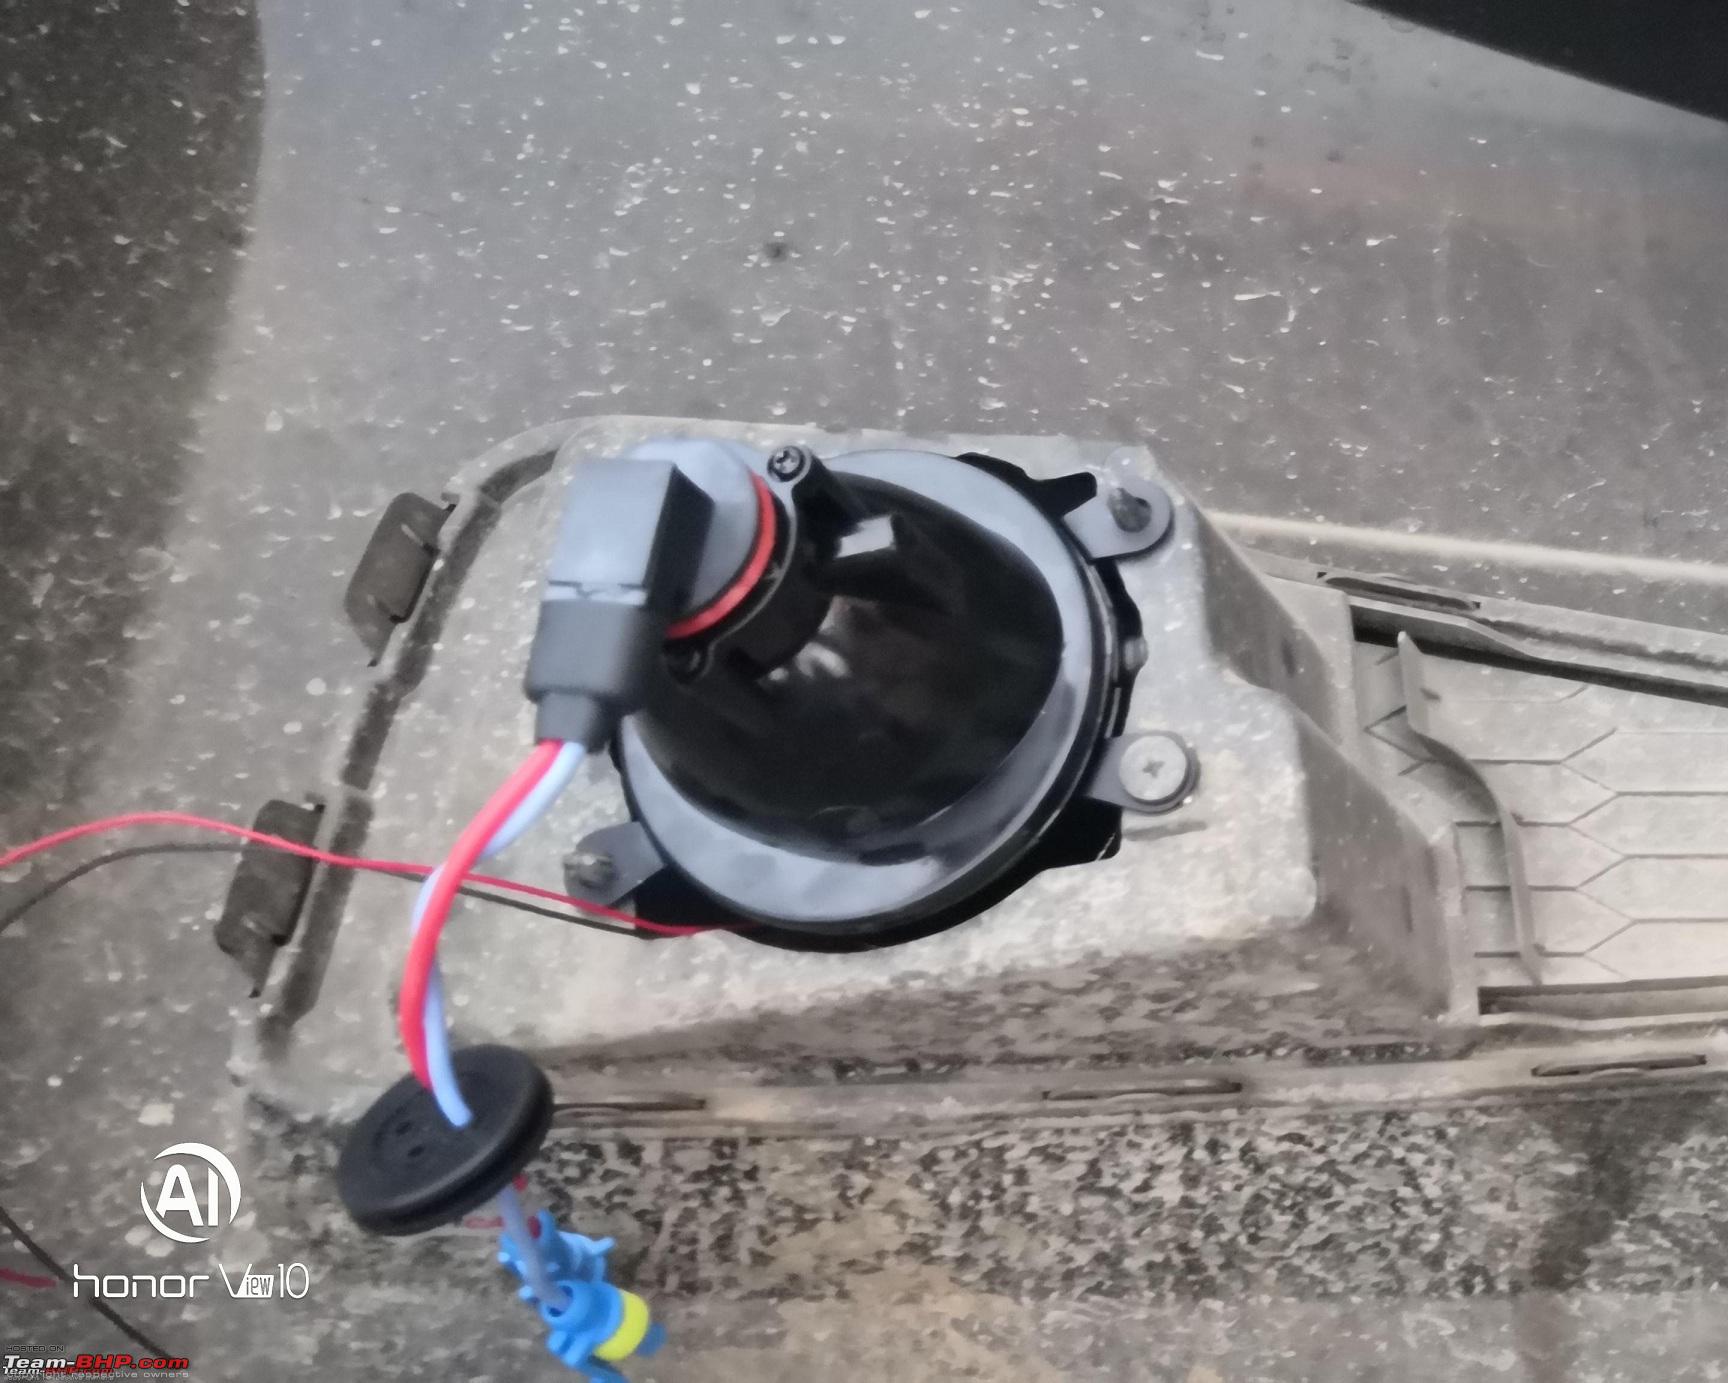 Ecosport mounting arrangement: 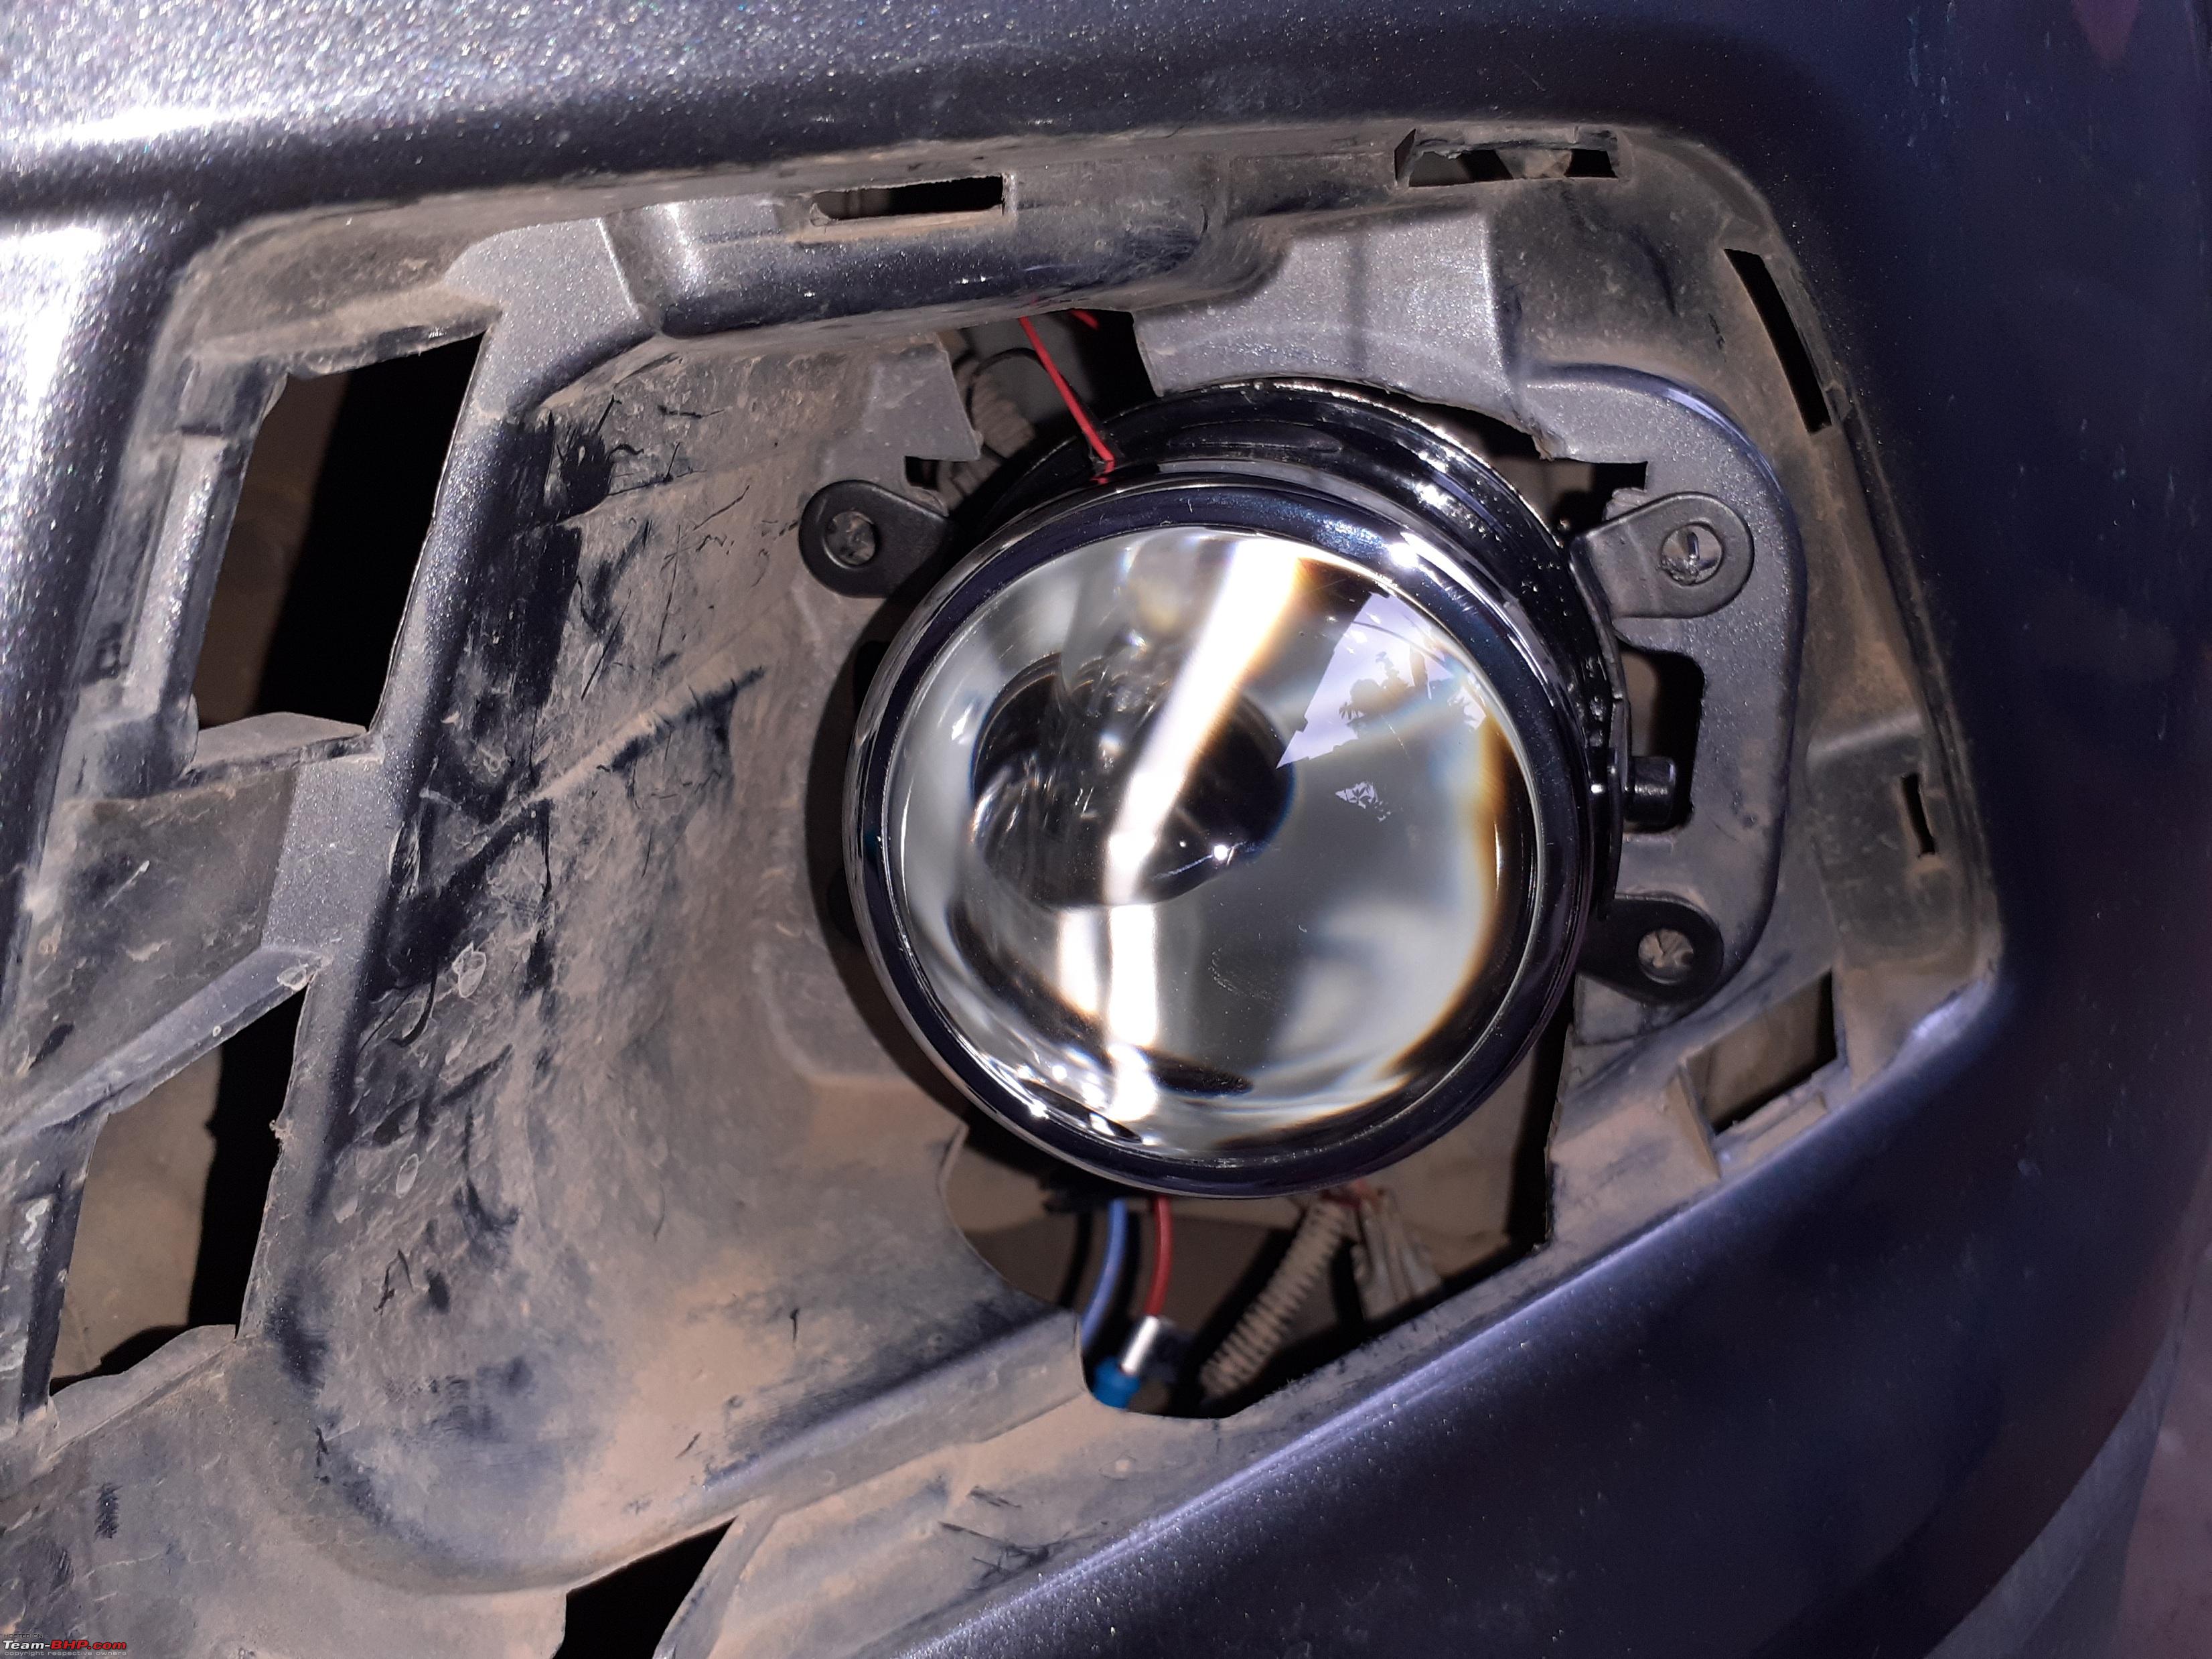 I did a trial run before fixing the projector in the bumper, simply pop in the HID kit coupler in the stock H11 coupler (check the polarity) & you are done, the actual wiring part is that simple. Switched on the fog lights, they fired up w.o any issue. Checked the projector orientation as well, the correct orientation is to have the solenoid wires (for high beam) pointing downwards. As expected the DRL bulb had a separate wiring & coupler, I have covered the DRL coupler with insulation tape (so that mud doesn't get in the coupler). For now there are no DRLs in my car, though in the future I might fit an aftermarket one since the coupler is already there. Will be a simple plug & play mod for me. Firing up the HID bulb for the first time:  The HID coupler fits perfectly in the stock H11 coupler: 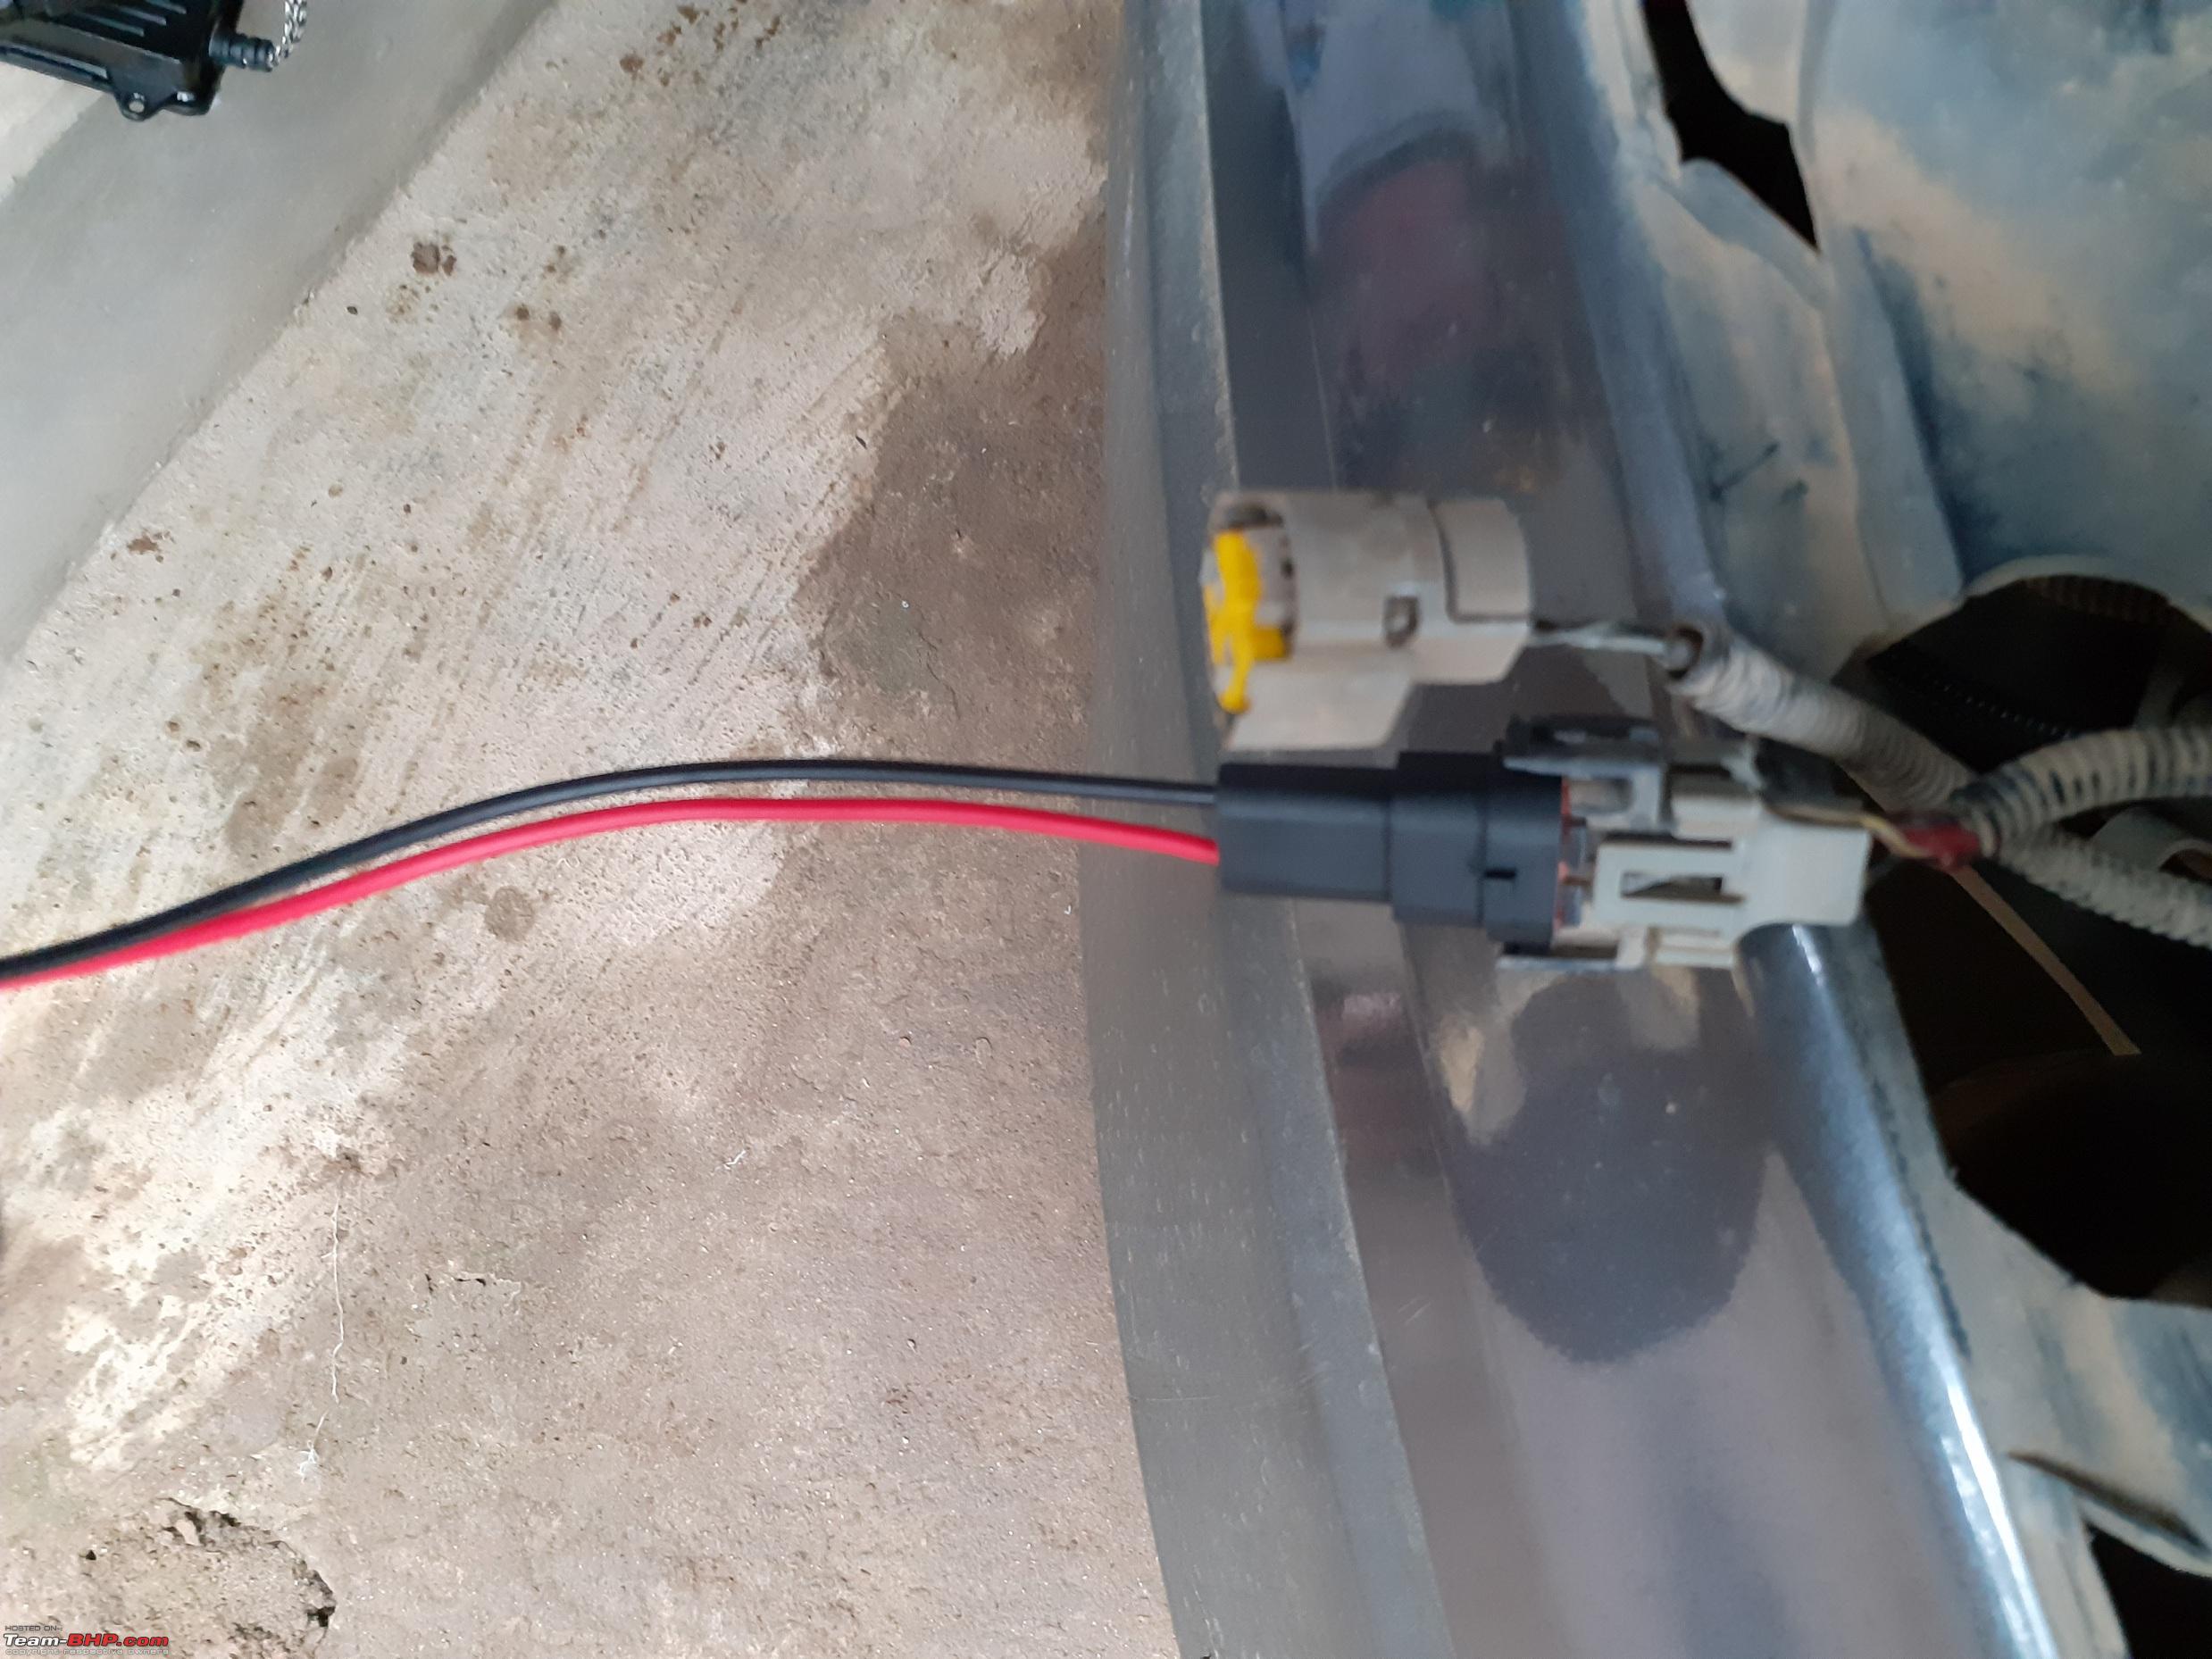 DRL coupler covered with insulation tape:  Stock fog light connection:  Then it was time for the main acid test, whether the projector fog will fit in the OE slot without any issue. The sellers sends two type of mounting bracket with the projector, from what I have seen only one type of mounting bracket is used in most cars. The mounting bracket is fitted to the projector via a single allen key screw, there are two mounting brackets, one on each side. The beam adjustment is done by these 2 allen key screws, loosen the screw a bit & projector can be moved up & down. Photos of the bracket fitted on the Projector:  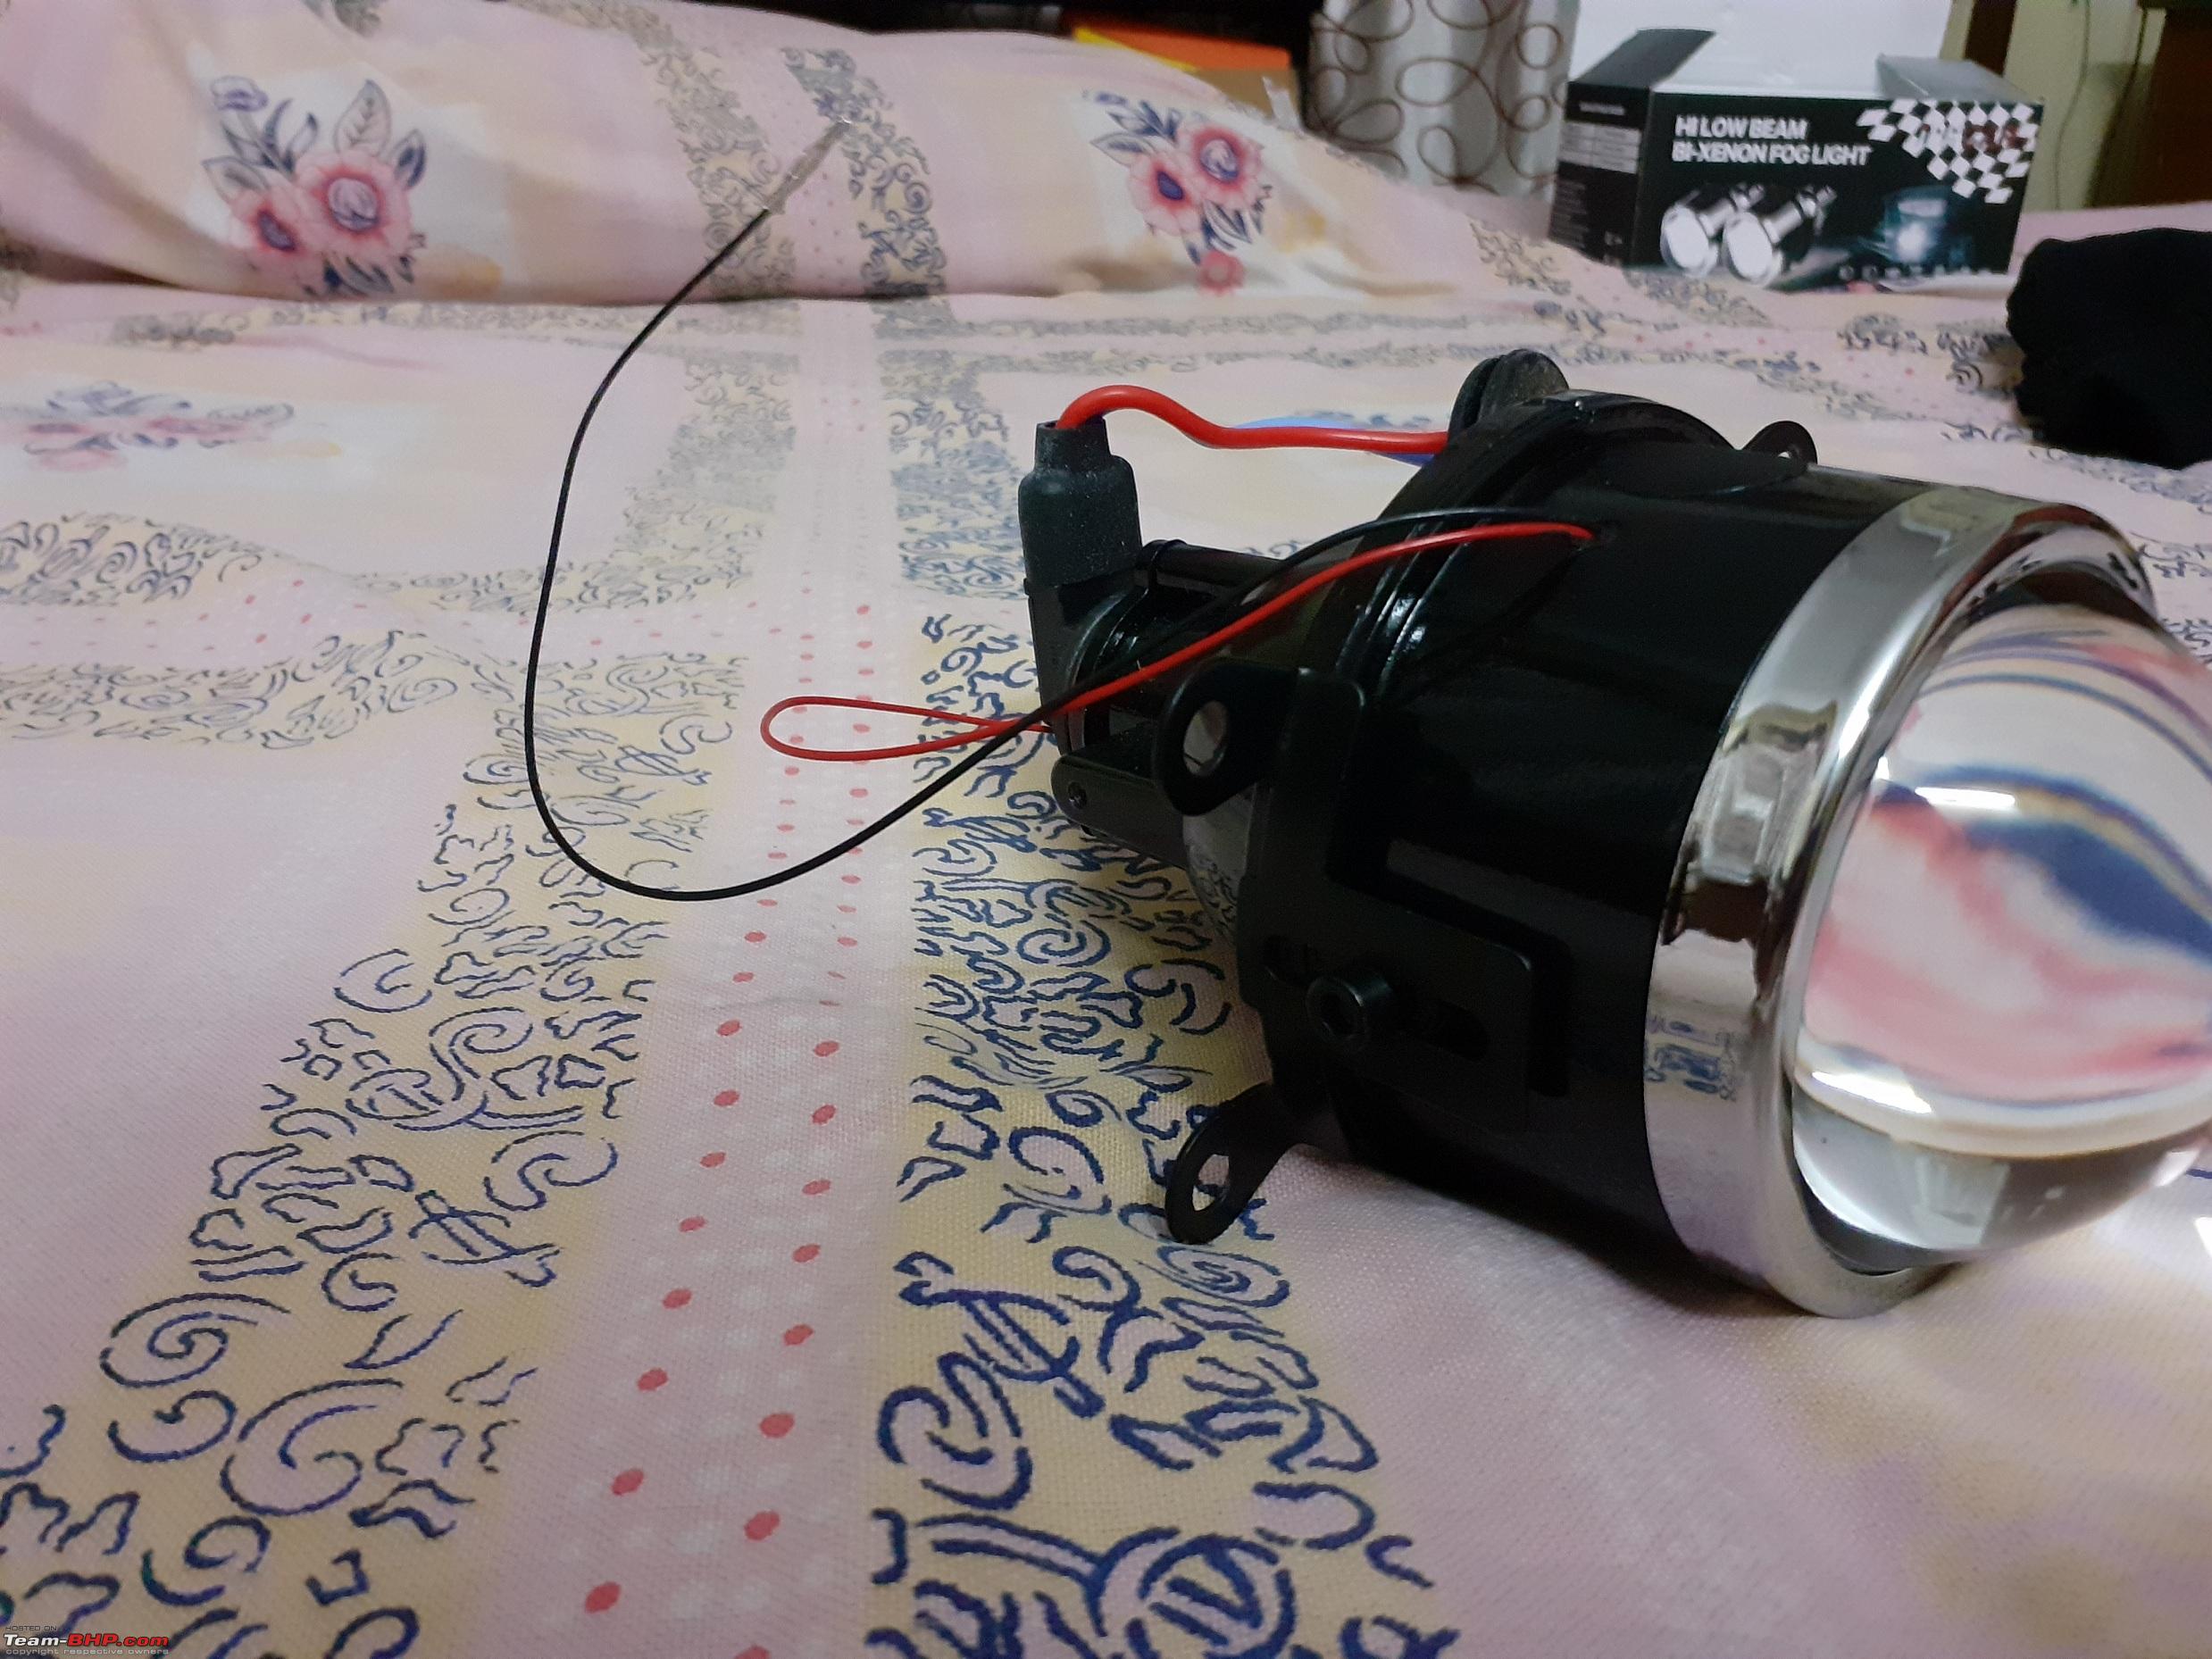 Beam adjustment can be done by loosening these 2 screw (one on each side):  Last edited by chiranjitp : 20th June 2020 at 16:18. |
|
| (23)
Thanks
|
| The following 23 BHPians Thank chiranjitp for this useful post: | audioholic, Dr.Naren, Fordlover88, GTO, InControl, Jaggu, keroo1099, Leoshashi, LONG_TOURER, paragsachania, procrj, Reinhard, Researcher, Rigid Rotor, SaiSW, samabhi, Simat, swapnil.awate, Taha Mir, Tanveer02, vaasu, Varun_HexaGuy, viXit |
|
11th June 2020, 14:27
| #3 |
| BHPian Join Date: Dec 2017 Location: Guwahati
Posts: 562
Thanked: 4,745 Times
| re: DIY: HID Bi-Xenon projector foglamps in our EcoSport Mounting the projectors Finally the moment of truth, I aligned the mounting holes of one side & then checked the other side. The other side mounting holes won't align perfectly. Tried bending the OE mounting holes a bit (that part is not the strong plastic type & can be easily bent) & then finally mounting holes of both sides aligned. I tightened the screws & it was a snug fit. I used the OE screws that were used with the stock foglights. However there was one slight issue with the LHS mounting, one projector mounting hole won't align properly with the OE support slot. There was a chance that the projector alignment might get disturbed a tiny bit in the long run & since I didn't wanted to do any major alterations with the bumper, did a small juggad. Made a small hole with the soldering iron, inserted a cable tie & tied the loose mounting point of the projector. The car has done around 1000km since then, the alignment is spot on even now. Trial fitting of the projector, notice how the screw slot & OE support align perfectly:  Final fitting: 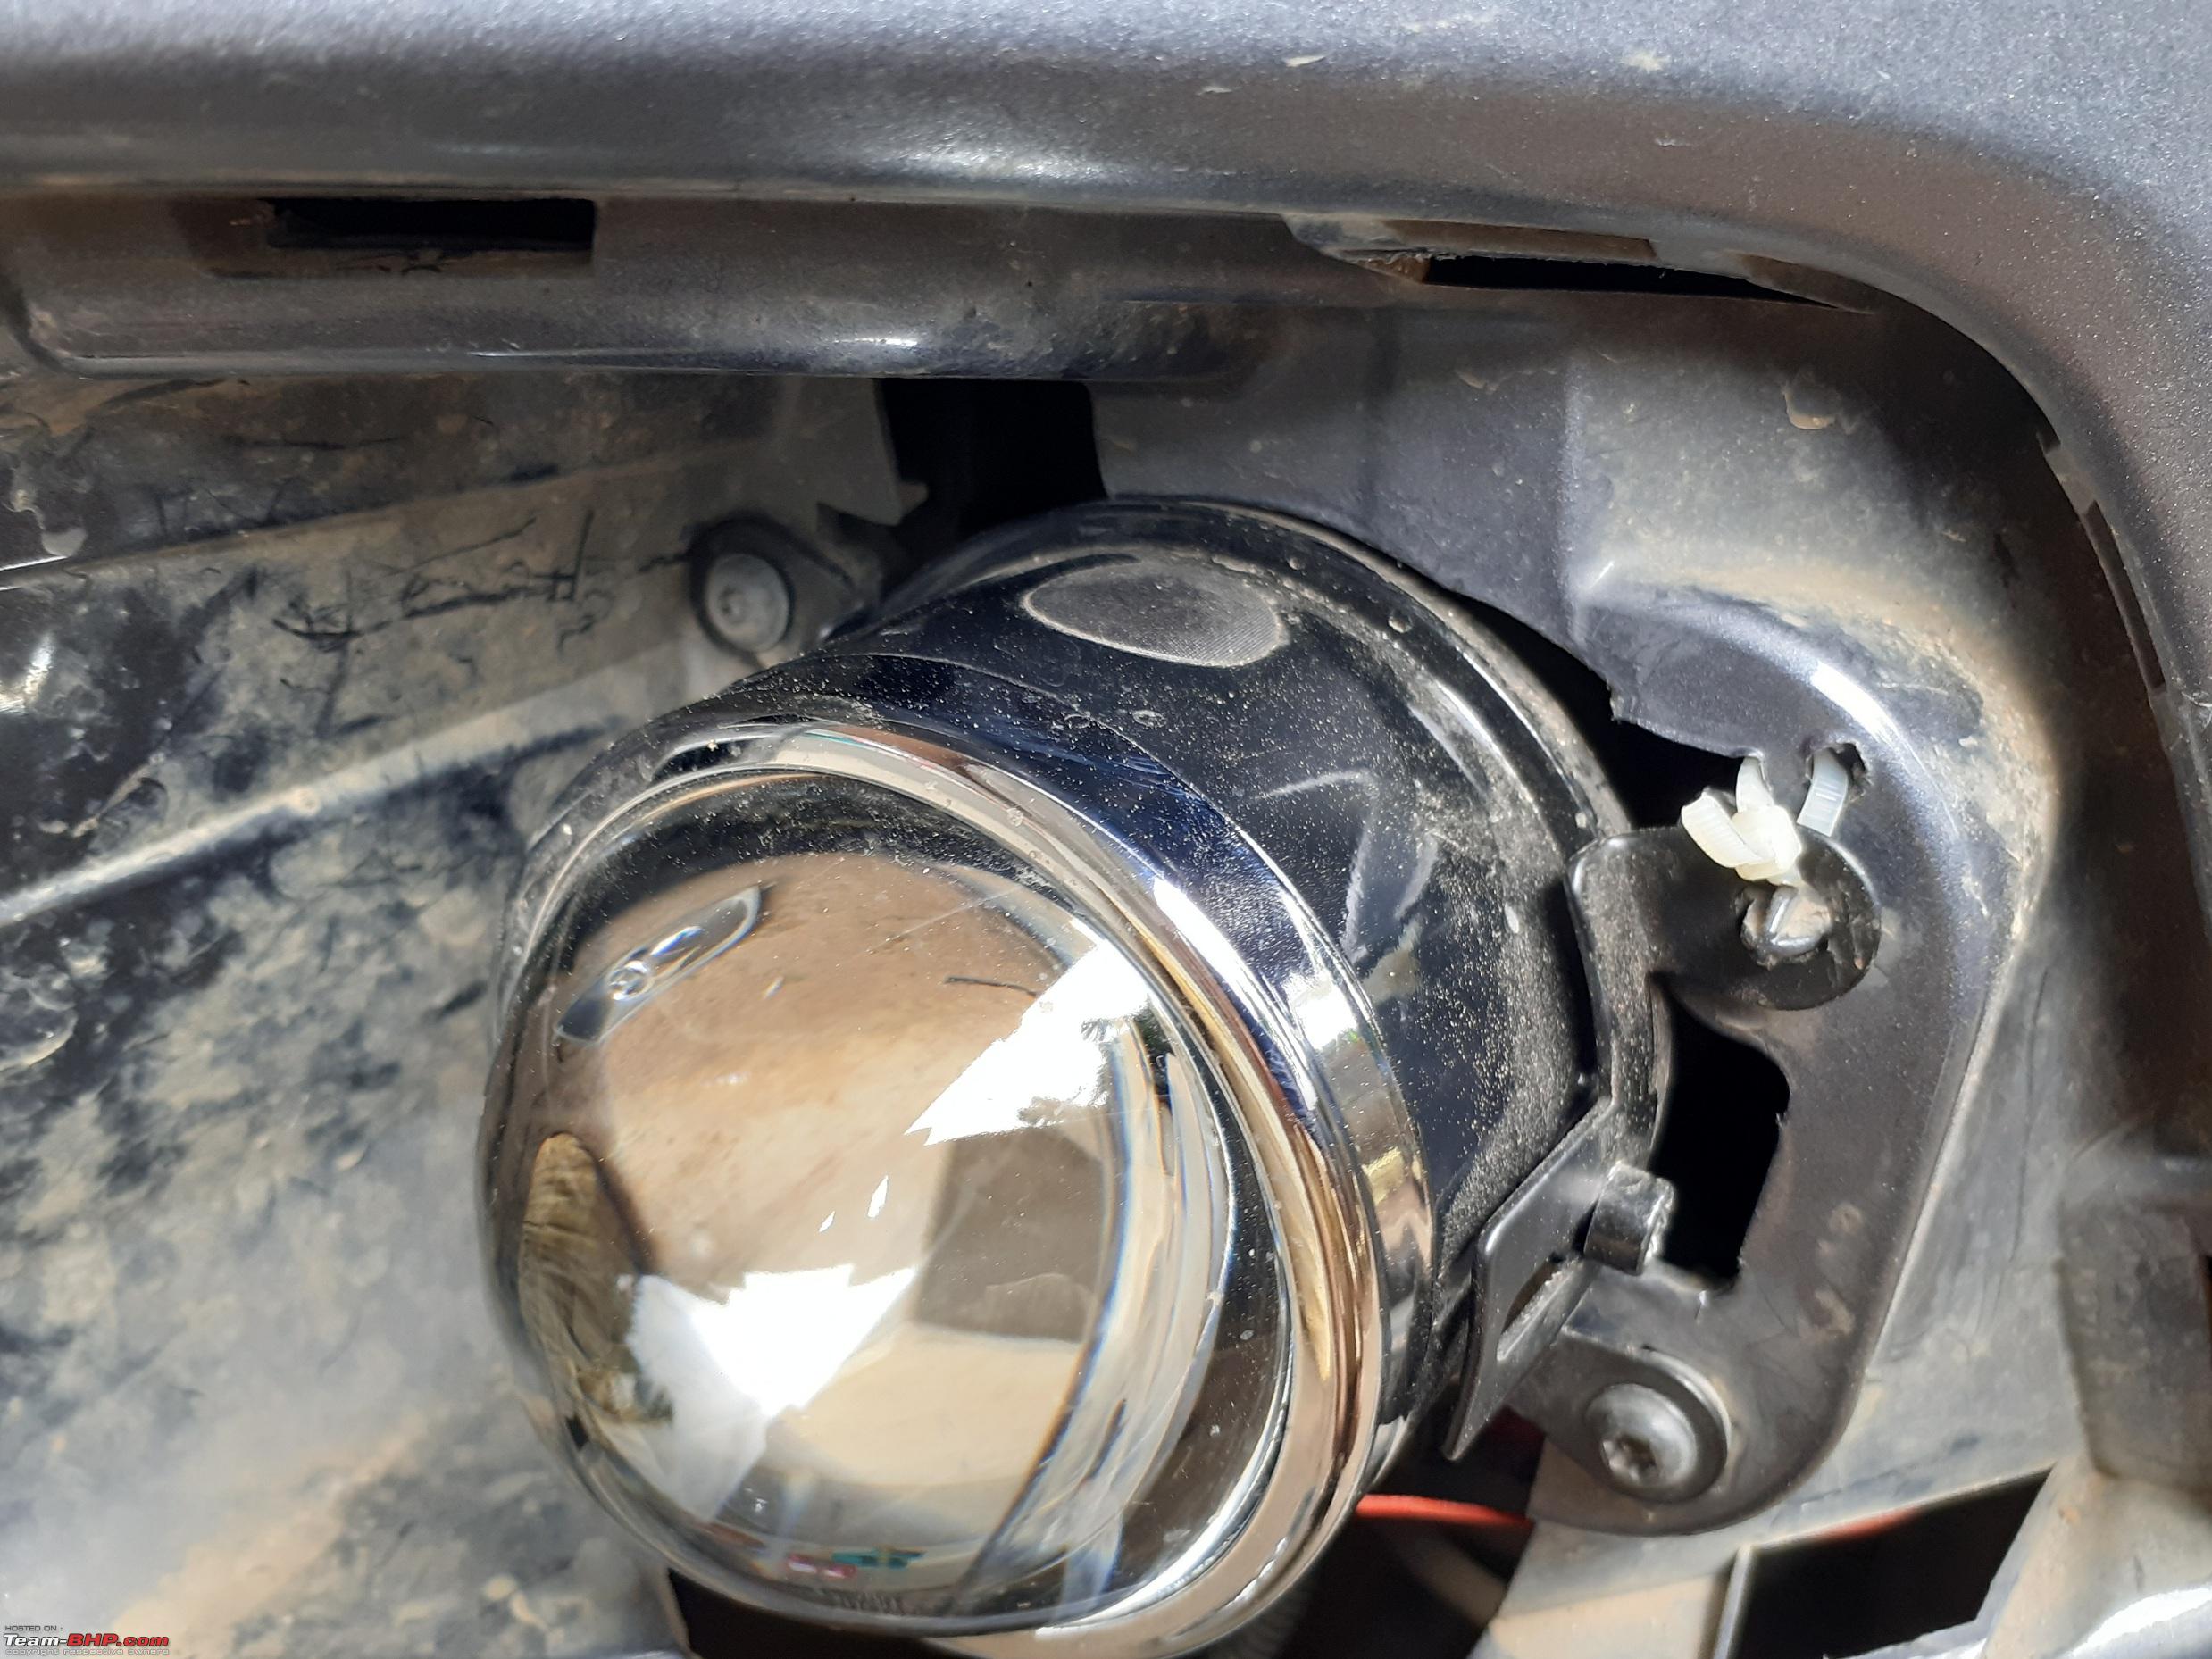 Closeup of the jugaad:  Next up was placement of the HID ballast & the wiring. The seller sends 3M double sided tape to fix the HID ballast securely in the engine bay. I mounted the RHS ballast in the front cross member with 3M tape, secured it with cable ties. LHS ballast was mounted on top of the fuse box, which is a more secure position than the cross member. The seller has assured me that these are waterproof, so I needn't worry about water getting inside them. The rest of the wiring was secured with cable ties for a tidy & safe finish. RHS ballast:   LHS ballast: 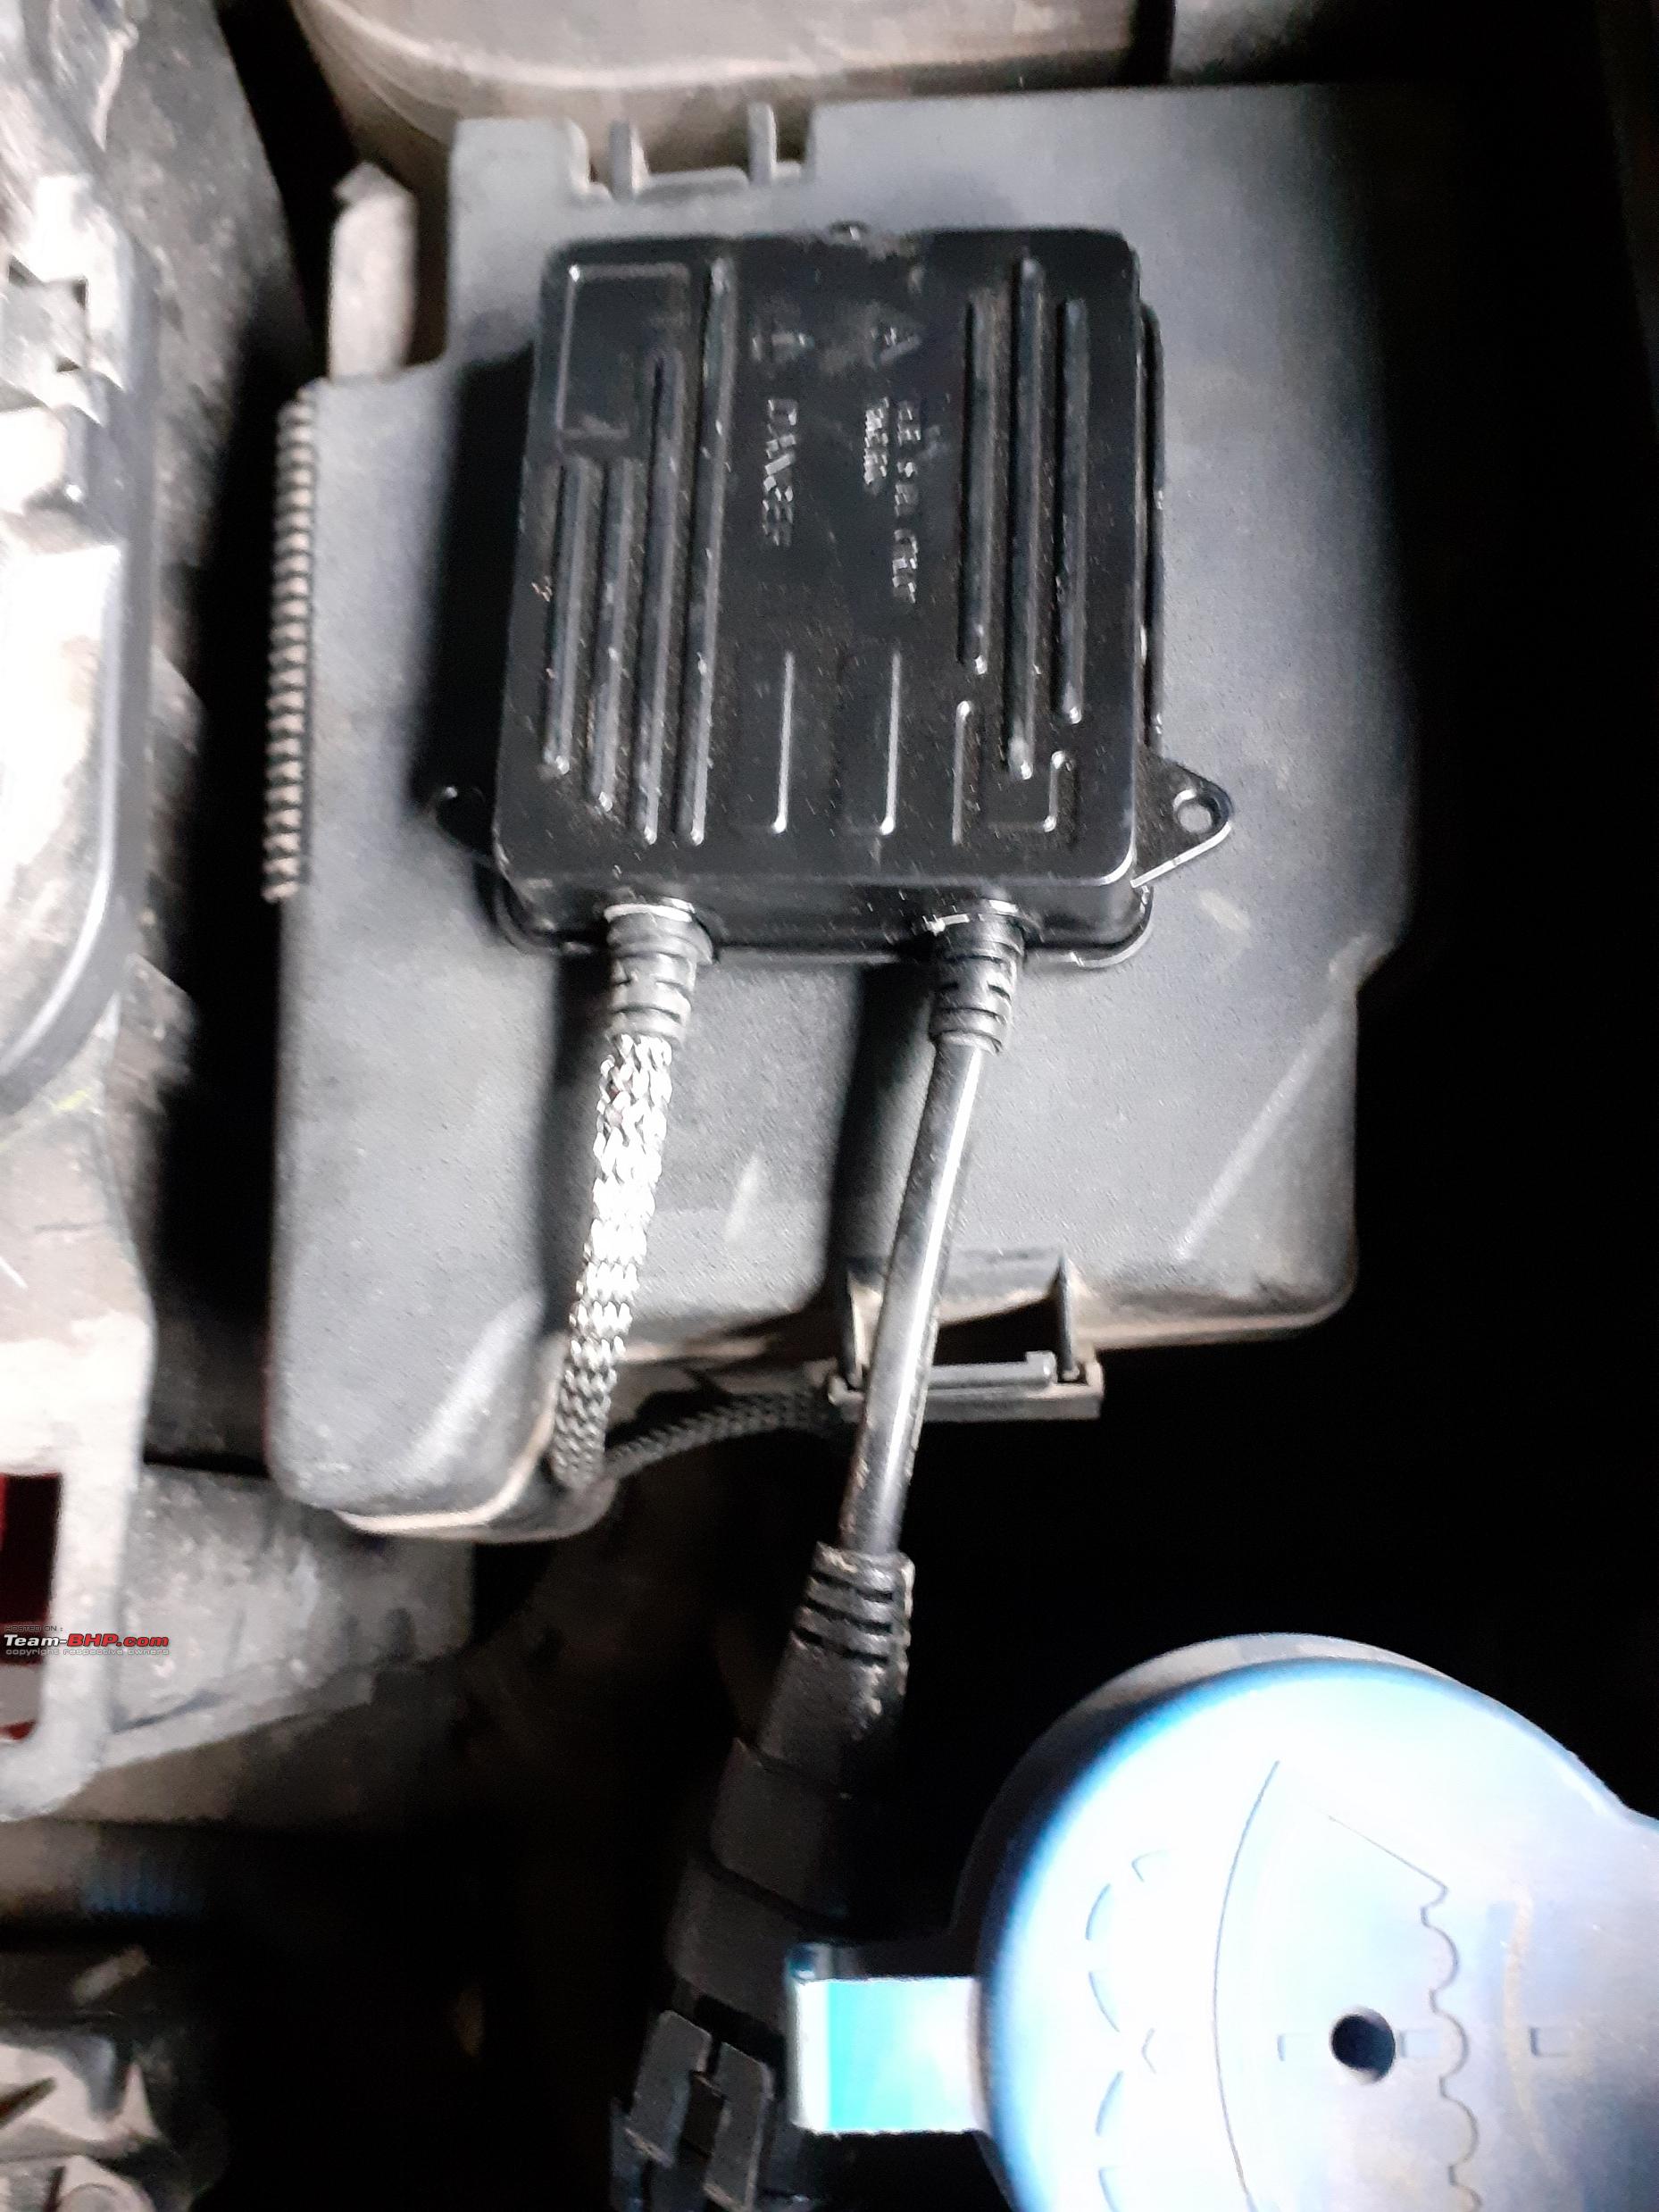 Fitted everything back & fired up the fog light, the HID bulbs take around 30 seconds to heat up properly. The lighting even in daylight was very impressive (it was cloudy that day). At night I took the car out on the street (which was empty & dark due to lock-down) to check the light & also to adjust the beam. First the output, I was awestruck the first time I fired up the HIDs, they were so bright & focused. The stock headlights were like candles compared to the HIDs. Placed the car around 25ft away from a wall to adjust the beam. Kept the fog light low beam cut off at a slightly lower level than the HL low beam cut off. I haven't yet done any long drives since then, but whatever I have driven in city, no one has flashed their high beams at me. The projector fog lights have a really sharp cut off, so no chance of light scatter. High beam activation Till then I hadn't connected the projector solenoid wires that activates the high beam, as this connection wasn't a simply plug & play. I had initially decided to use the fogs without the high beam function for now, had planned to activate the high beam function with the help with of an electrician at a later stage. Though after seeing how pathetic the stock HL output was when compared to the fogs, I wanted to activate the high beam function as well. Since I hadn't blown anything while fitting the fogs, I had grown in confidence . Decided to activate the high beam function the next day.High beam function is fully independent of the HID bulbs. There's a solenoid in the projector which when supplied with a 12V current, opens the cut off plate. I believe this is how it also works in cars equipped with Bi-xenon headlights, like the Hyundai Creta. There are two solenoid wires, one is 12V power wire, the other one is the earthing wire. The power wire needs to be connected with the high beam wire, so that it gets power supply when the high beam is activated. The seller supplied two scotch locks to tap in the high beam wire, so that there is no wire cutting done. H4 connector is a 3 pin connector, so I had to check which one of them is the high beam one with the help of a tester. In Ecosport it was the yellow wire that activates the high beam. Connected the negative wire to a nut from the engine bay & did a trial run. The cut off plate moved when I flashed the high beam, it makes a distinct clicking sound during operation. Connected both sides, fired up the fogs & activated the high beam. Everything worked properly & fog high beam was in perfect sync with the headlight's high beam. The solenoid wires of the projector are very short in length, so I needed to extend the wires. For a perfect joint, heat shrink tube is recommended. To fix the earthing wire (i.e the negative wire) securely, a earthing ring connector is recommended. Since I didn't have these with me, ordered them from Amazon along with a soldering kit. Finally completed the high beam wiring properly after all these things came. Tapped into the high beam wire using the scotch lock. Soldered the joint & secured it with a heat shrink tube. Crimped the earthing ring connector & the other end of the negative wire together, used a heat shrink tube over that as well. Finally the high beam wiring was completed to my satisfaction  . Hoping that the high beam wiring will last the distance, the fog light wiring on the other hand is plug & play, so lesser chance of anything going wrong there. . Hoping that the high beam wiring will last the distance, the fog light wiring on the other hand is plug & play, so lesser chance of anything going wrong there.Note: Ecosport like many European cars doesn't have a dedicated high beam slot in the HL stalk, it has a toggle based system. Pull the stalk towards yourself to switch to high beam, pull the stalk again towards yourself to switch to low beam. When one starts the car, the HLs by default starts in low beam. A small test I did regarding this, I engaged headlight & foglight high beam, then turned off the engine (while the fogs were still in high beam). Then started the engine & switched on the headlights, which by default started in low beam. Finally switched on the foglights (which were in high beam during shut down), they started in high beam. Switched the HL to high beam & back to low beam, the fogs were back to low beam. So, the high beam mechanism is fail safe even if you try something like this. Scotch lock:  High beam tapped with scotch lock:  Wire extended with heat shrink tube: 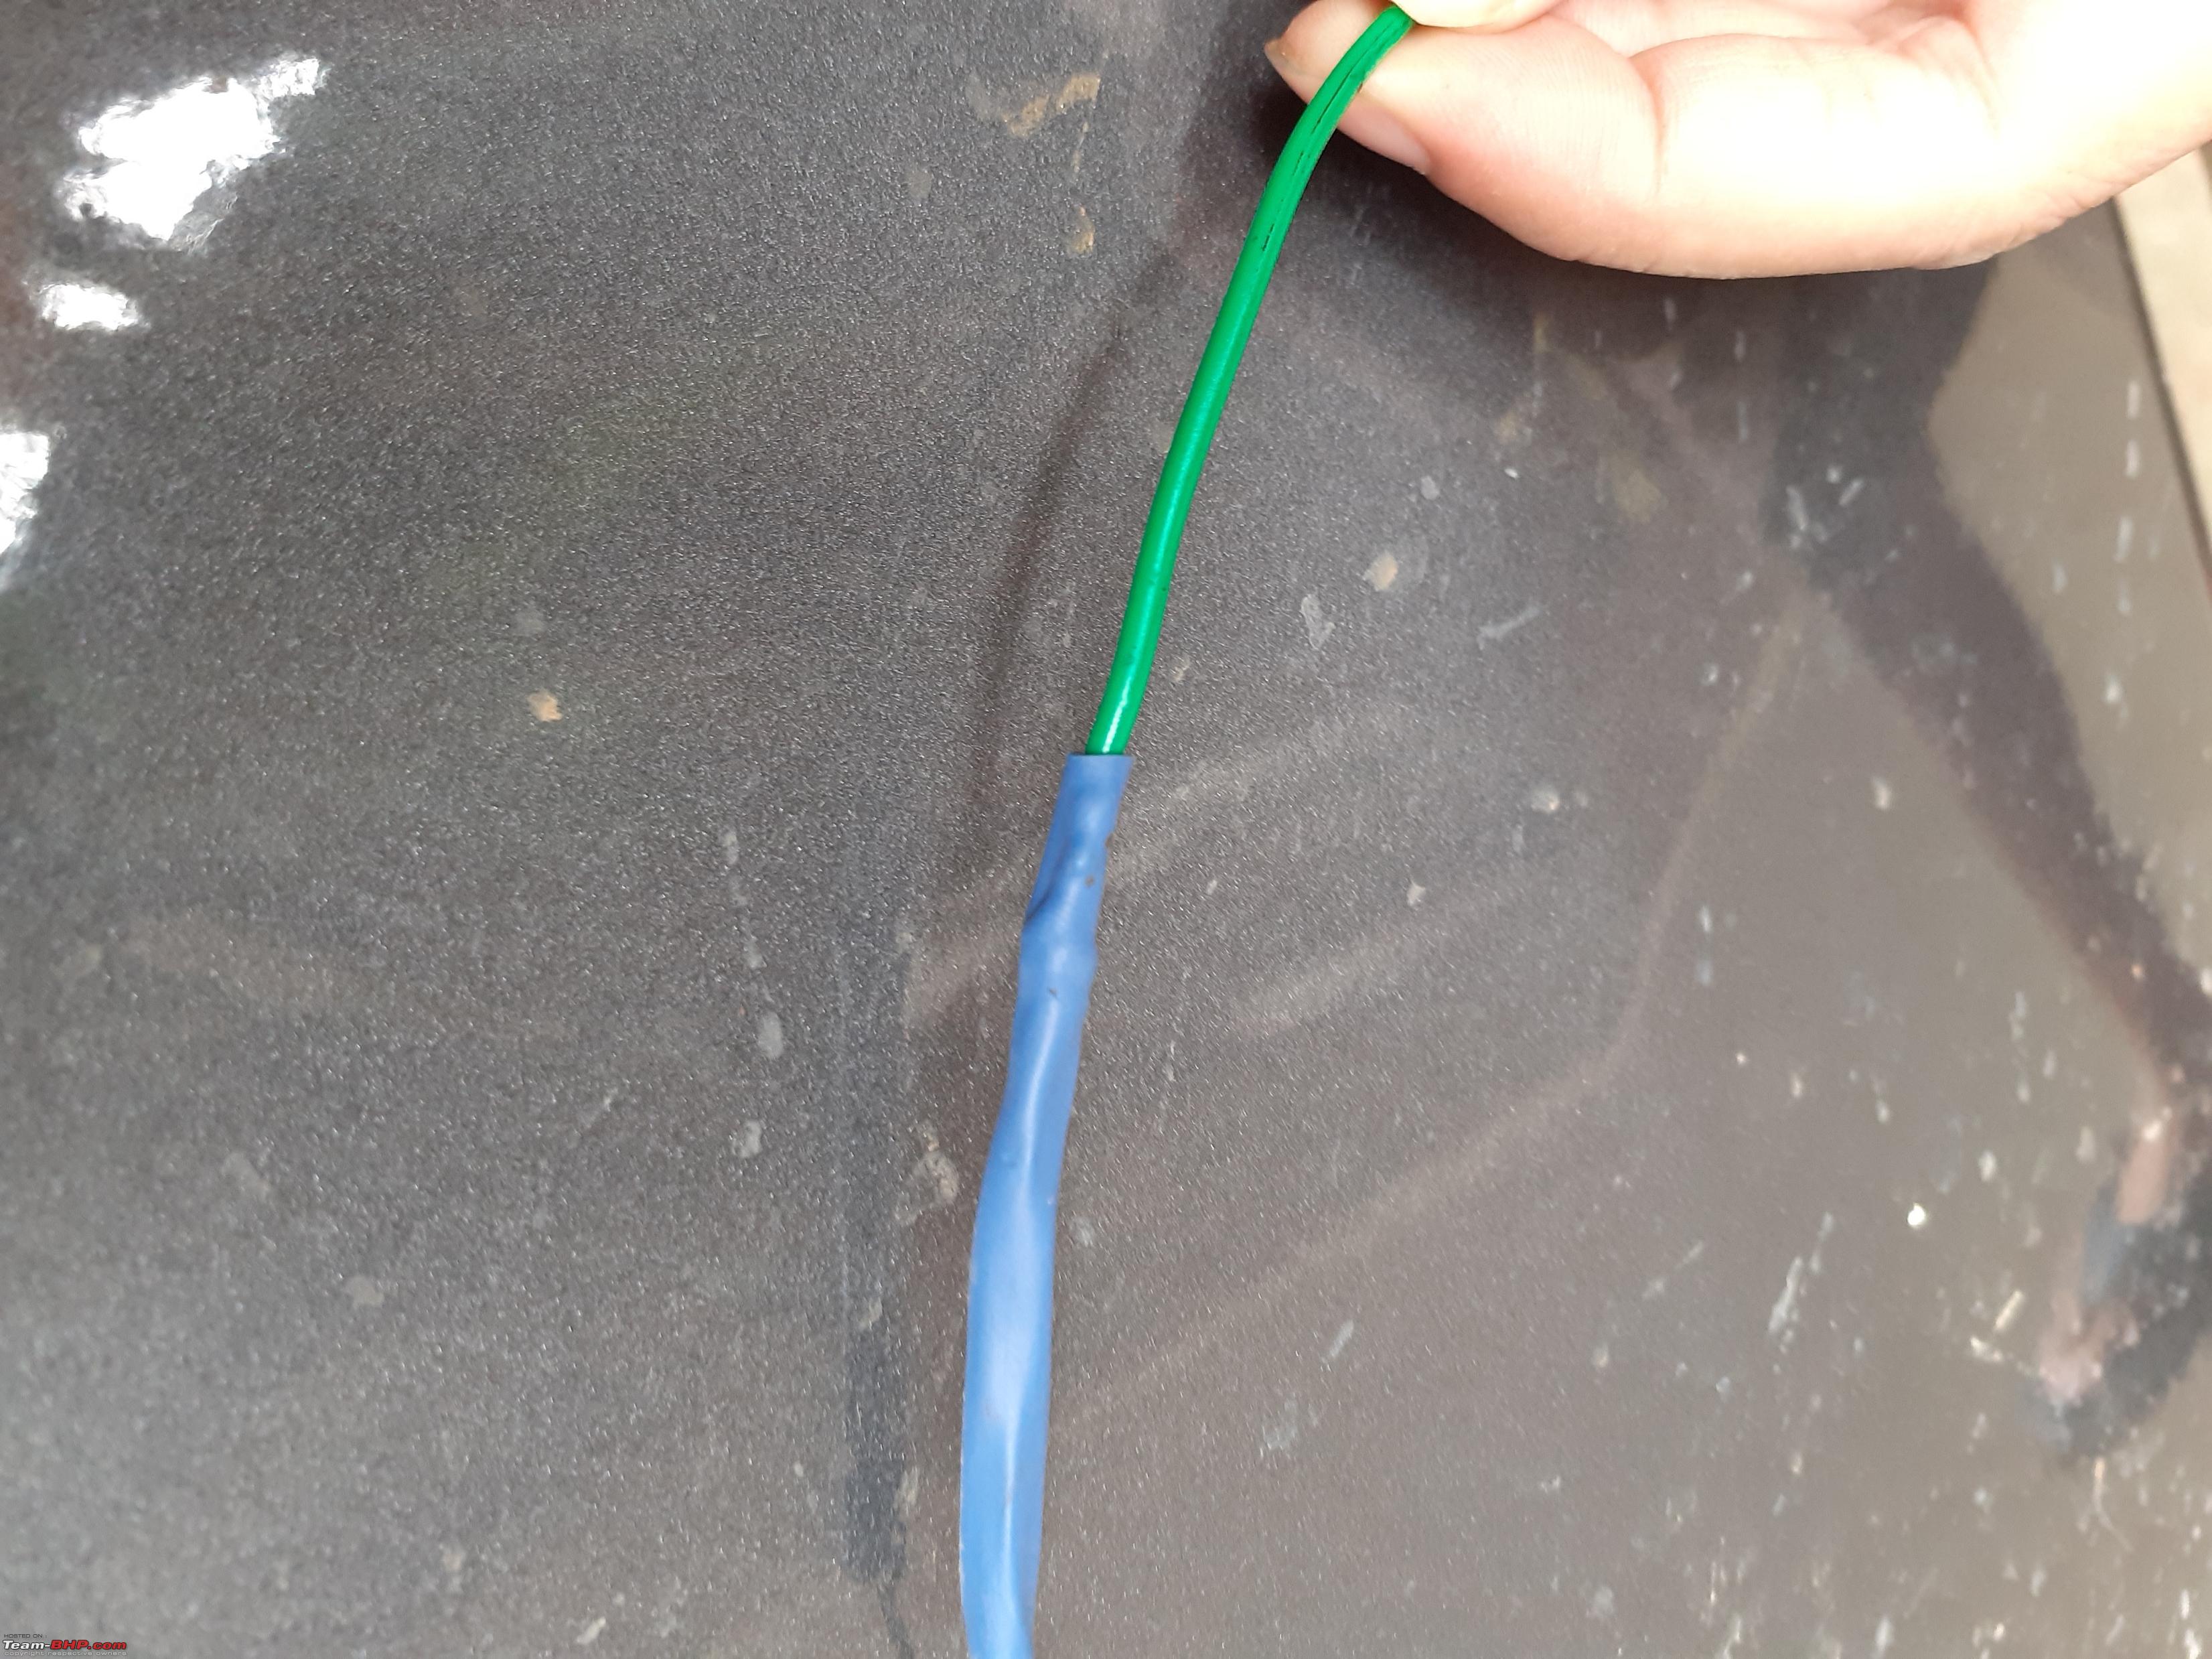 Earthing ring connector:  Earthing wire secured properly: 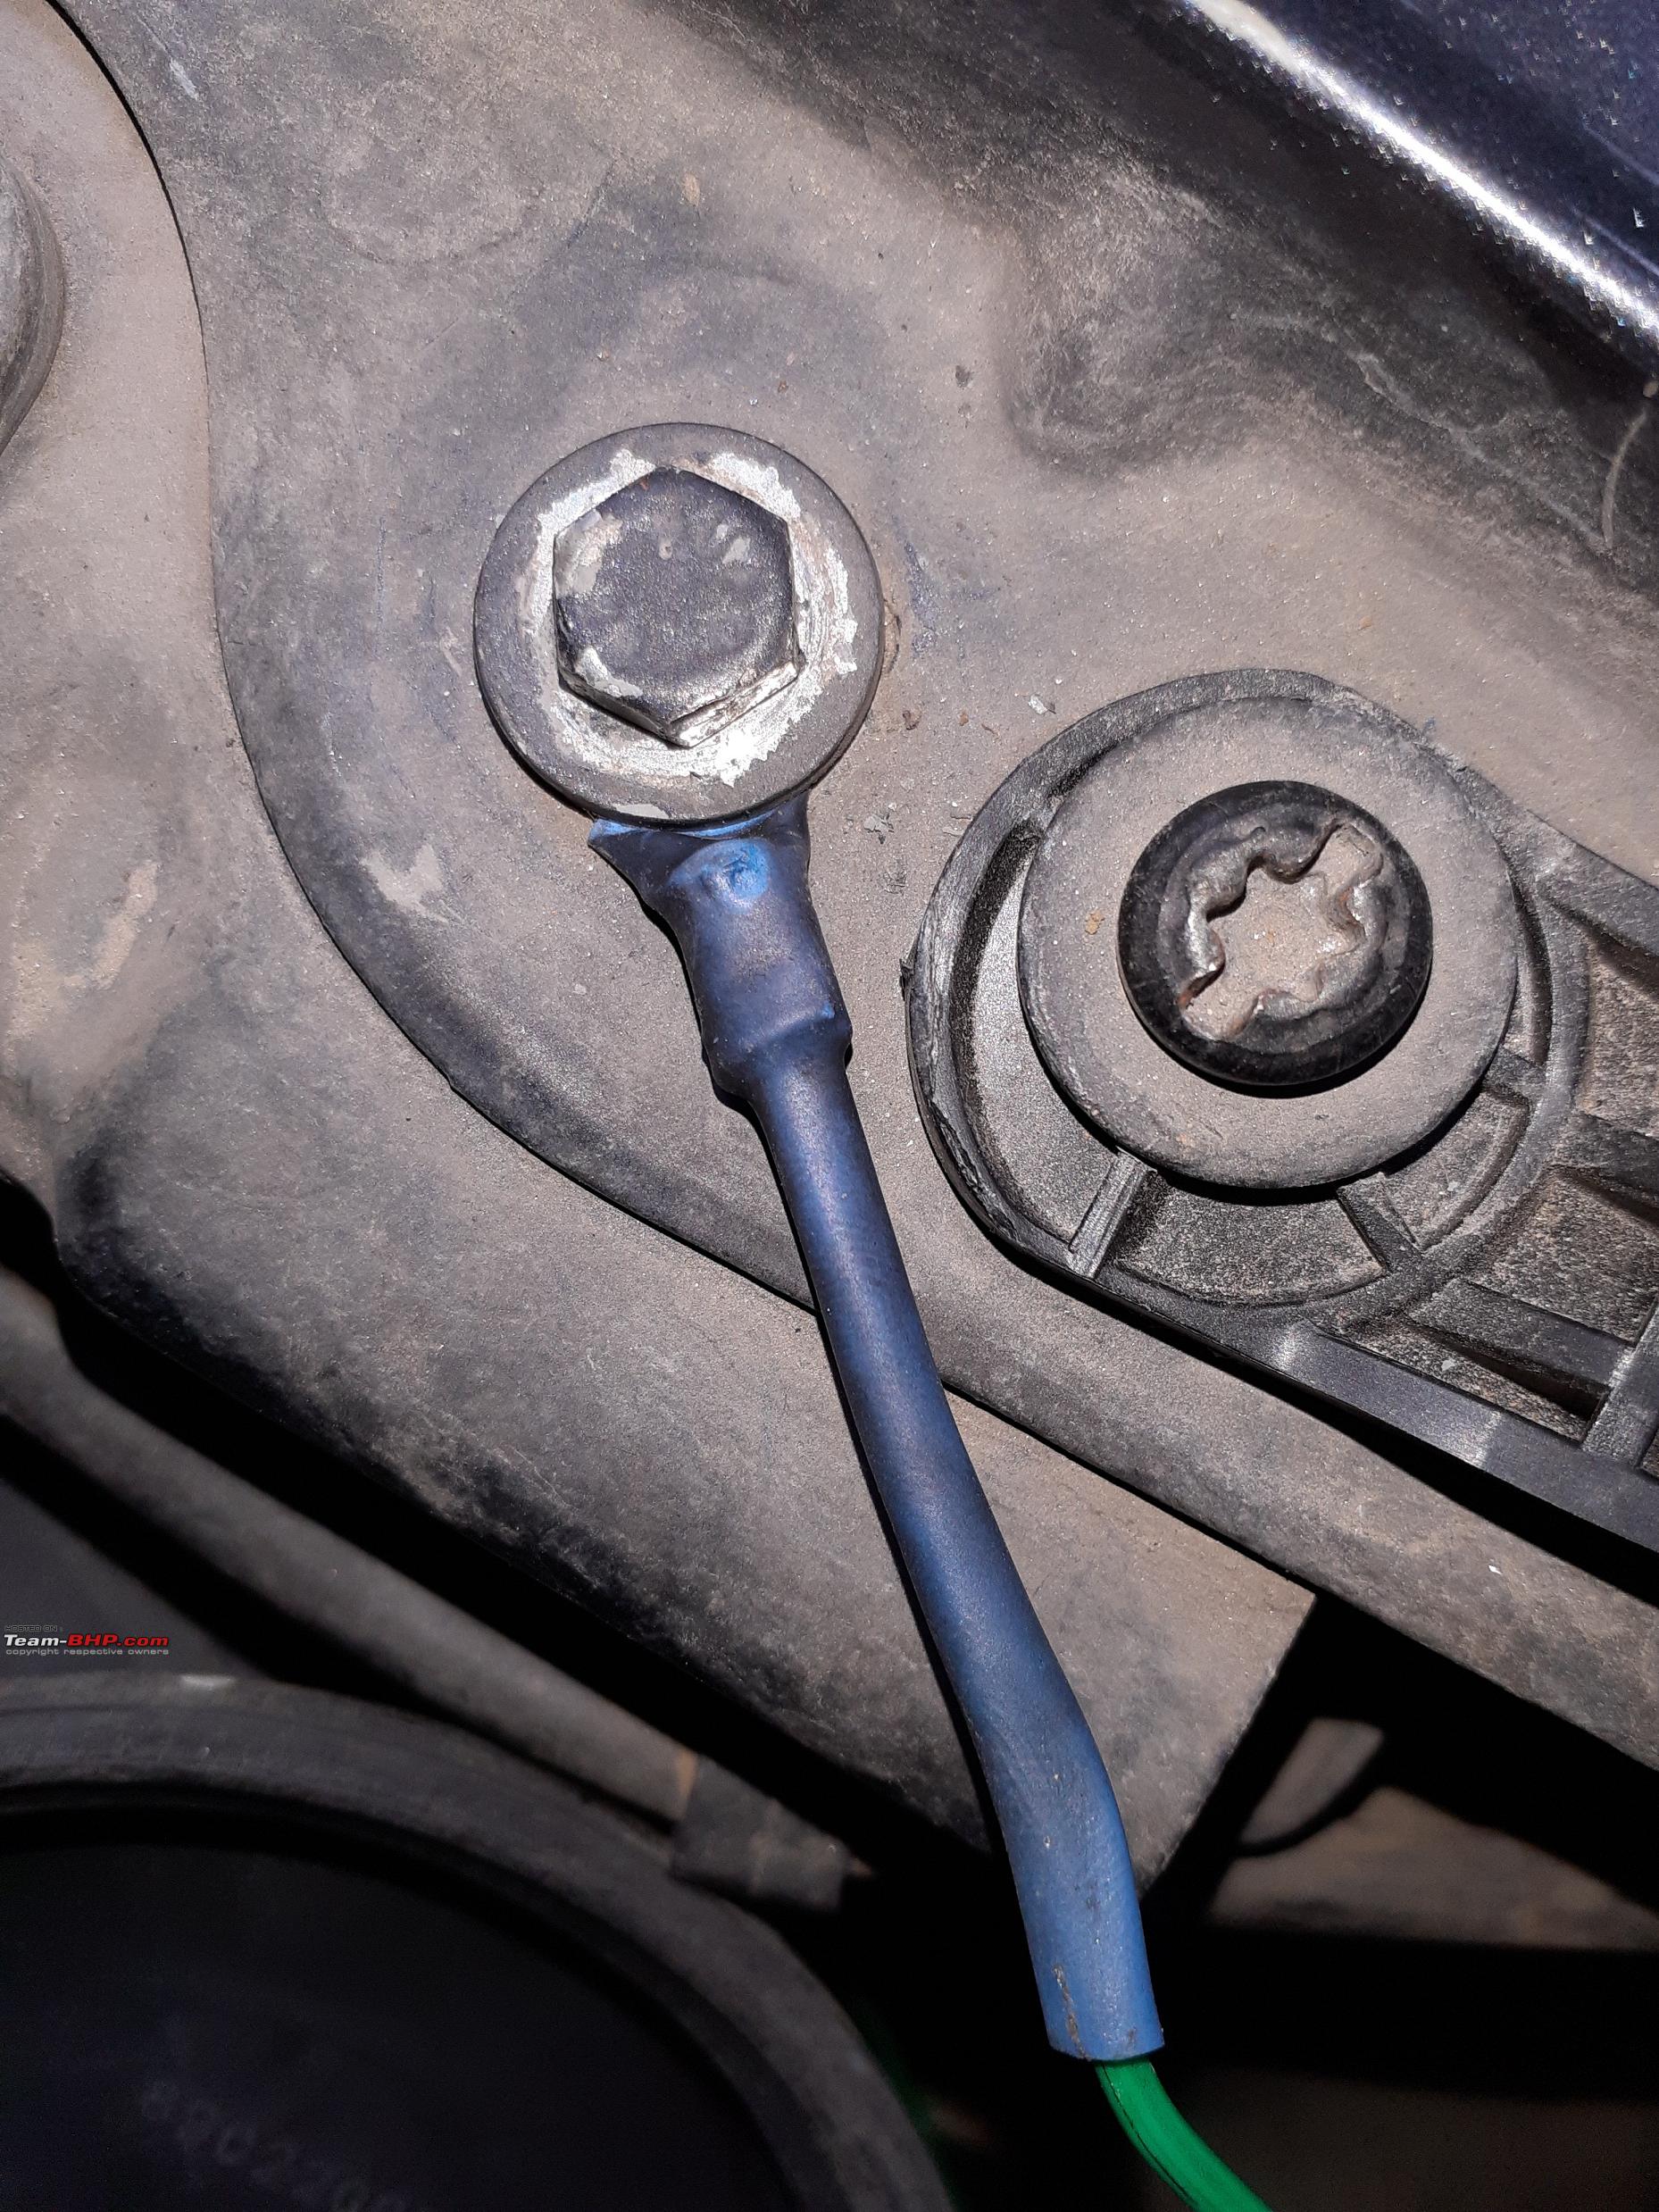 Time for some photos, doesn't look like an aftermarket fitting from the outside:   Some closeup shots:   Last edited by chiranjitp : 20th June 2020 at 21:14. |
|
| (26)
Thanks
|
| The following 26 BHPians Thank chiranjitp for this useful post: | 100Rabh, A.M., ashis89, Ashtoncastelino, audioholic, Dr.Naren, fiat_tarun, GTO, Ibanez_70, InControl, Jaggu, jithin23, keroo1099, Leoshashi, LONG_TOURER, paragsachania, Reinhard, Researcher, Rigid Rotor, SaiSW, Simat, swapnil.awate, Taha Mir, Tanveer02, The Rationalist, yogiii |
|
19th June 2020, 02:06
| #4 |
| BHPian Join Date: Dec 2017 Location: Guwahati
Posts: 562
Thanked: 4,745 Times
| re: DIY: HID Bi-Xenon projector foglamps in our EcoSport Let there be light I have tried my best in capturing the light output with the camera, also compared the light output with the other two cars of our garage. I clicked all the photos in manual setting. Aperture- f5Camera- Canon EOS 600D Lens- 18-55mm Shutter speed- 1/20 sec ISO- 1600 White Balance- 5000K P.S- Despite all my efforts to make the photos show the real life output, the stock headlights looks a bit too dim in the photos. Though even in reality, the difference in output is huge. Against a wall 25 ft away: Only foglight:  Foglight low beam + HL low beam:  Foglight high beam + HL high beam: 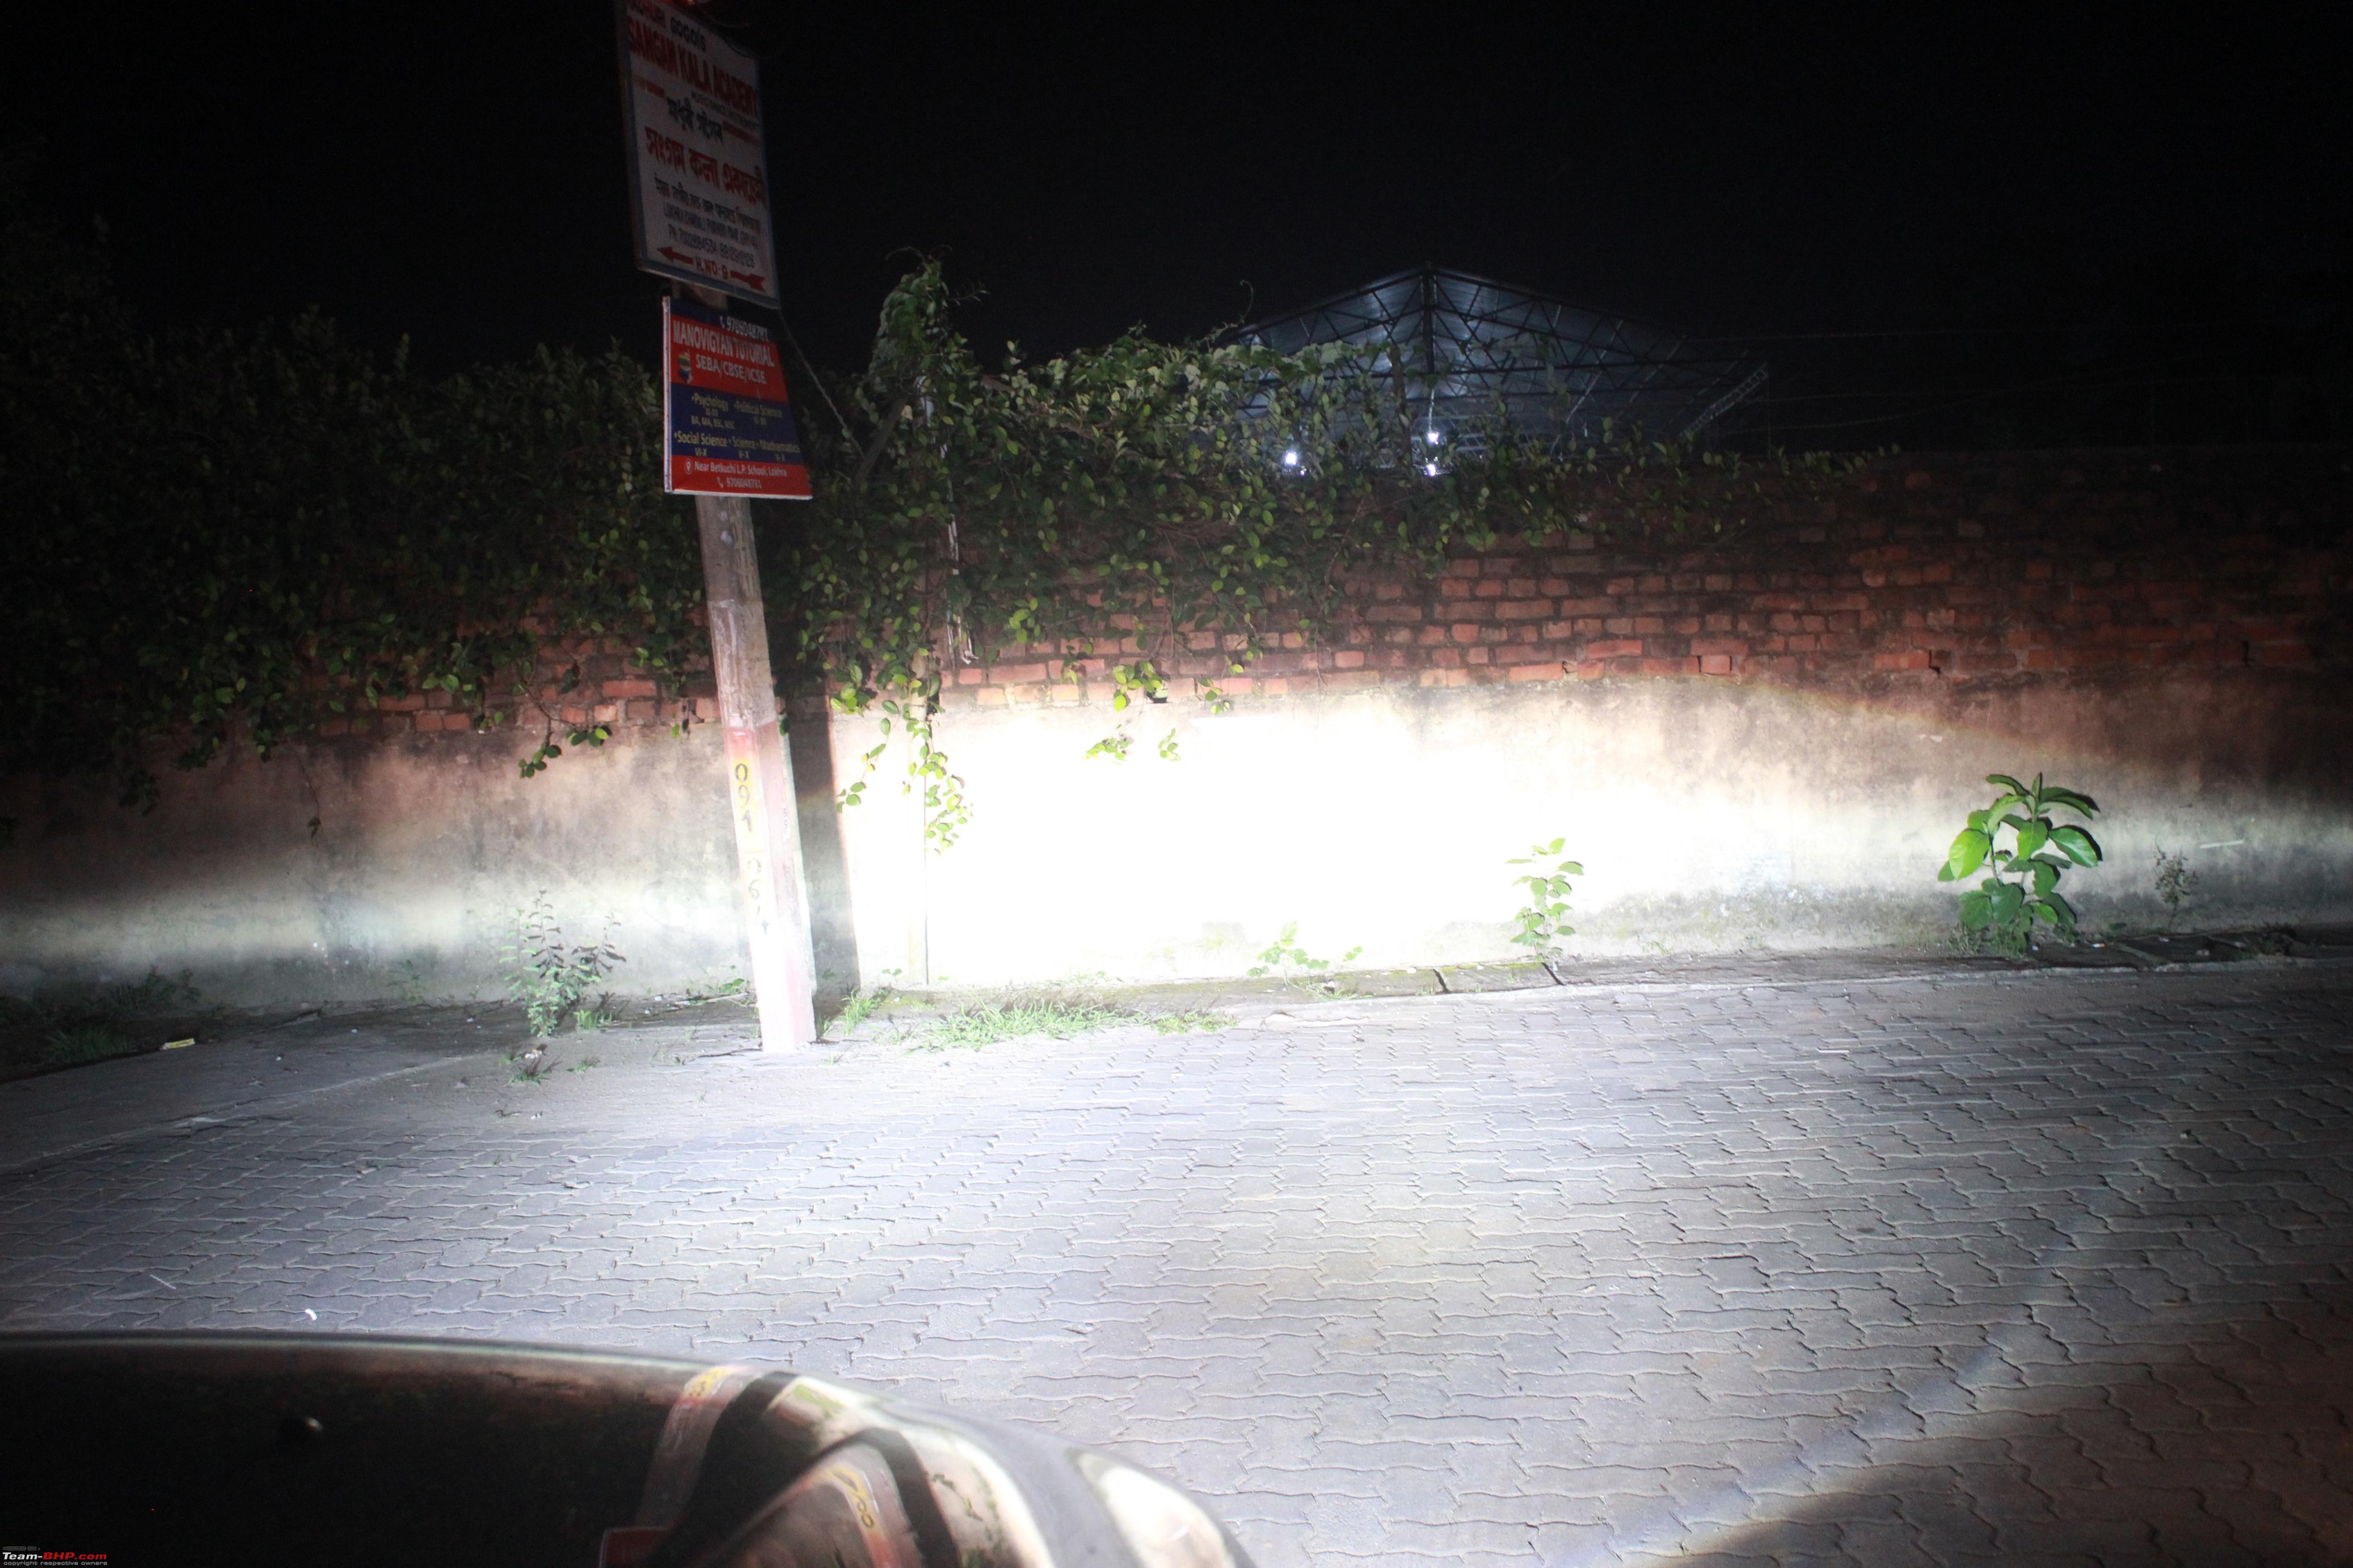 Only HL low beam: 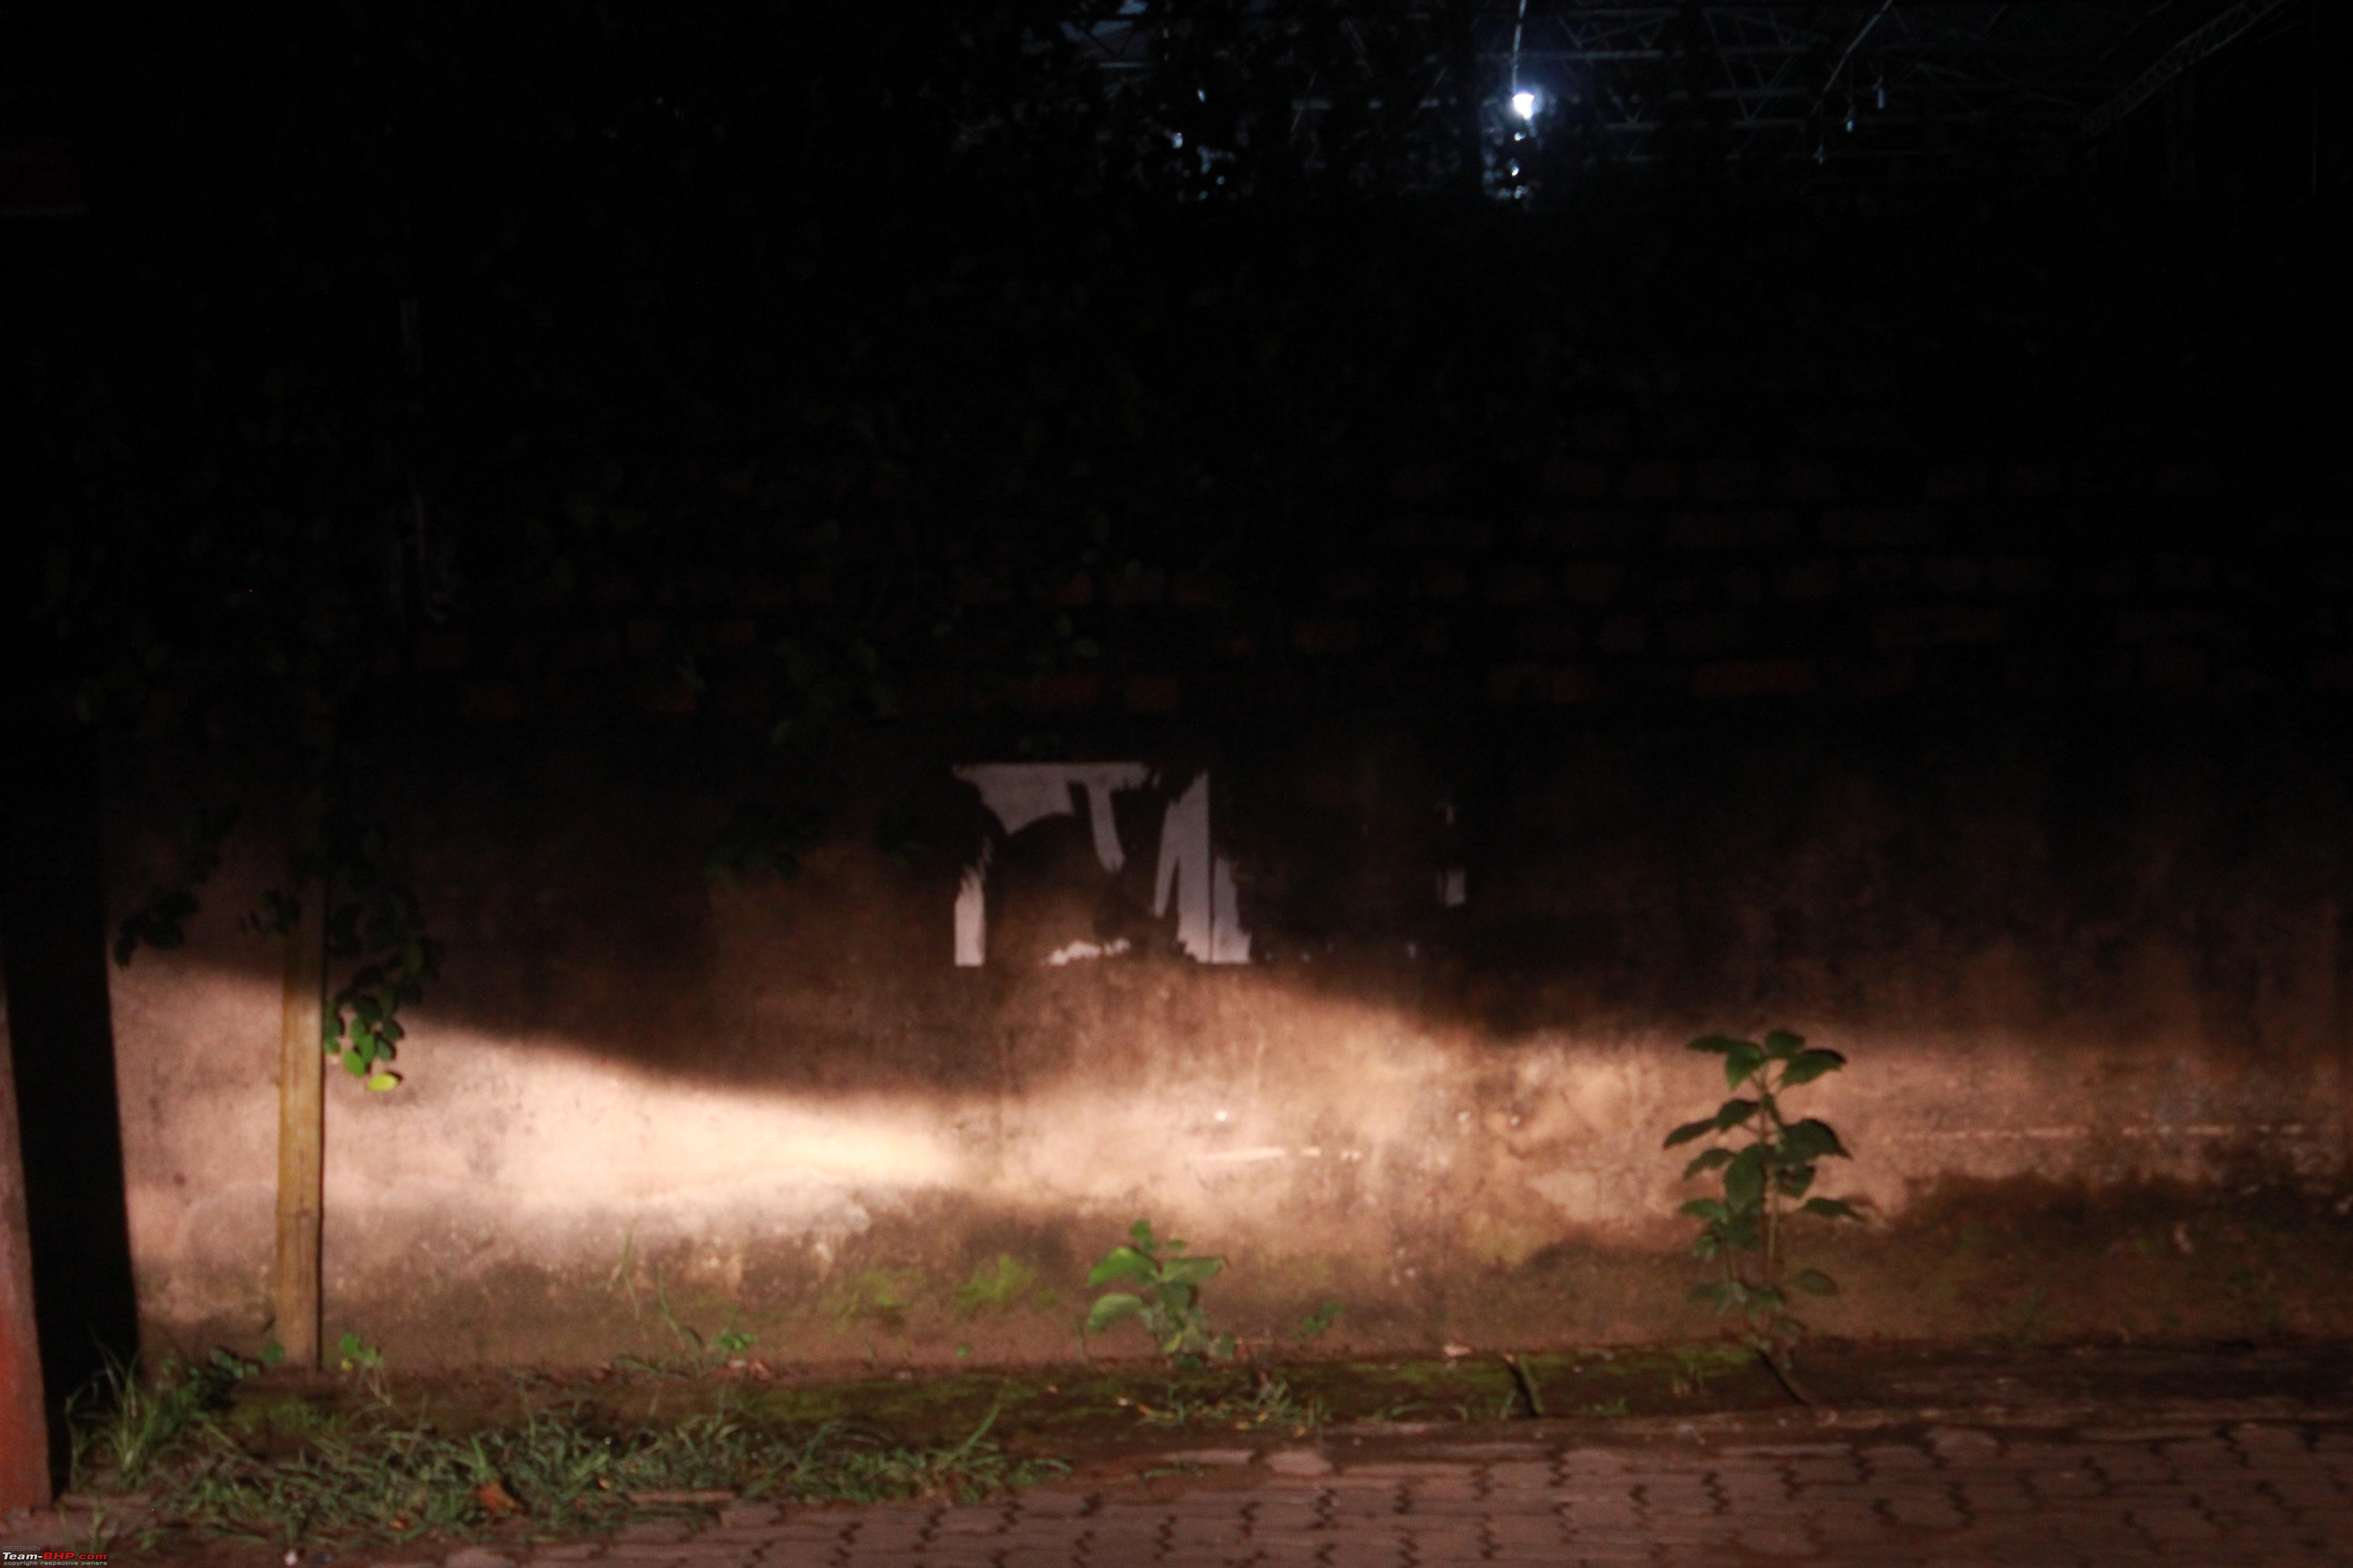 Only HL high beam:  Output in a dark road: Only foglight: 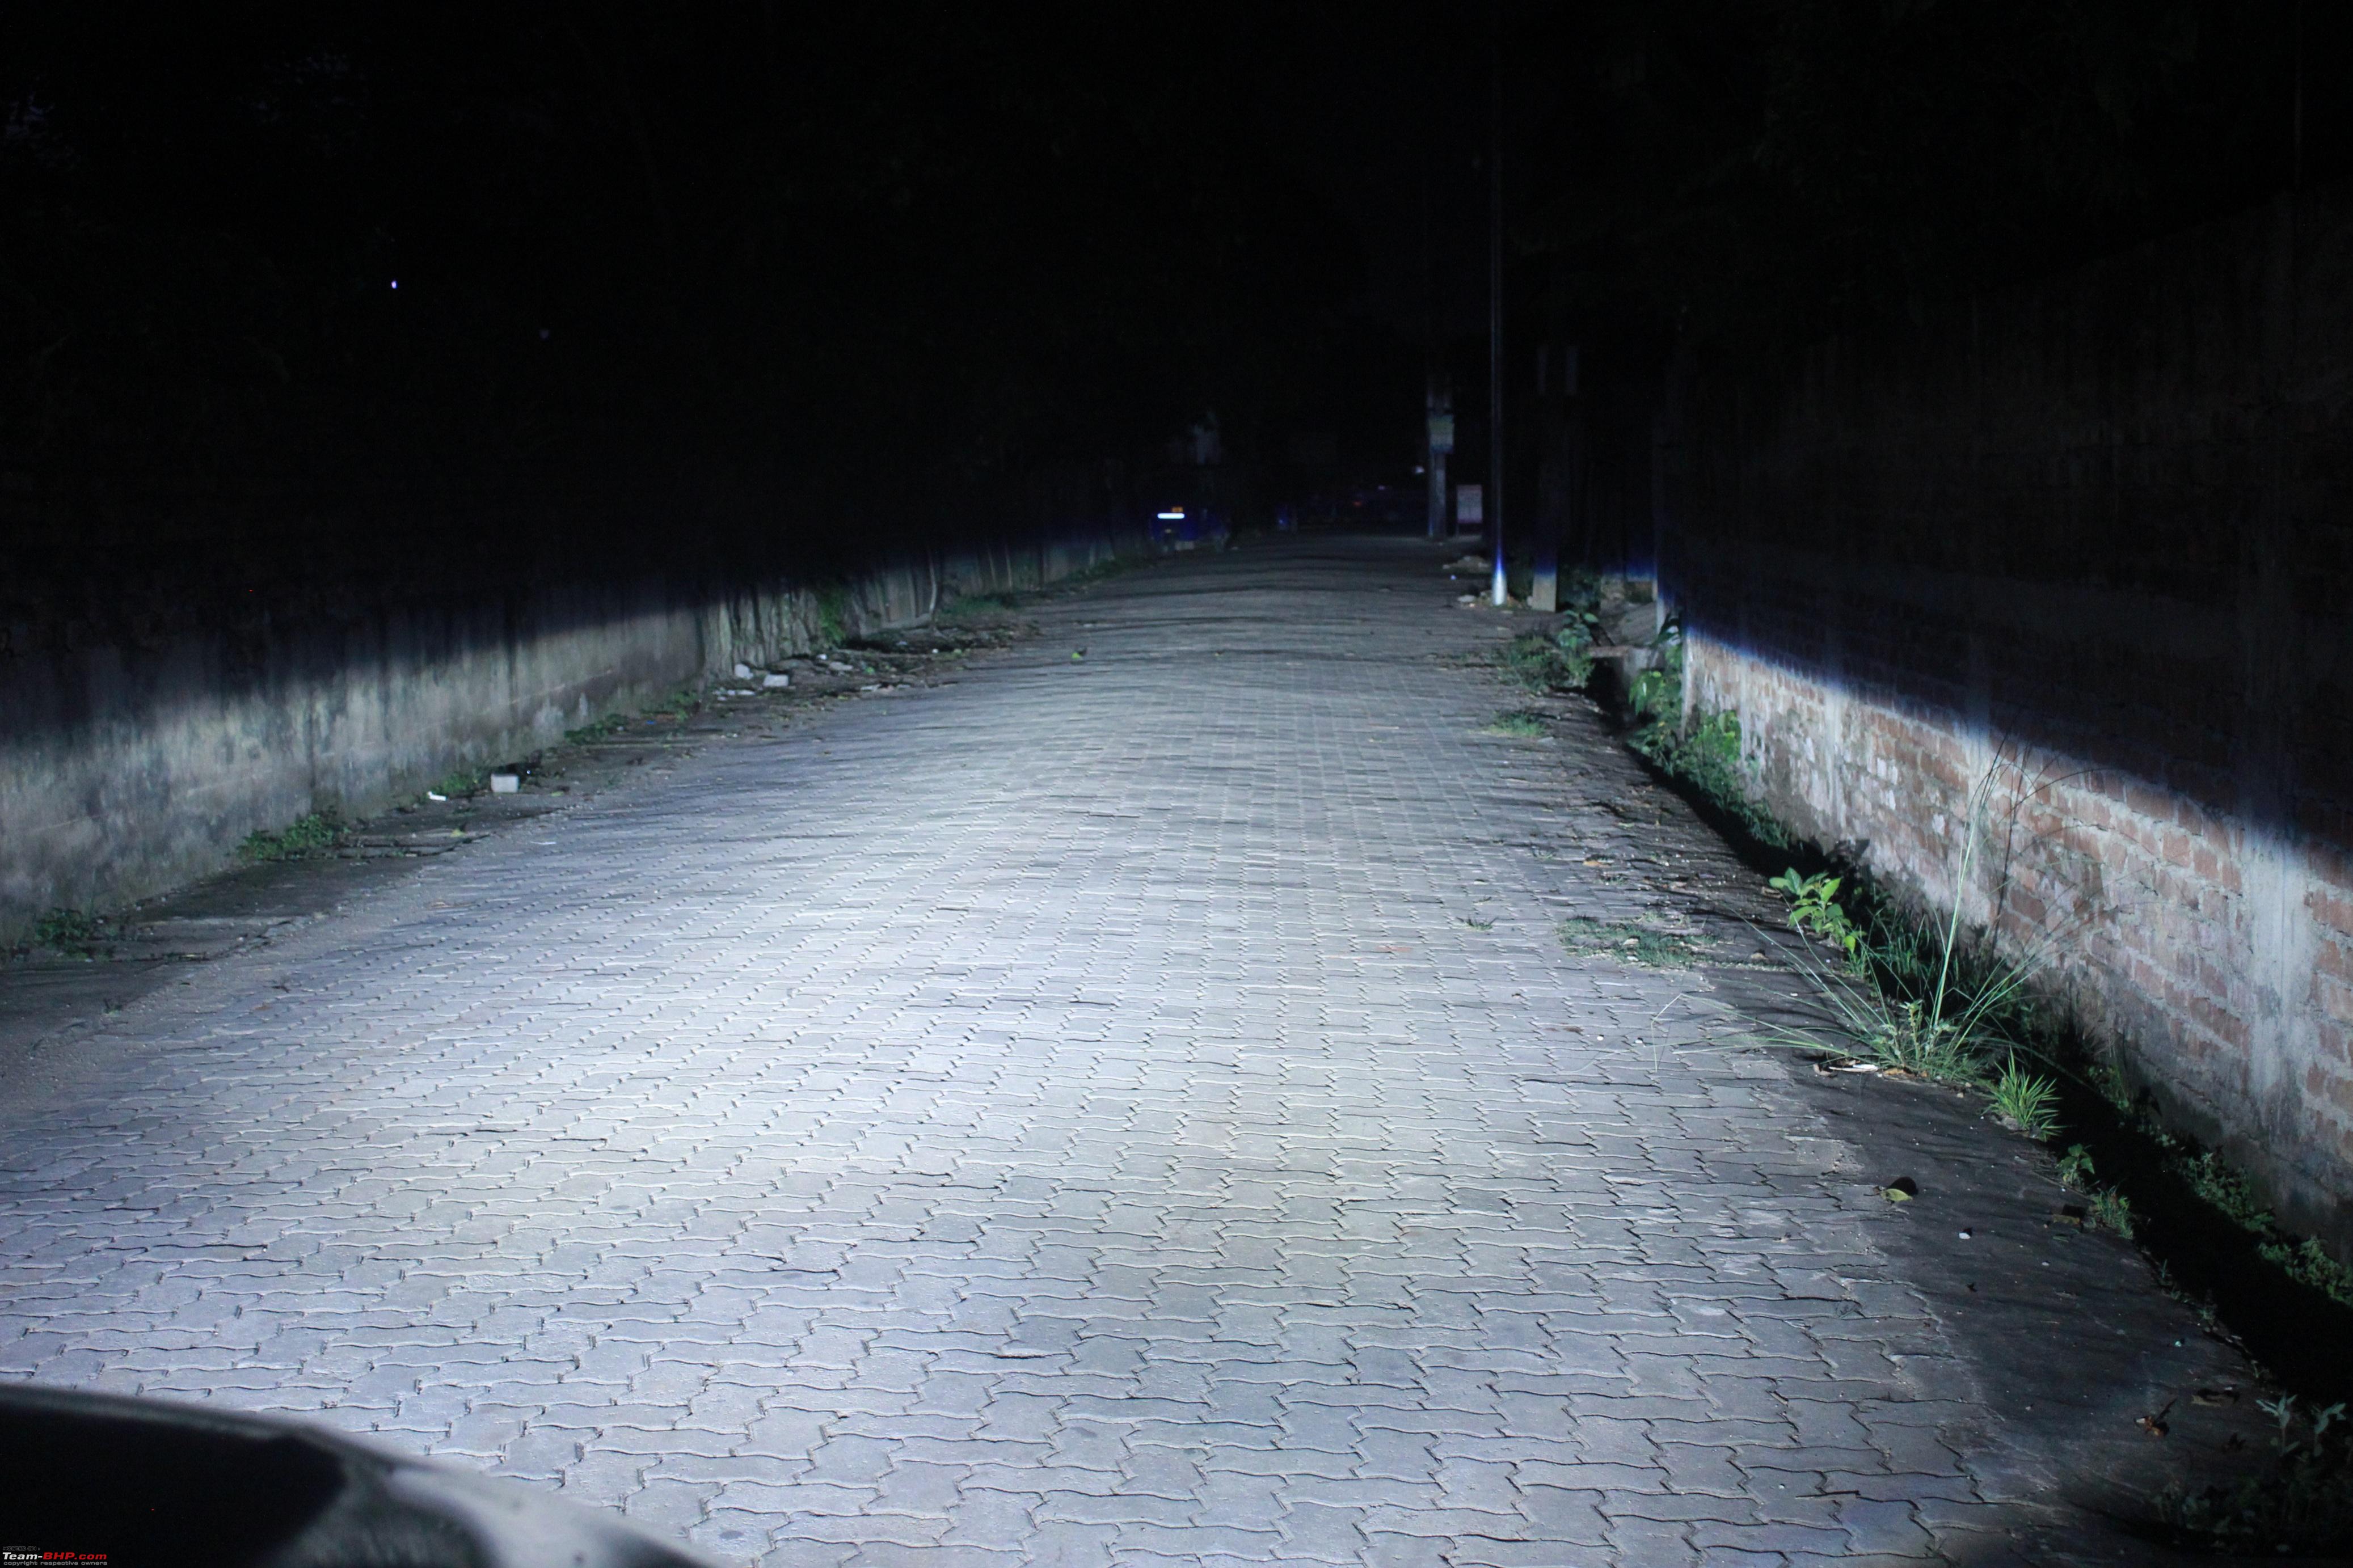 Foglight low beam + HL low beam:  Foglight high beam + HL high beam: 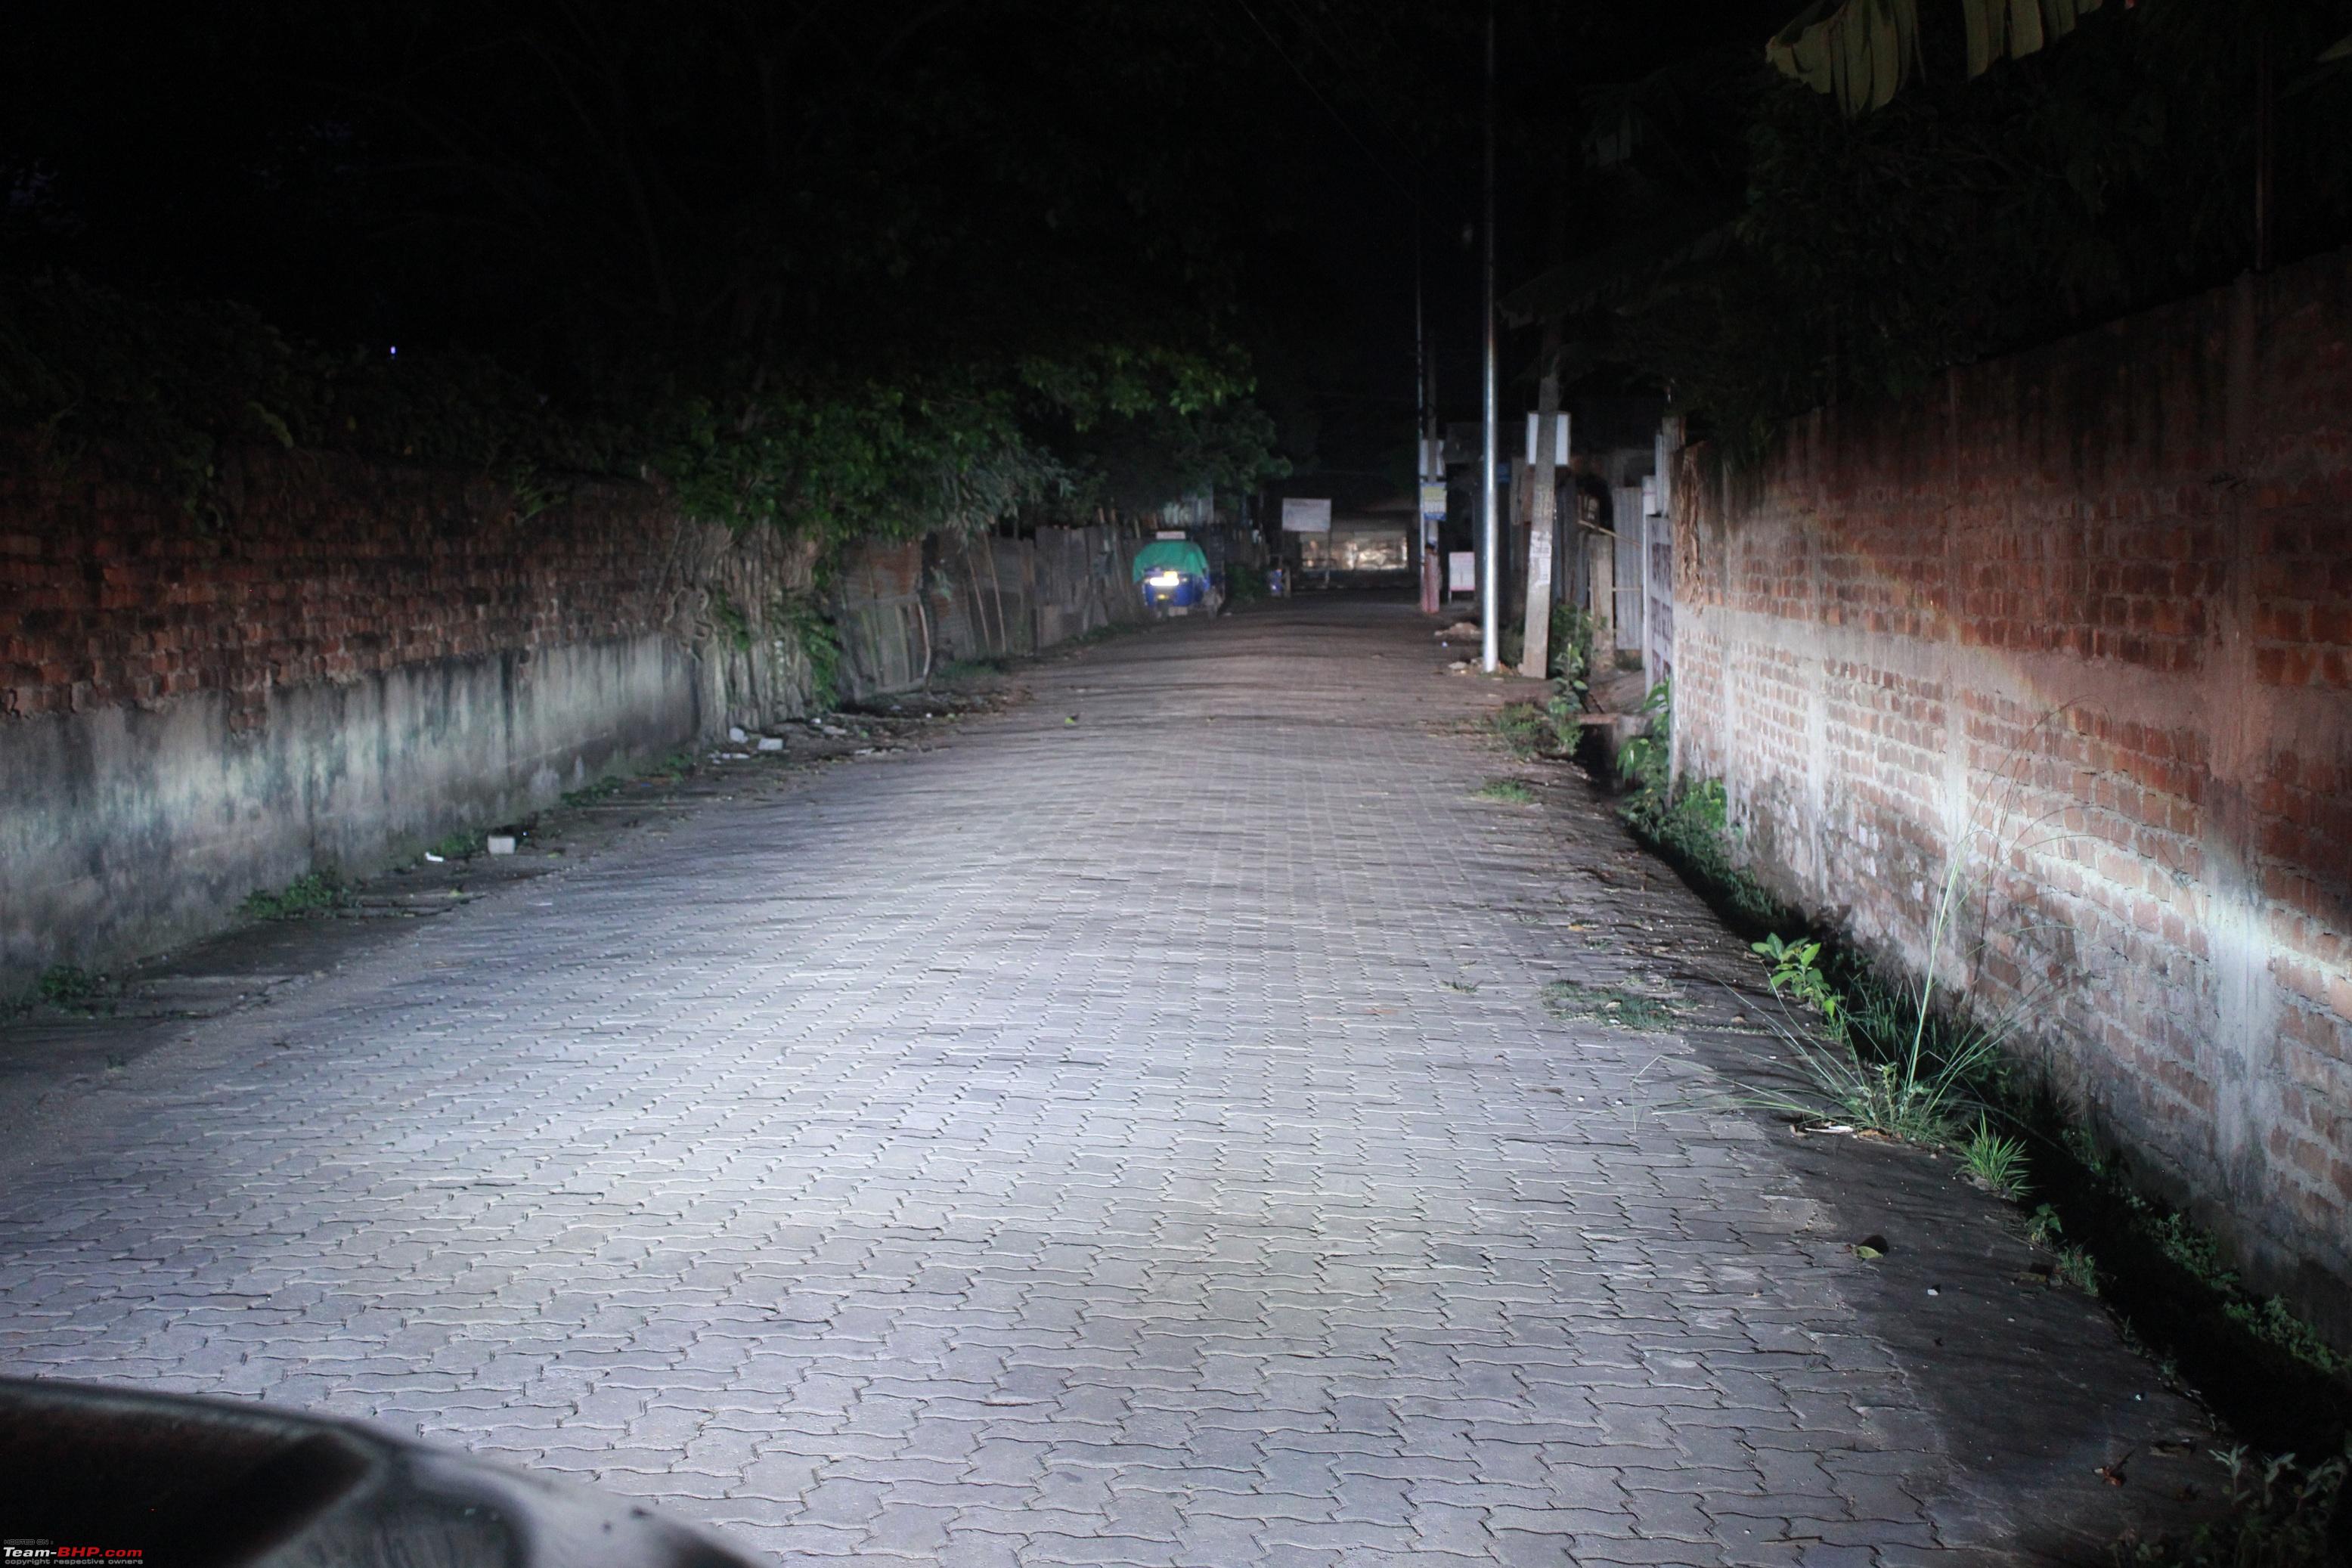 Only HL low beam:  Only HL high beam:  Made some small videos (these are shot in auto mode): Note- The last video was shot before activating the high beam. 2006 Swift output with stock headlights: Against a wall 25ft away: Low beam: 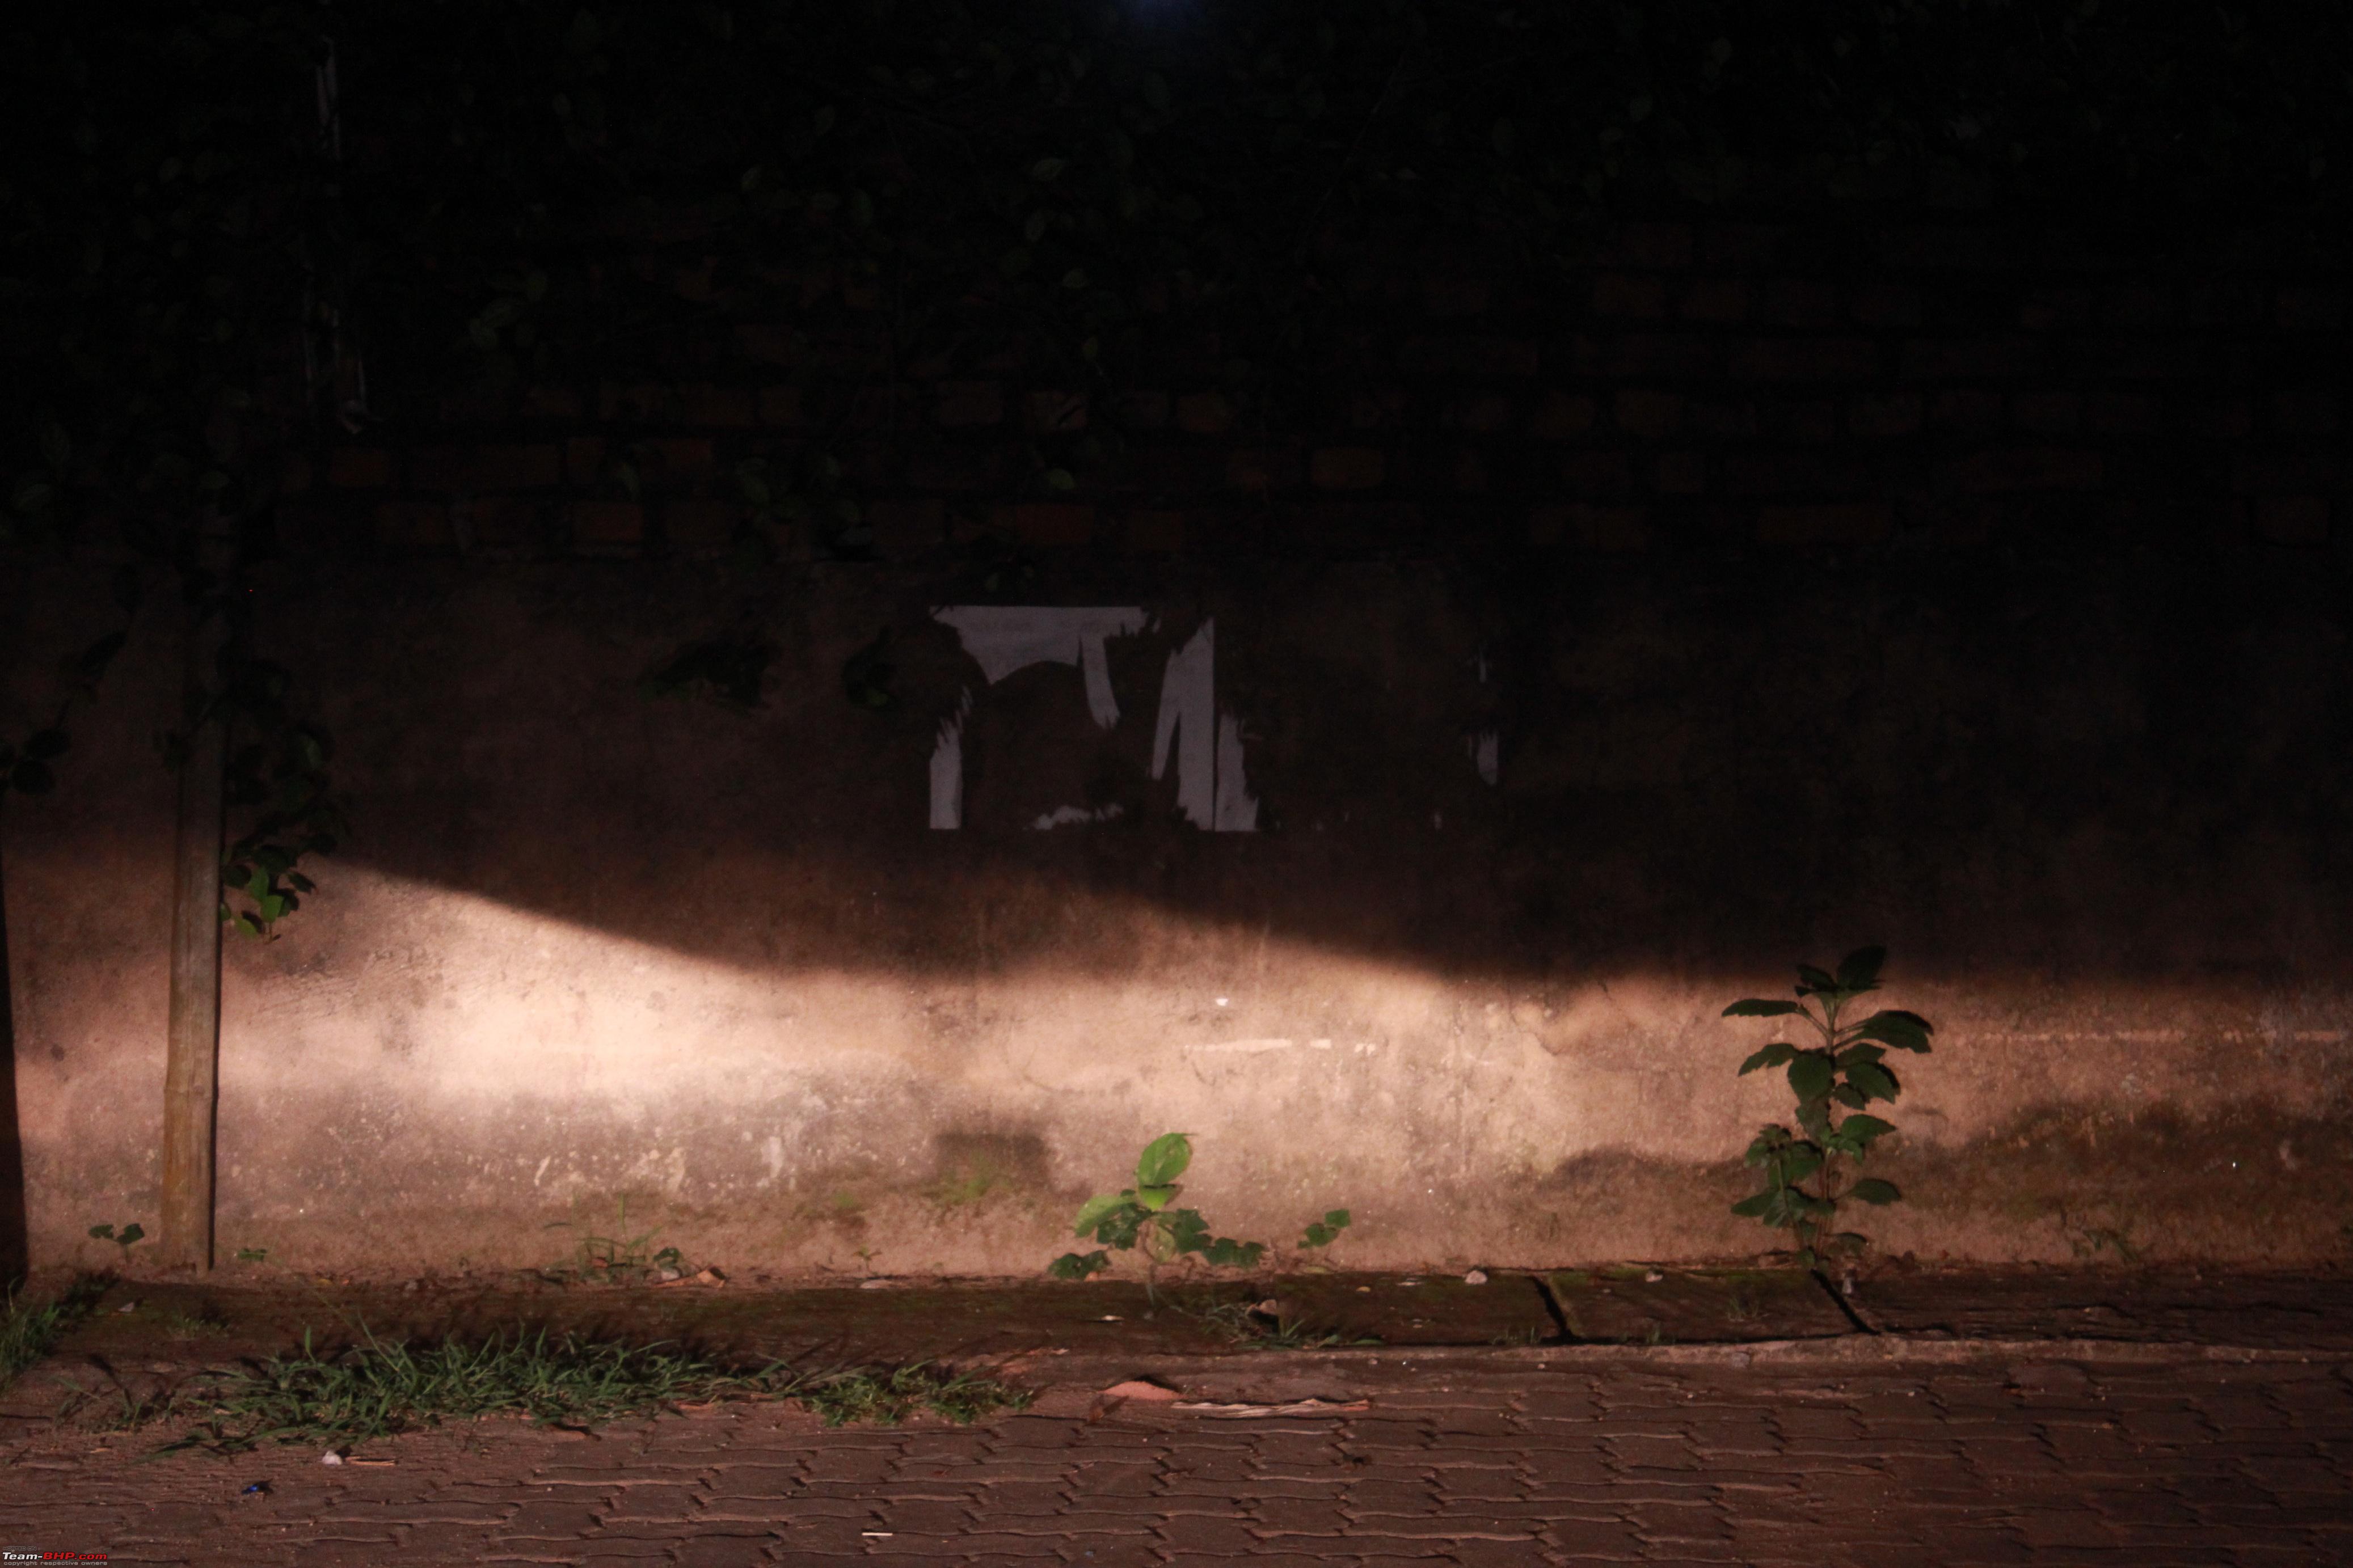 High beam:  Output in a dark road: Foglight (normal 35W foglights here) + HL low beam:  Foglight + HL high beam: 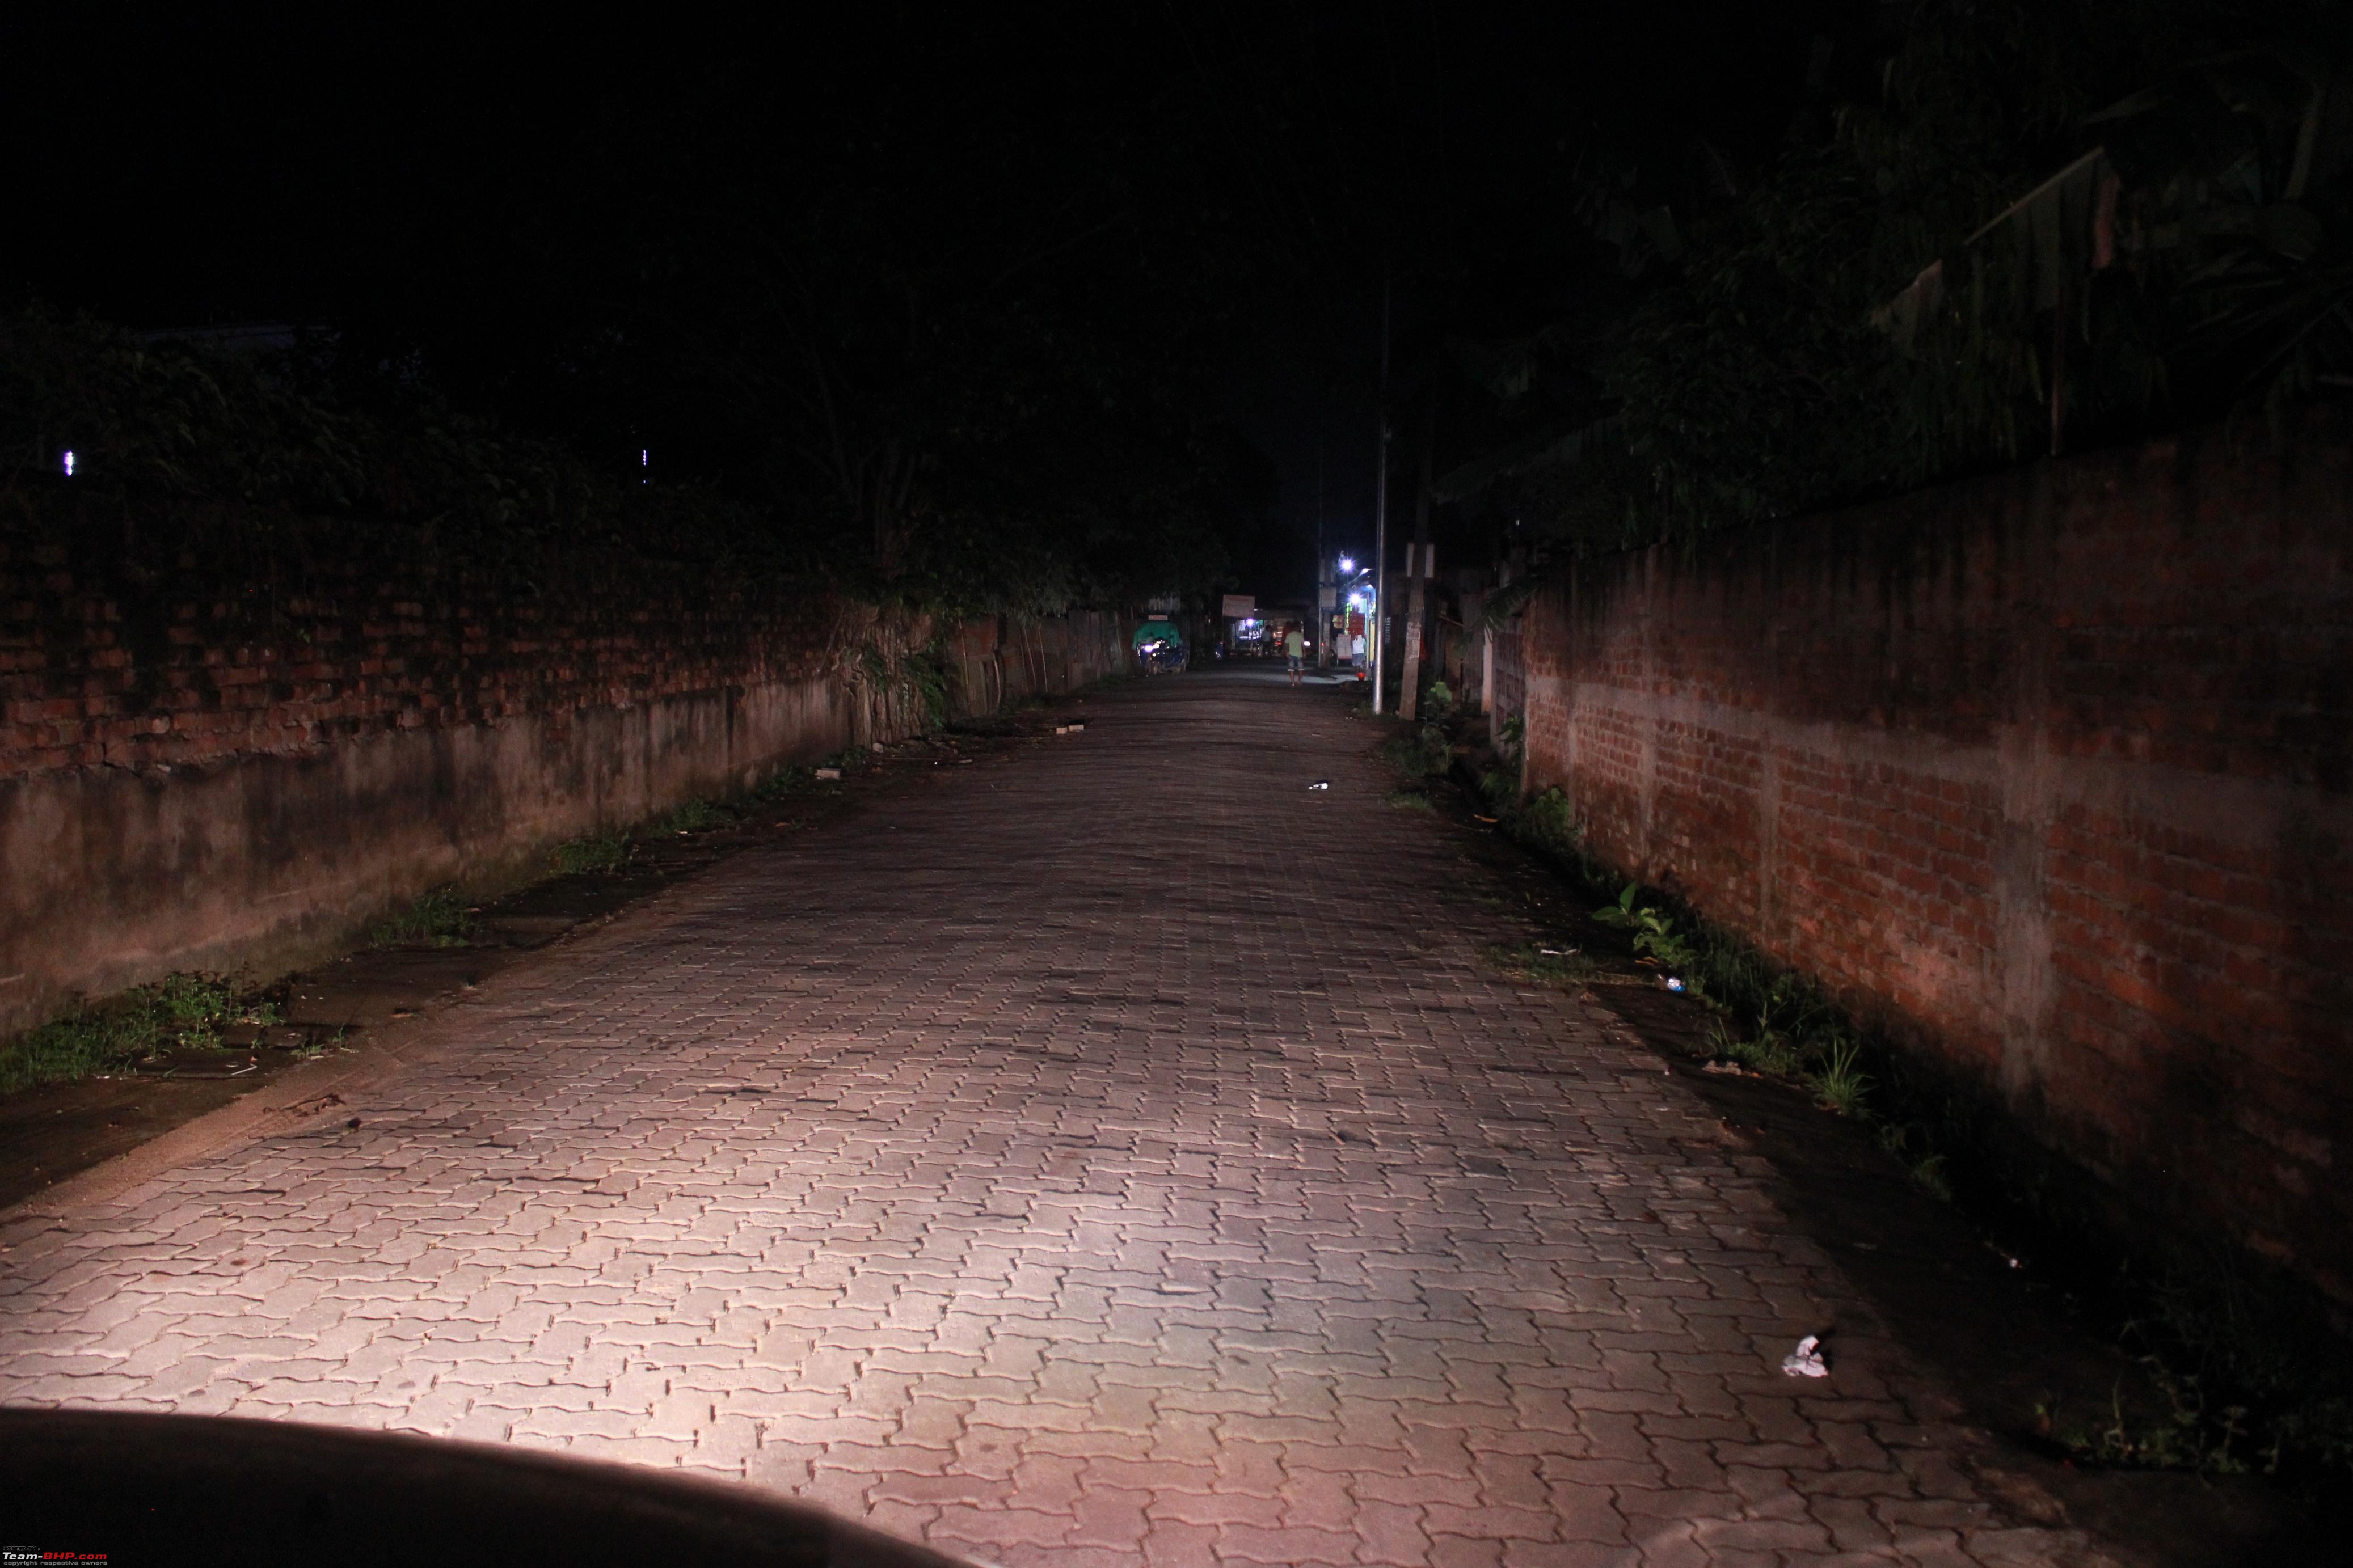 Only HL low beam: 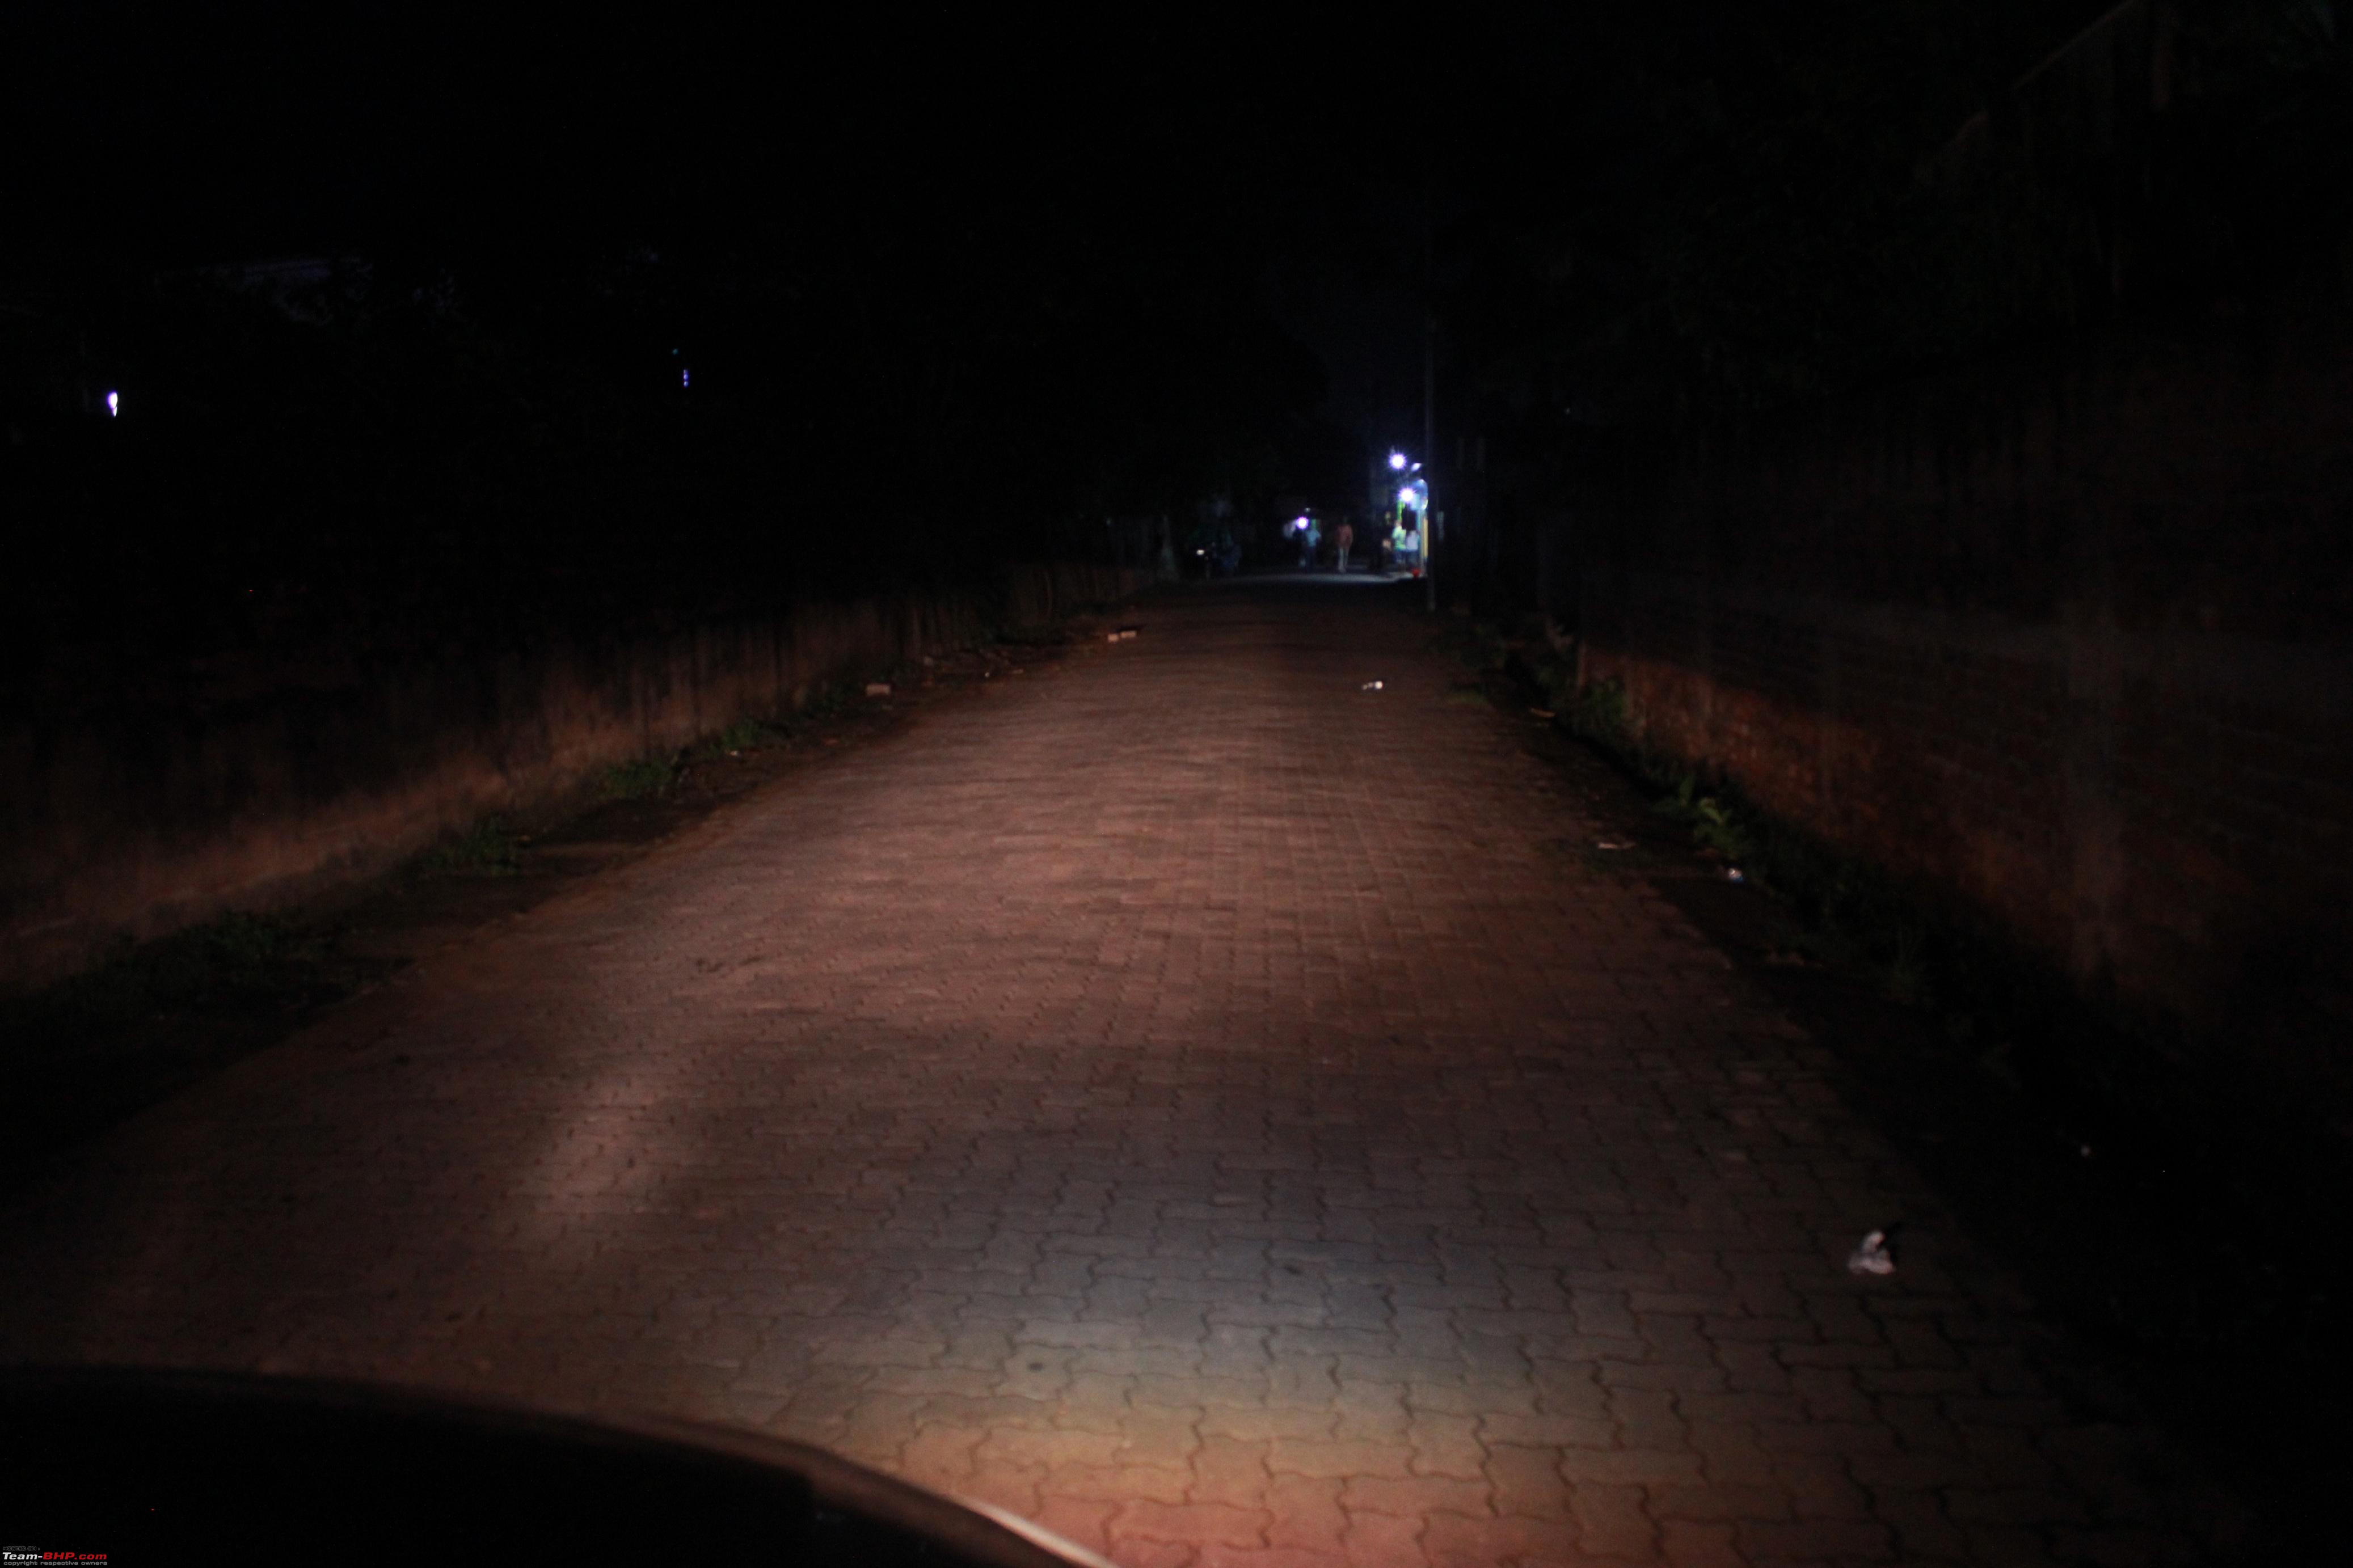 Only HL high beam:  99 Omni output with stock headlights: Low beam:  High beam:  Coming up next :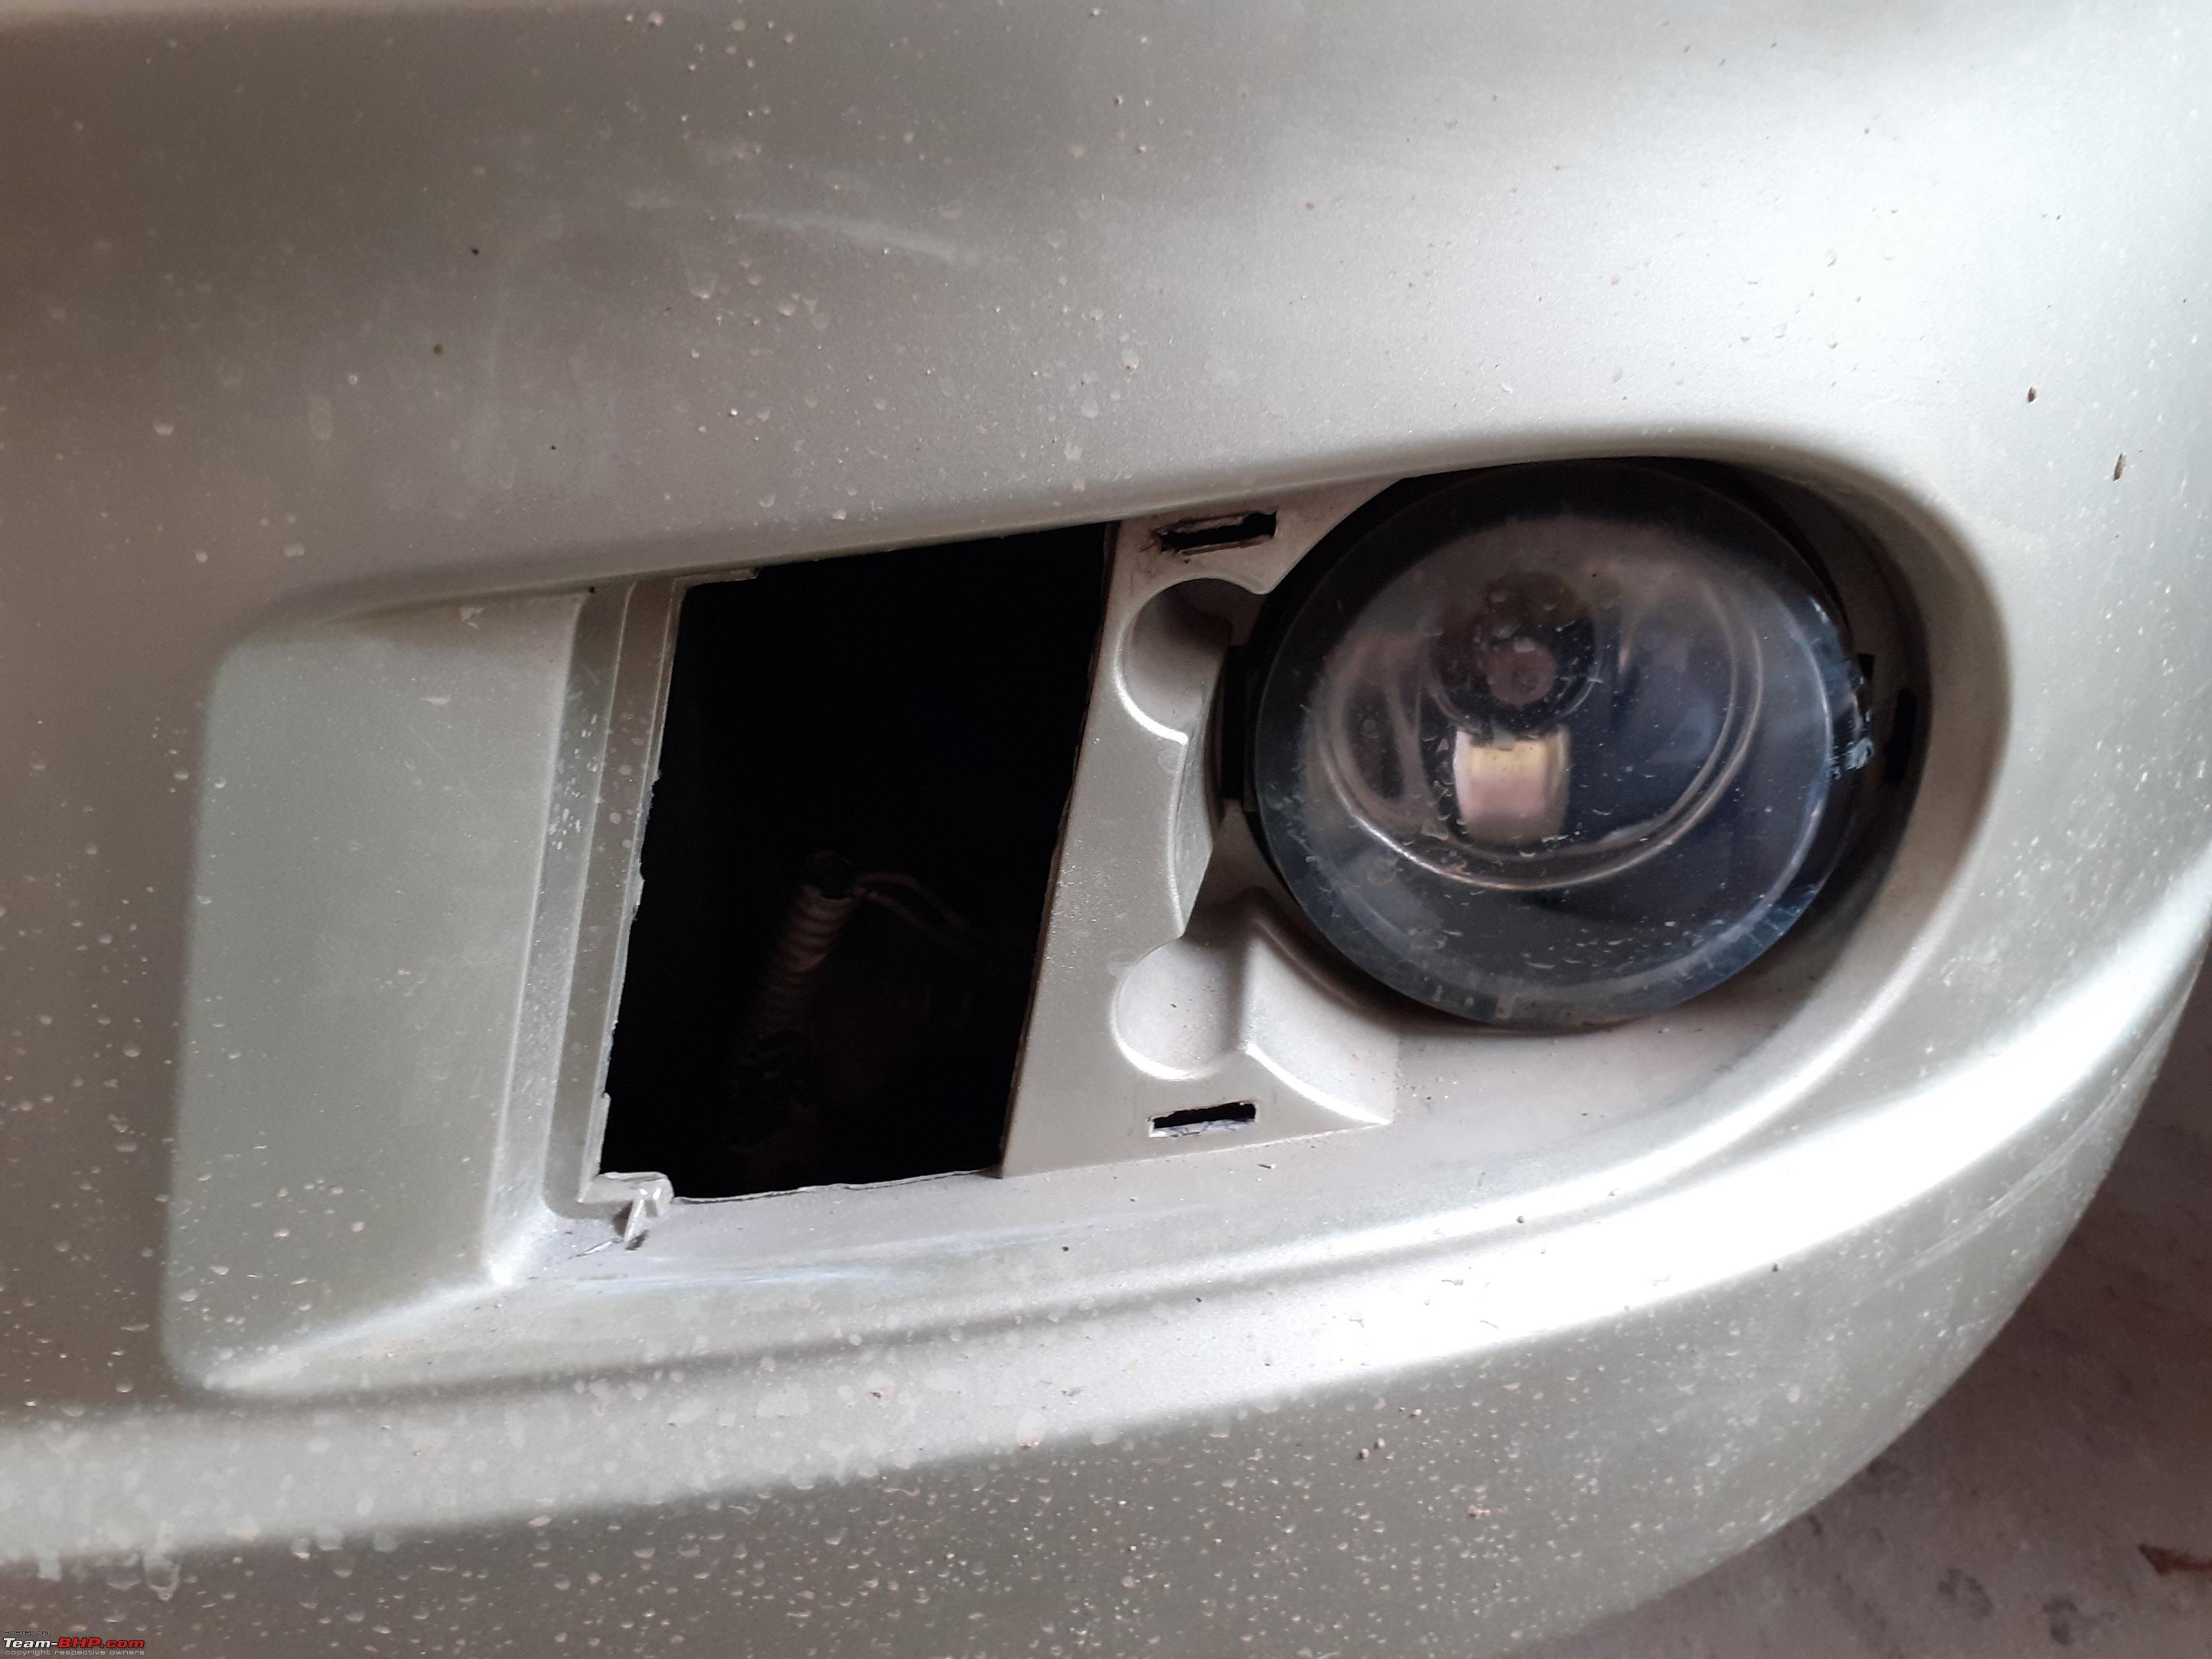 Last edited by chiranjitp : 20th June 2020 at 15:41. |
|
| (49)
Thanks
|
| The following 49 BHPians Thank chiranjitp for this useful post: | 07CR, 2himanshu, ACFT, Agarwal_Aayush, ashis89, audioholic, BoneCollector, CEF_Beasts, CrazyToDrive, Desmosedici, DevOnWheels, Dr.Naren, Ertigiat, fiat_tarun, Geo_Ipe, GTO, Ibanez_70, InControl, JD_404, jithin23, jkaushik, JoeTheWanderer, keroo1099, Leoshashi, LONG_TOURER, ManasN95, Night_Fury, nkapoor777, paragsachania, Prakritij, Reinhard, Researcher, revvharder, Rigid Rotor, SaiSW, samabhi, SamitMukherjee, Simat, SuhairZain, swapnil.awate, Taha Mir, Tanveer02, Thanos-VV, The Rationalist, Varun_HexaGuy, Viraj.515, viXit, vredesbyrd, zavegur |
|
22nd June 2020, 06:53
| #5 |
| Team-BHP Support  | Re: DIY: HID Bi-Xenon projector foglamps in our EcoSport Thread moved from the Assembly Line to the DIY Section. Thanks for sharing! Shortly going to our homepage |
|
| (2)
Thanks
|
| The following 2 BHPians Thank GTO for this useful post: | chiranjitp, SaiSW |
|
22nd June 2020, 10:01
| #6 |
| Distinguished - BHPian  | Re: DIY: HID Bi-Xenon projector foglamps in our EcoSport Excellent write up. Great coverage of steps. The previous gen Ecosport with its round fog-lamps was perfect. The HID fog lights was a logical upgrade in this car & everyone should do it. Your thread will be able to guide even those with 0 DIY experience on cars to do it. The difference between just headlamp low beams & the HID projector low beams really closes the case in 1 second. After installation, we keep wondering how on earth were we driving around with that candle-light all these years! Enjoy the safer night drives now. Later on Ford revised the bumper & put trapezoidal fog lights with indicators in those. That was a disaster since now the car simply can't house HID bi-xenon projectors without too much modifications for the shroud etc. |
|
| (4)
Thanks
|
| The following 4 BHPians Thank Reinhard for this useful post: | BoneCollector, chiranjitp, jithin23, RS90 |
|
22nd June 2020, 10:54
| #7 | |
| Senior - BHPian Join Date: Mar 2020 Location: Pune
Posts: 1,977
Thanked: 5,826 Times
Infractions: 0/1 (7) | Quote:
 Brilliant write up. You have gone into extreme detail and this will be helpful for any prefacelift ecosport owner. The Lights are also now offering brilliant throw and intensity. Having recently, purchased an Ecosport S, the improvement in headlights is staggering on the new version. Kudos to ford for that! Last edited by SDP : 22nd June 2020 at 11:18. Reason: Please edit original post instead of posting back to back posts. Kindly revisit the forum rules | |
|
| (4)
Thanks
|

| The following 4 BHPians Thank 07CR for this useful post: | chiranjitp, jithin23, Prakritij, zyeago |
|
22nd June 2020, 15:43
| #8 | |
| BHPian | Re: DIY: HID Bi-Xenon projector foglamps in our EcoSport Quote:
And for foglamps, is there an alternative apart from the projectors since the new EcoSport has a trapezium type foglamp. | |
|
| (1)
Thanks
|
| The following BHPian Thanks jithin23 for this useful post: | chiranjitp |
|
22nd June 2020, 16:24
| #9 |
| BANNED Join Date: Jun 2020 Location: Hyderabad
Posts: 10
Thanked: 6 Times
| Re: DIY: HID Bi-Xenon projector foglamps in our EcoSport Congratulations! Could you please share if you have more details on the type of Ballasts you got and selection preference you opted. With Blaze India, I also felt almost a similar experience.  they try to push more towards the available stock. Until and unless the received item is defective or not functioning they will try to support their execution/recommendations. I felt they definitely need some improvements but not that bad, so ok to consider with some additional care steps in reviewing the options they have and selection preference before ordering. they try to push more towards the available stock. Until and unless the received item is defective or not functioning they will try to support their execution/recommendations. I felt they definitely need some improvements but not that bad, so ok to consider with some additional care steps in reviewing the options they have and selection preference before ordering.My Honda City is also running with iPHCar fog lamps from Blaze India. So far they are doing good with Great Improvement. I also have 5500k which I have requested. I think these will be good to support for all seasons if we got 4300k with low beam. If budget permits, look for a backup HID bulbs set with 4300k. with these, you can shift and use them based on the seasons. Also, Ballasts will get too hot while running and during the long drive there will be more impact so I would advise shifting them away from the top of the fuse box and try to get them attached near to the metal base instead of the plastic. |
|
| (1)
Thanks
|
| The following BHPian Thanks VMRKarnati for this useful post: | chiranjitp |
|
22nd June 2020, 16:58
| #10 | |
| Senior - BHPian Join Date: Mar 2020 Location: Pune
Posts: 1,977
Thanked: 5,826 Times
Infractions: 0/1 (7) | Re: DIY: HID Bi-Xenon projector foglamps in our EcoSport Quote:
| |
|
| (1)
Thanks
|
| The following BHPian Thanks 07CR for this useful post: | chiranjitp |
|
22nd June 2020, 17:01
| #11 | |
| BHPian | Re: DIY: HID Bi-Xenon projector foglamps in our EcoSport Quote:
 | |
|
| ()
Thanks
|
| |
|
22nd June 2020, 17:13
| #12 | |
| Senior - BHPian Join Date: Mar 2020 Location: Pune
Posts: 1,977
Thanked: 5,826 Times
Infractions: 0/1 (7) | Re: DIY: HID Bi-Xenon projector foglamps in our EcoSport Quote:
| |
|
| (1)
Thanks
|
| The following BHPian Thanks 07CR for this useful post: | chiranjitp |
|
22nd June 2020, 17:31
| #13 | |
| BHPian | Re: DIY: HID Bi-Xenon projector foglamps in our EcoSport Quote:
| |
|
| ()
Thanks
|
|
22nd June 2020, 21:27
| #14 |
| BHPian Join Date: Sep 2016 Location: Nashik
Posts: 74
Thanked: 122 Times
| Re: DIY: HID Bi-Xenon projector foglamps in our EcoSport Fantastic. I am looking for something like this for my Figo Titanium (next gen, 2016 model), which has pretty useless fog lamps. Will it work? It has similar H11, round shaped fog lamps. Only thing is, in Figo, fog lamps sit lower as compared to EcoSport. |
|
| (1)
Thanks
|
| The following BHPian Thanks swapnil.awate for this useful post: | chiranjitp |
|
22nd June 2020, 22:35
| #15 |
| BHPian | Re: DIY: HID Bi-Xenon projector foglamps in our EcoSport Just bookmarked this URL - I can totally relate your challenges on the stock headlamps of Ecosport and I too just got rid of my 100/90W with its relay and harness very recently. My right headlamp reflectors are already showing its results. Thanks to your detailed write-up - though I am not a DIY guy as yet, please share the contact details of Blaze India so that I can reach out to them to get one for me as well. Much appreciated. |
|
| (1)
Thanks
|
| The following BHPian Thanks peterjim13 for this useful post: | chiranjitp |
|