Team-BHP
(
https://www.team-bhp.com/forum/)
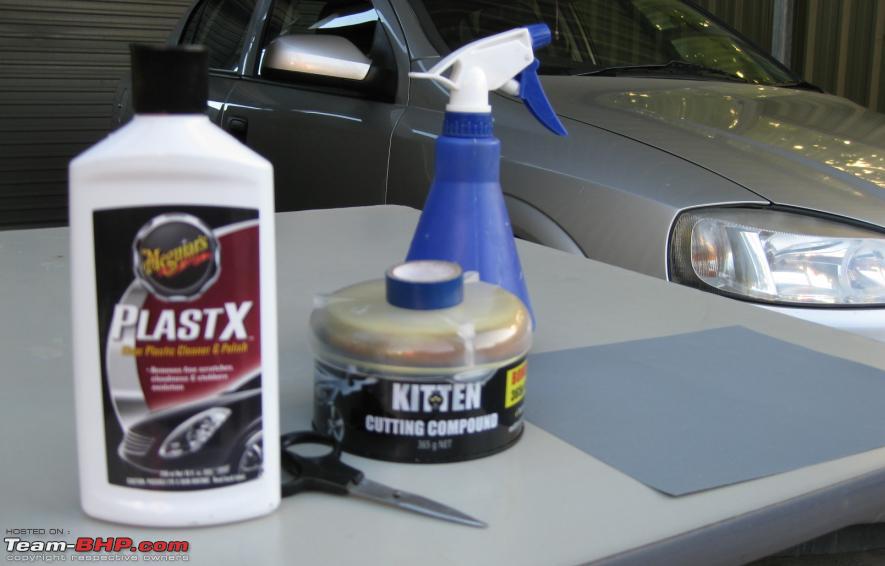
Dirt, weather and acid rain make car headlights go dull, off-color and pale,as a result your car starts looking ugly and boring. So does mine and I asked my car mechanic about it and he suggested a solution which is very much doable if you have right gear handy. Gears you require are:
- Sand paper wet and dry type (2000 grit for minor damage, 1000-1500 grit for heavy to moderate damage).
- Water spray bottle.
- Any good quality cutting compound.
- A good quality plastic polish. I used Maguires PlastX, specifically made for automobile headlights (If not available in India, any good quality headlight shiner from any car care shop wood do).
- A pair of scissors and some tape.
- And last but not least good ol' elbow grease :).
A quick look on what I used.

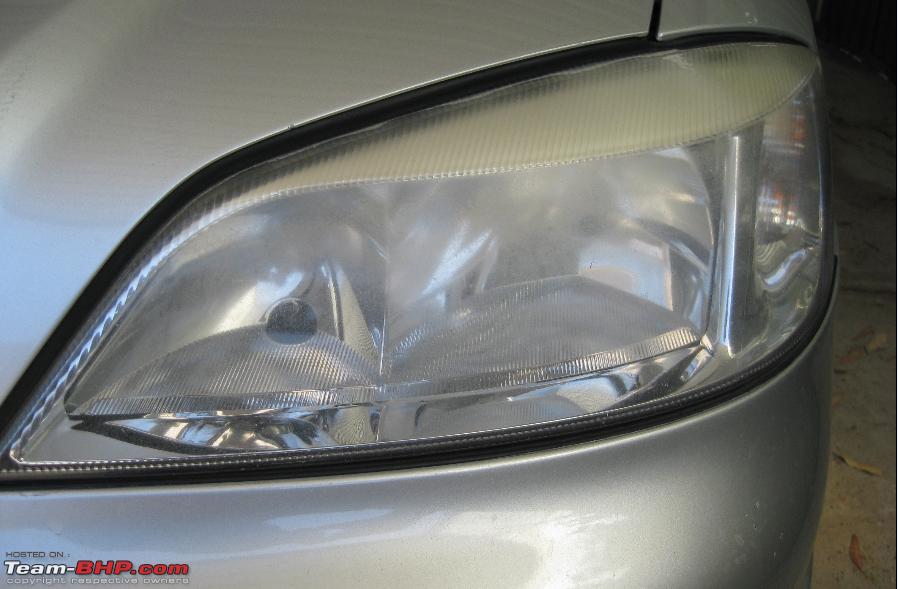
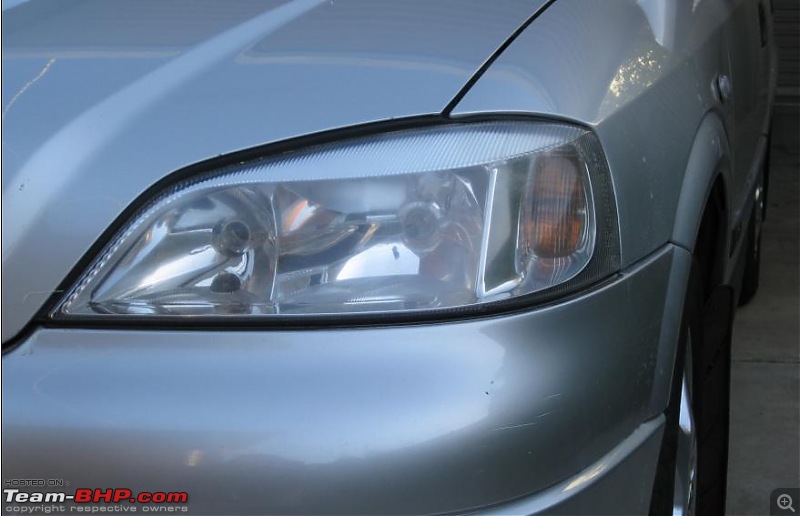
To start with, make sure the headlights' surface is clean and dirt Free. use any glass cleaner to get rid of any dirt, mud, bird poo or greasiness. This is how my car looked like before cleaning. If it wasn't in bad shape, it wasn't good either.

Once clean, spray a good amount of water on all over the plastic surface and wet the sand paper as well. Make sure you tape the car body/bumper at the bottom of headlights to avoid any accidental damage to paint work before you spray any water. Now start sanding it Horizontally or Vertically,
AVOID CIRCULAR MOVEMENTS on plastic. Whilst you sand, Don't let headlights' surface or sand paper dry. keep spraying water at regular intervals.
A close shot before cleaning

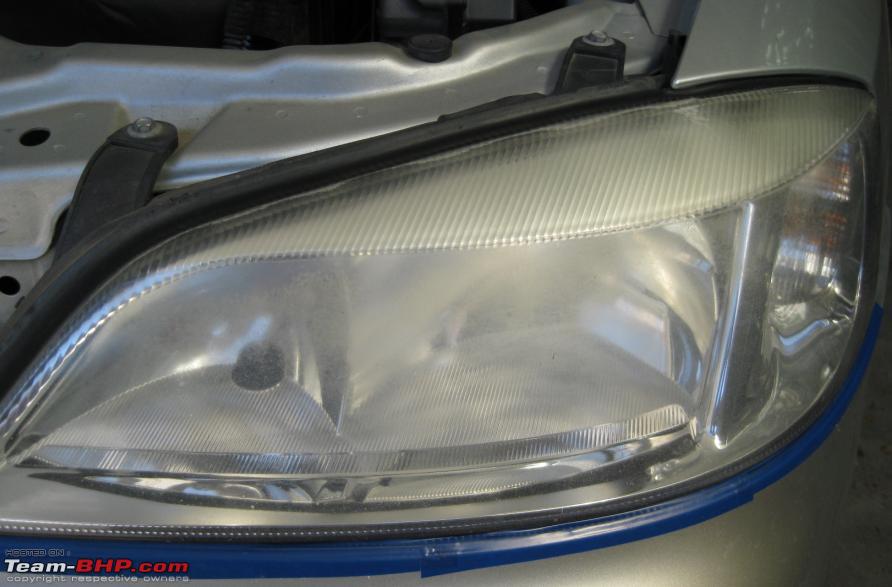
We are looking at rubbing it till you feel the surface smooth. You can feel the difference. I rubbed for about good 15 minutes on each side. If your headlights are really blurry you might wanna start with a 1500 grit (wet and dry type) sand paper and if you have deep scratches from minor accidents or like we are looking at using 1000 grit paper (again wet and dry type). Do not rub too much with 1000 grit paper, you would end up with some permanent damage on plastic surface. Once satisfied using your elbow grease on sanding, wipe dry the plastic surface with a dry cotton cloth (old t-shirt or a towel would be best) and apply cutting compound (I used a sponge applicator that came with compound to apply it). You can apply it in circular motions, its just the sanding we don't wanna do this way. Here is result after sanding and rubbing compound.

When compound disappears, wipe the surface with dry cotton cloth and its time to use the plastic polish. I took a big dollop from the bottle and rubbed it till it disappeared. Now buff it with a clean cotton cloth to get that sheen that you've been missing for long.
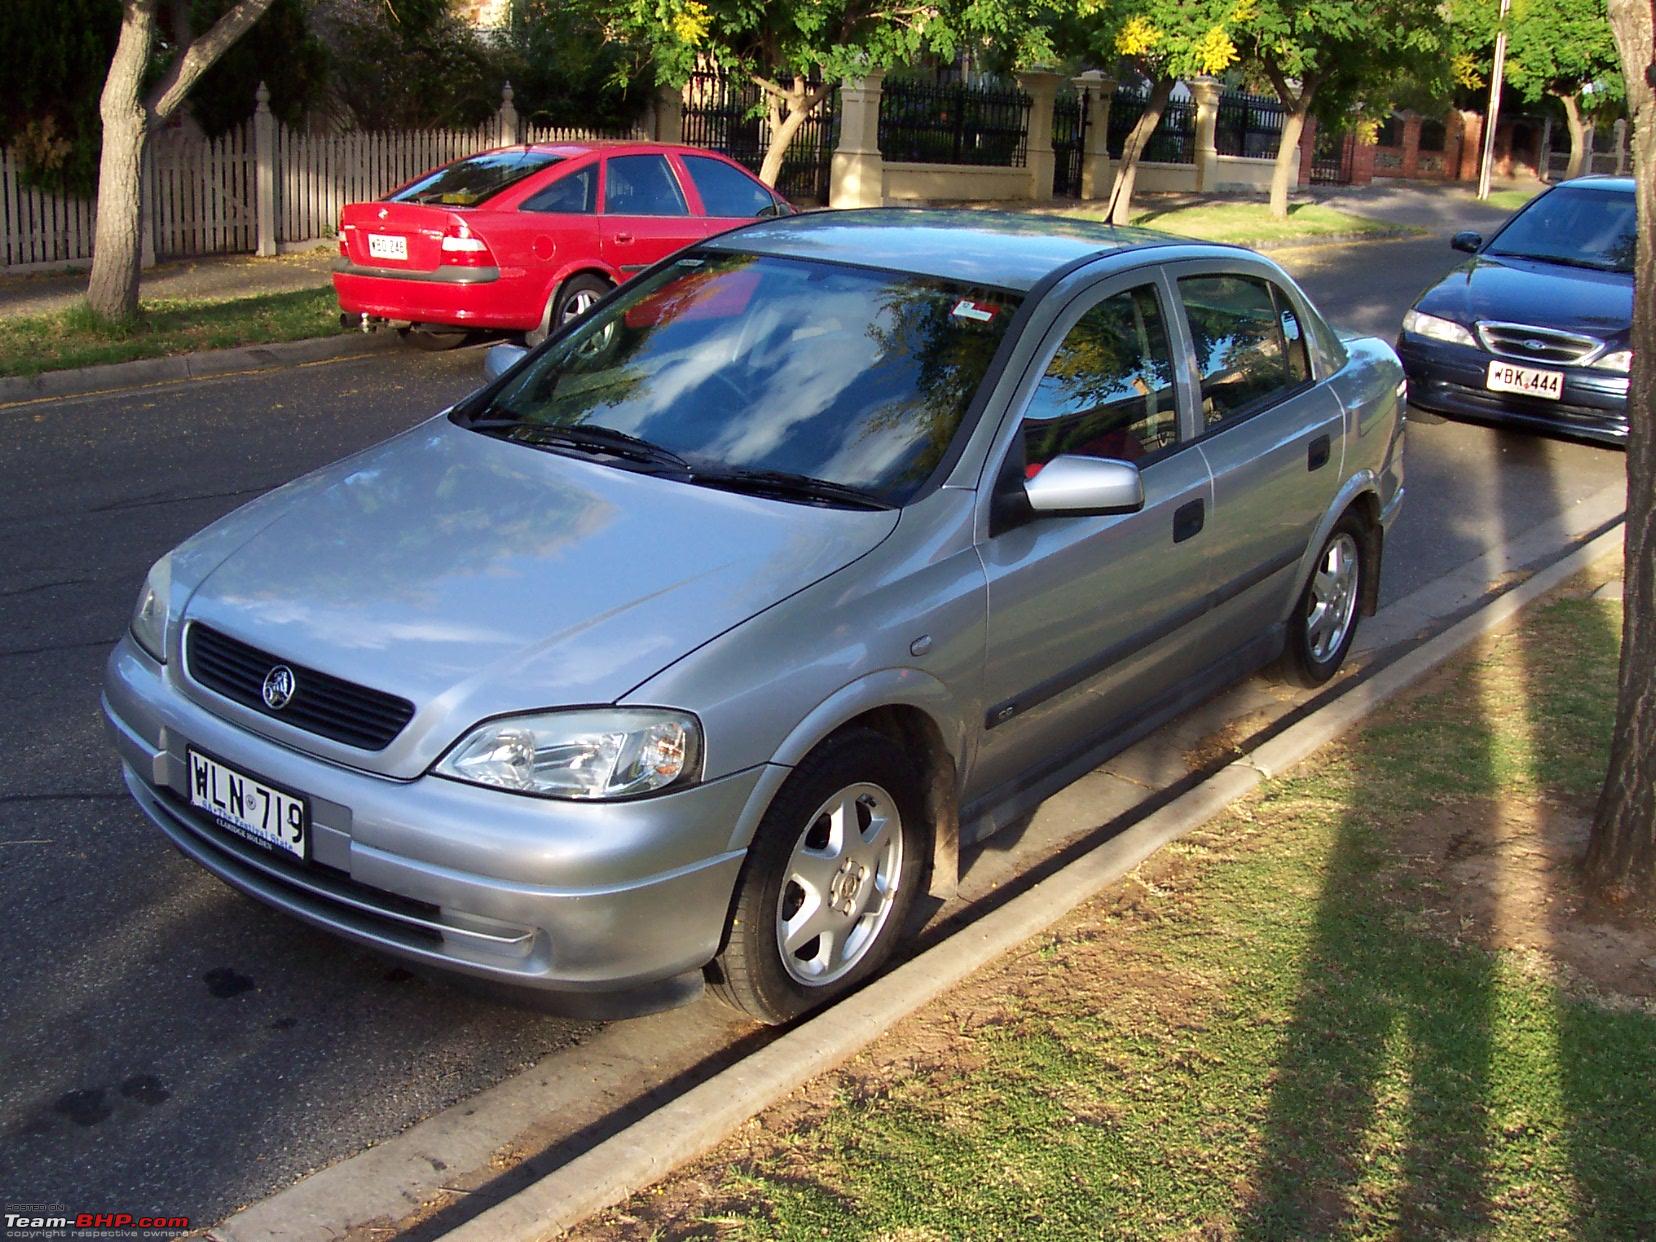
Final results on my car
I am happy with the results as car look has improved allot but still there is room for improvement. I'll give it another shot with 1500 grit and see if gets any better.
After this I gave my car a good wash and some polish. ladies and gents behold my 10 years old beauty

Hope this'll help you guys. Also, sorry if you guys find my writing boring. My writing skills are very bad.
Mods: if you find this thread at wrong place, please move it to where it belongs.
Regards
Punzabi
WOW!
Never knew one could even polish their lights.
Thanks for sharing this great DIY trick.
You mean you applied sand paper on the glass (lens) part of the head light assembley?
Brilliant! All I have to do now is wait for my car to get old :)
that;s a nice trick but if someone trying it do remember if anything goes wrong then the headlights will damage due to rough sanding
Cool trick...but is the headlight front glass or plastic?
God bless you my friend. I was wondering what to do for my alsomt 5 year old car. The low beam is as good as candle light and I dont use high beam unless for short periods of really dark roads. Will try the DIY and report.
Quote:
Originally Posted by neel385
(Post 1756359)
Cool trick...but is the headlight front glass or plastic?
|
Really need to know this before trying it out. I feel that sandpaper on a plastic headlight may render it opaque. If anybody has a spare (damaged) plastic HL lying around, please try this out and report. I'm going to try and source a damaged HL from my regular MASS.
But if it does indeed work, it would be a great thing.
Thanks for appreciation guys, head lights on my car are
plastic and this practice is very much safe. As mine were not too deteriorated, I used 2000 grit sand paper. Its very fine sand paper, upon touching you don't feel the rough surface much. I
would'nt recommend it on glass as I haven't tried it and don't know what the results would be. For those who are iffy about doing it on plastic, guys give it a try its safe and results will definitely please you. But make sure you are doing it right, somethings to be careful about (I know I am repeating these but just to clear you doubts):
- Good quality wet and dry sandpaper with no less than 1000 grit.
- 2000 grit for little scratches and just blurry headlights, 1000/1500 grit only if headlights are nearly opaque and have deep accidental scratches.
- keep spraying water on surface and sandpaper. Its the dry rubbing that'll damage the plastic headlights.
- Do not do it in circular motions. Only horizontal and/or vertical motions.
- Get a good quality plastic polish (I believe hardware stores are places to procure it or try ebay for Maguire's, Autoglyme or Chemical brother's headlight polish. These are good brands. I used Maguire's). Do test the polish first if its not specifically for headlights.
Happy D.I.Ying
Punzabi
Useful thread, Anyway its worth trying out this before changing the entire headlight unit.
IS this offered in any service stations?
@ Hpzone: No mate, its not offered at any service station or workshops. Its D.I.Y thing that you can do at you home.
Quote:
Originally Posted by hpzone
(Post 1756532)
Useful thread, Anyway its worth trying out this before changing the entire headlight unit.
IS this offered in any service stations?
|
Quote:
Originally Posted by Punzabi
(Post 1756540)
@ Hpzone: No mate, its not offered at any service station or workshops. Its D.I.Y thing that you can do at you home.
|
This trick is used in India by every car polishing guys, i myself do this every 6 months on our Matiz lights.:D
And mostly thanks to traffic conditions here, we get a chance to install new Headlights every often.:D
Quote:
Originally Posted by PAVAN KADAM
(Post 1756690)
This trick is used in India by every car polishing guys, i myself do this every 6 months on our Matiz lights.:D
And mostly thanks to traffic conditions here, we get a chance to install new Headlights every often.:D
|
it IS polishing Pavan, just like wood or any other surface. :)
Being living outside India, the down side here in these so called developed countries is everything costs through the nose and very less (read it rare) options for repair & restore. Buying new headlights is certainly a rip off. Now am planning for full car detailing and paint restore, just looking for plenty of free time.lol
Something really cool, i thought about sharing :
Over time your headlight lens will yellow out, and cause visibility problems for you at night.
If you're like me, you would think the only way to fix this is to replace your headlights, or adopt higher wattage bulbs / relay mechanisms. For those who park their cars out in the sun, this may be very useful.
I just saw this neat video which I think would be a good try before considering other alternatives:
YouTube - How To Restore Headlight Clarity
and something similar but not as effective with TOOTHPASTE!! :
YouTube - Remove Yellow haze on headlights with toothpaste?
pretty cool huh? lemme know how it works for you.
DISCLAIMER: I havent really tried it out myself, but I'm going to as soon as i can get the sandpaper and a buffer! Or maybe you could show your local garage or go to a detailing service.
| All times are GMT +5.5. The time now is 08:40. | |