Team-BHP > Shifting gears > Et Cetera
Register New Topics New Posts Top Thanked Team-BHP FAQ


Reply
  Search this Thread
3,646,770 views
Old 10th January 2012, 10:57   #13771
BHPian
 
The_Warrior's Avatar
 
Join Date: Jun 2008
Location: Travelling Most of the time!!!
Posts: 130
Thanked: 23 Times
Re: The Official non-auto Image thread

Gurus, Comments and Ciriticism please....
Attached Thumbnails
The Official non-auto Image thread-img_5796.jpg  

The Official non-auto Image thread-img_5917.jpg  

The_Warrior is offline  
Old 10th January 2012, 12:17   #13772
BHPian
 
Join Date: Apr 2007
Location: Bangalore
Posts: 39
Thanked: 11 Times
Re: The Official non-auto Image thread

A few pics that I took on a recent trip to the NE.
Attached Thumbnails
The Official non-auto Image thread-dsc03848.jpg  

The Official non-auto Image thread-dsc04172.jpg  

The Official non-auto Image thread-dsc05395.jpg  

sidkun is offline  
Old 10th January 2012, 15:24   #13773
Senior - BHPian
 
clevermax's Avatar
 
Join Date: Jun 2006
Location: Tvm/Amsterdam
Posts: 2,086
Thanked: 2,640 Times
Re: The Official non-auto Image thread

Quote:
Originally Posted by The_Warrior View Post
Gurus, Comments and Ciriticism please....
Not sure how it will look in color, but I think a color version would 've been better.
clevermax is offline  
Old 10th January 2012, 16:08   #13774
Team-BHP Support
 
Rudra Sen's Avatar
 
Join Date: Apr 2004
Location: Bangalore
Posts: 11,590
Thanked: 6,532 Times
Re: The Official non-auto Image thread

Quote:
Originally Posted by clevermax View Post
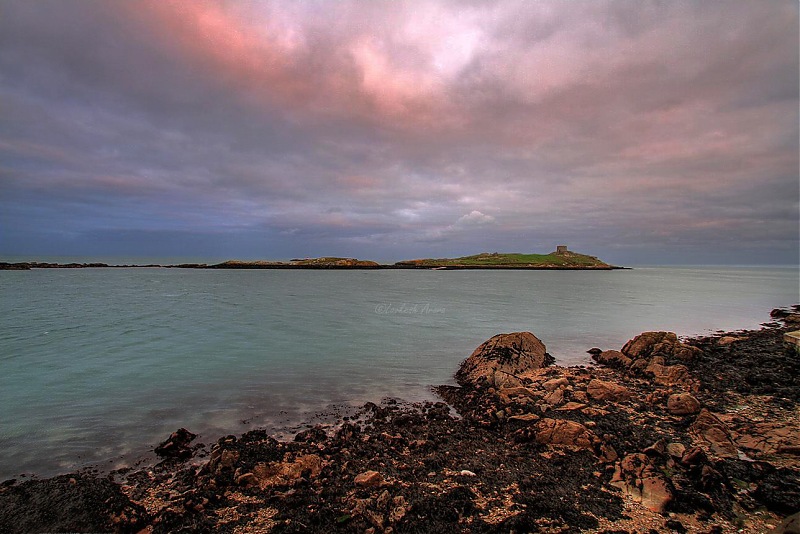
I have not touched on the contrast directly, but it may have increased during the processing. I selectively enhanced the water first, then brough down the levels of the sky, applied a high pass filter to enhance the contrast of clouds, increased sky's vibrance, applied a violet photo filter on the water to match the sky's tone and increased the overall sugary feel of the picture by adding a duplicate layer and playing with its Adjustments->Shadows/Highlights.
This is extremely interesting! Why did you go through so many steps? Is this something which you follow regularly or is this image specific treatment? I'm especially keen to know the reason for the use of high Pass filter.

Below is my process for increasing the tonal range. I'll explain the process here but after reading your thoughts and explanation first.

The Official non-auto Image thread-dalkey.jpg
Rudra Sen is offline  
Old 10th January 2012, 16:12   #13775
Senior - BHPian
 
shajufx's Avatar
 
Join Date: Apr 2007
Location: BLR & Singapore
Posts: 1,806
Thanked: 831 Times
Re: The Official non-auto Image thread

Quote:
Originally Posted by typeOnegative View Post
..This is what I feel is the best shot.....
Yes this is the best from that lot, I already liked it in Flickr

Quote:
Originally Posted by sidkun View Post
A few pics that I took on a recent trip to the NE.
Happy to see you here Sidhu. Loved the grass image. Last one looks more like a painting.

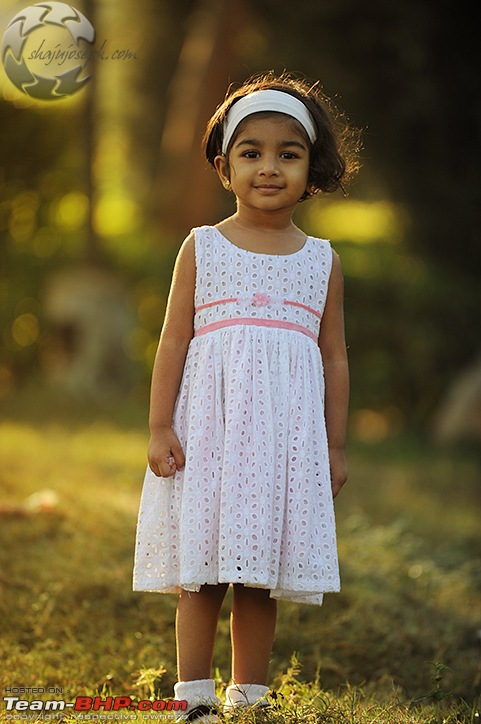
My baby !
The Official non-auto Image thread-faye.jpg
shajufx is offline  
Old 10th January 2012, 17:43   #13776
Senior - BHPian
 
clevermax's Avatar
 
Join Date: Jun 2006
Location: Tvm/Amsterdam
Posts: 2,086
Thanked: 2,640 Times
Re: The Official non-auto Image thread

Quote:
Originally Posted by Rudra Sen View Post
This is extremely interesting! Why did you go through so many steps? Is this something which you follow regularly or is this image specific treatment? I'm especially keen to know the reason for the use of high Pass filter.
Below is my process for increasing the tonal range. I'll explain the process here but after reading your thoughts and explanation first.
Attachment 869157
Here goes mine

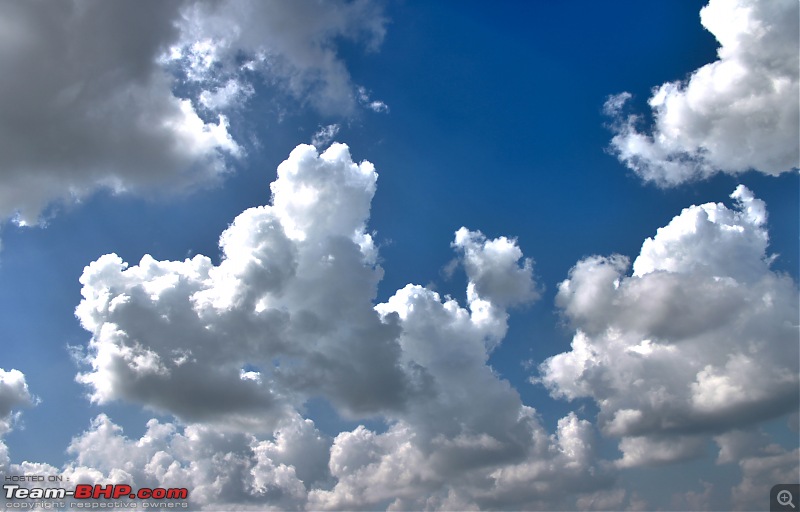
To make the sky look like what is shown, I admit so many steps were not required. I achieved that through bringing down the curve and then applying the high pass filter with a large radius - usually we apply HPF with a small radius to enhance the sharpness, but I've found that if we use a larger radius, it can make the clouds more pronounced... What I exactly did was to create a duplicate layer of the image, set the blending mode to 'Overlay' and applied HPF on it with a bigger radius and then set the opacity of that layer to about 70%. The radius to be set depends on the overall image resolution and how big the clouds are on that image. This may be a crude method but I do that often on the clouds

Looking forward to reading your method

Last edited by clevermax : 10th January 2012 at 17:51.
clevermax is offline  
Old 10th January 2012, 20:05   #13777
Senior - BHPian
 
gd1418's Avatar
 
Join Date: May 2006
Location: Gurgaon
Posts: 3,578
Thanked: 728 Times
Re: The Official non-auto Image thread

Wish you had lowered the aperture in the first picture to get overall sharpness. The 2nd pic is highly overexposed. You could have played with the aperture setting..

Quote:
Originally Posted by The_Warrior View Post
Gurus, Comments and Ciriticism please....
gd1418 is offline  
Old 10th January 2012, 20:54   #13778
Senior - BHPian
 
gd1418's Avatar
 
Join Date: May 2006
Location: Gurgaon
Posts: 3,578
Thanked: 728 Times
Re: The Official non-auto Image thread

Star male of Sariska Tiger Reserve - ST 6

The Official non-auto Image thread-5330.jpg
gd1418 is offline  
Old 10th January 2012, 22:15   #13779
BHPian
 
HellwratH's Avatar
 
Join Date: Mar 2007
Location: Bangalore
Posts: 115
Thanked: 57 Times
Re: The Official non-auto Image thread

Quote:
Originally Posted by typeOnegative View Post
@Veeresh, thanks dude. With regards to your recent pictures, don't you think that photography nuts will think of clicking almost anything if they are not out? Yesterday, I started clicking cut radishes. My wife already thinks I like the camera more than her.

Also, did you you use tissue paper? I find a glass top with a white paper / cloth below works better. Of course, you have to deal with the reflections ....
Ah, light the radishes/lemon from back and take a shot. That's next on my home experiments .

I used a paper napkin, yes. It was the closest I could get to white in my kitchen. Ideally, I would have loved to use plexiglass for it. But these were shots for me to practice specular highlight control for shiny surfaces, I think I did okay.


Quote:
Originally Posted by clevermax View Post
Does the camera recognize the flash, how did you trigger it?

On the banks of river Pamba
Attachment 867789
It has a hot shoe but the flash I used is very very old and I didn't want to mount it on my camera. So, I made my kitchen totally dark and used 1 second exposure and fired the flash manually. It was a pain, but good fun. I'll soon get triggers/receivers and some cheap flashes.

Quote:
Originally Posted by Rudra Sen View Post
This is extremely interesting! Why did you go through so many steps? Is this something which you follow regularly or is this image specific treatment? I'm especially keen to know the reason for the use of high Pass filter.

Below is my process for increasing the tonal range. I'll explain the process here but after reading your thoughts and explanation first.

Attachment 869157
Waiting for your tutorial . I think I had seen it on PAAI long long time back, but the photos do not show up there anymore :(. And for the love of God, I can't use the pen tool effectively at all.

I have found an excellent tutorial by Josesph Rossbach that I use to manually blend exposures. It's really really easy to do and gives good control as well. Here's the video for it:

HellwratH is offline  
Old 10th January 2012, 22:47   #13780
Team-BHP Support
 
Rudra Sen's Avatar
 
Join Date: Apr 2004
Location: Bangalore
Posts: 11,590
Thanked: 6,532 Times
Re: The Official non-auto Image thread

Quote:
Originally Posted by clevermax View Post
Looking forward to reading your method
1. Take a clean path drawing for the sky. Feather selection greatly depends on original image resolution. So for a low res image like this .5 feather is enough.
2. Copy paste as layer 1.
3. Multiply layer 1. Cut opacity to the kind of depth you like.
4. Duplicate background layer.
5. Keep colour palette black and white (black on top/white below). Go to IMAGE > ADJUSTMENT > GRADIENT MAP. This is purely a personal choice. I did it to cut the strong colours in front.
6. Cut opacity to 30% minimum to get those neutral colours. You can go more or less depending on your choice.
7. Mask out (layer mask) to bring out colours wherever you want more.

Note: This is not the only way I follow for all type of images.

Quote:
Originally Posted by HellwratH View Post
And for the love of God, I can't use the pen tool effectively at all.
You must get into this. It's a must tool.
Rudra Sen is offline  
Old 11th January 2012, 15:39   #13781
Senior - BHPian
 
jkdas's Avatar
 
Join Date: Sep 2005
Location: Thiruvananthapu
Posts: 9,687
Thanked: 1,492 Times
Re: The Official non-auto Image thread

Quote:
Originally Posted by clevermax View Post
Oh if you are already doing that, probably going a bit deeper into such processing will make it look more stunning.. this is my version, with your permission:

(Picture by extreme_torque)
Attachment 868170
Wish I had the raw file
Quote:
Originally Posted by extreme_torque View Post
Dalkey Village, Dublin
Quote:
Originally Posted by clevermax View Post
I have not touched on the contrast directly, but it may have increased during the processing. I selectively enhanced the water first, then brough down the levels of the sky, applied a high pass filter to enhance the contrast of clouds, increased sky's vibrance, applied a violet photo filter on the water to match the sky's tone and increased the overall sugary feel of the picture by adding a duplicate layer and playing with its Adjustments->Shadows/Highlights.
Quote:
Originally Posted by Rudra Sen View Post
1. Take a clean path drawing for the sky. Feather selection greatly depends on original image resolution. So for a low res image like this .5 feather is enough.
2. Copy paste as layer 1.
3. Multiply layer 1. Cut opacity to the kind of depth you like.
4. Duplicate background layer.
5. Keep colour palette black and white (black on top/white below). Go to IMAGE > ADJUSTMENT > GRADIENT MAP. This is purely a personal choice. I did it to cut the strong colours in front.
6. Cut opacity to 30% minimum to get those neutral colours. You can go more or less depending on your choice.
7. Mask out (layer mask) to bring out colours wherever you want more.

Note: This is not the only way I follow for all type of images.

You must get into this. It's a must tool.
That was an interesting thing

Hope we have more discussions like this in here
jkdas is offline  
Old 11th January 2012, 16:37   #13782
Senior - BHPian
 
shajufx's Avatar
 
Join Date: Apr 2007
Location: BLR & Singapore
Posts: 1,806
Thanked: 831 Times
Re: The Official non-auto Image thread

Quote:
Originally Posted by HellwratH View Post
....I can't use the pen tool effectively at all.
I can only think about Reynolds and Cello here

Quote:
Originally Posted by Rudra Sen View Post
......This is not the only way I follow for all type of images.......
The entire thing was Greek to me !!!! Will dedicate some serious hours into understanding it. One good thing about not knowing any of these = the never ending struggle to get things straight from camera, by whatever it takes
shajufx is offline  
Old 11th January 2012, 17:07   #13783
BHPian
 
Torqueguru's Avatar
 
Join Date: Nov 2007
Location: Seattle
Posts: 277
Thanked: 165 Times
Re: The Official non-auto Image thread

@Rudra
Awesome.

@Shaju
Remember u must first get a diamond to polish it else no matter how much u polish, the value wont be there!

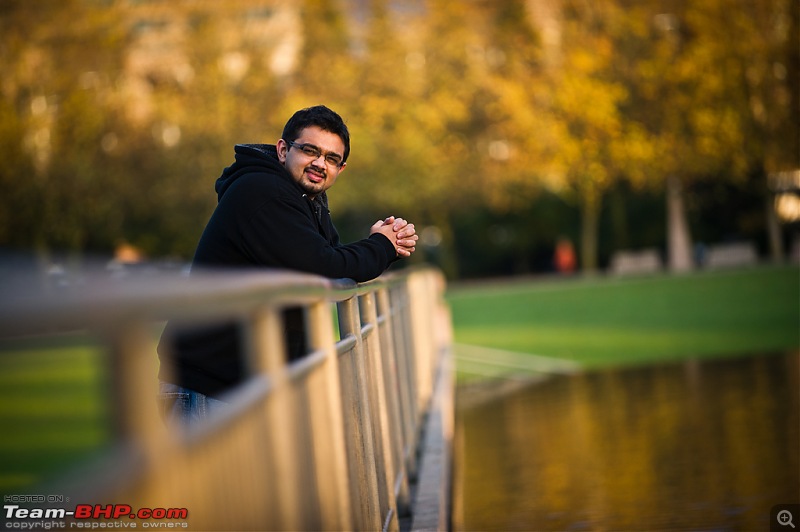
A portrait of one of my best friends.
The Official non-auto Image thread-6381898579_b7a3b620cc_b.jpg

Cheers,
TG.
Torqueguru is offline  
Old 11th January 2012, 17:08   #13784
Senior - BHPian
 
geeash's Avatar
 
Join Date: Apr 2009
Location: Chennai
Posts: 1,513
Thanked: 146 Times
Re: The Official non-auto Image thread

Quote:
Originally Posted by shajufx View Post
The entire thing was Greek to me !!!! Will dedicate some serious hours into understanding it. One good thing about not knowing any of these = the never ending struggle to get things straight from camera, by whatever it takes

For me too !!. Rudra sen please take 1/2 hr class each day for us !!

But what you have said is 100 % truth. I have always struggled to get the best possible picture straight out of the camera which in a way is good !!. I am a little old fashioned

But not knowing such things is a blunder in this era. Where did you learn all these things rudrasen?
show us some light !!

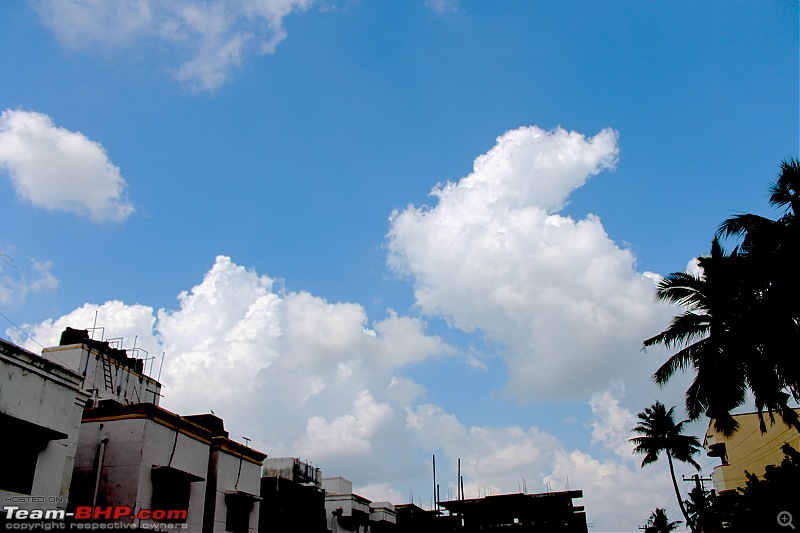
The Official non-auto Image thread-hdr2.jpg

The Official non-auto Image thread-hdr3.jpg

Last edited by geeash : 11th January 2012 at 17:10.
geeash is offline  
Old 12th January 2012, 06:52   #13785
BHPian
 
HellwratH's Avatar
 
Join Date: Mar 2007
Location: Bangalore
Posts: 115
Thanked: 57 Times
Re: The Official non-auto Image thread

Quote:
Originally Posted by Rudra Sen View Post
1. Take a clean path drawing for the sky. Feather selection greatly depends on original image resolution. So for a low res image like this .5 feather is enough.
2. Copy paste as layer 1.
3. Multiply layer 1. Cut opacity to the kind of depth you like.
4. Duplicate background layer.
5. Keep colour palette black and white (black on top/white below). Go to IMAGE > ADJUSTMENT > GRADIENT MAP. This is purely a personal choice. I did it to cut the strong colours in front.
6. Cut opacity to 30% minimum to get those neutral colours. You can go more or less depending on your choice.
7. Mask out (layer mask) to bring out colours wherever you want more.

Note: This is not the only way I follow for all type of images.

You must get into this. It's a must tool.
Thank you for the tutorial Rudra sir. Will start practicing on how to use the pen tool. Thank you once again.

Quote:
Originally Posted by geeash View Post
For me too !!. Rudra sen please take 1/2 hr class each day for us !!
Ha, I have been requesting that for a long long time .
HellwratH is offline  
Reply

Most Viewed


Copyright ©2000 - 2024, Team-BHP.com
Proudly powered by E2E Networks