Team-BHP > Modifications & Accessories
Register New Topics New Posts Top Thanked Team-BHP FAQ


Reply
  Search this Thread
14,948 views
Old 2nd February 2014, 11:06   #16
BHPian
 
narendra.vw's Avatar
 
Join Date: Apr 2010
Location: Bangaloru
Posts: 293
Thanked: 425 Times
Re: TDI VW Van: The story continues...

Rock & Roll bed.
During my work, I noticed the van’s OE middle row seat in a corner gathering dust.( It’s not a Recliner, it’s fixed). I had read about R&R bed in an other forum which is very active with VW vans. I set my mind to make one.
A week later, I started working on the design. I couldn't get any working design in terms of dimension. (It’s the most important). Started studying some visuals available on the internet.
I, then, made a prototype using my old jeep’s back bench seat. It operated as planned. However, a bit of correction was necessary .
Got the courage to implement the same on the van seat. If this works, I will have to remove the existing two bucket seats to make way for the R&R. The removed bucket seats will replace OE front driver & passenger seats. To avoid wastage.
Fabrication work started. Note:-- Neither a single hole was drilled nor a single part was welded to the van’s body.

Third Seat separated. (Cover & foam removed).
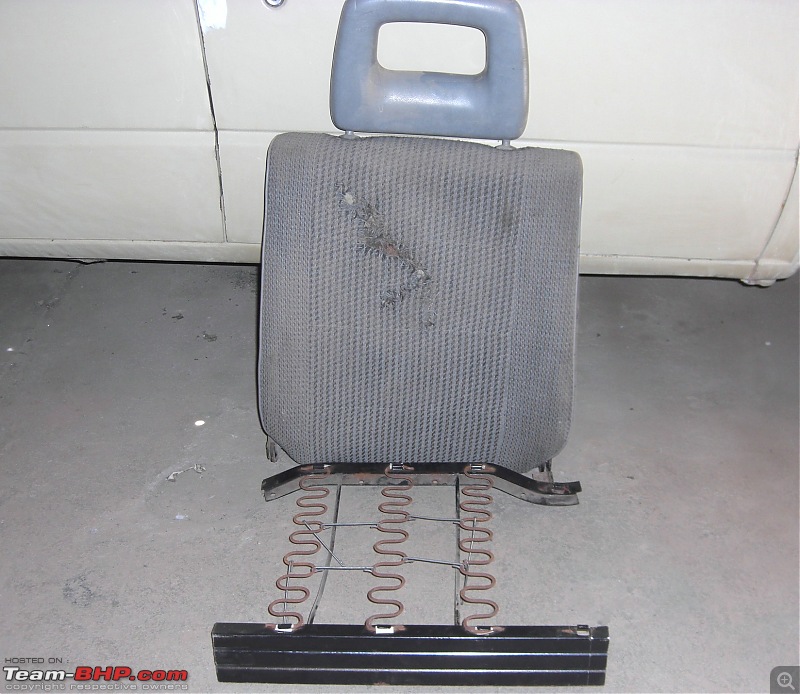
TDI VW Van: The story continues...-1.jpg

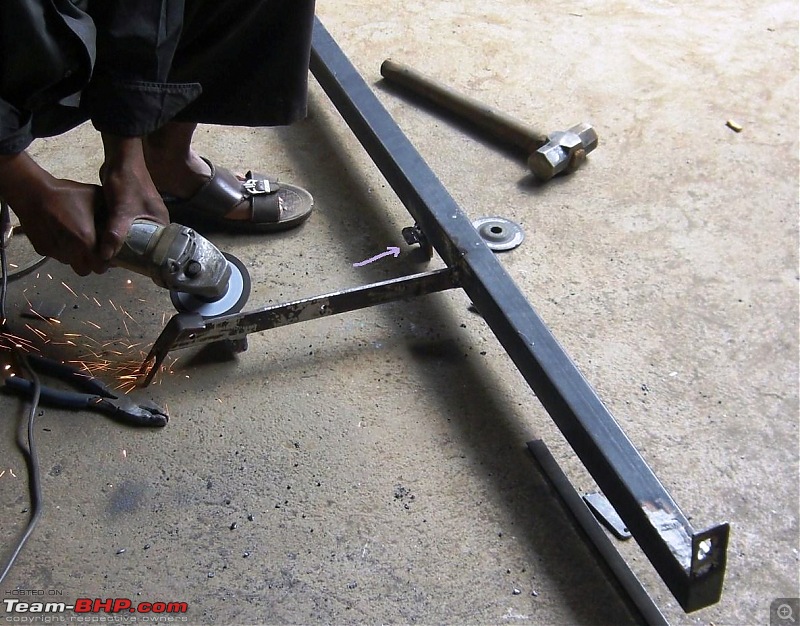
Frame was carefully matched & welded. Hinge was fabricated by using the cut material of the seat frame. Arrow shown.
TDI VW Van: The story continues...-2.jpg

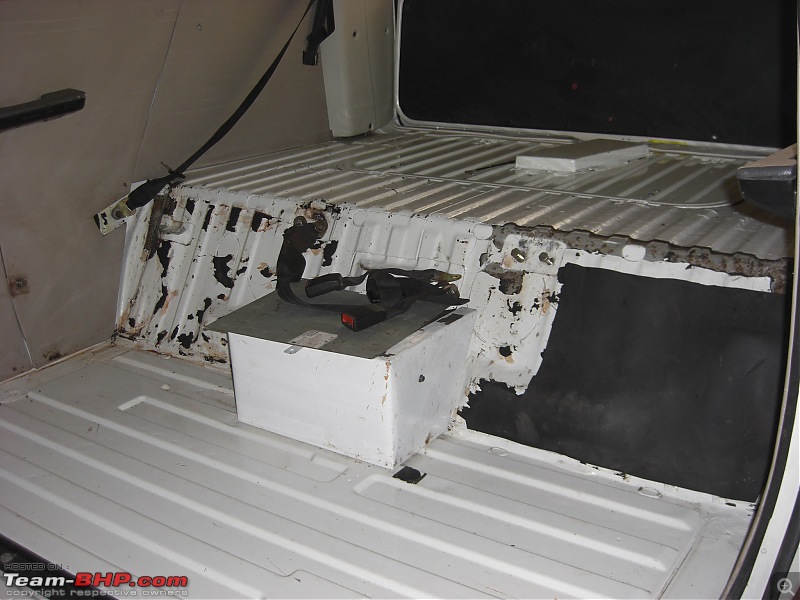
Found a sweet spot in terms of Sitting angle, Proper thigh support & Stretching length. (Under the covered plate lies ECU unit). On a side note, the wooden floor needs protection.
TDI VW Van: The story continues...-3.jpg

Almost finished. Photo does not do justice to the amount of brain work gone into it.
TDI VW Van: The story continues...-4.jpg

When fully stretched, available over all length measures 74”. Sorry, not for someone beyond 6 foot.
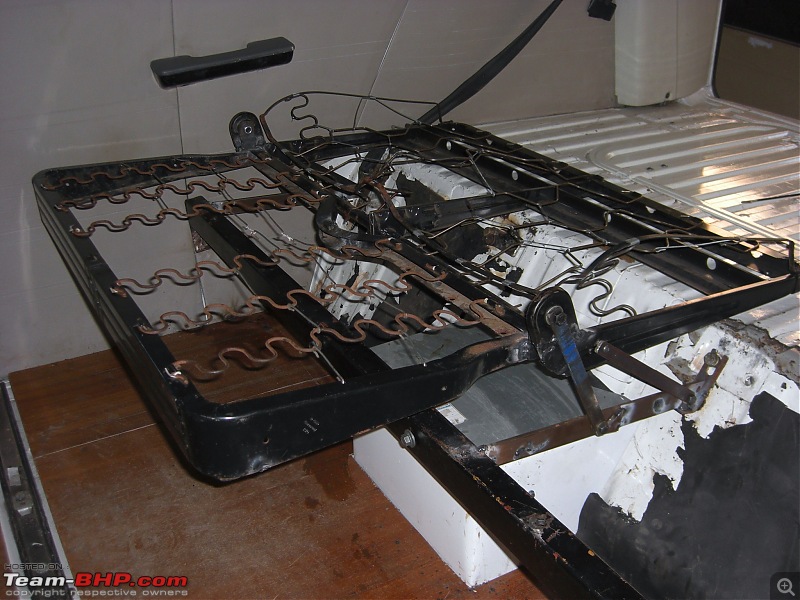
TDI VW Van: The story continues...-5.jpg

Positioning & determining the length of the lever is very important. The paired levers are not of the same length.
TDI VW Van: The story continues...-6.jpg

The unit was removed for final weld, grinding of rough edges & painting.(Arrow shows the ‘Stopper & Guider’ for the stand.)
TDI VW Van: The story continues...-7.jpg

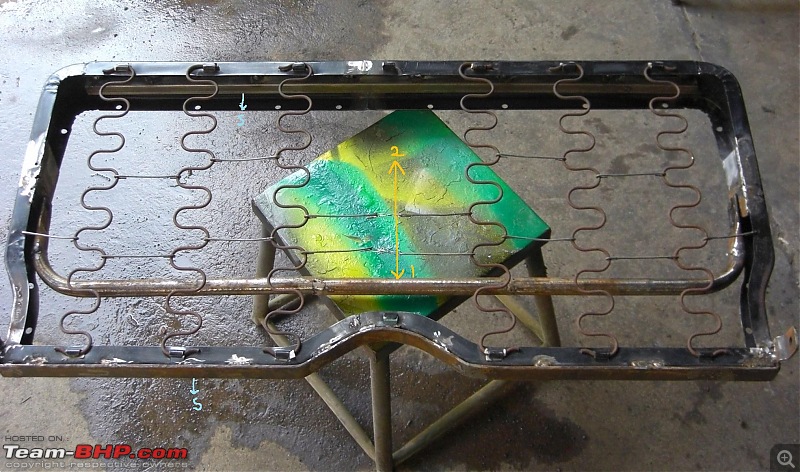
‘S’ Extra stiffeners added for strength. 1.Stand supports the seat when stretched. 2.Same stand will restrict back rest movement while in seating position.
TDI VW Van: The story continues...-8.jpg

After paint job & before assemble. Seat Mounting bracket is on the right.
TDI VW Van: The story continues...-9.jpg

Foam & Seat cover going back to their respective frame. ( Matching Seat Cover will be taken care of later.)
TDI VW Van: The story continues...-10.jpg

Assembling started. All parts were fastened by using M8 (8mm dia) half thread High tensile bolt, Self locking nut & Washers. So that there’s no loose end. Special Grease used at all the moving parts.
TDI VW Van: The story continues...-11.jpg

Cleaned all the mess before fitment.
TDI VW Van: The story continues...-12.jpg

Work was then complete. Unit worked like how I imagined it.

Visual demo in sequence.

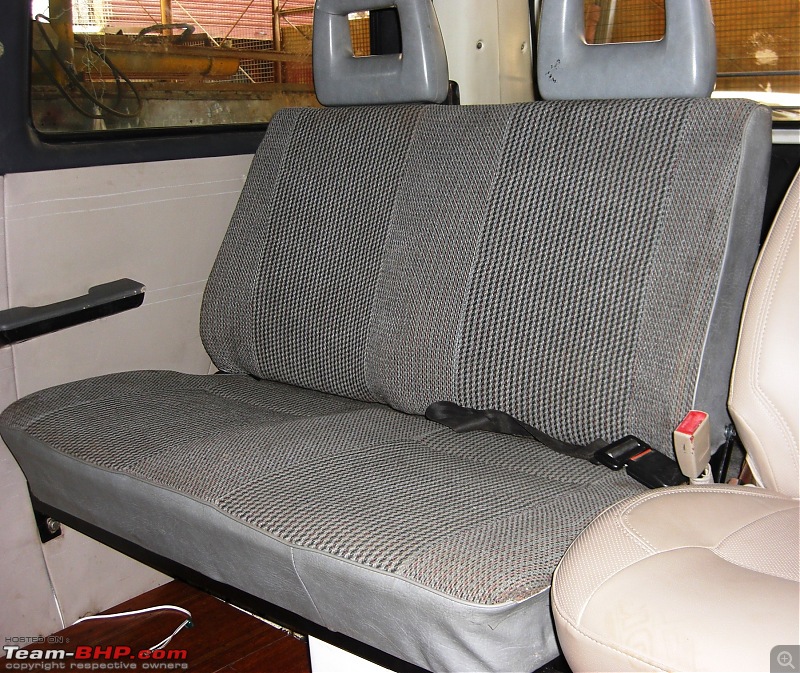
Seating position. Stand acts as a ‘Lock & Stopper’ for the Back Rest. Note:-- There’s OE Seat belts for all three Occupants.
TDI VW Van: The story continues...-a1.jpg
TDI VW Van: The story continues...-a11.jpg

When Bottom Seat is lifted & pulled, Seat is fully stretched . When stretched same stand supports the stretched Seat.
TDI VW Van: The story continues...-a2.jpg
TDI VW Van: The story continues...-a22.jpg

To push back , lift the Bottom seat a bit & fold the stand. Now press the edge of the Bottom Seat as shown & start pushing it back.
TDI VW Van: The story continues...-a3.jpg
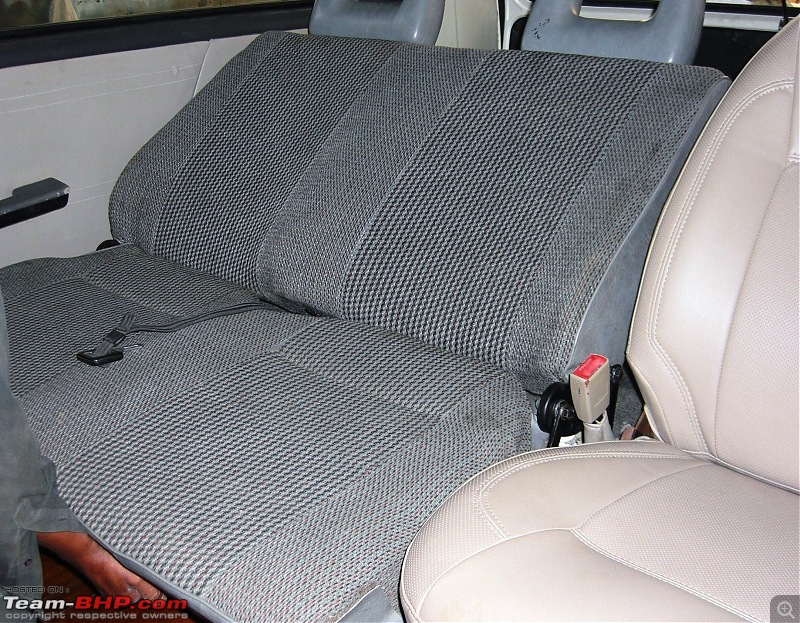
The unit automatically comes to seating position & locks. The whole operation takes less than 10 sec to complete.
TDI VW Van: The story continues...-a4.jpg

Important note:-- In Seating position , the Occupants weight is transferred to Mounting cross member & Rear body mount. Levers are simply used as guiders. No stress experienced by the levers.

All set for a week end trip to the mountains. Photo was taken without flash, the light is from the roof light.
TDI VW Van: The story continues...-a5.jpg

Amazing, how Engineering makes things simple.
Most likely suited for the Project:-- SUV having three row seats. (Quails).

May help Jeep owners.
TDI VW Van: The story continues...-back-holder.jpg


Thread will rest for a while. Thanks for being Pillar to this Thread..
narendra.vw is offline   (6) Thanks
Old 2nd February 2014, 15:04   #17
BHPian
 
human_wheels's Avatar
 
Join Date: Oct 2010
Location: Bangalore
Posts: 81
Thanked: 81 Times
Re: TDI VW Van: The story continues...

Wonderfully executed plan. Amazing to see all the mods coming through beautifully one after the another. Eagerly waiting for the next surprise. Also thanks a ton for giving me a ride in your van. Its a true labour of love.
human_wheels is offline   (1) Thanks
Old 20th May 2015, 21:40   #18
BHPian
 
narendra.vw's Avatar
 
Join Date: Apr 2010
Location: Bangaloru
Posts: 293
Thanked: 425 Times
Re: TDI VW Van: The story continues...

Hi, the Thread is back!!
There’s so much happening in this section, I thought why not update my own Thread.
Update follows.
As of today van is been driven once a week with occasional out station trip. Due to speedo error I assume van to have covered 18,000 + km.
In the meantime, van has gone through mechanical add-on & Interior Mod(mostly Utility for my family).
Following are the Add-on & Mod which I like to share.
-Air scoop.
-Rear shocks replacement(Bilstein shocks).
-Rear Brake drum replacement.
-The third Brake light for more visibility & safety.
-Self made Roof lining.
-Roof rail fitting.
-Making of a cup holder.
-Making of a Utility table.
-DVD player(single Din) having a 5.1 surround system.
I’m also working on cable type Gear shifter.

I’m hoping few of the above may inspire you in your project.


Let’s start of with a mechanical add-on.
Air Scoop(custom made).
In TDI engines, cold air inflow plays a major role with the performance of the engine. Since the horse power comes from the rear, I had to make sure to have cold air flow for the inlet. Hence this Mod.
The scoop advantage, it allows more air flow to the air filter & also cools the IC faster.
The van does have a OE Scoop at the top but it is not sufficient for the TDI engine.

Before the visuals, I like to explain the work done on the van’s body.
Below the van’s rear left corner a 6.5”x 7” sheet was cut. Here, I made sure to bend the cut van’s body by at least 5mm on all four sides. This gives back the strength to the van’s body. The Scoop was hand made using 18G ms sheet( I was impressed by my tinker’s magic).

Visuals,
The Scoop’s mouth is 1” wide & 6.5” in height. Arrow shows the Scoop’s back slide into the van’s body & front two nuts secure the Scoop. Easy to remove or refit.
TDI VW Van: The story continues...-1.jpg

Air filter viewed from the cut part of the van’s body, Way for the air filter access. IC is located below the air filter. Both have sufficient gap for each other.
TDI VW Van: The story continues...-2.jpg

The only way to loosen the air filter clamp. The hole is located near the engine bay area. This gives some kind of anti theft system.
TDI VW Van: The story continues...-3.jpg

The Scoop at it‘s rightful place.
TDI VW Van: The story continues...-4.jpg

The Scoop viewed from the rear(my favorite angle). The OE Scoop can also be seen at the top. Arrow near number plate shows reverse camera.
TDI VW Van: The story continues...-5.jpg
The Scoop’s inside is fitted with a mess to block dirt particles & to arrest water droplets. A must for an open air filter.

For the records, the Air filter base is 28“ higher from the ground floor.

Van on a bright sunny day doing some seasonal home work.
TDI VW Van: The story continues...-6.jpg

More to come. Thanks.
narendra.vw is offline   (5) Thanks
Old 6th June 2015, 17:03   #19
BHPian
 
narendra.vw's Avatar
 
Join Date: Apr 2010
Location: Bangaloru
Posts: 293
Thanked: 425 Times
Re: TDI VW Van: The story continues...

Add-on continues…..
At the time of restoration & modification, rear suspension was untouched. The shocks, arm bushes & the rear brake parts were all in good useable condition. All Parts were factory fitted!
After few thousand km, shocks started showing sign of weakness. Heaver TDI engine did help for the cause. Brakes lost it’s grip. Wheel cylinders showed sign of fluid dampness. Hand brake adjustment almost came to the end point(a sign of worn out brake lining).

Time had come for me to do the rear suspension.
Since, Coil spring had the right height & lower arm bushes looked like they could go for ever, I decided to retain the same.
Brake parts were ordered from Germany through online(a online is a boon for the restorers but at some cost). I made sure to replace to all new parts. No chances taken in braking system.
One funny incident I like to share when the parcel arrived, I had to hold the 20kg parcel from the post office to my house sitting behind the post man’s Scooter. See I do help others.
While changing brake fluid, fluid was replaced from Dot 3 to Dot 4. After brake overhauling I will stick to Dot 4.They do less damage to the rubber parts. Fluid Life is more in Dot 4.Brake fluid do come with Dot 5(Primary constituent, silicone).
Shocks along with other parts were from US, bought by my niece who was on a Holiday(our dear one’s staying for far away is an advantage). Please don’t remind me of the cost.

Visuals,
1.Rear shocks along with a mini compressor, Cables 8 feet in length for my gear shifter Mod, spare clutch plate & a 250 w Bazooka(A big hug to my niece).
TDI VW Van: The story continues...-1-shocks.jpg

2a. Master Flow MF-1050 Air Compressor(Details might help you).
TDI VW Van: The story continues...-2.jpg
The compressor, came to use only once for my BIL‘s Logan. I was amazed the way it inflated a flat tyre within a minute to it’s required pressure. Surprisingly it was silent too. It needs a direct clamping to the Battery.

2.Wheel brake cylinder set, clutch slave cylinder & speedo cable.
TDI VW Van: The story continues...-2-brake-parts.jpg
Some part’s box had ‘made in Italy’ print(Interesting).

3 Brake drums, brake lining with the relative springs.
TDI VW Van: The story continues...-3.jpg

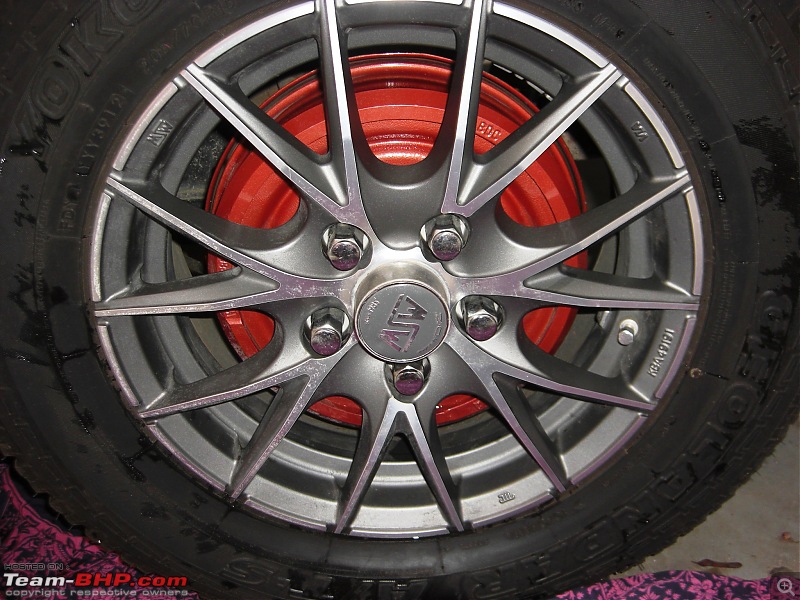
4. All Brake parts were fitted but not before giving some glamour to the Drums(makes a nice jewelry for the Ladies).
TDI VW Van: The story continues...-4.jpg

5. Shocks fitted on to the suspension.
TDI VW Van: The story continues...-5.jpg

Experience,
Brakes as expected were very sharp not before few km of running in to be effective. Brake Pedal stay put when applied. It means that seating of the Drum & the lining were perfectly aligned. Any difference could be felt in the brake pedal. Hand brake, effective with a minimum cable adjustment.
Shocks were nether soft nor hard just right, same with the no load condition. The shocks I got are of heavy duty(HD). They do come with a sports setup with a dampening setting knob.

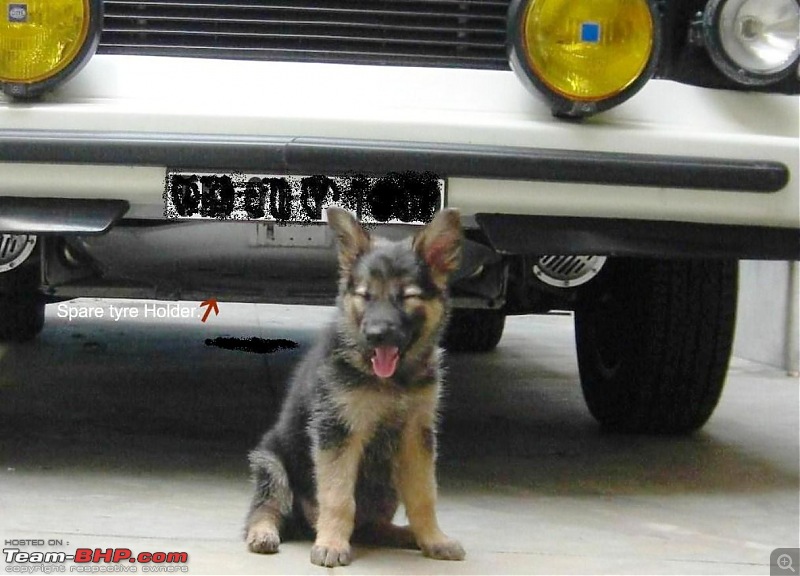
2.Our new family member. A 20 yr old Bosch grill Horn, under the van’s belly. Check the front Split spoiler tuck way back to the Bumper.
TDI VW Van: The story continues...-6.jpg

Thanking your patience, the post ends. More add-on in my next post…..
narendra.vw is offline   (5) Thanks
Old 22nd June 2015, 18:15   #20
BHPian
 
narendra.vw's Avatar
 
Join Date: Apr 2010
Location: Bangaloru
Posts: 293
Thanked: 425 Times
Re: TDI VW Van: The story continues...

A weekend project for you.
Making of a Cup holder.
In this project, I’m mainly concentrating on a slider type cup holder. It’s an attachment for the folding type table(my requirement). .
You can make it universal by having different fixtures of your requirement. eg:- a L type plate for vertical fitting or a Hinge type for folding.

Main Tools used,
-Grinding machine, cutting blade & frame.
-Welding job out sourced.

The material used are of used old parts laying in the garage.
Materials used,
- Old metal brake pipe, It’s softness makes easier to bend to the required shape also strong enough to hold a cup.
- ½ litre paint container, the lid of the container has a groove where the brake pipe will fit right into the groove. It also acts as a die for the pipe to get a smooth circular shape.
- Old drawer slider, I ’m using it to hide the Cup holder under the table when in no use.
- 2/3” flat, acts as a glider for the slider.
- Self tapping screws, to mount the unit to the table

Few visuals of a Cup Holder(CH)

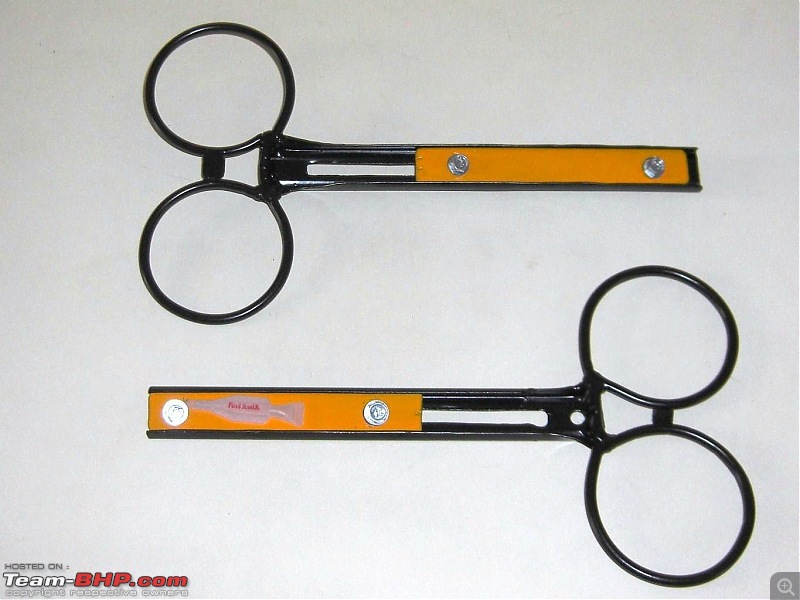
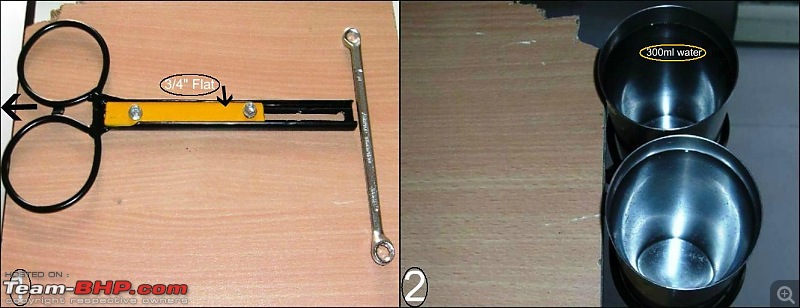
CH development details. CH’s 2 ¾ “ inner dia is ideal.
TDI VW Van: The story continues...-1.jpg

CH welded to the slider & powder coated(Flat included).
TDI VW Van: The story continues...-2.jpg

CH working Demo.
TDI VW Van: The story continues...-3.jpg
Actual fixture was done to the Universal utility table.

Roof railing, 3D view(Picture also highlights working Shark fin antenna).
TDI VW Van: The story continues...-v2.jpg
Roof railing development in my first Thread.

Roof railing viewed from the rear.
TDI VW Van: The story continues...-v3.jpg

‘Universal utility table’ next??
Let me know.
narendra.vw is offline   (6) Thanks
Old 22nd June 2015, 19:46   #21
knp
BHPian
 
Join Date: May 2006
Location: bangalore
Posts: 241
Thanked: 42 Times
Re: TDI VW Van: The story continues...

Post deleted by the Team-BHP Support : Please do NOT post messages that add little or no informational value to the thread. We need your co-operation to maintain the quality of this forum.

Please read our rules before proceeding any further. We request you to post ONLY when you have something substantial to add to a discussion.

Last edited by GTO : 11th August 2015 at 12:49.
knp is offline   Received Infraction
Old 25th May 2021, 11:01   #22
BHPian
 
av8er's Avatar
 
Join Date: Oct 2008
Location: Autoville
Posts: 146
Thanked: 86 Times
Re: TDI VW Van: The story continues...

This van used to be ours, my Dad had bought it for a reason but he passed away about 6-8 months after he bought it.

Still have many memories with it, numerous loong trips, spacious, comfortable, powerful and safe are just some words I can use to describe. A friend had an Innova but we never felt comfortable in it.

Few years later, I went abroad to study and my mother could not take care of it so she gave it off. I was told about it when I was out of the country already and I could not do anything about it. Else would have never let it go.

Anyway really nice to see that its in good hands and you are keeping it soo well.
av8er is offline  
Reply

Most Viewed


Copyright ©2000 - 2024, Team-BHP.com
Proudly powered by E2E Networks