The whole process took more than 10 hours and needed the car to be worked upon at night. Projector fitment is more of a precision work than anything else. It was needed to be done at night only so that while the work is going on, at every step the light throw and alignment can be checked. Not much labour intensive but extremely cautious handling is required.
The way it works is as given below -
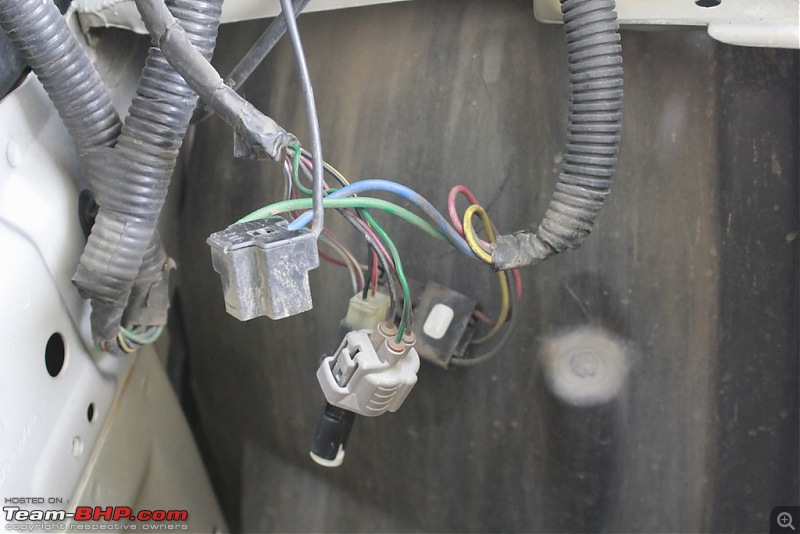
- You first uncouple all the headlight connections. I had earlier fitted a relay for 55-60 bulbs to bump up to 90/100 (IIRC). That also needed to be removed.
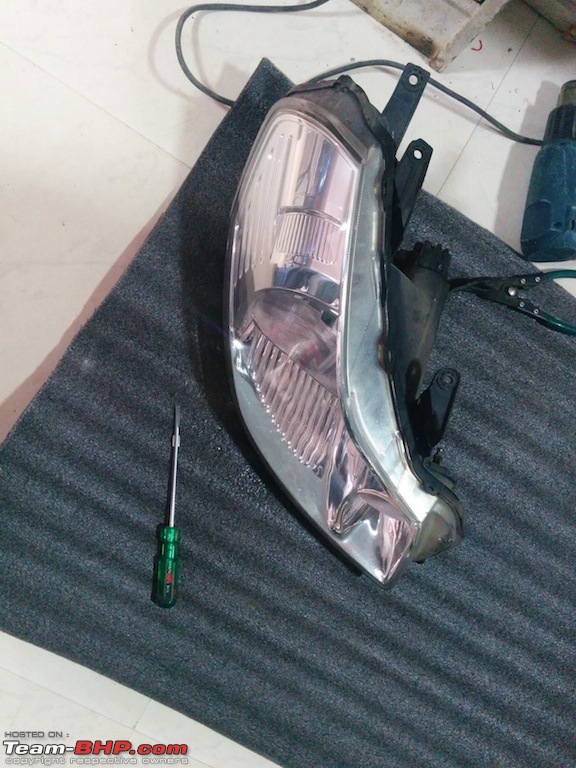
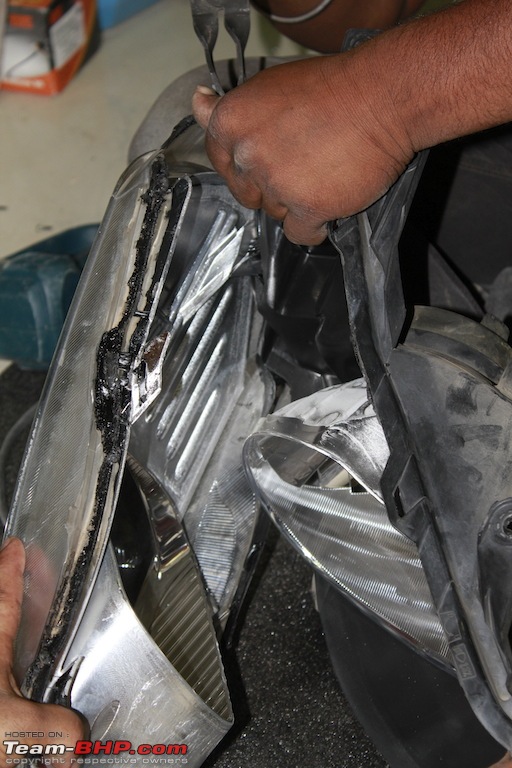
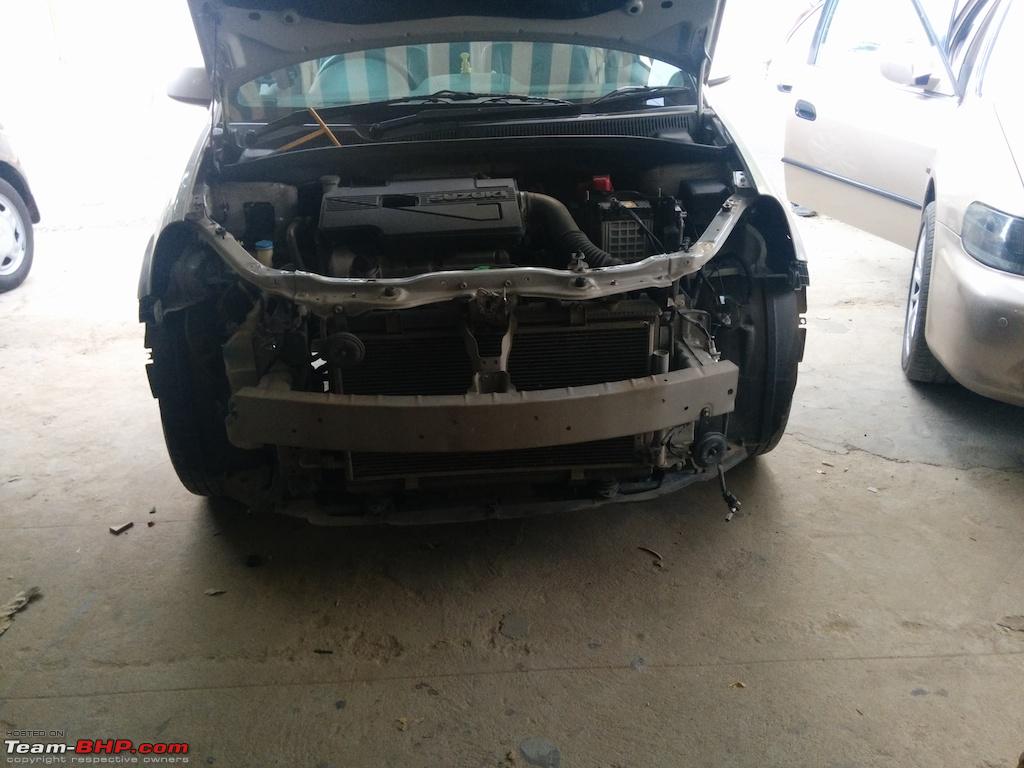
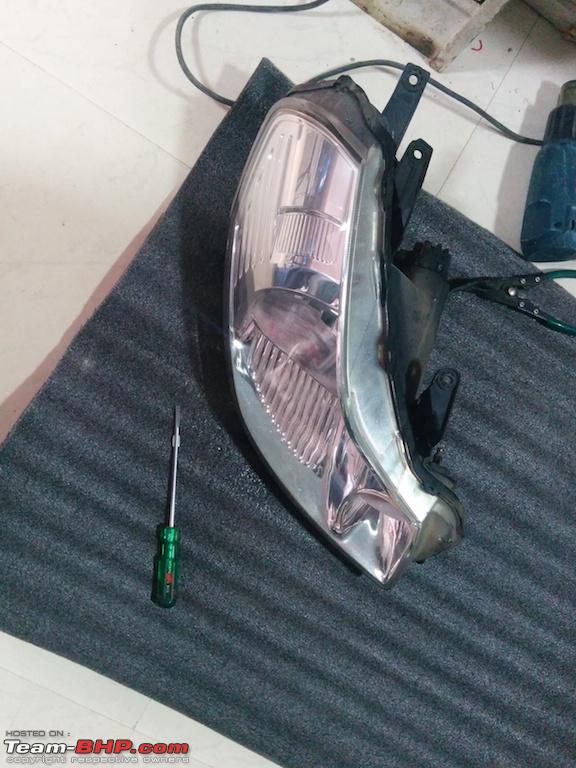
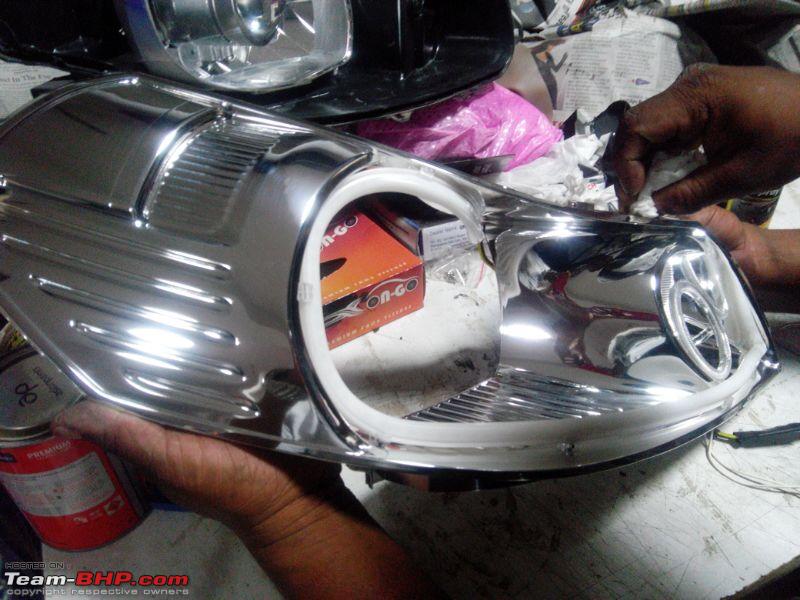
- Completely disassemble the headlight assembly and take the eyes out on stretcher! Some of the screws that hold the light assembly can be reached only by removing front bumper.
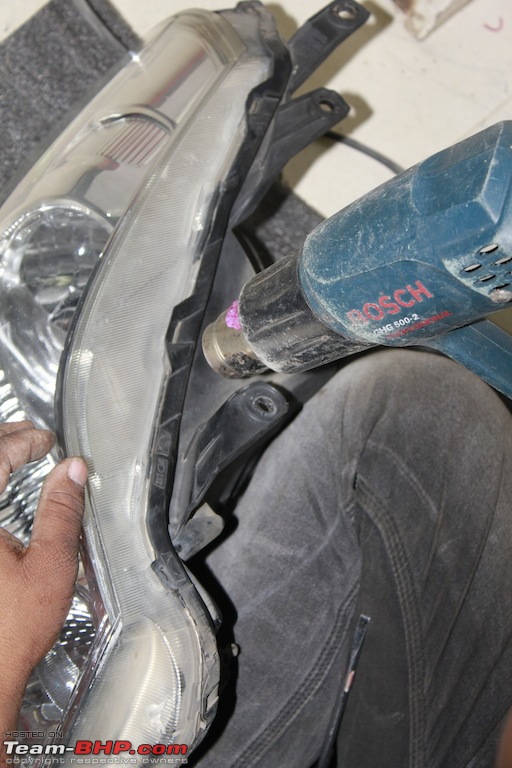
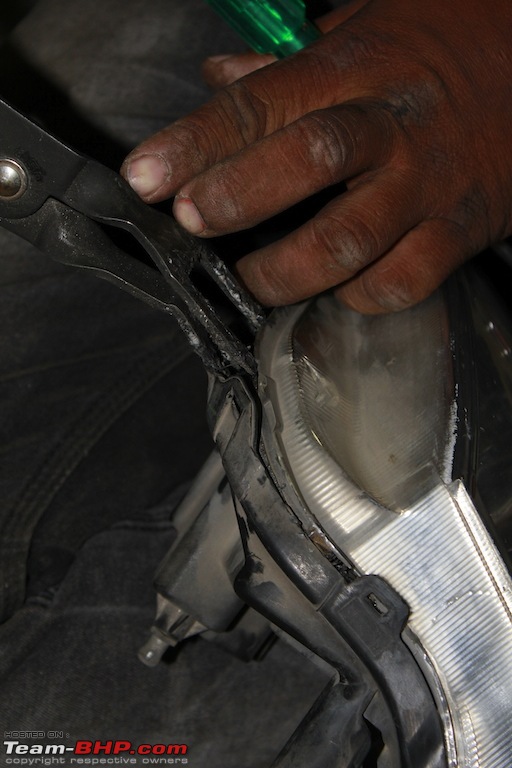
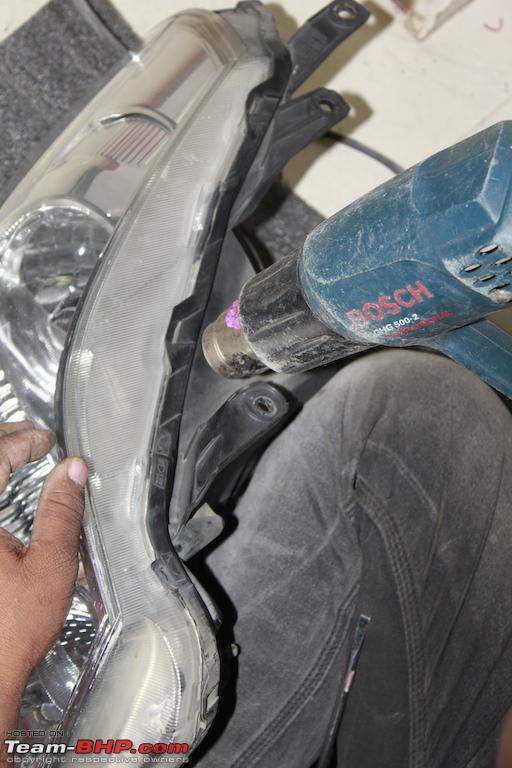
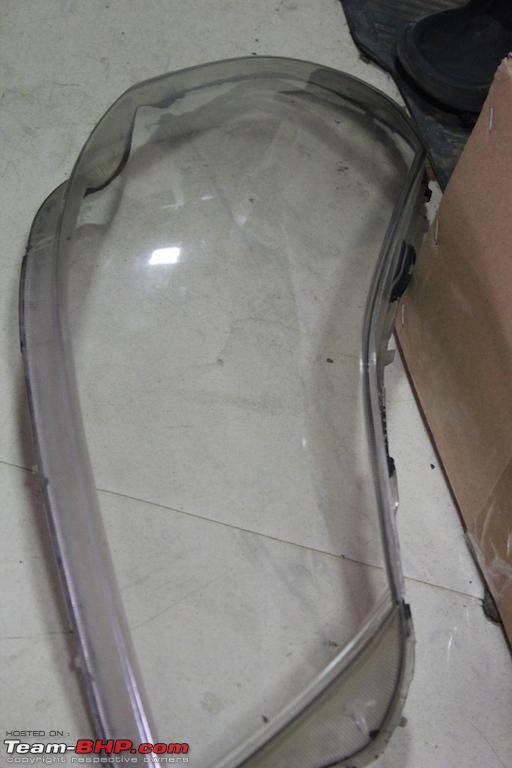
- Using a heat gun, separate the transparent/ plastic front part from the rear black casing of the headlight. This is where things can get tricky. You do one wrong move and Feviquick is only your next best friend, if at all

- Using cutting knifes, you got to make holes into the silver holders in order to make the projector sit "inside" them. There will be of course a casing around projectors that hides all these ugly cuts.
- Using actual ballasts and wiring harness, one projector is fitted in those cut portions by leveling with regular headlight on other side. This is to ensure that leveling is kept the same way you were using earlier on stock bulbs! Easier since you have old headlight on other side to refer the preferred working levels
- While the leveling is done as described above, use m-seal to to ensure tight fitting of projector lens into the hole precisely. It takes a lot of time and patience to do this. But once done, the second one is even easier.
- Then lay out the actual wiring, ballasts and prepare other headlight.
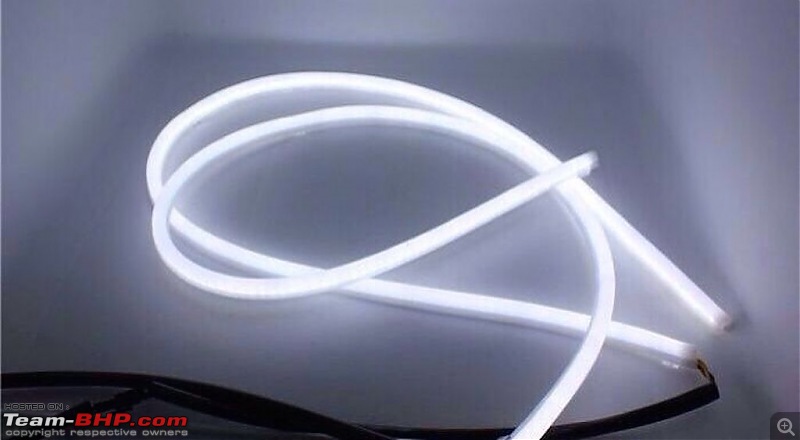
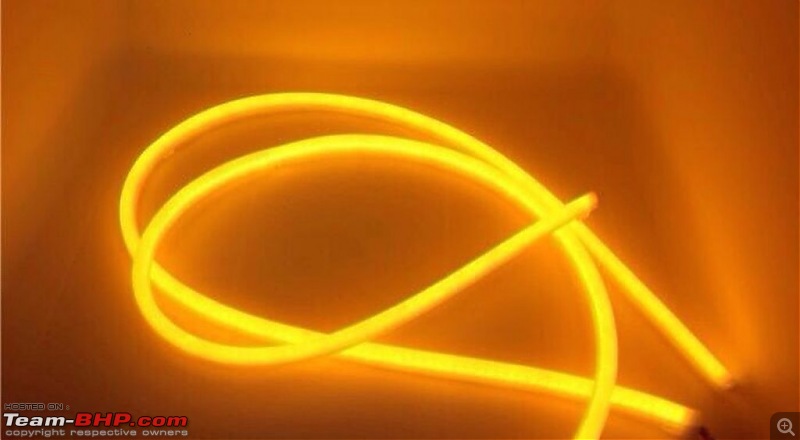
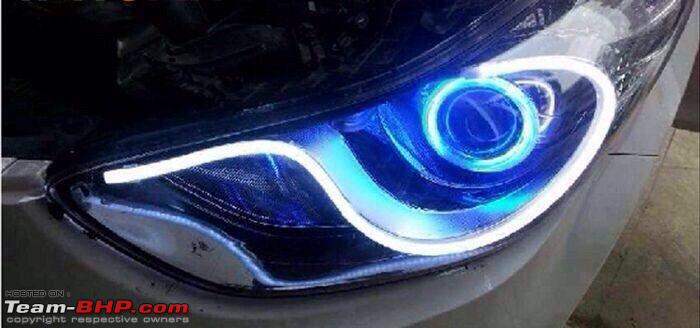
- Now since the assembly is already open, go ahead and install DRL tubes, angel eyes and whatever you want!
- Put the entire assembly back on the car, with all its component screws and stuff in proper place as it was earlier.
This entire procedure the way described above, seems so easy but trust me, this is no simple DIY kind of thing for faint hearted like me. That is why you need someone like Evo to do this professionally and with precision.
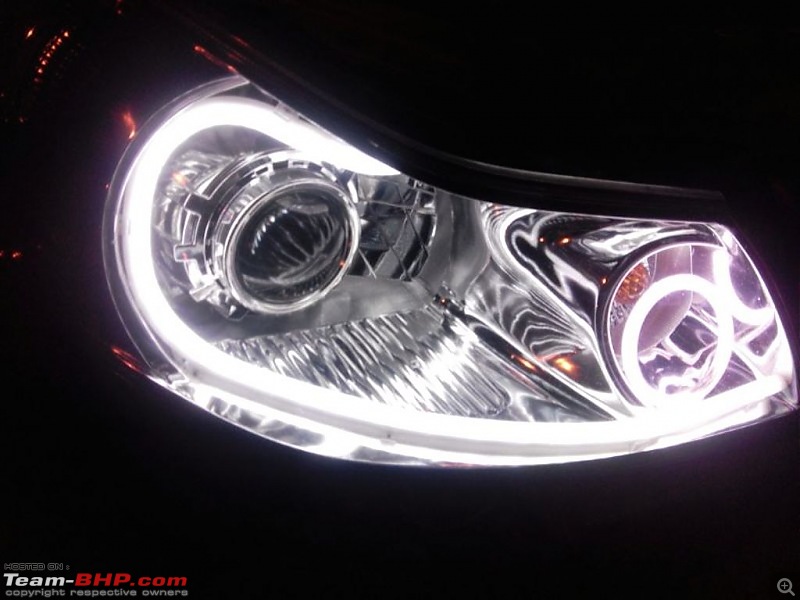
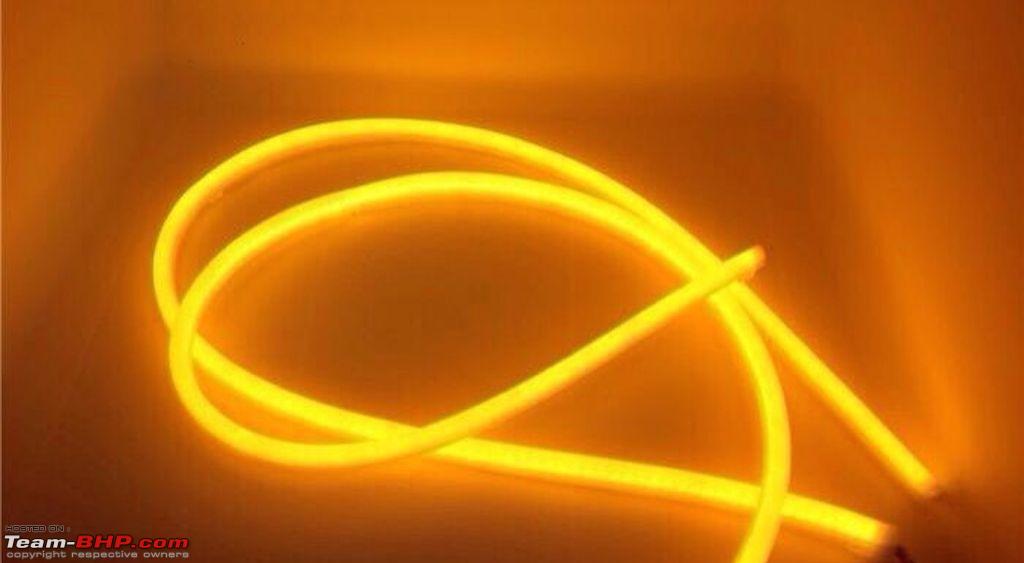
The DRL tube we chose had white light and an amber line in it. The DRL is linked directly to ignition with a switch. That helps ensure I can optionally use DRLs if I want to, else leave it as is. And while the switch is ON, it's wiring ensures the load isn't put on the battery unless the ignition is ON/ engine starts. The switch is pulled under the steering without any additional holes to dashboard or firewall. Its almost hidden and only I or the installer knows about it!
All other connections and wiring is pretty standard. We ensured that no cables/ wires left dangling but nicely tucked with plastic tags. Ballasts boxes kept such that it does not interfere with any other parts/ cables and cause any issues in future.
Here are the pictures taken step by step - not many since I was more glued to the entire craftsmanship and trying to make sense of what and why is being done!
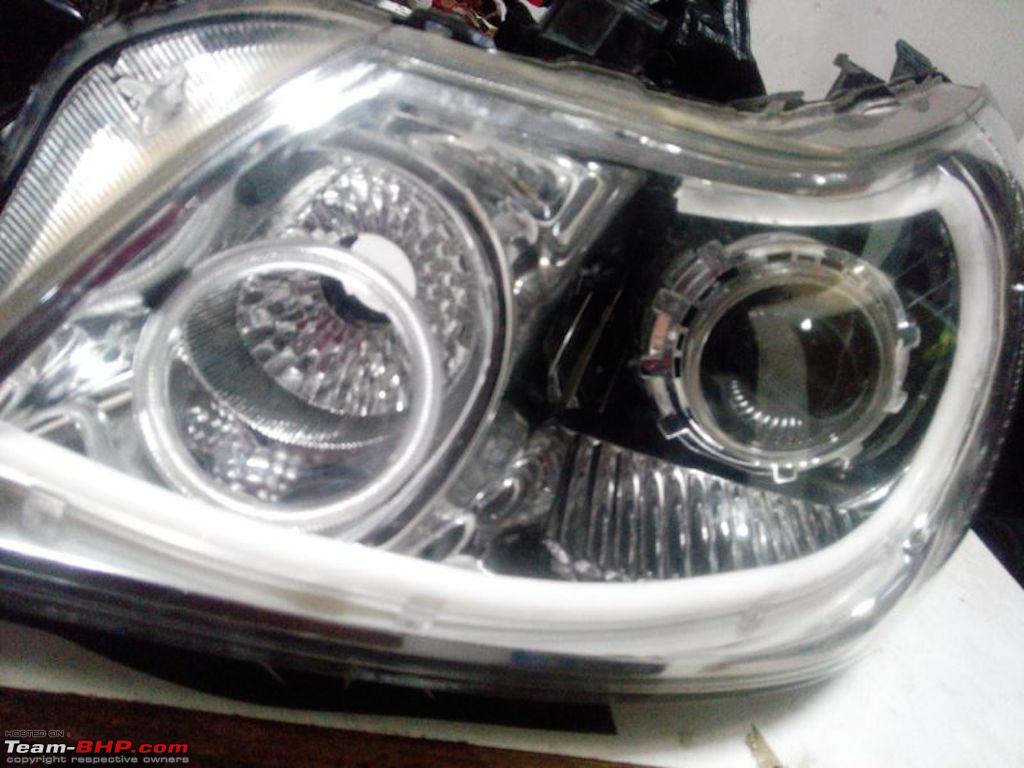
Eyes removed!
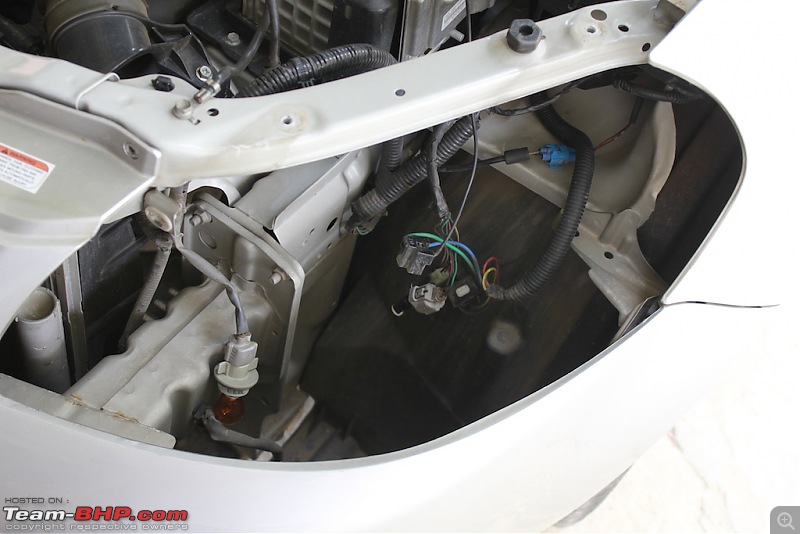
Eyes and nose are out on stretcher while the old wiring dangling...

Then the eyes put on stretcher and operation starts...
The precision instruments and surgeon in action...
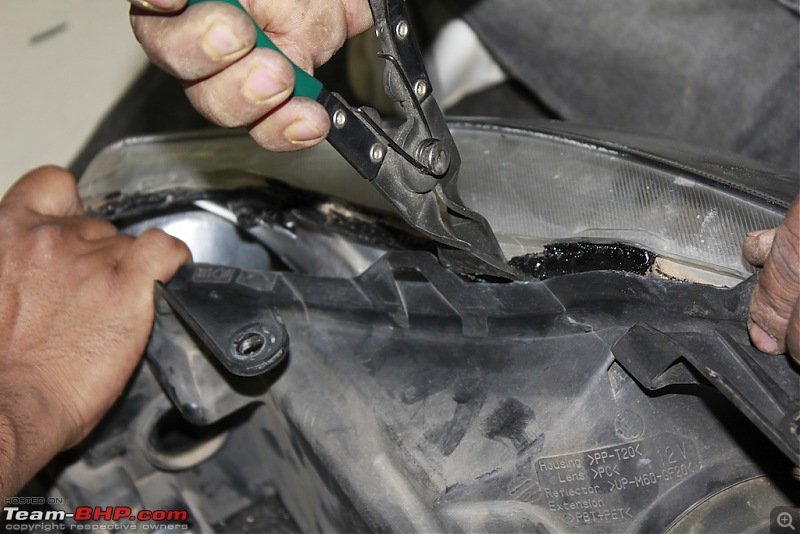

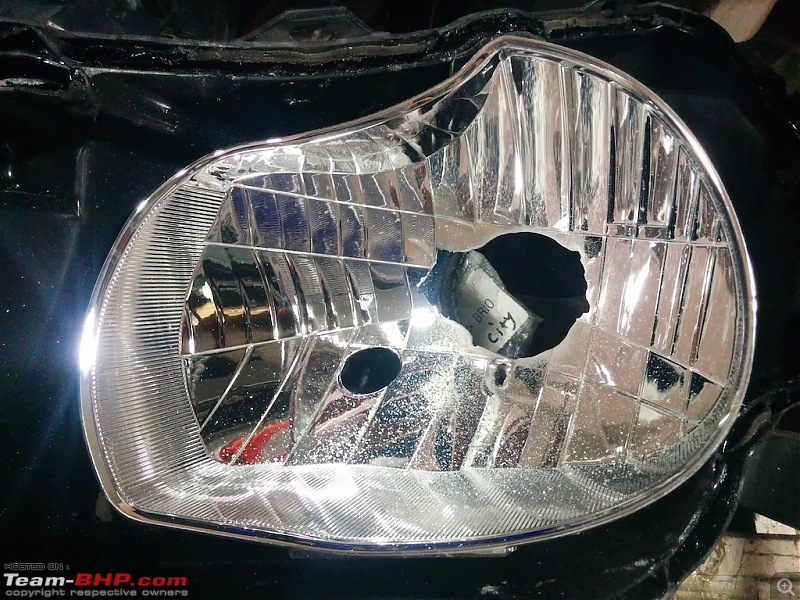
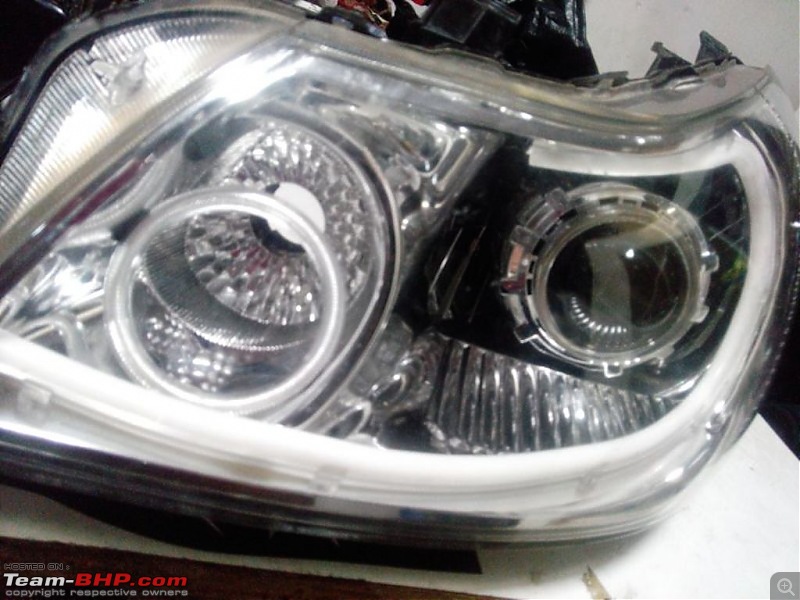
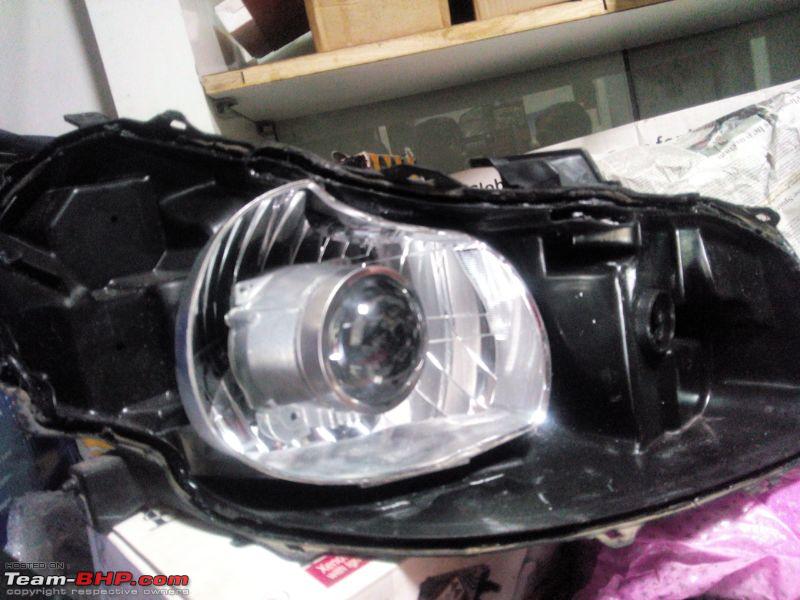
The hole is made on the headlight to fit in the projectors -
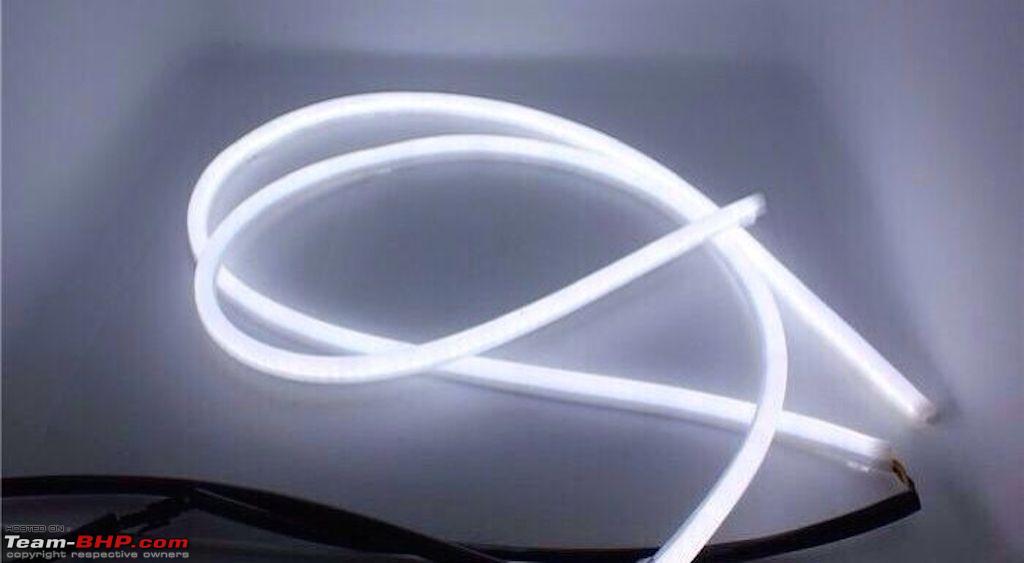
While the things are being prepared, you have opportunity to fit all these kind of DRLs -
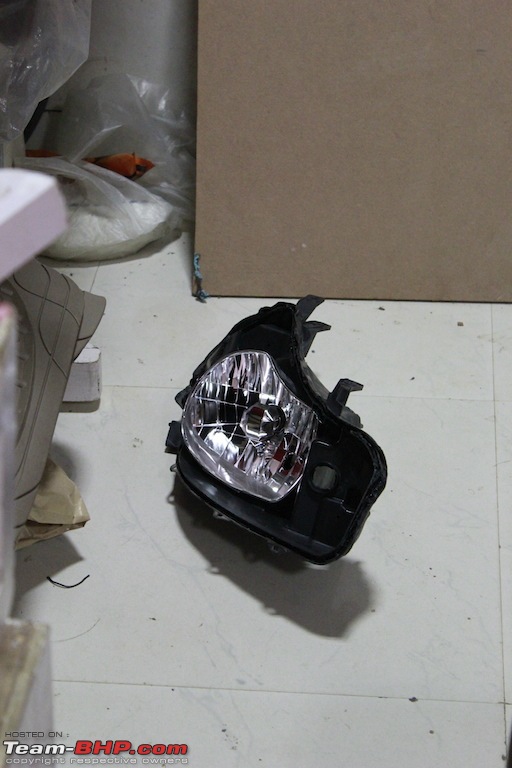
When the assembly part is over, using the rubber based glue/ sealant, the headlights needs to be prepared the way they were earlier. Tight and sung-fit.
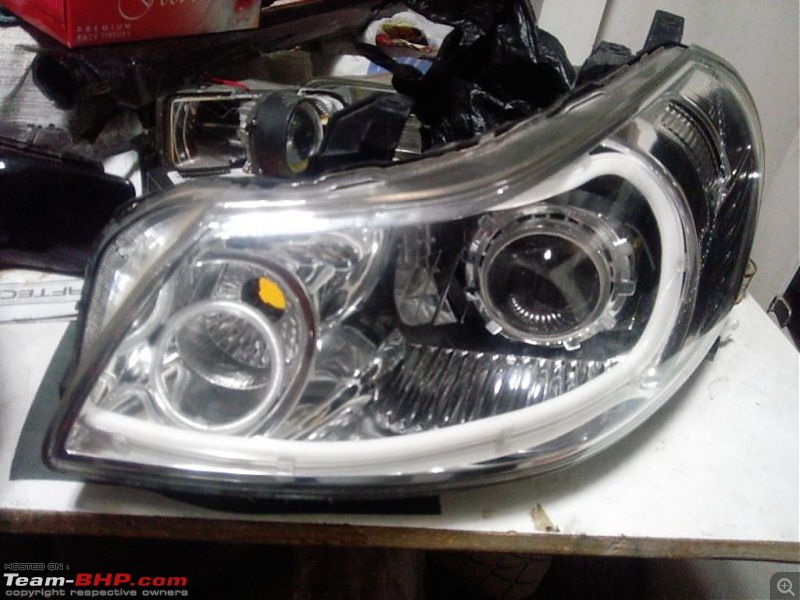
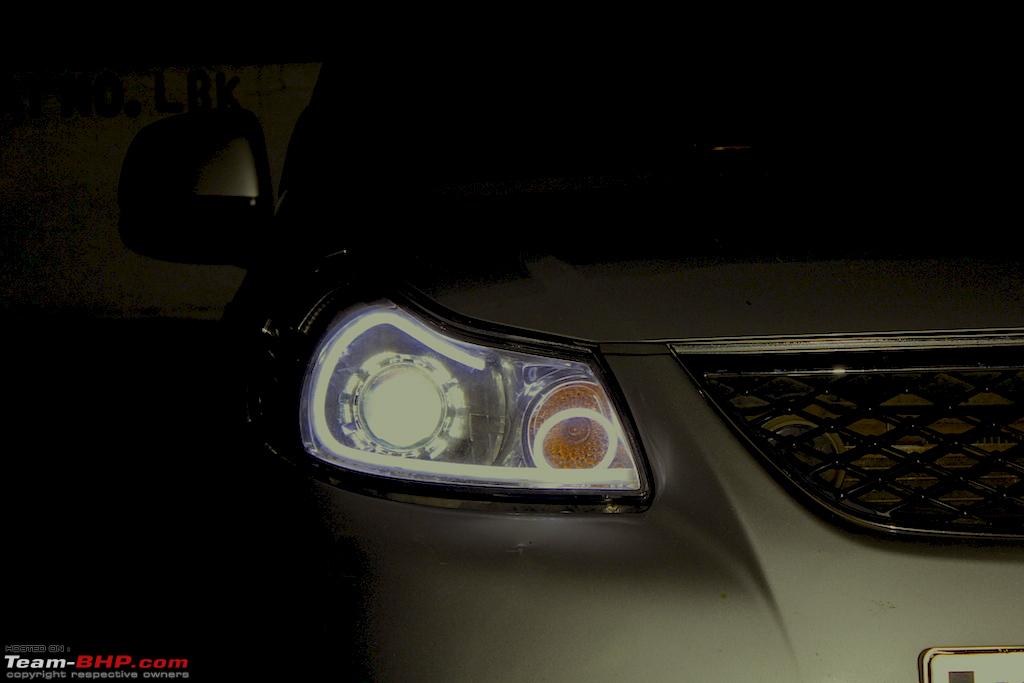
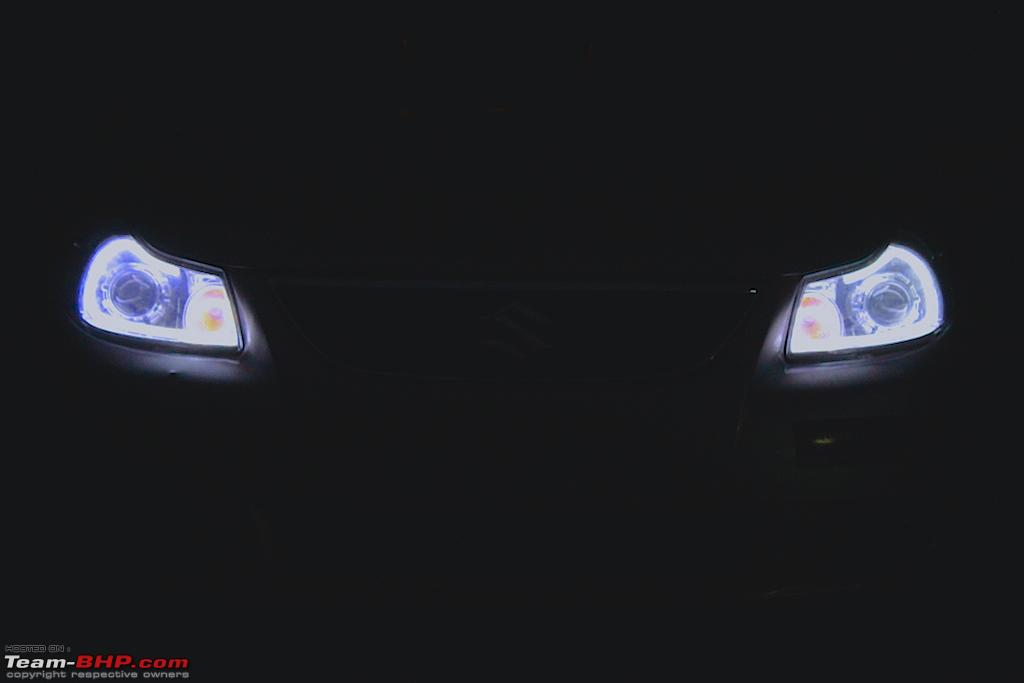
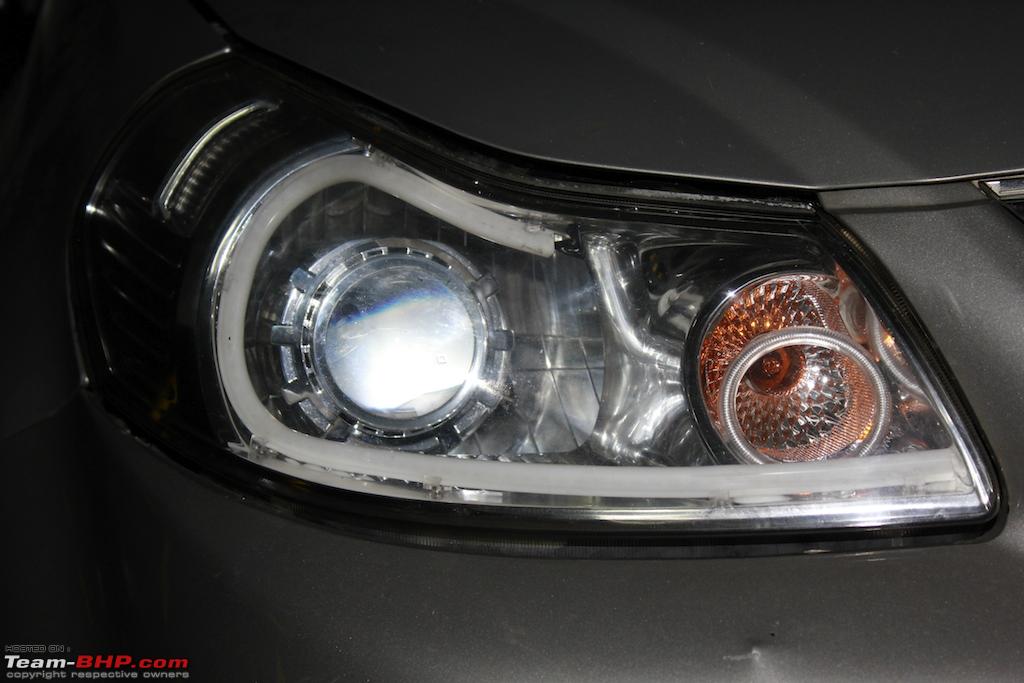
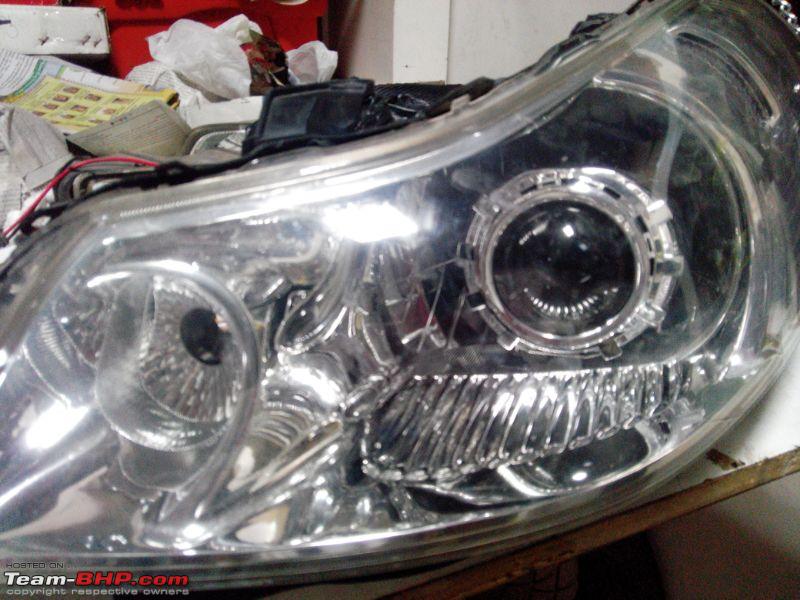
When the things are fitted properly in the headlight assembly, it looks something like below -
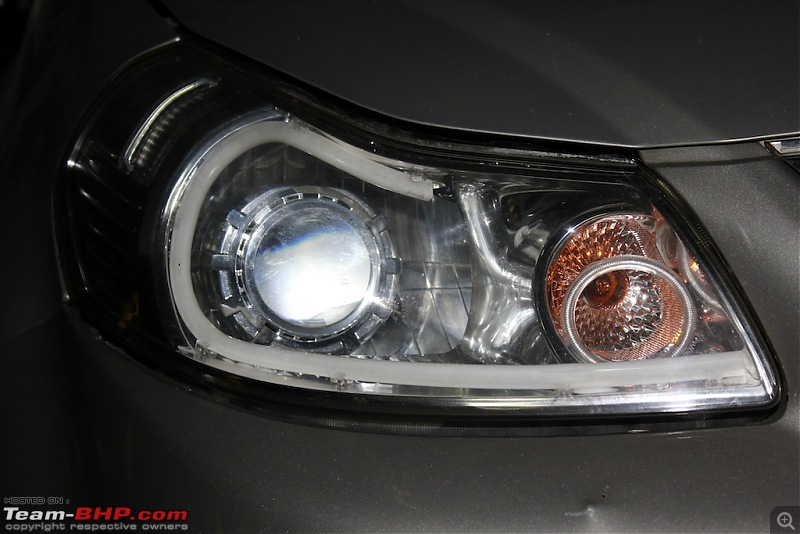
Once all the things are in place, all it is needed to do is, take it and put back on the car the way it was earlier.
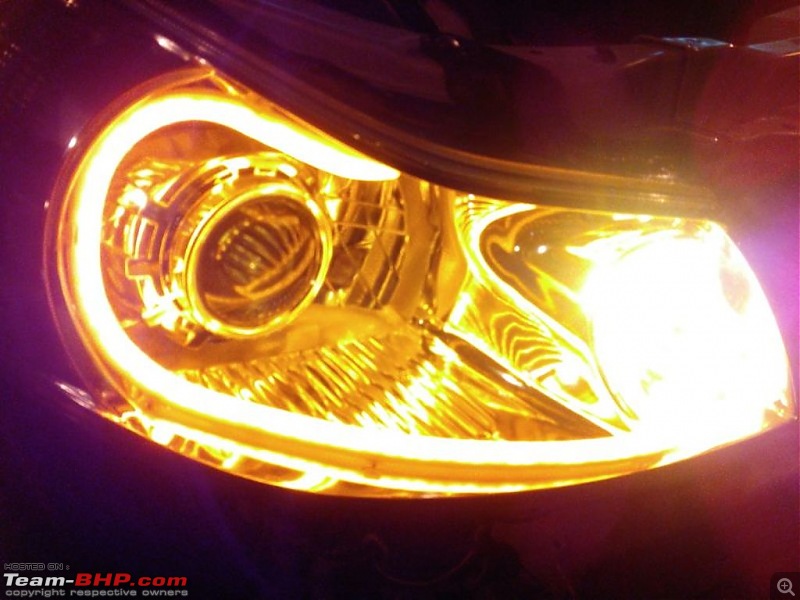
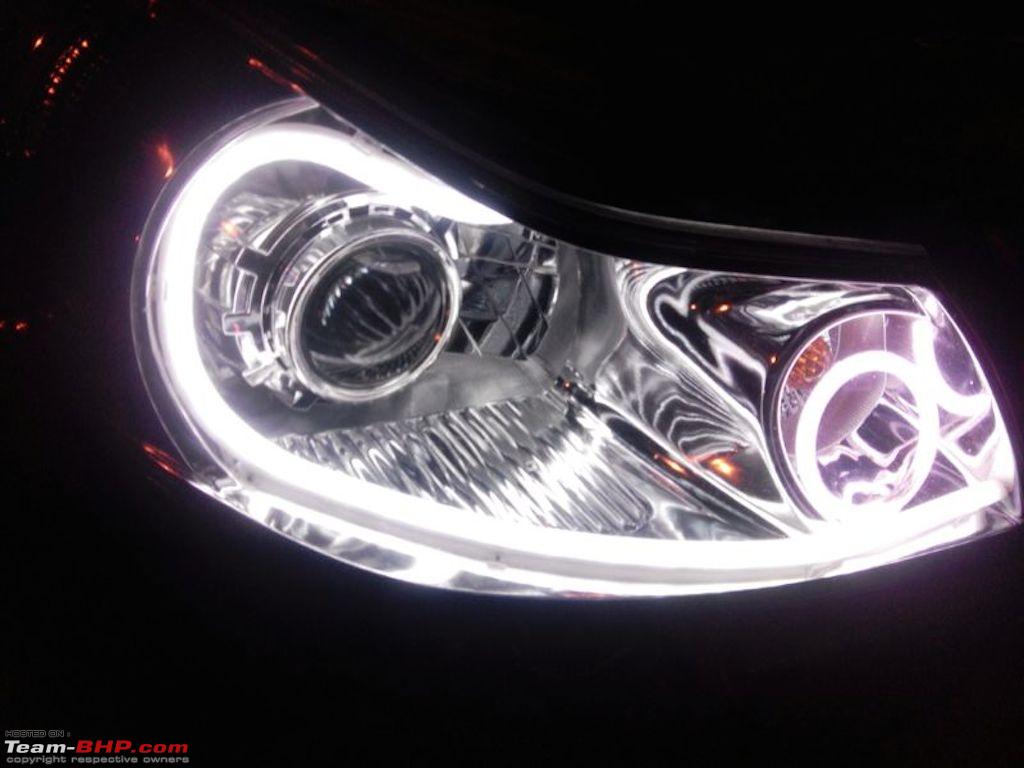
You may have now noticed that the ring around indicator bulb isn't of exact size and perfect 90 degree to floor. We did that on purpose - the headlight front portion has slope where the indicator amber light is. So perfect vertical fitting isn't going to be easy. Other thing we noticed that by putting smaller ring and keeping it slightly inclined, it was able to spread the indicator light all around headlight in a nice amber/ yellow refraction! We loved it and decided to keep it that way!
So all in all, below things are done on the car as part of this surgery - surgeon effort and instruments/ catheters included -
- Projector Lights FXR Stage 4 with HID
- Audi style DRL tubes (white on regular and amber with indicator on)
- Extra Angel Eye ring with control Unit
- Surgeon's effort to fit all of these
The ballasts are P8 Xenon conversion kits. The light intensity used is 4300 (yes, this suffices the regular highway needs as well as city commute without any issues).
A big thank you to Satya and his surgeon boy Rupesh for answering all my questions tirelessly and not loosing their focus on my silliest questions. You can imagine the kind of trouble someone like me who knows nothing about lighting can give them! And no, this consultation did not raise the overall pricing and costing! The overall experience is great and I definitely recommend this place. Its worth every penny you spend. There can't be any better peace of mind. While we were at this project, Satya also helped with fixing the dangling reverse camera in a perfect finish without charging a paisa, thank you sir

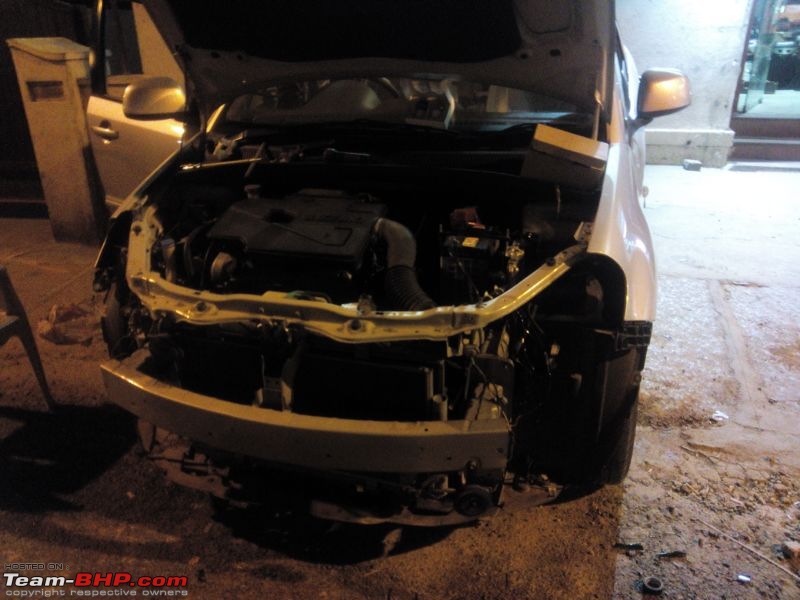
And here are few more random work in progress pics...


And lastly, thanks for stopping by this thread to read!


 29th March 2014, 23:39


 (14)
Thanks
(14)
Thanks


 That's what Satya told me. But I know, I agree with you. Mini does its job for which it is designed. But since they have limited spread compared to FXRs, I had chosen the larger FXRs. Nothing greatly impacts the equation still, but when I am spending so much, why not go little extra for FXRs! I didn't realize earlier that due to size, the reflectors will need to be cut. But then, the effort is worth it. Especially since I am not going to go back to original headlights anyday. As long as the new setup is clean and professional, all is well