Team-BHP
(
https://www.team-bhp.com/forum/)
Introduction
A Dashcam is a small addition to your vehicle that can bring many benefits:
• It's like an insurance for your car and for your family to protect you against road rage situations, catch mistakes of other drivers and proving your innocence against potential legal issues involving an incident on the road
• Dashcams can deter reckless driving and deter others from criminal activity
• Investing in one could potentially save you money not to mention peace of mind during those unexpected moments behind the wheel
• With a hardwire kit installed you could also capture hit and run incidents that happen when your car is parked
• An added bonus of having a dashcam is capturing pictures and videos for creating a travelogue
The Key Question: What video recording resolution and frame rate to choose when deciding on a dashcam? (this is based on my research from various articles on the Internet)
Actually, resolution and frame rate should be chosen based on your needs. The most common combinations you will find with dashcams are 4K(2160p)@30fps, 2.5K(1440p)@60fps and FHD(1080p)@30fps, but here's something to keep in mind:
• Higher the resolution, more the pixels, better the quality, BUT larger the video file size - On the F77, a 1 min video, based on HEVC (H.265) coding consumes 224MB at 4K/30 fps for Front and 174 MB at 4K/30 fps for Rear. H.264 coding will consume more space (see table below).
• Higher the frame rate, crisper the video, BUT again, a large video file size - On the F77, a 1 min video, based on HEVC (H.265) coding consumes 140 MB at 2.5K/60 fps for Front and the same 174 MB at 4K/30 fps for Rear (there is no 2.5K option for rear).
The real question is, for the file size, do you want more pixels or a crisper image? There are specific details you need to ask yourself before you jump in and choose your recording quality.
• 4K resolution offers better contrast and colour range, making it great for driving in city traffic with lots of cars and people around and is ideal for parking mode as well. You can zoom in without losing resolution, and it works better under lower-quality lighting.
• If there is a lot of motion in your video, you might benefit from choosing a higher frame rate over resolution. For example, if you often drive on highways, a higher frame rate is recommended because you can slow down the video to show the point of impact or details that the naked eye can’t see at full speed without compromising the crispness. However, high frame rates are not suited in low-light situations.
• If you do a lot of night driving, or if use parking mode, or if you prefer stunning visuals for your travelogues and social media uploads, go for 4K/30 fps preferably with a Starvis 2 sensor to capture number plates clearly at night. I am planning to use 4K/30 fps for city driving (~50%). On a 128 GB eMMC storage, usable storage is only 114.5 GB and I can get around 4.9 hours of recording for front and rear cameras put together, in this set-up.
• If you need to slow down frames without compromising the integrity, go with 2.5K/60 fps. I am planning to use this for highway driving, which is largely in daytime. I can get around 6.2 hours of recording for front and rear cameras put together, in this set-up.
Note: The size of a 4K video encoded in HEVC (H.265) is smaller than H.264, simply because HEVC codec saves nearly half by higher compression efficiency when compare to H.264, within the same graphic quality. That means we could benefit a whole lot from the compression. Redtiger F77 supports HEVC, hence the above file sizes are lower compared to the H.264 sizes shared in the table below.
H.264 recording space requirement:

Source:
https://www2.yitechnology.com/suppor...3/qid/10/oid/_
Dashcam Selection criteria:
Since 80-85% of my driving is during the daytime and nearly 50% of it is on highways, based on the above research, I defined the following criteria for selection with a budget of up to 25K:
•
4K Front camera with Starvis-2 sensor (desirable) - Preferably with an option for 2.5K@60 fps for highway drives
•
2.5K Rear camera with Starvis 2 sensor (desirable) - Dual channel for more coverage
•
Supercapacitor (mandatory) - Never take a chance with extreme weather conditions
•
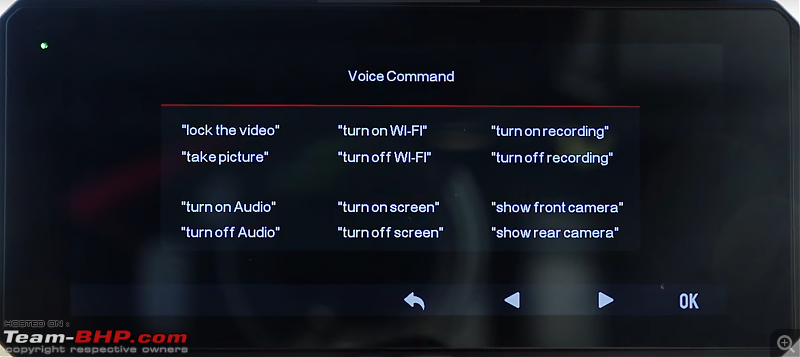
Smart Voice Control (mandatory) - Easily control your dashcam without taking your hands off the steering wheel i.e. for locking video, taking photo, turn on /off WiFi, turn on/off screen, etc.
•
5 Ghz Wifi (desirable) with App control- 8 MB/sec downloads (4x faster compared to 2.4 Ghz), live preview, track GPS data, change settings, edit, share footage, etc.
•
GPS based (mandatory) - For recording driving routes, location and speed where the GPS data can be easily used as indisputable evidence
•
128 GB Free SD card (eMMC desirable) - Built in eMMC storage or free SD card
•
Display/Touch screen (desirable) - For quick changes like changing recording resolution for city vs highway or day vs night. Logging into app will mean disconnecting Android Auto from car each time.
•
Flexible Mounting options/Ease of installation - Slide out mount and easy routing of cables
•
Optional 24 hour parking mode - Collision Detection & Buffered Motion Sensors will be triggered by the slightest impact or movement giving you the ultimate peace of mind. To be considered after warranty expiry.
Final shortlist and scoring:
 Two models which were an good fit but did not make it to the shortlist: DDPAI M200:
Initially, I was contemplating a good Starvis 2 sensor camera for front and the same one for the rear as well for which the DDPAI M200 was a perfect fit despite the limitations of 2 separate power outlets, shorter cable length, 2 SD cards, 2 WIFI connections and inconvenience of viewing the recordings one at a time. However, this model did not have a super capacitor and hence was rejected. For a similar setup, I considered the DDPAI Ace2 as shown in the table above.
WOLFBOX G900 Pro:
This is a Mirror dashcam and ticked all the boxes, but failed when it came to mounting options. It was designed for LH driving because the camera was placed on the left where my fastag sticker was fitted and if we tilt the IRVM towards the driver the footage would be further misaligned. Also, I wasn’t sure whether the large display (even if turned off) would be as good as the stock IRVM (with auto dimming). Hence was rejected.
Since supercapacitor was a must have feature for me, many good dashcams didn't make it to the shortlist.
Redtiger F77 finalised:
Initially, I ordered the F77 and switched to A4 (before shipment) after seeing some reviews of the thick Type C cable and the limited headliner gap (installation anxiety). Looking at the value offered by Redtiger A4, I took delivery of it, but the video quality was subpar in my brief testing at home perhaps because of the aperture being F2.0 (grainy video) and 4K@25 fps. All other dashcams in the above list have at least F1.8 aperture. Moreover, the A4's cigarette lighter adapter did not fit in my car's socket, hence I returned it and switched to F77. The pry tool which came with the A4 allayed my fears of installation because I was able to create a gap in the headliner for pushing the cable in. Of course, I had the same adapter fitment problem in the F77 as well, because all Redtiger adapters come with the same dimensions. Fortunately, I had an unused 2 socket splitter (with rainbow lights) which came in handy and it worked. The splitter also has a switch to turn off the camera when not needed and does not jut out like the Redtiger adapter.


Redtiger F77 review:
The Redtiger F77 is a great VFM dashcam with the World's first Dual 4K HDR Sony Starvis 2 (IMX 678, 1/1.8" 8 MP) sensor for both front and rear cameras. It may sound like an overkill but it fitted my budget and also has a built in 128GB eMMC storage, which is more reliable and faster than SD cards. Nearest competitor is the VIOFO A329 priced at 40K with only a Starvis 2 (IMX 675, 1/2.8" 5 MP) rear sensor, without any free SD card and no free hardwire kit.
What I liked:
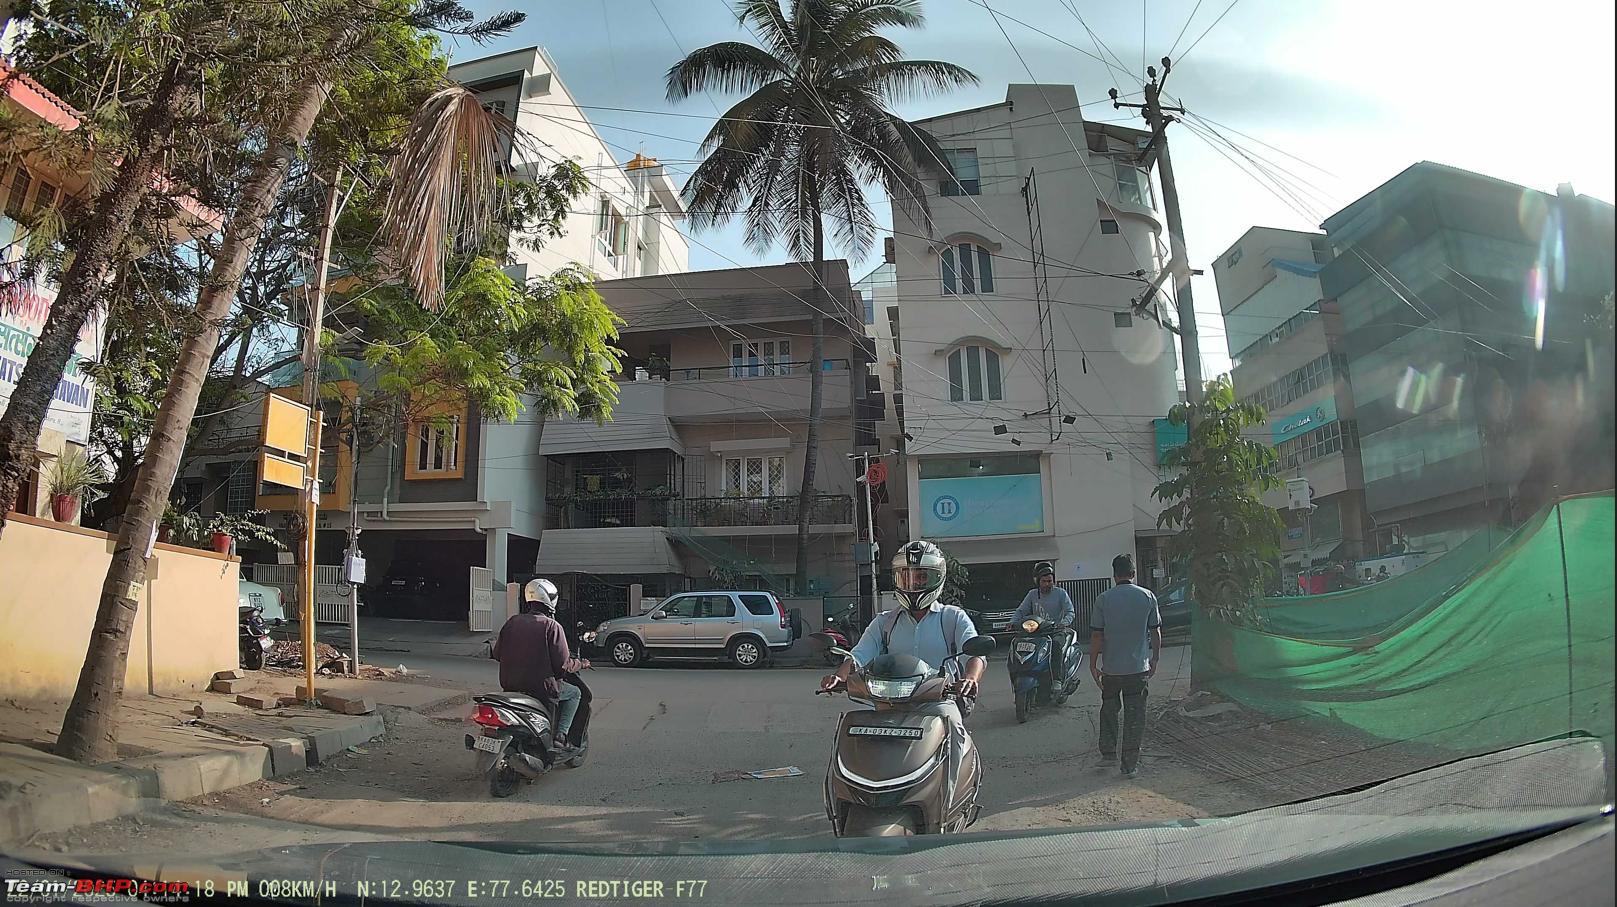
• Dual Starvis-2 sensor 4K Recording is amazing (Don't miss the day & night video footages at the end)
• HEVC/H.265 codec consumes half of H.264 storage space
• Free 128GB eMMC 5.1 Built-In Storage
• Super capacitor based
• 5.8GHz WIFI & APP Control (224 MB file download takes 28 secs i.e 8 MB/sec)
• Smart Voice Control (Take picture and Lock the video are my favourites)
• Vibrant and sharp 4" display (Clock view is handy)
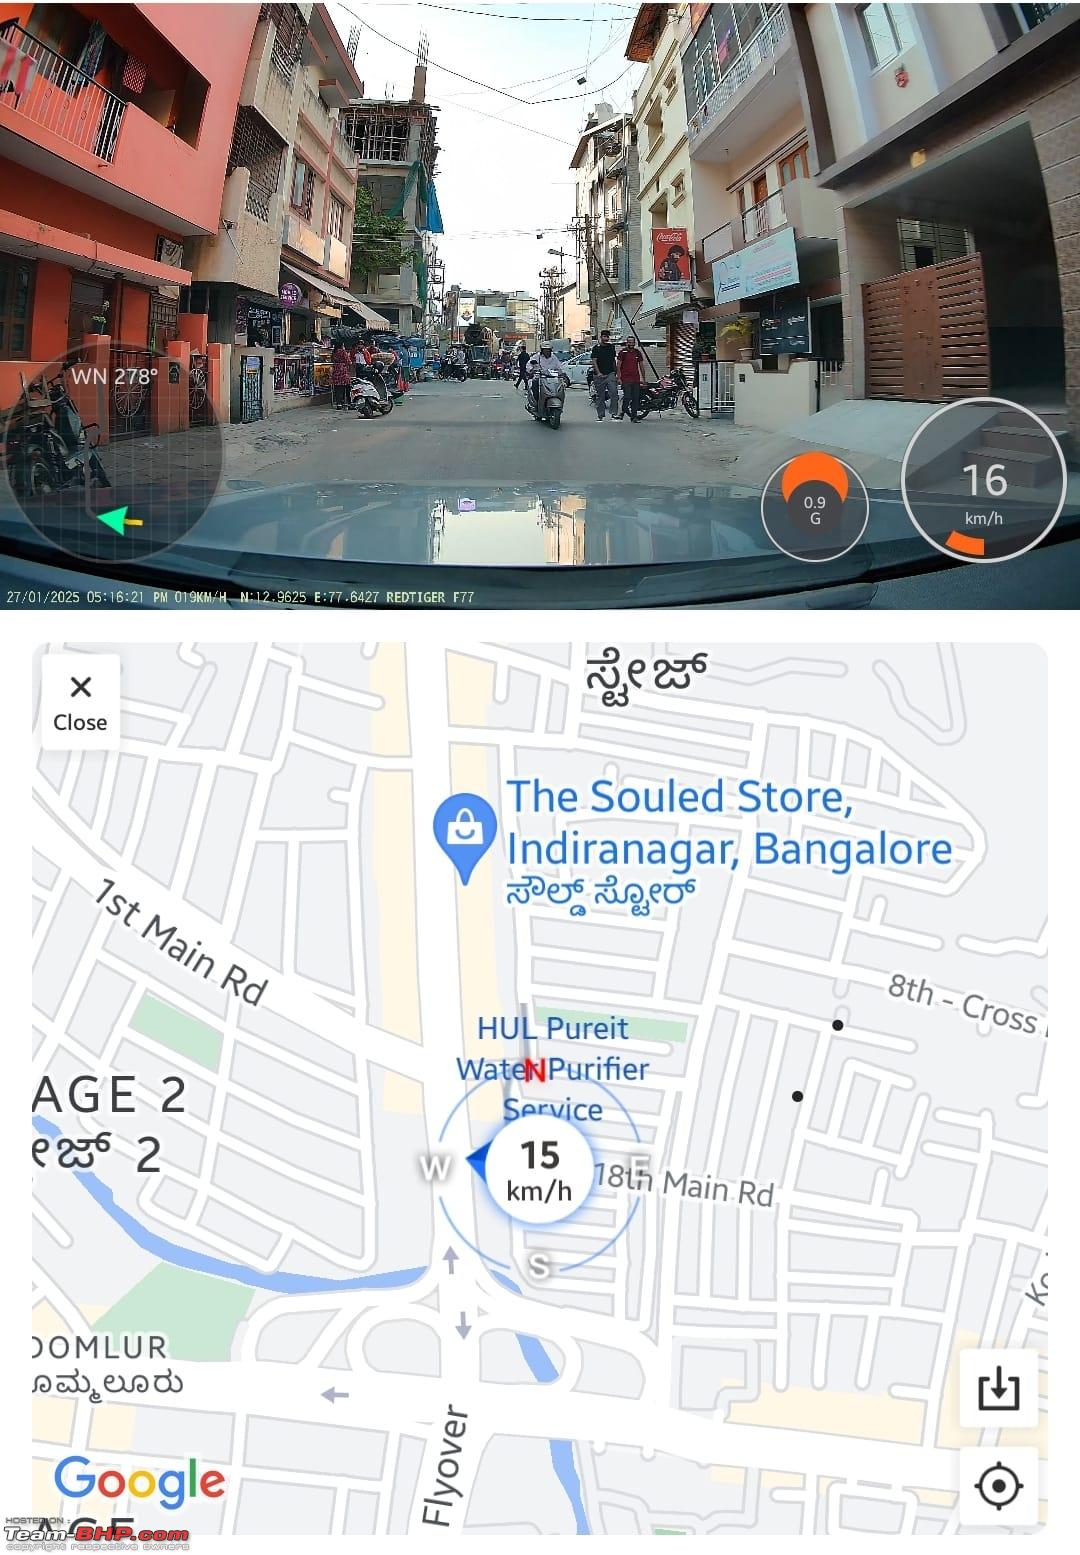
• Real-Time GPS Tracking
• Free Parking Monitor Hardwire Kit
• 2 Year warranty (Register on Redtiger website to get extra 6 months)
• It's a steal for that price (Cheaper to buy in India than in the USA)
What I didn't:
• Cable routing for Rear camera is challenging because it is Type C based and the cable is much thicker than the 3.5mm pin type cable.
• SD card slot is only for taking backups and storage expansion is not possible (only 114.7 GB is free)
• No horizontal swivel possible, hence install on a curved windscreen is tricky
• Rear camera does not support 2.5K/60 fps like the front - only 4K is supported
• Screen saver mode doesn't show the clock display, it turns off the screen
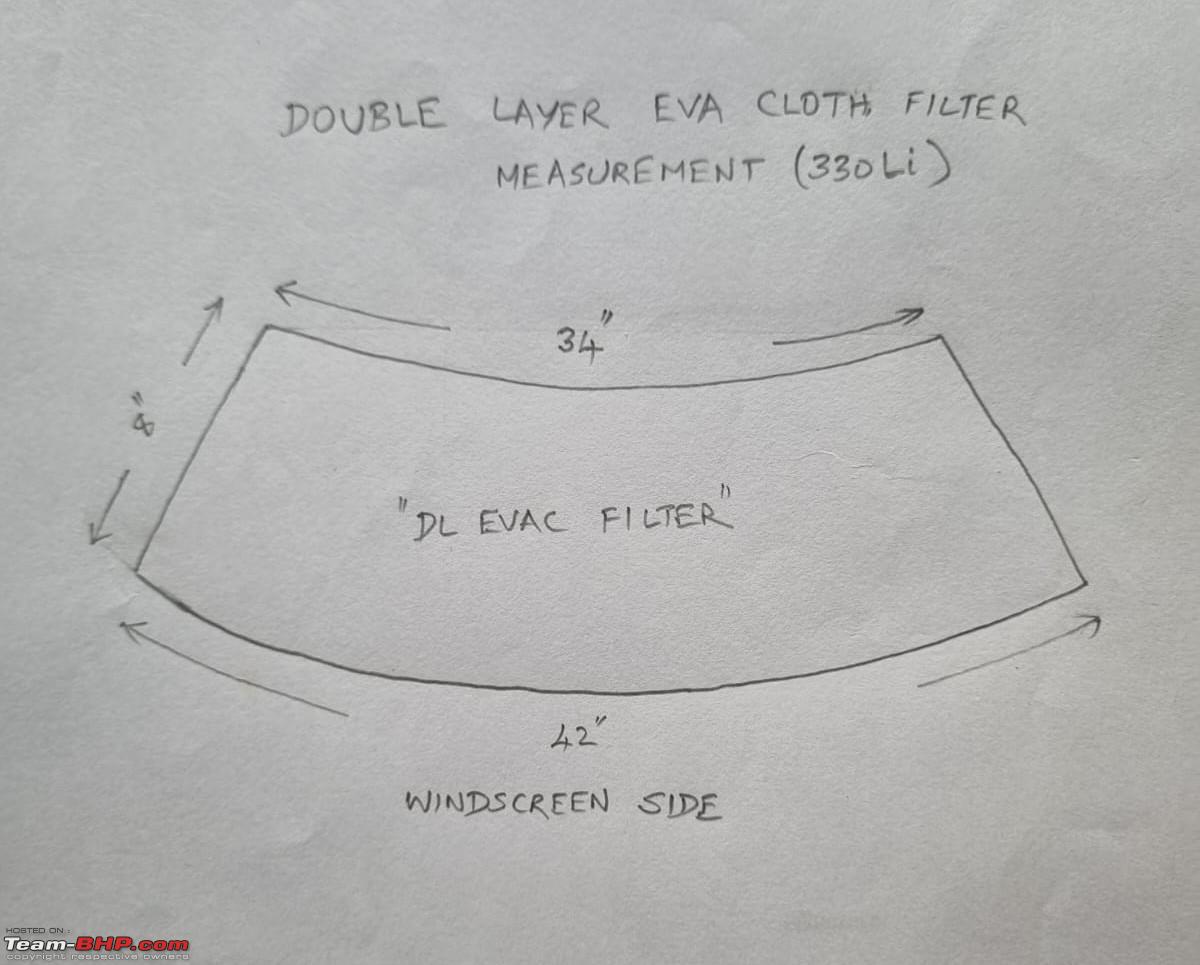
• No CPL filter available for F77
• Cigarette lighter adapter is not a direct fit for 330Li (car specific)
F77 box contents:  DIY Install:
Took me around 90 minutes to install it including the pre-planning to position it correctly. In spite of this, I had to remove and reposition the front camera once. In both the A pillars some wiring is visible because I didn't want to open the airbag cover and I couldn't pry open the C pillar section. Rest of the cabling is hidden. Overall, I didn't expect the cabling to come out so well. I am sure it can be bettered.
I routed the front camera cable exactly as shown by the blue line (see pic below), but on the driver side. For the rear camera, I routed it on the passenger side down the A Pillar and under the door weather stripping at the floor level. I placed the front camera slightly below the IRVM so that I can see the clock display while driving.
Wiring route:
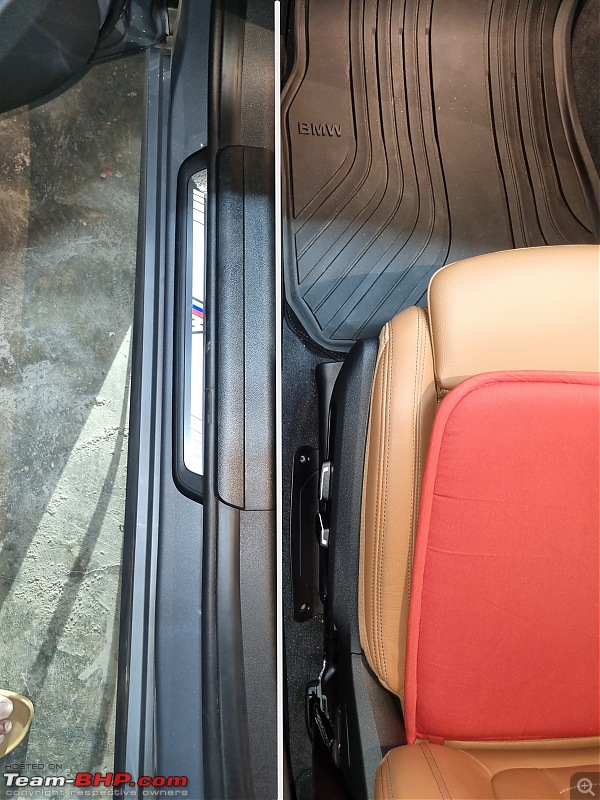
 Passenger side view:
  Front camera routing:


Rear camera routing: 


 Driver side view (you can see the rear camera through the IRVM):
 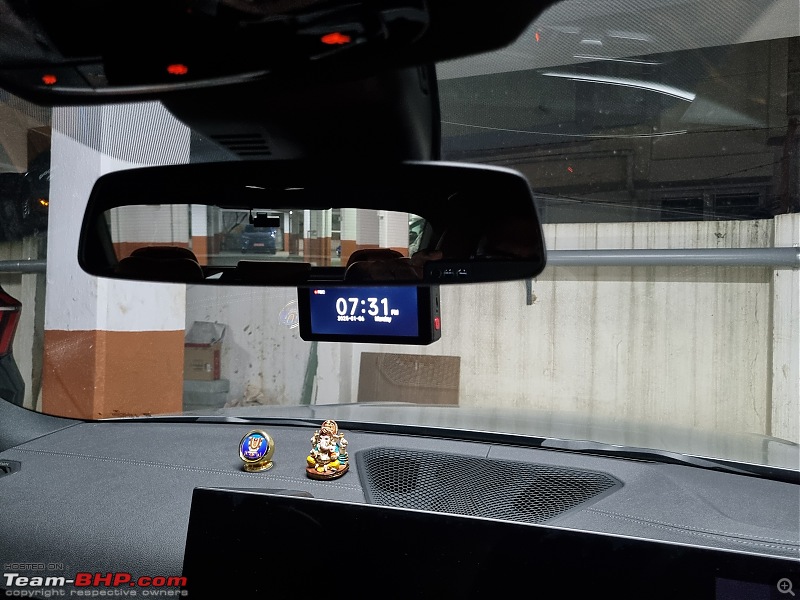 View from Outside:
 F77 Software settings:


Wow, that’s a great write up @Kelly. Really appreciate your patience and attention to details. Also quite impressed with the features of dashcam, mainly voice controls. Compared to this BMW is looting with their dashcam, I paid 60k for that.
Quote:
Originally Posted by sunikkat
(Post 5919041)
Wow, thats a great write up @Kelly. Really appreciate your patience and attention to details. Also quite impressed with the features of dashcam, mainly voice controls. Compared to this BMW is looting with their dashcam, I paid 60k for that.
|
Thanks for your kind words, sunikkat! Actually, I had that "How to" heading already in mind and didn't want to give up till it's done:). Took me couple of weeks to get it right. You can also do the same for your BMW dashcam. And yes, there are lots of positives in this dashcam.
On the positive side, in your dashcam it's like a factory fit and if it is hardwired (not sure if it is) you get parking monitoring too, without losing warranty and no exposed wires.
That looks clean, I had a similar USB powered setup in my Honda City and it just kept on getting loose, I had to push in the power adapter/charger every-time I started the car. It was annoying so decided to go with the BMW dashcam to keep the warranty.
If you can share, what is the total cost of F77?
Great write up and very informative.
I am using a DDpai Z50 4K on my 330 Li and did the installation myself as well.
You can easily tuck in the wire in the A and C-pillar covers using the prying tool. Also I am using one of the USB-C ports below the rear ac vents to power the camera instead of the 12V socket because I don't like console cover staying open and wires sticking out.
Quote:
Originally Posted by Altocumulus
(Post 5919566)
Great write up and very informative.
I am using a DDpai Z50 4K on my 330 Li and did the installation myself as well.
You can easily tuck in the wire in the A and C-pillar covers using the prying tool. Also I am using one of the USB-C ports below the rear ac vents to power the camera instead of the 12V socket because I don't like console cover staying open and wires sticking out.
|
Glad you found it useful!
Did you route it behind the A pillar airbag? If not, you should immediately remove it and check. F77 didn't work with a Type C inside the hand rest so I think it needs a 12V socket.
Quote:
If you can share, what is the total cost of F77?
|
25K.
Quote:
Originally Posted by Kelly66
(Post 5919717)
Glad you found it useful!
Did you route it behind the A pillar airbag? If not, you should immediately remove it and check. F77 didn't work with a Type C inside the hand rest so I think it needs a 12V socket.
|
I have the wire routed exactly the same way as you do, except instead of on the surface it is tucked in the A Pillar trim, about half a cm, out of sight.
However, saying that I was going through some pics of the airbags in G20. It seems that the entire side airbag runs through the A-pillar till the top of the B pillar. So effectively our setup is blocking the airbag be it tucked in or on the surface. I don't think the wires are strong enough to prevent airbag deployment, however they can turn into projectiles, whip themselves and cause serious harm. Need to think of a way to change that. Either open the trim and pass it behind the airbag, or run the wire through the gap between the windscreen and A Pillar.
Amazing writeup! Very informative and entertaining honestly.
I too find myself in your shoes looking for a dashcam. I was surprised to see no products from 70mai in your shortlist. Was this intentional? I was looking at a 70mai 810 for myself. You can get an aftermarket CPL sensor for this for like 1000rs.
Any thoughts on this?
Thanks
Quote:
Originally Posted by Altocumulus
(Post 5920764)
However, saying that I was going through some pics of the airbags in G20. It seems that the entire side airbag runs through the A-pillar till the top of the B pillar. So effectively our setup is blocking the airbag be it tucked in or on the surface.
|
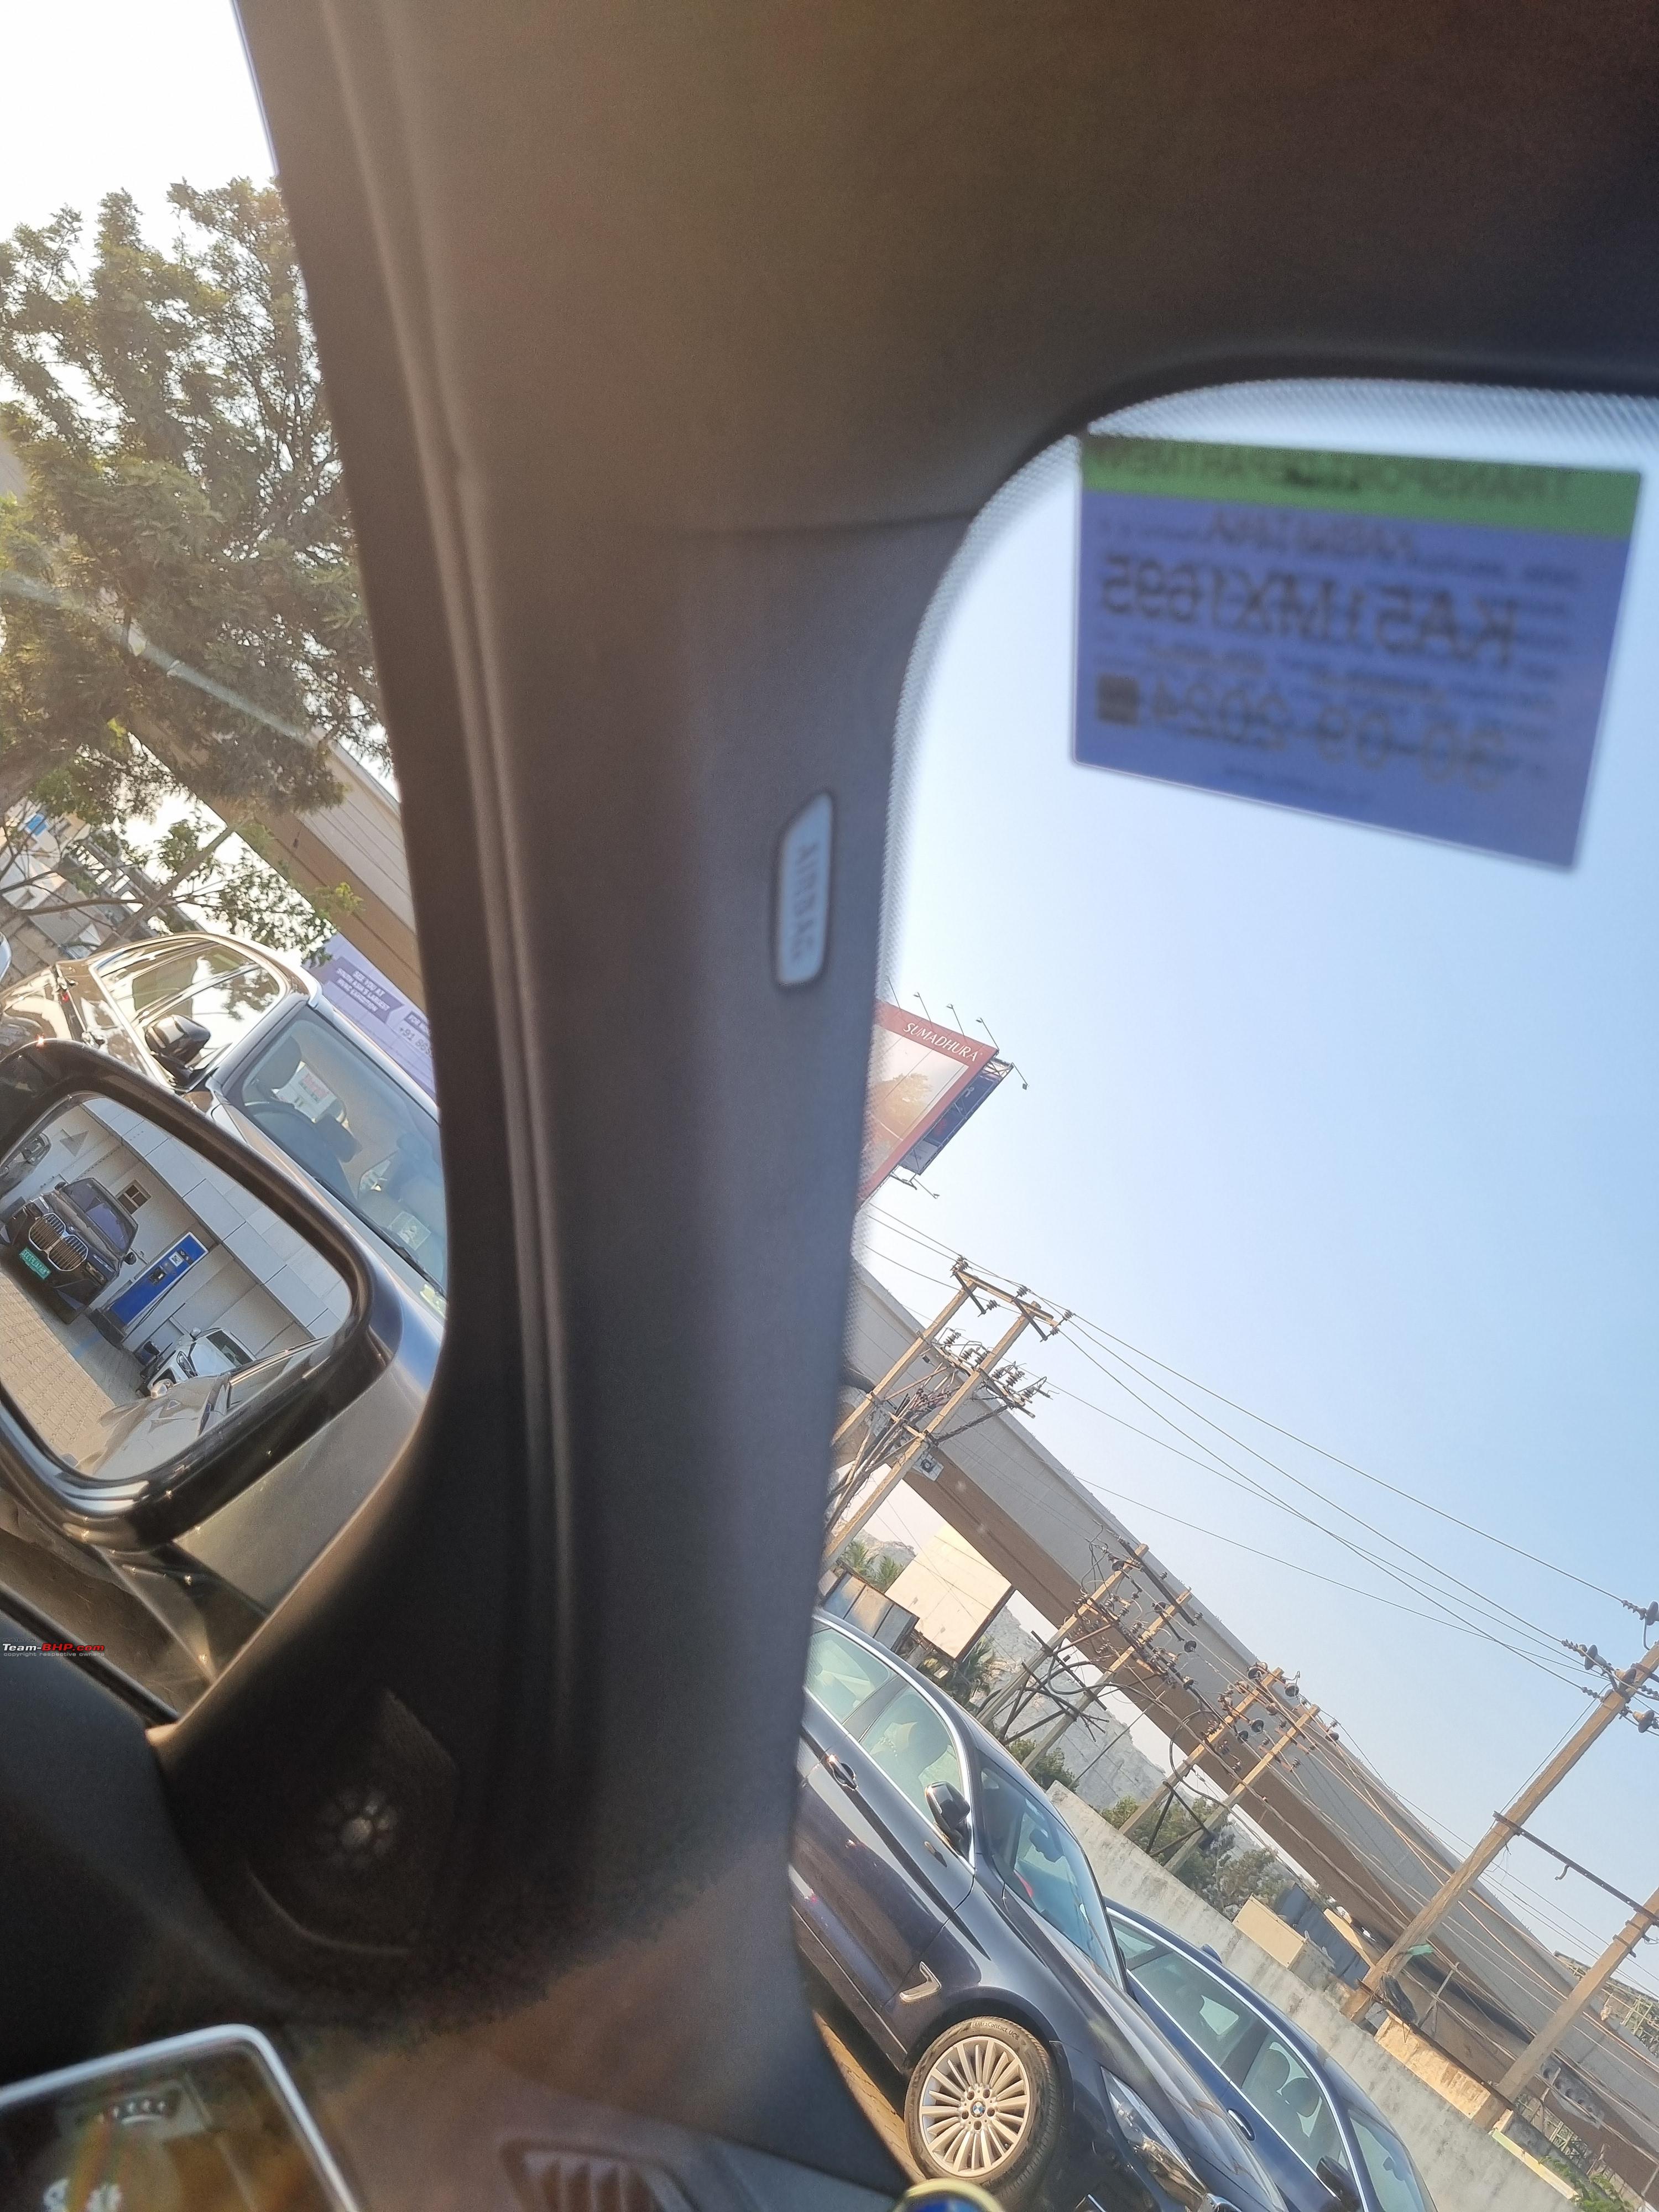
I visited the Kun SC last weekend and learnt that the airbag goes along the headliner all the way from the A pillar to the C pillar and drops down along the window. Actually, the airbag strap is behind that cover and you can see the start of the airbag.
I got them to remove the airbag cover on the right and left side and the technician routed the wire behind the black cable that goes between the A pillar and windscreen. It was a 15 min job.
Fortunately, didn't have to remove/re-route any other part of the dashcam cable since the previously routed length was perfect for this re-route.
Sharing some pictures below (couldn't find any such pictures in my searches): FR airbag cover removal 
FR airbag cover removed 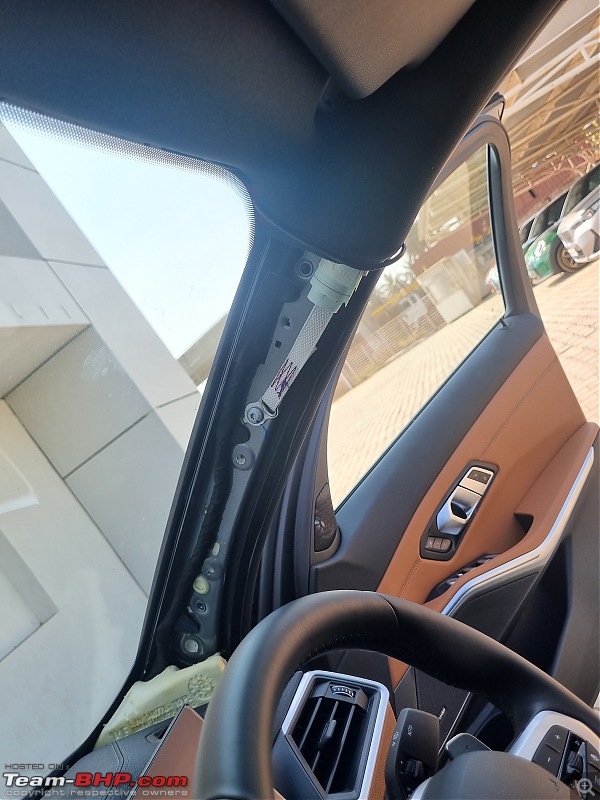 FR wire re-routed
  FR finished view
  FL airbag cover removal
  FL airbag cover removed
  FL wire re-routed
 FL finished view
Hope this helps!
Quote:
Originally Posted by CannedShroud
(Post 5927373)
Amazing writeup! Very informative and entertaining honestly.
I too find myself in your shoes looking for a dashcam. I was surprised to see no products from 70mai in your shortlist. Was this intentional? I was looking at a 70mai 810 for myself. You can get an aftermarket CPL sensor for this for like 1000rs.
|
Thanks for you kind words!
Yes, as mentioned in my review many dashcams didn't make the cut because there was no super-capacitor and 810 was one of them.
| All times are GMT +5.5. The time now is 00:16. | |