Team-BHP > Technical Stuff
Register New Topics New Posts Top Thanked Team-BHP FAQ


Reply
  Search this Thread
5,677 views
Old 9th December 2023, 21:48   #1
Distinguished - BHPian
 
Join Date: Oct 2012
Location: Delhi
Posts: 8,463
Thanked: 55,148 Times
The Sequel to Anatomy of a Car AC compressor

The Sequel to Anatomy of a Car AC compressor-img_5162.jpeg

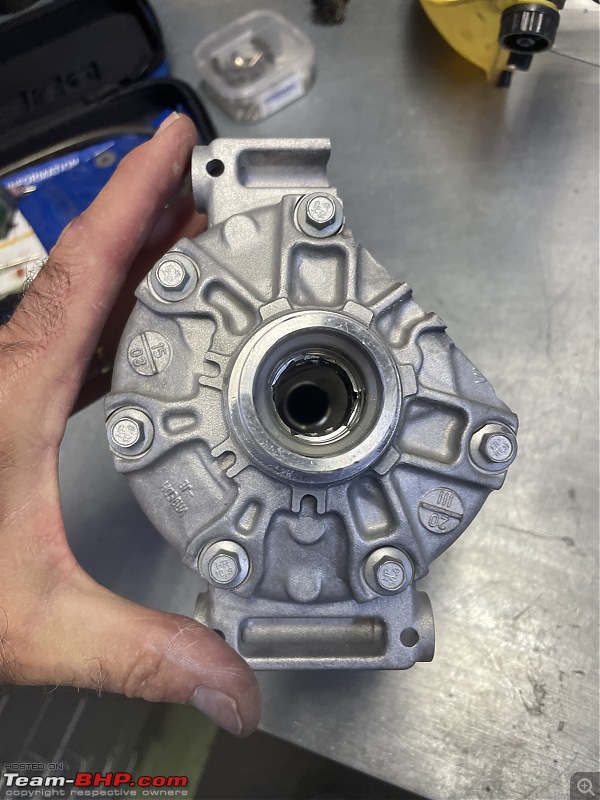
Those of you who follow my "fiddling with my cars" thread might remember I replaced the AC compressor on my wife's 2015 Ford Fiesta this summer, with the help of my friend Jack.

You can read all about it here, just scroll down a bit:

https://www.team-bhp.com/forum/diy-d...ml#post5561187 (My Car Hobby: Jaguar XJR, Mercedes W123, Alfa Romeo Spider, Jeep Cherokee & Mini One)

I subsequently took the AC compressor apart. Just for fun and for interest. Never done that before. I enjoyed doing that.

See this thread;

https://www.team-bhp.com/forum/techn...ml#post5563686 (Anatomy of a Car AC Compressor (clutch/variable))

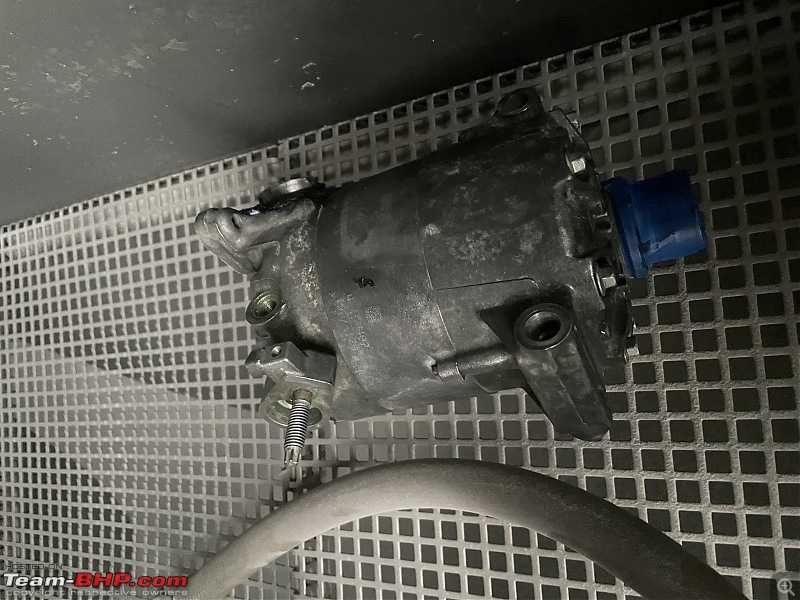
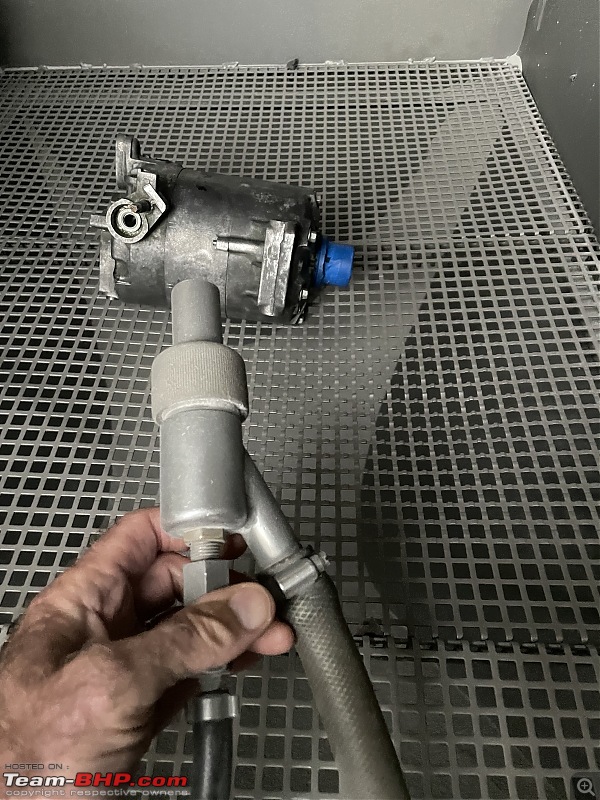
Somewhere along the line, I decided I would turn the AC compressor into a "cut-away model".

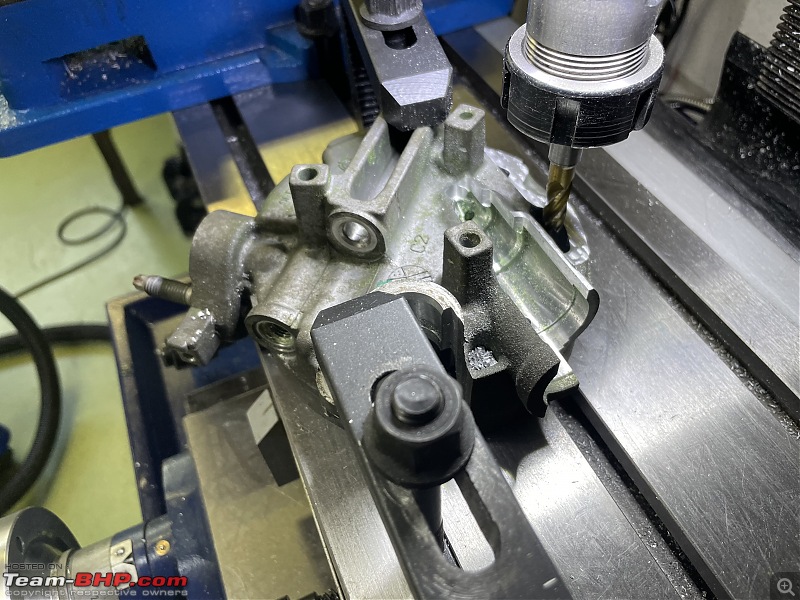
Which meant deciding how and where I would mill and cut bits away. I had never done anything like this before. So to some extent a bit of a trial and error approach.


Here is the very first cut I made with my mini mill:

The Sequel to Anatomy of a Car AC compressor-img_2080.jpeg

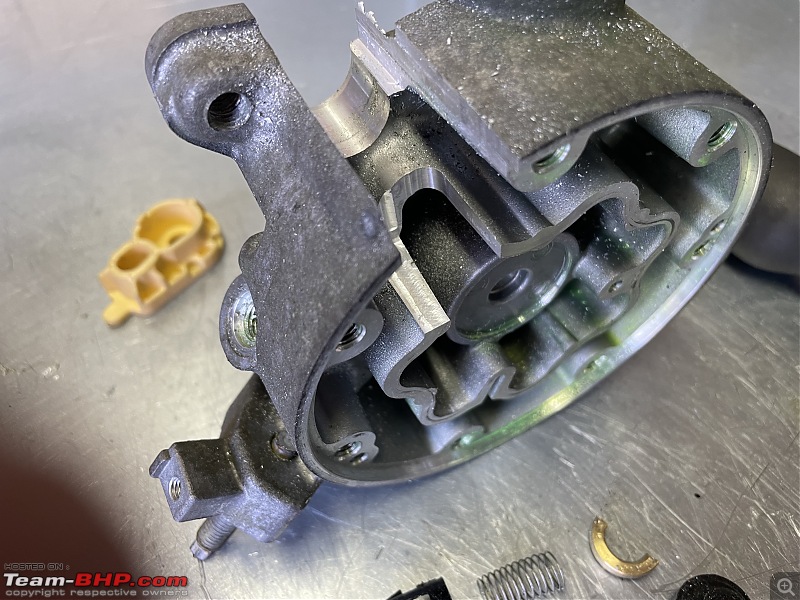
Here you see a part of the compressor bolted down to my mini mill. Most of the cut opening up the control valve housing is done.

The Sequel to Anatomy of a Car AC compressor-img_2124.jpeg

The first part was done and I was quite pleased with it!

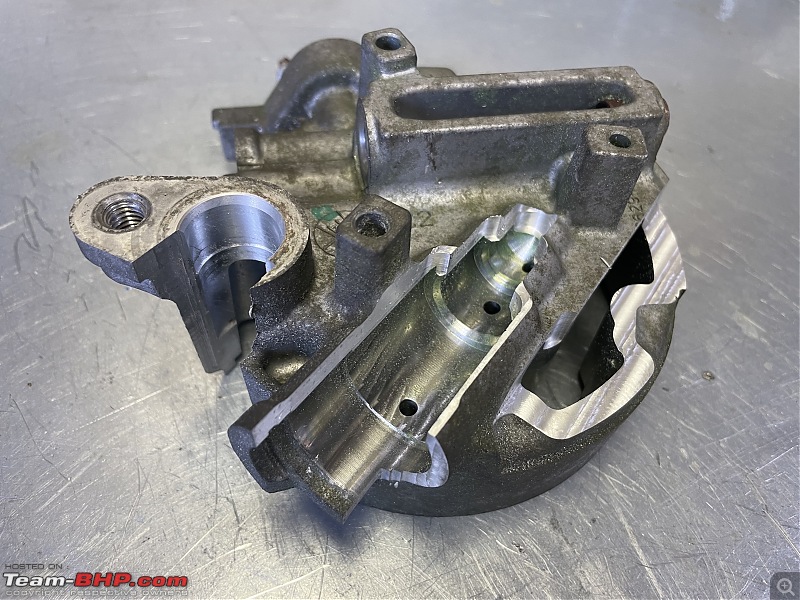
Without the control valve

The Sequel to Anatomy of a Car AC compressor-img_2125.jpeg

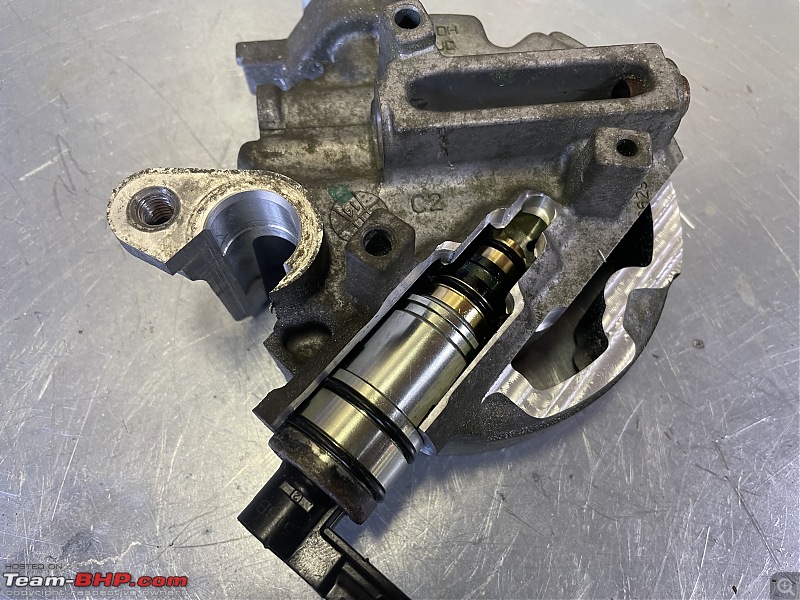
With the control valve fitted:

The Sequel to Anatomy of a Car AC compressor-img_2126.jpeg

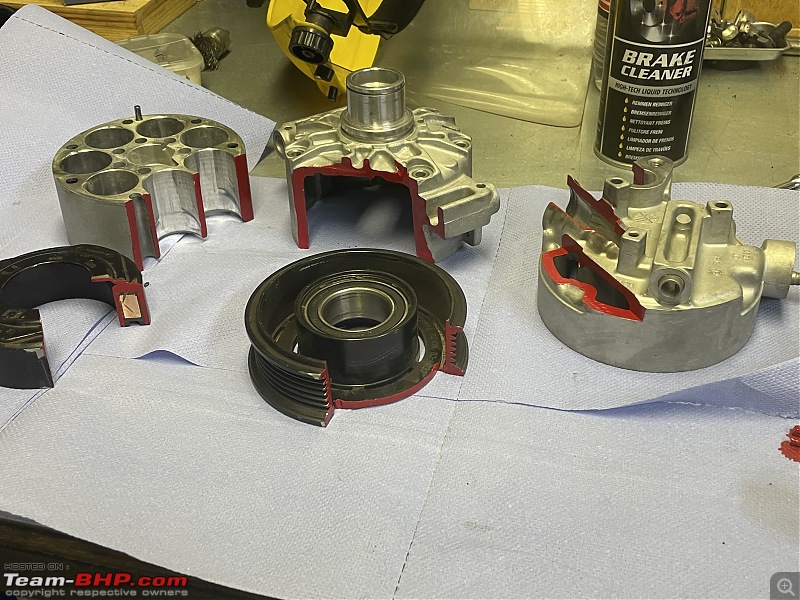
I did a lot more cutting with the mini mill and also just a plain grinder. This Compressor housing is made of a very soft type of alloy, very easy to cut through.

As this compressor had been stuck to the Fiesta for 8 years and almost 100K kilometres, the outside was pretty grimy and horrible. So I took it to a place where I could sandblast it myself. In this case, I used glass bead blasting as it is less aggressive than sandblasting and leaves quite a nice smooth-looking finish. You can rent this machine for Euro 15 and do it all yourself!

Have a look here for the full story:

https://www.team-bhp.com/forum/diy-d...ml#post5659726 (My Car Hobby: Jaguar XJR, Mercedes W123, Alfa Romeo Spider, Jeep Cherokee & Mini One)

The short version:

Here is the glass bead blasting machine:

The Sequel to Anatomy of a Car AC compressor-img_4767-2.jpeg

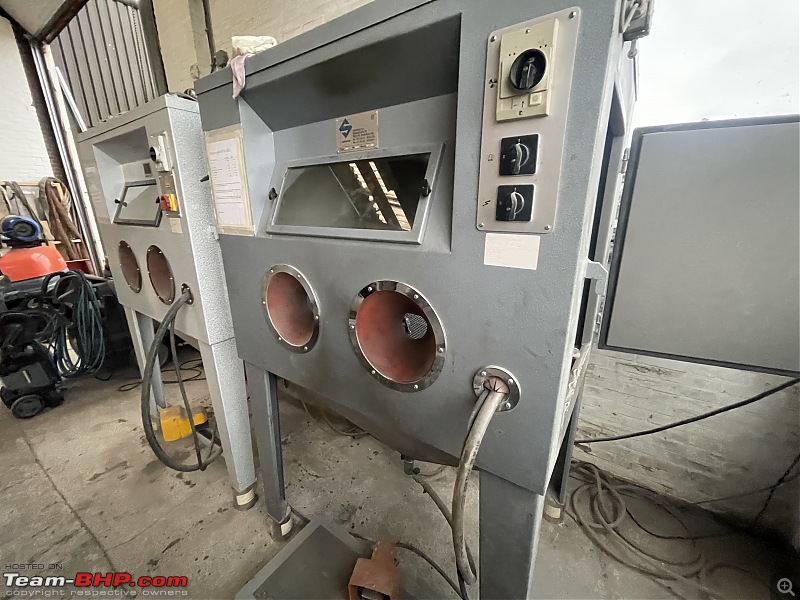
You stick in your part, in my case the assembled AC Compressor.

The Sequel to Anatomy of a Car AC compressor-img_4765-2.jpeg

And you blast away with this nozzle! Bob's your uncle!!

The Sequel to Anatomy of a Car AC compressor-img_4766-2.jpeg

It came out looking like new!!

The Sequel to Anatomy of a Car AC compressor-img_4770-2.jpeg

The Sequel to Anatomy of a Car AC compressor-img_4771-2.jpeg

The Sequel to Anatomy of a Car AC compressor-img_4772-2.jpeg

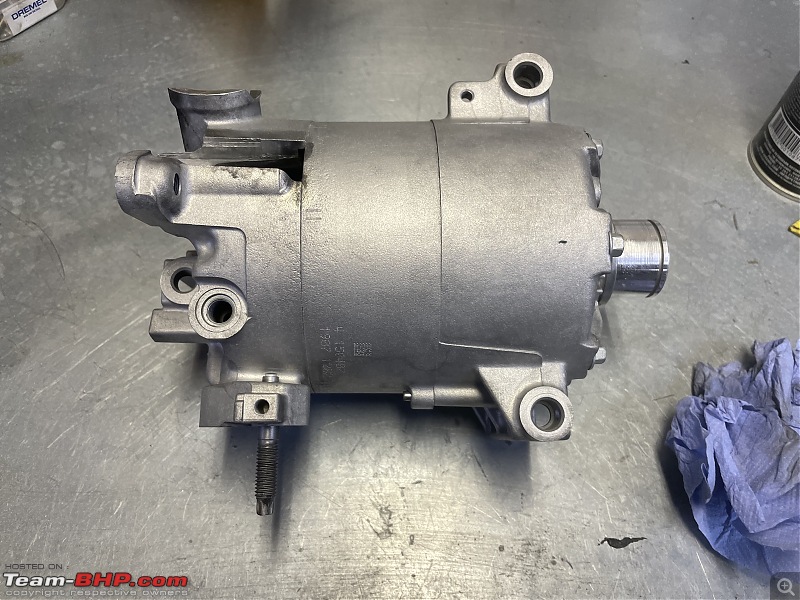
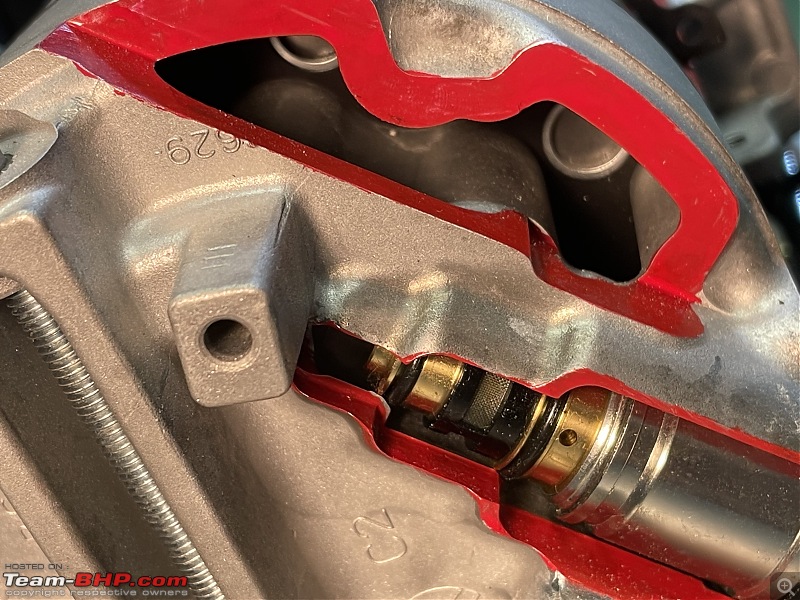
As is customary on these "cut-away" models I painted everything that was "cutaway" red.

The Sequel to Anatomy of a Car AC compressor-img_4773-2.jpeg

Time to do a final re-assembly.

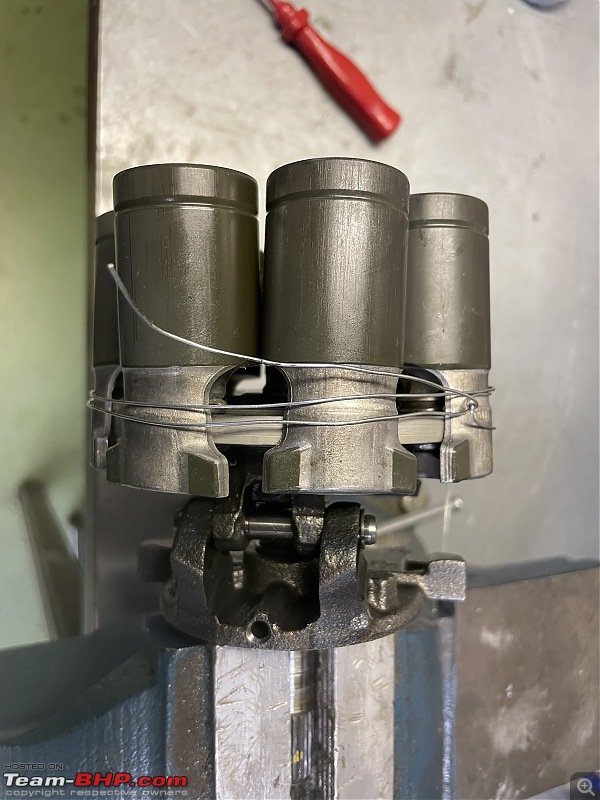
Getting the pistons back in was difficult. I just could not get it to fit properly. No matter what I tried, cleaned, lubricated, and tried different pistons in different cylinders, it just wasn't moving as smoothly as before.

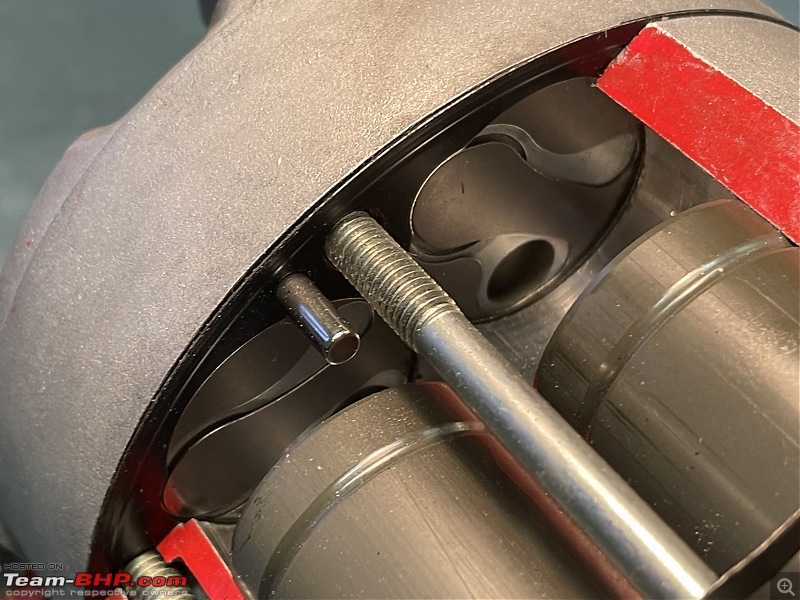
I attached all the pistons to the swathe plate first. Then secured them all with some wire and pushed all the pistons into their respective cylinders.

The Sequel to Anatomy of a Car AC compressor-img_5079.jpeg

In the end, I did manage to get them all in and I can also rotate it, so you can observe the compressor working. The Swathe plate is stuck at an angle because it allows the pistons to move up and down.

The Sequel to Anatomy of a Car AC compressor-img_5166.jpeg

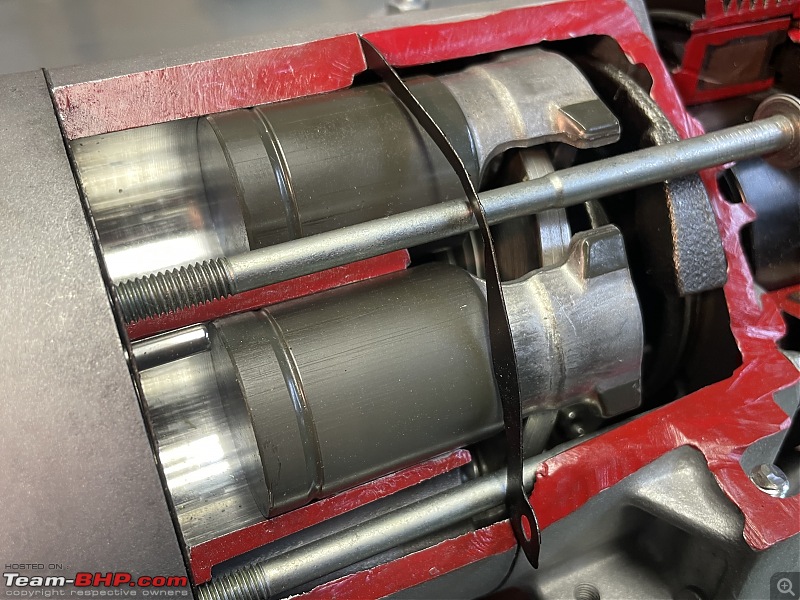
Notice the little valves mounted at the bottom of the cylinders

The Sequel to Anatomy of a Car AC compressor-img_5169.jpeg

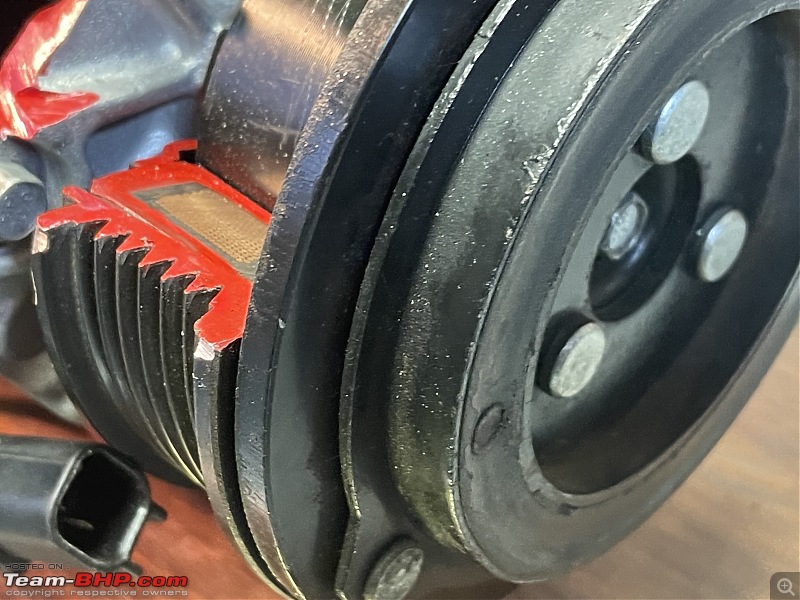
I am quite pleased with how the whole clutch assembly and pulley look. I managed to make a very clean cut through the coil. You can see the individual strands of copper mounted inside the insulating rubber.

The Sequel to Anatomy of a Car AC compressor-img_5165.jpeg

The Sequel to Anatomy of a Car AC compressor-img_5163.jpg

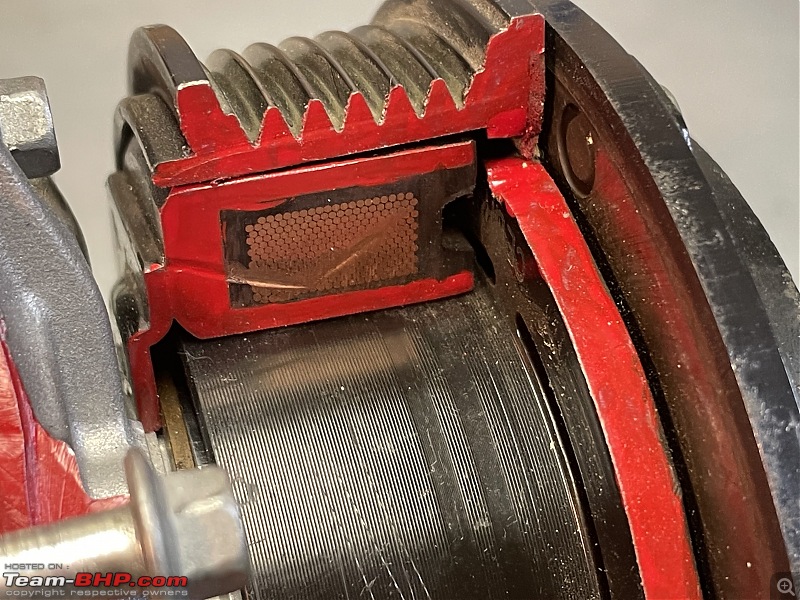
The control valves and some of the inside of the housing, including some valves can be well observed.

The Sequel to Anatomy of a Car AC compressor-img_5168.jpeg

The Sequel to Anatomy of a Car AC compressor-img_5172.jpeg

Complete compressor from the rear.

The Sequel to Anatomy of a Car AC compressor-img_5171.jpeg

From the top:

The Sequel to Anatomy of a Car AC compressor-img_5170.jpeg

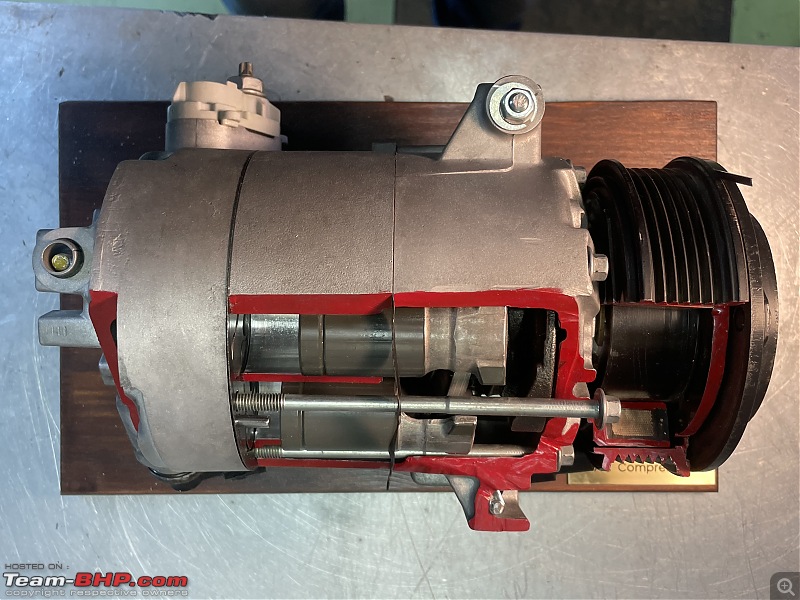
As you will have noticed, I mounted the complete AC compressor on a very simple solid wooden base. I stained it with some paint left over from another job. And of course the piece the "resistance", a little copper nameplate!!

Click image for larger version

Name:	IMG_5162.jpeg
Views:	136
Size:	2.57 MB
ID:	2541438

All in all, an enjoyable little project. This cut-away model will sit somewhere in my shop amongst all the other engine bits and model engines on display.

Click image for larger version

Name:	IMG_5162.jpeg
Views:	136
Size:	2.57 MB
ID:	2541438

Jeroen
Jeroen is offline   (40) Thanks
Old 10th December 2023, 05:14   #2
Team-BHP Support
 
Join Date: Feb 2004
Location: Mumbai
Posts: 18,674
Thanked: 80,728 Times
re: The Sequel to Anatomy of a Car AC compressor

Thread moved out from the Assembly Line. Thanks for sharing!
Aditya is offline  
Old 11th December 2023, 12:44   #3
Distinguished - BHPian
 
vigsom's Avatar
 
Join Date: Feb 2006
Location: NSEW
Posts: 3,858
Thanked: 27,279 Times
Re: The Sequel to Anatomy of a Car AC compressor

Lovely job there, @Jeroen. Glass bead blasting is new to me - have seen sand blasting enough. I managed a sneak peek at the compressor oil seal in one of the pictures.Kindly share pictures of the seal in case you have them.

Last edited by vigsom : 11th December 2023 at 12:46.
vigsom is offline   (1) Thanks
Old 11th December 2023, 14:32   #4
BHPian
 
Join Date: Aug 2019
Location: Kochi
Posts: 184
Thanked: 430 Times
Re: The Sequel to Anatomy of a Car AC compressor

Thanks a lot for sharing this very informative post. I recently faced a challenging situation with my friend's AC compressor multiple times, and your guide has proven to be an invaluable resource in comprehending the intricacies of the AC compressor's anatomy. Your work is truly commendable. Great job!
igemini is offline   (1) Thanks
Old 11th December 2023, 15:56   #5
Distinguished - BHPian
 
Join Date: Oct 2012
Location: Delhi
Posts: 8,463
Thanked: 55,148 Times
Re: The Sequel to Anatomy of a Car AC compressor

Quote:
Originally Posted by vigsom View Post
Lovely job there, @Jeroen. Glass bead blasting is new to me - have seen sand blasting enough. I managed a sneak peek at the compressor oil seal in one of the pictures.Kindly share pictures of the seal in case you have them.
First time I did glass bead blasting. Previously I had done sand blasting. This place offers both!

Sorry, the seal got badly damaged when I removed it. I must have thrown it out.

You can spot it in the overview images withal the parts laid out in the original thread

https://www.team-bhp.com/forum/techn...e.html#gallery (Anatomy of a Car AC Compressor (clutch/variable))

Jeroen

Last edited by Jeroen : 11th December 2023 at 15:58.
Jeroen is offline  
Old 11th December 2023, 16:13   #6
Senior - BHPian
 
svsantosh's Avatar
 
Join Date: Mar 2008
Location: Dubai
Posts: 4,138
Thanked: 7,154 Times
Re: The Sequel to Anatomy of a Car AC compressor

Beautiful little project Jeroen. Could you also please post a video of showing it work by rotating the compressor and explaining how the low pressure gas is compressed into high pressure. But for that you may have to deliberately increase the clearances of the piston to cylinder walls. Do the same with the solenoid also may be?
svsantosh is offline  
Old 12th December 2023, 18:31   #7
Distinguished - BHPian
 
Join Date: Oct 2012
Location: Delhi
Posts: 8,463
Thanked: 55,148 Times
Re: The Sequel to Anatomy of a Car AC compressor

Quote:
Originally Posted by svsantosh View Post
Beautiful little project Jeroen. Could you also please post a video of showing it work by rotating the compressor and explaining how the low pressure gas is compressed into high pressure. But for that you may have to deliberately increase the clearances of the piston to cylinder walls. Do the same with the solenoid also may be?
Sorry, but that is really difficult to do. Especially as the pistons are moving a little bit stiff. Check out the original thread. I have made a very short video where I sort of show how the pistons move up and down, depending on the position of the swathe plate.

I also posted this video, which gives a very good visual explanation of all the parts of this type of AC compressor.


Jeroen
Jeroen is offline  
Reply

Most Viewed


Copyright ©2000 - 2024, Team-BHP.com
Proudly powered by E2E Networks