Team-BHP > Technical Stuff
Register New Topics New Posts Top Thanked Team-BHP FAQ


Reply
  Search this Thread
311,617 views
Old 23rd September 2018, 19:47   #586
BHPian
 
Join Date: Feb 2011
Location: Mumbai
Posts: 117
Thanked: 118 Times
Re: Zen and the art of maintaining it

Quote:
Originally Posted by ashwinprakas View Post
I was worried about the not so obvious end i.e the distributor end.
Firing order is 1-3-4-2, Please refer page 311 of the workshop manual.
Alternatively, refer engine bay pics in this thread.
The cylinder that is closest to the distributor is No 4.

Initial ignition timing (Test switch terminal grounded or
fixed with SUZUKI scan tool): 5 1 BTDC (at idle speed)
Ignition order 1–3–4–2

Quote:
Originally Posted by ashwinprakas View Post
The workshop manual mentions the procedure in detail and I have no doubts about it, but the only issue is that I'm unable to find the marking mentioned in the workshop manual on my motor and pulley, I guess I might be looking at the wrong angle as I was trying to peek in through the sides with AF box still in place, would get that removed once the new parts arrive.
The markings are at the crankshaft pulley and its difficult to find, you may have to remove the air filter box.
Use chalk powder to get a clear view.

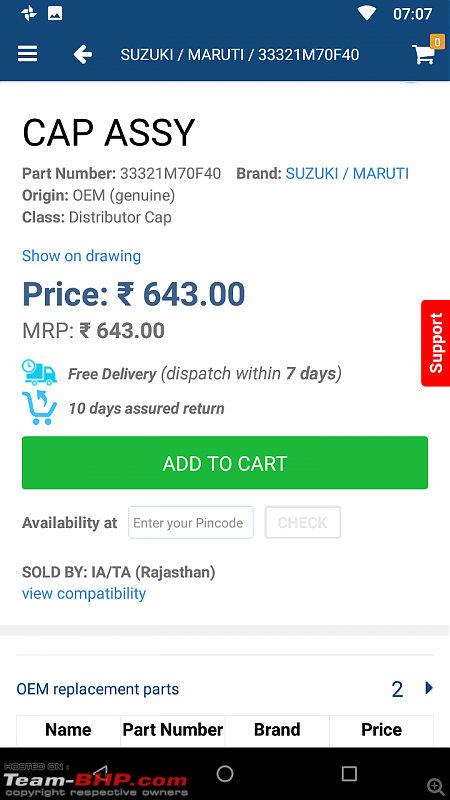
If you are changing the coil and the cables, then you might as well change the distributor cap. it costs around 400.

Last edited by T1000 : 23rd September 2018 at 19:49.
T1000 is offline   (3) Thanks
Old 26th September 2018, 17:32   #587
BANNED
 
Join Date: Nov 2016
Location: Kollam
Posts: 2,018
Thanked: 6,636 Times
Re: Zen and the art of maintaining it

Quote:
Originally Posted by R2D2 View Post
Did you get the injectors cleaned?
Not yet, ordered the remaining parts i.e grommet and O ring from Bodomo a while ago. Would go ahead with the cleaning once the parts arrive.

Quote:
Where does the fuel drip from and how much do fuel do you normally fill? Full tank? Fill only till the petrol dispenser switches off. Do not overfill. Also, check if the breather hose + overflow pipe attached to the fuel filler inlet is blocked. Also, tell the attendant to fill the tank at a slower pace.
The drip was under the car, a few inches away from the rear wheel.

The dripping is there when I fill half tank i.e 1~1.5k of fuel, when I fill for full tank i.e 2.5~2.8k I've noticed that the dripping/overflow would be going for a bit after until I drive a short distance.

If its not much trouble please educate me on how the overflow pipe is routed, does it passively let fuel drip to the ground like on motorcycles?

Quote:
Originally Posted by T1000 View Post
If you are changing the coil and the cables, then you might as well change the distributor cap. it costs around 400.
Thank you for the advice, ordered it on Bodomo, costs around 650/-.

Can I replace the cap without having to be bothered about setting timing? My presumption is that I take the old cap off, and fix the new cap with reference to the position the old cap was fixed in, please correct me if I'm wrong.
ashwinprakas is offline  
Old 26th September 2018, 17:49   #588
Distinguished - BHPian
 
R2D2's Avatar
 
Join Date: Oct 2008
Location: Pune
Posts: 3,231
Thanked: 5,742 Times
Re: Zen and the art of maintaining it

Quote:
Originally Posted by ashwinprakas View Post
The drip was under the car, a few inches away from the rear wheel.

The dripping is there when I fill half tank i.e 1~1.5k of fuel, when I fill for full tank i.e 2.5~2.8k I've noticed that the dripping/overflow would be going for a bit after until I drive a short distance.
Quote:
If its not much trouble please educate me on how the overflow pipe is routed, does it passively let fuel drip to the ground like on motorcycles?
I think you have a couple of defective cracked hoses. Check following:

a) Part no # 5 and the hose attached
b) Part no 8, the breather hose.

The image shows the routing.

Quote:
Can I replace the cap without having to be bothered about setting timing? My presumption is that I take the old cap off, and fix the new cap with reference to the position the old cap was fixed in, please correct me if I'm wrong.
Absolutely, no need to check timing. The ONLY time you need to check timing is if parts like the distributor and allied sensors are removed from the engine. So do not perform any adjustments or disassembly of these parts if you don't have the right tools and the manual. You can seriously compromise engine performance.
Attached Thumbnails
Zen and the art of maintaining it-zen-tank.png  

R2D2 is offline   (1) Thanks
Old 27th September 2018, 00:00   #589
BANNED
 
Join Date: Nov 2016
Location: Kollam
Posts: 2,018
Thanked: 6,636 Times
Re: Zen and the art of maintaining it

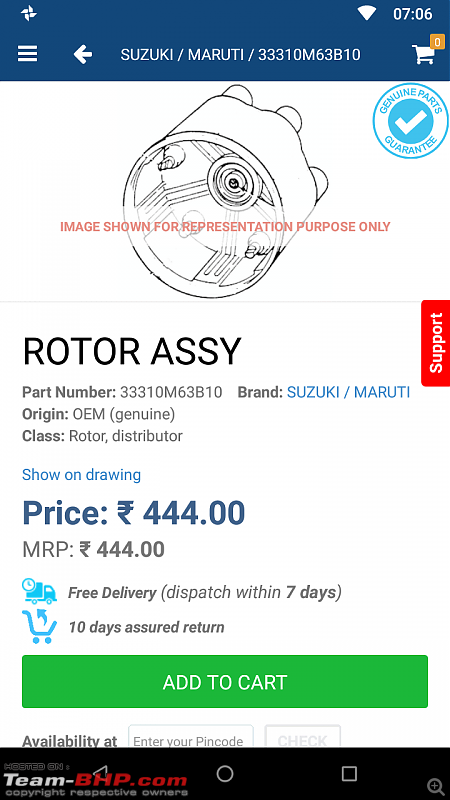
Another quick update. After being on the internet for a bit I got to learn that the rotor should ideally be replaced with the distributor cap, so I've ordered one as well, it's around 450/-

And while figuring out how to replace the rotor I came across a video where a dude showed how to set the timing without a timing light.

He takes the cap off and sets the rotor to plug one, the pulls out the cable coming from the coil going into the distributor cap and grounds it to the distributor body, he has the motor turned to 10 Degrees BTDC and the ignition on ON, now when he rotates the distributor it fires at a specific point and he stops and locks the distributor in place and reassembles everything.

The technique makes sense, thought I'd post it here to get your suggestions before experimenting.
ashwinprakas is offline  
Old 27th September 2018, 00:04   #590
Distinguished - BHPian
 
Leoshashi's Avatar
 
Join Date: Jul 2014
Location: India
Posts: 5,693
Thanked: 42,424 Times
Re: Zen and the art of maintaining it

Are the rotors and distributor cap available in MGP?? Specially for the MPI Zen??
Leoshashi is offline   (3) Thanks
Old 27th September 2018, 00:26   #591
BANNED
 
Join Date: Nov 2016
Location: Kollam
Posts: 2,018
Thanked: 6,636 Times
Re: Zen and the art of maintaining it

Quote:
Originally Posted by Leoshashi View Post
Are the rotors and distributor cap available in MGP?? Specially for the MPI Zen??
No idea about MGP, I'm hooked on the Bodomo mobile app, have placed an order for both the rotor and cap, total price would be around 1100/-.
ashwinprakas is offline   (1) Thanks
Old 27th September 2018, 01:06   #592
Distinguished - BHPian
 
Leoshashi's Avatar
 
Join Date: Jul 2014
Location: India
Posts: 5,693
Thanked: 42,424 Times
Re: Zen and the art of maintaining it

Quote:
Originally Posted by ashwinprakas View Post
No idea about MGP, I'm hooked on the Bodomo mobile app, have placed an order for both the rotor and cap, total price would be around 1100/-.
Can you share the link please?? Or the part numbers?? Even a screenshot of your order will do.
Leoshashi is offline   (2) Thanks
Old 27th September 2018, 07:09   #593
BANNED
 
Join Date: Nov 2016
Location: Kollam
Posts: 2,018
Thanked: 6,636 Times
Re: Zen and the art of maintaining it

Quote:
Originally Posted by Leoshashi View Post
Can you share the link please?? Or the part numbers?? Even a screenshot of your order will do.
Sure bro, here you go.

The app doesnt have a link share option, hence sharing screen captures of the item page.

Zen and the art of maintaining it-screenshot_20180927070702.png

Zen and the art of maintaining it-screenshot_20180927070647.png
ashwinprakas is offline   (3) Thanks
Old 27th September 2018, 13:02   #594
BANNED
 
Join Date: Jul 2010
Location: Gurgaon
Posts: 388
Thanked: 818 Times
Re: Zen and the art of maintaining it

Quote:
Originally Posted by ashwinprakas View Post
The drip was under the car, a few inches away from the rear wheel.

The dripping is there when I fill half tank i.e 1~1.5k of fuel, when I fill for full tank i.e 2.5~2.8k I've noticed that the dripping/overflow would be going for a bit after until I drive a short distance.
The leakage is most probably from fuel expansion tank which rest on top of fuel tank. The fuel tank would need to be lowered and then this expansion tank gets accessible and depending upon it's state, it can be repaired or replaced. Since it's an inexpensive part, better get it replaced. Hoses would most likely be fine, but if you see some cracking, as a preventive measure, get them replaced too.
chaudh2s is offline   (1) Thanks
Old 28th September 2018, 09:35   #595
Distinguished - BHPian
 
R2D2's Avatar
 
Join Date: Oct 2008
Location: Pune
Posts: 3,231
Thanked: 5,742 Times
Re: Zen and the art of maintaining it

Quote:
Originally Posted by ashwinprakas View Post
And while figuring out how to replace the rotor I came across a video where a dude showed how to set the timing without a timing light
It looks good and it could be done in an emergency.

But I think you should wait till you get the proper tool and do a perfect job the way the MSIL recommends it be done in the service manual.

Last edited by R2D2 : 28th September 2018 at 09:36.
R2D2 is offline   (2) Thanks
Old 30th September 2018, 03:27   #596
BANNED
 
Join Date: Nov 2016
Location: Kollam
Posts: 2,018
Thanked: 6,636 Times
Re: Zen and the art of maintaining it

Quote:
Originally Posted by chaudh2s View Post
The leakage is most probably from fuel expansion tank which rest on top of fuel tank. The fuel tank would need to be lowered and then this expansion tank gets accessible and depending upon it's state, it can be repaired or replaced. Since it's an inexpensive part, better get it replaced. Hoses would most likely be fine, but if you see some cracking, as a preventive measure, get them replaced too.
Having a look at the parts manual I'm confused by the number of tubes running up and down, hence I guess it would be best for me to just lower the tank and then get non OEM tubes in bulk and use as required.

I would order the expansion tank along with the fuel filter as I intend to change it in the next couple of thousands anyways and just to confirm by expansion tank you mean the 'Liquid Vapor Separator' right?

Zen and the art of maintaining it-capture.jpg

From the looks of it I see that some kinda flange is used at the junctions, I presume that these are made out of rubber and that they should also be replaced, please confirm if so.

Quote:
Originally Posted by R2D2 View Post
It looks good and it could be done in an emergency.

But I think you should wait till you get the proper tool and do a perfect job the way the MSIL recommends it be done in the service manual.
Tried a few other shops, they're clueless as expected, so my search continues.

And In the mean while I might consider replacing my air-box as the snorkel connector that I'd scrapped earlier was actually not entirely the snorkel connector put part of the air filter box, now my air filter box just has a huge hole which I guess warrants the need to replace the air filter box.

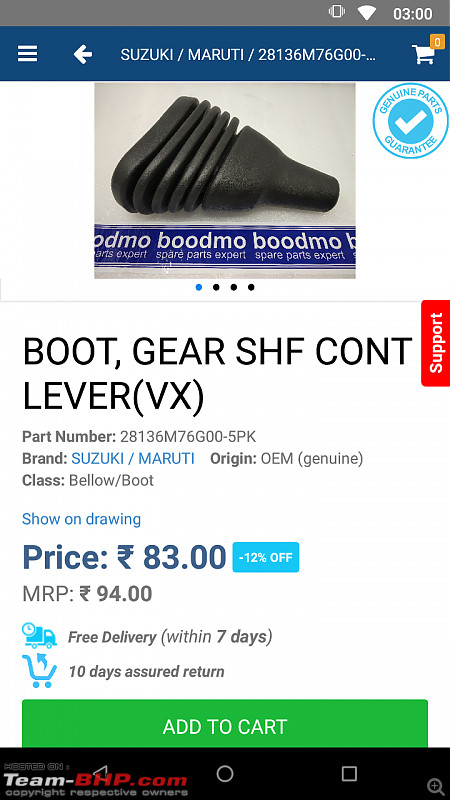
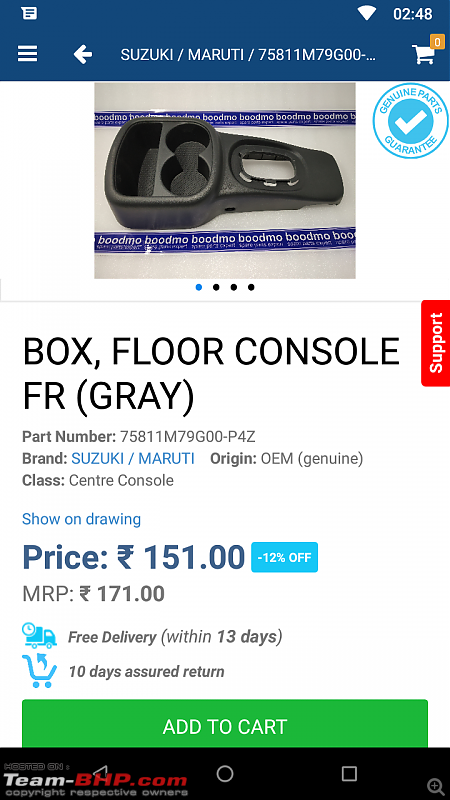
Also while I was simply browsing through Bodomo ordered these two inexpensive parts as my Zen has 3 12v ports set up and no place at all to keep the accessories, so at around 234/- I guess this would be a decent mod.

Zen and the art of maintaining it-screenshot_20180930030018.png Zen and the art of maintaining it-screenshot_20180930024839.png

Idea courtesy @chiranjitp, Thanks!
ashwinprakas is offline  
Old 13th November 2018, 11:56   #597
NKN
BHPian
 
Join Date: Jun 2014
Location: KL11,MH12
Posts: 33
Thanked: 50 Times
Re: Zen and the art of maintaining it

I have a 2005 zen VXI with front power windows.. Have been looking for LHS power window switch which has malfunctioned. I have checked with all Maruti dealerships in Pune, they mention that this spare is no more in their catalogue. Can someone please guide me as to where I could possibly find it?

Last edited by GTO : 14th November 2018 at 07:19. Reason: typos
NKN is offline   Received Infraction
Old 13th November 2018, 12:13   #598
Distinguished - BHPian
 
Leoshashi's Avatar
 
Join Date: Jul 2014
Location: India
Posts: 5,693
Thanked: 42,424 Times
Re: Zen and the art of maintaining it

Quote:
Originally Posted by NKN View Post
I have a 2005 zen VXI with front power windows.. Have been looking for LHS power window switch which has malfunctioned. I have checked with all Maruti dealerships in Pune, they mention that this spare is no more in their catalogue. Can someone please guide me as to where I could possibly find it?
Kindly post a pic of your PW switch. Zen got two types of switch. Although by 2005, I have a fair idea of what you need, but still to be on the sure side.

Last edited by GTO : 14th November 2018 at 07:20. Reason: quoted post edited
Leoshashi is offline   (3) Thanks
Old 13th November 2018, 14:59   #599
NKN
BHPian
 
Join Date: Jun 2014
Location: KL11,MH12
Posts: 33
Thanked: 50 Times
Re: Zen and the art of maintaining it

I didnt know there were 2 types. Here are the pictures if you can help
Attached Thumbnails
Zen and the art of maintaining it-20180127_160537.jpg  

Zen and the art of maintaining it-20180127_160556.jpg  

NKN is offline  
Old 13th November 2018, 21:15   #600
Distinguished - BHPian
 
Leoshashi's Avatar
 
Join Date: Jul 2014
Location: India
Posts: 5,693
Thanked: 42,424 Times
Re: Zen and the art of maintaining it

Quote:
Originally Posted by NKN View Post
I didnt know there were 2 types. Here are the pictures if you can help
The only compatible part I can see as open is 37995-75F00-P4Z. Costs Rs. 1638. Another compatible part with different color is 37995-75F00-R8J. It costs Rs. 1474.

The only difference between them is color. The former one is dark grey, while I am not sure about the latter.

Place your order on Boodmo.com, so that in case a wrong part comes, you can return. Chances are slim, but its better to be on the safer side.

Regards
Shashi
Leoshashi is offline   (5) Thanks
Reply

Most Viewed


Copyright ©2000 - 2024, Team-BHP.com
Proudly powered by E2E Networks