Getting this thread back on track - after a delightful journey

Fitted my first set of (off road) lights. The market has many options, which can broadly be classified as
1) Halogens / xenons - cheaper, draw more power for same wattage, decent life, high heat.
2) LED bar - expensive, most efficient power to watt ratio, long lived, almost no heat.
3) HID lights - also expensive, moderate power to watt ratio, warm up period before light takes effect, low heat.
There is decent variety available in India, though I would recommend buying the best international brands abroad - with the exception of Hella, I will clarify this further later. Choosing the best lighting system for your car can be quite confusing at first, but with a little research you can pick up tips and decide what's best. Don't make the ricer mistake of just plonking the largest LED bar you can find, on top of your windscreen and bump up 2-4 halogens or HIDs up front. Looks great, but that's a lot of screws to tighten - not much fun if you don't use them as intended! First take time to reflect on your own drive cycle, then work on customizing your lights to these needs. If you primarily drive on road, then there is little use investing in (and drilling for) high mounted lights with a wide throw. Focus (pun intended) on the road ahead and for heavens sake, invest in safe lights that help you but not at others' expense. With great power, comes great responsibility.
Disclaimer: I am no expert, just an amateur bhakt of googlebaba. Industry experts please feel free to short circuit any explanations from the thread, if found incorrect.
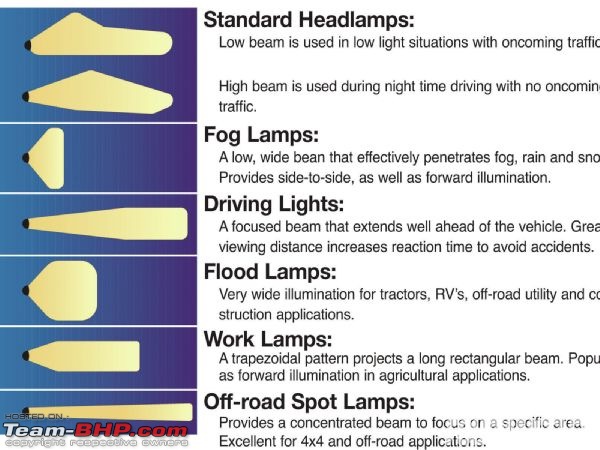
This handy chart from
www.fourwheeler.com was found useful.
My search led me to Hella. Realized along the way that these lights are manufactured in India; which gives us the advantage of international quality lights at a very reasonable price. Warranty etc is good to have, as a decent set of lights would cost you INR 5,000 for a pair, onwards. There are cheaper options in the market, including LEDs from highly suspect manufacturers. You can even buy lights off Amazon, and good luck installing them (quite easy once you know how).
What led me to this decision? Knowing that I still have lots to learn, and this is the early stage of my overlanding, and my four wheeling journey - I decided to take this project as a learning experience. Test out some basic lighting, so I know better how that helps me in the real world. Should the lights not be as advertised, can always use them as work lights at camp. With this experience, will hopefully be able to arrive at the correct combination for my rig. VivOverland knows, it is the journey that gives him joy, the destination is just the halfway point

Some of my readers would remember the mounting points on my new BAT roll bar. I know purists prefer not to use this term (this isn't really a safety accessory), but it just rolls off the tongue easier. Anyway, you can read about that project earlier in this thread. Here's what they looked like before the install.

My choice of lights, to overcome my aux light virginity - Hella 500 (2x) and Hella 500FF (2x). There is plenty of coverage (pun intended) of these lights in other threads - like
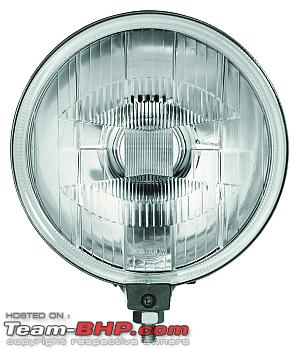
this one. Suffice to say, the 500s make a good pair of regular lights. This is how Hella describes them -
HELLA 500 Halogen Driving Lamp Kit
Ideal for:
• Rural, night driving
• Off-road activity
Features:
• Light-weight design
• Impact-resistant reinforced ABS housing
• Aluminum vapor-coated reflector
• Change the look of any HELLA 500 lamp with our Color Shieldz Protective Films available in Yellow, Smoke, or Blue shades.
• Bonded glass lens
Specifications:
• Voltage: 12V
• Beam Pattern: Driving
• Light Source: H3 12V/55W Bulb
• Power Consumption: 55W
• Housing Material: ABS
• Optics: Lens / Reflector
• Lens Material: Glass
• Connection: Wire Leads
• Bracket: Zinc Coated Steel
• Approval: ECE
Mounting:
• Upright
Technology:
• Halogen
• Parabolic Reflector
Single Lamp Includes:
• (2) Lamp
• (2) Halogen Bulb
• Universal Mounting Hardware
• Step-by-Step Mounting Instructions
The 500FF is identical, except for the patented 'free form' technology, which basically means you get a brighter reflective surface (helps to disperse light) and a clear glass lens. Note that both the 500s use glass lenses, and come standard with stone covers (required when mounted on the front bumper).
This is what the lights look like.
Hella 500
Hella 500FF

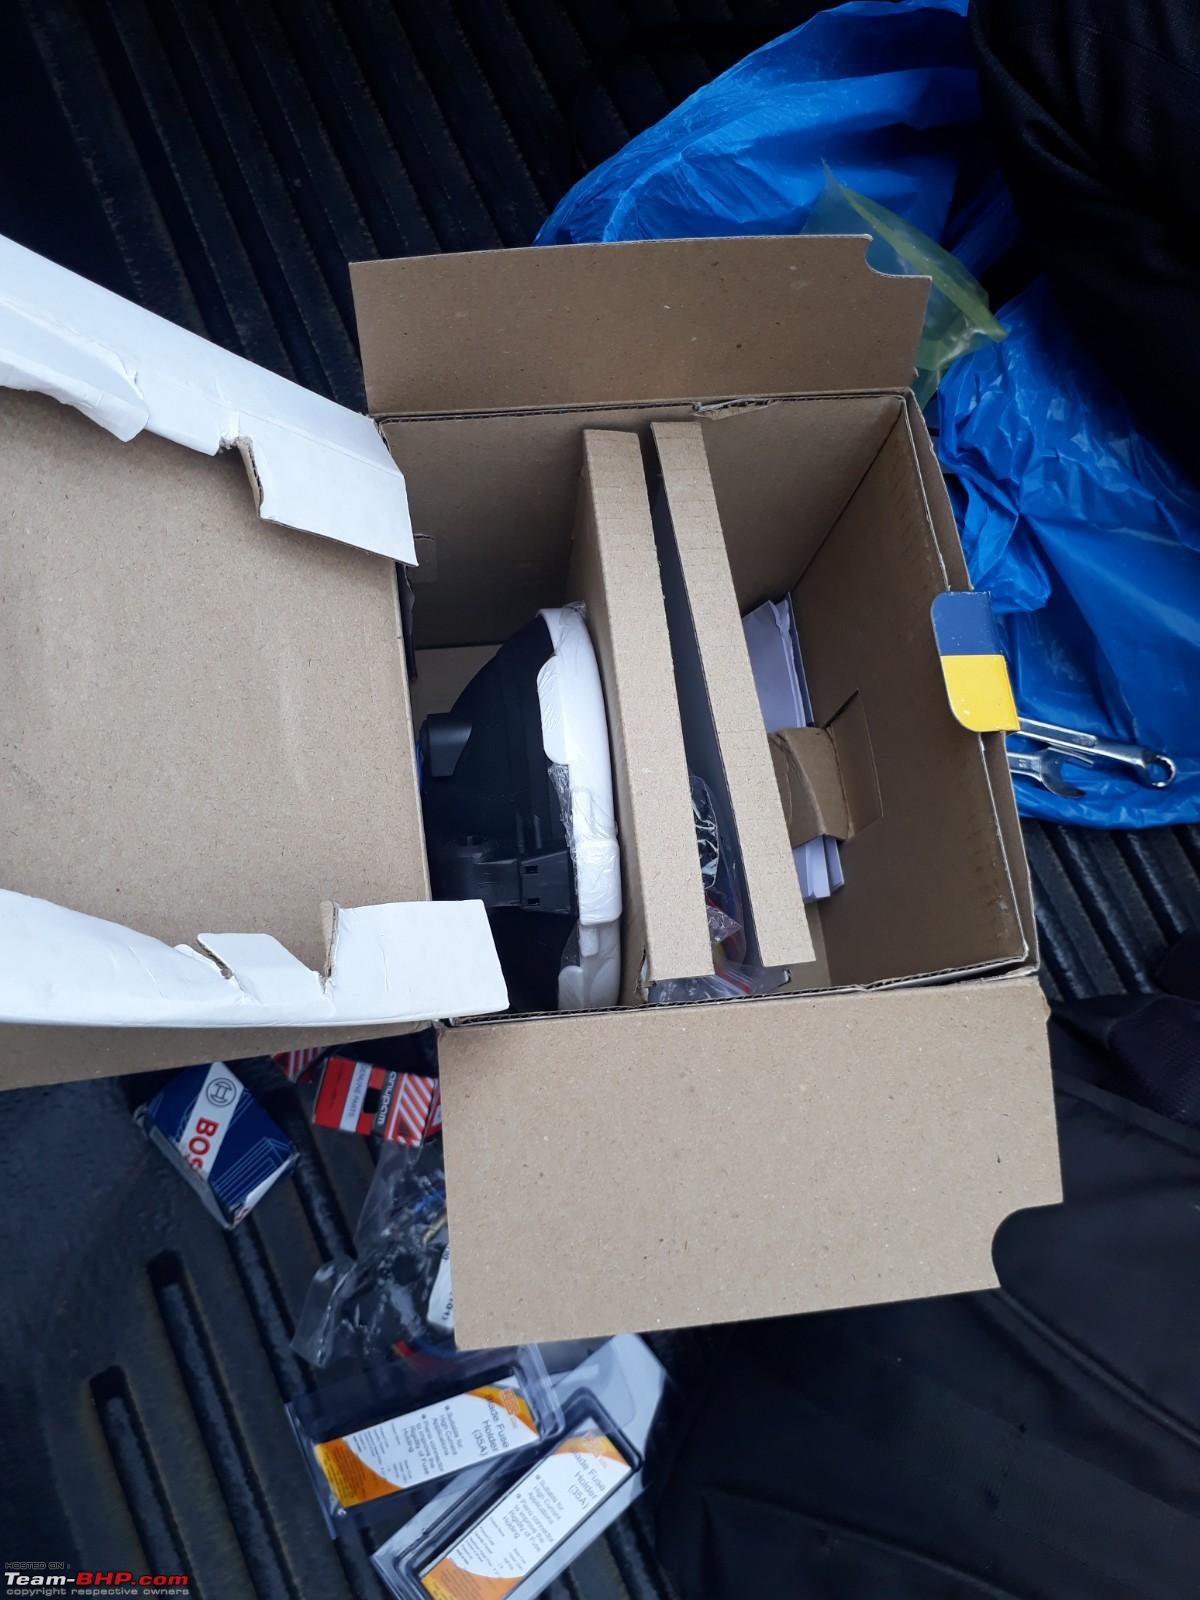
Unboxed

Entrusted this project to the dependable team at JMD Isuzu. More expensive than open market, but reliable and with warranty and full service support. I had booked several accessories from here - Carryboy roller lid, bed liner, wheels and tyres, side steps, reverse camera.
Disclaimer- I have no affiliation with this organization, except as a customer.
Step 1
Assemble components. Basic kit required for the job:
1) Wiring harness
2) Relays
3) Piano switches
4) Hella kits
5) Tools
6) Brackets and bolts
7) Wire sleeve
8) Lots and lots of insulation tape
As mentioned earlier, I had planned for mounting points in the roll bar, so I did not need an additional cross bar.
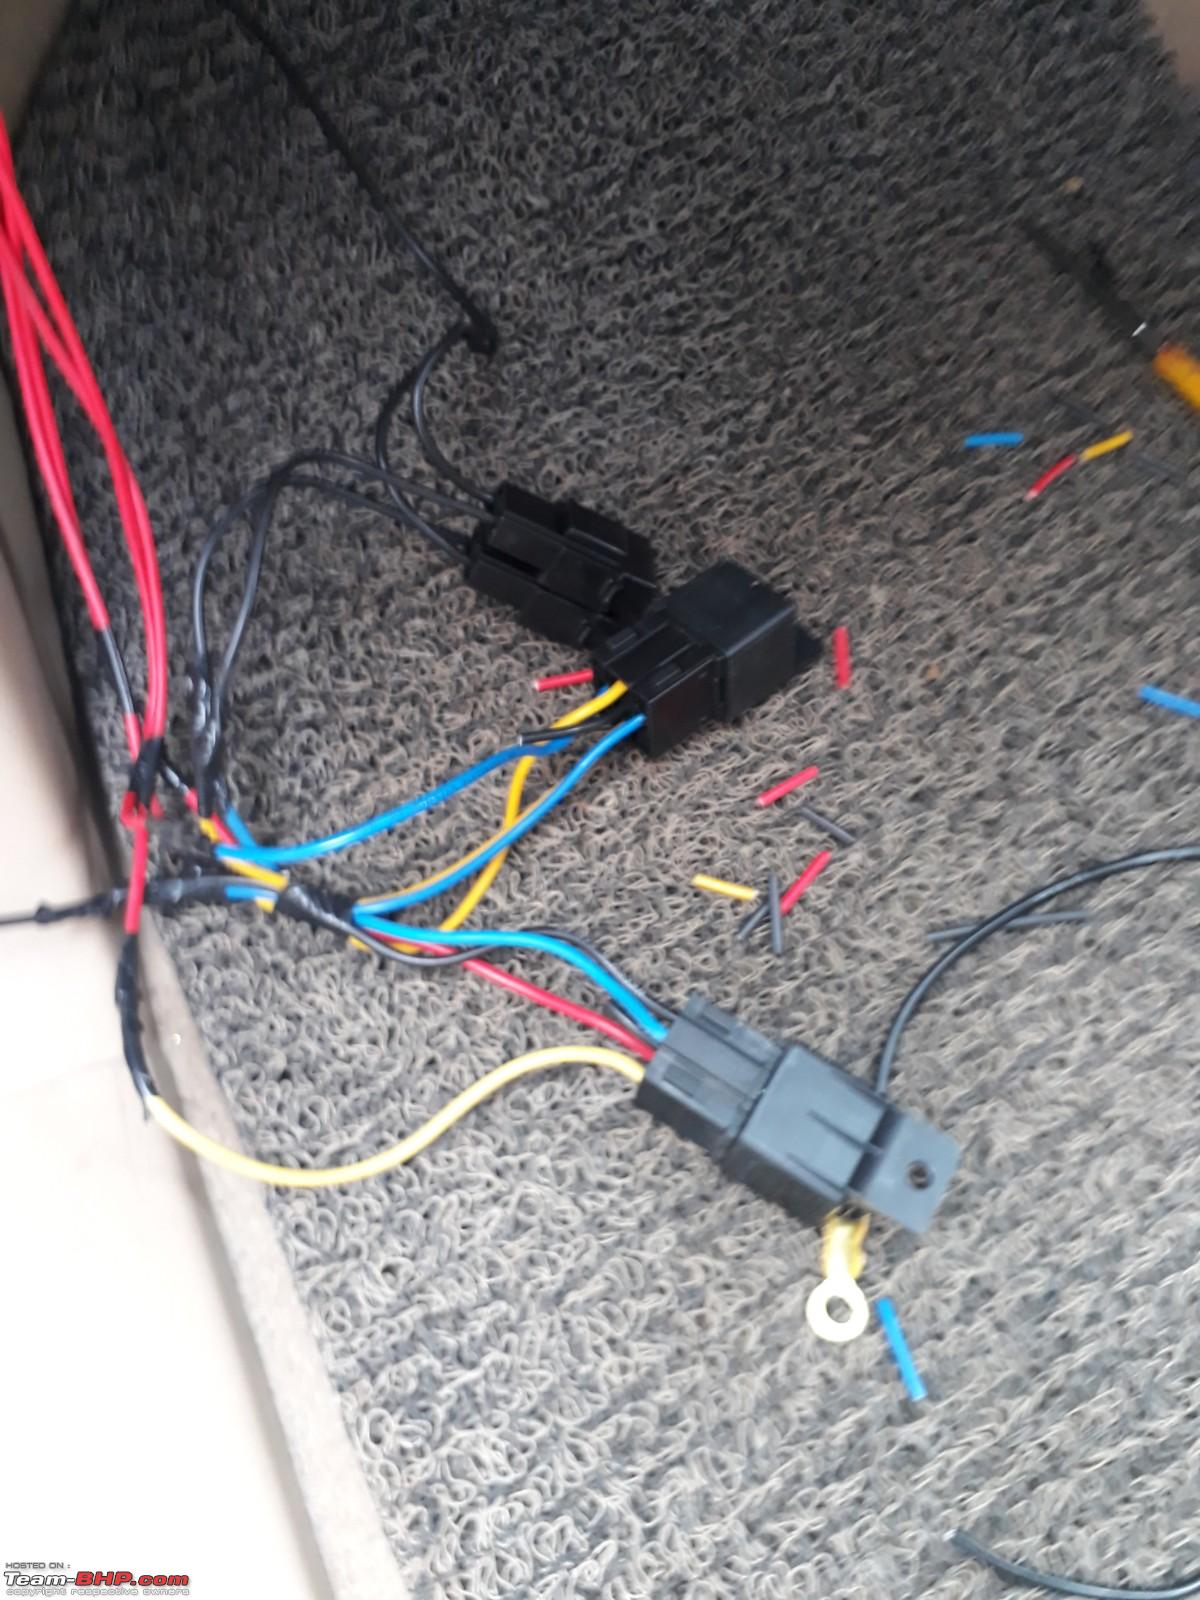
A typical wiring plan looks like this.
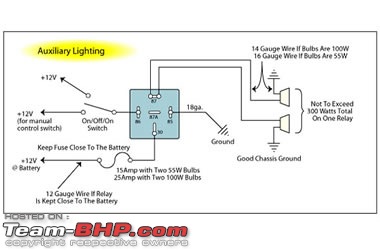
Quality material, and high ampere rated wire is necessary from the POV of long term use and dependability. Halogens draw a lot of power from the battery, so a relay is advisable. Also will be handy when adding more light or electrical accessories in the future. Some installers skip this step (relays), and the user will probably only realize months later when having to replace a battery / alternator / wiring harness.

Step 2
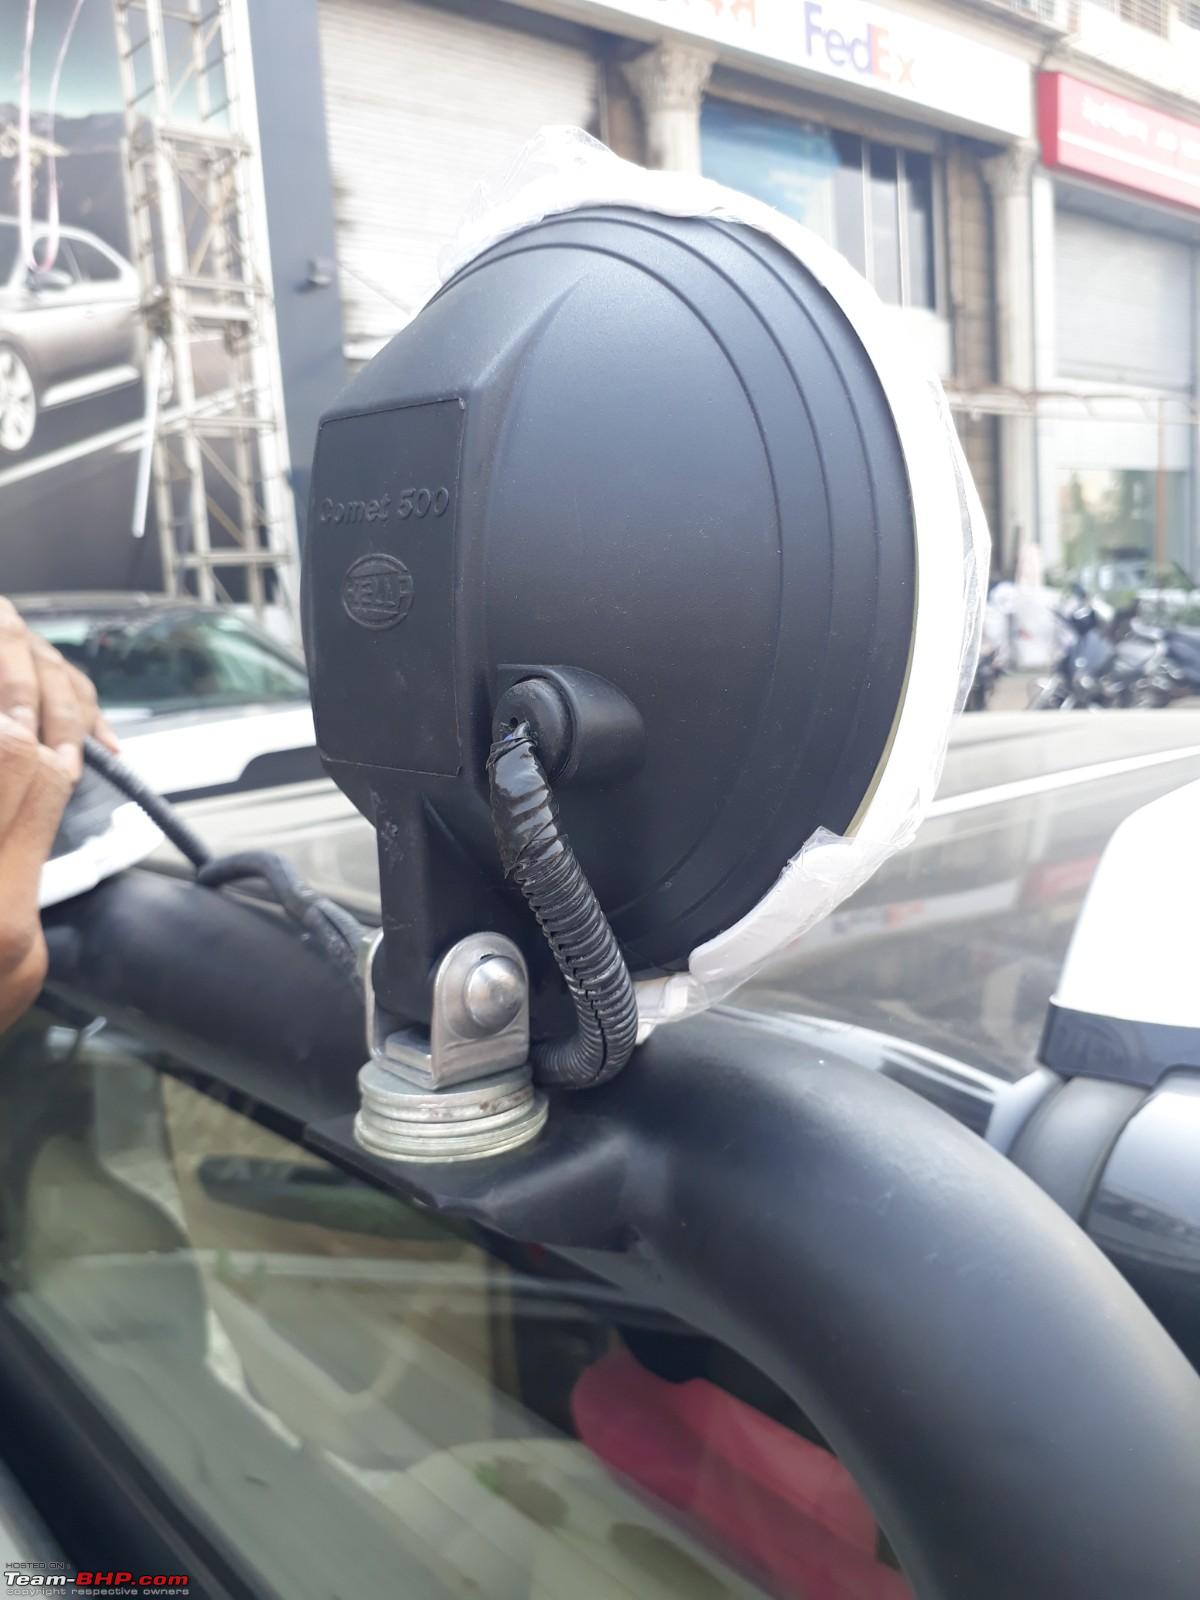
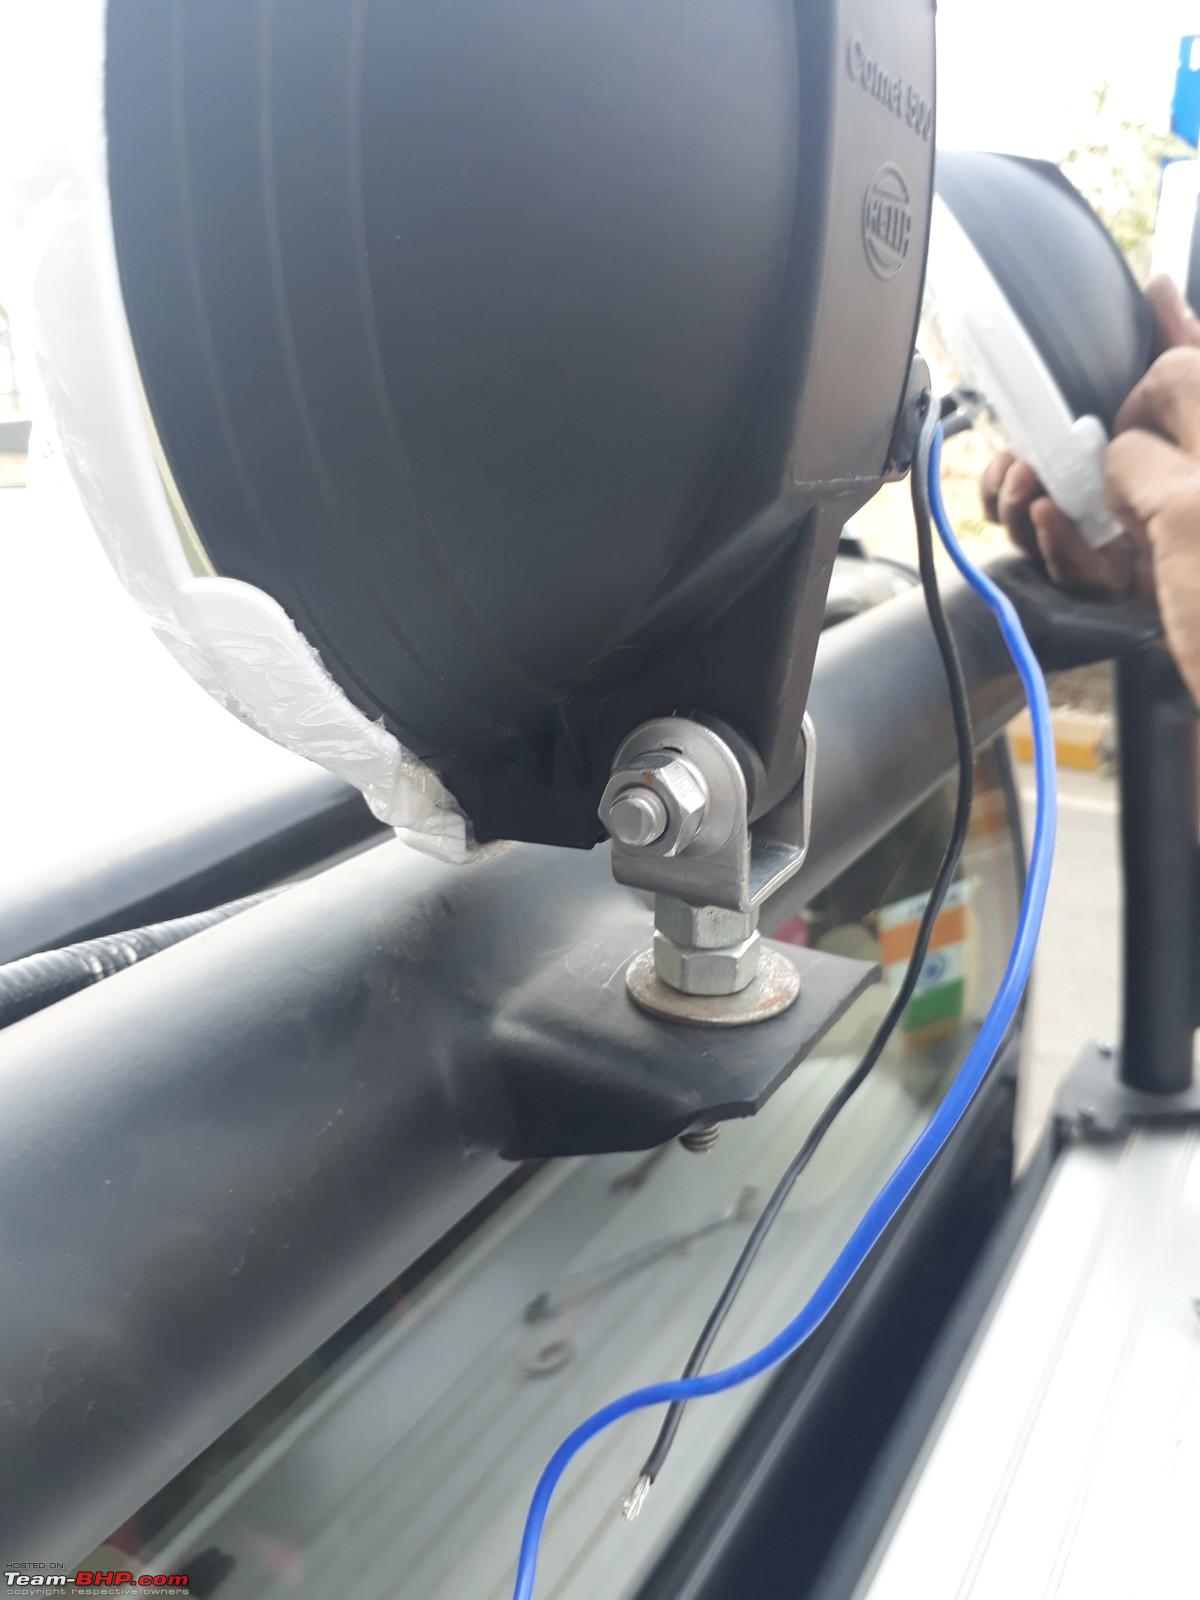
Check mounting options. It is important that your mounts give you enough play, to adjust your lighting as necessary. Not much point having great lights, that point to the sky... This ain't no rolling matinee show thank you very much! In my case, we had to try a few options, as the stock bolts (from the Hellas) weren't tall enough. We tried 3 alternatives before finding one that I was ok with. It was important to me that the stone covers fit, as these are not highway lights. Indian law is rather vague, and I could find no mention in the MVA - but capped lights should be fine. I can just uncap them when I air down on the trail.
If at first you don't succeed, try...

Then, try again...

Till you get it right

Step 3
Assemble and run your wiring. For an amateur this would be Step 1, and there are many 'how to' videos on YouTube. I was blessed to be working with an expert, so this was a smooth process.
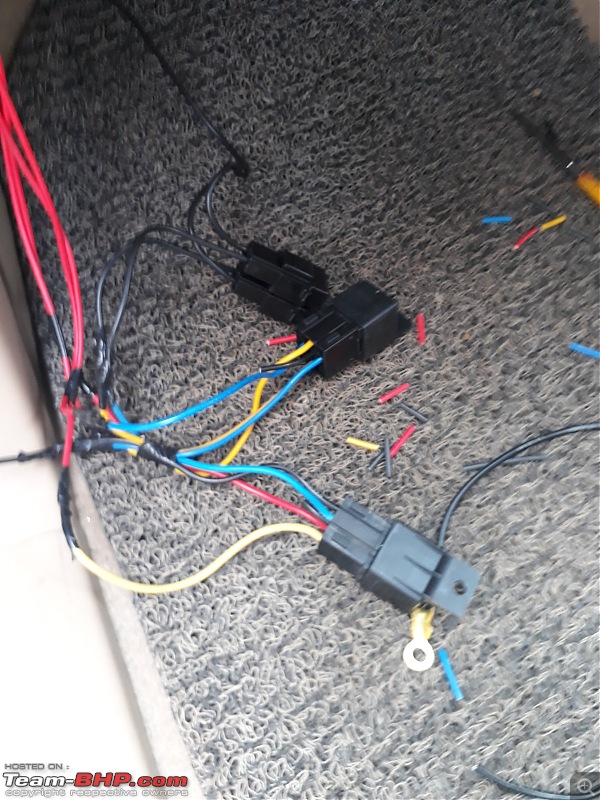
You can see the relays assembled here.
Running the cable from the truck bed into the cabin (we just used the same channel as the tail light wiring).

Along the floor (next to the rear bench)
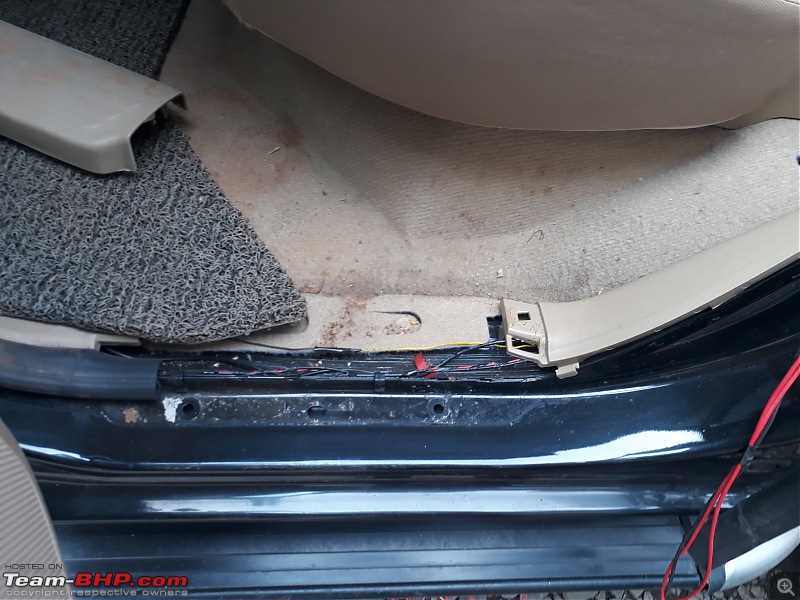
Along the floor (next to the passenger seat)

Into the engine bay

And into the drivers side (for the piano switches)
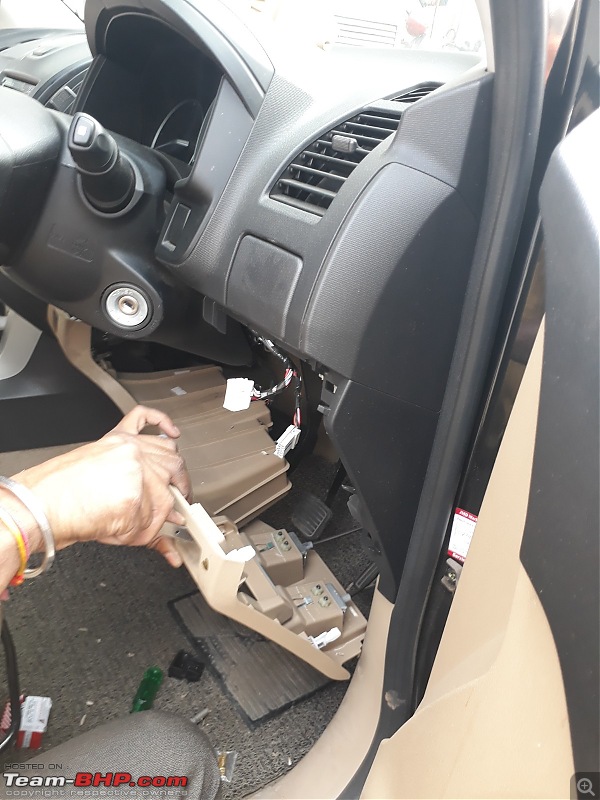
As can be seen, this is a simple job - but one that touches quite a few systems across the vehicle. You definitely want to entrust this to someone who knows your car model well. I felt supremely confident watching these guys tear out panels so expertly. They knew the pressure points, thread points and reassembly so well. A quack electrician would have probably damaged my precious Emma.
At last, we could see the lights mounted and all working fine.

Some alignment still required. OCD patients please look away. I suffer too, in silence.

View from the front

Will get some day and night time shots together soon. I'm learning how to take pictures of lights in action, haven't done this before!


 22nd February 2018, 22:02

 (5)
Thanks
(5)
Thanks


 .
.


