Team-BHP > Modifications & Accessories > Tyre & Alloy wheel Section
Register New Topics New Posts Top Thanked Team-BHP FAQ


Reply
  Search this Thread
35,255 views
Old 30th September 2009, 23:36   #1
BHPian
 
Glifford's Avatar
 
Join Date: May 2007
Location: Bangalore
Posts: 392
Thanked: 86 Times
DIY: Ford Fusion+ OE Alloy Wheel Restoration

As you must be aware, I have been looking to re-paint the scratched, chipped, stained and dirty alloys on the Fusion before I dressed them with a new set of tyres. Posted this, but got no response.

Other sources were inconclusive too (read) and hence on some encouragement from members of other forums, I decided to take the DIY route. Here are the results:

Rear Left, before and after
DIY: Ford Fusion+ OE Alloy Wheel Restoration-rear-left.jpg

Rear Right, before and after
DIY: Ford Fusion+ OE Alloy Wheel Restoration-rear-right.jpg

Front Left, before and after
DIY: Ford Fusion+ OE Alloy Wheel Restoration-front-left.jpg

Front Right, before and after
DIY: Ford Fusion+ OE Alloy Wheel Restoration-front-right.jpg
Ignore spray bleeding on the tyres. Decided that the tyres are anyhow due for replacement hence didn't mask off the front two tyres.

Sorry bout the missing nut covers (hub caps) on the "after" pics. Didn't fix them back when clicking. They are sparkling clean too!

End result/finish not exactly to my satisfaction, but the work definitely was. Not sure if a hired painter would have done a more meticulous (cleaning esp.) job, but I loved every moment of it doing it myself. Took the better part of 3 days of a lots of hardwork, scrubbing, splashing, spraying, drying, sanding, scraping and solvent inhaling.

Wonder how long it will last tho'. Will keep my fingers crossed.

This is just an intro-post. Have documented (photographed) each and every step of the process and will post in detail as soon as I have the time. Tomorrow I go to get a new set of tyres (to sit on the now deserving alloys)!

Last edited by Glifford : 30th September 2009 at 23:48. Reason: Added hub caps
Glifford is offline   (1) Thanks
Old 30th September 2009, 23:47   #2
Senior - BHPian
 
AbhiJ's Avatar
 
Join Date: Jun 2008
Location: Kolkata
Posts: 1,476
Thanked: 1,207 Times

Waiting for your step by step post....
AbhiJ is offline  
Old 30th September 2009, 23:56   #3
Distinguished - BHPian
 
Nikhilb2008's Avatar
 
Join Date: Jul 2006
Location: Bangalore
Posts: 5,196
Thanked: 10,138 Times

Holy CRAP! That's a fantastic job you've done there!

I'm usually not the DIY guy( a little too lazy), but this is fantastic! Didnt think you could get this kind of a finish irrespective of who did the job. All the more praiseworthy when it's done with your own hands.

Am eagerly waiting for the full description!
Nikhilb2008 is offline  
Old 1st October 2009, 09:24   #4
BHPian
 
shubhodeepdas@g's Avatar
 
Join Date: Sep 2008
Location: Bangalore
Posts: 386
Thanked: 558 Times

Awesome job done, Gliff.

Quick question though, how did you paint the center plastic hub that covers the nuts on the alloys in this particular model?
shubhodeepdas@g is offline  
Old 1st October 2009, 10:11   #5
BHPian
 
Matt's Avatar
 
Join Date: Jan 2008
Location: Christchurch NZ
Posts: 130
Thanked: 2 Times

Amazing job .
Your rear right tyre seems to have traveled on worse roads than others
Matt is offline  
Old 1st October 2009, 11:35   #6
BHPian
 
jinu_joseph's Avatar
 
Join Date: Aug 2006
Location: Mumbai
Posts: 421
Thanked: 188 Times

Step by step instructions please... this is fabulous.
jinu_joseph is offline  
Old 1st October 2009, 13:01   #7
BHPian
 
ihrishi's Avatar
 
Join Date: Aug 2004
Location: Pune
Posts: 256
Thanked: 1,225 Times

Lovely job Gliffy!
And kudos to your taking pains to document each step...
ihrishi is offline  
Old 1st October 2009, 18:00   #8
BHPian
 
WasavaTyres's Avatar
 
Join Date: Aug 2006
Location: Indore
Posts: 816
Thanked: 450 Times

Nice job. Would it be wise to have a clear coat done on this for lusture ??
WasavaTyres is offline  
Old 1st October 2009, 20:35   #9
BHPian
 
archat68's Avatar
 
Join Date: Dec 2006
Location: Kolkata
Posts: 897
Thanked: 619 Times

waiting for details.
archat68 is offline  
Old 1st October 2009, 21:09   #10
Senior - BHPian
 
anachronix's Avatar
 
Join Date: Mar 2006
Location: Madras
Posts: 3,286
Thanked: 1,336 Times

Thats unbeleivable piece of work! Do share more information on the DIY.

And some pics with the wheels on the +
anachronix is offline  
Old 1st October 2009, 21:44   #11
BHPian
 
Glifford's Avatar
 
Join Date: May 2007
Location: Bangalore
Posts: 392
Thanked: 86 Times

Hey everyone,

Thanks for your comments! Please have patience, am currently typing in the detailed step-by-step log and also have finished selecting, sorting and titling the pictures.

Will respond to each of your questions in detail ASAP. Just that had a busy day at work (ahead of the long weekend) and had to spend time cleaning up the bathroom that I messed up cleaning those wheels!

A day max and I will post. Haven't got the new tyres as yet!
Glifford is offline  
Old 1st October 2009, 22:54   #12
Team-BHP Support
 
Rehaan's Avatar
 
Join Date: Feb 2004
Location: Bombay
Posts: 24,046
Thanked: 34,078 Times

Looks like a great job there!

Quote:
Originally Posted by Glifford View Post
....Wonder how long it will last tho'...
Thats the first question that popped into my mind as well when i realised you had repainted the wheels. Will have to wait and watch i guess, and i'm sure you'll be extra careful to stay away from the curb!

Looking forward to the step-by-step with the pics!

cya
R
Rehaan is offline  
Old 3rd October 2009, 01:49   #13
BHPian
 
Glifford's Avatar
 
Join Date: May 2007
Location: Bangalore
Posts: 392
Thanked: 86 Times
Day 0 (Saturday, 26-Sep-2009):

Warning: Series of long, verbose posts ahead.

Day 0 (Saturday, 26-Sep-2009):

Start of the long weekend, I decide to check out the Goodyear Dealer I just found though Goodyear Wheel Assist. Also decide to stop over at Fast Cars (Palace Road) on the way so that I could get a quote for repainting the alloys. Located on Google Maps on the mobile, but my inaccurate GPS (no GPS actually) ensured I missed the spot and ended up behind Vidhana Soudha. Went on to JC Road and parked in the Govt. MLCP. Was surprised to see what all people use the top floor for! A picnic spot, a place to rest, but most importantly a place to fit the accessories just bought.

Head over to Cherry Agencies for Cooper ATP Zeon and then General Tyres for Goodyear Assurance. All this while I was wondering where I would park the car when all 4 rims go for a paint job. Guy at General Tyres told me that he can get the rims painted for some 1200-1500, will take 3 days. And when I asked where do I park the car (although they have immense space). He offered to lend me steel rims for that while. I said 108 PCD, 15" 6J. He said 5J he can arrange and it is OK to run on them for 3 days. Think of it as an option and walk on.

Then ask for Auto World (the dealer for Com-Paint, DIY Spray Touch Up paint). Find it, they have Ford Moondust Silver in Stock. Good. Ask who would paint alloys for me. He says no idea, but you can check in the street behind. Go there. Lots of paint shops and vehicles freshly painted in the dirty gullies. Ask in a paint shop. They have no idea, but point me to a painter.

Ask painter, he says depends on the colour. I say Hyper Silver. He has no idea. I take him to the next shop that has alloys hung and show him the colour. He says “arre yeh to Pearl Silver hai, very expensive”. Kitna? 2500! Wow. Ordinary silver ka kitna? (He shows me the steel rims painted) 600.

Decide it’s enough and make up my mind to try Com-Paint and DIY as suggested by a friend of mind on another forum. “No harm trying, if you fail you can get them professionally painted” he had said. I decided to agree, went back to Auto World, picked up the Value Pack and asked if I could get the AeroShot Top Cut (rubbing/finishing paste), no stock, they said.

Get back into MLCP and as I approach the car, two boys come running up to me. I thought they wanted parking charges. Turns out they were trying to see if I needed some service. Fixing, number plate anything. I said no. I just asked who paints alloys. They rub the dust off and say, “no need sir!”. I showed scratches, they say “who chota spray paint aata hai, woh lao, hum paint karke denge”. Fortunately they had not seen me keep the box inside the car. I thought to myself, I will do it myself.

Get back home, catch a nap and then plan the next day. Think it should be a 1 day job and I should be able to go for new tyres on Dasara morning (when shops were open for a short time). How wrong I was!


To be continued...

Last edited by Rehaan : 9th October 2009 at 11:30. Reason: Post title changed on request
Glifford is offline  
Old 3rd October 2009, 17:25   #14
BHPian
 
Glifford's Avatar
 
Join Date: May 2007
Location: Bangalore
Posts: 392
Thanked: 86 Times
Day 1 (Sunday, 27-Sep-2009):

Quote:
Originally Posted by Glifford View Post
To be continued...
Continuing from there:

Day 1 (Sunday, 27-Sep-2009):

Wake up and head down to wash the car. What’s the point having shiny wheels and a dirty car (car is not washed everyday, more like once a fortnight or two). Then drive for our Sunday obligation and get back, park (it in the basement of our building) in a way that would be easy to work on the wheels.

Time to begin. Check the inventory of stuff at home and find the following:

1. Tools: Check
2. Acetone (NC Thinner): Check
3. Waterproof Emery Paper (1000 grit): Not there, to get
4. Turpentine (Thinner): Not there, to get
5. Putty Knife: Old rusty one, need another one
6. Waterproof metal suitable putty: Check, Usable?: Check
7. Paint brushes: Not fine ones, to get
8. Sufficient Amount of Masking tape: Check
9. Other cleaning agents (Easy Off Bang, Mr. Muscle Kitchen Cleaner, Pril etc.): Check
10. Cleaning tools (old toothbrushes, scrubbers, cloth rags, ScotchBrite etc.): Check

Head down to the nearest small hardware store to get the missing stuff. This small guy has no fine emery paper. Take wife’s scooter and head out to a larger paint shop. Get all the stuff (turpentine (Rs. 40), 2” putty knife (Rs. 5), 1000 & 400 grit waterproof emery paper (Rs. 10+10)) and head home.

Begin by taking off all the 4 plastic hubcaps (or nut covers if you like it that way). As I take the lift up, I wonder what chemical/solvent I must subject them to! Turpentine/Acetone, Pril or Easy Off Bang. Something told me the solvent (and grease cutting abilities in) Mr. Muscle Kitchen Cleaner would work. It has impressed me in many places outside the kitchen.

Pic: Mr. Muscle about to attack the dirty hub caps!

DIY: Ford Fusion+ OE Alloy Wheel Restoration-p1110238.jpg


I was right! It worked like magic! A short spray and some scrubbing with an old toothbrush! Lo, it was shiny new. Of course some had scratches, but they looked new. So Mr. Muscle was gonna be my chemical-weapon of choice the next few days! Takes of brake dust, hard water and oil stains like as if they are dry dust. I was more than impressed.

Pic: After Mr. Muscle-d his way through the top two. The bottom two eagerly await their turn!

DIY: Ford Fusion+ OE Alloy Wheel Restoration-p1110239.jpg


Keep them to dry and then head down for the dirty work. Decide to begin with the rear wheels as they had the most damage. Remove the spare and jack up one wheel, replace it with the steel wheel (full size) spare (with a paper underneath to not dirty the virgin spare). Then jack up the other rear wheel, take off the alloy and leave the jack there. Roll up the wheels (the way the Ford Service Guys roll the wheels to the balancing machine) to the lift and then to my 3rd floor flat. Must be the wierdest thing carried in the lift (I hope).

Pic: Shiny clean plastic hub caps with a few scratches still left

DIY: Ford Fusion+ OE Alloy Wheel Restoration-p1110295.jpg


Before I roll them in the door, I take a broom and dust out as much stuff as I can. There is a lot of dust, mud, cowdung (?) inside the wheel. Carry them straight to the bathroom (as I didn’t want them to leave marks on the clean floor).

Use the health faucet and gave them the first soak. It is spray mayhem. Within seconds the bathroom walls are coated with grime! I get warning looks from my wife. And I realise who is gonna clean this up (no not the maid).

Pic: After an initial spray (notice the dirt on the walls), Mr. Muscle and eager Colgate and Oral-B wait to bite in!


DIY: Ford Fusion+ OE Alloy Wheel Restoration-p1110240.jpg


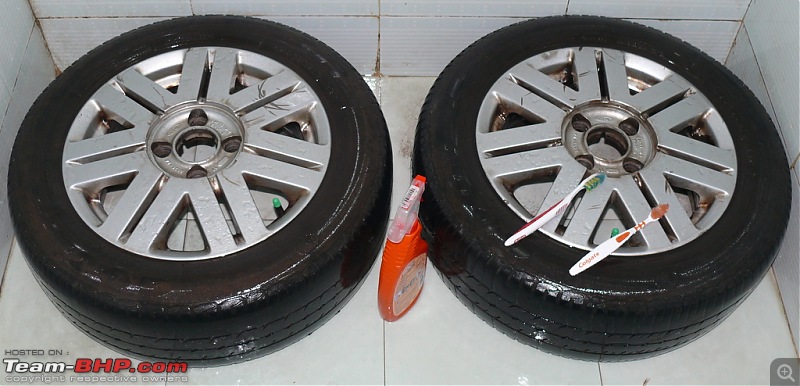
Pause for lunch and then head back to the bathroom. Wife is displeased I am not taking a holiday siesta, despite being at home. I labour on. Mr. Muscle and the Toothbrush. It seemed easy. Spray, scrub, rinse. Spot the dirt, spray again, scrub again. A couple of cycles and the outside (visible) was gleaming and the scratches were easily identifiable!

But then I encountered a black stain that refused to leave. No matter how hard I scrubbed or how much Mr. Muscle I used! Soon realised it was a layer of glue used to stick the balancing weights on the wheel. Excess (super?) glue had run over to the front side and had become black. Realised some coaxing could peel off the glue like a skin. But some places it was stuck hard So the only option was to use a sharp+blunt, hard+soft tool to coax it out. Tried with a broken hammer handle and later with a piece of wood strip. Not working. So tried with a screwdriver. Was leaving scratches. Then I found the tool that would help. A nose plier. The rounded nose of it could be used to gently scratch and peel off, and soon the fronts were clean!


Pic: After an initial scrub (even more dirt & brake dust around). More stuff takes their chances on the wheels (Pril, Scrubbers, ScotchBrite, Hammer Handle, Loose balancing weights)


DIY: Ford Fusion+ OE Alloy Wheel Restoration-p1110242.jpg


Flipped the wheel over and now to clean the inside (that encloses the disk/drum). This side was really really dirty. And using a toothbrush was gonna be a pain for such a large area. Used an old kitchen scrubber and a well worn ScotchBrite (lost its bite) along with Pril (first rinse) and Mr. Muscle (second rinse) and it was clean. Had to use the toothbrush to clean crevices in the back of the spokes. Took more effort than expected (as usual) but got done by around 16:30. Realised I was running much behind schedule, and my plan of getting new tyres on Dasara morning was in the bin.

Took the lift to the terrace and put them out in the evening sun to dry. Within an hour they were bone dry (even in the cracks).

Wife awoke from her siesta and was upset I was still working in the bathroom. My blackened face and the bathroom condition made her question why I couldn’t just outsource it?

Opened the putty can (Asian Paints Grey NO Wood/Metal Putty) and drained out the sealant water (you need to pour water over the left over putty to ensure it doesn’t dry up inside the can). The putty (left over from the wood work in the house) was in decent shape more than a year later. So decided to use it.

Went up the terrace with the two putty knives and tried my hand at applying it. (As usual) wasn’t as easy as I thought. I am used to puttying the walls (PoP putty) to cover drill holes. This was stickier and messier. But then soon enough I could get it.

Pic: Starting to apply the putty

DIY: Ford Fusion+ OE Alloy Wheel Restoration-p1110248.jpg


Was conservative and applied much more than required (will realise the consequences the next day).

Pic: First attempt at Putty-ing the deep scratches. Notice the excess.

DIY: Ford Fusion+ OE Alloy Wheel Restoration-p1110244.jpg


In an attempt to fill the corners I also made some scratches myself.

Pic: Trial-n-error with putty knife (ended up scratching on the sides)

DIY: Ford Fusion+ OE Alloy Wheel Restoration-p1110249.jpg


Nudged a sleepy and miffed wife to bring the camera up to the terrace and document what I was doing. She got trigger happy and started click me (in real tattered clothing) more than what I was doing. So I had to tell here where to focus.

Pic: Goodbye deep scratch (till you decide to kick out the putty and resurface)!

DIY: Ford Fusion+ OE Alloy Wheel Restoration-p1110250.jpg


Pic: Kinda got the trick by now!

DIY: Ford Fusion+ OE Alloy Wheel Restoration-p1110252.jpg


Soon all scratches were covered and we came down expecting it to dry soon.

Pic: Putty-ed wheel drying on the terrace in the evening sun!

DIY: Ford Fusion+ OE Alloy Wheel Restoration-p1110245.jpg


But I had my doubts! The tin said “dry overnight” before any subsequent coats. Even the instructions on the can of Com-Paint said “dry overnight”. I however expected the sun to assist the evaporation process. Unfortunately, the sun soon set and it got dark. The putty showed no signs of drying. No way was I going to be able to sand it in this shape.

So decided to let go of my Dasara morning plans and let them dry. Rolled the tyres back home when the sky got cloudy and seemed like it was about to rain. They spent the night in our living room.

Pic: The two rear wheels dry up overnight in the living room, next to the subwoofer!

DIY: Ford Fusion+ OE Alloy Wheel Restoration-p1110253.jpg


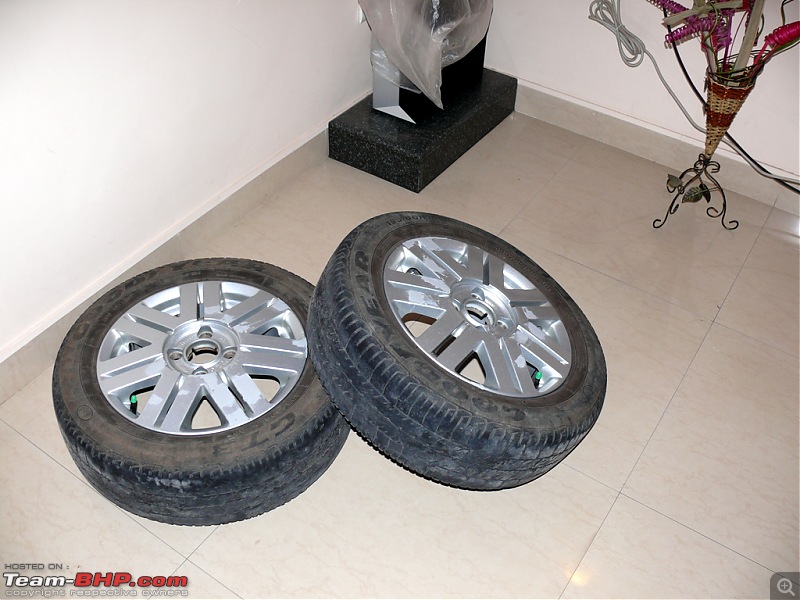
I went for a much-needed hot bath. Several scrubbings were required to make my face look fairer. I could have easily modelled for a Fair-n-Handsome ad, without any fake make-up.

After bath, sipped up some wine and watched a movie on TV while the wheels dried up in front of our feet.

To be continued...
Glifford is offline   (1) Thanks
Old 3rd October 2009, 20:52   #15
BHPian
 
archat68's Avatar
 
Join Date: Dec 2006
Location: Kolkata
Posts: 897
Thanked: 619 Times

Good write-up. Waiting....
archat68 is offline  
Reply

Most Viewed


Copyright ©2000 - 2024, Team-BHP.com
Proudly powered by E2E Networks