News
Aesthetic tweaks & enhancements to my 20 year old TVS Max 100R

I'm quite pleased with how it has turned out so far. But my interest in making more changes still exists and there will be a radical transformation sooner or later.
BHPian Abhijyth.K.A recently shared this with other enthusiasts.
Time to update the thread as it's been a while!
One of the reasons I got the matching tank cover made along with the seat was that I felt something was "missing" in terms of aesthetics. Well, it was those stickers on the tank & side panels which are a bit of a styling disaster coupled with the coffee brown seats. I knew it all along, but kept them anyways. That is, until now.
So I got to work at once. I sat down one evening with my blowdryer in hand and removed the stickers slowly. It's a straightforward job, but can take time if your stickers are particularly old and chip off. Just put the dryer on high heat, aim it at a corner, hold, then slowly peel away the stickee, heating the sticker whenever it starts becoming aggressive. And this was the result.

The plain tank vibes much better with the overall classic look I was aiming for. Had kept the side panels removed for a while as the seat's bushings had vanished into thin air and the seat caused some damage to the panels.
This is how I rode my bike for a while since. Including during my trip to Pondicherry with my friend. (Had already opened a thread for it, but will update some more details regarding that here soon. Let's now just focus on the things I have done with the aesthetics since.)
Then, I thought it was time for a change. So I went and got myself a seat rubber kit that comes in a neat little packet and worked on it. Bratty Biker's YouTube video on the same was extremely helpful, so I thought it deserved a mention!
But I thought, why not go all the way and do a little stripdown cleanup? So that's what I did. Removed the seat (A very simple system. Two bolts at the back and it slides out easily after releasing it from the slot in the chassis at the front near the tank).
Then, I removed the tank too. Again, very simple. First disconnect it by removing the fuel pipe that connects the fuel petcock on the tank to the fuel filter, then undo two bolts again at the back of the tank towards the seat, and it lifts right off. It's held in place and cushioned on two rubber clad wheels at the sides of the chassis. The same wheels are to be used to hold the wiring as well.
After the removal of the seat and the tank, this is what we were left with :
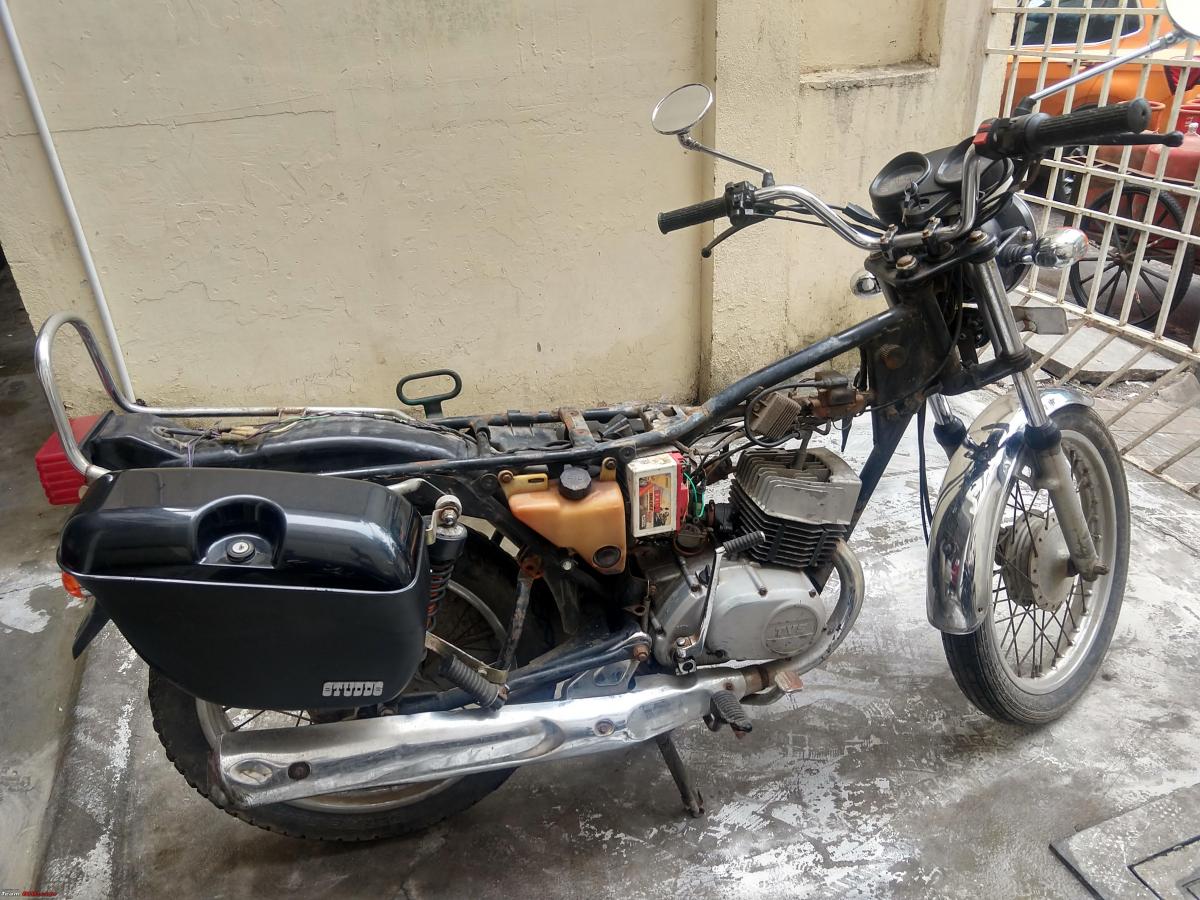
I gave what was in essence, the "rolling chassis with the engine and accessories" a good wipe down with a cloth. Did the same for the tank as well. Decided to remove the tank cover, just to satisfy my desire for an aesthetic change. Kept it stored safely for future use (Especially when touring).
You may also notice in the pic that the side box is missing the beautiful rear reflector. Unfortunately it seems to have come off without me noticing during a ride. That's a negative point for the quality of the box admittedly. And I don't think it's possible to get a reflector alone. So I'll be using some creativity here and will make an update on that later.
Then I got back to the seat. Replaced all the rubber components with the new ones. Also the front part that holds the slot tab and the back part that holds the bracket used to bolt the seat on has rubber beneath and require two bolts to be undone each before the rubber can be replaced.

The seat before replacing the rubber. Notice the front two bushes are entirely missing. This is what causes the seat to lower and move about, cracking the ABS plastic side panels in the process. This is a common problem and can be rectified by gluing down the rubber bushings with feviquik, so they don't fall off and disappear.
The older AX 100 was lesser affected by this issue because it had metal side panels. I guess that's the "price" for cost cutting in the case of the Max 100. On the other Suzukis like the Samurai, Shogun, and Shaolin, the issue is compounded because tail panels now come into the picture. That's the reason why we find many of the still surviving examples of these bikes with broken and misaligned tail panels. It's a sad sight, as I personally feel the design is so retro 90s and looks fantastic when they're in good shape. It also applies to the Supra, with it being more of an issue because the beautiful single piece tail panel is difficult to come by and most of the time, require fabrication for replacements.
Then, comes the wiring. Remember I said the two rubber wheels that hold the tank in place also is supposed to neatly hold and arrange the wiring? Seemingly not so in the case of my bike. The wiring is an utter mess as you can probably see in the picture and it wasn't feasible for me to move them about, risking causing any issues with it, so I decided to leave it as it is for now, and deal with it when I eventually get around to do a full restoration.
So I fitted the tank back without the tank cover, connected the fuel lines, then fitted the seat back as well. It was coming to shape very well indeed.
The next step was the side panels. I had stored them away for a while, so I took them back, and did some jugaad work with making them fit back. When the side panels are in perfect shape, they simply fit on the side with just one bolt each. The same applies for the AX 100 and the Supra. The Samurai, Shogun, and the Shaolin had a different style of side panel and they used a more convenient key lock system for the panels.
On my side panels, they were cracked on multiple portions, so I sealed the cracks with glue, made a hole on the inner folding, and used a wire to basically tightly hold them in place, in addition to the bolts. To many, all this will seem unnecessary, but there's a reason for it.
I know they're cheap and easy to get new, but the old ones could still be used till I go for the full restoration as I mentioned. I plan on doing some interesting stuff with side panels in the future. They are holding on very well indeed for now and will be used till then.
Finally, I removed the café racer cross on the headlight. Got bored of it and decided now that the bike is looking more and more classic, let's enhance the theme and make it more simplistic to look at. And this was the end result of all of this :
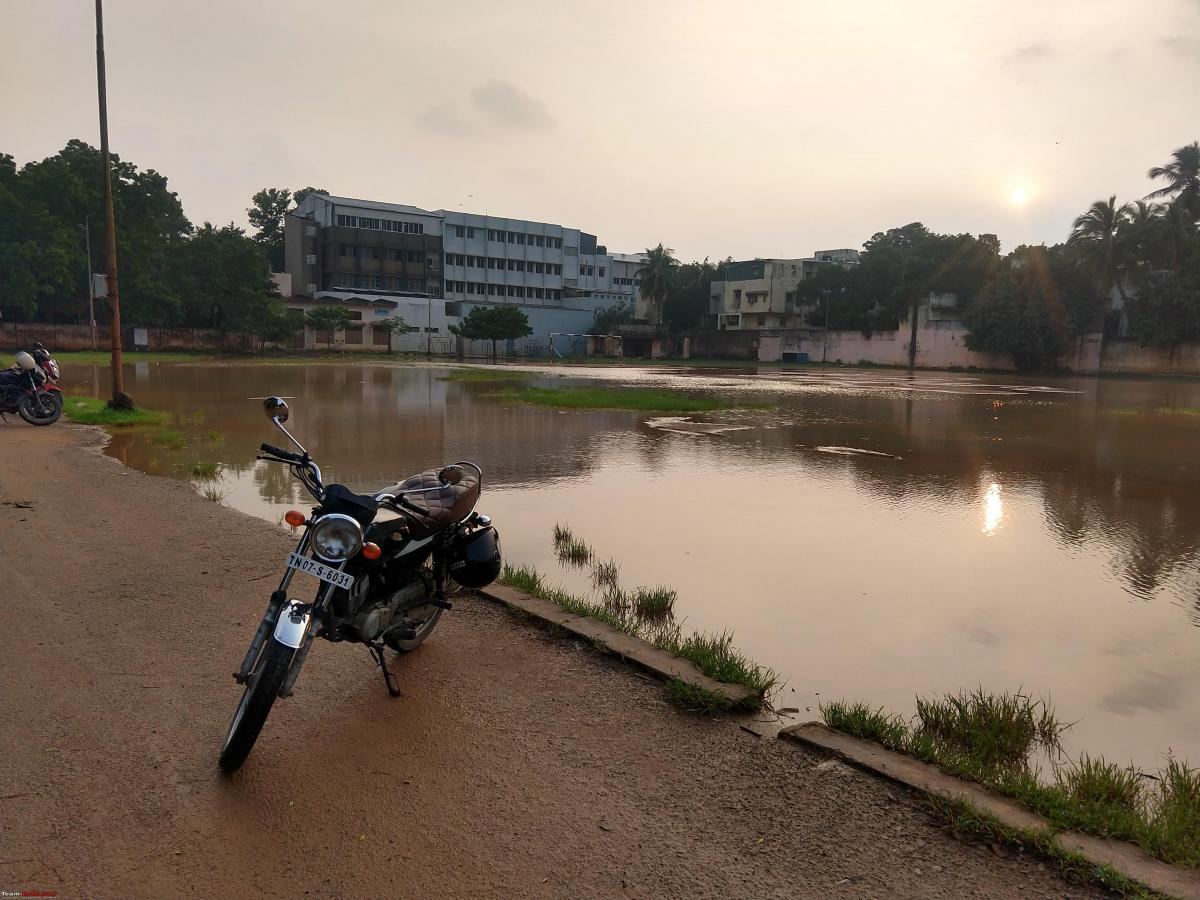
I'm quite pleased with how it has turned out so far. But my interest in making more changes still exists and there will be a radical transformation sooner or later, so stay tuned!
Read BHPian comments for more insights and information.
- Tags:
- Indian
- Member Content
- TVS Max 100R
Find Car News
Just News


.jpg)


About Us

Buy & Sell
USED CARS