News
DIY: Fitting Marsh preload adjusters on a Royal Enfield Interceptor 650

I recently installed handlebar risers and that made the bike ready for the front fork preload adjuster upgrade.
BHPian jomson13 recently shared this with other enthusiasts.
DIY Sunday - Fitting of Marsh preload adjusters
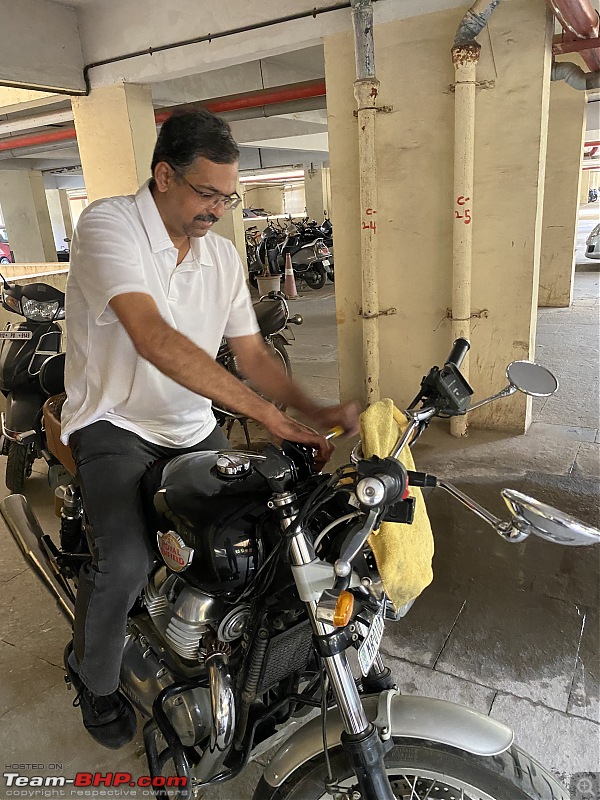
Big shout out to Bhpian Sukiwa; Not only did he order the preload adjusters (way back in October 2022) but also came down to my place, fully prepared with the necessary tools, and installed them over the weekend.
Here's the man in his element!
I recently installed handlebar risers and that made the bike ready for the front fork preload adjuster upgrade.
After some planning and rescheduling, we decided to undertake the DIY on Sunday 4th Feb.
Step 1 - The handlebar was removed and flipped over to rest on the fly screen.
Here you can see the risers and the stock fork cap

The cleaning cloth proved to be a good packing material to keep the handlebar in place

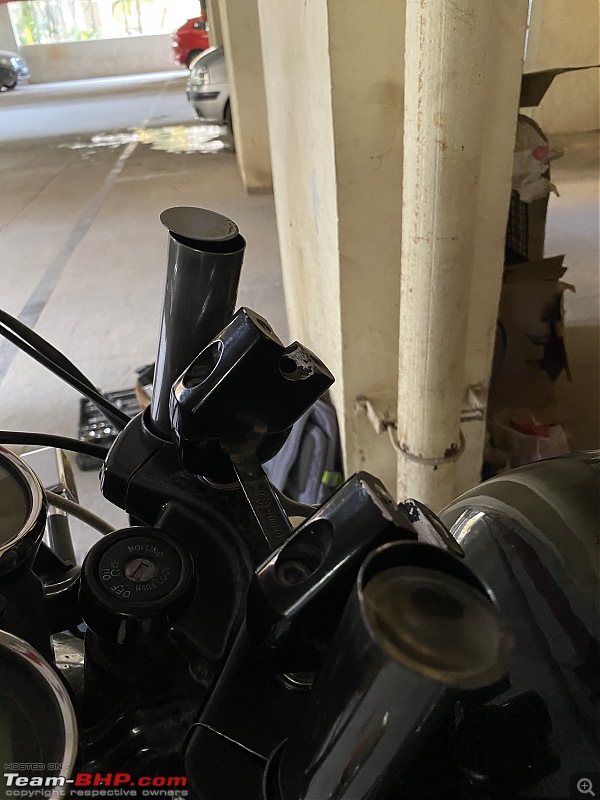
Step 2 - Remove the stock fork covers.
This proved to be a bit difficult as the stock fork covers were a bit over-tightened. I had the fork oil replaced during the last service and I'm guessing that my mechanic went overboard while tightening the fork covers.
We took turns but the nut would not budge.
Eventually, some WD40 was sprayed at the right places, and the steering was turned to the lock position in such a way that the steering stop would provide support while we tried to undo the fork cap.
It needed a fair bit of pushing and heaving but finally, we managed to get it off.
Caution - We undid both fork covers one after the other. This caused the forks to compress fully under the weight of the front end. This can be avoided by working on one fork at a time.
The fork has fully compressed under the weight of the front, notice the difference in the position of the triple clamp
Clearer picture, you can see the spacer jutting out from the fork

Step 3 - Fitting the fork adjusters
Since the fork was fully compressed, we had to push down the back end of the bike to extend the fork. Owing to the front-heavy weight distribution of the interceptor, this is not an easy task.Sukiwa managed to push and hold the back end down while I fitted the adjuster on the RHS fork. It's a fairly easy process - you need to push down against the spring and rotate the adjuster in the fork tube until it latches onto the internal threads. Once this was done sukiwa could let go of the rear end of the bike and I continued to tighten the adjuster by hand. The spring does not offer much resistance - I could tighten more than half of the travel by hand.
Stock vs Aftermarket


The LHS fork proved to be a menace!
I could screw the adjuster onto the RHS fork very easily but on the LHS it would not turn more than a quarter turn. It behaved as if there was something jamming the threads.
After taking turns in trying to fix the adjuster, we decided to inspect the threading. The spacer was removed and kept aside and the threads were checked. I could see some metal shavings stuck in between the threads. On the adjuster, we found that the black paint on the threads was coming off. Both threads were cleaned - first by a toothbrush and then by a cloth and then we tried fitting it onto the fork tube again.
This time we were able to get it to latch on but it was not screwing on freely like the RHS.
Nevertheless, we tightened it with a socket (M21) and proceeded.
Step 4 - Rework!!
After tightening both adjusters we realized that the LHS spacer was not put back in! So we had to redo the left-hand side and this meant another 10 minutes of fighting with the fork and the adjuster. Ultimately we managed to screw it in.
The LHS spacer (on the right of the image) was removed and forgotten.

To tighten the adjusters fully we had to screw in the preload adjusting nut (M14) to make space for the M21 socket which was used to tighten the adjuster onto the fork tube.
In doing so we disturbed the stock setting of the adjusters and had to spend some time in bringing both adjusters back to somewhat nearer to their stock positions. There are 6 markings on the adjusters which can be used as a reference to ensure that both sides are equally adjusted.
Step 5 - Setting the sag for my weight
I had no clue how this was to be done, Sukiwa took the lead on this one and explained the process.
3 measurements were taken (Fork height was measured between the front axle nut and bottom clamp)
- Bike on the main stand, front wheel off the ground - 500mm
- Bike off the main stand, the rider sitting on the seat with both legs on the footpegs, forks compressed and allowed to rebound - 460mm
- Repeat 2 but instead of compressing forks pull the forks upwards - this was missed
- Bike off main stand, no rider - 495mm.
Sag = 1 - Avg(2,3) (Formula sourced from the internet)
Since 3 was not done, we can approximate the sag to be 40 mm
This is too much sag for a road-based bike (again, based on internet reading) and it definitely needed to be reduced. The adjusting nuts were tightened so as to have 5 lines visible. The stock setting has 6 lines and some space under the 6th line visible.
This increased reading # 2 from 460 to 465mm which meant the sag had reduced to 35mm.
Current position - 5 rings visible (5th is flush with the bottom surface)


We decided to leave it at that and for me to make further adjustments after trying out the bike over varying road conditions.
I use the bike for my daily commute to the office and find the following changes:
- The front feels tighter, the very persistant khat khat sound from the front end has reduced quite a bit
- I feel that the front wheel is staying in contact with the road surface much better now. Extremely sharp speed bumps taken at moderate speed do not feel as scary as earlier.
Further adjustments will be made over the weekend (Sunday morning ride) Will update this thread from time to time.
Suggestions if any are welcome.
Check out BHPian comments for more insights and information
Find Car News
Just News


About Us


Buy & Sell
USED CARS