News
DIY: Installing puddle lamps on my Hyundai Creta

I wanted to install puddle lamps on my 1st-gen Hyundai Creta as I often go car-camping & have to park at nondescript places in the dark. I shortlisted three options.
BHPian Chhanda Das recently shared this with other enthusiasts.
Installing puddle lamps on my 1st generation Creta
It was near the end of the year 2019 and the 2nd birthday of Blaze (my 1st generation Creta petrol AT) was coming up. I wanted to upgrade his talents and started looking at possibilities. For the last few months, I was looking for puddle lamps for my Creta as I often go car-camping and have to park at nondescript places in the dark. I did not want to install them under the ORVMs as I have reserved that space for 360-degree cameras which I intend to install in the future. I also did not want to install them under the chassis as I do not like exposing wires and lights to the elements. My priorities were reliability and easy replaceability. In this regard, I had 3 options in no particular order.
My 1st option was to go for flat 12V LED strips which would be attached to the underside of the doors and draw power directly from the door lock wiring or the power window wiring. I did not choose this as I was uncomfortable with the idea of electrical wires and unsheathed LEDs being exposed to the elements as there isn't enough clearance within the area of the door protected by the weather seal.
My 2nd option was to go for 12V projector-based logo lights but I did not choose this as this would involve drilling a hole on the lower portion of the inner plastic portions of the door. I am very apprehensive about irreversible changes to my Creta.
The 3rd option and my choice was a set of 4 projector-based LED logo lights which can be attached to the lower inside portions of the doors via double-sided adhesive tapes and can be powered by a set of 3 AAA, 1.5V batteries each. These can be turned on and off manually and can also be activated or deactivated by the absence or presence, respectively, of the small neodymium magnets that come with the lights.
Since Aliexpress was easily accessible (those were the days but alas, no more), naturally I veered that way primarily due to its huge variety and unbeatable prices. I got the lights from Aliexpress on sale for INR 141 each with shipping.
Installation was a breeze. I cleaned the suitable areas with a cleaning and degreasing solution. Then I attached the lights to the doors with the double-sided adhesive tapes that came with the lights. Next, I aligned the magnets with the lights and attached them to the door sills (with the aforementioned double-sided adhesive tapes) within the areas protected by the weather seals. I had already got 12 numbers of rechargeable AAA sized 1.2V NiMH batteries which I installed in the light housing. The intent here was to be able to recharge the batteries with a USB charger in the car as and when necessary. This is because it is often difficult to find AAA batteries in nondescript areas in India. Moreover, such rechargeable batteries have a higher tolerance to heat when compared to the regular "leakproof" ones and I did not want leaking, corrosive batteries in my car. This aspect was very important considering the fact that the interior temperatures of a car parked directly under the sun often cross 100 degrees centigrade during the summer months in many places in India.
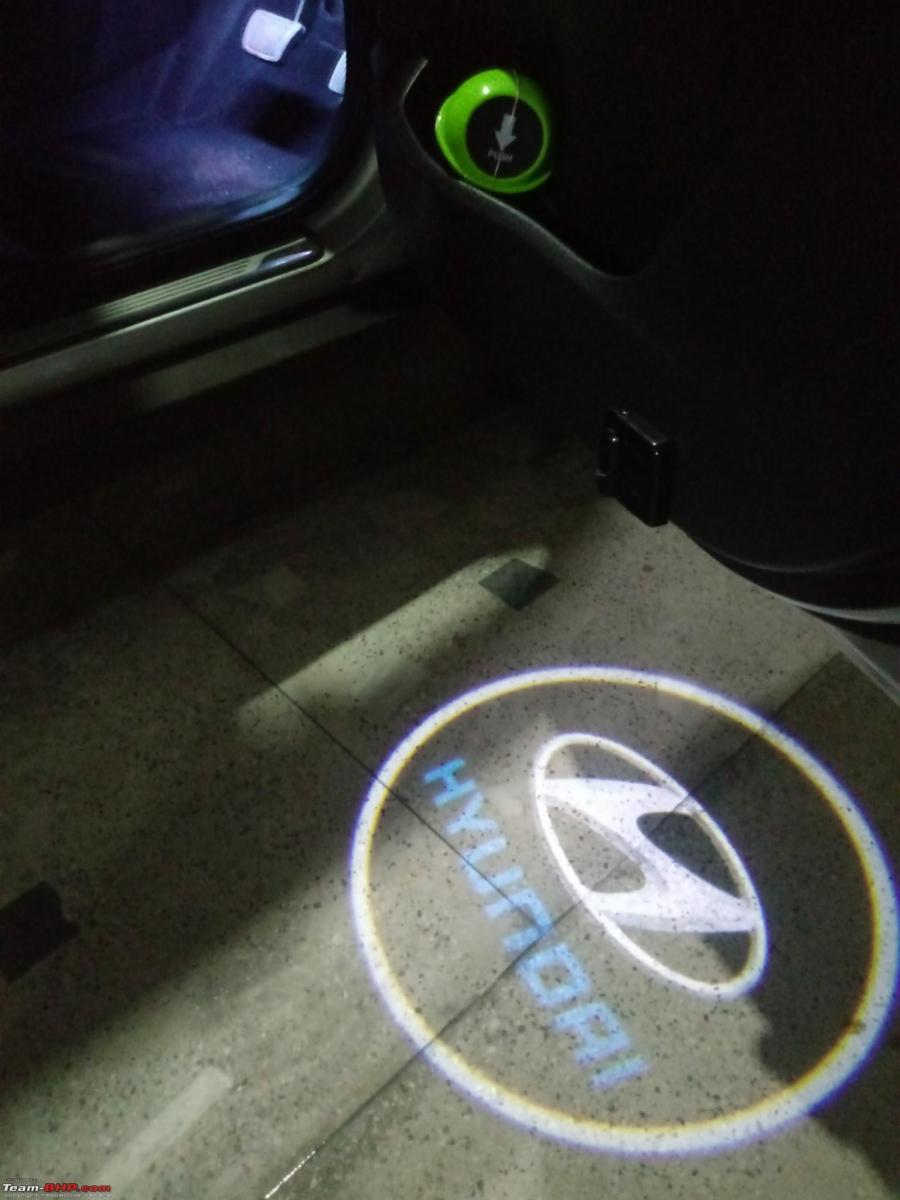
The LED projector-based logo light installed on the driver's door

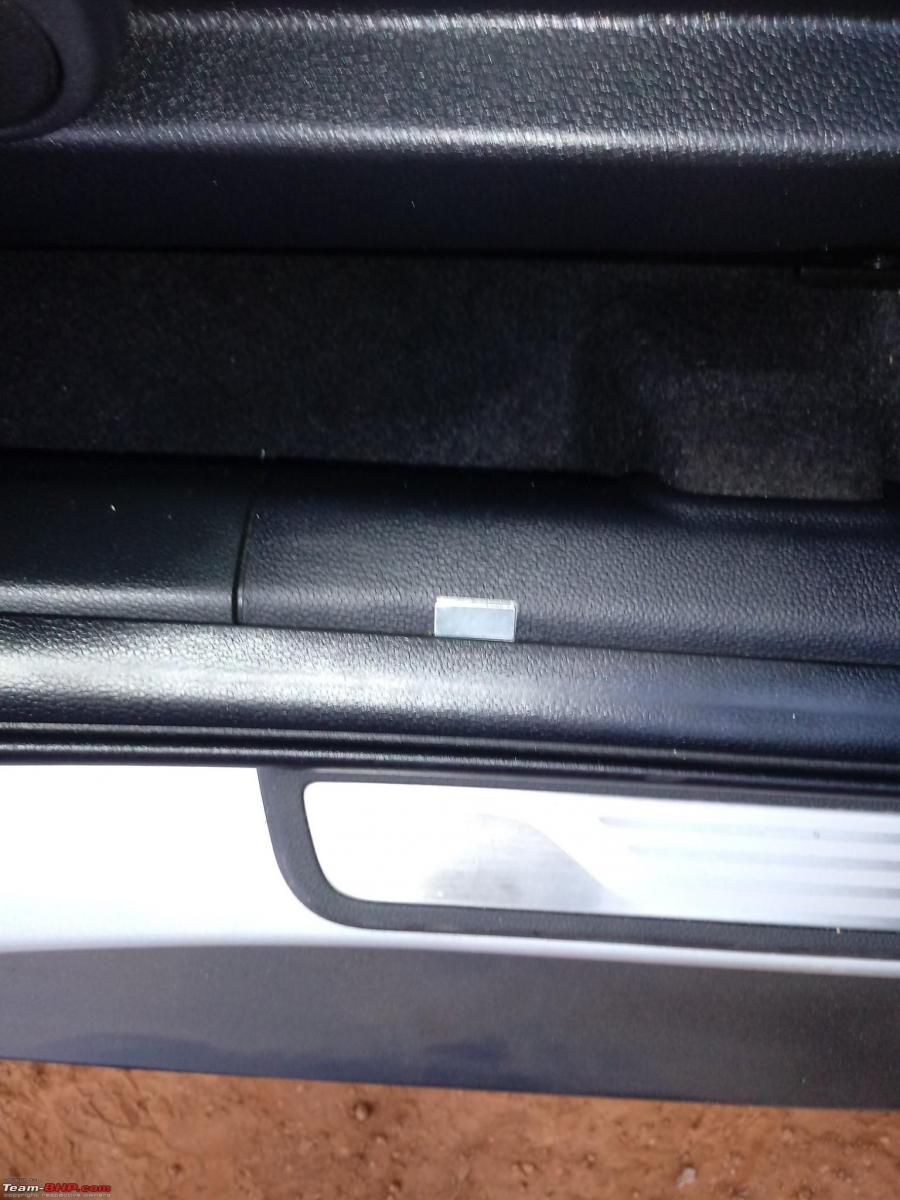
The rectangular neodymium magnet on/near the door sill
Next, we removed the logo films and sealed the thus exposed areas with black adhesive tape. Needless to say, the whole setup works like a charm even after 2 years. We only had to recharge the batteries once as per our usage during this time. Here is what the light output looks like before and after removing the "Hyundai branded" logo film.

Check out BHPian comments for more insights and information.
Find Car News
Just News


About Us