News
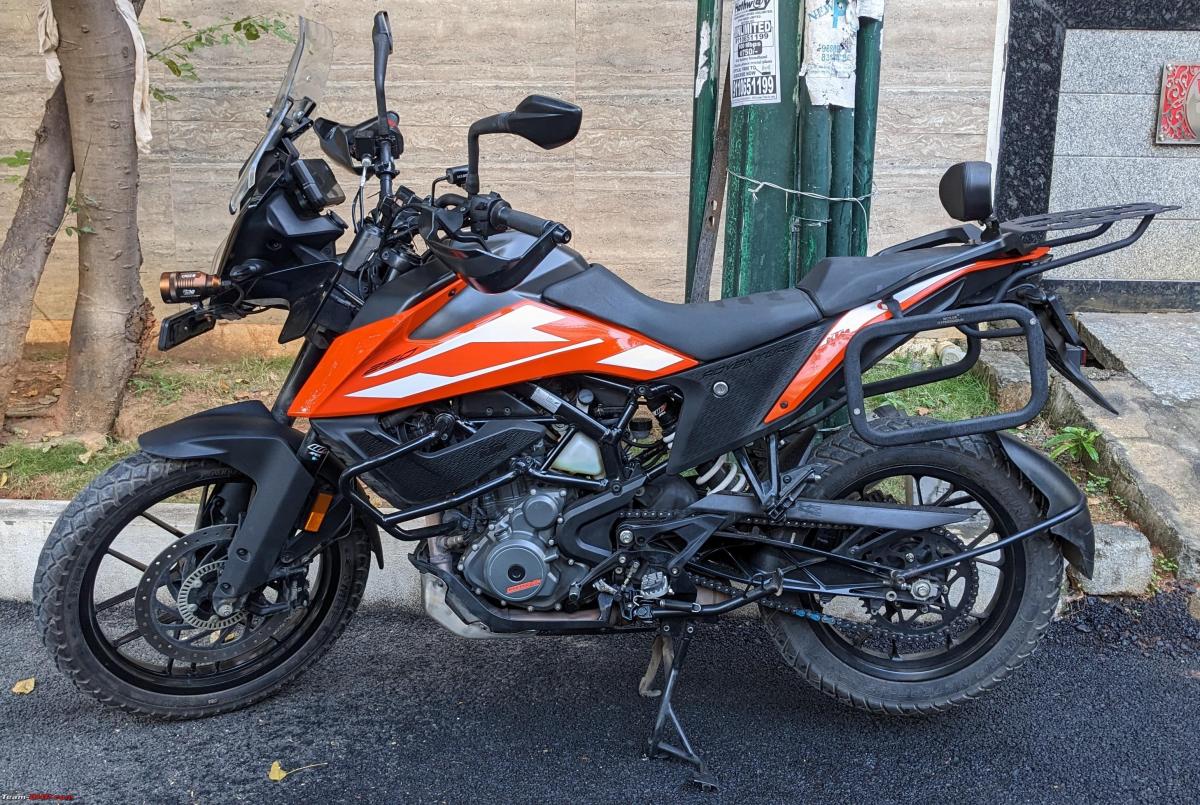
Modifying my KTM Adventure 250: Aux lights, saddlebags, FuelX & more

Got the third service done for the bike, before installing a bunch of upgrades.
BHPian advstreak recently shared this with other enthusiasts.
So here is the third service and mods update.
Third Service:
It cost Rs 3739 including the front brake pad change and the throttle body cleaning charge.

Now moving to mod updates starting from the front:

Windshield
The Inscape Dreamz V4 windshield allows it to be taken out by removing the top two screws. I did not want something bigger that will cause problems in the trails. The KTM ADV 250/390 headlight assembly seems weak and I did not want to stress it out further. I have also made a slot in it to act as pressure relief to stop further wind buffeting. There is also strengthening done by drilling holes to use the second bolt and a screw.
Headlight Bulb
The headlight bulb was the first upgrade I did on this bike. The normal led bulbs do not have a sharp cut-off line as they are not designed for halogen reflector assembly. The solution is to have the lens projector built right into the bulb itself. I have gotten a pair of them from Banggood whose link does not seem to be working now. Although a similar product is available on Flipkart here.
The main benefit of a projector lens bulb is the sharp cut-off line in the low beam which makes sure you don't blind the oncoming traffic. The high beam is still dependent on the reflector design. In KTM ADV 250 case the high beam is too high when the low beam is set correctly. But in the Hornet 160, the high beam is perfect.
Here are the led projector lens performance pictures:
This is in dark conditions. Please ignore the low light enhancement done by the phone camera. The road was pretty dark.

Now, this is the projector lens tuned on a low beam. Please note the wide beam spread and the perfect cut-off line.
Auxiliary Lights
As said earlier the high beam of the led projector lens is too high in KTM ADV 250. So its purpose is now reduced to flash pass signal.
Most of the aux lights available are spot+flood combo. I only needed spot ones as the led lens projector's low beam is wide enough.
Well actually, I needed hyper sports as I did not want the nearby areas to lit up. My observation is that if a spot+flood combo aux light is used then the nearby areas get too bright. This makes it harder for eyes to adjust to the relatively dim light far away road, thanks to the inverse square law. So searching for the same I stumbled upon HJG KZ30. It has adjustable focus allowing it to transform from hyper-spot to flood.
A practical demonstration of the focusing mechanism can be seen in this video from 4:16
I have used maddog's clamp, harness, and switch to mount these aux lights.
Here is what it looks like in the hyper sport mode:

And here is what it looks like when the high beam is turned on. Notice the crane boom which was not seen earlier pictures can be seen now pointing that the high beam is too high for any practical use apart from blinding the oncoming traffic.
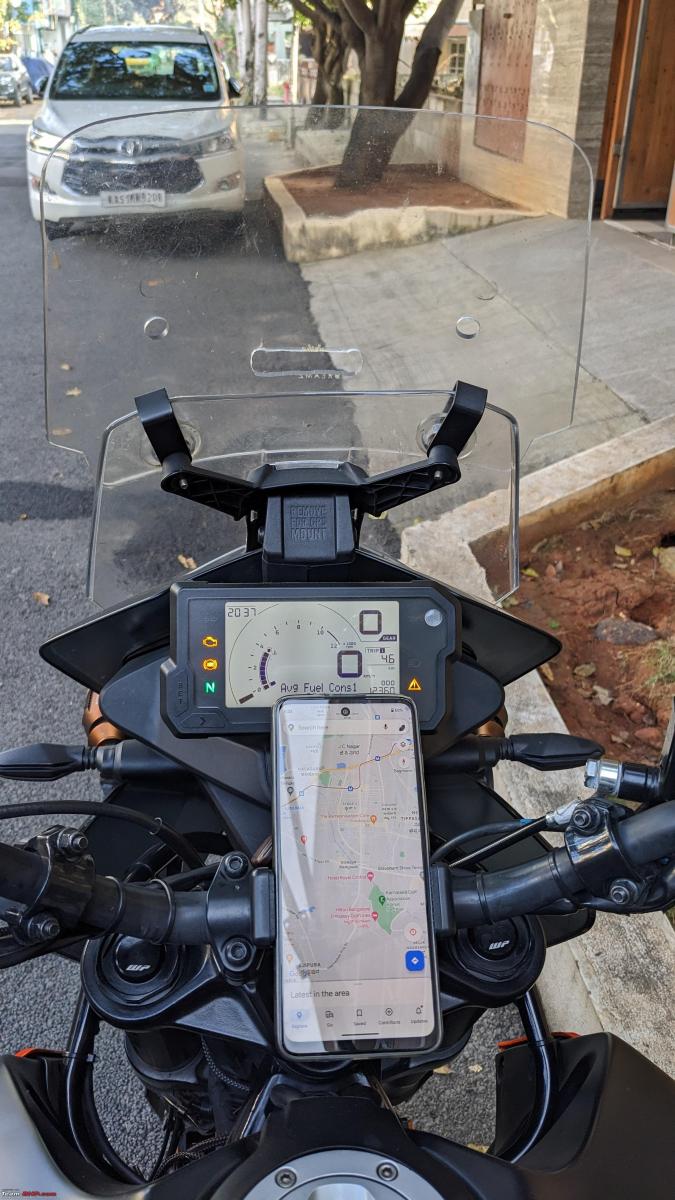
Phone Mount
I did not want to damage the OIS of my phone and hence mounted a tripod phone adapter to the centre of the handlebar using zip ties and a couple of silicone rubber layers for extra damping. This setup will have the least possible amount of vibrations beings transmitted to the phone.

Here is how it looks with a phone installed.
Centre Stand
I have installed the Madoverbike's centre stand for chain cleaning and lubing. The quality is decent enough but there was some design mistake because of which I had to cut an inch of the plastic bash plate to make clearance while installing the centre support bar of the stand.
Pro-Spec Easy Brake
The ADV 250/390 have slightly angled footpegs. Hence the rear brake lever is also slightly angled. This coupled with the lack of feedback made me use the front brake a lot more leading to the brake pads wearing out very soon (12,316 km on ODO). Pro-Spec easy brake is wider and higher than the stock base which makes it easier to use the rear brakes.

Backrest
My Brother and Sister in Law also want to try touring on this bike. Hence got the Backrest from Bandidos Pitstop as it was the lowest height. I prefer a low-height backrest for aesthetic reasons.

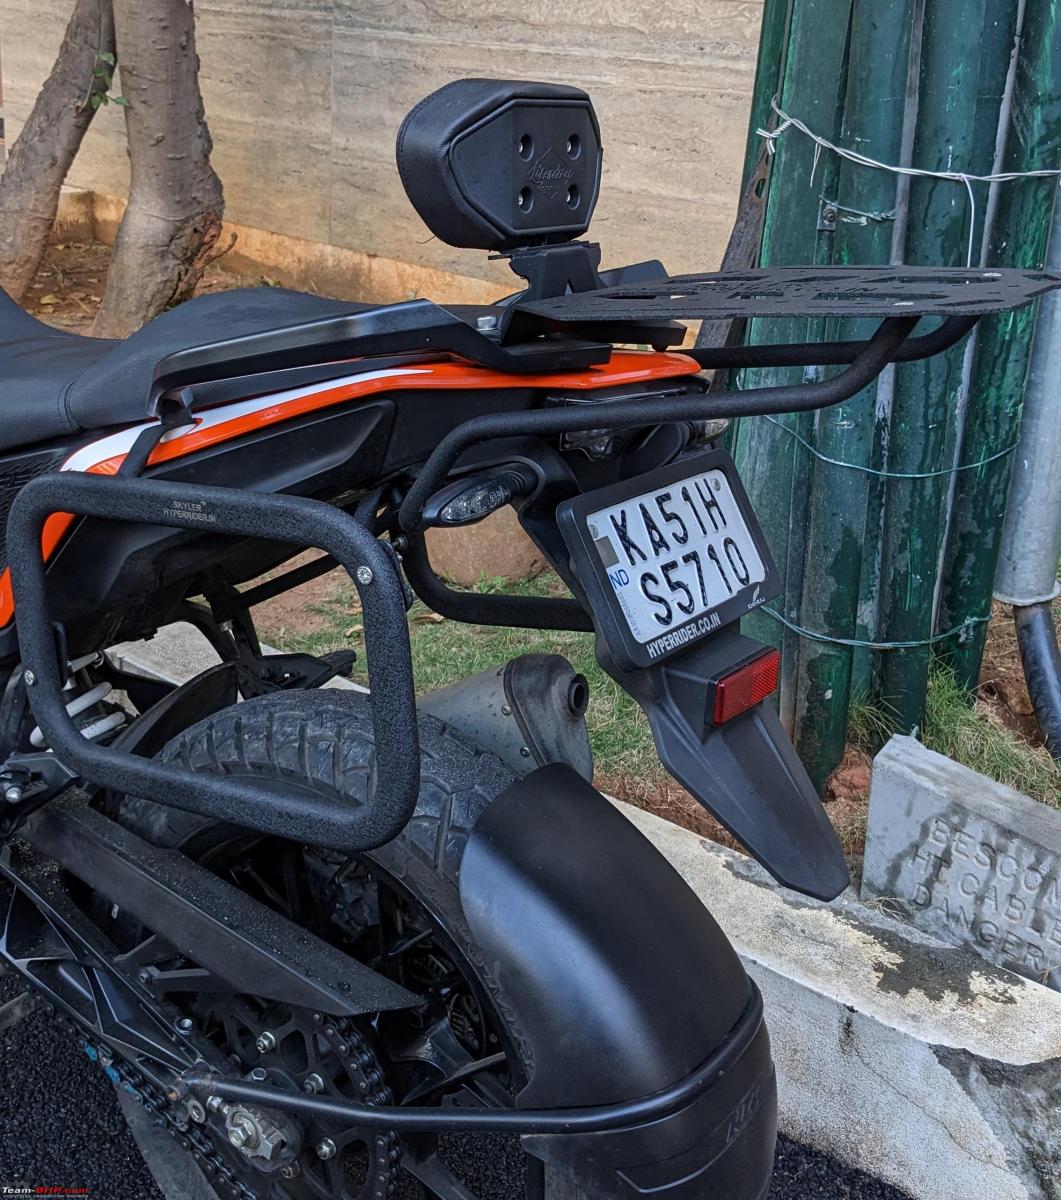
Saddlestays+Top Rack+Tyre Hugger
The reason for going with Hyperider's saddle stay is that the top rack had clearance to mount the backrest.
Also got the Hyperrider's tyre hugger installed to reduce the mud splash.
Here are how they look.
Saddlebags
My initial plan was to get the Viaterra Claw Mini tail bag and not install the saddle stays to keep the weight low. I also have Viaterra Pod 12 which would have gone nicely with the claw tail bag.
But once my brother started to show interest in touring I decided to get the Viaterra Condor 2 UP to make it easier for them. I will drop comments on these after the coming long trip.
Here is how they looked in the short ride last Sunday with minimal weight.

FUELX LITE
I have done 1000+ km after the Fuelx lite installation. There seems to be almost no effect on fuel efficiency in city usage as well as highway. This can be attributed to the fact you had to either rev past 4k rpm or downshift to get the bike going earlier. Now the bike can move without any drama in higher gears at lower RPMs.
Check out BHPian comments for more insights and information.
Find Car News
Just News


About Us