Team-BHP > Technical Stuff > DIY - Do it yourself
Register New Topics New Posts Top Thanked Team-BHP FAQ


Reply
  Search this Thread
83,987 views
Old 23rd July 2020, 12:44   #46
Distinguished - BHPian
 
Join Date: Oct 2012
Location: Delhi
Posts: 8,104
Thanked: 50,909 Times
re: DIY: Metal model engine building UPDATE: build complete (page 16)!

Quote:
Originally Posted by Sutripta View Post
Neither a test indicator or a dial gauge will show surface roughness.
Me and Blondihacks are measuring these ridges just fine with our dial gauges: Check at 6;34. (for some reason I can’t get the timed link copied)


Surface roughness might be different, but the surface finish is fine, just these ridges.

Quote:
Originally Posted by Sutripta View Post
For the time being I'd just leave it square. The beautifying can be done later.
Don't see how angling the head will help you in this case.
We will see, it all about the learning, not necessarily getting to the end result quickly. Angle the head, gives you an angled cut across the piece. I wonder how well that would work as the spindle will be at an angle to the column. Not the most rigid of set up I would think. Even so, these are just very shallow, narrow cuts.

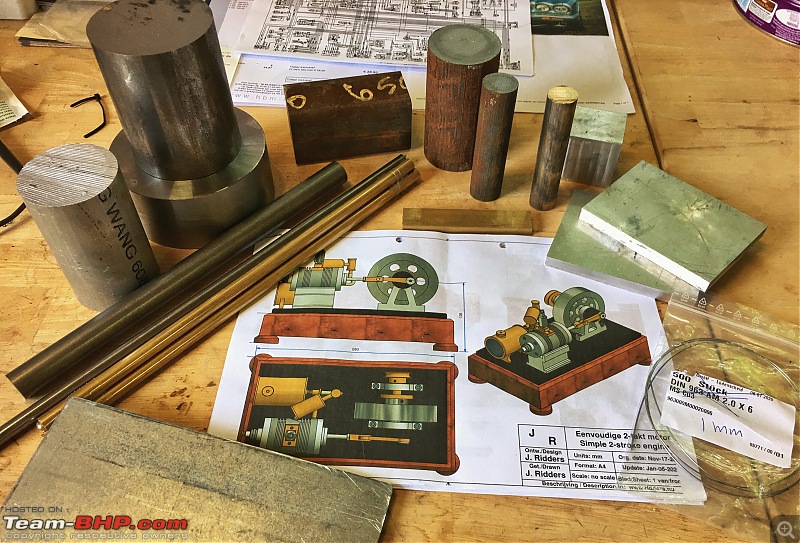
Lots of goodies arriving this very morning:


I have most of the materials in house now, still more to come and I have not even began on the screws, bolts, washers. Those can wait though.

DIY: Metal model engine building UPDATE: build complete (page 16)!-img3084.jpg

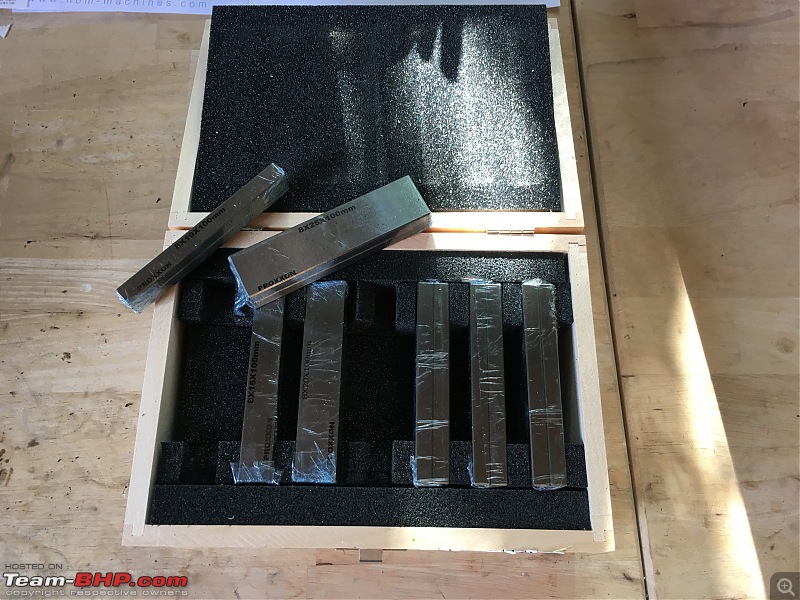
I picked up this set of Proxxon parallels on the internet.

DIY: Metal model engine building UPDATE: build complete (page 16)!-img3085.jpg

All the bits for my Lathe arrived too:

DIY: Metal model engine building UPDATE: build complete (page 16)!-img3087.jpg

Not sure when I will be able to continue work on the cilinder support. Quite a few other things going on. Weather this weekend looks lousy, so that would make for some good machining time!

Jeroen

Last edited by Jeroen : 23rd July 2020 at 12:49.
Jeroen is offline   (2) Thanks
Old 23rd July 2020, 13:09   #47
Senior - BHPian
 
Join Date: Jul 2009
Location: Calcutta
Posts: 4,668
Thanked: 6,217 Times
re: DIY: Metal model engine building UPDATE: build complete (page 16)!

Quote:
Originally Posted by Jeroen View Post
Me and Blondihacks are measuring these ridges just fine with our dial gauges: Check at 6;34. (for some reason I can’t get the timed link copied)
OK. Thought you were trying to measure the what the eye sees as semicircular/ quartercircular tool/ machining marks, not the ridge between passes.


Quote:
Angle the head, gives you an angled cut across the piece.
How do you plan to machine a length greater than the tool diameter, requiring a X feed?

Sutripta

Last edited by Sutripta : 23rd July 2020 at 13:10.
Sutripta is offline  
Old 23rd July 2020, 13:16   #48
Distinguished - BHPian
 
Join Date: Oct 2012
Location: Delhi
Posts: 8,104
Thanked: 50,909 Times
re: DIY: Metal model engine building UPDATE: build complete (page 16)!

Quote:
Originally Posted by Sutripta View Post
OK. Thought you were trying to measure the what the eye sees as semicircular/ quartercircular tool/ machining marks, not the ridge between passes.
No agree, that would not work. The ridges do show up and also these very shallow, hollow cuts Blondihacks calls water chutes. Truth of the matter remains that they look worse than they really are.


Quote:
Originally Posted by Sutripta View Post
How do you plan to machine a length greater than the tool diameter, requiring a X feed?
Wait and see, all will be revealed eventually!

though I can’t guarantee it is yet another case of me just not being experienced enough and thinking this can be done easily, akin to the drilling at an angle episode on my Wobbler engine.

Jeroen
Jeroen is offline   (1) Thanks
Old 23rd July 2020, 18:40   #49
Distinguished - BHPian
 
Join Date: Oct 2012
Location: Delhi
Posts: 8,104
Thanked: 50,909 Times
re: DIY: Metal model engine building UPDATE: build complete (page 16)!

Quote:
Originally Posted by Sutripta View Post
Does Proxxon have motors as accessories for the X and Y traverse/ feed?
Not as far as I know or can tell from their catalogue:

https://www.proxxon.com/en/micromot/...ng-systems.php

They do have CNC (ready) mills, but I have not seen motors sold as accessories. I have seen a few stories here and there about people putting their own motors on them.

The FF500 CNC is approx Euro 4500,-- en the FF500 CNC Ready is approx Euro 3300. Which I think is a lot of money for just essentially, still a hobby mill.

Jeroen
Jeroen is offline  
Old 24th July 2020, 11:56   #50
Distinguished - BHPian
 
Join Date: Oct 2012
Location: Delhi
Posts: 8,104
Thanked: 50,909 Times
re: DIY: Metal model engine building UPDATE: build complete (page 16)!

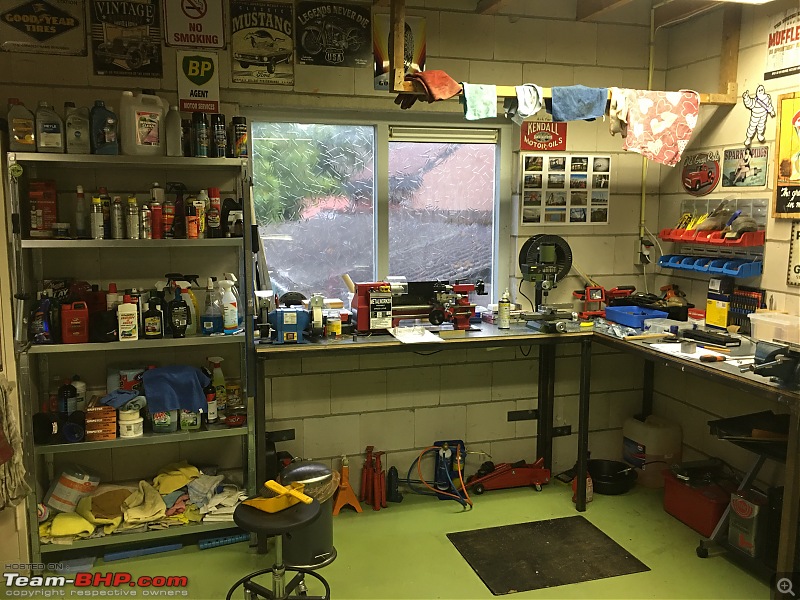
With so much new stuff aquired in the last couple of weeks my workspace was getting very cluttered. Those of you that have followed my “fiddling with cars” thread know I am very particular about keeping my workshop clean and tidy.

So last night I decided to arrange some things first before doing any more milling. Actually, I do enjoy that too, it is all part of being very nerdy, some say.

I just know I enjoy a tidy space better. Especially these days, with my memory going, keeping everything in its exact same space, helps me remember where to find it.

I also unpacked all the bits for my lath. With the new chuck I should also be able to turn the flywheel, no problem. I have a large chunk of metal of about 115mm diameter and it will fit into the new chuck.

Before:

DIY: Metal model engine building UPDATE: build complete (page 16)!-img3088.jpg

I cleaned out one shelve and arranged all my special lath and milling kit there.

DIY: Metal model engine building UPDATE: build complete (page 16)!-img3089.jpg

DIY: Metal model engine building UPDATE: build complete (page 16)!-img3090.jpg

Got rid of some stuff, re-arranged some stuff. I do need a large work surface to work so, more stuff had to be moved to free up and create some more space.

Also, I took away all the boxes and various other bits and pieces sitting behind the lathe/mill. Cluttering up space and it is a whole lot easier to clean the chips away.

DIY: Metal model engine building UPDATE: build complete (page 16)!-img3091.jpg

DIY: Metal model engine building UPDATE: build complete (page 16)!-img3092.jpg

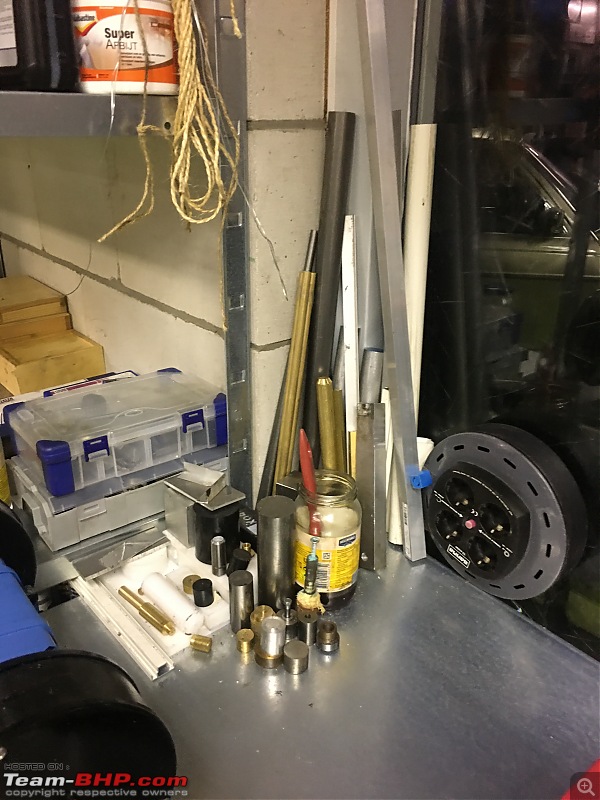
Left my little pile of stock in place for now. Not shown here is all the new stock that arrived earlier. It’s kept in a separate box for now.

DIY: Metal model engine building UPDATE: build complete (page 16)!-img3093.jpg

The one thing I don’t like about the new set up, is the fact that the grinder is very close to this shelve with all the lath/mill and measuring kit. I will fix something on the side of the shelve to keep the grinding dust of it.

This weekend, hopefully, some milling!

Jeroen

Last edited by Jeroen : 24th July 2020 at 11:58.
Jeroen is offline   (3) Thanks
Old 24th July 2020, 19:32   #51
Distinguished - BHPian
 
Thad E Ginathom's Avatar
 
Join Date: Jun 2007
Location: Chennai
Posts: 11,005
Thanked: 26,445 Times
re: DIY: Metal model engine building UPDATE: build complete (page 16)!

A suggestion: At some point in the future, separate the lathe and bench grinder. Shop wisdom seems to be to keep grinding dust away from bearing surfaces.

In the meantime, I guess... cover the lathe up when grinding?
Thad E Ginathom is offline   (1) Thanks
Old 25th July 2020, 15:02   #52
Senior - BHPian
 
Join Date: Jul 2009
Location: Calcutta
Posts: 4,668
Thanked: 6,217 Times
re: DIY: Metal model engine building UPDATE: build complete (page 16)!

Grinding and electric welding are the two big no nos near precision machines.

Sutripta
Sutripta is offline   (1) Thanks
Old 26th July 2020, 07:40   #53
Distinguished - BHPian
 
Join Date: Oct 2012
Location: Delhi
Posts: 8,104
Thanked: 50,909 Times
re: DIY: Metal model engine building UPDATE: build complete (page 16)!

Quote:
Originally Posted by Thad E Ginathom View Post
A suggestion: At some point in the future, separate the lathe and bench grinder. Shop wisdom seems to be to keep grinding dust away from bearing surfaces.

In the meantime, I guess... cover the lathe up when grinding?
Quote:
Originally Posted by Sutripta View Post
Grinding and electric welding are the two big no nos near precision machines.
I know, I know. But as they say, it is what it is. This is what my set up is currently and other than protecting my equipment by covering it up, there is not much I can do. Ideally I would have liked to have both the Lath and the mill in a complete separate spot. But I don’t have the space for that. I have my eye on the loft of my garage. My wife has laid claim to the loft from day one, for her Barbie Doll and Doll house collection. But everything is still packed up in boxes. We will see.

At long last I got back to some actual machining and milling!

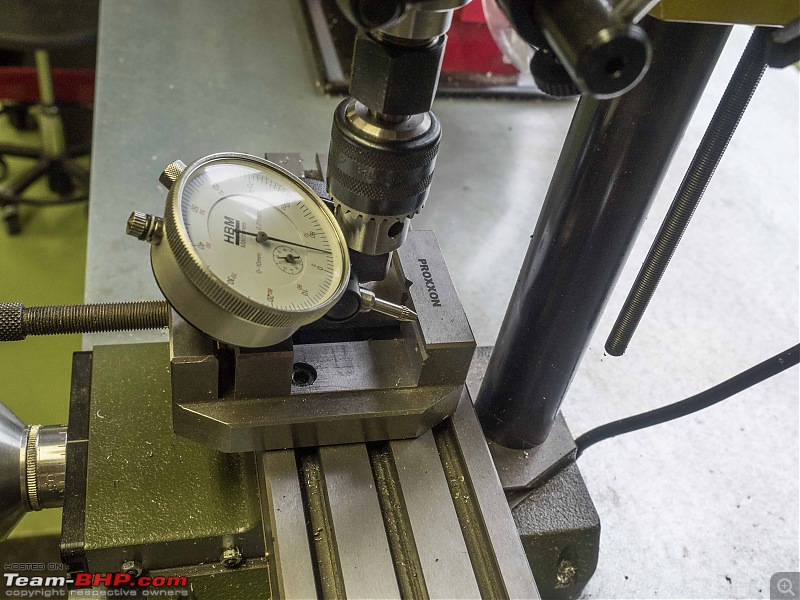
First thing is to put the vice back on and get it properly aligned

DIY: Metal model engine building UPDATE: build complete (page 16)!-p7250003.jpg

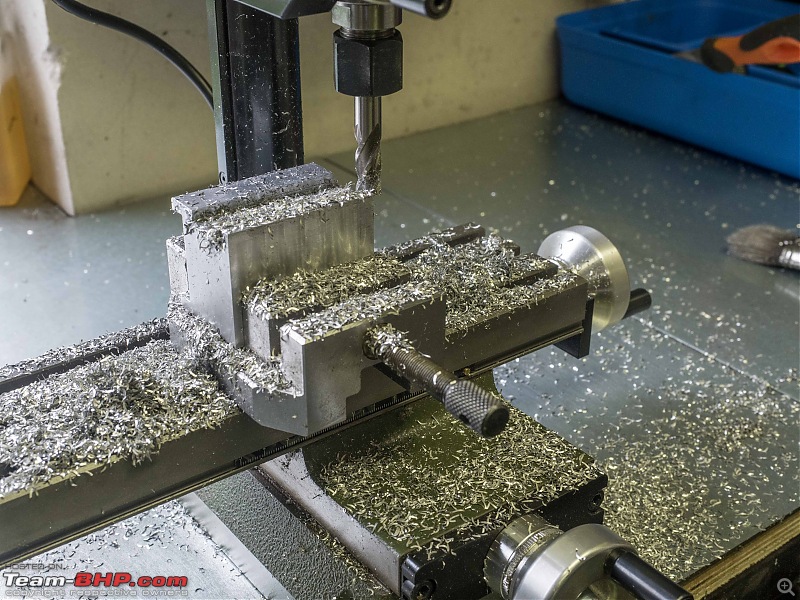
Next, lets make some chips!

DIY: Metal model engine building UPDATE: build complete (page 16)!-p7250004.jpg

DIY: Metal model engine building UPDATE: build complete (page 16)!-p7250005.jpg

Here my very sloppy, horror, layman technique on marking. A bit of blue on the work piece. Put whatever measurement needed onto the caliper, carefully scrape along. One perfect line, perfectly placed! I know this is not how you should treat your caliper, but it has worked for me for decades. Essentially, you only scrape of the blue marked dye, not even scratch the surface of the aluminium.

DIY: Metal model engine building UPDATE: build complete (page 16)!-p7250006.jpg

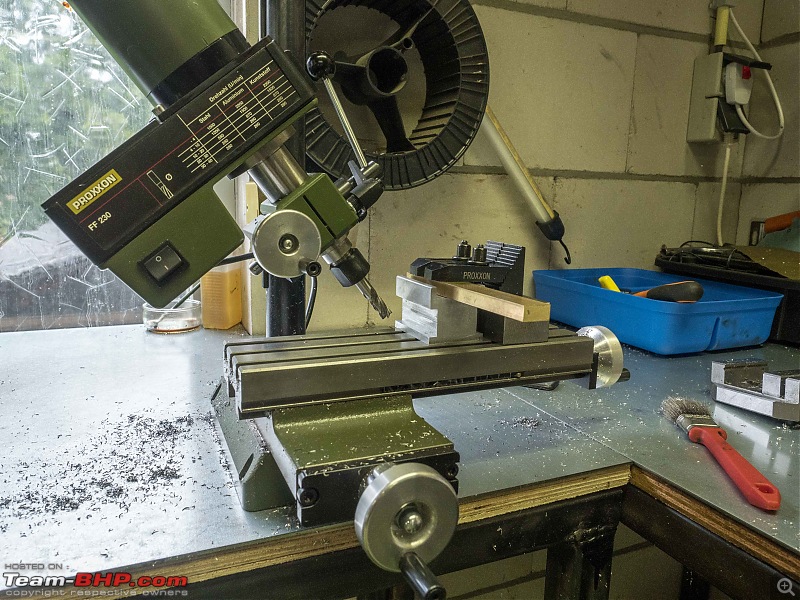
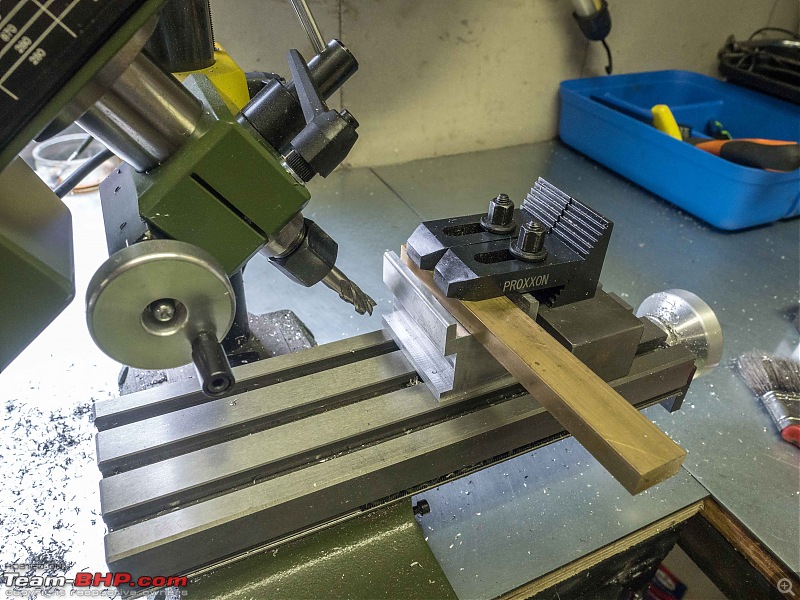
And now for the tricky part, milling under an angle

Quote:
Originally Posted by Sutripta View Post
For the time being I'd just leave it square. The beautifying can be done later.
Don't see how angling the head will help you in this case.
Quote:
Originally Posted by Sutripta View Post
How do you plan to machine a length greater than the tool diameter, requiring a X feed?
Like thus:

This worked surprisingly well. Of course, proper alignment is key, or this cuts will taper towards one end.

DIY: Metal model engine building UPDATE: build complete (page 16)!-p7250007.jpg

DIY: Metal model engine building UPDATE: build complete (page 16)!-p7250008.jpg

Worked really well!

DIY: Metal model engine building UPDATE: build complete (page 16)!-p7250009.jpg

The alternative was clamping the block of aluminium under a 45o angle. But I don’t have such blocks yet.

Overal, I am pretty pleased with the end results.

DIY: Metal model engine building UPDATE: build complete (page 16)!-p7250010.jpg

The measurements are pretty good.

DIY: Metal model engine building UPDATE: build complete (page 16)!-p7250011.jpg

The finish could be a bit better. But once I know everything fits well, I will concentrate on polishing everything so it will look a bit tidier.

DIY: Metal model engine building UPDATE: build complete (page 16)!-p7250012.jpg

Next, the cilinder itself!

I got this in the mail from one of my new model building buddies. He suggested I should try one of these on large surfaces, so he made me one. Very kind.

DIY: Metal model engine building UPDATE: build complete (page 16)!-p7250013.jpg

Not quite sure what the correct English term is for these? We call this a kotter and using them is known as “kotteren”.

Jeroen

Last edited by Jeroen : 26th July 2020 at 07:44.
Jeroen is offline   (3) Thanks
Old 26th July 2020, 09:48   #54
Senior - BHPian
 
Join Date: Jul 2009
Location: Calcutta
Posts: 4,668
Thanked: 6,217 Times
re: DIY: Metal model engine building UPDATE: build complete (page 16)!

Quote:
Originally Posted by Jeroen View Post
Here my very sloppy, horror, layman technique on marking. A bit of blue on the work piece. Put whatever measurement needed onto the caliper, carefully scrape along. One perfect line, perfectly placed!
Get a jenny. Should not cost more than a couple of Euros.
The Mitutoyo caliper has a feature for just this. But for short lengths. For longer lengths, align a straightedge along the caliper edge and then remove the caliper.

Quote:
And now for the tricky part, milling under an angle
You are bevelling an edge. Thought you were going to fabricate the crank support A Frame.


Quote:
I got this in the mail from one of my new model building buddies. He suggested I should try one of these on large surfaces, so he made me one. Very kind.
Home made fly cutter.

Sutripta
Sutripta is offline   (1) Thanks
Old 26th July 2020, 13:34   #55
Distinguished - BHPian
 
Join Date: Oct 2012
Location: Delhi
Posts: 8,104
Thanked: 50,909 Times

Quote:
Originally Posted by Sutripta View Post
Get a jenny.
Thanks. I had to look that up. Apparently, they are also known as Hermaphrodite calipers. Live and learn.


Quote:
Originally Posted by Sutripta View Post
Home made fly cutter.

Looks like we have different Dutch terms for these. The term fly cutter is used here as well, but never for these.

This one is also known as a slagmes, which translate roughly as strike knife. These never get referred to as a fly cutter. The one with the big hefty body tend to be referred to as fly cutters.

Its probably mostly semantics as they all do the same job in a similar fashion. I will test it some time this week

Jeroen
Jeroen is offline  
Old 26th July 2020, 13:40   #56
Senior - BHPian
 
Join Date: Jul 2009
Location: Calcutta
Posts: 4,668
Thanked: 6,217 Times
re: DIY: Metal model engine building UPDATE: build complete (page 16)!

Quote:
Originally Posted by Jeroen View Post
Looks like we have different Dutch terms for these. The term fly cutter is used here as well, but never for these.
That's why I said homemade!

Quote:
Originally Posted by Jeroen View Post
Thanks. I had to look that up.
Debbie Harry doesn't use them?

Sutripta

Last edited by Sutripta : 26th July 2020 at 13:48.
Sutripta is offline   (1) Thanks
Old 26th July 2020, 22:28   #57
Distinguished - BHPian
 
Join Date: Oct 2012
Location: Delhi
Posts: 8,104
Thanked: 50,909 Times
re: DIY: Metal model engine building UPDATE: build complete (page 16)!

Quote:
Originally Posted by Sutripta View Post
Debbie Harry doesn't use them?
She made a record called Parallel lines, so maybe she did use them!

https://en.wikipedia.org/wiki/Parallel_Lines

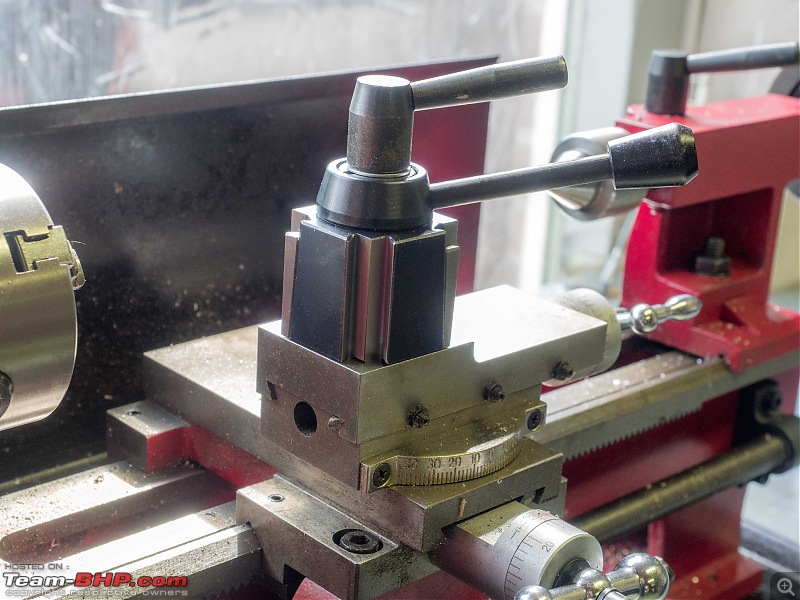
I fitted my new quick change post to my lath. Very easy and convenient. I used the old handle from the original post, rather than the nut supplied. To be honest, somehow I was under the impression it was a one handle operation, but it is not, it is a two handle operation. Ok, I can live with that.

DIY: Metal model engine building UPDATE: build complete (page 16)!-p7260002.jpg

I had not done a proper checking of all the materials that had been arriving over the last few weeks. So I spend about an hour checking all the stuff I have got against my material sheet.

DIY: Metal model engine building UPDATE: build complete (page 16)!-p7260003.jpg

The good news, I have got most now. The bad news, I havent got everything. I made a few errors ordering and I simply overlooked two bits too. This memory thing of mine is really playing up. More stupidity to come!

All right, next tool I am buying is a decent electrical saw! i have had my eye on one of these:

https://www.hbm-machines.com/product...metaallintzaag

They are not cheap, and they are big, bulky and heavy. But this is the alternative:

DIY: Metal model engine building UPDATE: build complete (page 16)!-p7260004.jpg

After about 30 minutes, lots of sweat and muscle ache tomorrow no doubt!

DIY: Metal model engine building UPDATE: build complete (page 16)!-p7260005.jpg

Anyway, we are in production. I had been studying the design and the measurements of the cylinder for hours. So I cut it to the length I thought would work. Then I put it on my lath. I had been contemplating using the four jaw chuck, but this still works. The advantage is, this give my clearance at the back of the piece as I bore through.

DIY: Metal model engine building UPDATE: build complete (page 16)!-p7260007.jpg

Squared both edges. Checked the drawing. Only the realise I had made a mistake reading the drawing. The good news. I have the overall length at precisely 61mm.

I thought I had an additional 12 mm. Which would have meant I would have been able to machine it all from one position in the lath and then face it off in one go. That is not going to happen now. I will work on it from two directions. The cooling ribs are conveniently spaced out, so I won’t have to much trouble getting the outside diameter looking identical once I swap the piece of stock.

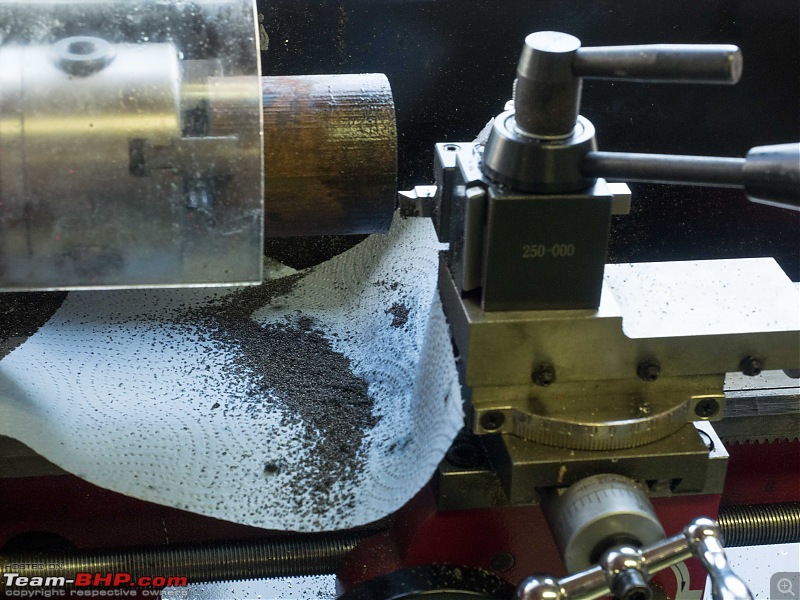
I decided to machine it to the correct diameter and put the cooling ribs cuts into it, before drilling/boring the inside. My reasoning is that this is still a fairly big chunk of metal for my little lath. I like to do all the machining on the outside with it stuck firmly in the chuck on one end and the other end supported as well.

We will see how it goes. If anything the going is pretty slow. With cuts of more than 0,25mm the lath thermo limiter trips every second cut! That makes me wonder how I am going to turn the flywheel which is a whopping (relatively speaking) 110mm!!.

Anyway, apart from making quite a mess, this finish I am getting is pretty good!

DIY: Metal model engine building UPDATE: build complete (page 16)!-p7260008.jpg

DIY: Metal model engine building UPDATE: build complete (page 16)!-p7260009.jpg

Jeroen
Jeroen is offline   (3) Thanks
Old 27th July 2020, 06:38   #58
Senior - BHPian
 
Join Date: Jul 2009
Location: Calcutta
Posts: 4,668
Thanked: 6,217 Times
re: DIY: Metal model engine building UPDATE: build complete (page 16)!

Quote:
Originally Posted by Jeroen View Post
She made a record called Parallel lines, so maybe she did use them!
Wish I still had the vinyl. Could have then gone through the sleeve notes to find whether a Jenny or someone from the LGBTQ community was credited!

Quote:
All right, next tool I am buying is a decent electrical saw! i have had my eye on one of these:
Could have parted it off on the lathe.
A bandsaw of that type is not really necessary for a home workshop. A 'DoAll' type is more versatile.
And for cutoff duties an abrasive wheel cutoff machine is the better alternative. (NB - not to be used on Aluminium)

Incidentally I see you use a live centre. Got it with the lathe, or bought separately?

Sutripta

Last edited by Sutripta : 27th July 2020 at 06:53.
Sutripta is offline   (1) Thanks
Old 27th July 2020, 10:54   #59
Distinguished - BHPian
 
Join Date: Oct 2012
Location: Delhi
Posts: 8,104
Thanked: 50,909 Times
re: DIY: Metal model engine building UPDATE: build complete (page 16)!

Quote:
Originally Posted by Sutripta View Post
Could have parted it off on the lathe.
That would have required a very deep cut and I am not too keen on that. I still need more practice on my facing skills before attempting

Quote:
Originally Posted by Sutripta View Post
Incidentally I see you use a live centre. Got it with the lathe, or bought separately?
Bought it separately, standard comes with a dead centre.

Jeroen
Jeroen is offline   (2) Thanks
Old 27th July 2020, 13:00   #60
Distinguished - BHPian
 
Thad E Ginathom's Avatar
 
Join Date: Jun 2007
Location: Chennai
Posts: 11,005
Thanked: 26,445 Times
re: DIY: Metal model engine building UPDATE: build complete (page 16)!

I gasped at the prospect of taking a hacksaw to that! And again at your beautiful straight, neat cut!
Thad E Ginathom is offline   (1) Thanks
Reply

Most Viewed


Copyright ©2000 - 2024, Team-BHP.com
Proudly powered by E2E Networks