Team-BHP > Technical Stuff > DIY - Do it yourself
Register New Topics New Posts Top Thanked Team-BHP FAQ


Reply
  Search this Thread
83,895 views
Old 21st October 2020, 18:45   #151
Senior - BHPian
 
Join Date: Jul 2009
Location: Calcutta
Posts: 4,668
Thanked: 6,217 Times
re: DIY: Metal model engine building UPDATE: build complete (page 16)!

Quote:
Originally Posted by Jeroen View Post
It depends a bit who you want to believe, but here is one data point:

Facts
• The flame temperature when burning Propane in Oxygen is 2800 degree C
• The flame temperature when burning Acetylene in Oxygen is 3100 degree C
Here Oxy LPG is commonly used for cutting steel.

DIY Acetylene - what sort of cylinders? Throw away, refill or exchange?

Sutripta
Sutripta is offline  
Old 21st October 2020, 19:13   #152
Distinguished - BHPian
 
Join Date: Oct 2012
Location: Delhi
Posts: 8,093
Thanked: 50,783 Times
re: DIY: Metal model engine building UPDATE: build complete (page 16)!

Quote:
Originally Posted by Sutripta View Post
DIY Acetylene - what sort of cylinders? Throw away, refill or exchange?
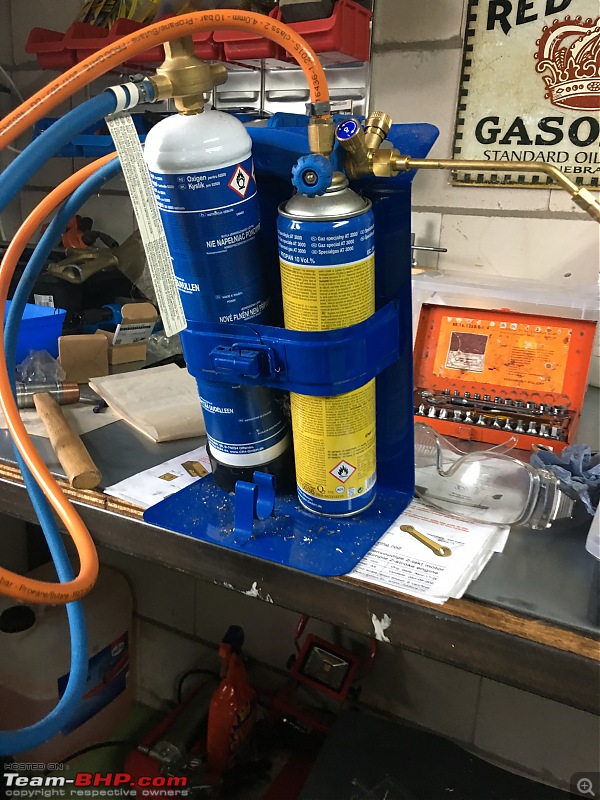
All three systems are available. Depends a bit on your preference and amount of use.

My little set has just throw away cylinders.

DIY: Metal model engine building UPDATE: build complete (page 16)!-img_3526.jpg

Obviously, these are very small cylinders. As soon as you go for larger cylinders most companies would offer the exchange system. You “buy” a cylinder once and every time it’s empty you get it exchanged for a new one. These cylinders come under quite a safety/inspection regime. These exchange systems guarantee you that you always have a safe cylinder.

For DIY purposes, acetylene would come in various sizes from 5 to 50l. Larger is possible, but you end up with more professional outfits.

Many DIY guys like me would have a little portable set like mine. When working on cars it is just very handy to have a good hot flame around. You might never ever use it to weld, but it comes in very useful for other applications.

Not sure what is being used for cutting steel these days. I know we used just mostly massive acetylene burners on the tugs. Primarily for cutting through anchor chains and heavy duty shackles (and the odd cutting through hulls/holds in case of salvage work). We also had some special electrodes for cutting I seem to recall? Long time since I have done any cutting!

Jeroen
Jeroen is offline   (3) Thanks
Old 21st October 2020, 21:39   #153
Senior - BHPian
 
Join Date: Jul 2009
Location: Calcutta
Posts: 4,668
Thanked: 6,217 Times
re: DIY: Metal model engine building UPDATE: build complete (page 16)!

Quote:
Originally Posted by Jeroen View Post
All three systems are available. Depends a bit on your preference and amount of use.
All DA type?


Quote:
Not sure what is being used for cutting steel these days.
...
We also had some special electrodes for cutting I seem to recall?
Oxy Acetelene, Oxy LPG. Oxy Hydrogen works but has no extra advantages, lots of disadvantages, so not really used.

Tungsten based gouging rods.

Sutripta
Sutripta is offline  
Old 22nd October 2020, 01:21   #154
Distinguished - BHPian
 
Join Date: Oct 2012
Location: Delhi
Posts: 8,093
Thanked: 50,783 Times

Quote:
Originally Posted by Sutripta View Post
All DA type?

Sorry, what is DA type?
Jeroen is offline   (1) Thanks
Old 22nd October 2020, 07:05   #155
Senior - BHPian
 
Join Date: Jul 2009
Location: Calcutta
Posts: 4,668
Thanked: 6,217 Times
re: DIY: Metal model engine building UPDATE: build complete (page 16)!

^^^
Dissolved in Acetone.

Sutripta
Sutripta is offline   (1) Thanks
Old 22nd October 2020, 11:44   #156
Distinguished - BHPian
 
Join Date: Oct 2012
Location: Delhi
Posts: 8,093
Thanked: 50,783 Times
re: DIY: Metal model engine building UPDATE: build complete (page 16)!

Quote:
Originally Posted by Sutripta View Post
Dissolved in Acetone.
Yes, as far as I am aware. Also, the cylinders have this brick like poreus material inside.

Jeroen
Jeroen is offline  
Old 22nd October 2020, 13:22   #157
Distinguished - BHPian
 
Join Date: Oct 2012
Location: Delhi
Posts: 8,093
Thanked: 50,783 Times
re: DIY: Metal model engine building UPDATE: build complete (page 16)!

Managed to get a bit more work done on Debbie earlier this week.

I finally got the cylinder bottom plate set up very accurately in the four jaw chuck. The dial just did not move noticeable at all when spinning. Took me about an hour I guess. Which is for the very first time since using one of these in long time is not bad going. I did study various Youtube on how to dial in the 4 jaw chuck. I still like blondihack’s the best:


Once properly dialled in, I centre drilled, next drilled 3mm, next 5.9mm and finally my 6mm reamer. I must say this is the best looking hole I have yet drilled on my lathe. Looks pretty perfect to me. As you know I was not always satisfied with the way my drilling, including the reaming, eventually showed up. So I do believe some of that might have been due to the fact that the tailstock was not aligned properly in combination with the errors of a 3 jaw chuck. As long as you can do all the cutting and drilling in one go in the 3 jaw chuck, concentricity is not that a big thing. But when you need to take the material in and out of the chuck is when the trouble starts. Also, I believe my tailstock was not just out of alignment to the centre, but also slightly twisted, which means it would not drill perpendicular either. So some progress at last

DIY: Metal model engine building UPDATE: build complete (page 16)!-pa200001.jpg

Next I removed the four jaw chuck and went back to checking the turning accuracy.

DIY: Metal model engine building UPDATE: build complete (page 16)!-pa200004.jpg

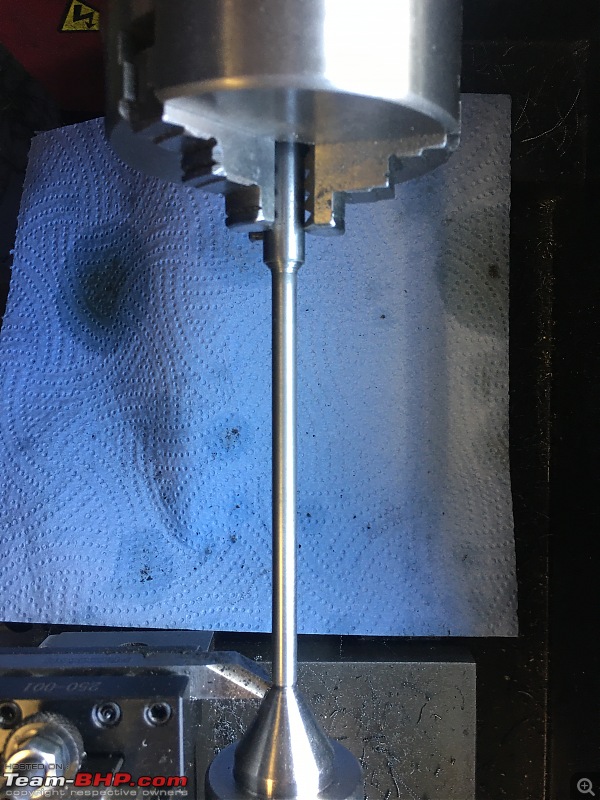
It was pretty good, but it still required a little adjustment. I finally had a go at producing the next piston rod:

DIY: Metal model engine building UPDATE: build complete (page 16)!-img_5121.jpg

DIY: Metal model engine building UPDATE: build complete (page 16)!-img_9972.jpg

Across the full length of this piece of material (about 90mm) I am getting about a 0,03mm taper. Given the fact that the actual stroke of this little engine will be 24mm, I think that should be ok.

Still need to do the final finishing and threading.

Jeroen
Jeroen is offline   (3) Thanks
Old 22nd October 2020, 17:27   #158
Distinguished - BHPian
 
Thad E Ginathom's Avatar
 
Join Date: Jun 2007
Location: Chennai
Posts: 10,999
Thanked: 26,417 Times
re: DIY: Metal model engine building UPDATE: build complete (page 16)!

Good stuff, Jeroen. Coming along nicely
Quote:
Originally Posted by Jeroen View Post
Not sure what is being used for cutting steel these days.
Looks like plasma is cool (if you see what I mean)! If you have room for it, water jet is actually cool, and an amazing way of cutting anything.
Thad E Ginathom is offline   (2) Thanks
Old 22nd October 2020, 21:27   #159
Senior - BHPian
 
Join Date: Jul 2009
Location: Calcutta
Posts: 4,668
Thanked: 6,217 Times
re: DIY: Metal model engine building UPDATE: build complete (page 16)!

Quote:
Originally Posted by Jeroen View Post
Also, the cylinders have this brick like poreus material inside.
That is to prevent the Acetone from sloshing around.

Sutripta
Sutripta is offline  
Old 22nd October 2020, 23:31   #160
Distinguished - BHPian
 
Join Date: Oct 2012
Location: Delhi
Posts: 8,093
Thanked: 50,783 Times
re: DIY: Metal model engine building UPDATE: build complete (page 16)!

Quote:
Originally Posted by Sutripta View Post
That is to prevent the Acetone from sloshing around.
This is what I was told on the the use of porous material:

Ensuring there is no free space within the cylinder.
Helps in cooling the internal atmosphere in case of thermal decomposition.
Formation of high pressure pockets within the cylinder is a major cause for concern of acetylene cylinder manufacturers, suppliers, and user. However, the porous material helps in relieving any pressure that builds up over time.

In addition, in case of a big leak, say a broken hose, pressure regulator coming off, the porous material also ensures that only a relative small volume of gas / per second is released only. (so it works somewhat as a regulator in itself.

I recall a while ago you asked something on what kind of service are available in the west when it comes to re-sharpening toolkits.

Somehow I made it onto the mailing list of a professional tool company. Just got their catalogue through the mail. Noticed a “resharpening service”. All in Dutch I am afraid, but you will get the gist.

DIY: Metal model engine building UPDATE: build complete (page 16)!-tool-sharpening.jpeg
Jeroen is offline   (2) Thanks
Old 23rd October 2020, 02:04   #161
Distinguished - BHPian
 
Thad E Ginathom's Avatar
 
Join Date: Jun 2007
Location: Chennai
Posts: 10,999
Thanked: 26,417 Times
re: DIY: Metal model engine building UPDATE: build complete (page 16)!

I seem to remember about acetylene being very very unstable in its free liquid state. There is a warning to keep the cylinder upright too.

ThisOldTony has something about it on his "Fire" video. There are formal regulatory instructional videos on Youtube too: boring but thorough. And they make it plain that when stuff goes wrong with acetylene it goes wrong in a bad way.

Yes, I know I could blow up my house with cooking gas, but I can't help feeling that there is a huge difference in danger levels between propane and acetylene, not just in the flame but the whole handling.

Hmmm... Oxygen can pretty dodgy too!
Thad E Ginathom is offline  
Old 23rd October 2020, 08:45   #162
Senior - BHPian
 
Join Date: Jul 2009
Location: Calcutta
Posts: 4,668
Thanked: 6,217 Times
re: DIY: Metal model engine building UPDATE: build complete (page 16)!

Quote:
Originally Posted by Jeroen View Post
This is what I was told on the the use of porous material:

Ensuring there is no free space within the cylinder.
Like shaking a soda can before opening it. But with acetylene instead of CO2 results are likely to be tragic rather than comic.

Sutripta
Sutripta is offline   (1) Thanks
Old 23rd October 2020, 12:45   #163
Distinguished - BHPian
 
Join Date: Oct 2012
Location: Delhi
Posts: 8,093
Thanked: 50,783 Times
re: DIY: Metal model engine building UPDATE: build complete (page 16)!

Finished the little piston rod last night. Took quite a bit of time to get it to run fine within the glide bush. Last few hundreds of mm requires emerald paper, polishing paper and a lot of elbow grease. But it moves very smoothly through the glide bearing. No play, just smooth back and forth action!

It reminded me of one of the video’s of Blondihack. In one of them she warn viewer of the very distorted view you get from watching these machining videos. And her videos are on average 20-25 minutes. But as she explains, a lot of the very tedious work, especially on final finish with emerald paper, polishing paper takes hours! Very true. Still very satisfying to get such results after so many hours of labour!

Tried out my new DIY tool as well: Worked really well

DIY: Metal model engine building UPDATE: build complete (page 16)!-pa220001.jpg

Thread looks really nice, very even

DIY: Metal model engine building UPDATE: build complete (page 16)!-pa220003.jpg

The finished piston rod

DIY: Metal model engine building UPDATE: build complete (page 16)!-pa220005.jpg

DIY: Metal model engine building UPDATE: build complete (page 16)!-pa220004.jpg

A quick assembly. From left to right: Piston, Bottom cylinder plate with glide bearing bush with piston rod, on the far right the fork

DIY: Metal model engine building UPDATE: build complete (page 16)!-pa220006.jpg

There is a problem with the fork though; I had seen it fitted crooked on the piston rod before. It was one of the reasons I redid the piston rod. But even with a near perfect piston rod, the fork still does not fit well. Which means there is a problem with it. Still crooked, so I have to redo this part

DIY: Metal model engine building UPDATE: build complete (page 16)!-pa220007.jpg

However, the next job I want to tackle is to make the piston fit the cilinder. That is going to take several hours, lots of polishing paper and polishing paste, probably some more honing too, and lots, lots of elbow grease.


Jeroen
Jeroen is offline   (1) Thanks
Old 25th October 2020, 20:55   #164
Distinguished - BHPian
 
Join Date: Oct 2012
Location: Delhi
Posts: 8,093
Thanked: 50,783 Times
re: DIY: Metal model engine building UPDATE: build complete (page 16)!

Miserable rainy, windy Sunday morning, so I spend most of my time in my garage, working on Debbie and some other stuff.

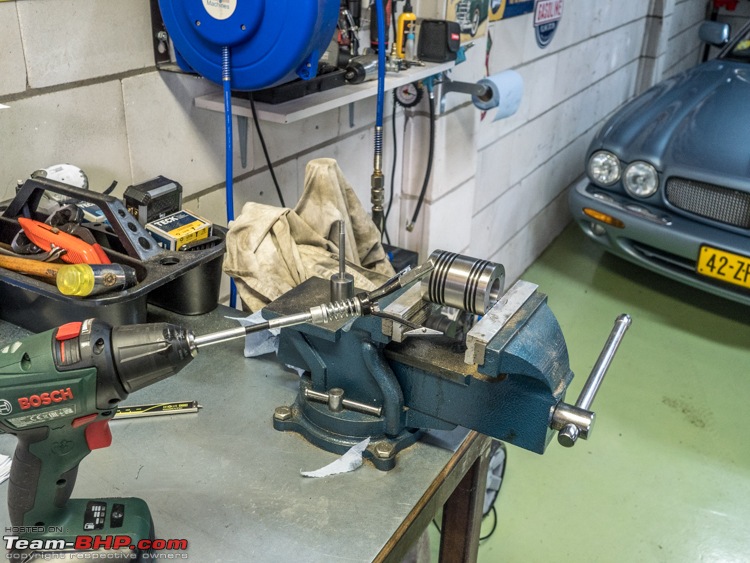
This morning I wanted to make the piston fit the cilinder properly. Which meant a lot of additional honing. Normally cilinder honing is done to create the right surface for (cilinder) oil to adhere to the cilinder wall. Debbie does not have any oil, so I am just using this honing tool to increase the bore of the cilinder every so slightly!

According to the drawing the piston and cilinder need to fit with 0,02mm clearance!

DIY: Metal model engine building UPDATE: build complete (page 16)!-pa250001.jpg

Lots of elbow grease later:

DIY: Metal model engine building UPDATE: build complete (page 16)!-pa250003.jpg

DIY: Metal model engine building UPDATE: build complete (page 16)!-pa250004.jpg

DIY: Metal model engine building UPDATE: build complete (page 16)!-pa250005.jpg

DIY: Metal model engine building UPDATE: build complete (page 16)!-pa250006.jpg

DIY: Metal model engine building UPDATE: build complete (page 16)!-pa250007.jpg

Very happy with the final finish and how well the piston fits and moves in the cilinder!

Good thing it was finished when it was. My little honing tool has come to its end! I need to get some new honing stones.

DIY: Metal model engine building UPDATE: build complete (page 16)!-pa250008.jpg

I was drinking endless cups of coffee whilst doing this honing operation. Not quite sure how it happened, but at some point in time, I found myself dipping my brush not into the jar with honing fluid, but my coffee mug!

Jeroen
Jeroen is offline   (4) Thanks
Old 25th October 2020, 22:19   #165
Senior - BHPian
 
Join Date: Jul 2009
Location: Calcutta
Posts: 4,668
Thanked: 6,217 Times
re: DIY: Metal model engine building UPDATE: build complete (page 16)!

Quote:
Originally Posted by Jeroen View Post
Normally cilinder honing is done to create the right surface for (cilinder) oil to adhere to the cilinder wall. Debbie does not have any oil,
Two stroke. So I would think premix.

Sutripta
Sutripta is offline   (1) Thanks
Reply

Most Viewed


Copyright ©2000 - 2024, Team-BHP.com
Proudly powered by E2E Networks