Team-BHP > Technical Stuff > DIY - Do it yourself
Register New Topics New Posts Top Thanked Team-BHP FAQ


Reply
  Search this Thread
110,177 views
Old 5th July 2009, 07:04   #211
BHPian
 
ramki067's Avatar
 
Join Date: Sep 2006
Location: BANGALORE
Posts: 610
Thanked: 35 Times

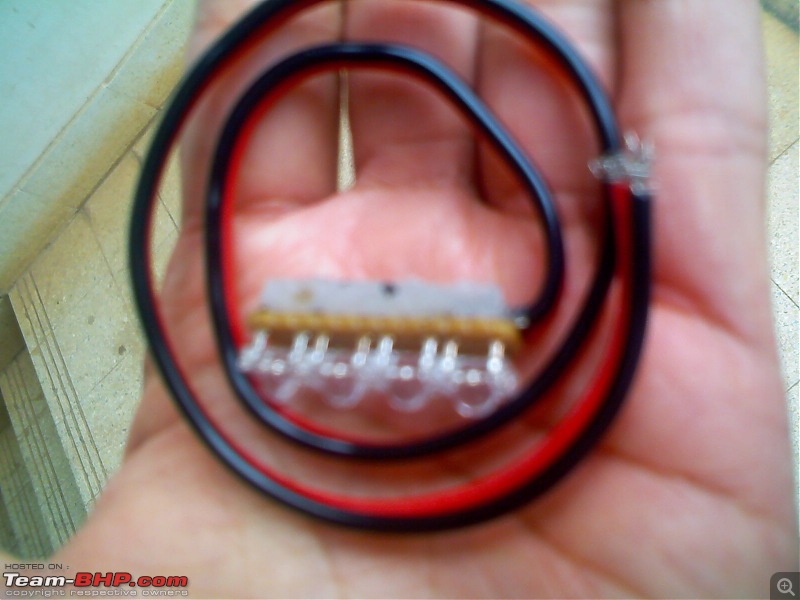
Yes, greenhorn. All anodes of the LEDs are connected to the resistor and the other end of the resistors are fused together and connected to the red wire as shown in the pic. All cathodes are fused together to be connected to the other end. I hope i've done it right! Is their any issue in this?

Thanks,
Ramki
ramki067 is offline  
Old 5th July 2009, 08:00   #212
Senior - BHPian
 
greenhorn's Avatar
 
Join Date: Apr 2007
Location: KL-01
Posts: 7,746
Thanked: 4,403 Times

ramki, you've done it right, but what voltage are you using to test it ?

amd you'll need 2 or more sets of such LED's
greenhorn is offline  
Old 5th July 2009, 09:20   #213
BHPian
 
ramki067's Avatar
 
Join Date: Sep 2006
Location: BANGALORE
Posts: 610
Thanked: 35 Times

I've connected it back to the connector in the car and tested it. Its showing very low light. Don't know what to do

Meanwhile, the space provided in the WagonR for interior light is very small and can accomodate only so much LEDs hence the setup.

Thanks,
Ramki.

Last edited by ramki067 : 5th July 2009 at 09:21.
ramki067 is offline  
Old 5th July 2009, 09:34   #214
Senior - BHPian
 
greenhorn's Avatar
 
Join Date: Apr 2007
Location: KL-01
Posts: 7,746
Thanked: 4,403 Times

I would say use 5 mm LED's , and add a lot more of them. instead of using one LED in series with each resistor, do it like I did, with three LED's in series with a 100 ohm resistor.

BTW, you're soldering on the wrong side (excused since you are a newbie )

here is a much smaller board I made for my rear hatch light. You can see the soldering too. thats a total of 12 5 mm LED's ( 4 sets of 3 LED's + resistor in series) that I've used
Attached Thumbnails
Benny's first DIY : LEDs on an Ikon-img_2954.jpg  

Benny's first DIY : LEDs on an Ikon-img_2970.jpg  

greenhorn is offline  
Old 5th July 2009, 10:23   #215
BHPian
 
shyamhegde's Avatar
 
Join Date: Dec 2006
Location: Bangalore
Posts: 284
Thanked: 5 Times

Green (now red), that looked like one aftermarket light than DIY. Some nice job there.

Ramki, if you find it difficult to work with small LEDs and making cluster of them on PCB, work with higher powered ones.
Wire 3 numbers of 1 watt LEDs with a 12Ohm/5Watt resistor, all in series. You will get brighter light and less soldering involved.
You could buy 1 watt LED at Om Electronics, SP Road (costs Rs.80 or so each). They come with flat alu heatsinks and you can just stick them using doublesided adhesive tapes. No PCB required.
shyamhegde is offline  
Old 5th July 2009, 10:27   #216
Senior - BHPian
 
greenhorn's Avatar
 
Join Date: Apr 2007
Location: KL-01
Posts: 7,746
Thanked: 4,403 Times

Quote:
Originally Posted by shyamhegde View Post
Green (now red), that looked like one aftermarket light than DIY. Some nice job there.

You could buy 1 watt LED at Om Electronics, SP Road (costs Rs.80 or so each). They come with flat alu heatsinks and you can just stick them using doublesided adhesive tapes. No PCB required.
Thanks

You guys are lucky. You dont get 10 mm LED's forget the 1W stuff with heatsinks in my city :(

heck, a few years ago, white LED's were non existent

PS: here are the shots of my hatch lit up by the light
http://www.team-bhp.com/forum/1302261-post165.html

Last edited by mobike008 : 18th March 2011 at 15:49. Reason: 2 Smileys per post please. Thanks!
greenhorn is offline  
Old 6th July 2009, 11:23   #217
BHPian
 
ramki067's Avatar
 
Join Date: Sep 2006
Location: BANGALORE
Posts: 610
Thanked: 35 Times

UPDATE: Tried with 3 numbers of 5 mm LEDs with 100 ohm resistor and it WORKED.

But the light emitted was far less than the stock light. I could accomodate only 3 LEDs with the space provided in my WagonR. Anybody having WagonR/Alto have done this D.I.Y, can you people post a pic of how its done?

Thanks,
Ramki
ramki067 is offline  
Old 6th July 2009, 11:37   #218
Senior - BHPian
 
greenhorn's Avatar
 
Join Date: Apr 2007
Location: KL-01
Posts: 7,746
Thanked: 4,403 Times

can you post a close up of the light assembly in a wagon R ?

You probably need some more practice and a little more thinking before you can cram a few more LED's onto a board of the same size.
check out my numberplate lights. they're cramped , but there is still more room to put even more of them in

EDIT: Also , could you let me know how to open the light assembly up? I've found a volunteer. Let me see if I can make something for him, the design of which you can also use

Last edited by greenhorn : 6th July 2009 at 11:48.
greenhorn is offline  
Old 6th July 2009, 11:41   #219
BHPian
 
ramki067's Avatar
 
Join Date: Sep 2006
Location: BANGALORE
Posts: 610
Thanked: 35 Times

sure greenhorn, will do this today evening as i'm in office now . The problem is horizontal space which is very less and almost same as the pic you have provided.

But the 10mm LEDs with 470 ohm resistor connected emits very low light.Why is it?

Thanks,
Ramki

Last edited by ramki067 : 6th July 2009 at 11:44.
ramki067 is offline  
Old 6th July 2009, 12:08   #220
Senior - BHPian
 
greenhorn's Avatar
 
Join Date: Apr 2007
Location: KL-01
Posts: 7,746
Thanked: 4,403 Times

update. just went and checked his car out ( Yes, I have absolutely no work )

It IS small compared to the indica. But there are possiblities. Easiest would be to cut two thin strips of PCB, solder at least one row of 3 LED's on them, and use one each on either side of the switch/bulb. In addition, you may be able to fit a third strip directly where the bulb is now ( you might have to bend the long metal strip that holds the bulb in place inward to accomodate.) Remember to be careful and insulate the back side of the PCB and any wiring you may use , as well as the stuff inside the lamp so as to prevent any shorts. worst case , you will have a blown fuse , but prevention is better than cure
greenhorn is offline  
Old 6th July 2009, 12:20   #221
BHPian
 
ramki067's Avatar
 
Join Date: Sep 2006
Location: BANGALORE
Posts: 610
Thanked: 35 Times

Wow, thats fast. Kerala -> Bangalore and back .

Will try that idea during this weekend. Thanks greenhorn.

Ramki.
ramki067 is offline  
Old 25th July 2009, 20:52   #222
BHPian
 
gopinathann's Avatar
 
Join Date: Jun 2007
Location: Chennai
Posts: 765
Thanked: 20 Times

Today I tried to add White LEDs to the number plate, I find it difficult to put 3 LEDS inside as I have to use the place for the size of that bulb as I could not pull the assembly. So I thought of creating a LED strip and connect it. I need input to create a best way of creating LED strips. I am planning to use a plastic sheet for the strip and will put Fevicol Pen on top of the LED connections in order to place them firmly and to prevent water getting into it.
gopinathann is offline  
Old 26th July 2009, 00:19   #223
BHPian
 
shyamhegde's Avatar
 
Join Date: Dec 2006
Location: Bangalore
Posts: 284
Thanked: 5 Times

You can try these 4 legged white LEDs. They sit firmly on general purpose dotted PCB. I tried a cluster with them, here is a snap (sorry bad quality and blurr) Benny's first DIY : LEDs on an Ikon-img006.jpg I used the hot glue gun to cover the soldering side to prevent any shorts.
shyamhegde is offline  
Old 26th July 2009, 09:26   #224
BHPian
 
archat68's Avatar
 
Join Date: Dec 2006
Location: Kolkata
Posts: 897
Thanked: 619 Times

Quote:
Originally Posted by archat68 View Post
I'm running four white power LEDs in series directly in my Zen. The LEDs are square with four legs, very bright and operates on 50mA. Look at the below mentioned datasheet for example:
http://www.vishay.com/doc?81260
These type of power LEDs are available in market. The white ones are available at Kolkata for about 15-20 Rs. a piece.
This is my setup in my Zen. Sorry for the bad quality pictures - they are taken from my phone. I'm using four square high power square LEDs connected in series along with a 100 ohm, 1W resistor in series. The LEDs are soldered on a general purpose PCB - then the PCB was cut around the LEDs to give the desired size (the PCB in my setup is just of the size of the four LEDs fitted side by side). Whole assembly was then fixed in place with double sided tape. It fits the space of the stock bulb in my Zen quite perfectly. Ample black insulation tape was used to prevent any short circuit. Light output is quite good - better than my stock bulb - would be better if the cover was clear in my case.
Attached Thumbnails
Benny's first DIY : LEDs on an Ikon-26072009001.jpg  

Benny's first DIY : LEDs on an Ikon-26072009002.jpg  

Benny's first DIY : LEDs on an Ikon-26072009005.jpg  

Benny's first DIY : LEDs on an Ikon-26072009007.jpg  

Benny's first DIY : LEDs on an Ikon-26072009008.jpg  

archat68 is offline  
Old 26th July 2009, 14:00   #225
BHPian
 
ghpk's Avatar
 
Join Date: Mar 2009
Location: Ghaziabad
Posts: 870
Thanked: 211 Times

archat68, Nice work with pirhana L.E.D.'s
Good Clean Install.
you can add more L.E.D. for better lighting.
ghpk is offline  
Reply

Most Viewed


Copyright ©2000 - 2024, Team-BHP.com
Proudly powered by E2E Networks