Team-BHP
(
https://www.team-bhp.com/forum/)
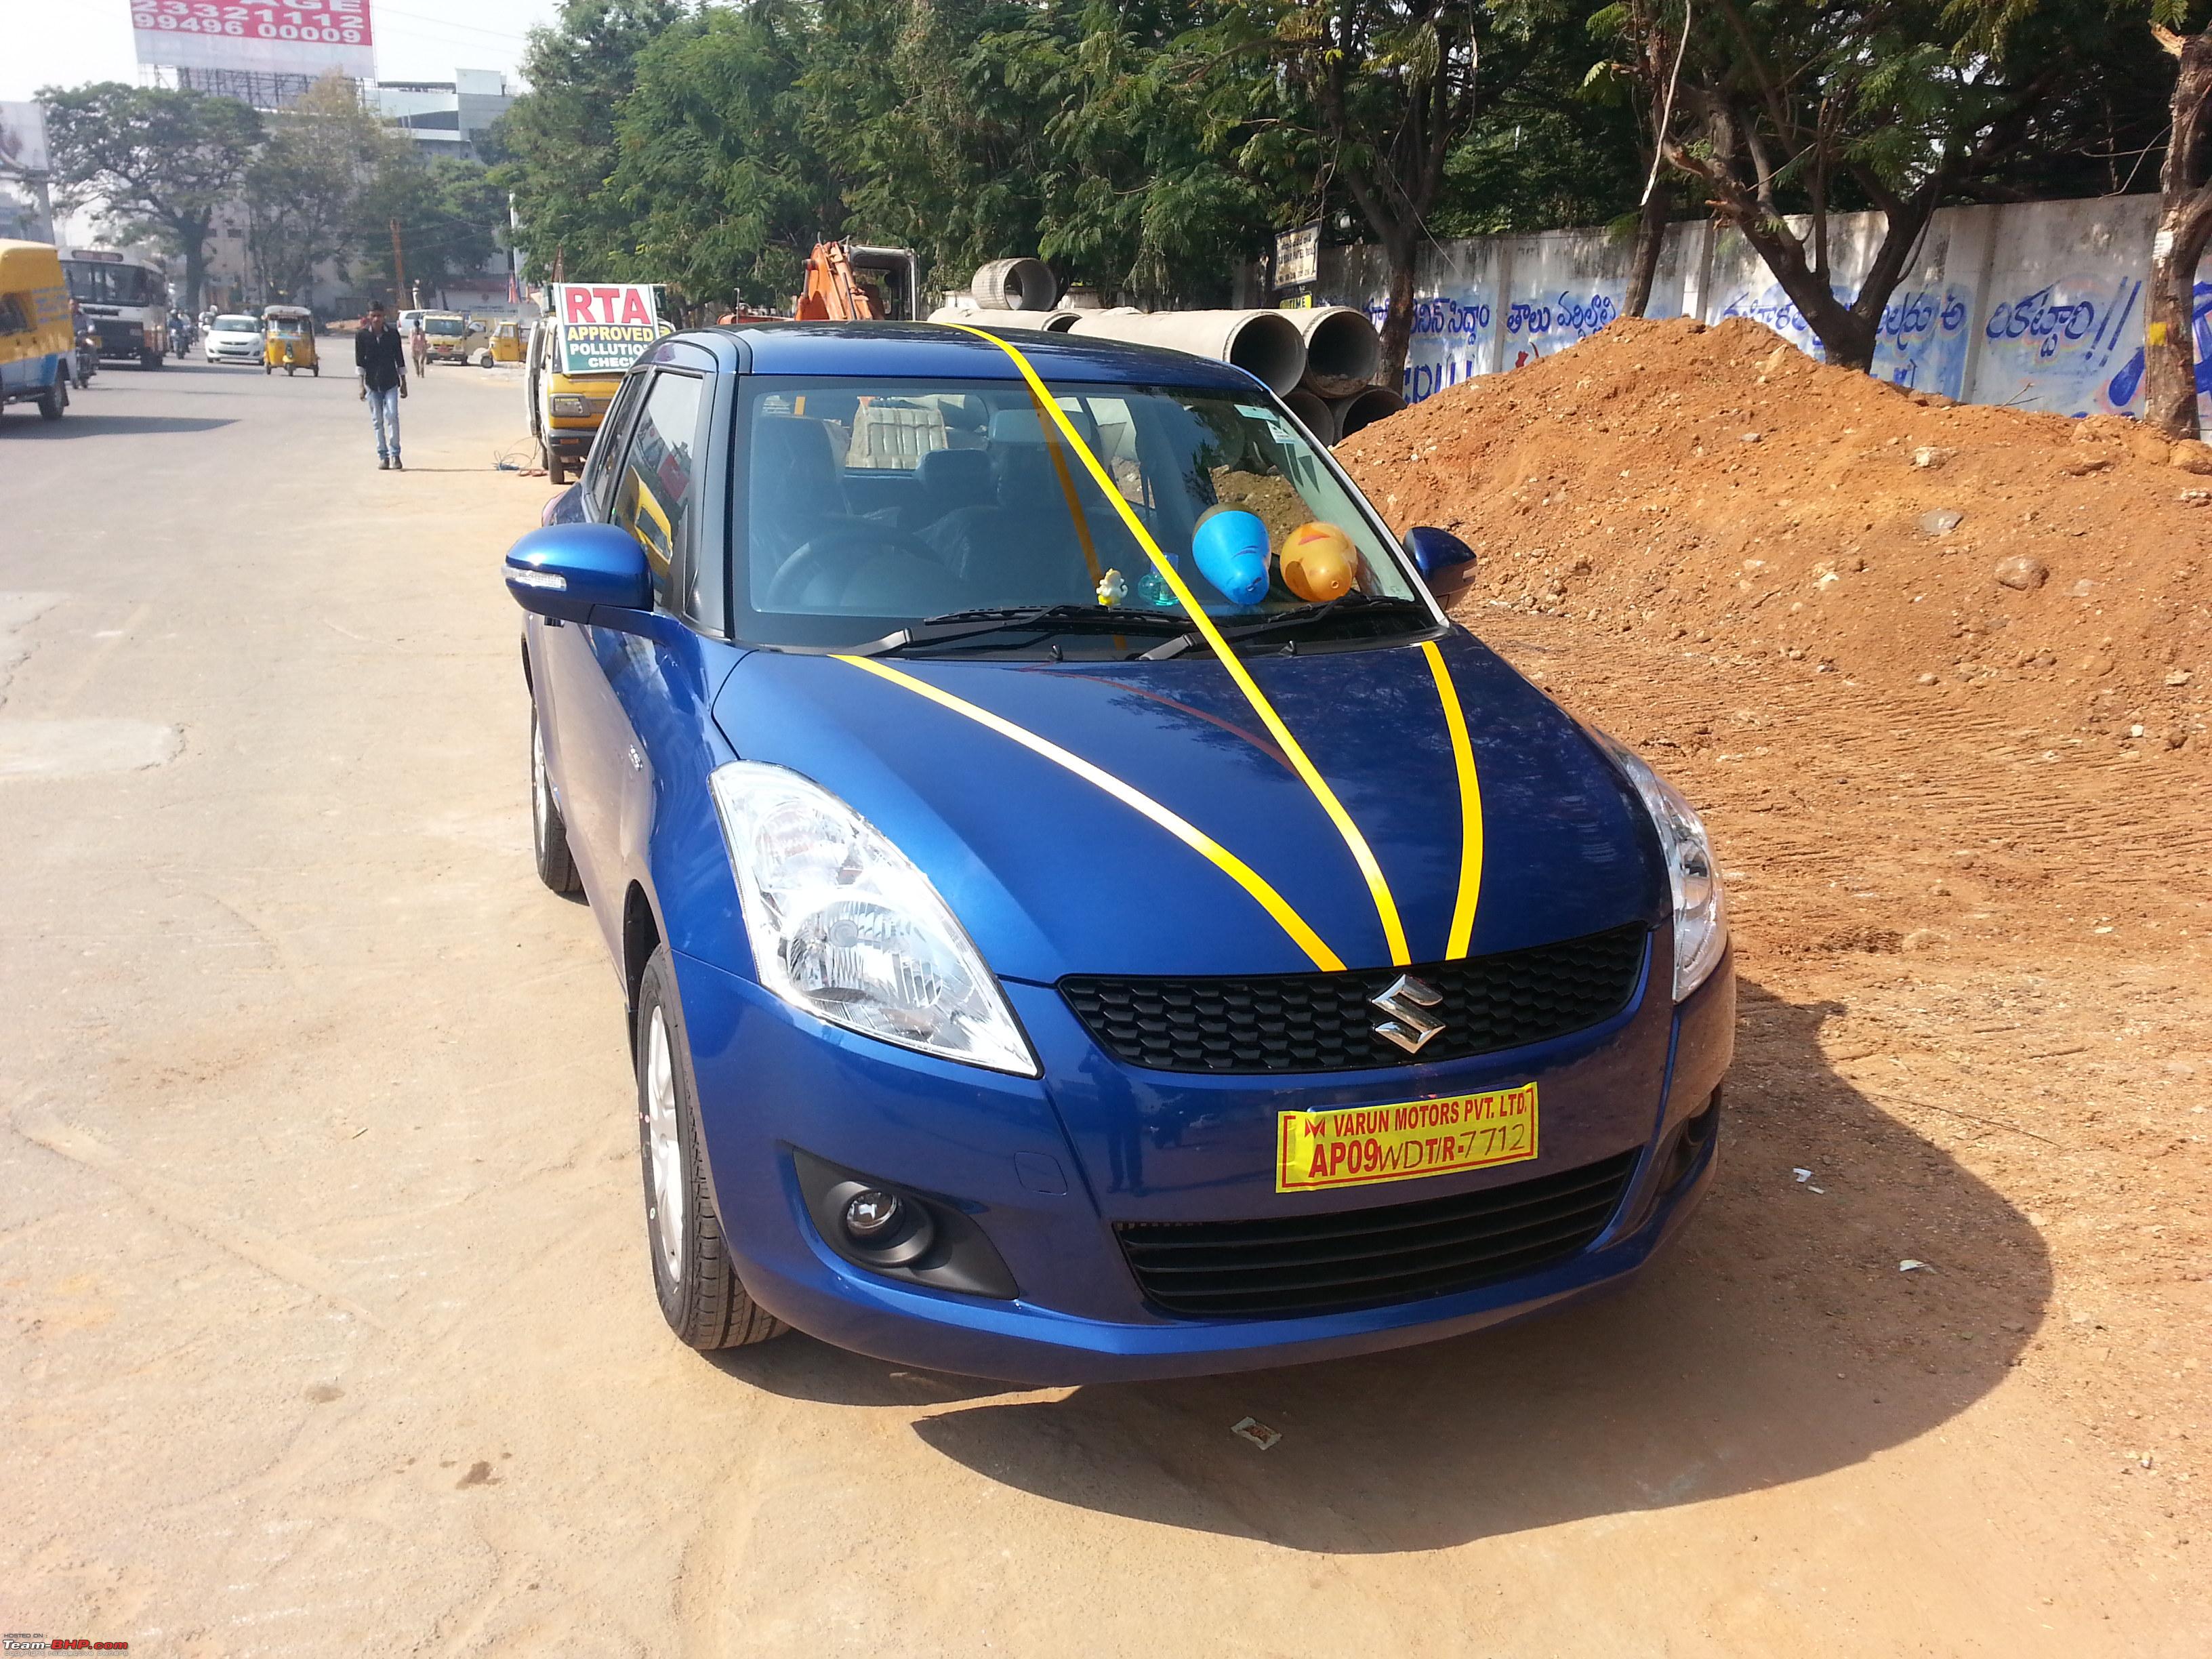
After a short gap, here's the review of the steed that took charge from my
'Blue Streak' aka Maruti Swift ZDi. The chosen candidate to fill the shoes of the Swift is the
Hyundai Creta 1.6L CRDi SX (O) in Polar White. :)
The Blue Streak....  Odometer at the time of Sale
I am not going in thorough detail by posting pictures of the smallest part in the car like my earlier reviews of the Swift, K10 etc. I'll be keeping it to the point as many seniors here have penned down their respective reviews and shown us all how the Creta is inside out. I can't match their standards.
Moderator Moralfibre has given us the best detailed review for the Creta.
Here's the link to the Official review. DBHPian Naveen.raju has the same variant as I own so for all the fine intricate details and images one can go check the review as me putting down the same will be repetitive.
Here's the link to his brilliant review. Why the sudden change and What was I looking for in my next car?
In the month of August 2017, I had suffered a lower back-related issue that got me bed-ridden for 1 month and 'no driving' for 1.5 months. Post recovery due to my heavy usage, the doctor had advised not to use low-height cars that requires me to crouch for ingress/egress and also not to prefer driving around in low seating vehicles as much as possible. This could aggravate the issue hence the need for a new car came up. Main requirement was car must be tall and should make me 'almost walk in & out' of it rather than crouching as I used in the Swift.
Choices/Options to replace the Swift ZDi
The only option in mind was the S-Cross 1.6L but thanks to Maruti's decision to discontinue the DDiS 320 in the S-Cross was a major setback to me. All I was left with now keeping my requirement of "tall body style + higher seating" were
Brezza ZDi+;
XUV 5OO W8 and
Creta 1.6L CRDi SX (O).
Brezza, a good car when viewed solely with no real negative points but a complete downer for me due to the engine (I have had enough of the DDiS 190/200 engine now).
XUV 5OO was the best fit here for me but the 2nd and 3rd row would never be put to use hence had to strike this car off the list. Last and the only option I had was the
Creta 1.6L CRDi which is what I got at the end too.
Here's the summary of the booking details taken from
"I Booked My Car Thread!" Quote:
Make : Hyundai
Model : Creta
Variant : SX (O)
Fuel : Diesel
Booking Date : First booked on 30.08.2017. Cancelled and re-booked on 23.09.2017 at another dealership.
Color : Polar White
Expected Delivery Date : 1 month.
Freebies : Floor Mats, Mud Flaps
Price : ₹ 17.20 lakhs OTR (Post the 7% Cess Hike)
Booking Amount : ₹ 25,000/-
Dealership 1 : Saboo Hyundai, Trimulgherry (Cancelled after 23 days);
Dealership 2 : Lakshmi Hyundai, Himayatnagar
City : Hyderabad
|
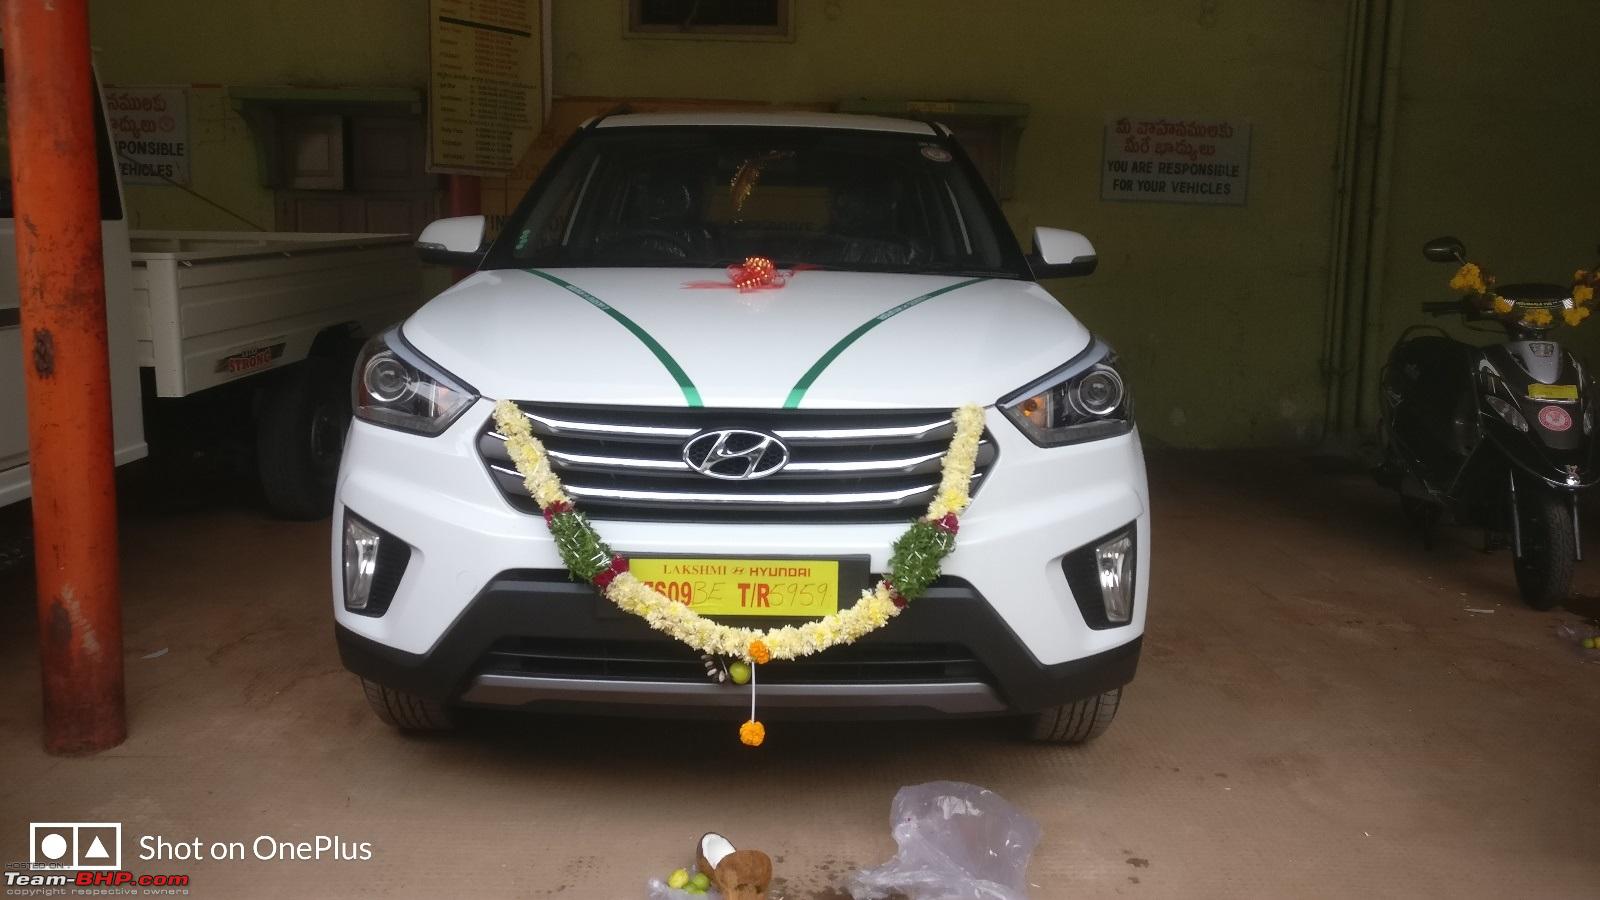
After all that wait of almost 50+ days, got the delivery finally on 18.10.2017 @ 15:00. VIN decode done and found it to be
October 2017 manufactured (Fresh from the oven, literally). Same was checked for the Bridgestone tyres which were having the DOT code - "40 17" meaning 40th week of 2017 i.e. anytime between 2nd to 8th October.
So here she is:
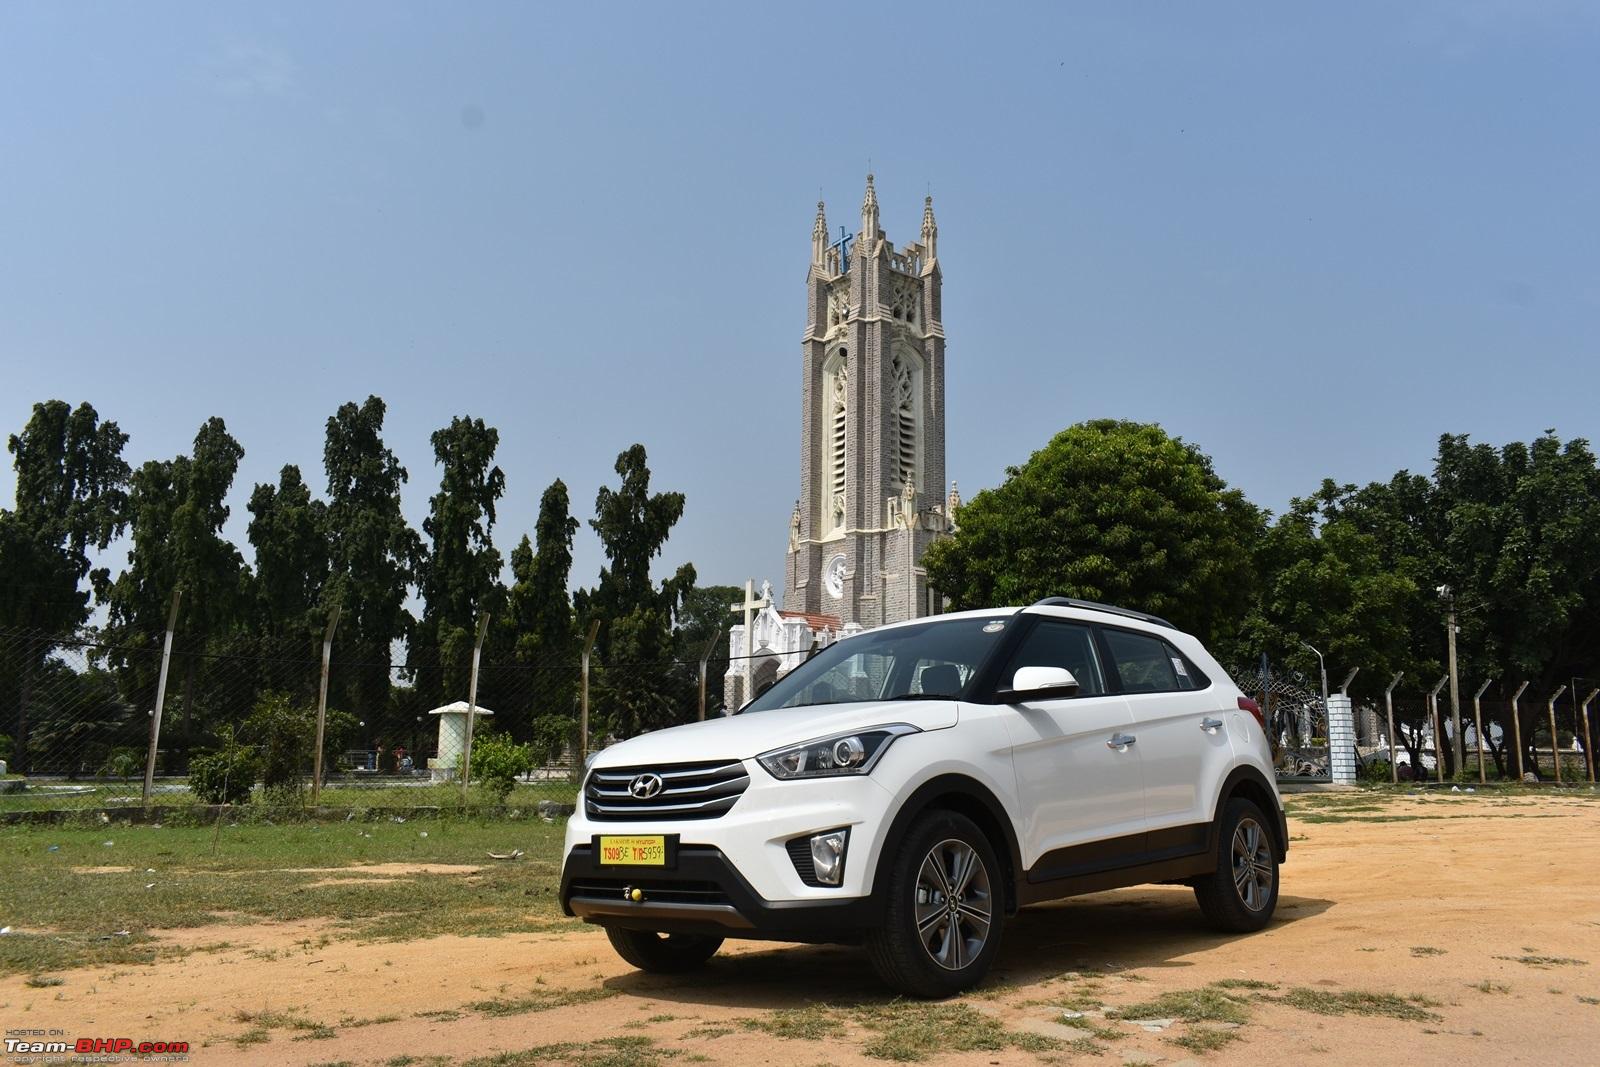
Hyundai Creta 1.6L CRDi SX (O) in Polar White At the time of Delivery  At the temple for blessings from the Almighty
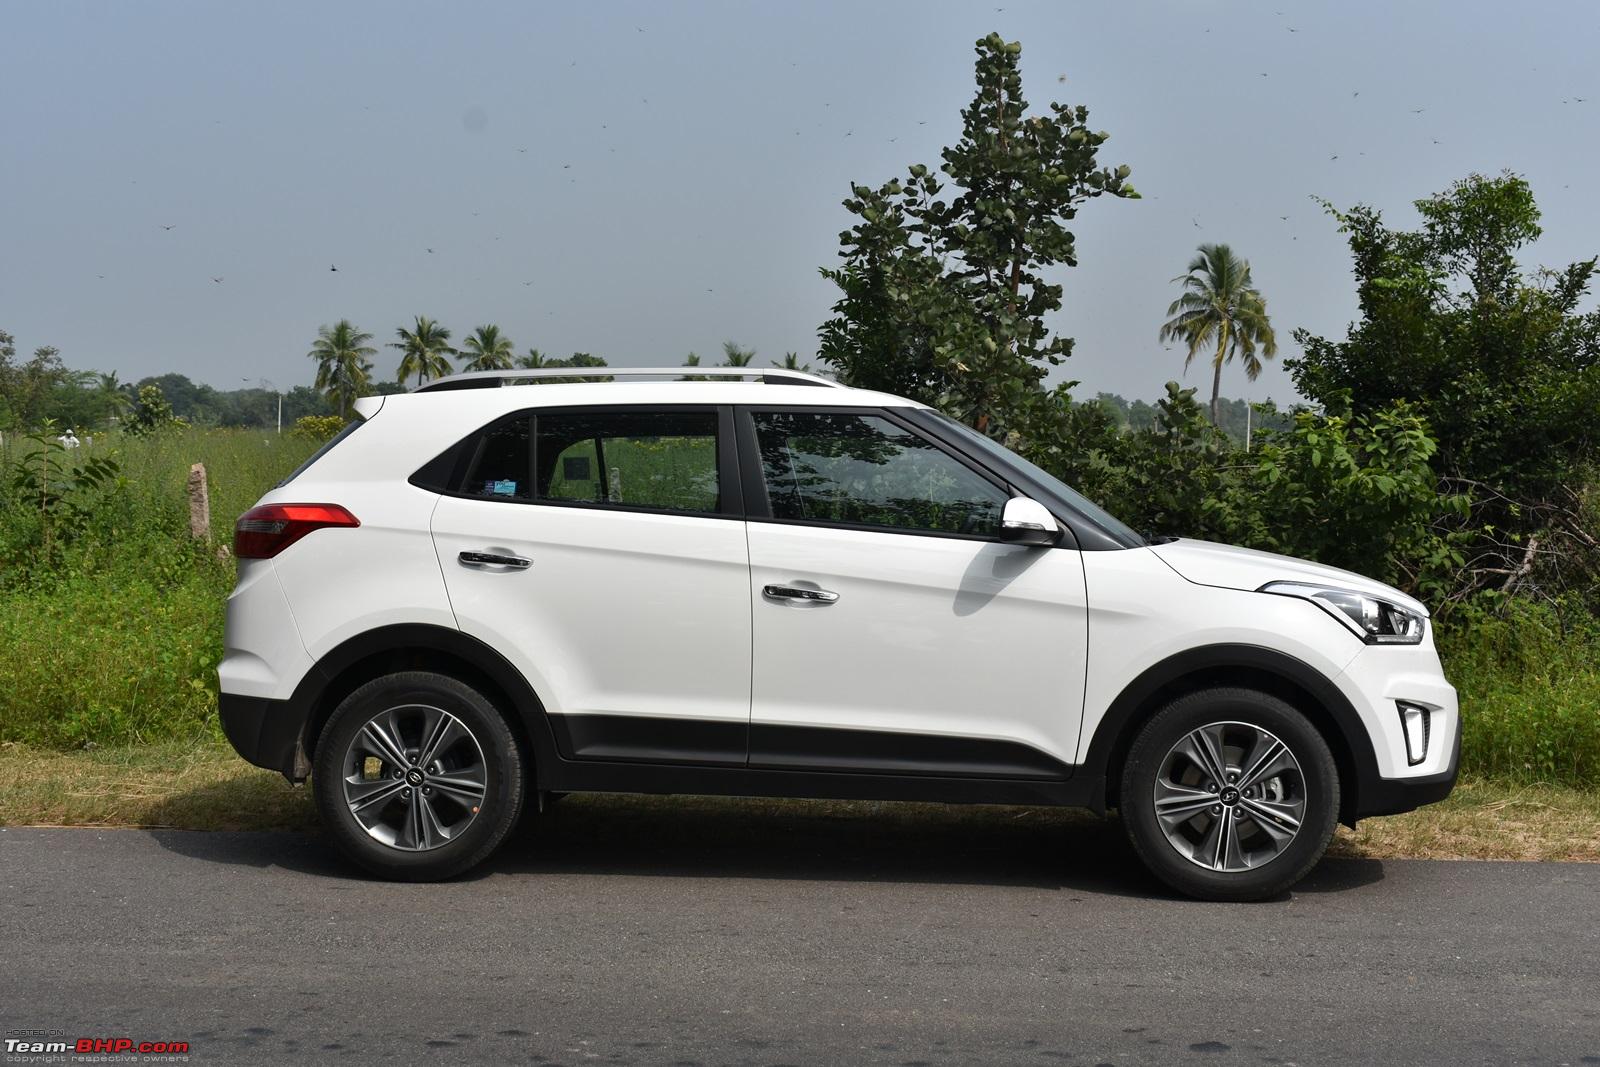
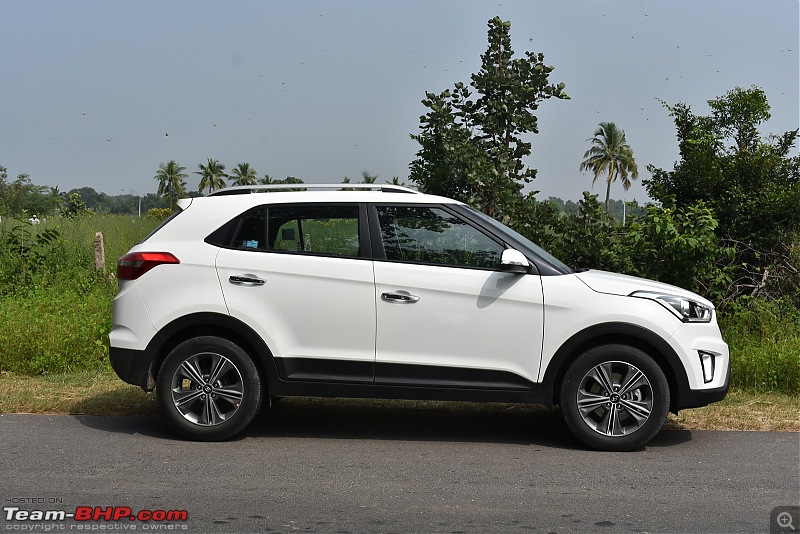
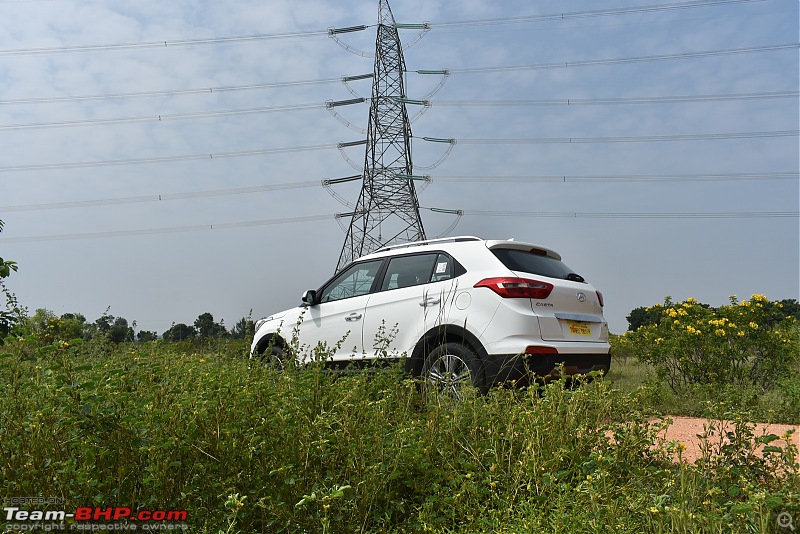
Polar White colour, IMHO, is the best shade on the Creta which brings out the characteristic lines and makes it look like an SUV and moreover this is the most popular choice of colour by the masses too as seen on roads.
Price Breakup Ex-Showroom: ₹ 14,52,095
1 % TCS: ₹ 14,521
Insurance (0-Dep): ₹ 54,423
Life Tax (@ 14%): ₹ 2,03,300
4th Extended Warranty: ₹ 12,956
Grand Total: ₹ 17,37,295
Price received for the Swift ZDi: ₹ 4,30,000
Net Amount paid: ₹ 13,07,295
In the excitement of the new car, I had totally forgotten about the 1% TCS that was charged at the time of purchase and the same should have been updated against my PAN. I realised it lately on the December 11th and checked the Form 26AS. To my surprise, I see the entry in
Part B under section
206CL, ₹14,521 was collected. Happy about it as the SA did his job promptly without the need for reminders from my side. I see some BHPians haven't received the updates on the 1% TCS entry in their respective Forms.
Other point that I want to highlight is the 4th year extended warranty. Hyundai from the factory provides a coverage period of
3 years or unlimited kilometers, whichever is earlier from the date of purchase.. When I received the extended warranty document from my dealership I was both awe struck and confused. It stated that the warranty is applicable for
4 years or 80,000 kms whichever is earlier from date of purchase. I may be wrong but I was under an impression that the
unlimited kilometers part would remain constant and the addition would be an extra year of coverage for which the ₹12,956 were being charged. Attaching the prices for parts covered (apologies as it is not clear, please zoom in for better read-ability).
PS: The odometer at the time of writing this review was at 16,000 kms.
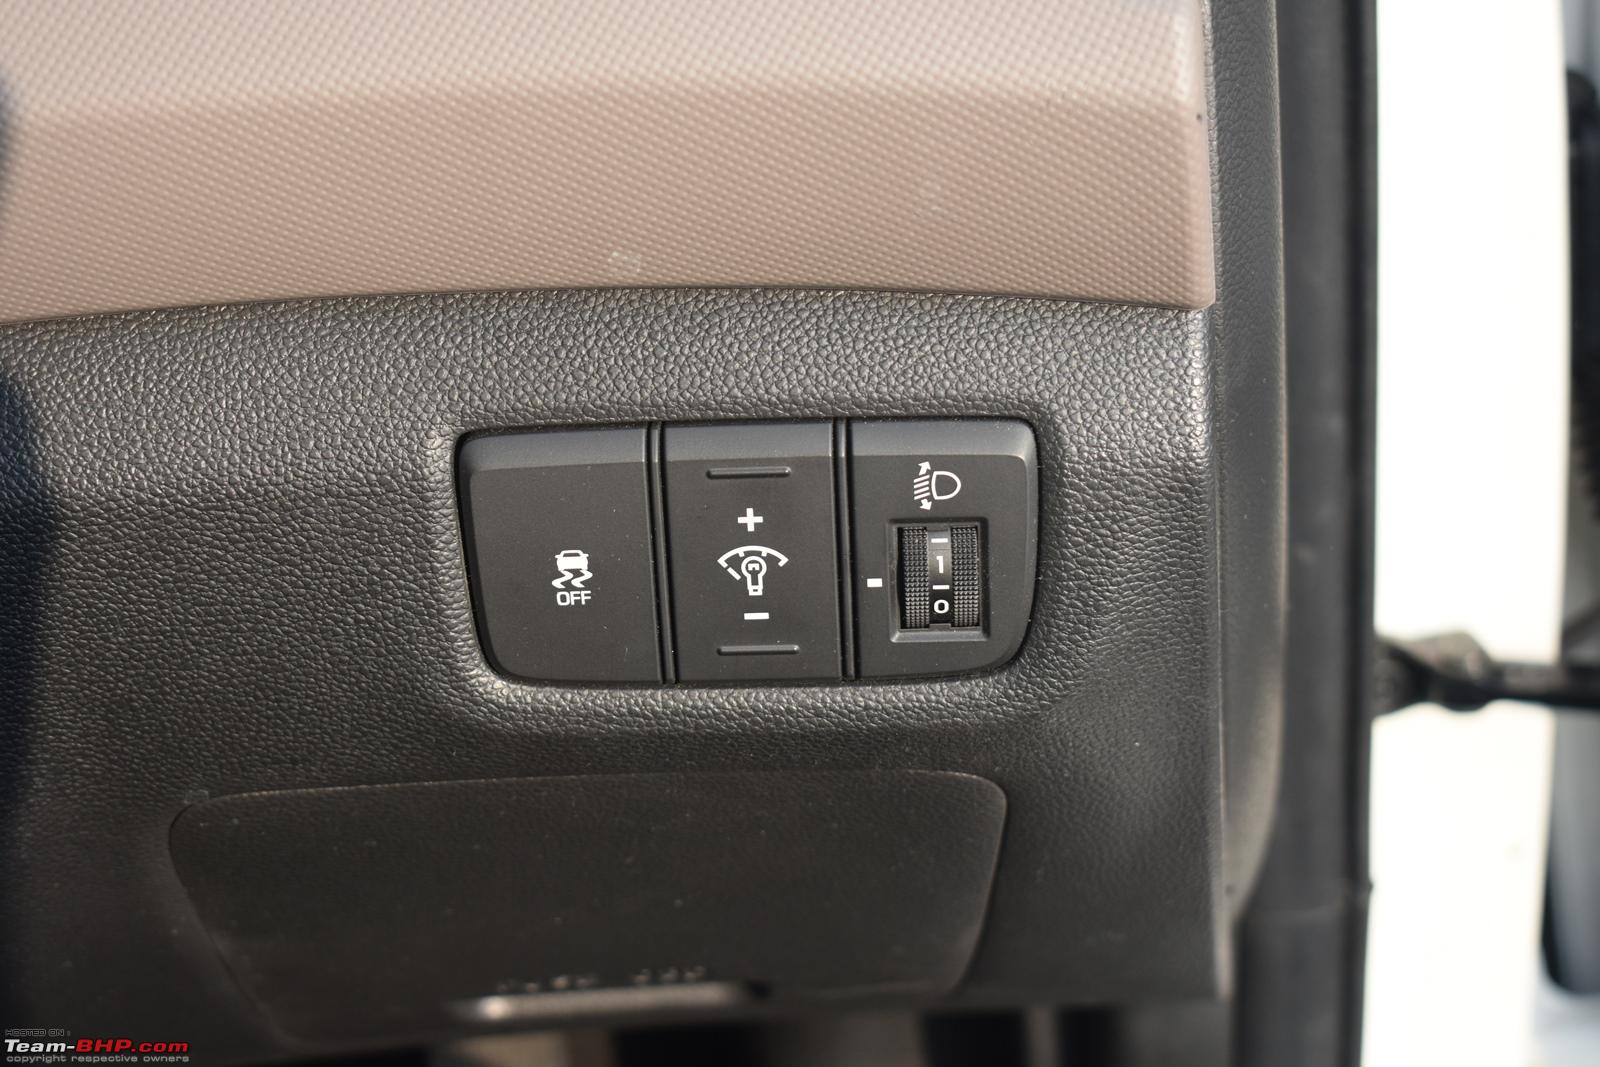
What I like about the car: - Safety Quotient (6 airbags, ABS, TC, Hill-hold assist)
- NVH levels
- Engine refinement.
- City drive-ability and in-gear acceleration
- QUALITY of materials used in the car
- Fit and finish, no rattles so far in 16,000 kms
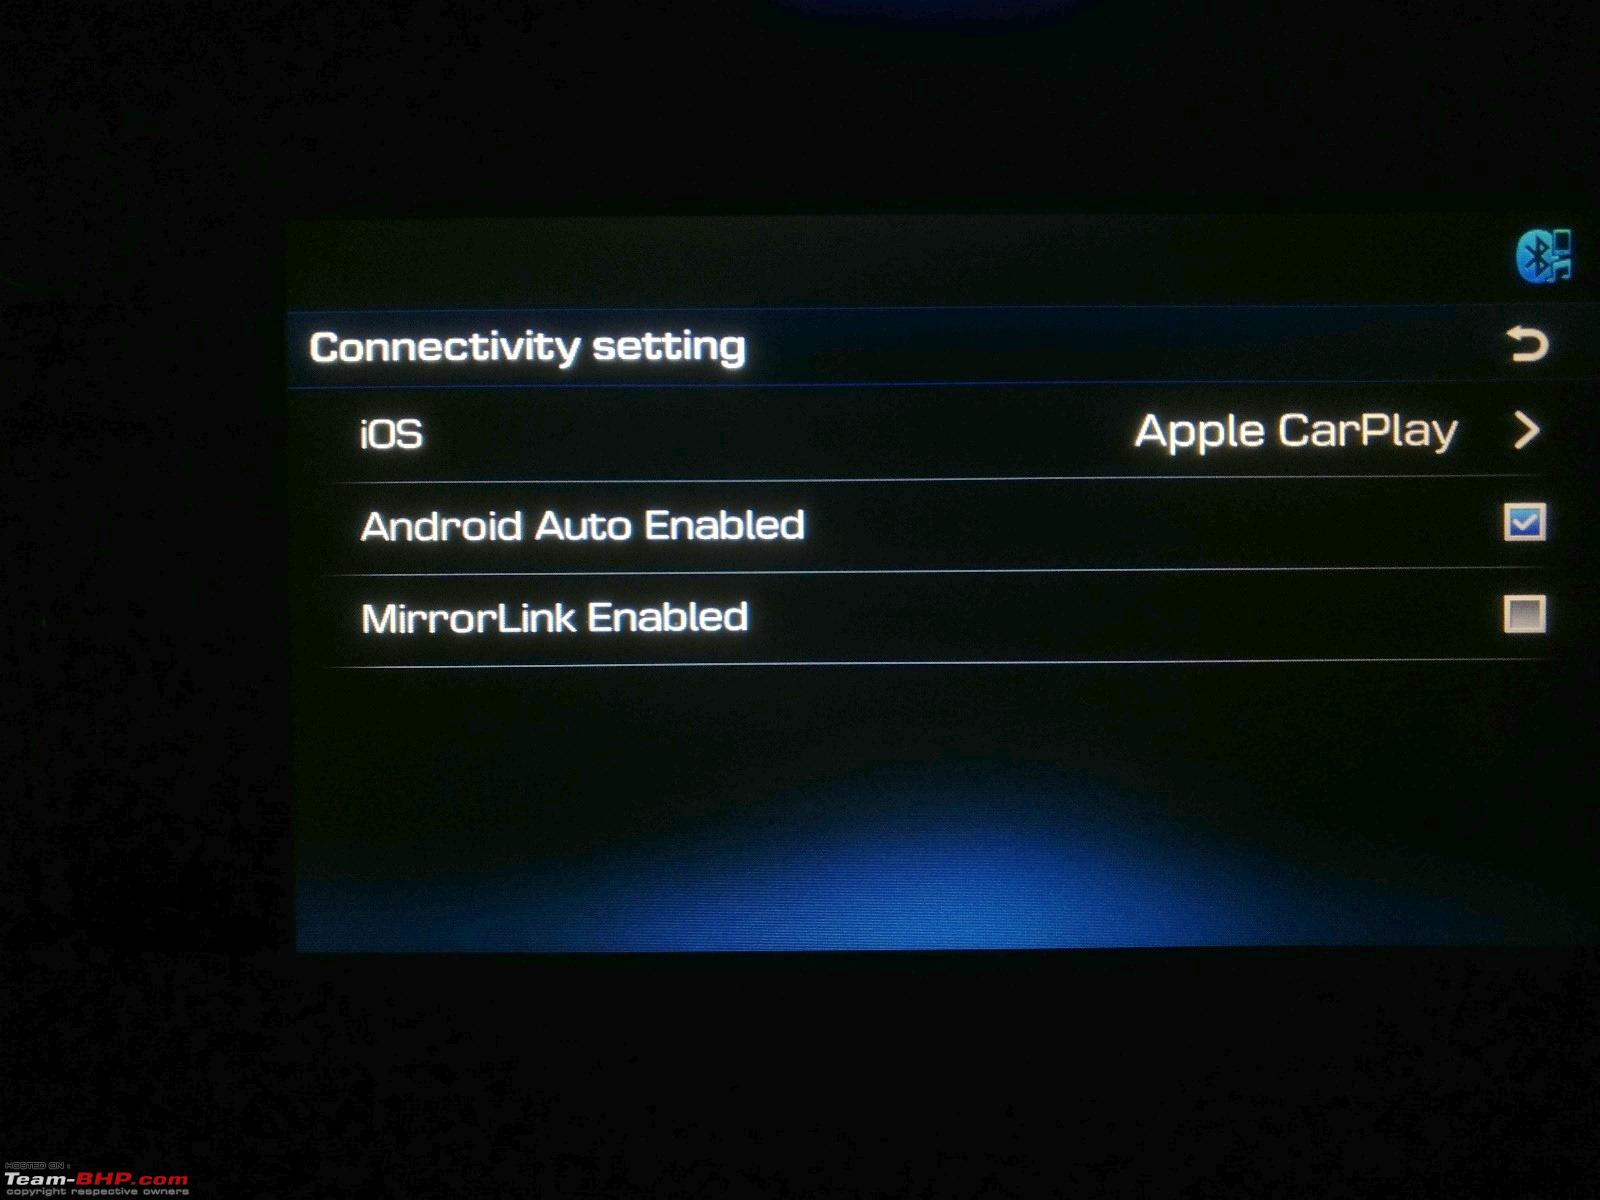
- Android Auto function.
- Cornering light
- Powerful horn
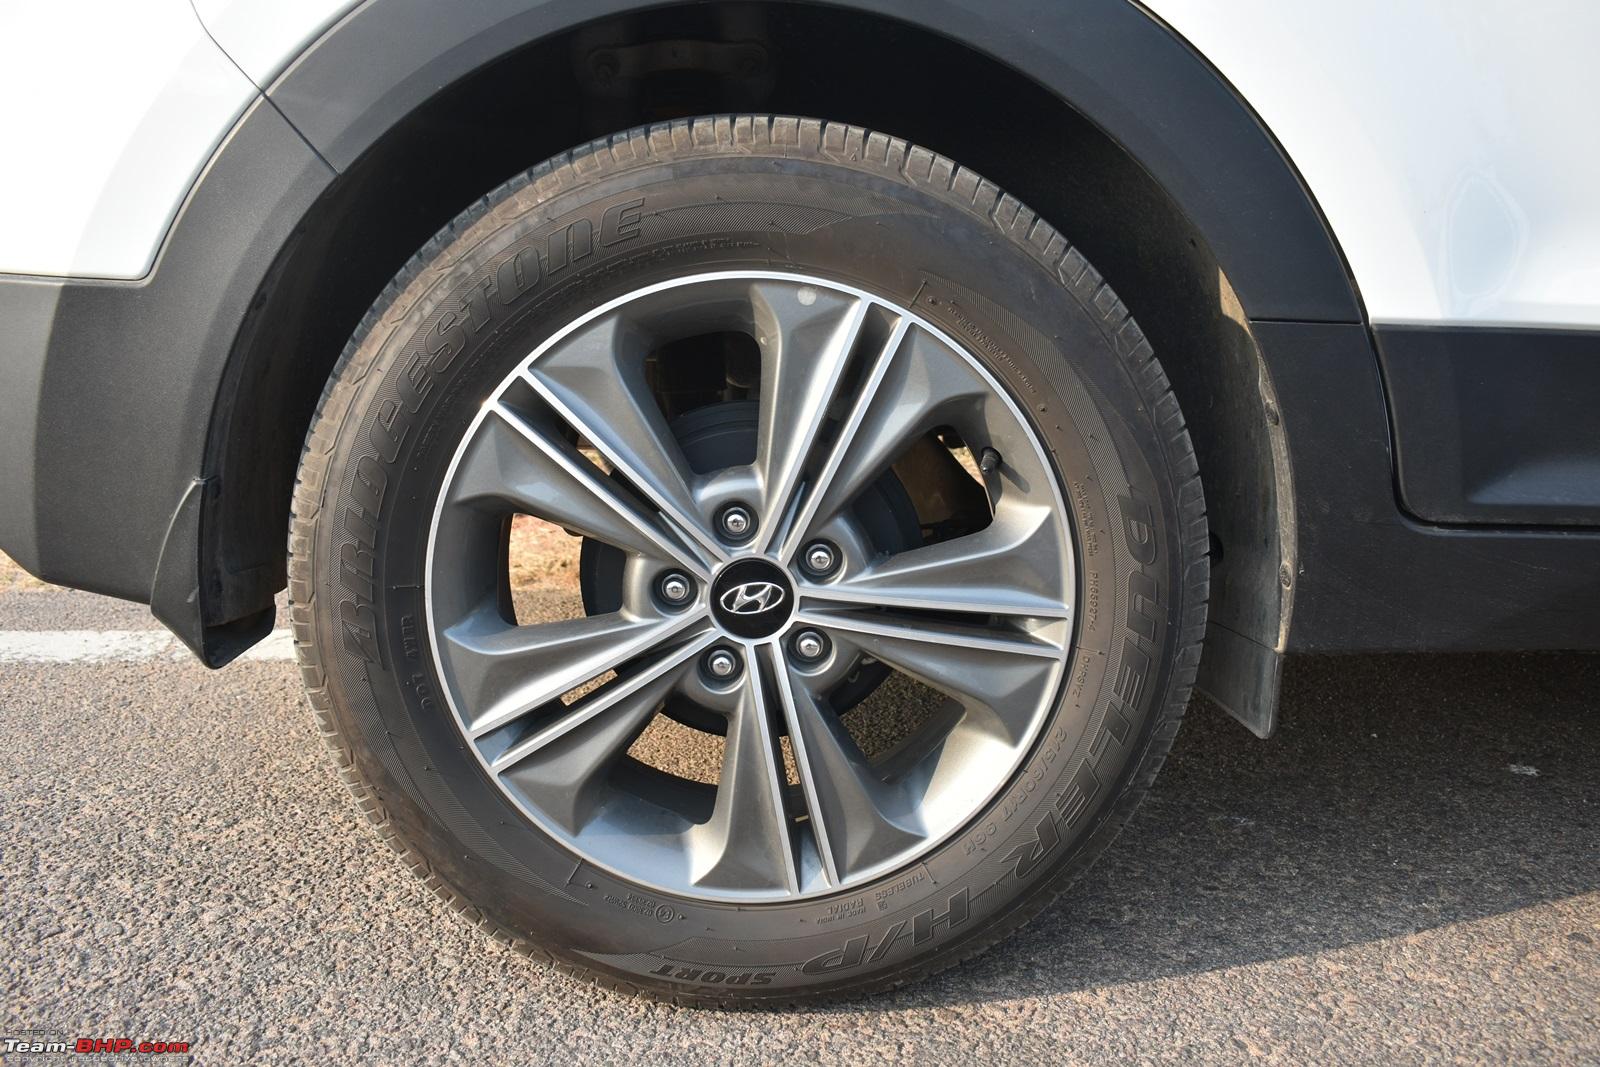
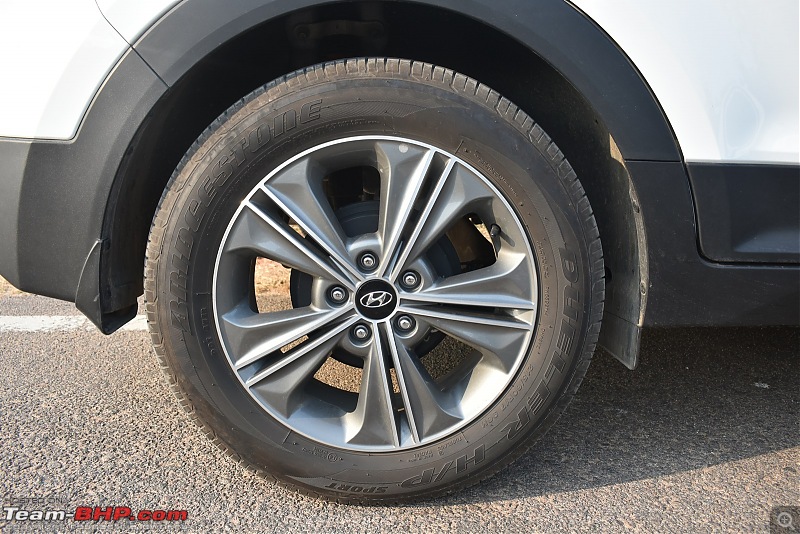
- Overall looks of the car with the 17" alloys
What could have better: - Brakes
- Gear Ratios especially the 6th, want it a bit more taller
- Hood insulation
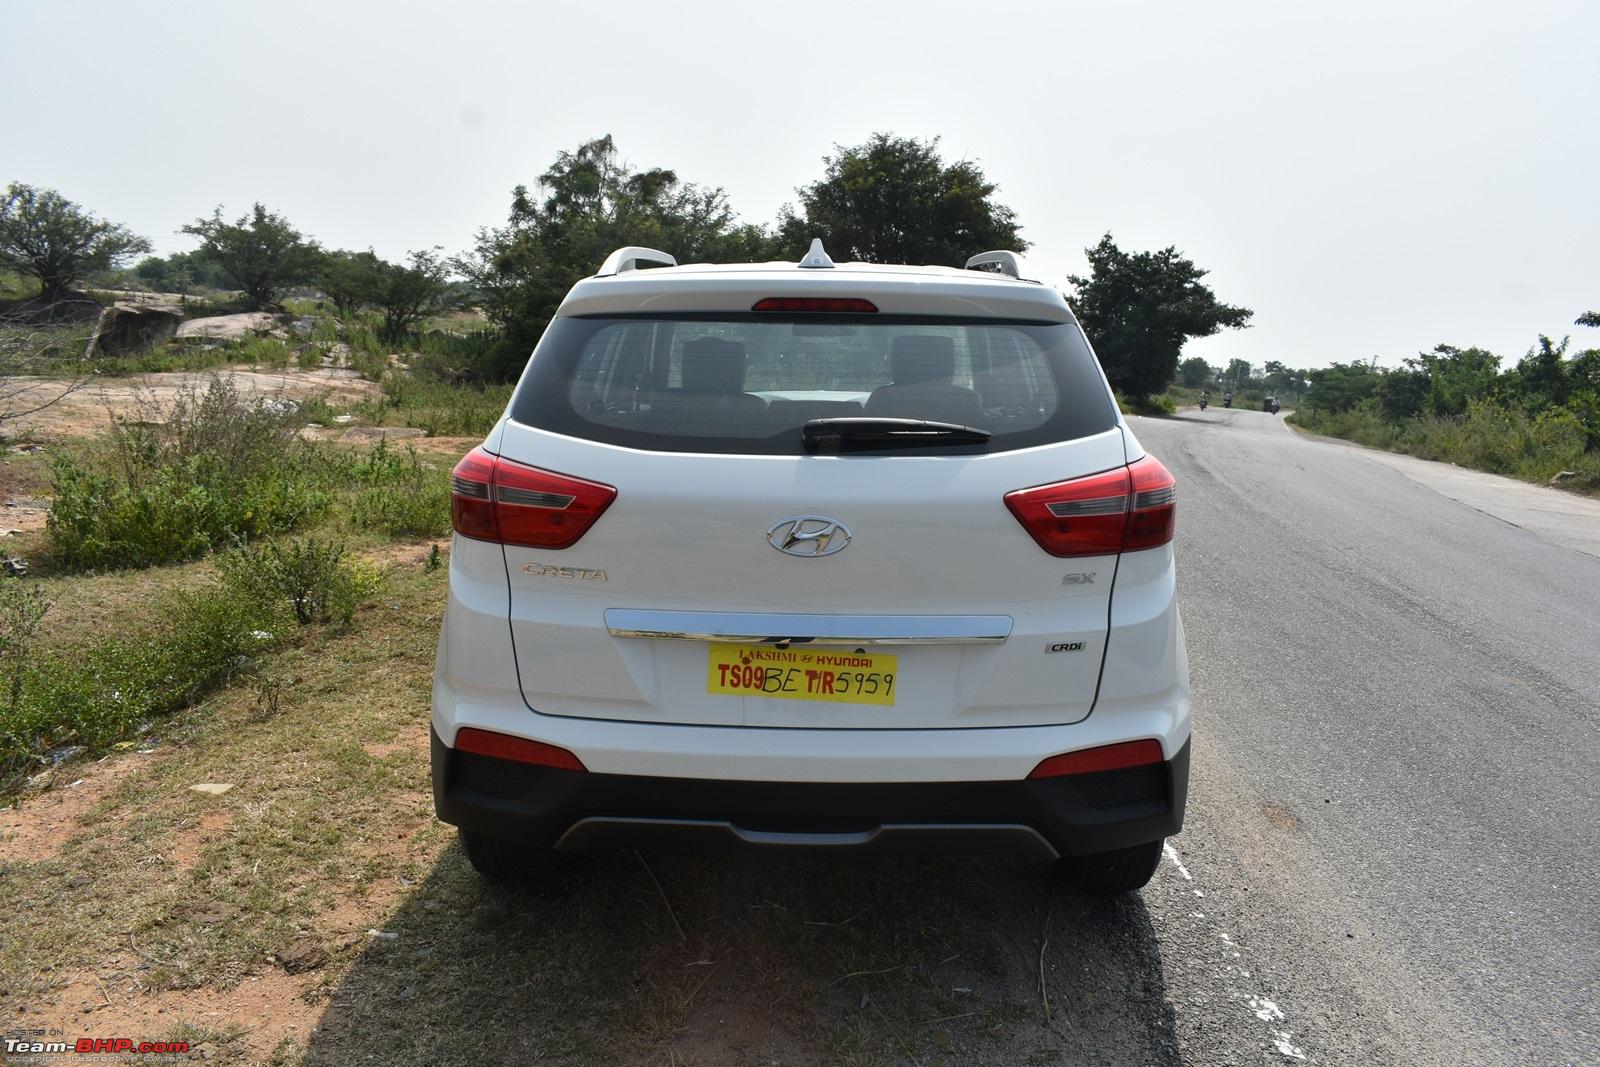
- Design of the Tail light. Find it plain and boring.
What I hate about the car: - Head unit :Frustrati (wish I could use more of this smiley's)
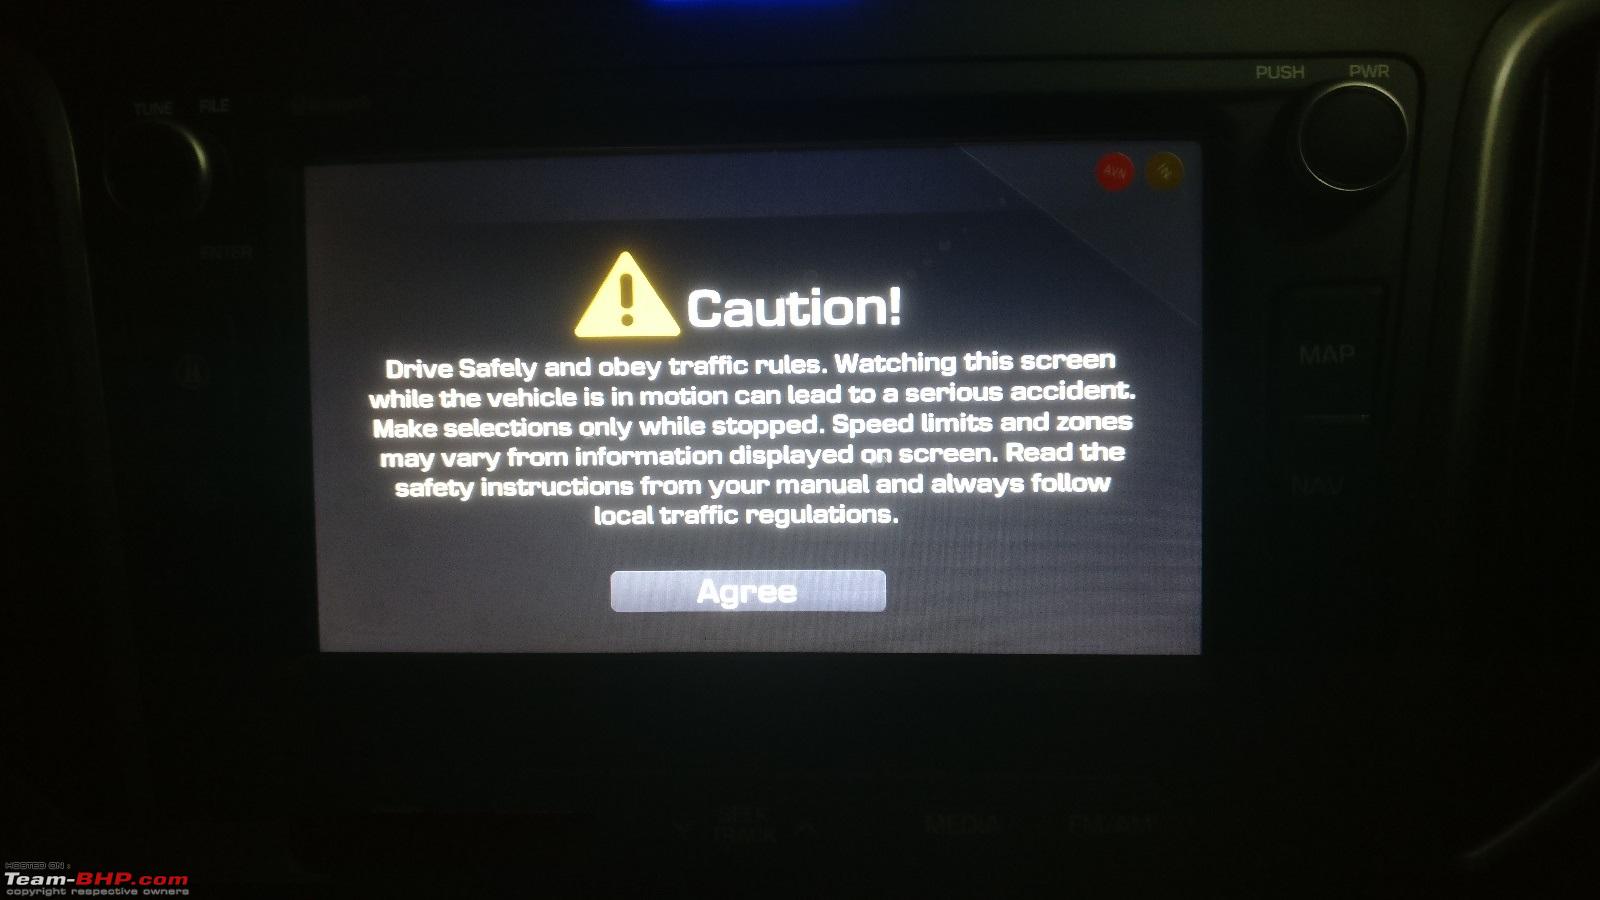
- 'Agree' screen when HU is switched ON
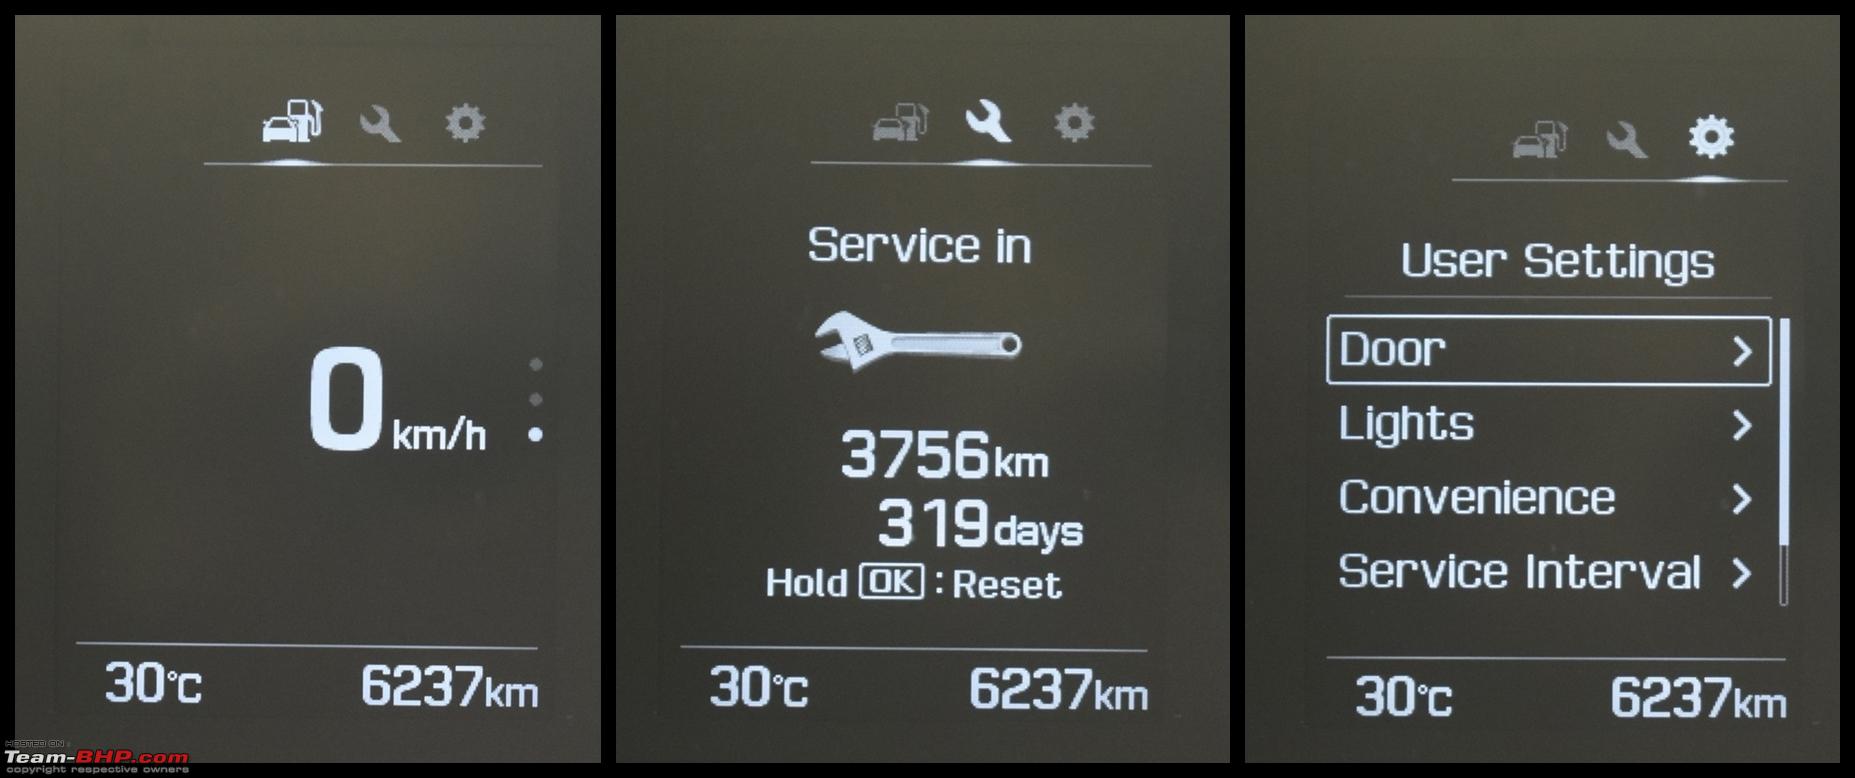
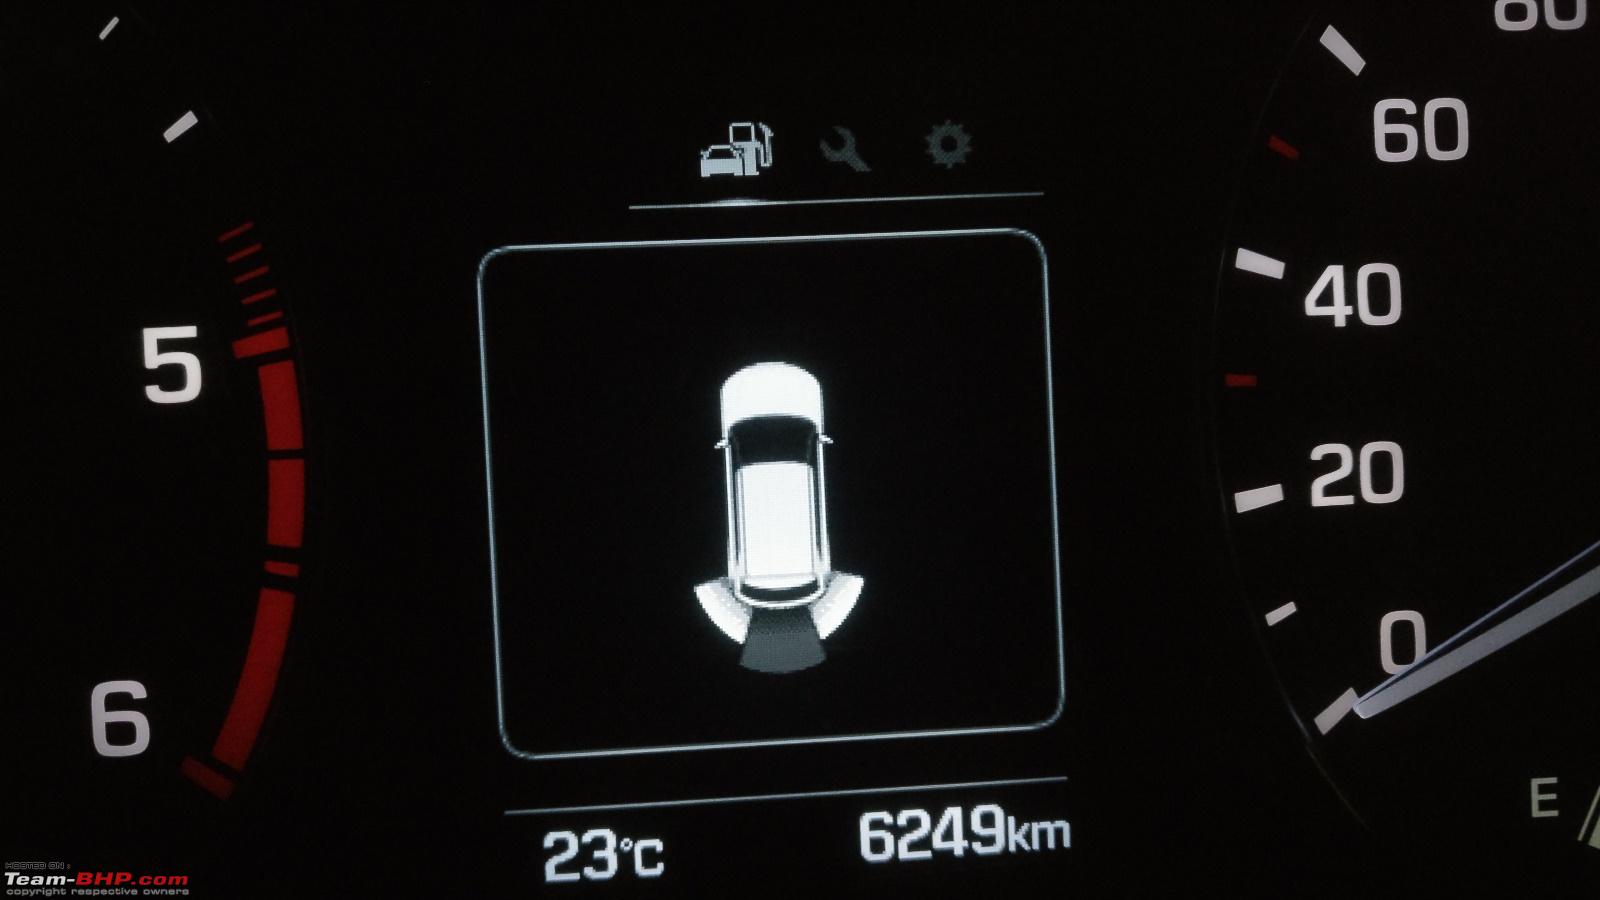
- Lack of Fuel Efficiency details
- Lack of Cruise Control
- Spare wheel is a steel one and not Alloy as given in initial batches.
Comfort & Ergonomics
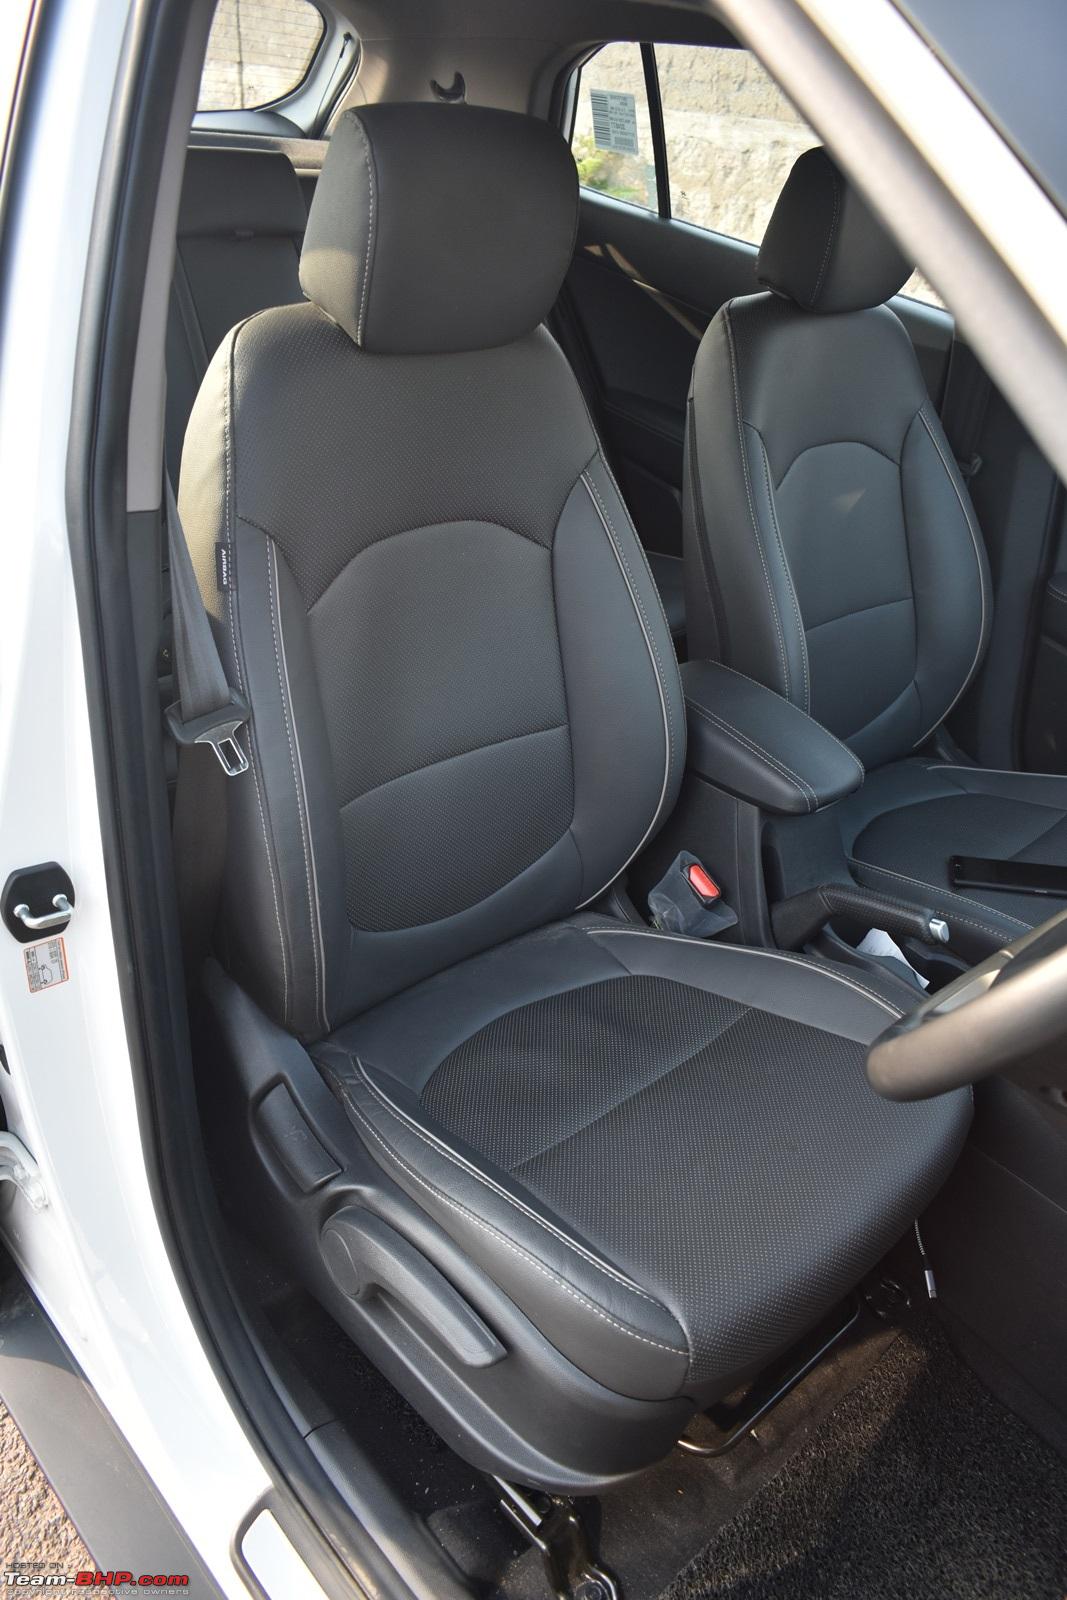
A very important point and the whole purpose for the car change to happen this early. To put in short I am mighty impressed with the seats and comfort it gives me.
Compared to the Swift, Creta's seats are slightly larger in size with good cushioning and bolstering. Love the way the seat hugs from sides near the ribs area and part of the lower back. I have done 600 kms continuous highway without break in the car and never did I feel tired. Pretty happy with the decision to get the Creta as it hasn't disappointed me in any way.
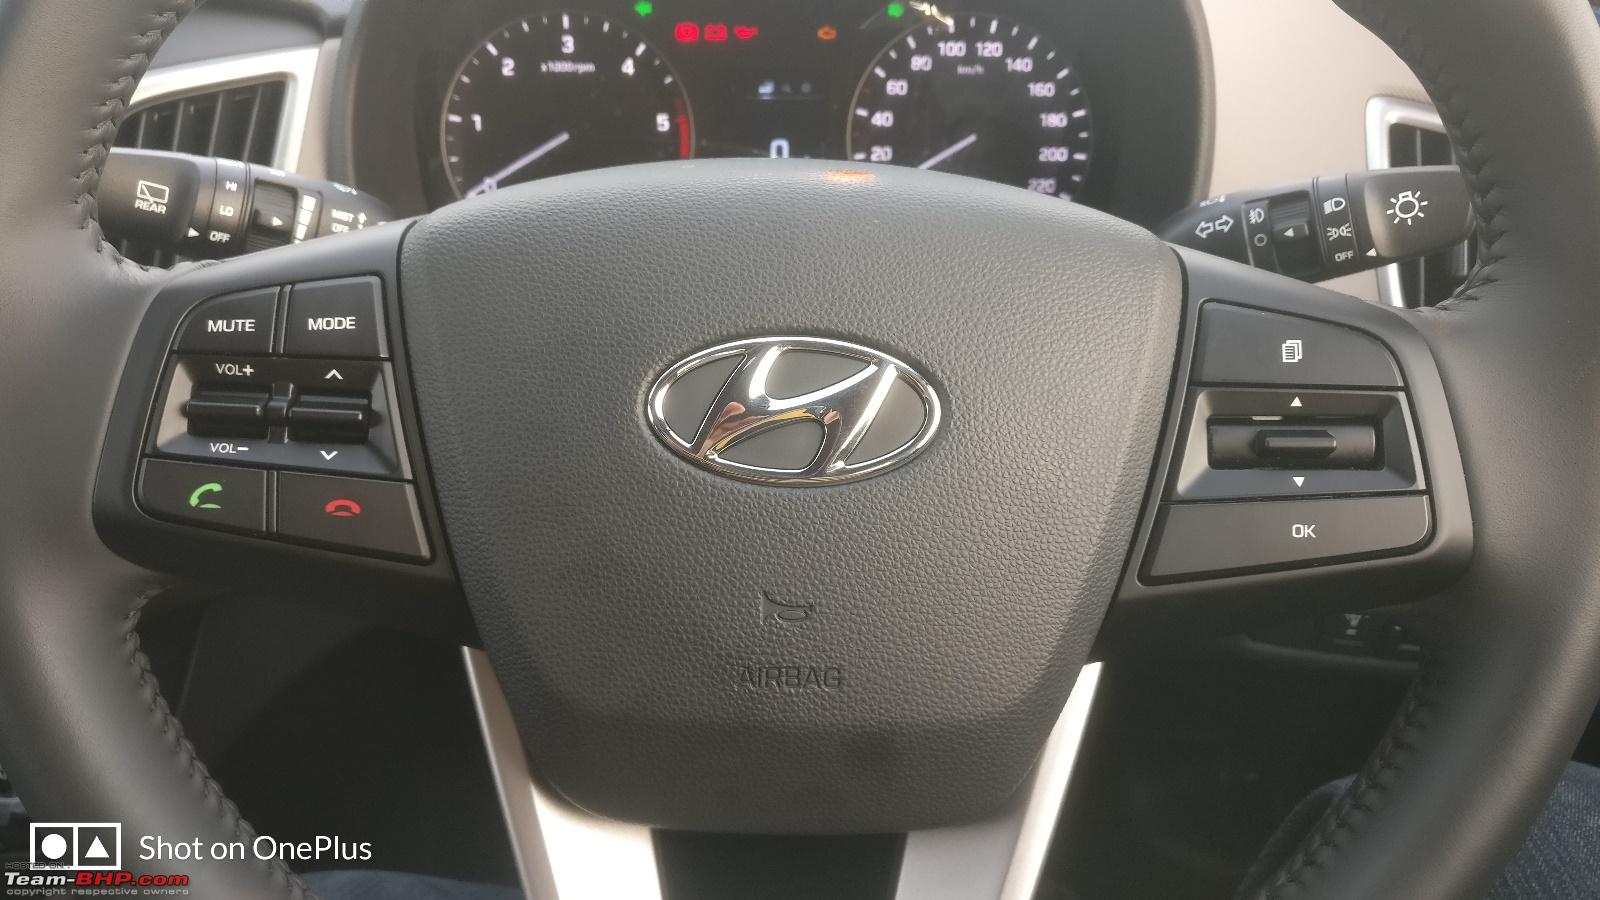
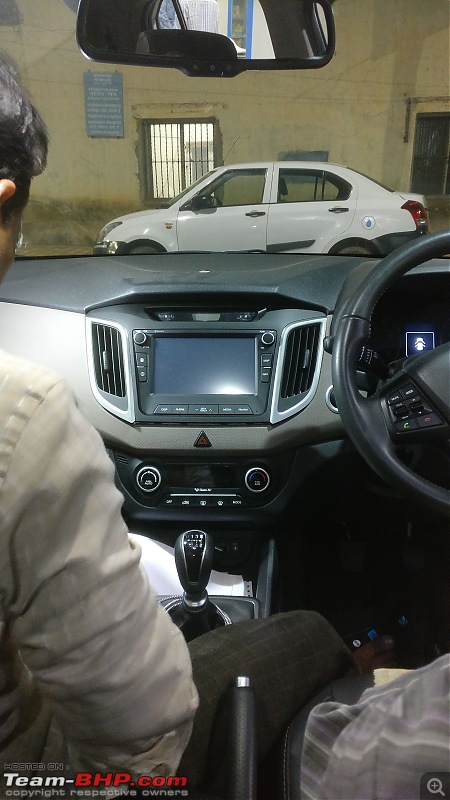
From the point where the seat is adjusted, all buttons, controls fall in place without the need to stretch. I can shift gears by having my elbow rested on the armrest. Large glass area makes it bright inside with IRVM and ORVM helping rearward visibility even better. Only in tight spots I need to use the reverse camera/sensors but otherwise the ORVM are enough.
Engine & Gearbox
If the 1.3L MJD is a master stroke from Fiat then the 1.6L U2 CRDi is the same from Hyundai. One of the best engines I have driven apart from the 1.3L MJD.
From a 74PS & 190Nm to a 126PS & 260Nm spec engine, the transition was nothing sort of brilliant for me. The 74PS engine in the Swift performed its best and I got the same feel in the Creta with it's 126 PS engine. The engine comes to life without much vibration but while switching off it does vibrate the cabin a bit.
With a short gearing that the Creta has this engine coupled, makes city driving a breeze. Keep speeds above 5 kmph, 2nd gear cleanly pulls the car with no vibrations or judder. What I don't like is when on the highway say at 100 kmph in 6th gear, the RPM hovers at 2100 whereas the same in my Swift @ 100 kmph in 5th gear it was at 2300 RPM. May be motto of the engineers was 'no/very minimum lag during city or highway driving', such short gearing was designed for the Creta. The S-Cross @ 6th gear at 100 kmph does it at 1750 RPM this makes it a silent cruiser on the highway.
1st to 3rd gearing is too short for my liking with the 1st gear being the shortest and craziest. I am always careful to avoid 1st gear as much as possible especially in heavy traffic (if speeds are above 5 kmph, I stay in 2nd gear). 4th gear is the best for relaxed city cruising, be it as low as 35 kmph too, no strain/lugging, it pulls cleanly and 1500 RPM onwards, the car becomes a sprinter with that 'push-into-the-seat' effect.
Coming to the gearbox, it took me a few days to realize that the car has a
6th gear too. stupid: Same goes for the reverse gear location in the Creta, beside the 1st gear. Though notchy, it irritates to fall in place in the first try. Hopefully should smooth out with time. Gears slot smoothly and the gear lever feels premium to hold while using.
Another part that I have liked is the way the engine is mounted as compared to Swift. The intake manifold is placed in the front whereas the exhaust manifold is facing the firewall that will make my life easier when I go for EGR + intake manifold cleaning in future. I could clean the EGR only in the Swift due to the inaccessible condition of the intake manifold in the Swift's engine.
Ride & Handling
Tight handling but not near as my Swift. I am not comparing both cars directly because the Creta is a tall body C-SUV whereas the Swift was a road hugging hatchback that went around corners very well. The Creta doesn't disappoint one bit but I can't take corners at the speeds like how I did in my Swift. The current state of tune on the suspension makes the Creta feel it is a larger hatchback and not a C-SUV, very composed and planted on bad patches or smooth tarmac (like the ORR in Hyderabad).
The car runs on a 17" alloy (6.5J x 17") on Bridgestone Dueler HP Sport (215/60 R17). Front suspension duty done by McPherson Strut setup and rear is the regular Torsion beam which again is another similarity when compared to the Swift.
Have tried 33psi, 34psi and 36 psi all around but felt 34 psi the best that gives me comfort over both good and bad roads plus the required handling too. I also follow the ritual of wheel balancing, alignment and rotation every 5,000 kms at MRF T&S Centre. At 34 psi the ride isn't back-breaking on bad roads but does toss you around slightly. 1 puncture so far in 16,000 kms. I like the tyres on the Creta and thinking to keep it stock and not up-size when
going for a change when this set wears out.
Brakes
Coming from the Swift, the brakes on the Creta are NOT up to the mark especially at highway speeds (above 90 kmph). Again it is the same setup as my Swift (Front = Discs & Rear = Drums).
At city limits, it is sharp and spot-on but as speed increases, brakes feel lazy to kick-in. I have had 3 close encounters with animals on the ORR but sheer luck I could save myself from a nasty outcome. I have decided that I will upgrade the brakes to something better and this shall happen soon. Yes, this is a common complaint that I have seen in reviews and also when I spoke to customers that I met at the ASC. Hyundai is all deaf ears to this and thinks we don't know how to drive. Hopefully the face-lift will have this addressed.
Features
6 Airbags, TC, Hill hold assist, passive key-less entry, 7" navigation HU, Reverse cam + parking sensors are some of the features that I have gained with respect to the Swift.
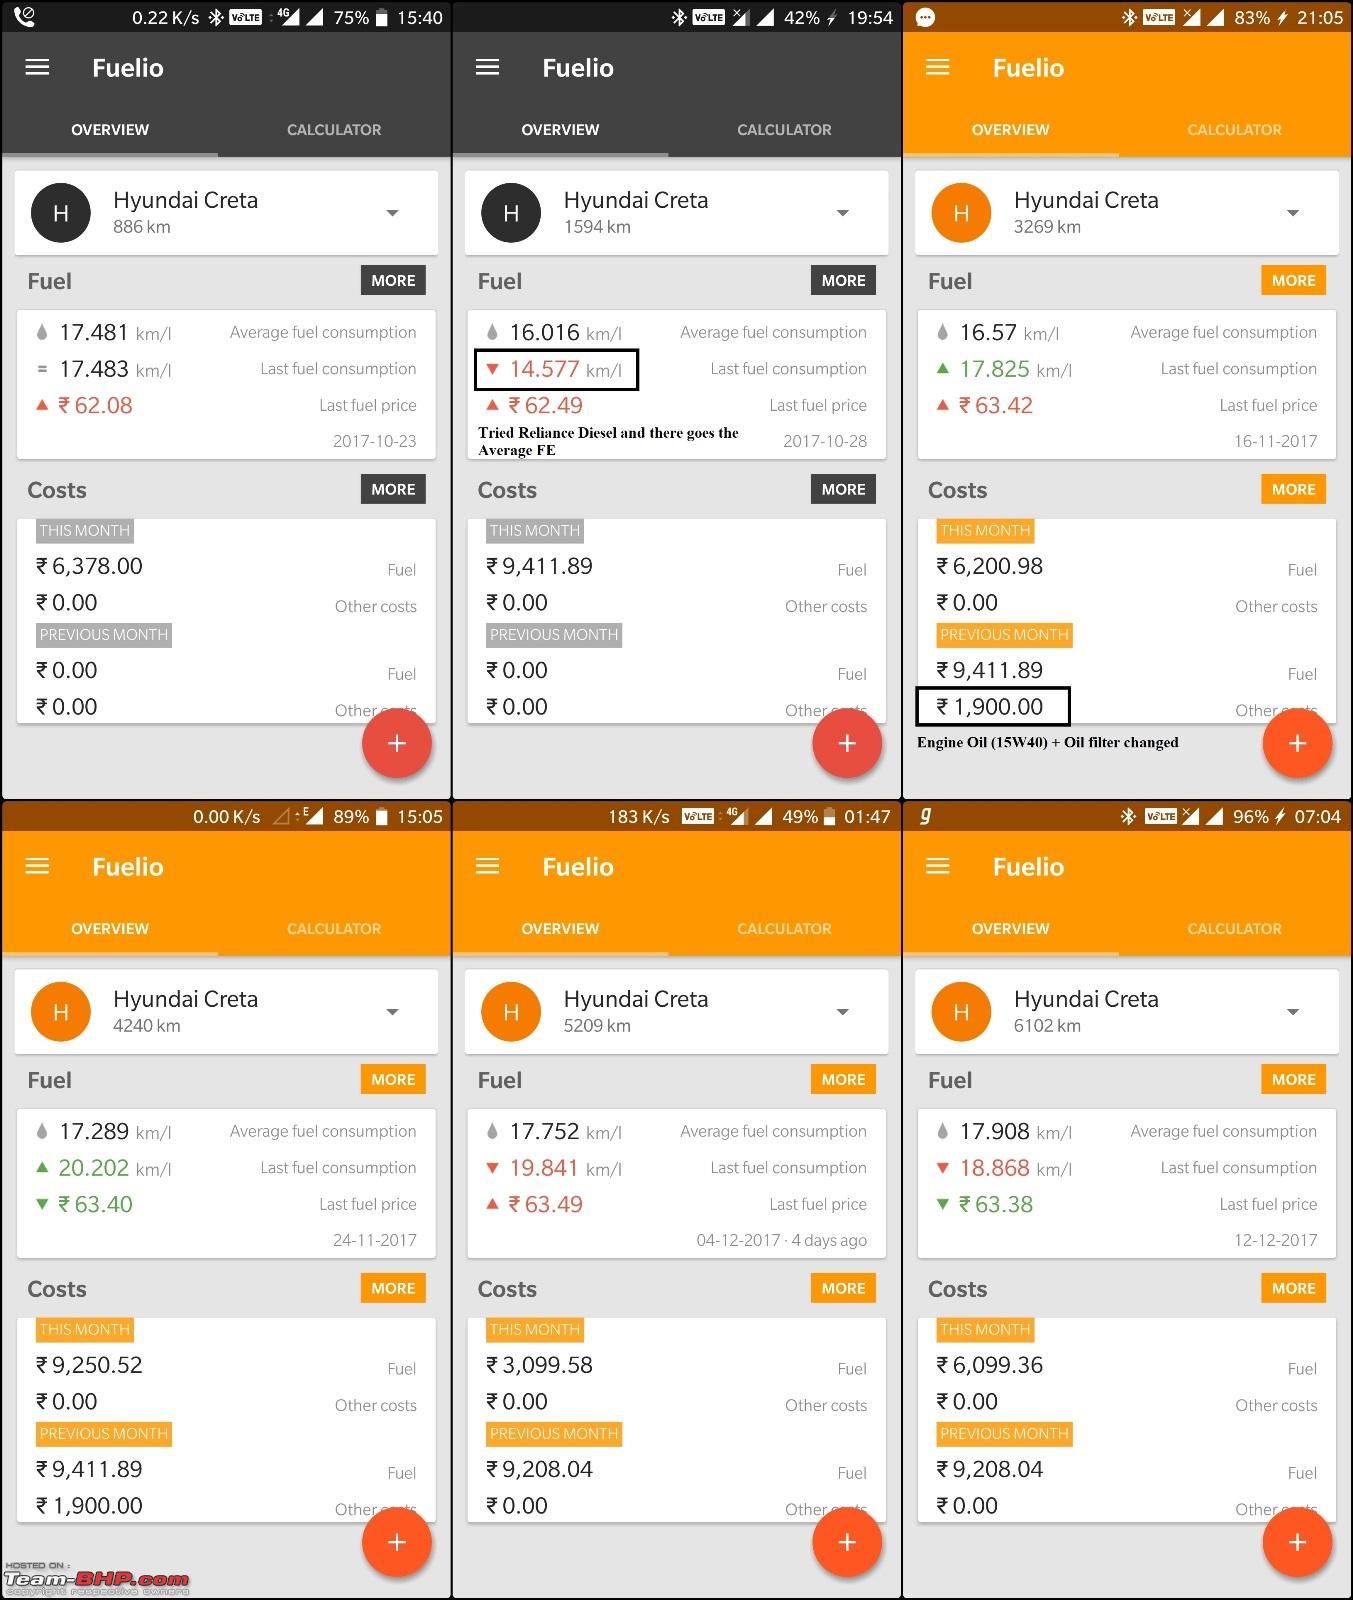
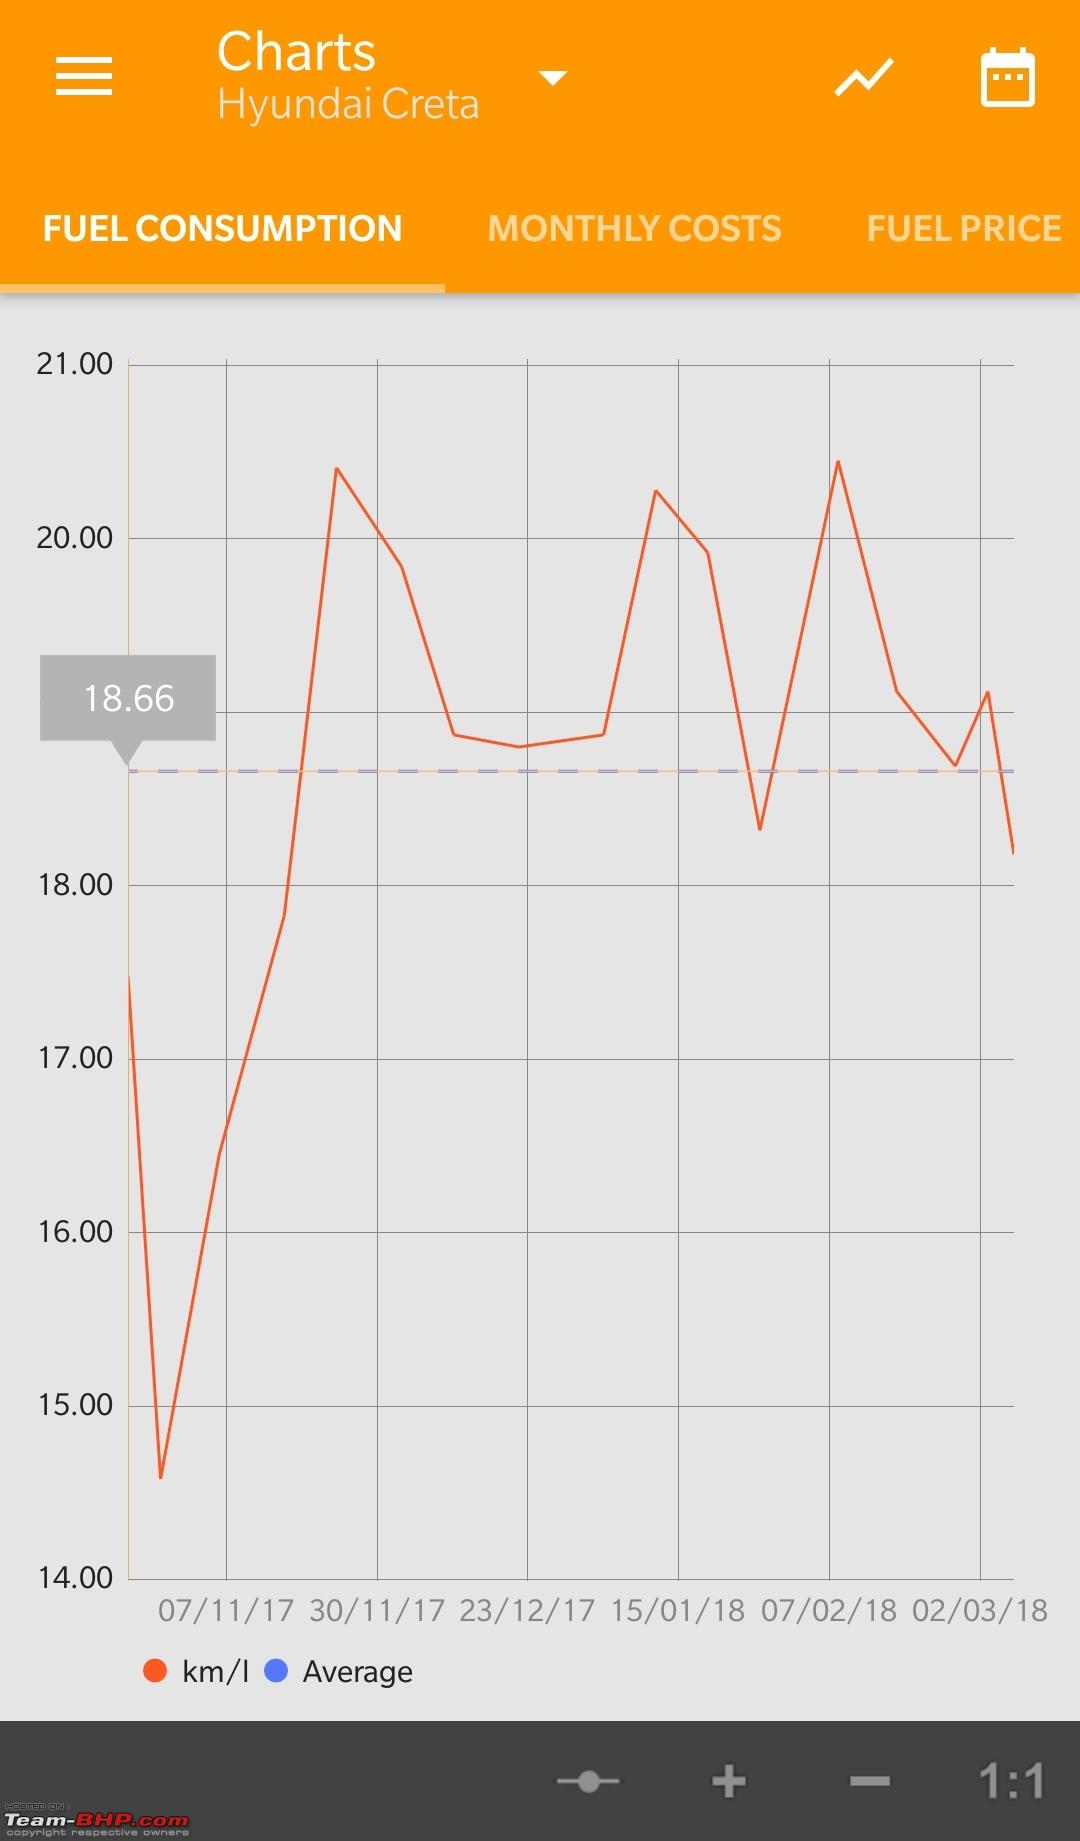
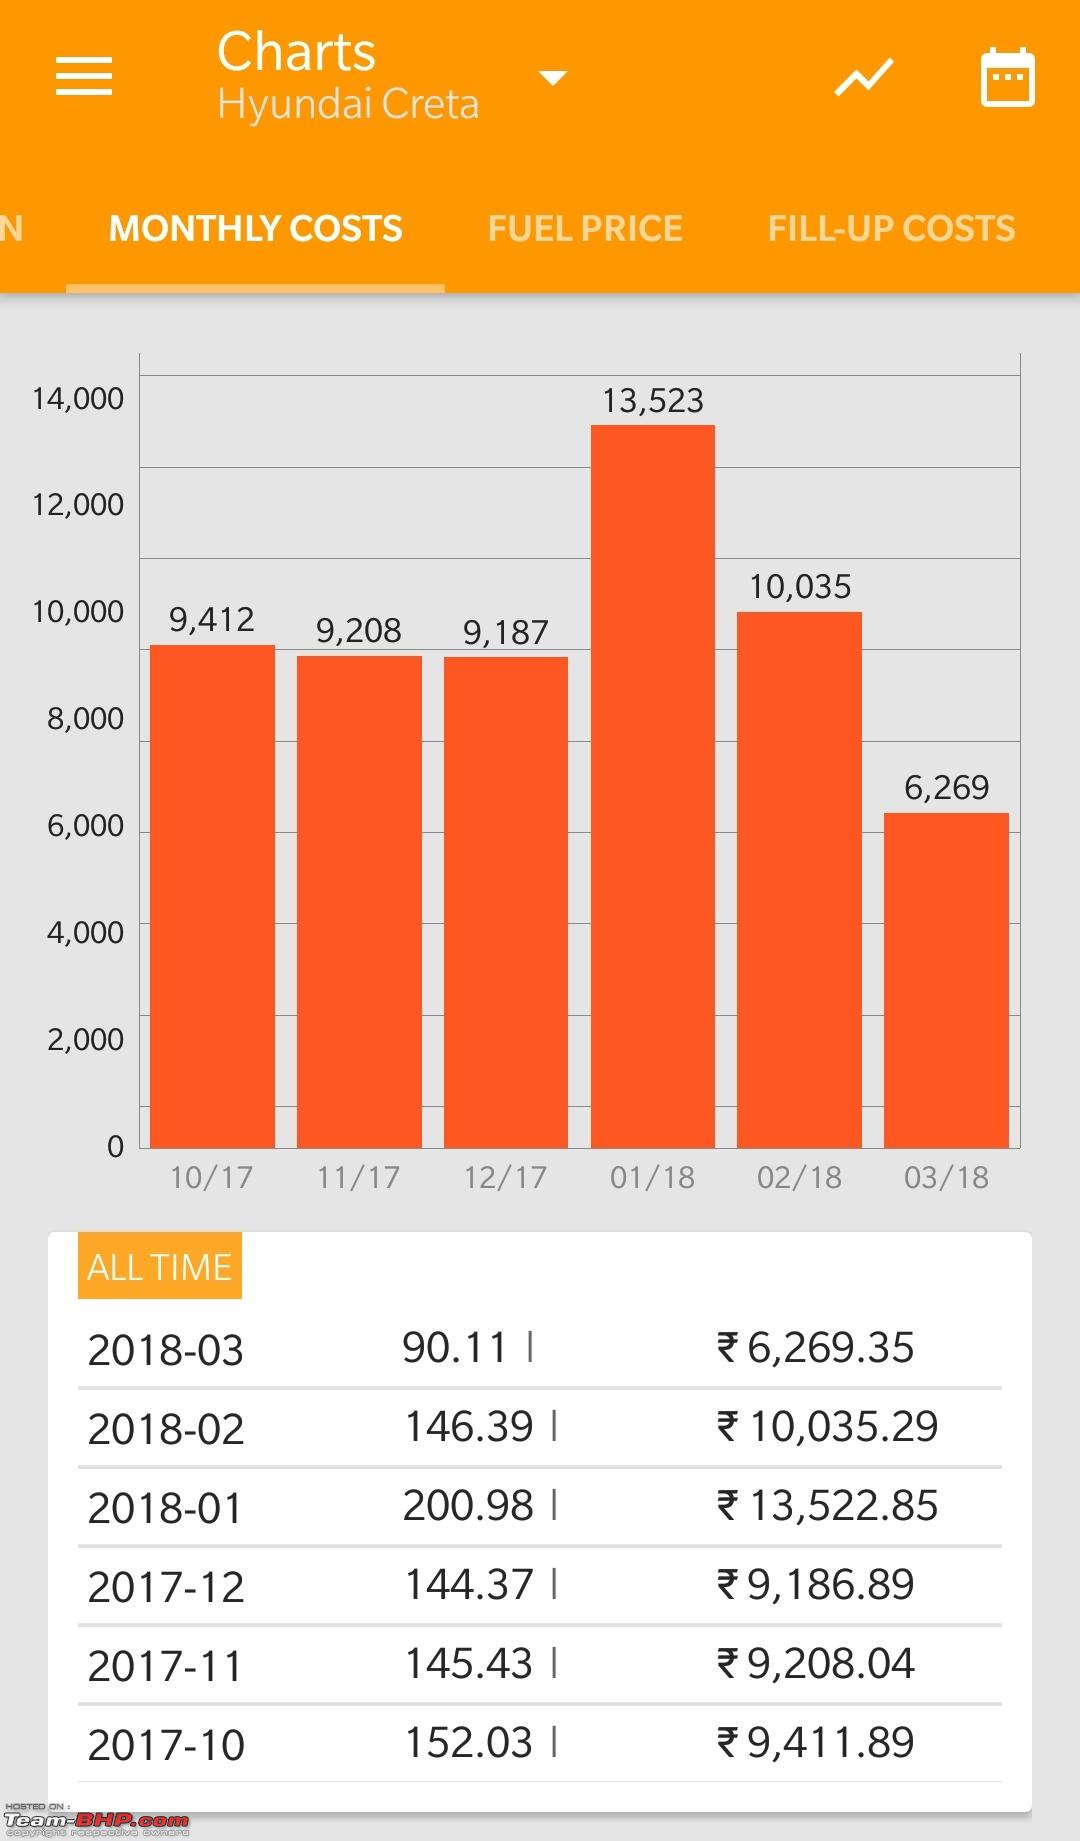
Major grouse with Hyundai is for not providing FE data be it average consumption or even for that matter range. I am relying on the Fuelio App to keep track of FE data.
After paying 17 lakhs for the car, not having the Cruise Control makes me sad. I tried retrofitting it but didn't work. Need to get hold of the Service manual to know the pin outs of the connectors to do the necessary modifications to activate it.
Another pain point in the car is the Head Unit. Haven't seen such a useless unit than this. Takes long to boot and then there is that 'Agree' screen that needs to be agreed to. Bluetooth connectivity issues are a plenty. The HU has a mind of its own, it suddenly restarts while playing songs with no warning signs. Sometimes the HU is ON but no audio output. I have to switch off the car and wait for 20-30 seconds and restart it.
The only saving grace is the Android Auto feature which makes life easier thanks to driving oriented layout with large icons + Google Maps, outstation trips or visiting some unknown area in the city is a breeze for me else I would have needed to invest in a mobile holder for the sole use of Google Maps. All said and done, I'll be upgrading the HU soon to something better.
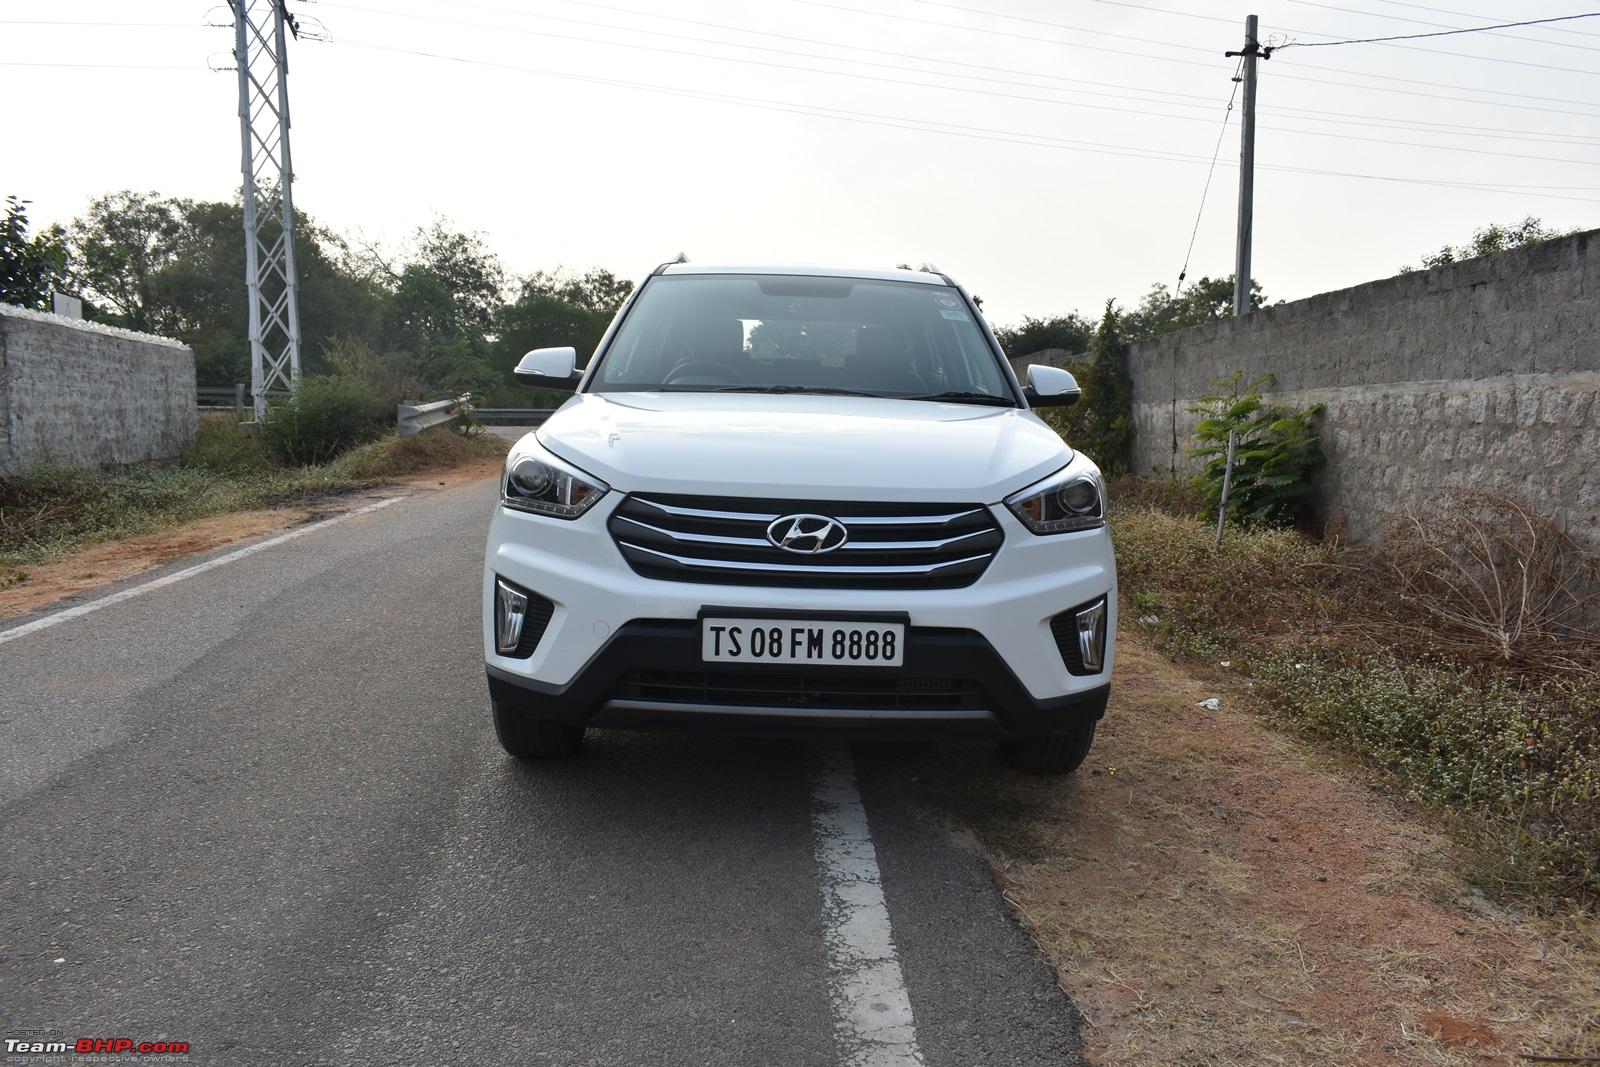
It's show time lol:
Front View

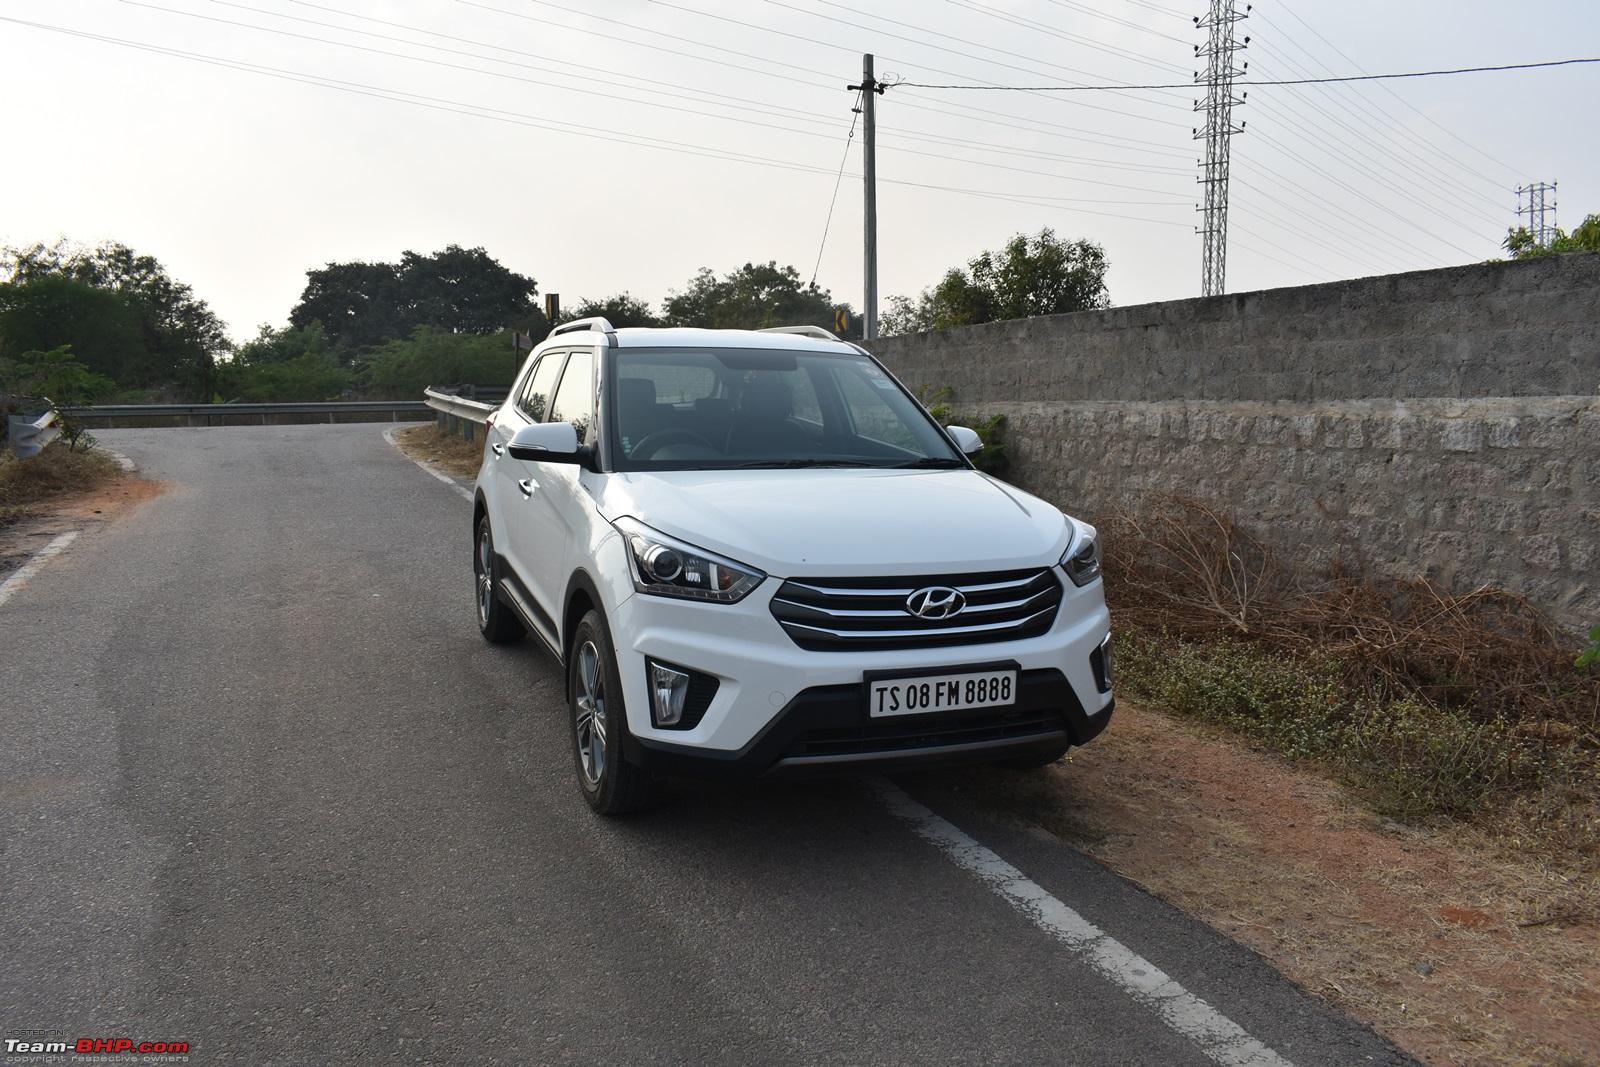
Front 3 quarters

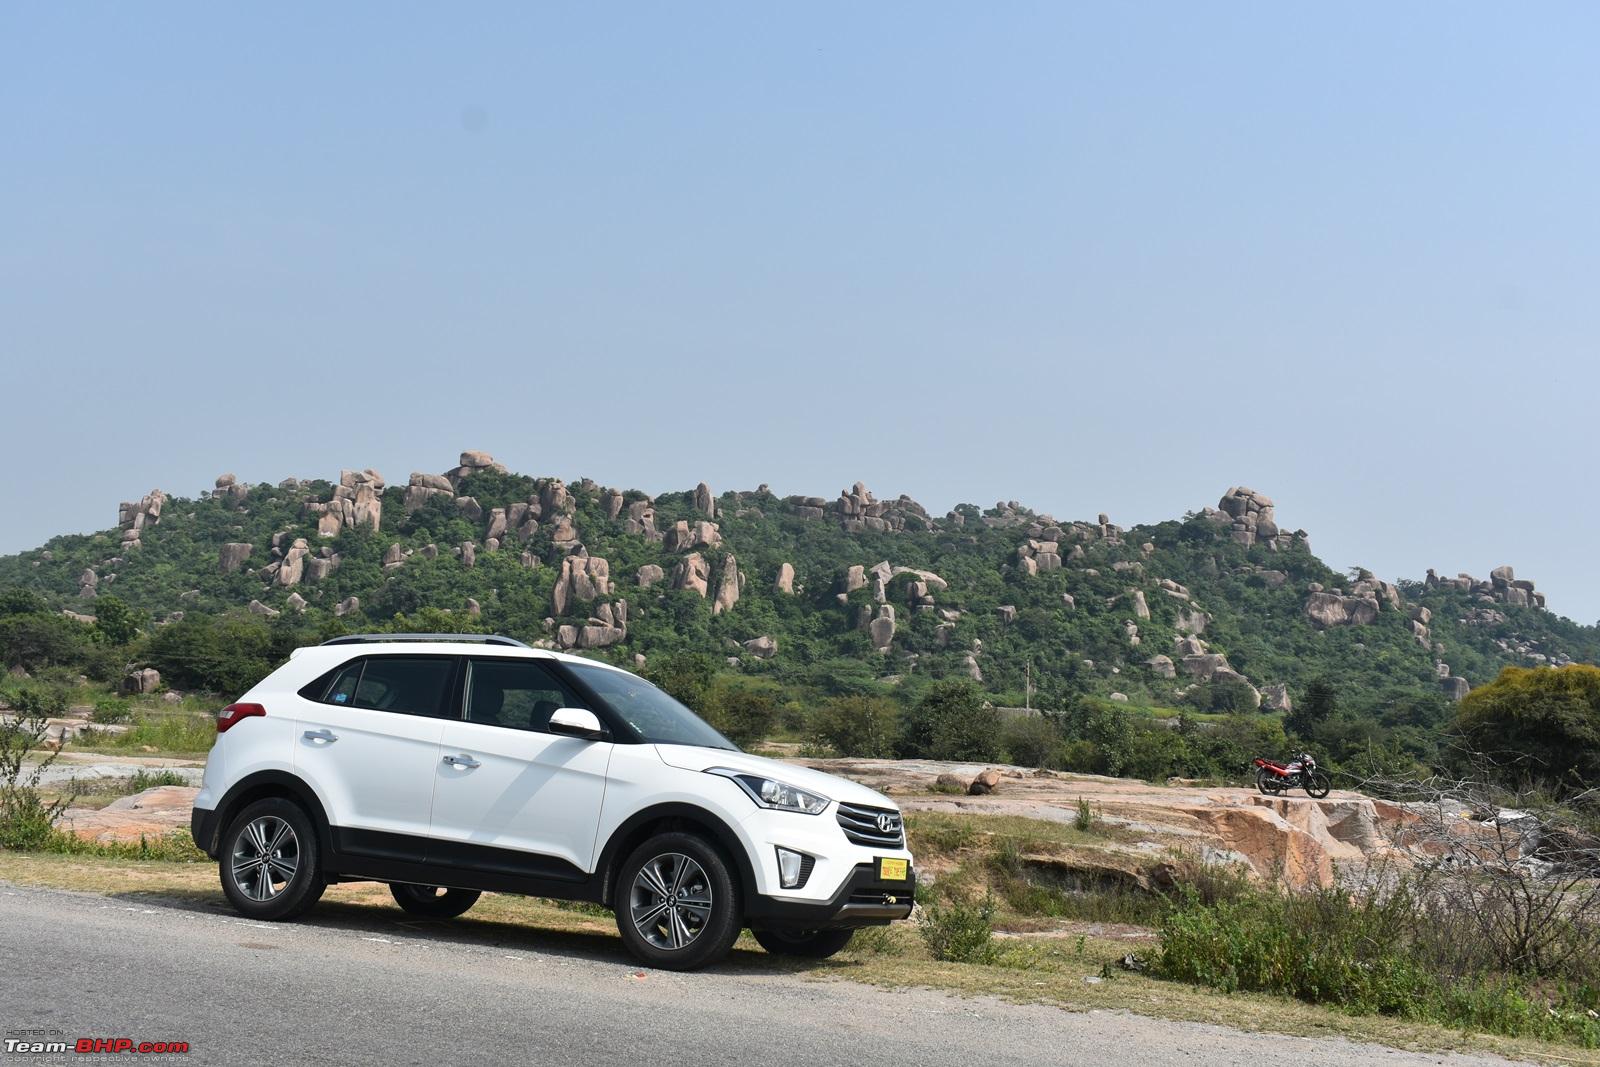
Side view
Rear View

Good looking 17" alloys with Bridgestone Dueler HP Sport (215/60 R17)
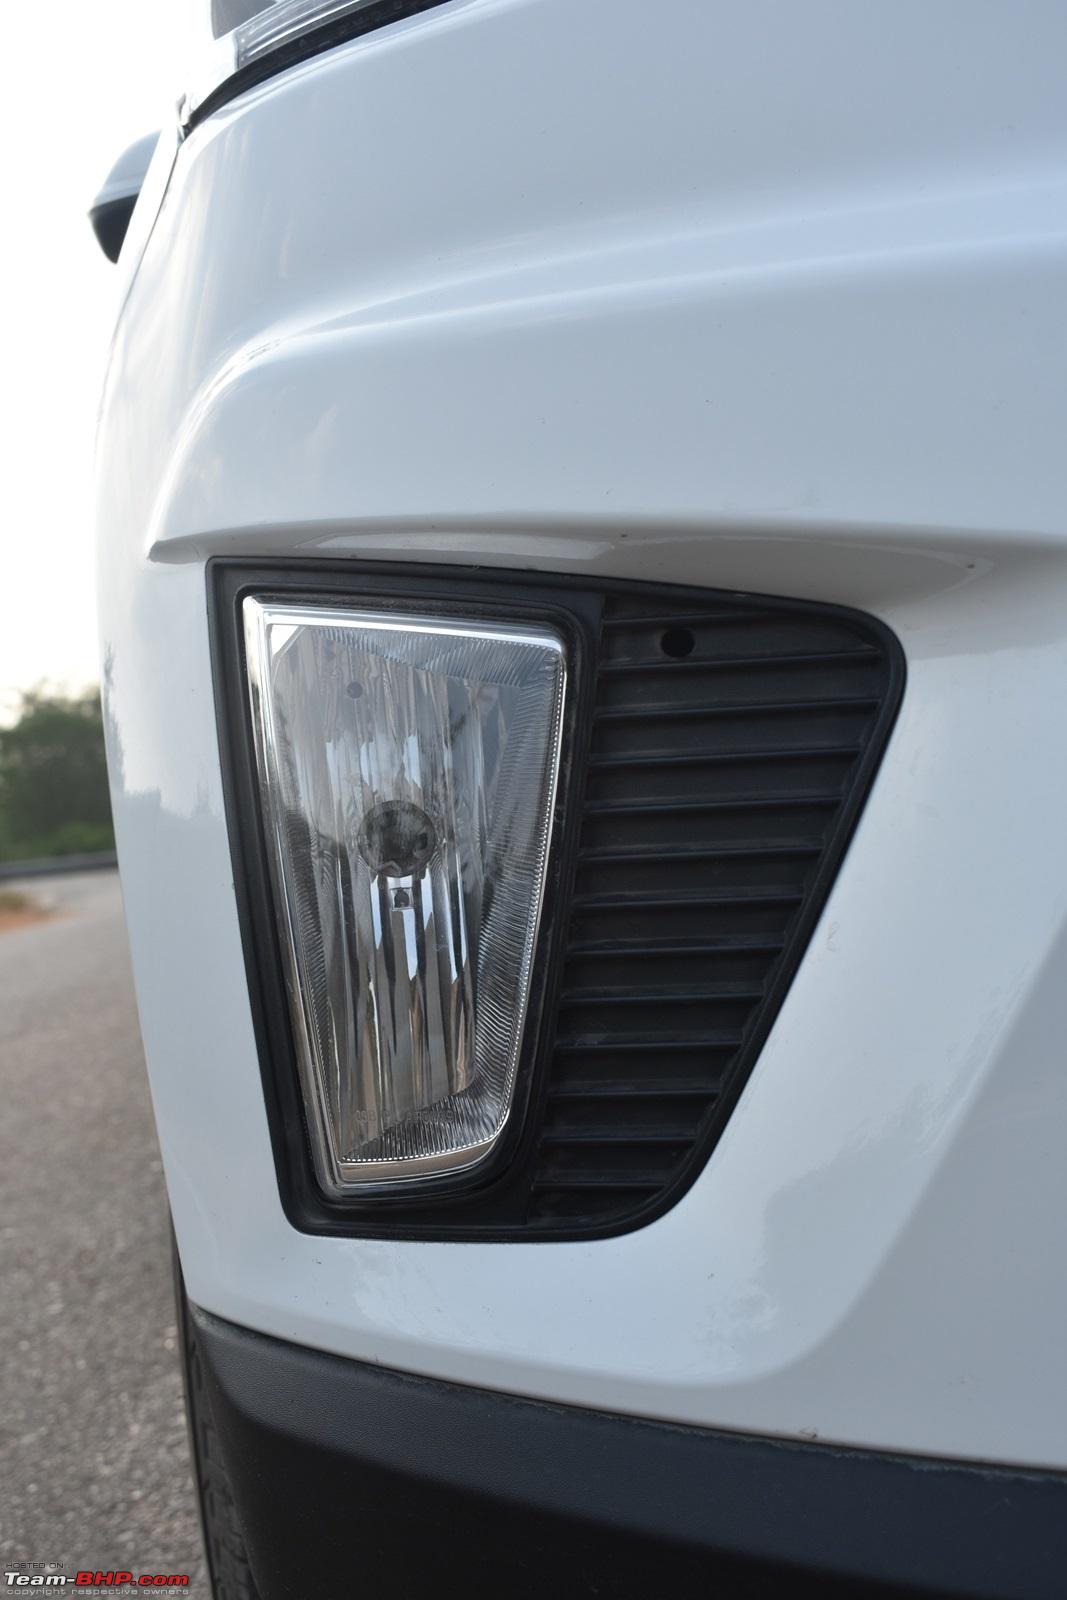
Fog lamps

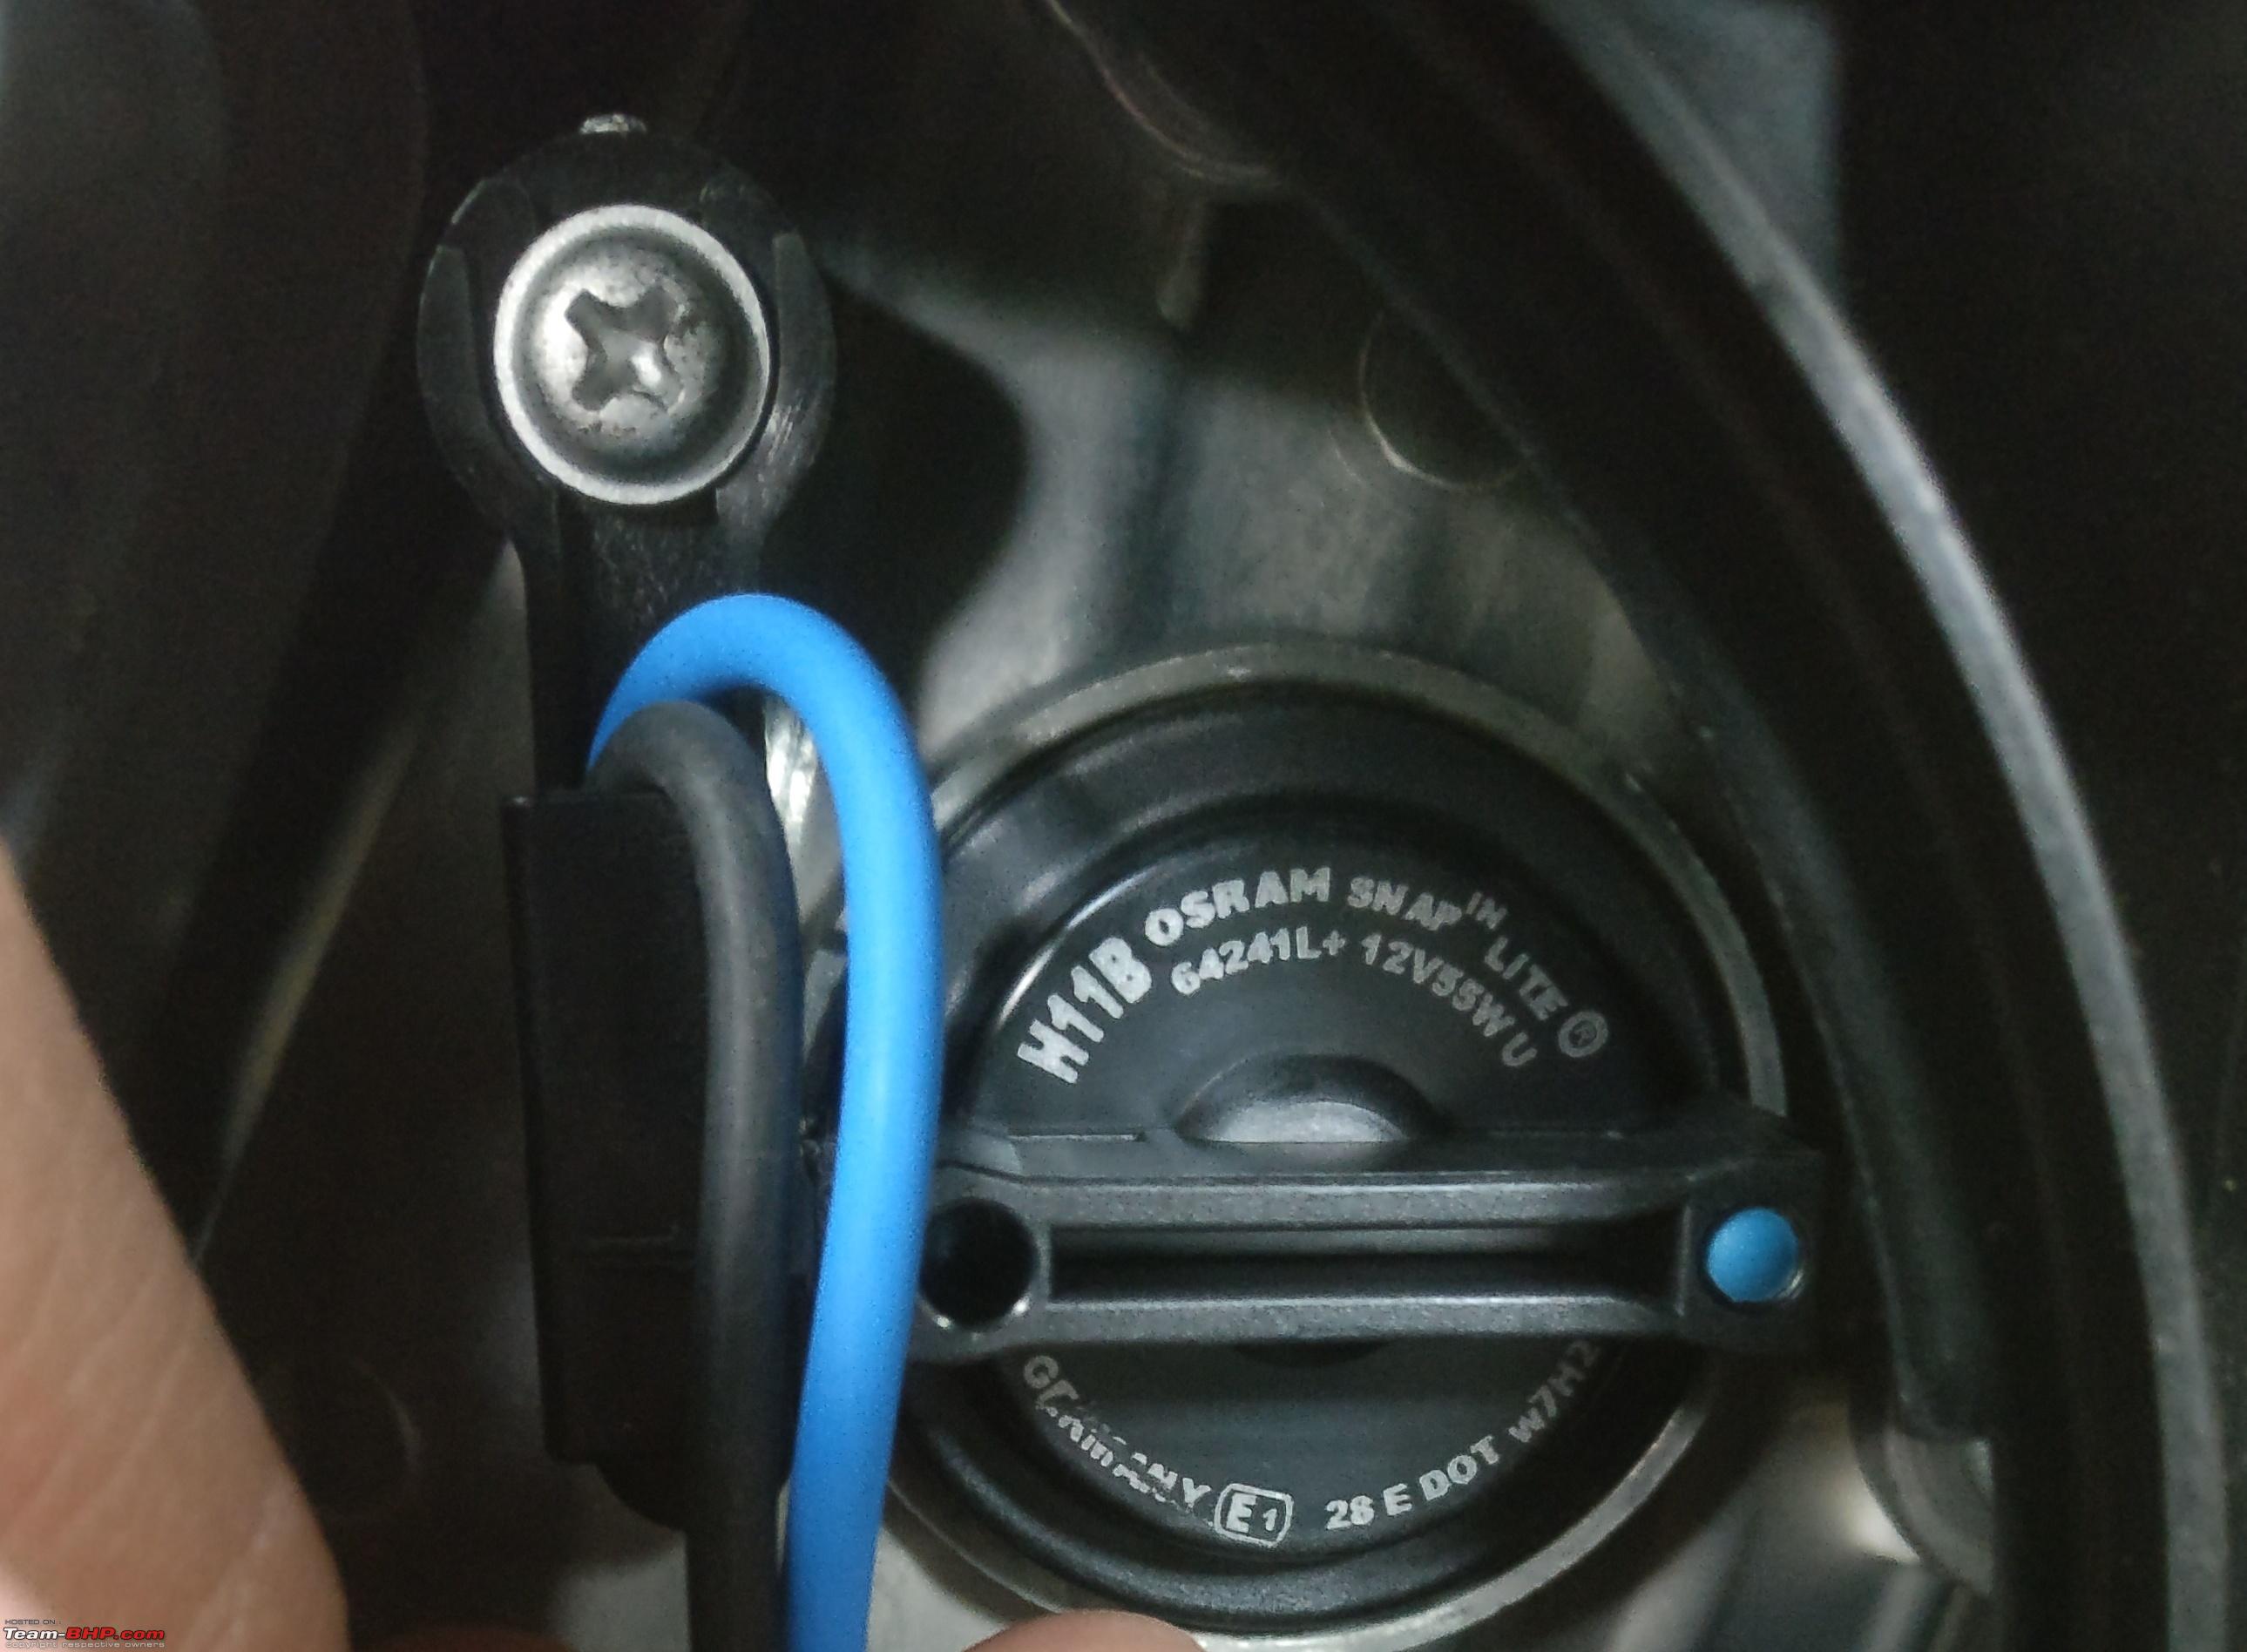
Cornering lamp bulb spec

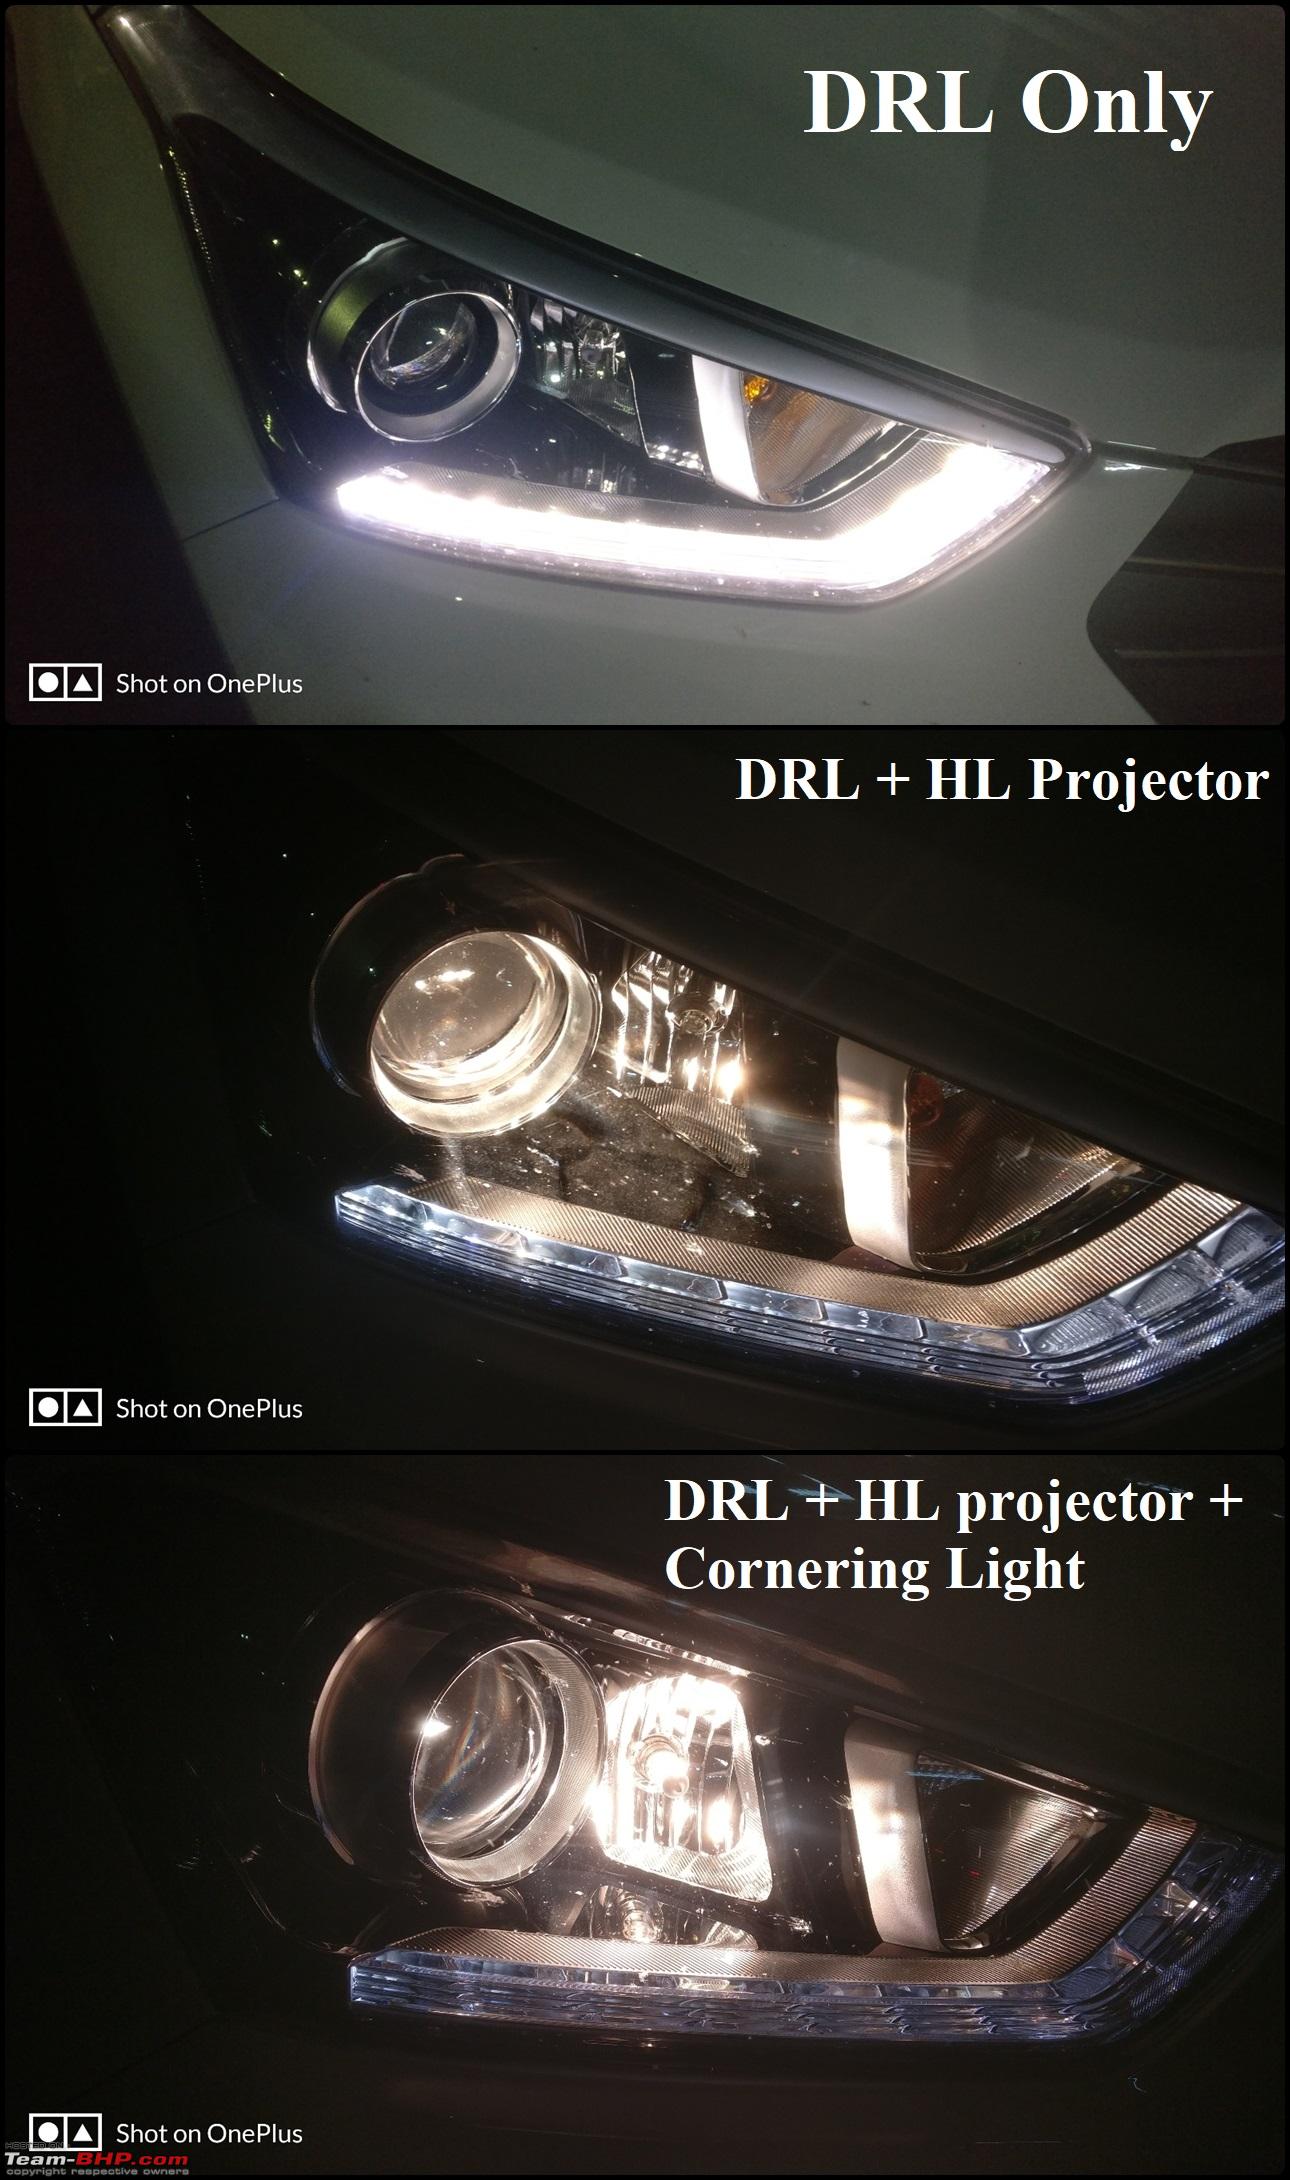
Cornering Lamp in action

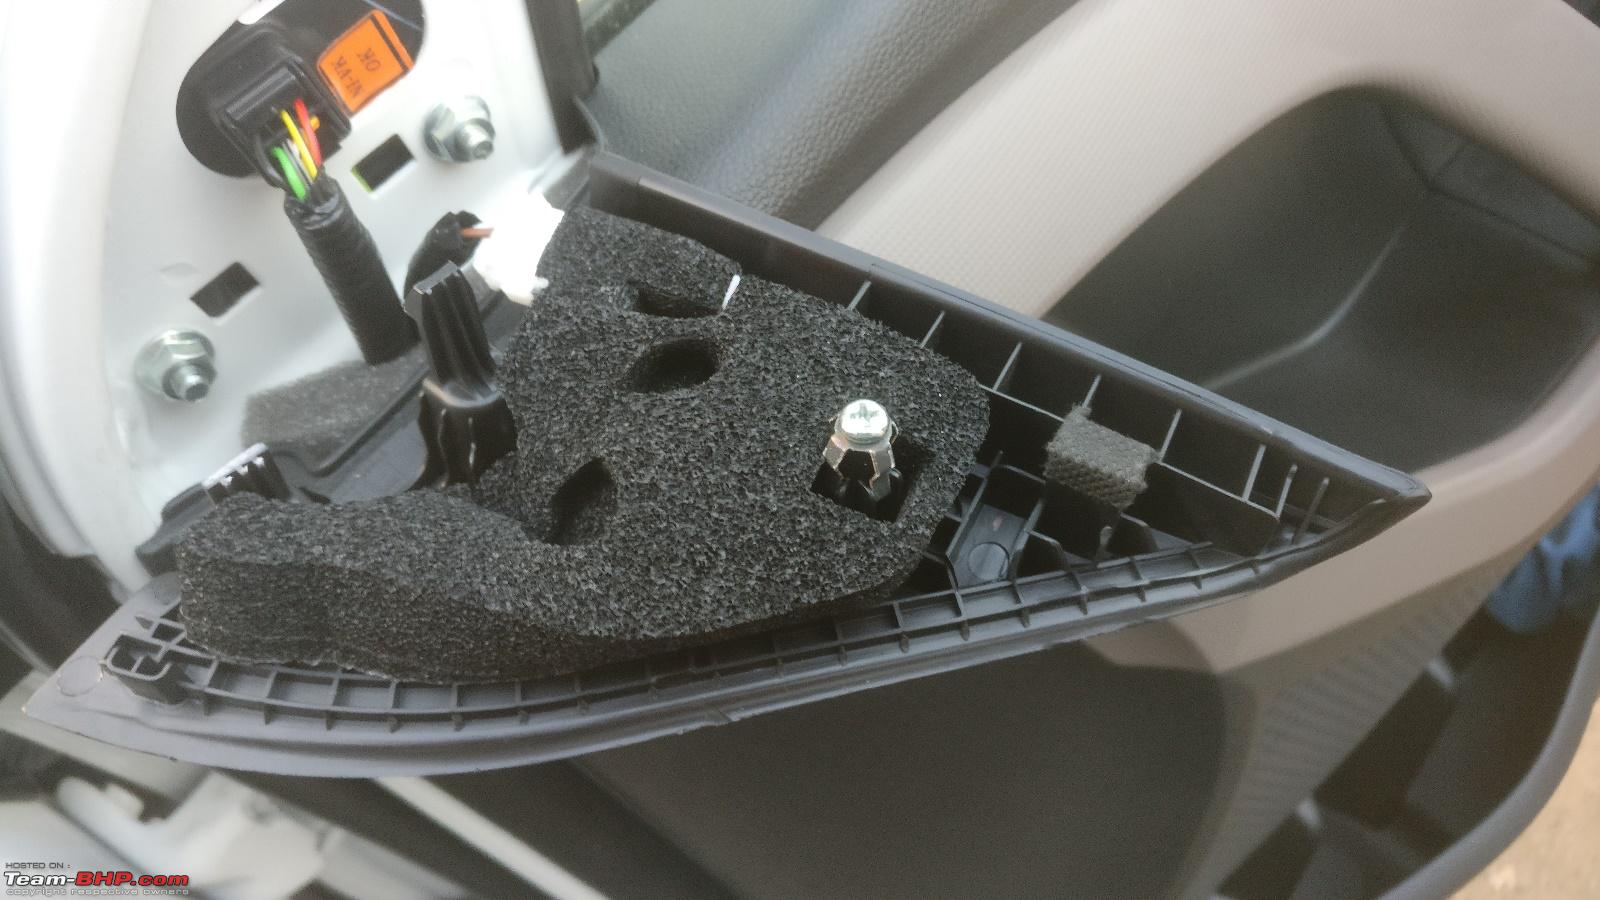
Cover for the door striker

Cover fit on the door striker. Gives a neat look

Lack of under-hood insulation, gives it an incomplete look

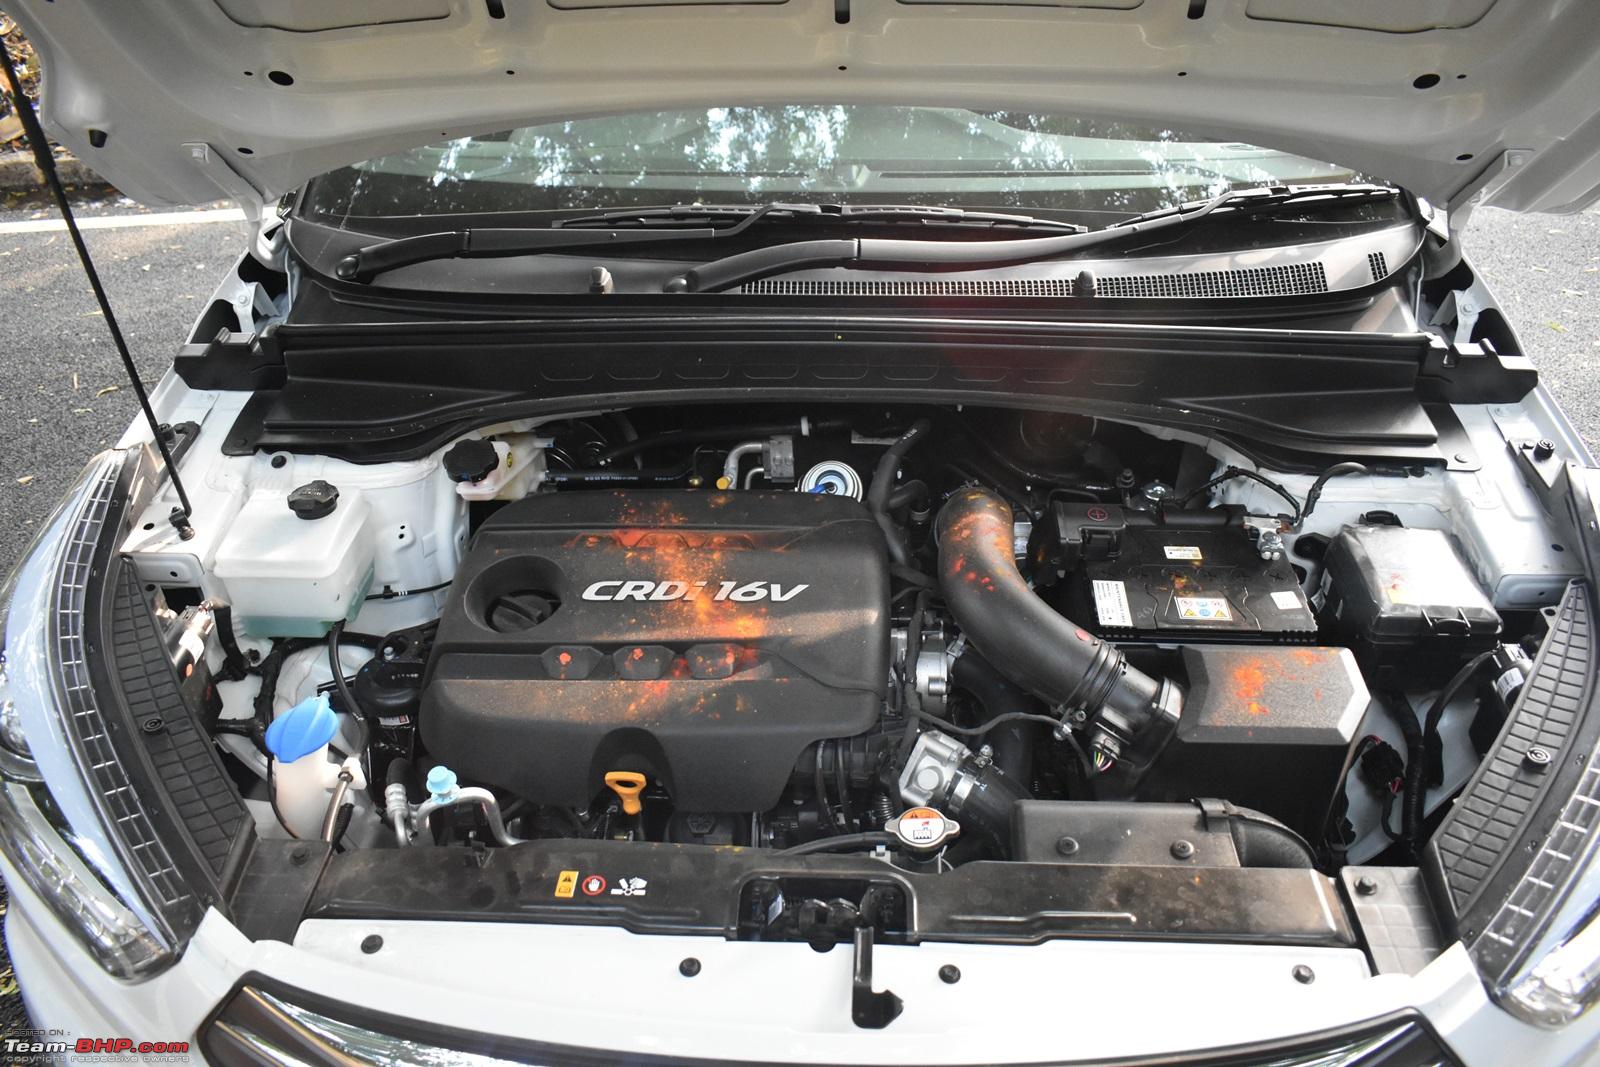
Engine bay
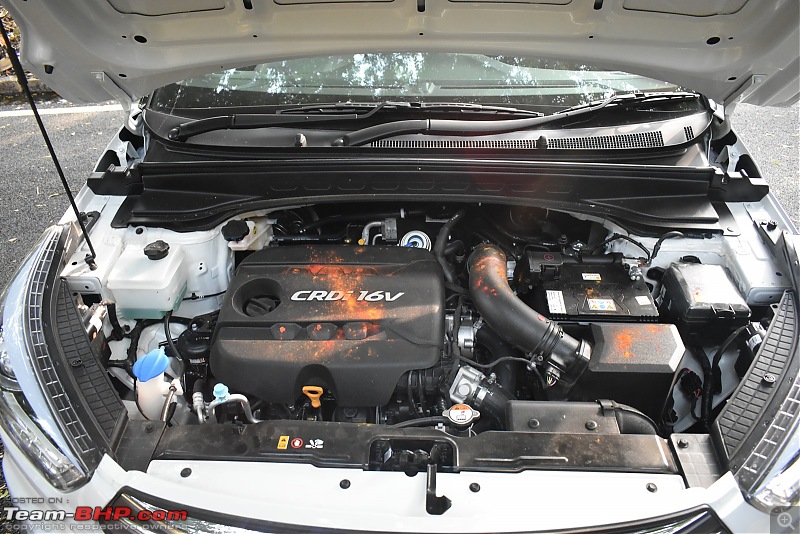
CRDi cover removed

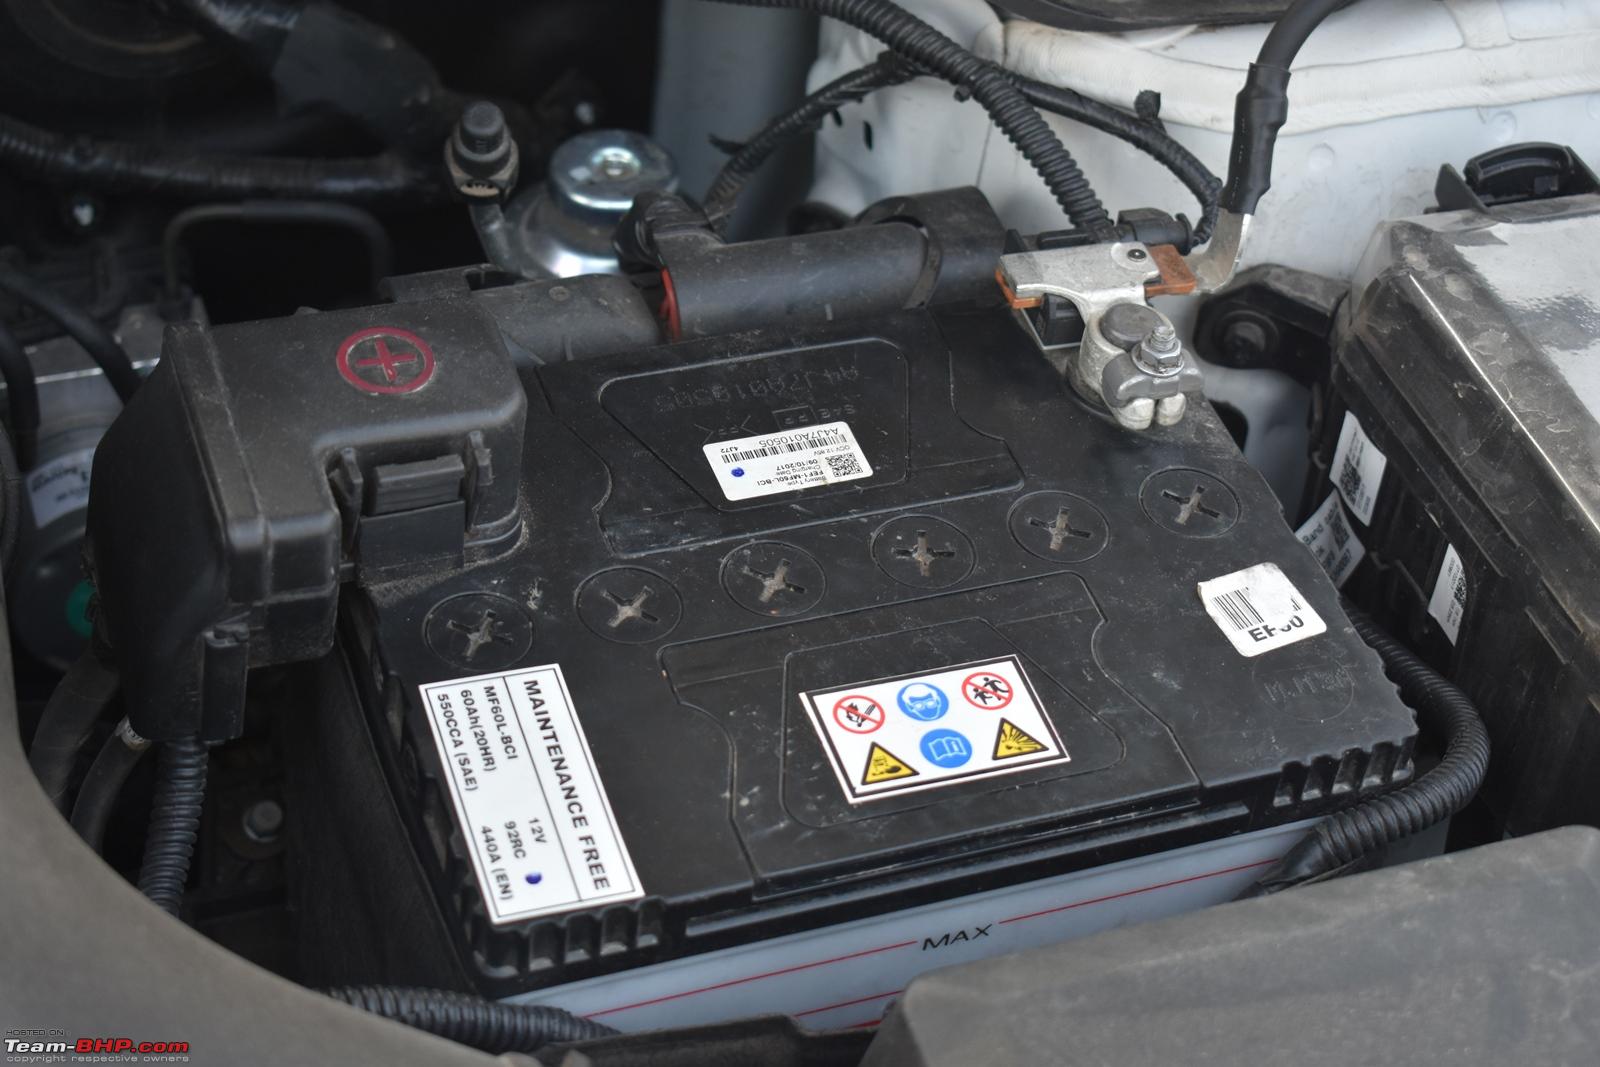
Battery is Exide Maintenance Free (60Ah)

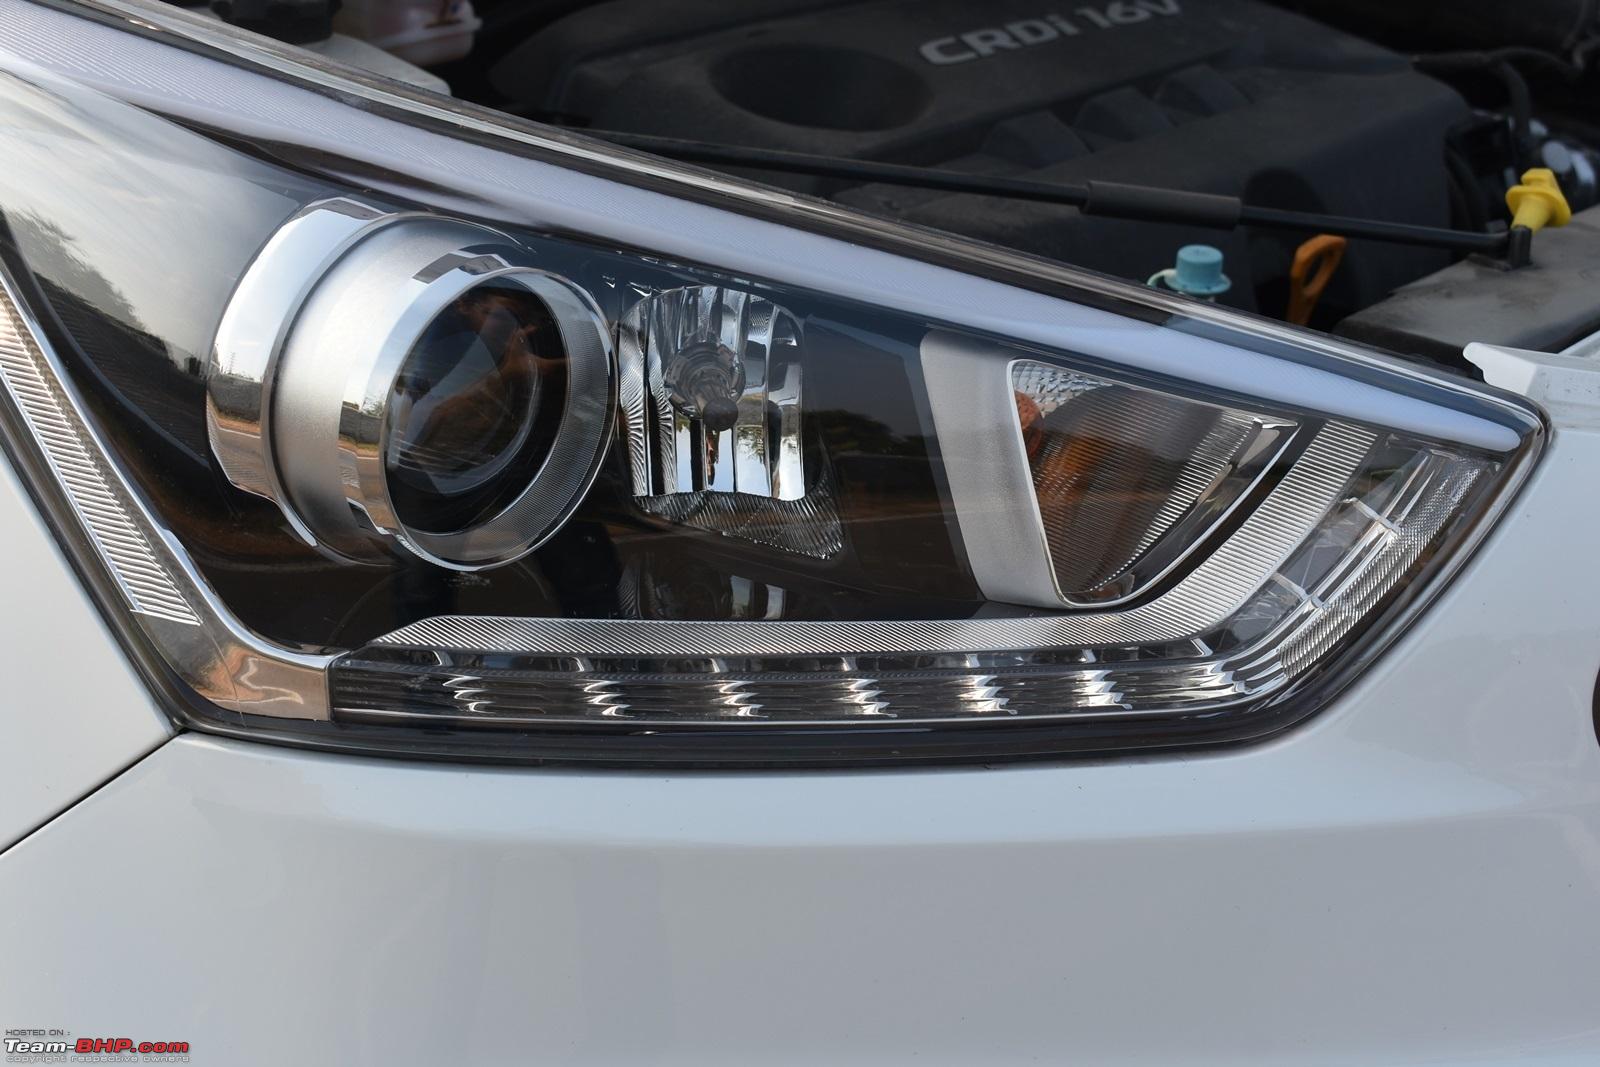
Beautiful Headlight design


Turbo by Garrett-Honeywell

Only Pilot Lamps ON

Pilot Lamps + Fog Lamps

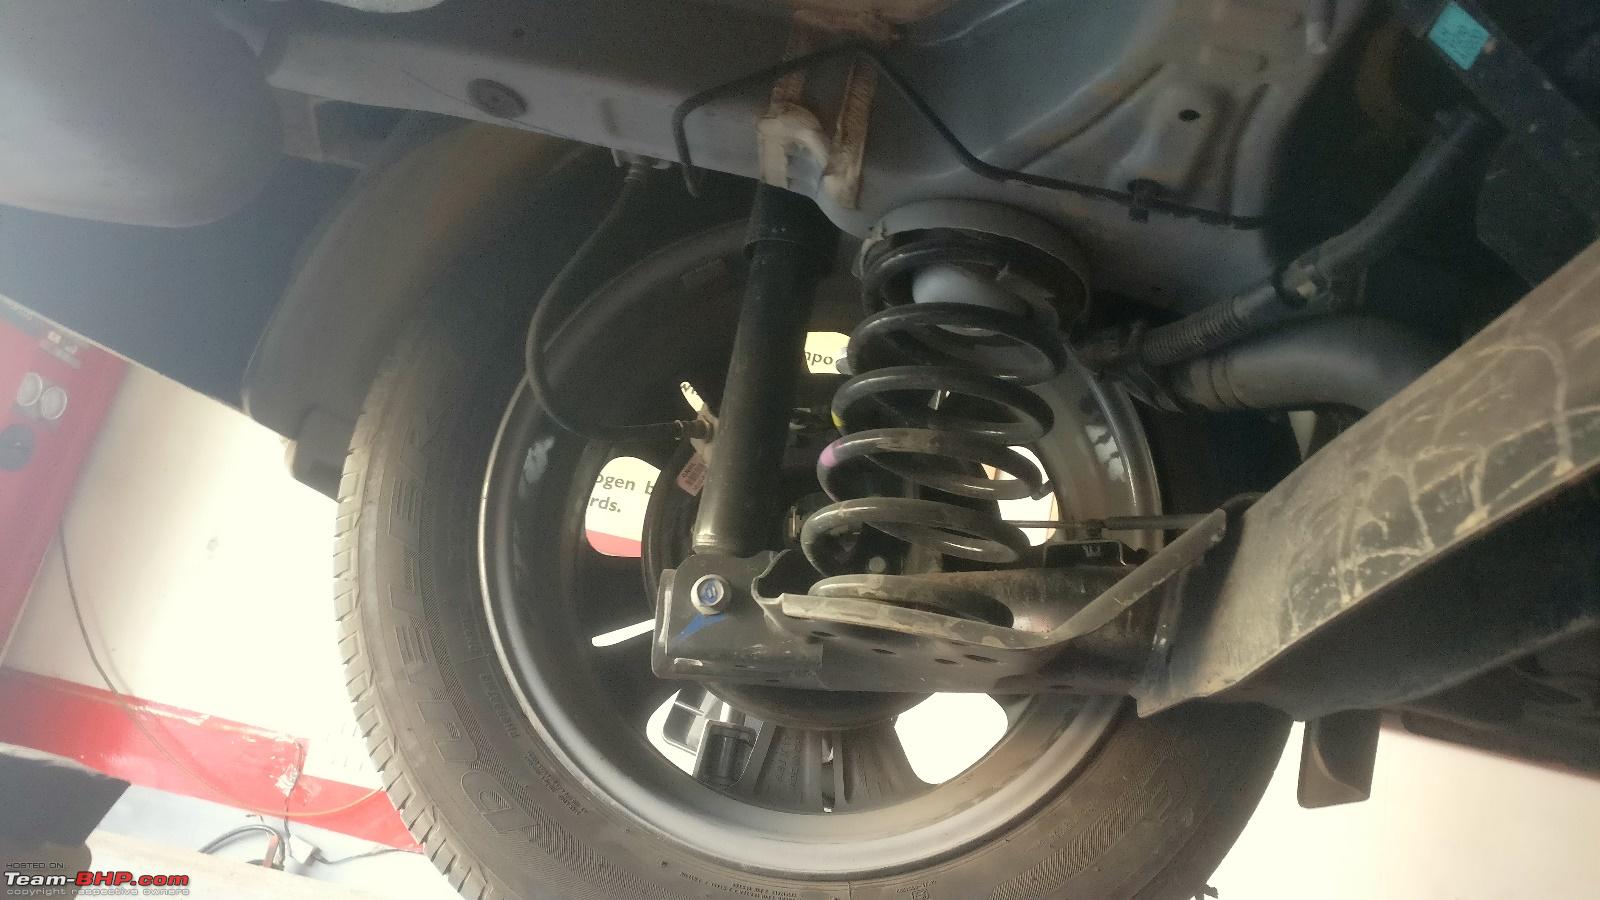
View of the rear suspension, things are neat in there

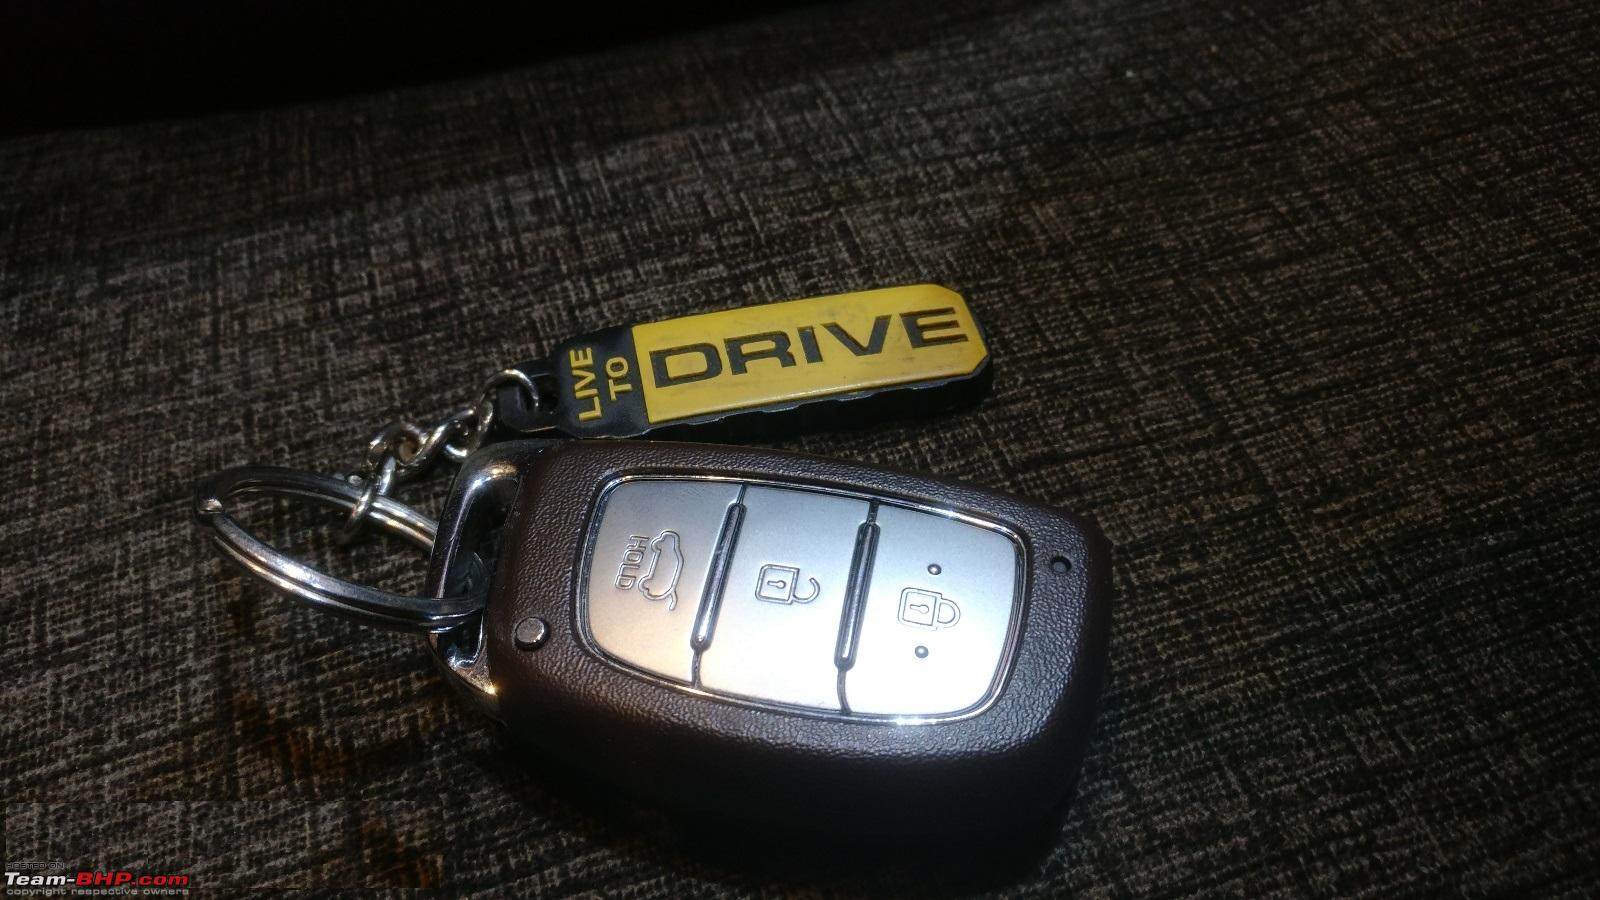
The key,
fat key!!

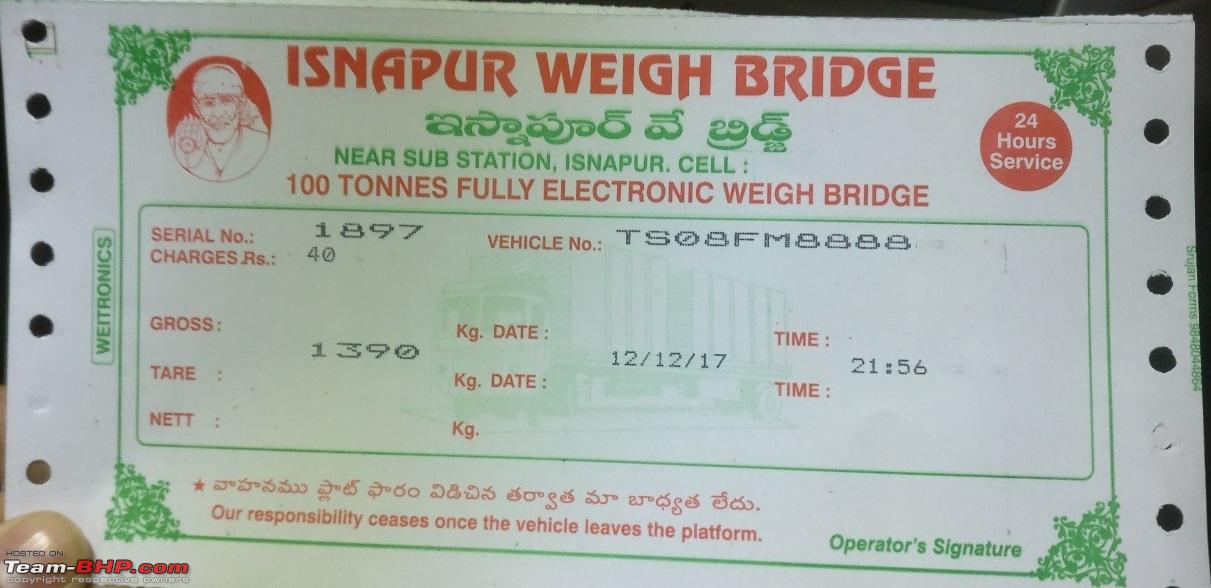
Put the car on weighing scales with full tank of fuel

Some more exterior shots taken


Continued....
Following posts shall be carrying the details on the
MODIFICATIONS done since purchase :)
Here's the list: - Audio Upgrade (Speakers and Amplifier from Swift)
- DIY - Auto dimming IRVM
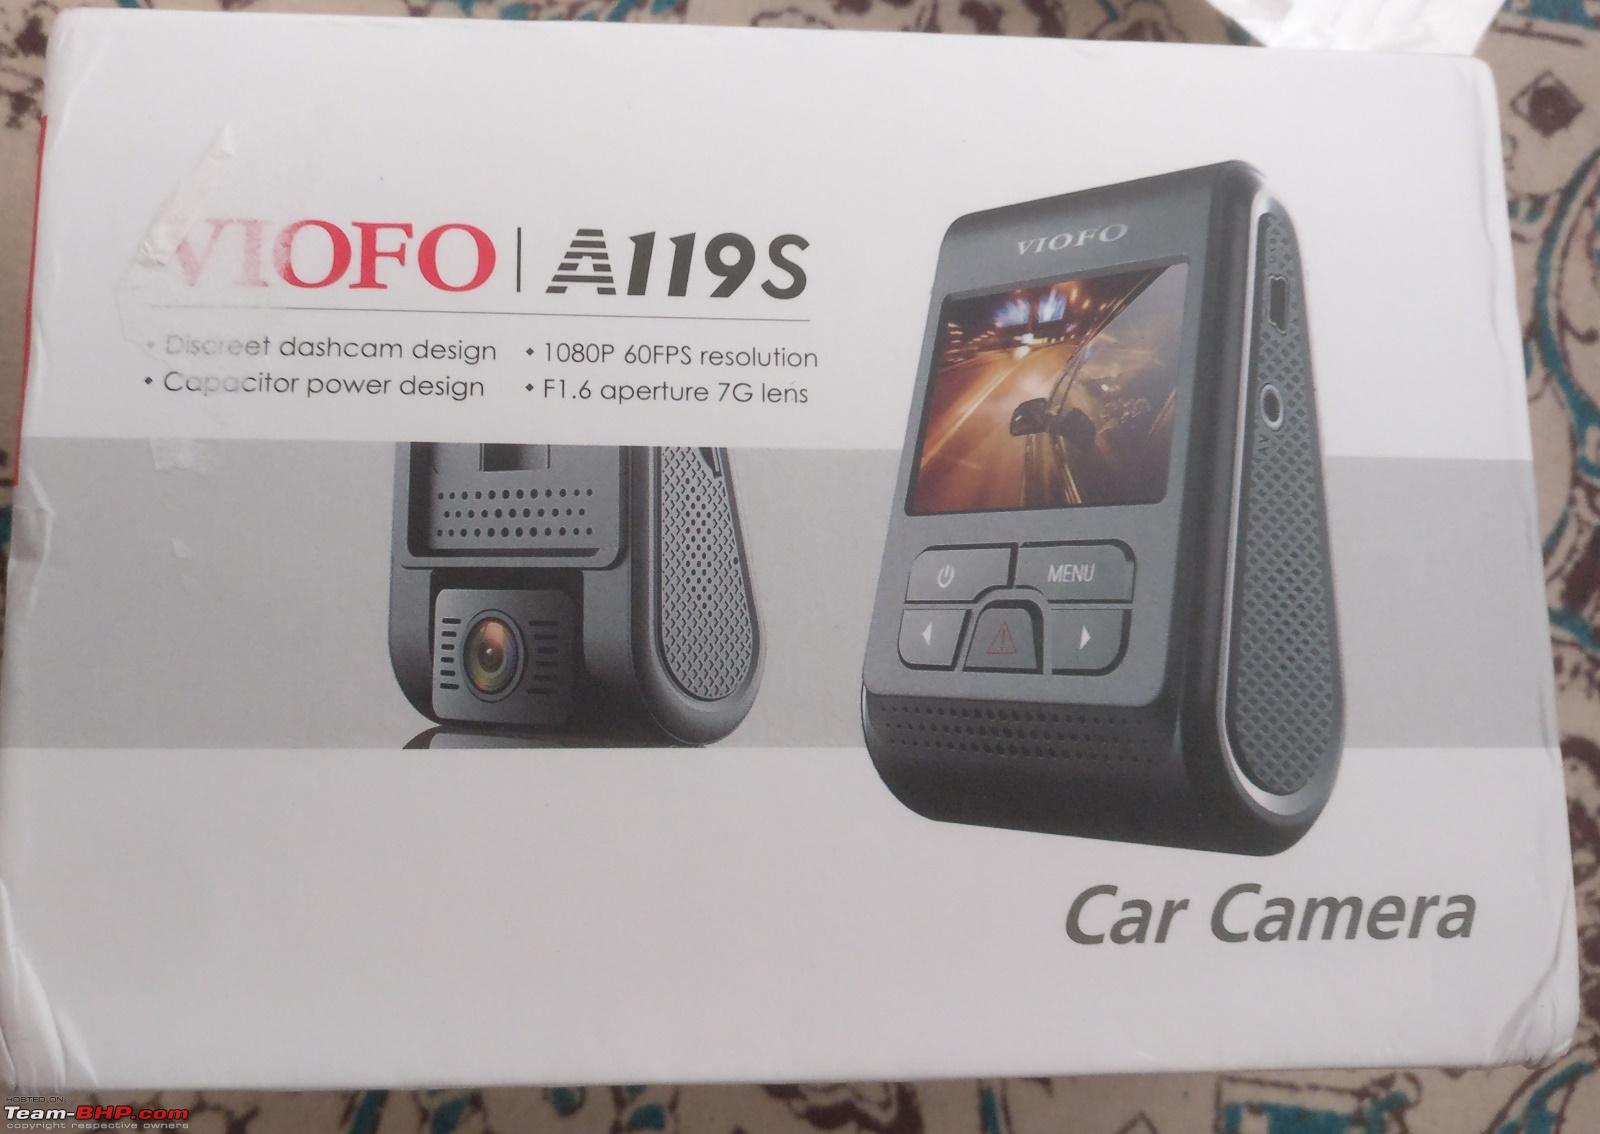
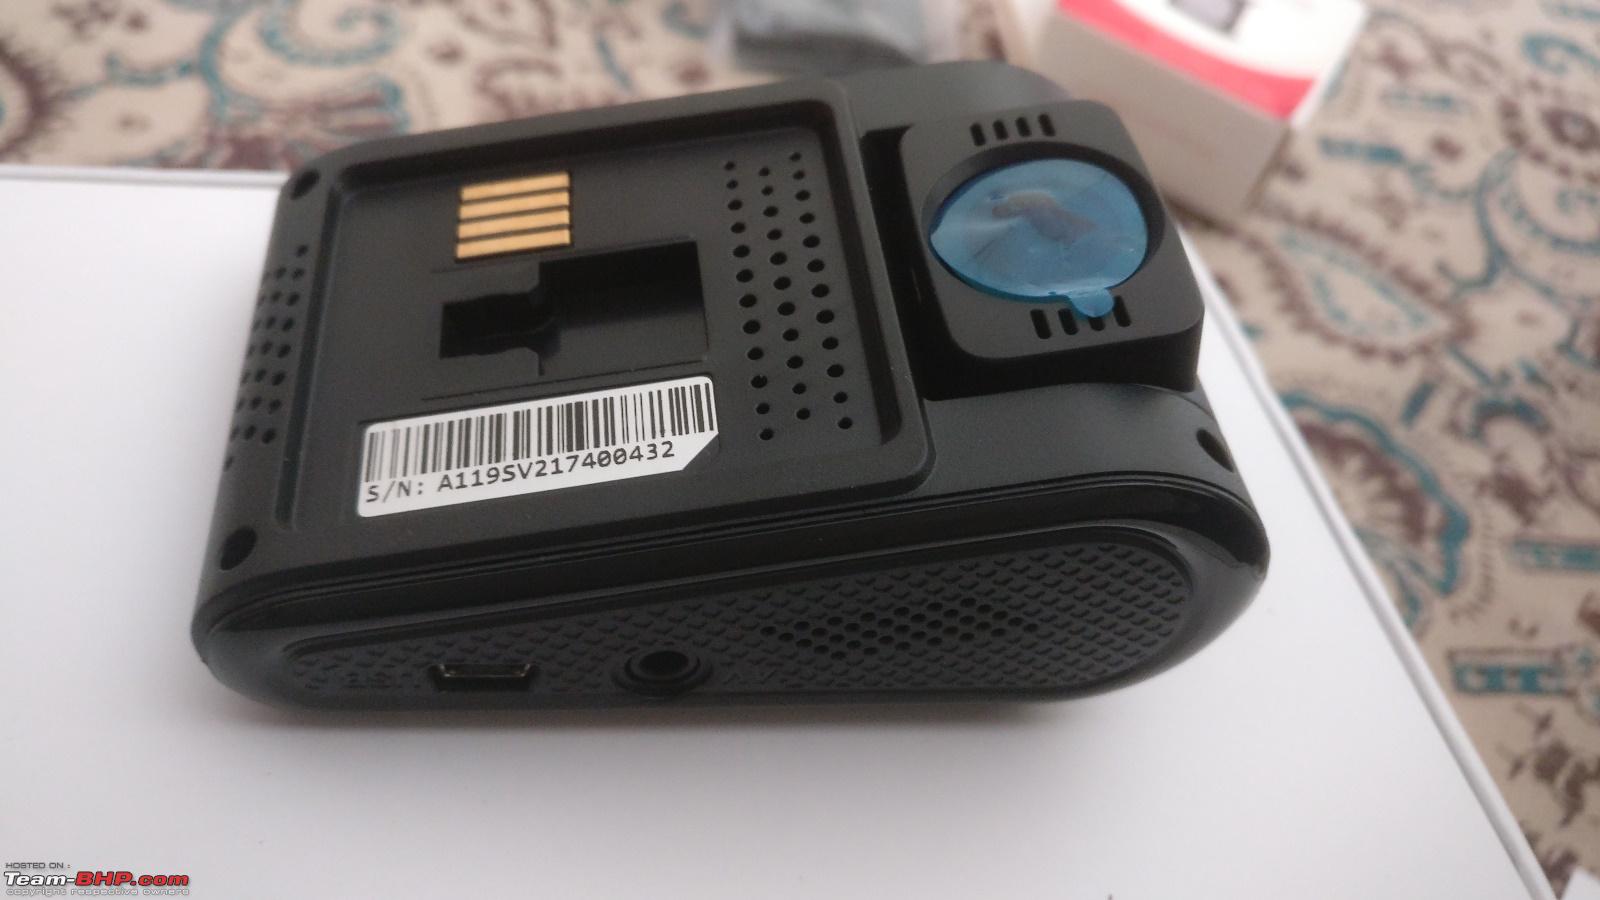
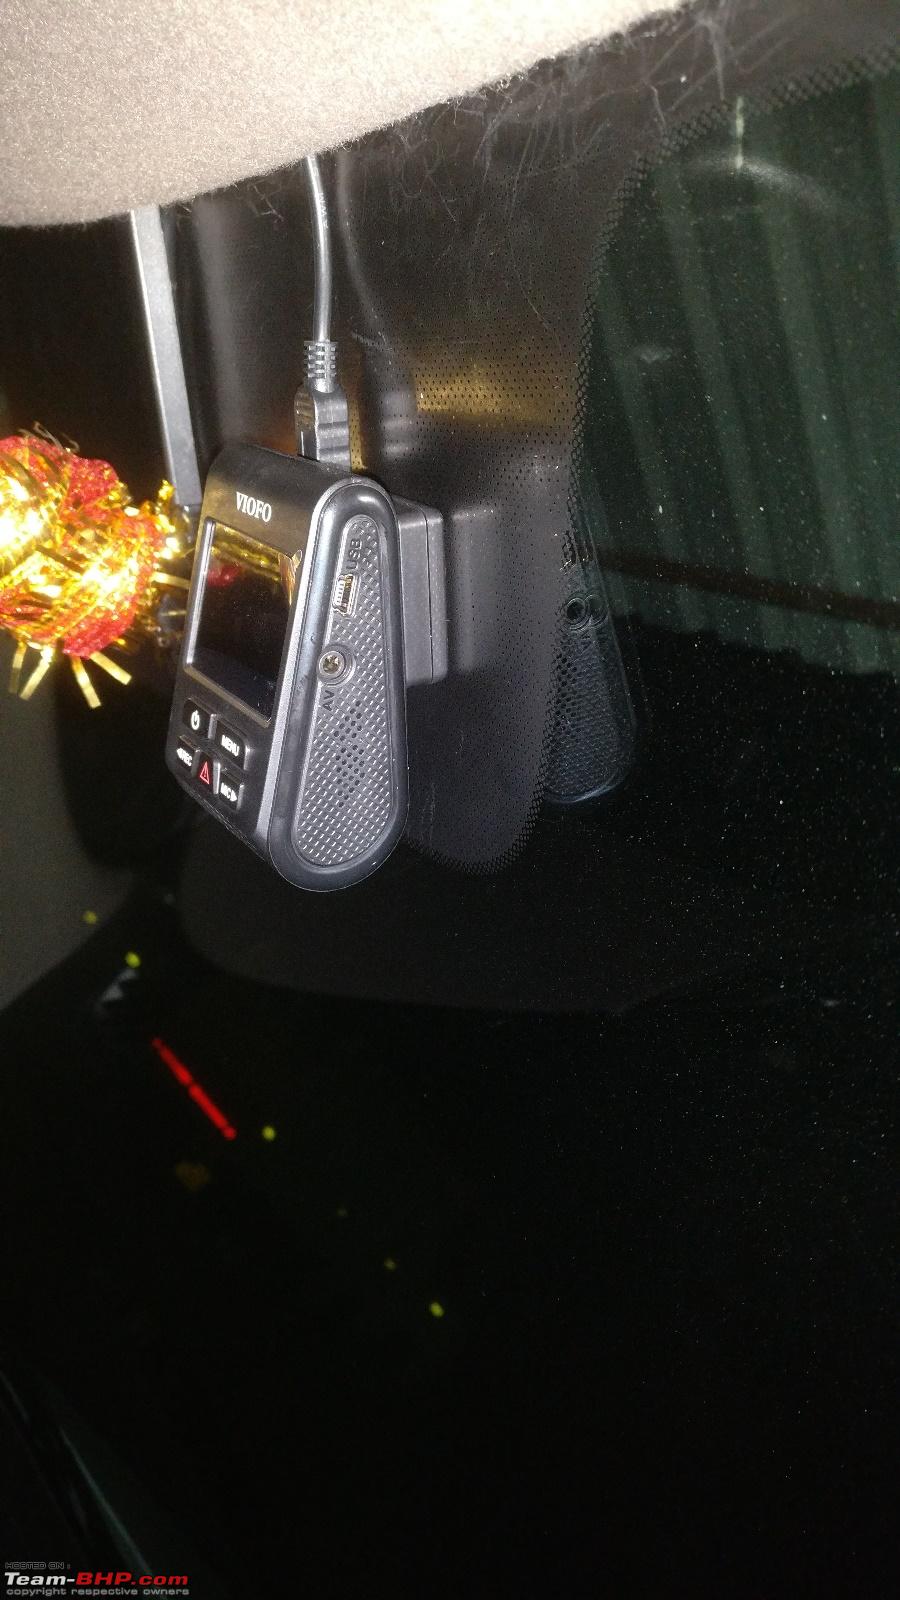
- DIY - Dashcam - Viofo A119S V2
- DIY - Noodle Mats (Local ones)
- DIY - Gas Struts for Hood
- DIY - Headlight bulb swap from Sylvania to Philips Xtreme Vision
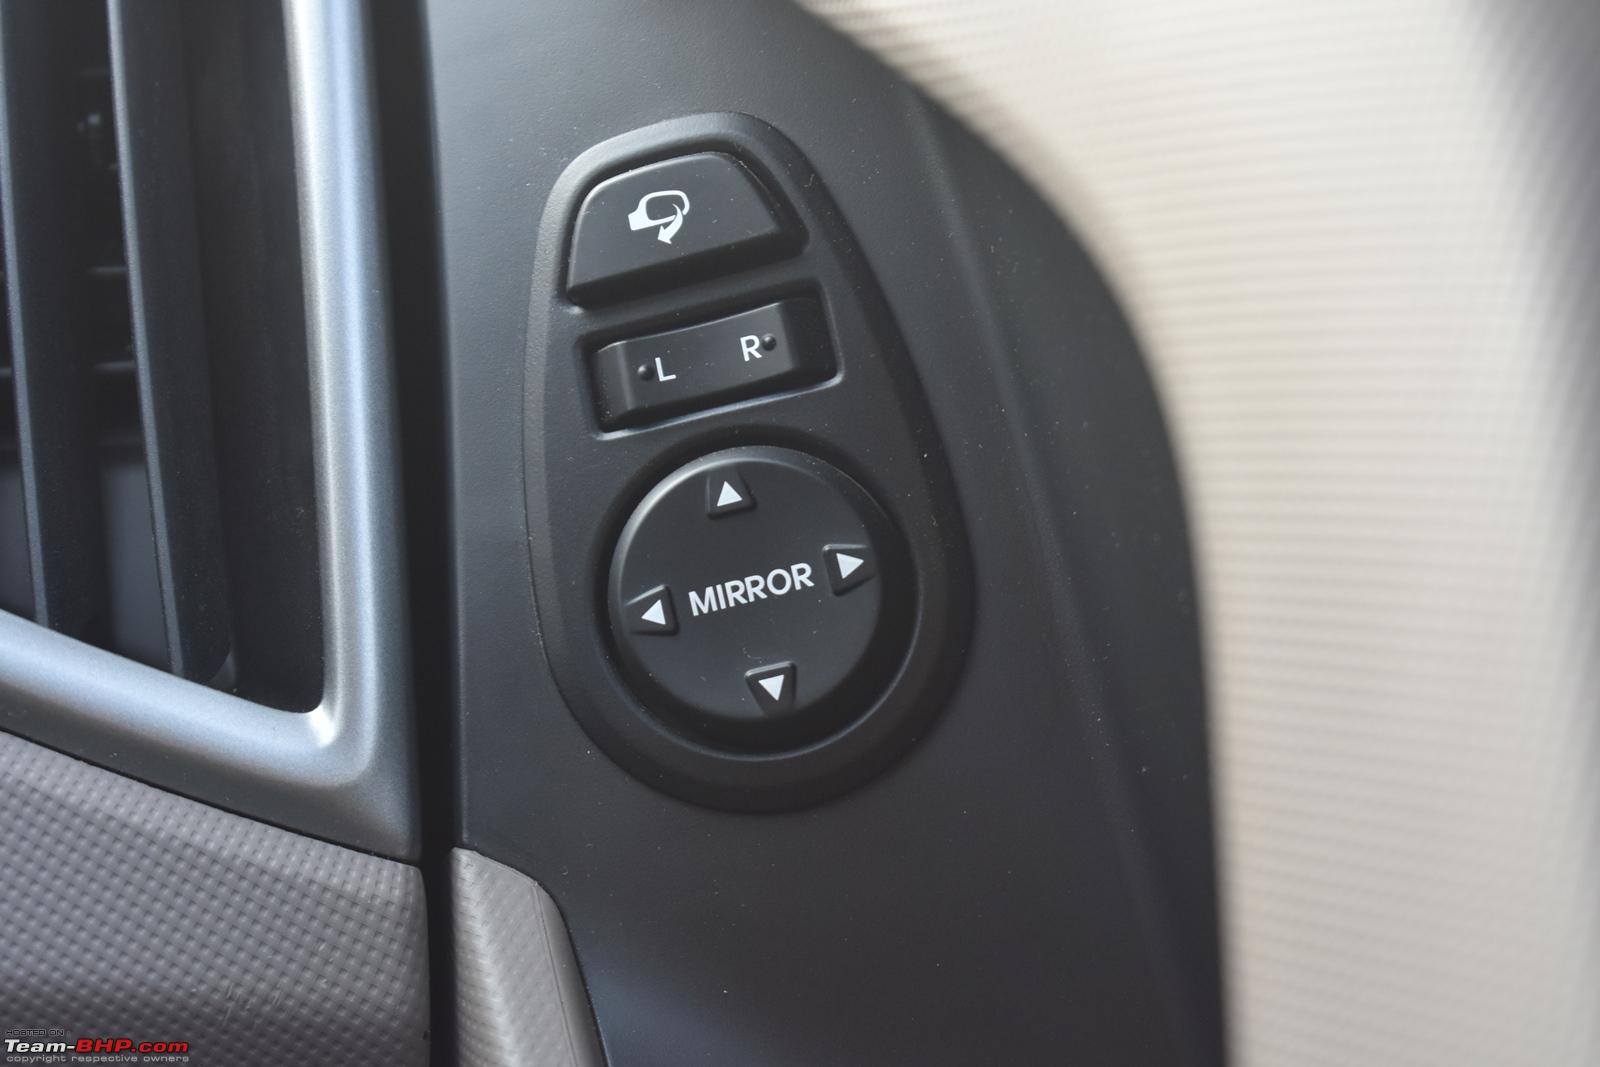
- DIY - ORVM Auto Folding relay
- LED Rear Reflector ('Lambo style')
- DIY - Conversion of the Central cabin lamp and the two Reading lamps to LED
- DIY - Conversion of the Boot lamp to LED
- DIY - Conversion of the High Mount Stop Light to LED
- DIY - Conversion of the Tail & Stop light to LED
- DIY - Conversion of the Registration plate light to LED
- DIY - Conversion of the Reverse to LED
- Speedex Font Style number plate
PS: Modifications highlighted in bold are NOT DIY by me.
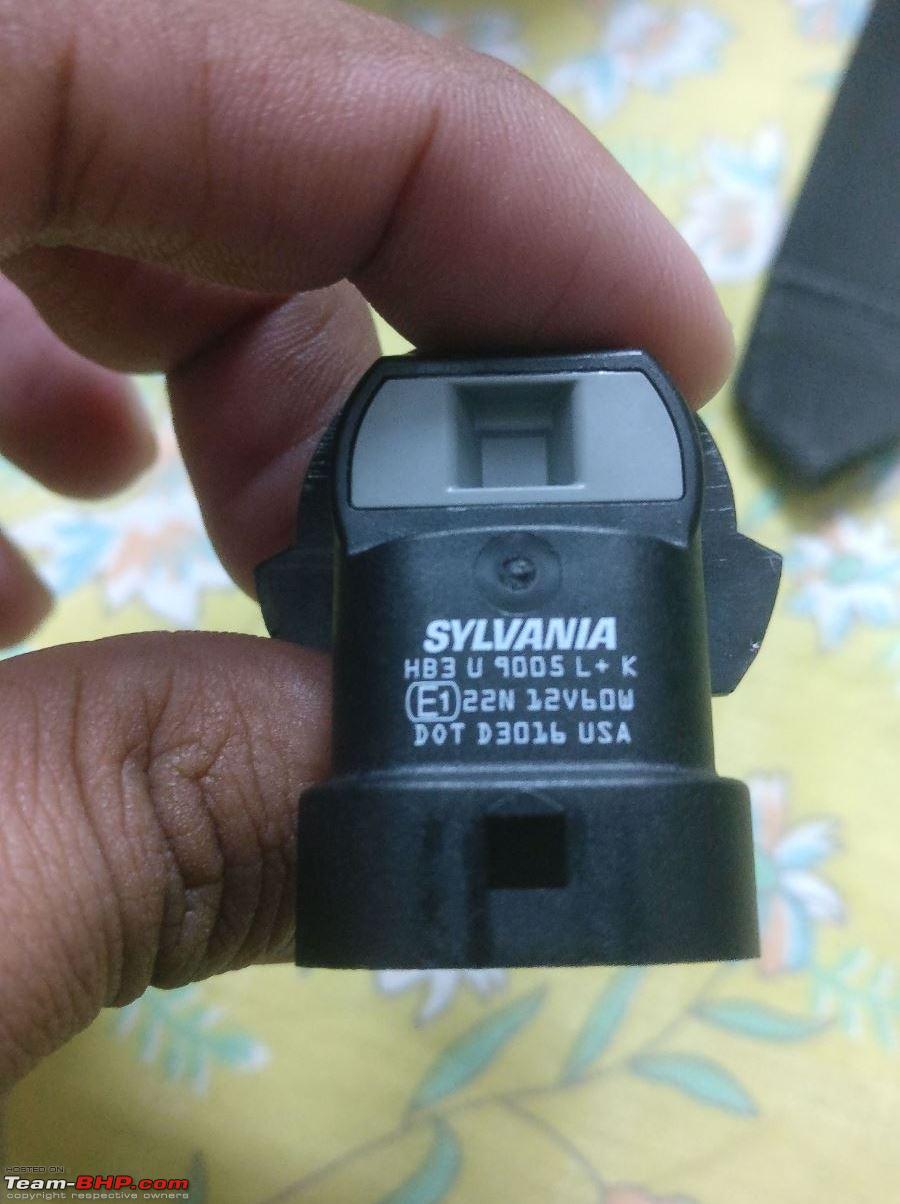
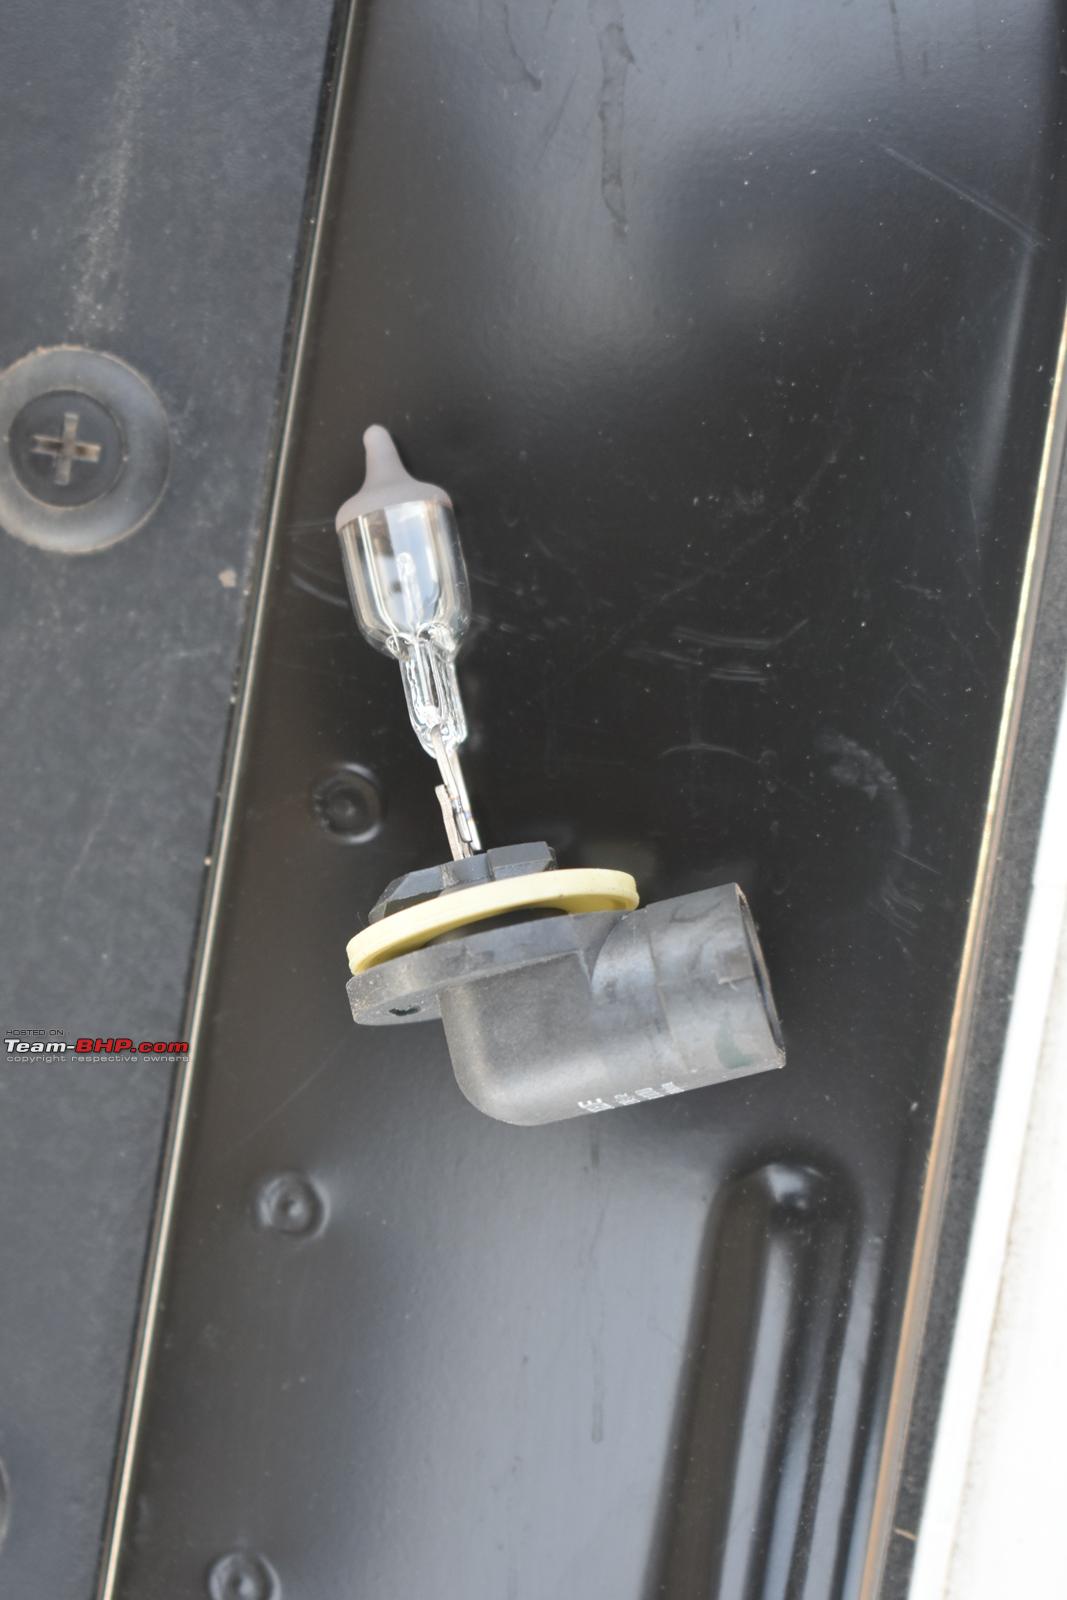
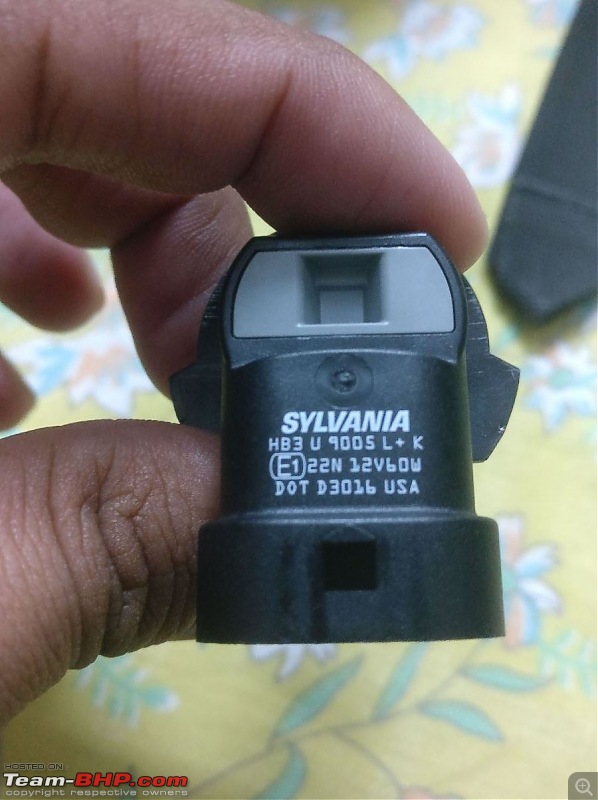
Before I proceed here are some specifications of the bulbs used in the car (Would help someone and be reference in future). Headlight: It is halogen projector that houses a single filament bulb supplied by
Sylvania. The projector has a solenoid that switches the beams on the flick of the headlight stalk (one can hear the solenoid working when the outside environment is silent).
Type: HB3 9005
Wattage: 60W
Voltage: 12V
Cornering Light: In the Creta, this is a halogen bulb housed inside the headlight unit at a fixed angle (hence named as
Static bending lamp by Hyundai) that activates when it senses the steering input to the respective side (provided headlights are ON). After completion of the turn when the wheel is straight, the light fades away (theatre-dimming effect). It is a single filament bulb manufactured by
Osram.
Type: H11
b
Wattage: 55W
Voltage: 12V
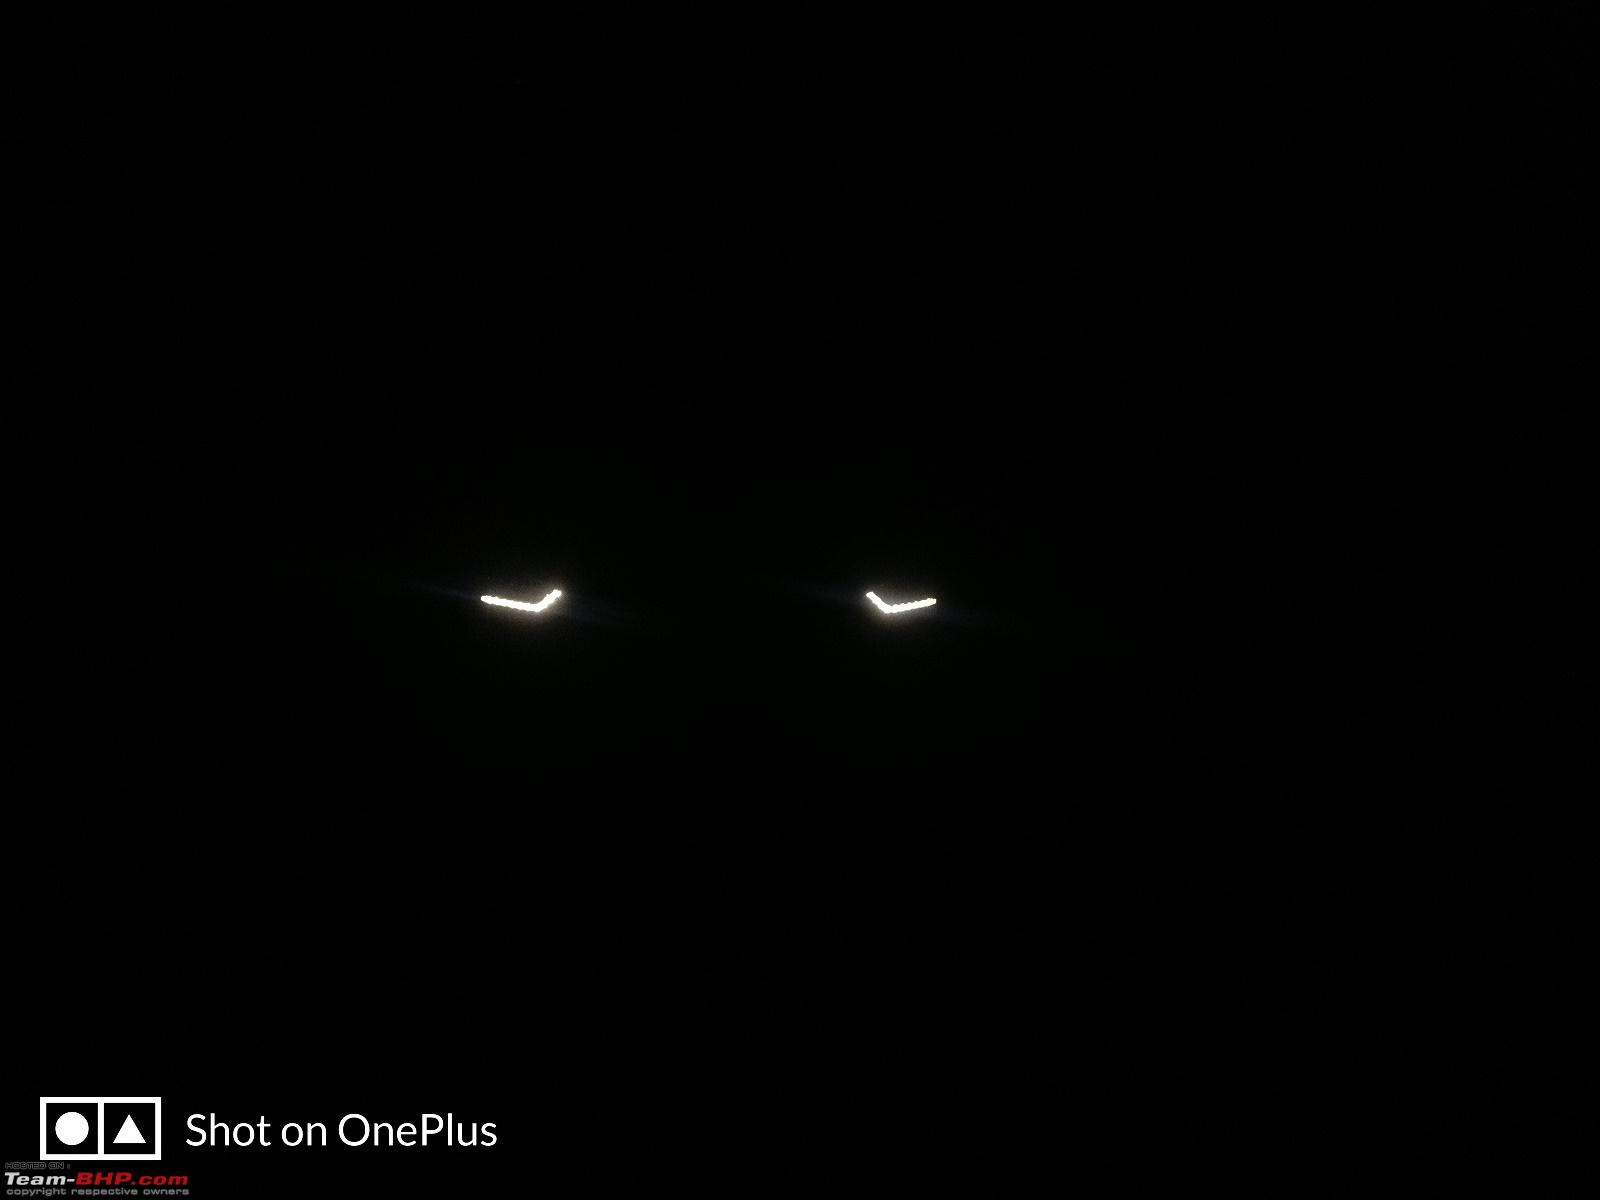
Here's a video of the cornering light and how it fades off neatly:
Cornering Light Fog Lamp: Funky design with decent spread. Hyundai has gone bonkers to use a non-standard bulb in the non-standard design of the fog lamp that leaves no choices at all if one wants to upgrade. :Frustrati Execlite is the manufacturer and is labelled as Made in Korea.
Type: H27/2 or 881
Wattage: 27W
Voltage: 12V
Tail/Stop Lamp: Creta comes with a twin tail light section where the one on the body houses the brake+tail light and the Indicator where the section found on the boot lid houses the tail light and reverse.
A) Tail Light
Type: P21W
Wattage: 5W
Voltage: 12V
B) Stop + Tail Light
Type: P21/5W
Wattage: 21/5W
Voltage: 12V
Reverse Light: Thank god Hyundai didn't go into cost cutting mode and give 1 reverse light as it has done in the Elite i20. Fairly bright light that helps in visibility during nights with reverse cam ON. I was thinking the bulb to be a P21W as seen generally in Maruti's but not the case here. It is a different one.
Type: T15 or W16W
Wattage: 16W
Voltage: 12V
Indicators: Standard bulb used here. Controlled by the BCM hence left these bulbs as it is else would have swapped them for LED's.
Type: PY21W
Wattage: 21W
Voltage: 12V
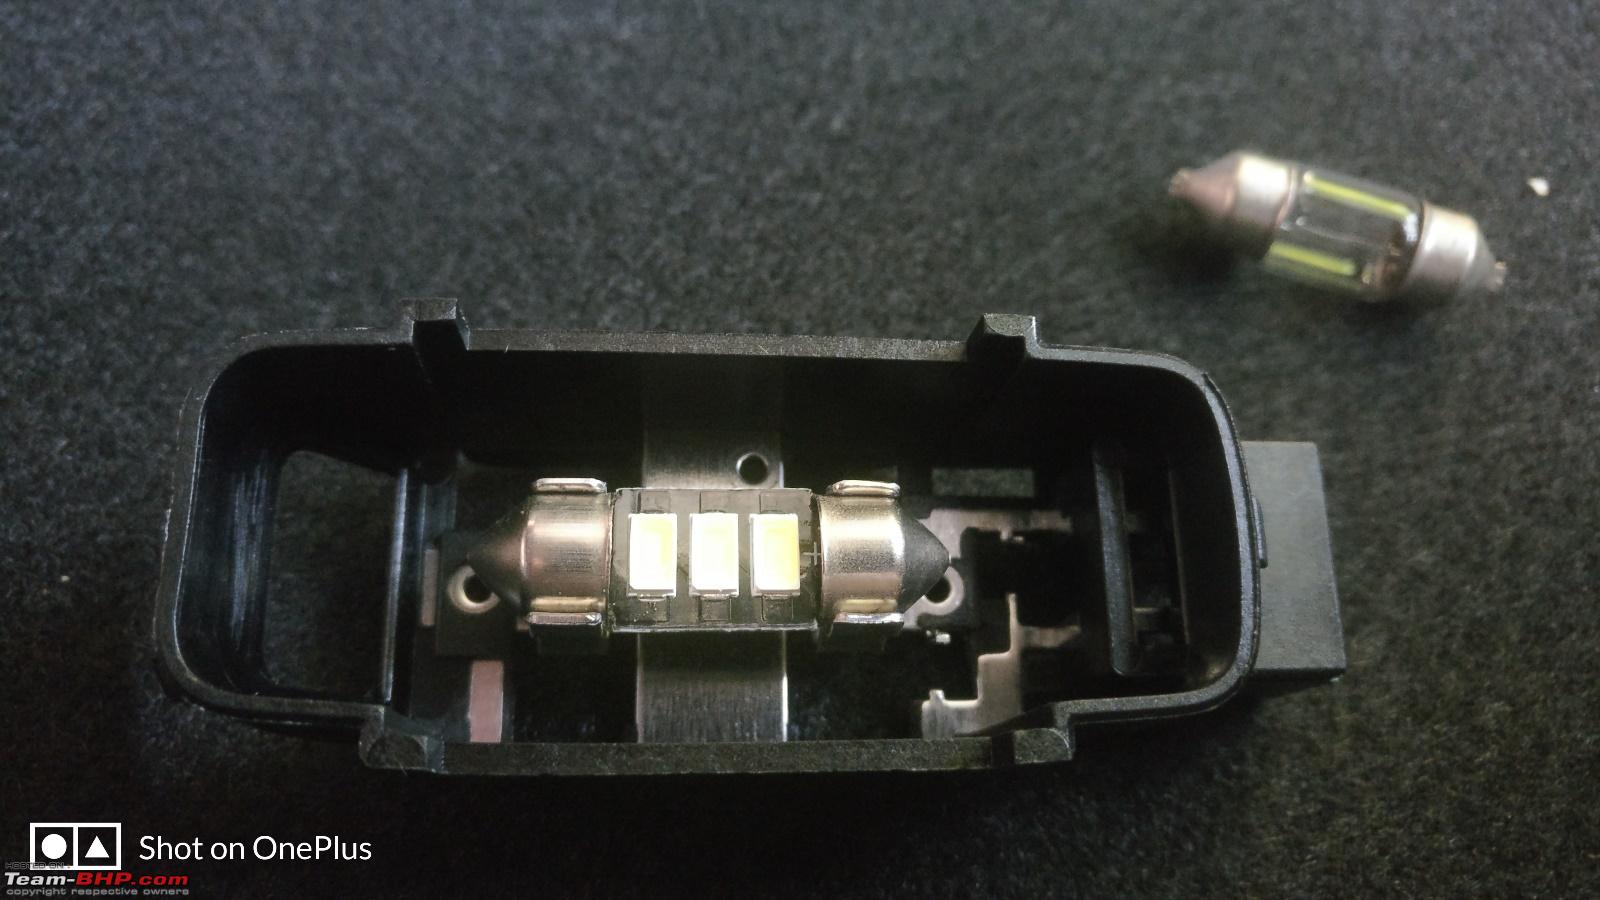
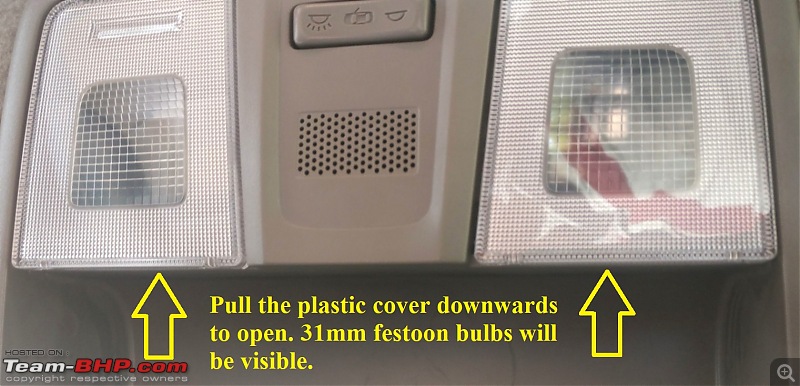
Cabin Light + Reading Light + Boot Light: There are a total of 2 reading lights located at the front best the sunglasses holder, 1 central cabin light and 1 boot light. All the 4 bulbs are same in specification.
Type: Festoon
Size: 31mm
Wattage: 8W
Voltage: 12V
Registration Plate and High mount Stop Light:: Both are standard bulbs used.
Type: T10
Wattage: 5W
Voltage: 12V
Pilot or Position Lamps: It is LED type that is sealed into the headlight unit.
MODIFICATION #1: Audio Upgrade (Speakers and Amplifier from Swift)
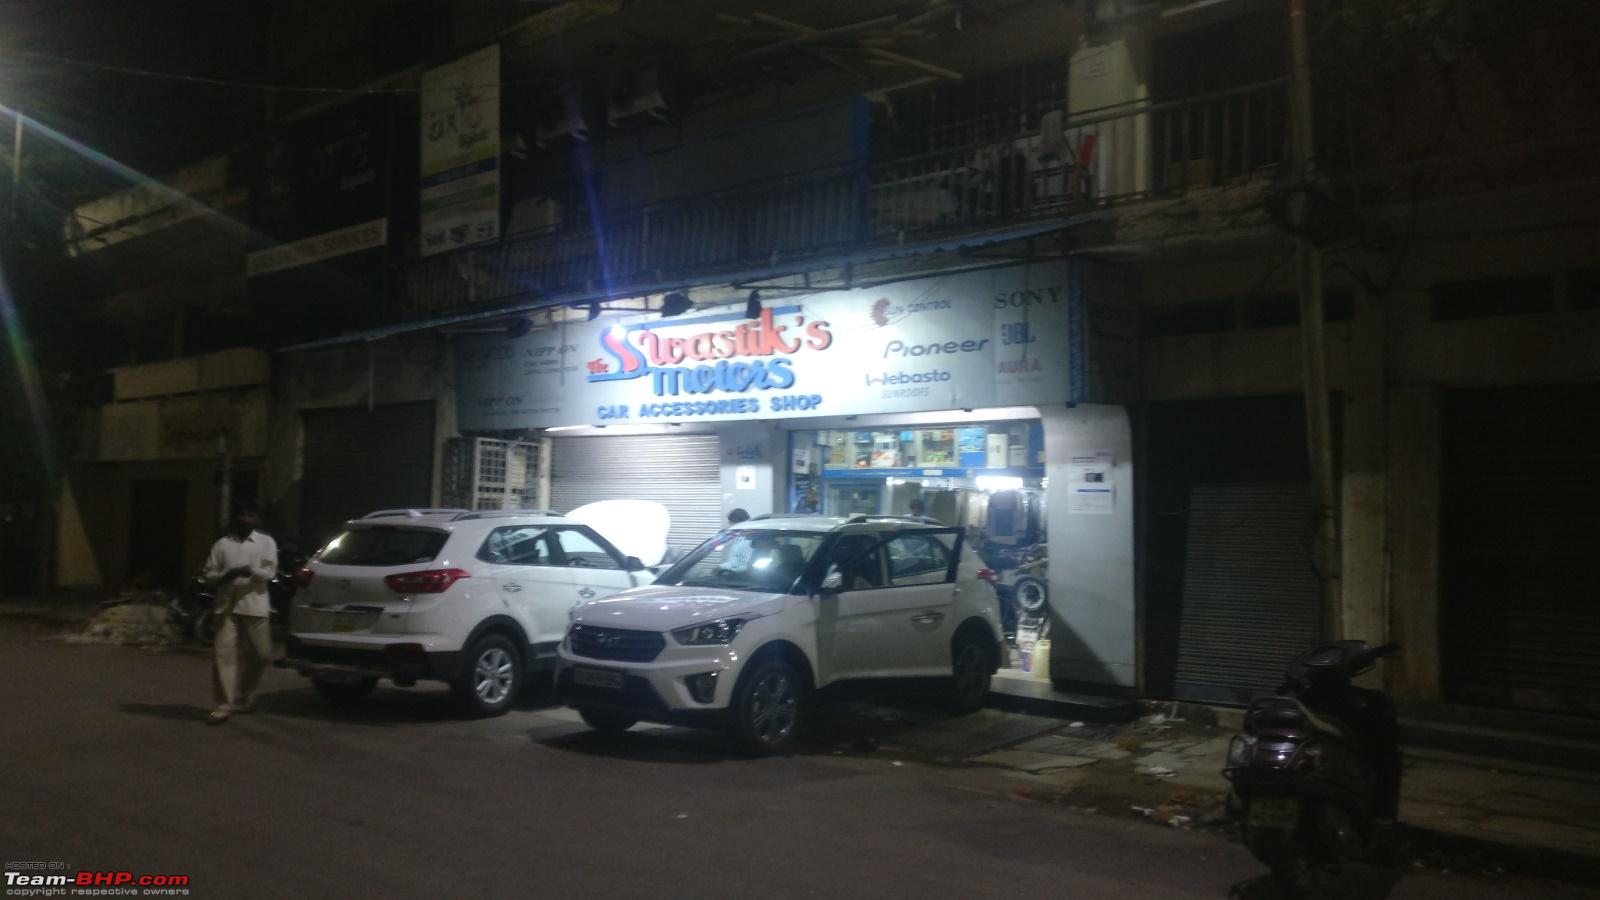
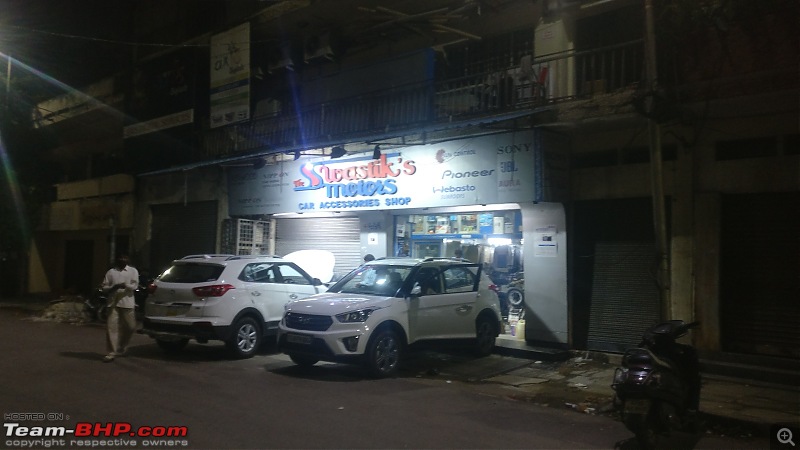
Since the audio upgrade on my Swift was done at the last moment, I removed it from the car before selling it. After 1.5 months of searching around Hyderabad for good installers, I could located one accessory store who could do the audio works the way I wanted (NOT a DIY). Visited Swastik Motors @ SP Road and got the job done by them. Kept the HU stock for now (regret the decision though).
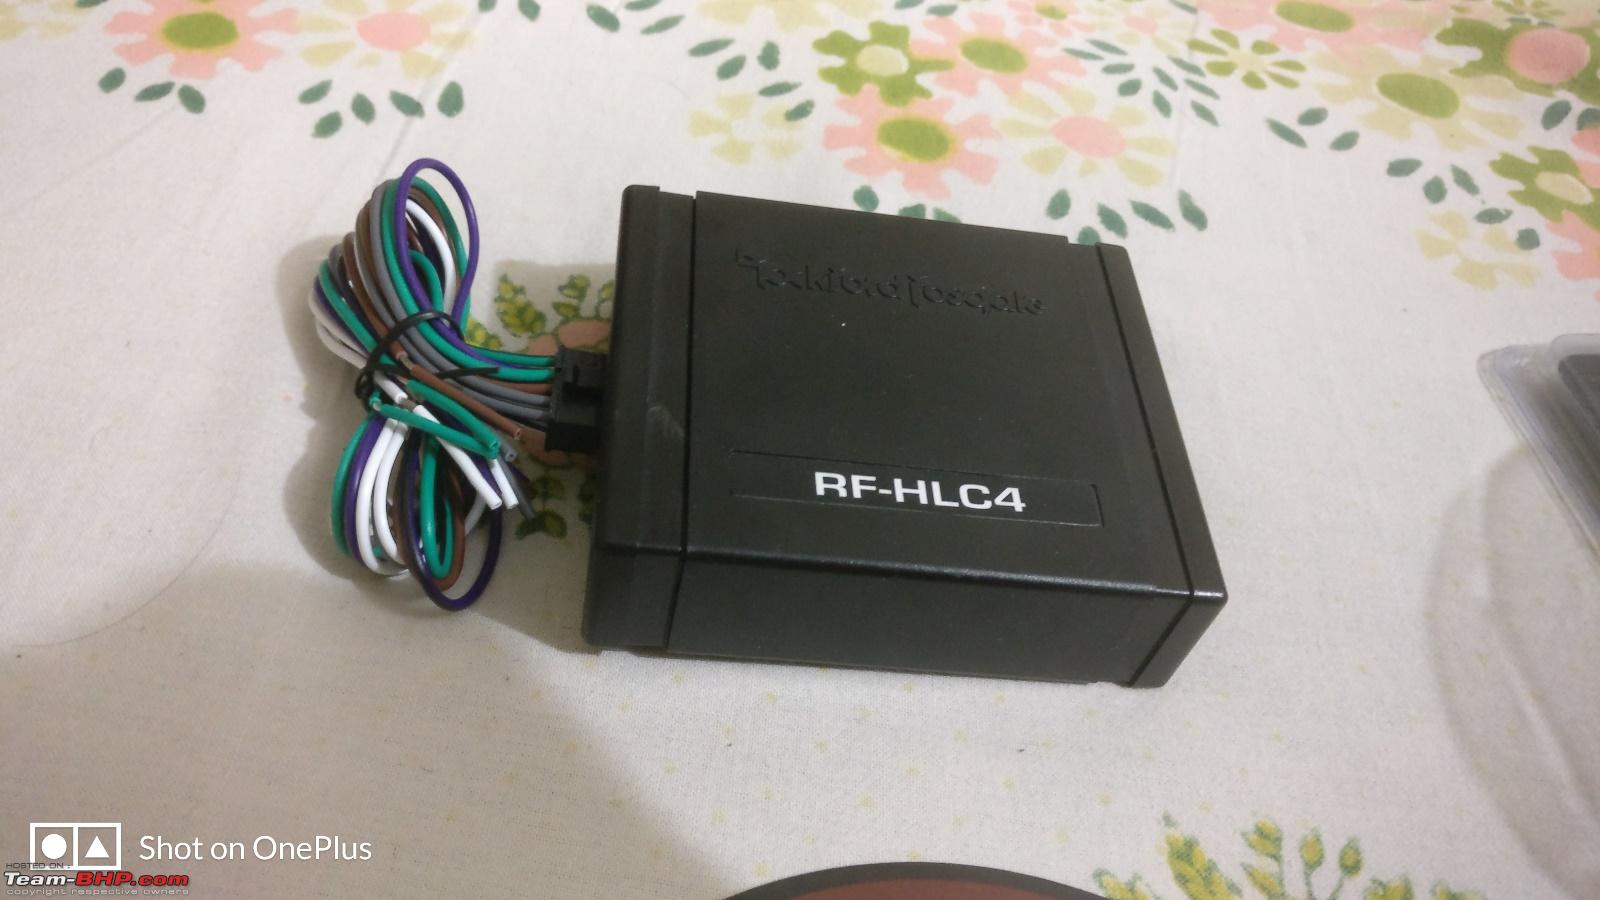
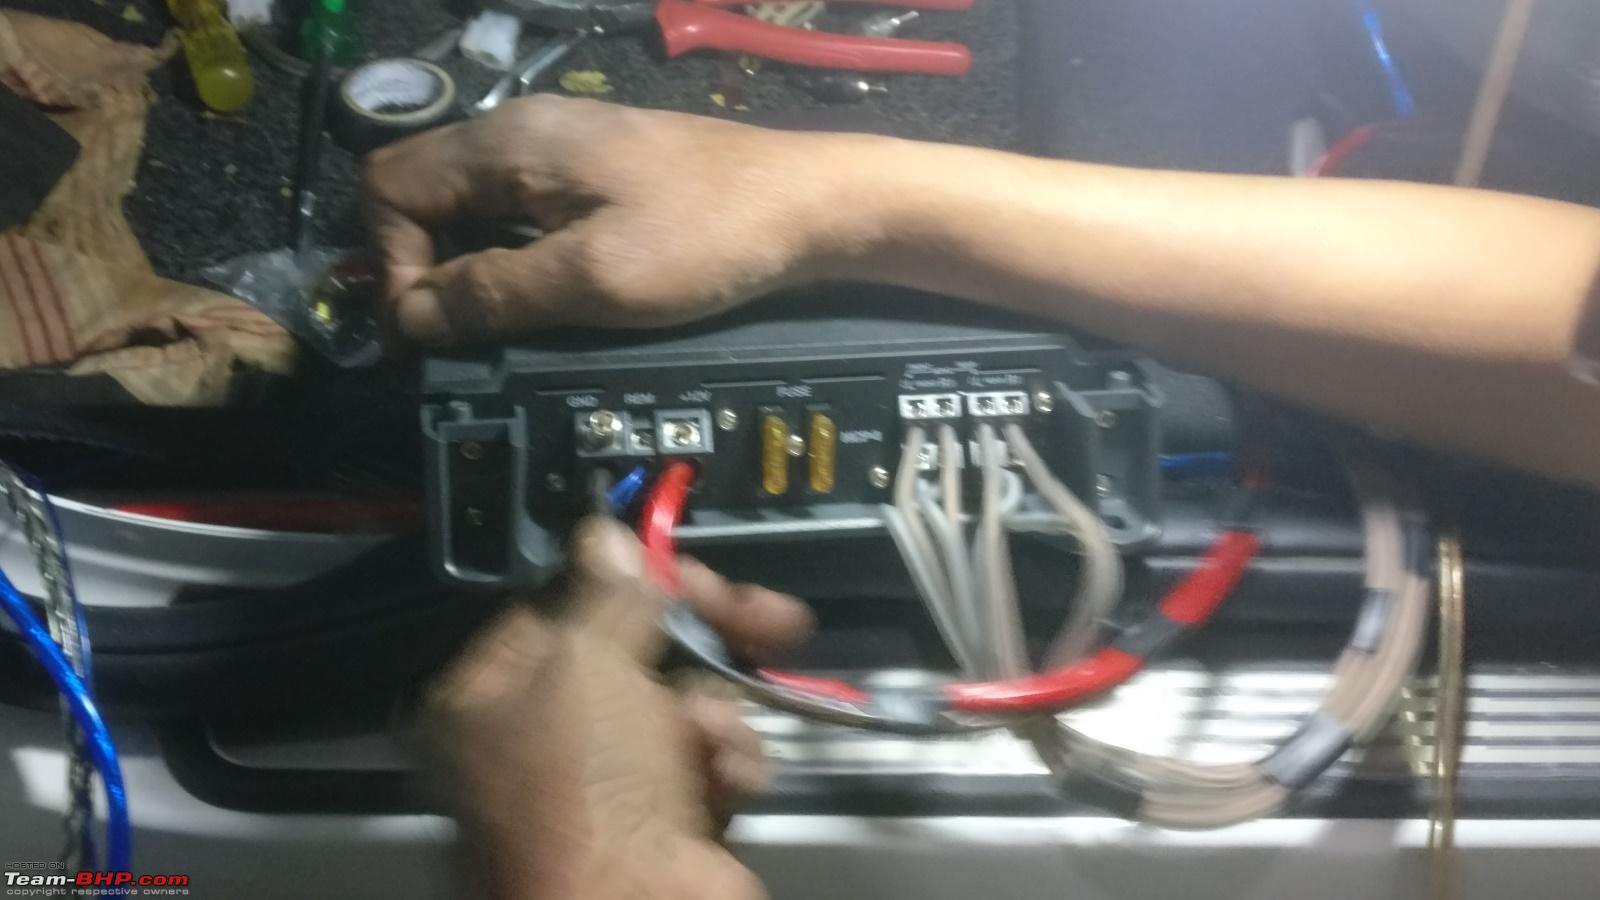
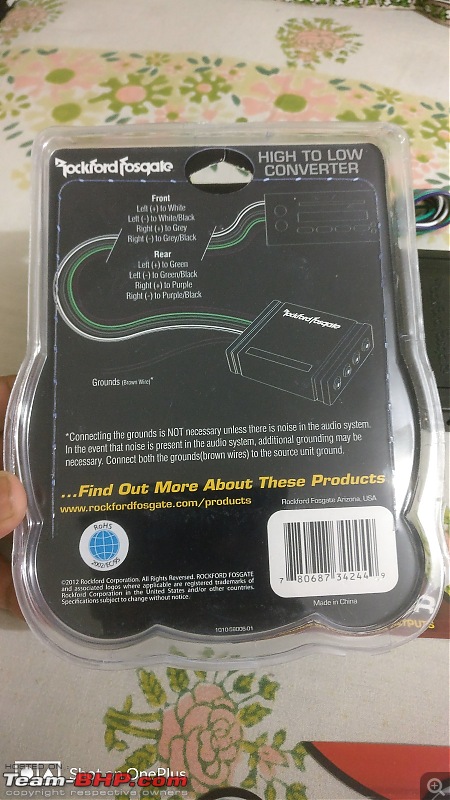
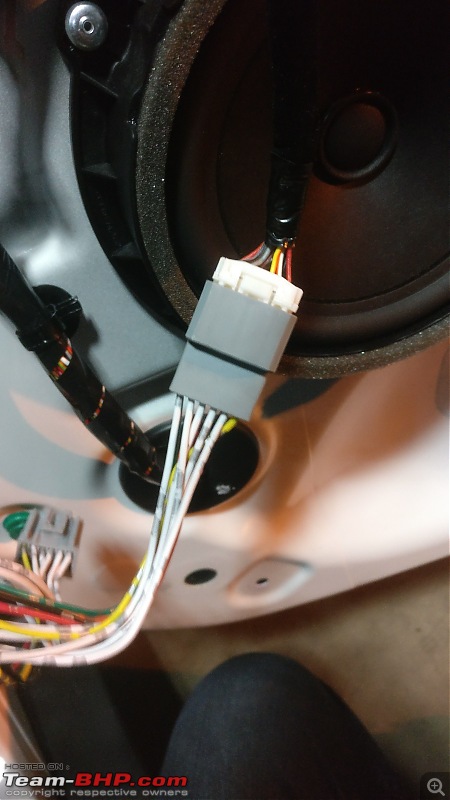
Decided to go the Hi-Low converter route this time rather than the flimsy ATX connector that is used in this amplifier for high level input from HU. BHPian Sudeepg's colleague was coming down to India from the USA so ordered the Rockford Fosgate Hi-low converter from Amazon.com for ₹1,829. The same thing in India costs ₹3,000 when I had enquired at the distributor for Rockford Fosgate in Hyderabad. :Frustrati
It was a fairly straight forward install that took almost 3 hours from start to finish. Some images I took during WIP:
Swastik Motors @ SP Road, Secunderabad
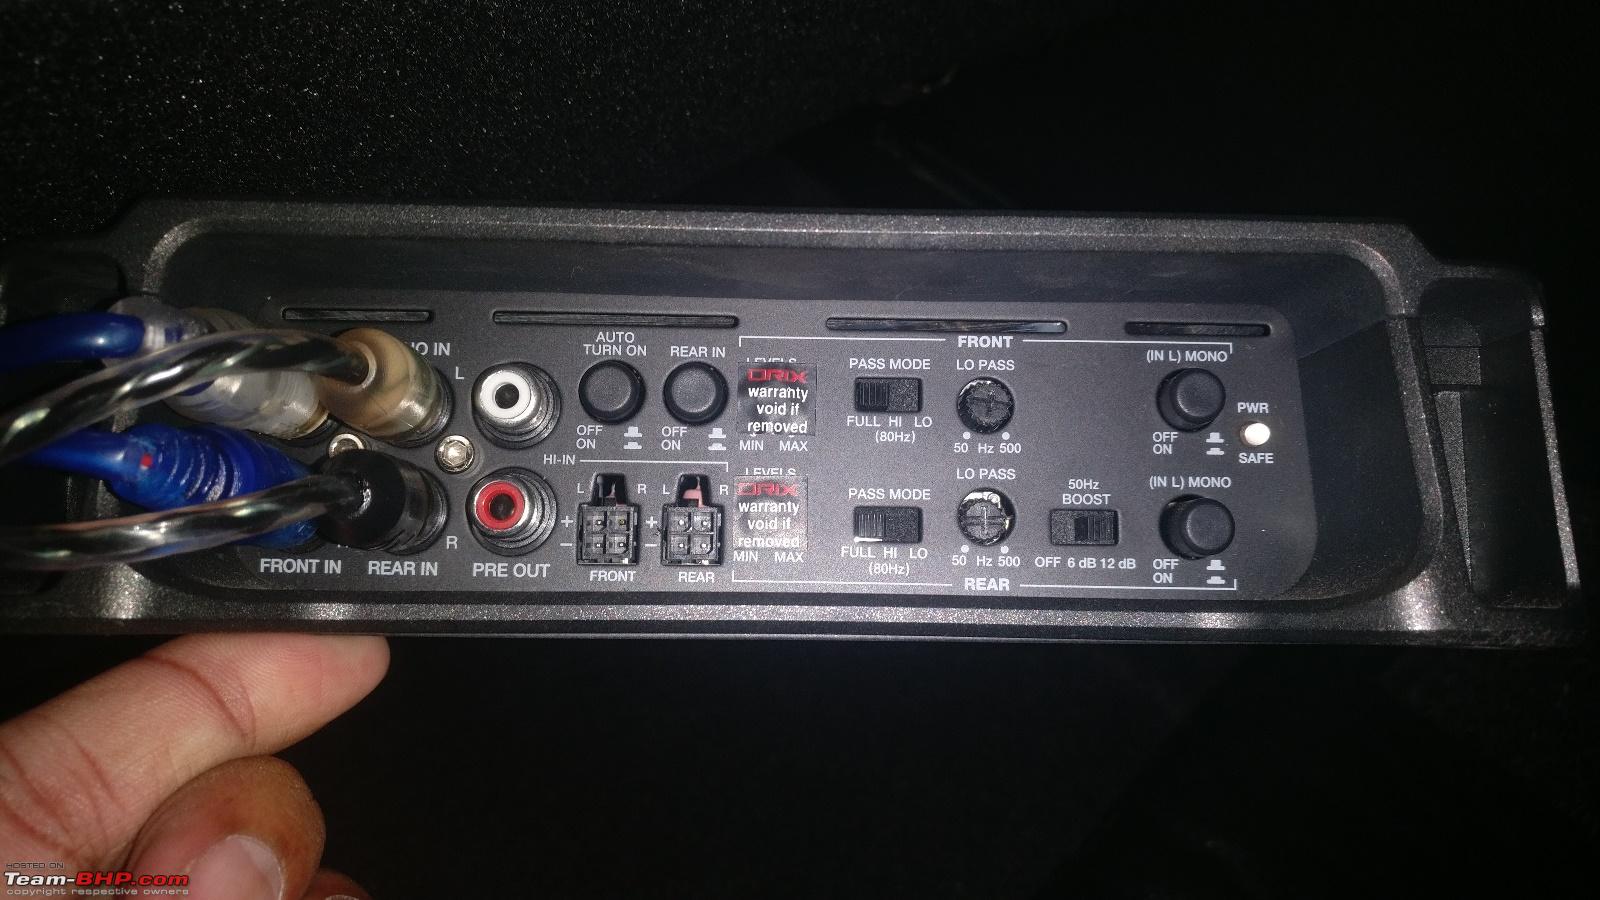
Rockford Fosgate 4-channel converter (RF-HLC4)

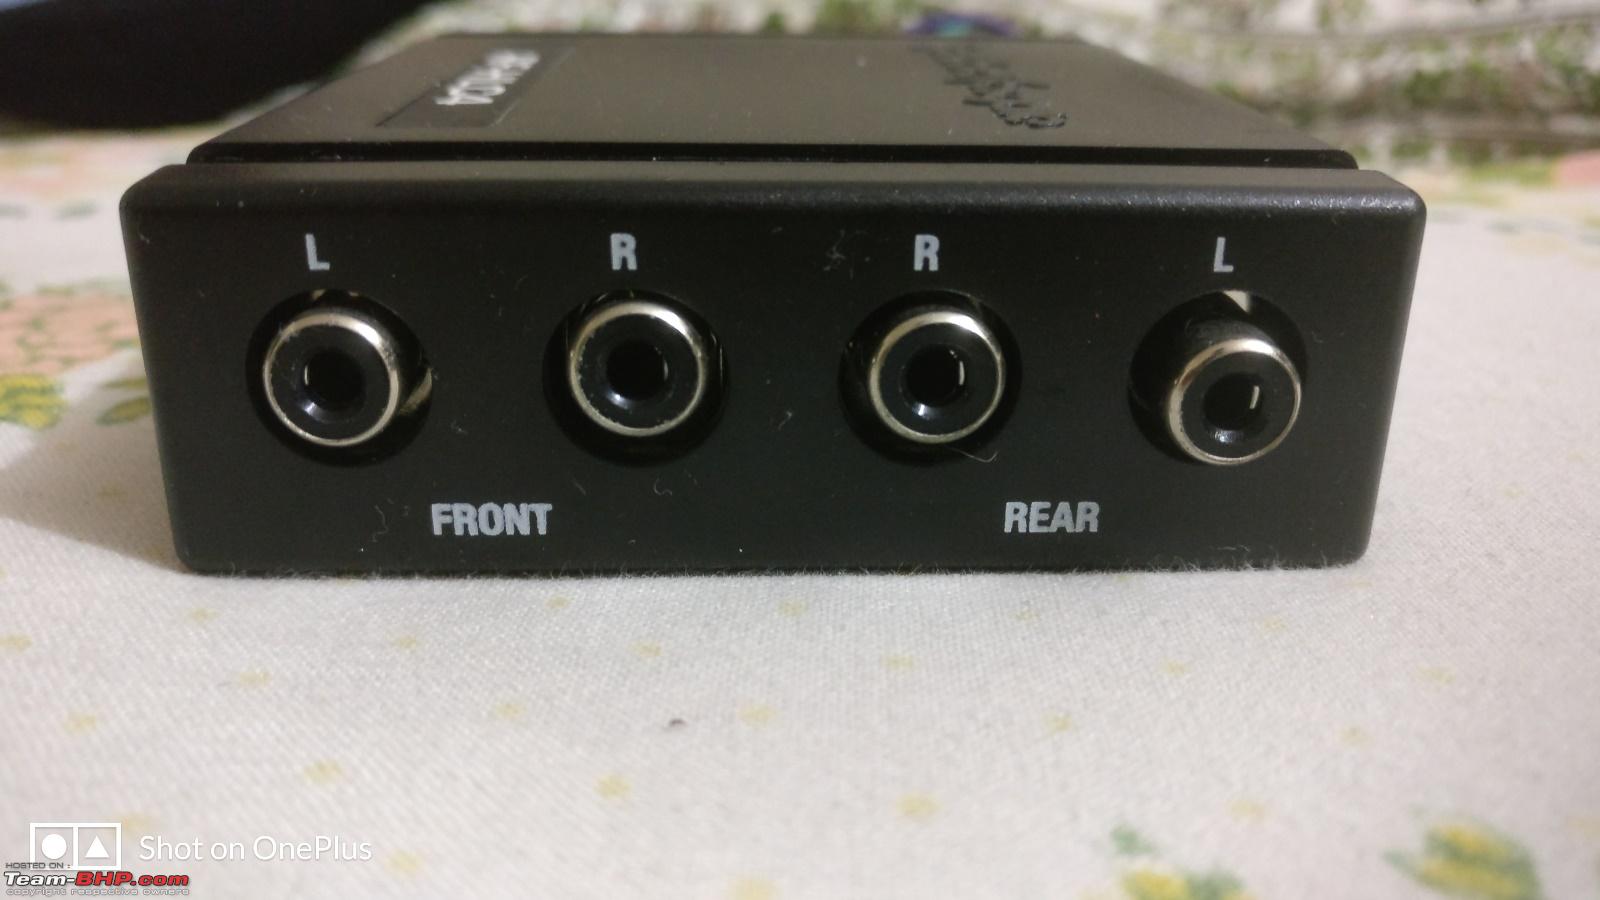
RCA Inputs

Clear instructions on how to wire the converter with colour coding
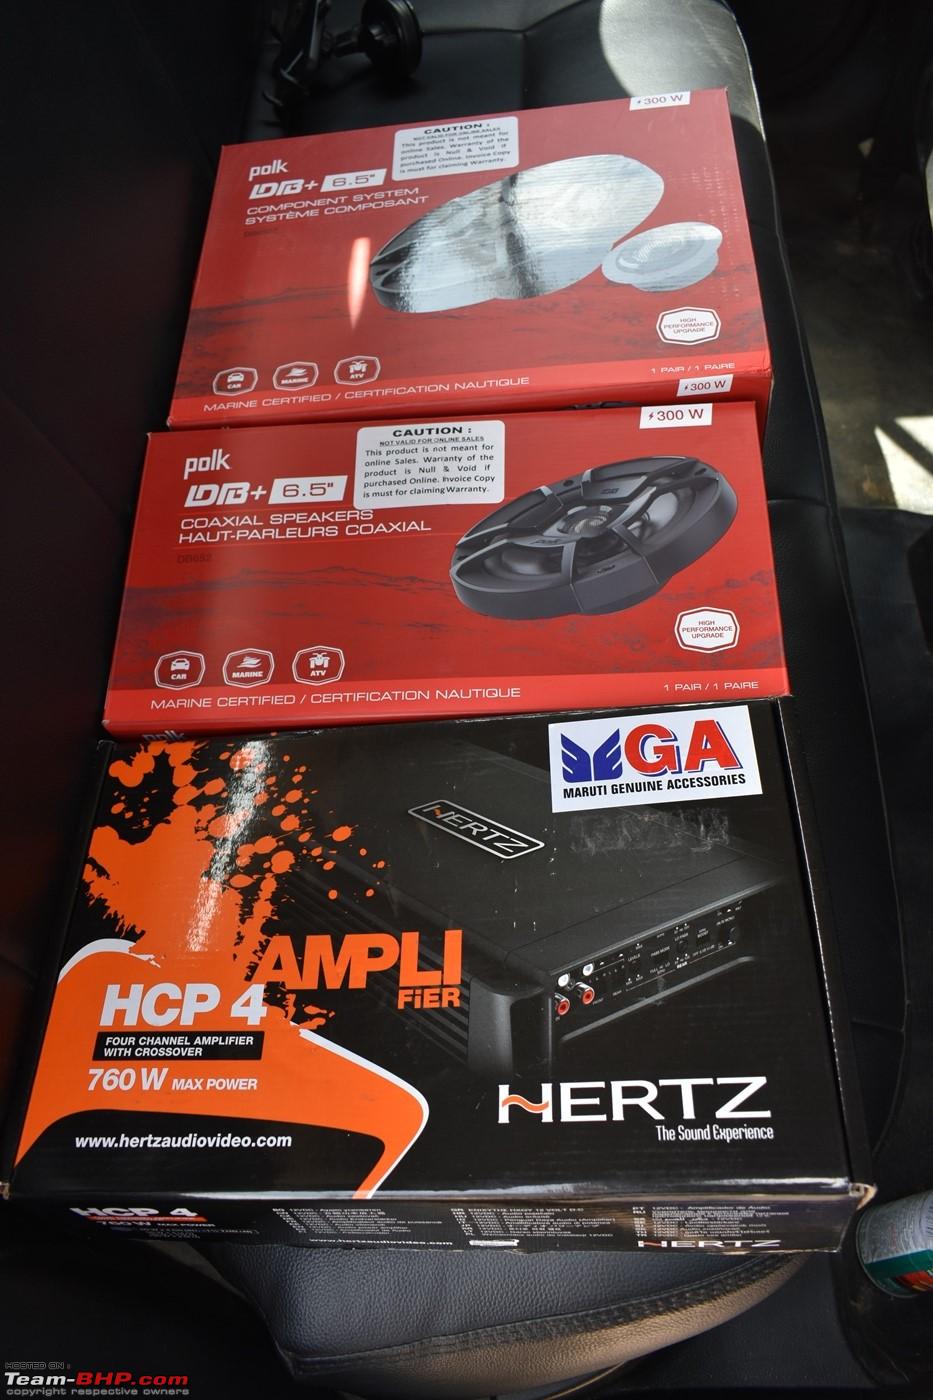
Set used in the upgrade

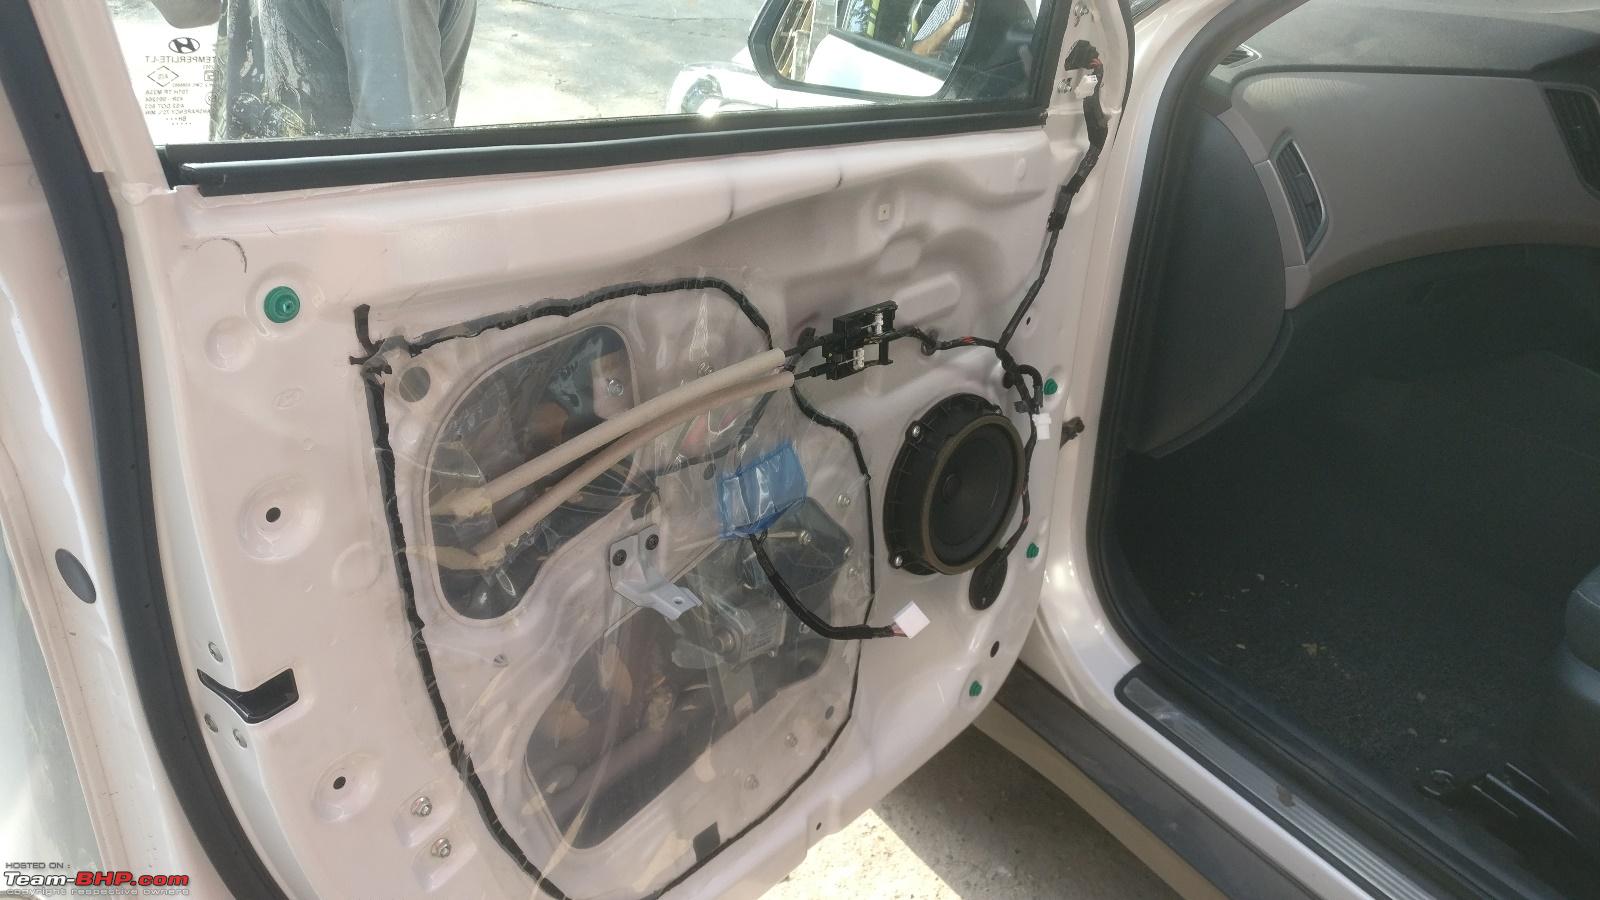
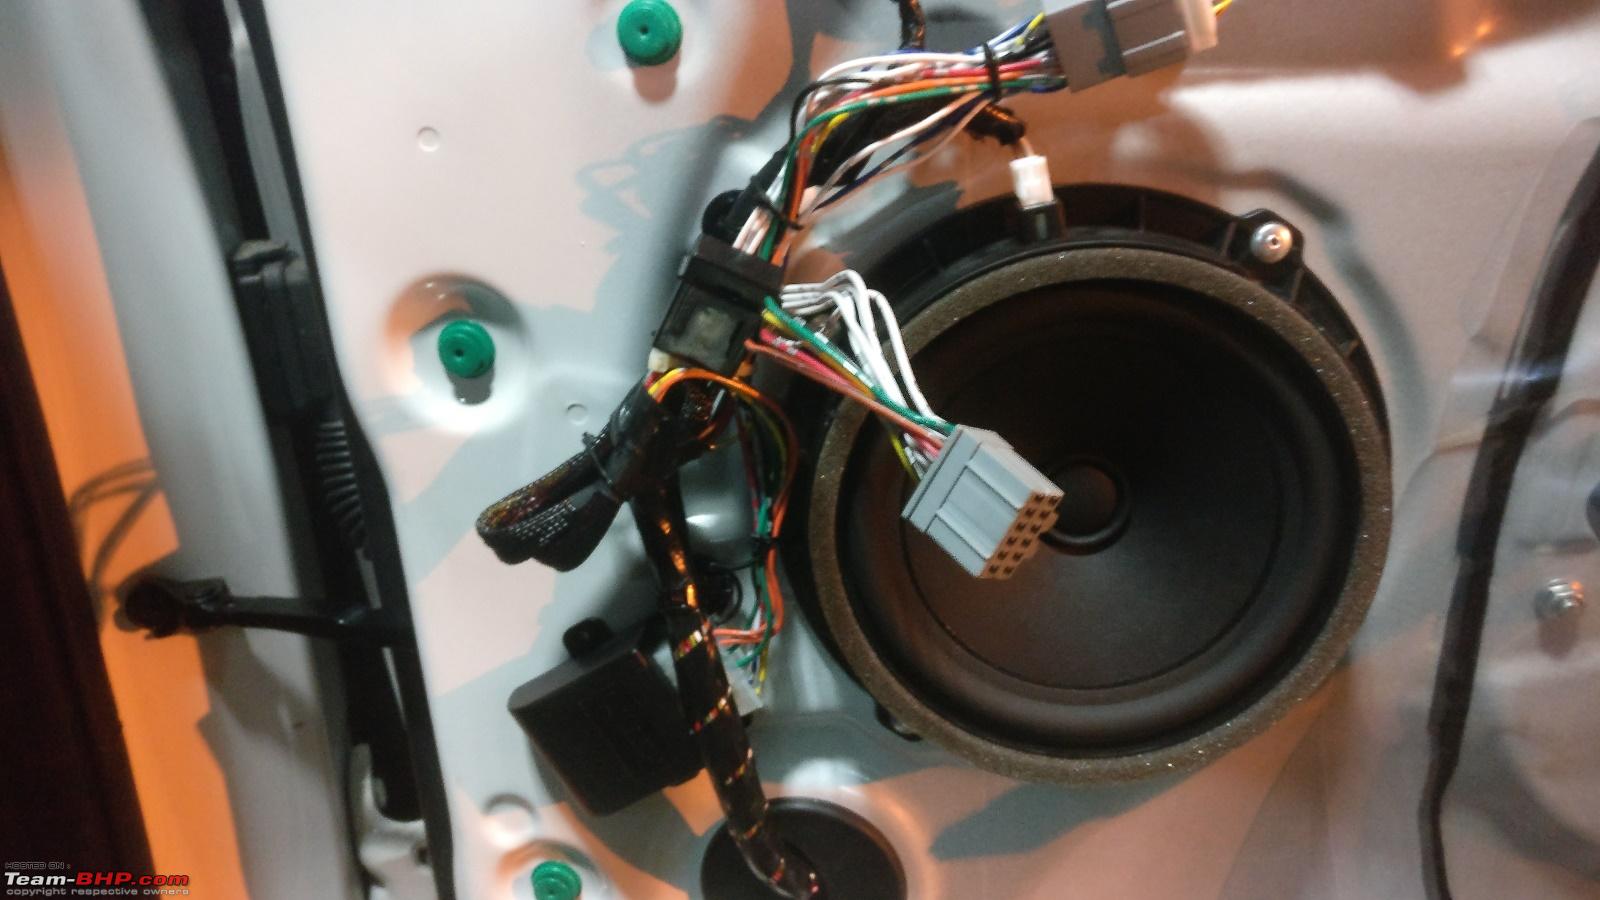
OEM Tweeter hiding beneath the sponge

Door pad removed revealing the internals and wiring

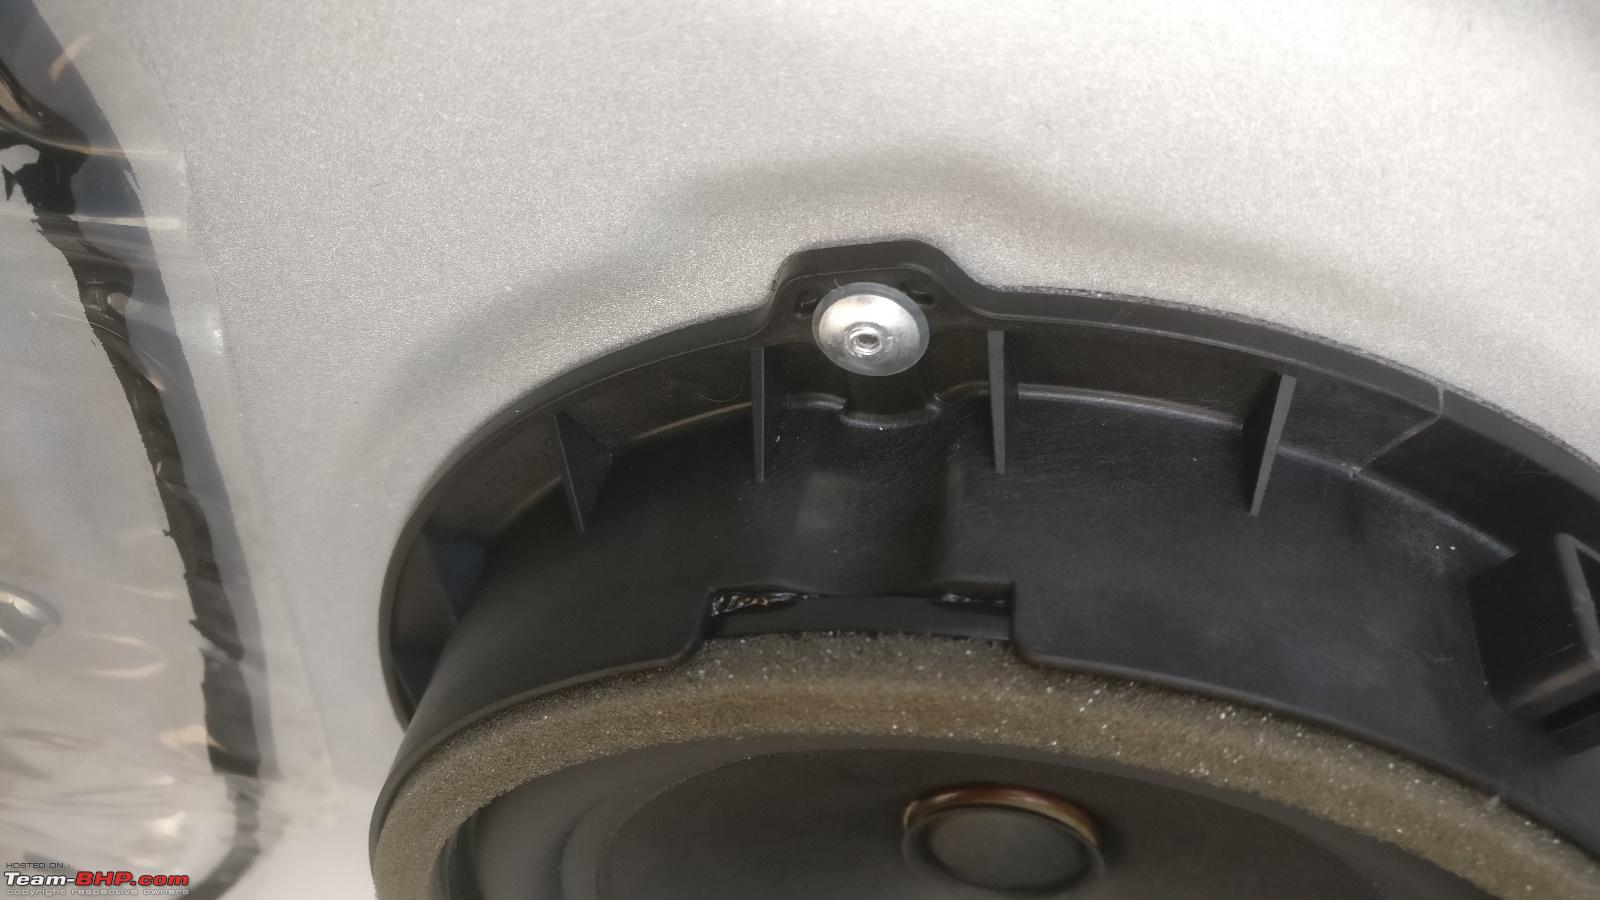
Rivets used to mount the speakers :Frustrati (I call it over-engineered)

OE Woofer (20W RMS and 40W Max at a 4 Ohm impedance). Sounded better than what I got as OE in Swift.


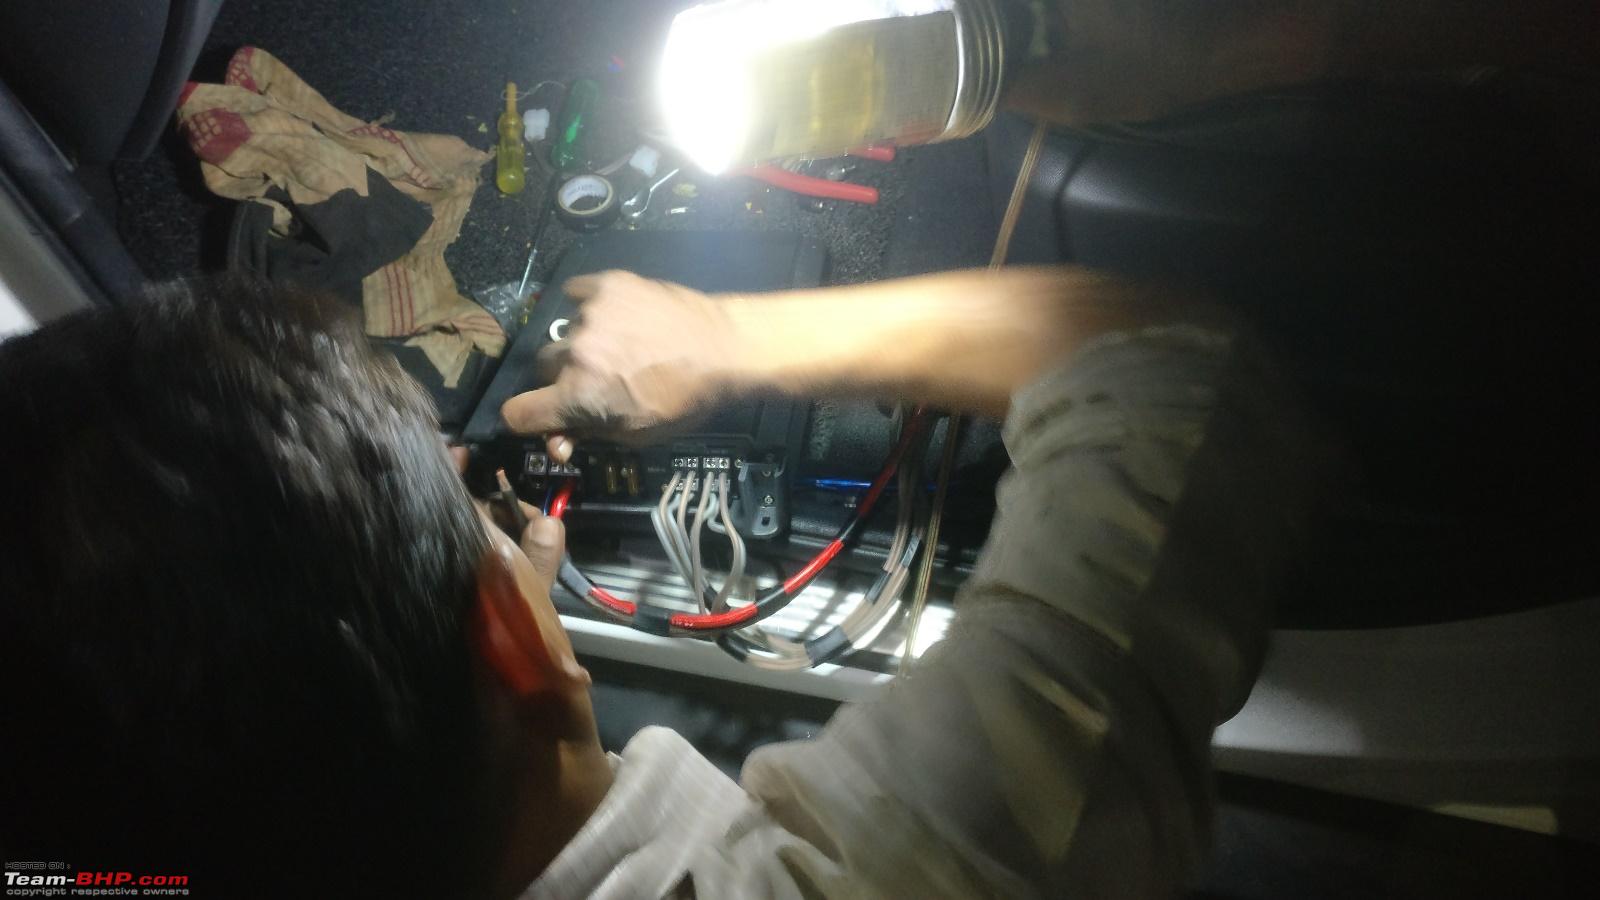
Amplifier wiring done

RCA's connected from the hi-lo converter

HU wiring done and panel re-fitting going on
Stock
Front Speakers: Polk dB+ 6502 components
Rear Speakers: Polk dB+ 652 coaxial
Amplifier: Hertz HCP 4 (4 Channel)
Wiring: Scosche 8-gauge wiring kit
For the time being it is going good but I am not really happy with the output of this setup in the Creta. I am shortly upgrading the complete setup from a reputed installer that I'll be visiting in a months time. Plan to put the Polk speakers and Hertz amplifier on sale pretty soon.
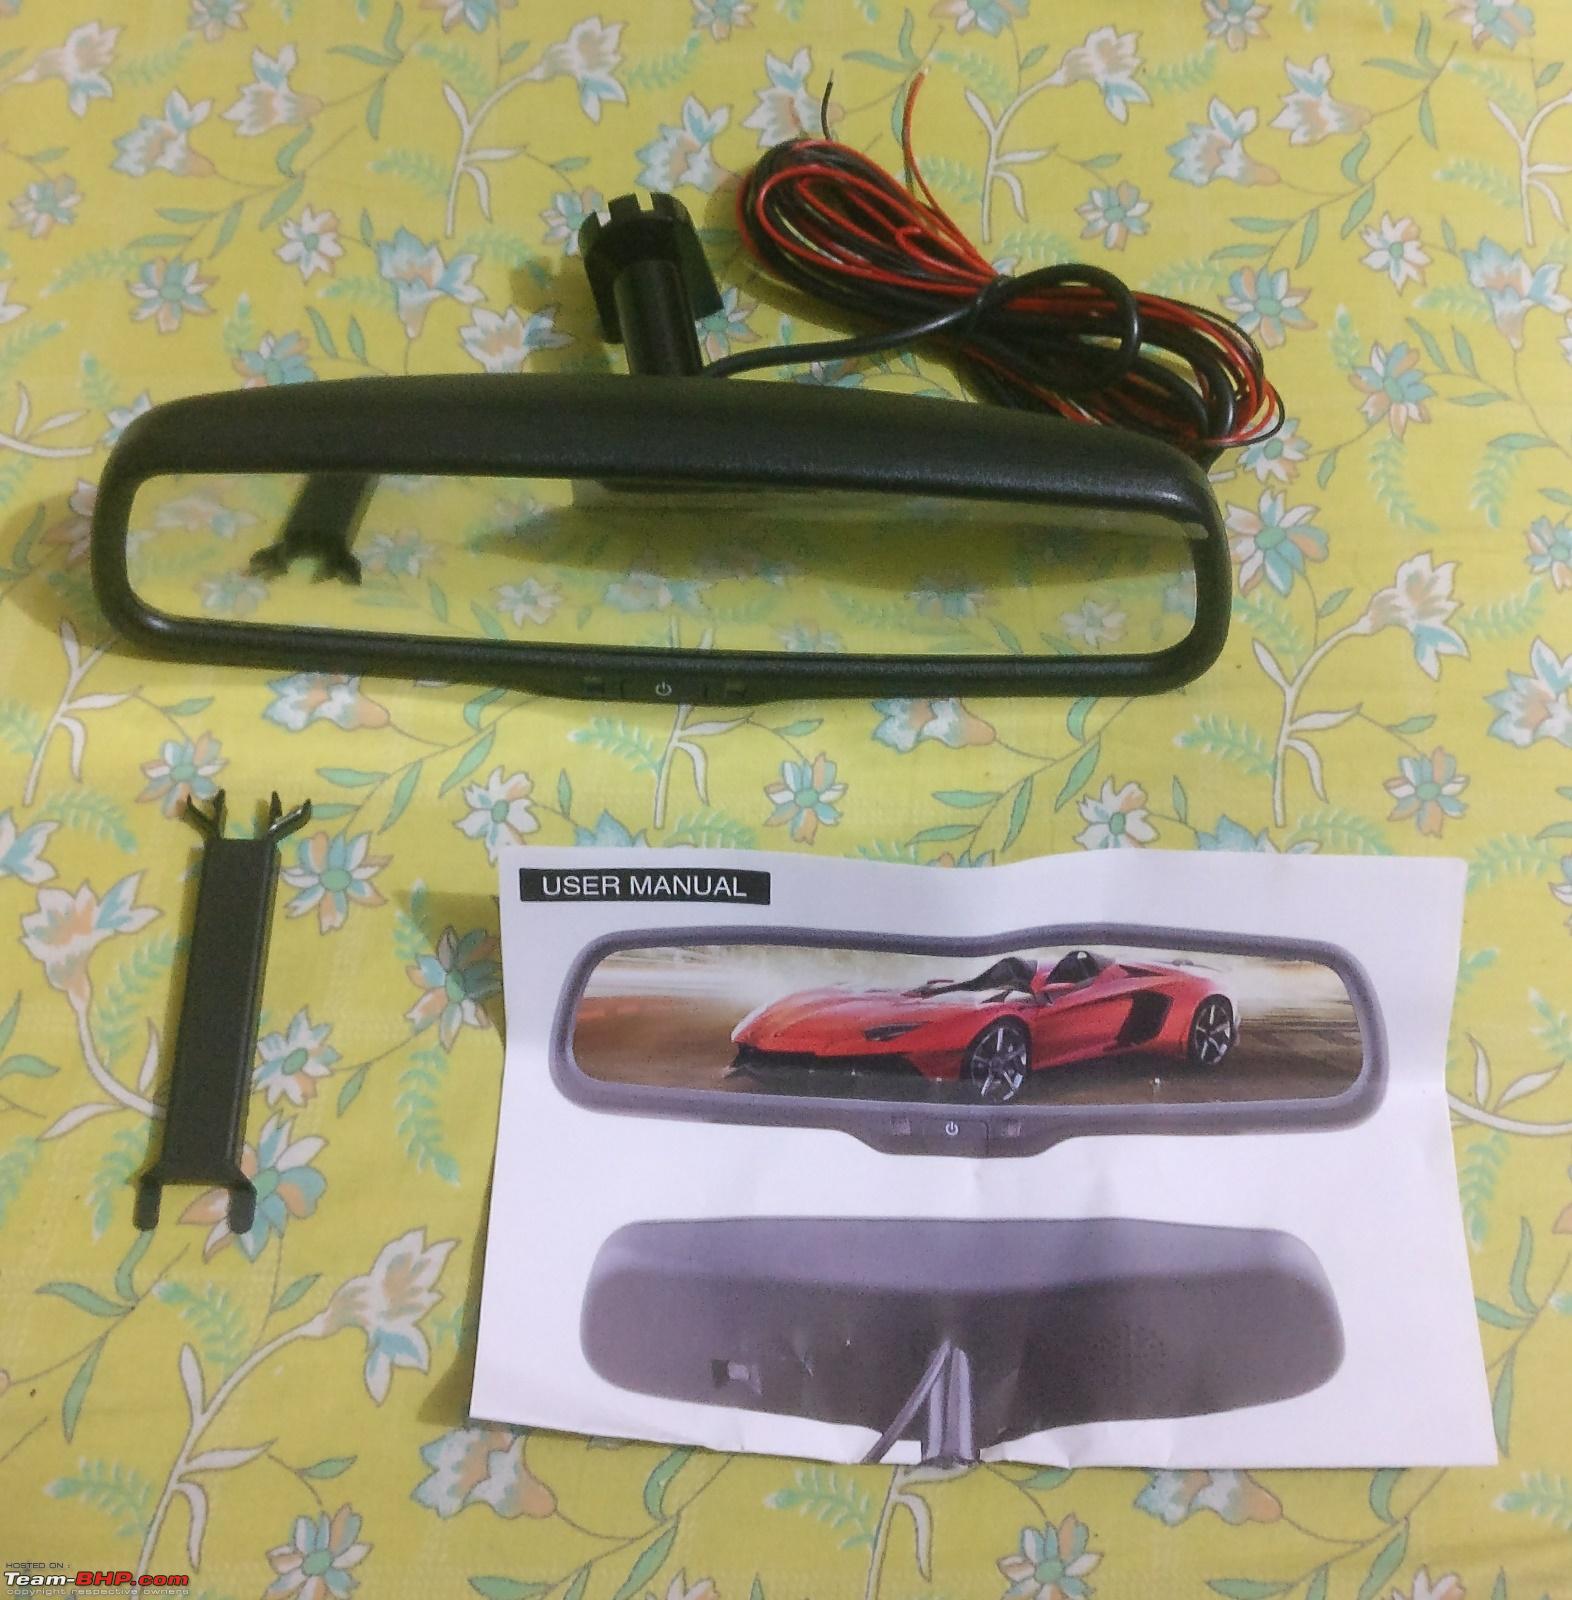
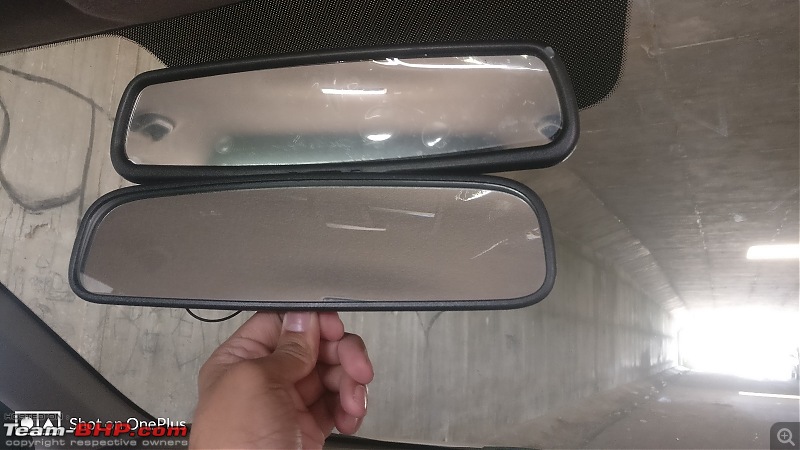
MODIFICATION #2: DIY Install of Auto dimming IRVM
Process of install being the same, I didn't click many pictures. For all fine details and how to prepare the wiring plus the requirements for the install, please check my Swift's auto-dimming IRVM install thread
(Link here)
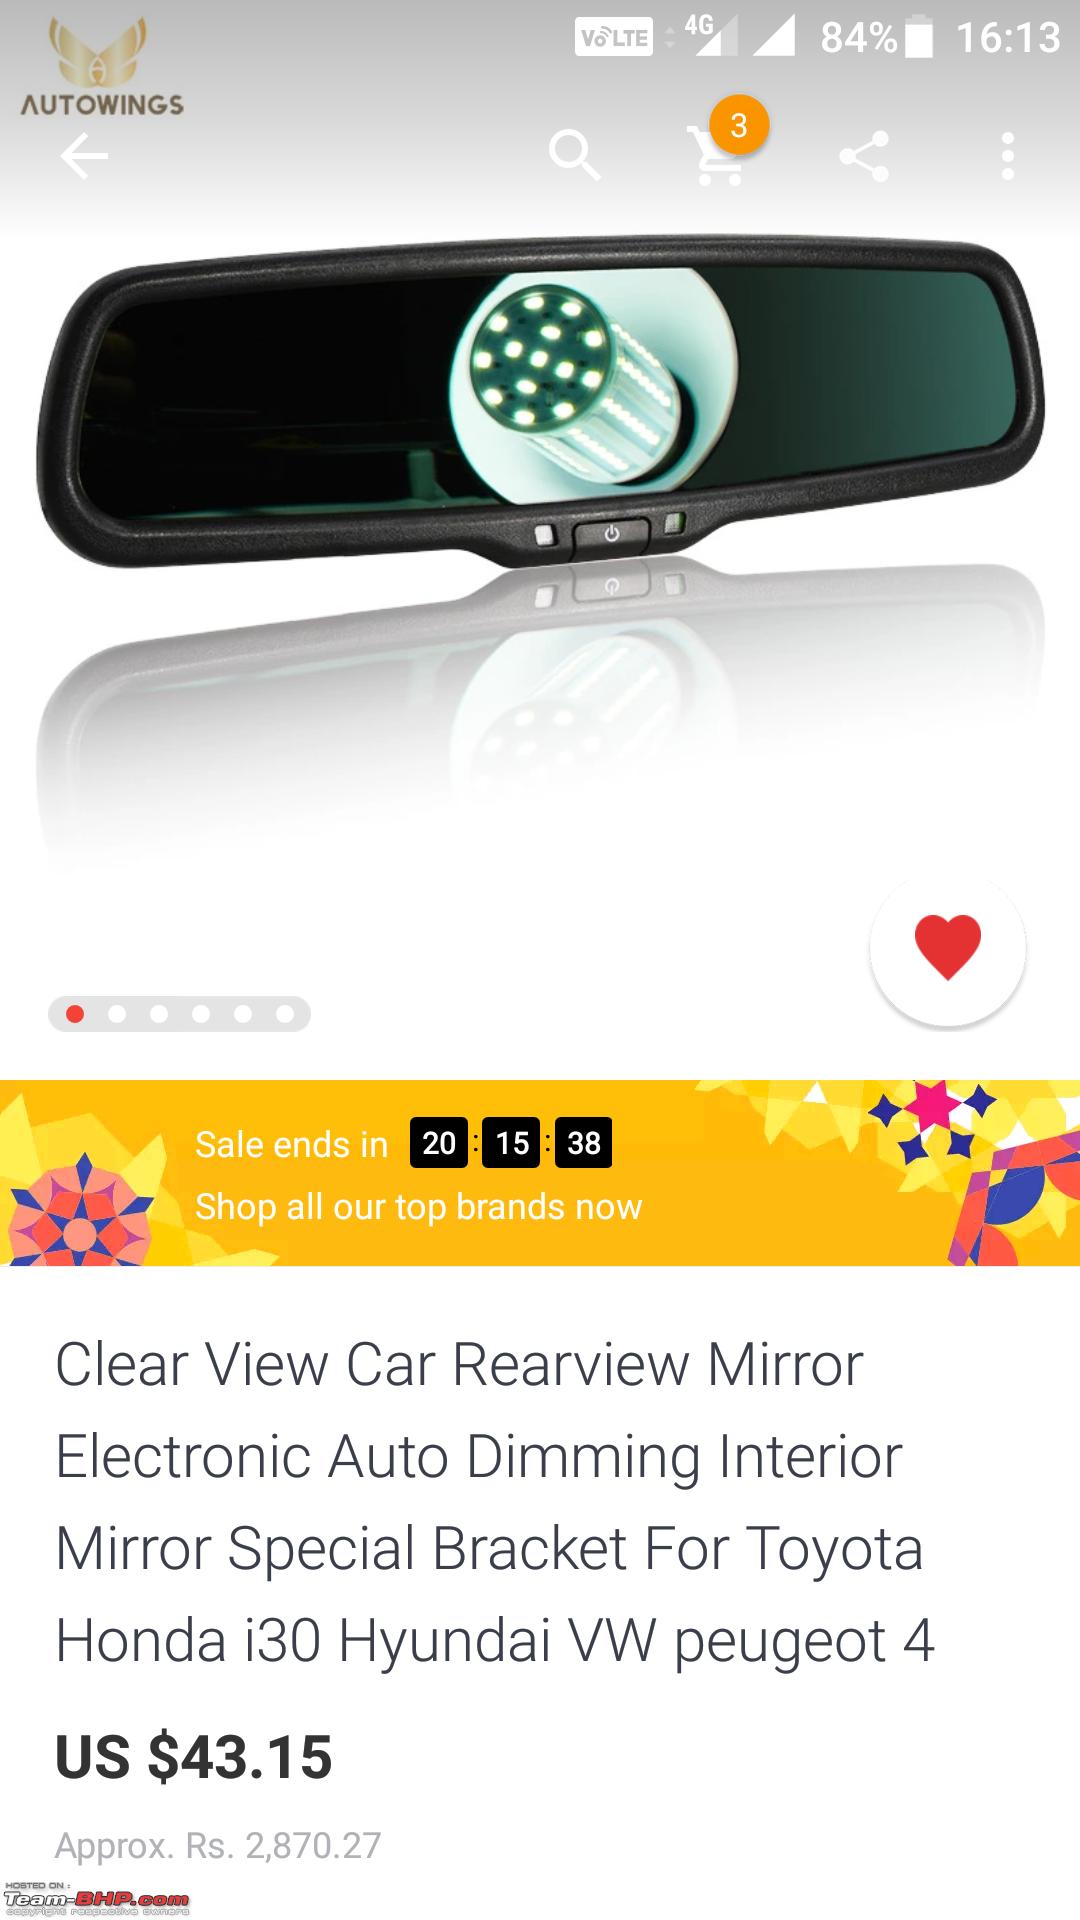
Price I paid with free shipping

Contents of the package (Bracket No. 1)

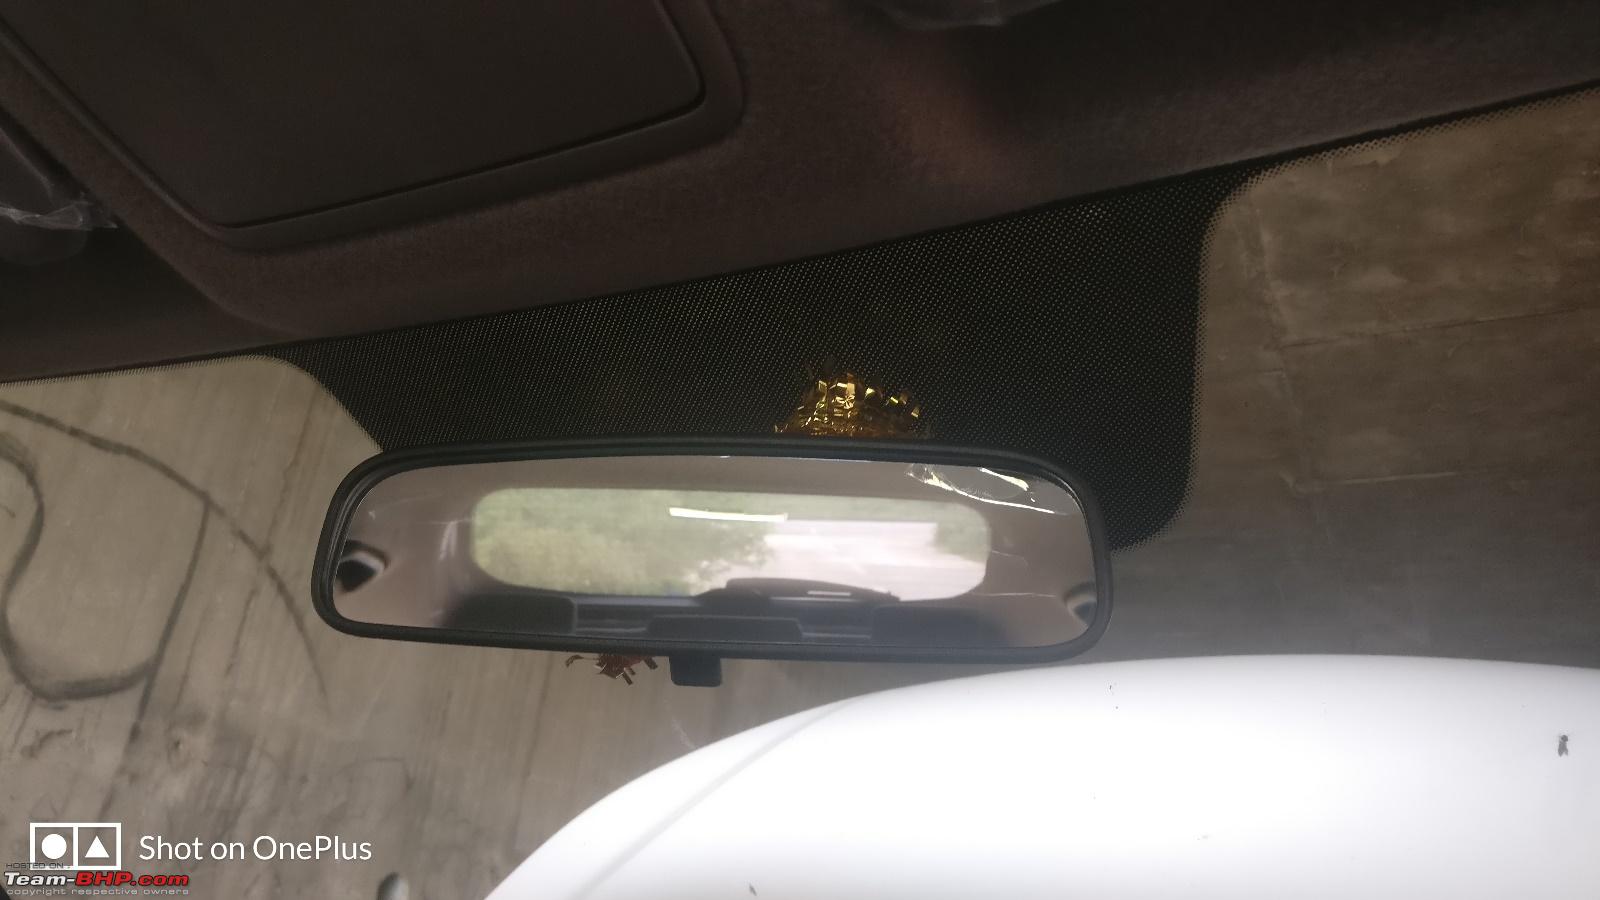
Manual OE IRVM
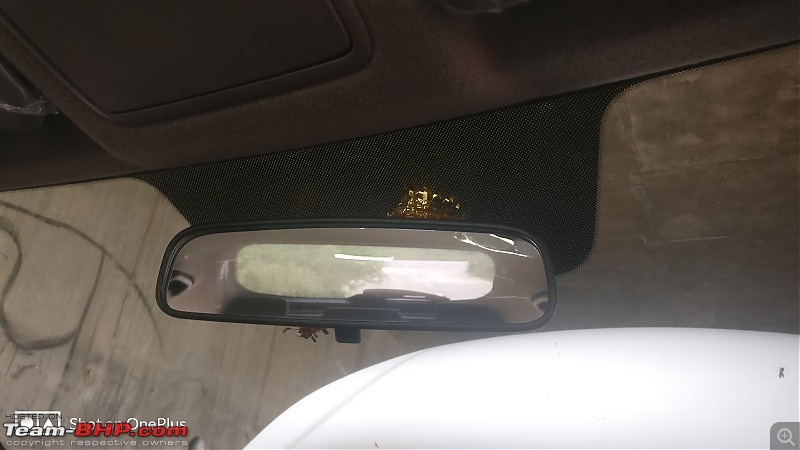
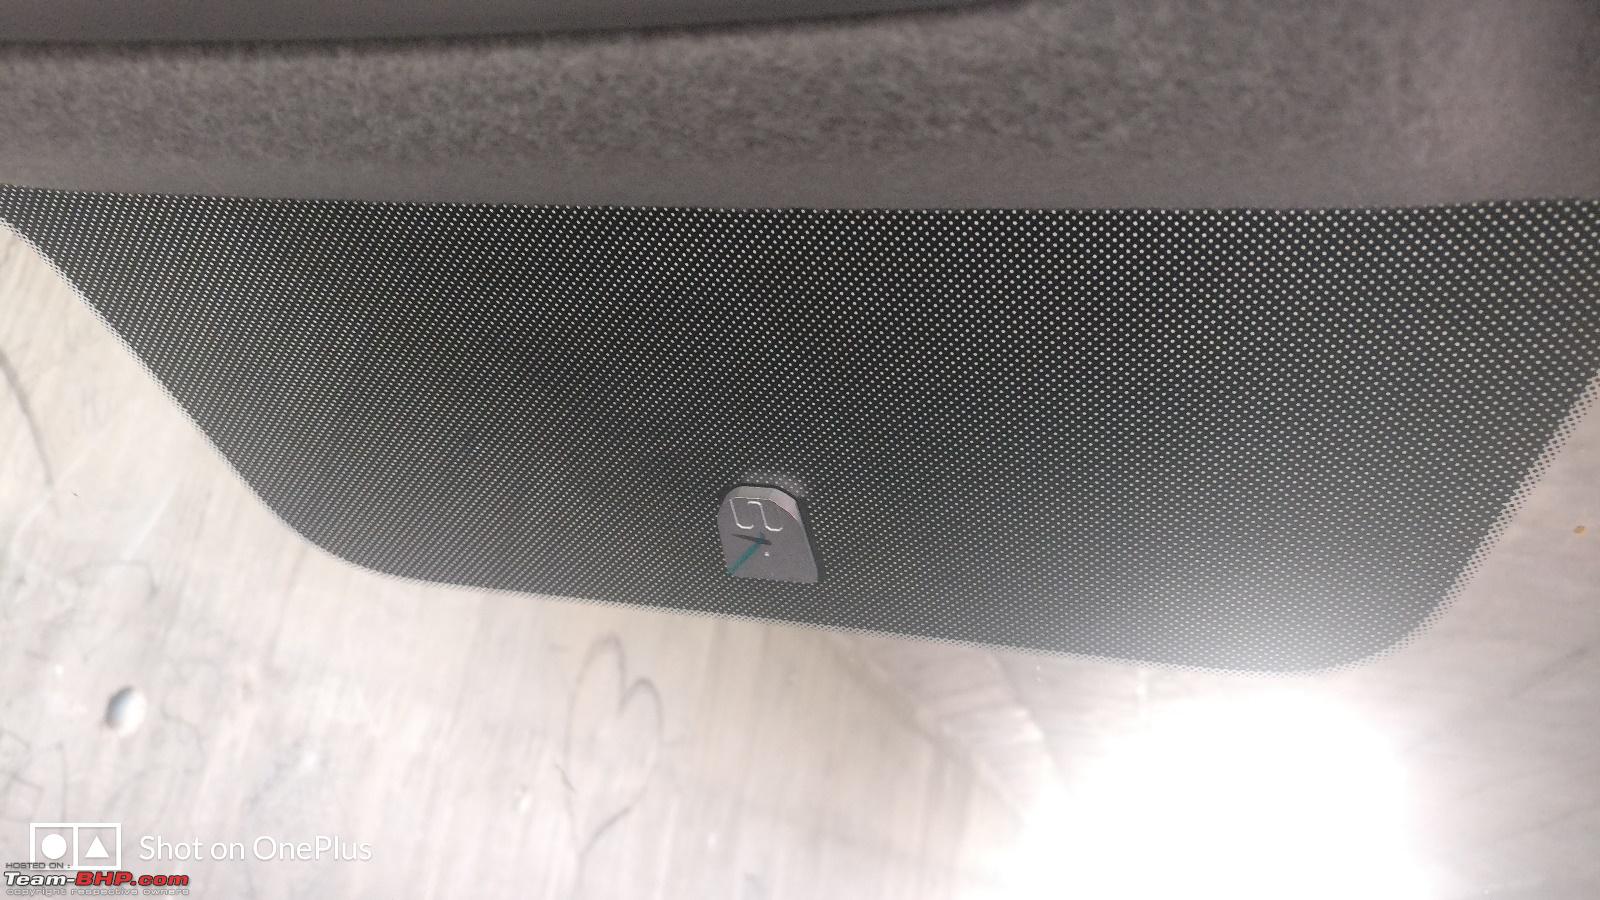
The way it's mounted on the windshield
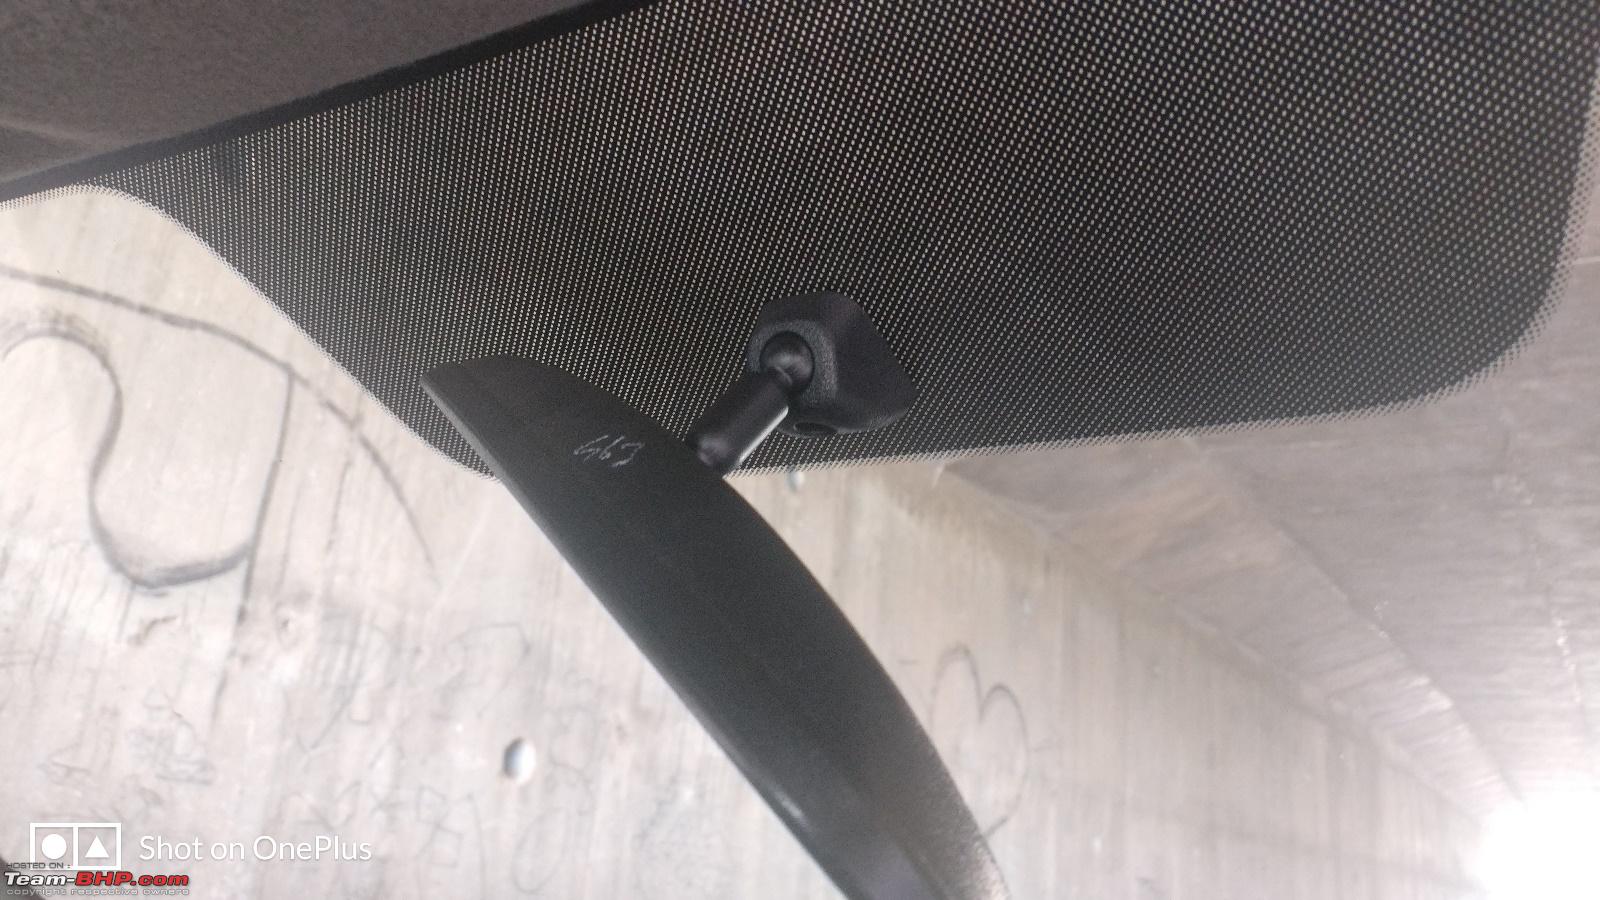
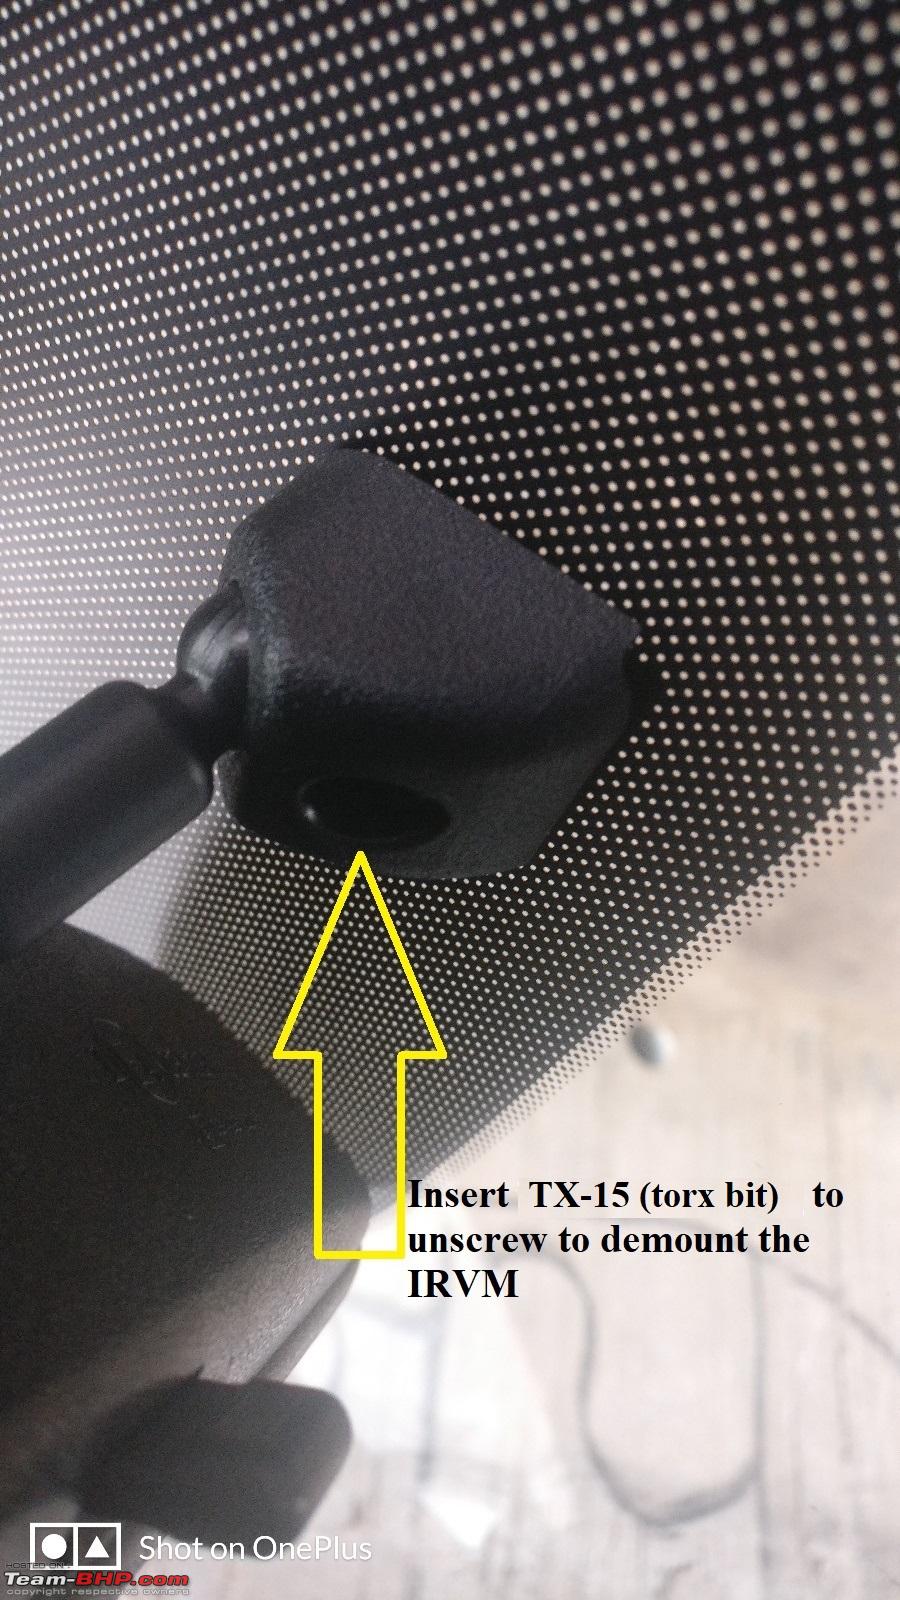
How to remove the OE IRVM

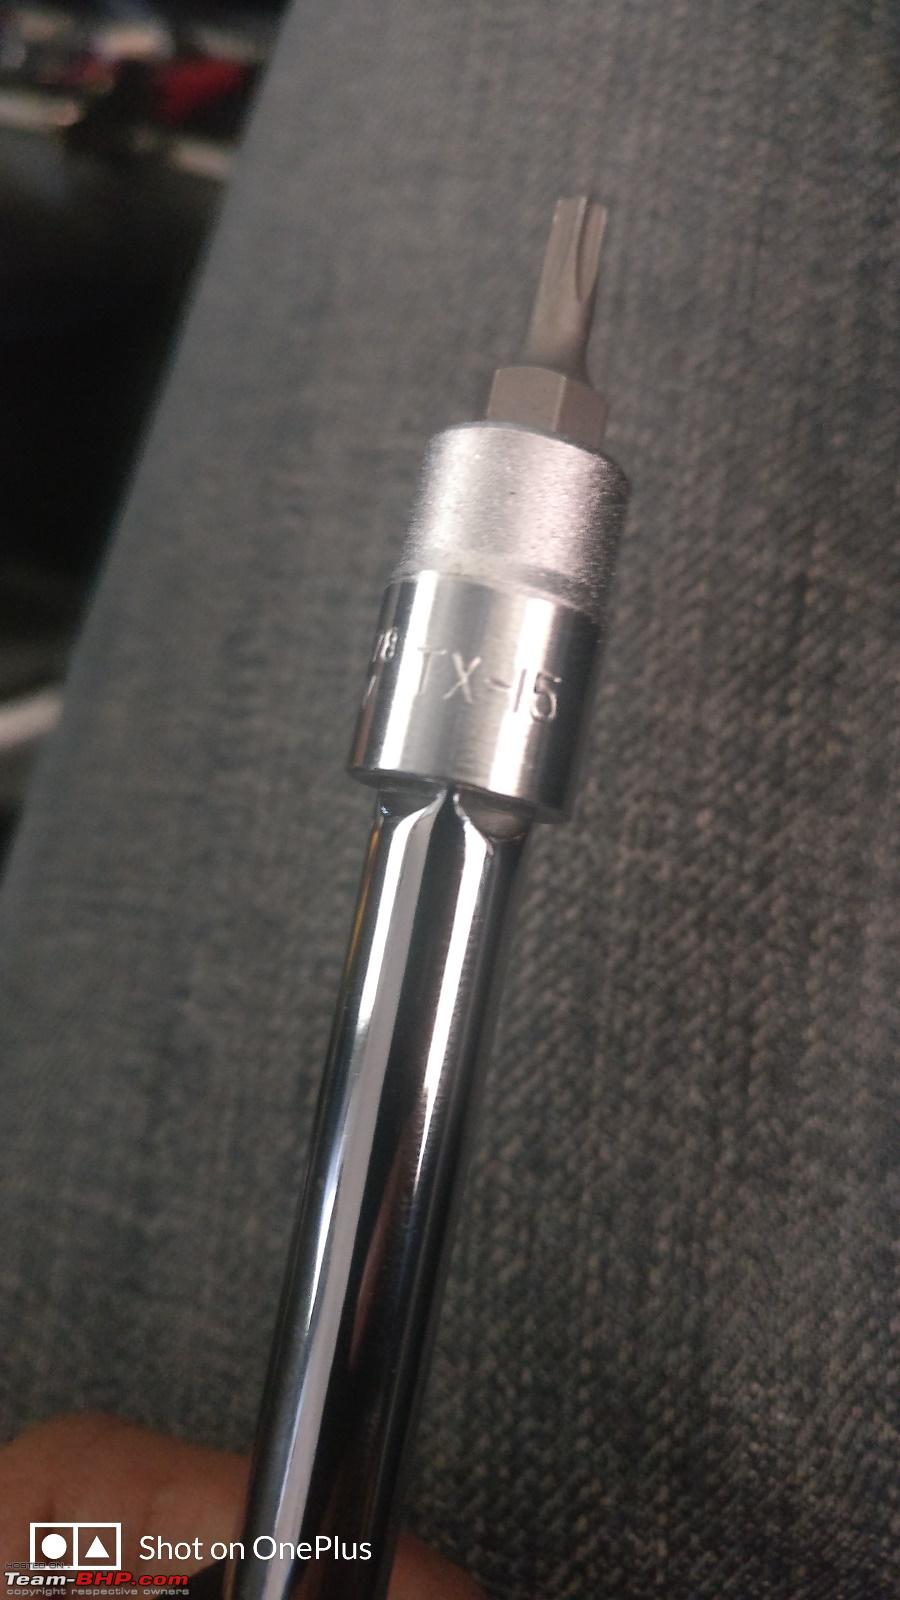
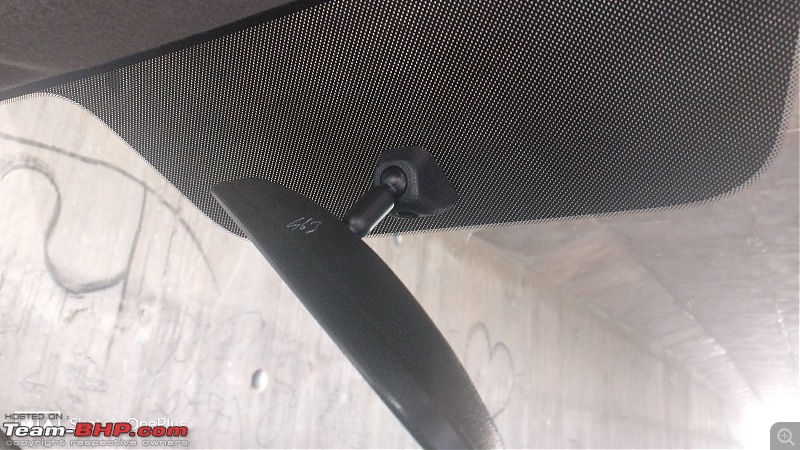
Bit required to remove the OE IRVM

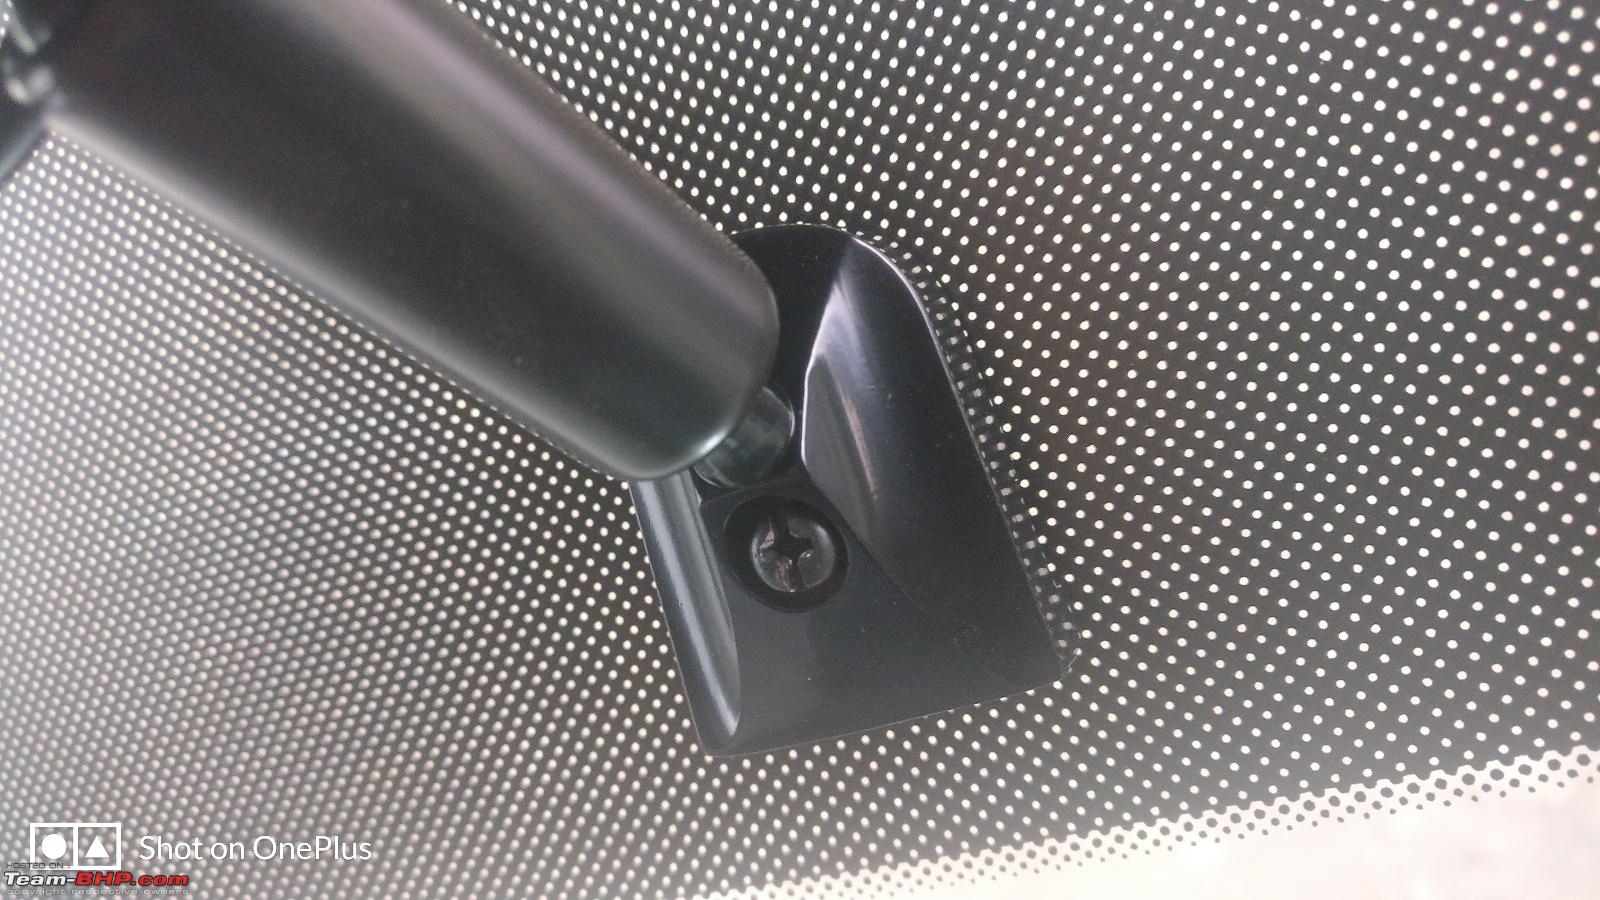
Metal piece that holds the IRVM is stuck on the windshield.
Bracket No.1 that I ordered will slide fit into this metal piece and then tightened with the star screw provided in the kit

OE IRVM removed
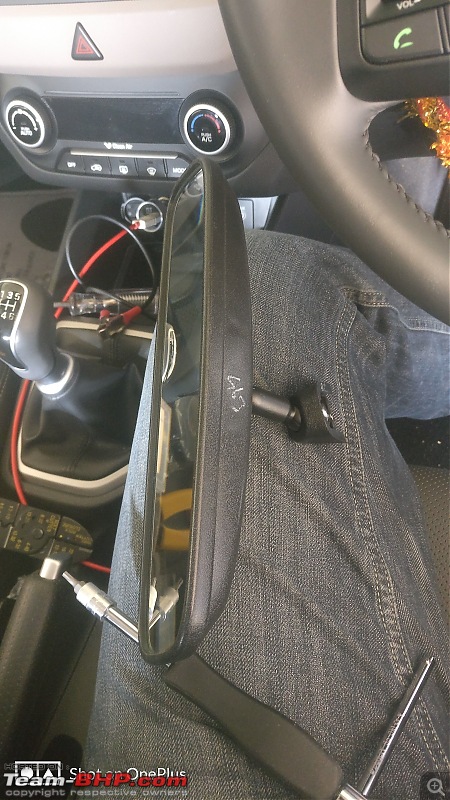
New IRVM mounted and fit tight

View of the IRVM before wiring it

Ready and up functioning after wiring it

A comparison between the OE one and the new one.
Fit the Low-profile mini ATM fuse tap into selected fuse (I chose 'FR Power Outlet (20A)', highlighted with a yellow arrow)

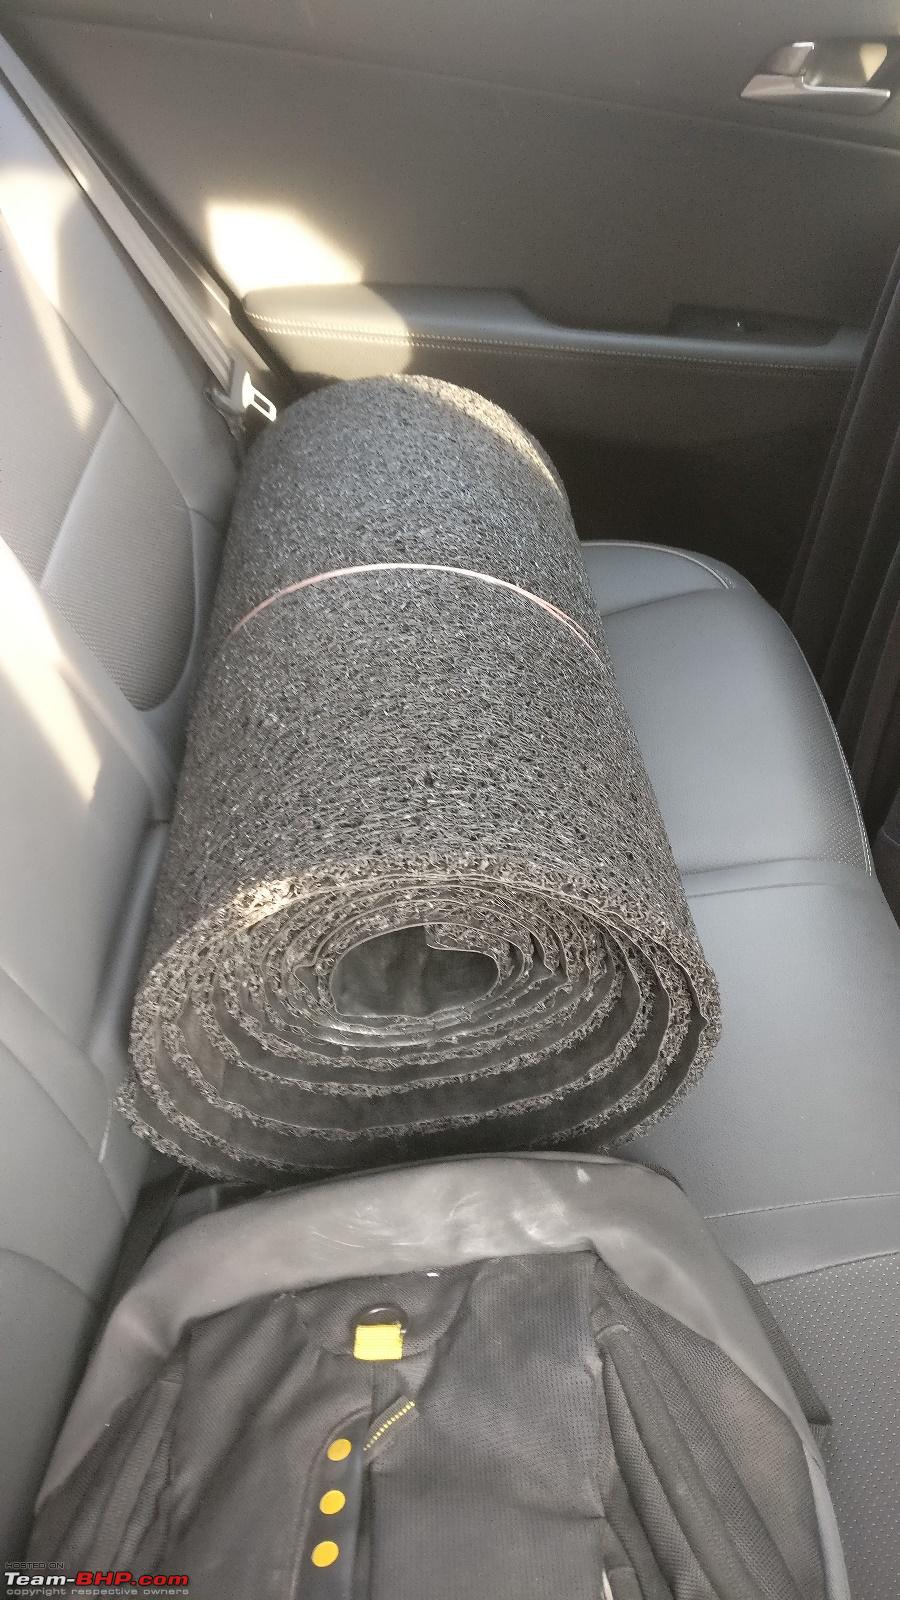
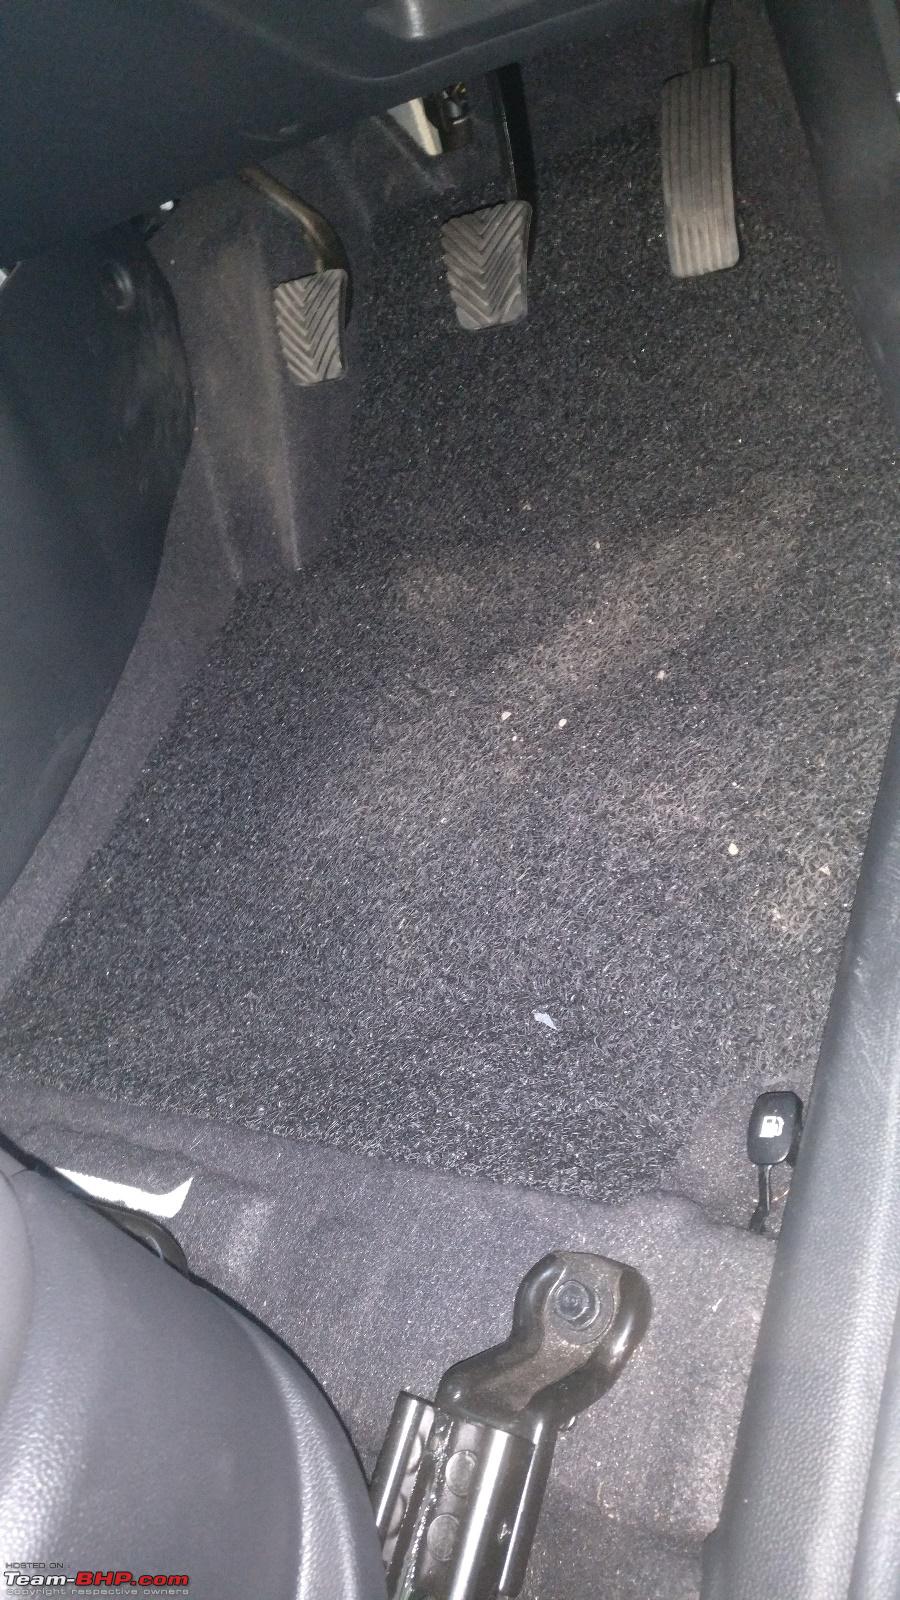
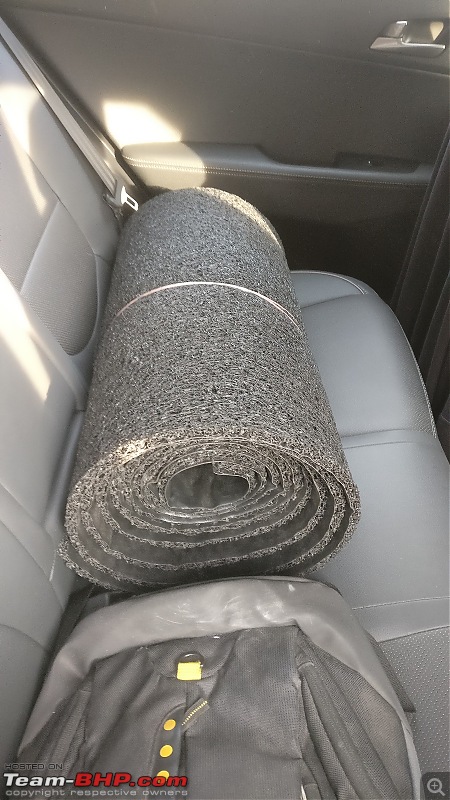
MODIFICATION #4: Noodle Mat DIY
Inspired by the
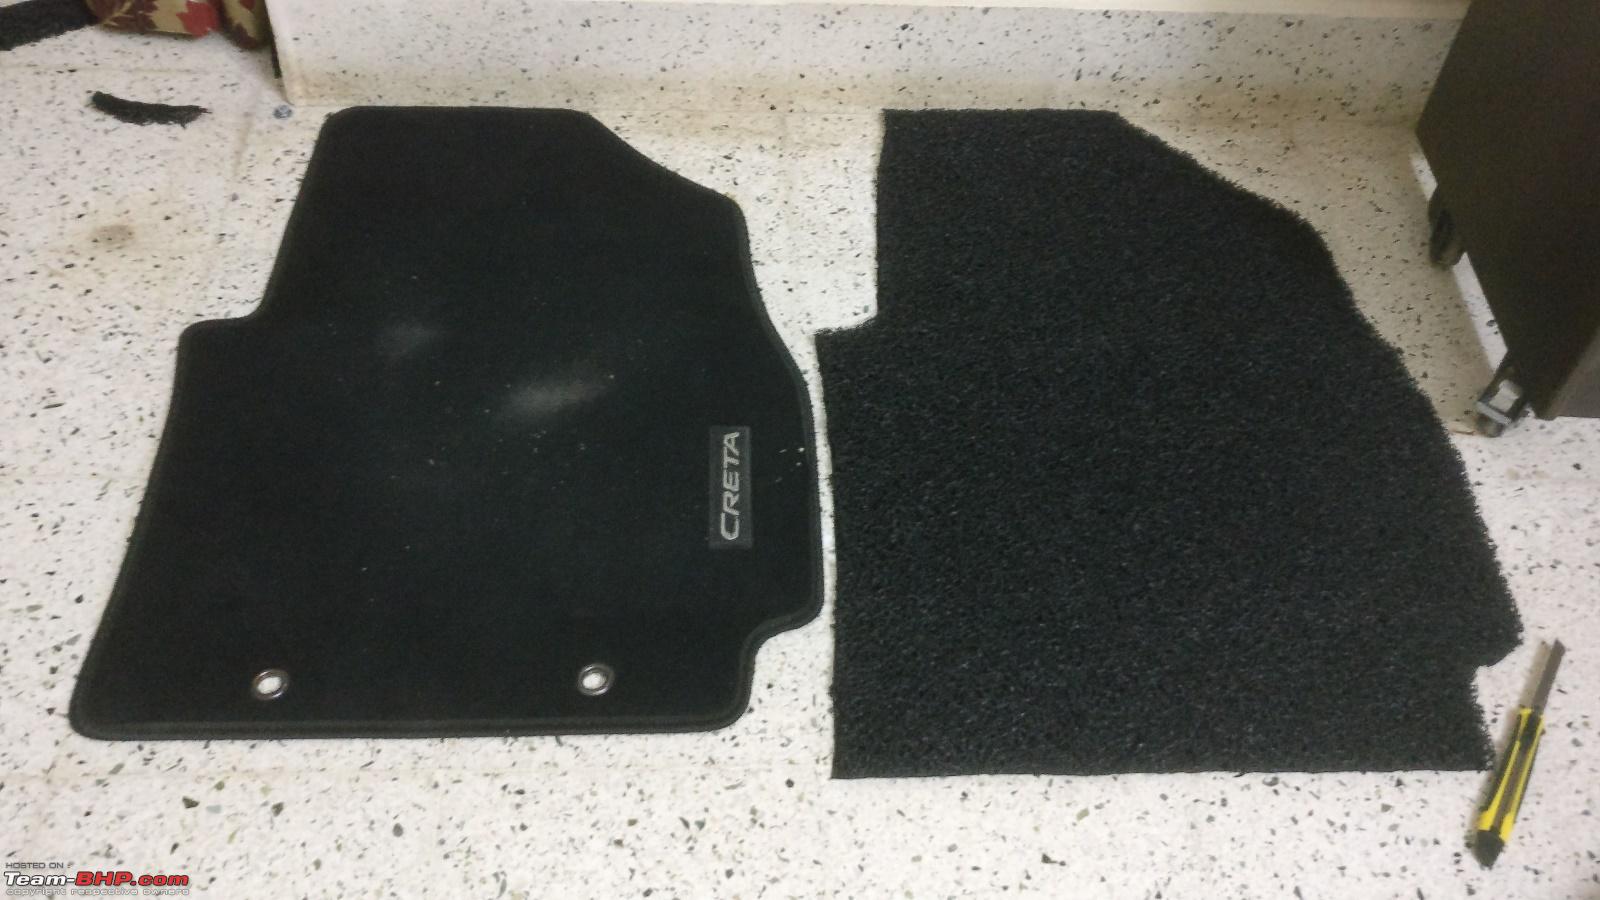
noodle mat DIY thread on the forum, decided to follow the same for the Creta. Bought 30 sq ft @ ₹1,650. Used the OE cloth mats to cut the noodle mats.
The Mat used (30 sq ft)
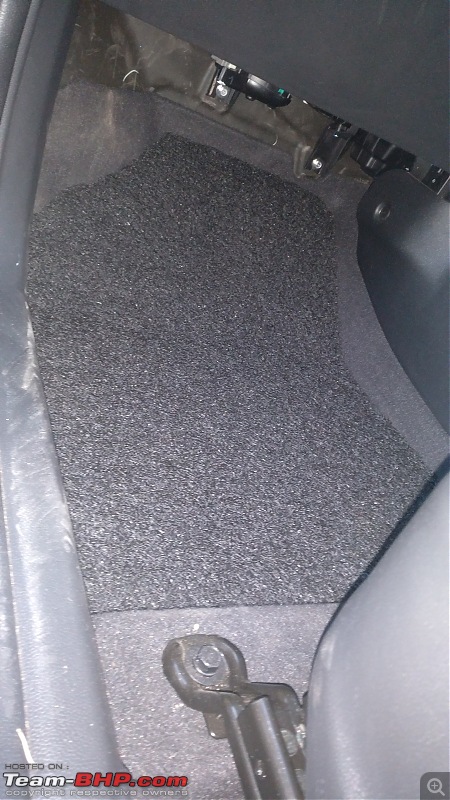
W.I.P for driver's side mat

Driver's side cut and put in place

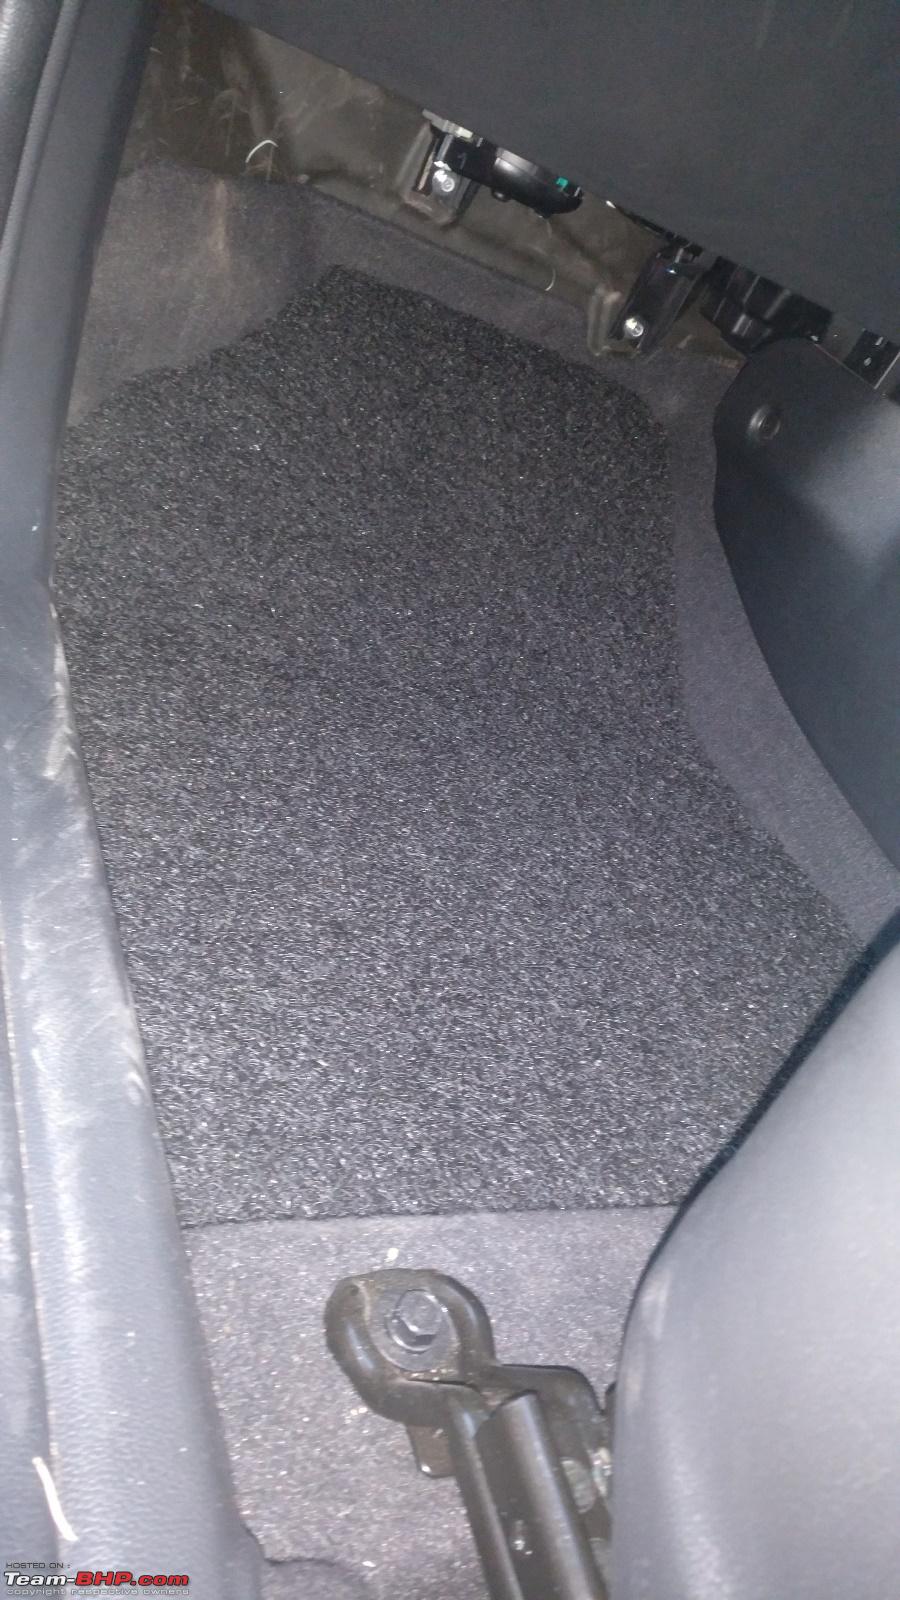
Passenger's side cut and put in place
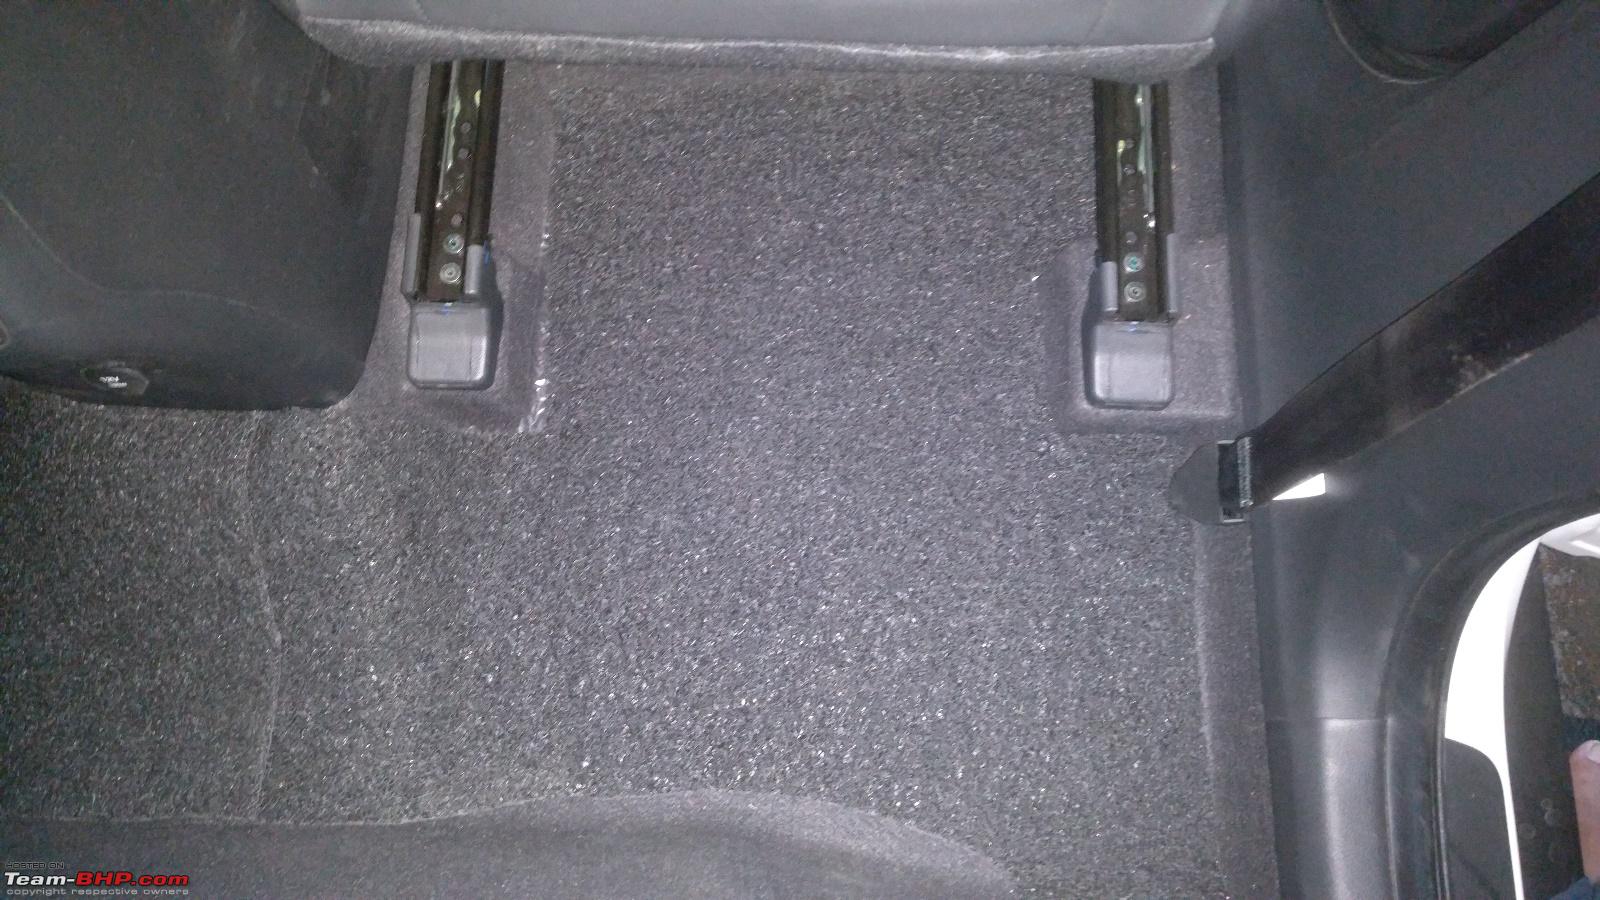
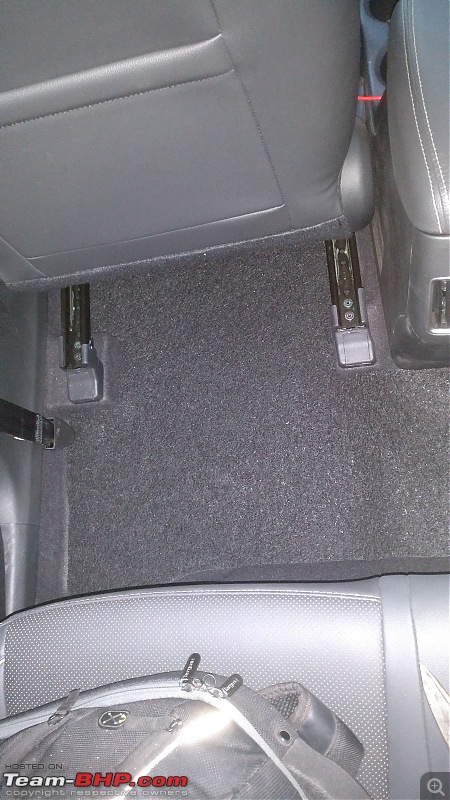
Behind the driver seat area cut and put in place

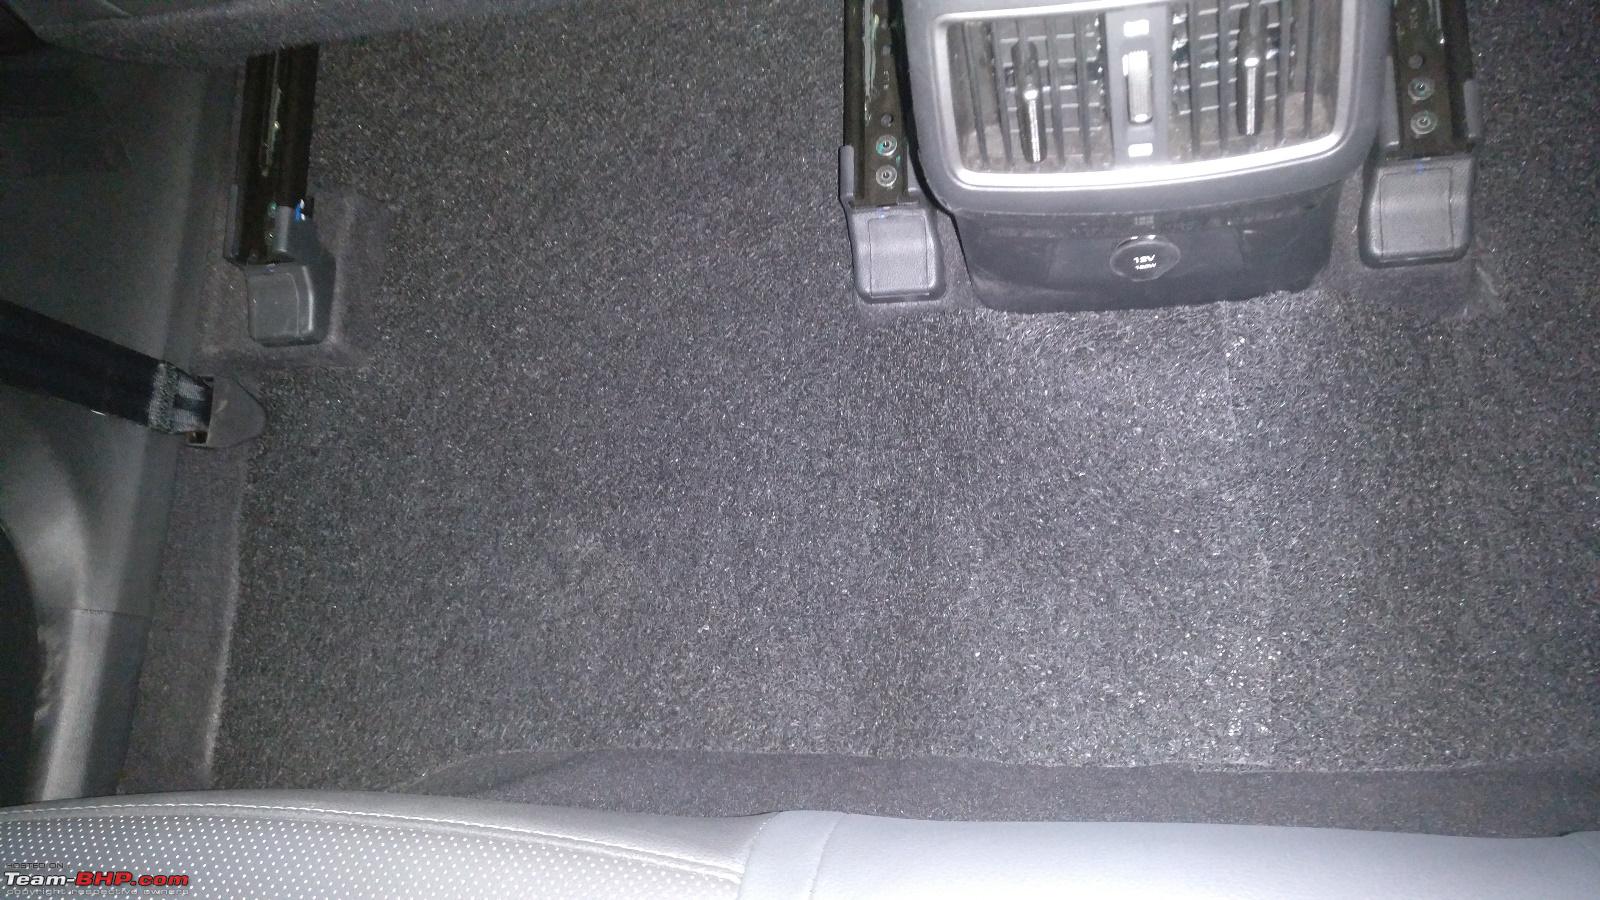
Behind the passenger seat area cut and put in place
Central hump area with a mild overlap (looks bad, I know)

I initially wanted a 3 piece type consisting of Driver side, passenger side and a single piece for the rear. This idea of having a single piece at the rear didn't go well since I miscalculated and cut-out a single large piece that didn't fit in the rear so with no choice left, cut it into two pieces and gave a small overlap on the central hump.
Actually not happy with the outcome being a first time for me. Anyway I'll be needing a second set of mat for the drivers side which is when I'll rectify the mistake I did when I cut it the first time and also get a better quality noodle mat too that survives usage better than the current one.
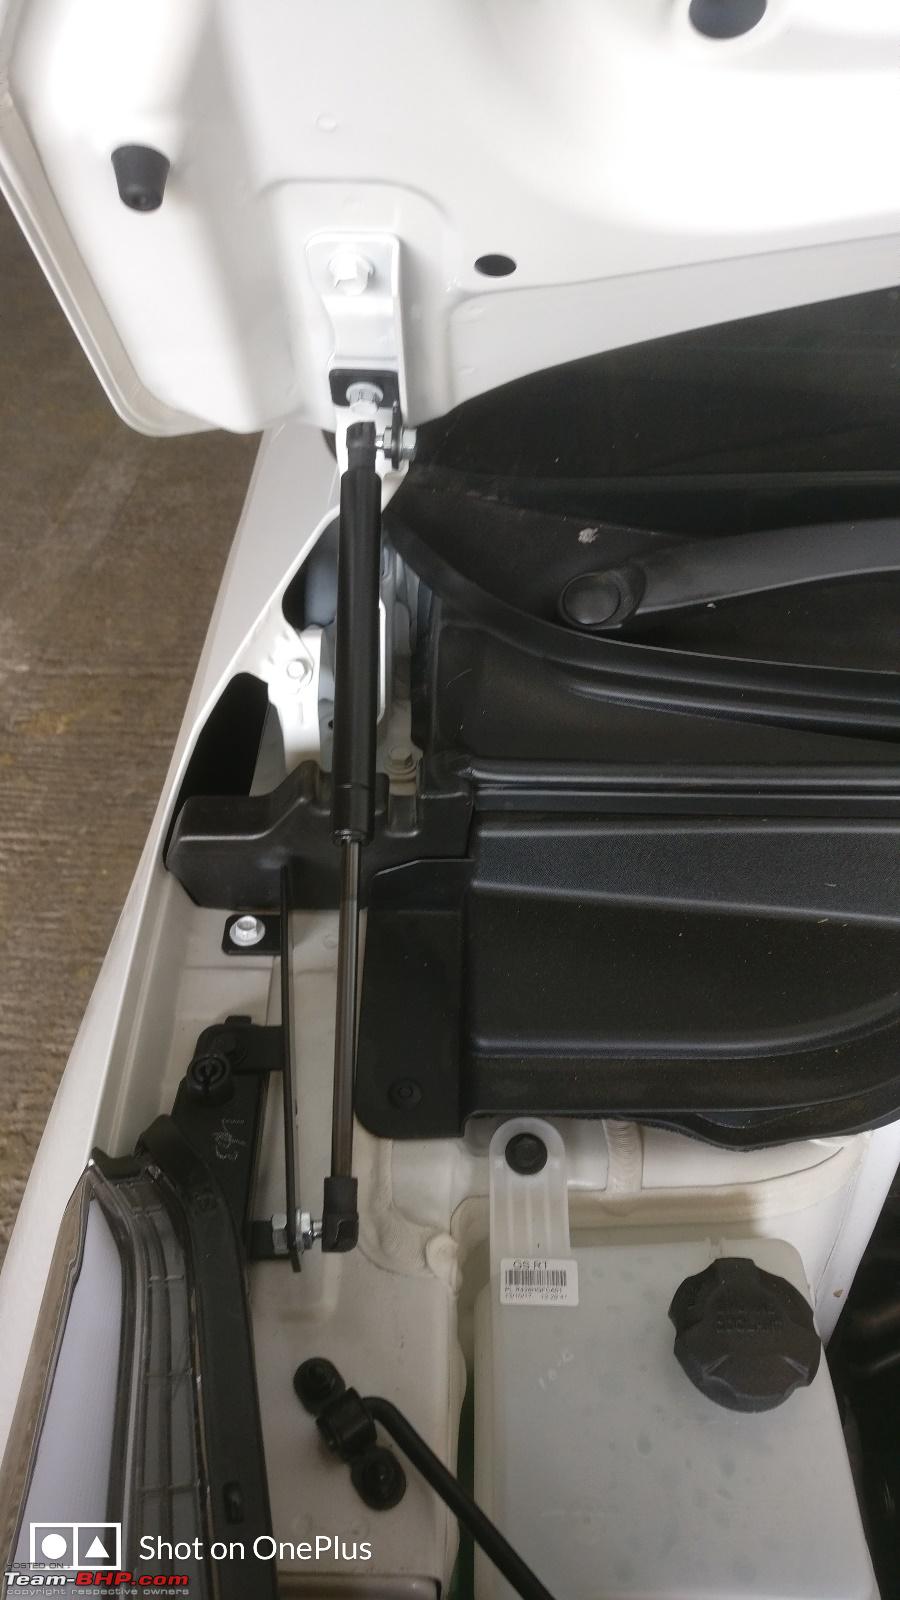
MODIFICATION #5: DIY Install of Gas Struts for Hood
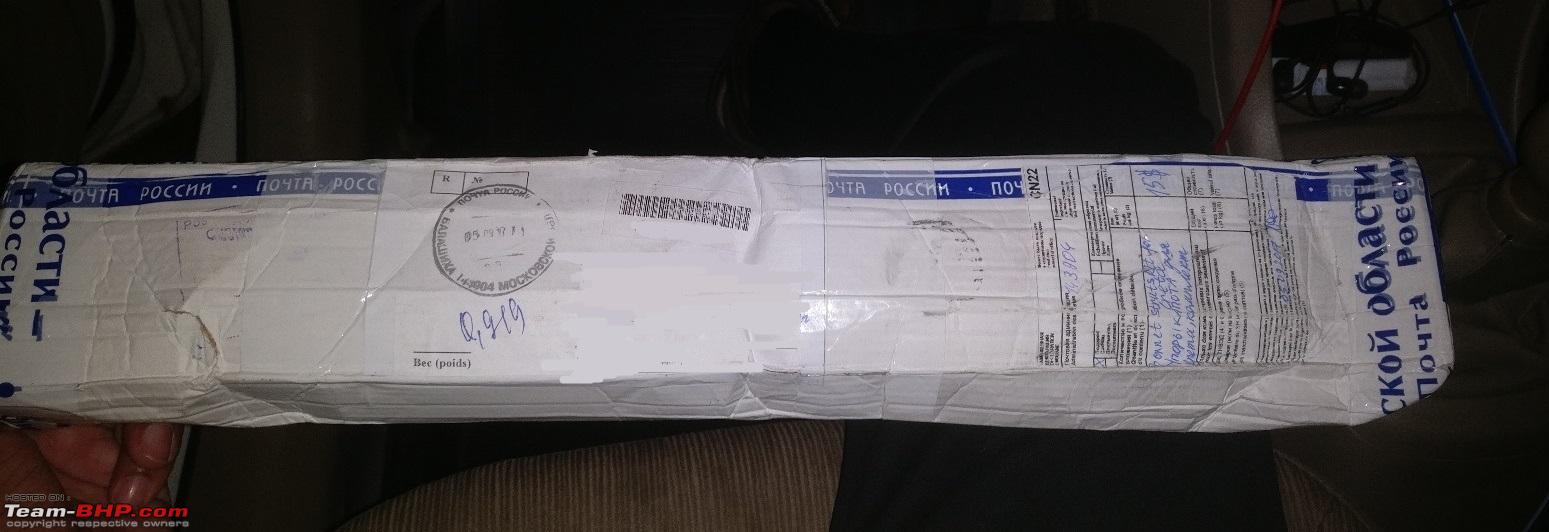
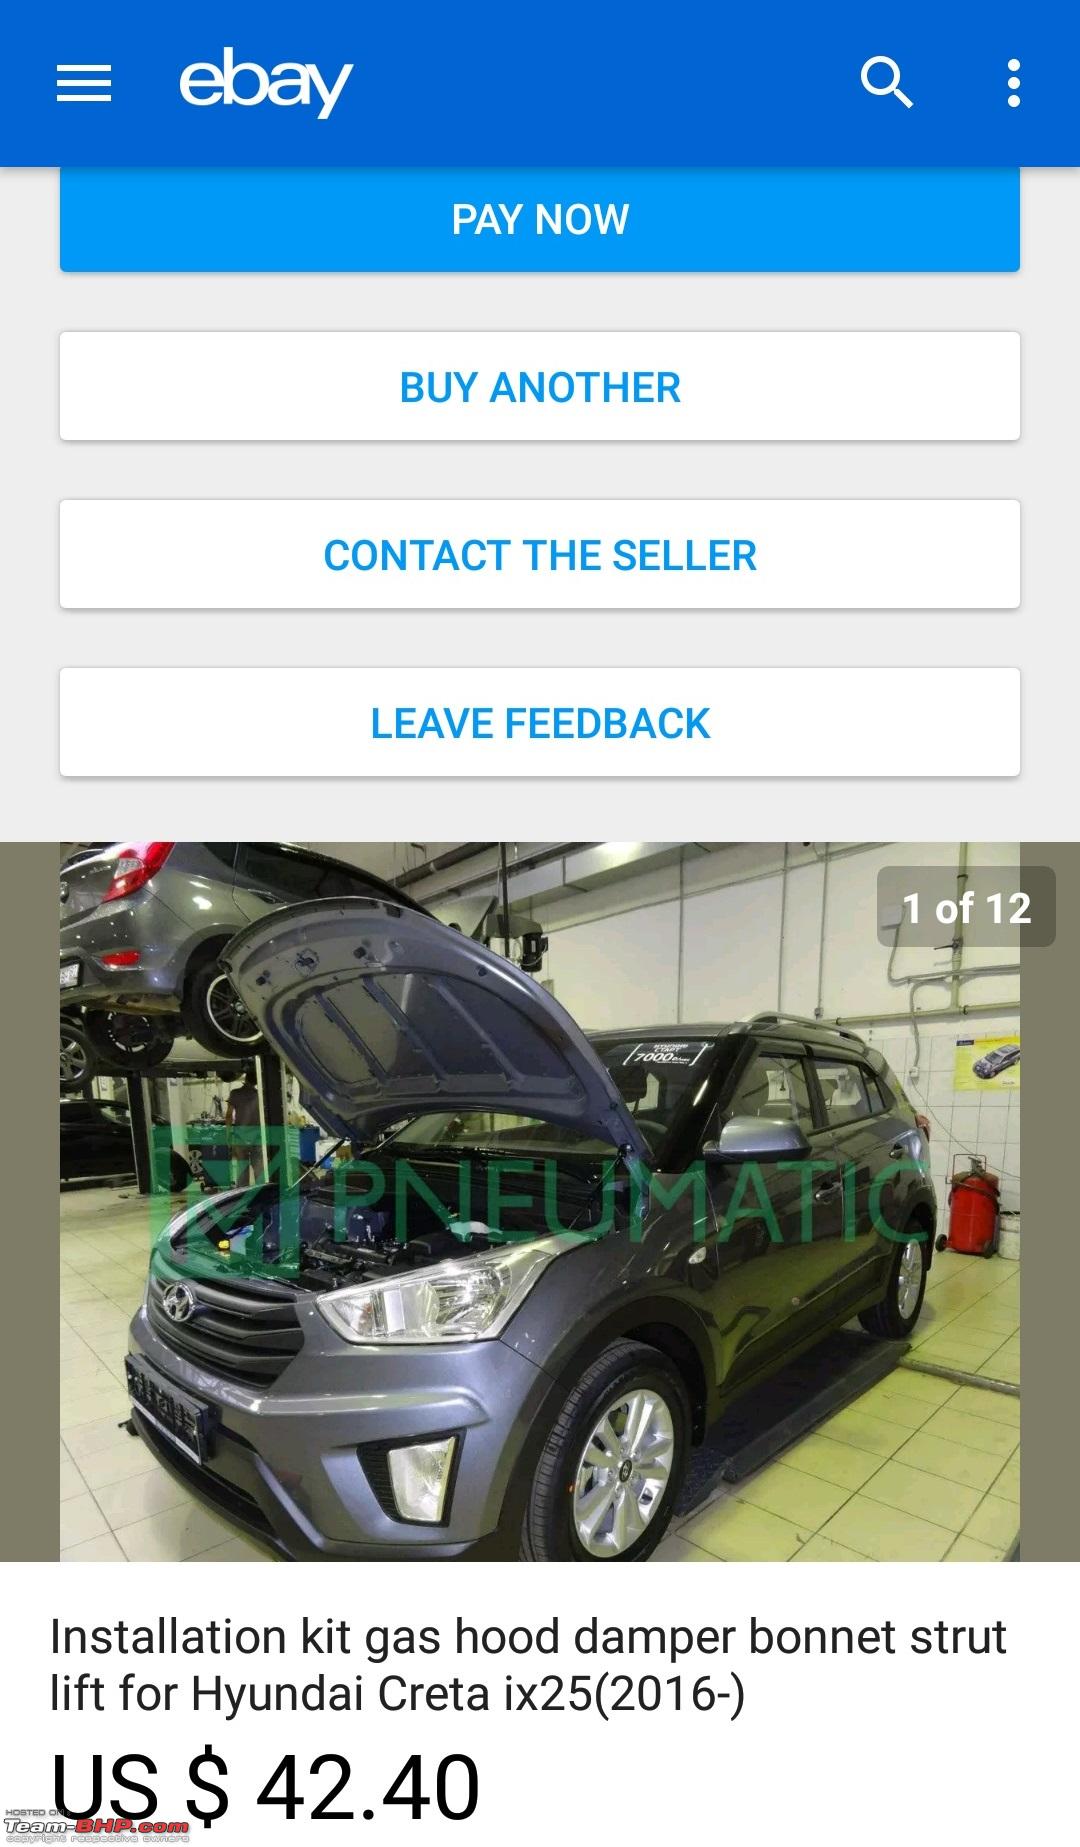
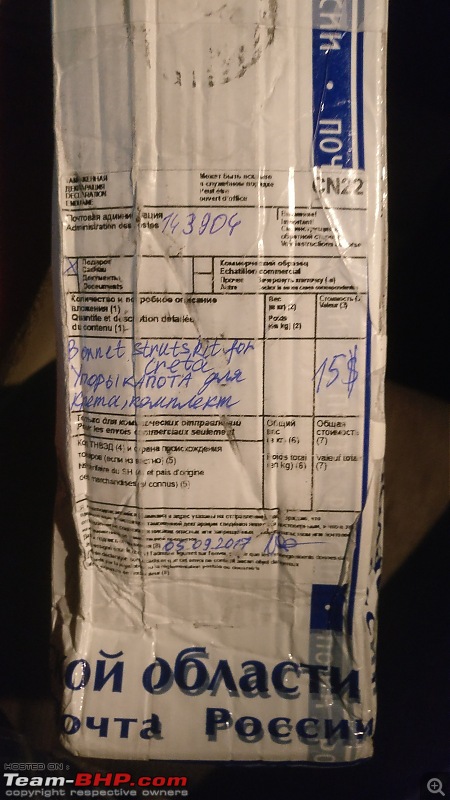
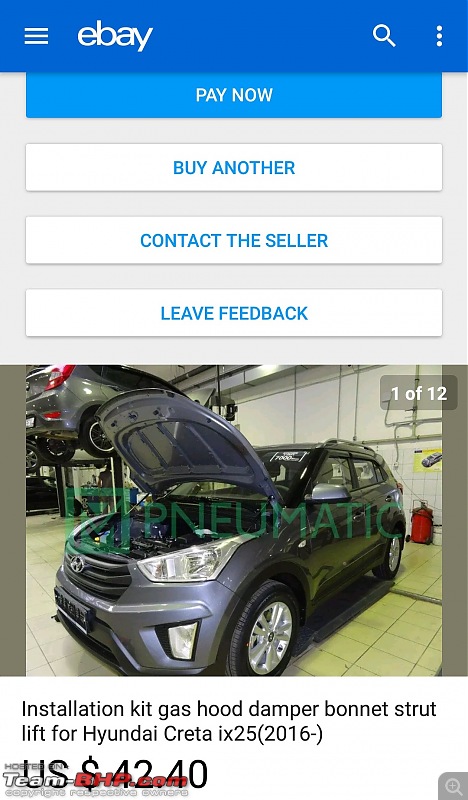
Inspired by Gannu's thread, wanted to get the same for the next car that I would buy. Started searching for it and luckily found a ready-made set on eBay which was costing $42.40 + Shipping costs (if shipped outside USA). Thought of getting it directly but shipping cost was $40 plus wasn't sure how much customs would be charged. Sent a message to the seller to declare low value so my friend isn't troubled when he lands here.
Pretty straightforward installation (no efforts needed to design the clamps/brackets, paint them, talk to suppliers for procuring the correct strut, nuts etc). To put it in simple terms - 'Plug n Play' it is.
Packing

Item details and Value declared by seller upon request
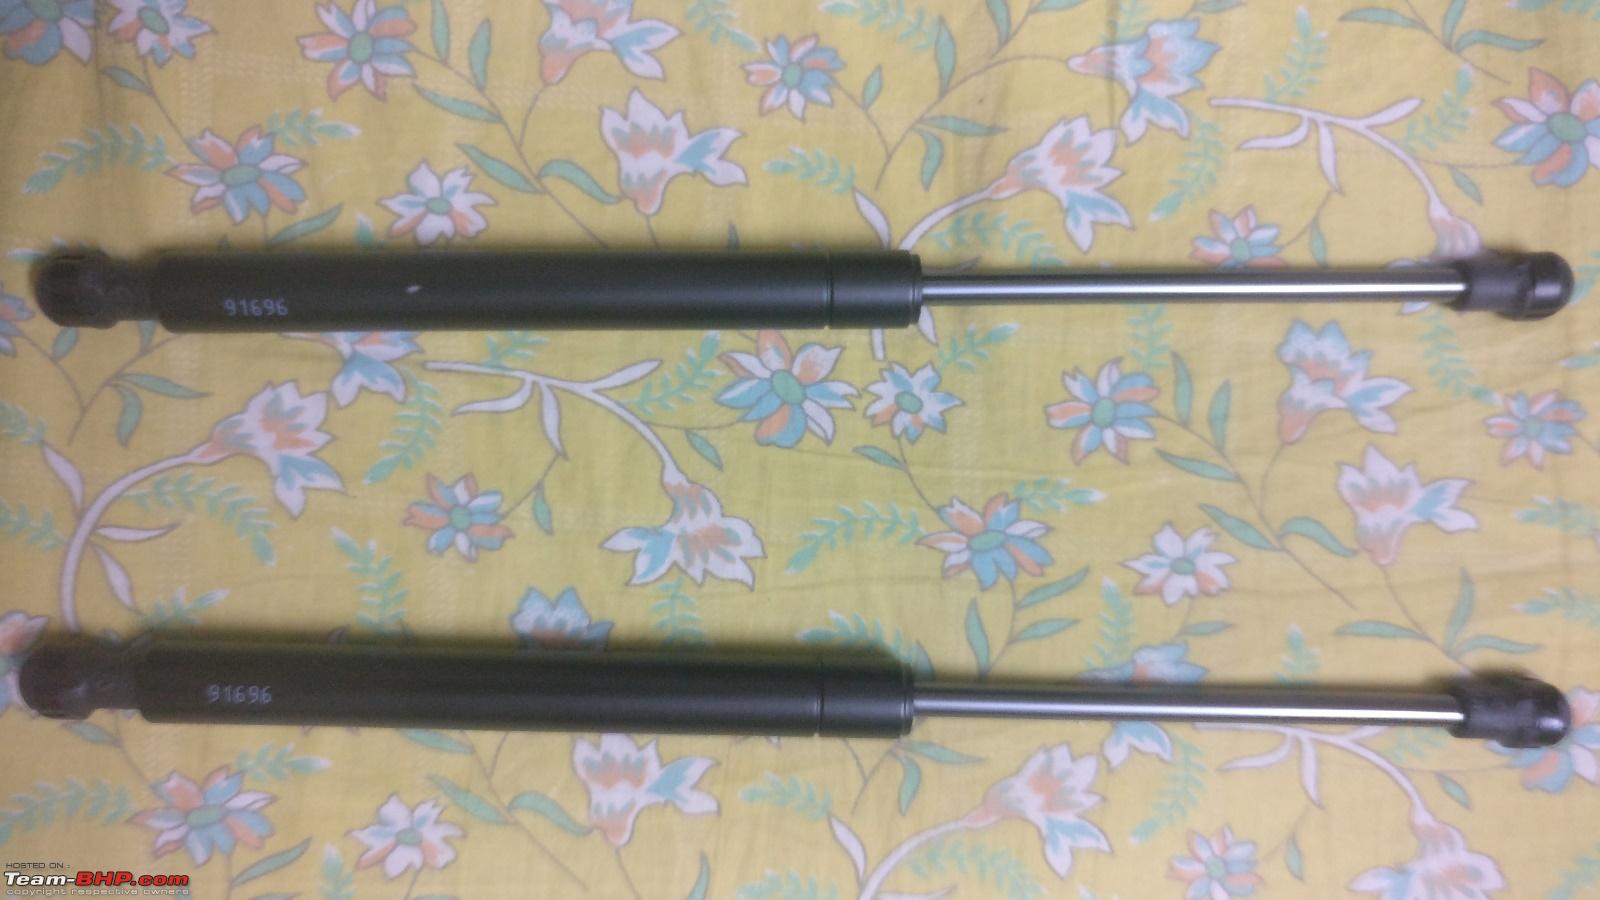
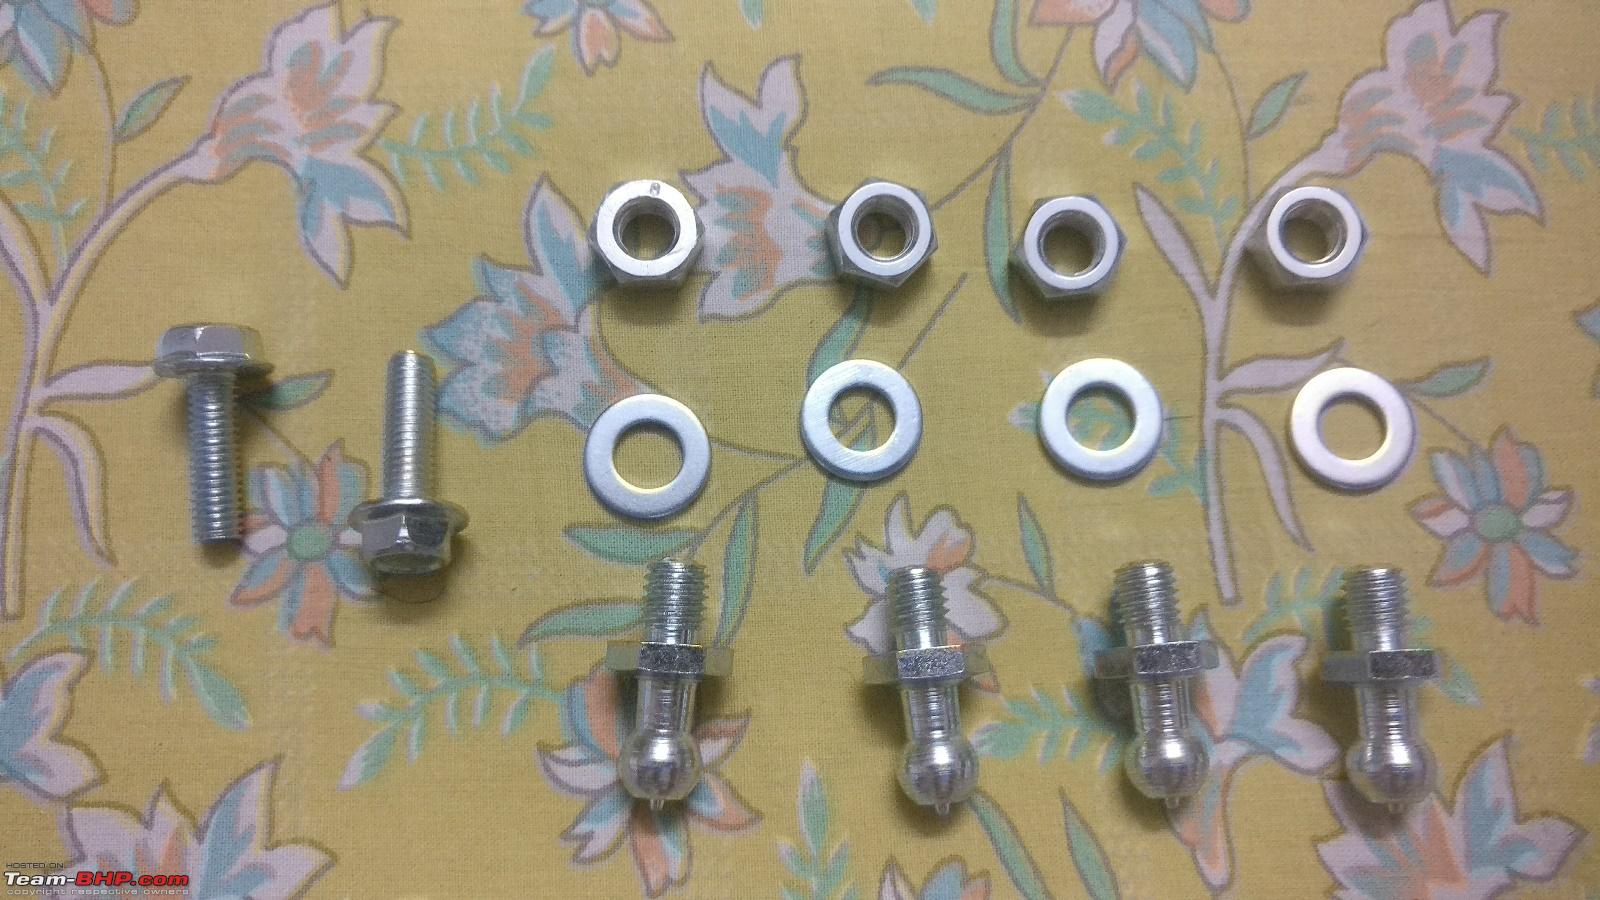
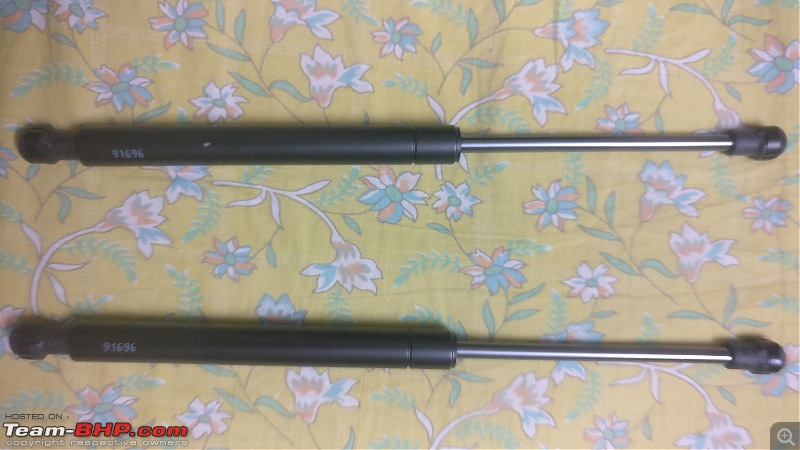
Struts - Pair of them (No name/label)
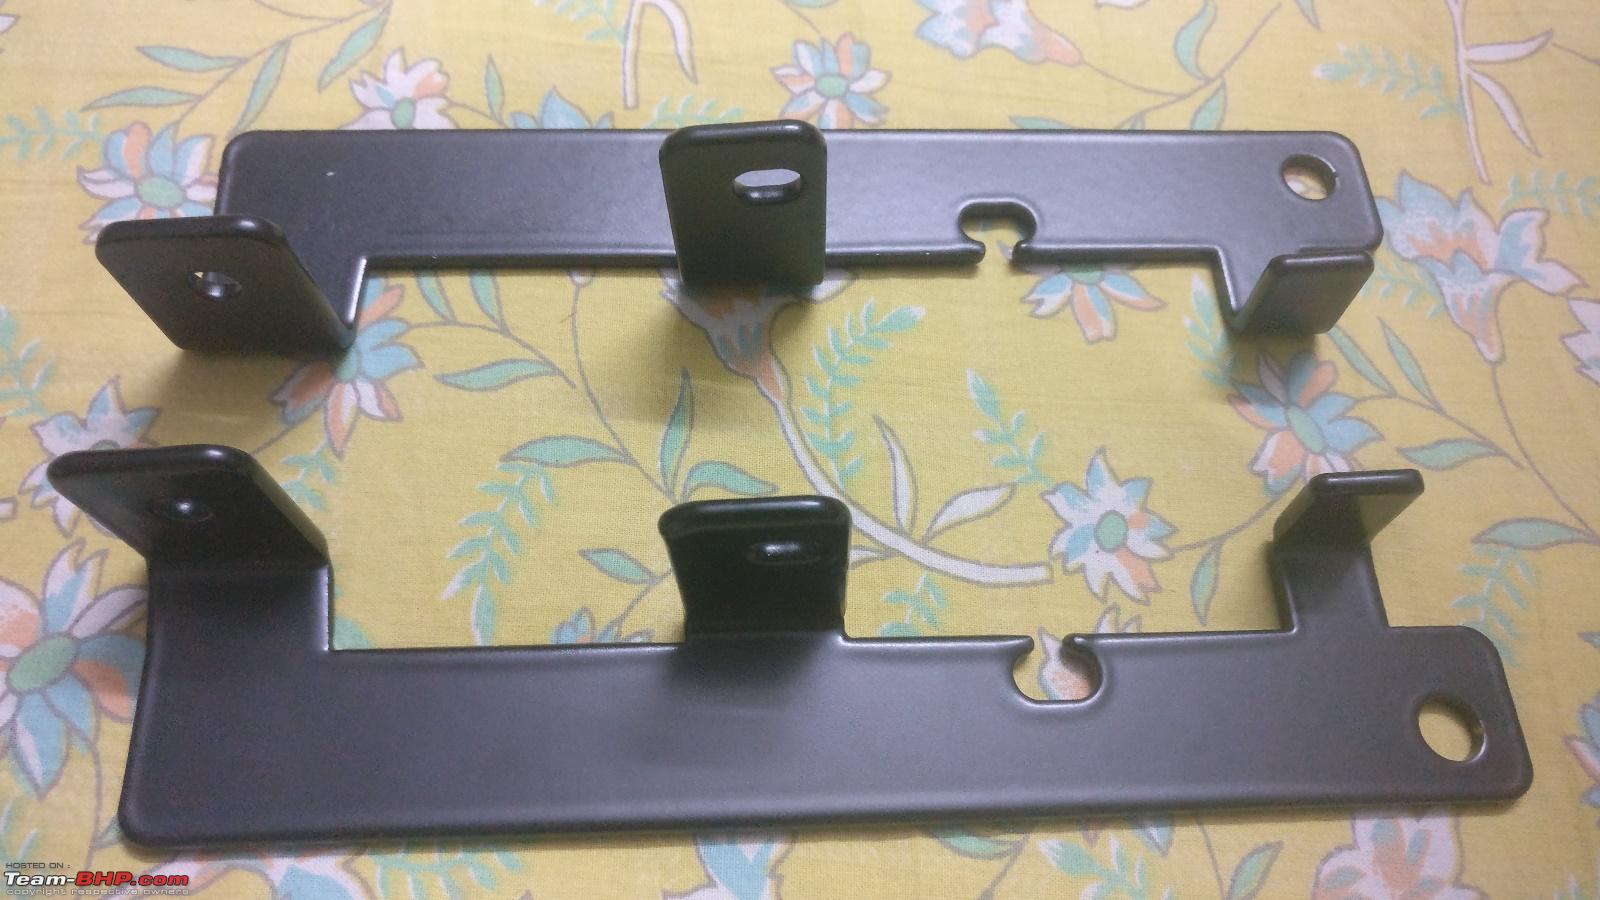
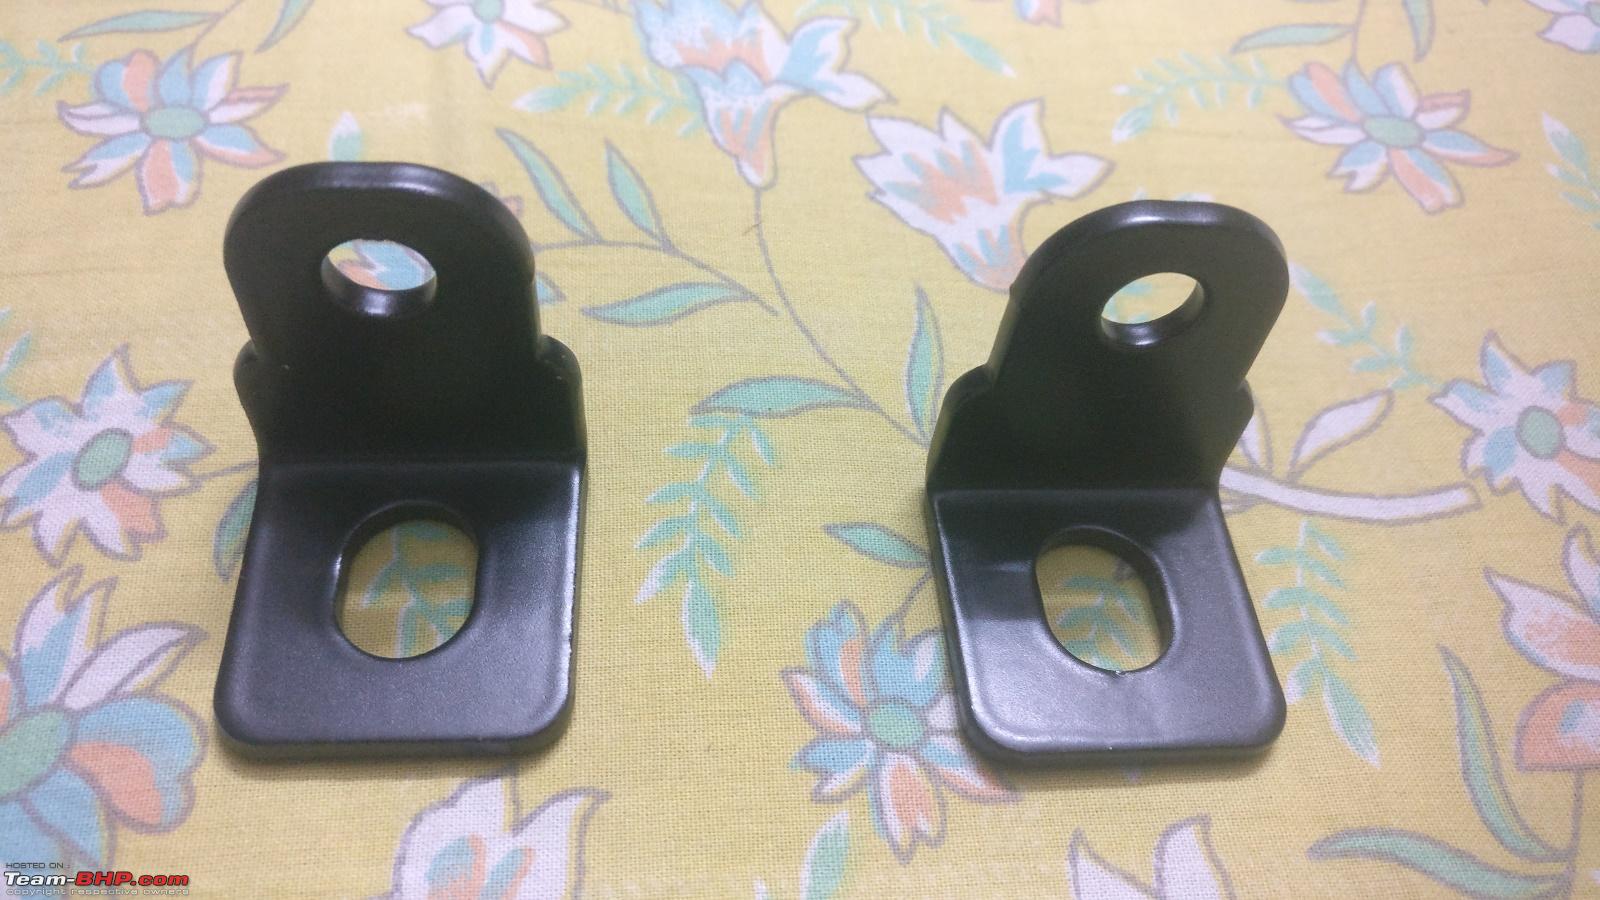
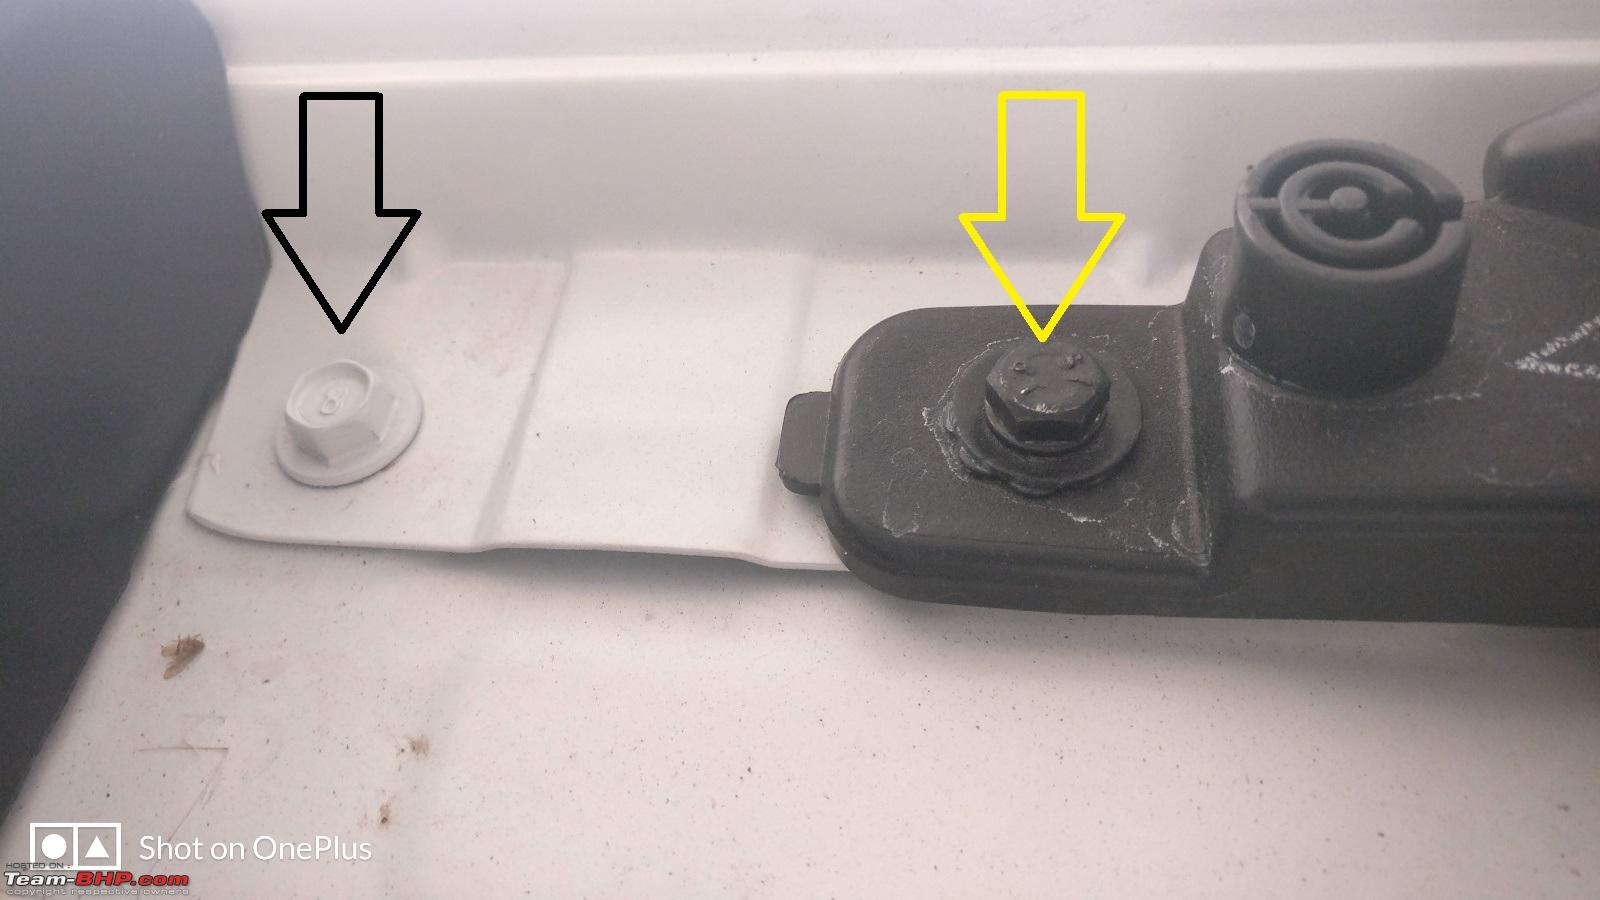
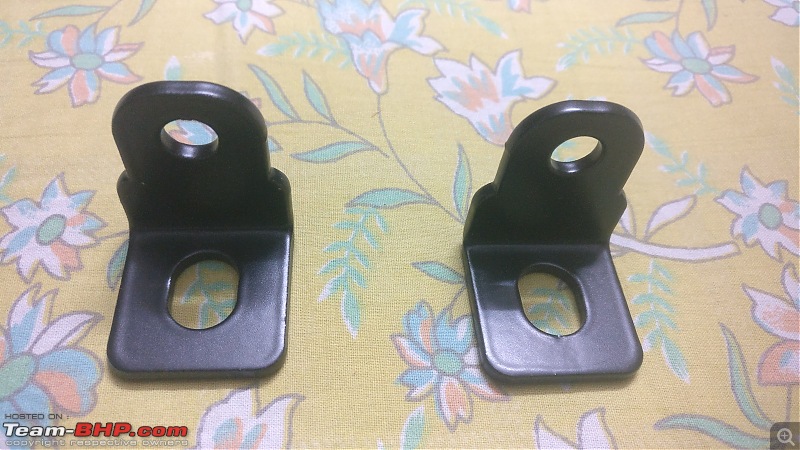
Lower Clamp to be mounted on nuts that holds the headlight (top portion)

Upper clamp that fits on the hinge of the hood
M8 ball stud along with the washers and nuts

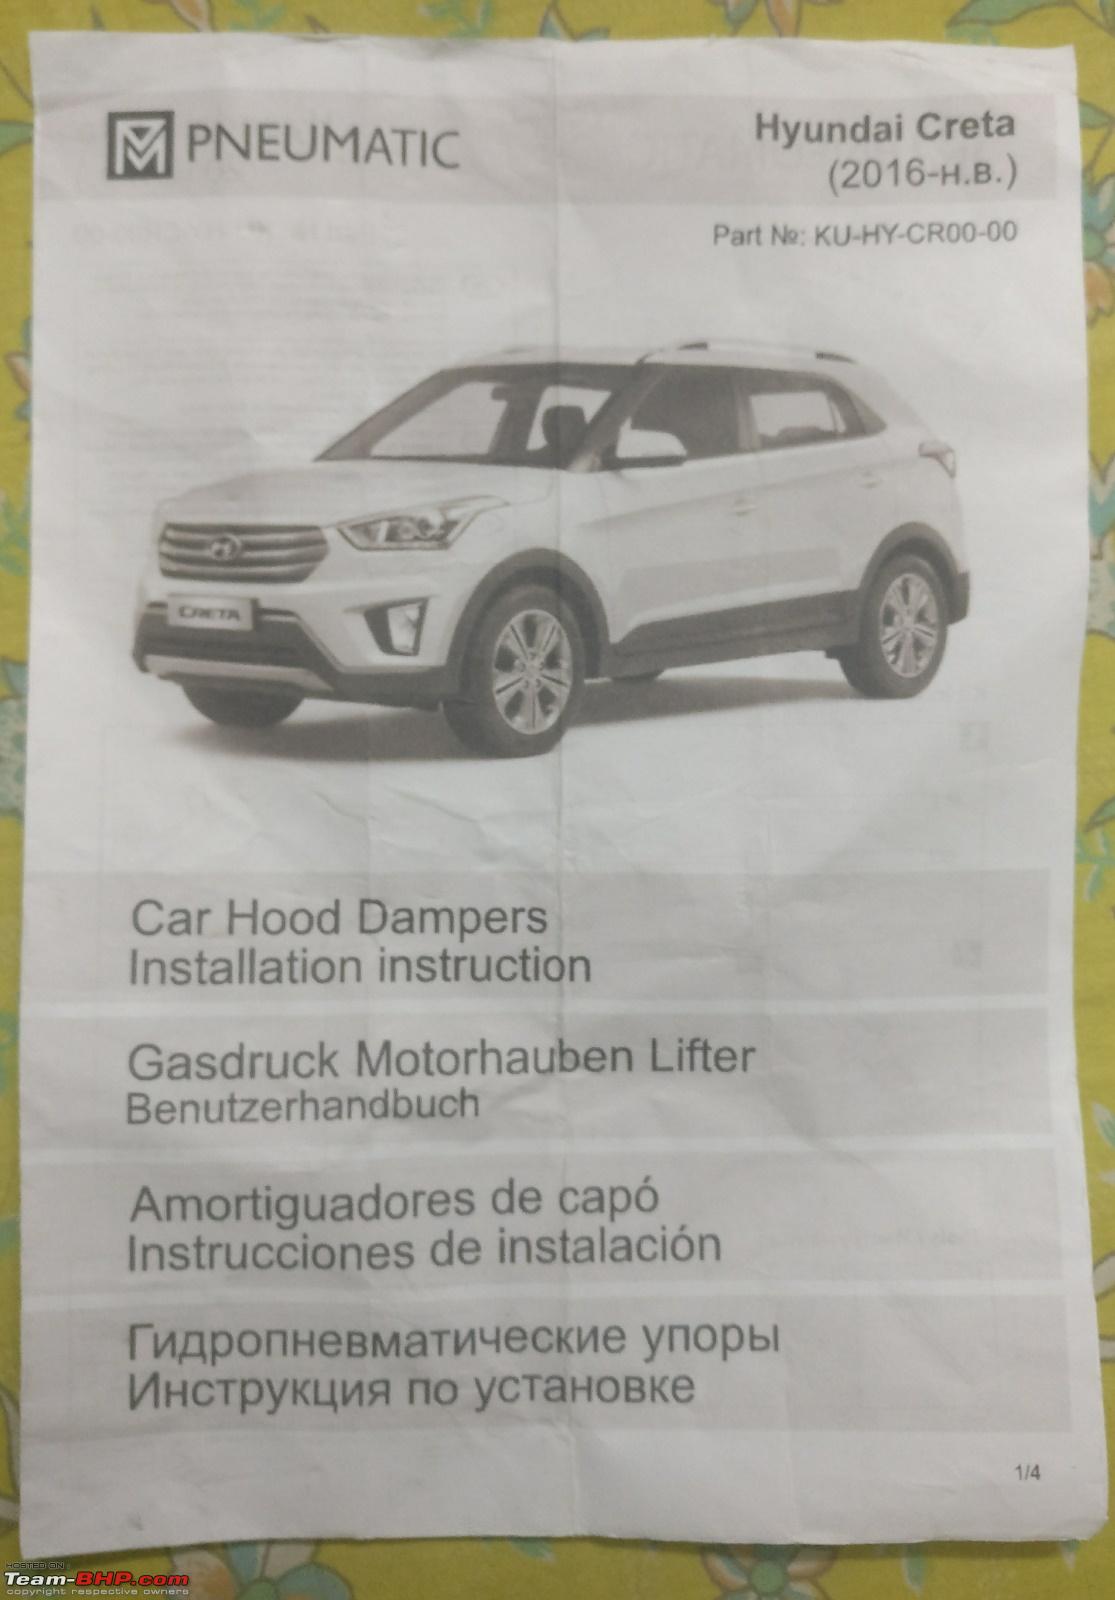
Instruction manual

Price I paid
Unscrew the nut to fix the upper clamp

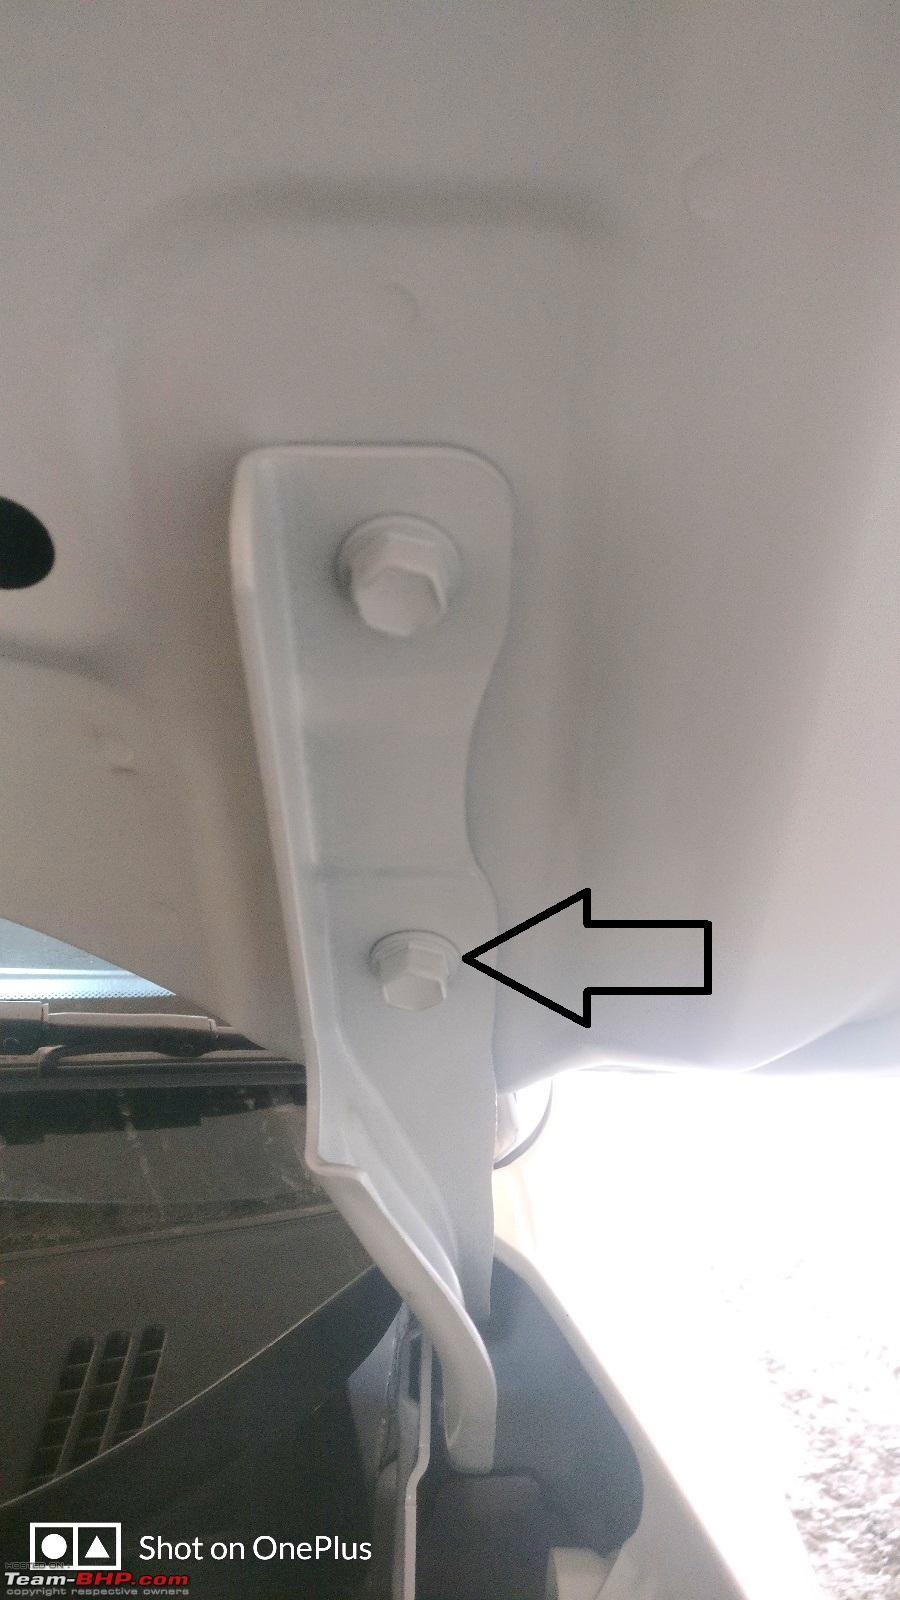
Unscrew the two nuts to fix the lower clamp

Top Clamp Fixed
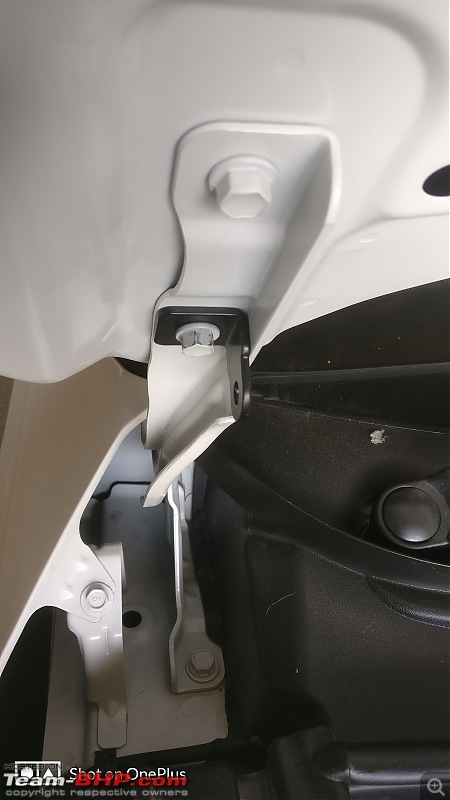
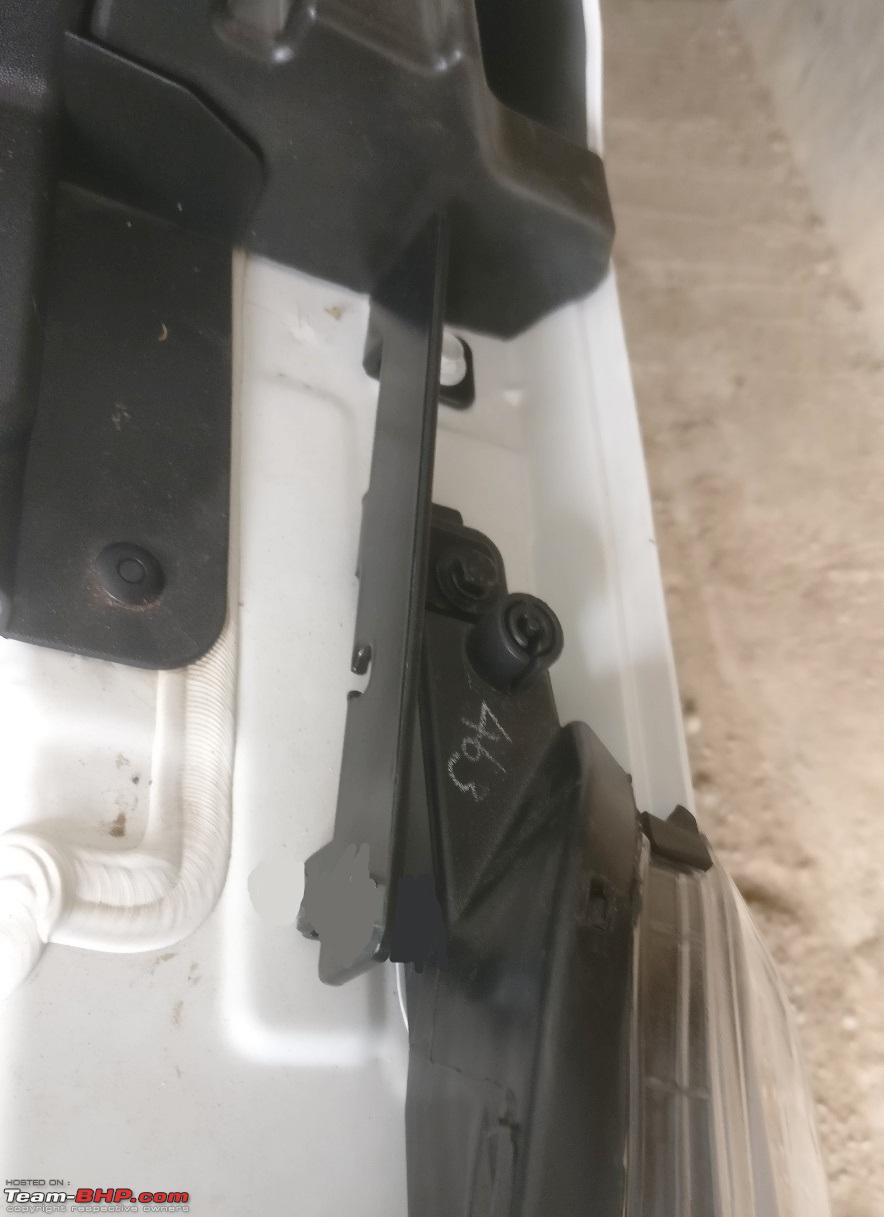
Bottom Clamp fixed

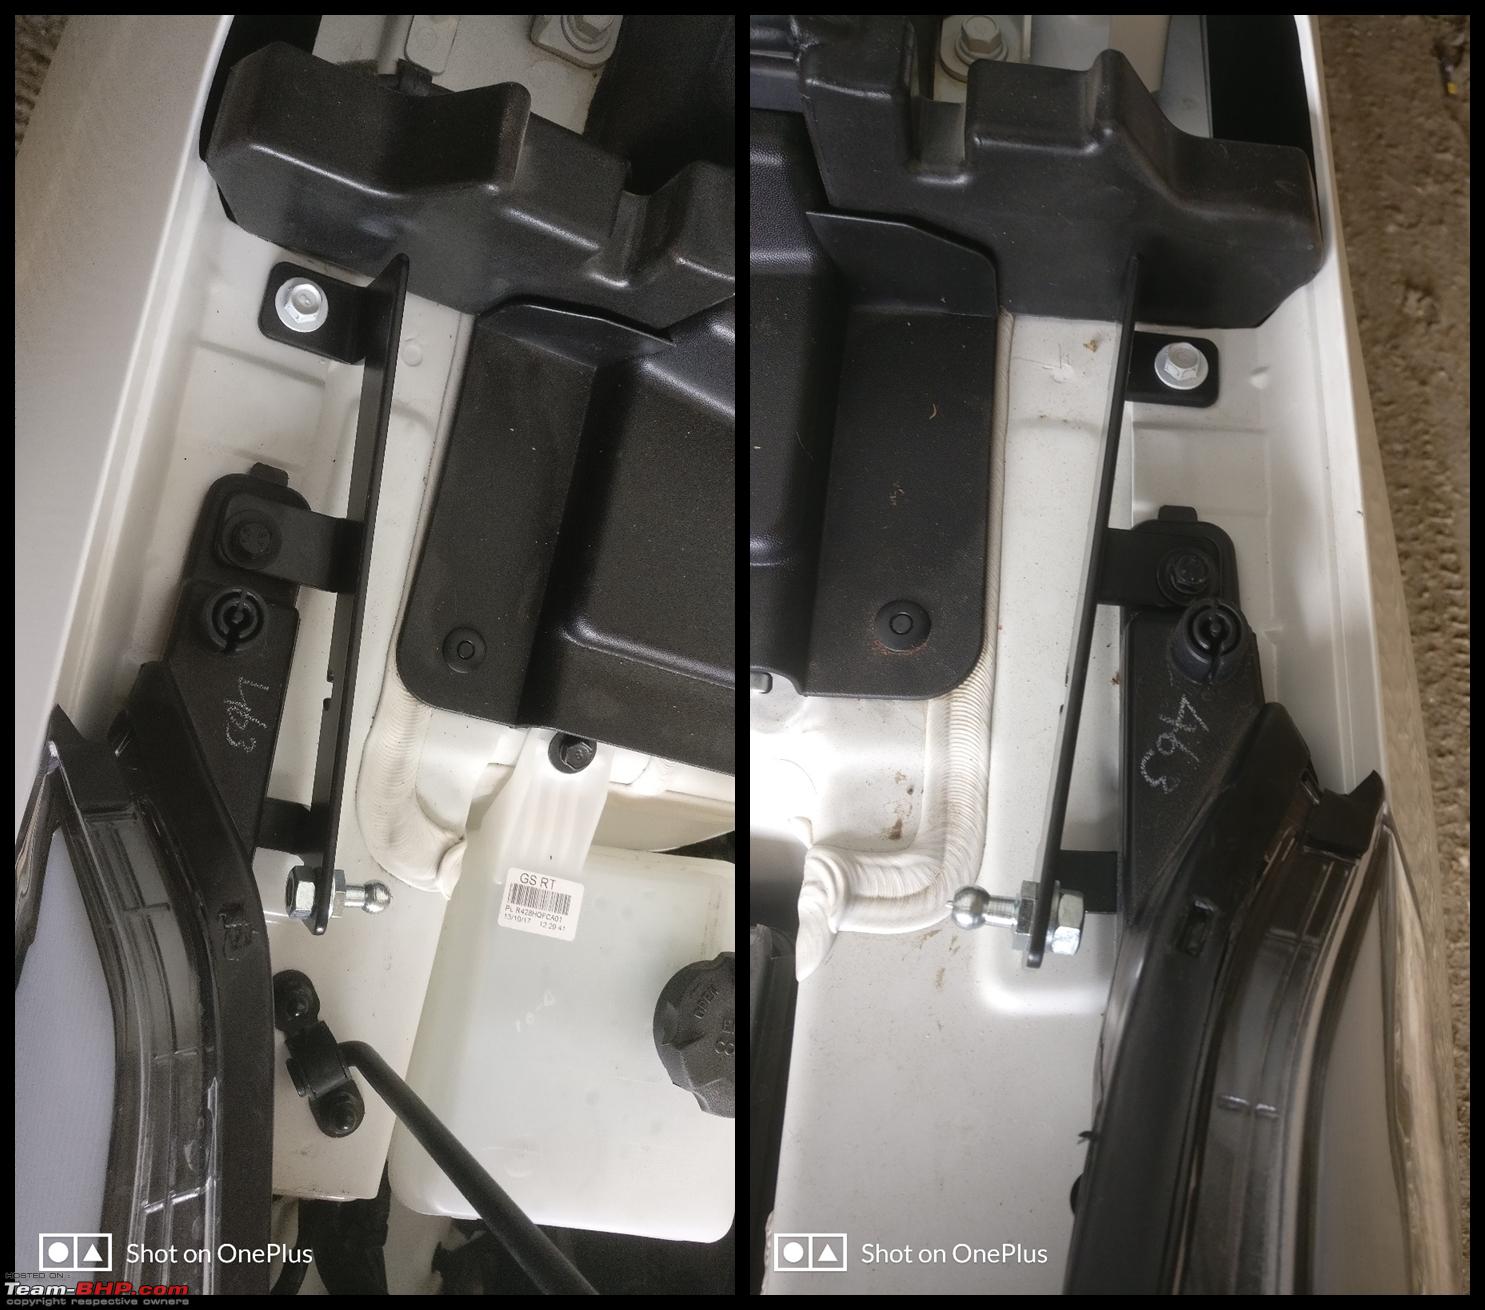
M8 ball stud attached to the top clamp
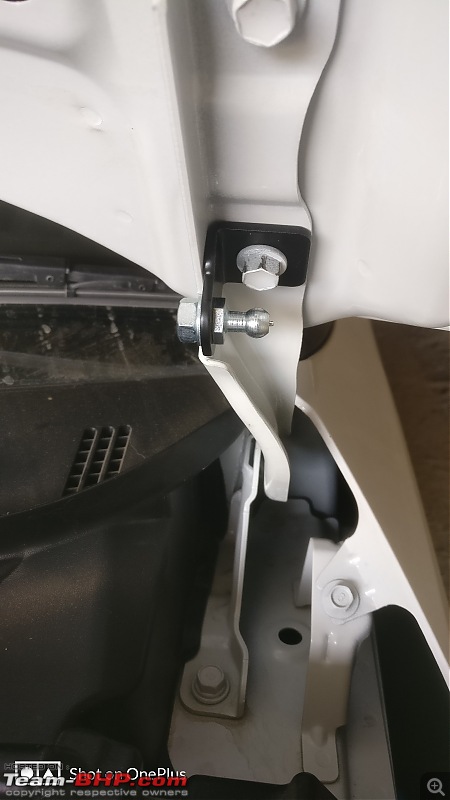
M8 ball stud attached to the bottom clamp
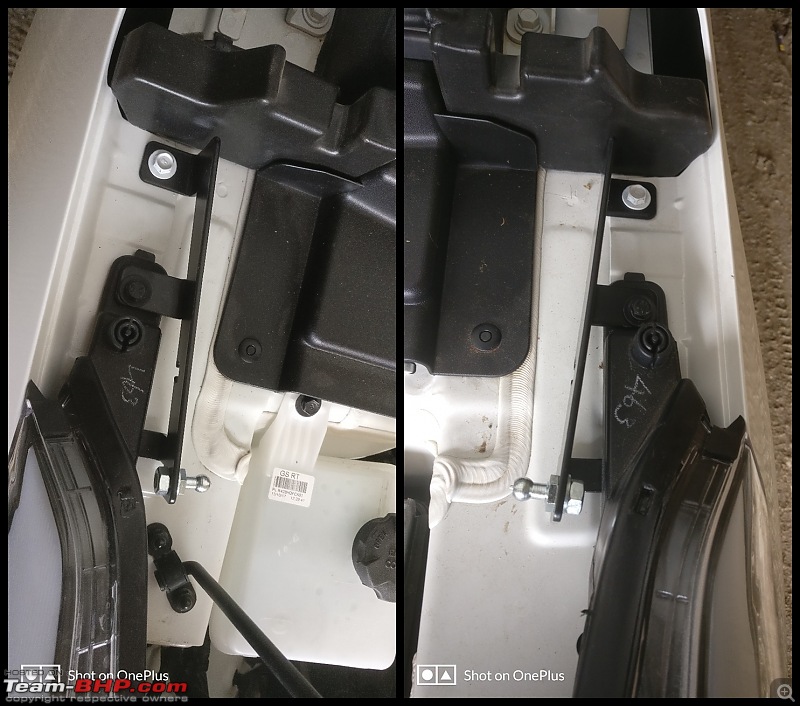
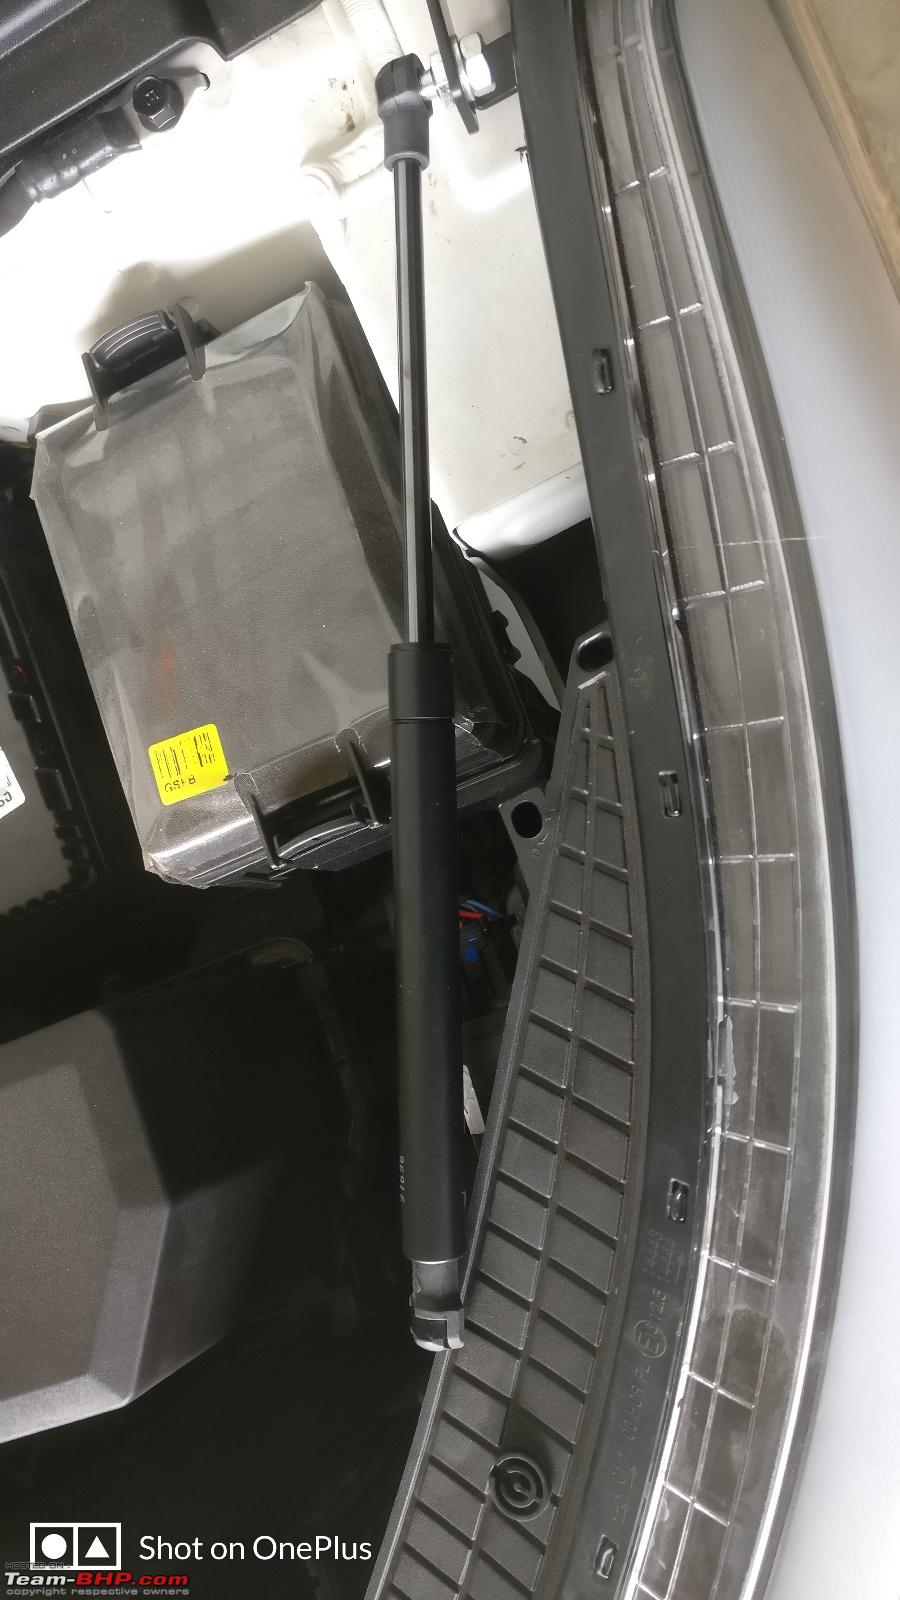
Strut attached to the ball stud on the bottom clamp...

...then the strut fixed to the ball stud on the top clamp

Finally... hood is now held by the struts
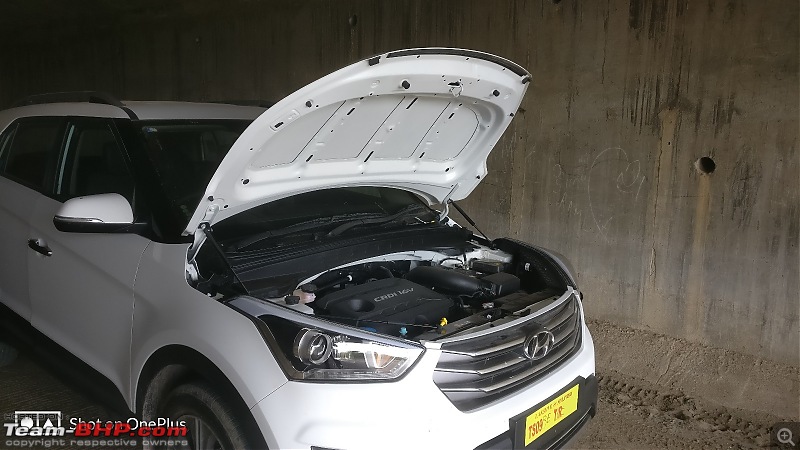
Close up

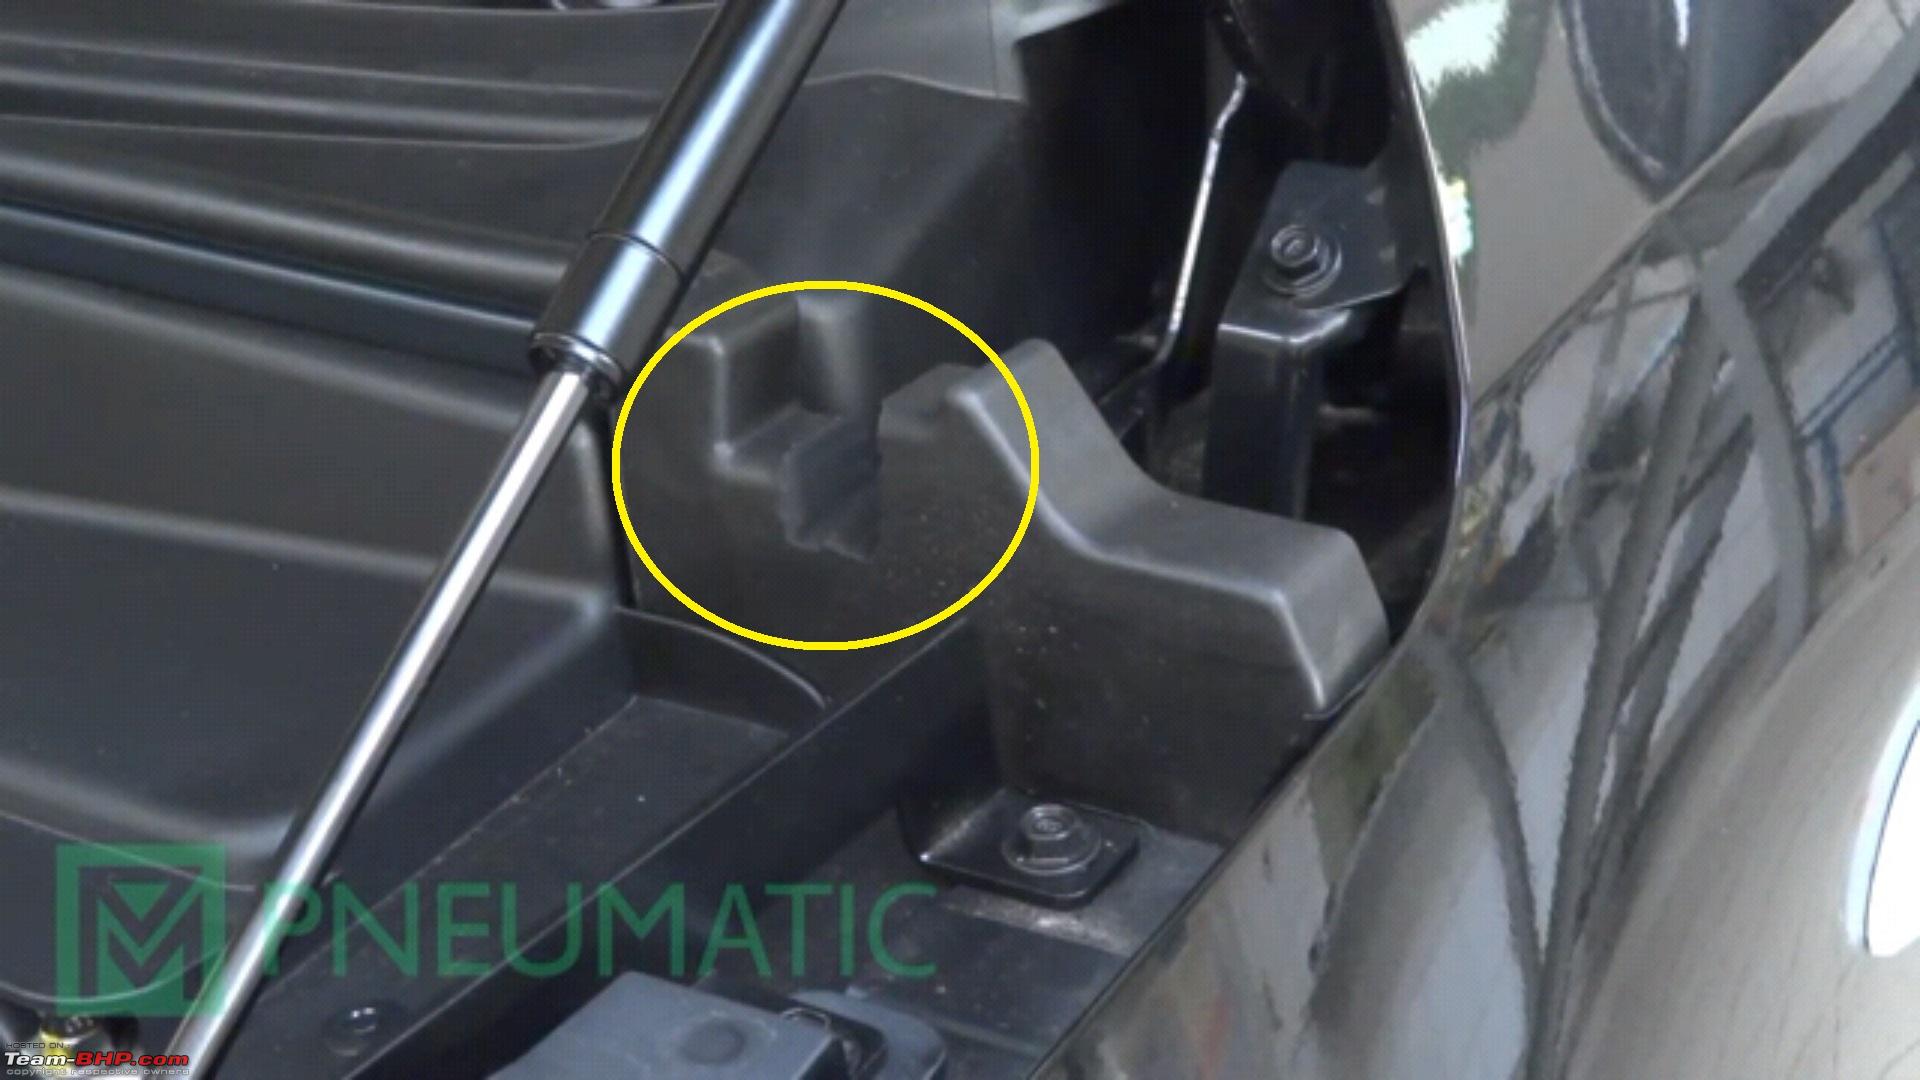
After installing, one needs to slowly lower the hood to see where the struts come in contact with the insulator pad/sponge. Using a paper knife, that much portion of the sponge which is coming in contact with the strut needs to be cut (Image source Pneumatics website gallery)

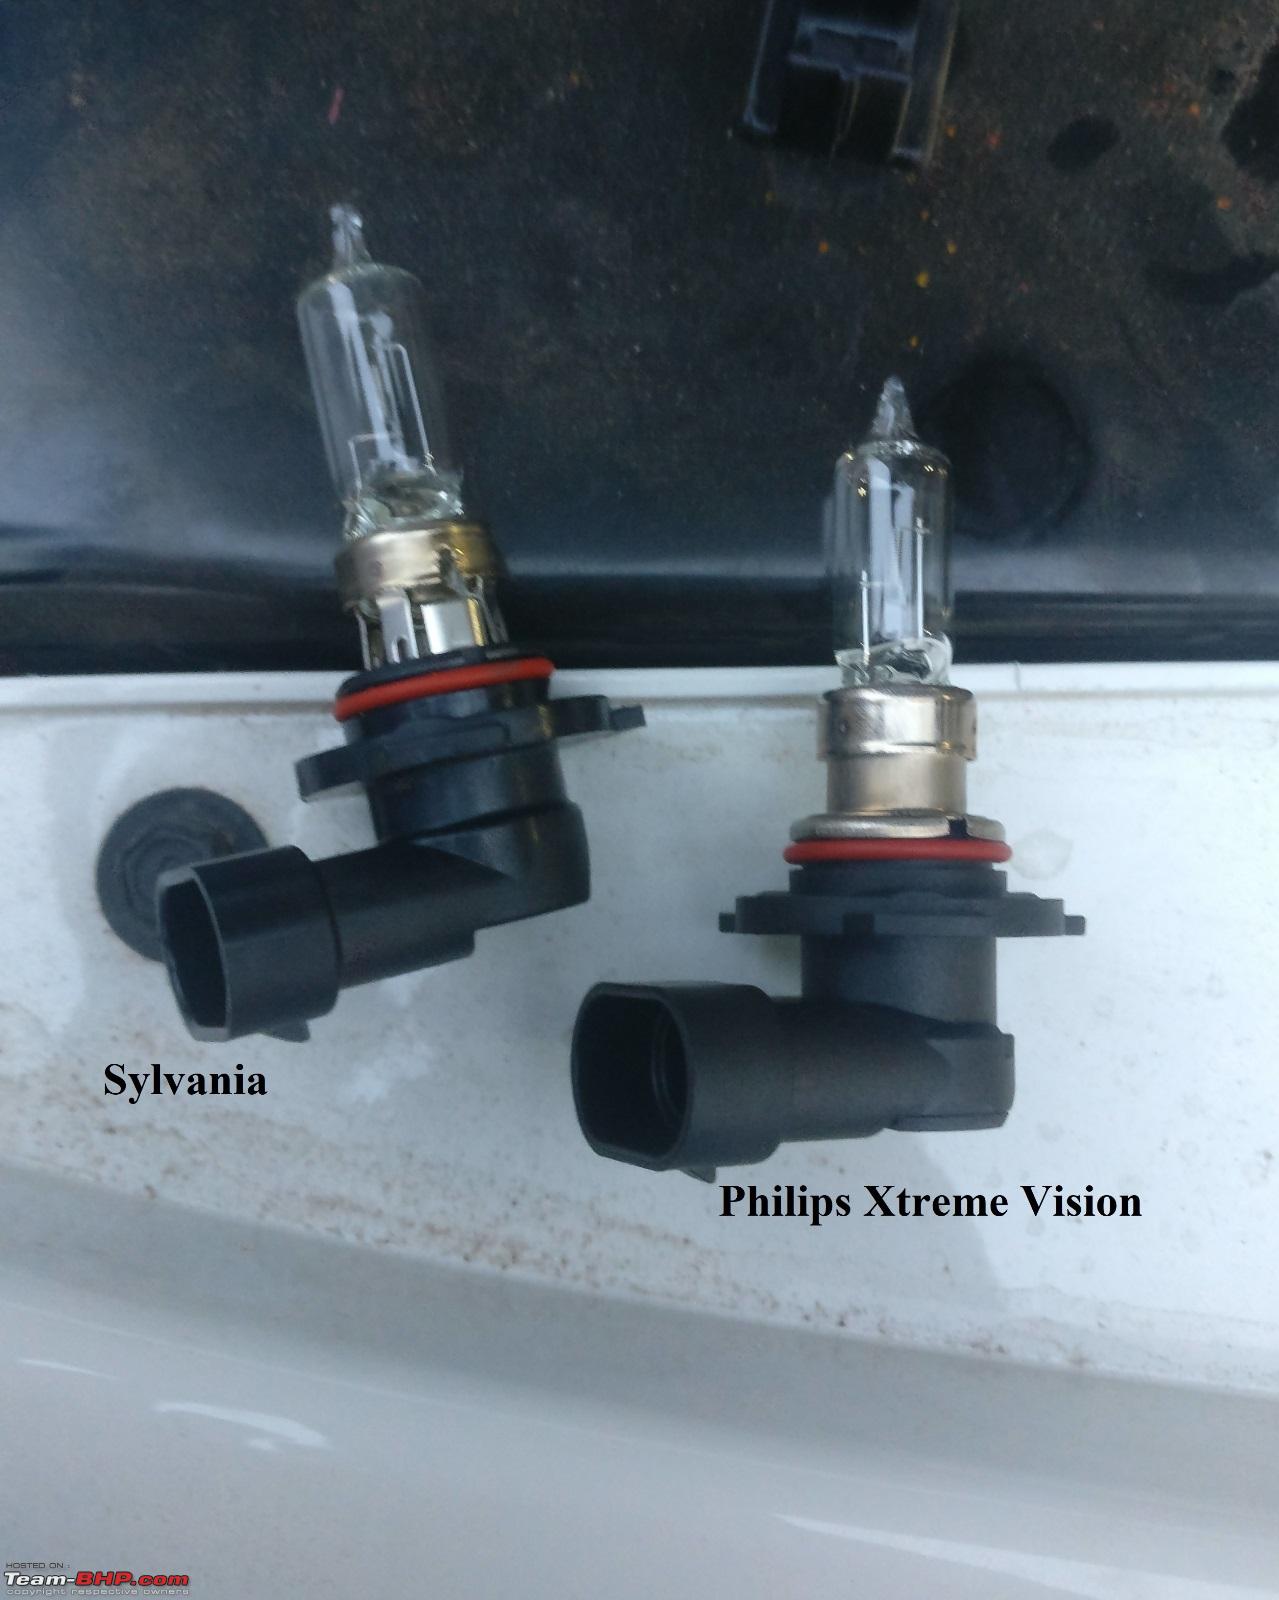
MODIFICATION #6: DIY Headlight Bulb upgrade (Minor one) from Sylvania to Philips Xtreme Vision
Coming from a 100/90W + 35W XP Micro (bi-xenon projector) combination setup to a 60W halogen projector + 27W fog lamp combination, it was difficult for me in the initial days to adjust to the lighting output but now it is okay since I'm getting used to it but not of much help while travelling at highway speeds on our national highways. I don't blame the projectors on the Creta since they are one of the best light outputs I have seen from the factory.
Only bulbs that were available were the Philips Xtreme Vision on Amazon.in.
Here's the link
I got the bulbs from the distributor here in Hyderabad for ₹ 600 x 2 = ₹1,200.
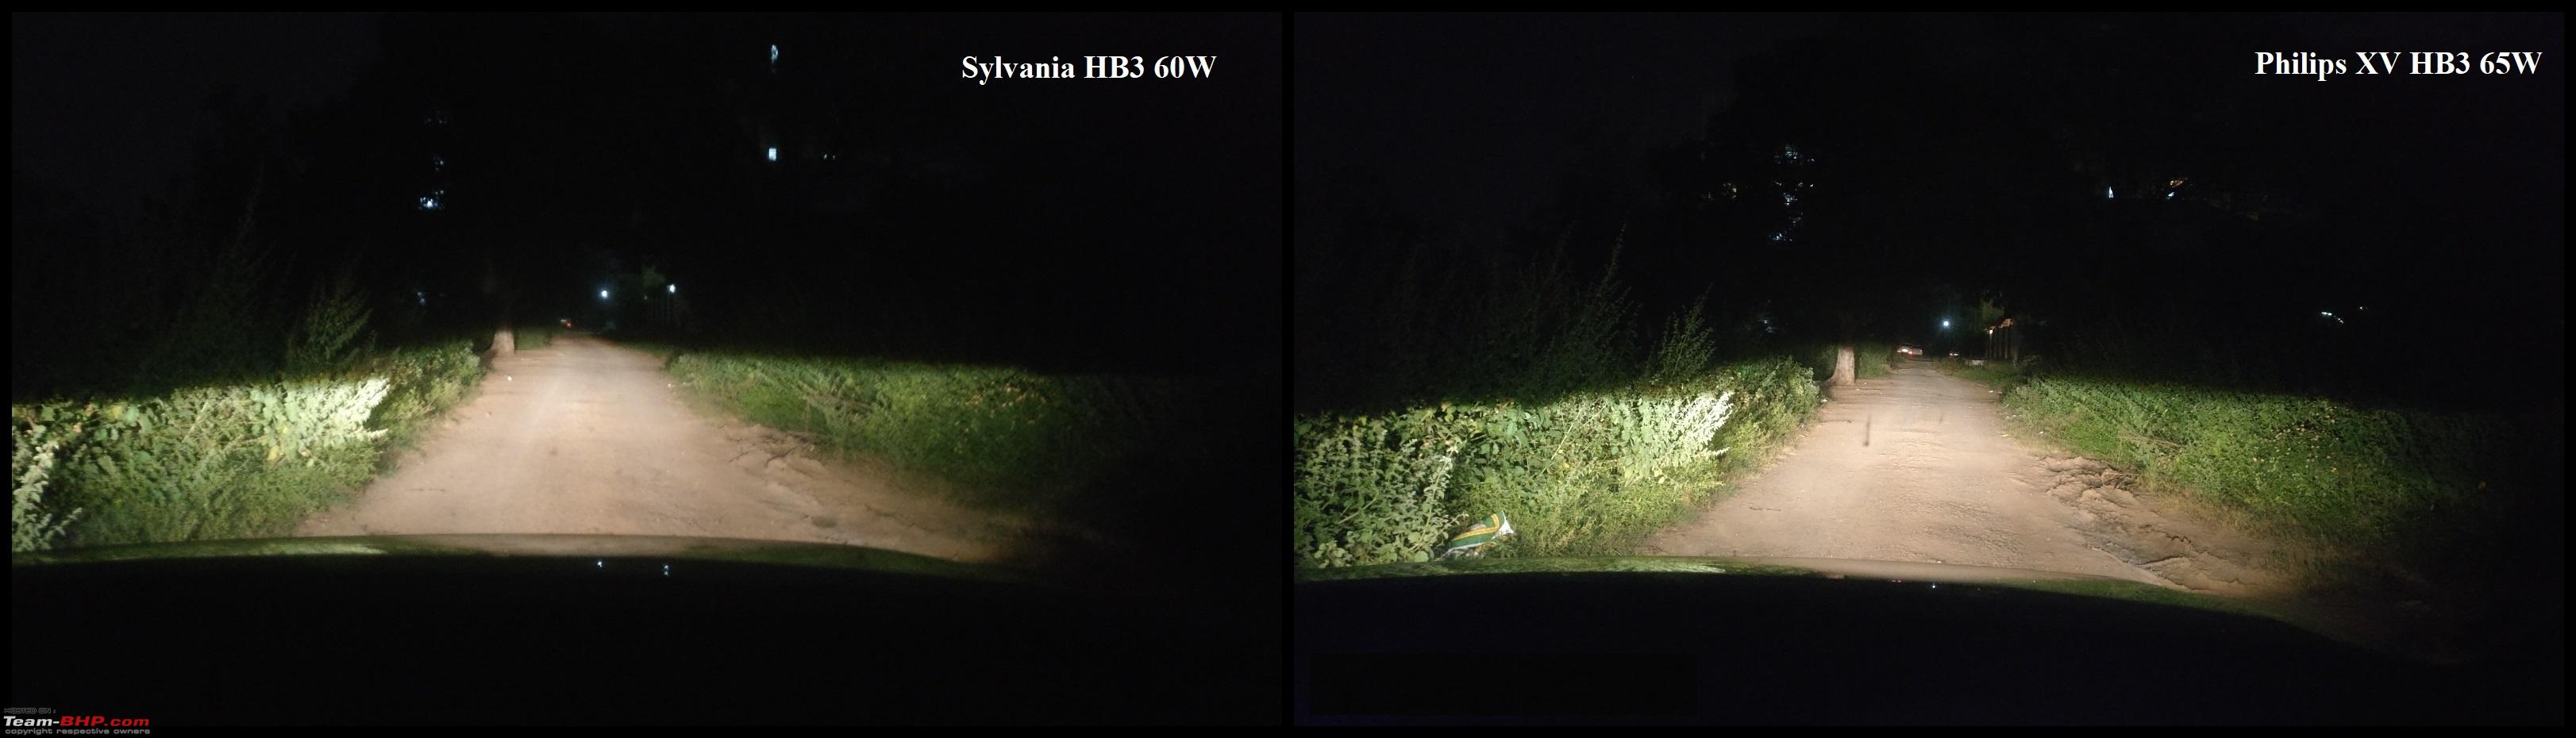
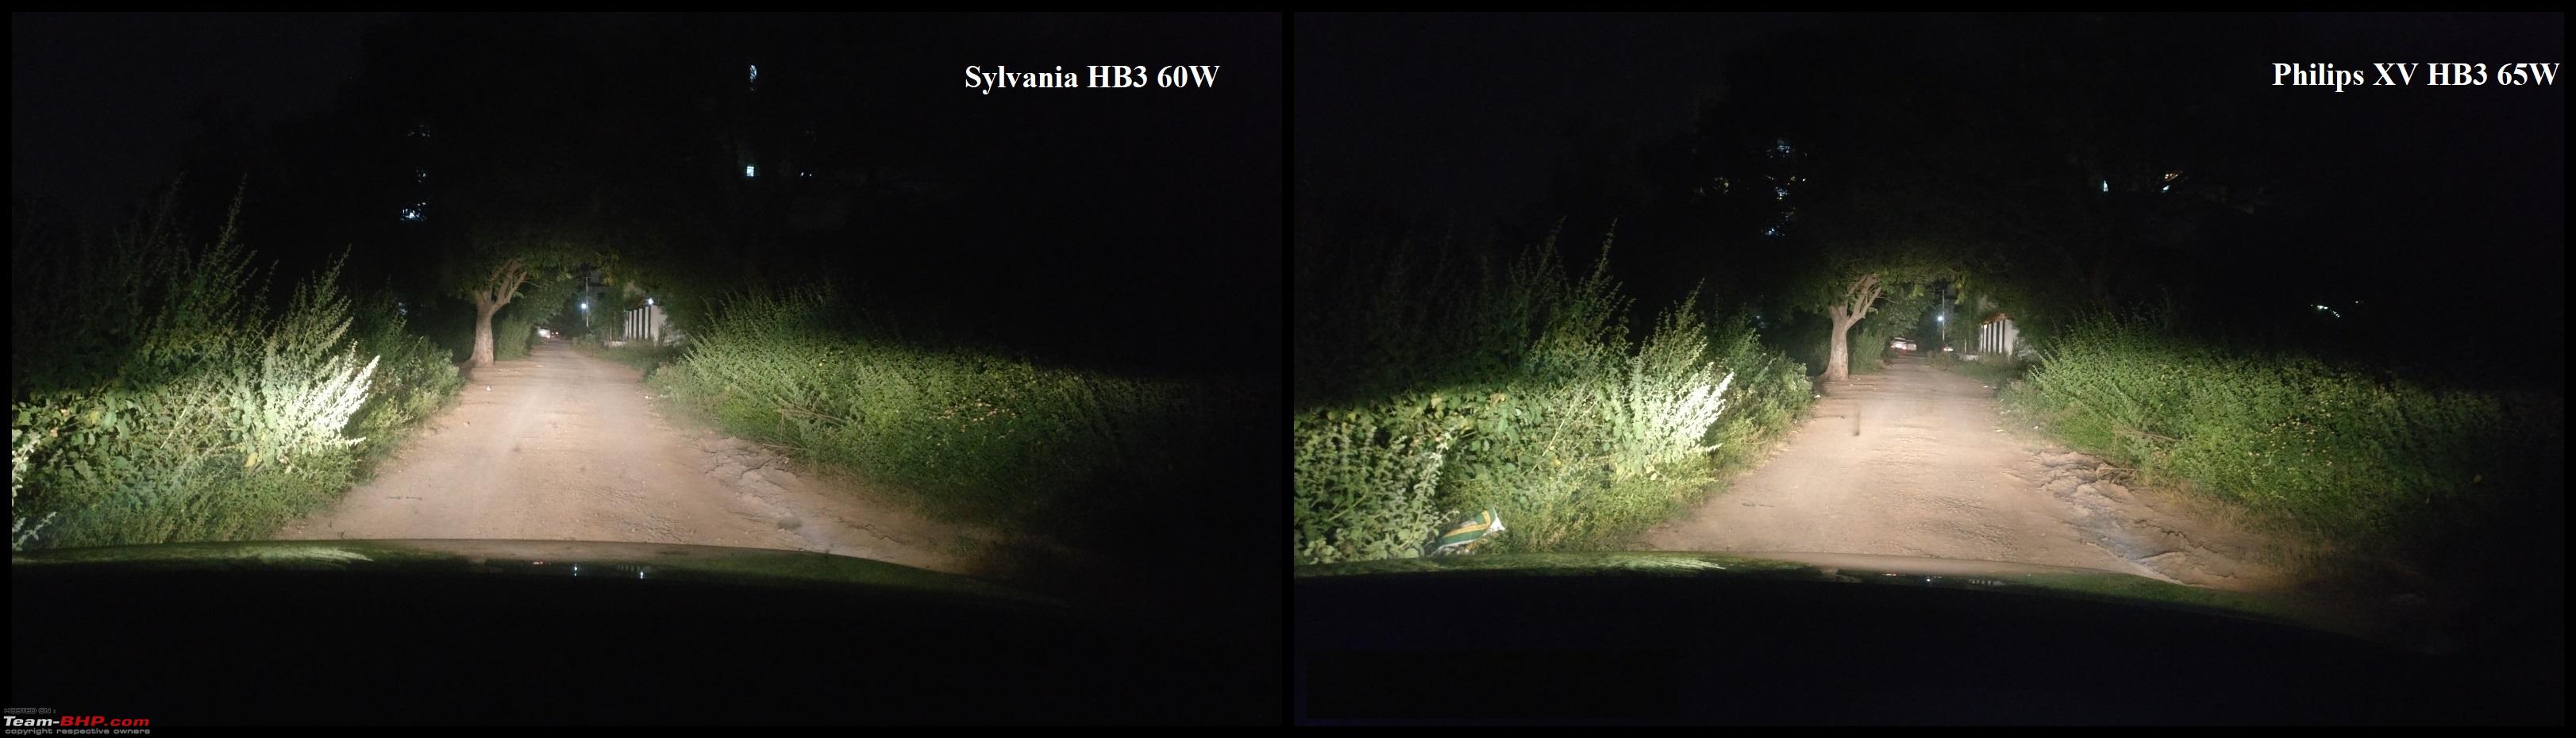
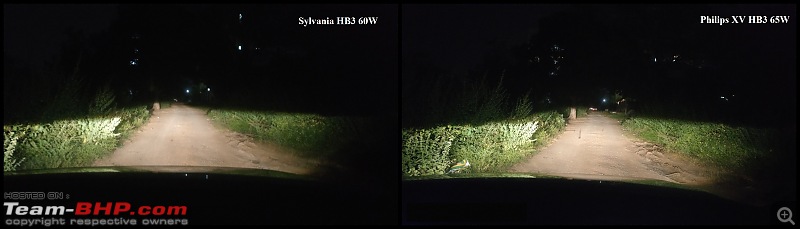
Difference in lighting output (read brightness) is negligible as the Sylvania's are of 60W and the Philips XV are 65W, a bump by just 5W. Only difference that I could notice with the Phillips bulbs were the cut-off lines are a bit more sharper than the OEM Sylvania's.
OEM bulbs (Sylvania HB3 9005 - 60W)
Philips Xtreme Vision HB3 9005 65W

Bulb comparison (L=Sylvania & R=Philips XV)

Front Fog lamp bulb

Fog lamp specification

Lighting output of Fogs ONLY

Low beam output Comparison - Sylvania vs Philips XV
High beam output Comparison - Sylvania vs Philips XV

Low beam
High beam

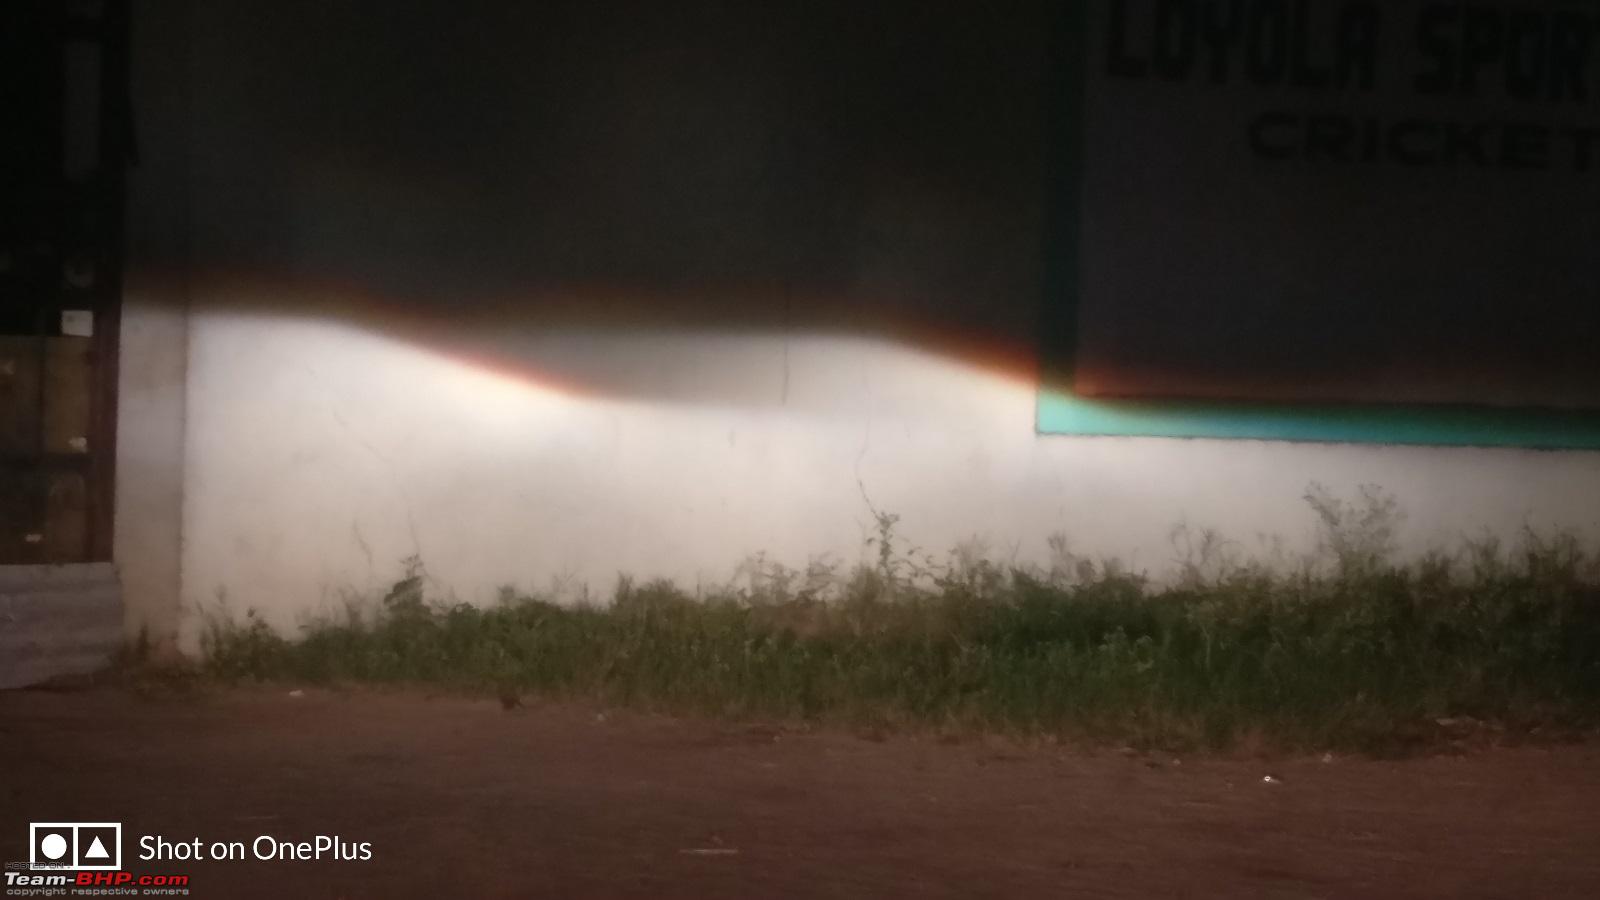
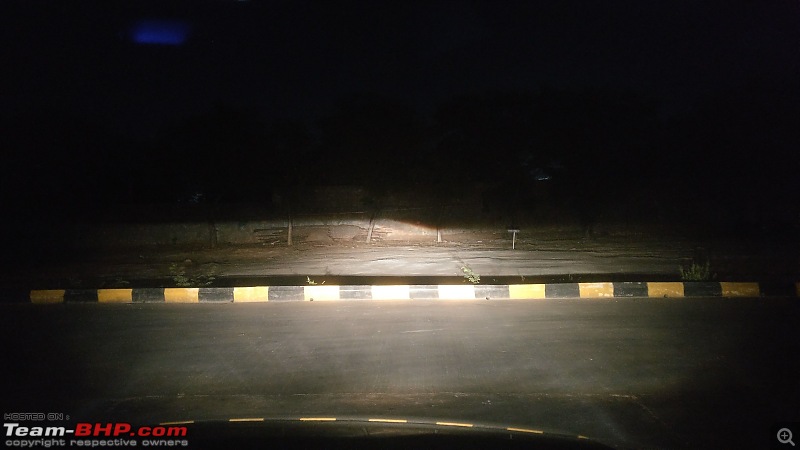
Zoom'ed in on the cut-off lines (pretty neat for a OE halogen projector)

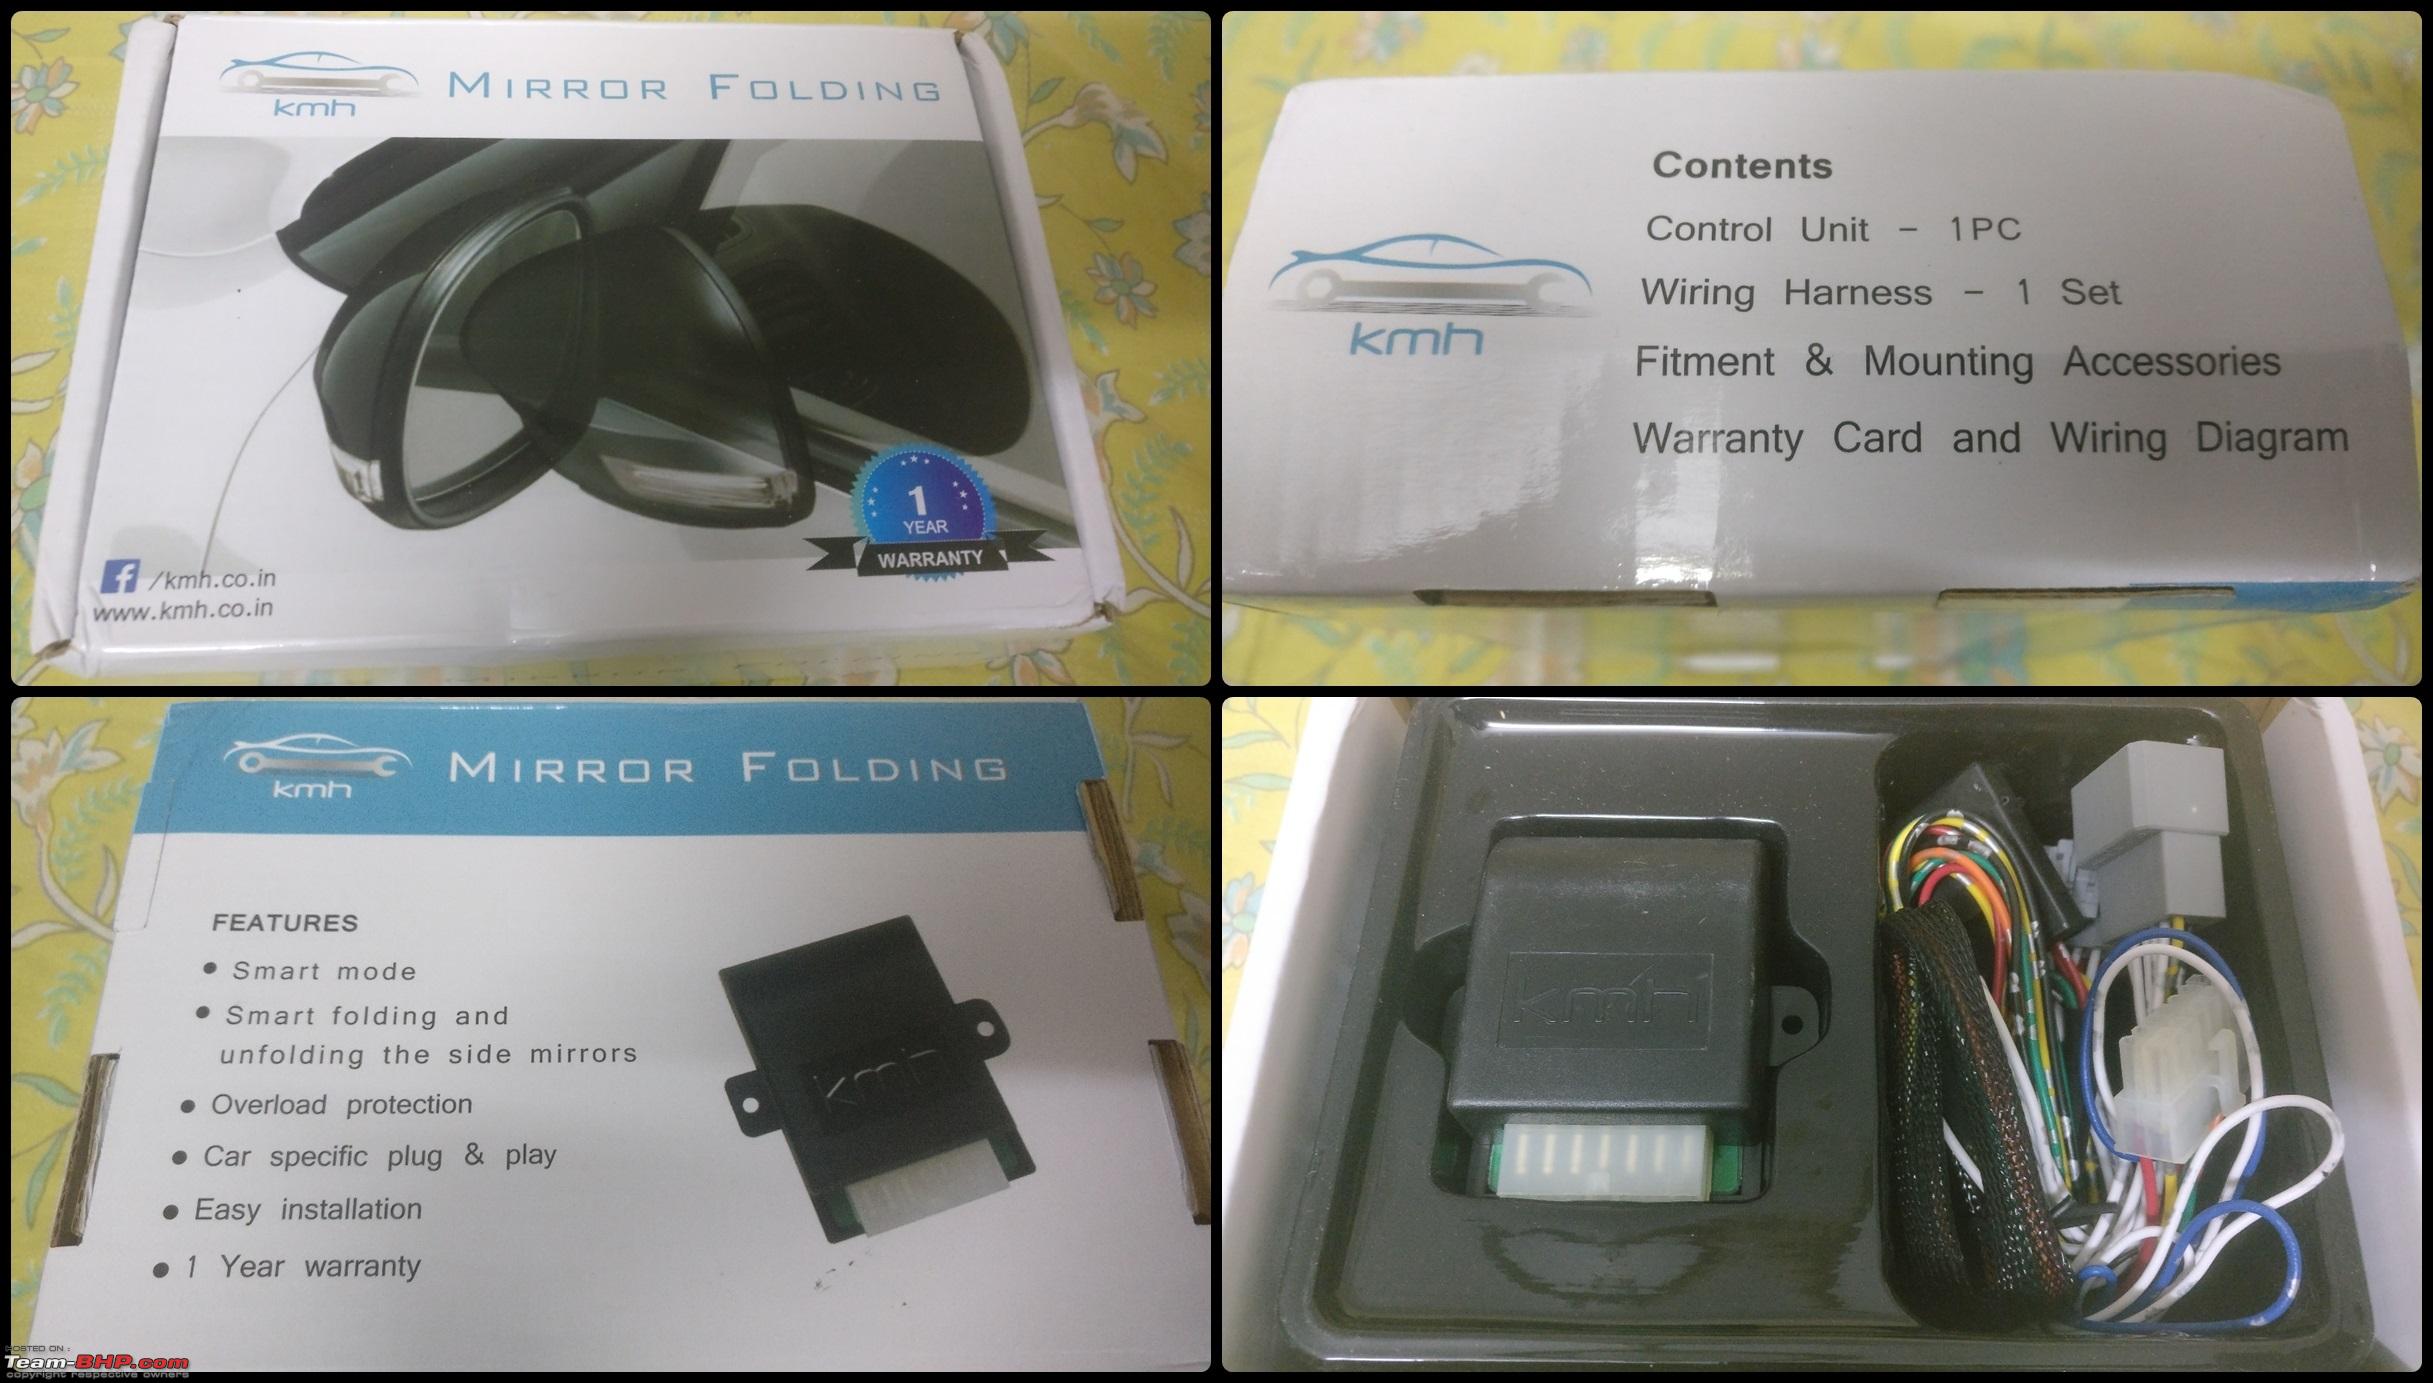
MODIFICATION #7: DIY Install - ORVM automatic folding Relay
One of the things that was lacking in the car was the auto-fold/opening of the ORVM when locked/unlocked.Had seen couple of videos and understood it is a straightforward install so went ahead and purchased it from CarPlus website for ₹1,600.
These units being car specific and plug n play types, not much of tinkering is required. I had an option of getting this fit before delivery by the dealership but they were installing the 'Power window closing + ORVM relay' that was costing a whopping ₹8,000. I didn't want the power window closing function hence didn't get it fit at the dealership before delivery and came to know from the accessory guy that they too were going to use scotch-lock connectors to tap into the wiring which is when I decided to do it myself. :)
A clear tutorial video is available on YouTube published by CarPlus themselves so I had nothing much to do but follow the instruction as it came
(POW00013) KMH ORVM Folding Relay For Hyundai Creta (Installation Video)
ORVM Relay package and contents

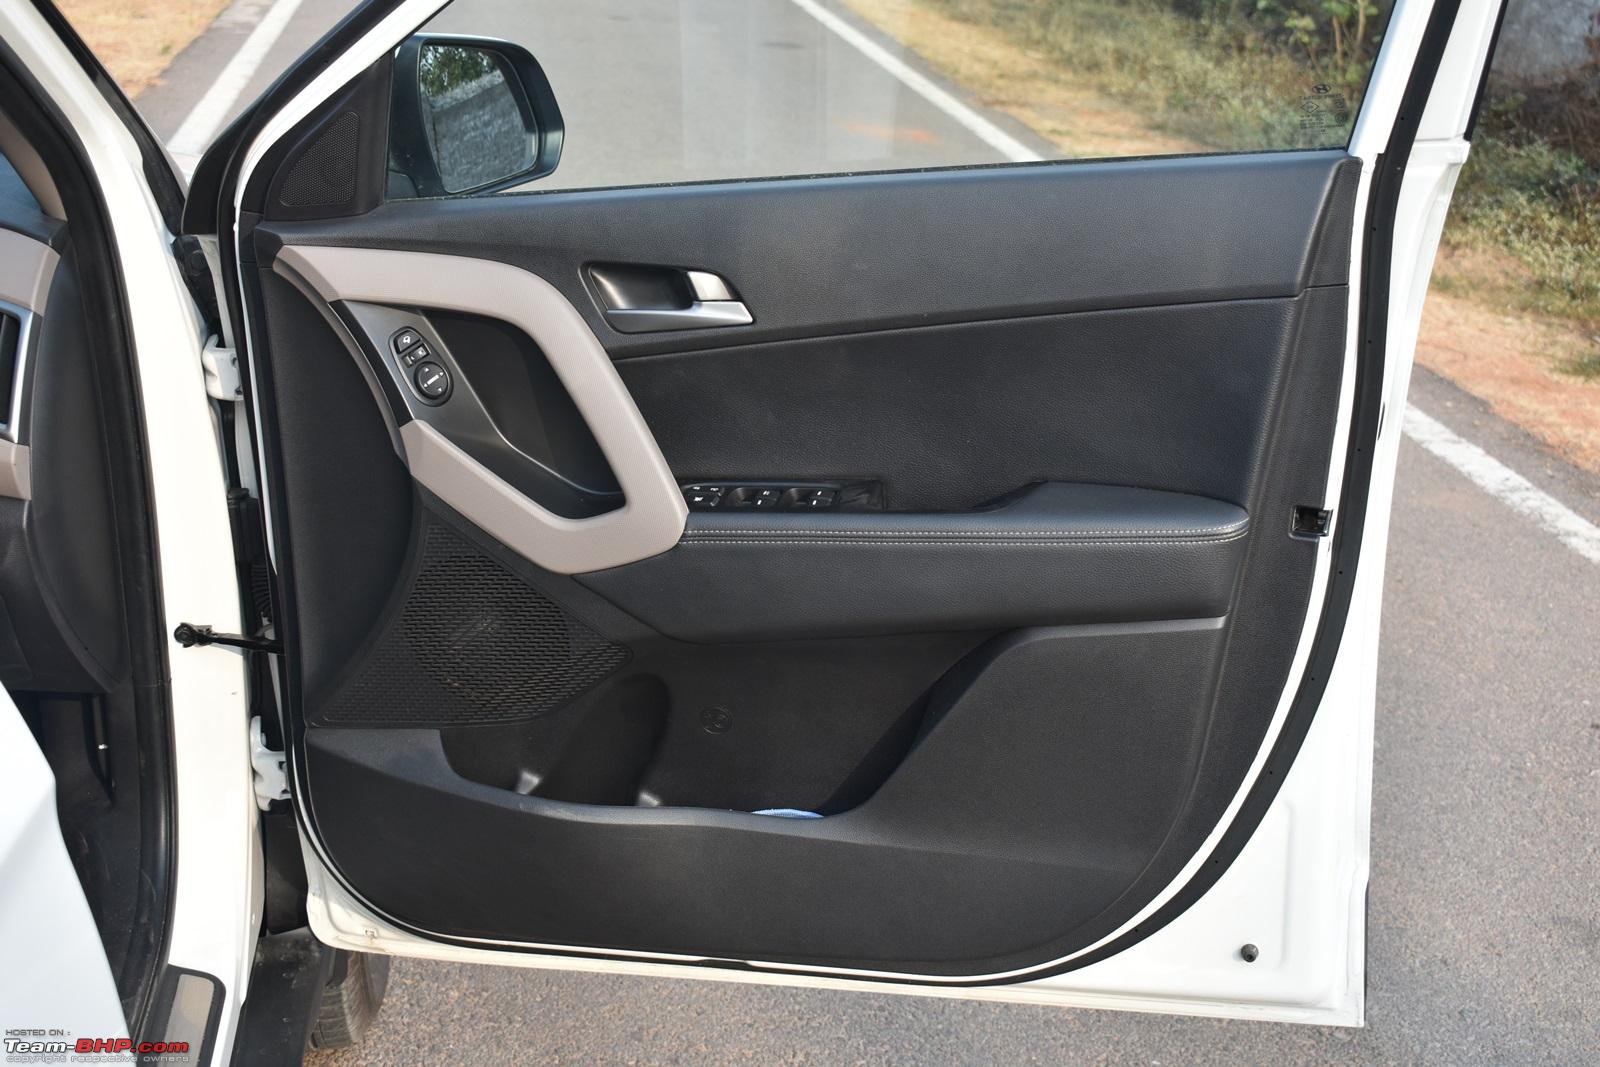
Front door pad

Screw No. 2 inside the door handle cup (Screw No. 1 is located behind the cover of door opening lever)

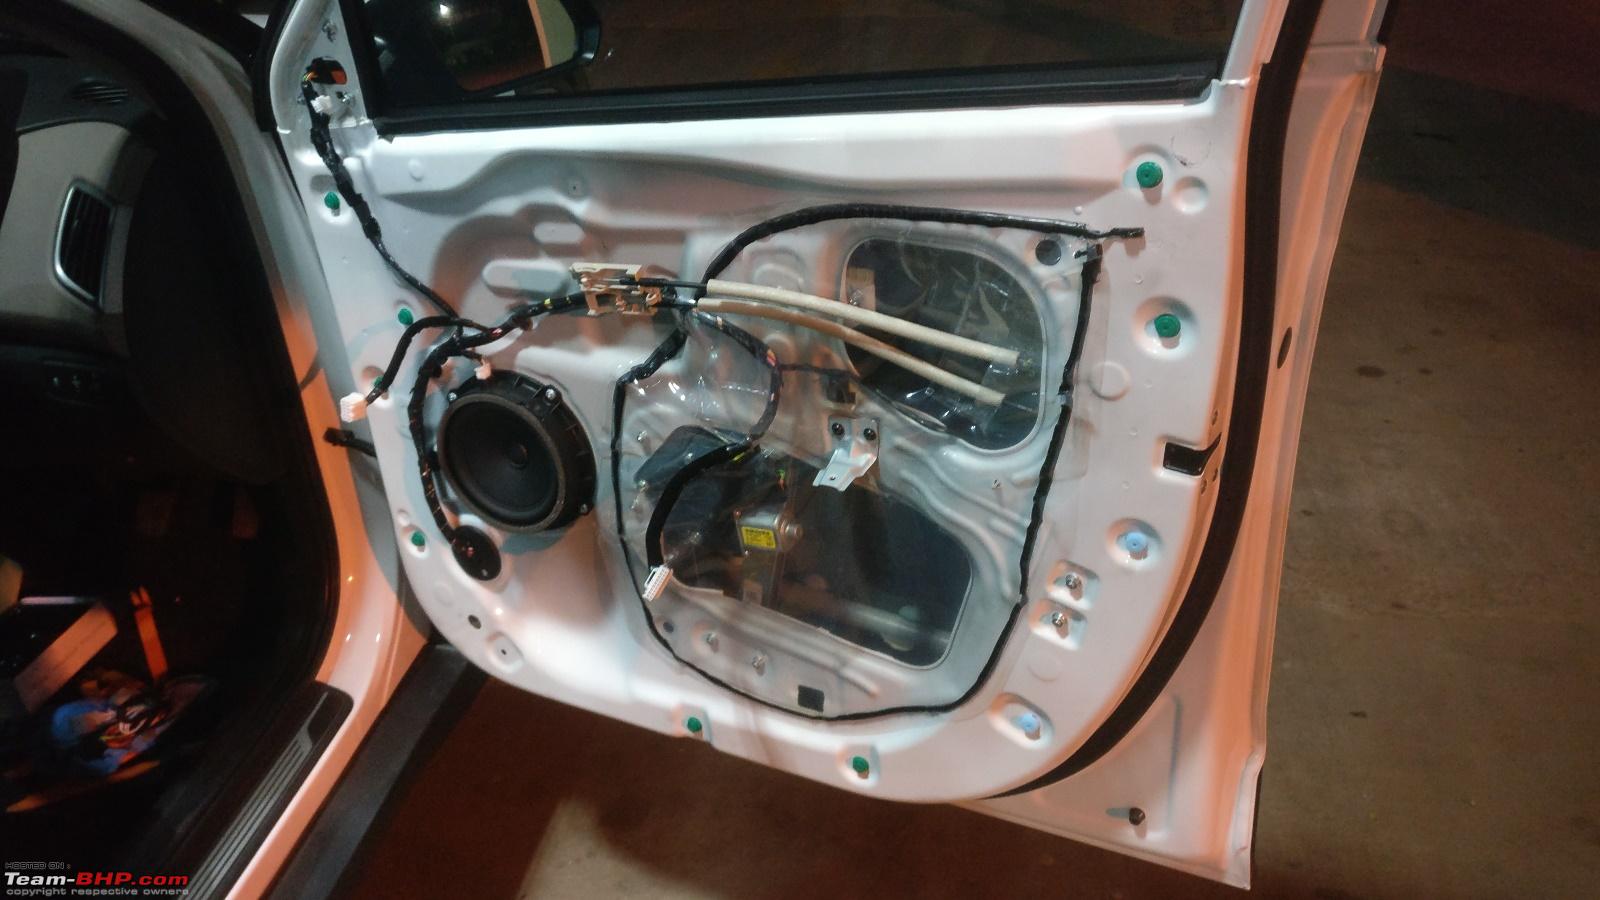
Door pad removed

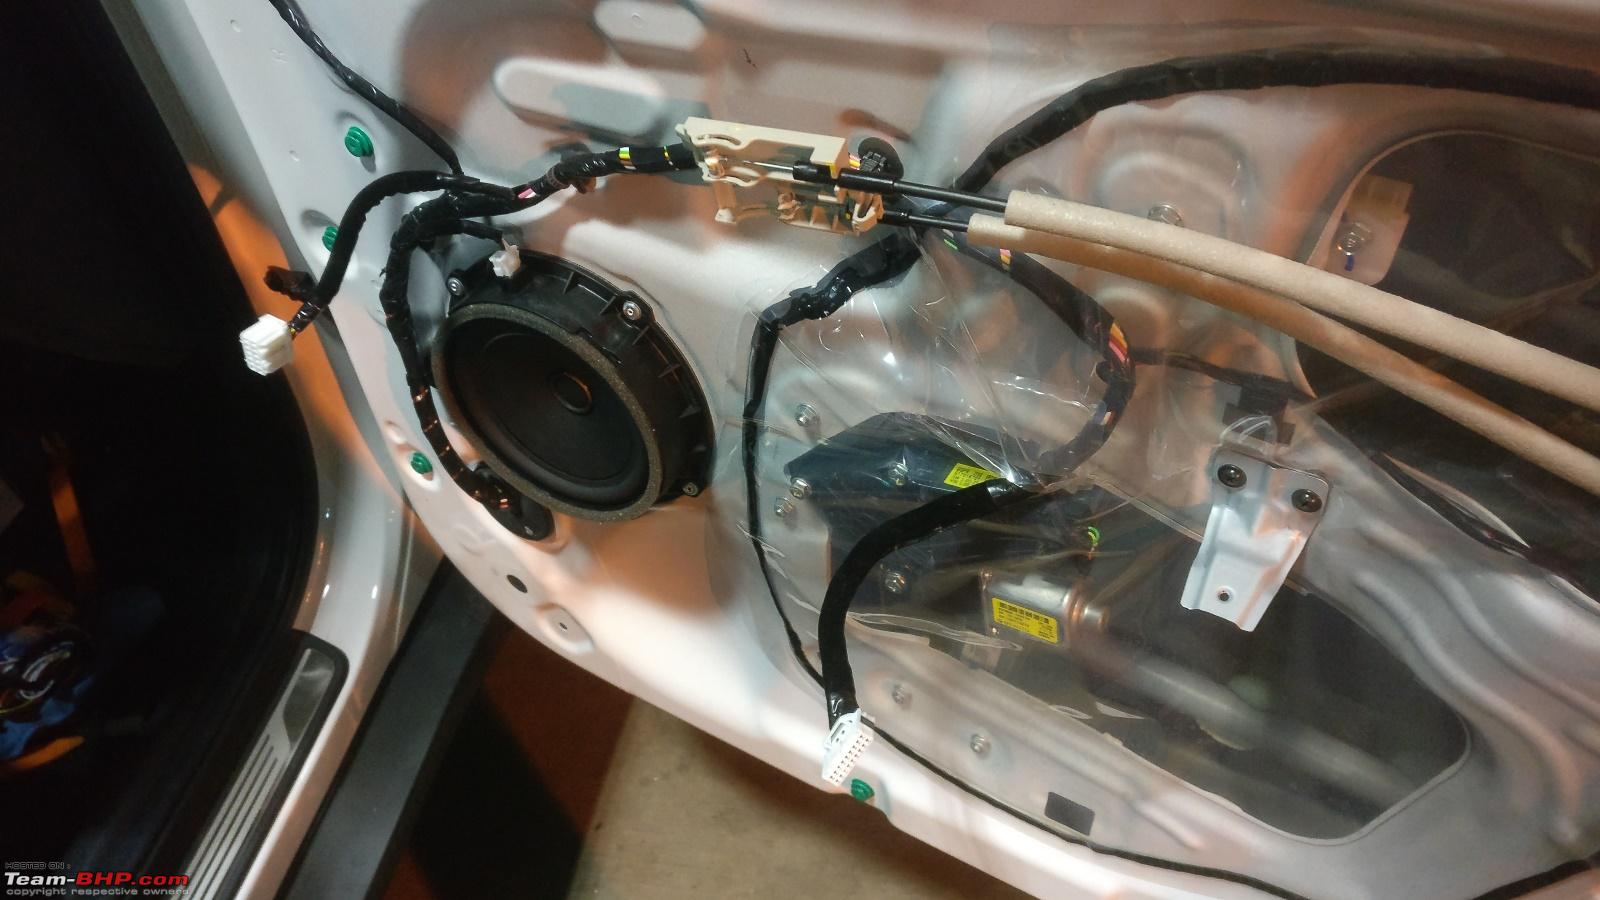
Close up of the internals

Connected the scotch lock connectors as in the instructions video

Relay connectors plugged-in
Relay mounted on the body using 3M double sided tape

Neatly secured the extra wiring using zip ties

Taped the scotch lock connector using insulation tape and secured all the wiring with cloth tape too

Here's the video of the ORVM opening and closing in auto
https://www.youtube.com/watch?v=kFKQpHURyPE Link to the item
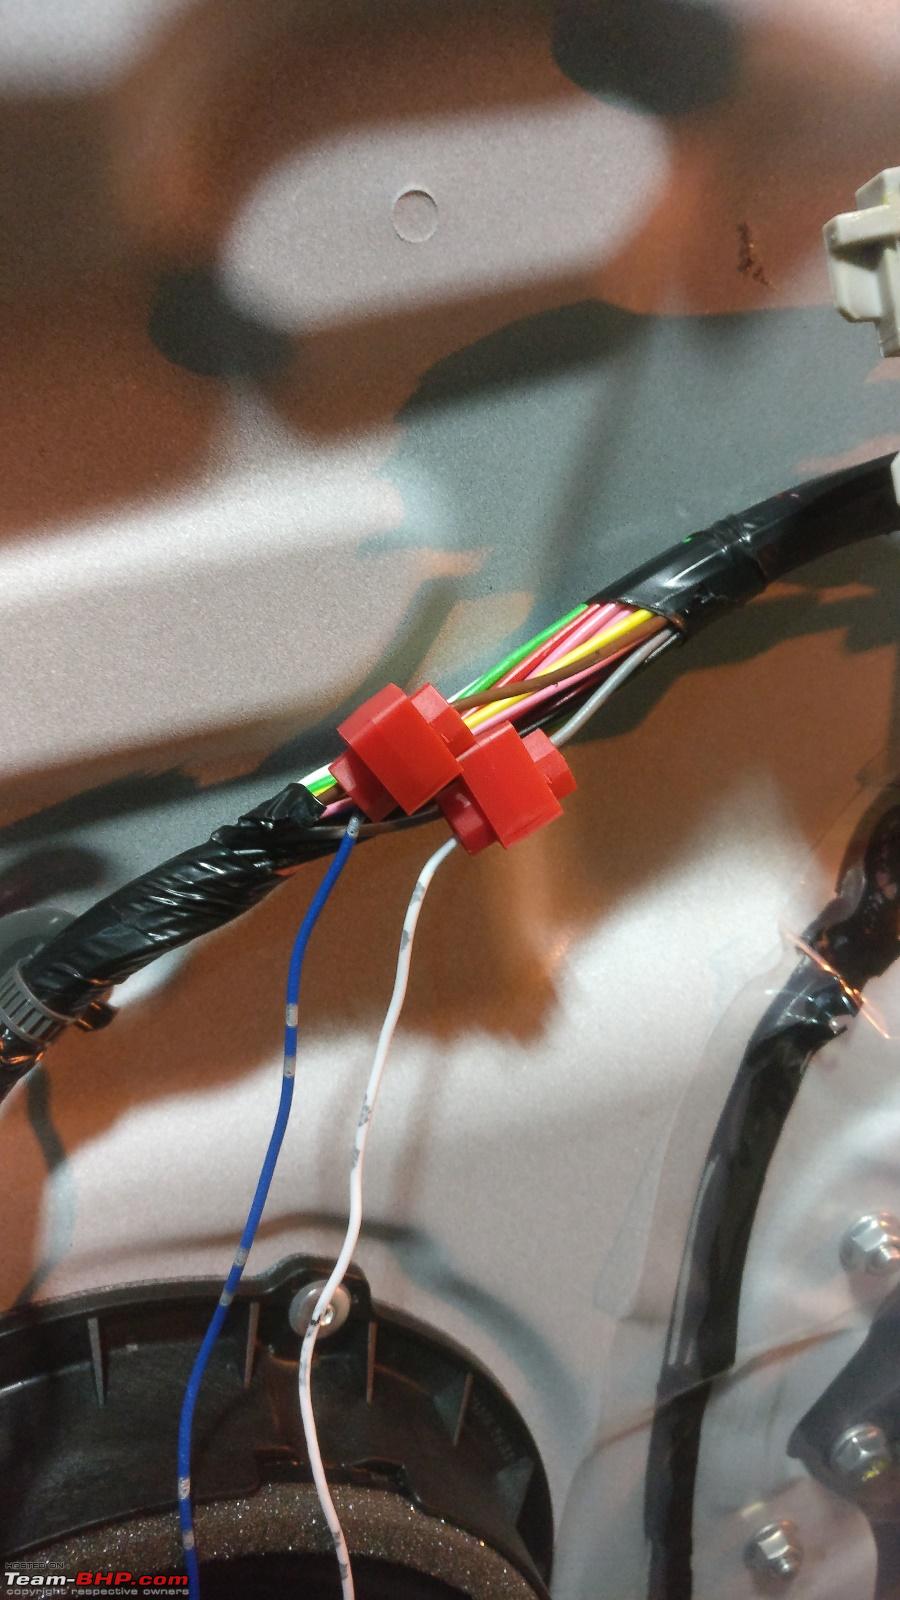
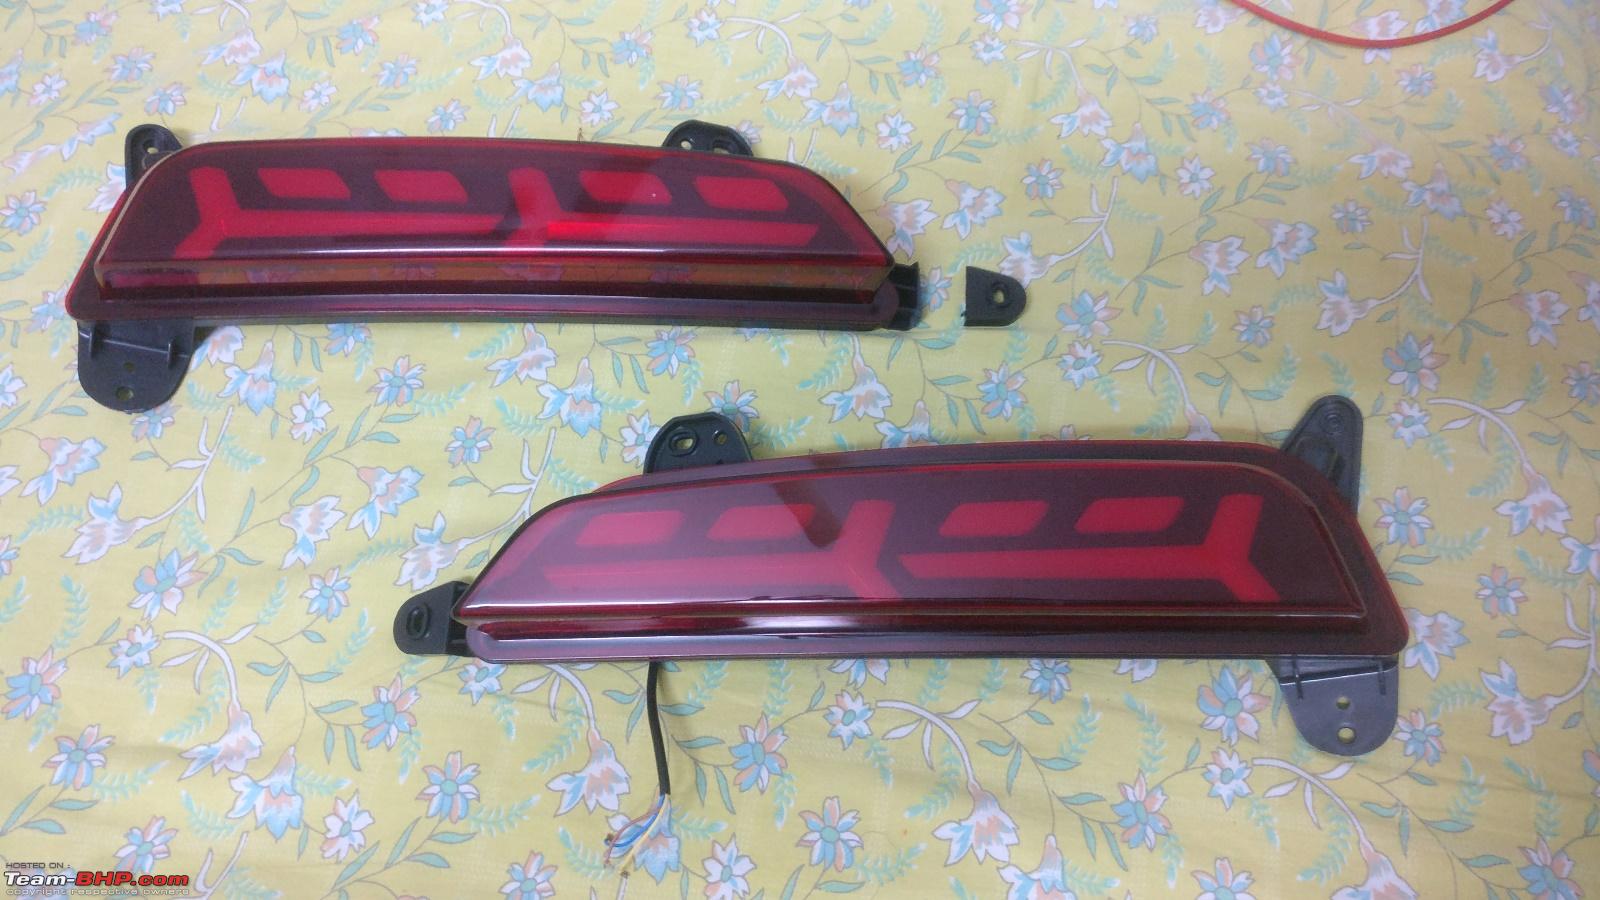
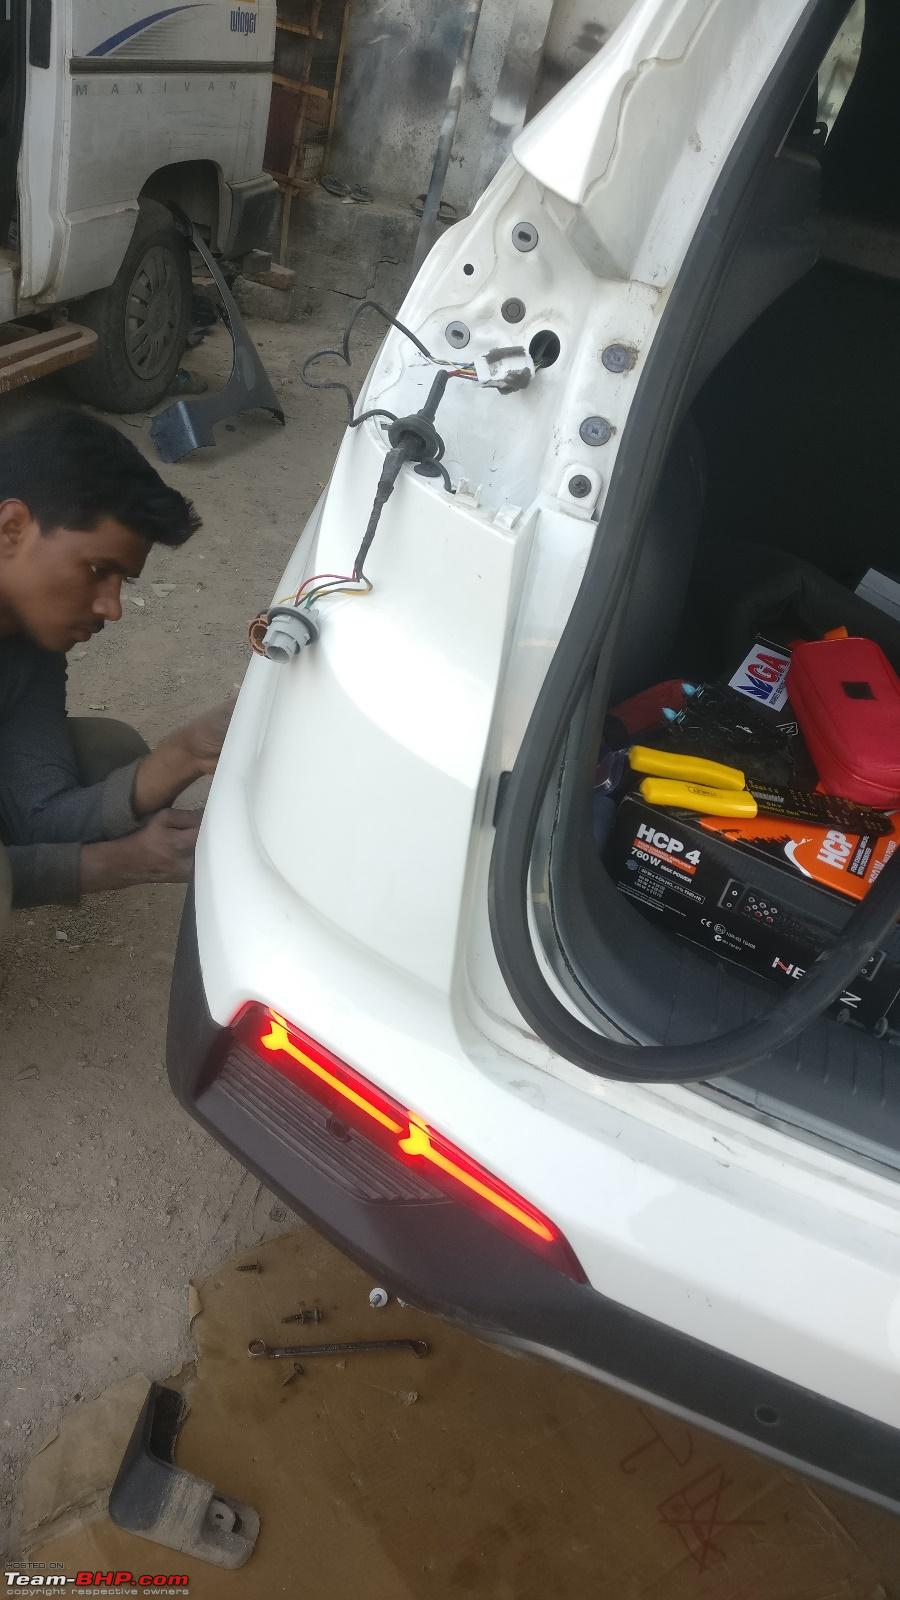
MODIFICATION #8: DIY Install of the LED Rear Reflector ('Lambo style')
Purchased for ₹ 1,600 after discount on eBay.in.
Link for purchase
Contacted BHPian interc00led and went to my FNG where we could work peacefully.
Lambo LED's reflectors for the Creta. I received the clamp in broken condition. Sent the broken unit back and received a new one.

Price paid

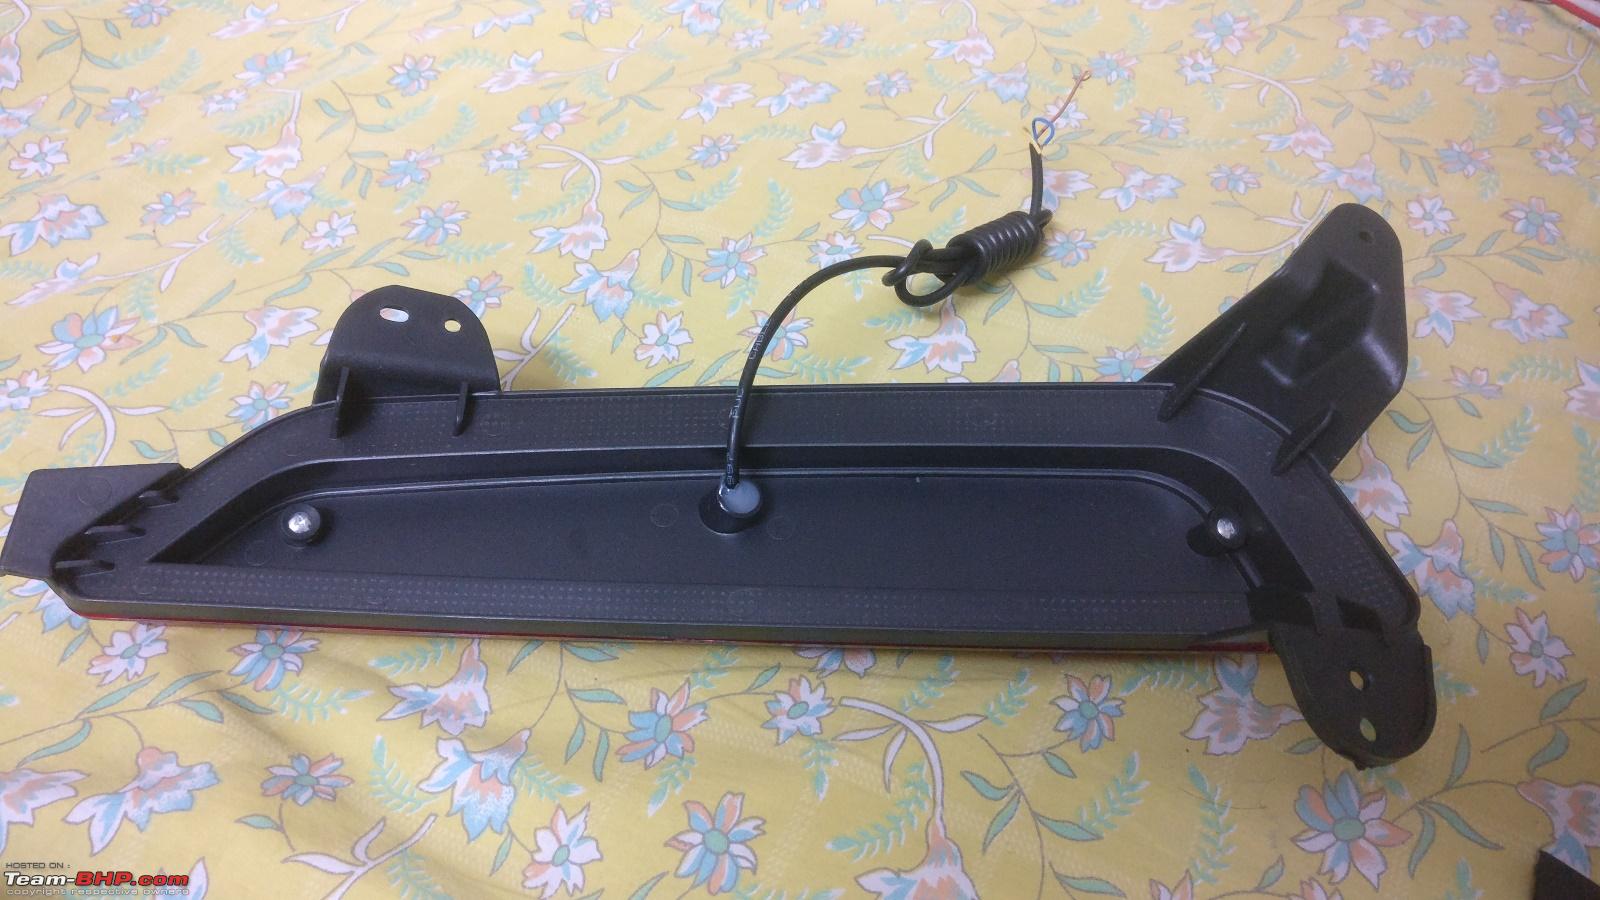
Underside of the reflector

Wiring that needs to be connected

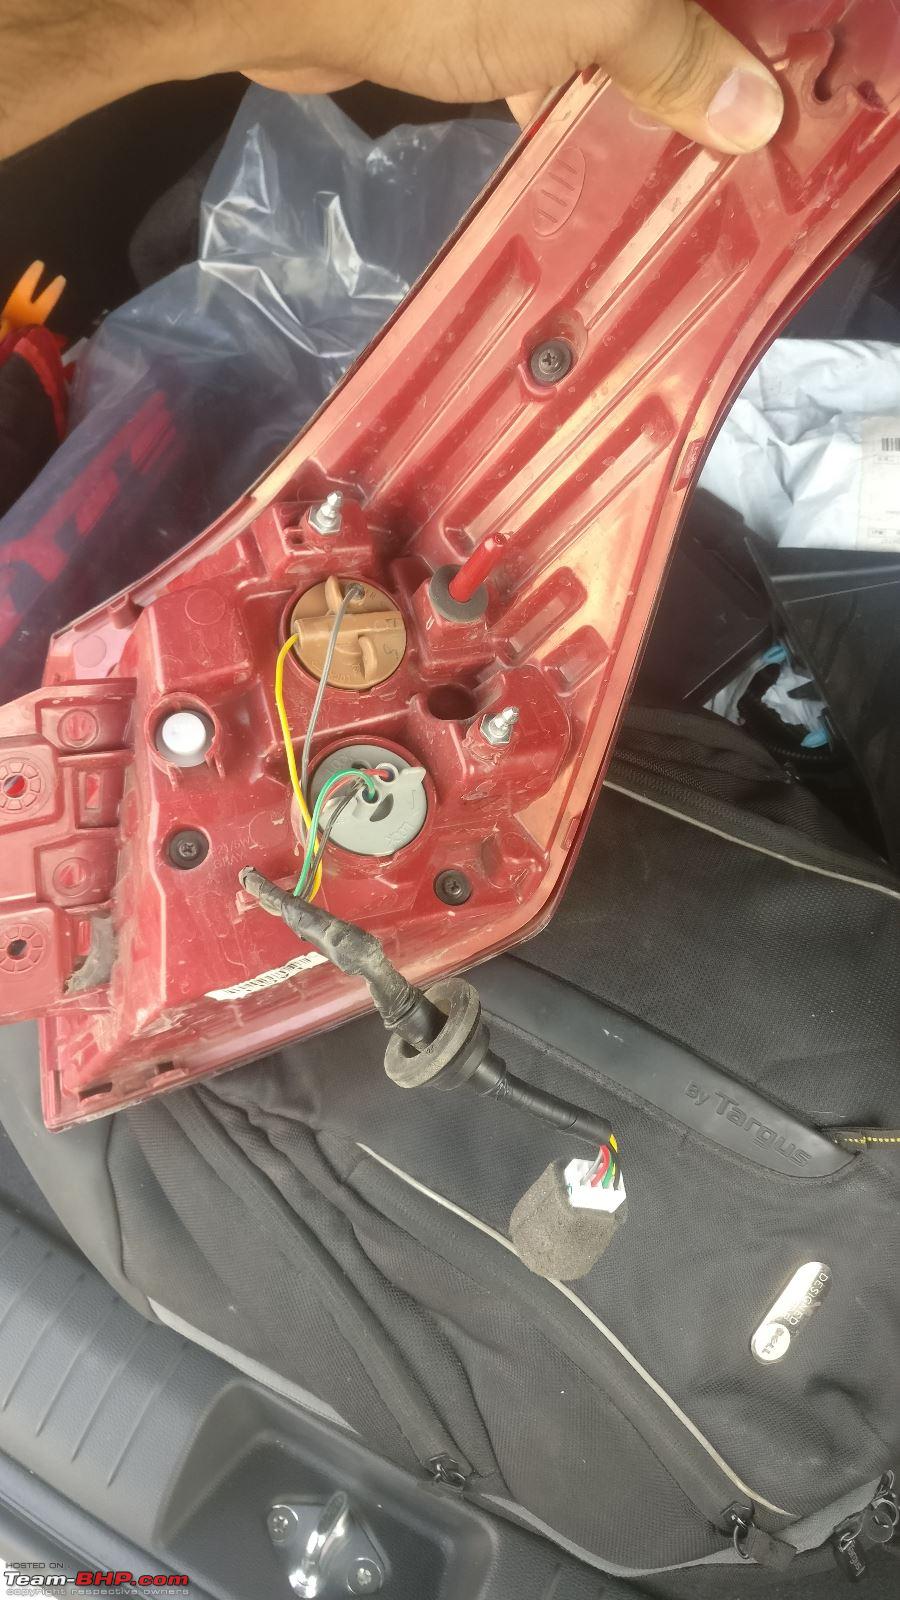
Taillight removed for connection

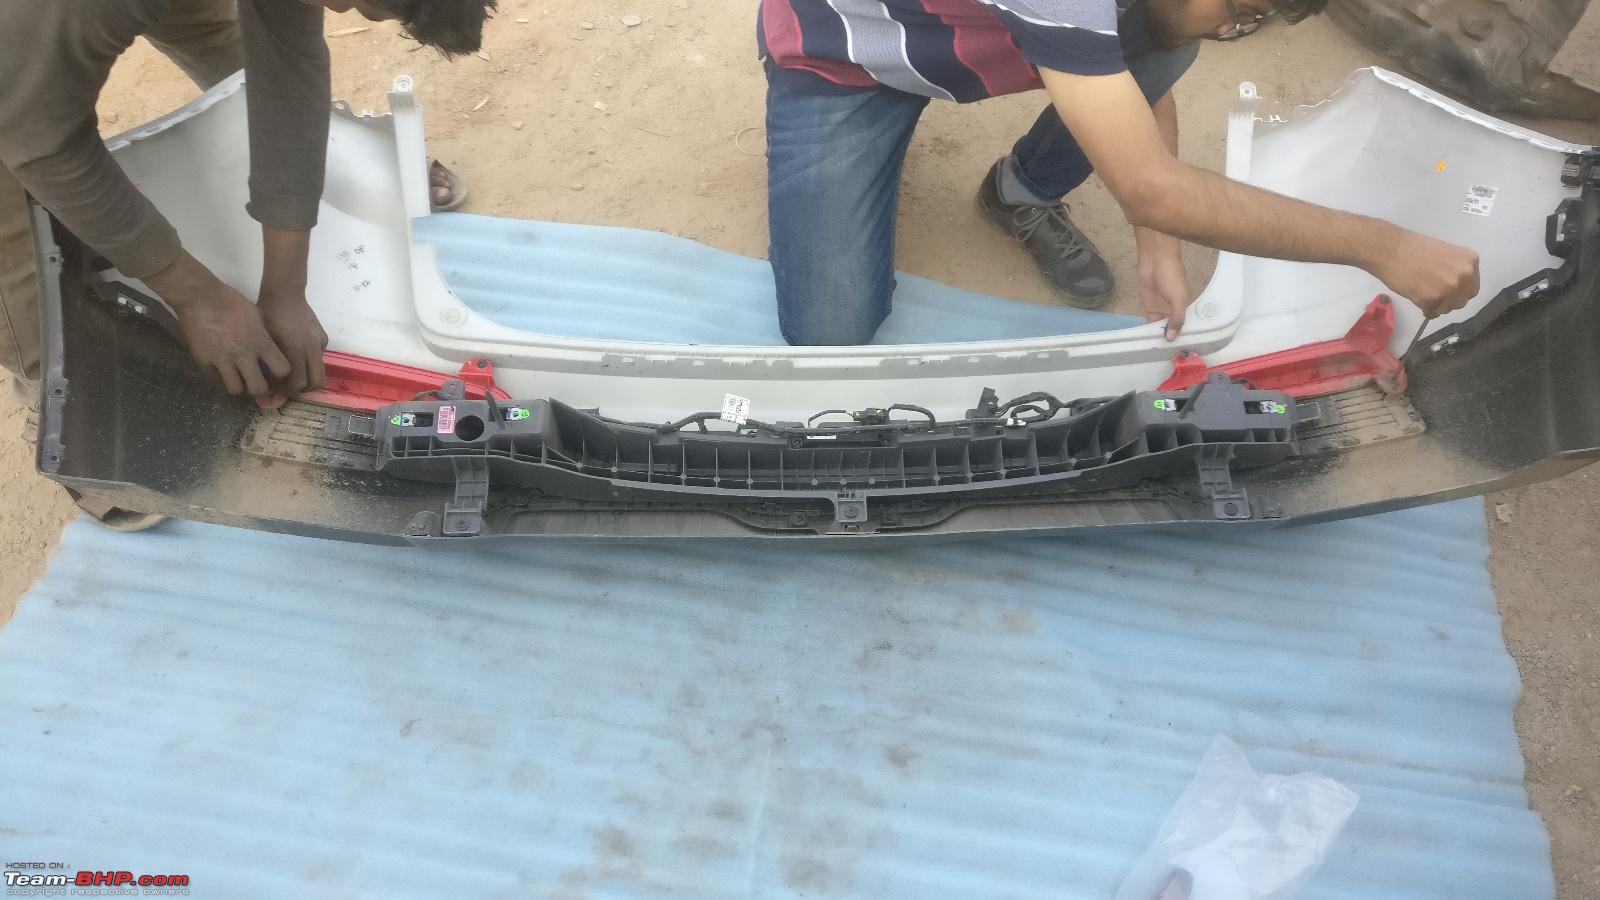
Rear bumper removed

OE Reflectors beingremoved
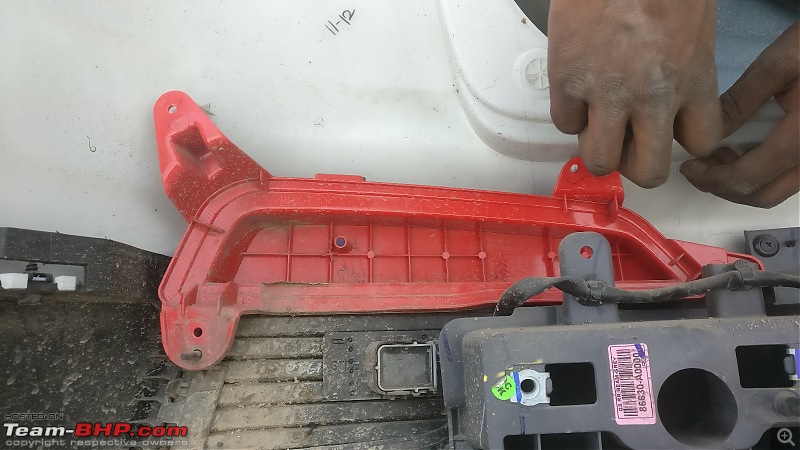
Sockets and connectors of the tail light

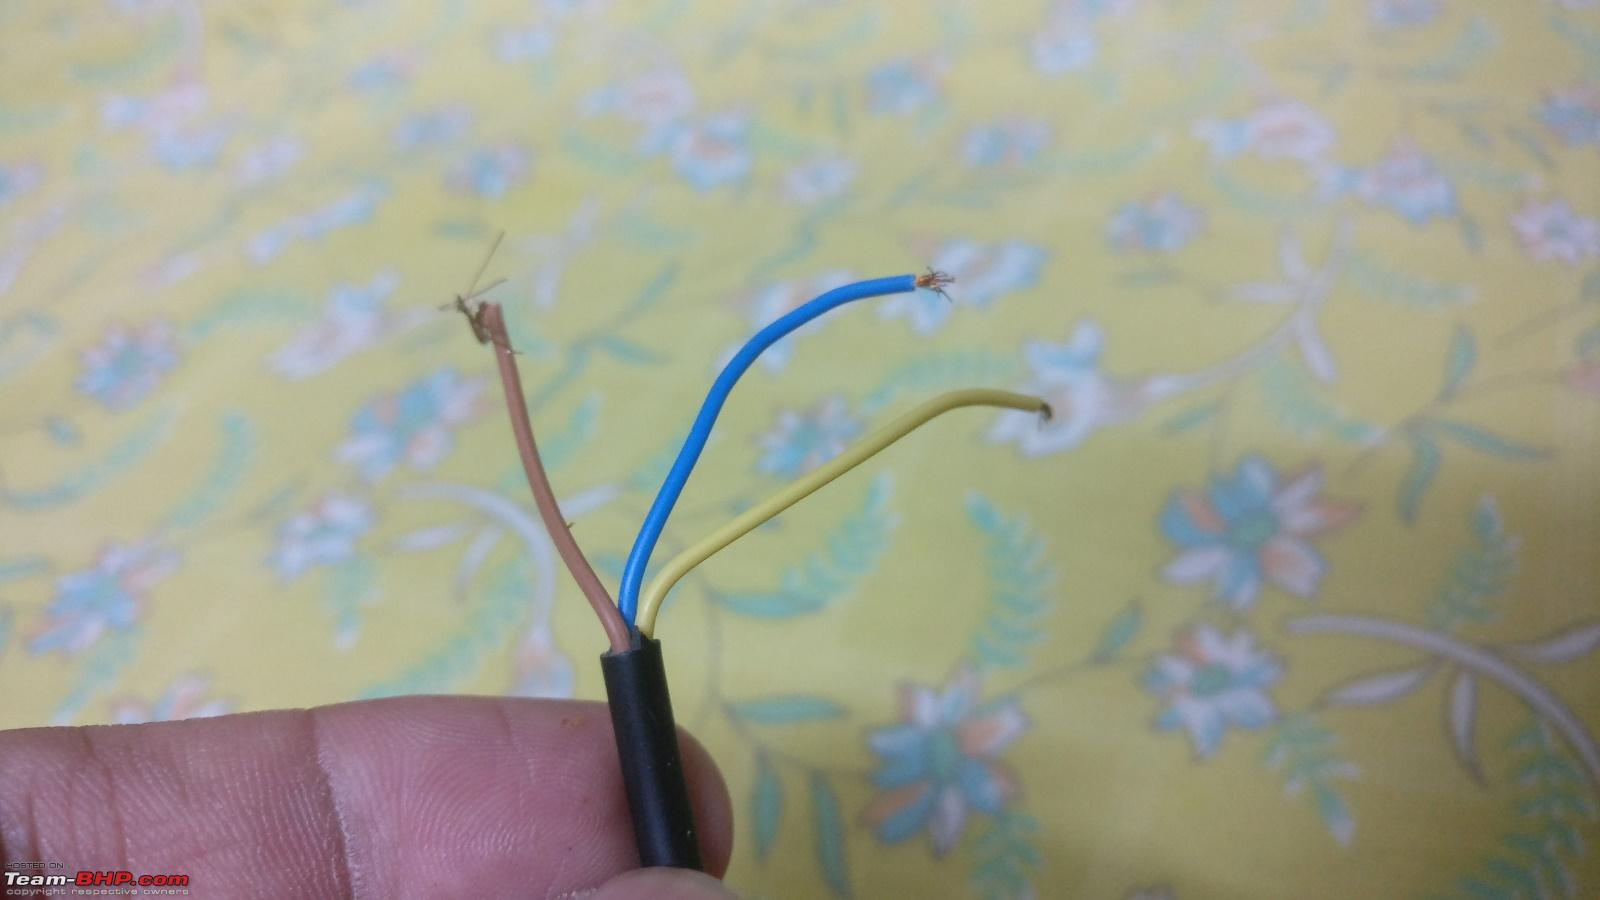
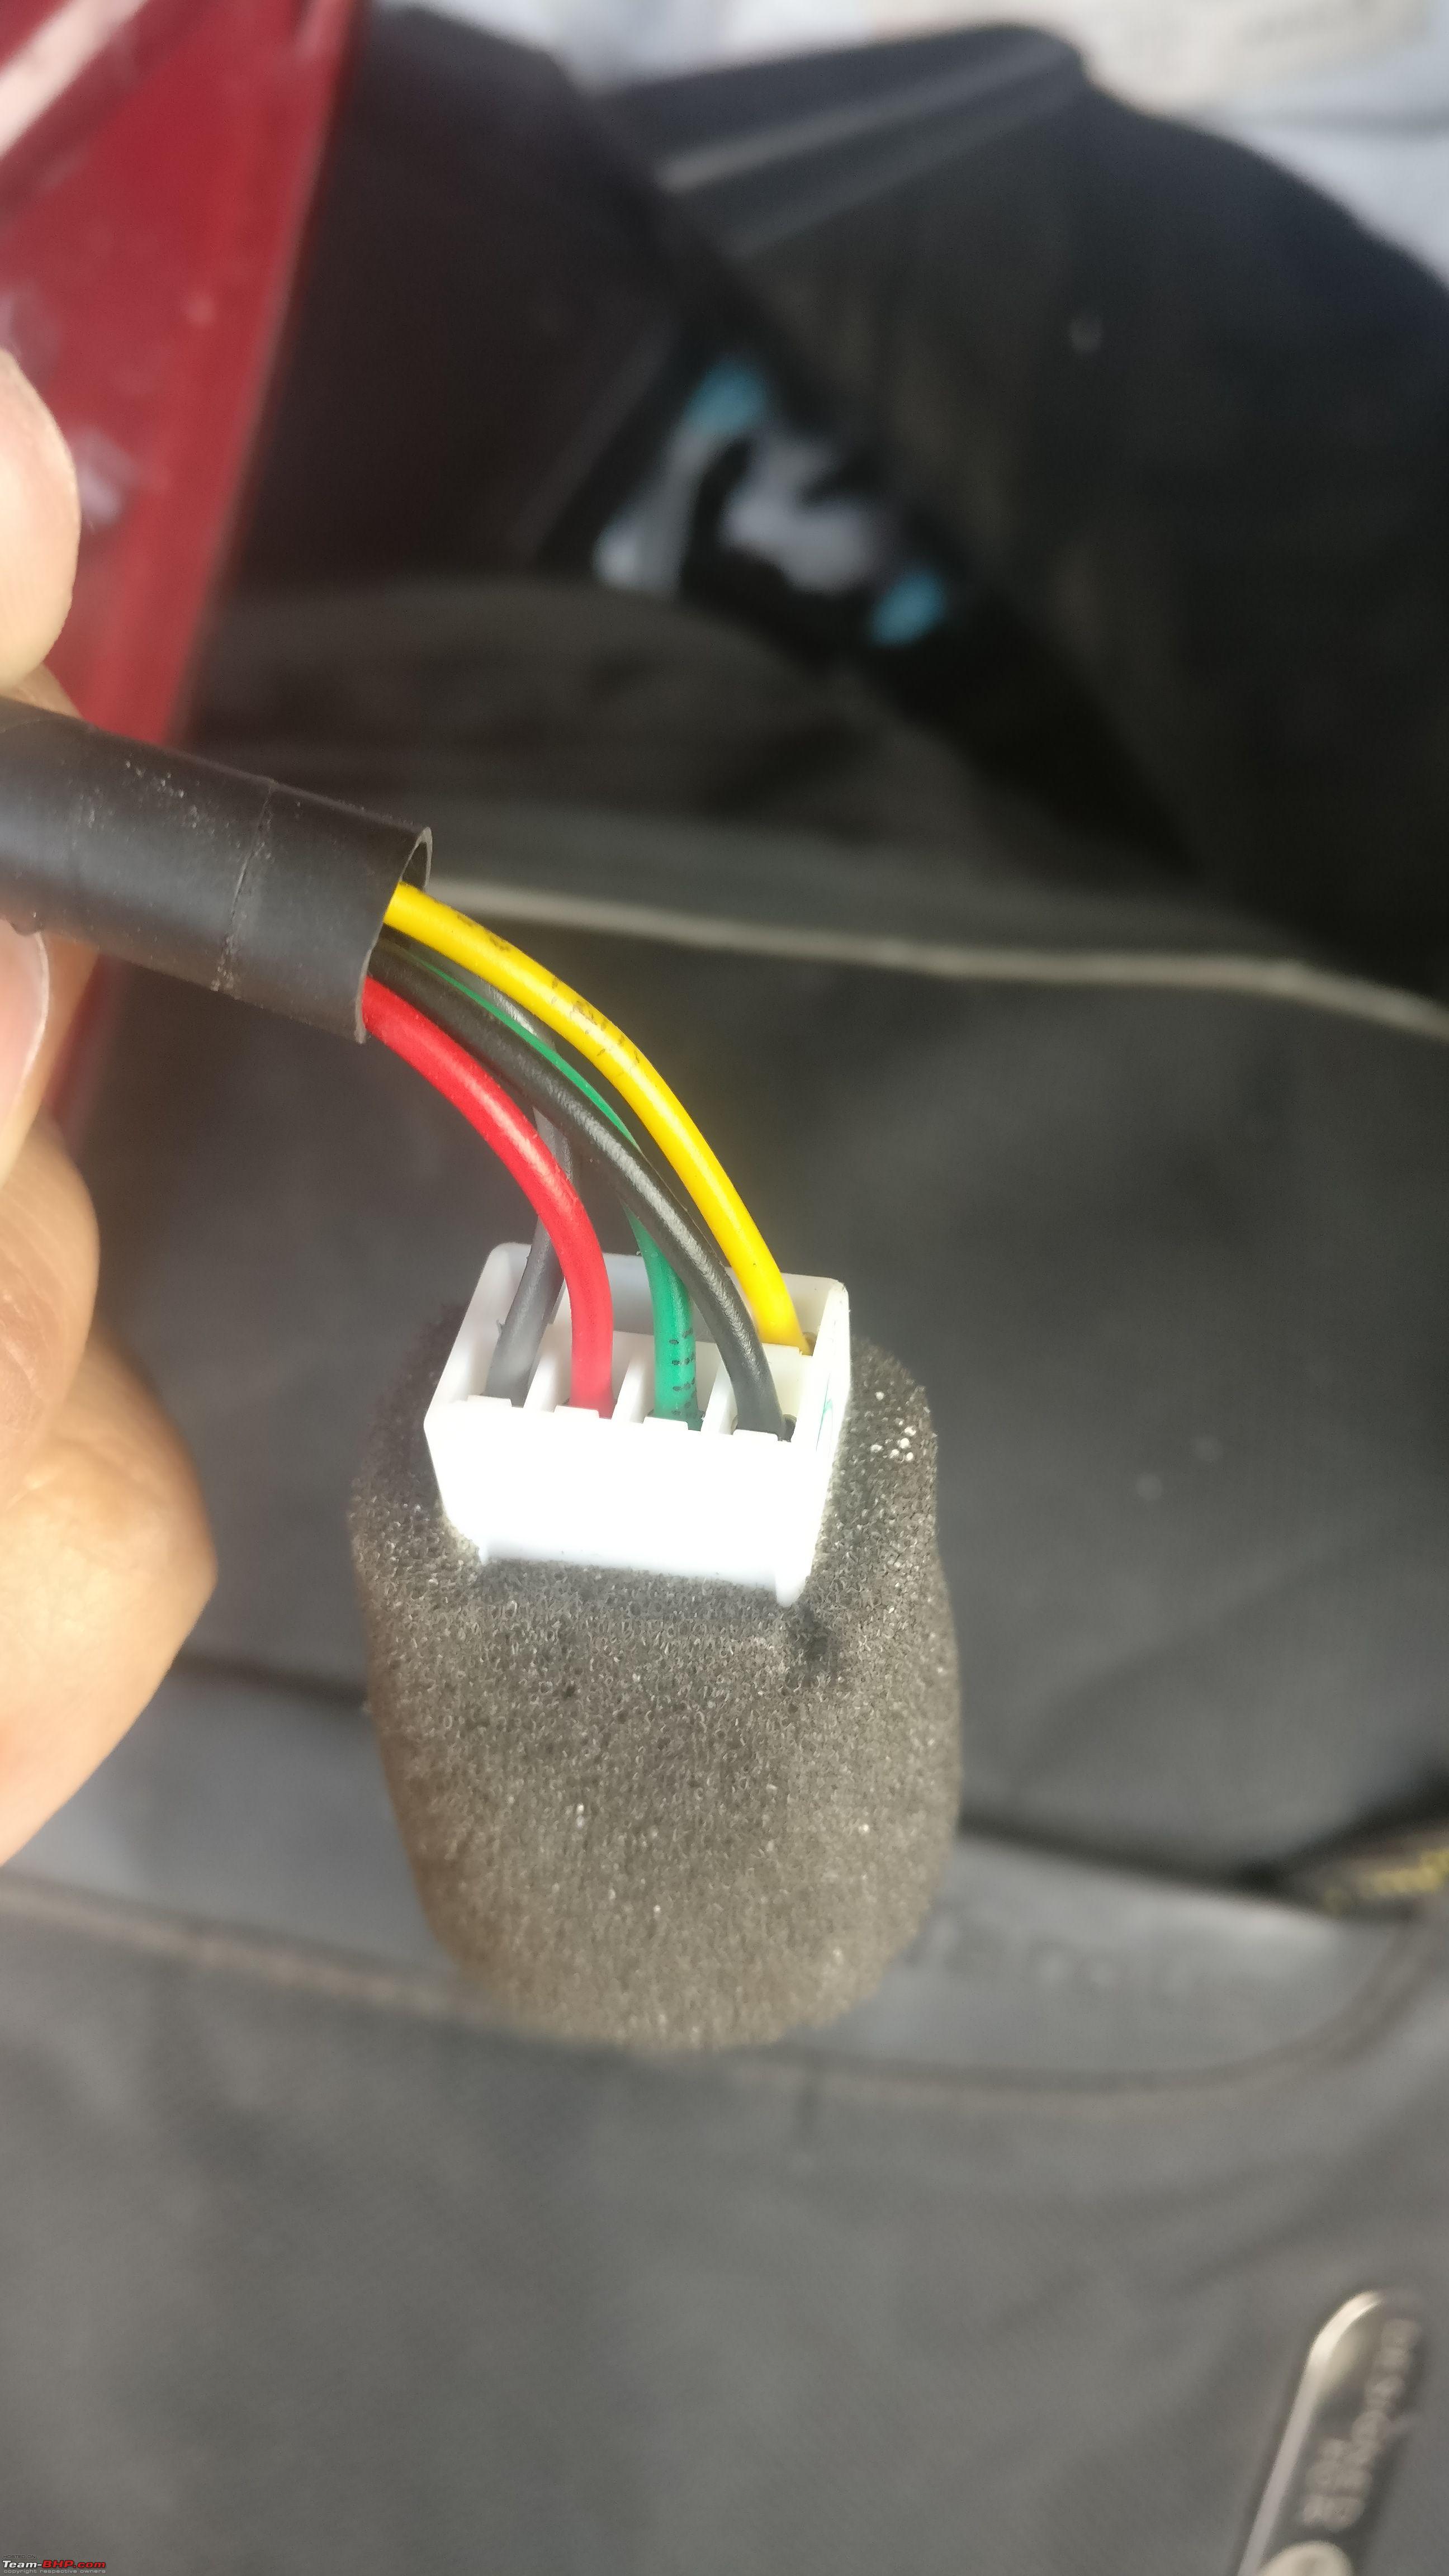
Connector in which the wiring from the LED reflector needs to be connected
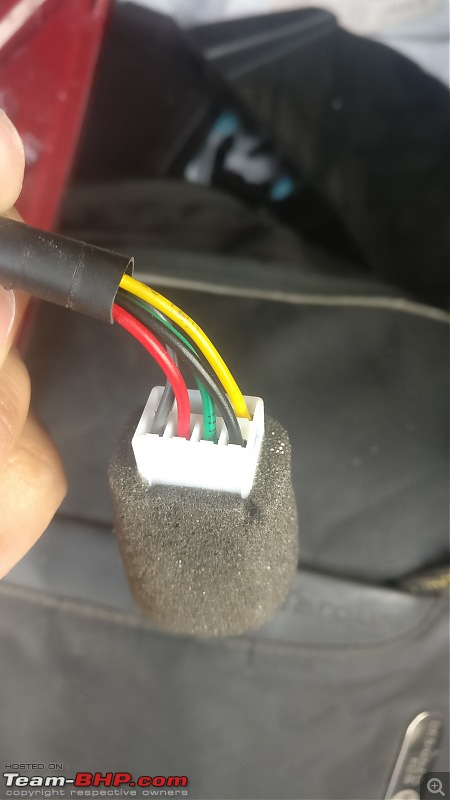
Which wires need to go where.

De-pin the wires from the connector and the new ones were attached into them

Bumper refit after fitment and routing of the wiring

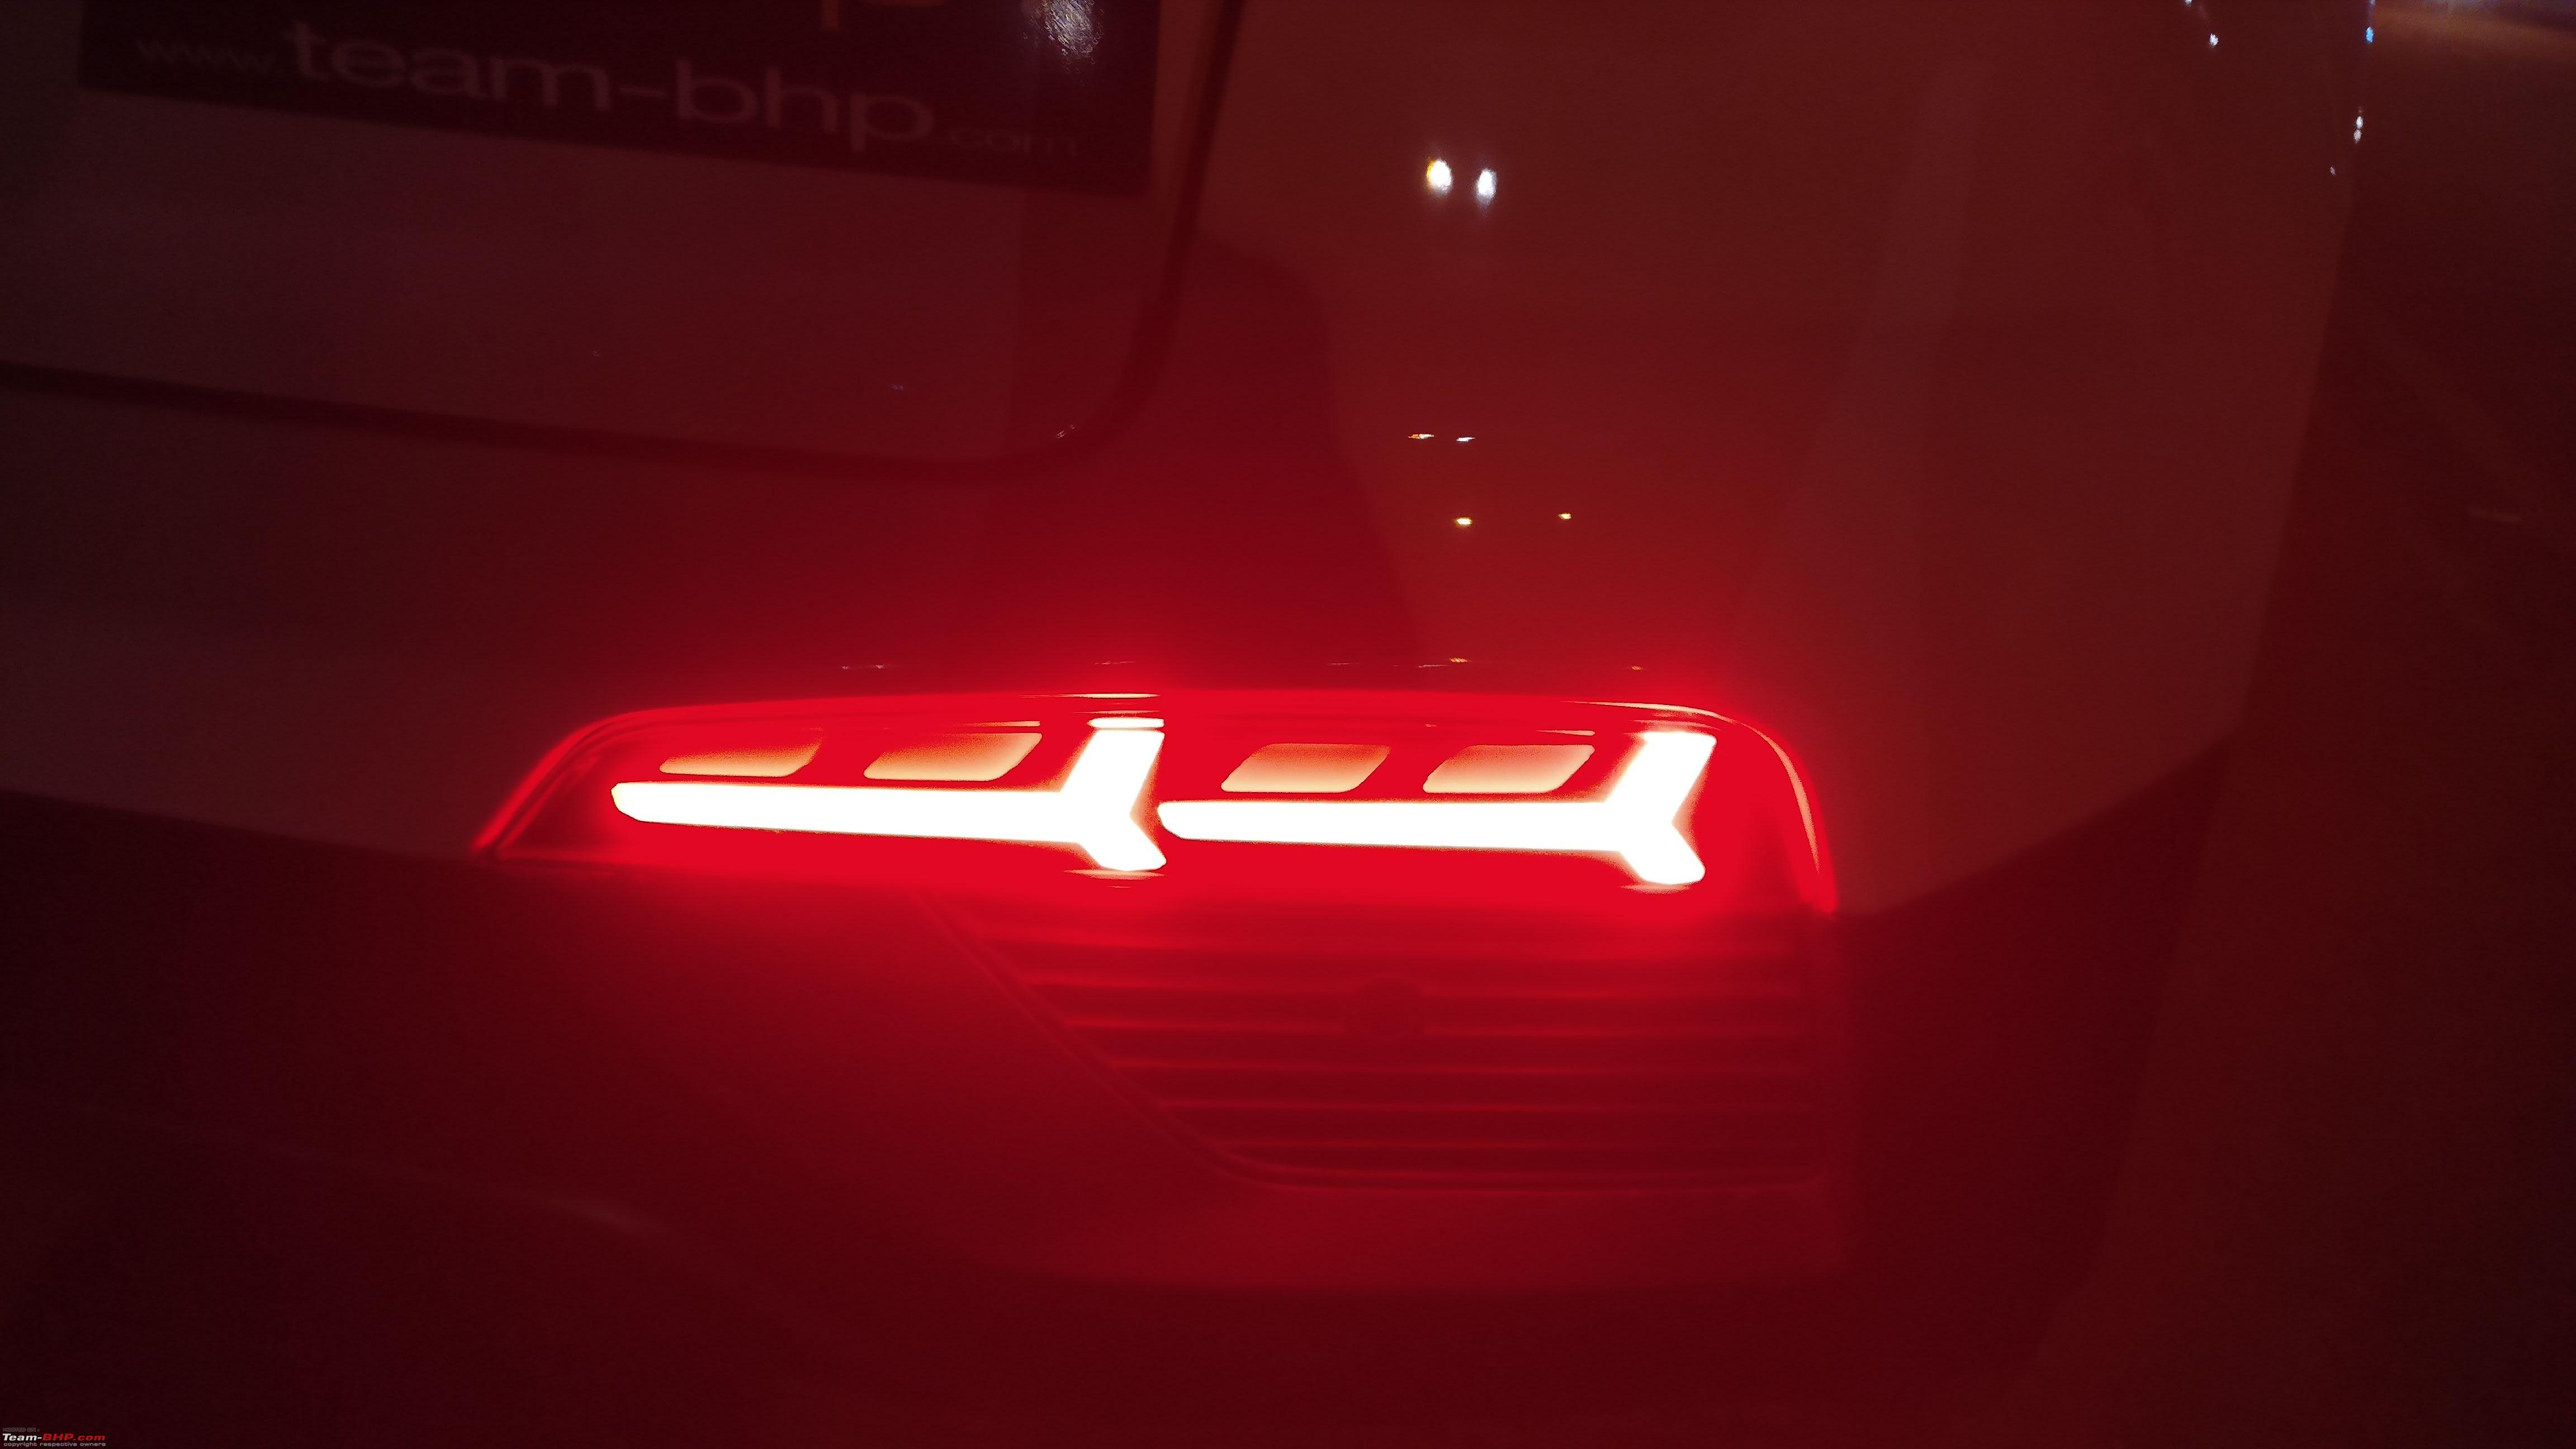
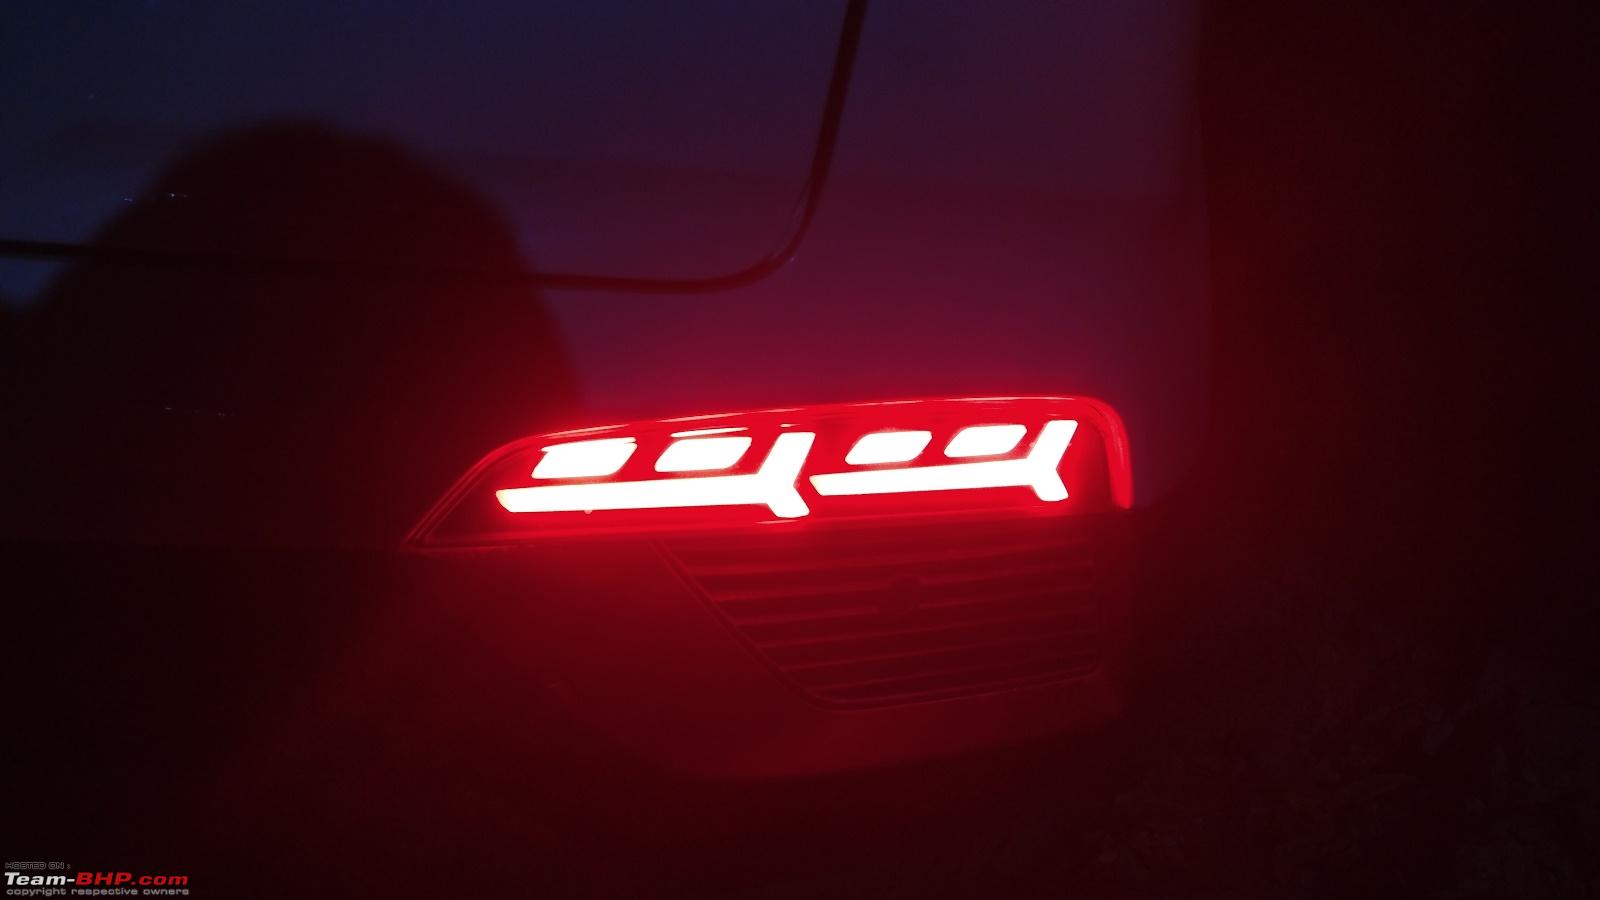
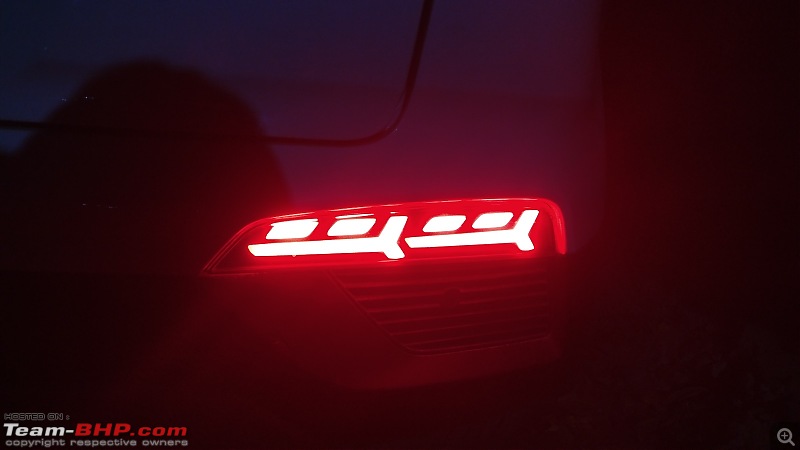
LED Lights when pilot lamps/headlights are switched ON

LED lights when brakes are pressed
Complete view of the rear when pilot lamps/headlights are switched ON
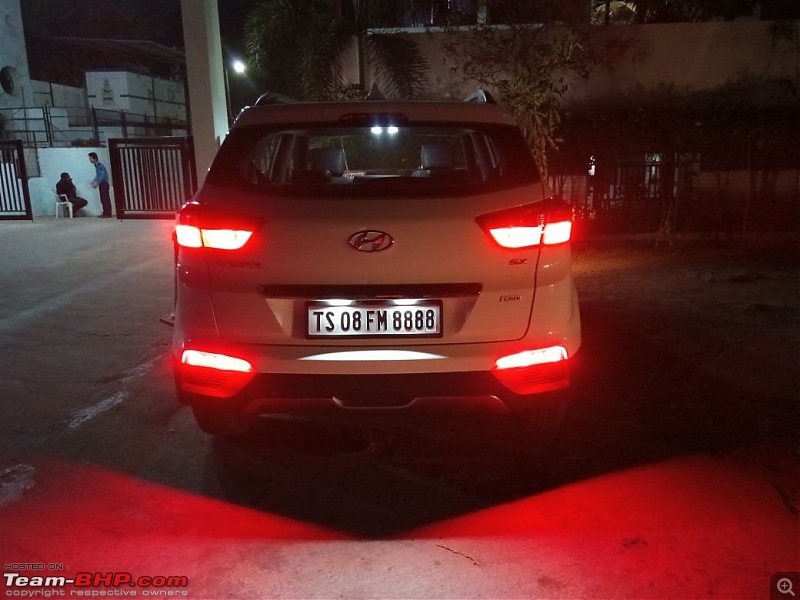
Complete view of the rear when brakes are pressed

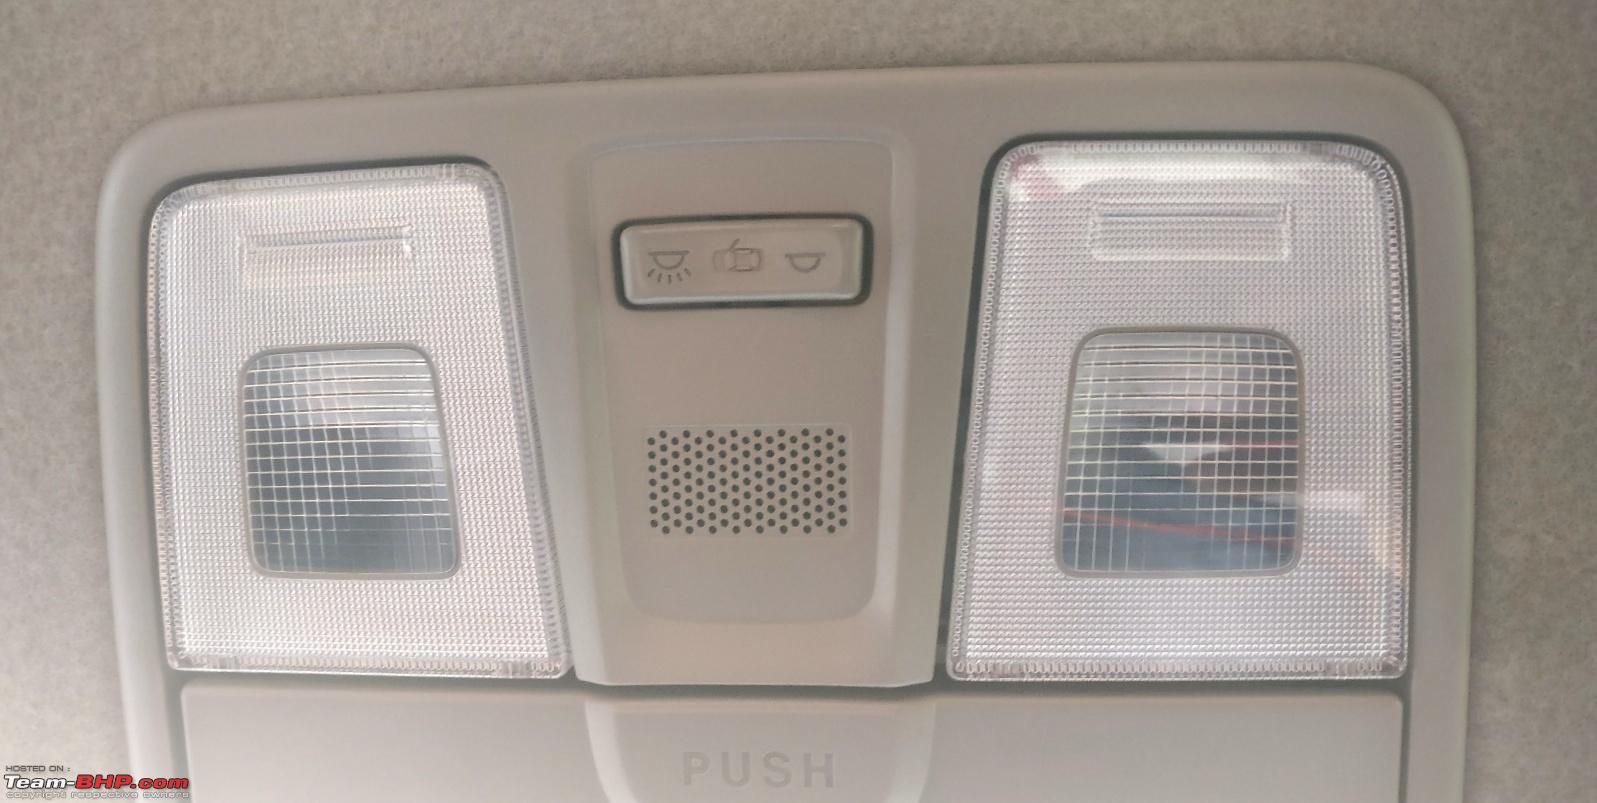
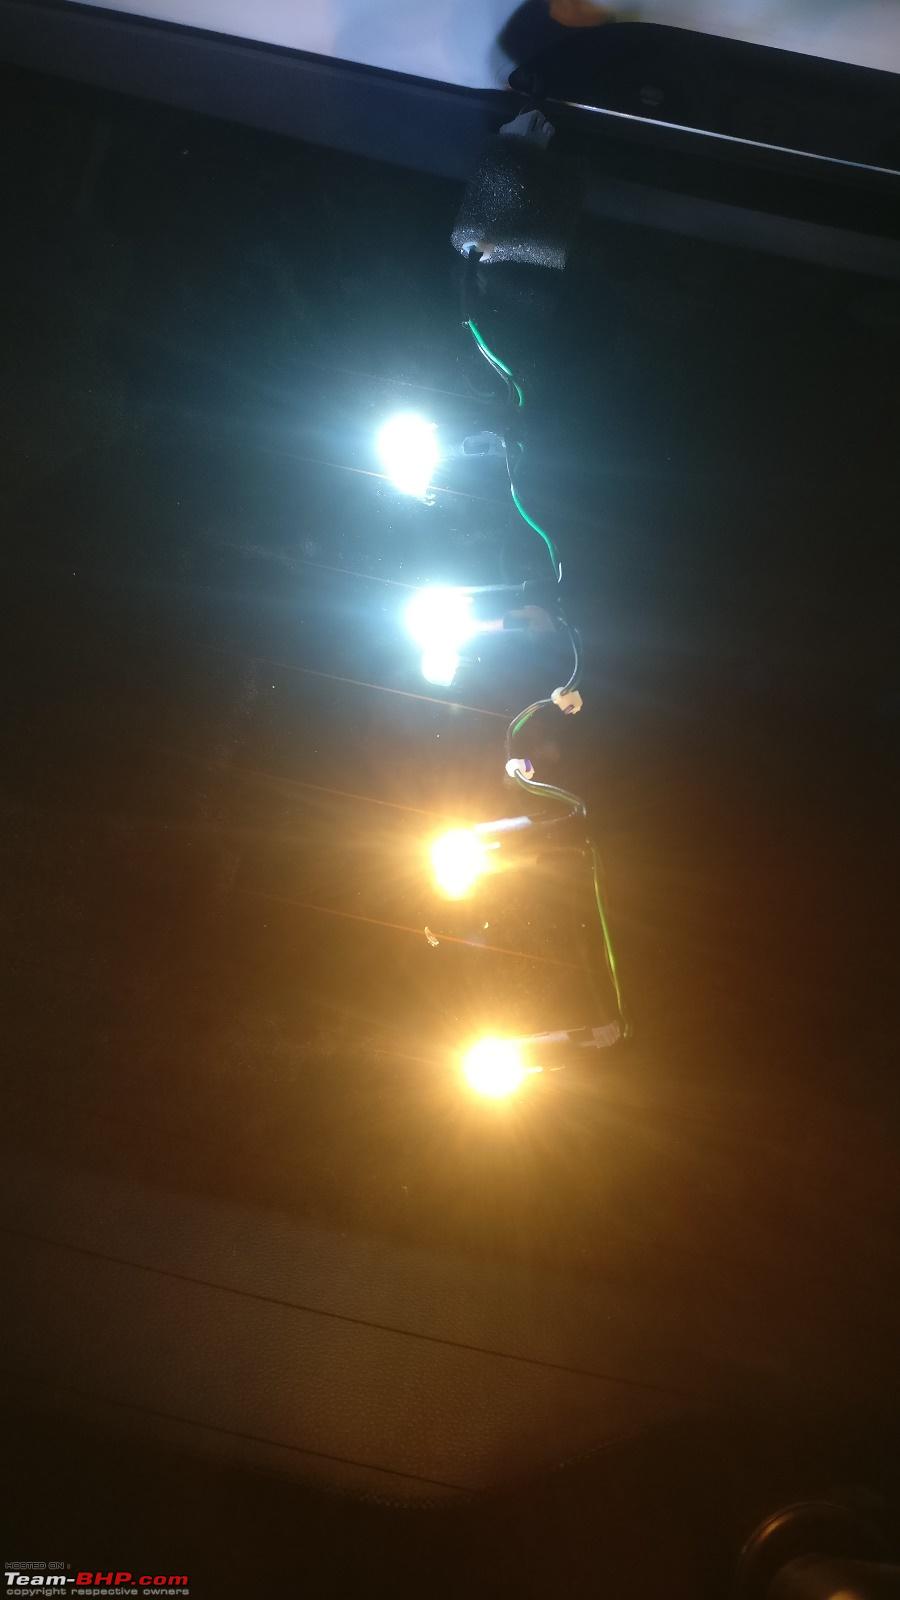
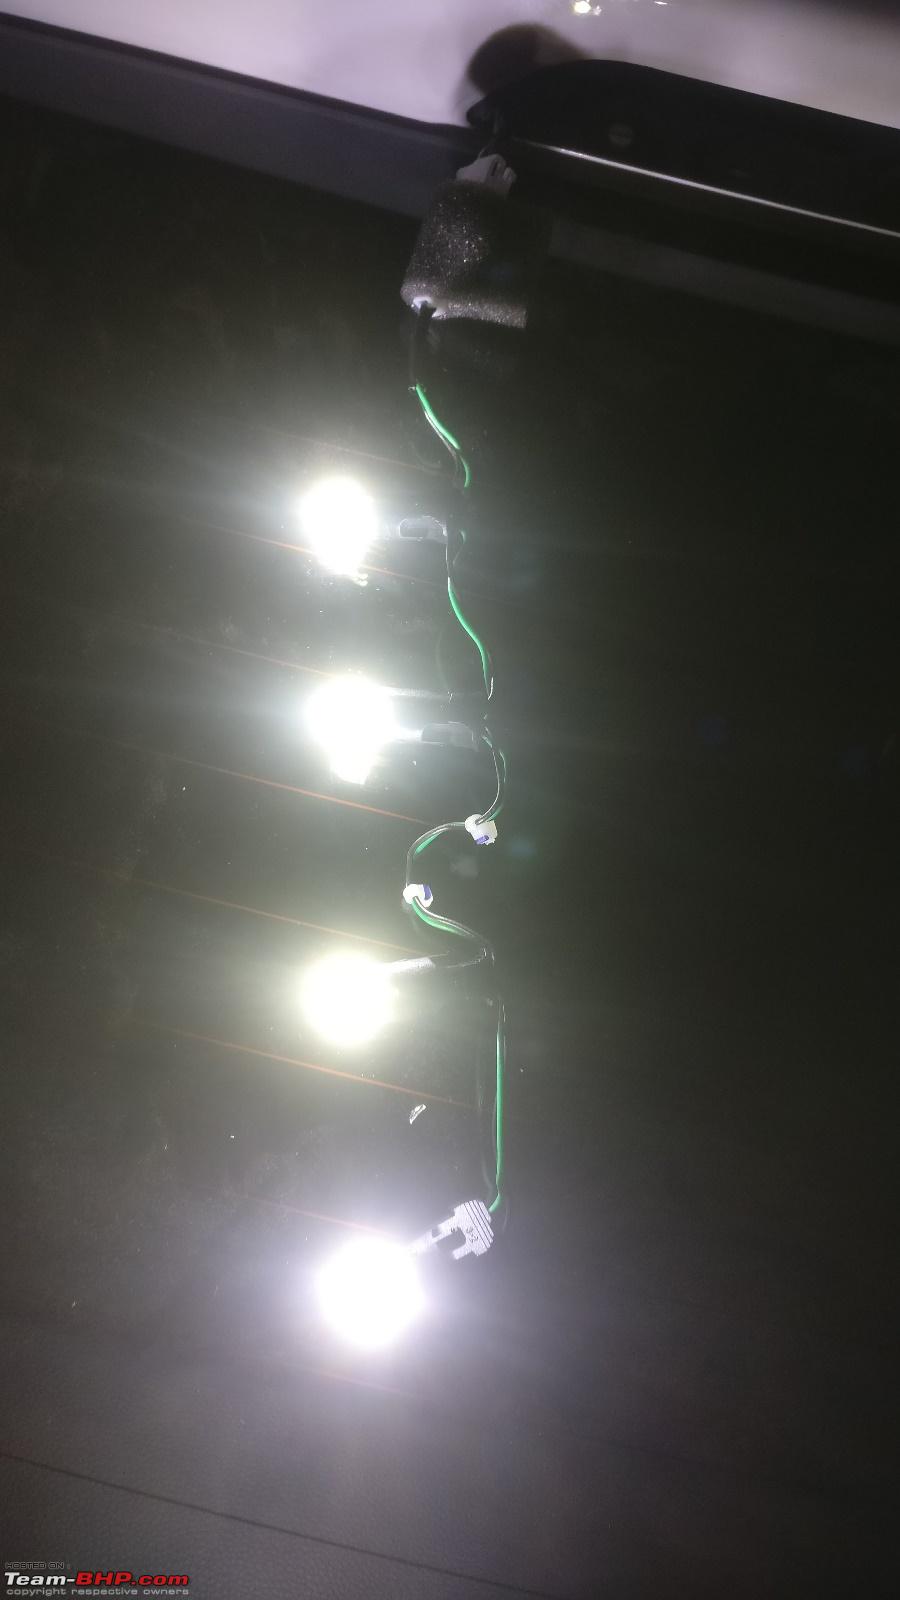
MODIFICATION #9 & 10: DIY conversion of the Central cabin lamp, the two Reading lamps and Boot lamp to LED
Easiest DIY in the car so far.
Took me 10 minutes to change all 4 bulbs in the car. :)
2 x in reading light
1 x Central cabin light
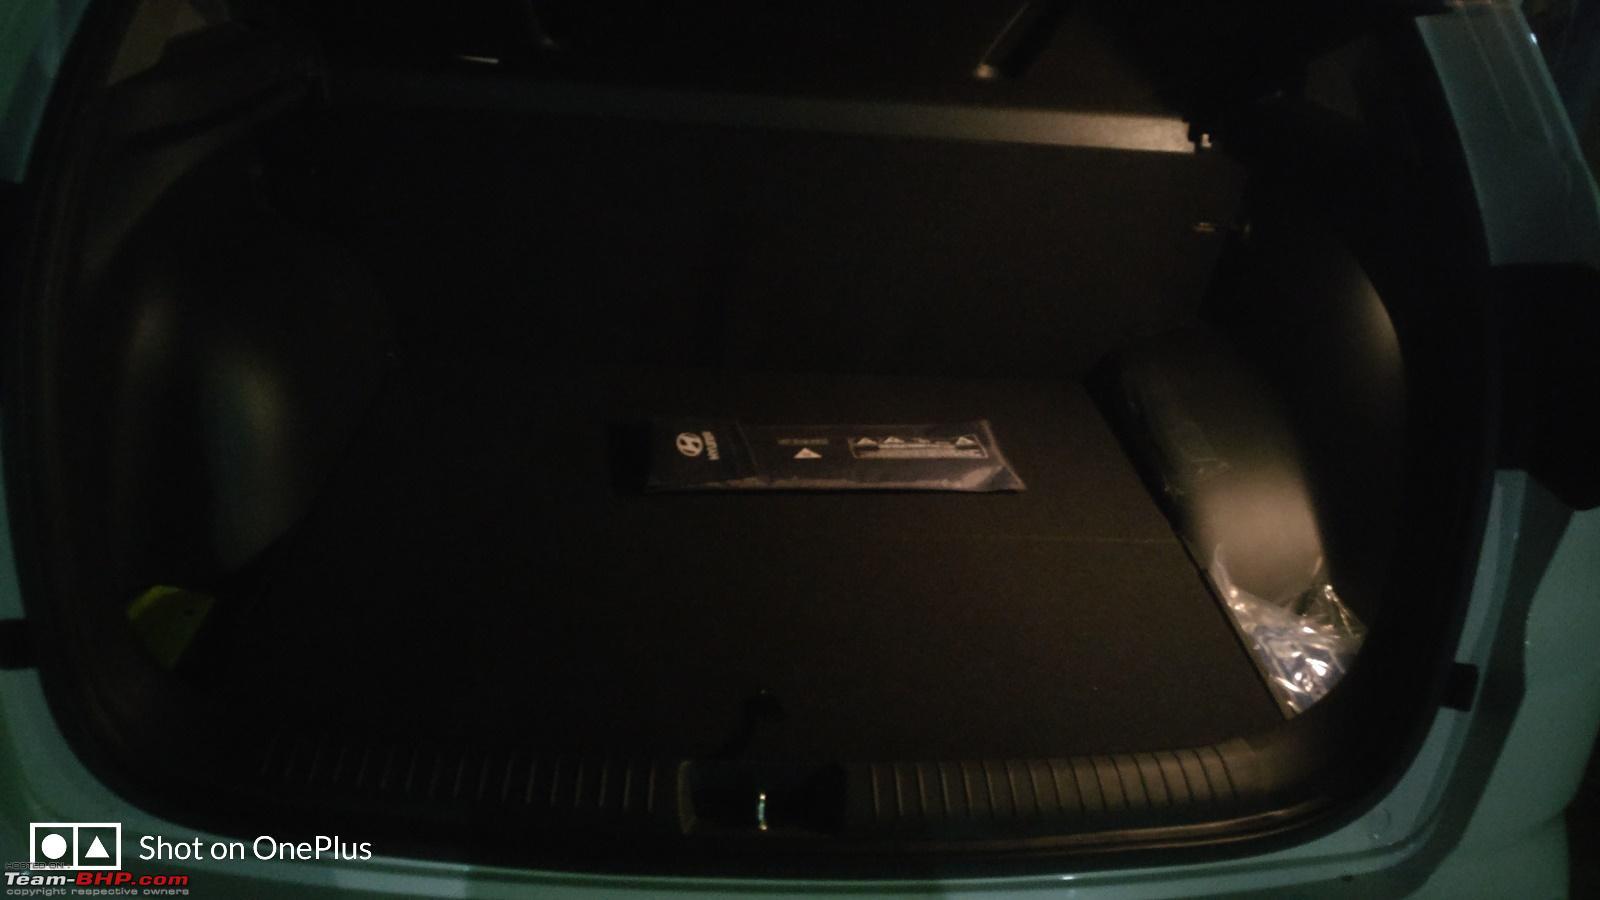
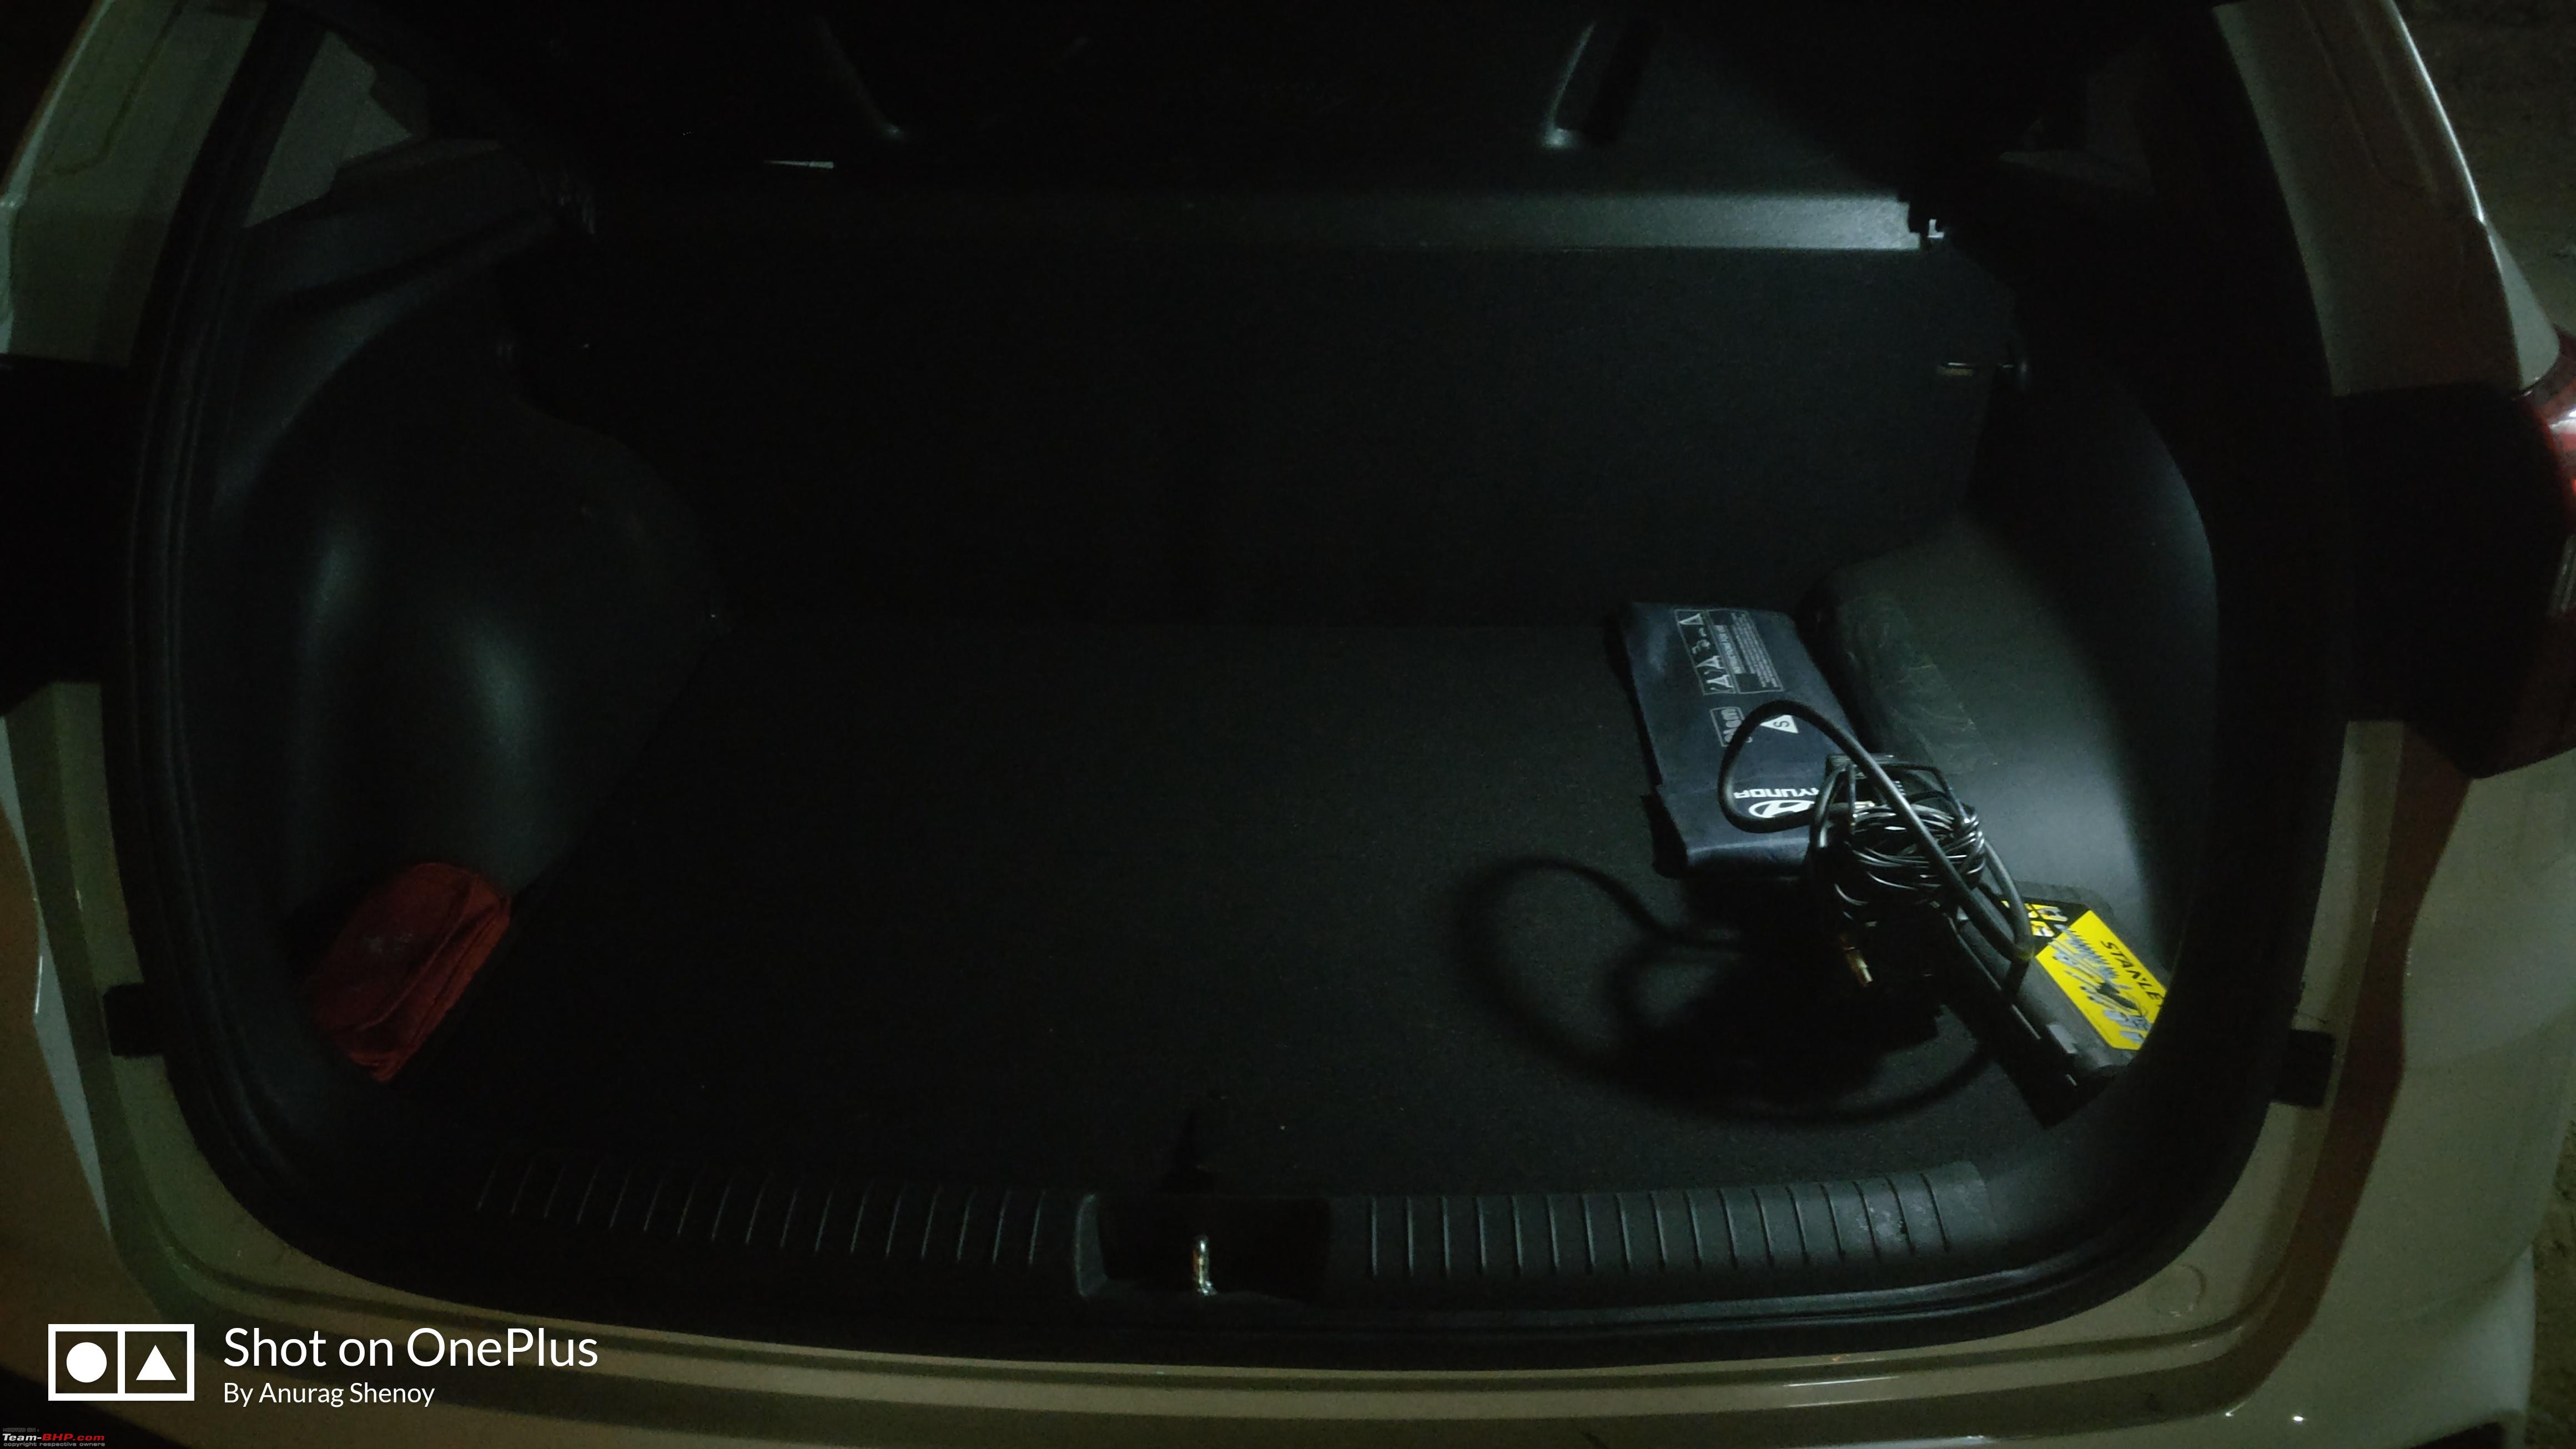
1 x boot light
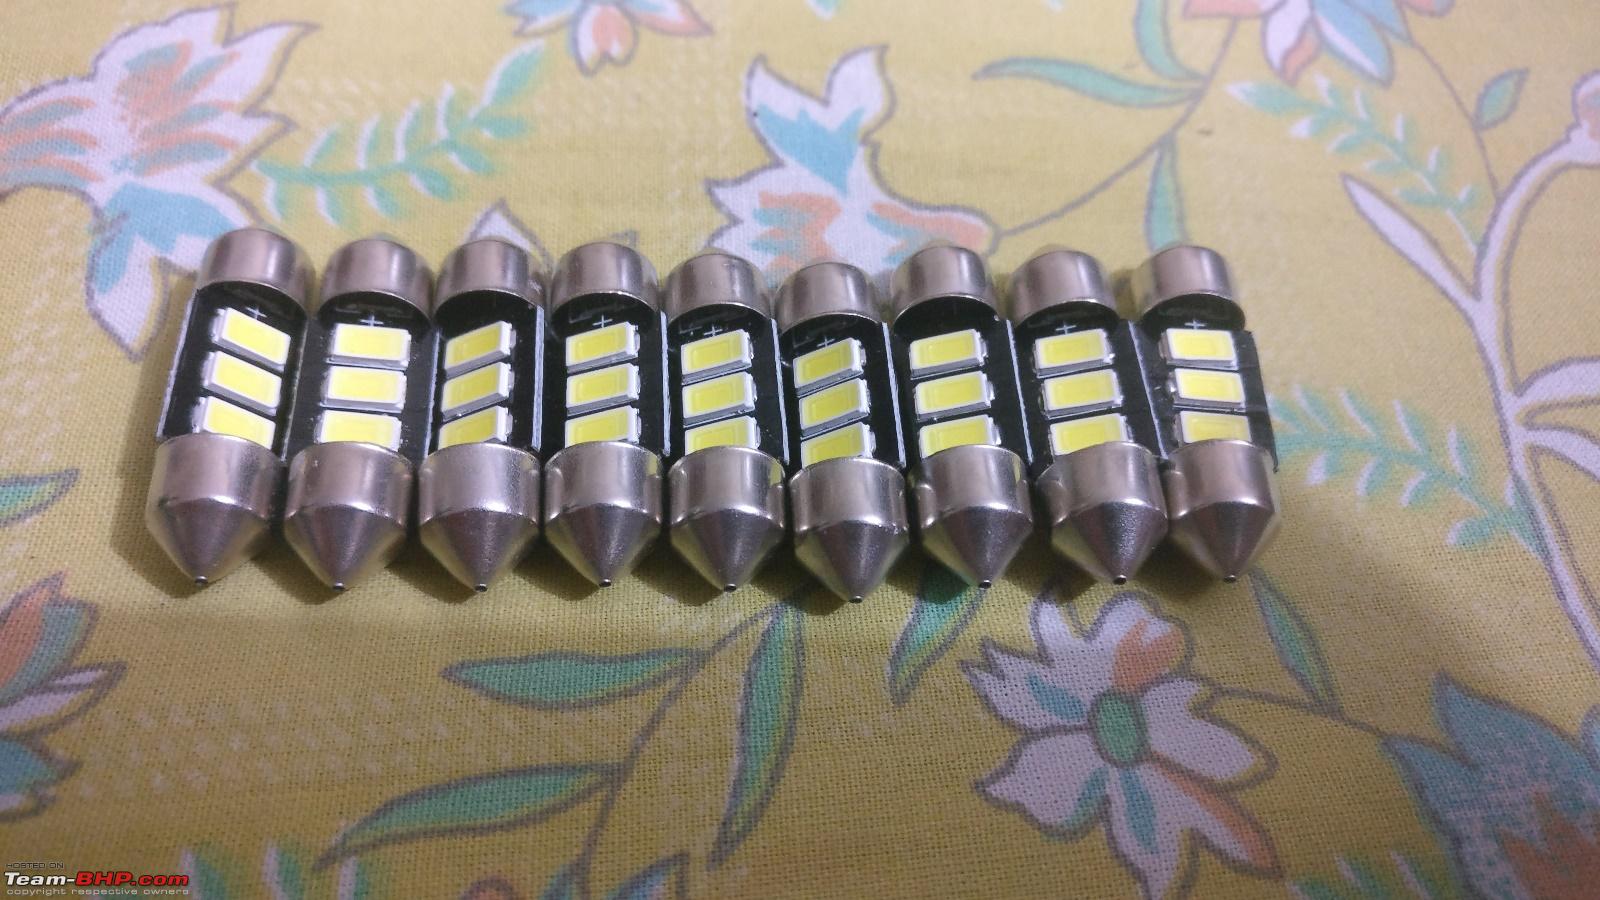
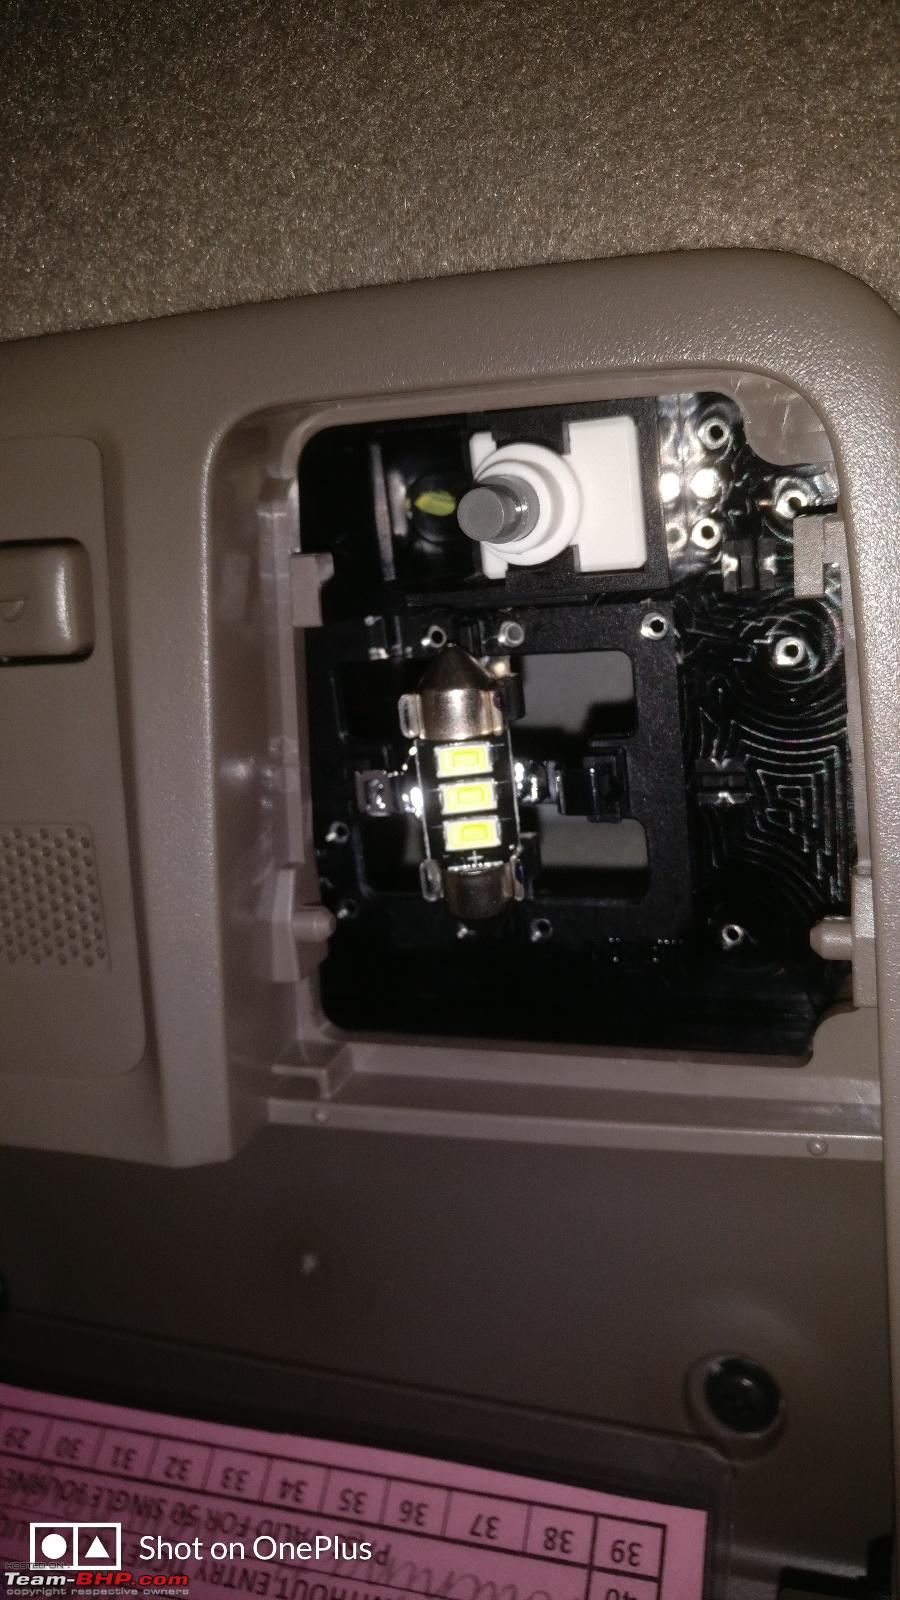
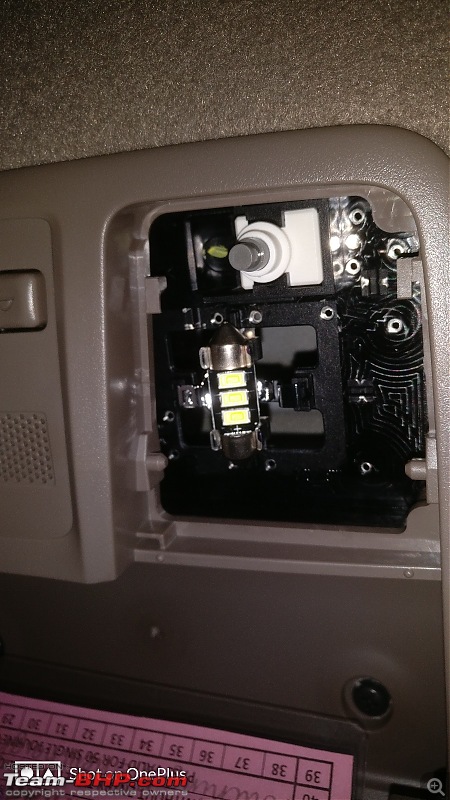
LED that was used which is a 3SMD festoon (31mm length)

Purchased a pack of 10 bulbs for $3.19

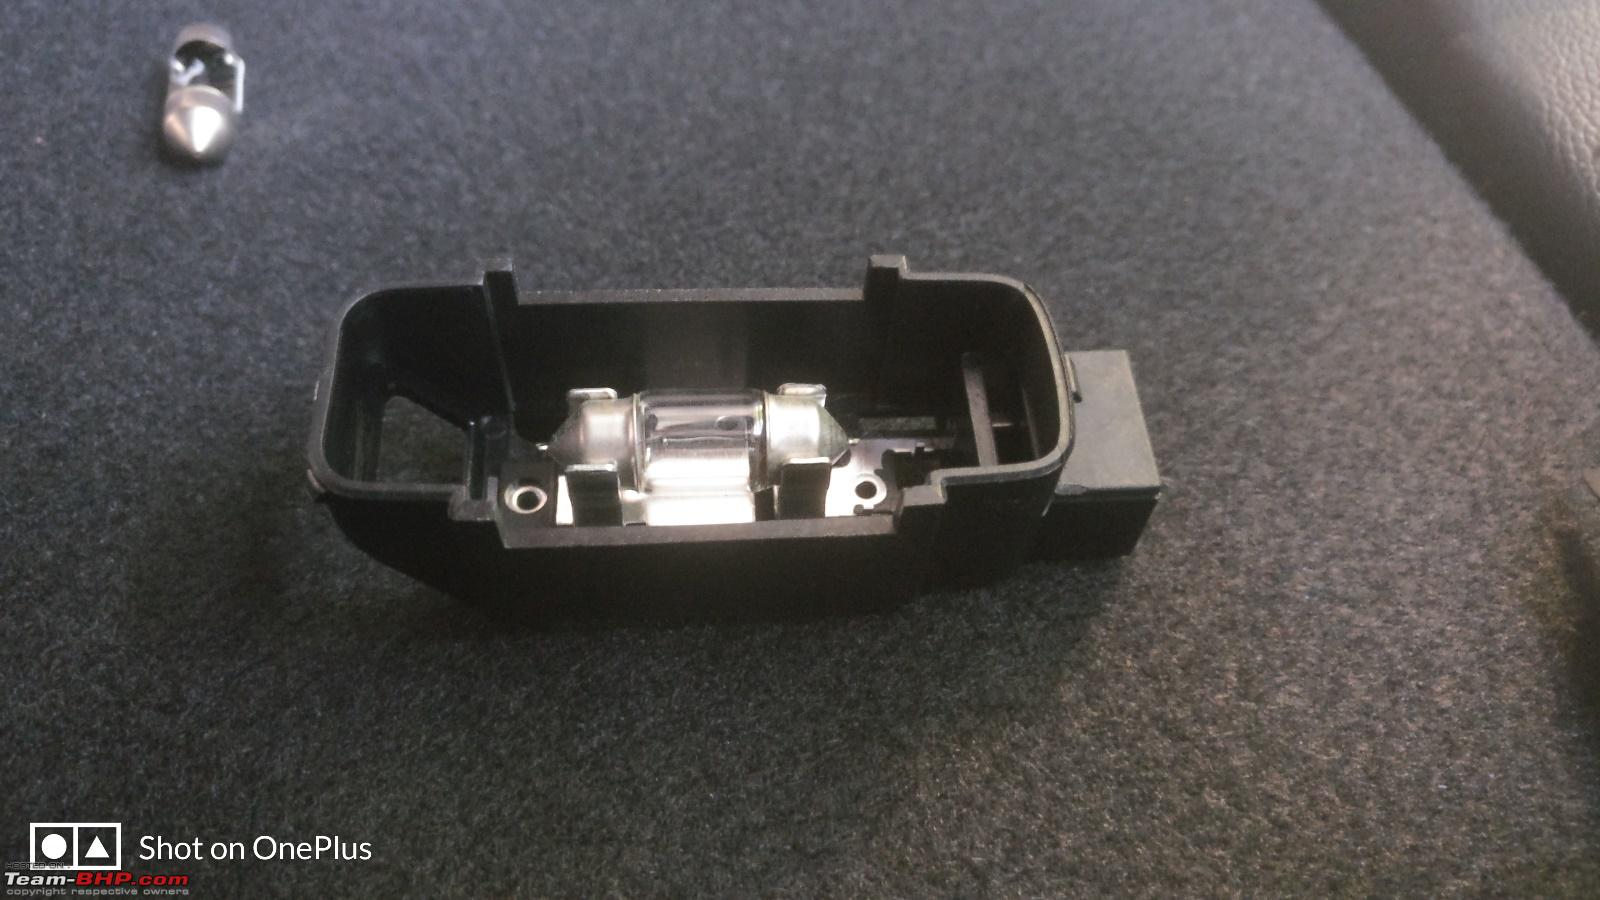
OE festoon vs LED

Reading light with individual lights for driver and passenger side

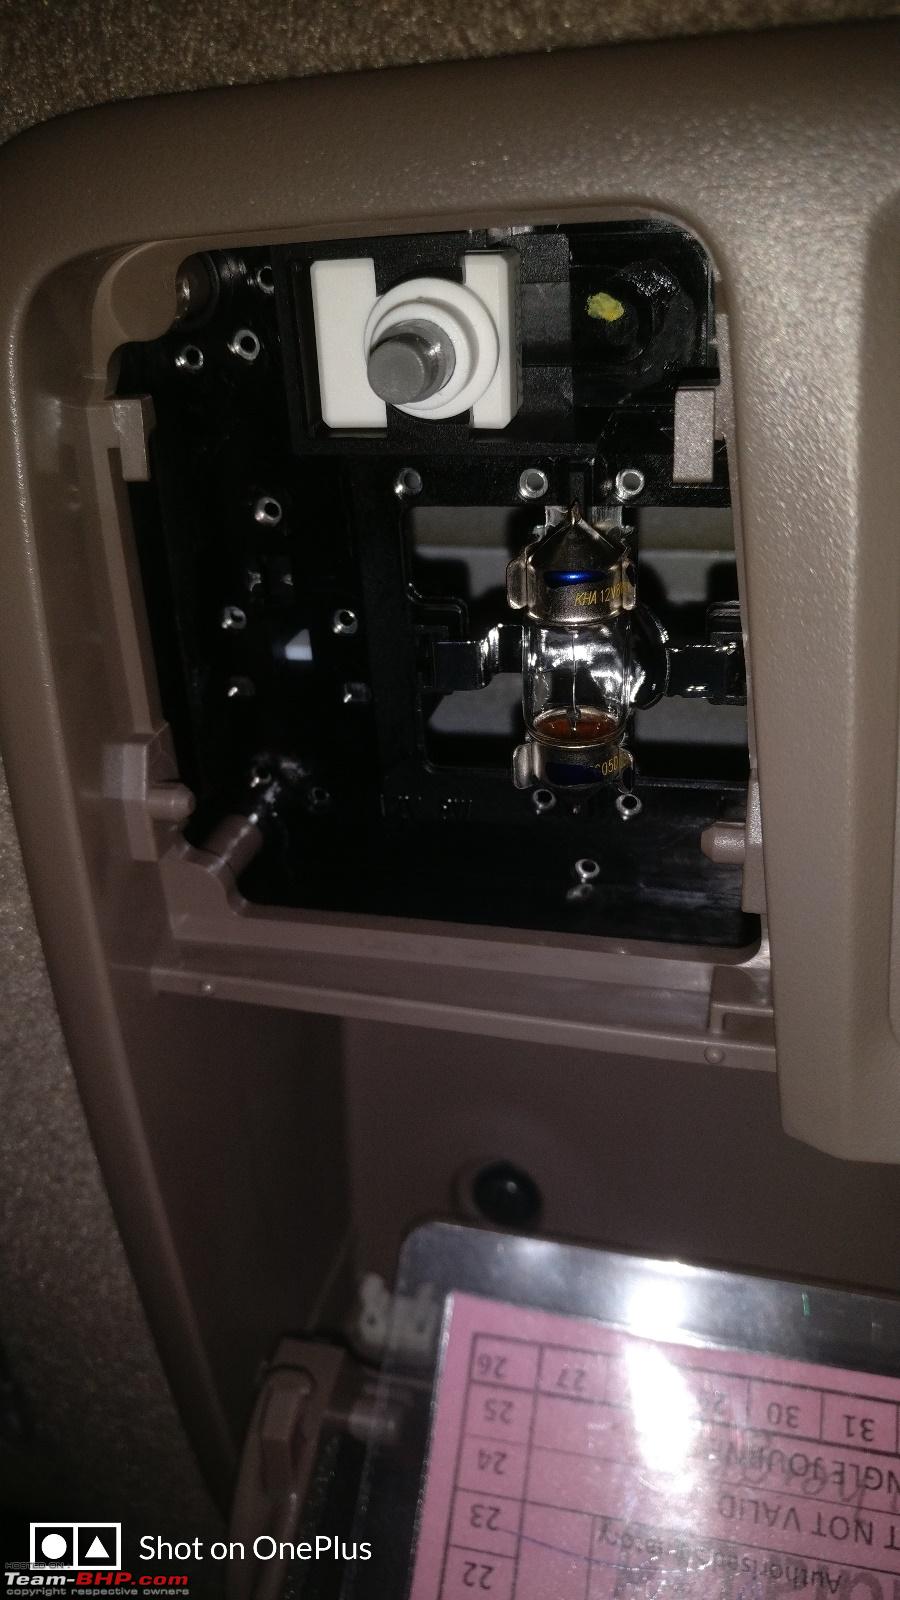
How to open to access the bulbs
OE festoon bulb in place

LED festoon in place
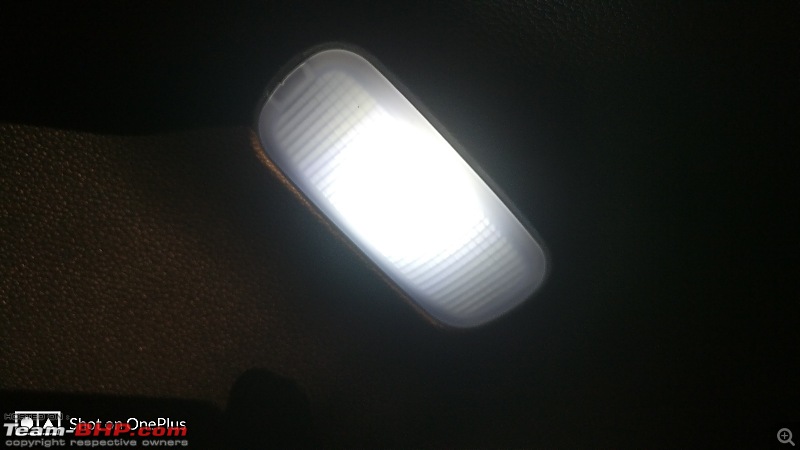
OE vs LED lighting comparison

Before replacing the cabin light with LED

After replacement of the cabin light to LED

OE Festoon in boot lamp unit

LED in the boot lamp unit

LED glowing
Before replacing the boot light with LED

After replacing the boot light with LED, picture isn't doing justice as the camera wasn't able to capture the difference whereas in reality it is decently bright and covers the whole boot area

Link to the item:
31mm Festoon 3 SMD LED
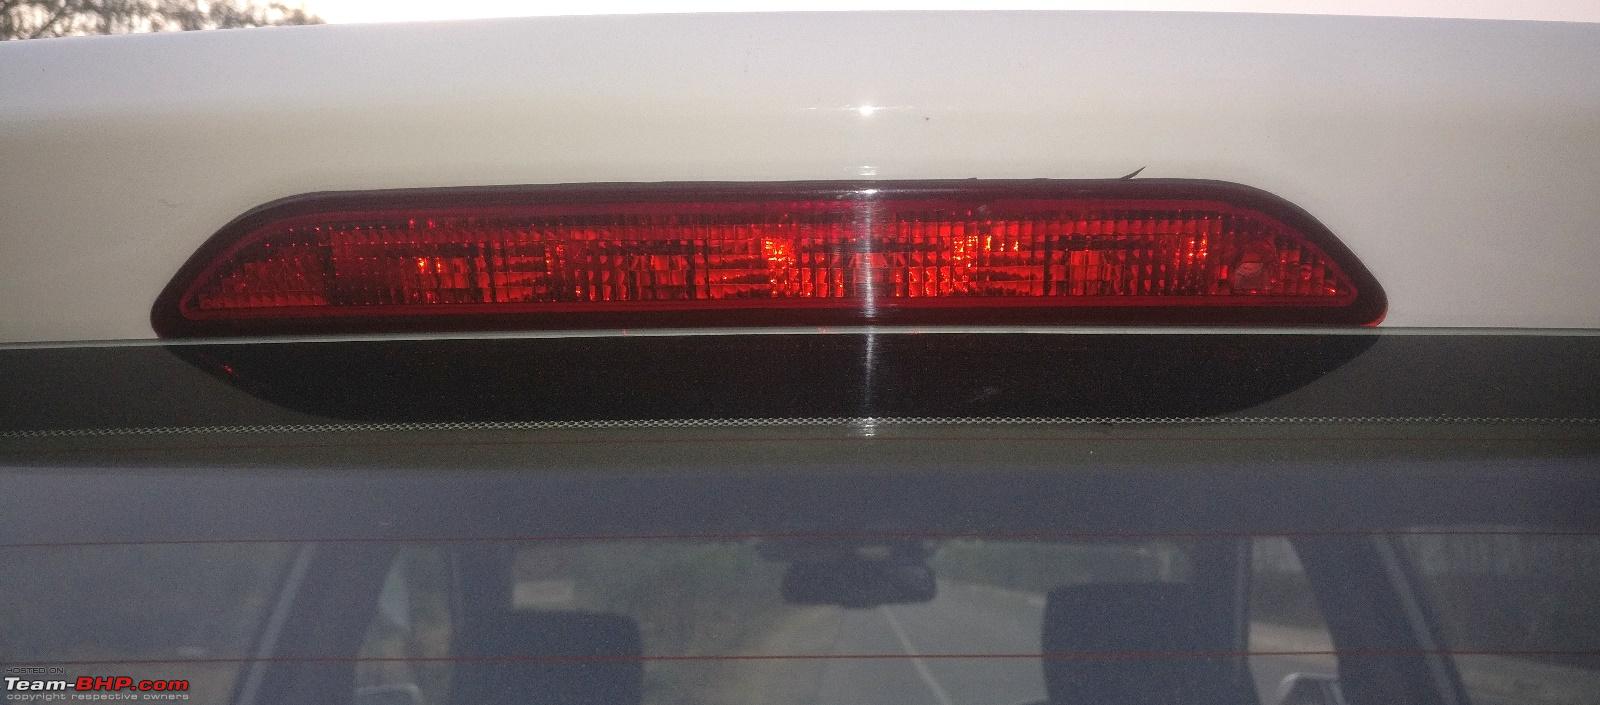
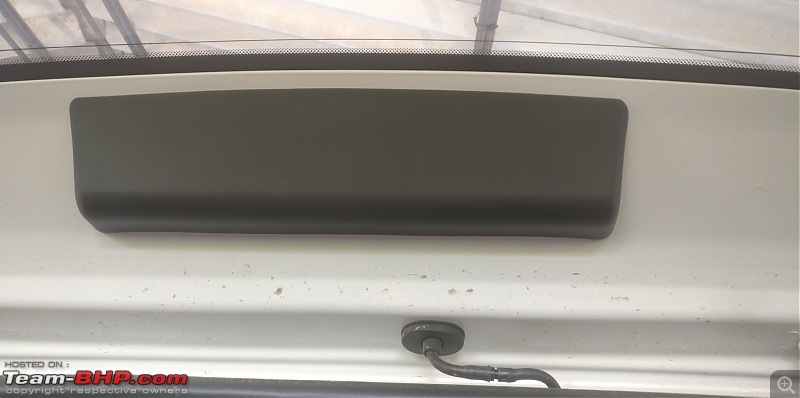
MODIFICATION #11: DIY conversion of the High Mount Stop lamp (HMSL) to LED
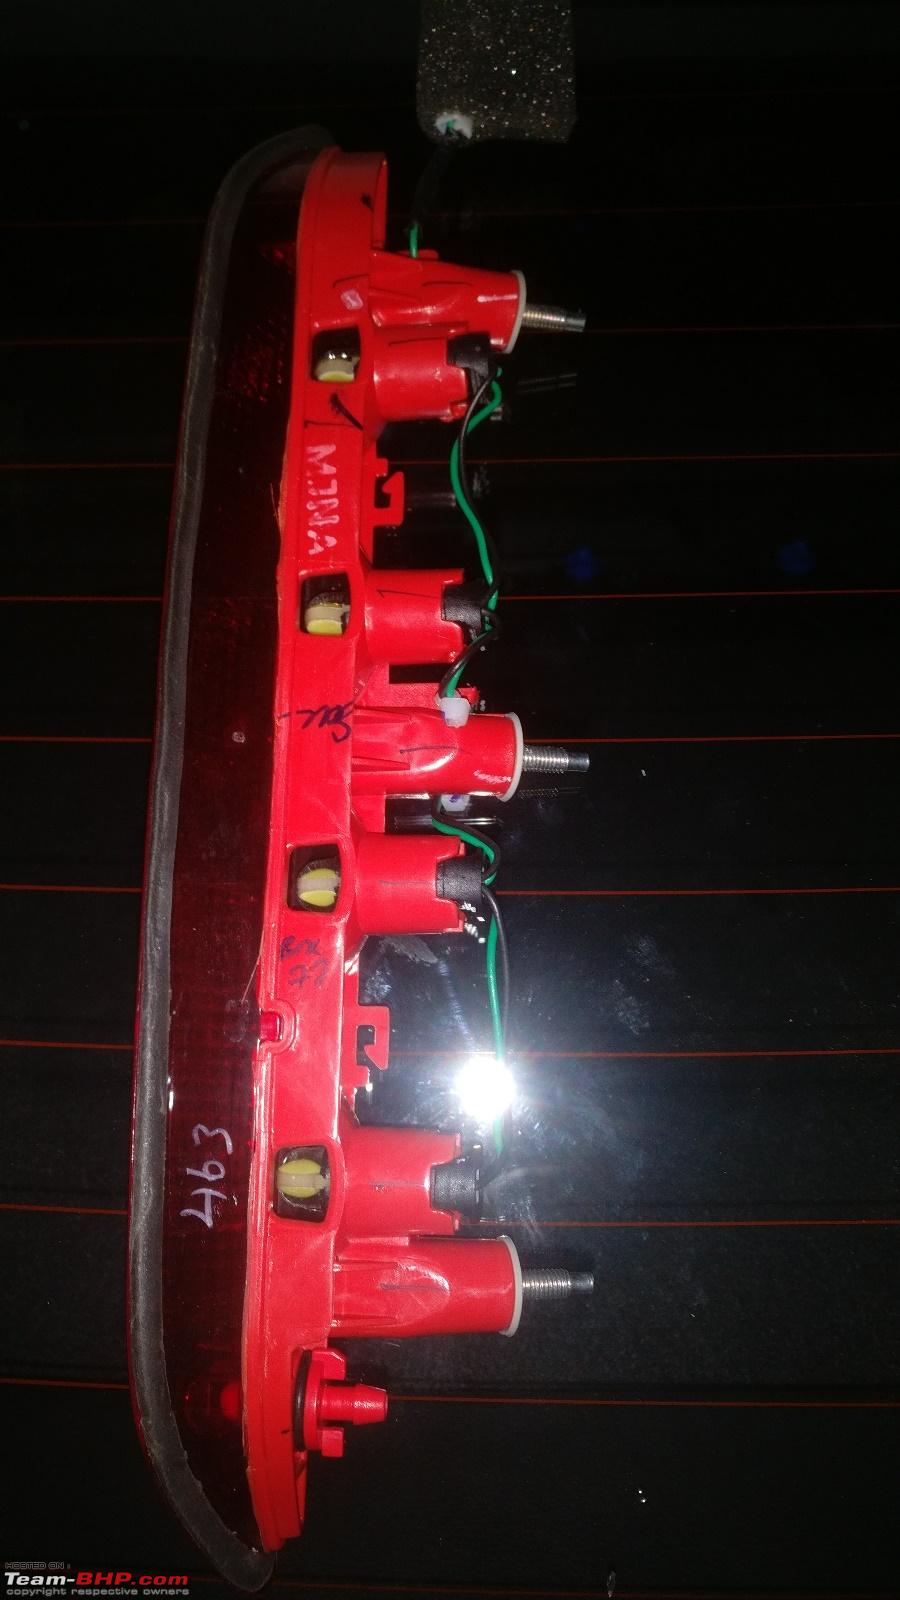
The high mount stop lamp features 4 numbers of T10 bulbs. Replaced the 4 bulbs with LED.
High mount stop lamp on the boot lid which also houses the rear windshield washer spray

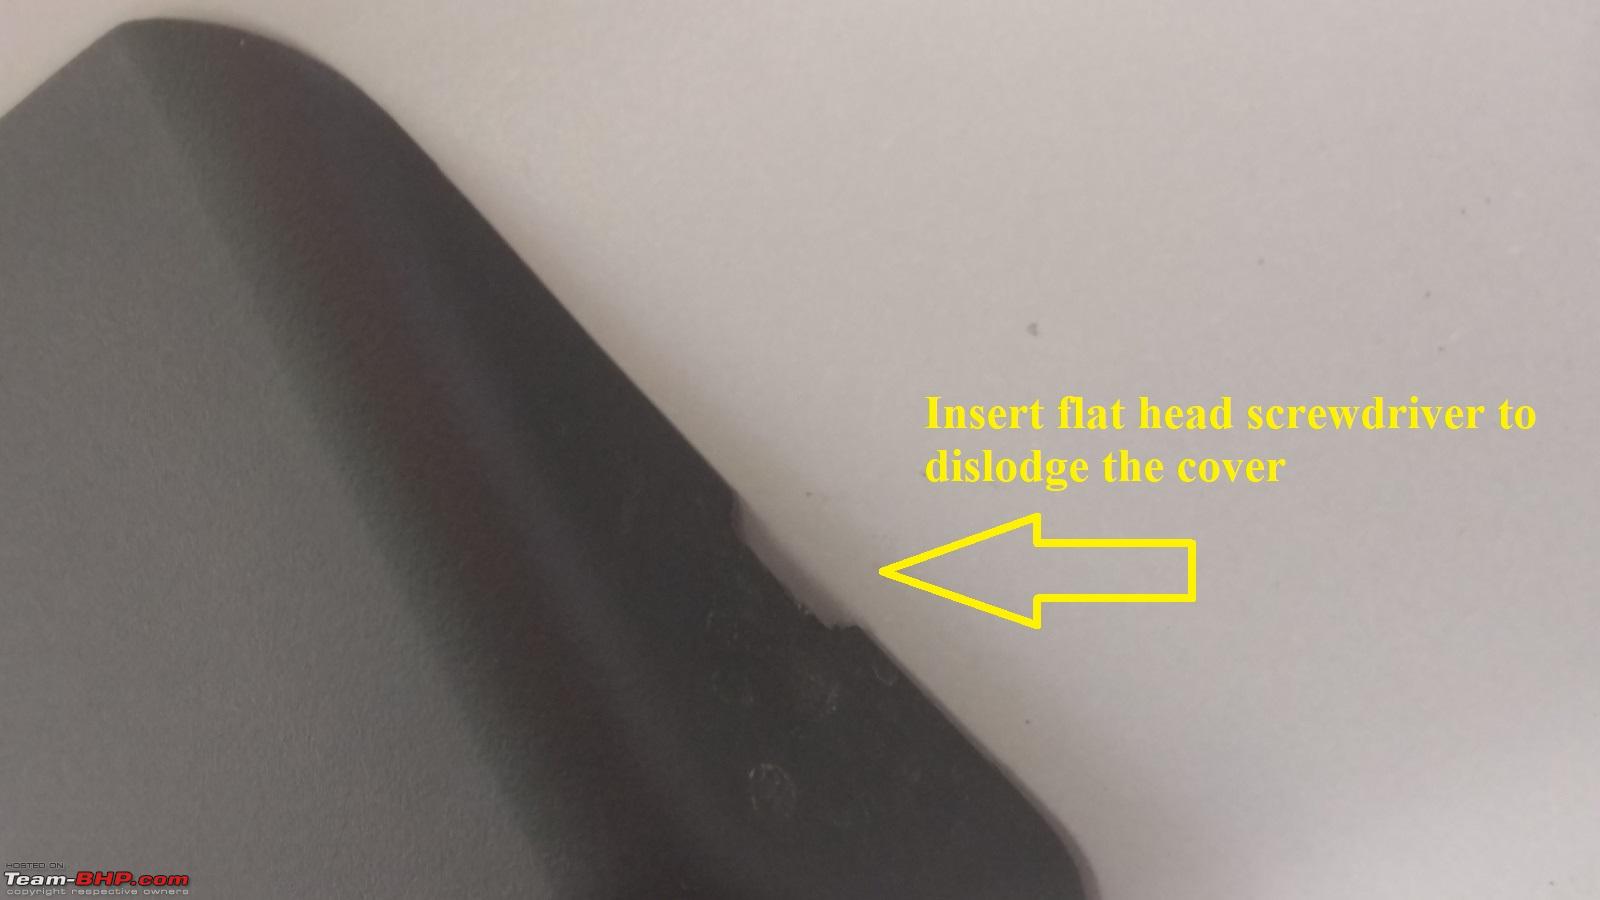
Cover that hides the ugly screws which hold the HMSL in place and holes
Notch on the right side of the cover. Insert a flat head screwdriver and pull it outwards to dislodge the cover

Cover removed

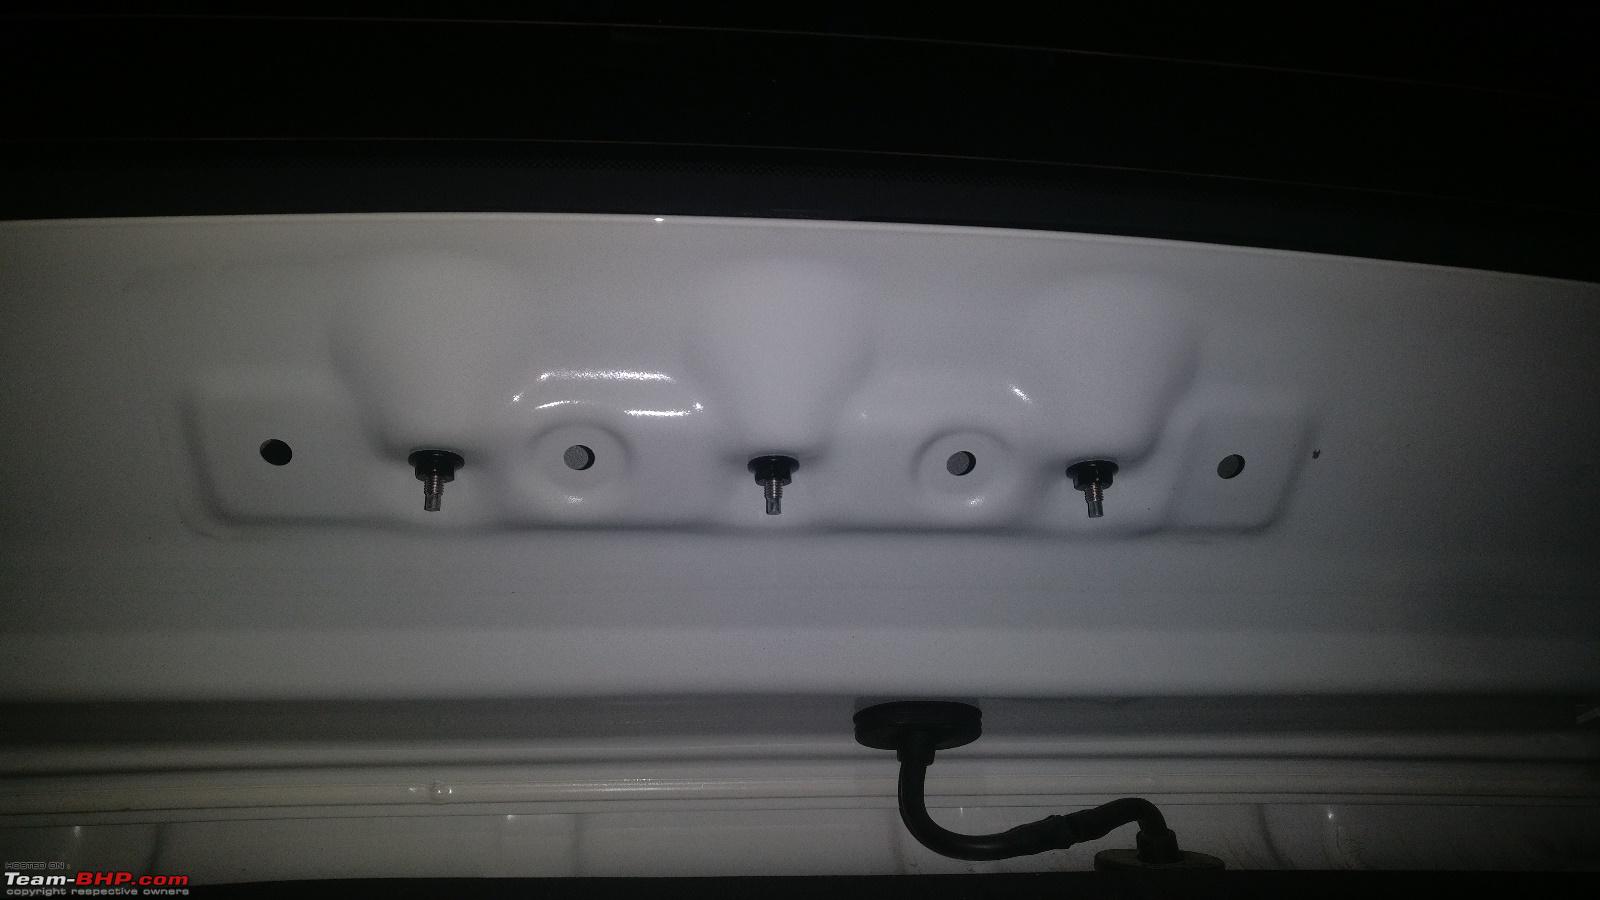
Here's what is seen underneath the cover. Screws that hold the HMSL in place. Unscrew the nuts and push it outwards to free the HMSL from the body

HMSL removed from the body

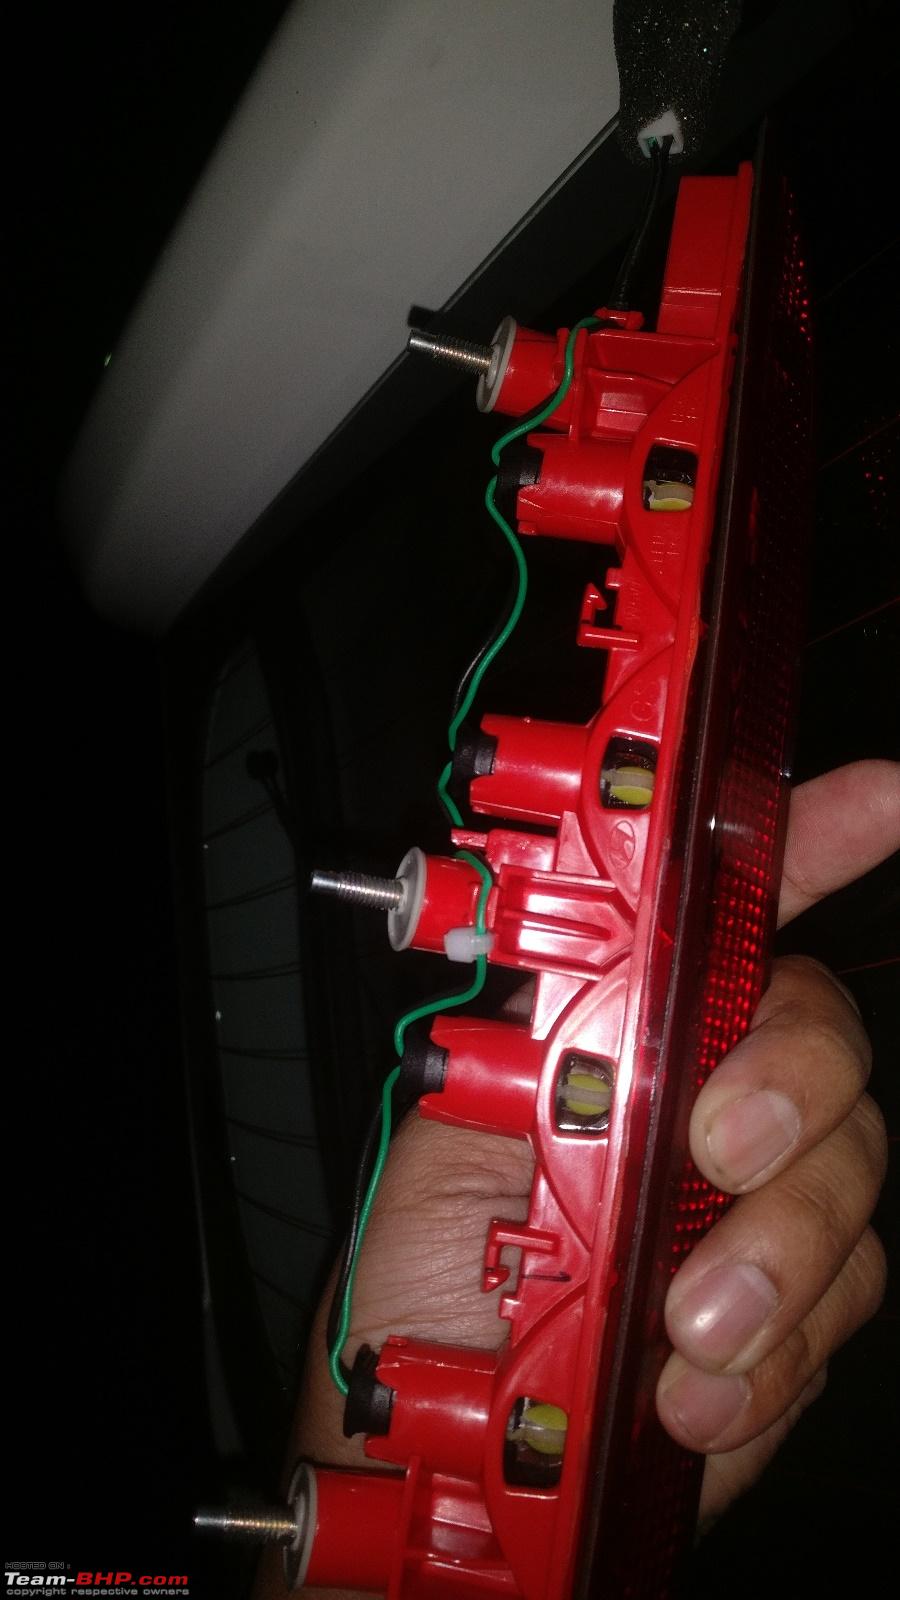
Another angle

Another view

OE T10 vs the LED T10 light output comparison

All 4 bulbs replaced with LED's

OE vs LED which was used

Link to the item:
T10 W5W LED bulbs
| All times are GMT +5.5. The time now is 09:19. | |