Team-BHP > Modifications & Accessories
Register New Topics New Posts Top Thanked Team-BHP FAQ


Reply
  Search this Thread
58,536 views
Old 9th May 2022, 22:58   #31
BHPian
 
maheshm619's Avatar
 
Join Date: Aug 2020
Location: KL-47 / UP-79
Posts: 186
Thanked: 830 Times
Re: Rejuvenating a Mitsubishi Cedia | Additional equipment, parts, maintenance & more

Quote:
Originally Posted by Jassy1313 View Post
Thank you guys for the love and support.

Let's continue with the story.
Its great to see a good car getting the attention it deserves. I would anyday prefer a solid car with good mechanicals than an air purifier / smartphone with wheels. Your efforts are showing great results. Do keep this thread updated.
maheshm619 is offline   (2) Thanks
Old 9th May 2022, 23:41   #32
BHPian
 
Jassy1313's Avatar
 
Join Date: Feb 2007
Location: Mumbai
Posts: 340
Thanked: 858 Times
Re: Rejuvenating a Mitsubishi Cedia | Additional equipment, parts, maintenance & more

Quote:
Originally Posted by Durango Dude View Post
I meant how much did you pay for the Cedia, not for the body kit, that is only if you don't mind revealing the price. Thank you.
I paid 1.50 lakhs for the Car. Registration and Transfer extra. As I mentioned earlier, I got it for a price I couldn't say NO to.

No regrets till date.
Jassy1313 is offline   (2) Thanks
Old 9th May 2022, 23:47   #33
BHPian
 
Jassy1313's Avatar
 
Join Date: Feb 2007
Location: Mumbai
Posts: 340
Thanked: 858 Times
Re: Rejuvenating a Mitsubishi Cedia | Additional equipment, parts, maintenance & more

Back to the story...

Just after the brake job, the Bodykit arrived.
I was super excited to go and pick up the package from the Transport.
Attached Thumbnails
Rejuvenating a Mitsubishi Cedia | Additional equipment, parts, maintenance & more-whatsapp-image-20220509-12.49.19-am.jpeg  

Jassy1313 is offline   (5) Thanks
Old 10th May 2022, 00:00   #34
BHPian
 
Jassy1313's Avatar
 
Join Date: Feb 2007
Location: Mumbai
Posts: 340
Thanked: 858 Times
Re: Rejuvenating a Mitsubishi Cedia | Additional equipment, parts, maintenance & more

Now that I had some import parts for the conversion, I still needed a few more parts/stickers/accessories to do the perfect conversion.

And with time the missing pieces of the puzzle started falling in place.


Lets talk about the first piece of the puzzle:-

In the month of June - 2020 My friend Aritro shared the pictures of the Original Ralliart decals that he acquired. I asked him if he is ready to sell the part of it that goes right below the ORVMs. I am not interested in the complete set. And he just gifted it to me. I am really thankful to him for all the kind things he did and have been doing for me.


The Decals he gifted to me.
Rejuvenating a Mitsubishi Cedia | Additional equipment, parts, maintenance & more-img20200606wa0020.jpg


The picture of the complete set he had
Rejuvenating a Mitsubishi Cedia | Additional equipment, parts, maintenance & more-img20200609wa0020.jpg
Jassy1313 is offline   (6) Thanks
Old 10th May 2022, 00:25   #35
BHPian
 
Jassy1313's Avatar
 
Join Date: Feb 2007
Location: Mumbai
Posts: 340
Thanked: 858 Times
Re: Rejuvenating a Mitsubishi Cedia | Additional equipment, parts, maintenance & more

So it's time for the second piece of the puzzle.

2010 and later Cedia, Cedia Sports Basic and Sports Advance were BSIV. They even got a Badge on the trunk lid, right below the Cedia Logo.

BSIV Reference picture:Name:  IMG20200629WA0043__01.jpg
Views: 1143
Size:  9.0 KB

The previous owner had removed that logo to paste some 'Limited Edition' badge. It was too big for my taste
Rejuvenating a Mitsubishi Cedia | Additional equipment, parts, maintenance & more-img_20190518_181357__01_li.jpg

So I came across a trunk lid that was going to get scrapped. It had the BSIV badge so I carefully removed it and used ultra-thin 3M double tape to paste it on my car's trunk lid. Before pasting it I wanted to know the exact position of the logo so I browsed over a lot of cedia pictures to understand the exact placement of it. Now I will leave it up to you to decide if it was done well or not
Name:  WhatsApp Image 20211124 at 5.32.18 PM 2.jpeg
Views: 1128
Size:  69.9 KB
Jassy1313 is offline   (10) Thanks
Old 10th May 2022, 01:19   #36
BHPian
 
Jassy1313's Avatar
 
Join Date: Feb 2007
Location: Mumbai
Posts: 340
Thanked: 858 Times
Re: Rejuvenating a Mitsubishi Cedia | Additional equipment, parts, maintenance & more

The third piece of the puzzle wasn't expected to be found so easily.

It was the month of April 2021. I was browsing through olx (as usual) and I came across a cedia getting scrapped in Amritsar. The car had the part I had been looking for. I immediately contacted the scrap dealer. I asked for more pictures of the part. Later, I transferred him the money. Paid him Rs.1500/- for it. A few days later the part was home. So it was a dashboard trim that had a cutout for the Foglight switch. Only Sports/sports advance got the foglights fitted from the factory.
Luckily the previous owner of the car had the foglights installed from the dealership but wired it with an aftermarket switch. I wanted to do it OEM again. So this was the only way.
Fun fact:- Every cedia has the wiring socket for the fog lights switch hidden behind the trim. So I just needed the Trim and the OEM switch.

The trim that came with the car.
Rejuvenating a Mitsubishi Cedia | Additional equipment, parts, maintenance & more-img_20210415_174524.jpg

The trim I bought from the scrap dealer. (I still haven't installed it. First I need to find someone who can hydro dip it in the same colour/pattern that will match my old trim)
Rejuvenating a Mitsubishi Cedia | Additional equipment, parts, maintenance & more-img_20210417_120644.jpg

Last edited by Jassy1313 : 10th May 2022 at 01:21.
Jassy1313 is offline   (10) Thanks
Old 10th May 2022, 09:18   #37
BHPian
 
Jassy1313's Avatar
 
Join Date: Feb 2007
Location: Mumbai
Posts: 340
Thanked: 858 Times
Re: Rejuvenating a Mitsubishi Cedia | Additional equipment, parts, maintenance & more

One fine day while going to the office, I stopped by my mechanic's shop to check tyre pressure. I make sure to check the air pressure of the spare tyre every 6-8 months. But this time I found some surface rust generating on the trunk floor bed. So I decided to take care of the matter before it gets aggravated.

My Dad, brother and I decided to do it on a Sunday morning. We removed the surface rust with a grinder and some sandpaper. Later we applied Zinc Primer to prevent future rusting. And then applied some coats of white colour (spray can) to cover the job and make it look clean. We even did it under the rear seat.

Some pictures to support the job.
Attached Thumbnails
Rejuvenating a Mitsubishi Cedia | Additional equipment, parts, maintenance & more-img_20210523_193446.jpg  

Rejuvenating a Mitsubishi Cedia | Additional equipment, parts, maintenance & more-img_20210523_193451.jpg  

Rejuvenating a Mitsubishi Cedia | Additional equipment, parts, maintenance & more-img_20210523_193417.jpg  

Rejuvenating a Mitsubishi Cedia | Additional equipment, parts, maintenance & more-img_20210524_180643.jpg  

Rejuvenating a Mitsubishi Cedia | Additional equipment, parts, maintenance & more-img_20210524_180640.jpg  


Last edited by Jassy1313 : 10th May 2022 at 09:22.
Jassy1313 is offline   (7) Thanks
Old 10th May 2022, 20:14   #38
BHPian
 
Jassy1313's Avatar
 
Join Date: Feb 2007
Location: Mumbai
Posts: 340
Thanked: 858 Times
Re: Rejuvenating a Mitsubishi Cedia | Additional equipment, parts, maintenance & more

While I was busy fixing petty issues, I realised the car needs a few new parts like Spoiler gaskets, Boot cover screw and front shock absorbers to name a few.

So I ordered some parts from Boodmo and some from Mars auto.

Boodmo took a good 2 months to deliver the parts. I should be thankful that I atleast got what I needed. These parts are not easy to get.😜

The shock absorbers were readily available at Mars Auto so bought them for 7k (pair). Those were aftermarket and turned out to be good, so far.

OEM Screw from Boodmo.
Rejuvenating a Mitsubishi Cedia | Additional equipment, parts, maintenance & more-img_20210715_115813.jpg
Rejuvenating a Mitsubishi Cedia | Additional equipment, parts, maintenance & more-img_20210715_115834.jpg

OEM Spoiler Gasket from Boodmo.
Rejuvenating a Mitsubishi Cedia | Additional equipment, parts, maintenance & more-img20211118wa0022.jpeg

Aftermarket Shock Absorbers from Mars auto.
Rejuvenating a Mitsubishi Cedia | Additional equipment, parts, maintenance & more-img_20210313_234936__01.jpg

The picture of the car taken after installing new front shocks.
Rejuvenating a Mitsubishi Cedia | Additional equipment, parts, maintenance & more-img_20210325_170744.jpg

And the OEM Ralliart Decal (Gifted by Aritro dada)
Rejuvenating a Mitsubishi Cedia | Additional equipment, parts, maintenance & more-img20210616wa0001.jpg
Jassy1313 is offline   (6) Thanks
Old 10th May 2022, 21:18   #39
BHPian
 
Jassy1313's Avatar
 
Join Date: Feb 2007
Location: Mumbai
Posts: 340
Thanked: 858 Times
Re: Rejuvenating a Mitsubishi Cedia | Additional equipment, parts, maintenance & more

By now I managed to have almost everything to perform the Sports Advance conversion. But being an @$$ I again got distracted and found something bizarre to do for my car.

This time it was related to the interiors of the car.
As you all must be aware of the fact that Mitsubishi EVO 7/8/9 and Mitsubishi Cedia share 90% of the interior parts. There are a few things that we didn't get, though.
One of them was the shifter ring.
Rejuvenating a Mitsubishi Cedia | Additional equipment, parts, maintenance & more-incollage_20220510_203248124__01.jpg

Even if I order the ring, it won't fit in India cedia (it didn't have the clip holes). Getting the entire trim piece was an expensive affair.
So if you can't buy it, just make it.

I showed the design to my dad and we decided to try n make it over the weekend.

On 12th June 2021, we rolled up our sleeves and started working on it.

You can see how the aluminium piece started taking shape.
Rejuvenating a Mitsubishi Cedia | Additional equipment, parts, maintenance & more-img_20210612_115936_bokeh.jpg

Rejuvenating a Mitsubishi Cedia | Additional equipment, parts, maintenance & more-img_20210612_120307.jpg

Rejuvenating a Mitsubishi Cedia | Additional equipment, parts, maintenance & more-img_20210612_123517.jpg

Rejuvenating a Mitsubishi Cedia | Additional equipment, parts, maintenance & more-img_20210612_140629_bokeh.jpg

Rejuvenating a Mitsubishi Cedia | Additional equipment, parts, maintenance & more-img_20210612_140639_bokeh.jpg

Test fitted it to check the placement. (Please ignore the hole on the panel. It was done by the previous owner to place the switch for the foglights. Not to worry, something special coming up to cover the holes). ��
Rejuvenating a Mitsubishi Cedia | Additional equipment, parts, maintenance & more-img_20210612_132324_bokeh.jpg

Measurements were taken continuously to avoid errors.
Rejuvenating a Mitsubishi Cedia | Additional equipment, parts, maintenance & more-img_20210612_141942.jpg

Making dimples on the ring.
Rejuvenating a Mitsubishi Cedia | Additional equipment, parts, maintenance & more-img_20210612_144117.jpg

Some finishing touches.
Rejuvenating a Mitsubishi Cedia | Additional equipment, parts, maintenance & more-img_20210612_154342.jpg

Final outcome.
Rejuvenating a Mitsubishi Cedia | Additional equipment, parts, maintenance & more-img_20210612_154519_bokeh.jpg

Later I got it Anodized.
Rejuvenating a Mitsubishi Cedia | Additional equipment, parts, maintenance & more-img_20210619_144423.jpg

Rejuvenating a Mitsubishi Cedia | Additional equipment, parts, maintenance & more-img_20210619_144436.jpg

Rejuvenating a Mitsubishi Cedia | Additional equipment, parts, maintenance & more-img_20210619_144413.jpg

Rejuvenating a Mitsubishi Cedia | Additional equipment, parts, maintenance & more-img_20210619_144506.jpg

End result. We used 3M double tape to fix it.
Attached Thumbnails
Rejuvenating a Mitsubishi Cedia | Additional equipment, parts, maintenance & more-img_20210621_164111_bokeh.jpg  

Rejuvenating a Mitsubishi Cedia | Additional equipment, parts, maintenance & more-img_20210621_164146.jpg  


Last edited by Jassy1313 : 10th May 2022 at 21:25.
Jassy1313 is offline   (20) Thanks
Old 10th May 2022, 21:42   #40
Distinguished - BHPian
 
ninjatalli's Avatar
 
Join Date: Jul 2011
Location: Bangalore
Posts: 3,811
Thanked: 15,638 Times
Re: Rejuvenating a Mitsubishi Cedia | Additional equipment, parts, maintenance & more

Quote:
Originally Posted by Jassy1313 View Post

My Mechanic was shocked to see the final results. He couldn't believe those were the same calipers. He kept asking me if they were the same caliper or brand new.
What a lovely thread - it's always nice to see some of these old Jap beauties being taken care off. Kudos to your efforts and all the best for a long ownership.

My only suggestion - paint those calipers red. With the red spoiler, red skirts and the decals, the red calipers would fit in just perfectly!
ninjatalli is offline   (2) Thanks
Old 10th May 2022, 22:02   #41
BHPian
 
Jassy1313's Avatar
 
Join Date: Feb 2007
Location: Mumbai
Posts: 340
Thanked: 858 Times
Re: Rejuvenating a Mitsubishi Cedia | Additional equipment, parts, maintenance & more

Quote:
Originally Posted by ninjatalli View Post
What a lovely thread - it's always nice to see some of these old Jap beauties being taken care of. Kudos to your efforts and all the best for long ownership.

My only suggestion - paint those callipers red. With the red spoiler, red skirts and the decals, the red callipers would fit in just perfectly!
Thank you for the kind words, sir.

Your suggestions are much appreciated but the bodykit and the spoiler are already painted and fitted on the car. Callipers will be painted soon.
The story is currently running in the past. The conversion is already done and I am trying to cover the story in a timeline. More pictures coming in the later posts, soon.
Jassy1313 is offline   (1) Thanks
Old 10th May 2022, 23:27   #42
BHPian
 
Jassy1313's Avatar
 
Join Date: Feb 2007
Location: Mumbai
Posts: 340
Thanked: 858 Times
Re: Rejuvenating a Mitsubishi Cedia | Additional equipment, parts, maintenance & more

By now you all know how I got the Ralliart stickers.
It was time to pay back. I called up aritro and told him to send the pair of spare front rotors he has.

I wanted to try something and surprise him as well.

So once the rotors were here we began with the work.
I wanted to make the stock rotors into dimples drilled rotors and send them back to him.
Before performing the job we measured the thickness of the rotors to make sure we don't affect the structural strength of the rotors.

Rejuvenating a Mitsubishi Cedia | Additional equipment, parts, maintenance & more-img20210821wa0004.jpeg

Proper measurements were taken before drilling the dimples.
Rejuvenating a Mitsubishi Cedia | Additional equipment, parts, maintenance & more-img20210821wa0010.jpeg

Sandblasted with the finest grade of sand.
Rejuvenating a Mitsubishi Cedia | Additional equipment, parts, maintenance & more-img_20210821_161603.jpg

Applied a thin coat of primer to avoid rusting in transit.
Rejuvenating a Mitsubishi Cedia | Additional equipment, parts, maintenance & more-img_20210821_165015__01.jpg

I sent the rotors back to him and he was very happy to receive them.
Rejuvenating a Mitsubishi Cedia | Additional equipment, parts, maintenance & more-img20210919wa0007.jpg
Jassy1313 is offline   (8) Thanks
Old 11th May 2022, 09:29   #43
BHPian
 
Jassy1313's Avatar
 
Join Date: Feb 2007
Location: Mumbai
Posts: 340
Thanked: 858 Times
Re: Rejuvenating a Mitsubishi Cedia | Additional equipment, parts, maintenance & more

After all the distractions now it was time to do the conversion.
The conversion took place in 2 parts. First, we installed the spoiler, later we installed the skirts. I also got the bumpers painted and polished the entire car.

Let's start with the' Spoiler' story.

On 22nd November 2021, I gave the spoiler to my painter along with the paint material. I prefer buying the paint myself. This way I can control the quality of the material. I prefer the brand Axalta Cromax (Good quality primer, paint, thinner, hardener and clear coat).

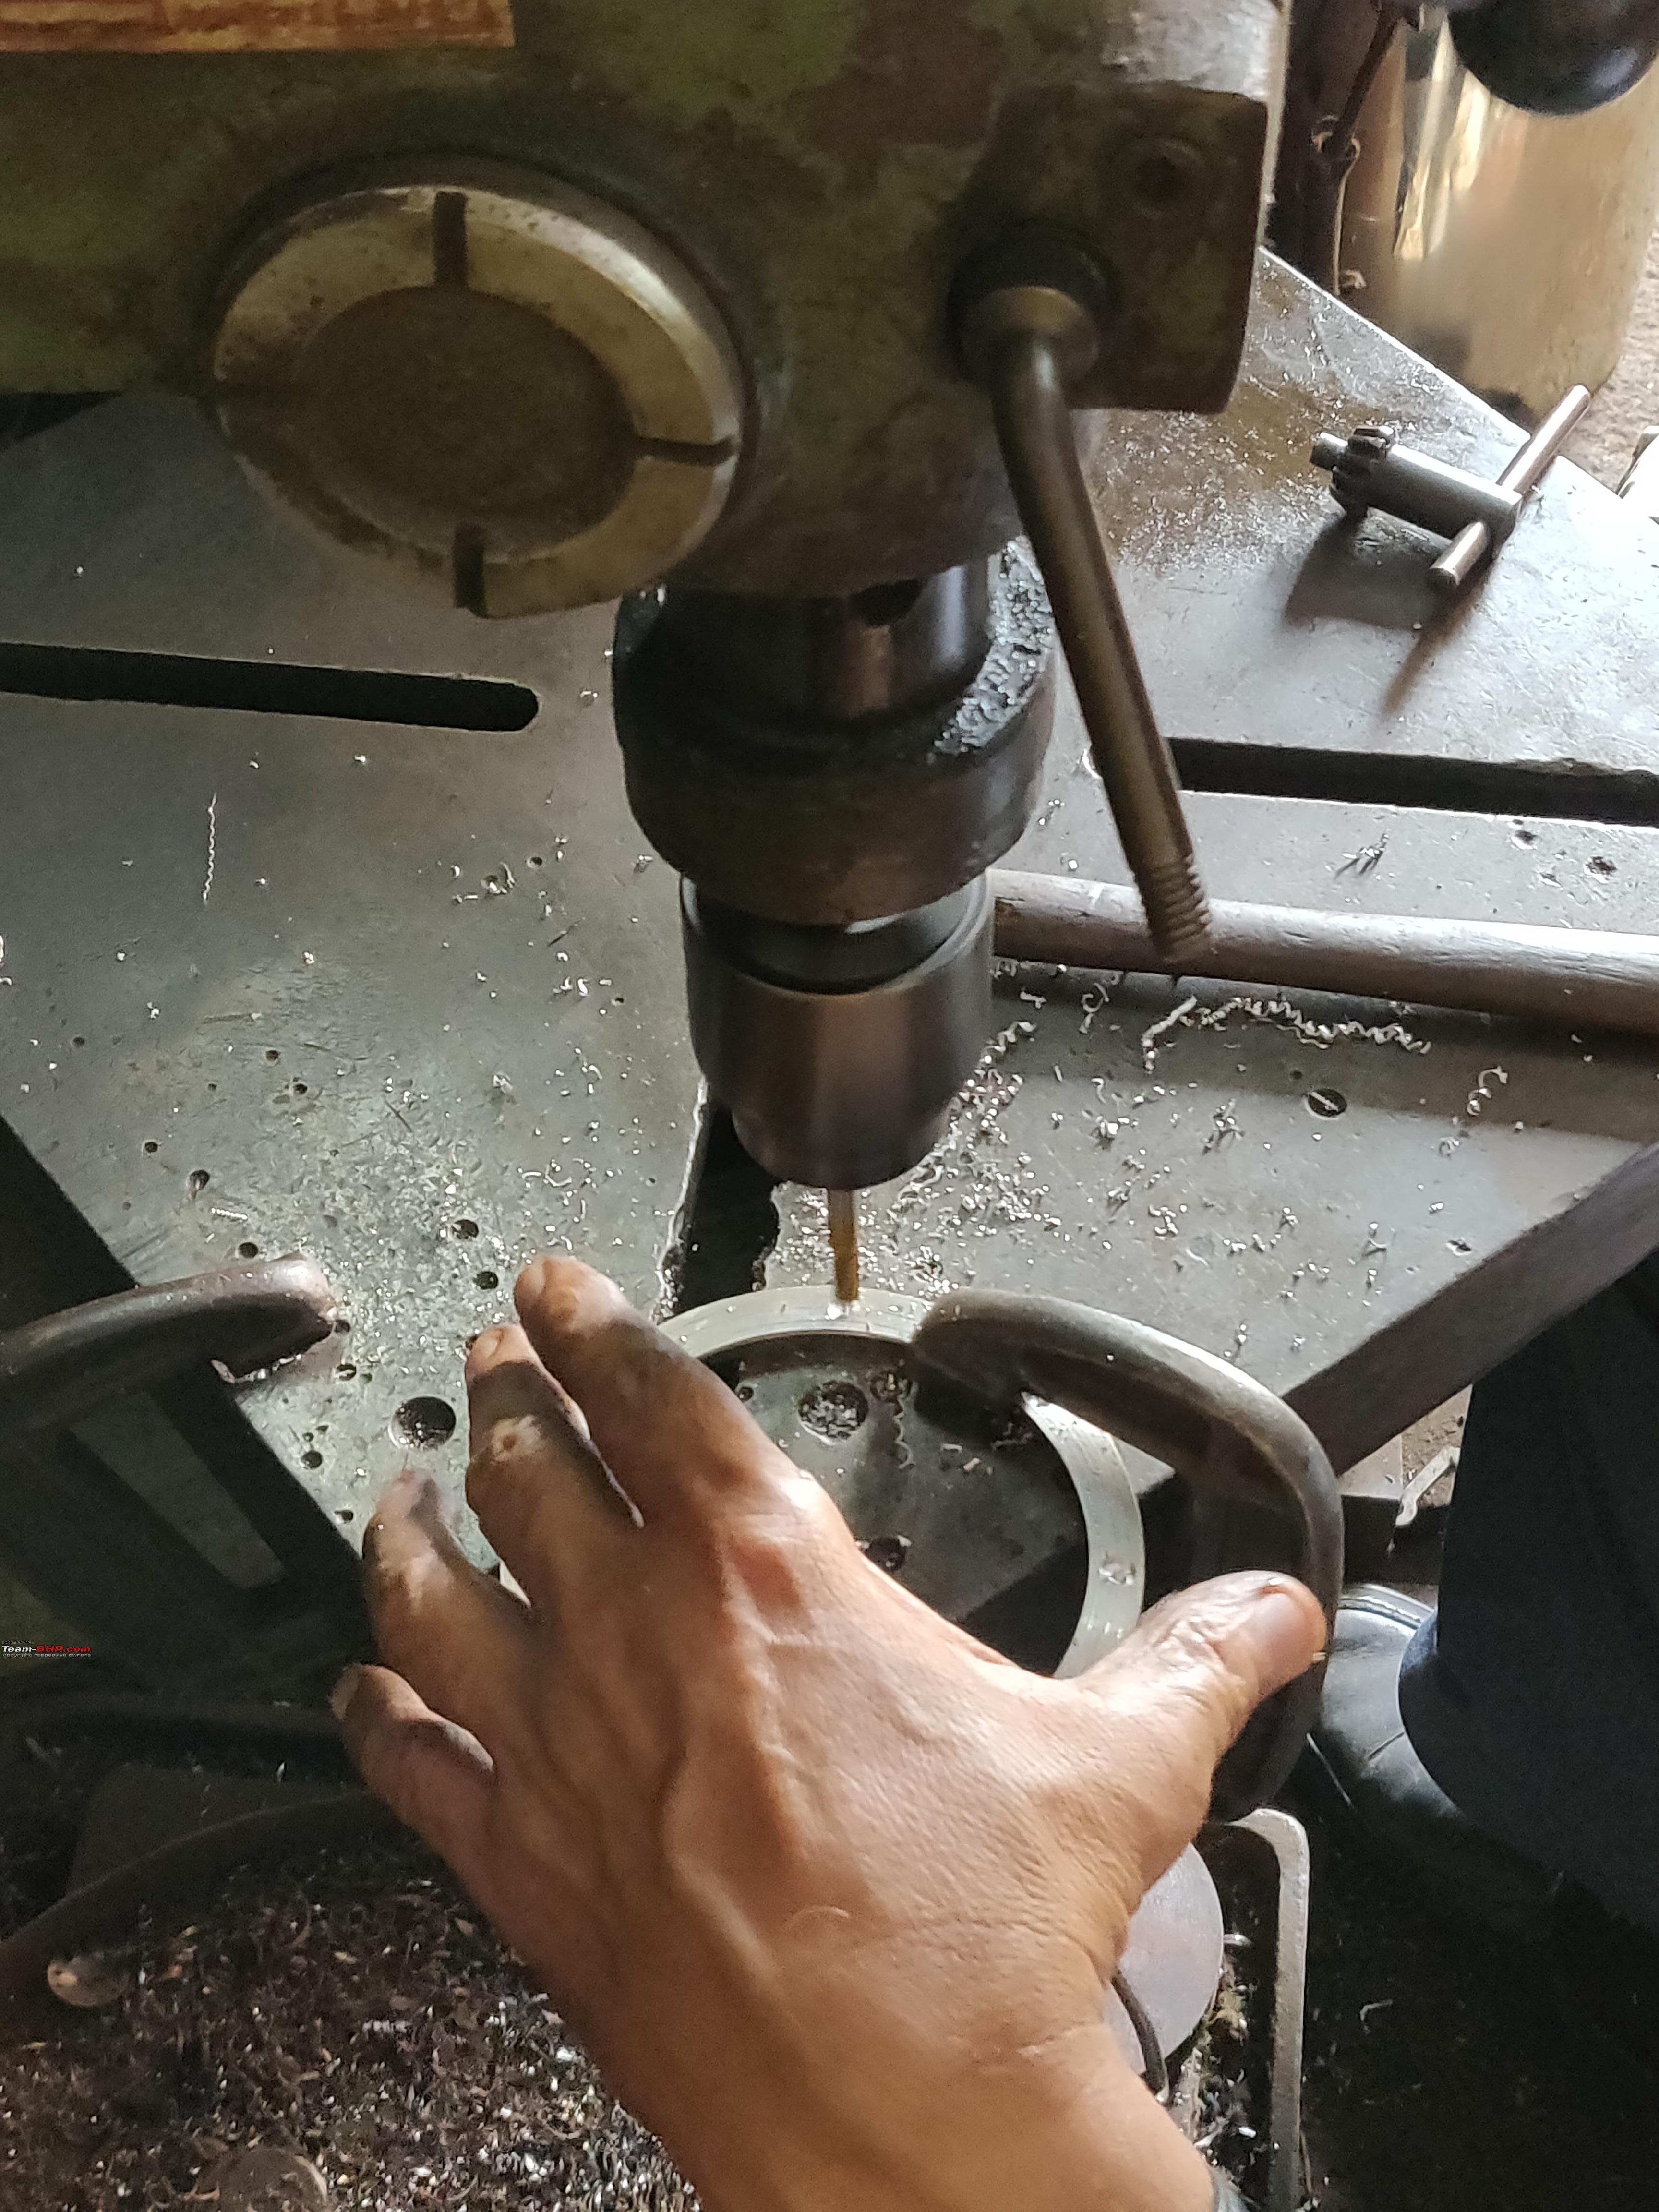
On 24th November 2021, I picked up the painted Spoiler and I took it to my factory to install it on the car. I did the installation with the help of my dad and brother. I wanted it to be OEM fit so I asked a few members for drilling points. You just can not drill anywhere and place it. You need to find the spots where Mitsubishi drilled holes.

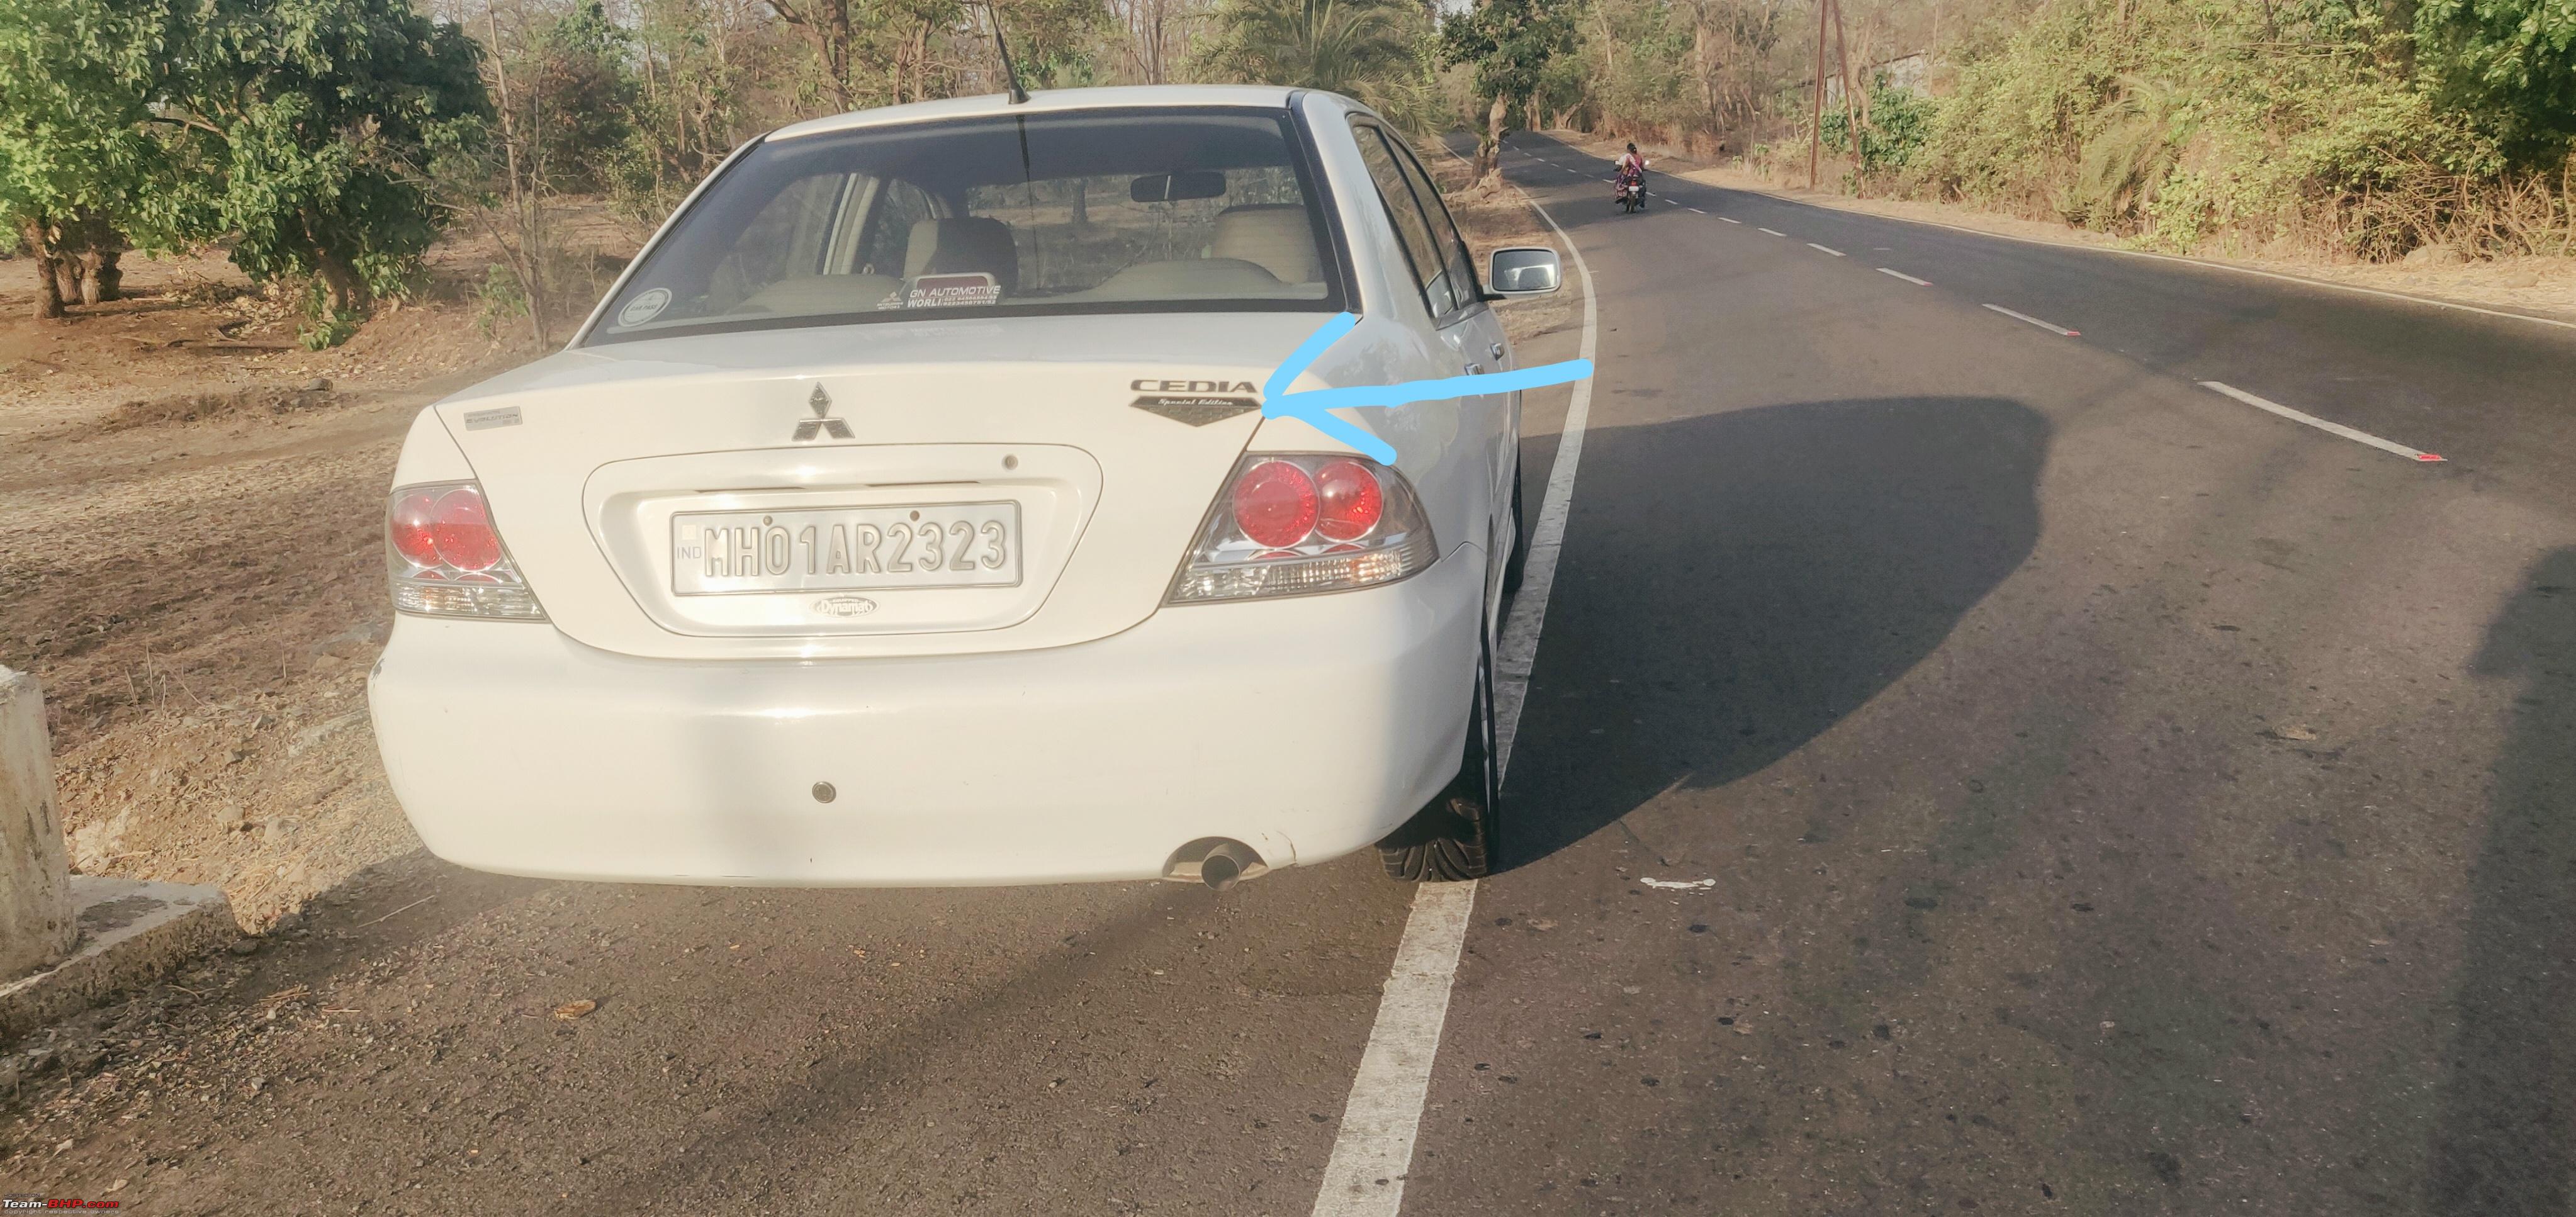
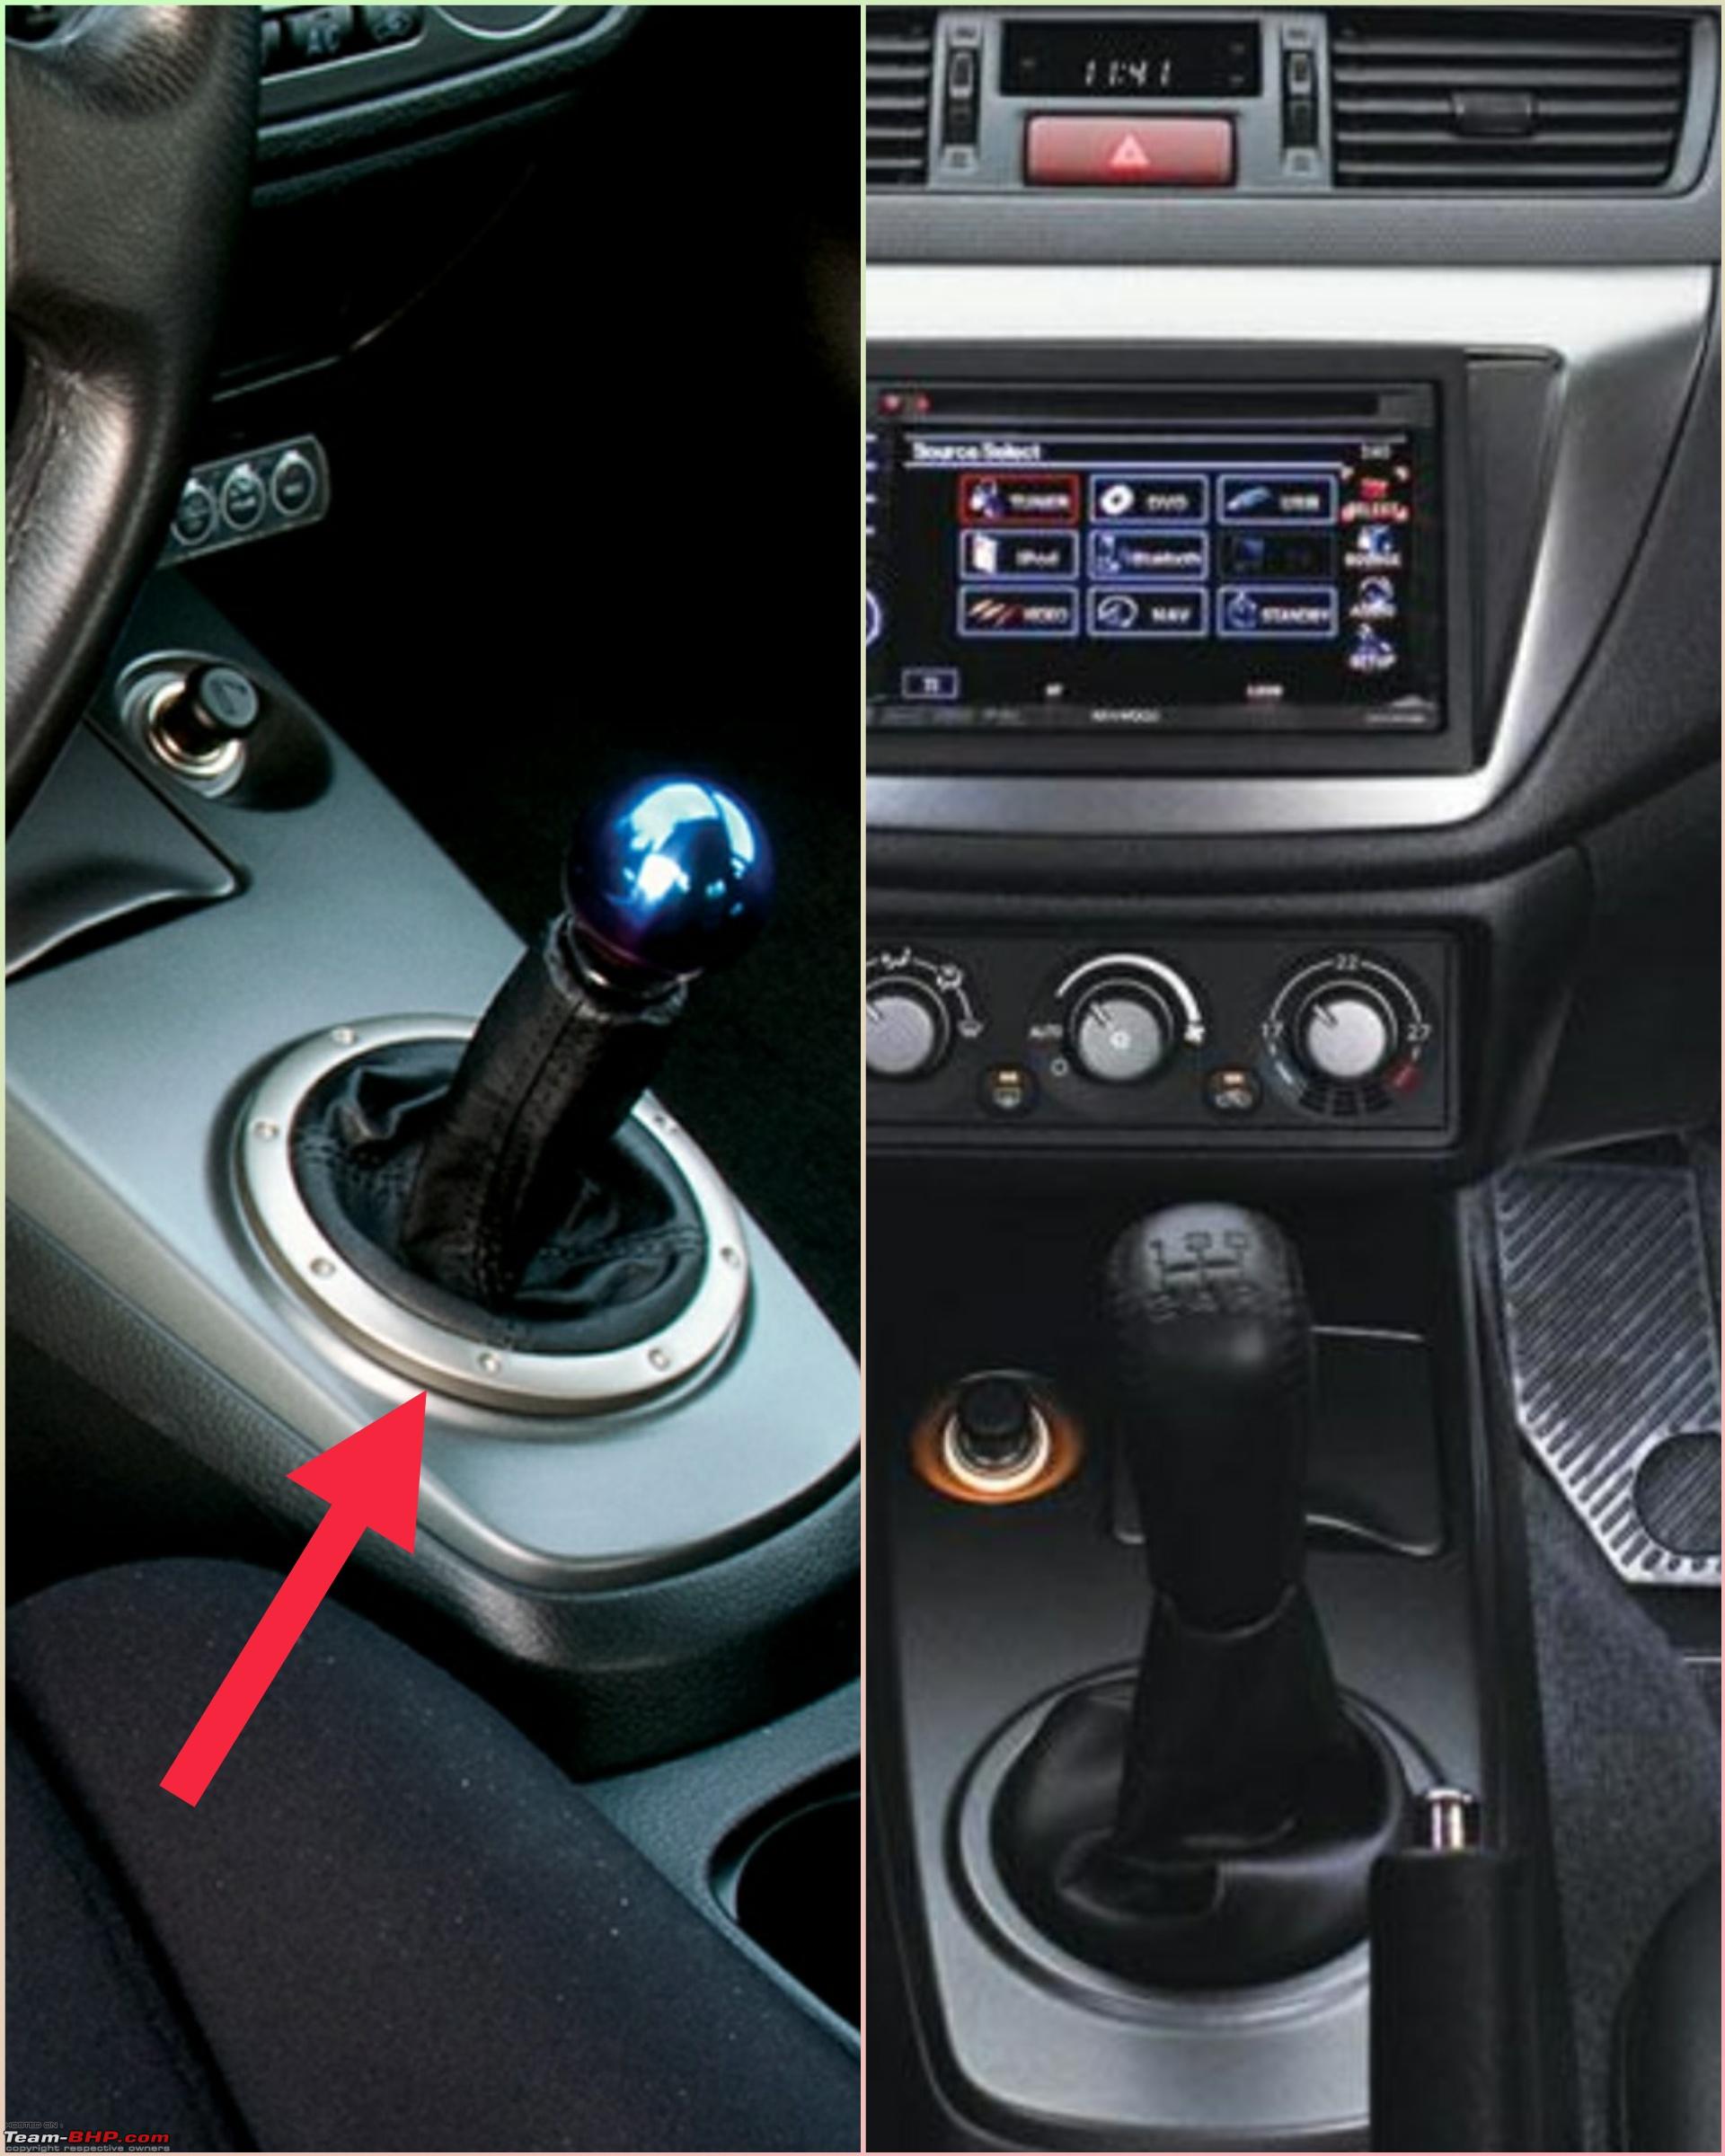
The marked arrows indicate the spots where you should drill the first set of holes.
Rejuvenating a Mitsubishi Cedia | Additional equipment, parts, maintenance & more-img_20211028_152519__01.jpg

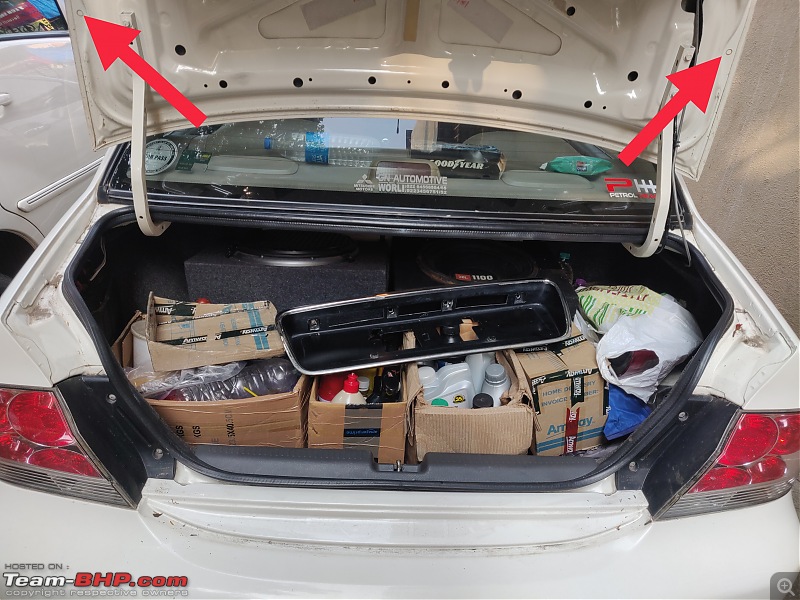
After drilling the first set of holes in the trunk lid, we placed the spoiler on the truck so we could mark the second set of holes.
We were too occupied with the installation process that none of us took pictures while it was happening ��

So as we wanted everything as per OEM spec, even the spoiler light had to be wired that way. While we were trying to figure that out, I came across a connector that was under the trunk lid. It wasn't connected to any wire. The spoiler was OEM so it too came with a connector at the end of its wire. I connected both of them and the Spoiler brake light started working.
This shows that even though My car didn't come with 'Sports Advance' accessories, the car came with all the connections from the factory.

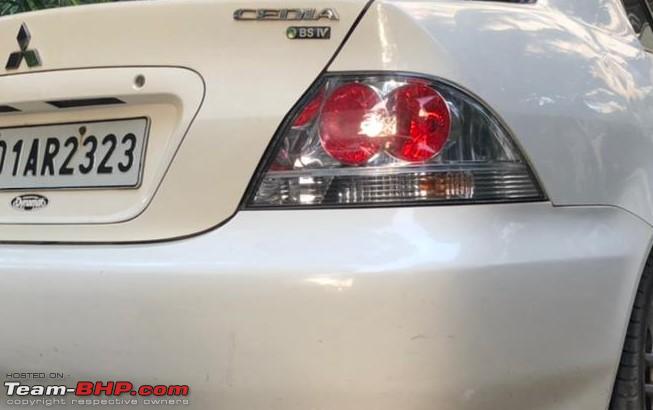
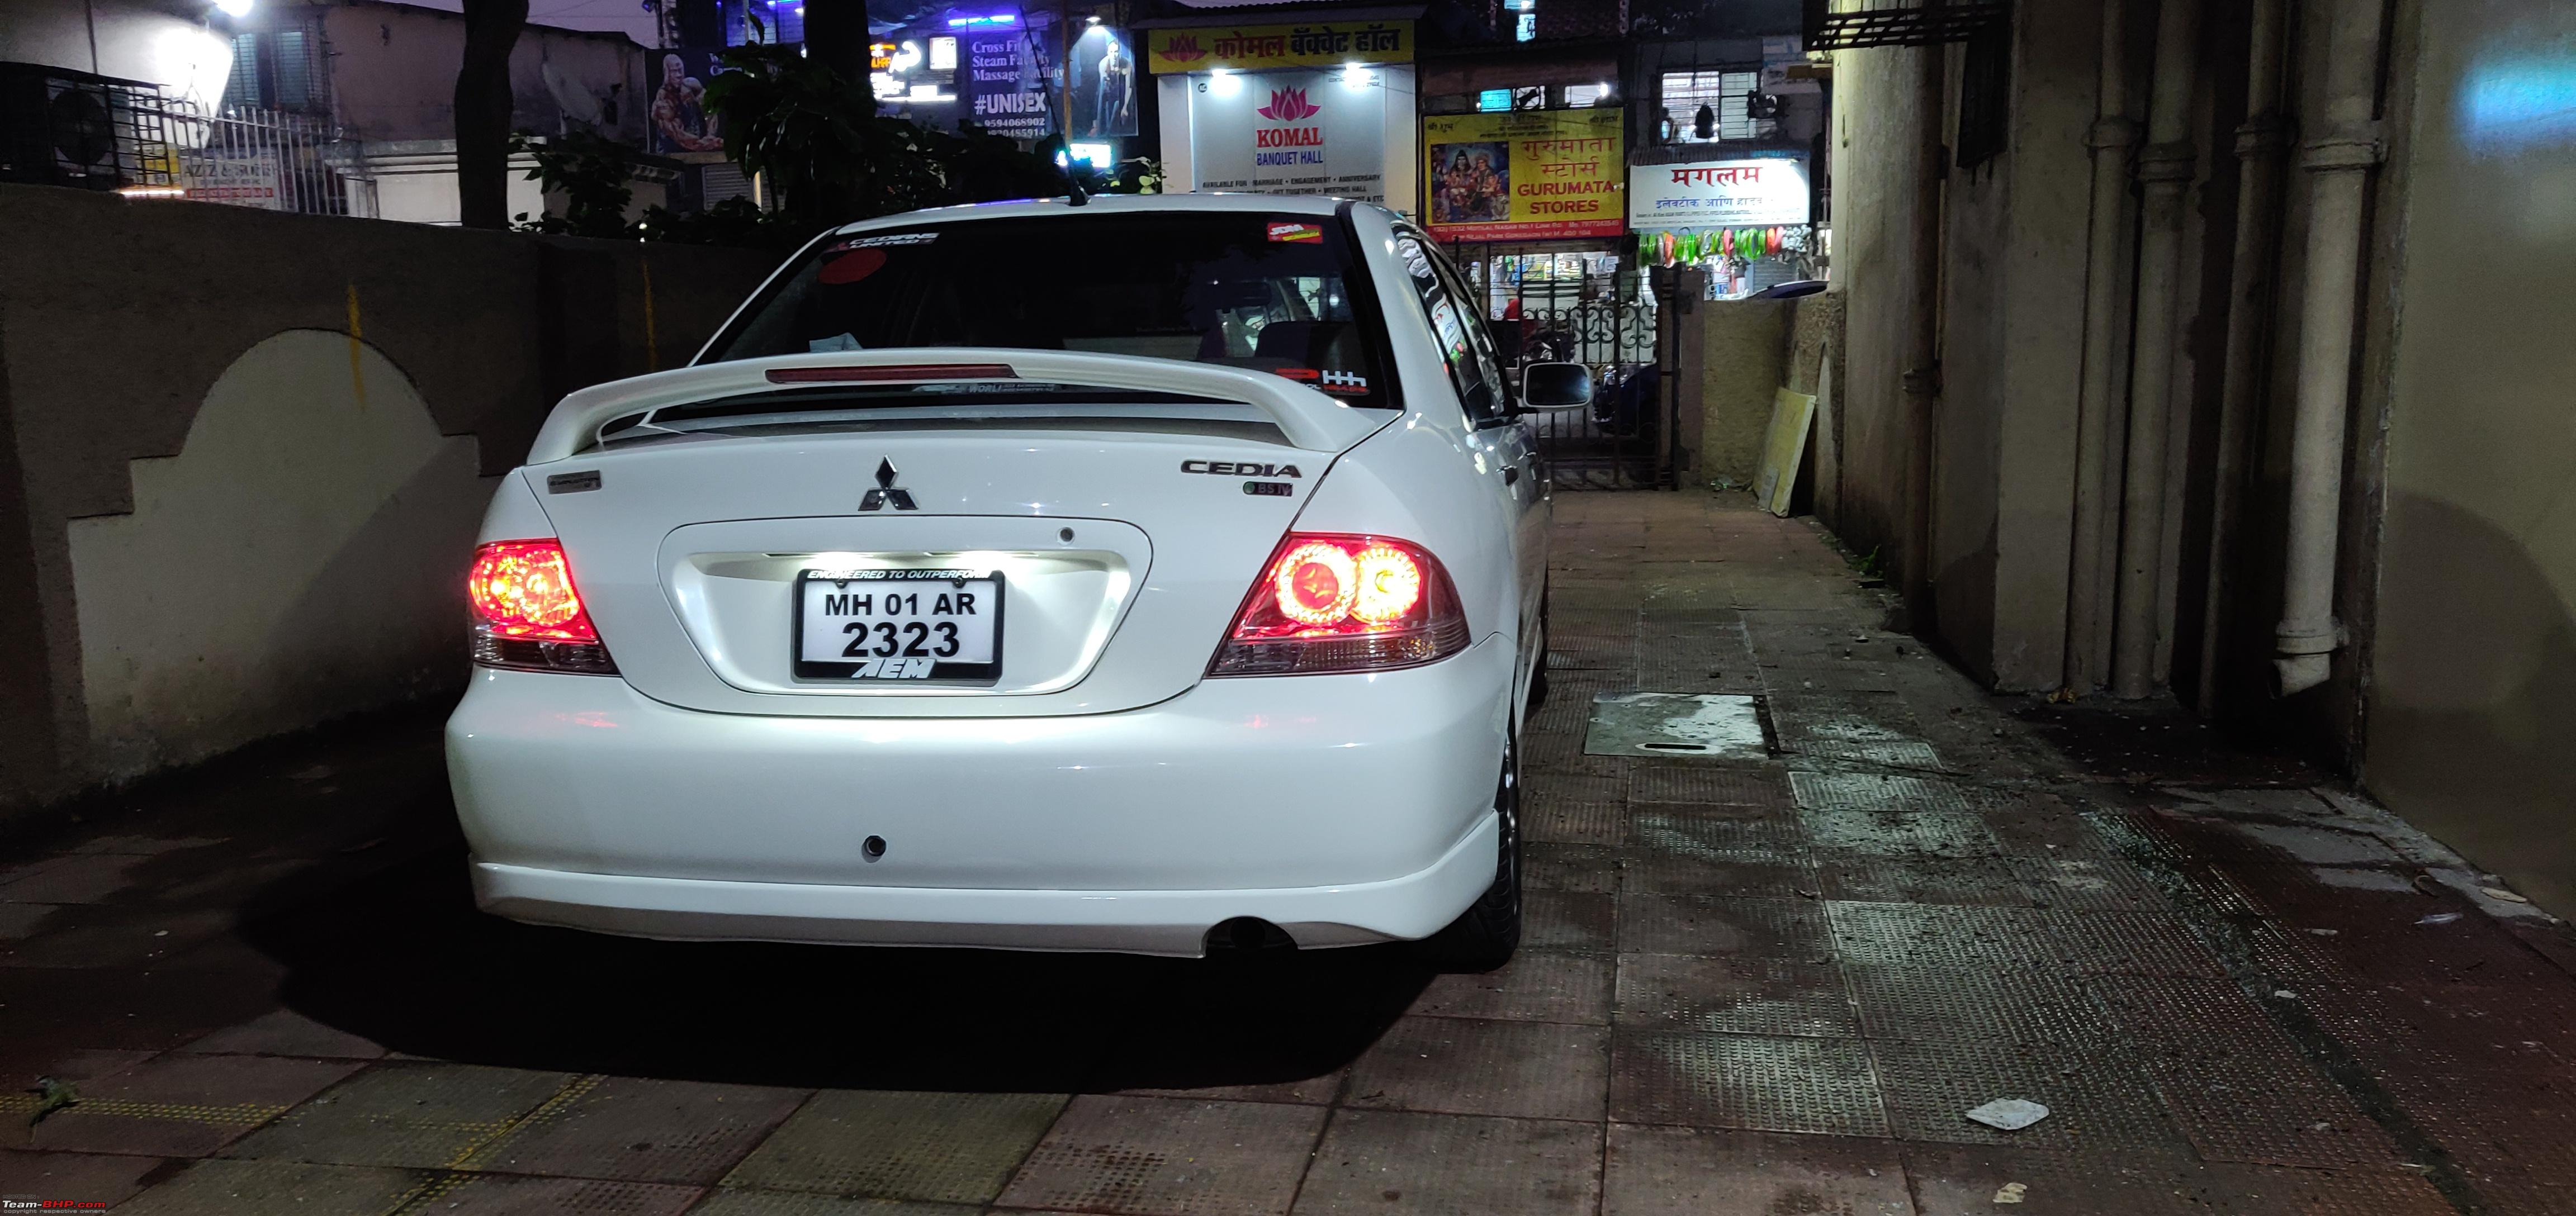
Here are some pictures after installing the spoiler.
Attached Thumbnails
Rejuvenating a Mitsubishi Cedia | Additional equipment, parts, maintenance & more-img20211124wa0015.jpg  

Rejuvenating a Mitsubishi Cedia | Additional equipment, parts, maintenance & more-img20211124wa0006.jpg  

Rejuvenating a Mitsubishi Cedia | Additional equipment, parts, maintenance & more-img20211124wa0012.jpg  

Rejuvenating a Mitsubishi Cedia | Additional equipment, parts, maintenance & more-img20211124wa0010.jpg  

Rejuvenating a Mitsubishi Cedia | Additional equipment, parts, maintenance & more-img20211124wa0011.jpg  

Rejuvenating a Mitsubishi Cedia | Additional equipment, parts, maintenance & more-img20211124wa0007.jpg  


Last edited by Jassy1313 : 11th May 2022 at 09:49.
Jassy1313 is offline   (8) Thanks
Old 11th May 2022, 10:18   #44
BHPian
 
Jassy1313's Avatar
 
Join Date: Feb 2007
Location: Mumbai
Posts: 340
Thanked: 858 Times
Re: Rejuvenating a Mitsubishi Cedia | Additional equipment, parts, maintenance & more

Time for the 2nd part of the conversion.

On 28th November My dad & I took the car to the local fabricator. I explained the job to him. This being the OEM bodykit, it had all the mounting points and bolts to fit it directly on the bumpers. The Bumpers of Sports Advance came with holes for the kit to fix. My bumpers didn't have those holes. So it was time to make some. We started with the process. We had to remove the rear bumper for the same. After a lot of test fittings and measurements, the Bodykit was in place.
Rejuvenating a Mitsubishi Cedia | Additional equipment, parts, maintenance & more-img_20211128_145115__01.jpg

[The mounting brackets of the front skirt were broken so we used china screw to fix it. We had no other option.]

Then the bumpers & bodykit were painted and later the entire car was polished.
Rejuvenating a Mitsubishi Cedia | Additional equipment, parts, maintenance & more-img_20211204_115238.jpg
Rejuvenating a Mitsubishi Cedia | Additional equipment, parts, maintenance & more-img_20211204_132332.jpg
Rejuvenating a Mitsubishi Cedia | Additional equipment, parts, maintenance & more-img_20211204_132527.jpg
Rejuvenating a Mitsubishi Cedia | Additional equipment, parts, maintenance & more-img_20211204_132827.jpg
Rejuvenating a Mitsubishi Cedia | Additional equipment, parts, maintenance & more-img_20211129_103835__01.jpg
Rejuvenating a Mitsubishi Cedia | Additional equipment, parts, maintenance & more-img_20211129_103821__01.jpg

Later the Ralliart Stickers and New numberplates were installed.
Rejuvenating a Mitsubishi Cedia | Additional equipment, parts, maintenance & more-img_20211204_161153__01.jpg
Rejuvenating a Mitsubishi Cedia | Additional equipment, parts, maintenance & more-img_20211204_161213.jpg

The Numberplate frame was imported from the US.
Rejuvenating a Mitsubishi Cedia | Additional equipment, parts, maintenance & more-img_20211218_182318.jpg

Last edited by Jassy1313 : 11th May 2022 at 10:21.
Jassy1313 is offline   (11) Thanks
Old 11th May 2022, 11:12   #45
BHPian
 
Jassy1313's Avatar
 
Join Date: Feb 2007
Location: Mumbai
Posts: 340
Thanked: 858 Times
Re: Rejuvenating a Mitsubishi Cedia | Additional equipment, parts, maintenance & more

Time for some pictures.
Attached Thumbnails
Rejuvenating a Mitsubishi Cedia | Additional equipment, parts, maintenance & more-psx_20220211_193504-1.jpg  

Rejuvenating a Mitsubishi Cedia | Additional equipment, parts, maintenance & more-img20211205wa0074.jpg  

Rejuvenating a Mitsubishi Cedia | Additional equipment, parts, maintenance & more-img_20220501_092905.jpg  

Rejuvenating a Mitsubishi Cedia | Additional equipment, parts, maintenance & more-img20220429wa0059.jpg  

Rejuvenating a Mitsubishi Cedia | Additional equipment, parts, maintenance & more-psx_20220211_192344.jpg  

Rejuvenating a Mitsubishi Cedia | Additional equipment, parts, maintenance & more-psx_20220211_193014.jpg  

Rejuvenating a Mitsubishi Cedia | Additional equipment, parts, maintenance & more-img_20211221_003301.jpg  

Rejuvenating a Mitsubishi Cedia | Additional equipment, parts, maintenance & more-screenshot_20211205221630.jpg  

Rejuvenating a Mitsubishi Cedia | Additional equipment, parts, maintenance & more-img_20211221_003528-1.jpg  

Rejuvenating a Mitsubishi Cedia | Additional equipment, parts, maintenance & more-psx_20211205_220805.jpg  

Rejuvenating a Mitsubishi Cedia | Additional equipment, parts, maintenance & more-psx_20220211_192928.jpg  

Rejuvenating a Mitsubishi Cedia | Additional equipment, parts, maintenance & more-img_20220501_093024.jpg  

Rejuvenating a Mitsubishi Cedia | Additional equipment, parts, maintenance & more-psx_20220211_192529.jpg  

Rejuvenating a Mitsubishi Cedia | Additional equipment, parts, maintenance & more-img_20211205_130954__01.jpg  

Rejuvenating a Mitsubishi Cedia | Additional equipment, parts, maintenance & more-img_20211221_003420.jpg  


Last edited by Jassy1313 : 11th May 2022 at 11:14.
Jassy1313 is offline   (27) Thanks
Reply

Most Viewed


Copyright ©2000 - 2024, Team-BHP.com
Proudly powered by E2E Networks