News
DIY: Installed a dual daschcam on my Mahindra Scorpio
The rear camera wiring was were the actual effort went in.
BHPian that_sedate_guy recently shared this with other enthusiasts.
So, without a doubt, my Scorpio was due for a dashcam. Driving in central and eastern Bangalore mandated the installation of one at the earliest. I started searching hither and thither for a suitable model. My primary requirement was that it had to be a dual channel.
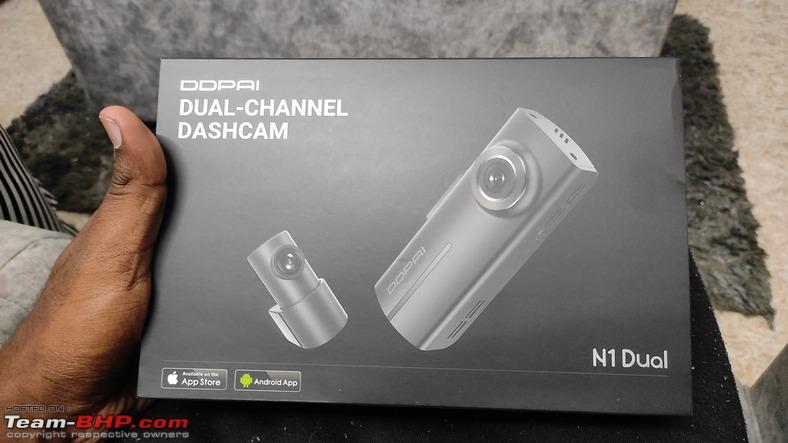
I did some digging and figured out that Nexdigitron was the brand to go to. 70mai was a stretch on my limited budget so I looked at options from DDPAI.
The N1 Dual seemed to tick my boxes so I went ahead and ordered it from the website itself and it arrived quickly and uneventfully in two days.
Quite a neat looking box I must say
Nothing much about the packaging

Here's where things take a different turn. Now, there are tons of dashcam installation threads on TBHP and almost every car is covered. The installation process is also fairly simple and in most cases it is just about running the wires directly to wherever needed. I went through a bunch of threads on TBHP and for added measure, I checked out cars with dashcams IRL. I noticed that wires were usually run along a straightforward path in the interior.
Which was what I did NOT want to do. I wanted each and every inch of the wire to be out of the way completely such that the Dashcam would feel and look like a part of the car installed at the factory.
I decided that I would do a completely concealed wiring using the frame of the car as the routing duct. As you can figure out, this took way longer than most installations but was worth it in the end. Stay tuned for that!
Setting up the wiring for the front camera:
Starting with the USB power socket, I routed it along the gear lever cover trim. As luck would have it, the cable fit perfectly snug in the gap between the gear lever dust cover and the plastic trim.

From here, the wire was routed underneath the steering column and then along the dashboard side panel.

After that, I routed the wire beneath the dashboard trim and took it out at the base of the A-Pillar. This took quite some effort since I don't exactly have the slimmest fingers but I managed it.

From an access hole at the top of the A-Pillar, I passed a stiff wire all the way down to the base and used it to route the cable inside the pillar and out of the hole at the top.

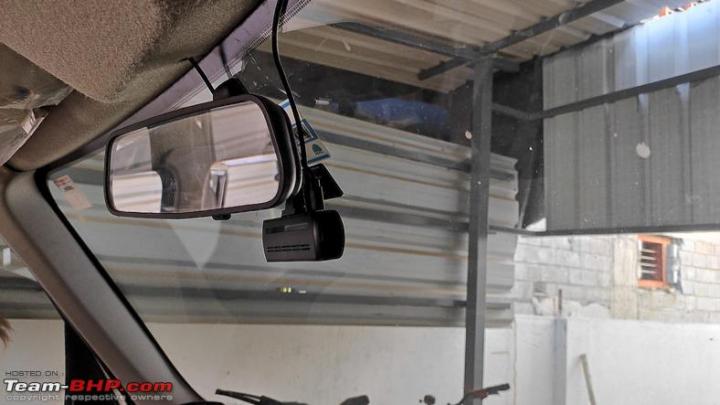
From the A-Pillar, it was time to thread the cable along the windshield under the roof lining. A very neat detail that I absolutely loved was the small hole that had been provided on the roof lining just above the IRVM. The hole made the wiring look like a factory fit.

And just like that the front camera wiring was done! Simple eh? The rear camera wiring was were the actual effort went in.
Rear camera installation:
With the front camera cables routed, I started work on the long rear camera cable and spent a good hour and a half trying to thread a stiff helper wire from the A-Pillar all the way back to the D-Pillar before I realised that the frame was not a continuous duct but had structural elements and damping pads in-between.
So I decided to take things one at a time and wired the cable in from the A-Pillar, through the frame and out at the B-Pillar.

This is where I met the first major obstacle because of the insulation pads and frame ribs completely blocking the passage through to the C-Pillar. I had to simply keep the wire stuffed underneath the roof lining for the space between the B and C pillars.

Even after figuring out what to do, it was not a quick job because,
1. I had to remove the pillar panels which meant taking out the seatbelts
2. I was dealing with 8 year-old plastic panel fasteners which meant I had to be really careful
3. I had to be careful with the panels themselves since they had the tendency to get dented for each and every touch.
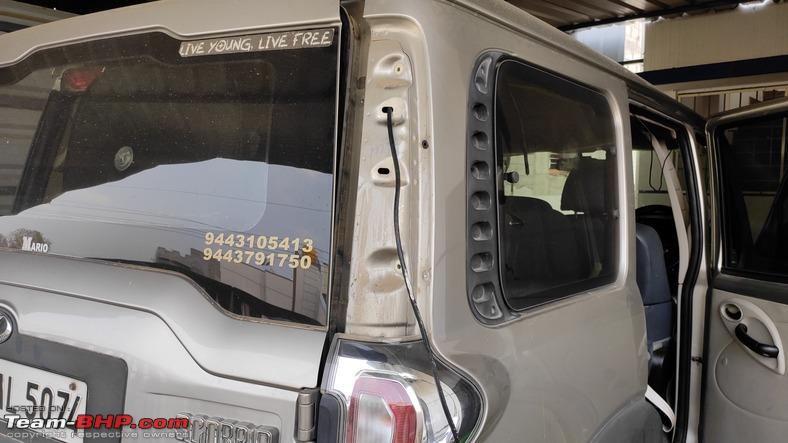
However, the below image shows exactly the result I was expecting - not a trace of wires anywhere!

Once the B to C-Pillar cable routing was done, I put a pause on the interiors and went outside. I dismantled the black plastic piece above the tail lamps and found two access holes there on the frame which I deemed would be helpful. Mind you, I had no idea these holes existed so it was just pure experimentation, dismantling one thing, assembling something else and so on. I pushed a wire insertion helper in through one of the holes and pushed it all the way in to another access window on the frame above the C-Pillar. Using this, I pulled the wire to the D-Pillar. Finally!
Here is where I ran into the next situation. I thought I could simply use the second access hole to route the cable from the D-Pillar all the way down to the wiring harness of the door.

However, try as I might, I could not get the wiring helper to go through. Using my phone camera, I clicked photos of the inside of the frame and realised that the frame had not one but two reinforcing ribs. Not that I was complaining but they certainly had made my job harder now. I had to do what I didn't want to do. I routed it back through to the interior which was again a pain because at that area, there was very little wiggle room to thread the cable through.

Continue reading BHPian that_sedate_guy's DIY report for more insights and information.
Find Car News
Just News


About Us


Buy & Sell
USED CARS