News
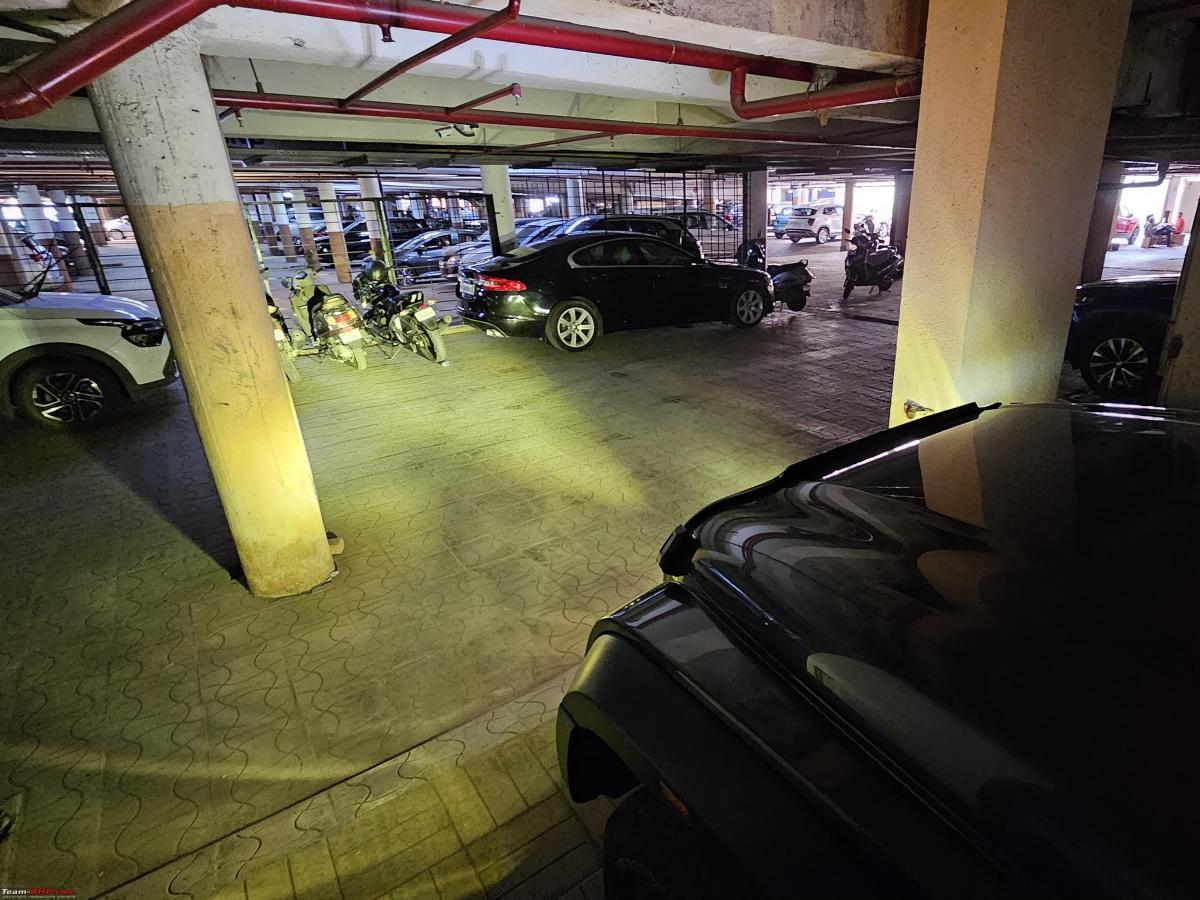
Ending my year-long search for yellow aftermarket fog lamps for my Thar
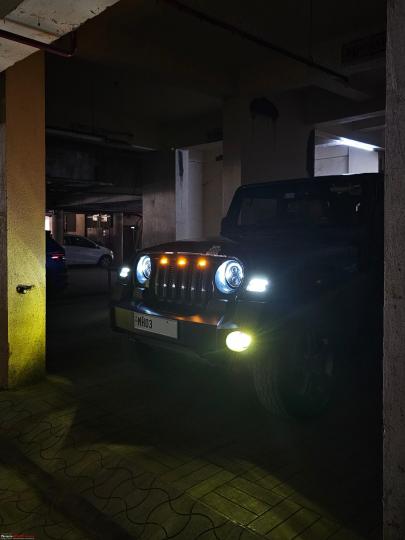
The OEM replacement arrived in 3 days and was installed on my SUV quickly.
BHPian Nair.V8 recently shared this with other enthusiasts.
My year-long search for a suitable OEM replacement ‘yellow’ fog lamp ended recently after I discovered this Indian auto light manufacturer, called Vaishnu. The company has over 50 years of experience in the automotive lighting & electrical component industry; they offer a wide variety of lights & wiring harnesses for motorcycles & few 4-wheelers. After seeing quite a few positive reviews online, I decided to take a plunge and try their universal 3-inch fog lamp.
The product details (as mentioned on their website) are as follows:
- MODEL: 3 Inch Round Fog lamps
- INCLUSIONS: 2 Units of Matt Black Fog Lights + H8/ H16 Wiring Harness with Switch
- FITMENT: H8/ H11
- WATTAGE/ PAIR: 70 Watts (35 Watts Per light)
- RAW LUMENS: 9200 Lm/ Set (4600 Lm/ Light)
- POWER CONSUMPTION: 5.3 Amps (+-5%)/ Pair
- 1 LUX DISTANCE: 350 Metres
- IP RATING: IP67
- LED SOURCE: Bridgelux USA
- OPERATING LIFE: 50,000 Hrs | OPERATING TEMPERATURES: -40 Degrees C ~ +80 Degrees C
- WARRANTY: 1 Year
- HOUSING COLOR: Matt Black
- GLASS: Yellow
- COLOR TEMPERATURE: 3300k
I went for their combo kit that includes these lights & H8/H16 wiring harness. The order was placed directly on their website. The shipment arrived at my location in Mumbai in 3 days.


Check out BHPian comments for more insights and information.
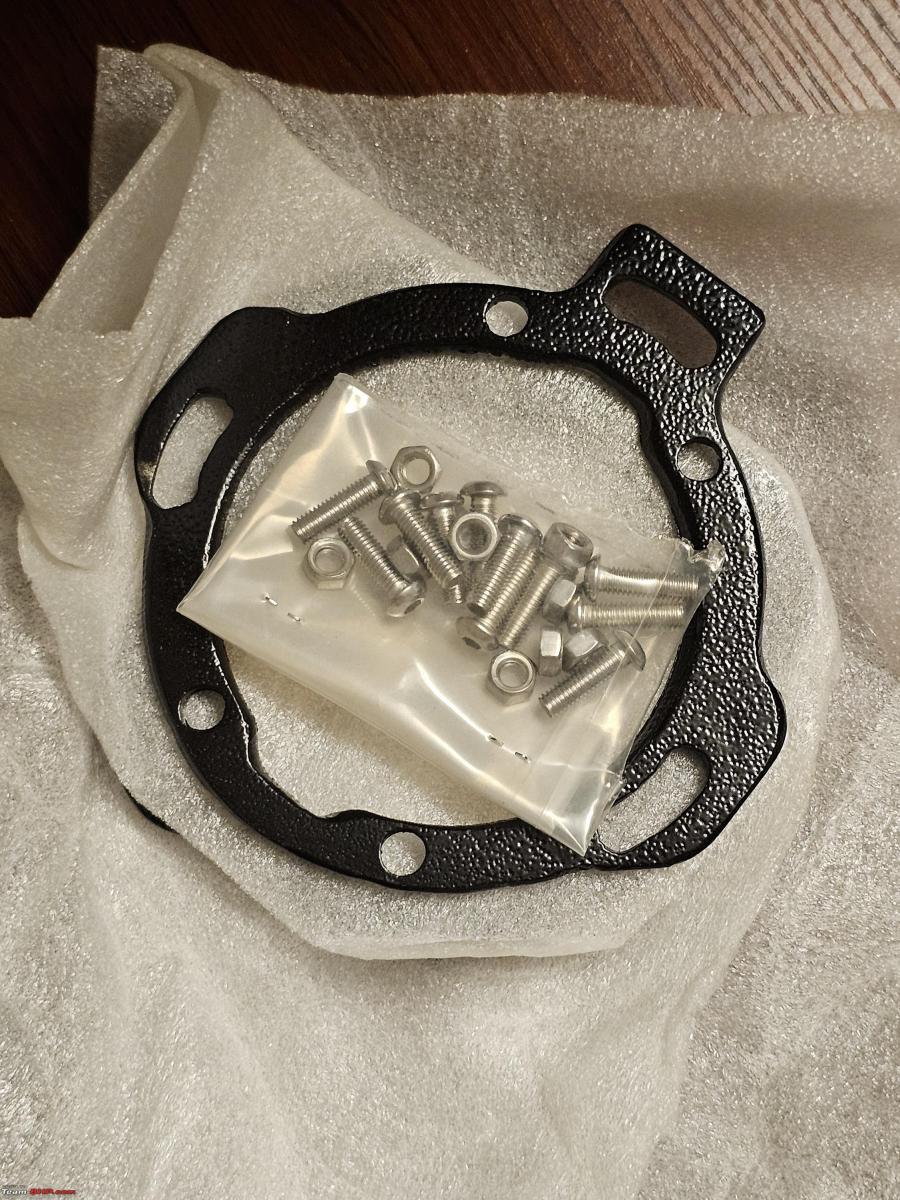
News
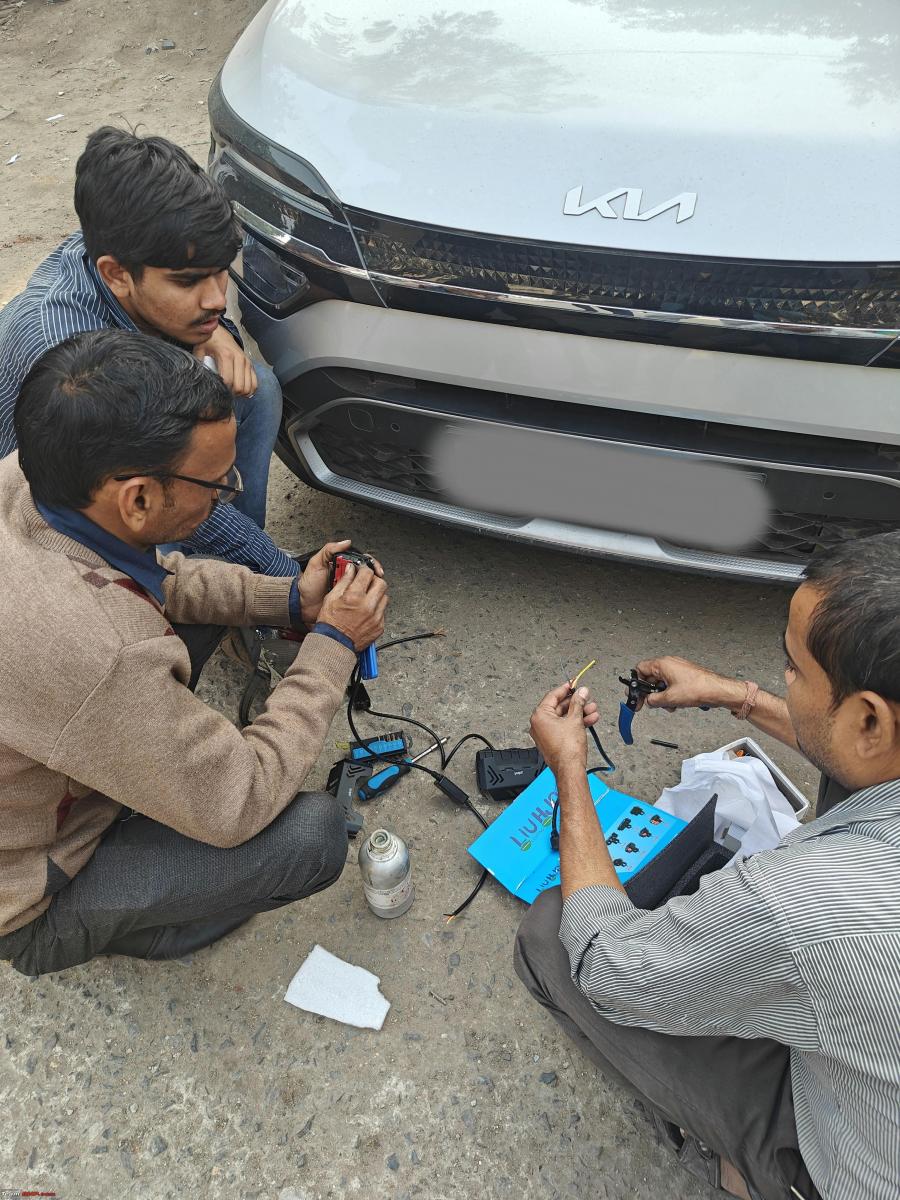
Got HJG Future Eye 4 fog lamps for my Kia Carens: Installation & costs
.jpg)
The biggest advantage of selecting this was their size - which fits perfectly in the slot/grill
BHPian ptaneja recently shared this with other enthusiasts.
The only thing I really missed in this variant were functional fog lamps. Even the top-spec variant has useless fog lamps in terms of throw.
After a lot of research, finalized HJG Future Eye 4 fog lamps. The biggest advantage of selecting this was their size - which fits perfectly in the slot/grill without any cutting or making holes in it. Slide it in, use 3M double tape and you are done.
Also, the same set of lights has dual colors - white and yellow.
Purchased it via Amit - 8800878716 ( he has a YouTube channel - RideWithResponsibility ) - he ships/couriers pan India.
Cost - 3400
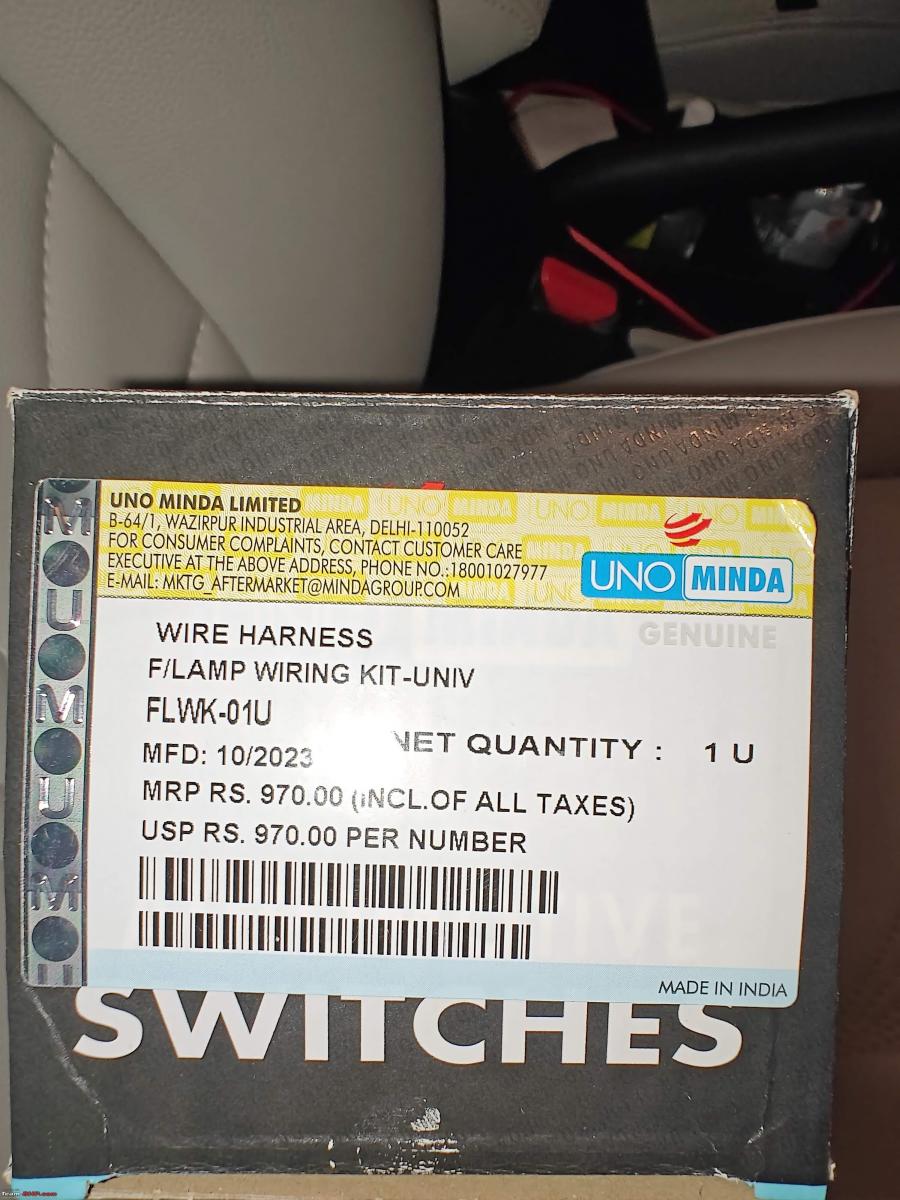
Purchased Minda wiring harness and 3 way switch from Karol Bagh, Delhi.
Wiring Harness Cost - 800
Switch - 200
Installation - 300 ( including extra wire )
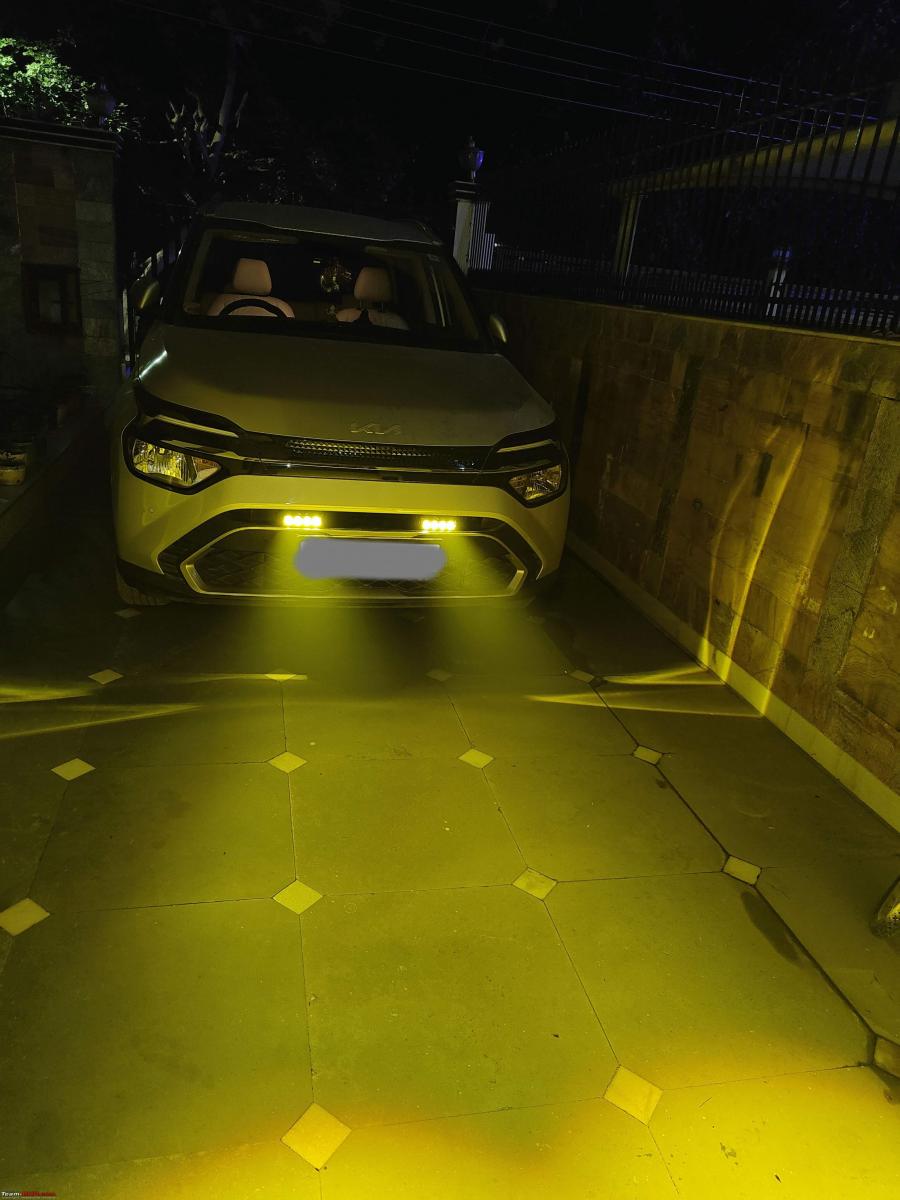
I have not driven it extensively at night, but so far on a stationary car, just love the throw and road-hugging visibility.
Looks Post Installation -

Pre/Post Installation -

Wiring Harness -

Switch Installation -
Wire runs parallel to the gear central console.
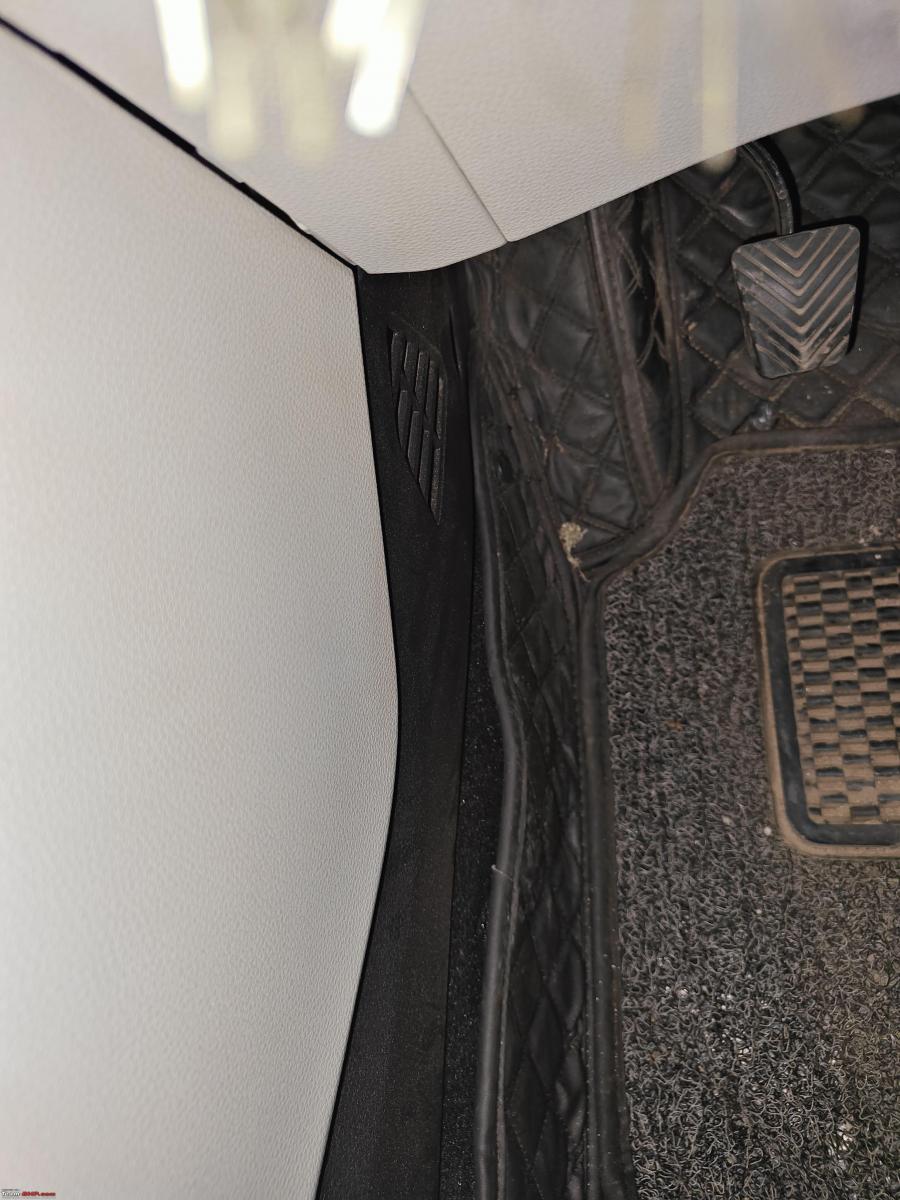
I have not attached a switch or drilled hole anywhere. It's stuck between the seat and the central console.

Light Throw -

Check out BHPian comments for more insights and information.
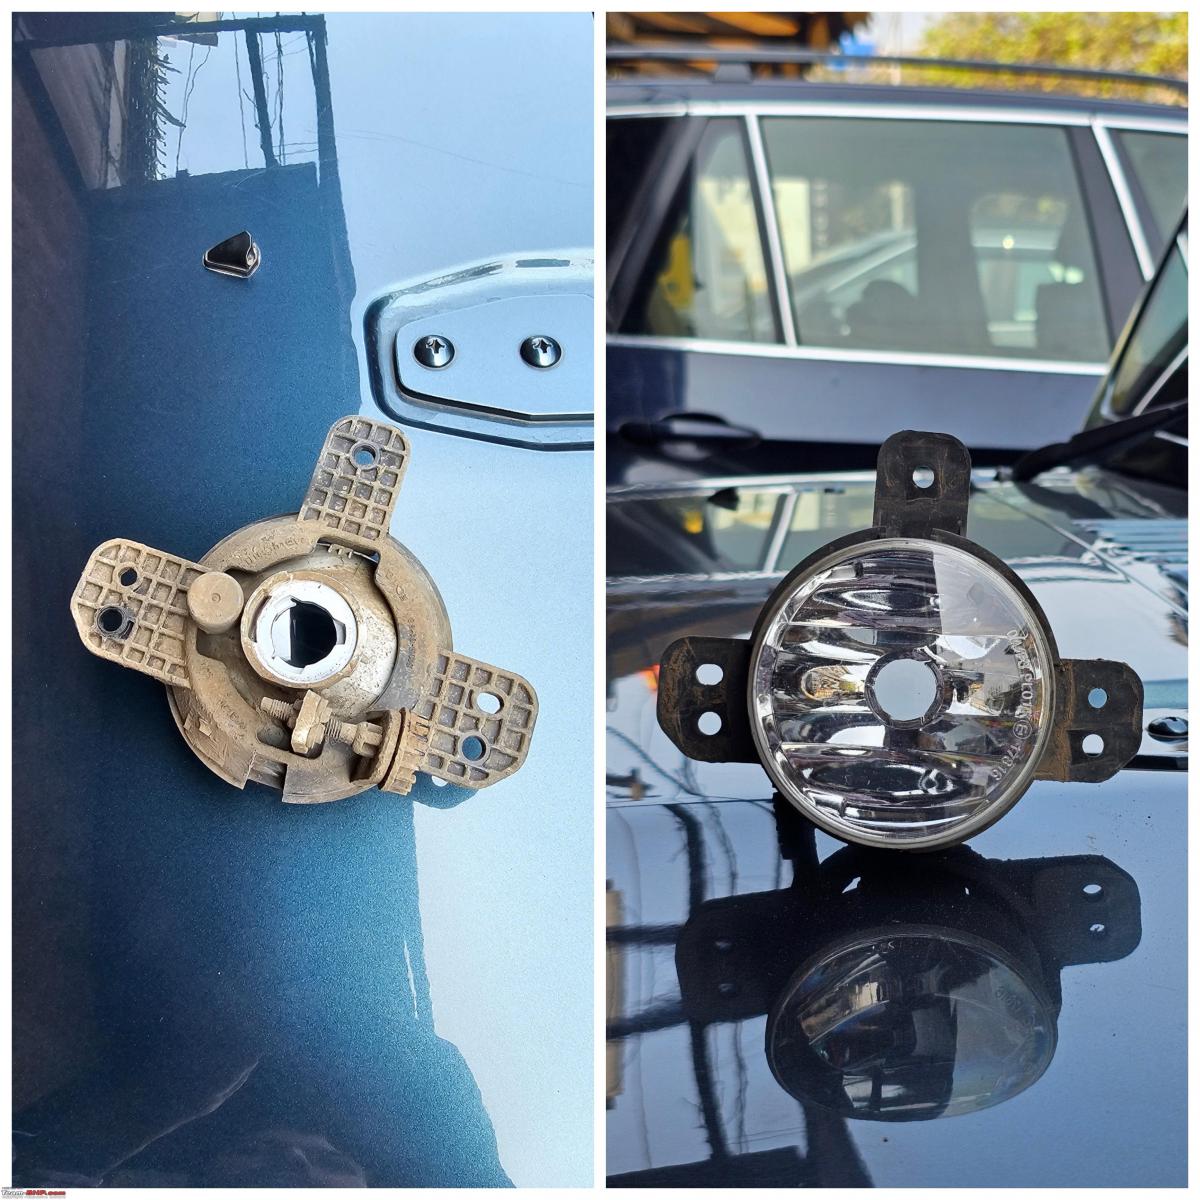
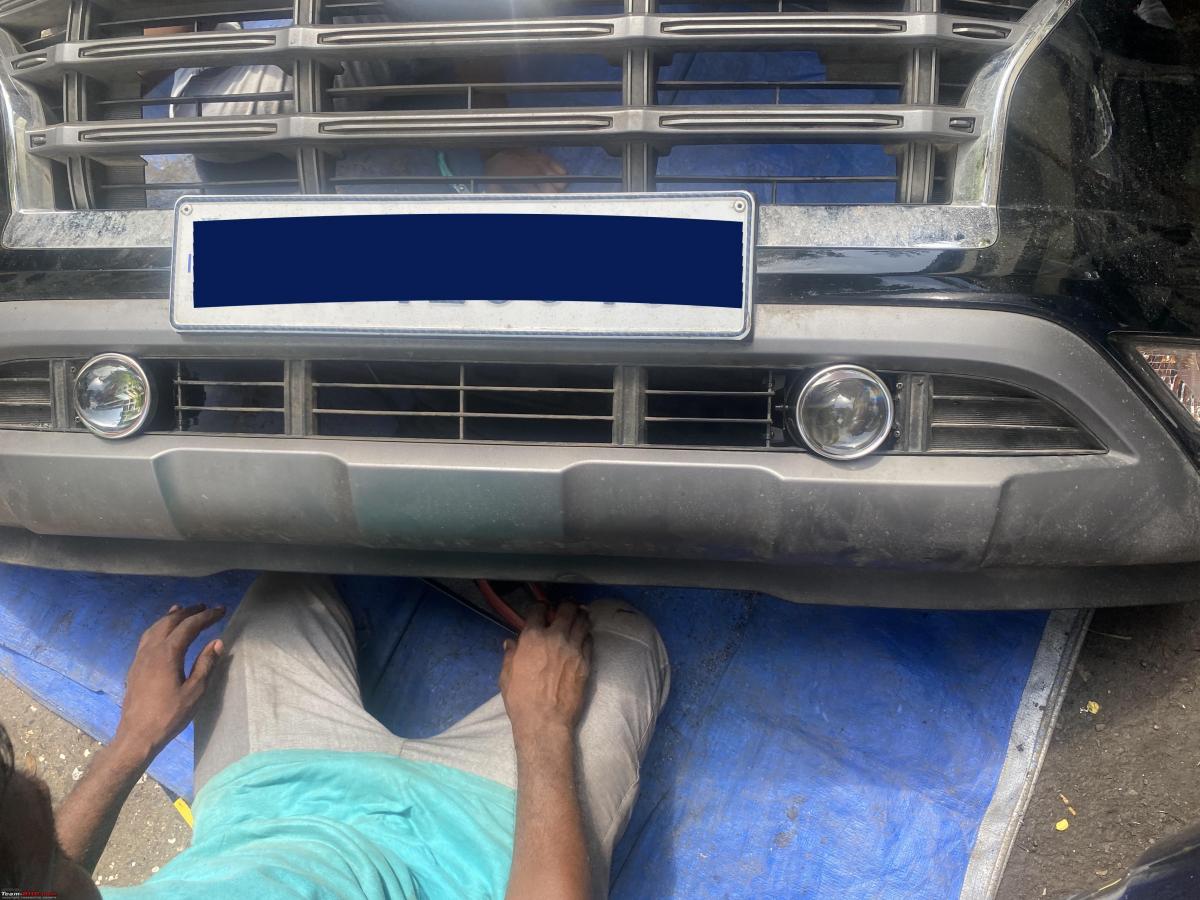
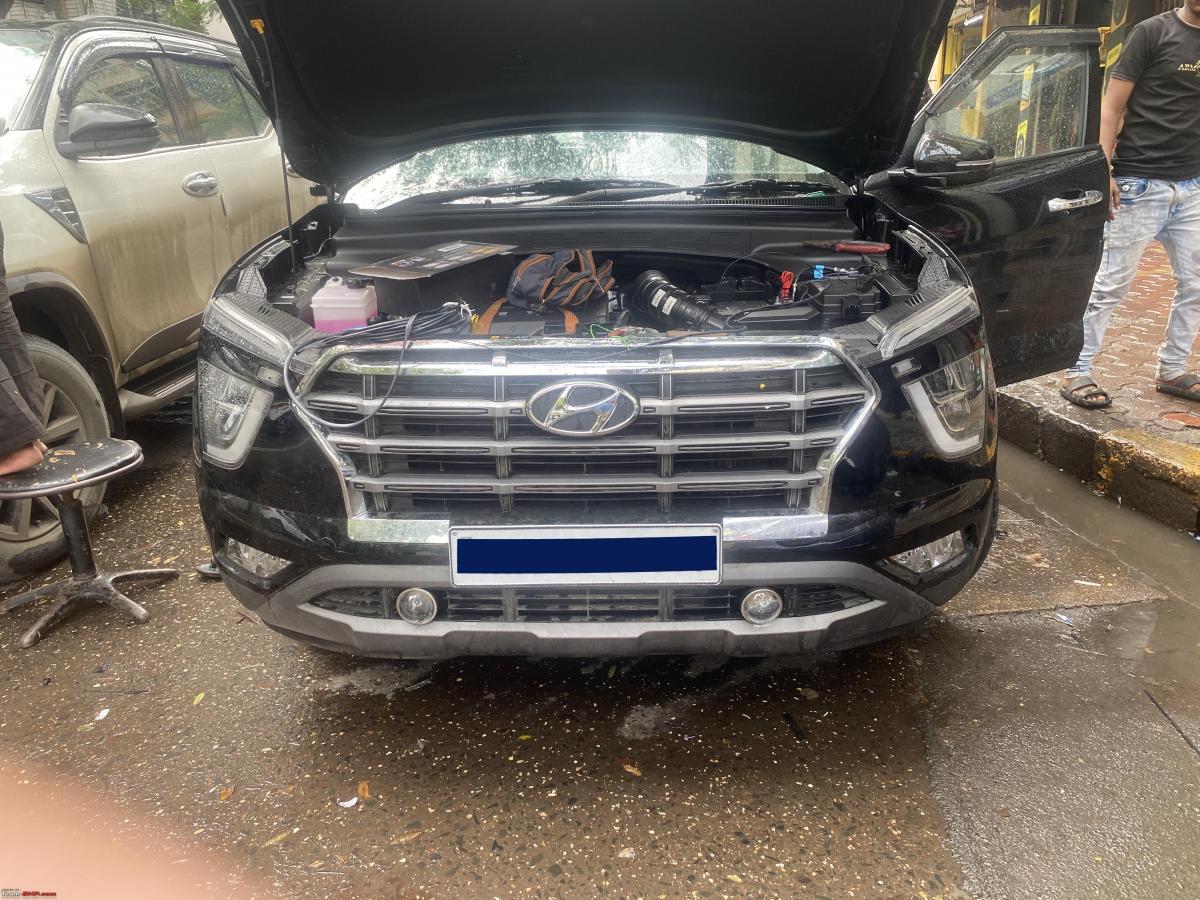
News
Installed Bi-LED 3 colour projector fog lights on my Hyundai Creta

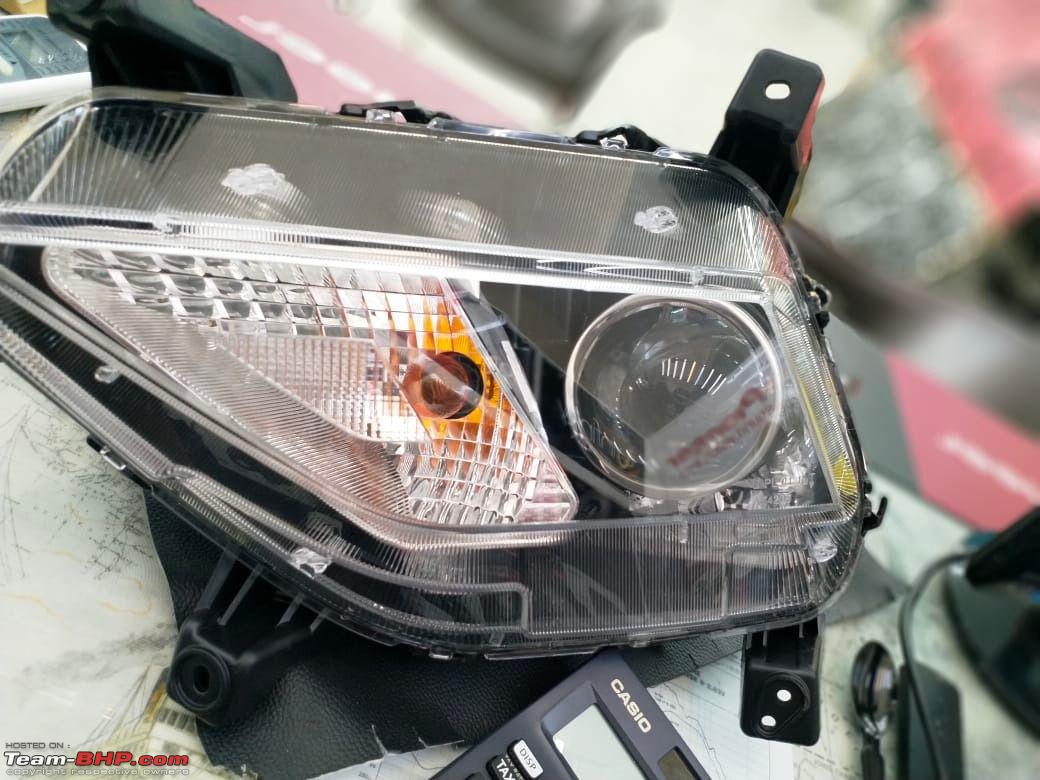
The taking apart of the front bumper by these installers isn't a very happy scene.
BHPian Roark recently shared this with other enthusiasts.
I recently installed the IPH Bi-Led 3 Colour Projector Fog Lights.
If I understand it correctly, there are 2 ways one can install a Projector Fog Lights in the new Creta. When I had a long discussion with Amit Sawhney from Blaze he send me the below photo of how a projector Fog Light could be integrated in the Fog Light Housing:
But then that required a lot of running around on my part to get the install done. Also, was not too sure, if that would have kept the warranty intact. If I am not mistaken, OEM halogen bulb and the reflector housing would have to be taken apart and there would have been some cutting and chopping of the Fog Light Housing involved. I just wasn't ready for that.
Not to mention the person Amit Sawhney had indicated in Mumbai was located at Mira Road and he just wasn't willing to quote a figure for the job.
So thought of going for the simple solution of just replacing the Fog Halogen Bulbs with DHC F75 LED Headlamps - 75W. Got the pair for 5,900/- all inclusive. Perhaps 150W is a bit of an overkill but then as of yet not tested the lights out - just installed it in the evening. So lets see. Hopefully it would brighten up the road at nights!!
Next, I wasn't too sure, now how to go about installing the IPH Projector Fog Lights. Post a lot of deliberation and discussion internally (within myself and with the missus) thought of going ahead and doing it in a traditional way. Cutting out a recess at the bottom of the front bumper and setting up a completely separate wiring and a button inside - so as to not mess around with the OEM wiring and install.
Boy, but was it difficult to see a brand new car being taken apart in this way and then summarily cut and mutilated. The taking apart of the front bumper by these installers isn't a very happy scene. The pulling, tugging and yanking of the front bumper and the heart was pounding away. I just felt that one wrong tug here or a strong pull there and the entire front bumper might just deform if not tear and then not fit properly. Thankfully nothing of that sort happened (though the front bumper has been attached well and seemingly there are no gaps within the panels but then post a long drive only will get to know if the panels are attached perfectly)
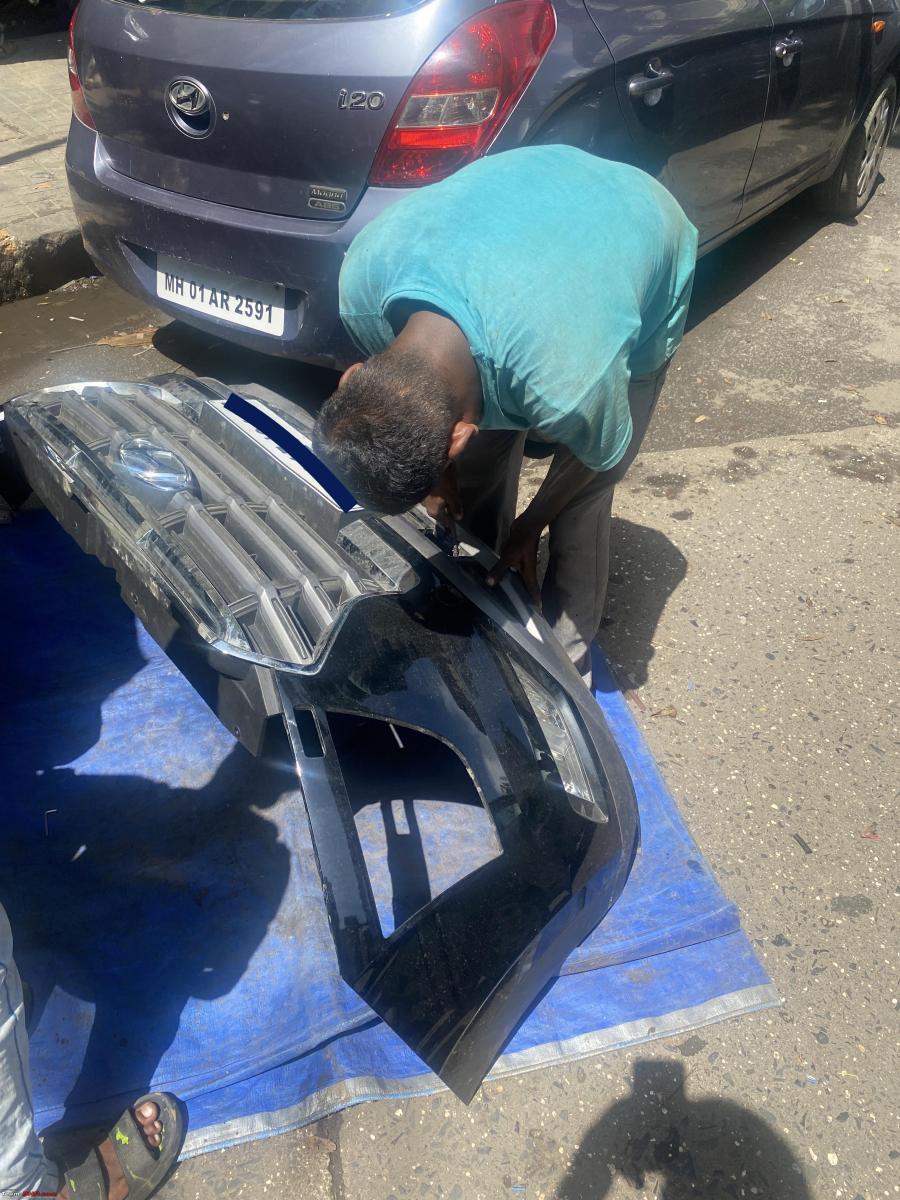
The installer then took out a round file and then a flat file and went about creating a recess - cutting, chopping, scratching away to glory. Whew! Seriously, it's a new car - not even a month old:
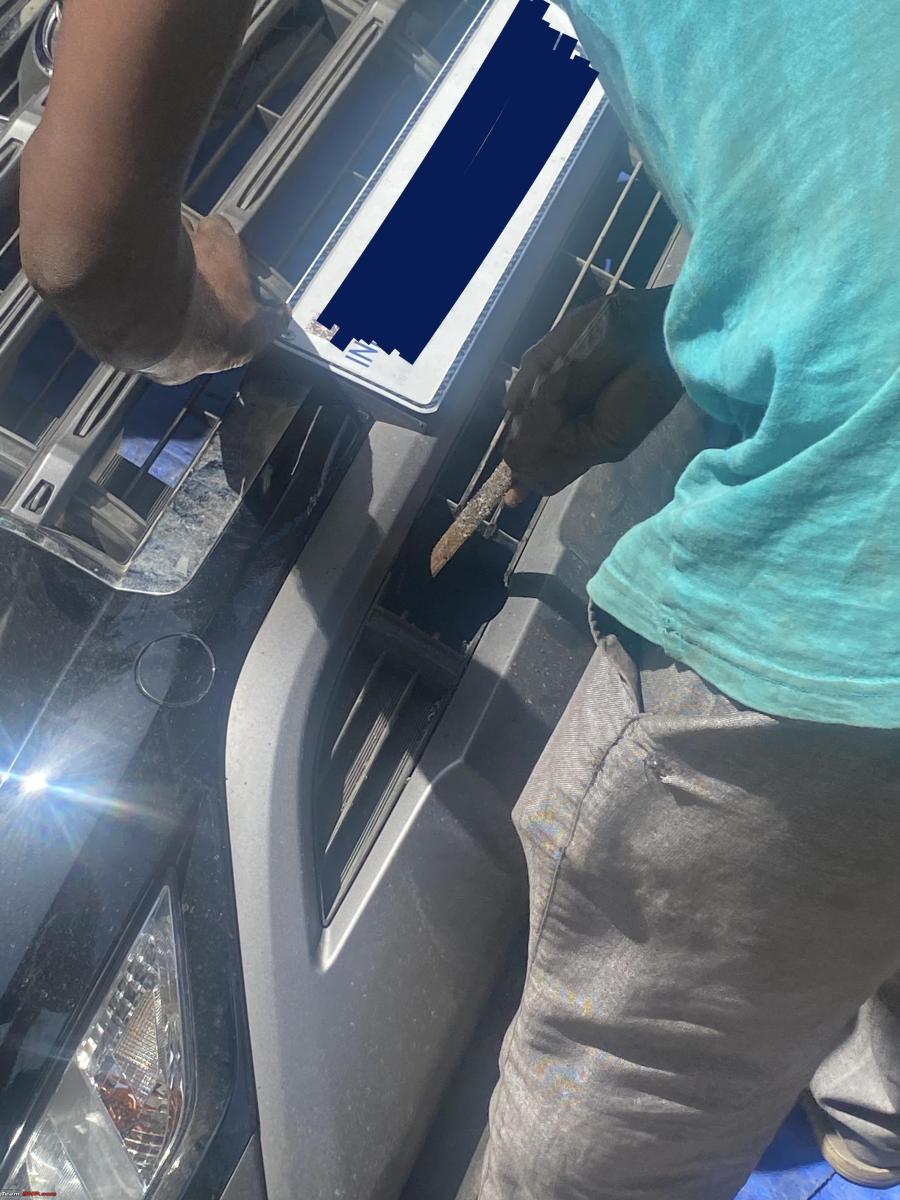
Anyways, post cutting the recess, he fitted the two projectors neatly in to the holes cut - and fastened then at one end by a pair of screws and the other end by mechanics-and-installers-fastening-weapon-of-choice i.e. zip ties:

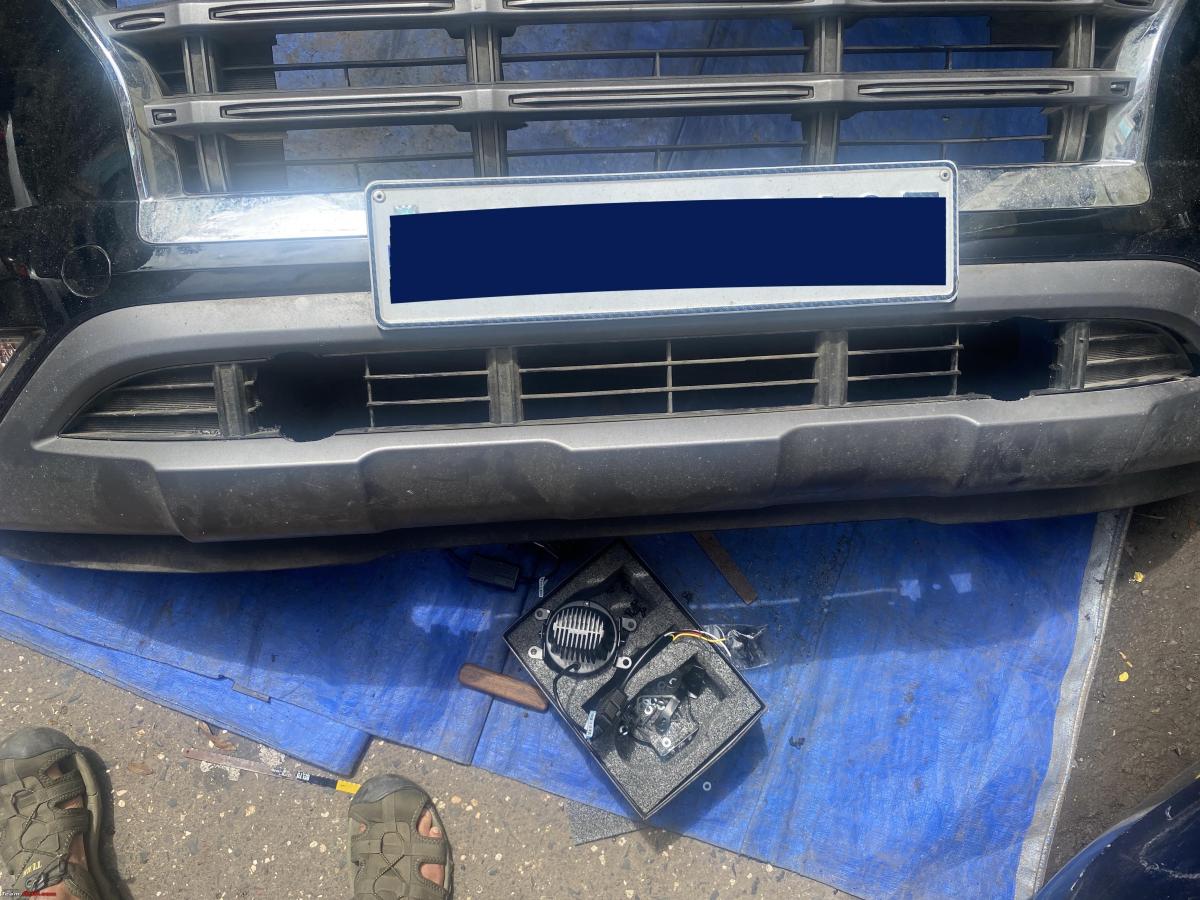
Well, to be honest, the projectors were quite sturdily in place and didn't seem like they would move. The wiring etc and the button inside (simple tick tock one) was quite well done. This entire install costed me about 1,700/- or so
So this is how the install looks like. Just had it done in the evening, so am not too sure how the results look like or how the throw/quality of the lights are. Also, will have to check the levelling too. All in good time over the next month or so:
Check out BHPian comments for more insights and information.
News
DIY: Tata Nexon gets LED fog lamps installed without cutting any wires

In the top model, you get halogen fog lamps but I was looking for a fancier option.
BHPian KarDIY recently shared this with other enthusiasts.
I own a Tata Nexon XM(S). In this model, you don’t get fog lamps which are necessary for winter, especially in Delhi NCR. Moreover, it helps in better lighting the road while driving and gives better visibility. Now, I had a few options while choosing which type of fog lamps to choose. In the top model, you get halogen fog lamps but I was looking for a fancier option. I had the option to either choose projector fog lamps or LED fog lamps. After some thinking and research, I settled on LED fog lamps. In this post, I will show you how you can install fog lamps in your Nexon without cutting any wire. I installed DLAA LED Fog Lamps. The part number is 542754400123.
If you are someone who understands better by watching a video you can watch this video.
Tools Required
- Screw Driver Set
- Pry Tools
- Wire Set
- Fuse Tap
- Switch
- Front Fog Lamps
- Knife/Blade
- Filer
- Switch
Note: In the beginning, I first removed the whole front bumper to get proper access to the fog lamps' bezel. But later on, I realized it is much better to just take the bezel out using pry tools. You can still go and remove the bumper to access the bezel but I would suggest simply removing the bezel as it is more convenient.
In the procedure, I will use the same bezel-removing approach but if you choose the other option you can use the given link to check the other post where I have shown how to remove the front bumper in detail.
Wiring Diagram

Procedure
1. Insert the pry tool in the bezel and carefully move it along the edge to make sure all of the locks get unlocked and then you can pull it out.
Note: Don’t use screwdrivers, use pry tools only. Using pry tools might scratch the bumper.


2. Take a hot knife and cut the fog lamp portion along the edges. Push it a little.
Note: Using a filer, smooth the rough edges after the cutting.

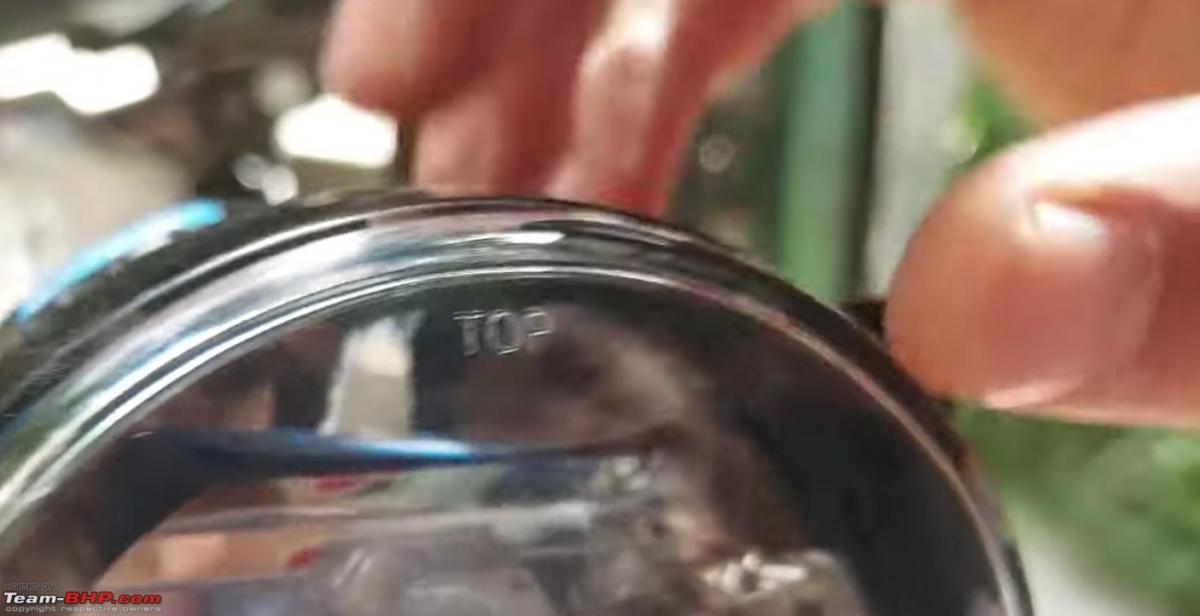
3. Take out the lamps and install mounting on them. The mounts will have L1 and L2 mentioned to help you mount the correct one. You can also see if the holes in the mounting bracket and lamp match or not.
4. Take a washer, put it on the lamp and install the mounting bracket on it using two screws.
5. Put the U-clip on the housing area of the bumper.

6. Put the lamp on the housing and use screws to mount it there.
Note: The lamp has the top mentioned on it so you know which side is the top.
7. Put the bezel back.
Note: Now, since it is not company-fitted, there will be some gap between the bezel and the lamp. But it would be fine, no need to panic.
8. Two wires with connectors will be connected to the fog lamps. Use cable ties to secure their position.
9. Open the panel under the glove box by opening the 5 screws on it. This will give you access to the firewall grommet.
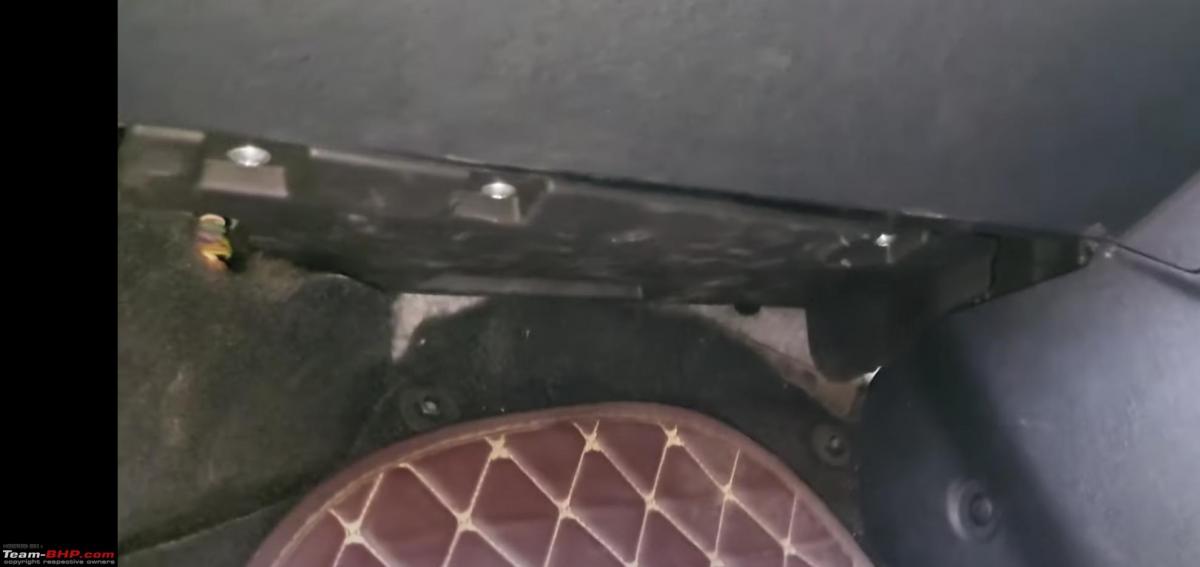

10. Using a firewall grommet, push the wire with the switch inside the car on the passenger side.

11. Mount your relay somewhere nearby in the car. I mounted it here.

12. One wire with the fuse on it will be connected to the positive terminal of the battery.
13. Black one would be connected to the negative terminal of the battery.
14. The wire with a red scotch lock will be connected to the parking lamp wire of the headlamp socket. This will be the white wire. First, remove the socket with the help of a pry tool, pull it out and then connect the wires.
15. Open the fuse box under the bonnet. Now, I have the diesel variant of Nexon, so I plugged in the fuse tap in the 20A Front Wiper Motor fuse. If you have a petrol Nexon you need to plug it into the 10 A Reverse Lamp fuse.
Note: Use the diagram on the inside of the fuse box cover to find the correct fuse.
16, Using the pry tools, remove the driver-side coin box.
17. Using a drill machine, make a hole in it according to the size of the switch.

18. Push the button from the inside of the box.
19. Connect the negative wire to the golden pin.
20. Connect the blue wire to the middle pin.
21. Connect the red wire to the last pin.
22. Put the driver-side coin box back again.
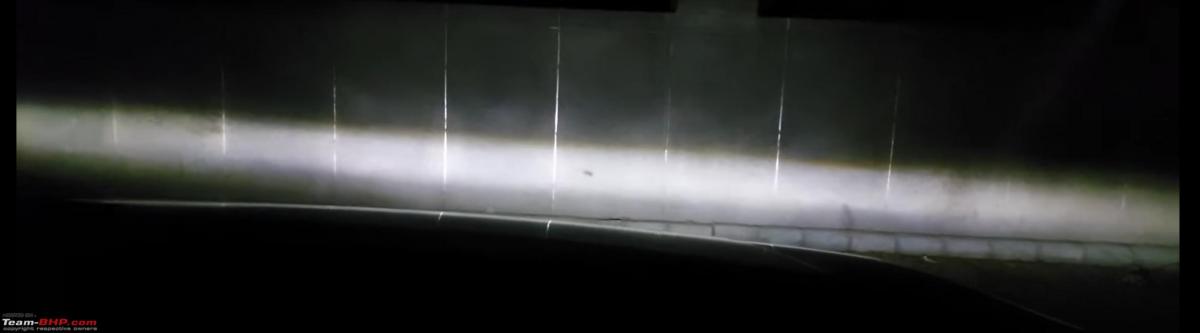
With this, your fog lamps have been installed.
This is how the beam looks. It’s bright and like a continuous bar from side to side.
Check out BHPian comments for more insights and information.
News
Fog lamp installation on my Maruti XL6 for better visibility
The immediate surroundings and road edges are so well illuminated that one can easily carry speeds confidently.
BHPian Leoshashi recently shared this with other enthusiasts.
Increasing the Visibility: Part 3-Fog Lamps
I don't have much driving experience in fogs, and recently when I encountered it for perhaps the fifth time in my life, I was shaken. High Beam was creating a white wall in front of me (tried it out of desperation), the low beam was slightly better, but the stock fog lamp was absolutely useless. No difference if it was turned on or off!
A friend who owns an Ertiga 1.5D was driving along, and he has IPH Projector fogs installed with 4300K HIDs. While his setup absolutely rocks in normal conditions, it struggled badly in that fog. Just two beams were visible, but even he wasn't able to locate road/divider edges properly. It was so bad that I nearly crashed into a divider despite being at 20kmph speed. I needed something which spreads the light lower on the road rather than focusing it.
I was actually eyeing this projector setup, but after my recent experience, I was shocked. Started exploring some old school options, and swapping LED stock units with Reflector based units was an option high on my list.
Now almost everyone I asked opined that stock halogen fog lamps were useless. Also during casual browsing on Boodmo, I noticed that the fogs by Valeo had quite a dense reflector design. Hoping that it would translate to better spread, I placed an order. Link: Valeo Fog Lamp

My guess was right, and the Valeo fogs had awesome quality and the reflector design was also quite rich.


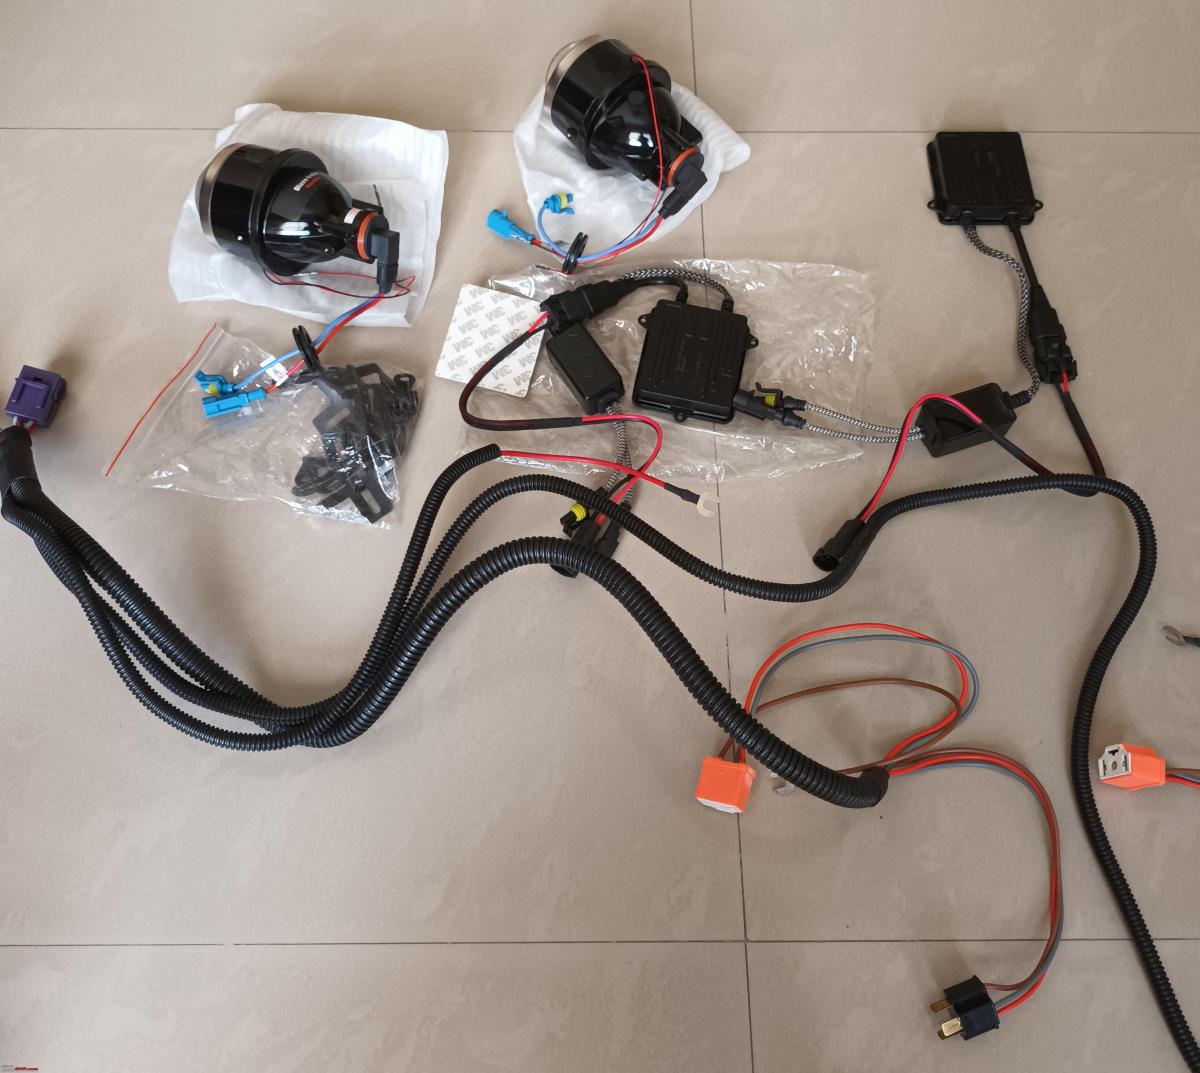
DBHPian ProcRJ was quite worried if we'll need to remove the bumper to swap fog units/bulbs. XL6 has lots of space and one can easily reach the 3 screws on each side to remove the unit. Well, this pic is for you buddy:

Bulb swapping is a 10-second affair:

Stock LED fog vs Valeo:

Even with Osram 19W H16s which came with the Valeo Fogs, it was evident that light spread of this unit was way superior:
With the Fog lamp shortlisted, it was now time to test different bulbs. I tried Philips Ultinon Pro9000 H11 LED Fog, Osram H11 LED, Philips Xtreme Vision Halogen 55W H11s, Osram Night Breaker 55W H11s. I had the Philips Xtreme Vision H11 Halogens with me, while all others were new purchases. After testing them all, I decided to stick to Philips Ultinon Pro9000 LEDs. Bought it offline from a Philips distributor at a decent discount. Thus my entire setup costs Rs. 11k.
Osram H11 LED was extremely VFM at around 4k for the set, but decided to return it because of the following demerits:
A dangling controller:


Extremely loud fan, it was so loud that one can hear it even with the engine running! With the engine off, it's irritating:
Throw of Philips was slightly better, although not enough to command a 2x price difference. It's your call.
Osrams were rated at 6000K while Philips is 5800K and matches the Headlamp colour exactly.
Still, for someone on a budget, I highly recommend Valeo fogs+Osram LEDs. Throw wise they are as good as my setup.
Pics of Philips Pro9000:

Osram H11 vs Philips H11 LEDs:

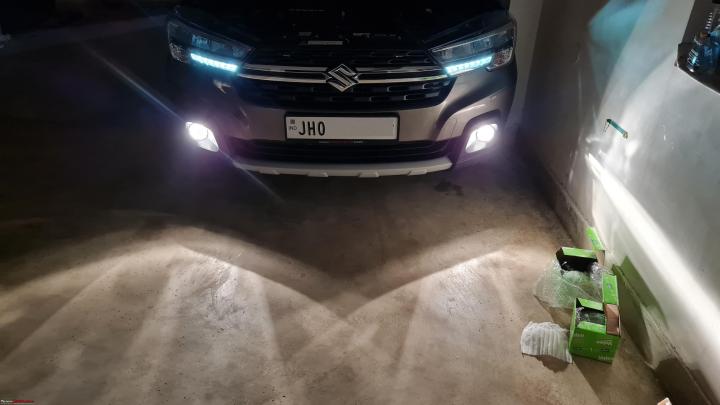
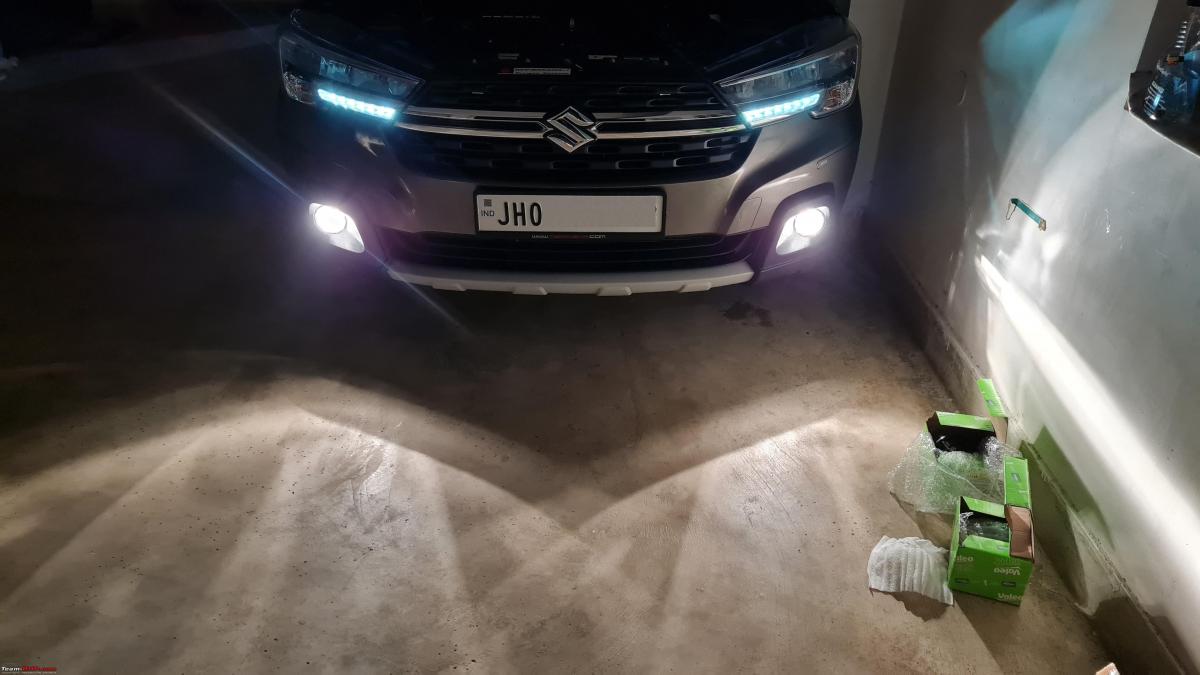
Pics post-installation:
Note the sideways throw:

High Plus Fogs:

High Only:

Low Only:

Spread is almost 180 degrees:

Light spreads even below ORVM, who needs a cornering lamp!:
Final Look:

A video showing how nicely a new fog setup makes a difference:
Some important points:
- Entirely plug and play. No warranty will be void.
- Stock Maruti fuse is 20Amps for XL6's fogs. So it can comfortably take 55W bulbs also.
- Since swapping bulbs is so easy, I used to carry halogens and have swapped in dense fog. White light or Halogens made NO difference to the visibility.
- The feeling of helplessness one felt earlier in well-lit conditions, or when the opposite vehicle came with high beams on, is now gone. The immediate surroundings and road edges are so well illuminated that one can easily carry speeds confidently. Headlamp beams still disappear but the fogs now feel substantial thus helping a lot.
- Another reason for not opting for IPH projectors was the crude installation process. It's not as clean as the Valeo swap. Plus the quality is a hit or miss.
- XL6 uses just 3 screws per fog, thus any heavy unit like IPHs or Hella Knight rider vibrates when going over bad roads. Yes, had tested Hellas too!
- Took me around a month to test and narrow down to the best option.
- This setup will not help in long-range visibility or throw as projectors do, for that, stock headlamps are decent. This setup illuminates immediate surroundings beautifully, and that's its USP. Scattered light lower on the road helped better than focused output projector fogs give in foggy conditions.
Check out BHPian comments for more insights and information.
- Tags:
- Indian
- XL6
- Fog lamps
- Modifications
News
DIY: Installing aftermarket fog lamps on my Tata Tiago

The car didn’t have pre-installed fog lights and hence there was no wiring present which I could have used.
BHPian SulemanP recently shared this with other enthusiasts.
This could be a normal DIY specifically for after-market fog lamp installations where an OEM does not provide one. I have searched a lot in Team-BHP but have not come across a thread specifically for Tata Tiago any variant. Hence a new thread.
I bought my ride in 2019 still under warranty and I had no idea that Tata would not provide me with 2 important things in the car 1) Fog light and 2) Auto/Manual IRVM which greatly aid while driving at night times. Read quite a lot about DIYs in this forum and specifically threads from @Reinhard, @leoshashi, to name a few…these have really helped me gather a lot of information to go ahead and do it.
I was a little confused as to what should be done because 1) The car didn’t have pre-installed fog lights and hence there was no wiring present which I could have used. 2) I was not comfortable piecing the car’s firewall and installing a switch inside. 3) I was not in favour of using a headlight switch to operate the fog lights that way I would have had no separate switch for the fog lights.
After pondering a lot on what to do…I decided to have independent control, it was necessary to install a separate switch and hence piercing the car’s firewall was the only option. Though @Reinhard had used the Bluetooth method to control the fog lights I steered away from the idea…also warranty related issues are untouched if you have a dedicated circuit & control for the fog lamps installed.
Let's quickly go ahead with the DIY project it will be in STEPs for better clarity.
Materials used for the DIY.
- 2x IPHCar 3" bi-xenon projectors including mounting brackets (Model number 612, water-proof)
- 2x 55W AES HID ballasts (Non-Canbus adapter type)
- 2x 55W 5500K HID bulbs with H11 spec
- H4 wiring harness with relay
- Push/Pull switch for now (later on I’ll replace it with a toggle switch)
- ½ inch flexible pipe 2-3 meters
- Couple of Spade & Ring Lugs for 1 sq.mm wire gauge
Materials used:
Most of them are aware of what are the tools required for a DIY project and you can find more of it over here. Before we start with the DIY you really need to know if your car is Positively Switched or Negatively Switched, it will help to understand how to proceed ahead and complete the wiring safely. It is a must if your car is from a Premium segment cause in that case the wiring may be monitored by a computer or a dedicated module which may throw up some error signs later on.
Engine bay before wiring was installed:

Step 1 – Install the Push/Pull switch in the cabin - Pull the panel below the steering wheel towards you from the LHS that way it is easier to remove, it will need a little jerk so the panel unlocks, then proceed to the RHS here too you will have to apply a little jerk and pull the panel toward you and it will unlock.
I have installed the switch on the LHS as marked in the below image:
The Fuse box:

Panel with the switch installed:

The scene behind the panel had to make a tiny hole in the firewall gourmet to get the wire through, with this, we complete the work on the inside of passenger cabin:
I was stupid to follow a Youtuber and install the switch in this place... I should admit it is not a good place to install a switch. Anyways, I will change the place soon.
Step 2 – Modify the H4 wiring kit to power fog lamps, here you will find that there are 2 circuits one for low beam and the other for high beam. Since we are using this kit to power fog lamps I would need any one of the circuits and the remaining one you can put away after applying insulation tape at the ends. Cut both the H4 connectors of the wiring kit and solder the H11 connectors that come with the fog lamps.
Please ensure two things over here, always make a straight joint to combine the wires. The joints should never be parallel / at the same length to each other. When you bring the joints near, they should come one after the other please see the image for reference.
Straight joint:

Step 3 - Open the bonnet to complete the wiring part using the modified H4 wiring kit. Ensure you route the wire such that it does not come in contact with any moving part and heated surface as it may lead to melting of wire insulation and further the circuit will be grounded. Use cable ties (wherever feasible) to fix the wiring and iron wires/nut bolts to fix the ballast.
Engine bay after I was done with the wiring part:

Step 4 - Remove the front bumper for fog lamp & ballast installation
Without the front bumper:

Ballast installed on the RHS vertical member of chassis using 3M tape and wrought iron wire for better weight management as I don’t trust only 3M tape and cable ties to hold the ballast:

Over a period both the tape and the cable tie will give away leaving the ballast dangling freely:
Repeat the same on the LHS.
Step 5 – Installing the projectors on the front bumper fog lamp housing. TATA Tiago bumper has no provision of nut bolts to fit the fog lamp body, TATA has given simple flat head screws along with a locking system to install the fog lamp body. In my case they had given a blank plate in the fog lamp housing, so you need to cut this blank plate to fix it around the projector body. Post cutting this plate it turns into a ring that fits around the lamp body.
I have been doing this DIY for 2 weeks now because I manage to get free time only on Sundays. Hence even while writing this thread I am yet to address the alignment issue post-installation. I would be posting additional images once I am done with the alignment part.
There are a couple of things that I would like you to check & recheck while doing such a DIY, they are as follows:
- Never leave any wire exposed in the engine bay, either use a ½ inch flexible pipe to cover the wire or at least wound the wire generously with black (only black) insulation tape. If you have cloth type black insulation tap nothing like that.
- Always use a lug at the wire ends it is a best practice to avoid any untoward incident refer to image
- Always use iron wires/nut bolts to secure the ballasts in addition to 3M tape
- Put a sealant in place if you, puncher the firewall to seal the hole.
Installation:

Job done:

Complications:
- If there is no wiring, then you will also not have a switch in the front fascia plate and you will have to install one of your own.
- Initially when I installed the ring on the projector body it did not fit perfectly and I had to use a double-sided tape (Gap filler) for a sturdy fit, later I used silicon sealant to fix the ring properly on the projector body.
- It will certainly take some time to adjust the beam throw primarily because there is no provision for projector type fitment. This is really bothering me as of now.
- If you go for Fascia Plate on the Dashboard it is an expensive affair & you still won’t find a separate switch over there. TATA has smartly combined the wiring and the plate itself is basically an electronic circuit board that is difficult to be modified or a time-consuming affair.
I will post the remaining images once the alignment is done.
Check out BHPian comments for more insights and information.
- Tags:
- Indian
- Tata Tiago
- DIY
- Fog lamps
News
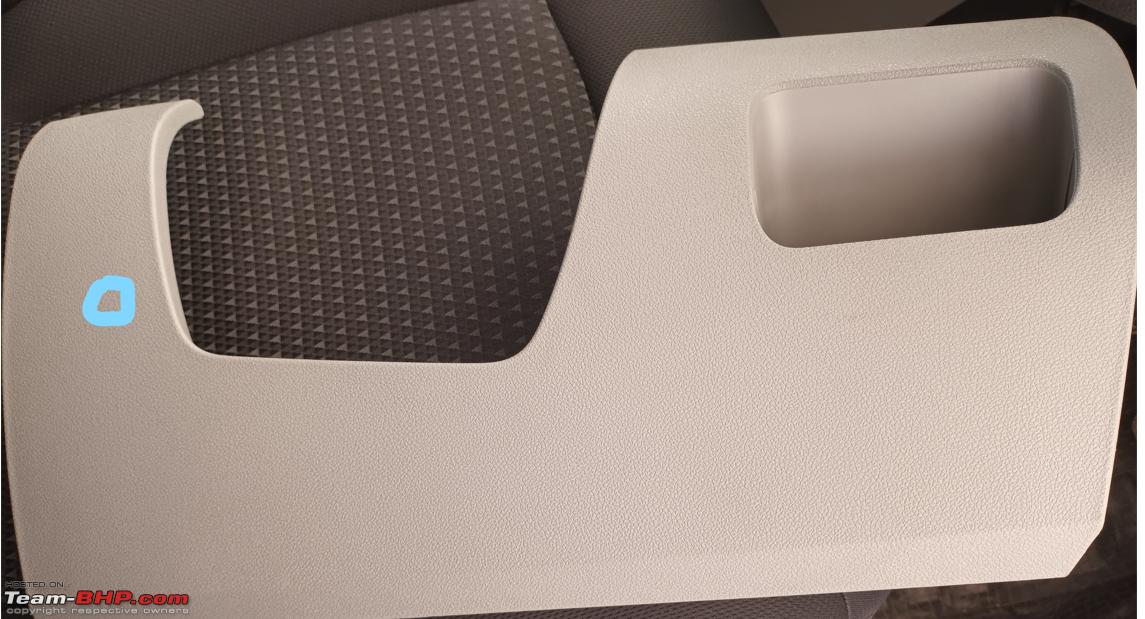
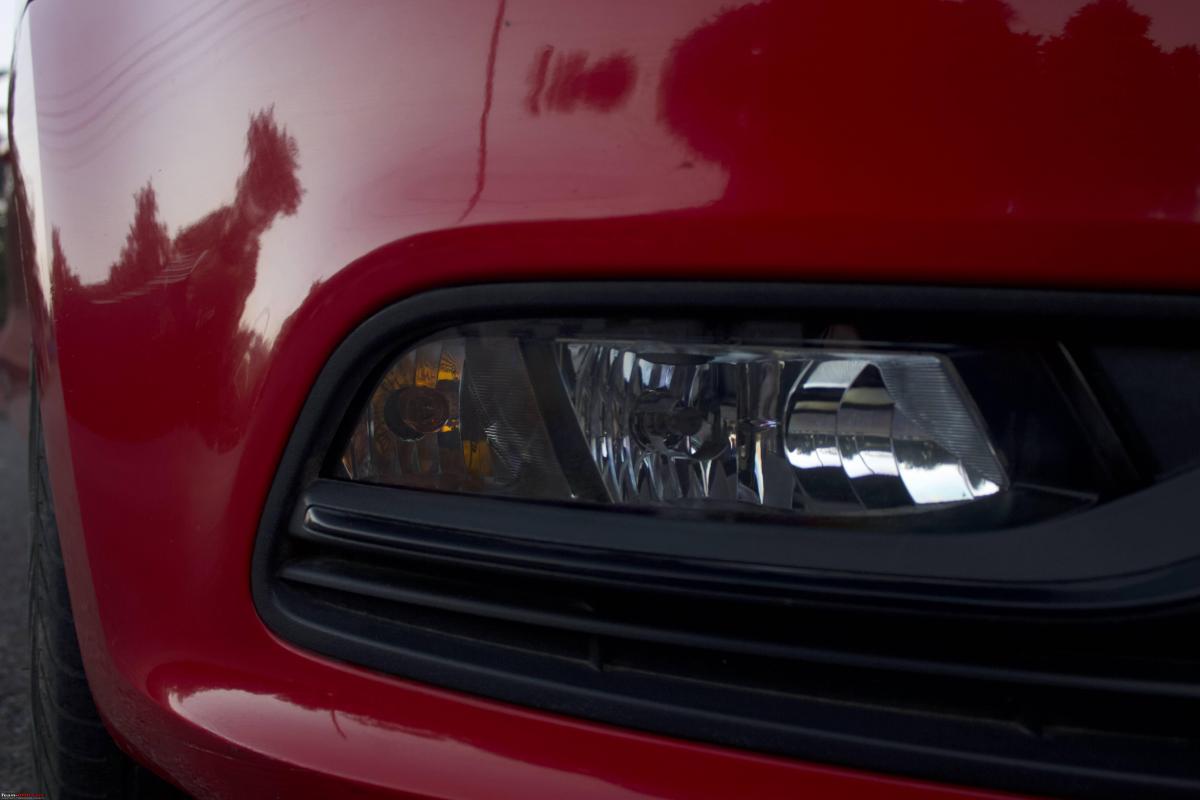
DIY: Fitting Euro-spec DRL fog lights on my Volkswagen Polo
I always wanted to have a pair of DRLs on my car but I had no idea how to achieve it in the cleanest way possible.
BHPian fluidicjoy recently shared this with other enthusiasts.
Adding OE style DRLs on a Polo
I thought I’d pen down this really cool DRL DIY which was on my mind ever since I got our Polo. It’s well-known that the Highline+ Polo or the GT TSI is not offered with the fancy GTI LED headlights and hence there was no DRL on the car at all.

DRLs are good to have, a standard feature in most cars in 2021, and frankly, they’re not just for style, but they actually make for a decent safety feature if implemented perfectly. Even our Grand i10 came with a beautifully bright DRL which is controlled by the parking brake. So, getting a pair of DRLs was always on my to-do list, but I had no idea how I was going to achieve it in the cleanest way possible.

The OEM way to get DRLs in the Polo 6R without a new headlight assembly was to have the DRLs running in the foglight.

I had first seen this implementation in the European spec Polo 6R which had a halogen DRL in the foglight assembly itself. On the Indian spec car, the spot for the DRL is a blank. There is plastic moulding in the rear, but the reflector is solid with no provision for a DRL.
Disclaimer
This is a retrofit I did not complete myself since I eventually moved to DRLs integrated within the headlights. Most of the parts and connectors listed have been cross-referenced to be a straight fit. However, some minor elements could still be different when you start to do this on your car.
A friend of mine and a Polo enthusiast Prerak was successfully able to install these DRLs on his Polo with these guidelines and so I’m confident you can too.
This thread would not have been as vibrant and lucid without the photos and videos he has clicked while documenting his process workflow.
The discovery
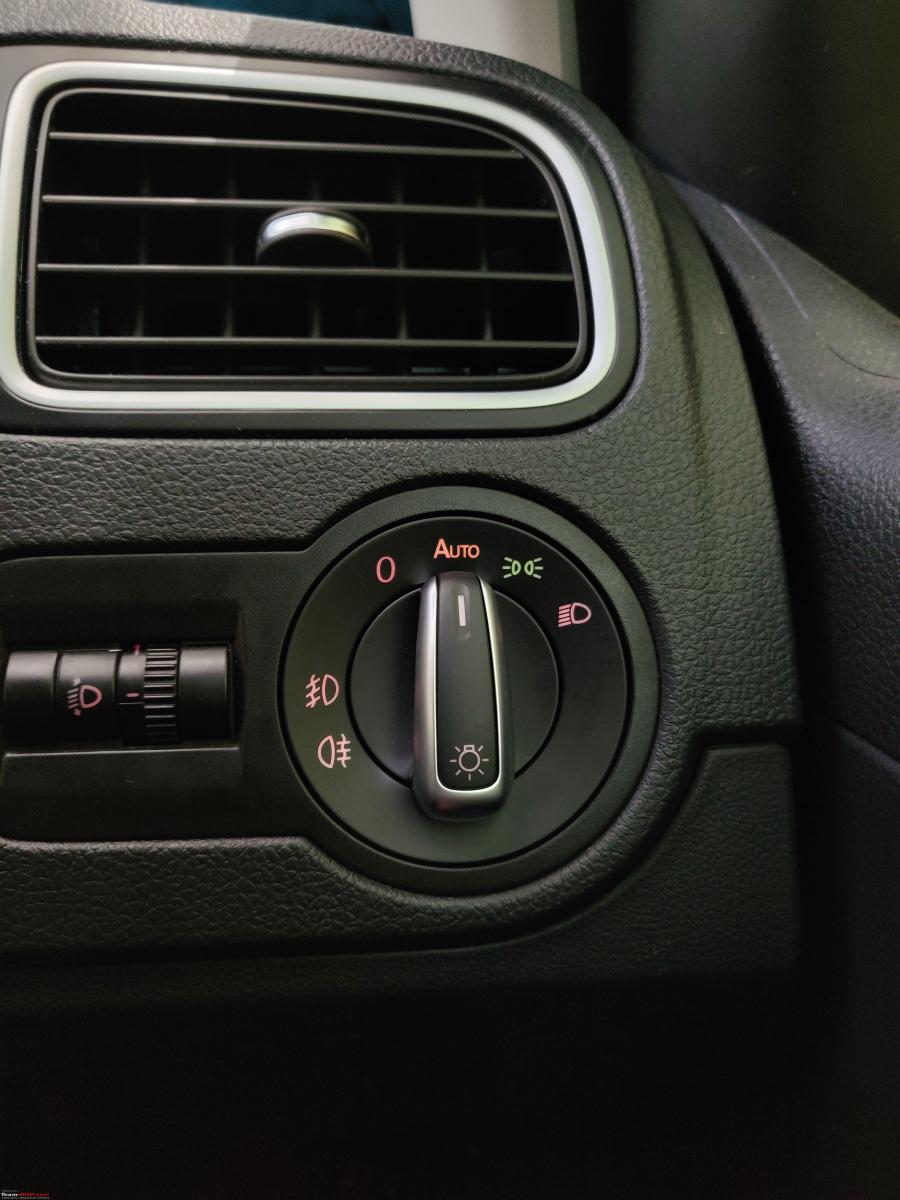
When I was installing the Chinese Automatic Headlight switch last year, I was curious to see the different notations on the T17 headlight pin connector. TFL, NSL, 56* were some of the notations I saw.
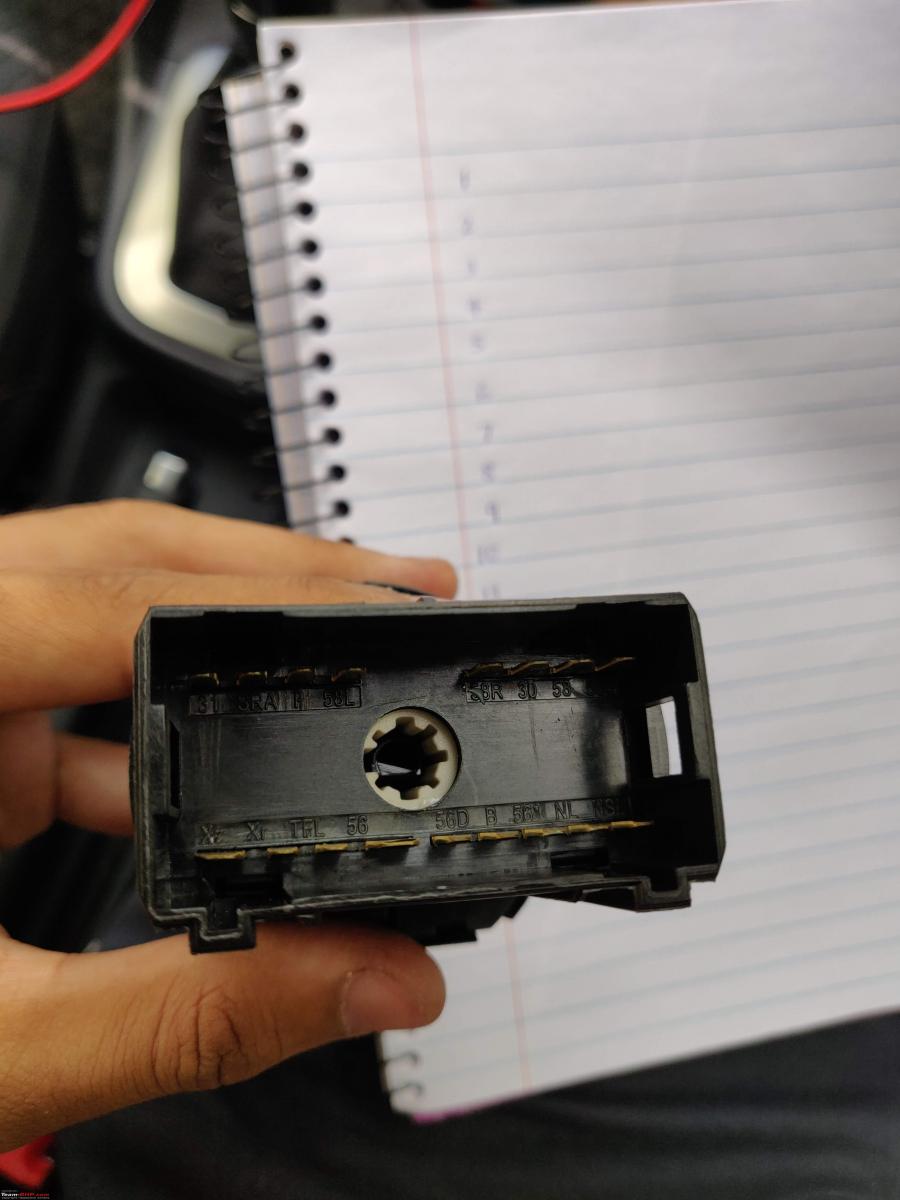
Turns out that these are short forms for different terminals and lights in VW’s lingo. Then, using a continuity tester, I found that the empty slot at T17/3 on the headlight switch was working as a proper DRL with voltage appearing and disappearing just like it should for DRL circuitry.
Some more scouting around helped me find references to VW’s own wiring diagram for a DRL which was being powered from T17/3 and thus was born the idea of wiring a DRL to the Polo using the OEM route.
We began this discussion by saying that the stock foglight does not have a ready-made provision for throwing in a DRL bulb and so if you don’t want to modify any stock fixture, then your best bet is to buy a new pair of OEM GTI fog lights. As per my friend Sheethal’s experience (who is a passionate and highly knowledgable VAG master), these imported fog lights are a lot better than the India-made fog lights.
Buying this new part gives you a dedicated slot and bulb holder for this DRL and all you need to do now is to complete the wiring. The part numbers for this fog light with DRLs are 6C0 941 661 and 6C0 941 662.
The last time I checked, these were about Rs. 13-14k a pair. You can source OEM equivalents on eBay UK for lesser, but the net price does not turn out to be all that great once they pass through our unpredictable Indian customs who might send them to you duty-free or might even outrageously value them for 2x-2.5x more than what they’re really worth.
The DIYers out there would love to soil their hands and have this retrofitted on their car. The DIY route is the cheaper yet more fulfilling option and here’s a list of parts that you’d need.
Tools, parts & part numbers
- DRL Bulb Holder (Bulb Carrier) - 6C0 941 669 x2
- DRL Bulb Connector - 1J0 973 722
- DRL Bulbs - W21W
- DRL Output Wires: 1mm^2 for power, 1mm^2 for ground
- Headlight Switch to Fusebox Input Power Wire - 1mm^2 - N 906 844 05 - Headlight Switch T17/3
- Fuse : 15A (SB56), Fusebox Pins - N 907 327 03 if wiring from Fusebox
- TESSA Tape - Fabric Type, Soft type
- T20 Torx Screw to unscrew fog-lights

The bulb holders turned out to be slightly expensive for me since I imported them, but I heard it could be possible to procure these for about Rs. 3000 a pair locally. These holders might also be aboard a few older Skoda Superb and Passat cars, and if you’re someone who likes to search around for used parts, then this could work out to be incredibly cheap. I had procured holders for retrofitting DRLs on my car but ended up sending them to Prerak, who was undoubtedly more excited than I was to install these on his car.
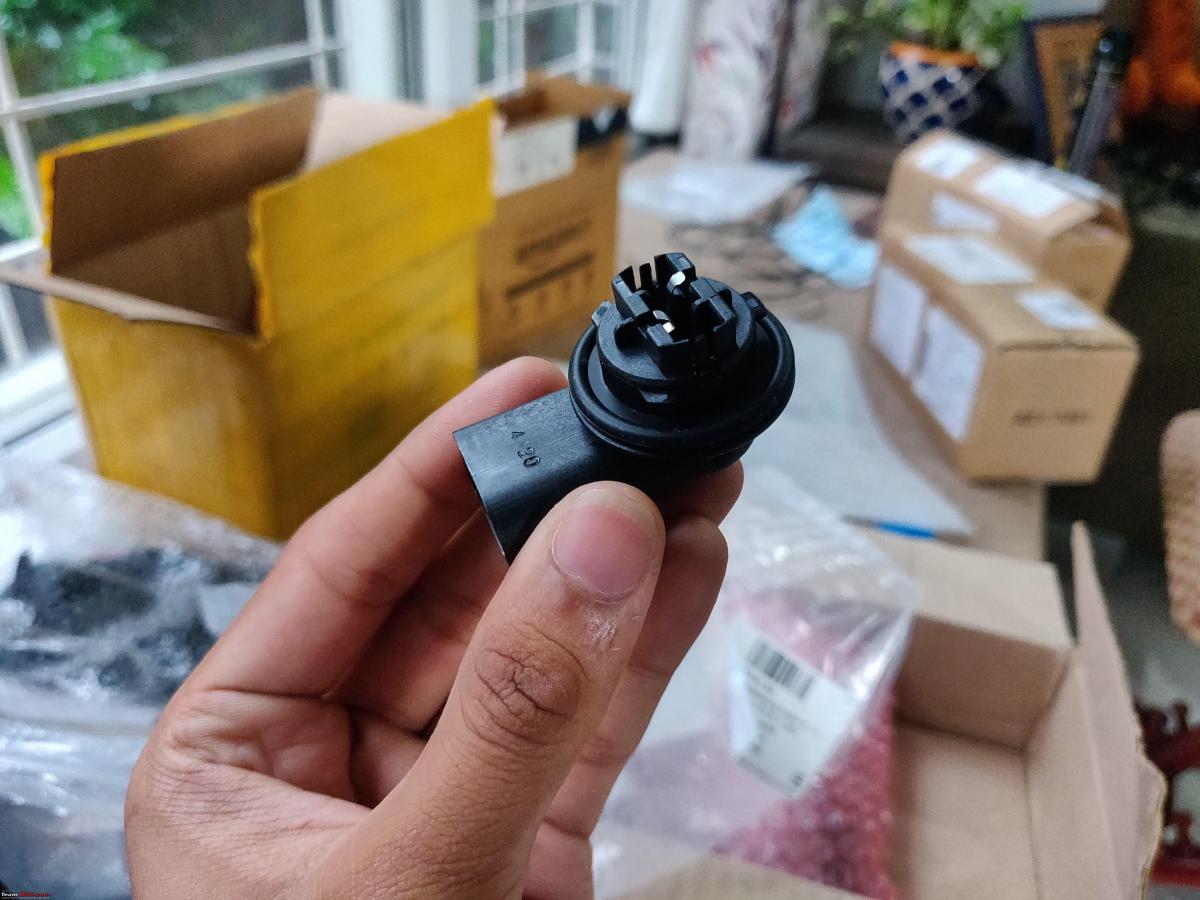
Here’s another closer look at the bulb holder. This bulb holder can house W21W bulbs and you can also use an LED bulb. The holder twists and locks onto the foglight DRL section. It also has an O-ring for keeping water out, so make sure that’s not cut or damaged before installing. If you have doubts about the sealing, then I recommend small beading of silicon gasket to ensure even better waterproofing.
Next, to connect these DRL holders to power, you’ll need to find yourself some Bulb Connectors. 1J0 973 722 is the right connector for the bulb carrier we’ve used. I consulted and verified this part number with another Polo enthusiast Dr. Patil.

I hate to admit, Aliexpress was indeed a great place to source electrical connectors and crimps and if you look 1J0 973 722 up on Aliexpress, you’ll get a full connector kit along with waterproof seals and crimps which looks something like this.
If it’s possible, then I’d recommend sourcing the entire set, and crimping it with a fresh set of wires and crimps. If that doesn’t seem to work out, then try and source this connector from a scrap yard along with the wires too.
However, the one potential downside with sourcing from a scrap yard is that the stock wire gauge might not be sufficient or robust enough for your project. Not all appliances which may be using this same connector might require the same wiring gauge and so make sure your wires are of the right spec.

Smaller wires could particularly be more concerning if you plan to use power-hungry bulbs. Prerak had to reassemble each crimp and solder it since the wires on one of the connectors he procured were not as per the mark.
The VW wiring diagram suggests 1mm^2 gauge wires and you can buy these from a local automotive store. If you like to colour code your work, then buy a Red wire for power and a Brown one for the ground. Again, to err on the side of safety, you’re better off with having a larger core wire than a smaller one.
Simplified Circuit Diagram (Modified from VW’s Official DRL Wiring Diagram)

How does this work?
This is not a BCM controlled DRL for the BCM High. The DRL is powered by the light switch from slot T17/3 and is protected with a 15A fuse.
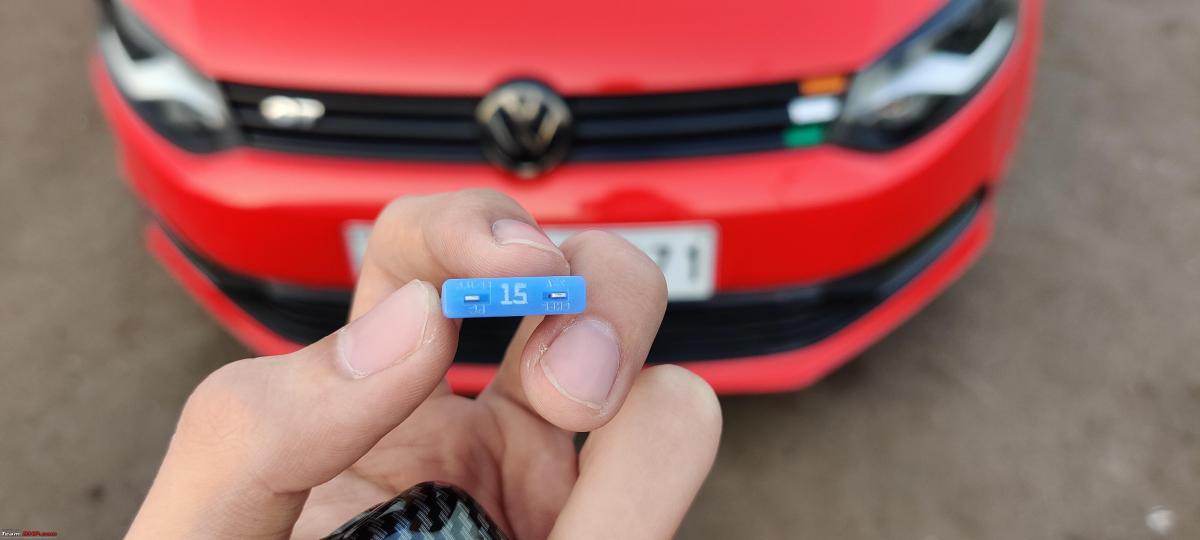
Depending on your comfort with working on the fusebox, you can choose to wire it in the stock fusebox or just connect an in-line fuse between the wires to complete the circuit. A 15A fuse was specified on the factory spec assuming 21W bulbs.
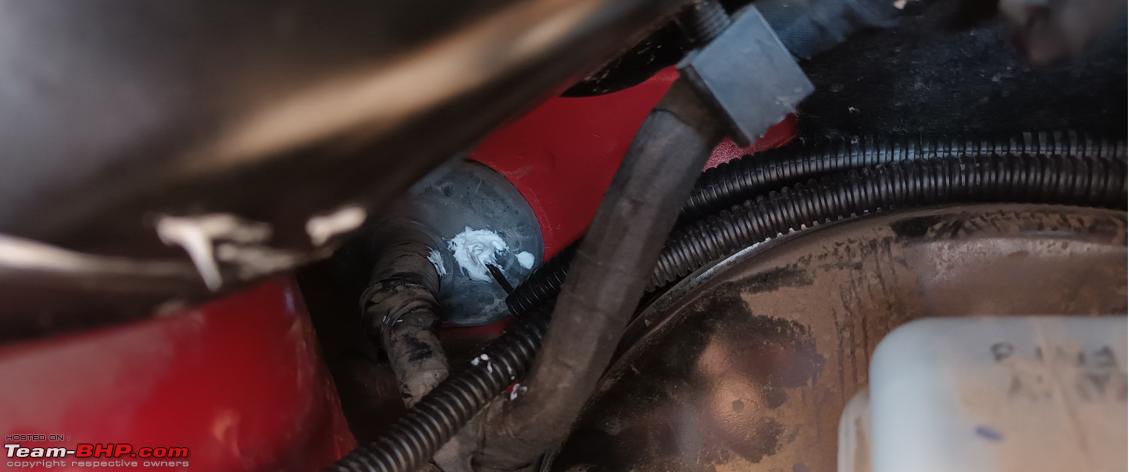
The OEM way to wire any accessory is to wire it in the fusebox, but it could be tricky for most folks who don’t have the right tools and haven’t worked on their car fuses before. Just to be clear, in this case, we are not tapping any power from another circuit and so a fuse tap is not really the right option. Prerak used a fuse which is housed in a plastic box and placed it in the engine bay. It's located along the fender and can be spotted by observing the two red wires.

Please note that unlike an electrical accessory like dash cams, reverse cameras, etc. which we connect to battery power, these DRLs are being powered from the headlight switch and hence we do not need to tap into any Fuse Power (+15 or +30). That is the beauty of this retrofit.
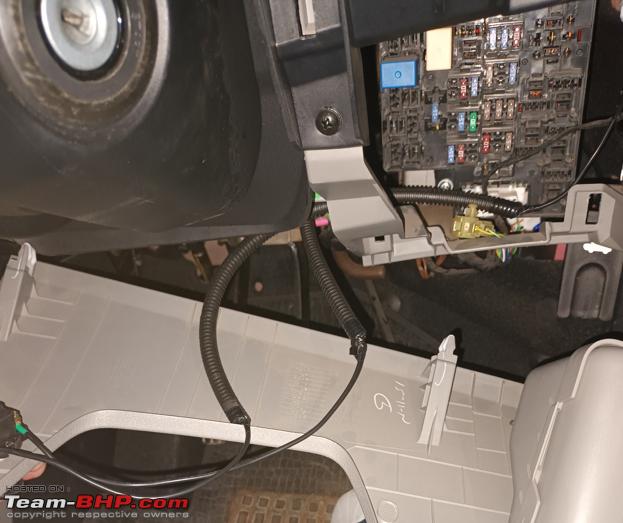
If anyone still wants to connect this to a fully empty slot in the fusebox, then you will need to procure two Fusebox Pins - N 907 327 03. This would be followed by procedures to take the driver footwell air vent out, fuse box out, remove the locking pin and insert wires, and put everything back without damaging the big wiring bundle which relates to everything on your car.
An inline fuse would be highly easy and convenient for this retrofit and you can buy one for as little as Rs. 50.
Quick Process Workflow
- Preparing Fog-light Assembly to mount new DRL Bulbs.
- Remove the foglight from the car.
- Drilling a hole into the blank reflector region to fit the bulb holder.
- Install the DRL bulb holder.
- Mounting the bulbs.
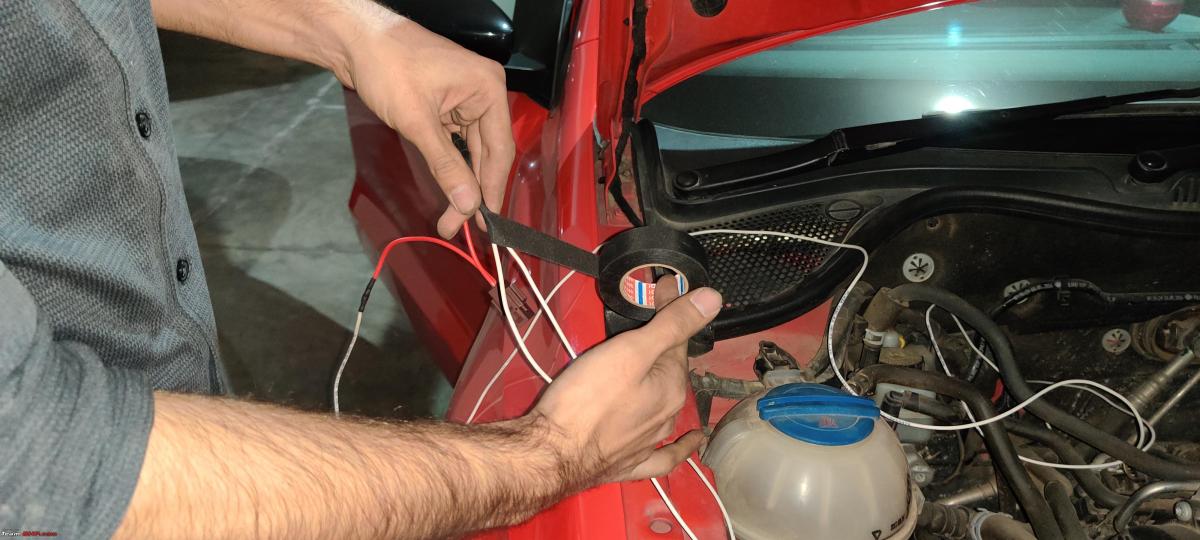
Wiring
- Making the wiring as per the schematic.
- Routing the wires to the fog lights and routing the wiring in the inside of the car.
- Connecting plug and play connectors to the headlight switch via a FUSE.
- Connecting appropriate ground points as per your wiring length and convenience.
Testing
Drilling into the reflector

To make way for the DRL, we need to finely trim along the blank cutout so the DRL holder can lock in place here. You might need to use multiple tools and will need plenty of patience to do this right. The holder will then twist in and be secured in place inside this new DRL space.

Once you have the holder secure, you still have to cut into the reflector bowl. I was personally paranoid about this step because it seemed like the most challenging part of this DIY.
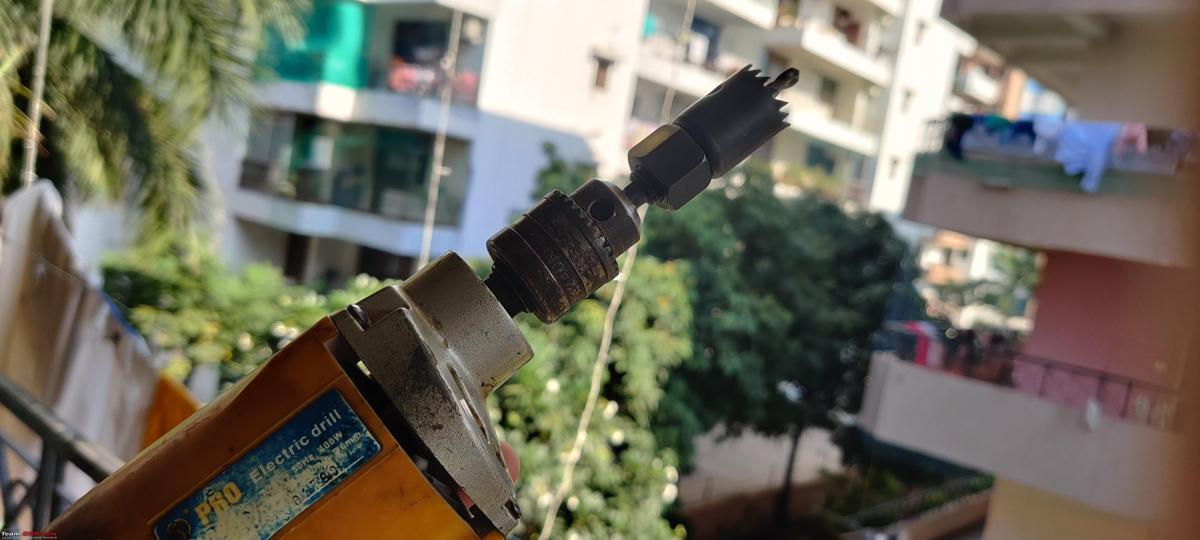
Using a drill, you can gently carve into this reflector bowl and make the right-size hole depending on what dimension bulb or LED you wish to use.
I was expecting a lot of debris to fall inside while drilling, but if you use an inverted workbench, then you can reduce the amount of debris that remains inside. If there’s any debris inside after drilling, then a flexible soft brush or a vacuum cleaner should be a good option to evacuate this DRL chamber and make it ready for housing your new bulb.
Preparing Wires and Routing
The schematic above is incredibly simple. We have one wire going into the headlight switch at T17/3 and you can find a crimp with part number N 906 844 05.

To access the headlight switch and the T17 connector, you will have to take the side panel on the driver side out along with the headlight switch, which can be twisted and turned to be pulled out elegantly. If you’re doing this on very early cars like 2012-2013, then it wouldn’t harm to check the switch once to see if it has a DRL pin at T17/3. Another way to double-check is using the multimeter and checking for power at T17/3.
This T17/3 wire splits into two wires which will go on either side of the DRL. This is the primary power wire which will run the DRLs and turn it off when the headlights are turned on. Just as they should.
Each DRL also needs a ground connection. You can also make a similar arrangement by making a long common ground wire, but I prefer to have two independent ground points for the two DRLs. There are plenty of ground points in the engine bay and if you have a Ring-Connector at the end of your ground wire, then you can loop your ground cable to any ground point nearest to you.
Joining & taping harnesses

Automotive wiring can be joined in quite a few ways depending on your preference. There are so many different techniques to join wires and I’ve seen at least 3-4 good ones on YouTube. Soldering, X-Splices (Western Union Joints) and Adhesive Heat Solder crimps are a few of the options I’ve used in the past.
Regardless of which one you use, make sure the joint is nice and tight and does not come off easily. A layer of insulating tape or shrink would make your joint corrosion resistant if you plan on keeping it in the engine bay, where it could have access to moisture during the monsoon or washing.

Prerak has used heat-shrinks to prepare his harnesses and taped wires with Tessa tape. There are two types of automotive tapes I’ve come across while working on VW cars. Softer ones which I’ve found in the interior and a slightly more resilient one that is more heat resistant and more suitable for wiring in the engine. So make sure you choose the one you need, as sellers on Amazon seem to be prescribing one type for both uses.
For automatic cars, the empty rubber grommet for the non-existent Manual Clutch Cylinder is one of the quickest ways to get wires from the engine bay into the cabin. This grommet should be removed to make a small hole to feed the wires and then should be reattached securely to the engine firewall.
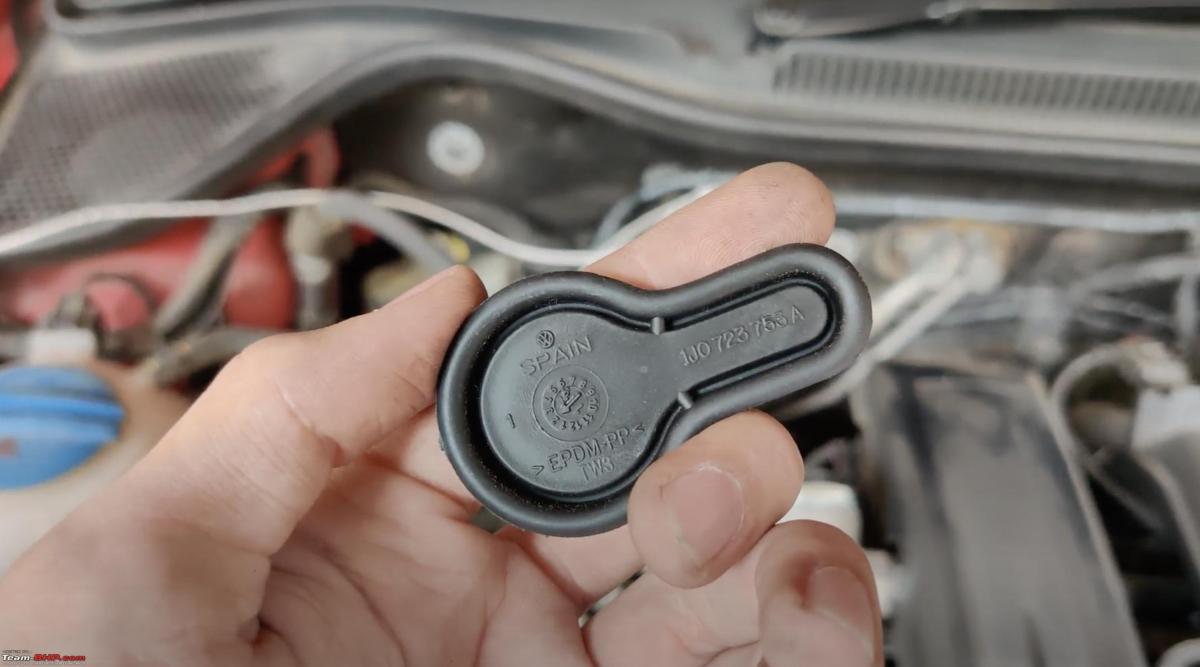
For manual cars, you can use the door-fender grommet or the wiring grommet under the windshield covering plastic on the passenger side for feeding the wire inside to the light switch, but I would love to know if there are any more convenient routes for manual transmission cars, since I haven’t personally worked on one.
Connector breakup view
To insert crimps into the VAG connector, you need to pull out the pink locking tab which slides out when you pry it out gently with a flat blade screwdriver. Once you insert the crimps inside, reinsert the pin locking tab to secure the pins in the connector.
Once everything is connected, you can test the fruits of your labour by trying out all the positions in the headlight switch.

You have successfully installed some neat-looking DRLs on your car and you have full freedom to install whatever bulb and colour temperature you wish. I'm for sure a fan of White DRLs. The DRL will turn off when the headlights are turned on. The fog lights work as usual. Here is a click of the fog lights along with the DRLs.

Heartiest congratulations and a big thanks to Prerak for sharing pictures and videos of his efforts with me so they could be shared on Team-BHP. I hope this DIY helps many more passionate Polo Vento drivers.

Check out BHPian comments for more insights and information.
- Tags:
- Indian
- Volkswagen
- Polo
- DIY
- Fog lamps
News
New trend - luxury car makers are dropping fog lamps

The headlights of new luxury cars are claimed to be good enough for the driver to see road markings even in foggy conditions and hence, manufacturers have started omitting fog lamps. We can bet that this trend is certain to make it to mainstream cars shortly.
Luxury car makers are dropping fog lamps
Over the years, various features that were common in cars, have disappeared. Now, another item can be added to the list. Vehicles from many luxury carmakers are no longer coming with fog lamps.
These lights, which used to be housed low in the front bumper, are no longer considered necessary in new cars. According to carmakers, headlamps of new cars feature technology that makes them a lot better than those found in older cars. This illumination provided is far superior and eliminates the need to have separate fog lamps.
Fog lights alone do not provide adequate illumination for night driving. However, as they are placed low in the bumper, they light up the road beneath the fog. They do not shine into the fog and reflect off it. This helps the driver spot road markings such as painted lines while driving in foggy conditions and keep the car from running off the road. Headlamps, on the other hand, don’t penetrate fog and instead, reflect back towards the driver. A less important use of fog lamps is that they do improve the look of a car.
That said, fog is not common in most places and at other places, occurs only seasonally. This means that fog lamps are not required regularly. Even in foggy conditions, to prevent accidents, one has to be driving very slowly as the throw of the light from the fog lamps is very short.
In luxury cars, the space that was occupied by fog lamps is being used to house other features such as daytime running lights, cornering lamps and sensors for radar guided safety technology. The headlights of the cars are claimed to be good enough for the driver to see road markings even in foggy conditions.
Here are some cars available in India that have lost their fog lamps either with a facelift or a change of generation.
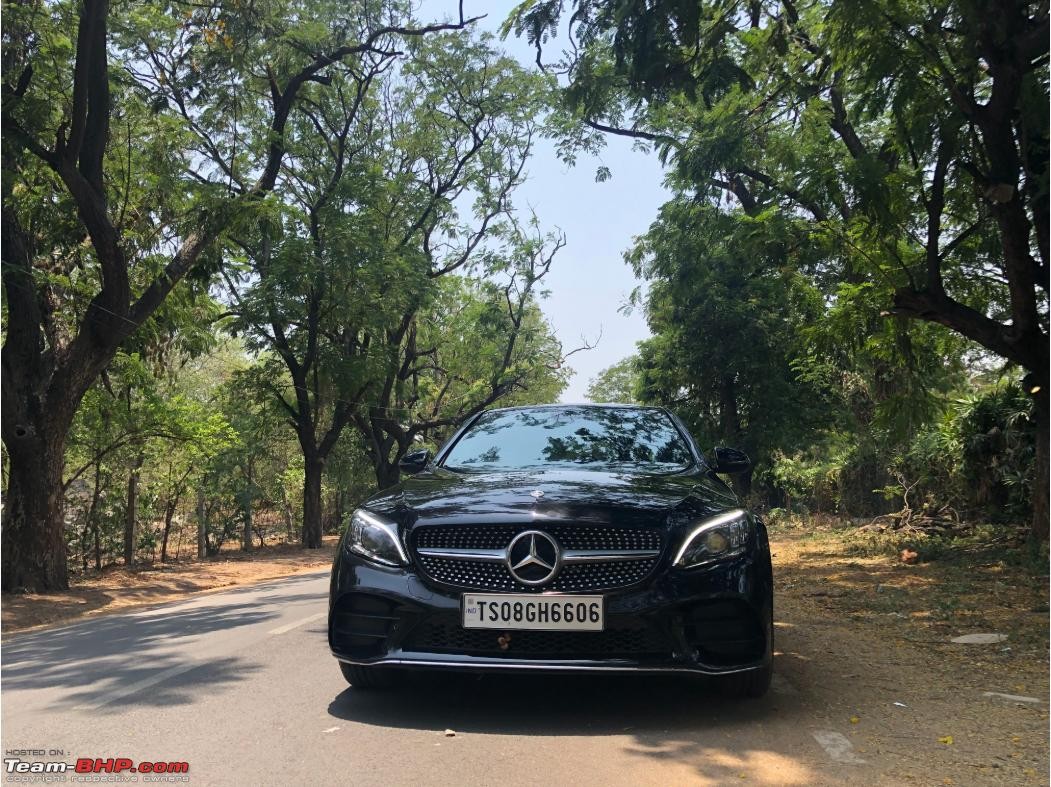
1. Mercedes C-Class:
While the W204 C-Class came with fog lamps...

...the W205 did not:
2. Mercedes E-Class:
The W211 E-Class had fog lamps...

...while the W212 got daytime running lights on its bumper:

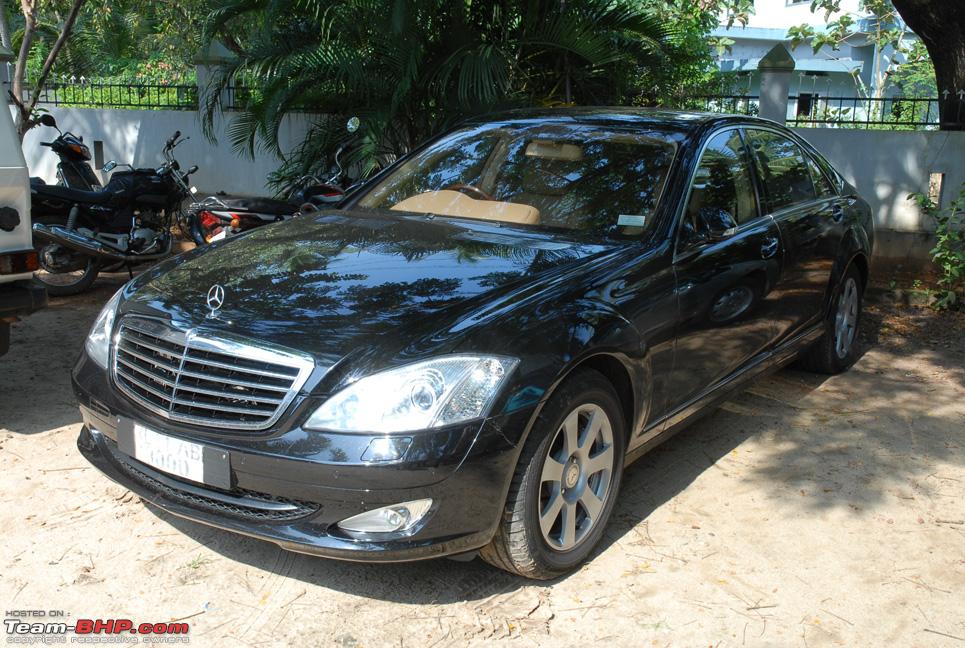
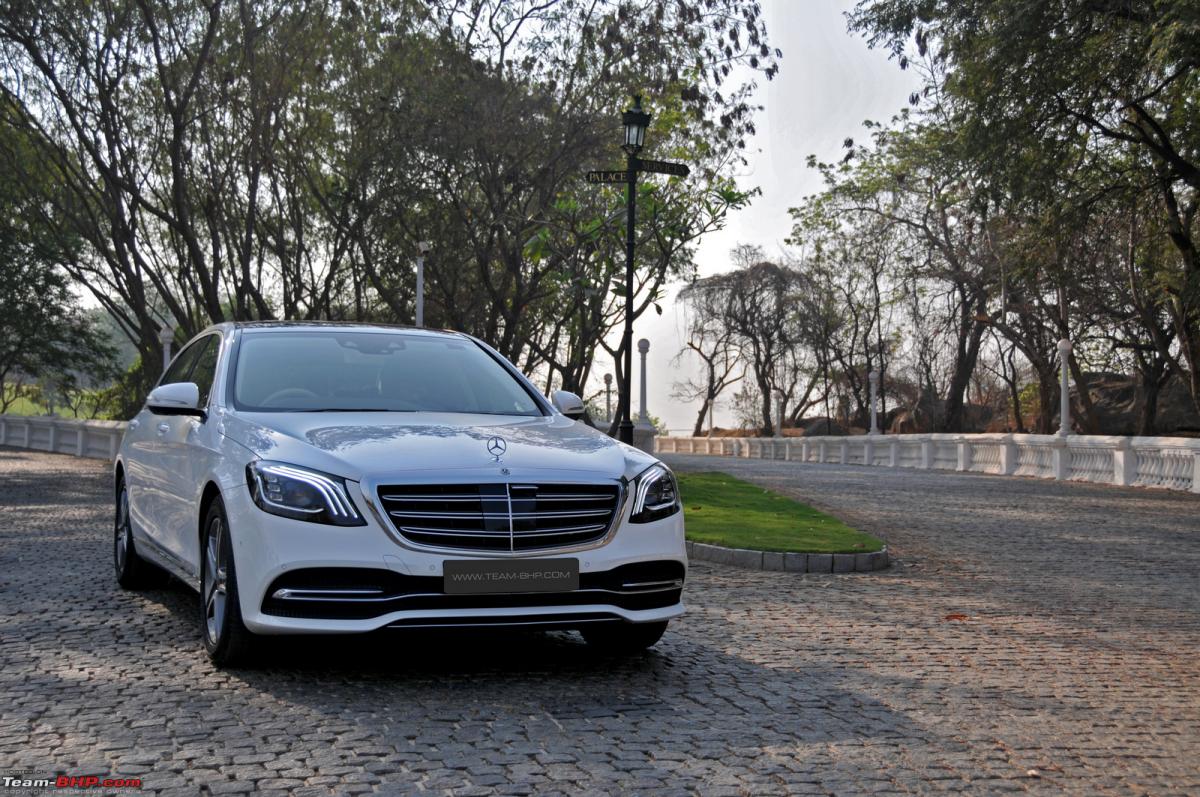
3. Mercedes S-Class:
The W221 Mercedes S-Class was the last generation of the great car to come with fog lamps:
The W222 does not get fog lamps:
4. Range Rover:
In 2016, the Range Rover had fog lamps...
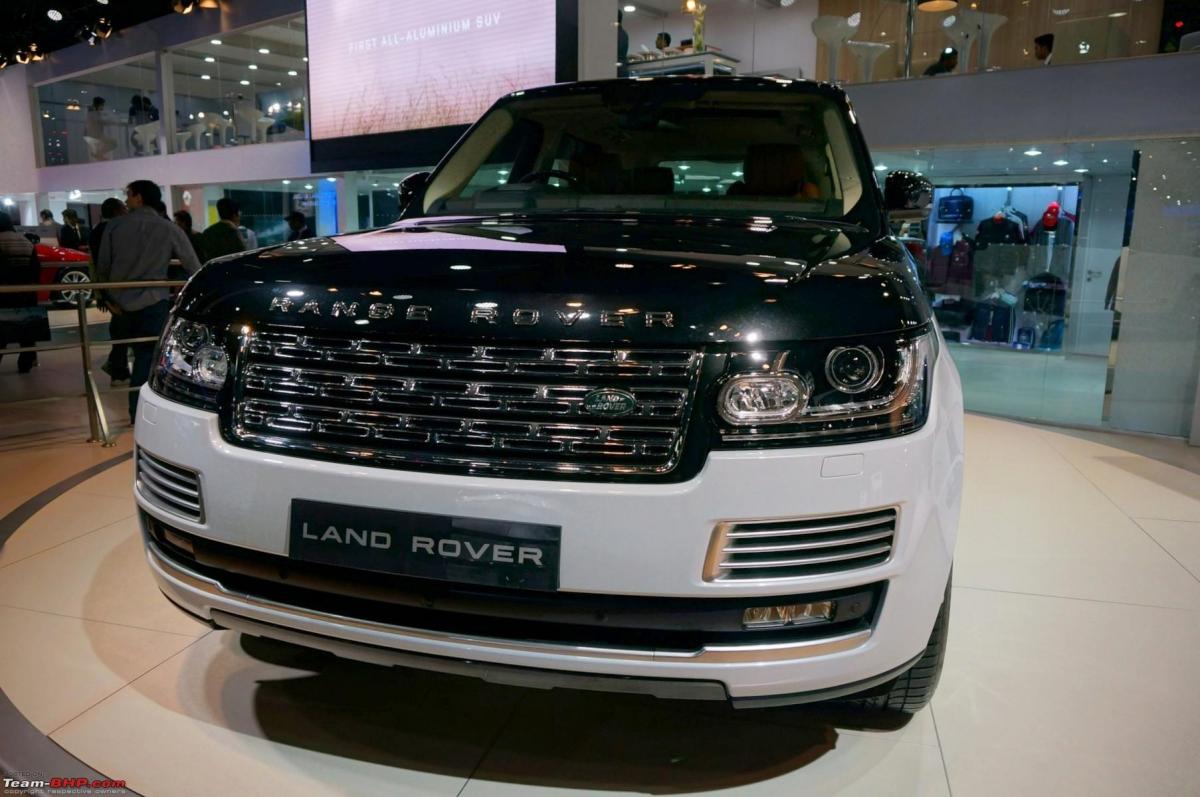
...while the 2019 Vogue that we drove, didn't:

5. BMW 3-Series:
The regular 3-Series has fog lamps...

...but the Gran Limousine we tested earlier this year, doesn't:

6. BMW 7-Series:
The G11 BMW 7-Series had fog lamps when it was launched...
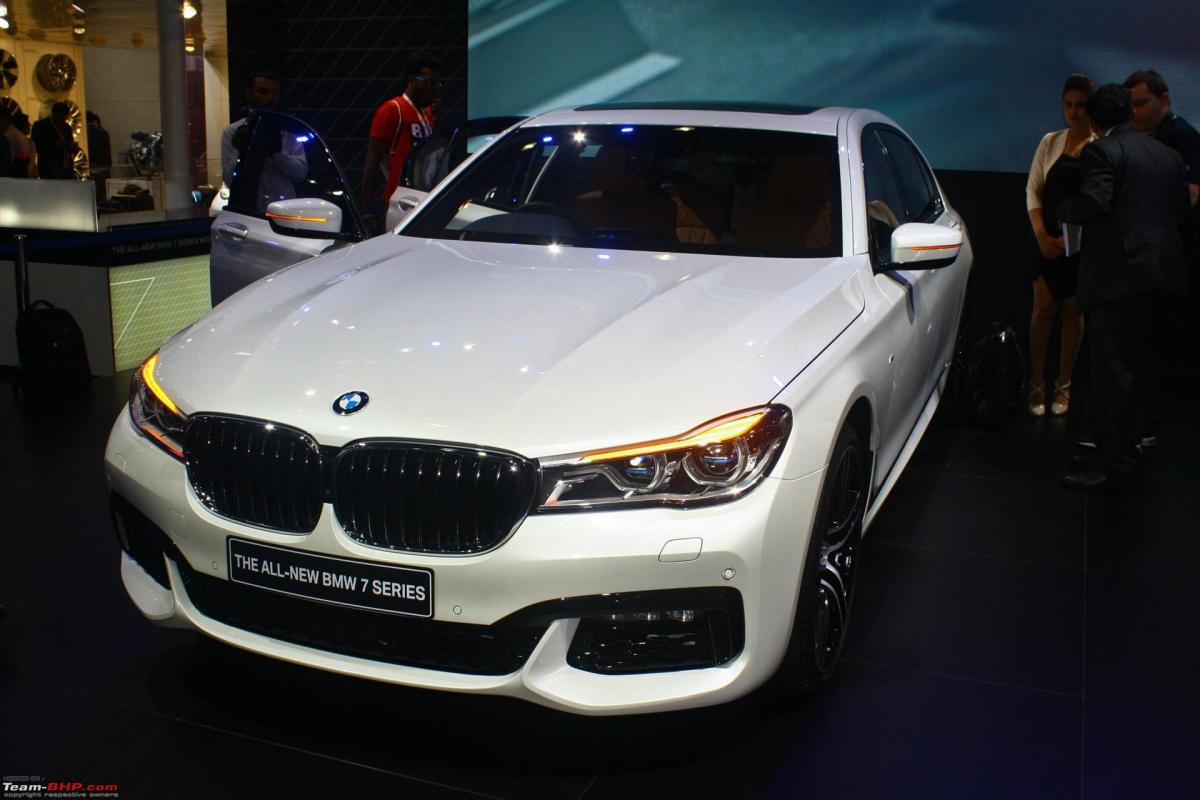
...but in the 2019 facelift, they were gone:

7. Audi Q3:
The Q3 came with fog lamps when it was launched:

With the introduction of the facelift in 2015, the fog lamps disappeared:

8. Audi Q5:
The first generation Audi Q5 had round fog lamps, but...

...the second generation model doesn't have any:

9. Audi Q7:
The Audi Q7 had fog lamps while in its first generation:

The second generation car does not get fog lamps:

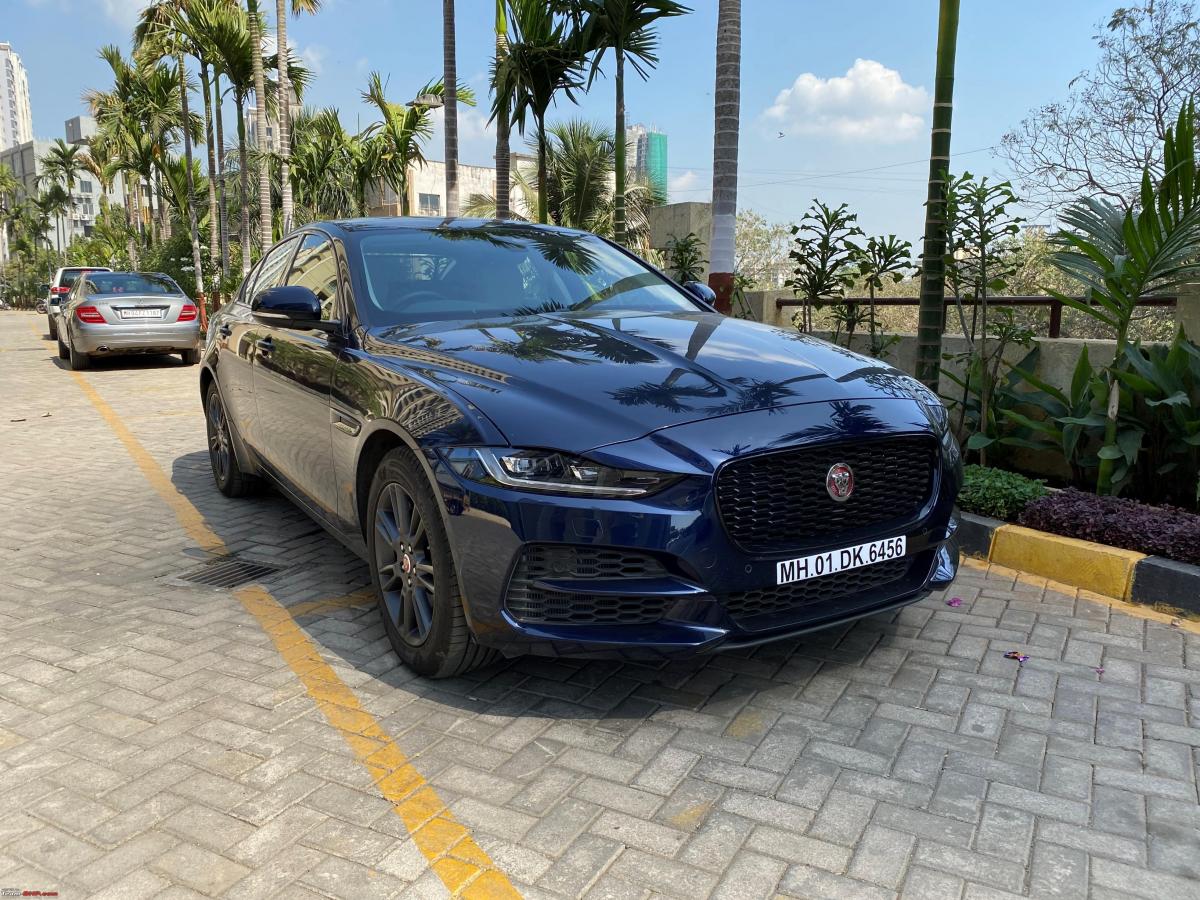
10. Jaguar XE:
The Jaguar XE never came with fog lamps:
We have already seen that the trend of adding or deleting features starts with luxury cars and, with time, flows down to mainstream vehicles. We can bet that this trend of omission of fog lamps is certain to make it to regular cars shortly.
About Us