News
DIY installation of Tri-colour LED fog lights on my Maruti Swift
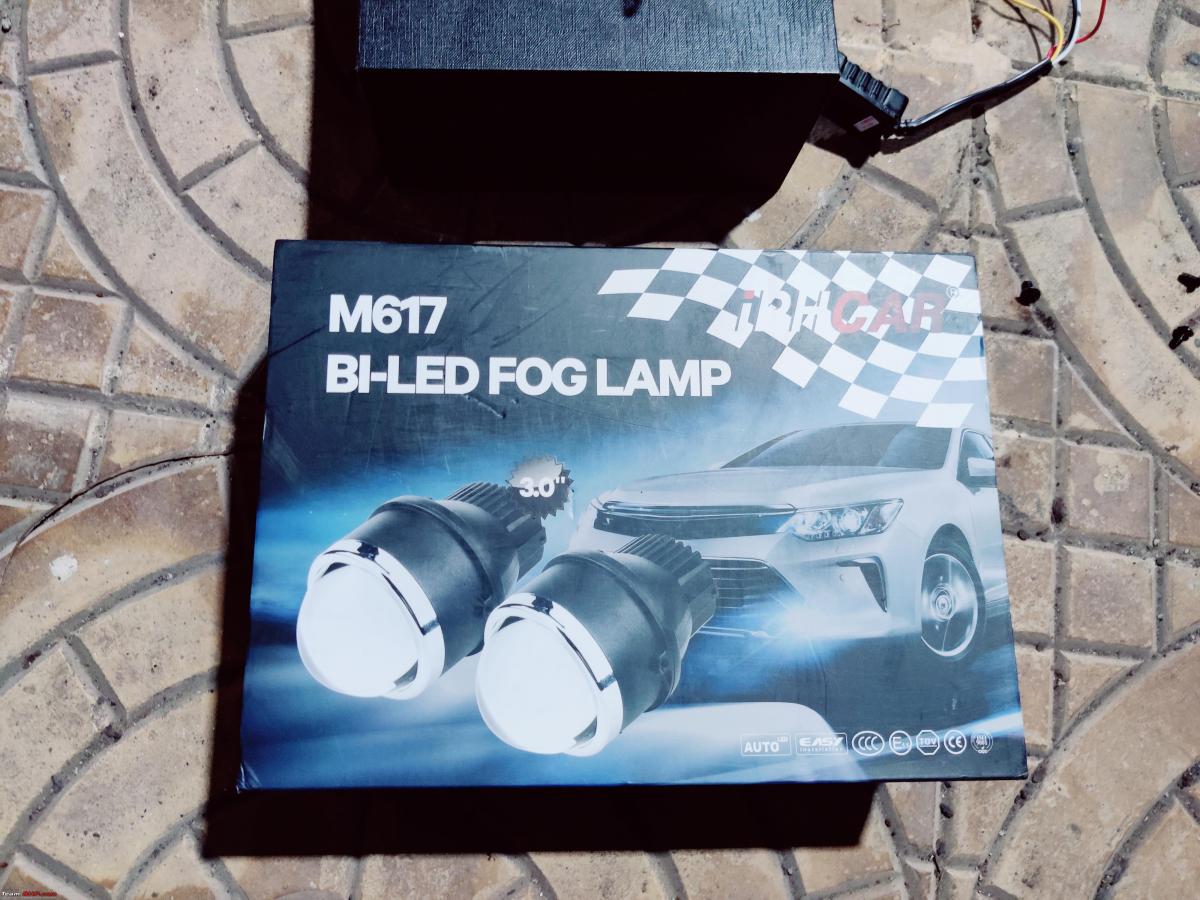
Maybe I will upgrade to the IPH M617 LED Projector Fogs later this year but for the time being these are more than enough.
BHPian Ashtoncastelino recently shared this with other enthusiasts.
Activation of DRLs.
I initially thought that I would get a DRL controller that would be connected directly to the battery which would be activated when the battery voltage goes above 13.5V and the controller would switch off the DRLs when the battery voltage comes below 13V which means the car is Switched off. While I liked this setup, Dad told me to connect them to the parking light so I agreed as well because of lesser wires running here and there.
Issue was I couldn’t find any male connector for the parking position socket. I wasn’t willing to cut any wires so I came up with another idea, I planned to change that 2 pin connector to a different two-pin connector(speaker connector type) using the same pin so it is reversible in the future. Used my depinning tool kit and swapped the connector to the new type of connector. Passed the wires through the rubber grommet of the headlight and to the shrouds. Apologies but I seem to have lost pics of the DRL wiring. Will post it at a later stage.

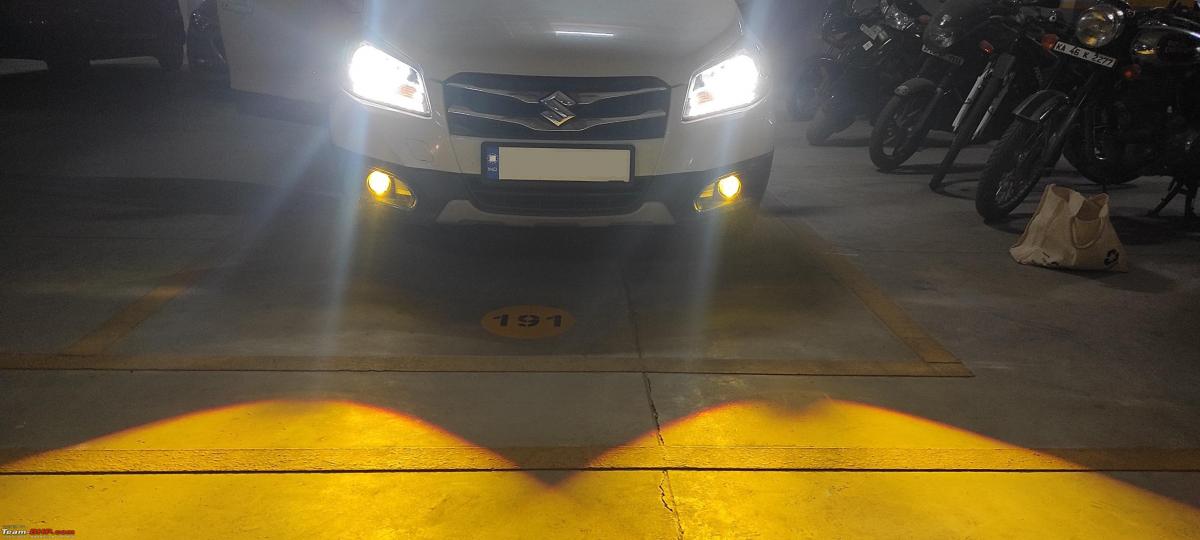
DRL's Activated
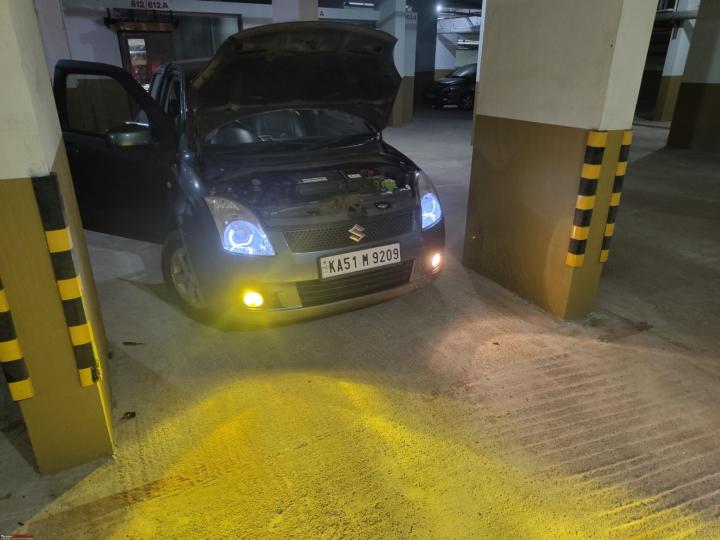
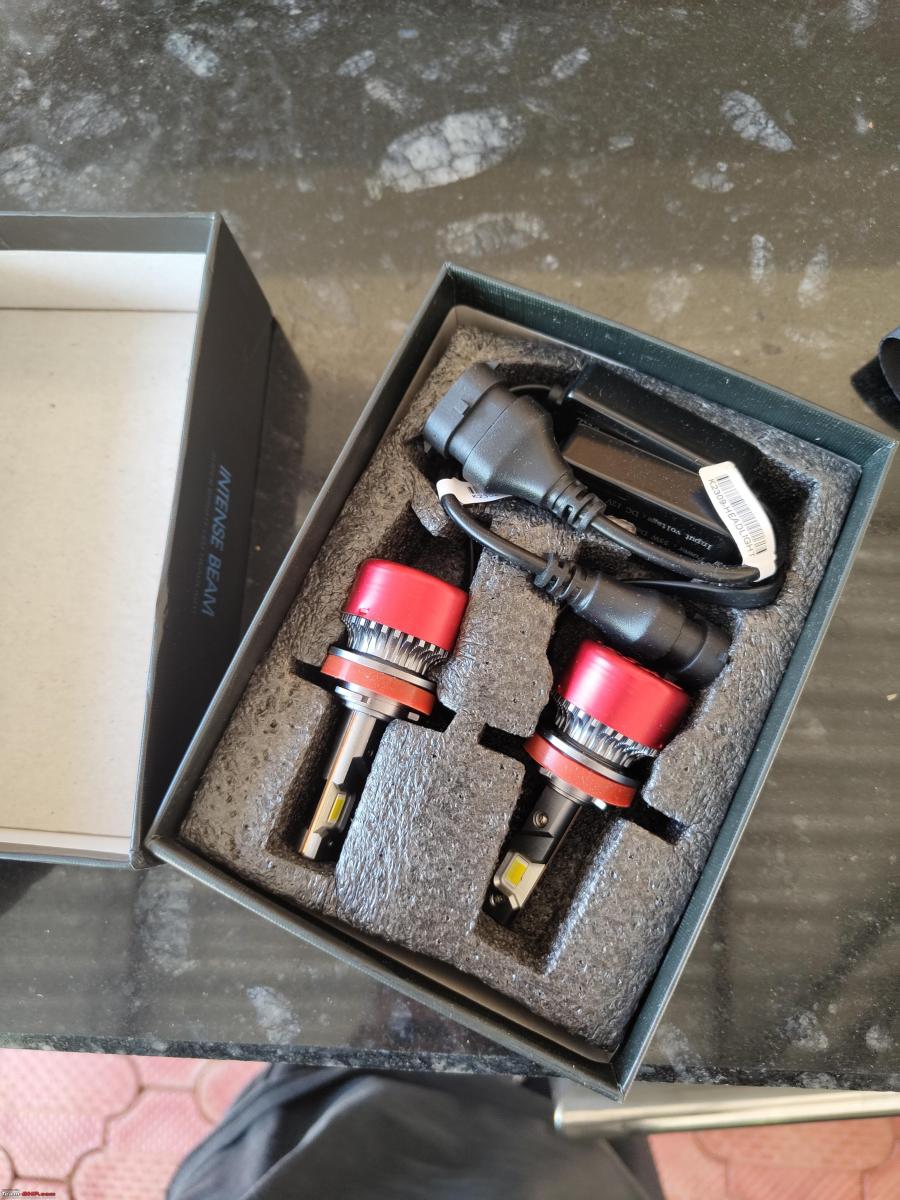
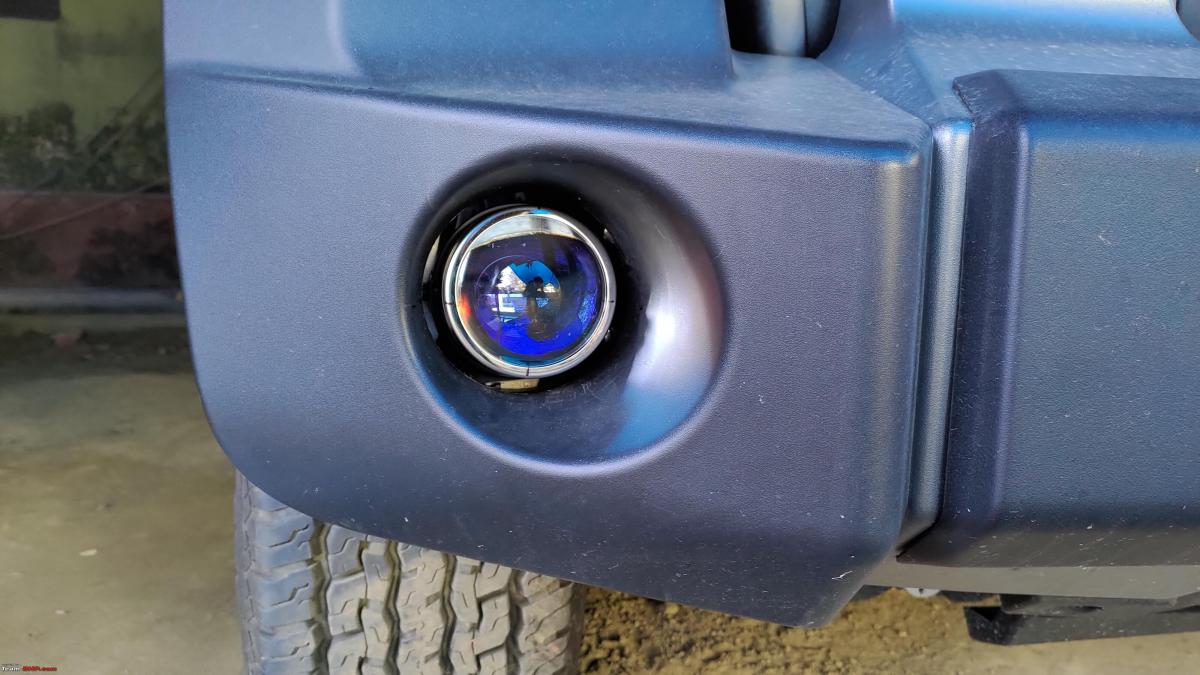
Got a set of Tri-color H11 LED Fog lights from CNSUNNYLIGHT Store and a friend hand-carried them to India. 3000K,4300K, and 6000k is what these LEDs output.

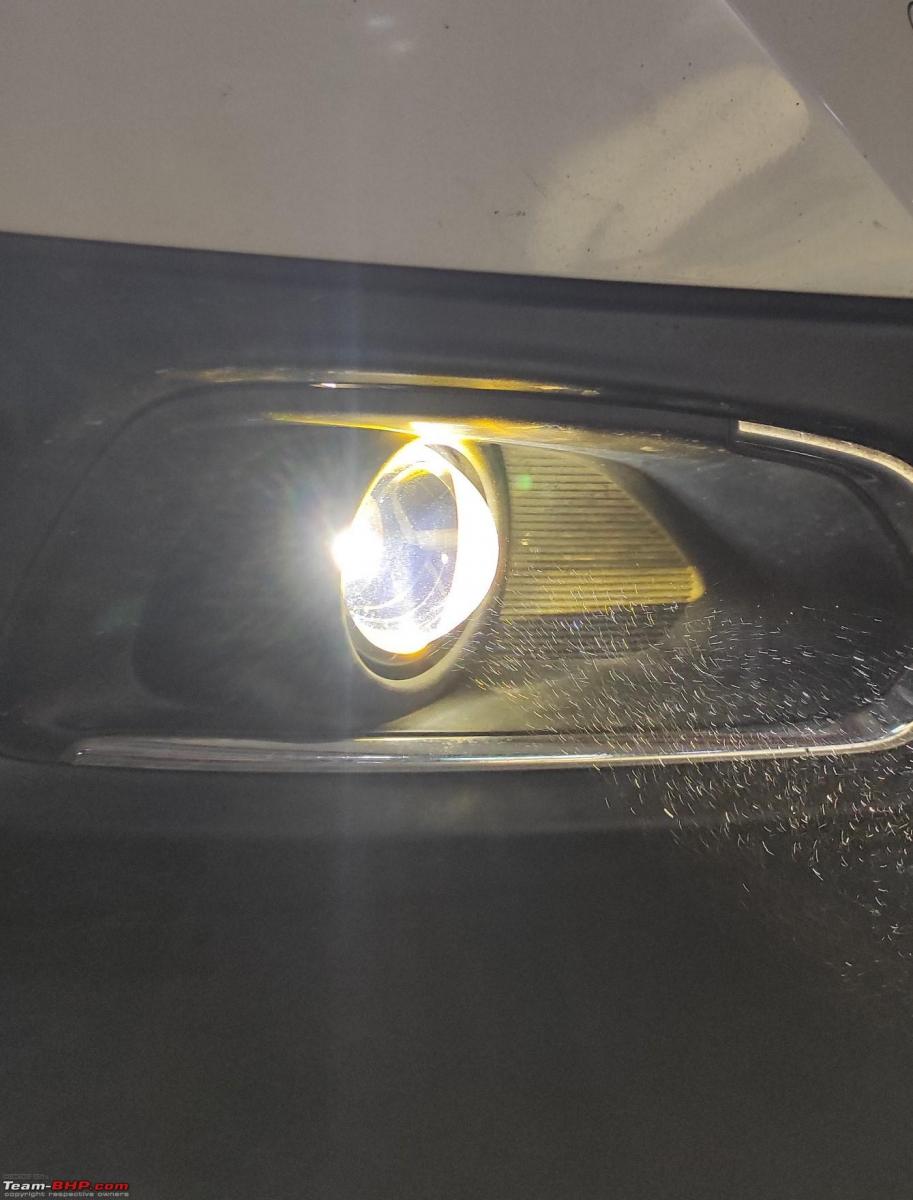
LED vs Stock halogen Fog

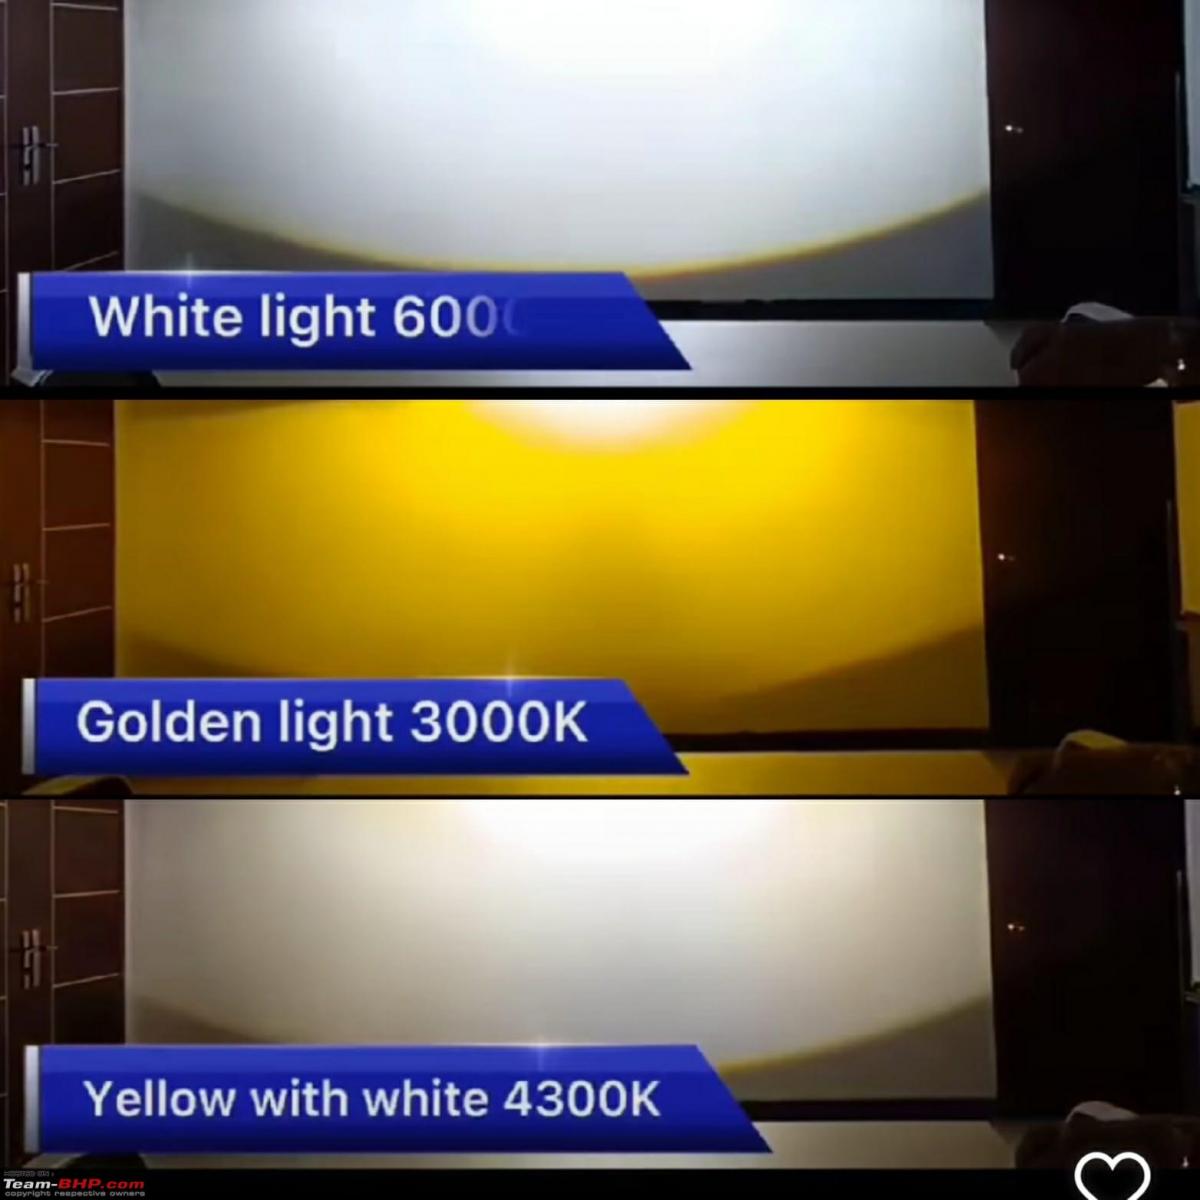
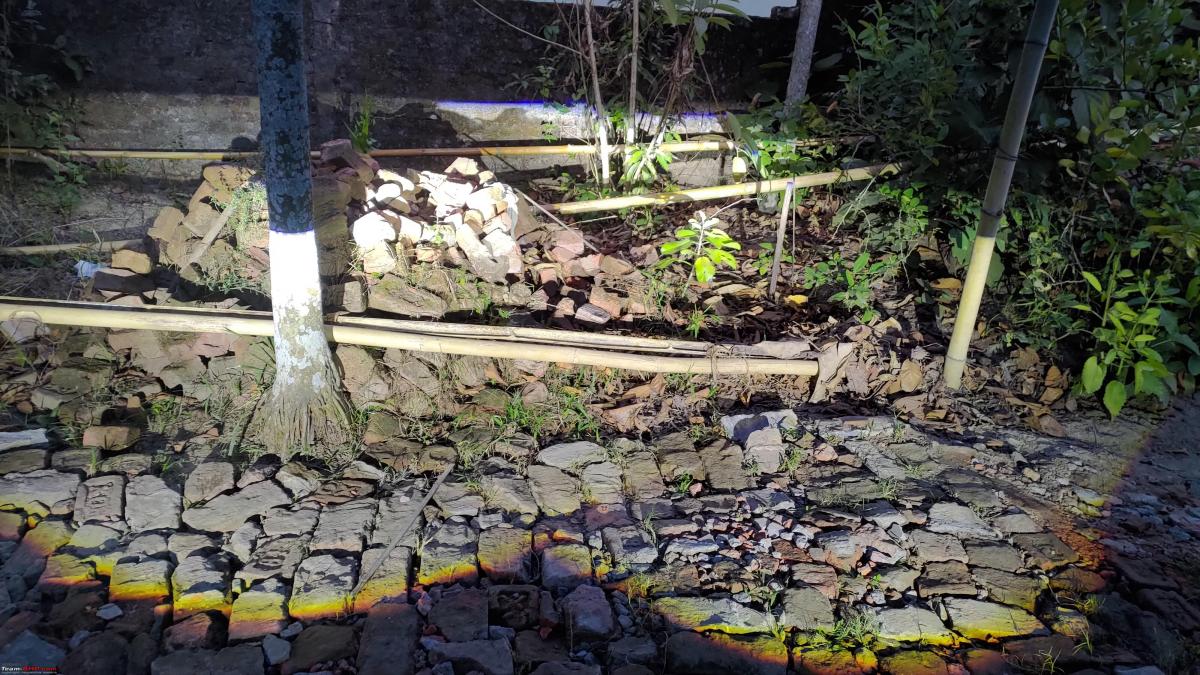
6000K Fog

4300K Fog

3000K Fog
They too have added good output to the existing setup and it's been a breeze so far. Maybe I will upgrade to the IPH M617 LED Projector Fogs later this year but for the time being these are more than enough.

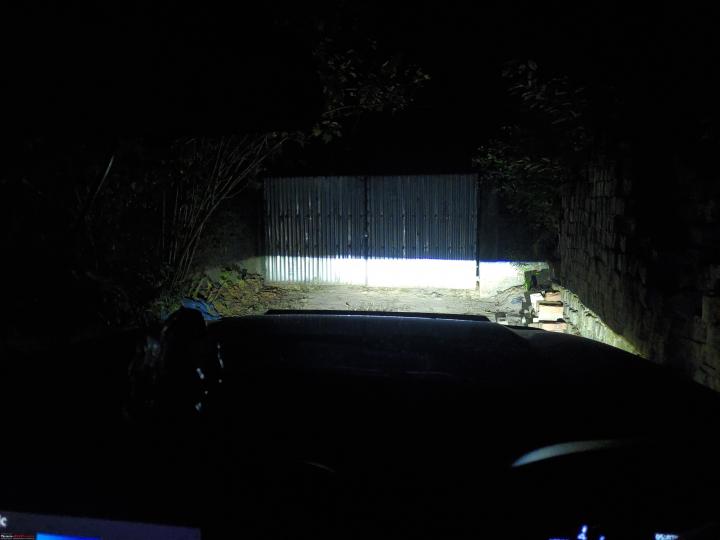
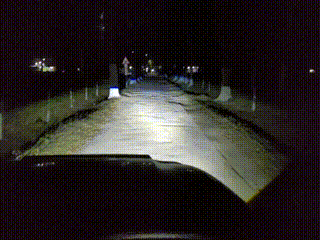
Alignment on point even after throwing it on bad roads

Until the next update and Happy New Year!
Check out BHPian comments for more insights and information.
News
DIY: Converted the rear fog lamp on my Maruti Swift to LED
I noticed the OEM one had provision to mount the LED reflector along with the LED's same where the aftermarket one had them.
BHPian Ashtoncastelino recently shared this with other enthusiasts.
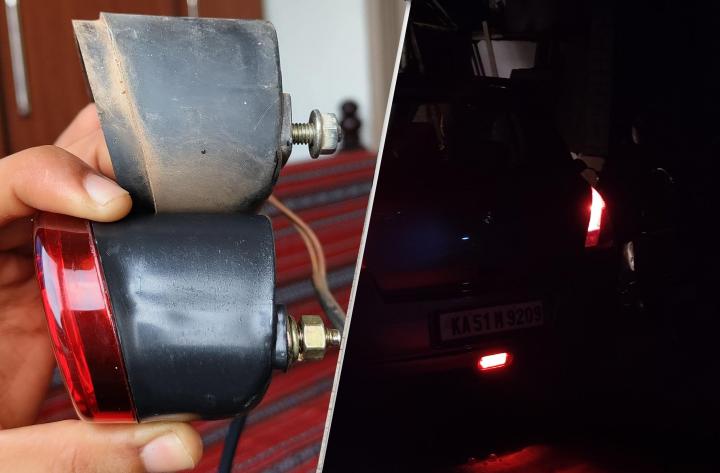
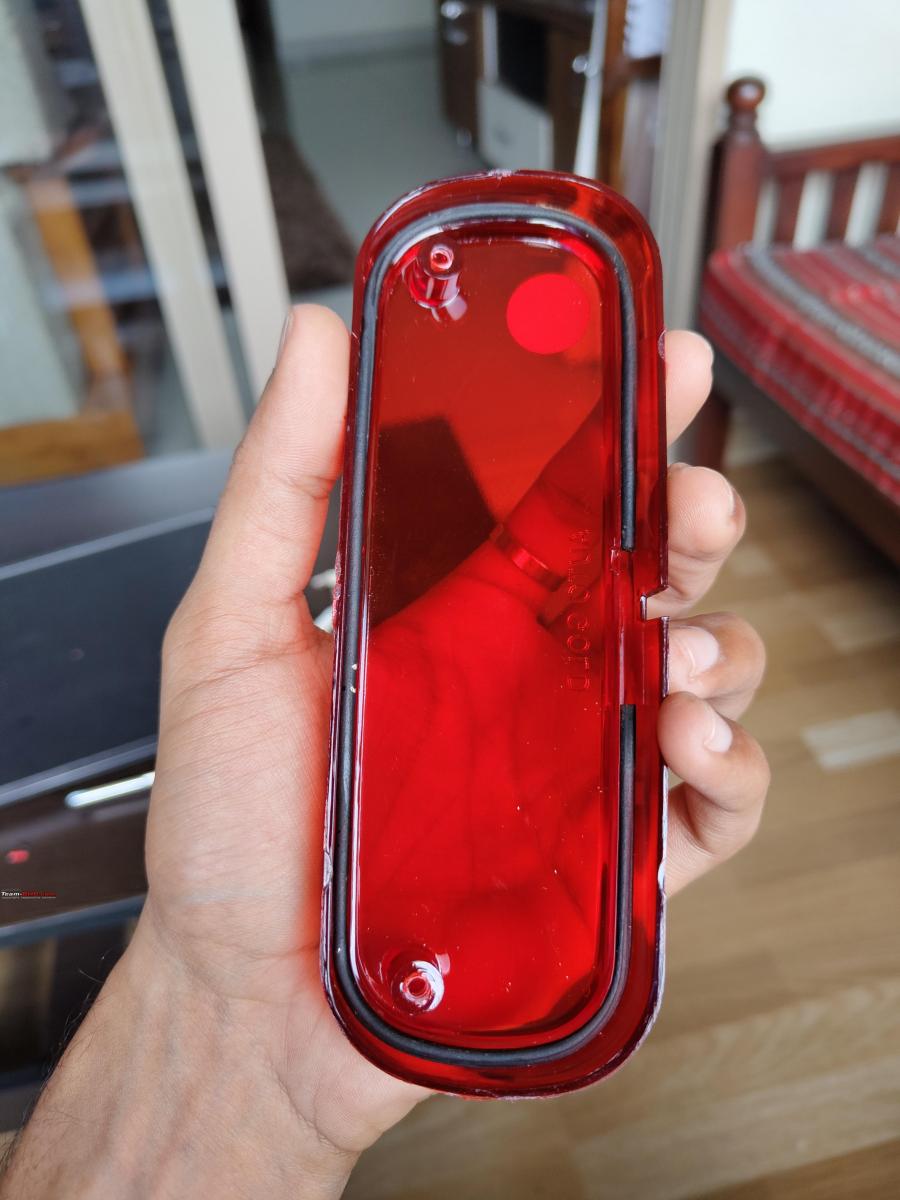
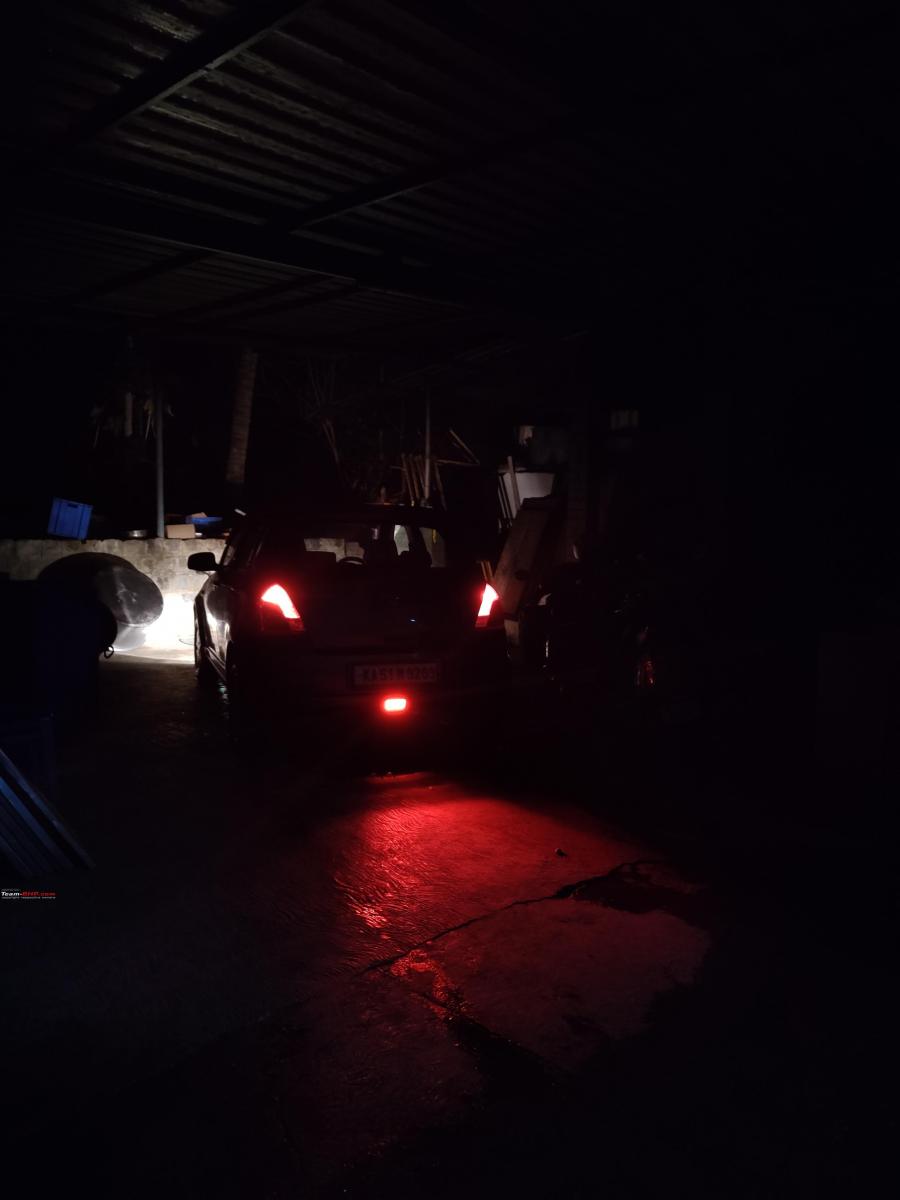
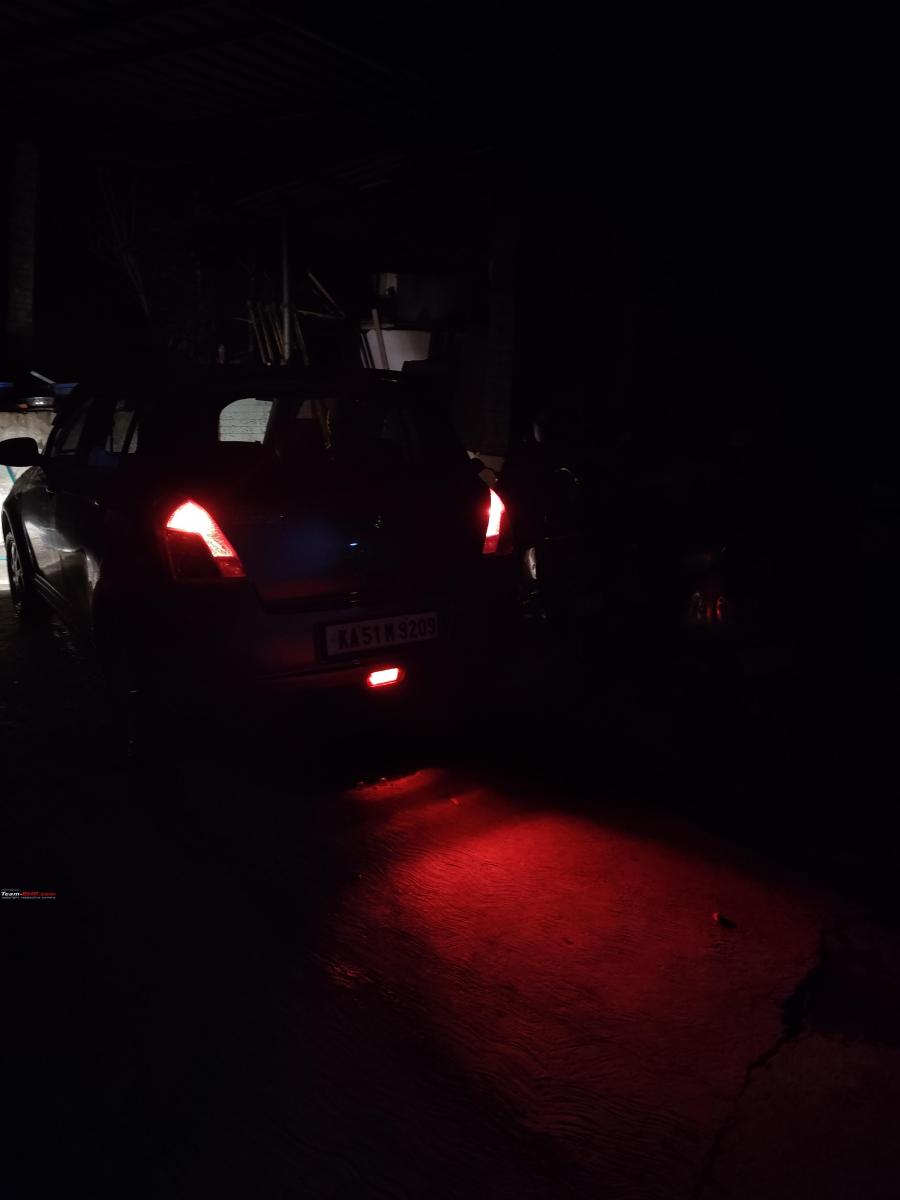
Rear fog light LED conversion:
The existing stock rear fog lamp reflector was burnt and more over water ingress caused the reflector to worsen. I tried putting LED bulb but it was of no use. for the time-being my uncle at home had 3 led strips so I mounted the same for a few months and was on the look out for a replacement.
I scouted Boodmo and the only fog lamp with LED I found was manufactured Auto-Gold. But it was mentioned compatible with the Second Generation Swift ( 2011-2017). I anyways placed an order on Boodmo for it and it arrived in 5 days:
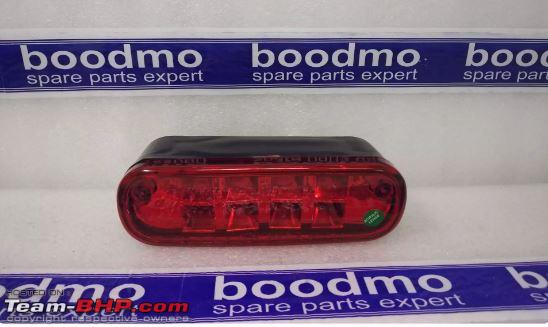
As soon as I opened it I could notice the quality issues. The waterproof plugs for the pins behind the connector were not present, the connector was of poor build and it had a HOLE in it !! and moreover the housing did not feel sturdy as the OEM one:
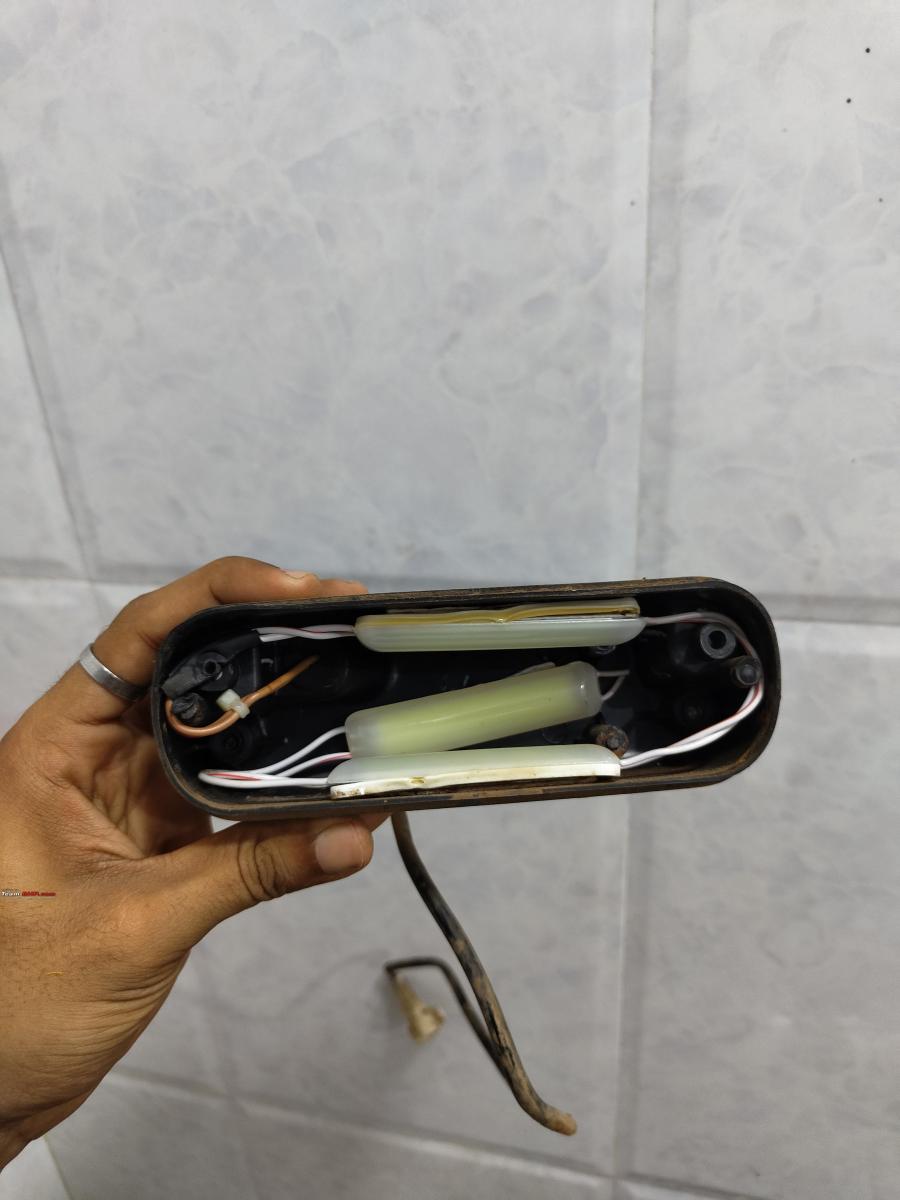
Only thing I wanted to see was how bright the LED's were. Bench tested it and it turned out to be EXCELLENT ! So I decided to open my existing rear fog and compare the internal design with the Autogold one:
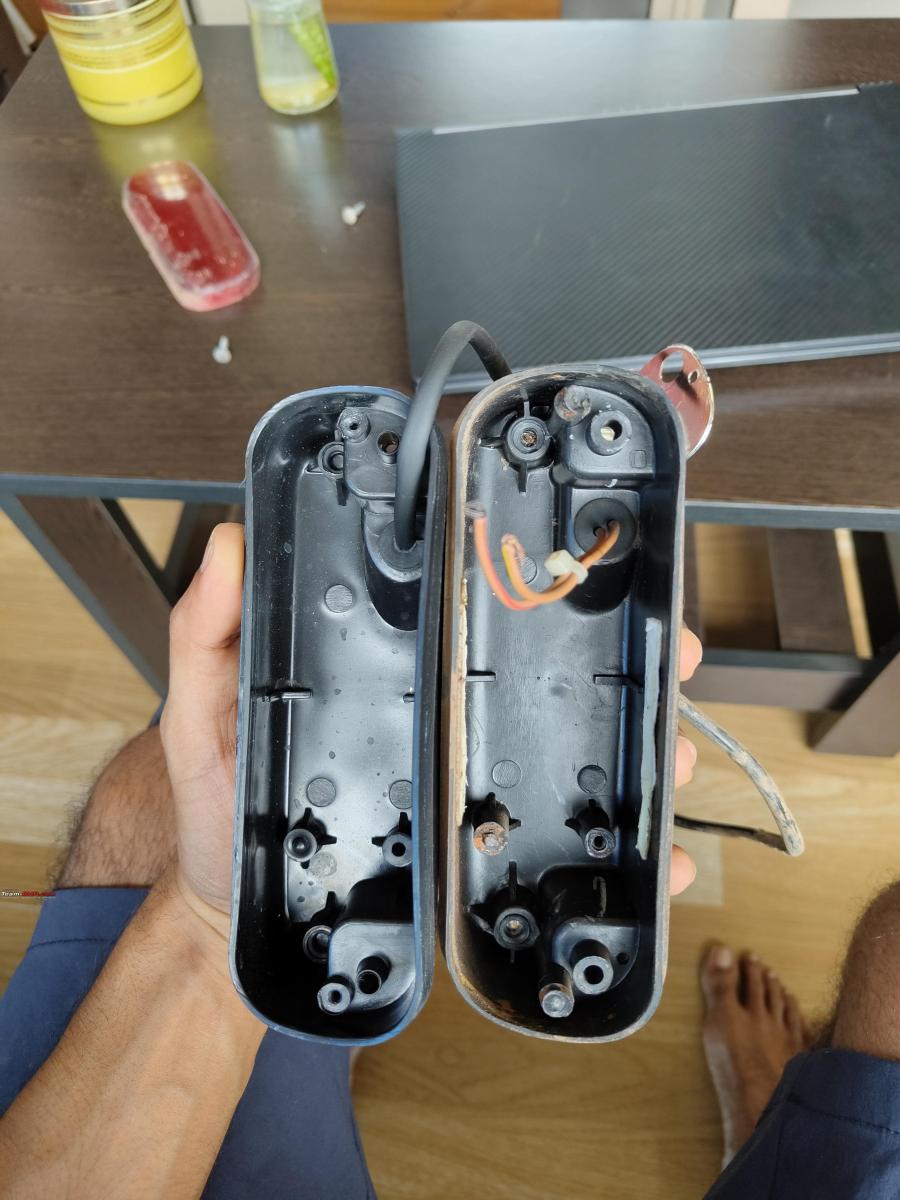

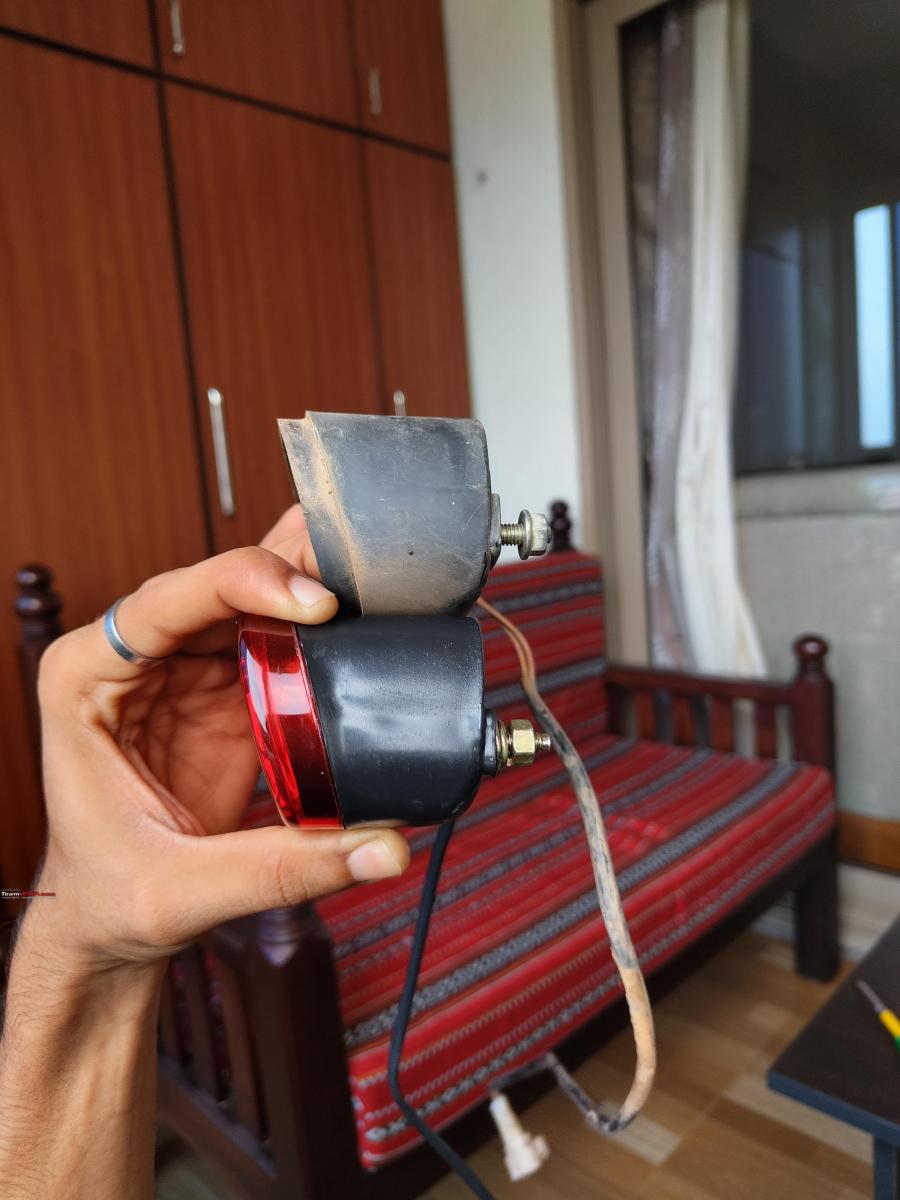
The internal structure was the same. Only thing was that the length of the AutoGold one was more longer than stock, maybe since it is specifically made for the Second Gen Swift.
I noticed the OEM one had provision to mount the LED reflector along with the LED's same where the Autogold had them. So it was decided to transplant the LED onto the stock rear fog lamp and also use the stock rear fog lamp wiring harness than using the Autogold one:
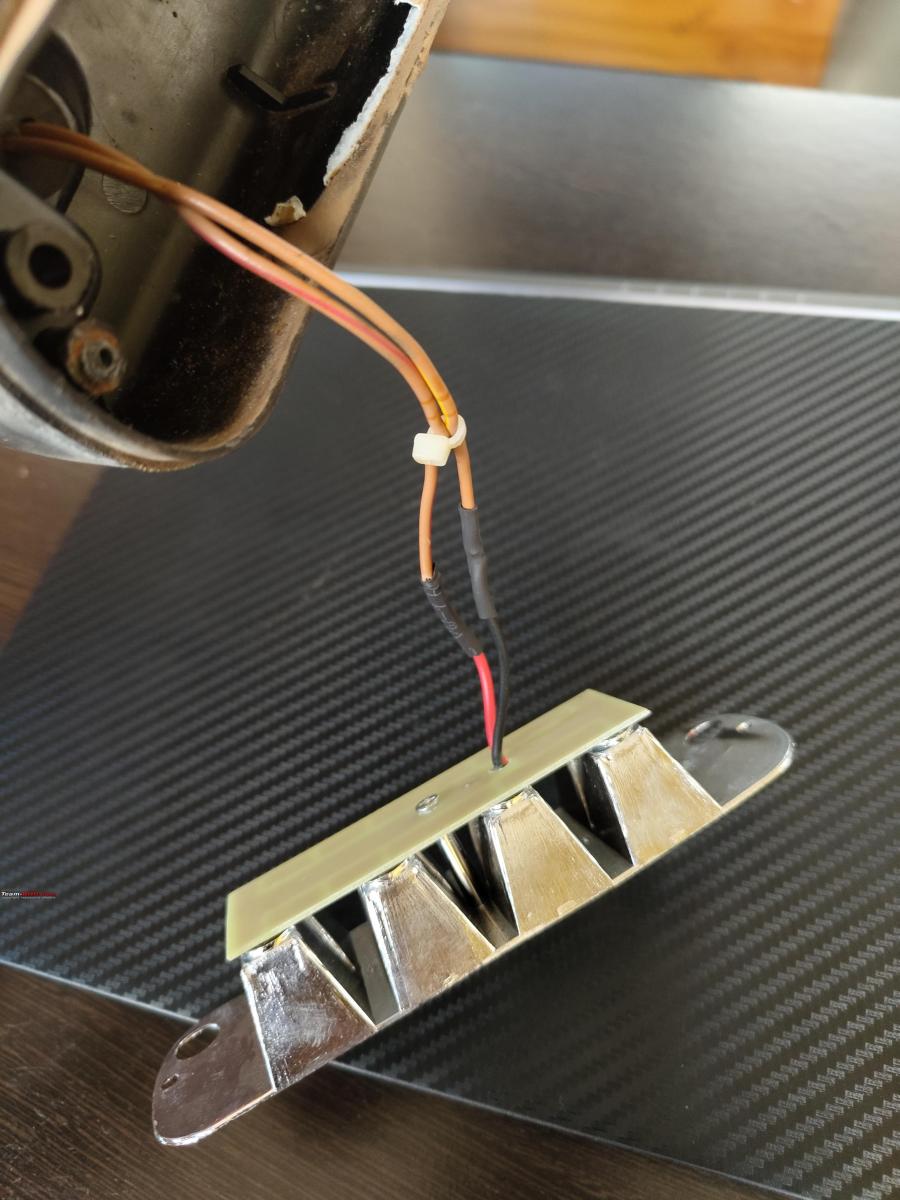
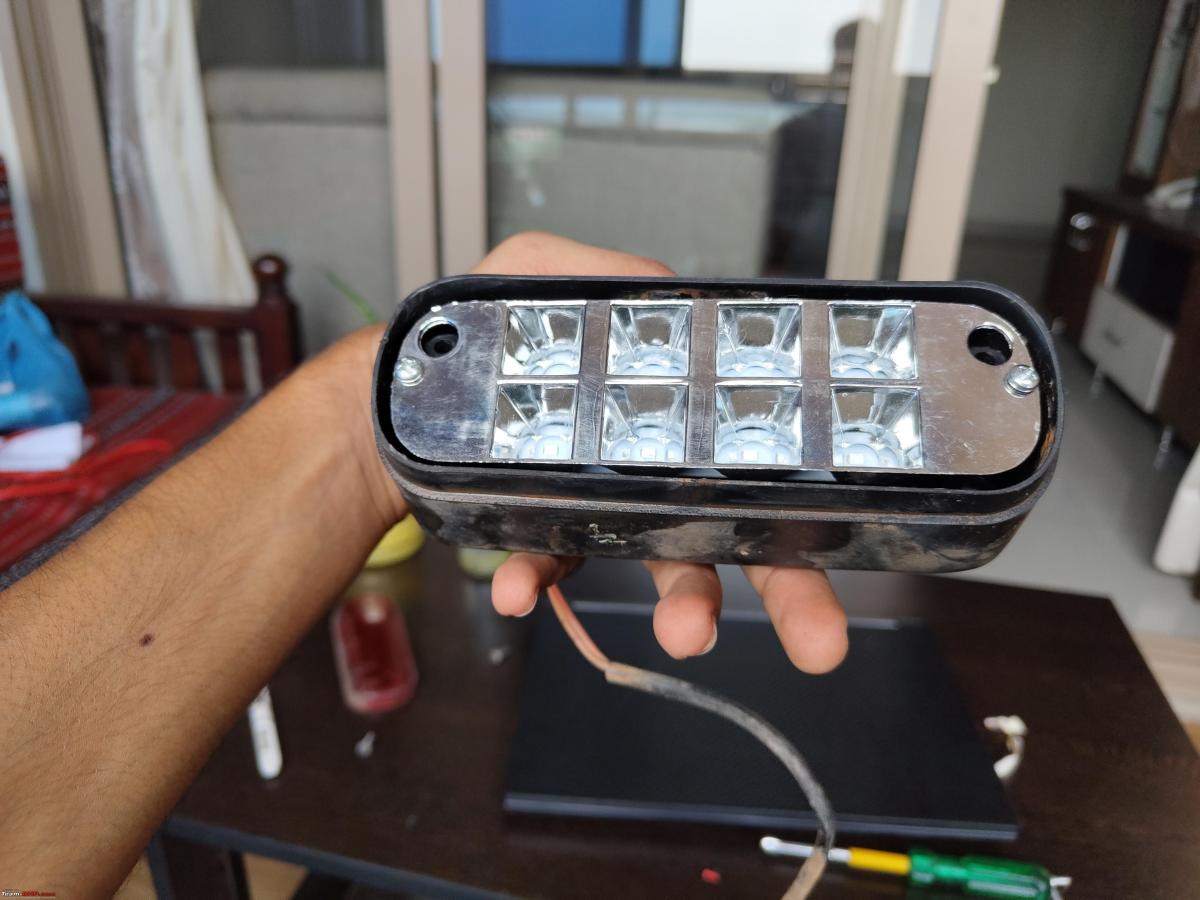
Soldered the wires and installed the LED's onto the Stock rear fog lamp housing. I also sourced the gasket for the fog lens from my MGP because the Auto Gold one did not have that as well. Costed just ₹16:
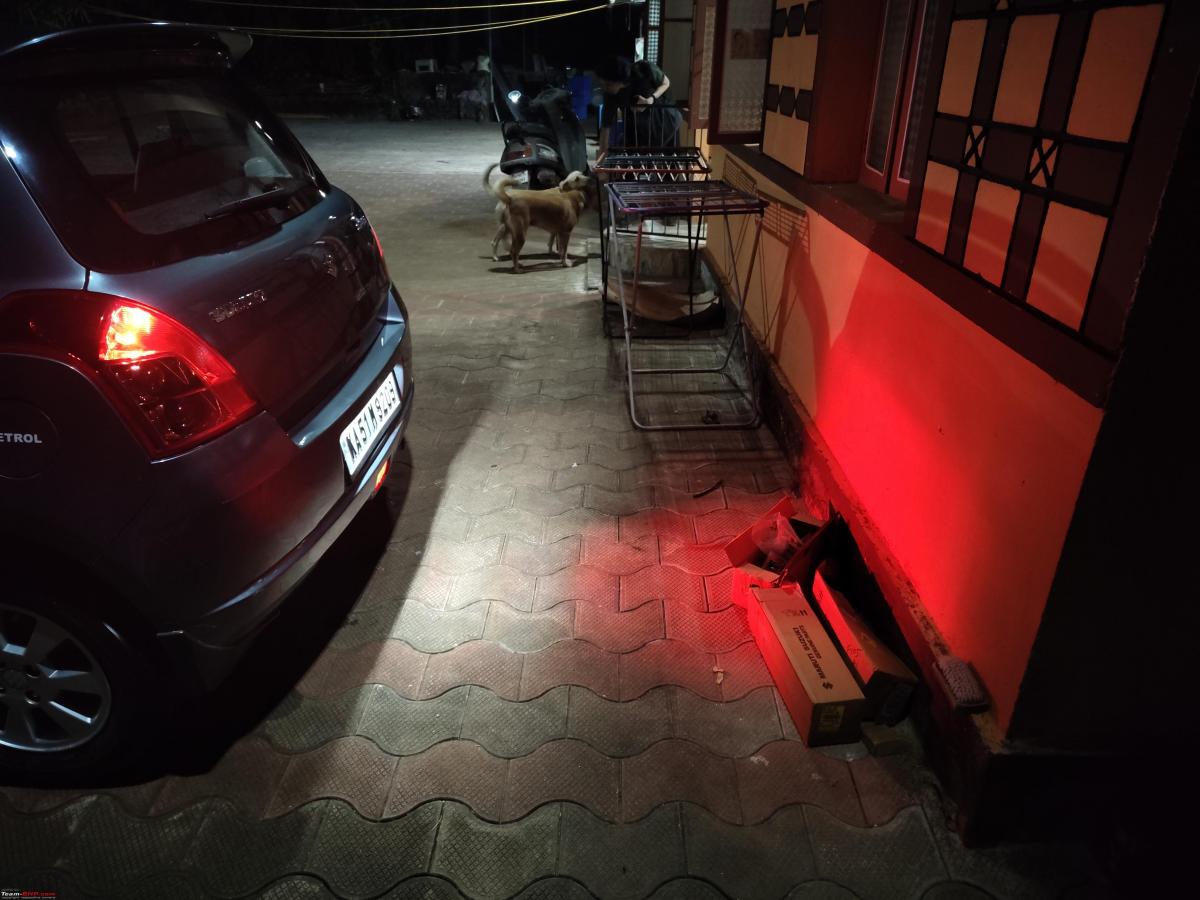
Assembled it all and fixed it back on the car. Tested the light output at night and it was fantastic ! My main concern was that it should not dazzle the vehicles behind me and this perfectly suited:
Check out BHPian comments for more insights and information.
- Tags:
- Indian
- Maruti Swift
- DIY
- LED
- fog lights
News
DIY: Upgraded the fog lights on my preowned Maruti S-Cross 1.6


The S-Cross comes with fog lamps which have a small protruding plastic latch that holds the stock fog lamps. These need to be cut so that the mounting bracket for these LEDs can fit in.
BHPian sudeepg recently shared this with other enthusiasts.
Happy Diwali Everyone.
Fog light upgrade:
It is a very well-known fact that fog lights, and most OEM lights, are quite dull and ineffective for regular use. The premium offerings from Maruti all come with the dull fog lights that have been in use for years. I had previously used XP Micros on my blue S-Cross and they never failed me, besides providing great light on highways. I wanted to install these fogs in my white S-cross as well and had procured them from Blaze India. As a Diwali gift, I installed them yesterday.
Credits:
- To a good friend and BHPian Ashton Castellino who helped procure the H8/H11 connectors at a reasonable cost & for the good advice during install. Thoroughly enjoyed the conversation on how to go about the installation.
- To my dear son who always helps me with the DIY.
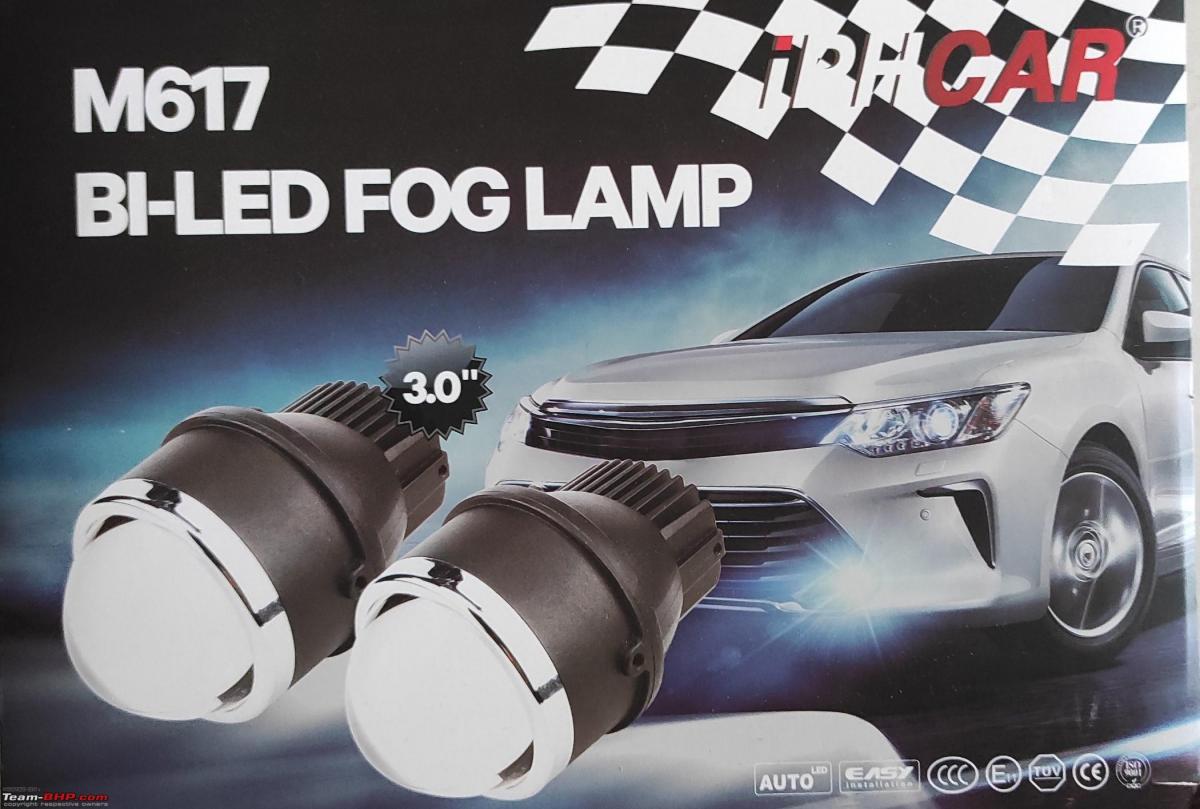
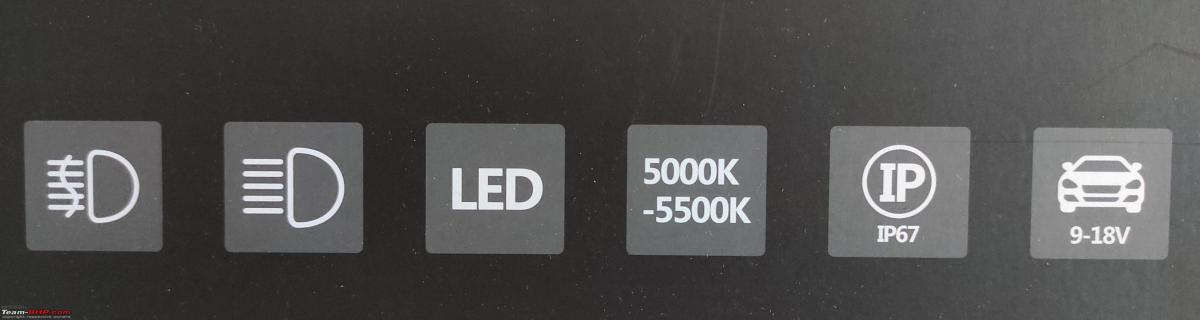
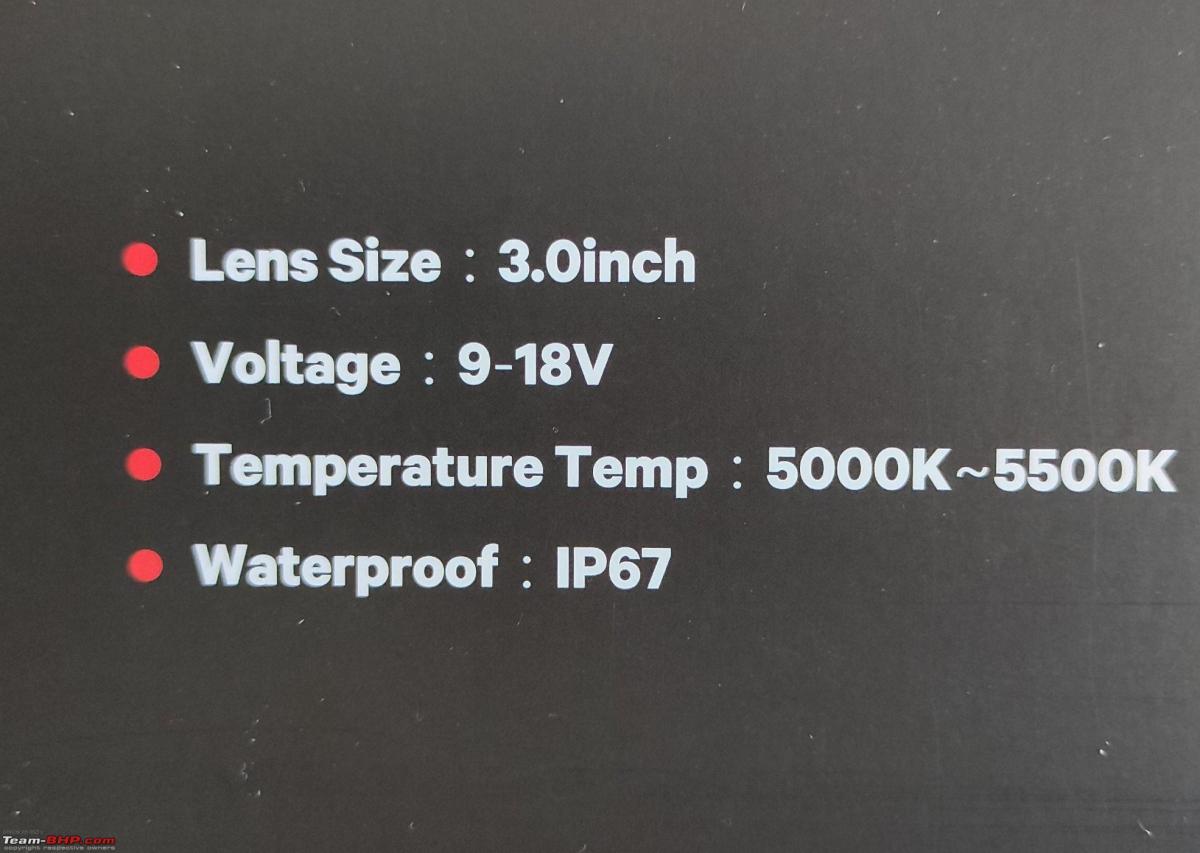
The product:
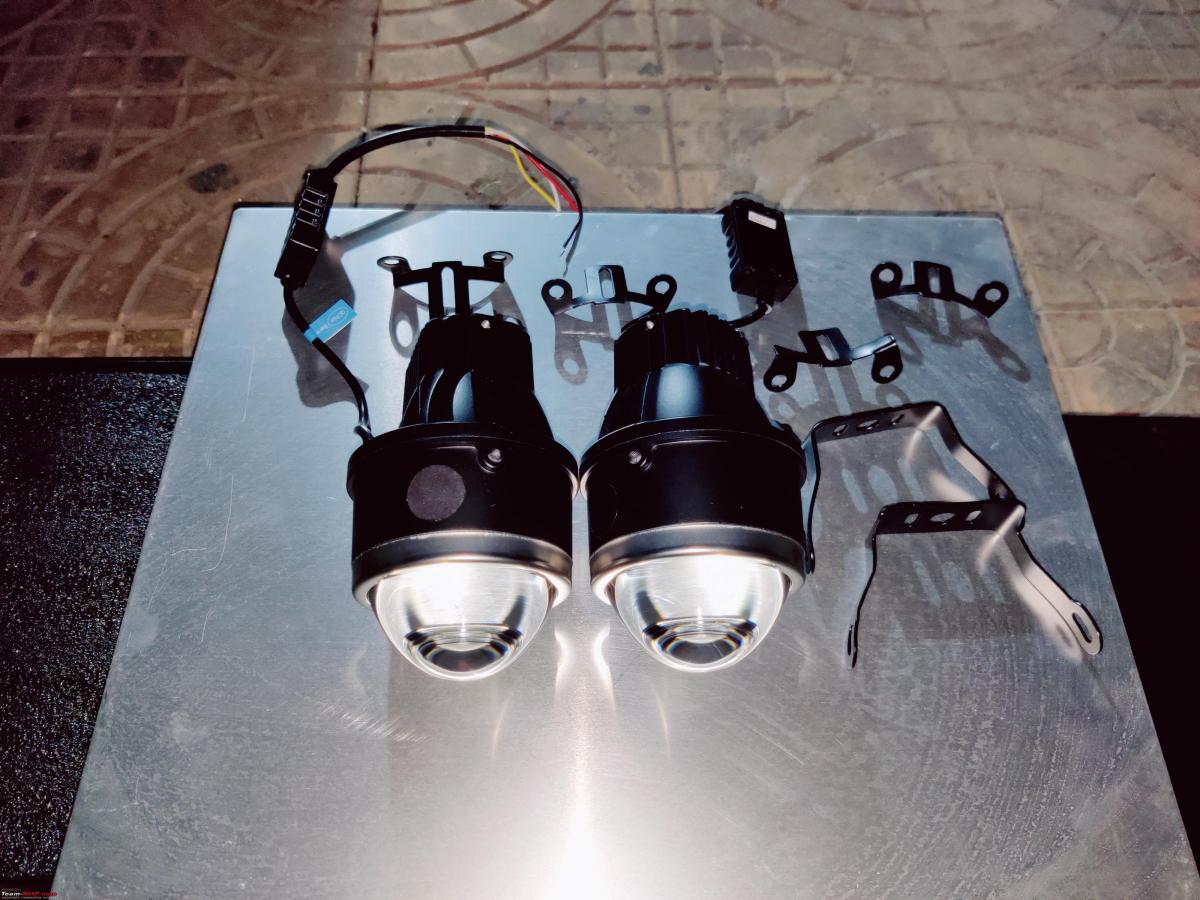
- Make: Sealed IPHCar Bi-LED Fog lamps with high and low beams
- Lens Size: 3.0 Inch
- Waterproof rating: IP67
- Colours: Yellow (3000K), White (5000-5500K).
- Operating Voltage: 9 - 18 Volts
- Provider: Blaze India
The installation:
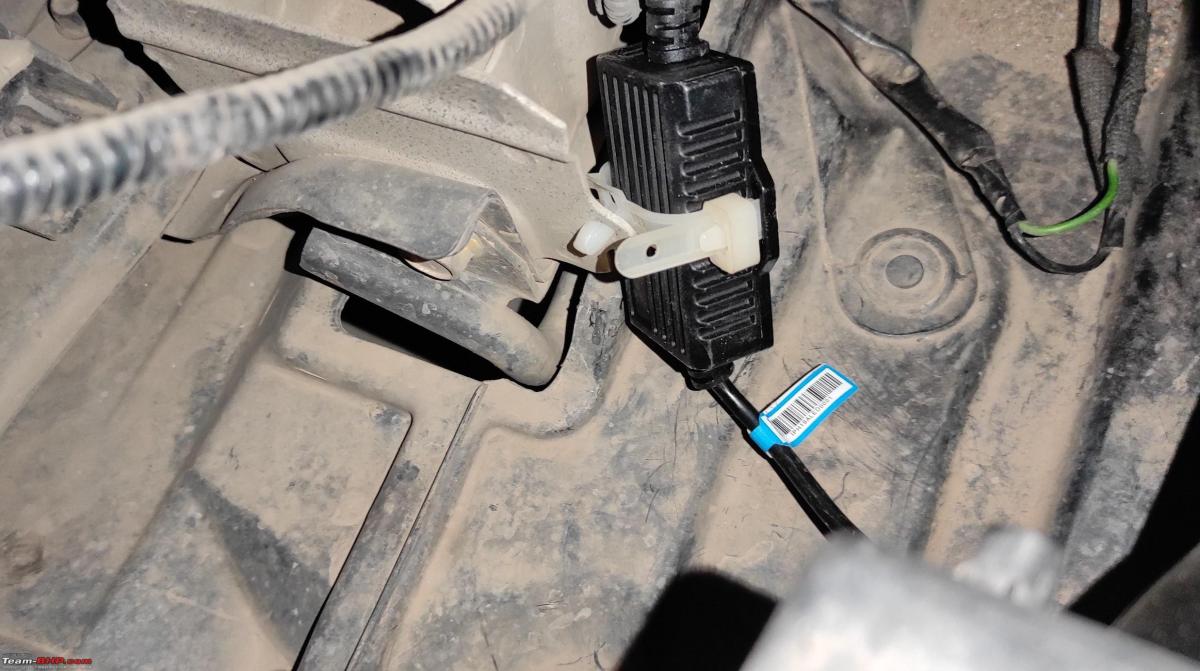
The box says installation is straightforward, but it isn't so. First, the low and high-beam wires do not come with end connectors for universal compatibility. They come like this:
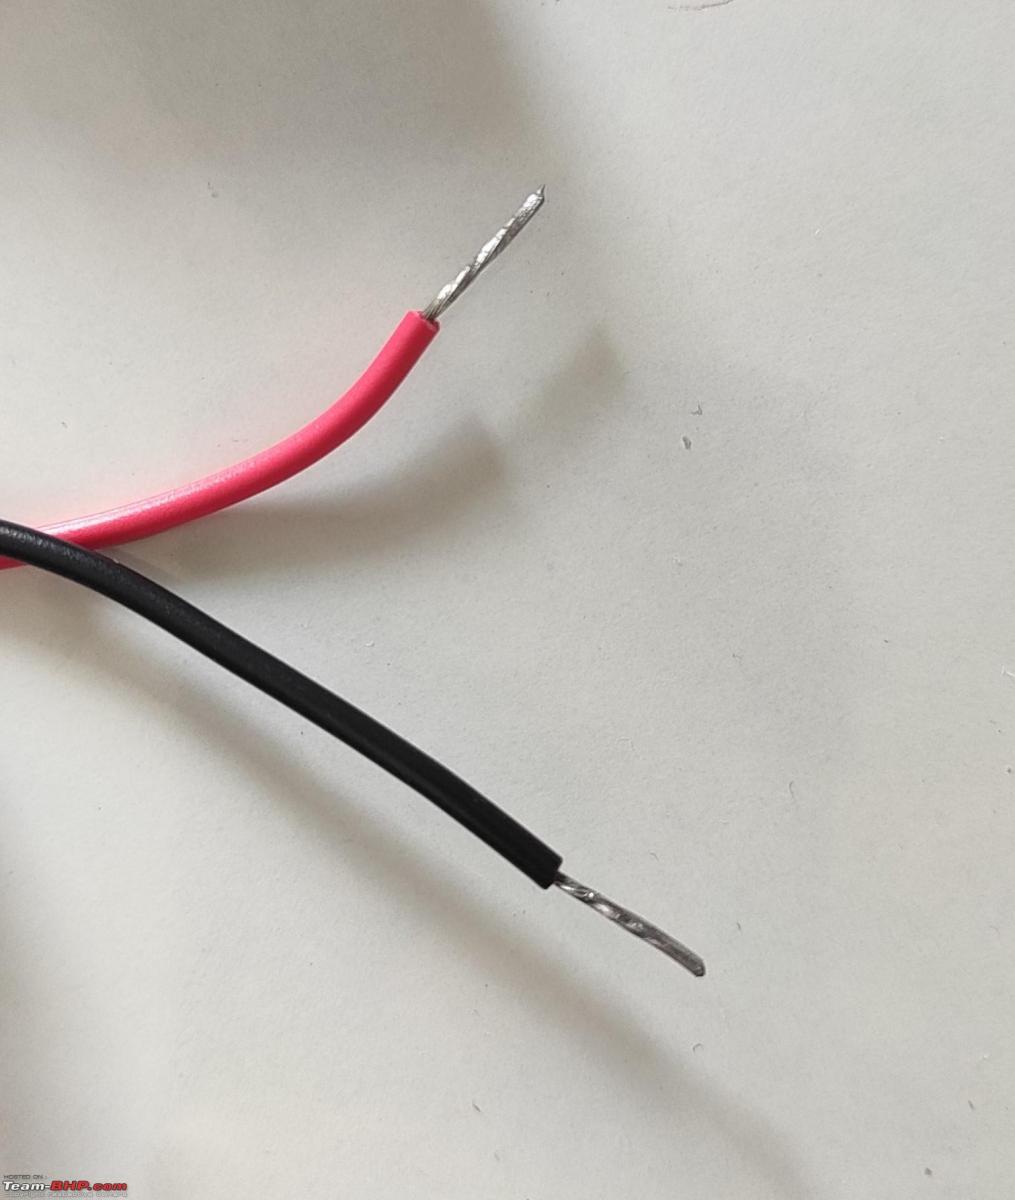
We have to procure the corresponding waterproof connectors (For S-Cross H8/H11) or resort to using electrical tapes. The latter approach also makes it somewhat difficult to maintain it in the long run since these fogs sit very close to the ground and can be subjected to a lot of water splash.
Secondly, there are multiple problems I encountered when I began the installation:
- The S-Cross comes with fog lamps which have a small protruding plastic latch that holds the stock fog lamps. These need to be cut so that the mounting bracket for these LEDs can fit in.
- The mounting bracket is a curved T Shaped bracket with vertical and horizontal adjustments. It is impossible to tighten them once it is installed due to the lack of space for the Allen key to reach into the screw on the inside area. Not even a short, 90-degree Allen key can access it.
NOTE: Keep in mind that the fogs are mounted in the S-cross from the front side, not from inside the bumper. Even in the case of mounting from inside the bumper, you will need the bumper to be securely mounted before alignment. To reach the inside area of the bumper, you have to remove holding screws which will throw the bumper out of alignment.
- You need two washers to get a good grip on the mounting bracket for the projector. Even then I am 100% sure that due to the vibrations, they will come off by themselves in no time. You have to use a thread locker like Loctite to lock it in, but the issue again is, how do you apply the thread locker since aligning and tightening is impossible (due to the point noted above). If you remove and tighten it by hand, the alignment of the beam will go off. I resorted to using a bit of MSeal to secure the projectors. Unfortunate, but that is what it is.
You will have to bend the bracket a bit to align the mounting holes. I chose not to install the high beams for two reasons:
- One yellow light on high beam can be very distracting.
- The high beam isn't that tall & I am already having great high beams on the Morimotos.
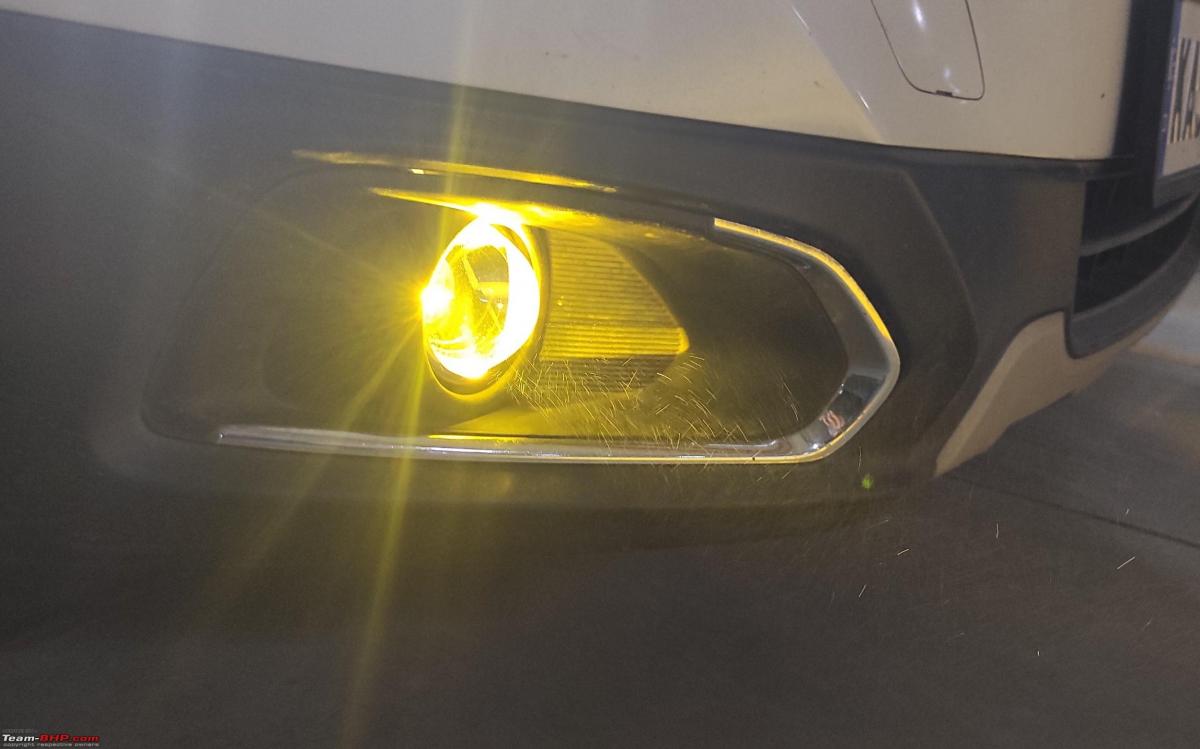
The color is cycled using the fog lamp switch (On/Off)
Pictures of the installation:


Check out BHPian comments for more insights and information.
News
DIY: Bi-LED projector fog lights on my 2nd gen Mahindra Thar


I love the satisfaction of DIY installation on my car. Since I already did DIY replacement of my Thar's AC vents, DIY fog lights installation was next on my mod list.
BHPian dr_TJ recently shared this with other enthusiasts.
Introduction:
I happen to own a 2nd gen Mahindra Thar and coming from the halogen projector low beam setup of the Ford Ecosport, the halogen reflector headlights of the Thar felt inadequate. Another quirk to be noticed is, with Fog lights ON along with the Headlights in Low beam at level 1, there is a dark area between the illumination of the Fog lights and the Headlights low beam.
I got a taste of the Thar's headlights plus fog lights illumination power during my first night drive and also after my 500 km road trip.
This made me consider upgrading the setup whichever way possible with stock wiring.
I did check out the other Thar ownership review threads here in our forum and the official Thar review thread as well. Information gathered was, Thar has H16 19 watts fog lights. Fellow BHPian MithunSathianat has made a thread about DIY 3" Bi-Xenon fog lights installation on the 2nd gen Thar. Although his custom stainless steel mounting plate was a worry for me cause I won't be able to get that fabricated back here. Still I decided to give it a try. His thread was immensely helpful in guiding my DIY installation process albeit with some modifications. Link to his DIY Thread is here.
The hunt for the projectors:
Initially I was considering 3" Bi-Xenon Projectors from iPhcar but I was worried about the wiring. As MithunSathianat initially used the stock wiring on his setup but later, he got himself a relay harness. I decided to look out for other options which would be feasible with the stock wiring.
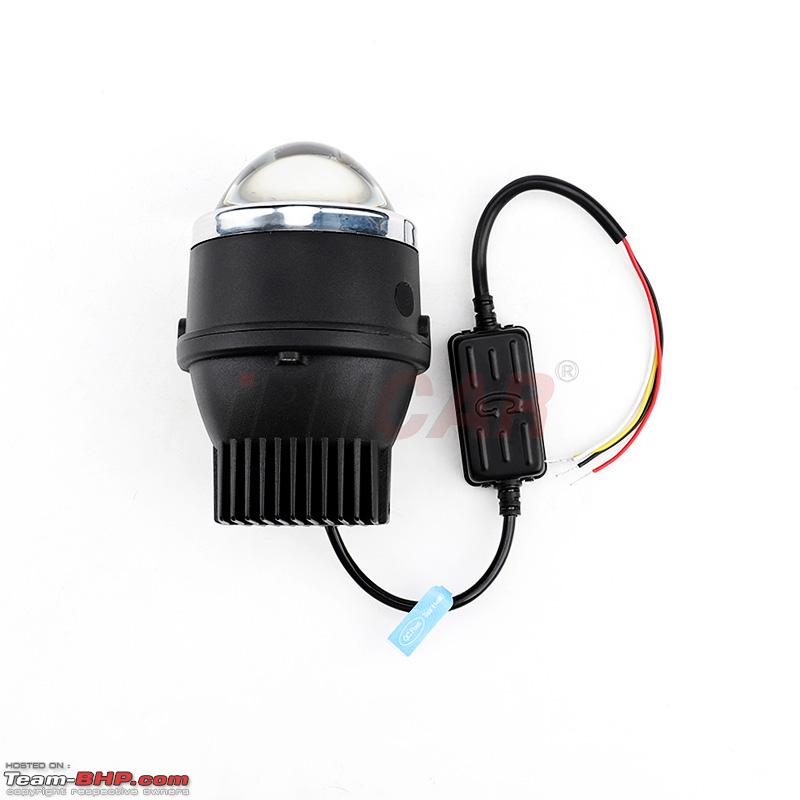
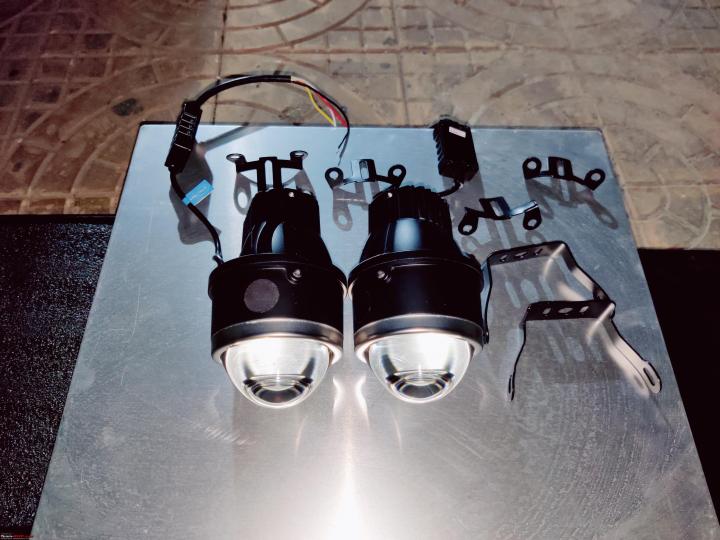
Came across Bi-LED Projector fog lights from iPhcar which according to most sellers are rated at 35W Low beam, 40W high beam, Which is quite weird cause the switching of low beam to high beam just involves a solenoid to flip a shroud behind the projector lens. Another worry was the color temperature of the LED Projectors, cause with a color temperature of 5500-6000K, it would cause issues in foggy or rainy conditions (Which would be a big irony). And in Assam, I would not be happy with such a situation considering our weather conditions here.
However, I came across another model of the LED projector fog lamps ,from iPhcar again, which has 3 color temperature output (3000K, 4300K and 6000K).
And thankfully I found fellow Bhpian Manuuj, who got these new LED projectors installed on his brand new Force Gurkha. Famously known as Asterix. I PM'd him through our forum and I got a prompt reply from him regarding the seller (Bindra Motors). The asking price was less compared to the others sellers I contacted earlier. I thanked him and contacted the seller on WhatsApp. The next morning, I made the payment, and the seller sent me a video of testing the Projectors and the packed parcel. I got the tracking information in the evening. Very prompt service. I did ask the seller about the installation process for the new Thar, to which he replied, We can use the stock mounts for the LED Projectors, will require some trimming. I received the parcel after 6 days.
Trivia:
Once I received the parcel, I was still curious about its power draw situation. Cause if it happens to be 40W, I would have to buy a relay harness as well. So, I decided to test its current draw with my multimeter. I used my 70mai 12V power bank for the required 12V and used the multimeter to check the current in Ampere. As per the multimeter, Voltage of the power bank was measured at 12.6 Volts and the current draw of a Single Projector was at 1.67 Amps, which equals to a approximate power draw of 21 Watts. Yes, for both low and high beams. So, No more requirement of relay harness.
Installation:
Why DIY?
I love the satisfaction of DIY installation on my car. Since I already did DIY replacement of my Thar's AC vents, DIY fog lights installation was next on my mod list. Yes, requirement of a custom mounting plate was a worry but as per the sellers advice, I was keeping my fingers crossed for the projectors to work with the stock mounts.
Let's get started:
In order to access the fog lights, we need to remove the wheel well plastic lining aka splash guard. The guard is held in place by 6 scrivets. They have a Phillips head pattern. Thankfully, the Thar has good enough space to get to all the 6 scrivets with a Phillips head screwdriver (Although with a 1/4" Rachet) with the wheel kept straight albeit with some dirty arms.
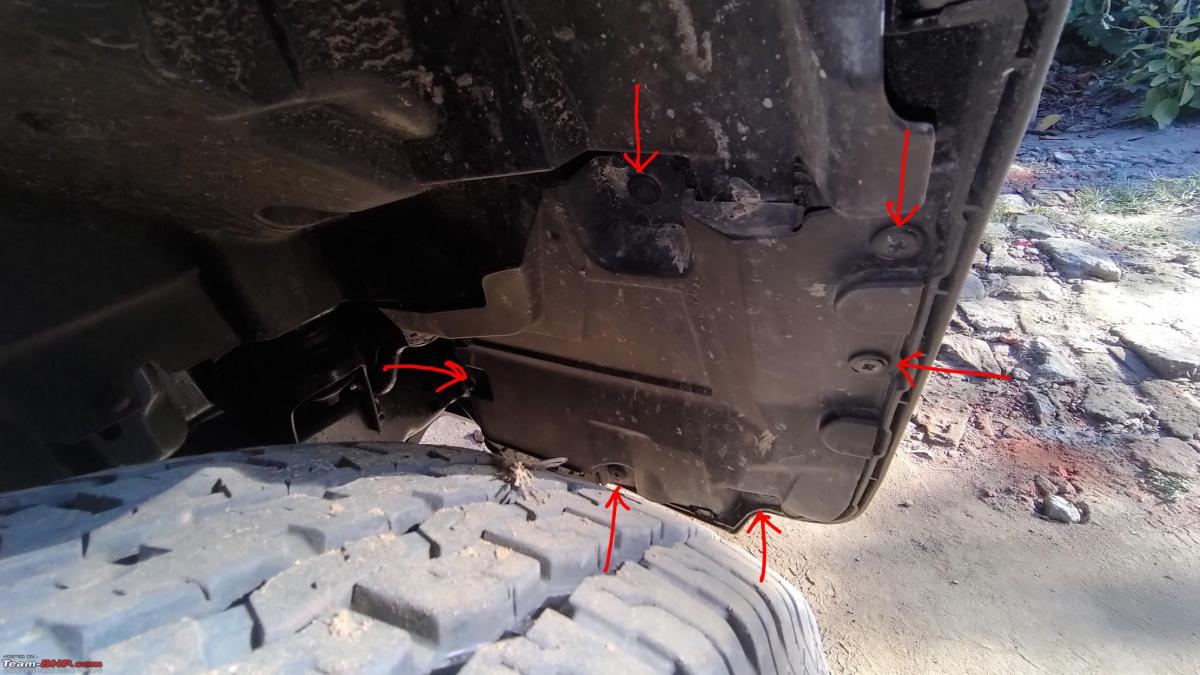
Once all the scrivets are removed, The plastic panel comes out and we have full access to the fog light connector and mounting screws.
The Thar has a different type of mounting situation. It is held in place with 3 screws (Phillips head) at three different points and two support/orientation pins.
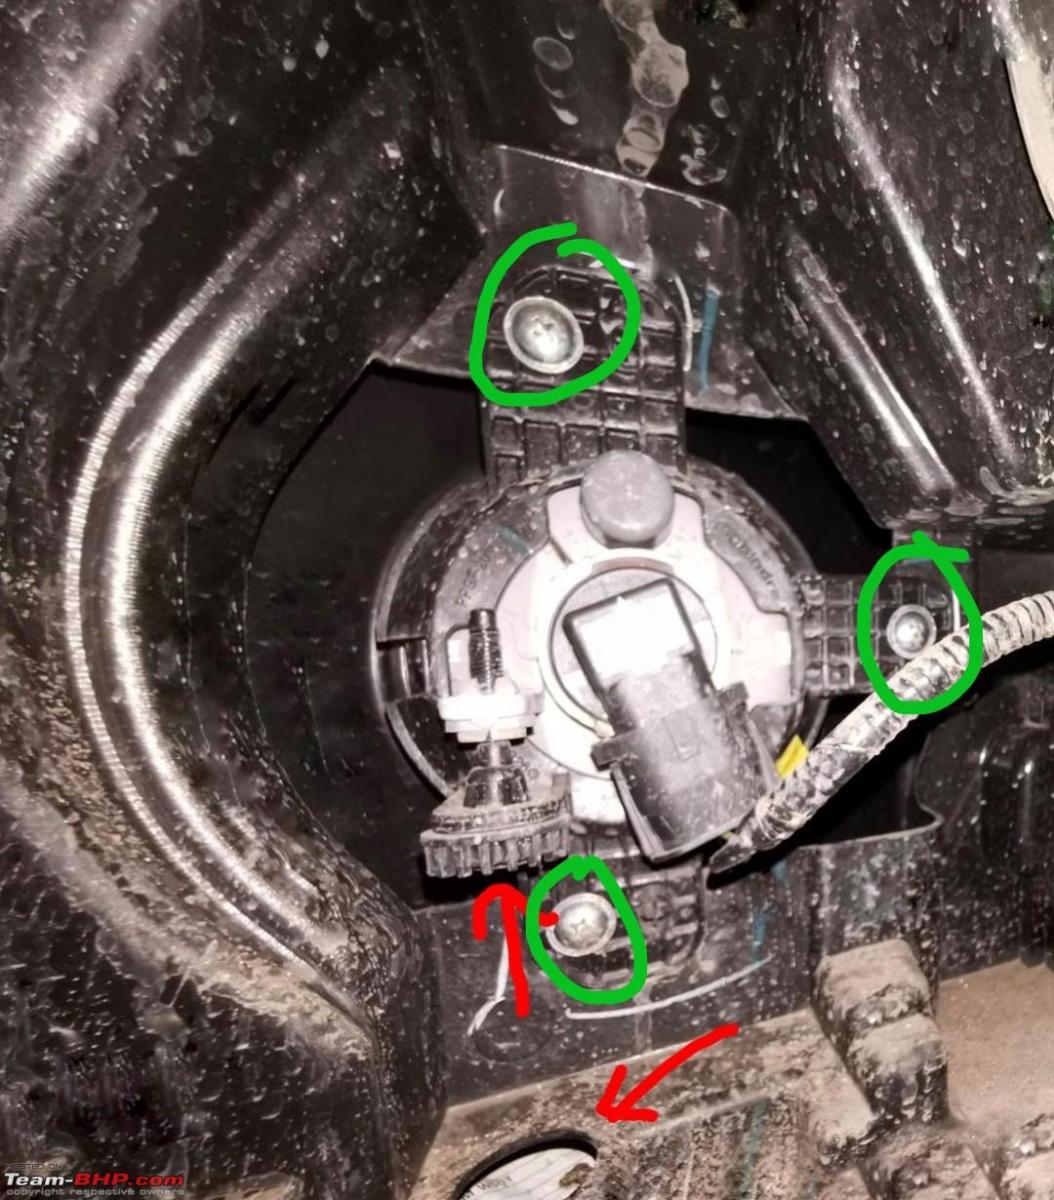
The stock fog light held with 3 Phillips head screw (marked in green). Note the red arrows indicating the stock fog lights leveling screw and a hole to access that from below the bumper without removing the plastic panel. We will need a long Phillips head screw driver for this
I disconnect the fog light coupler and unscrew the 3 screws. The fog light is easy enough to remove. Now, In order to separate the fog light from the mounting kit, we need to remove the leveling screw and pop the fog light housing out from the two retaining points on the side of the mounting kit.
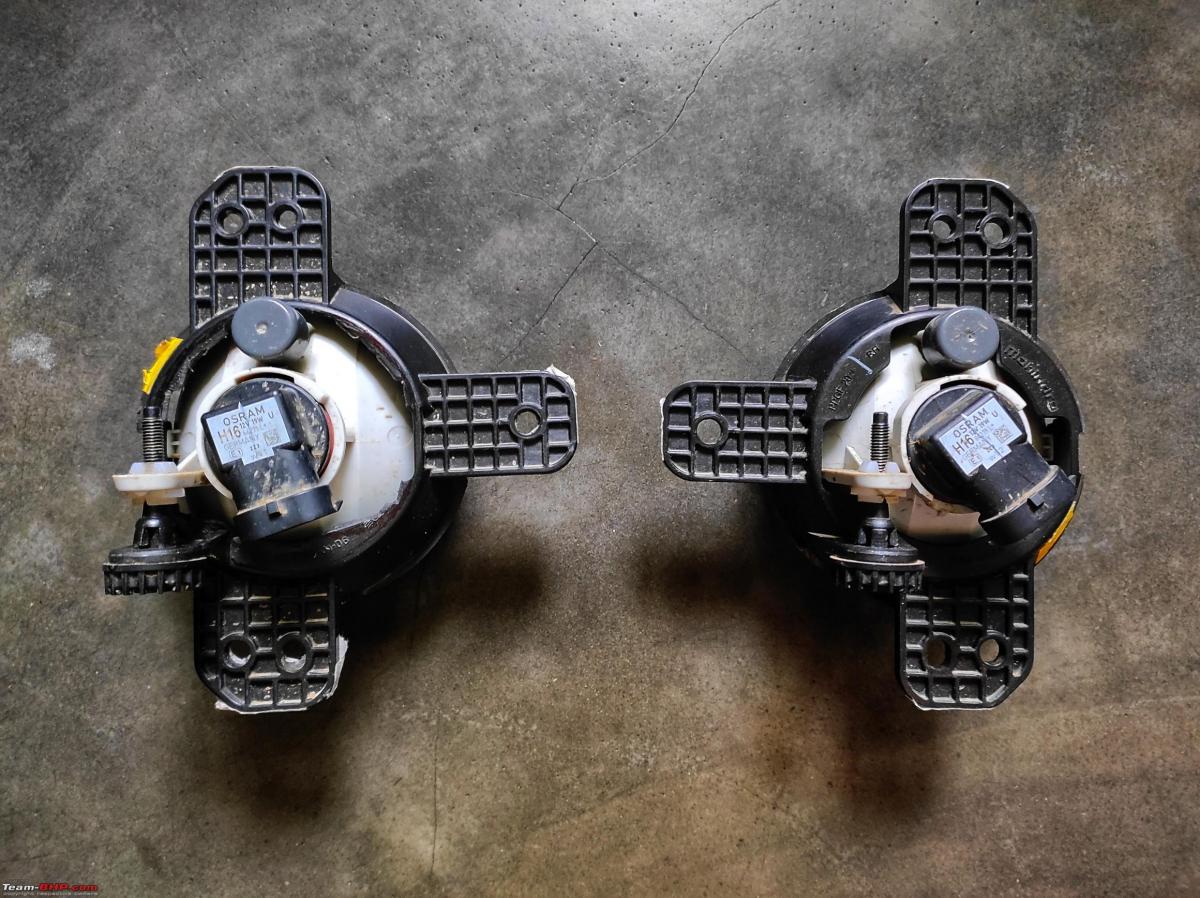
Now, as per the seller, I can use the stock mounts, so, I started with the trimming process. I used a wire cutter to cut small pieces of the mounts to fit the projectors. After trimming few chunks on the mount, I could fit the heat sink of the projector.

But then I realized, Even if I do some substantial amount of trimming, the projectors won't fit in the stock mount.

Unless I go crazy with the trimming, thereby either breaking the stock mount or weakening it substantially. I also wanted to retain the stock fog light setup just in case I need to revert back to stock.
Now, the only option left, was to make custom mounting plate for my projectors similar to MithunSaithanat's setup like this. I contacted a steel fabrication shop for help but they seemed confused, and also fine tuning the mount for the exact dimensions was a big issue.
So, I decided to do some test mounting. Made a template of the mounting plate in paper and did some test fitting. Once, it was good, I decided to fabricate the mounting plate out of plastic. I found a relatively sturdy and unused plastic panel in my home and decided to use it for the fabrication.
I laid down the paper template and marked the dimensions on the plastic panel and use a heck saw to carve out the mounting plate. The inner circle was cut with the help of a chisel and micro-motor drill
Wish I had a dremel tool for better and faster results.
Yes, a very makeshift fabrication process but I just wanted to mount the projectors once and check out the alignment. If everything is ok, I would refine this particular mounting plate or use a different material.

My plastic mounting plate.
Saturday afternoon went by in this mounting plate fabrication process. Sunday would be the day, where I actually mount the projectors to the bumper.
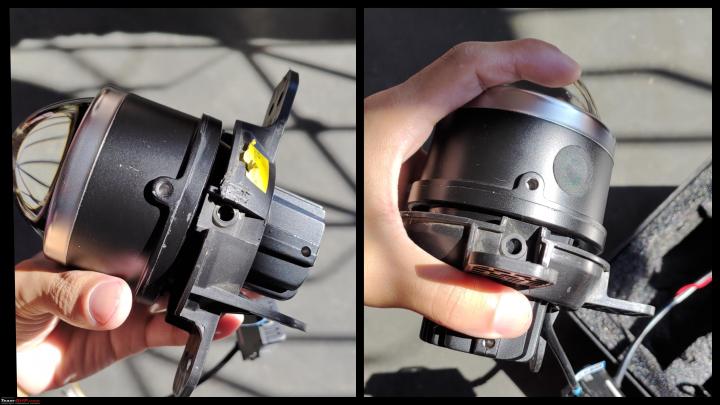
The projectors has two clamps per unit which is held to projector body with a Hex allen screw and washer on either side.

Picture given by the seller.

This picture is courtesy of BHPian Chiranjitp.
Any better solution?
Yes, There is a better solution available which I plan to do in the future.
I came across these fog light covers in Boodmo, which is normally present in place of the fog lights in AX variants. This has a diameter big enough to fit the 3" projector fog lights through and the overall dimensions with respect to the mounting screws would be perfect.
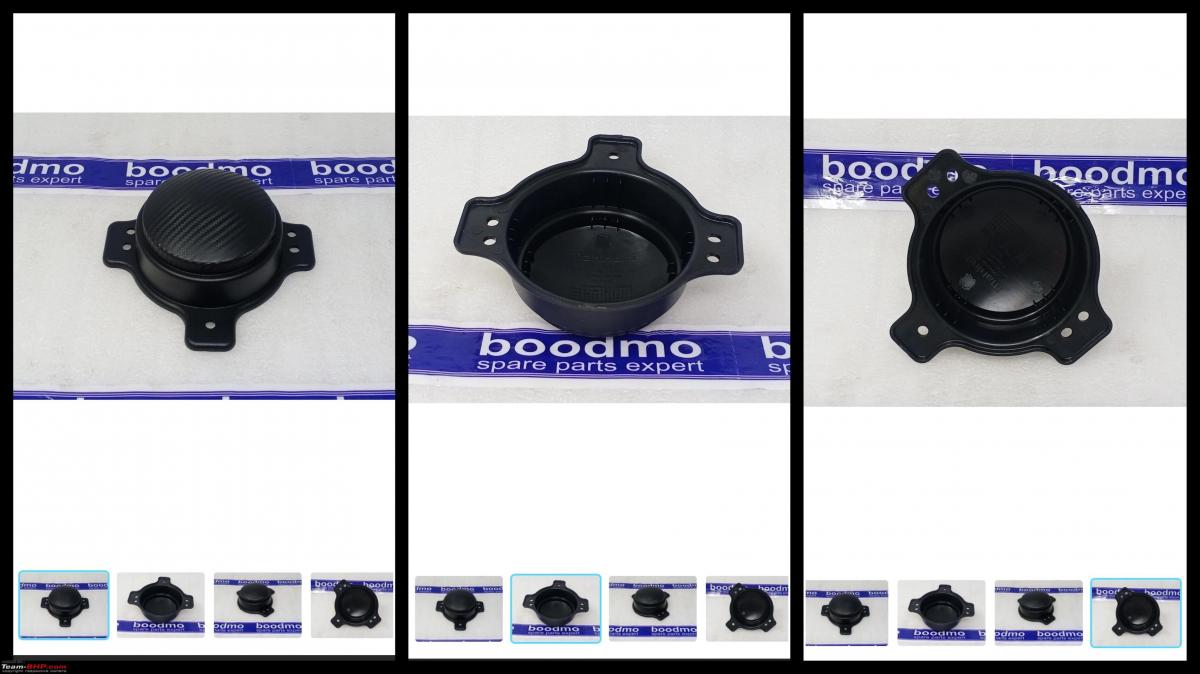
Right side fog light slot cover.

Left side fog light slot cover.
These are relatively cheap to procure and will be extremely helpful for the mount dimensions.
The Next Day:
With lots of mounting and un-mounting, I finally decided to screw in the projector to the plastic mounting plate. I used 4 nut bolts to mount the projectors with the help of the clamps to my custom plastic mount.
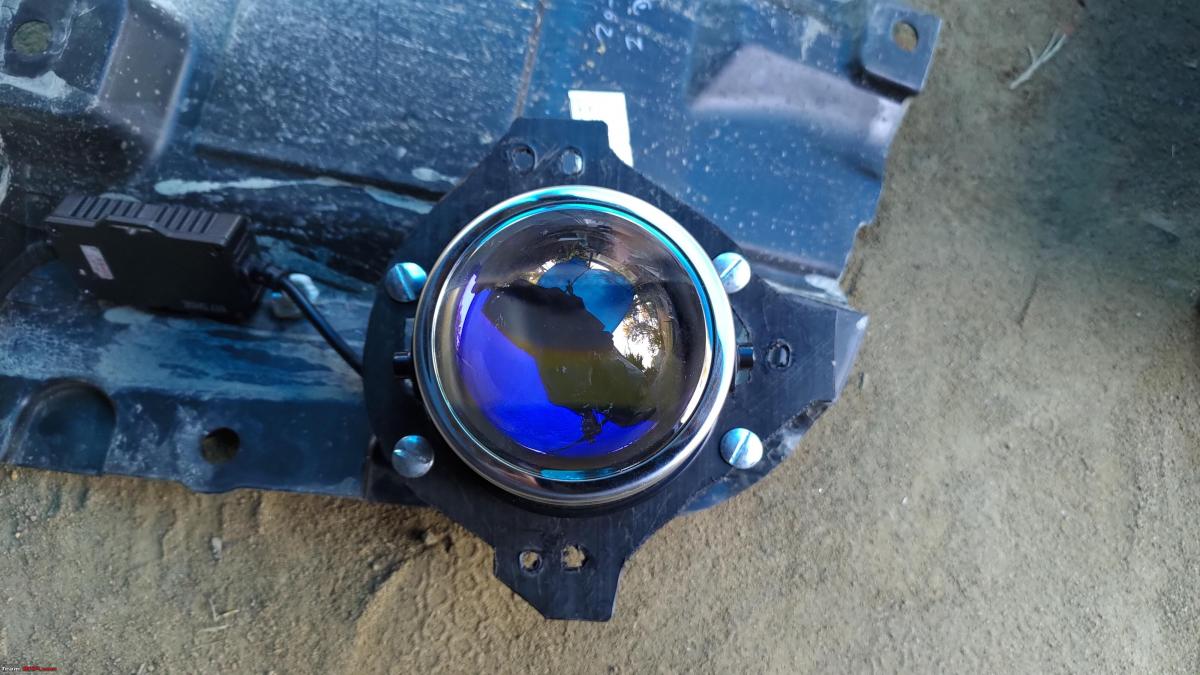
I used my 70mai power bank to power the projectors to adjust the beam level and alignment.
The alignment and leveling was more or less good enough in my rough setup, but I would be facing a nasty surprise. (Will come to that shortly):
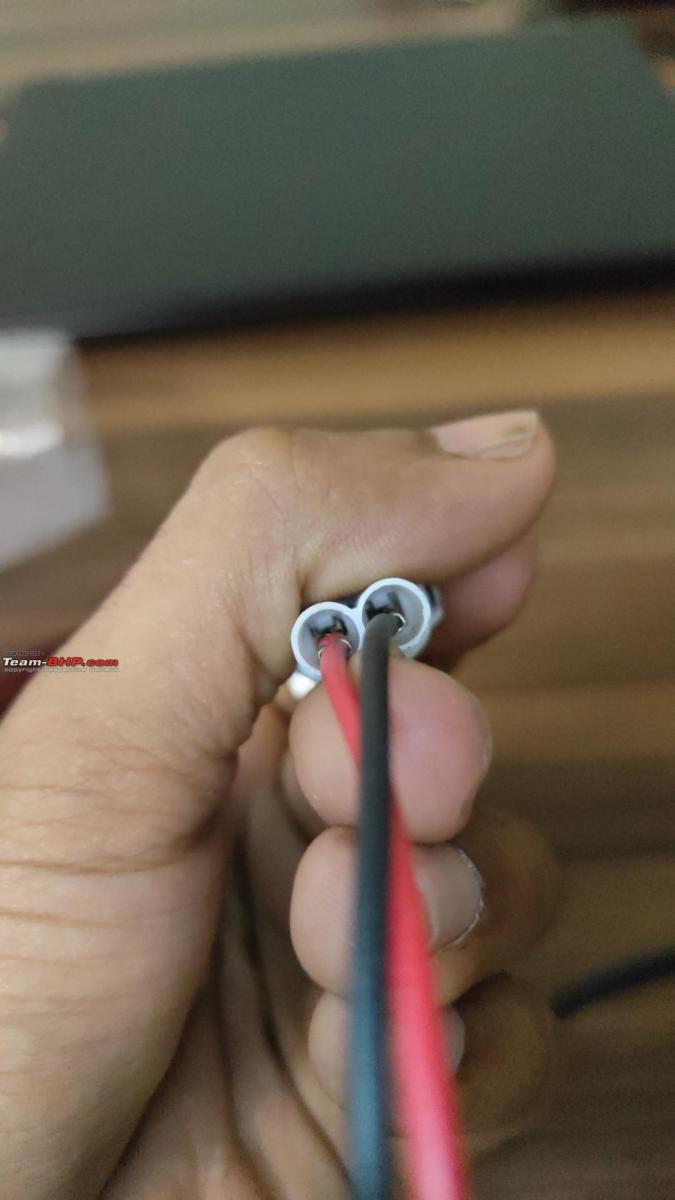
Unlike the HID Lights in Bi-xenon projectors, which comes with a ballast and a H8/H11/H16 connector/coupler to be powered via the stock fog light connector or the relay harness. These LED projectors had bare unmarked 4 wires. Red is +ve for the fog light and black is negative for fog lights, yellow is positive for high beam and white is the ground wire.
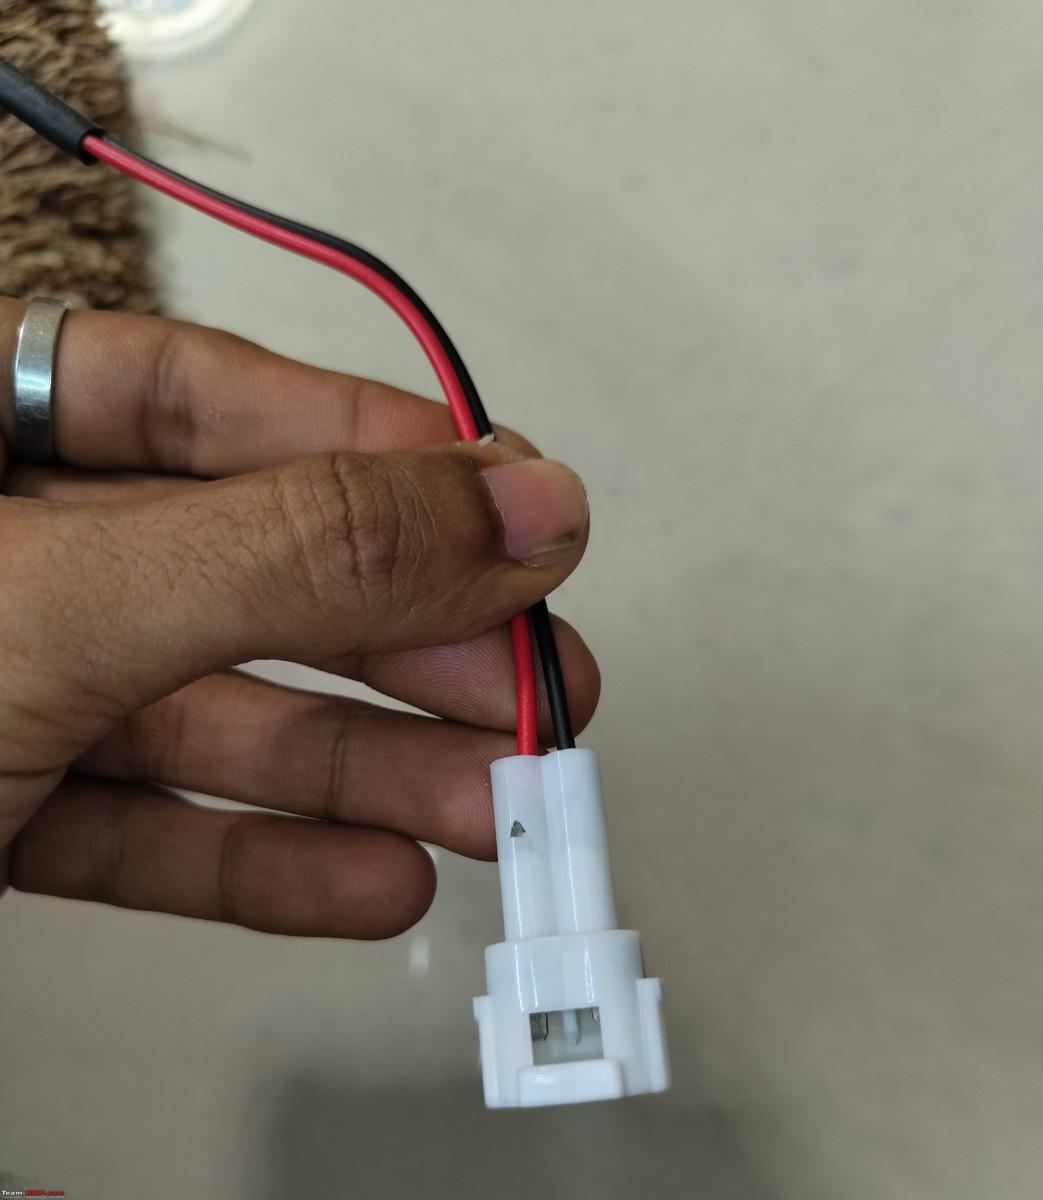
I am not willing to cut or splice the stock wiring, so, I decided to use H8/H16 coupler to power the LED projectors. Thanks to fellow BHPian ChiranjitP for sourcing the coupler wire from Blaze India.

Just for testing the setup, I used a terminal connector to plug into the stock fog light H16 Female connector. Once I received the Coupler wire, I used some insulated butt connectors to crimp the projector's wires to the coupler and finally plugged it to the stock connector. That's what I call Plug and Play.
Now comes the Nasty Surprise:
All the alignment and installation process was done with my car switched off. So everything looked and felt good. But when I decided to take it out on a drive to see the on-road performance, I saw a nasty surprise. As soon as I cranked up the engine, I could see the projector beam vibrate. Yes, being a diesel engine, I can feel slight vibration when idling on the front bumper, but the vibrations were getting amplified in the projector beam. Situation got worse when I drove it over our rough roads. It was bad enough for me to abandon testing and return back home. Since, it was already dark and cold as well. I decided to fix it the next morning.
Next morning, I opened up the panel again, tightened the mounting screws as well as the clamp screws. Also decided to add some foam pieces around the mounting plate to stop or atleast minimize the vibrations.
With substantial amount of foam pieces added, Vibration are no longer an issue, but this cannot be a long term solution. I needed a permanent solution. What could be causing these vibrations? Might be because of my custom plastic mounting plate instead of a metal mount. Also the weight of the projectors are significantly more than the stock fog lights. I decided to make some new mounting plate with thicker plastic panel or search for a steel fabricator. BHPian Prakritij offered his help in fabrication of metal mounting plate and for that, I would require a near perfect dimensions because once it has been cut from metal, adjustment would be considerably difficult. So, saved this option for the last.
But before going forward with metal mount, I decided to re-investigate the issue. I found a probable cause. The projectors having a glass lens at the front, makes it considerably front heavy and the way I have mounted the projectors with the clamps and to the mounting plate, the projector ended up being placed relatively forward. This forwardly mounting might be resulting in vibrations because it is to far away from the center of mass of the projector. So, I un-mounted the setup again, unscrewed the clamps and adjusted them in a way, the projector now sits more backwards in the fog lamp slot compared to before. This also made the clamps and mounting plate to be more close to the mounting point on the projector. Weight distribution was much better and balanced now.
After this adjustment, I cranked up the engine and did a short test drive, and finally, no more vibrations. Thankfully.

So, now all I need to do is, fine tune the low beam cut off to be at an optimum height so as not to blind on-coming traffic.
Low beam cutoff tuning is a bit tricky for the Thar cause of its high ground clearance and hence a relatively high set front bumper. This makes the fog lights to be at almost the same level as the headlights of hatchbacks and sedans. After few trials, I think I can finally say that I have got my optimum setup.
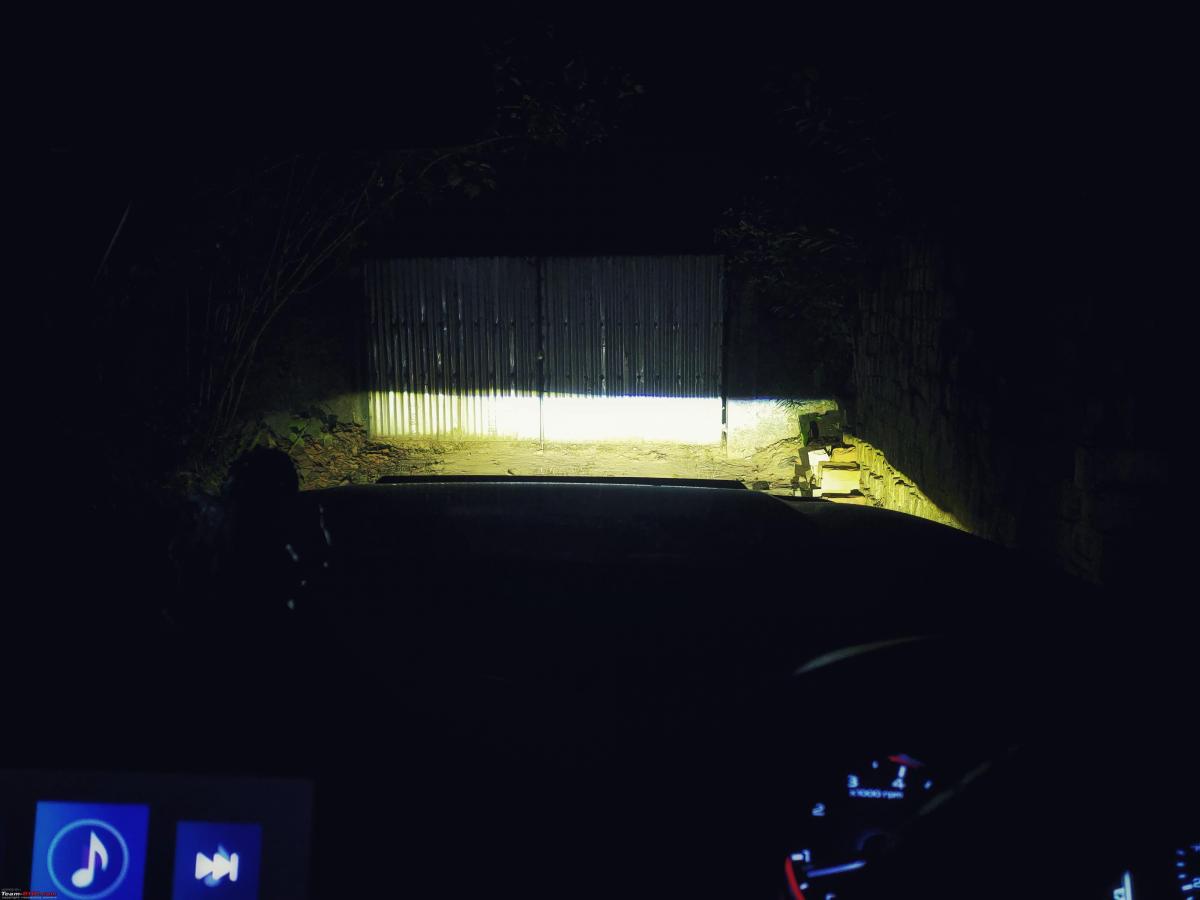
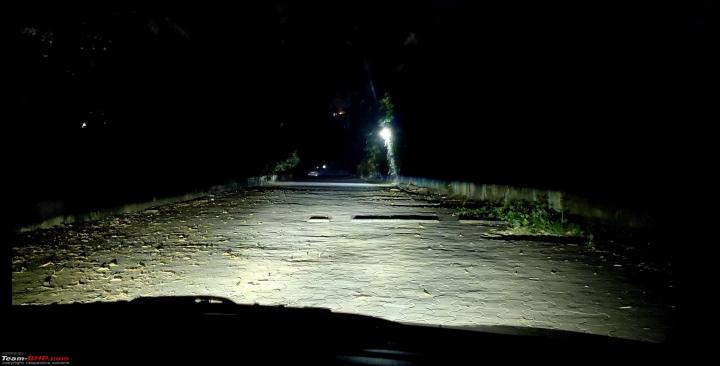
Final Result:

I captured the below posted pictures on my mobile in manual color temperature mode of 5000K. Still not close what my eyes saw:
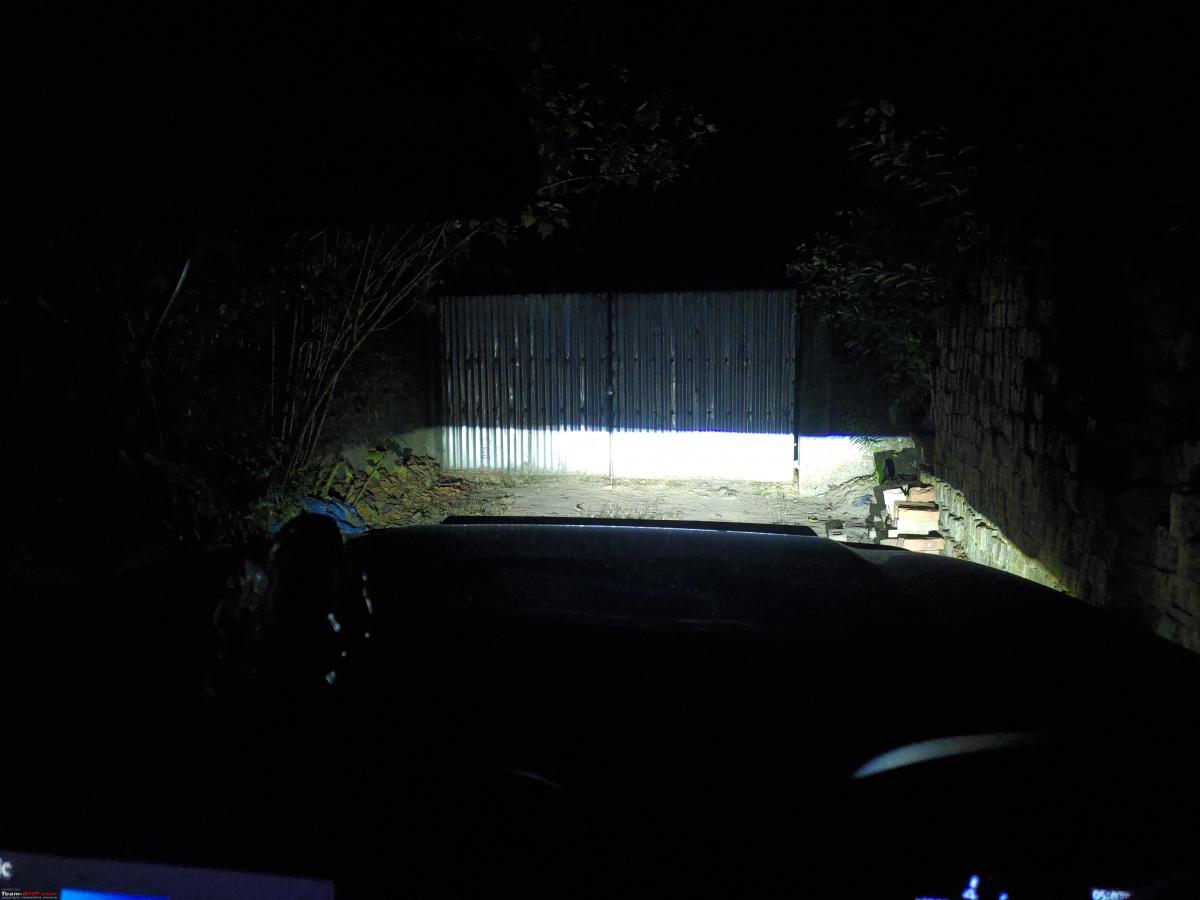
6000K
4300K

3000K
Initially I planned to tap power from the headlight high beam wire for high beam signal for the LED projector fog lights.
I also bought a H4 male to female connector so that I don't even have to use scotch lock connector on the stock wiring:

But as of now, I have no plans to use the high beam feature of my projector fog lights.
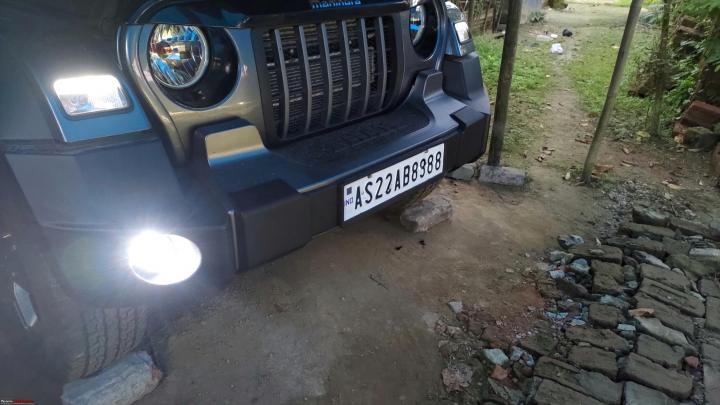
The setup with the projectors in low beam is good enough for me:

I am pretty happy with this lighting setup.
The projectors light up the road really well. And the low beam cut off is razor sharp ensuring no glare to other road users. If anyone is willing to upgrade the fog lights of their new Thar with the stock wiring setup, these LED projectors are a really good option.
Hope you guys like this DIY.
Check out BHPian comments for more insights and information.
News
Headlight and LED fog projector upgrade on my Maruti Baleno


I discussed with Pratham and opted for IPH LED fog projectors. Advantages are easy to install, VFM pricing, lower operating temperature, and consistent output. Drawbacks are high beam won't be as good as HID and full projector has to be replaced if anything goes bad. It's a fully built LED projector
BHPian Dr.Naren recently shared this with other enthusiasts.
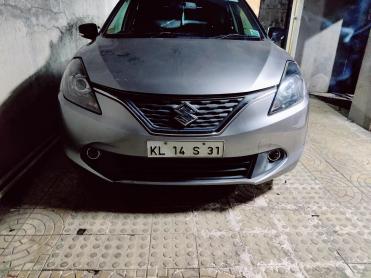
I was using HID projectors from Xenon Planet since last 5 years. They called it Mini Super V2 which was a decent projector. I had faced couple of issues with the setup and had to visit the installer multiple times to rectify. Not going into details, it's all documented in my Baleno ownership thread.
I had driven to Mumbai for some work and also got an opportunity to meet couple of S-Cross 1.6 owners. Few of them were running HID projectors which were installed by fellow S-Cross 1.6 owner named Pratham. He is into retrofits since the last 2 years and his work has received good feedback.
XP projectors in my Baleno had good brightness for first 2 years and it gradually decreased. After 5 years it was pathetic. Reason ? Read on...
I discussed with Pratham and opted for IPH LED fog projectors. Advantages are easy to install, VFM pricing, lower operating temperature, and consistent output. Drawbacks are high beam won't be as good as HID and full projector has to be replaced if anything goes bad. It's a fully built LED projector.
Few pics:


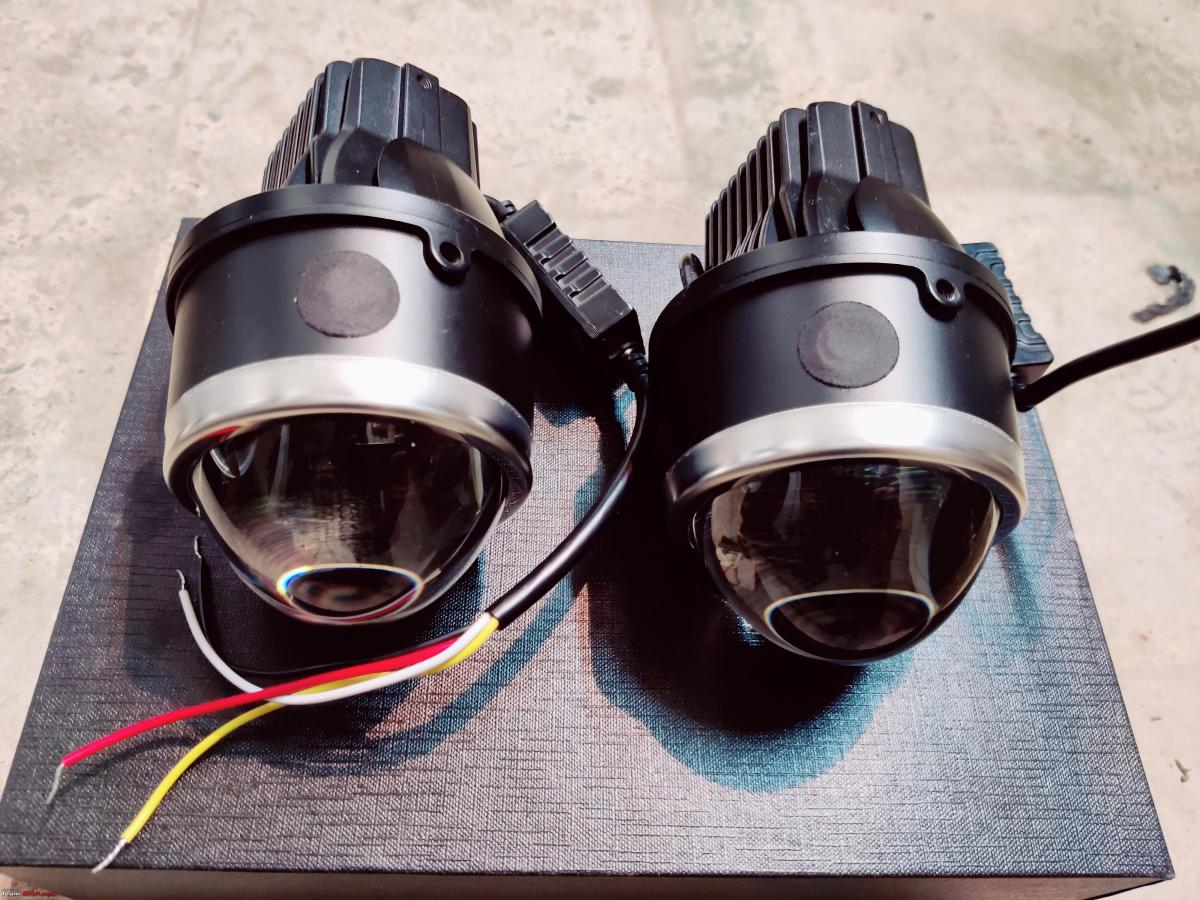

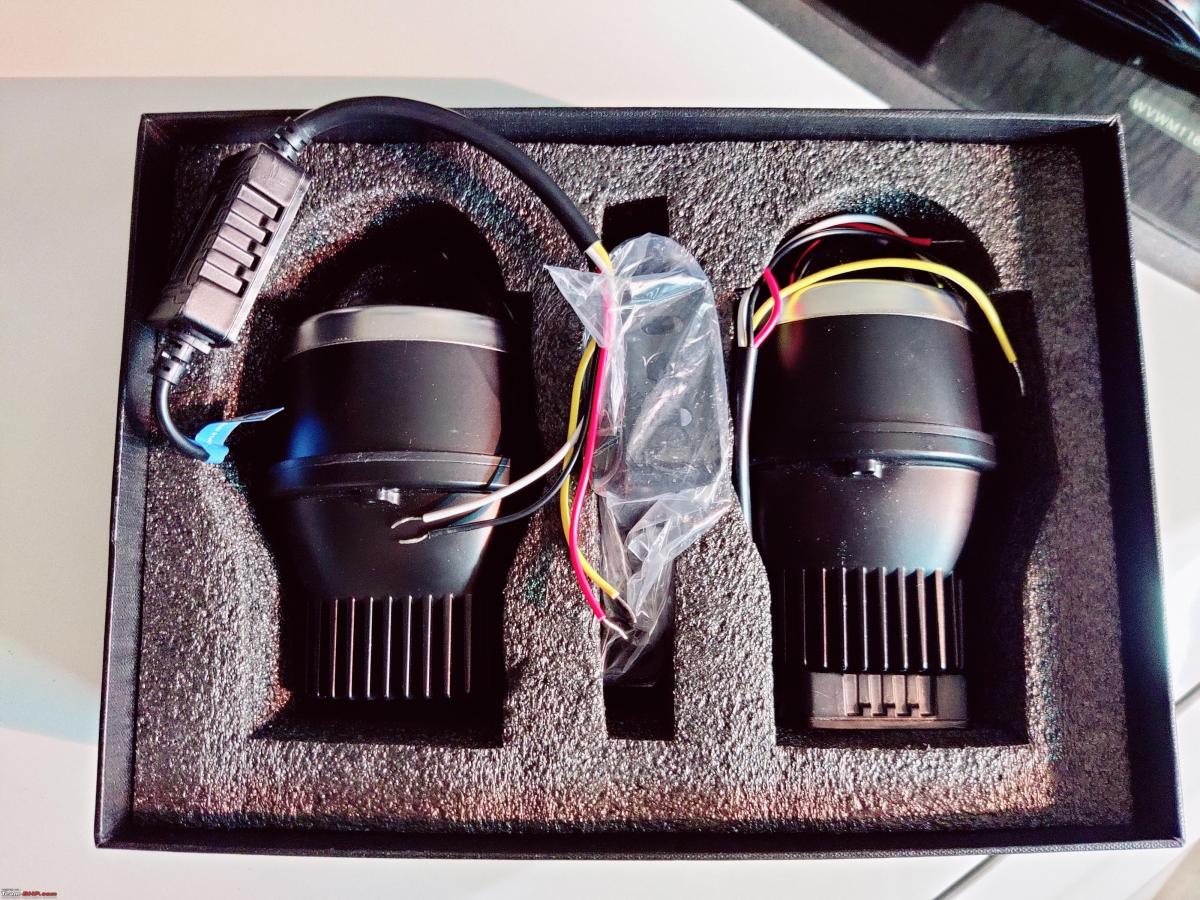
Pre installation check:
Low beam:

High beam:

The setup is not plug and play as the OE fog connector wouldn't fit into this fog projector. It should be possible to make it fully plug and play by sourcing suitable connectors. I am not exactly sure what was done, but the installer did tell me that the OE connector is retained and I can plug it with OE fog lamps if required (reversible). The high beam wire of the fog projector was tapped into the headlight coupler. We had not planned this installation in advance, it was a sudden plan. If not, they could have sourced the suitable connectors for the Baleno. I am very bad with wiring and electricals, sorry if I am wrong.
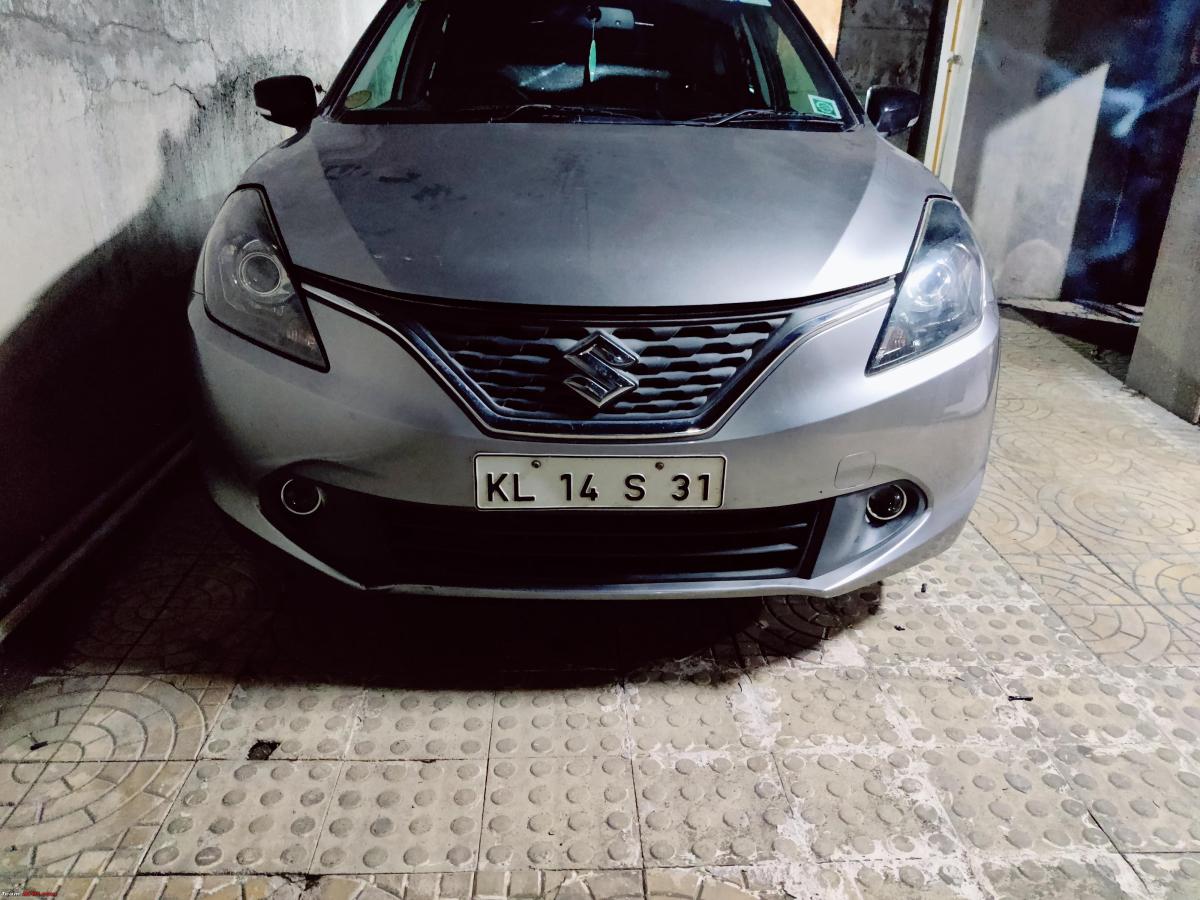
Fog projectors were easy and flush fit in the Baleno. It hardly took 30 minutes for the installation:
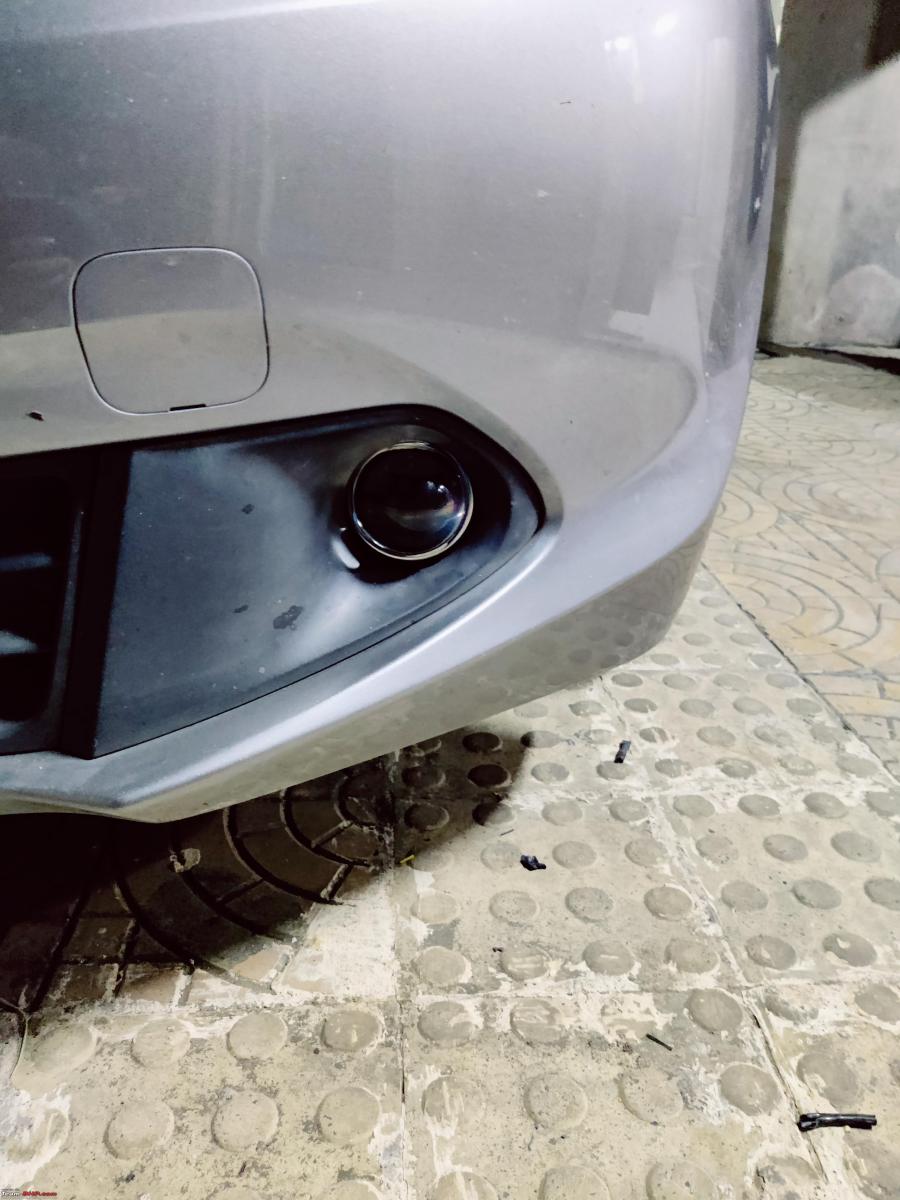
Output:

This is the low beam of fog projectors. Headlights aren't on. Cut off is good and it won't glare or blind the oncoming traffic.
I was impressed with the product. Output was also good. But the story doesn't end here.
Continue reading on Dr.Naren's Maruti Baleno lights upgrade for BHPian comments, insights and more information.
About Us