News
First few cosmetic mods on my BMW M2 before & after taking delivery
It is finally starting to look like a M car now.
BHPian Reesnat recently shared this with other enthusiasts.
The very first mod I did to the car even before I took delivery was protecting the front transmission cooler that is completely exposed in the M2 automatic cars.
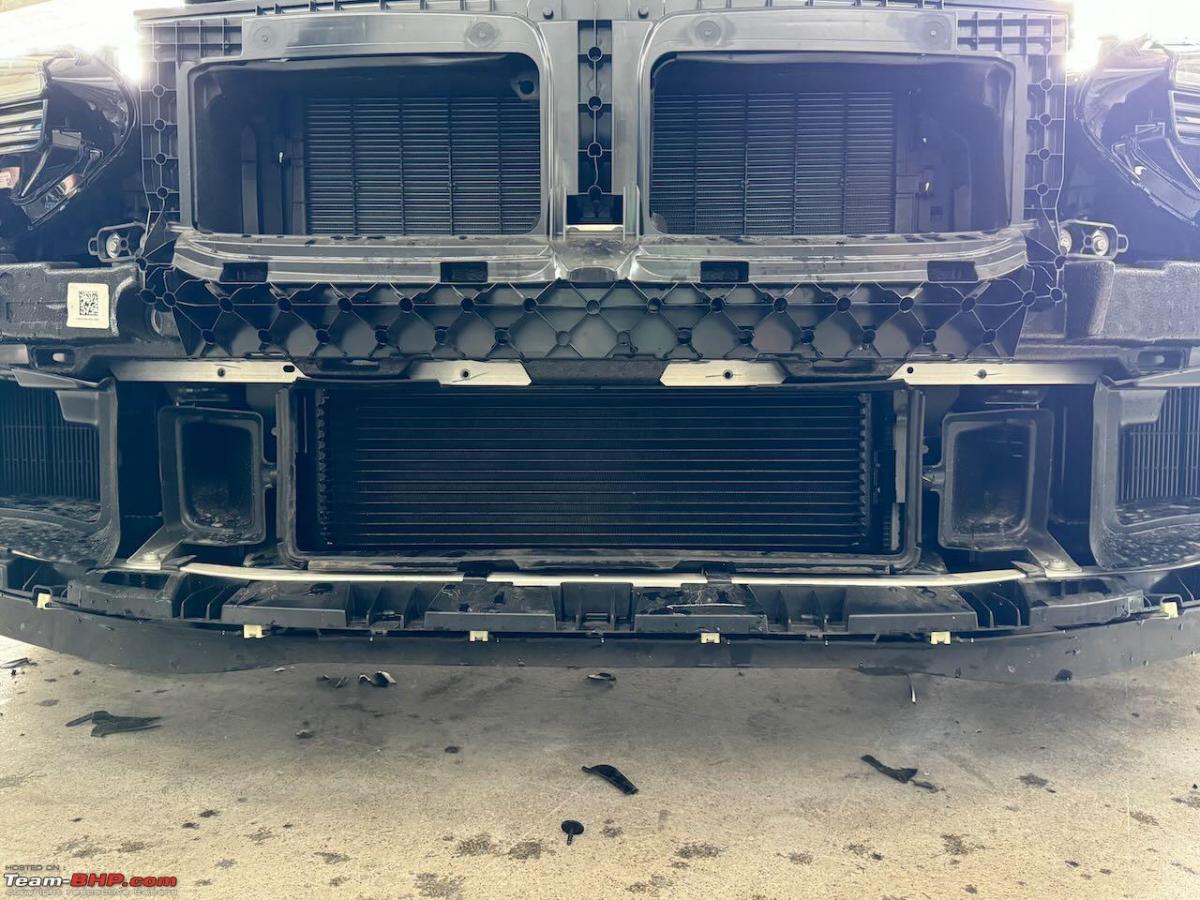
In our conditions there is a very high chance of this getting peppered badly and losing its efficiency, or worse, failing completely. The simplest solution I came up with was to purchase a honeycomb grill sheet (similar to the ones BMW use on their cars of the older generation), cut to size and secured via zip ties around the radiator.
Found a cheap one on Amazon.
I felt it was important to not put the grill right in front and secure it on the bumper, but secure it on the radiator itself. This is because underneath the transmission cooler, sits the engine oil cooler, so it was important to not block any air coming into that lower front area.


With that done and delivery taken, the immediate next step was to get the car to my friend Niranjan at OCD for a full-body PPF and to get the wheels painted. Being a black car, I knew going in, I was going to be in for the pain of maintaining a black car in India. Let me put it this way - no matter what you do a black car is only clean for 5 minutes in India. Sad, but I still fancied owning a black car for that look, so took the plunge. For any darker-coloured car, good quality, self-healing PPF is a must if you want your car to look swirl-free over longer periods. So we settled for the most expensive PPF on the market, Llumar Valor. Plus 3M CR70 tints all around.
Next, we wanted to tackle the wheels - after some looking around we settled on a shade of silver that compliments the wheel design and contrasts the black paint well. We ended up with a satin finish instead of going full matt or gloss.
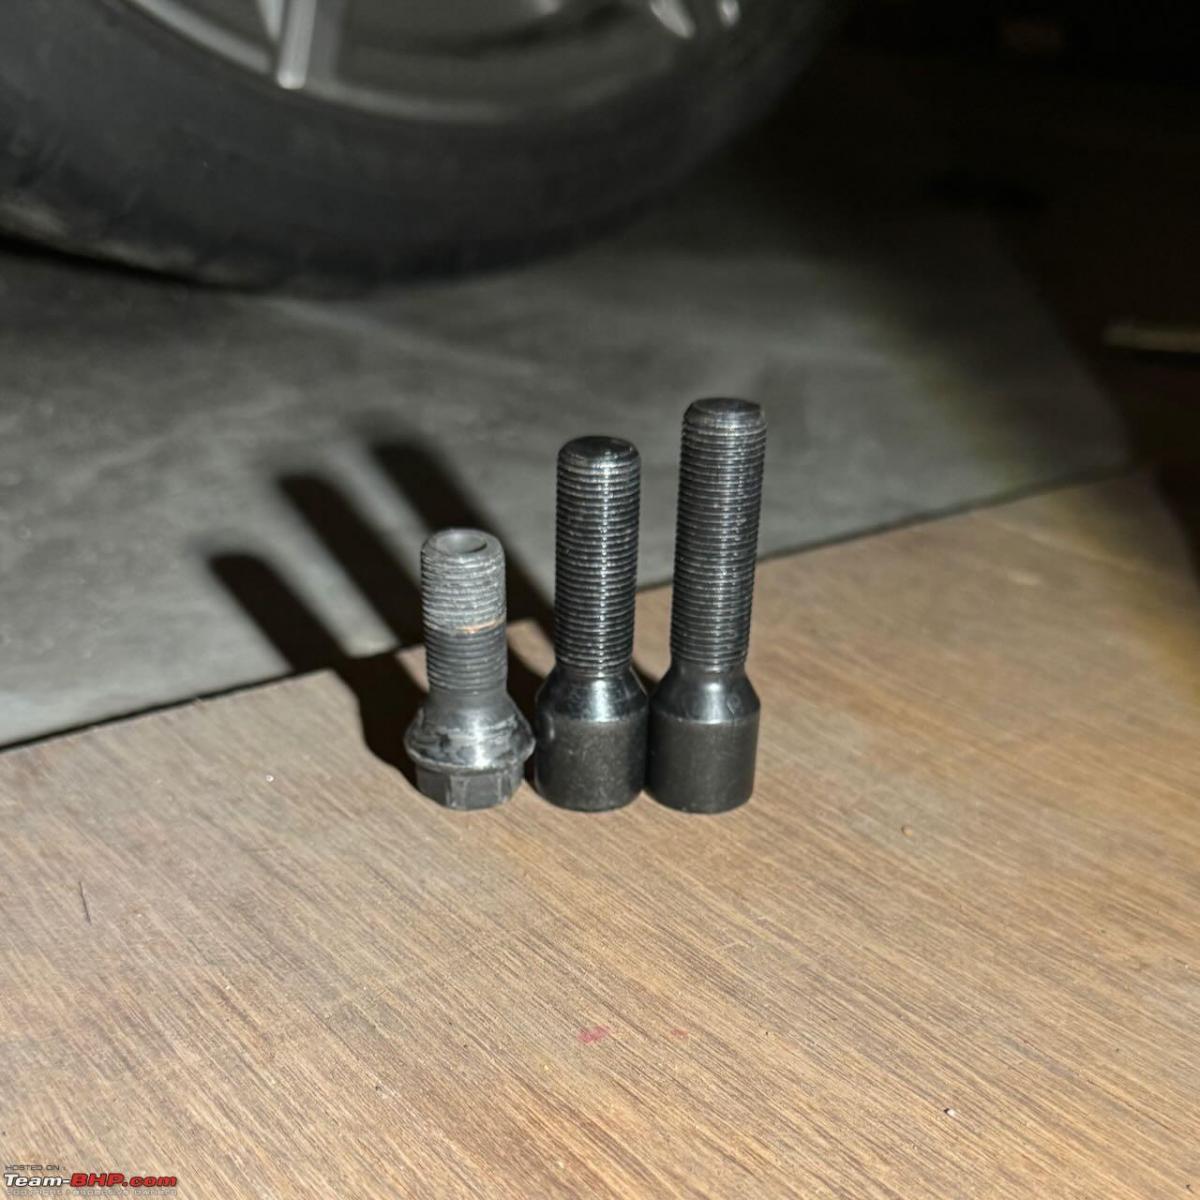
Next was to address a big issue with the look from the factory - the stance. The wheels are unusually inset very deep (for an M car) and come with pretty high GC for a car of this type so the wheel gap is significant. So spacers were much needed. I’m usually not a fan of spacers but in this case, it was a necessity to fix the look.
Getting high-quality spacers is very important to avoid any sort of vibrations or seating issues. The seat between the wheel hub and wheel has to be perfect and even the slightest misalignment can cause vibrations. I picked up a set of Japan Racing spacers - 15mm in front and 12mm in the rear. In addition to the spacers, you need matching longer wheel bolts to match.

The addition of spacers has pros and cons to keep in mind - the pros being better stance/look and an increase in the track width, this will improve the grip and handling characteristics of the car, making it sharper to drive. Cons are that it will add some weight (negligible) and will introduce a little more transmission into the chassis from the road due to the leverage increases. In the case of the M2, it has little feedback from the steering wheel so a little more transmission from the road isn’t too bad. The spacers certainly delivered on the promised improvement in driving dynamics - noticed this straight away.
On the exterior, I also wanted to compliment the carbon roof with some more carbon bits, so I picked up the carbon fibre mirror caps and rear lip spoiler.
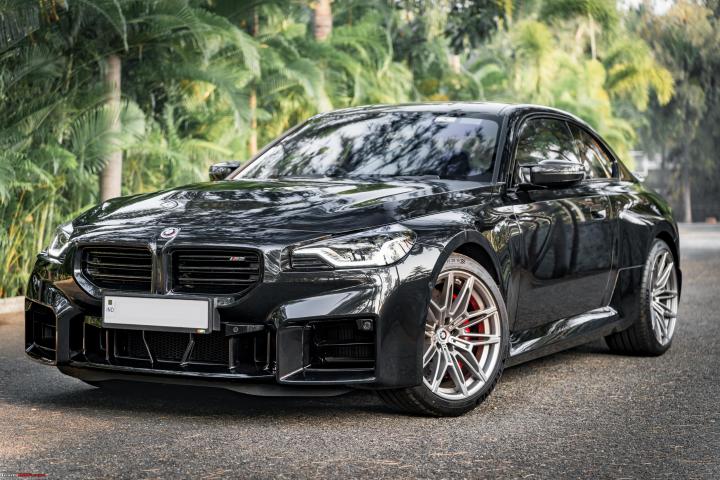
So with all that, this is how the car looked at this point:

It's finally starting to look like an M car. The aggressive body design seems to fall flat with the way the car is stanced from the factory. Just the spacers make the whole design come together so much better!
Check out BHPian comments for more insights and information.
- Tags:
- Indian
- BMW M2
- Modifications
News
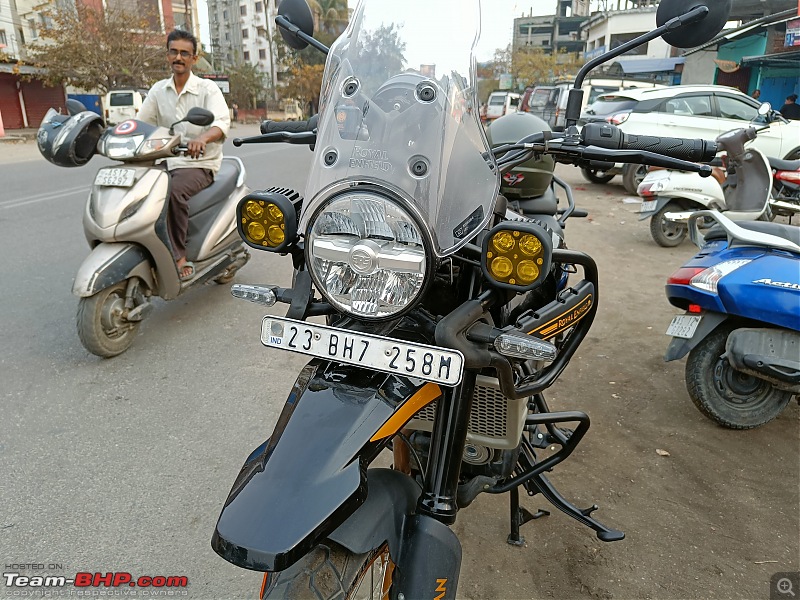
Installed Gold Runway aux LED lights on my Royal Enfield Himalayan 450

The best part is the intensity is adjustable from 10% all the way up to full (100%). Installation is a simple DIY.
BHPian aviator1101 recently shared this with other enthusiasts.
Purchased the costliest accessory for Bagheera (my Himalayan) : a pair of Gold Runway aux lights for ₹20,500.00
The performance of the stock LED headlight is very poor. Hardly anything is visible when any vehicle comes from the opposite direction. Hence, the need was felt to upgrade the lights.
Thanks to fellow bhpian techfreak for recommending these lights to me. But they are worth every penny.
The lights come with all accessories required for installation and nothing else is required to be purchased separately.
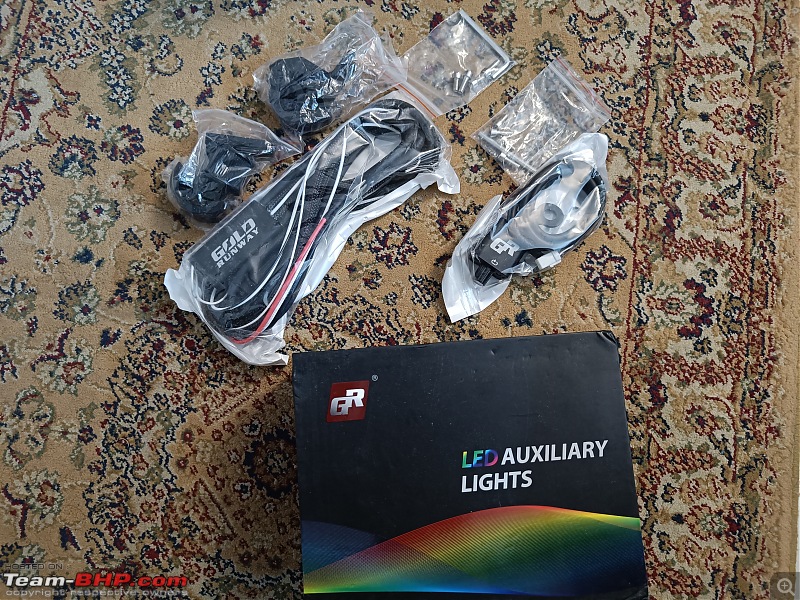
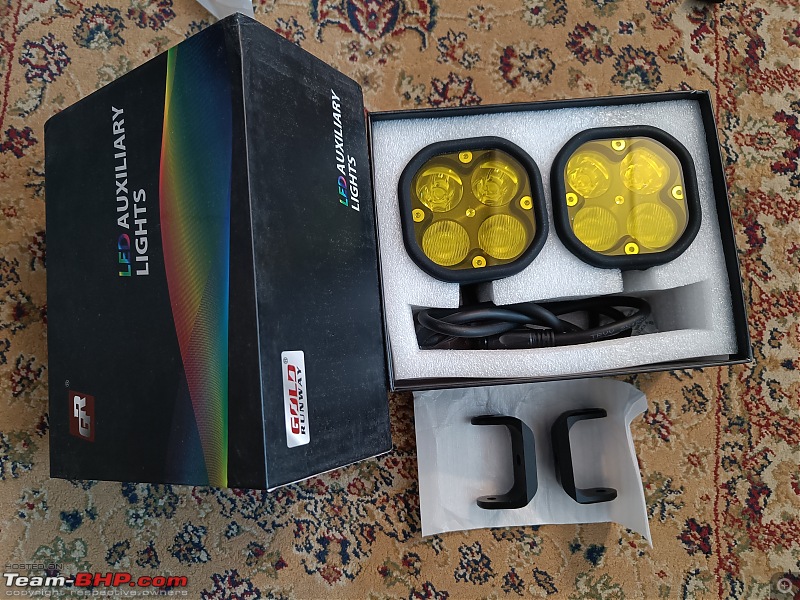

The box comes with a pair of aux lights, yellow filters, a pair of clamps, a wiring harness and a switch with rotary control to adjust intensity /brightness and a set of nuts, bolts and washers required for installation.
Installation is a simple DIY.
The lights were fixed to the clamps which were further fixed to the tank guard frame.

This is how the lamps are fixed to the frame.

Photo of both lamps installed on either side of the stock headlight
The performance, I must admit is beyond my expectation.
The best part is the intensity is adjustable from 10% all the way upto full (100%)
The high beam switch makes the intensity increase to 100%
Also, the horn switch activates the strobe function which is a deterrent for oncoming traffic who refuse to switch from dipper to dim.
Sharing a link of the video demonstrating the various functions of the light after installing it on Bagheera.
Check out BHPian comments for more insights and information.
News
Ordered Showa sequential taillights for my Maruti Jimny from Japan

One sunny afternoon, while browsing through a global website on Jimny products, Shiv stumbled upon an product that piqued his interest. It was the Showa Sequential Taillights, a revolutionary lighting system known for its mesmerizing sequential pattern.
BHPian ShivC recently shared this with other enthusiasts.
A Whimsical Tale of Jimny Showa Sequential Taillights
Introduction: In the charming town of Bangalore, with its chock-a-block traffic and concrete structures along with a smattering of some trees for its landscape, lived a peculiar car enthusiast named Shiv. Shiv had a deep love for his trusty Maruti Suzuki Jimny, a compact 4X4 SUV that had faithfully accompanied him on countless adventures. However, he often felt that his Jimny lacked a touch of uniqueness that would truly make it stand out on the road. Little did he know that his quest for individuality would lead him on a whimsical journey involving Showa Sequential Taillights.
The Discovery: One sunny afternoon, while browsing through a global website on Jimny products, Shiv stumbled upon a product that piqued his interest. It was the Showa Sequential Taillights, a revolutionary lighting system known for its mesmerizing sequential pattern. Immediately captivated by the idea, Shiv embarked on a mission to acquire these intriguing taillights for his beloved Jimny with a little help from DHL Express. The day of reckoning came – the Showa Tail Lights (which had traversed a long way from Japan to Bangalore ) were delivered by a trusted old friend – DHL Express.
The Installation: With the Showa Sequential Taillights in hand, Shiv eagerly set out to install them on his Jimny. However, what was supposed to be a straightforward process turned into a comical escapade. Armed with a toolbox and a can-do attitude, Shiv dove headfirst into the installation, only to find himself tangled in a web of wires and confused by an instruction manual that seemed to be in a language only known to aliens.
The Unexpected Outcome: Despite the initial setbacks, Shiv's determination remained unwavering. With the help of his trusty garage CarMed, a trusted lovable bunch of car experts, they ventured into uncharted territory. With each failed attempt, their frustration transformed into laughter, creating a bond that went beyond mere car enthusiasts.
The Transformation: After hours of tinkering and tweaking, the moment of truth arrived. As Shiv turned on the ignition, a wave of anticipation washed over him. Suddenly, the Jimny was illuminated by a mesmerizing dance of lights. The Showa Sequential Taillights came to life, casting a spellbinding glow that transformed the ordinary SUV into a magical chariot.
The Envy of Bangalore: Word of Shiv's eccentric modification spread like wildfire throughout the town. Curious onlookers would gather in awe as the Jimny gracefully maneuvered through the streets, leaving a trail of enchanting lights in its wake. People couldn't help but smile and wave as the whimsical spectacle brightened their otherwise mundane daily routines.
Epilogue: Shiv's Jimny became a symbol of creativity and individuality in Bangalore. The installation of the Showa Sequential Taillights not only added a touch of fun to his beloved SUV but also brought joy and laughter to the entire community. From that day forward Shiv and his Jimny would forever be remembered as the pioneers of whimsy, reminding everyone that sometimes, a little touch of humour can truly make the world a brighter place.

The Final Look -
The Final Look - 2

The Final Look - 3

Start of Installation

Hoisted with Old Tail Lights

Work on the bumper including installation of switch for change between normal and sequential lights

Check out BHPian comments for more insights and information.
News
Modifying my 2022 Aerox 155 into a sleeper; 32 upgrades made till now!
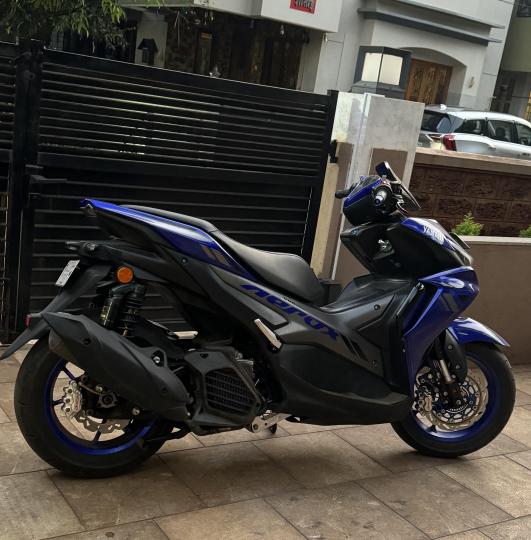
The scooter looks stock, but all the part upgrades make it a monster - a proper sleeper.
BHPian HYPERTOURER recently shared this with other enthusiasts.
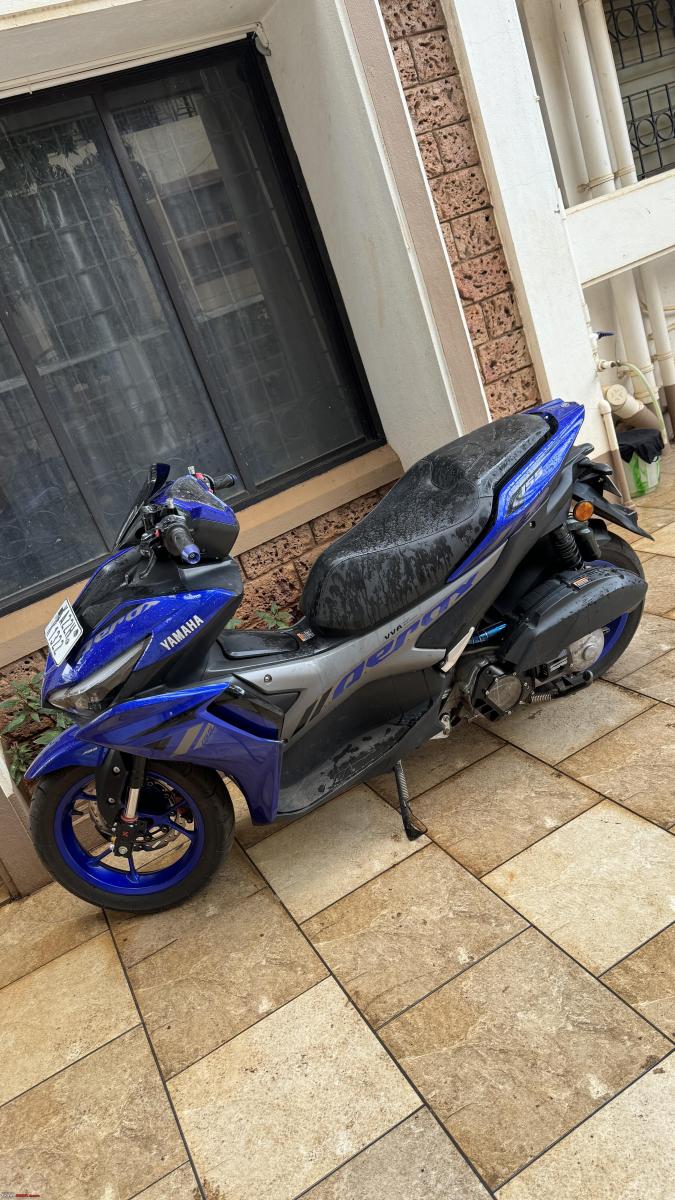
So time for a quick update on my Aerox. Got the bike in 2022 Jan and have done 4k kms to date. The reason for the low mileage is that it's not my main mode of transport and also that it's constantly being worked on and is with the mechanic.
Let me quickly share the list of mods I have done to date:
- Rear suspension RCB VD series with extra soft springs.
- 8-litre fuel tank
- CVT pulley and gearbox upgrade. (multiple versions)
- Projector Headlights
- LED indicators
- Tail lights
- USD forks (2 different types installed tried and settled with KYTACO)
- Upsize front disk
- Larder calipers front and back
- Rear disk setup with complete rear wheel replacement so that I don’t have to drill wheels which is unsafe.
- Master cylinders upgraded to 14mm RCB
- Braided lines front and back
- Larger Intake Hose
- Air Filter Delete (need to ride without filter details below)
Now let's get to the juicy bits:
- aRacer RC Super-X ECU and afr kit.
- Full systems cjIpoh exhaust. (Looks stock but is now) Now running an OP RACING exhaust again looks stock but is a calculated exhaust.
- Red Leo super Head (custom bored)
- Red Leo valves and valve springs
- SCK racing 68mm bore
- Ashuka racing 4mm extension
- Cardinals racing camshaft
- Cardinals racing crankshaft.
- 38mm throttle body (this needs a lot of air which a filter won't allow and that is why the filter was deleted)
- Custom 450cc injector
- Performance fuel pump.
- Swingarm extended so that the bike doesn't pop wheelies under acceleration.
- Custom copper clutch
- Custom torque spring
- Custom CVT puller and rollers.
- Quick throttle
- Large main radiator
- Second radiator up front for added cooling.
Lot more bits and pieces which I need to recollect. The bike looks like a stock bike because I want the sleeper looks but all these parts make it a monster. The main reason I got the Aerox is because of its mod potential. The bike hits great speeds easily though I haven't pushed because I still am trying to get the fueling right.


Check out BHPian comments for more insights and information.
- Tags:
- Indian
- Aerox 155
- Modifications
News
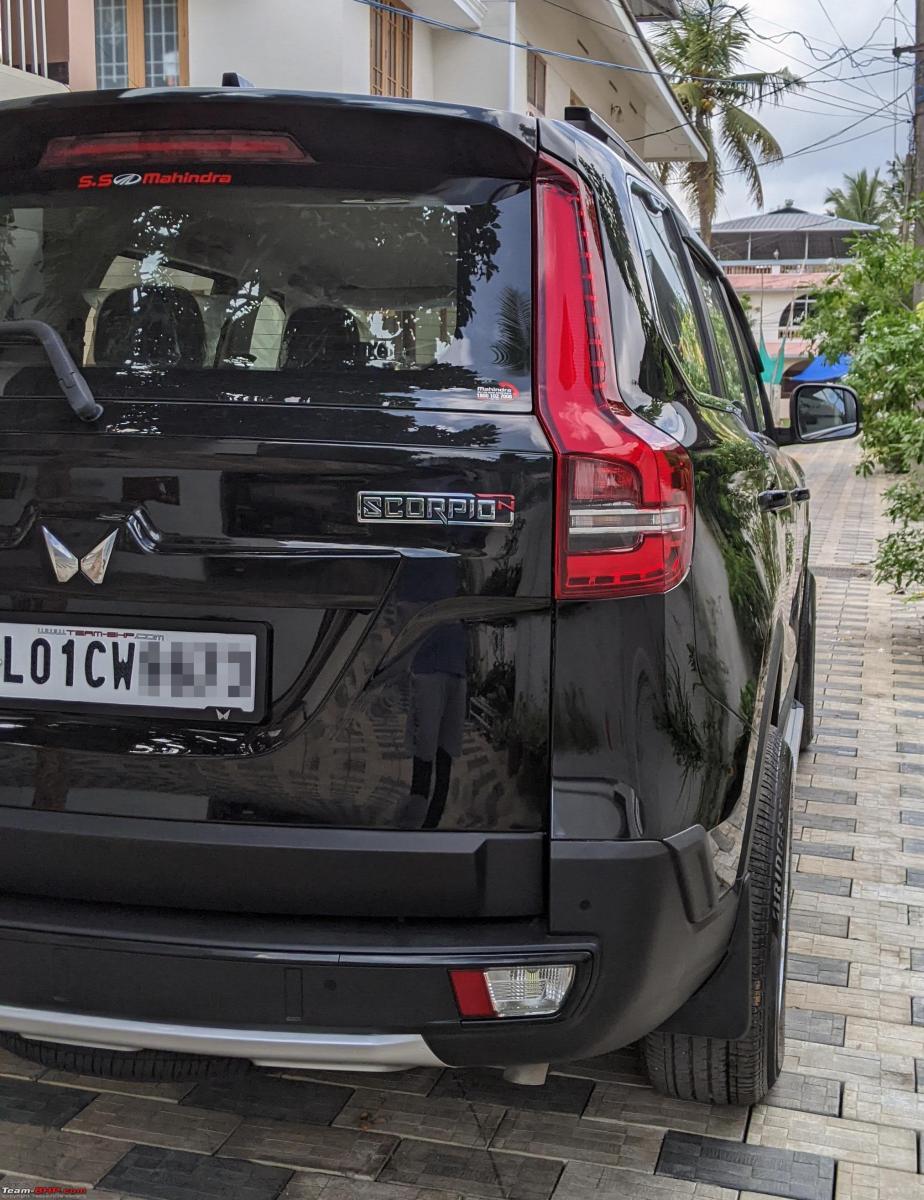
Finally found compatible aftermarket alloy wheels for my Scorpio N
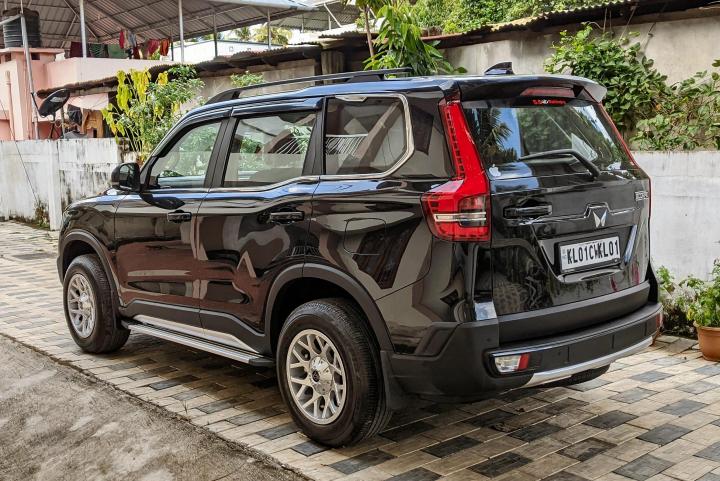


They were previously being used on a Mahindra XUV500 but since getting a good set of used rims in this size and PCD was a rare thing, I went ahead with them.
BHPian vivekgk recently shared this with other enthusiasts.
Hi,
As I have already lamented on the tyre/wheel section, Mahindra "cruelly" chose to outfit the Scorpio-N with an odd PCD/wheel size/Tyre size combo, restricting the mod potential of the Scorpio rather badly. The PCD is 5 x 139.7. The tyre size is 245/65 on R17 wheels which is unique to the Scorpio-N, AFAIK. Why did they put this odd PCD on the Scorpio-N, when every other vehicle, even their Off-road focused Thar has a 5x114.3 PCD?
Why is this a problem? While 5x139.7 is a very common PCD, used by the older Jeeps, the Gypsy and the Jimny and also the erstwhile XUV5OO, the problem is that commonly available off-road wheels usually use a 15-inch or 16-inch rim, with tall sidewall tyres. 17-inch and above sizes commonly come with a 6x139.7 PCD, used by the Fortuner/Hilux/D-Max/Endy and such.
Scorpio-N is thus caught in a no-man's land in between these two common sizes. Most of the options in the 17-inch come in the 5x114.3 PCD, due to it being the most common in this price range. It's used in the Creta, Seltos, Vitara, and even the XUV700, Scorpio Classic and the Thar, which makes it easier to find a design that you like.
I didn't want to use a PCD adapter except as a last resort, as it adds another failure point, and is supposed to cause instability and wobbling+vibes at higher speeds. At the time, there were very few options available, and I didn't like most of them. I was calling up dealers all over Kerala, and scouring through OLX/FB market for used options, with limited success.
Then, I got a lead from Kottayam, where one of my friends had gotten alloys fitted for his Bolero. While we were admiring the ones he had got, he told me that the dealer had a variety of options in stock. The Dealer was Parappally Tyres, Kottayam. I got in touch with them, and they sent me several options, all priced around 40-60k, none of which really appealed to me, esp at the prices quoted. Then, he sent me this pic of a used set taken off an XUV5OO.
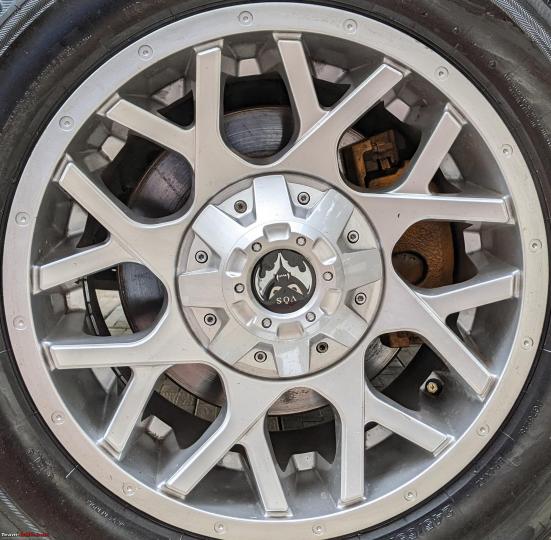
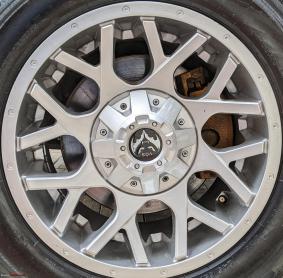
I immediately liked the design and did a reverse image search on Google, and came up with the make and the model, as well as some more pics. It's from a brand called VOS, not sure about the model. Originally, it came with a really cool gloss black finish with diamond cut accents, as seen here.

However, the pics forwarded by the dealer showed a fair amount of scratches. it would definitely need to be retouched or repainted.
Here's what they are supposed to look like. Pics taken off Facebook.


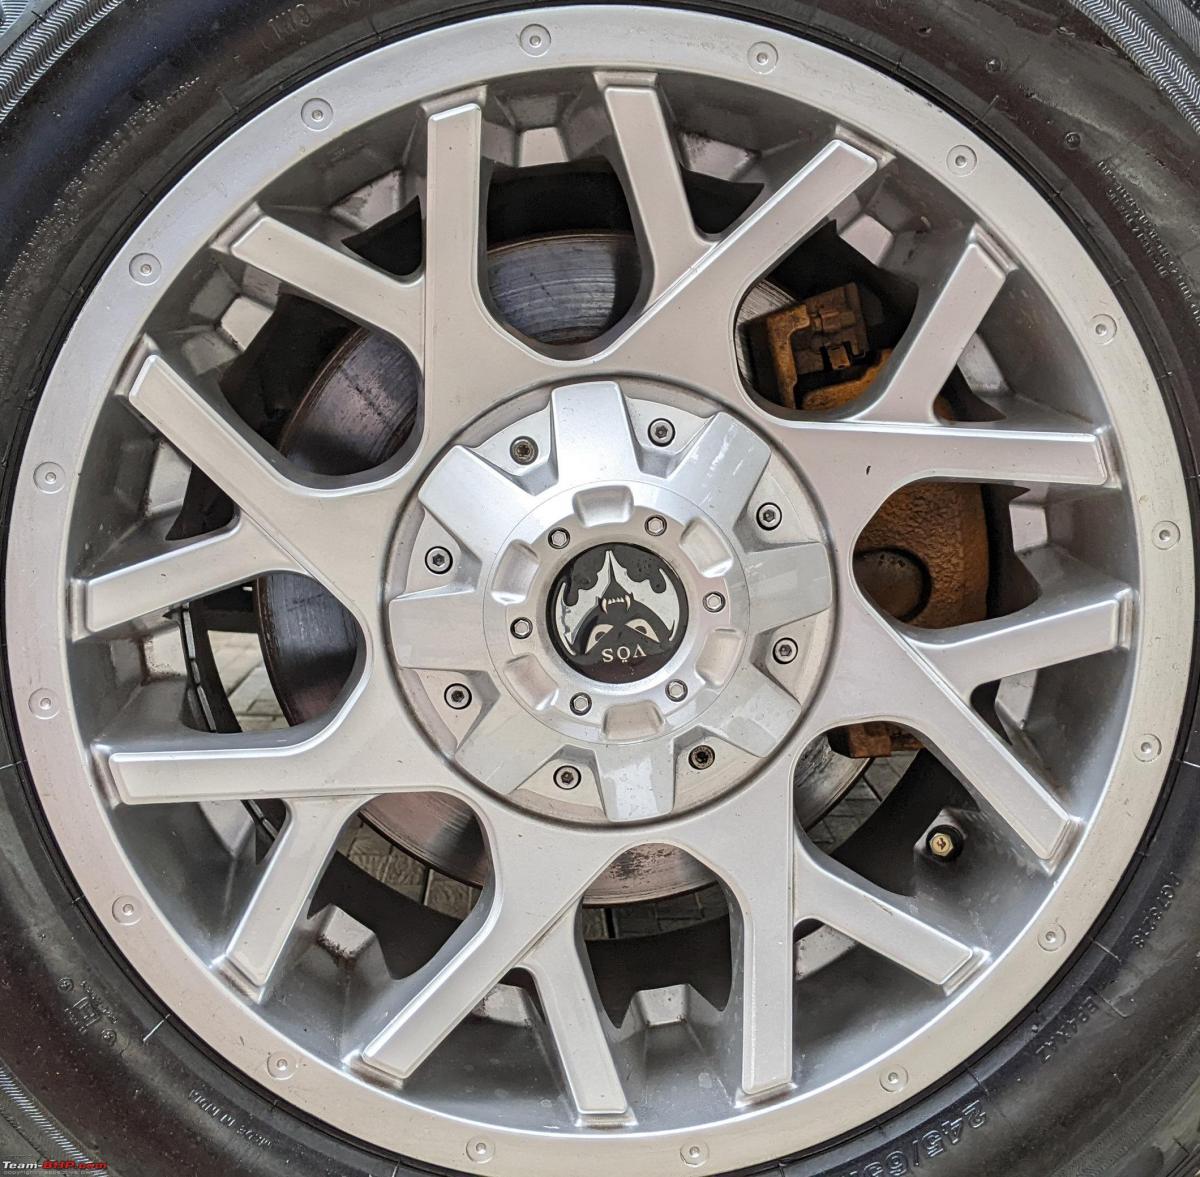
I had planned to restore it to its original finish, but my go-to detailer said it was a no-go. There were scratches all over, and the diamond-cut finish could not be retained by him. It would have to be one shade. After some deliberation, I decided to go for a full bright silver finish, which I thought would go well with the silver accents on the Beast, and would also give a more classic SUV look.
My cousin from Kottayam helped me out by checking out the rims in person and sent me his own set of pics. He said there were no major scratches and no dents. They were also really wide at 8J. I had another chat with the dealer and settled on the price, which was a bit more than I had planned.
Still, getting a good set of used rims in this size and PCD was a rare thing, and I had seen higher prices in OLX and FB marketplace. Plus, I liked the pattern, especially up close. I paid an advance immediately and paid the balance after they had sent me the Waybill, and it was confirmed. Even considering the additional cost of painting, I felt it wasn't a bad deal, all things considered.
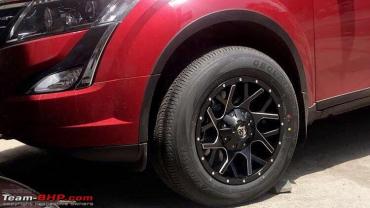
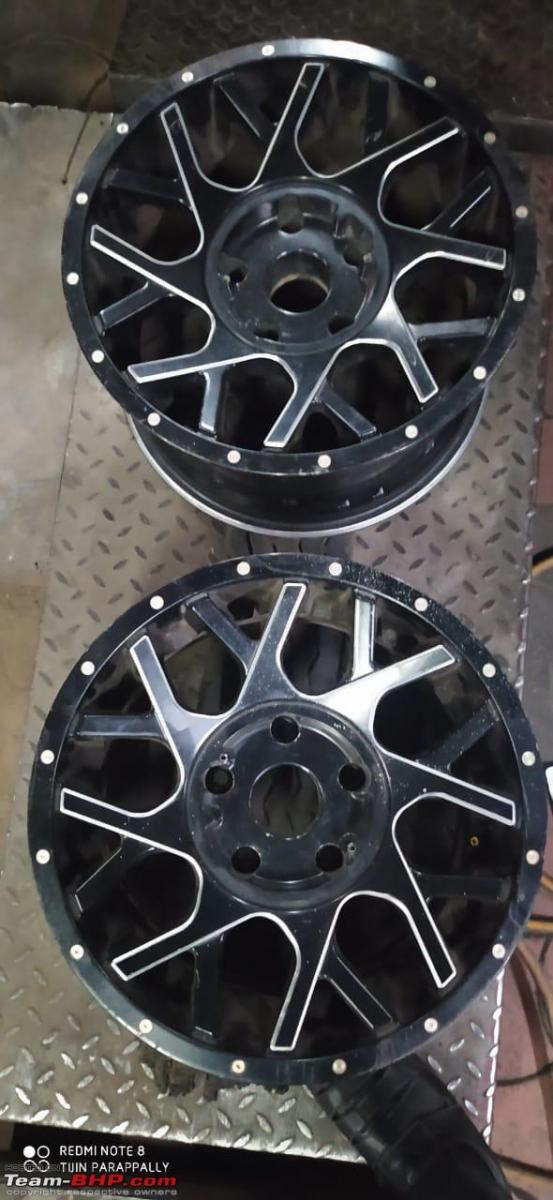
The wheels reached me in a couple of days by parcel service. I immediately took them to the painter. As he was busy, it took about a week to get them painted. I went to pick them up and I was impressed by the quality of the finish. They looked absolutely brand new. Unfortunately, I lost the pics that I'd taken immediately after painting due to a screw-up on my part. These pics were taken after the wheels had been dirtied a bit after a trip.

The rims stayed in the back seat of the Beast for a week before I found the time to get them fitted. However, once I got them to the tyre store, there was a problem. The 245/65 R17 tyres were a bit too narrow for the 8J rims. The factory steel rims were 7J which seemed a bit too narrow for the 245s. So, the tyres were pinched on the stock rims, which made the gap even larger on the alloys. But these guys were experienced in fitting narrow rims on wide wheels since that is the current trend here for hot hatches and sedans. They simply stuffed the gap with old tubes, and once the tyre started filling up, pulled out the tubes.
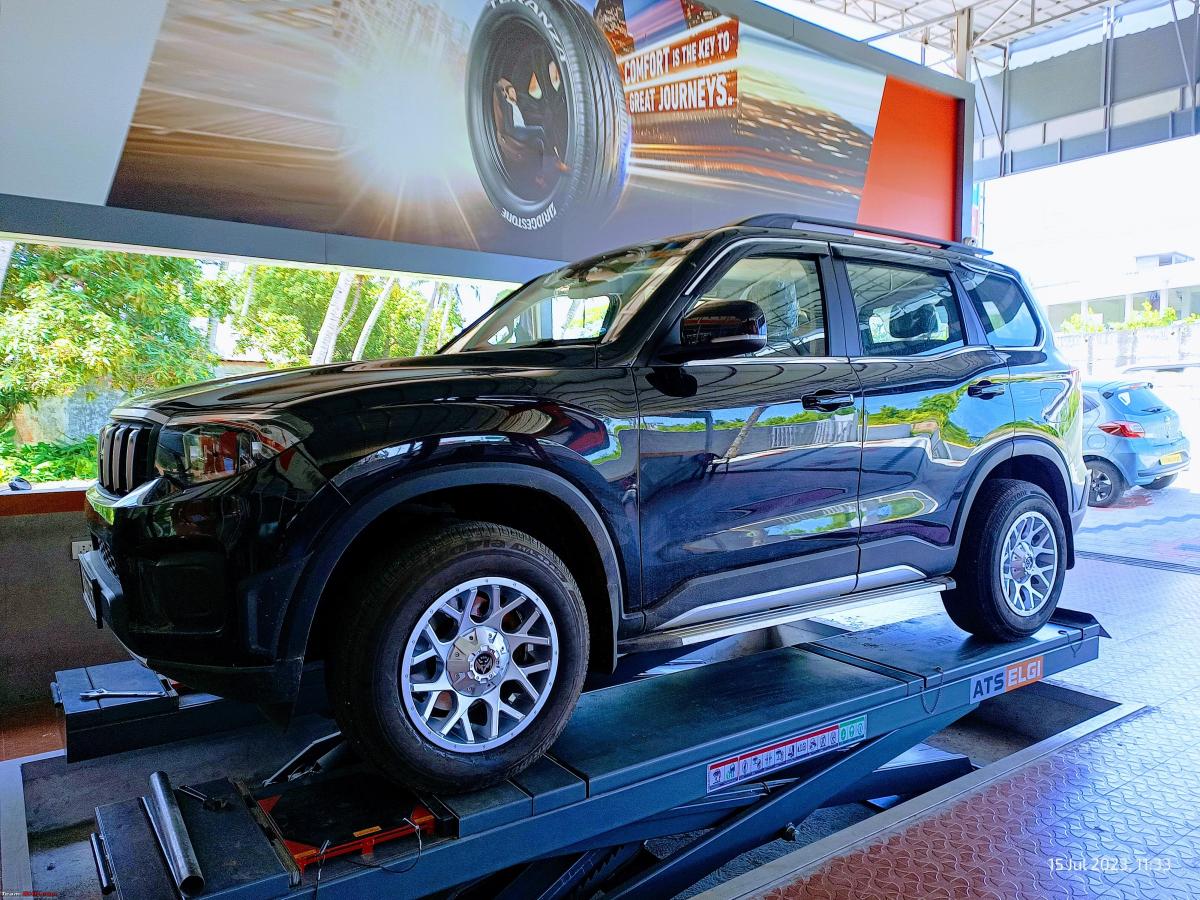
Getting the alignment done...
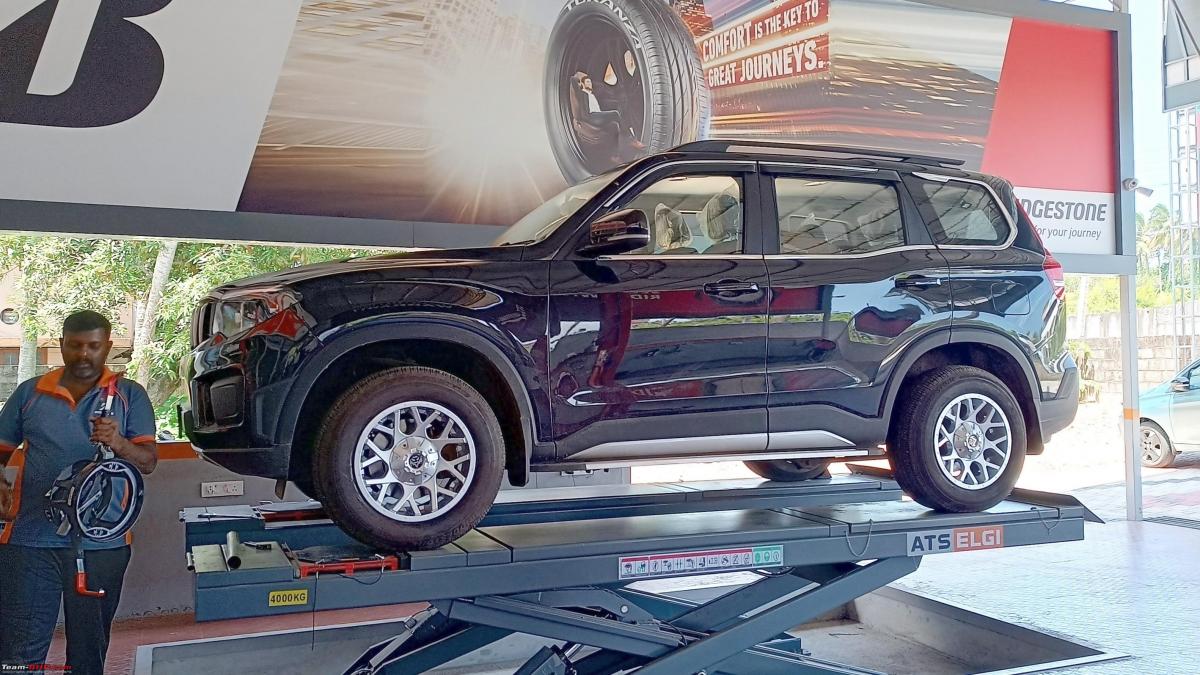

The wheels fitted very well on the hub, and there were no issues with clearance. They did tell me that the OEM wheel spanner was no longer usable due to the large -ve offset of the rims and the deep holes for the wheel studs. I got a universal cross-shaped TAPARIA wheel spanner from Amazon which solved the issue.
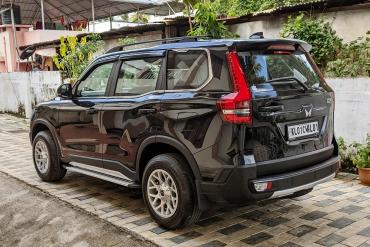
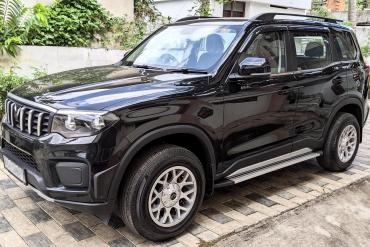
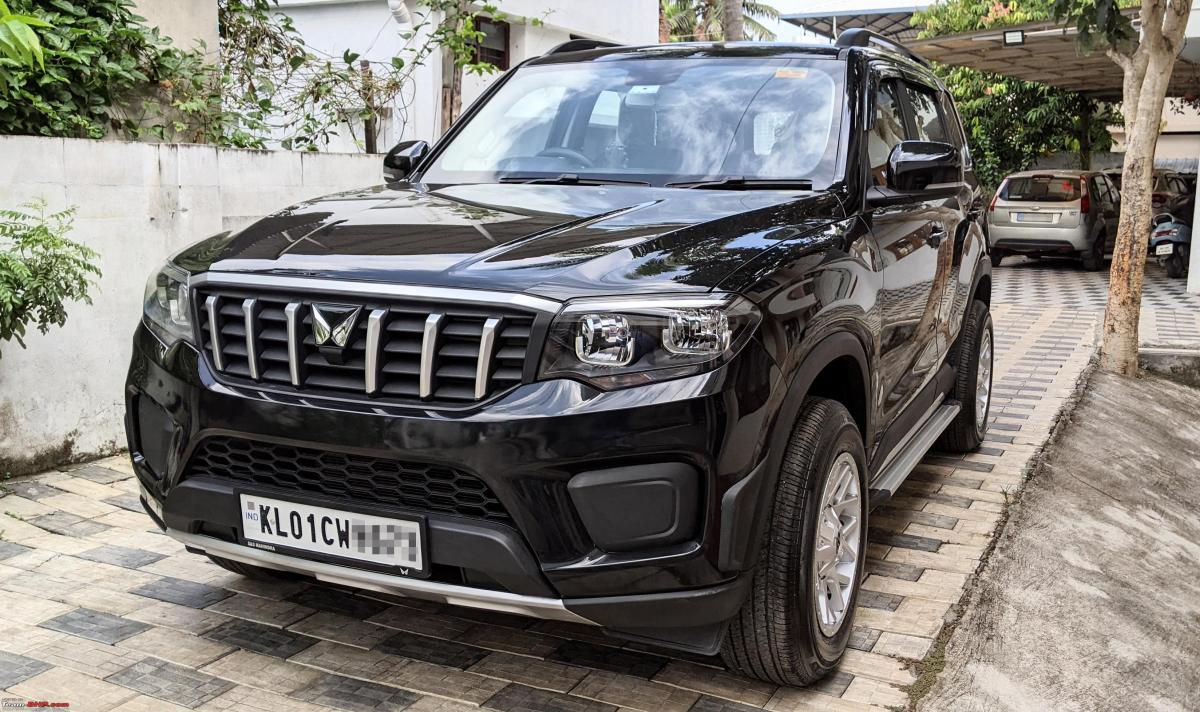
So, here's what the Beast looks like with the new rims. I think that the stance has improved vastly. My concerns are with the tyres protruding out of the wheel well, which might cause issues with the authorities. I feel that the turning circle has also increased due to the increased track. The ride quality has improved, and the handling at low and high speeds has not been affected.
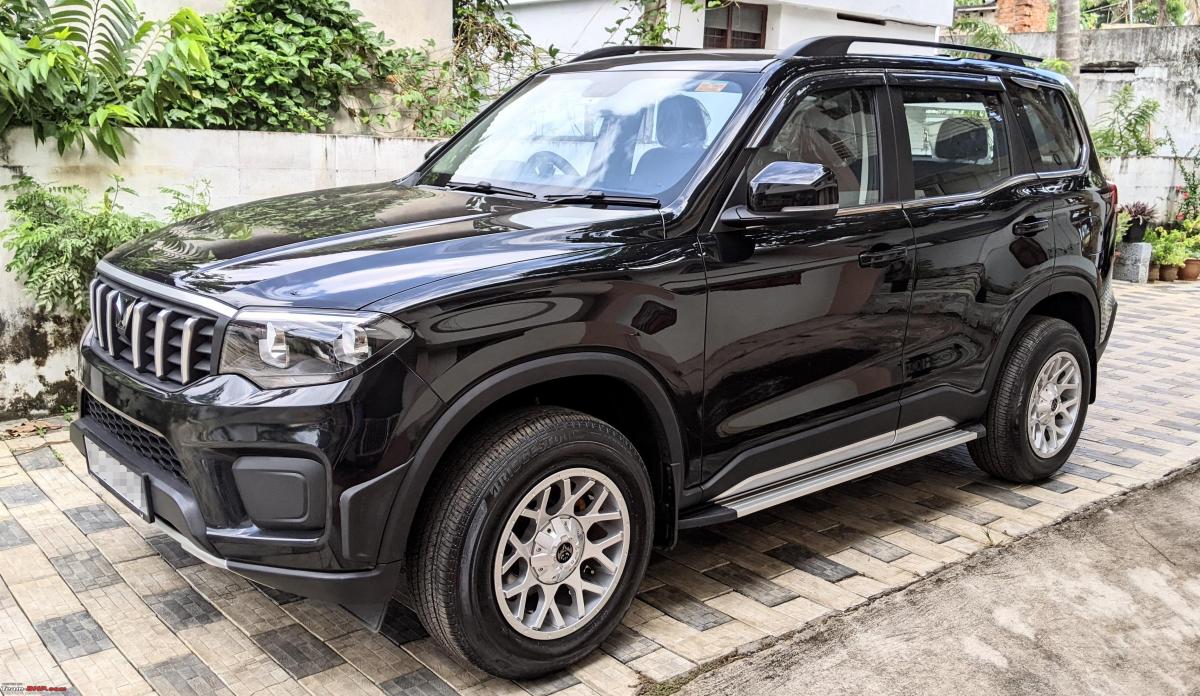


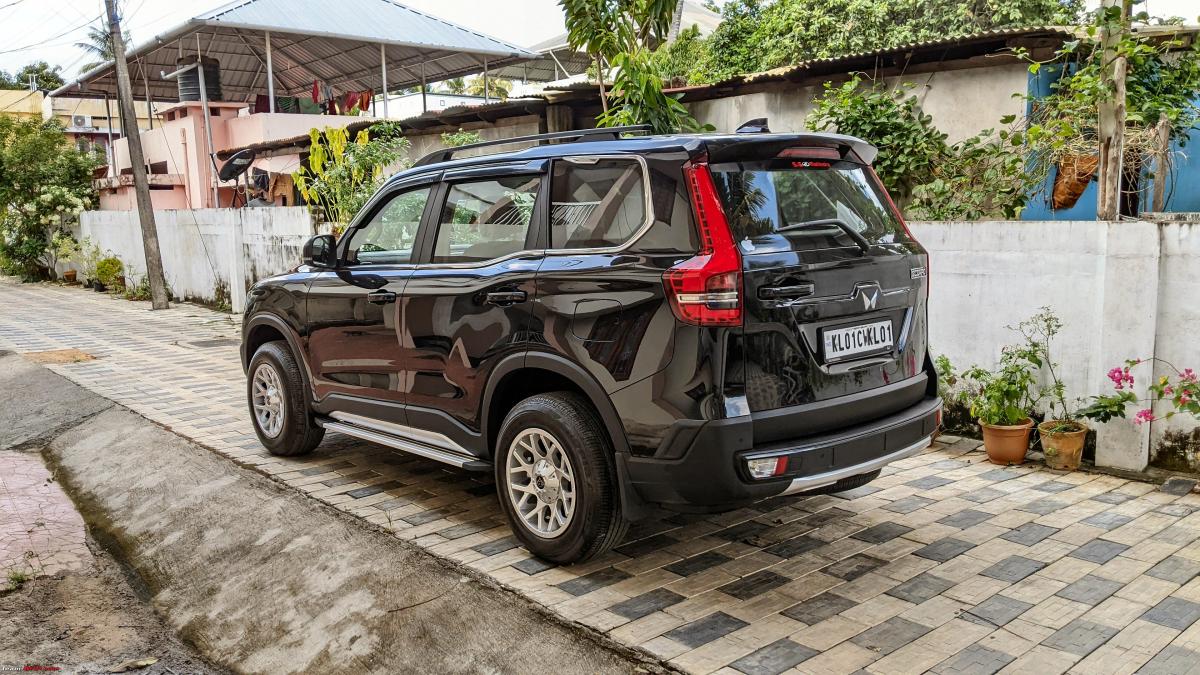
Please post your valuable comments and suggestions.
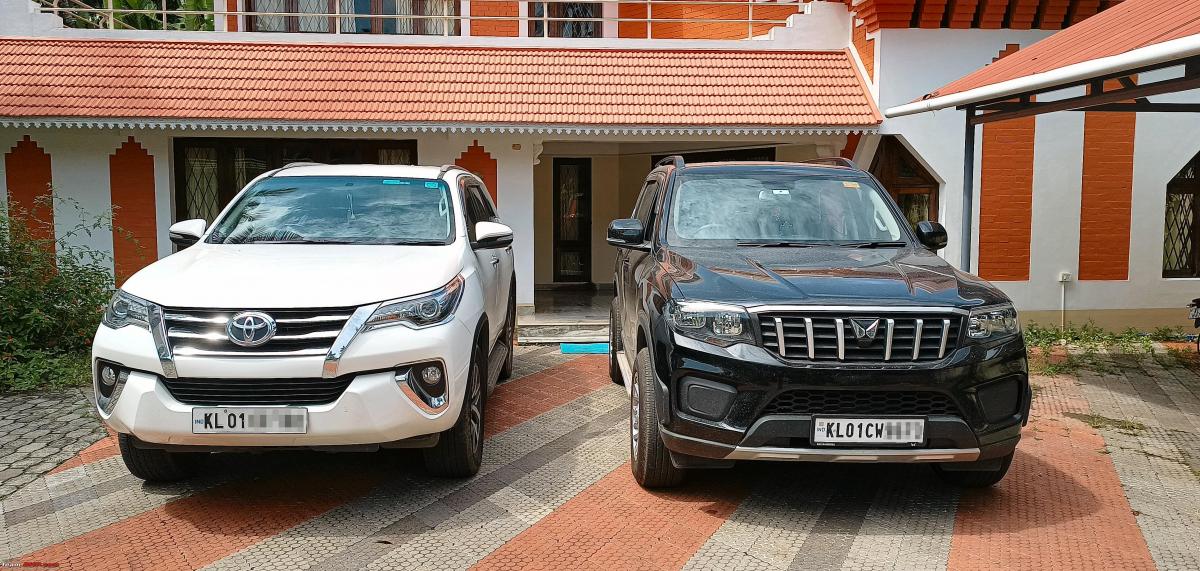
On another note, I also had a chance to compare the Beast with a friend's Fortuner. It was a 2020 2WD AT model. While the interiors were far more plush feeling than my Z4, I felt that it was noticeably harder to drive in the city due to the tight steering, and I also felt that there was more lag in the TC. The Sport mode felt a lot more powerful than the Scorpio. The Beast also rode a lot better, in both our opinions.
Check out BHPian comments for more insights and information.
News
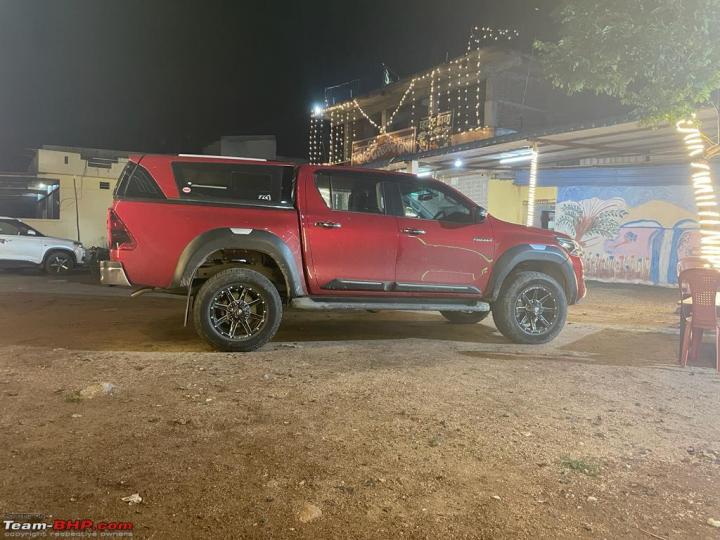
Modified my Toyota Hilux pickup: A suspension lift kit, canopy & more
Feedback from the family was extremely positive especially that the front is so much more comfortable, the rear is way better though still nothing can be done about the 90 degree backrest.
BHPian logout recently shared his with other enthusiasts.
So, it has been more than a month since The Red came home. A canopy was very much needed for my kind of work where I travel a lot with expensive, sensitive HiFi gear.
I started looking at the options in India and was also open to importing. But after a lot of research I came to the conclusion that importing was risky as well as time consuming and so I focussed on the local availability and after talking to many 4*4 owners and dealers I finally narrowed it to Azad4*4.
I was apprehensive since I had read a negative thread about them here in the forum though it was finally resolved to the customer's satisfaction. But since my research showed them to be the better option in terms of experience and workmanship and since I couldn't use the vehicle for its intended purpose without a canopy, I decided to go ahead with them.
I set off to Uttar Pradesh in The Red.
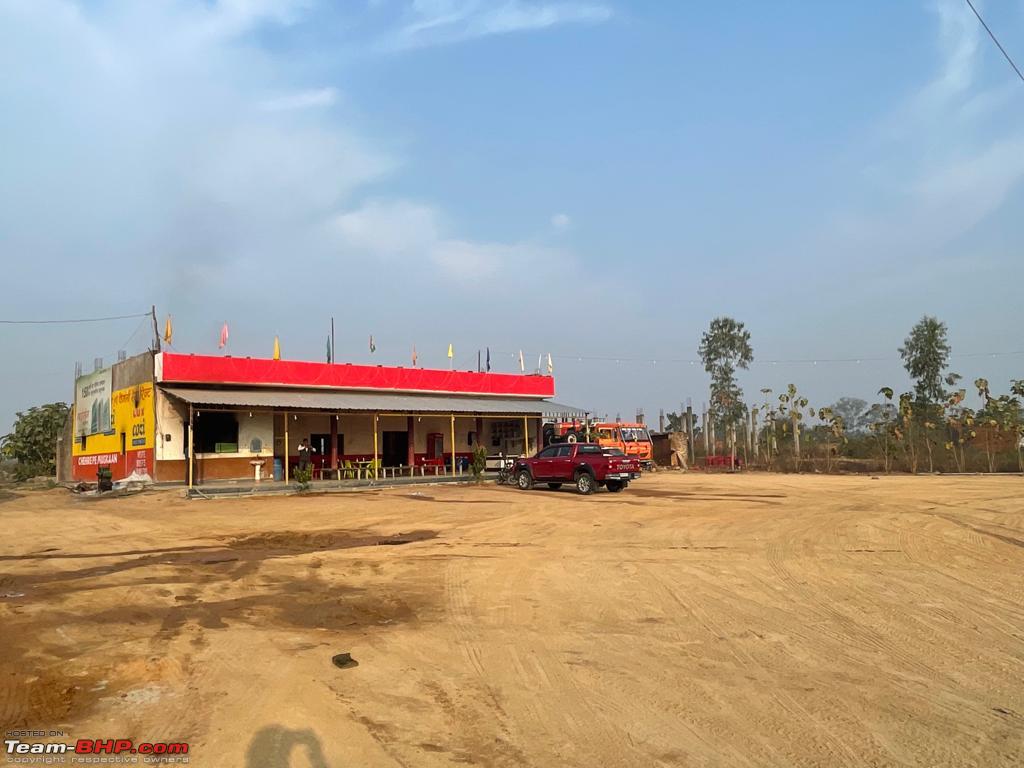

Started on a Friday morning and reached Ghaziabad on Sunday evening. The trip made me aware of each & every minute - bone, joint and muscle in my body. I was already dreading my return journey.
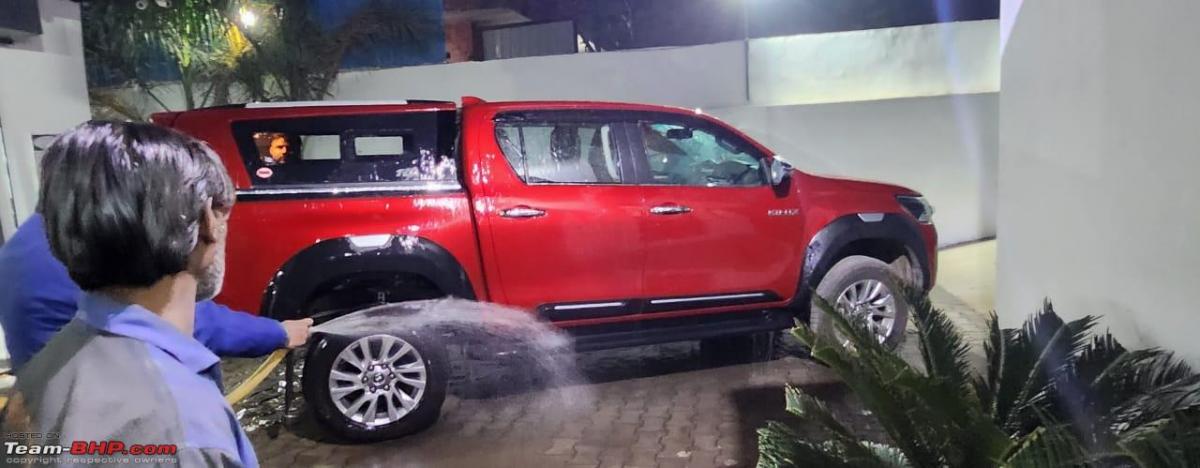
Next day got the canopy fixed. It is the SMM brand from Thailand.

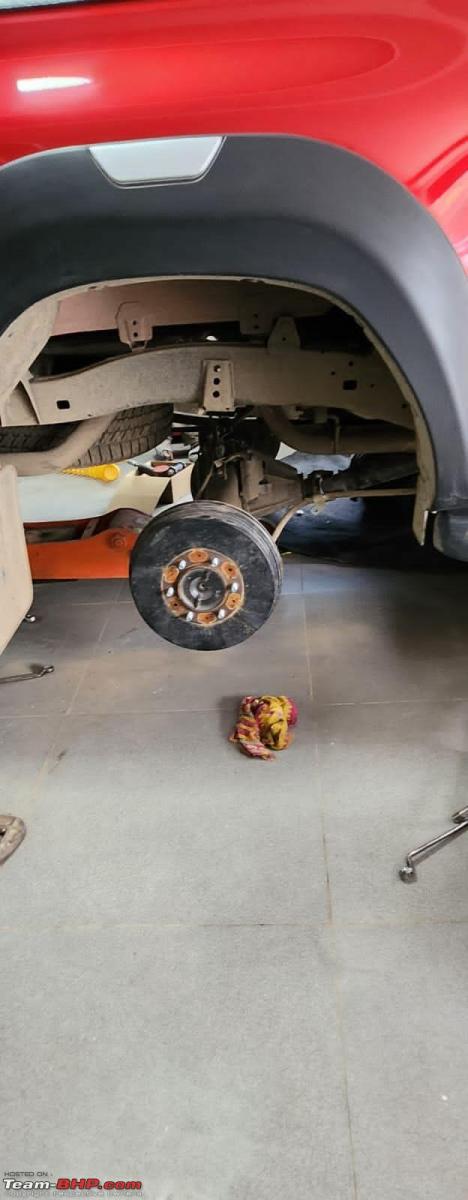
While the mechanics were fixing the canopy, I saw a Hilux there all decked and kitted up and was told that it had a lift kit installed and it would improve ride quality along with the lift needed for 4*4 adventures.
I was tempted especially about the ride quality and went for a test drive. It was a totally different ride and I immediately decided to go for it. They had a few options like Oldman Emu, Profender, Dobinsons etc.
The test drive I took had Profender kit and so I went for the 2" lift kit.


I had my heart in my mouth while watching the process but I must mention that the boys who fixed it were very professional.
Finally The Red looked like this:


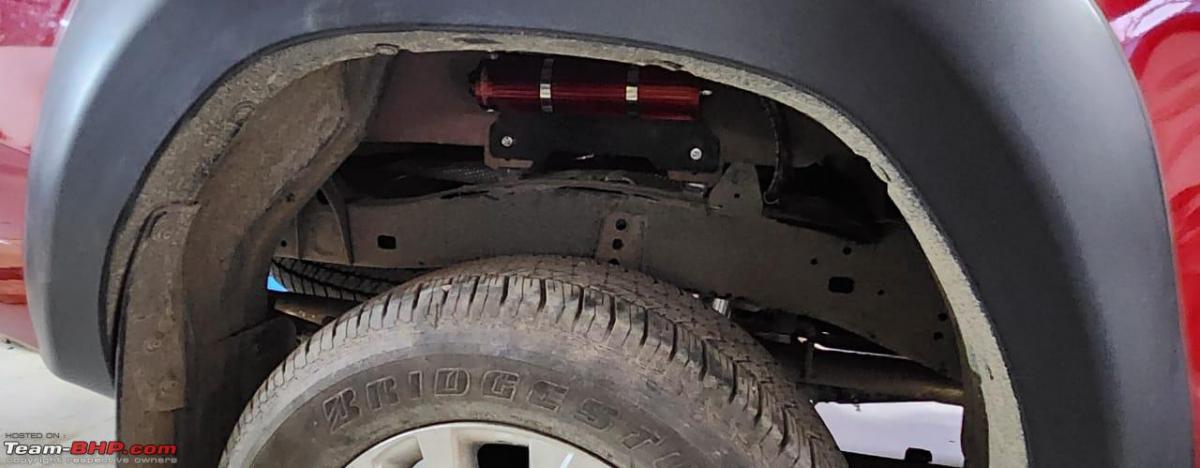
So now the vehicle is standing tall with the wheels & tyres looking puny, I decided to go for upsizing of the tyres. Went for 285/60 R18 Michelin LTX Rally.
On a side note: Tyres are so damn cheap in Delhi. We are being squeezed dry by the Chennai shops.
So here it is:

The return journey was quicker & smoother with a vantage driving position, almost car like comfort, better handling and the added bonus was that the vehicle was a head turner wherever we went.

Feedback from the family was extremely positive especially that the front is so much more comfortable, the rear is way better though still nothing can be done about the 90 degree backrest. There is stiff competition as to who gets to sit in the front passenger seat and I am relieved that my seat is safe.
Endy & The Red on a recent trip:

Read BHPian comments for more insights and information.
News
Royal Enfield Interceptor 650: Installed AEW exhausts after 1st service
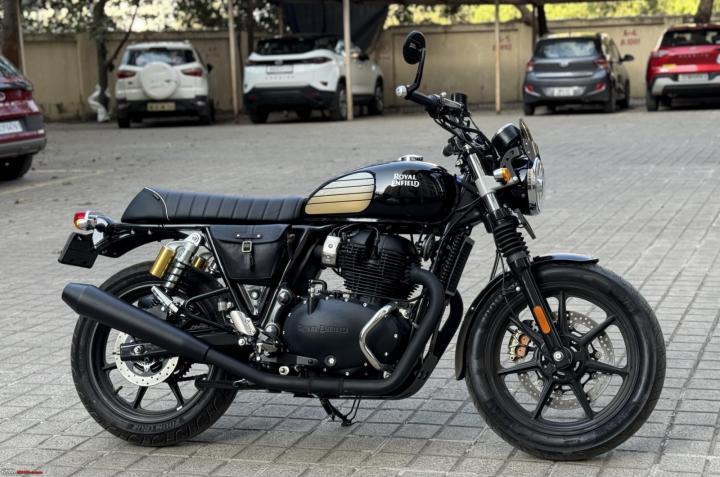
The bike feels noticeably lighter, also thanks to the lighter & louder pipes.
BHPian parrys recently shared this with other enthusiasts.
Took the motorcycle for the first service, exactly at 500 km reading on the odometer.
Here's how my day went - Sunday, 7th April 2024.
Serviced at Soniya Motors RE Centre in Thane. The same showroom from where I purchased the motorcycle. Booked the service appointment online. That selection allowed for a 9 am slot. Reached on time, only to note that the service centre opens only at 9:30 am. Never mind that.
The advisor who assisted me & the technician who performed all the tasks; were both, very well & soft-spoken. Heard me & my inputs clearly. Love it!
The bike was taken on the ramp within minutes after a quick trial and after filling the job card.
I think the service centre can be made to look & feel more premium (aesthetic & clean)


Engine oil was drained. I was told that the first fill is also full synthetic. The oil filter was replaced, and the air filter was cleaned.

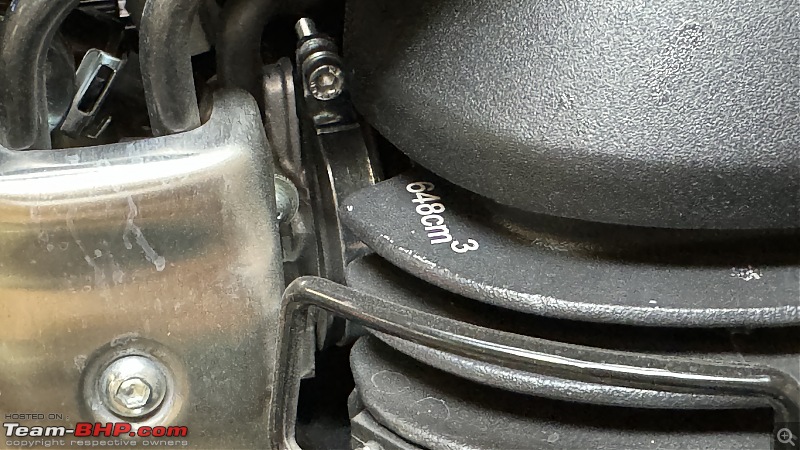
Heartbreaking moments, to notice paint peel on a brand-new engine. The motorcycle is barely 10 days old and washed only twice.
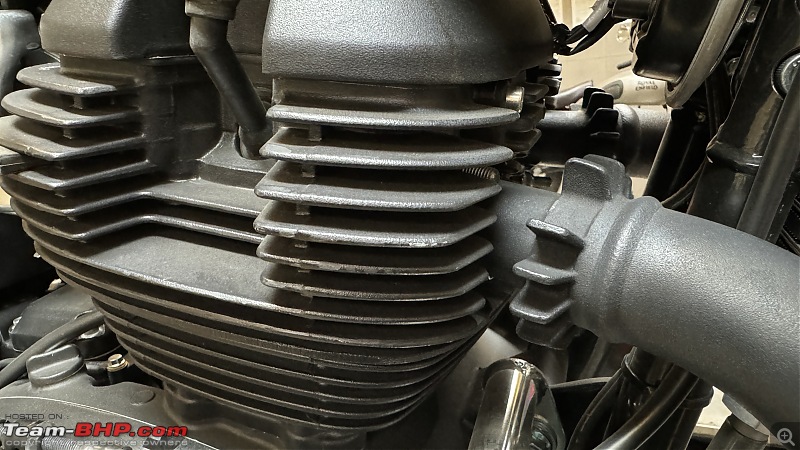
Paint peel is seen on multiple spots. I will live with this for now, and then touch it up when time permits.
Who's willing to try these Ceat tyres to the claimed limits? Not me.

Final bill after first service. I paid INR 3,000.02 for the first service.

Then went riding down to the Shell fuel pump which is far away from home, got the tank full, and had a chilled beverage at the very neat & clean cafe housed in the Shell pump. I always prefer filling up at Shell.

Premium price at Shell, but then I have noticed that the fuel quality is so good, in the long run, your fuel filters last much more. I have also noticed that the floor at Shell pumps is well swept. Never dusty.
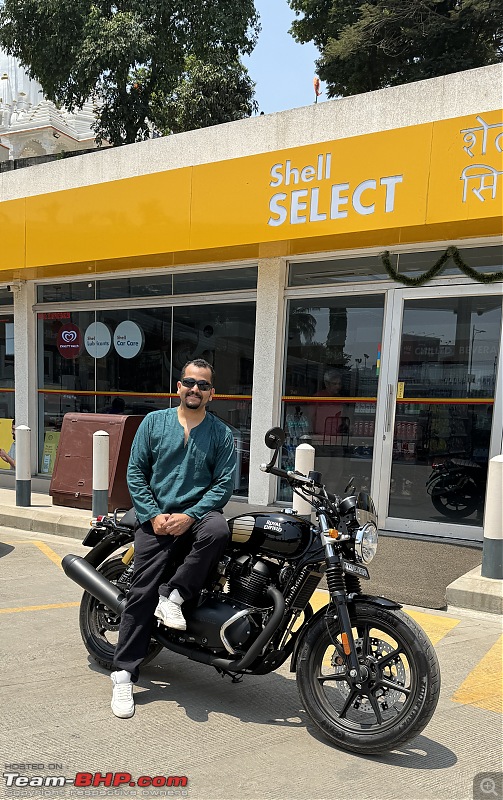
It was a really hot and sunny day in Mumbai / Thane today, and before heading to my friend's garage, had a mug of sugarcane juice from the same place where I would enjoy it when I was a kid.Little Things.

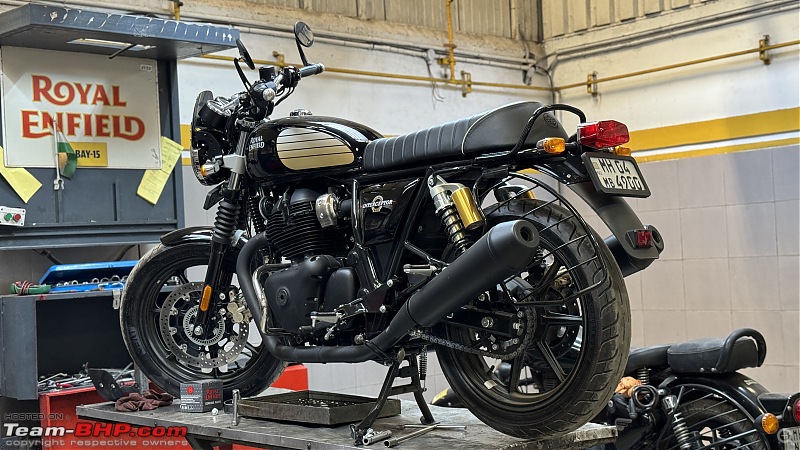
I made time just to get the first 500 kms completed quickly, only because I was very excited to fit AEW exhausts. These are the 102 units, finished in black.

Fixed the poorly aligned fly screen. 95% done I would say. Will try again another day.

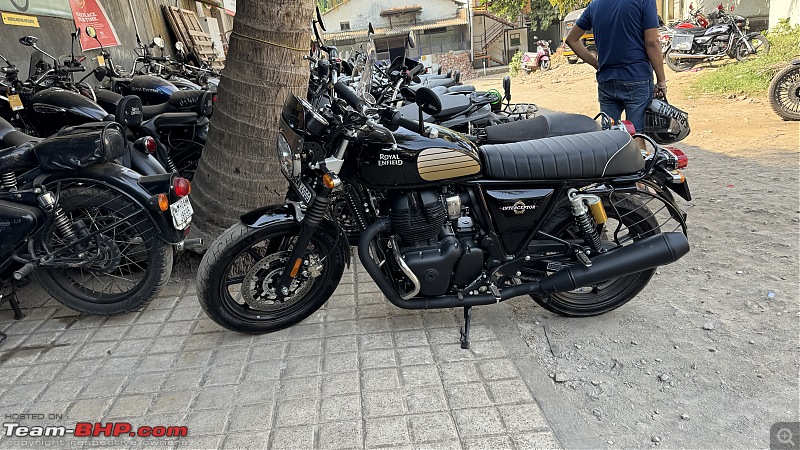
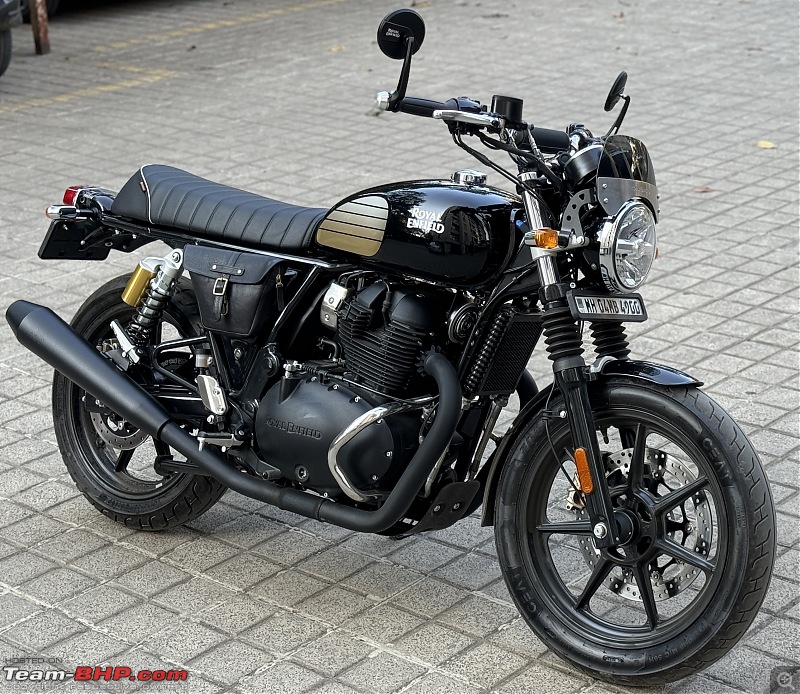
Here's the final output. I had been dreaming about this for a year. Just read the thread from day 1. This is a love affair.

Notice the exhaust & seat angles. No sissy bar, no saree guard = weight loss. The bike feels noticeably lighter, also thanks to the lighter & louder pipes.

These AEW 102 exhausts are so neatly finished, they almost look like OEM. Also, at idle, and idling speeds, the exhaust sounds just like the stock one. Get on the gas, and you get a nice rumble. I don't plan to get the baffle out for daily use. Maybe on a long highway ride someday, I might pop it out for some distance.

There's nothing more satisfying than a shiny new black motorcycle, or a car.

I will try my best to keep it in the best & shiny state & shape for as long as I will own it.
Can't wait for my next weekend ride around the hills, listening to the exhaust, and enjoying that smooth twin. What a change this has been, compared to the KTM 390 ADV. Not rapid fast, but ultra smooth. Not angry and agile, but flowing.

Check out BHPian comments for more insights and information.
News
4 essential accessories for the Royal Enfield Himalayan 450

The Saree Guard is gone for the good.
BHPian aviator1101 recently shared this with other enthusiasts.
Ownership update: Bagheera crosses 4000 kms
Posting after quite some time.
Both Bagheera and self were quite busy on the roads all this while. Managed to cross 4000 kms.
Also, a few accessories fitted over the past few months.
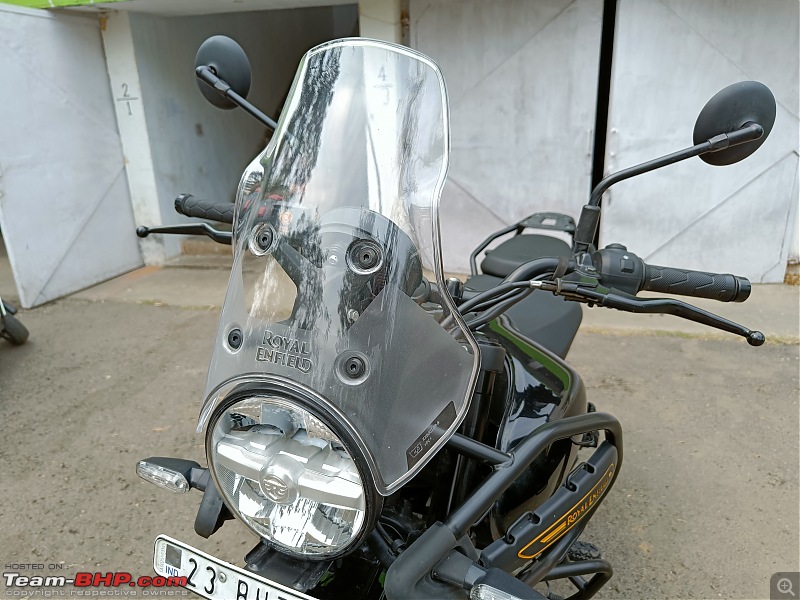
The OEM tall visor.

The Metal Radiator Guard.

The OEM Engine Guard
A pair of Gold Runway Aux Lights.

The Saree Guard is gone for the good.
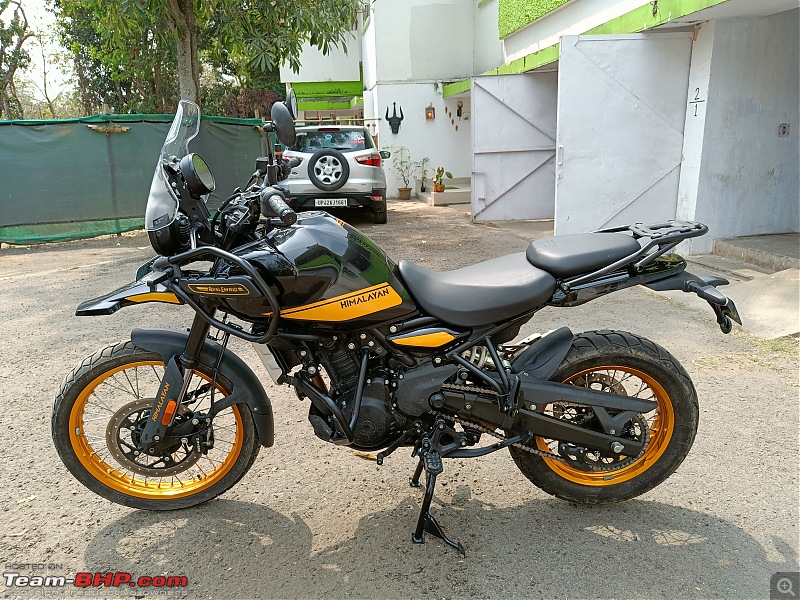
The clean and tidy look sans the saree guard.

Some interesting figures on the Odometer.
All 4s.

The Odo now stands at 4549 kms. Second service around the corner.
Check out BHPian comments for more insights and information.
News
Honda Elevate: 4 interior modifications for comfort & sound quality

There is a HUGE difference in the sound response of the car post these mods.
BHPian hondadriver recently shared this with other enthusiasts.
Interior Mods to my Silver V-MT:
- Fitted with Autoform's fitted seat covers.

- Got the side door fabric covered in the same material as the seat covers.

- Replaced the stock speakers with Infinity Reference components in the front and Infinity Ref coaxial in the rear. The speakers can get on the car door frame without any drilling if a coupler is used (that's what I got).

- Got a single layer of door damping from Infinity. This combined with replacing the stock Goodyears with Continental UC6s has made the cabin way quieter. Even quieter than my 4th Gen facelifted Honda City.
There is a HUGE difference in the sound response of the car post these mods. The original speakers were pathetic in their construction as well as response. Now the music is clear and crisp and it fills the cabin. Great sound for heavy metal, Punjabi, and Western classical music (as tested). Highly recommended.


Check out BHPian comments for more insights and information
- Tags:
- Indian
- Honda
- Elevate
- Modifications
News
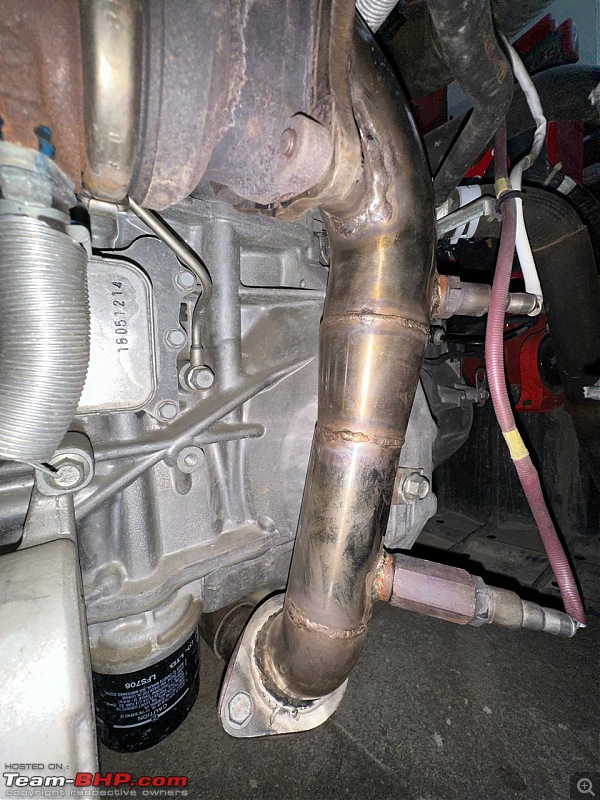
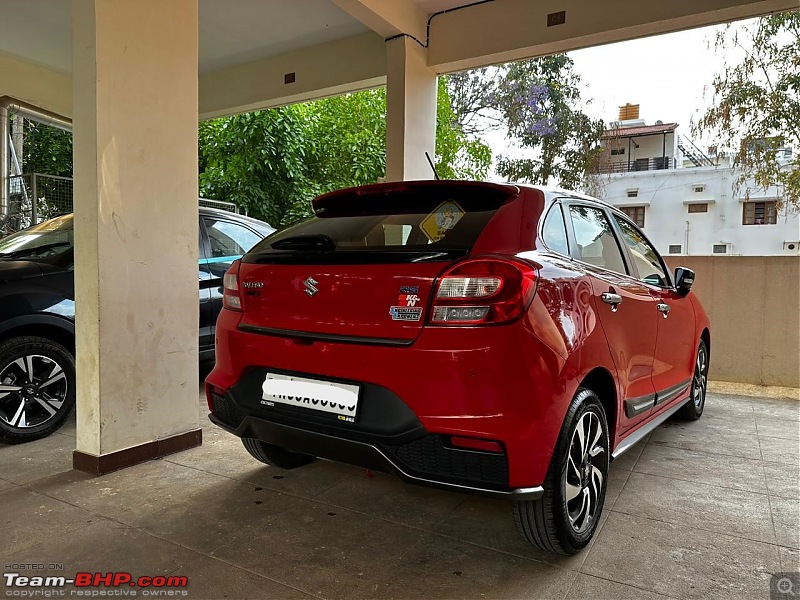
Got a Wolf Performance Stage 2 upgrade for my Maruti Baleno RS

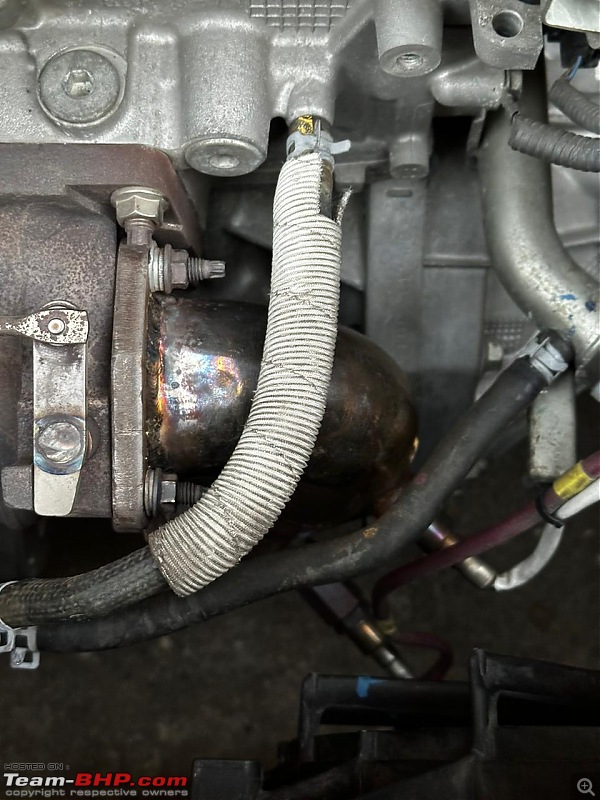
I decided to elevate my car's capabilities by opting for a decat downpipe and a Stage 2 tune from Wolf Moto Performance & Engineering Exponent in Bengaluru.
BHPian VarunVelavan recently shared this with other enthusiasts.
RS is now Stage 2!
Apologies for my prolonged absence from updates, fellow petrolheads! I'm thrilled to share some exciting developments with you all. Firstly, I've been promoted both at work and in life—I'm now a proud father to a future petrolhead!
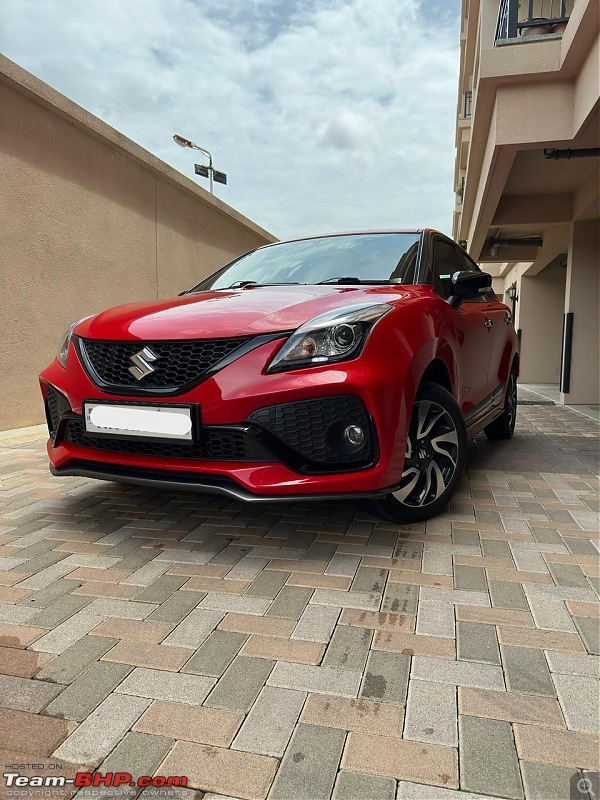

On the car front, my trusty ride has crossed the 30K mark, prompting me to seek an upgrade in performance. While the Stage 1 tune from Wolf Performance had served me well, the enthusiast in me craved more. I decided to elevate my car's capabilities by opting for a decat downpipe and a Stage 2 tune from Wolf Moto Performance & Engineering Exponent in Bengaluru. With the car already equipped with a K&N replacement filter, Stage 2 was the natural progression. I was delighted when the car was handed back to me in just 2 days, surpassing my expectations with each drive.


The enhancements have significantly amplified the car's character—it's now more vocal, with a raspier exhaust note. The mid-range performance is nothing short of epic, effortlessly propelling the car into triple-digit speeds. I've taken it on several short trips, and every journey leaves me enamored with the car all over again.
In addition to the performance upgrades, I've also invested in enhancing the in-car entertainment and comfort. The car now boasts a Dr. Artex damping package from Evo in Bengaluru, ensuring a smoother ride. Furthermore, all speakers have been upgraded to Alpines, providing the perfect accompaniment for those long drives.
Looking ahead, I'm considering a significant upgrade to the car's infotainment system, aiming for a top-notch audio experience. On the performance front, I'm contemplating concluding the upgrades with an enhanced intercooler.
Check out BHPian comments for more insights and information.
Pages
About Us