News
How much money I spent on my used Laura 1.9 TDI in 4 years of ownership

My advice to anyone planning to buy a pre-owned luxury car, please keep at least 15% of the original value of the car in ready cash, if you want to enjoy the car and maintain it well.
BHPian Joshua_Ray recently shared this with other enthusiasts.
- Is it worth buying a used German car?
- Are used VAG cars a nightmare to own and maintain?
- Is a used Skoda a reliable choice?
- Do premium pre-owned cars break the bank?
Hello everyone & welcome to my long pending, but very detailed ownership review of my 2010 Skoda Laura 1.9 PD TDI Ambiente... yes, a long name for one of India’s finest D-segment sedans!
This thread has been a long time in the making and I hope to answer all the above queries, by sharing my own experiences. 'Black Beauty' was solely responsible for introducing me to the world of tuning, modification and of course a master class in patience for maintaining a pre-owned German!
This thread will focus on two important topics:
- Life with a pre-owned luxury sedan - with all its ups & downs.
- A detailed list of all service/maintenance and part replacements with all the transparent costs.
The main aim is to help all those individuals who are on the wall, deciding whether or not to take the plunge into the pre-owned luxury car space!
The hunt for a new daily
Let me take you back to the year 2019, the air is clean, COVID was unheard of, I had started a new job and my trusty 2005 Ford Ikon was feeling a bit old and under the weather. You can read all about that car here.
The itch to upgrade had well and truly settled in and my requirements were very simple - it had to be a pre-owned sedan with low mileage, diesel, have a slick-shifting MT (a reason I will regret later), tuner friendly and most importantly cost less than ₹6 lakhs.
The Polo 1.6 GT TDI was every enthusiast's dream at that time, especially in red! However, there weren't many well-maintained examples to be found at that budget and most had run 70k+ km, so I started looking for the next best thing, a Vento 1.6 TDI. After seeing a few examples, I was somehow not able to connect with any of them and had almost decided to give up on a VAG car… but that was when on the evening of 14th Jan 2019, while browsing OLX (as had become my hobby over the last few weeks), I saw an ad for a 2010 Skoda Laura diesel, advertised for ₹5.95L in black and the most striking thing was the mileage - just 34000 km!

Seeing this ad re-kindled my desire for a Skoda (I was a huge fan of the MK1 vRS) and the thought of finally being able to get one, kept me up all night in excitement!
Love at first sight(ish)
The next day, I instinctively called in sick at work, and by 10:30 AM my Dad and I were at the Dealer location to have a look at the car.
The car looked clean apart from dents on the bonnet and a significantly weird curved dent on the rear left door. The interiors were very clean and all electronics were in working order. During the test drive the AC stopped working and the Dealer mentioned that it was 'just' a solenoid switch that needed replacing - a lie which revealed itself sooner than expected.
The car had some service records, but like most Skodas, it was serviced outside post the warranty period. Initially, I was a bit skeptical about the extremely low mileage of the car, especially for its age, but I guess my enthusiasm and naive-ness at the time decided to rule out any odometer roll-back (I did later check with VCDS that the mileage was genuine, what a relief!)
Post the test drive and the document check, we sat down to discuss pricing. My Dad being the shrewd negotiator, told the dealer to name his final price, after which we would decide. After a minute he revealed ₹5.25L and the next second we had a Wheeler Dealer Mike Brewer moment – hol’ out yer hand!
We decided to take the car the same evening, paid a token amount to block the car and headed home.
Delivery Time - The Plot & the Sudden Twist
We have parking for only 2 cars at home and my parents were very much against having 3 cars, that too an old ageing Ford was a strict no. I grudgingly agreed to sell the Ford, on the condition that we at least get ₹70k for it. The plan was to take the Ikon in the evening, sell it to the dealer and return home in the Skoda – a bittersweet thing for me, as for some reason I was and still am very attached to that car.
Fate, played in my favor as the Dealer offered only ₹40k for my beloved Ikon. (probably a good deal then, as it is probably worth only half now!). I happily rejected that offer, as per my deal at home and was extremely overjoyed with the fact that we now had a Skoda and my beloved Ikon! I was a very happy 22-year-old that day and we drove home in both the black cars!

The customary pic with all 3 cars
The start of the modifications
It had been one month of ownership with the Laura and things were smooth(ish), apart from the AC packing up within 20 days of ownership! Yes! That solenoid the dealer mentioned, turned out to be the entire AC system. I will dedicate an entire section, at the end of this thread with all the maintenance/parts cost for a better reading experience.
Mine being the older 1.9 PD and not the later 2.0 CR, performance was a bit dull for such a big and heavy car. It did 0-100 in 10.6 seconds, which was very respectable, but it still felt slow. As mentioned in the beginning, a tune was in the pipeline and within 2 months of getting the car - the very first modification was done – a BMC performance air filter and stage 1+ tune from Code6! The numbers increased from 105 BHP/250 NM to 140 BHP/320NM! The car had so much poke that the stock R15 tyres were scrabbling for grip throughout 1st gear (with TC off).
The car had developed a new character and could transform from a sedate cruiser to a torque monster, with just a quick downshift and a tickle of the throttle. The 0-100 time dropped to just 9.5 seconds and I had a big smile on my face, every time the turbo spooled! The car was a hoot to drive and the tune induced the need for bigger wheels and tyres, to keep all that power in check...
I was able to source a set of R16 rims from an Octavia (mk3.5) and with 205/55 Conti MC5 tyres – the grip and stance of the Laura had really improved tremendously! After the wheel upgrade, the car did 0-100 in just 8.9 seconds and the car had a newfound sense of stability and comfort, heightening the overall driving experience!

Life was good and the Skoda and I were in perfect sync.
The first breakdown…
Many people warn against buying used Germans, especially Skodas, as you never know when they would leave you stranded… and as an enthusiast who really looks after his machines – always performing oil changes before schedule, warm up and cool down rules, no hard launches (after the Ikon lessons), etc., I felt that a breakdown was something that would never happen to me! But life has its ways of teaching us important lessons…
The year was 2020, exactly one year after buying the car and we had planned a road trip over 5 days, during my Pongal holidays. Chennai - Rameshwaram – Dhanushkodi – Kerala – Coimbatore – Chennai, was the route and I was super excited! The trip started well and we really enjoyed the drive to Rameshwaram, but the next day while en route to Kerala, disaster struck and the clutch went straight to the floor!
Luckily this had happened on a quiet road at around 40 kph and not on some highway at high speeds! We pushed the car to the side and while we waited for a tow truck, I googled the nearest Skoda dealership and was lucky to find Maverick Skoda in Madurai – a distance of 60km from where we were. A tow truck came and it was a jolty and jumpy ride atop the flatbed to Madurai, at least we could keep the car running with the AC on…
Trust me, riding on top of a tow truck is an experience on its own and I'm sure it's something my parents and I will never forget!
On the way, we spoke to our contact in Gurudev Motors Chennai who gave us the Service head contact in Maverick. We were treated very well by them and they even supported us in checking us into a hotel. The issue was traced to a failed clutch MC, a relatively simple fix - but, there was a catch, the workshop was working the next day, but the following 2 days were holidays thanks to Pongal and this dealership did not have the parts in stock! Luckily, after a few phone calls – parts were overnighted from another dealership and the next day we received the car in good working order – phew!
Special thanks to Maverick Skoda Madurai for helping us out that day!
This was my first ever breakdown and while we did get back on the road pretty easily, the incident had left a bitter taste and I was a bit shaken at the thought of this happening elsewhere, especially with my Mom and Dad in the car. Considering that my Ikon, with all the abuse it had taken, had never once left me stranded anywhere!
The remaining year was very uneventful, as with Covid and lockdowns, we never really drove much and that meant that apart from an oil change and a set of ABS wheel speed sensors, all was well with the car. The odometer was just around the 46k km mark.

Chillin' at the office parking, post lockdown
The second breakdown…
It was 2022 and with things opening up, I had started using the car as intended, racking up many thousands of kilometers. My workplace is a 100 km round trip and I was thoroughly enjoying the car – it was extremely solid, and gave a lot of confidence to the driver. Bad roads were not a problem and a combination of the sorted suspension, excellent body control, precise steering and of course the extra power from the tune – made this car punch a class above and I really enjoyed 'friendly duels' with bigger luxury cars on the highway.

Drive in the rain they said, it'll be fun they said...
At around 52k km, the clutch developed a bit of a rattle and fearing another breakdown, I got the clutch and flywheel replaced. Turns out that one of the pressure plate leaves had broken off! After this, I was really looking forward to enjoying the car again, when bang – the clutch went straight to the floor and the car had to be towed (again!) - this time though, I was alone and very close to the trusted garage, that had done the clutch replacement. This time it was the MC again, an O-ring had fallen off which had caused the issue. A replacement was found and the car was good to go.
This second breakdown dampened my confidence again, but the car felt so good to drive that I gradually began trusting her soon enough. I had to travel for work and made a few trips to Vellore, Erode, Salem and Hosur with the car performing flawlessly.
Originally designed for the open autobahn, the car felt at home on the highway, regardless of whether you were cruising at 100 kph or higher! Having a job that required early morning drives on empty highways made this possible. On the mileage side, a constant 11-12 in the city and 16-21 on the highway were the norm, even with the tune.
In May 2022, I decided to put away my fear of 'maintaining a detailed car' and went ahead for a proper detail and the end results were absolutely stunning. Link to that story.

Fresh after the detail
Things were great for a while until in September 2022, the temperature gauge slowly started creeping up… yes, at 60k km, the water pump had failed. The car was parked for over two weeks, waiting for parts. It was at this time when my Ikon’s fuel pump had also failed and the only functioning car was the reliable and trustworthy Honda! Soon enough, the parts arrived and we got a new timing belt installed as a preventive measure. With a fair bit of money already spent on the car, and with all the niggles sorted out, I felt it was a good time to invest in some creature comforts. The lack of Bluetooth was really annoying in 2022 and hence an RCD 340 with a green backlight was sourced and we also got the seats done in some premium Genous leatherette covers.

I sometimes still miss this view...
Third time's the charm
It was April 2023, the car was running beautifully with just under 70k km and I was truly enjoying this car every single day. My only gripe was that I was deputed to work out of our city office for 2/5 days and that meant dealing with painful city traffic at peak hours. Having faced two clutch related breakdowns already, the thought of being stranded in the middle of T Nagar traffic was not very enticing at all. This meant that I was flicking my dad’s Honda whenever I had city office duties.
On one fateful morning, I was on my way to Oragadam and you guessed it, I had another breakdown! This time a portion of teeth on the timing belt, (which was new, but probably old stock) had fallen off causing a sudden power loss and the car refused to start, leaving me stranded at a busy intersection just after the Tambaram bypass. The car was in the workshop for a week again, waiting for parts and the garage did the job for free, taking full responsibility for the failure. By sheer luck, the timing had not skipped when the teeth broke off and the car was running fine with just a brand-new belt.
But, by this time I had totally lost confidence in her – she was lovely when working, but the constant breakdowns had taken a toll on my peace of mind. The question – what if this had happened elsewhere? – was constantly cropping up and my parents were also thinking the same. My beloved Skoda was no longer a reliable companion for work duties, let alone outstation trips.
With a heavy heart, I wrote the ad on OLX and within a week she was sold for ₹4L – a decent amount considering the purchase price and all the money spent on her.
The pressing question – how much did 4 years and 35k km cost me?
Let me give you the detailed cost break-up of how much I spent totally on the Laura – including service, maintenance, modification et all! The list is pretty long and expensive so please do sit down with a hot cup of coffee for this…
Modifications
- Stage1+ Code6 tune with Air filter: ₹25K, R16 wheels and tyres: ₹50K, Genous seat covers: ₹30K & RCD 340: ₹30K
- Total: ₹1.35L
Servicing
- Oil changes - Shell 5w-40 (5 times): ₹25K, Coolant changes (twice): ₹4K & Diesel filter (twice): ₹4K
- Total: ₹33K - excluding bits & bobs like wheel alignment, wiper blades, etc.
Maintenance
- A/C Full System: ₹30K, Clutch + Flywheel (Sachs): ₹35K, Clutch cylinders: ₹13K, Front brakes (Rotors + Pads): ₹13K, Rear brake pads (EBC Ultimax): ₹3K, ABS Sensor set (2 sets): 16K, Water pump: ₹12K, Timing belt: ₹20K, Battery: ₹10K, Wheel bearings (front): ₹16K
- Total: ₹1.68L
All this totals to around ₹3.36L in 4 years!
They usually say the second owner spends the maximum on any car and that definitely proved itself true in my case! Excluding the ₹1.35L spent in modifications, ₹2L in 4 years and 35k km, translates to approximately ₹50k per year.
My advice to anyone planning to buy a pre-owned luxury car, please keep at least 15% of the original value of the car in ready cash, if you want to enjoy the car and maintain it well. Another important lesson, the money spent on modifications is never ever recovered when you sell the car, invest in them wisely.

Her last pic...
Every cloud has a silver lining
and with the Laura sold, it was time to go car hunting! With no specific budget in mind, options were all across the board, right from a brand new Slavia/Virtus to an enthusiast’s dream, a pre-owned 530d! We had a look at a few, but they were either too old or not maintained properly and the nice ones were trading at an inflated price point – also for my usage, a 530d would have been overkill and heavy on maintenance too. A 520d would have been a good option, but they felt very lethargic, thanks to the weight, floaty suspension and the same powerplant from the smaller 320d. After the experience of the Laura, my parents were not keen on any pre-owned VAG – so that ruled out everything starting from a mk3 Octy all the way to an A6.
Logically, we now had two options – new Slavia/Virtus or pre-owned 320d. We had a look at a few 320s, but most were the base ‘prestige’ model and they weren’t very appealing. All the Luxury/Sport line trims were either in bad shape or with high mileage. So, we took a test drive of the Virtus and felt that it ticked all boxes, it was spacious, comfortable, feature laden, German and the 1.5 TSI was a blast. However, it lacked the solid feeling of the Laura and in that one aspect alone, it felt like a downgrade.
With no other choice on the horizon, we were about to book one, which is when on 29th April, a 2014 Melboure Red BMW 320d Sport line popped up for sale, with a full company service record, a single owner and just 46k km on the clock!
We jumped at it and after a quick TD, a detailed scan of the service records and a bit of negotiation - a few days later we had a shiny red BMW occupying the Laura’s garage space! It was a dream come true!
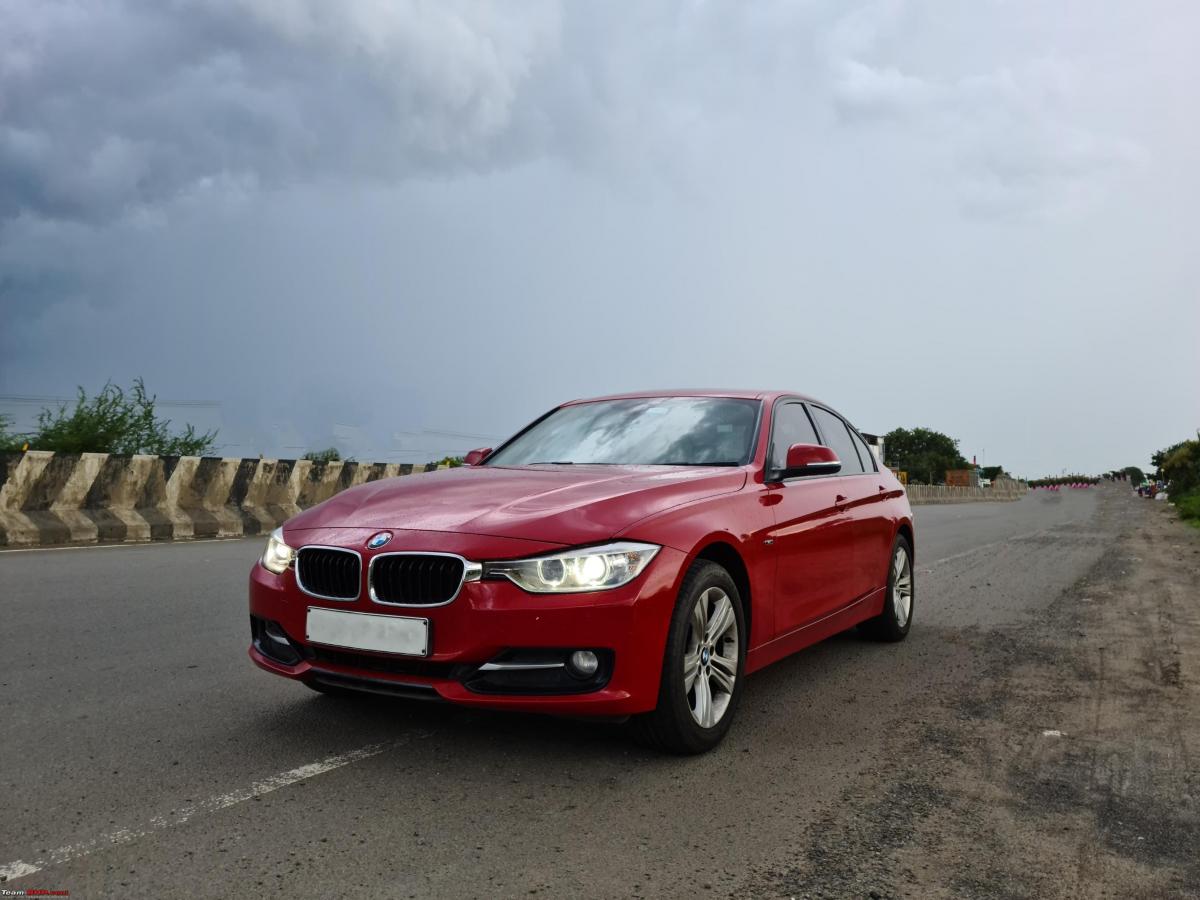
Nothing like a BMW in red!

Chennai's monsoon clouds adding to the drama!
Some of you might wonder, why did I go the pre-owned route with a German sedan again...well, there is only one answer to that...
Life is too short to drive boring cars!
A detailed thread on the Beemer will be coming soon! Stay tuned!
Cheers!
Check out BHPian comments for more insights and information.
News
Mods on my Royal Enfield Interceptor 650: Some needs and some wants
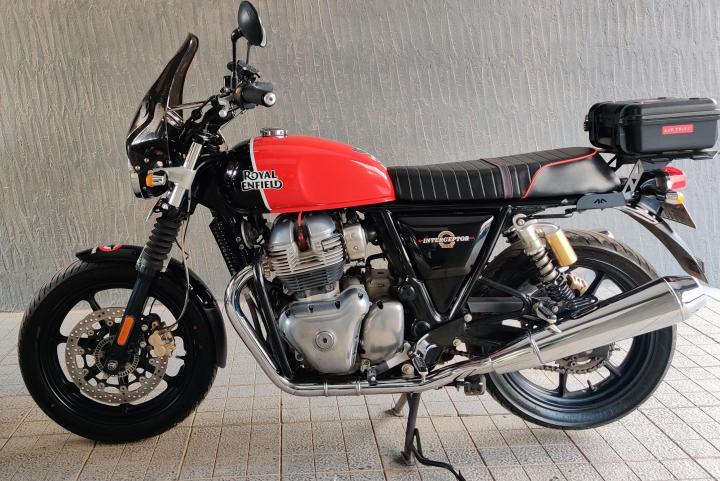
I have the Motowings performance filter with the stage 2 kit + Iridium spark plugs. Am I flying? Not at all. Does it sound good? Indeed it does.
BHPian surjaonwheelz recently shared this with other enthusiasts.
Some needs, some wants - mods on my Interceptor 650
Want - NGK Performance kit
A good gentleman ordered this for me from BikeNBiker. The kit contains iridium spark plugs, suppressor caps and low resistance lead wires (red).

I got it installed at Pitlane but not without any drama! The first NGK spark plug slipped and the threaded part cracked. On inspection, it was found to be CR9EIX but Bikenbiker website mentions that the kit will contain 2 CR8EIX NGK plugs. Pitlane had CR8 as it's used in Dominar also.

I didn't want one CR8 and another CR9 installed so when I checked the NGK Part Finder page, we found that CR7 (not Ronaldo) is recommended. Hence, I ordered a set of CR7EIX plugs (extra cost). If anyone could share some spark on these numbers then it would be enlightening!
In the meanwhile, got the front sprocket area cleaned which was long pending.
Now I have, Motowings performance filter installed back [aargee will not agree] with stage 2 kit (open air filter intake) + Iridium plugs! Am I flying? Not at all. Does it sound good? Indeed it does!
Need - Better cushioned seat.
I've clocked 18,500kms on the stock seat and my bum deserved something better. I'm the flag bearer of custom seats and had a good experience with my Classic 350 seat, I was ready to go down this route!

If the experiment goes wrong then you can always buy the GMA seat. I wanted something like a scrambler bench seat. I knew the bucket-type seats don't really work on the stock seat base, you need something wider for that!

I zeroed in one shop nearby and explained my needs. They took out a 30mm thick HD (high-density) foam. Plan was to cut out the stock foam and fix this on top and then shape it. A new cover with ribbed pattern and red piping to complete the custom touch.

Old foam cut out from stock seat reduced.

New HD foam sheet ready to replace it.

Before putting on the new cover, I took a test ride keeping this in mind that the height is not increased much. I could put my feet down and manage the bike as earlier. The result was more like the GMA type 2 touring seat.
I've completed a 1000+ km road trip on it and I'm satisfied with the work.
Need - New battery
My Interceptor, Spitfire is now 3 years, 9 months+ old.
I faced these problems and I was skeptical. I checked all the voltages and they were within range. 12.7V standby, charging going 14V+ and cranking voltage falling to 10.4V (checked with Digital Multimeter). Hence I sprayed some Contact cleaner and was happy with it. Did many rides and commutes without issues!
A day prior to a long ride, I was doing my usual routine of cleaning and preparing the bike. When I was done and cranked the bike for warm-up! Gone the lights started blinking. It was still afternoon, I chalked out a few more checks after an hour, assuming some water ingress, battery voltage, fuse etc. Fuel pump was priming, horn was sounding!

Considering the age of the battery (stock) and the upcoming ride I didn't hesitate a plonk a brand new Amaron Pro Rider battery. I took out the old battery and got the new one from my regular Battery shop in exchange for the old one. (I already have so much of stock parts!) I fitted the new battery in place and bingo, it fired back to life! A huge sigh of relief just before a long ride.

That's all folks, thanks for being a part of this journey.
Check out BHPian comments for more insights and information.
News
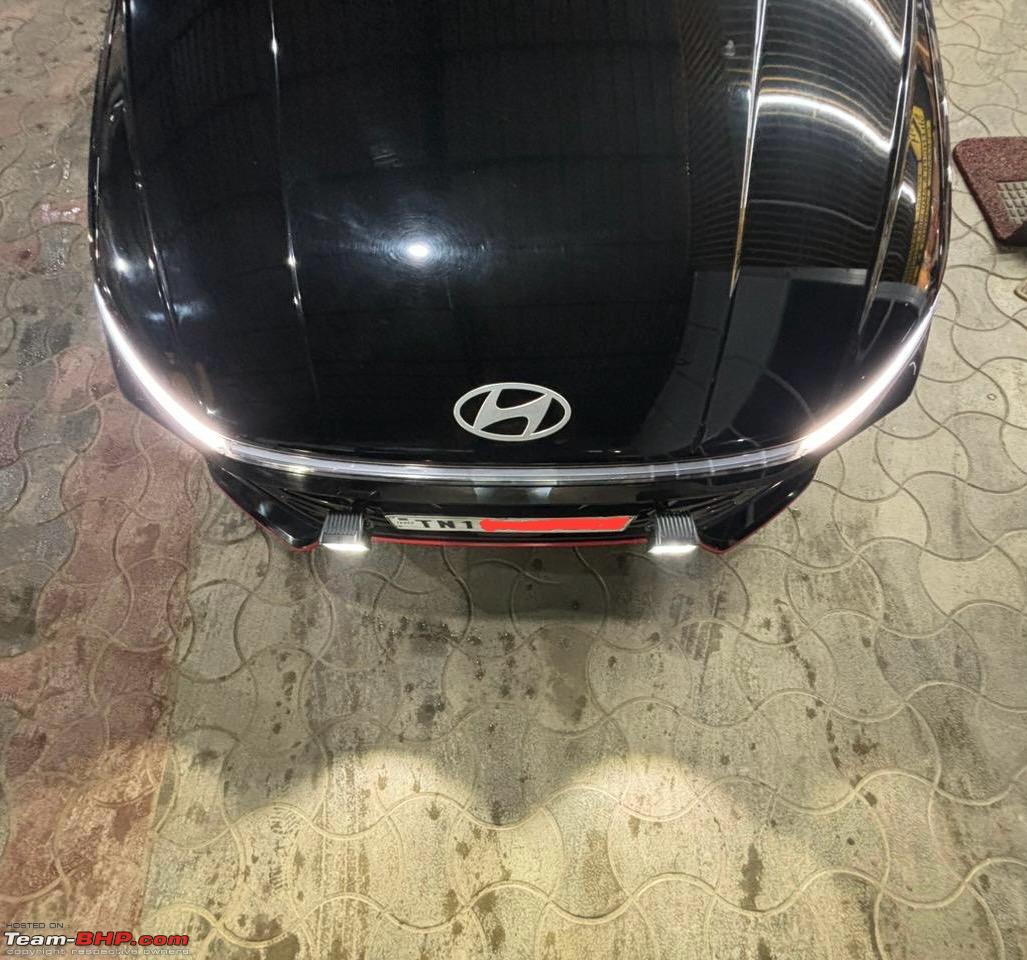
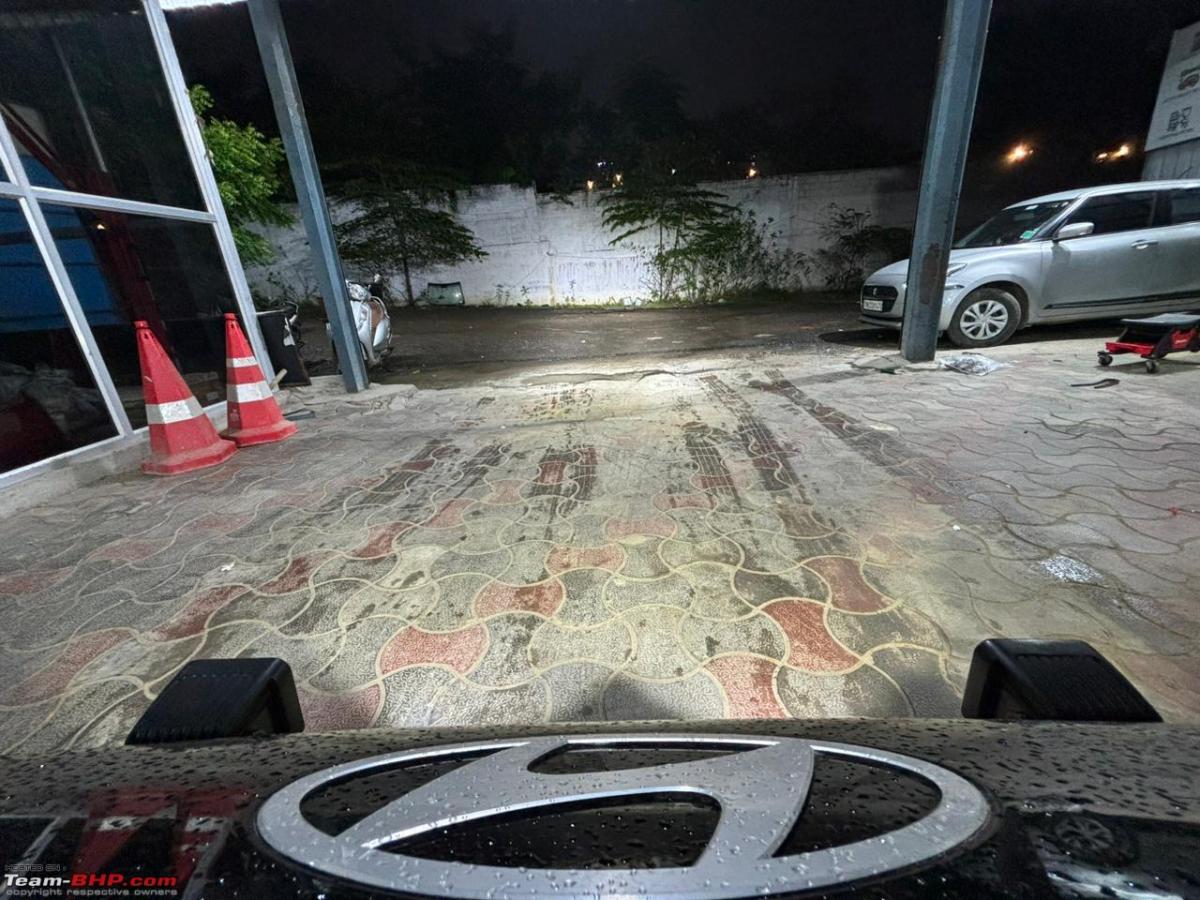
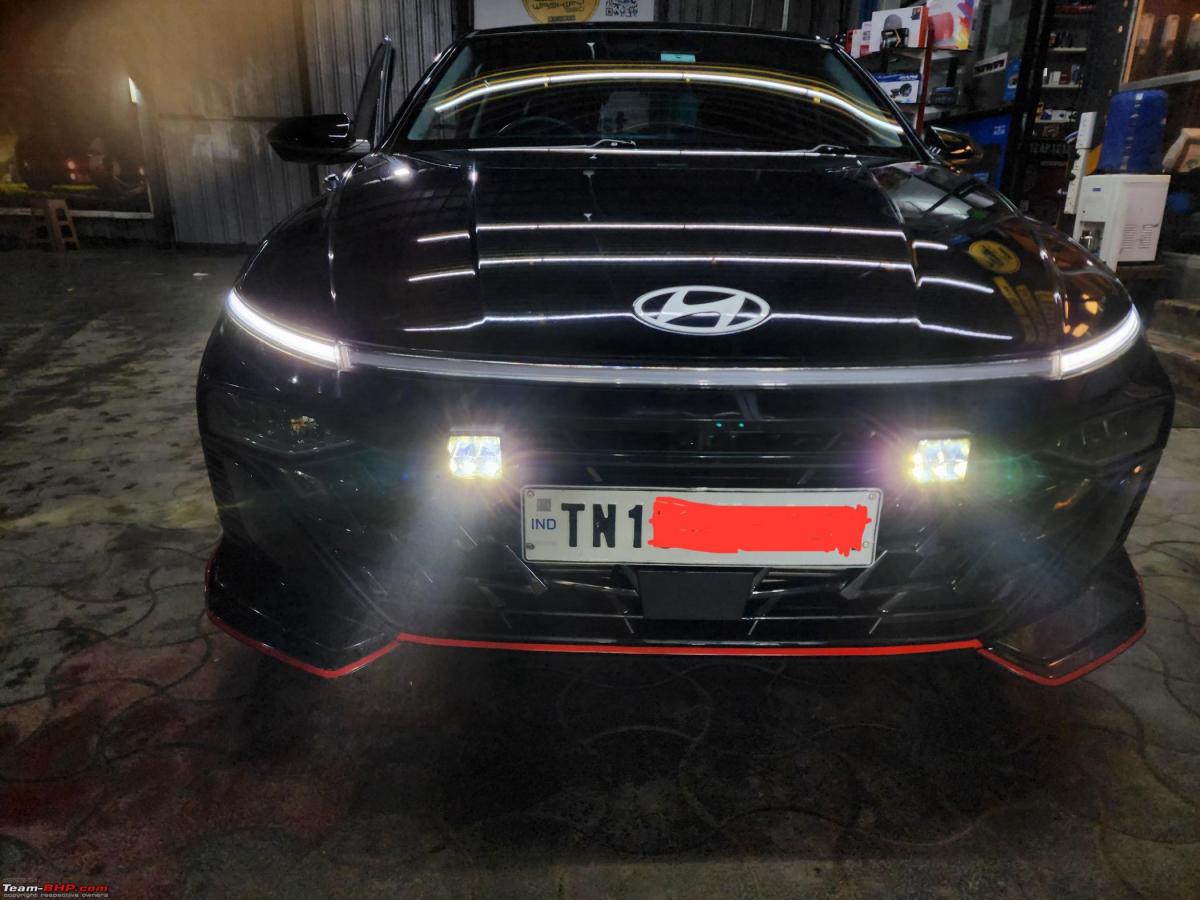
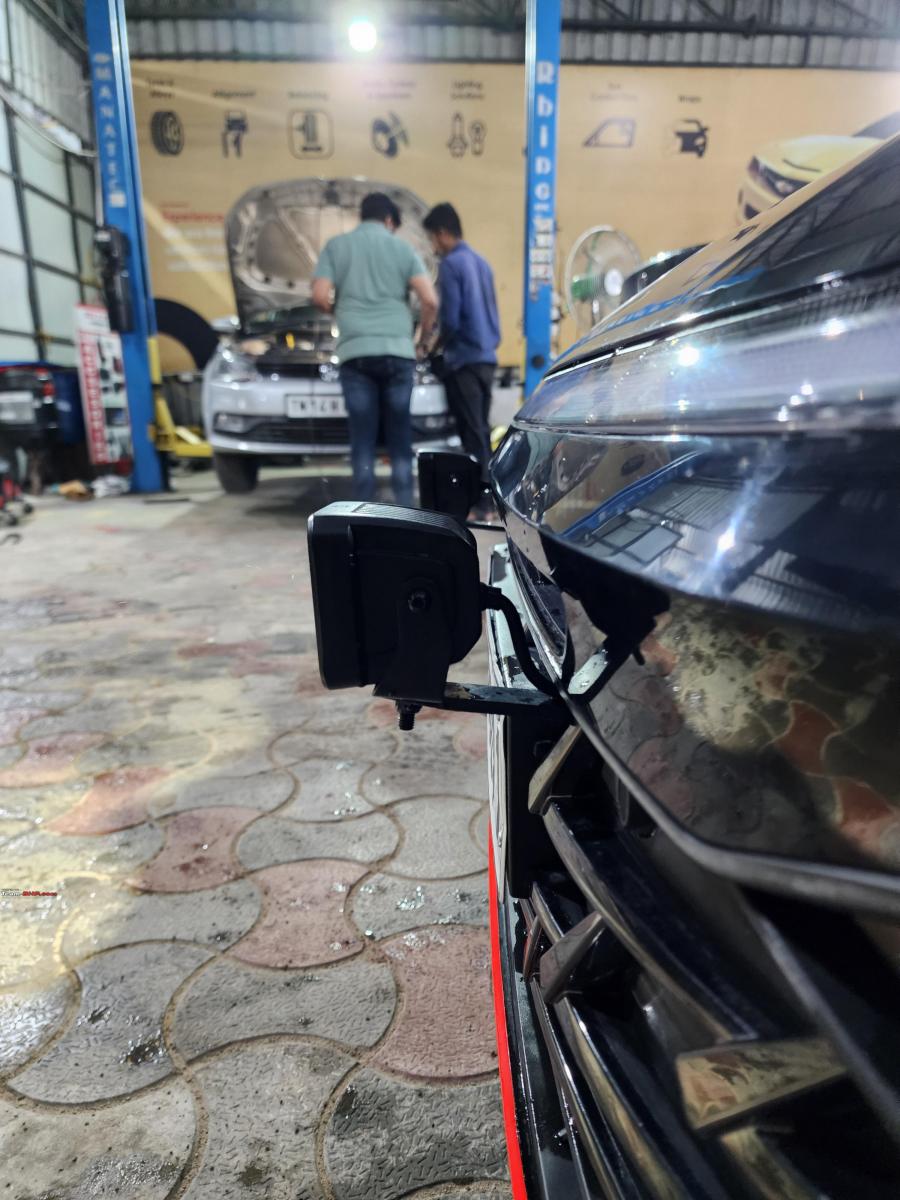
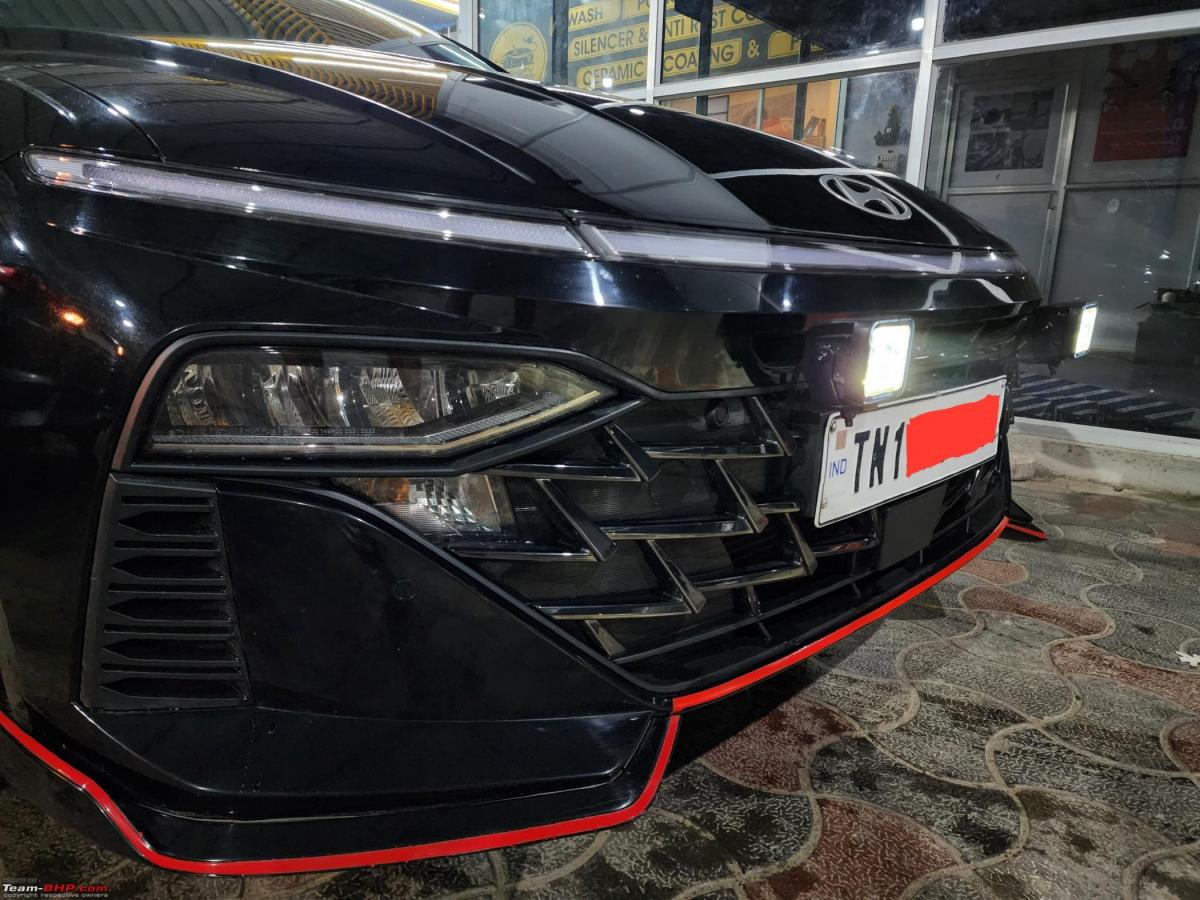
Installed Hella aux lamps on my Hyundai Verna: Happy with the results

The light throw is awesome but I think I should try different angles to find the correct position before going on the road trip.
BHPian V_Nyx recently shared this with other enthusiasts.
There was a problem in fixing the fog lamp as the time was very limited for me as I am going on a road trip next week. Hence, I thought I would try the aux lamps and so went with Hella Black Magic 3.2 Spot beam.
Got the lights directly from a vendor through my friend who installed the lights too. I am very happy with the performance of the lights. Light throw is awesome but I think I should try different angles before the trip to confirm the correct angle. My intention is to use them only when needed and not to blind others.
Bayview Garage helped me on time to fix this ASAP and it is a pretty neat setup too.
Attaching a few pictures here.


I also got the rim protector as complimentary and they look awesome for the full black wheels.

Check out BHPian comments for more insights and information.
News
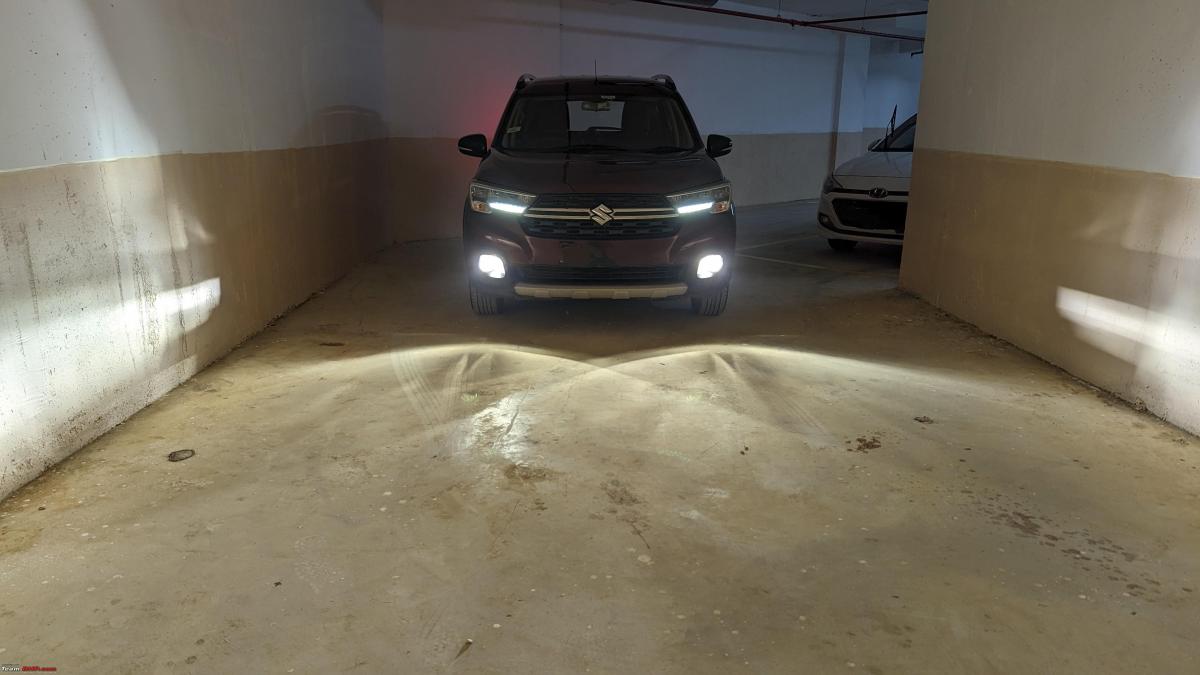
Upgraded fog lamps on my Maruti XL6: Significant visibility improvement
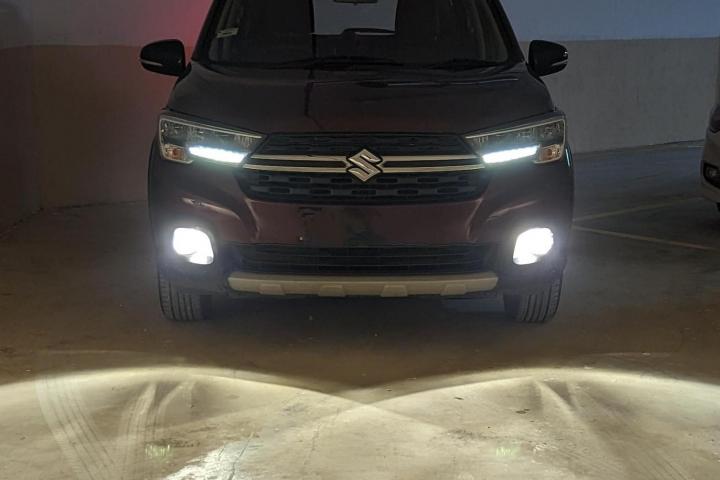
Fitting them on the car was a simple 20-minute DIY job. The best part is that everything is just plug-and-play with no wire cutting.
BHPian procrj recently shared this with other enthusiasts.
Fog lamps upgrade
After sitting on the fence for a year and reading up on all options, decided to upgrade fog lamps for better visibility. Valeo fog lamp housing was the default choice and I had zeroed in on the Blaupunkt 9X Pro, but feedback from Leoshashi ensured that I picked the newly launched Osram 50W 4200K LEDs.
Valeo costed 1.4K INR and Osrams were on a deal for 5.1K INR.
Fitting the same was a simple 20 min DIY and the best part is that everything is plug and play, no wire cutting.
Some pics that clearly highlight the difference.
OEM vs Valeo + Osram

Let there be light


Now it's time to stretch my legs and test the fog lamps out in fog/rain.
Here is a video of the fog lamps in action.
There is a significant improvement in visibility with the fog lamps. In the video, the first 6 seconds are just the low beam, and after that, it's low beam + Osram fogs.
Definitely recommend the Osram 50W at Rs 5.1K price point.
Check out BHPian comments for more insights and information.
- Tags:
- Indian
- Maruti XL6
- Maruti
- Modifications
News
Installed Duke 250's tank panels on my 390 Duke: My cosmetic dream spec

I was never really a fan of my bike's colour. I tried to achieve this look previously with a wrap but failed miserably in doing so.
BHPian saikishor recently shared this with other enthusiasts.
Odometer:18881km
This was a long-pending cosmetic update. I always loved the way the BS3 390 Duke looked, especially without stickers. I was never really a fan of my bike's colour. I tried to achieve this look previously with a wrap but failed miserably in doing so.
Then, I decided to buy used tank panels and paint them gloss black, but was pretty unsure of how long the paint would last. After ruling this out, I decided to install the matte black tank panels that the final version of the 2nd gen bike used to come with. I went to a showroom to check out how this colour looked in person, but to my dismay, these 390 Dukes were out of stock everywhere and would take a minimum of 10 days to arrive after booking one(little did I know that the new-gen launch was just around the corner). After I was told about this, I was leaving the showroom but then a 250 Duke in ebony black caught my eye. It had the exact gloss-black finished panels that I wanted. Upon asking the service personnel about the 250's panels being compatible with the 390, he replied saying that all tank panels are compatible with all models. I was overjoyed. I checked for stock at my nearest SVC and found them to be in stock in a different SVC. The very next day I went and bought the panels home. I messed up on removing the 250 stickers, there still is some residue left even after a week of removing the stickers. I will get rid of it with some type of machine wash shortly, as suggested by the place I go to regularly to get Citrus washed. Today, I even got the black handguards installed, and Citrus looks terrific now. I must say I am in my dream spec era now, at least cosmetically. Say what you will but I love the way Citrus looks now.


There is one small pending work that I have to do; my bike came with a screen protector installed on the TFT screen when I bought it. It has been well past two years since it was installed and now it is causing distortions of the screen. I ordered a new screen protector. It arrived today, and I will be installing it whenever I have some time to spare as installing a screen protector perfectly without bubbles is no joke.
Check out BHPian comments for more insights and information.
- Tags:
- Indian
- KTM Duke 390
- Modifications
News
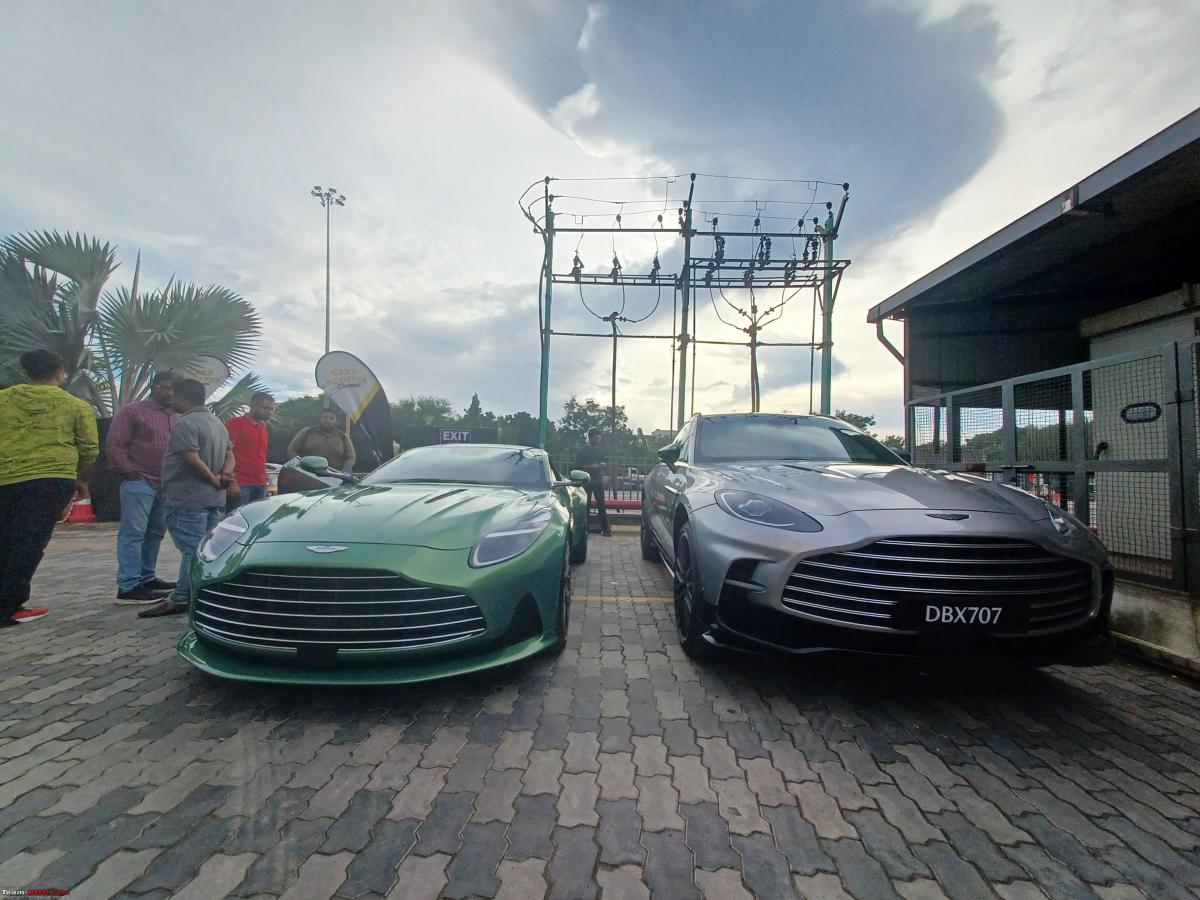
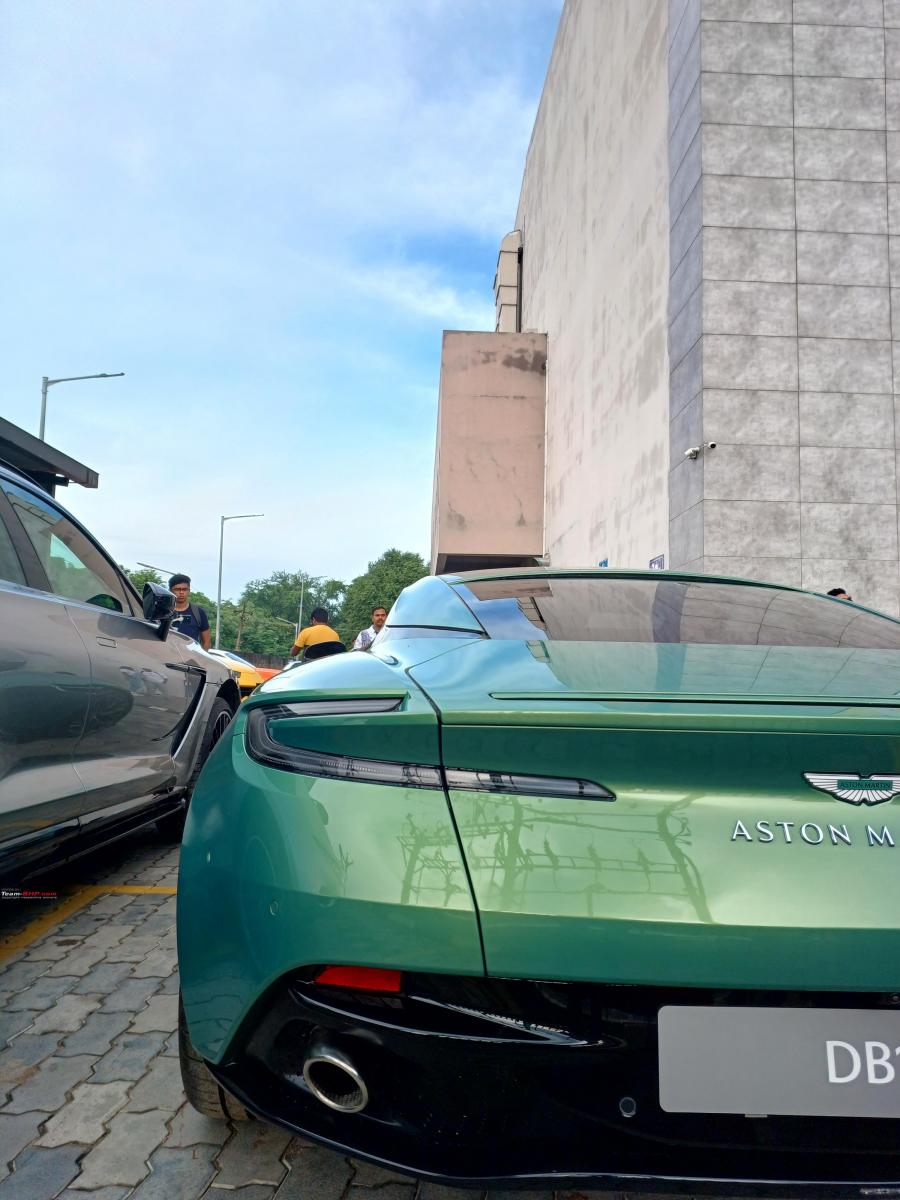
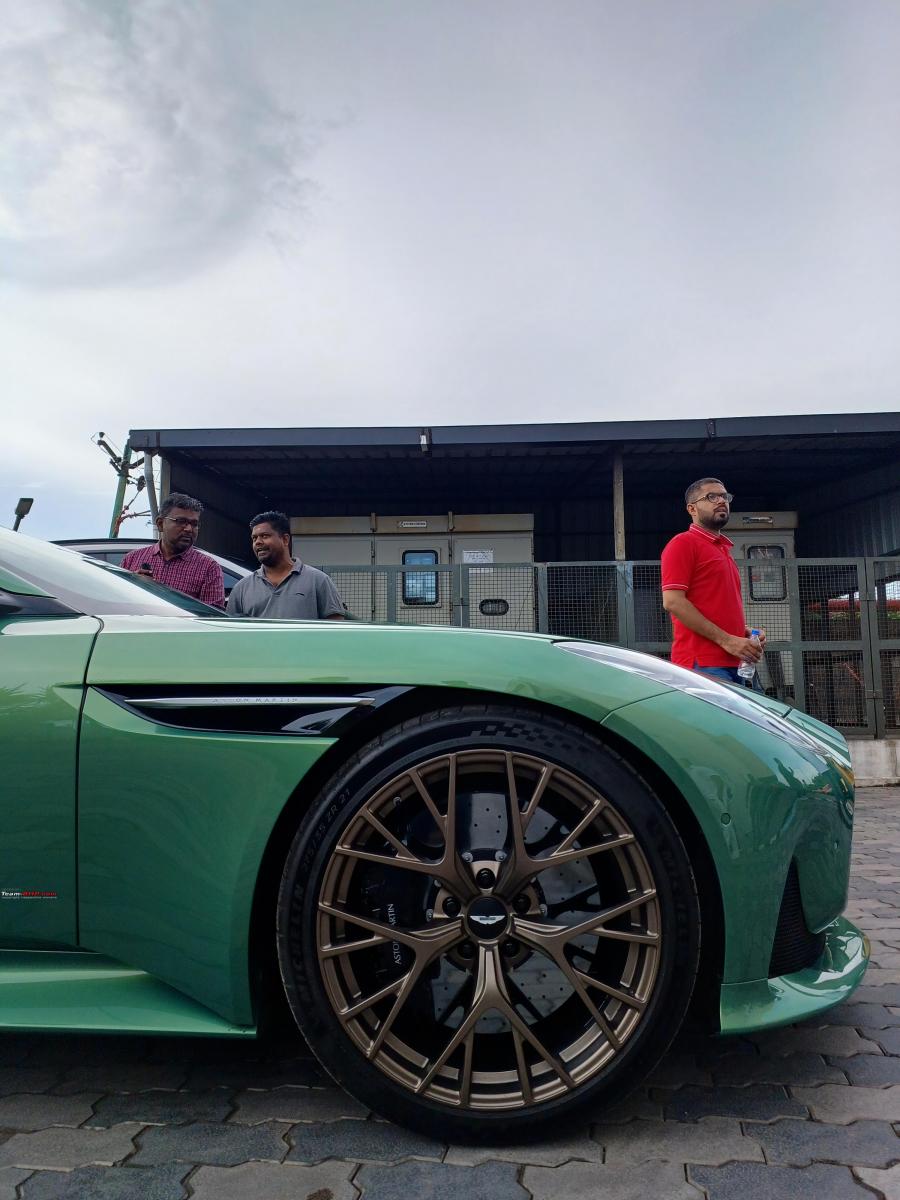
Cars & Coffee event: Saw supercars, JDMs, classics & modified vehicles


The crown jewel of the event must be the showcasing of the DB12 and DBX707 from Aston Martin Delhi.
BHPian amg5610 recently shared this with other enthusiasts.
Greetings BHPians,
Sunday morning can't get any better. I got an invite to visit the 4th edition of Cars and Coffee that took place today at Ciclo Cafe, ECR.
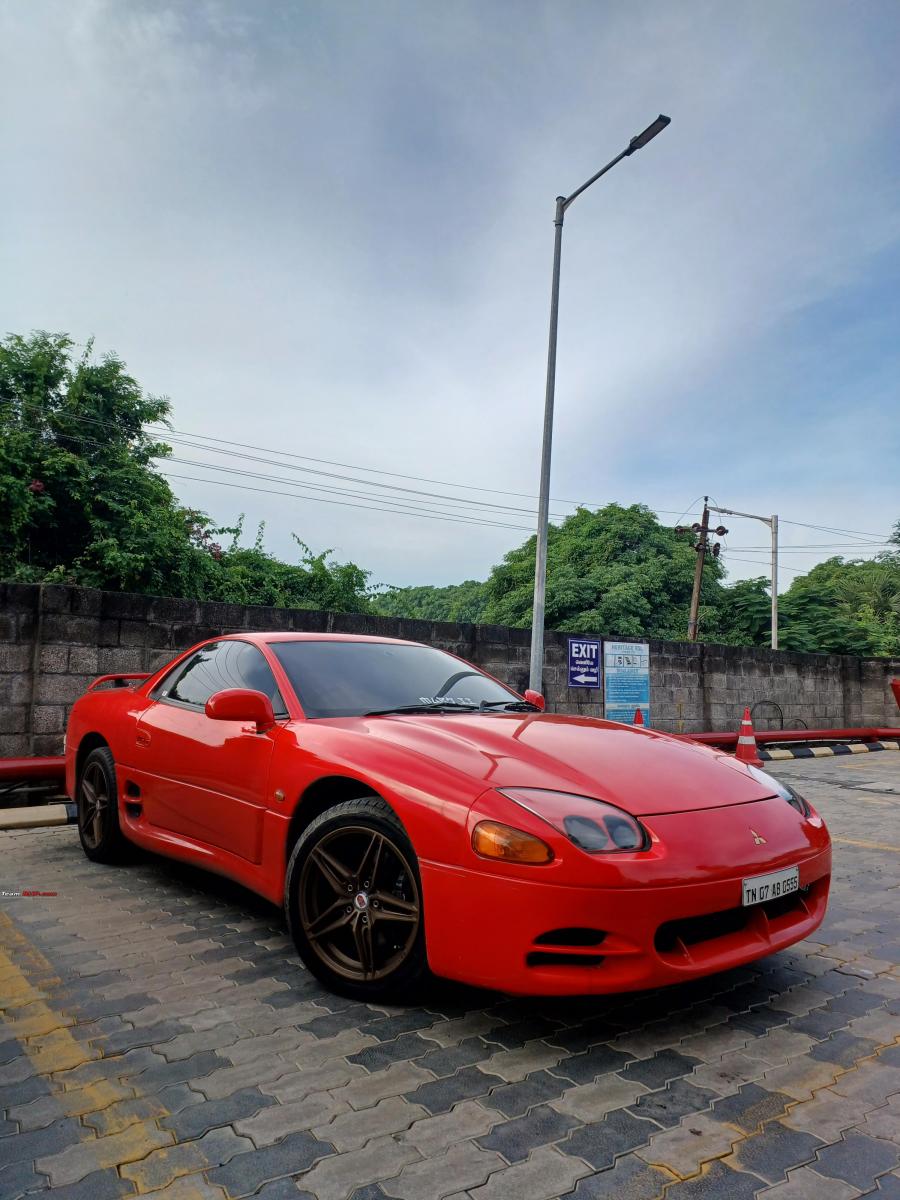
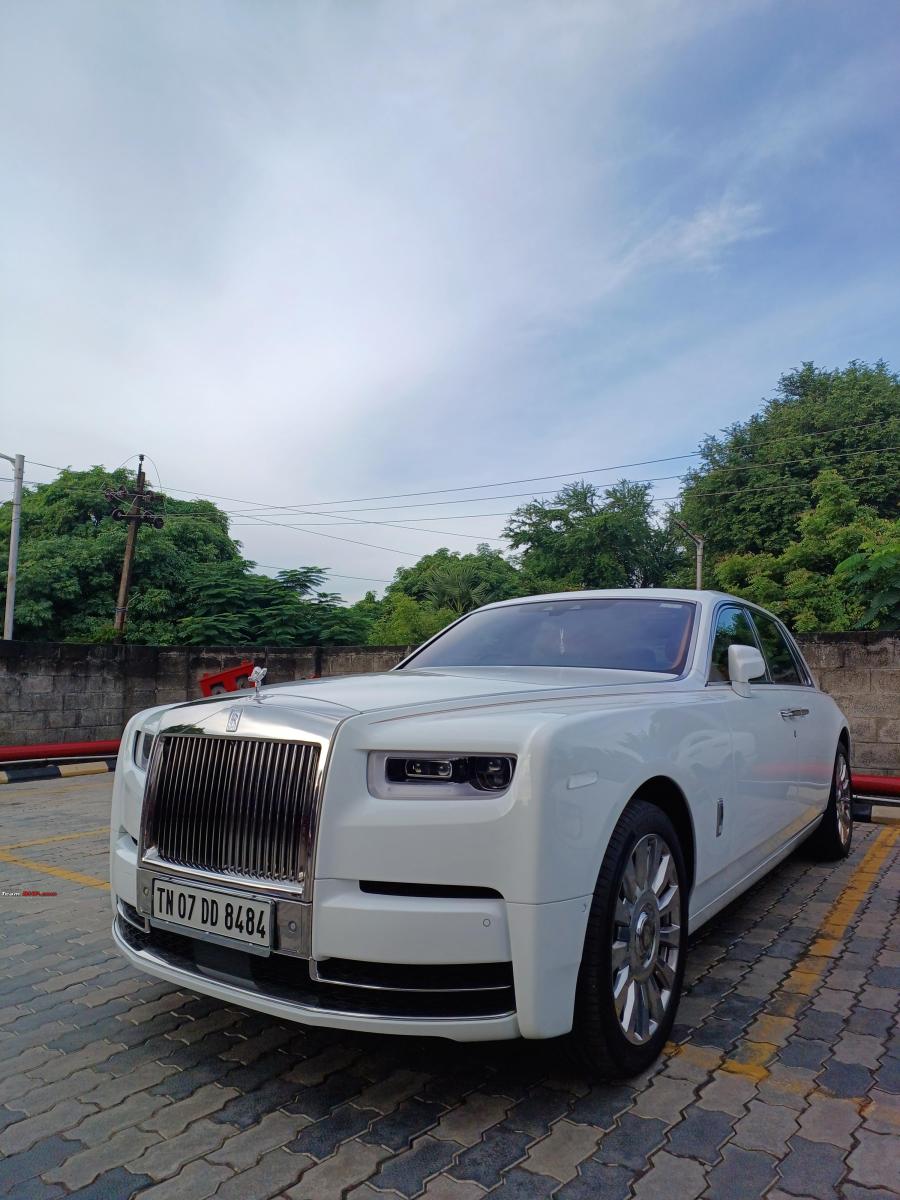
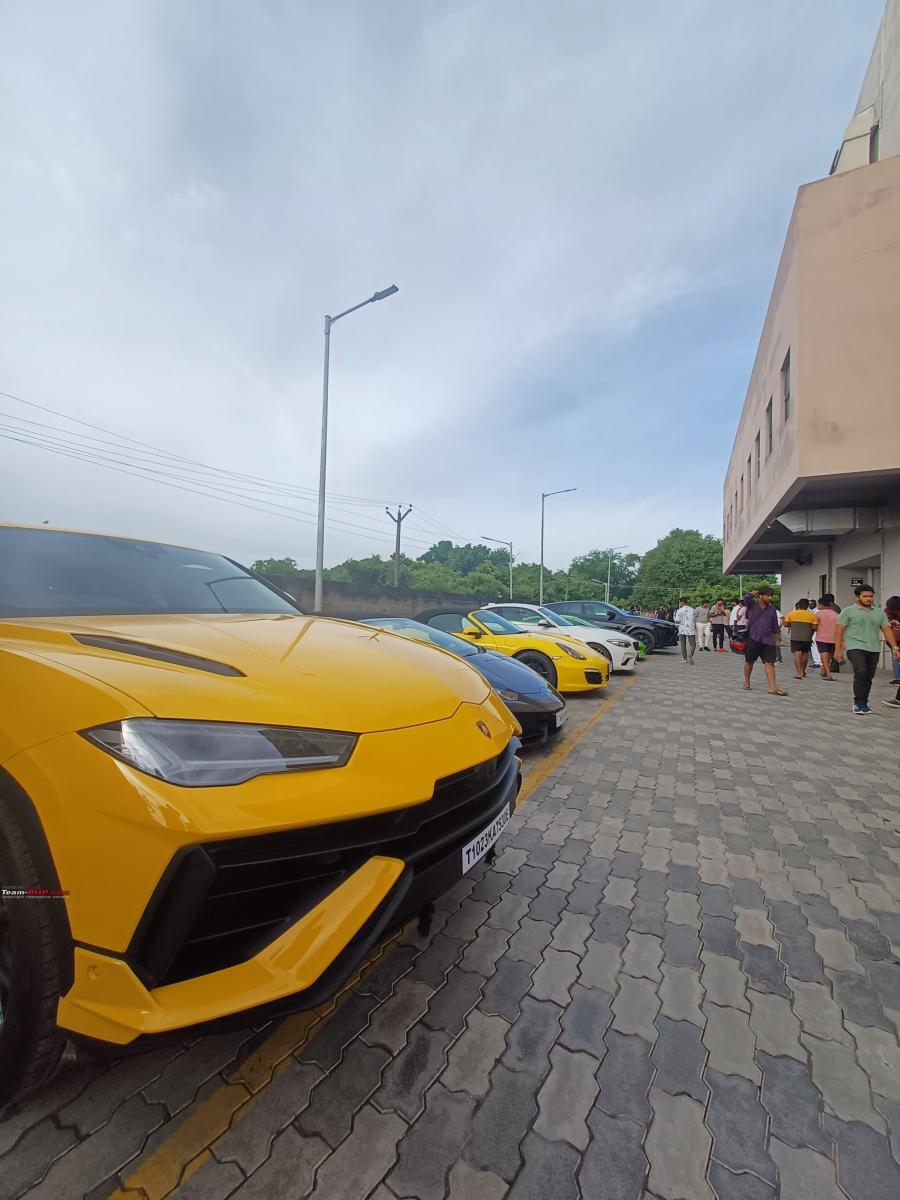
An impressive variety of cars ranging from supercars to JDMs to classics and modified beasts participated in the event. The crown jewel of the event must be the showcase of DB12 and DBX707 from Aston Martin Delhi.
Some of the other highlights include:
- Twin turbo Huracan
- Stage 2 Cayenne Coupe Turbo
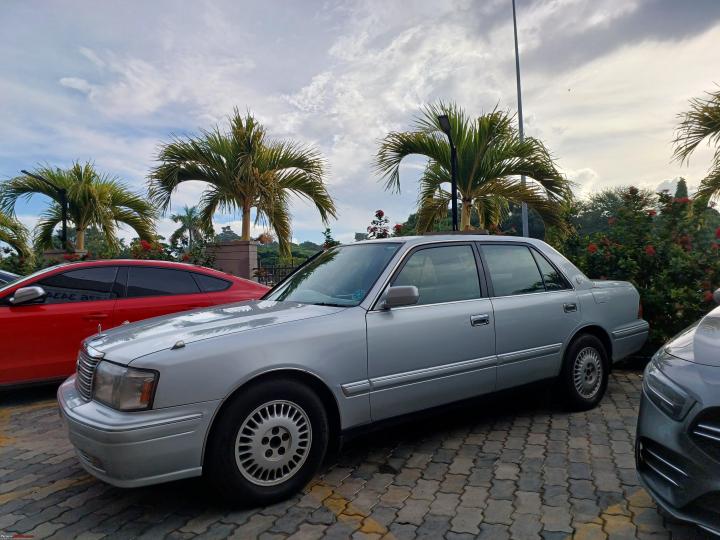
- Toyota Crown
- Gen2 LHD Mustang
Here are some of pics I took:


Check out BHPian comments for more insights and information.
News
Modifications & 5th service of my KTM 250 ADV during a 5200 km ride

Was initially planning to get the service done post the ride.
BHPian advstreak recently shared this with other enthusiasts.
So here is the 5th service and mods update:
The initial plan was to get the fifth service done after the 5,200 km+ desert ride of Bengaluru-Bombay-Ahemdabad-Dholavira-Jaiselmer-Jodhpur-Udaipur-Vadodra-Bombay-Bengaluru. But while doing the Vadodara-Bombay route (after 6,500 km since the last service) the bike had gotten noticeably vibey. Hence I decided to get the bike serviced at 26,060 km ODO in the KTM Chembur service center. The total cost of the service was Rs 3,384. Apart from the usual things, the brake oil was also changed. Surprisingly the spark plug was not changed as they did not have one in stock. Anyway, I plan to change it to an NGK Iridium spark plug in the next service.

Now coming to the mods:
Wind Deflector
I have continued the same setup as mentioned in the post here during the Bengaluru to Bombay run.
Here is one more pic of the setup somewhere near Chitradurga.

Then I changed it to an almost vertical position making it a "windshield extension". This position almost gave zero wind buffeting if there were no cross winds on the roads allowing me to maintain good highway speeds.
Here is a pic of the setting somewhere on the Road to Heaven in Dholavira.

So I use the flat angle setting in off-road and hot weather city usage where I want more airflow and would prefer that it wobbles less. For smooth highway runs I make the position vertical for maximal wind protection.
Nylon Mesh Seat Cover
Based on shravansp24 observations
I noticed during the Bombay to Ahmedabad run that the typical butt pain started way earlier (around the 300 km range). I usually have a tolerance for about 700 km on the stock KTM seat after which I need to increase my break frequency. But that did not happen in the other part of the trips in Rajasthan, cementing the fact that the pain was due to increased humidity which led to increased sweating leading to softer skin/muscle and hence the nerve endings of the bone feeling more pressure.
Hence I added the nylon mesh cover at a local seat cover shop in Vadodara for Rs 150. As observed by others the nylon mesh works well. But the real test would be in the 1000 km ride from Bombay back to Bangalore. I did not feel any pain and this was the most comfortable 1000 km a day ride I had done all thanks to the mesh seat cover and the windshield extender in highway position.
One more benefit of the mesh cover is that the seat does not get hot when the bike is standing in the sun. But it has one downside, that it takes some time for it to dry after getting wet unless exposed to the sun directly.

Dominar Mirrors
So the stock KTM mirrors used to vibrate at highway speeds, especially the right-hand side one, making it difficult to track who is behind. Dominar mirrors with their cast stem are super stiff leading to a shift in the fundamental resonant frequency. They also seem to cover more areas compared to KTM and go better with the sharp edgy design language.
I had got the Dominar mirrors long back in 2020 to change them on my hornet but never really got it done as it required thread modification or a custom thread adapter which converts left-hand thread to right-hand one.
To fit these mirrors I got a RHS clamp while the left-hand clamp comes with the clutch lever as a single piece. One problem is that the left-hand grip is glued and it has to be taken out to change the left-hand level assembly. The grip becomes slightly loose after it is put back and can rotate when given a twist. The solution will be to stick it back with some rubber glue.

Aux lamps relocation
The RHS spoiler middle support stud broke randomly without any falls. Even the LHS mount has developed a crack. This prompted me to remove both of the spoilers.

I also wanted to mount the aux lamps on the now exposed metal frame to further reduce the headlight wobble which was done by cutting off the headlight aux mount clamp. That made sure the beam had enough clearance from the front plastic parts. This is still in trial and if it works well then I will repaint the clamps to prevent them from rusting further.


Tool Kit Tray Airbox Mod
Based on this video I decided to remove the Tool kit tray. It did make the bike respond a little faster to throttle inputs because of the easier airflow. It was very easy to remove by just loosening three bolts. However one has to be careful about the accessory port and the relay cable while removing the tray.

Resonator Delete
The pursuit to use the top end in a better way led me to install the detonator by LBS pitstop. I was also happy about reducing more than a couple of kilos. I would say that it is worth it performance-wise. The top-end pull is much cleaner.
But I am not sure about the sound. I went for around 300 km breakfast ride after getting it installed and realized that the exhaust had become loud and not in a good way. It sounds to have much more treble and goes “brrrrrraaaap” at 6-7K rpm which I don't prefer. I was expecting it to sound more bassy and not that loud.
So I checked upon a couple of people who have deleted the resonator on their 390. Their sound was more bassy and did not become intrusive at higher rpm.
After that, I went to LBS and told him about this. The owner on the phone said the 250 would be louder compared to the 390 due to different compression ratios and bore and stroke. But he asked the mechanic to tighten the clamps anyway. I noticed on the ride back that it sounds less “brrraaapy” in the mid-rpm. This leads me to believe that the more treble-orientated “brrraaapy” sound is more because the components do not fit properly.
So the plan will be to see if the sound settles after some time and visit LBS again to make sure all the fit is proper. If still the sound remains the same then I might consider the option of going back to the stock resonator.

Check out BHPian comments for more insights and information.
News
Installation: My Mahindra Thar gets Ultimate9 evcX throttle controller

Being able to fine-tune the throttle sensitivity to my personal preference adds a level of control I never knew I was missing.
BHPian Nair.V8 recently shared this with other enthusiasts.
Switchable driving modes are something I’ve always wanted on the Thar. Mahindra could’ve easily offered this feature, especially considering that it's already available on their other SUVs. The Thar’s poor fuel efficiency has been discussed so very often on this thread; this issue could’ve been addressed (to an extent) with the simple addition of an Eco mode. I’m sure that owners of the petrol automatic Thar (like myself) would welcome such a feature with open arms.
In search of an alternate solution, I’ve been long waiting for a reliable tune/remap for the petrol Thar (with switchable maps), and that’s when I came across shankar.balan’s thread (big thanks for this!) regarding this neat little throttle controller by ultimate9. Based on his feedback & multiple reviews online, It seemed to offer exactly what I’ve been looking for. I decided to contact Ajit @TapaswiRacing (the official importer for this product) to get further details on the ultimate9 evc. Ajit was kind enough to answer all my queries regarding this product, after which he connected me with his distributor in Mumbai (Shrey @Matt&Gloss).
Ultimate9 has two throttle controllers on offer, the evc & the evcX. The evcX offers a few additional features (as explained in the below image) so I decided to go ahead with this and purchased it from Matt&Gloss last weekend.

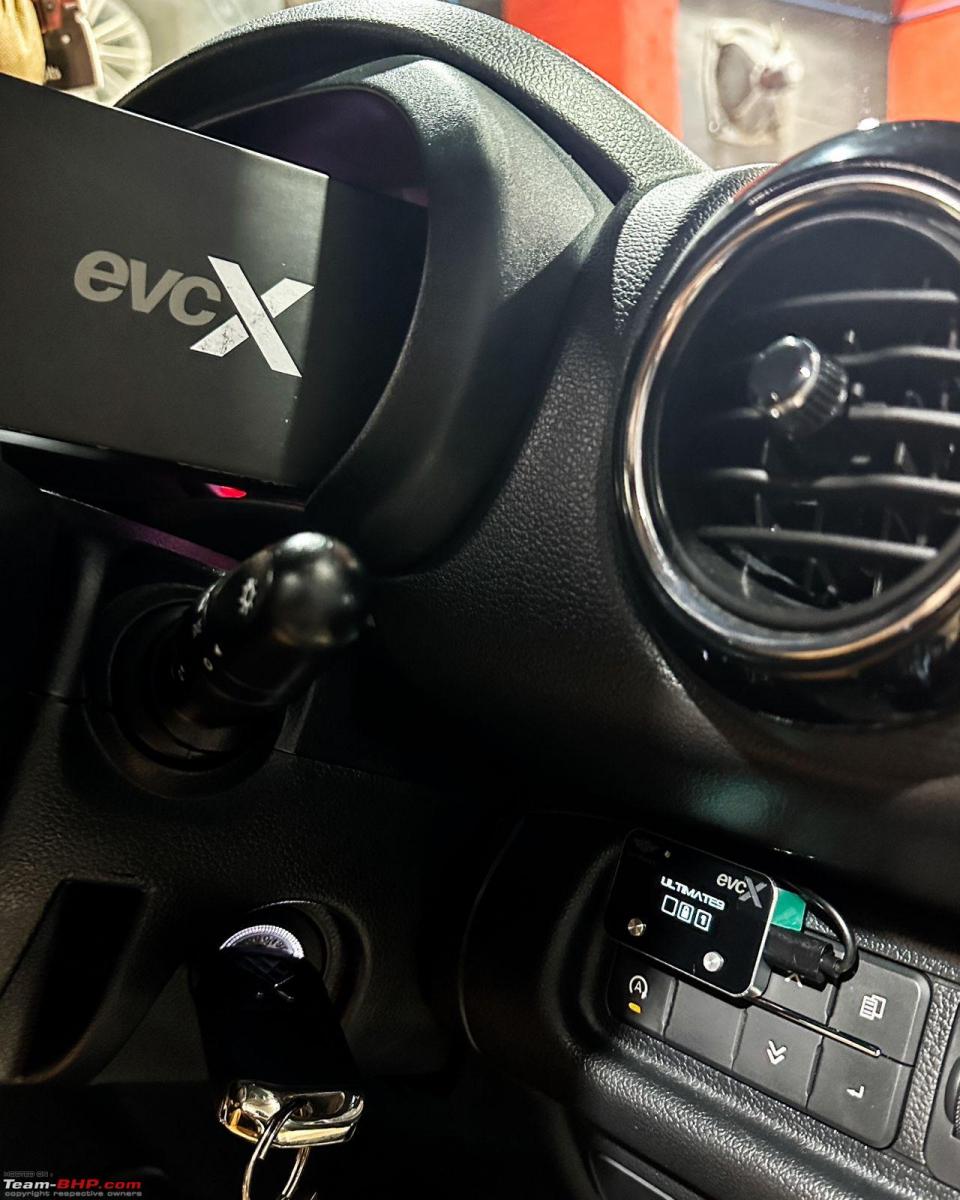
The installation is supposedly a DIY process that involves connecting the module between the throttle cable and the ECU. I preferred getting this done by the professionals at Matt&Gloss for added peace of mind. After this a display/controller module is placed on the dashboard at a suitable position, we decided to fix it on the blank switches above the start-stop switch. After waiting for 10 minutes, Shrey paired my phone with the evcX via Bluteooth using the ultimate9 application and then we went ahead for a quick spin to test the device and to experience the various modes. Right away the difference in throttle response felt like night and day! The below screenshot taken from the ultimate9 app shows the various modes on offer:
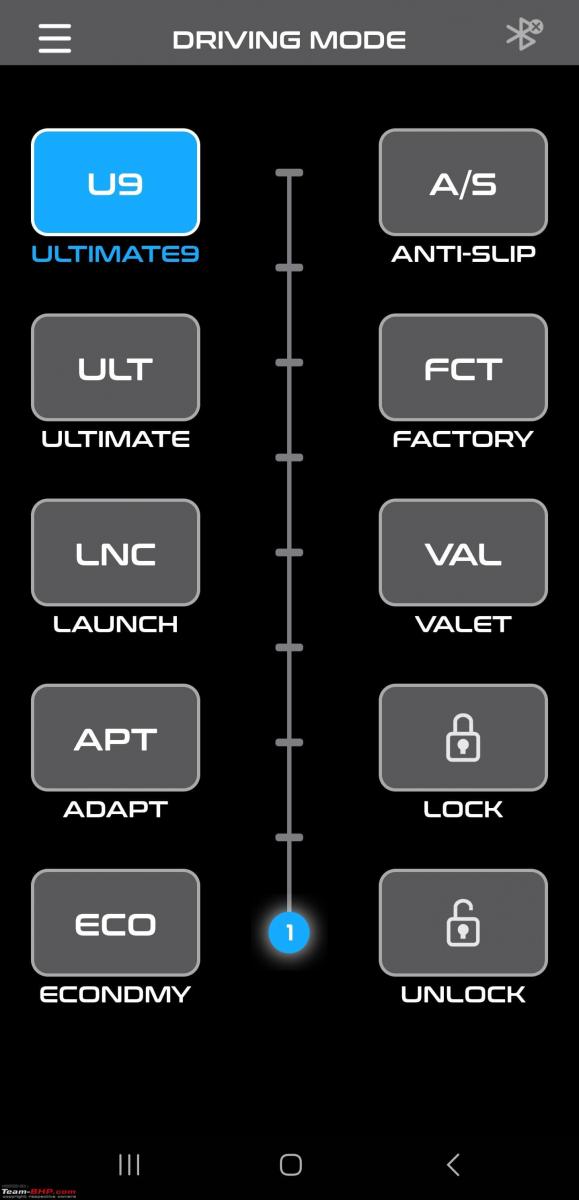
Whether I'm looking for a more aggressive ultimate mode or a relaxed eco mode, this device delivers an instant transition to suit my requirement. The switch between modes can be done on the fly using the smartphone app or from the little display/controller module (I prefer using the smartphone app as it is more convenient). Being able to fine-tune the throttle sensitivity to my personal preference adds a level of control I never knew I was missing. The response time is significantly reduced, and the acceleration feels smoother and more immediate.
I look forward to testing this device out across various driving situations, especially the eco mode (which has 9 levels of adjustments for intensity!) for any possible gains in fuel economy & the anti-slip mode in off-road conditions. Super happy with this spontaneous upgrade!
Check out BHPian comments for more insights and information.
- Tags:
- Indian
- Mahindra Thar
- Modifications
News
DIY mods on my Maruti Jimny: 4 interesting updates on the SUV

I believe that a product is not your own until you work on it yourself and Jimny is such a great platform for that.
BHPian sammysossa recently shared this with other enthusiasts.
Did a few DIY mods over the last few months so thought of sharing them with the team:
1. Like many on this forum I don't like the look of the stock grill, especially the chrome bits. So wrapped the original one in matte black vinyl. This is more of an experiment than a finished product since this was my first time attempting automotive wrapping and the final product has some flaws (when looked closely). But overall, I am glad with how it came out. It was a tough job and there was a lot of back and forth. For someone planning to attempt something like this, please buy good quality vinyl with air channels and not the cheapest stuff on Amazon. Mine is the cheap version but I was ready for the consequences. Don't go overboard though since these wraps are perishable products. A heat gun, isopropyl alcohol and a precision knife are a must for a hassle-free job (and loads of patience).
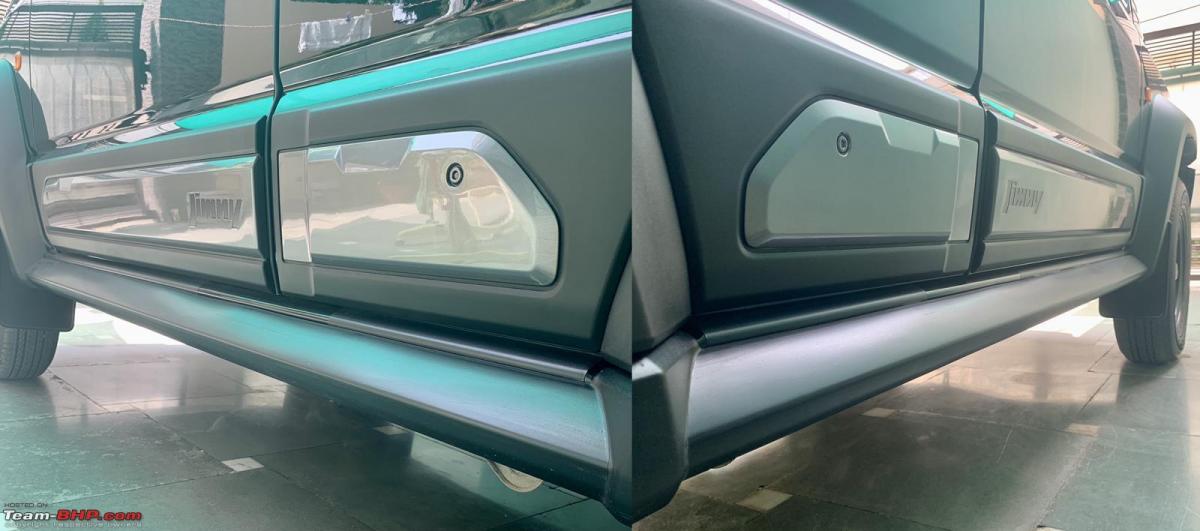
2. Wrapped the door sill and the plastic running board with matte black floor marking tape. This is much more forgiving than a vinyl wrap and goes on hassle-free. Bought a roll from Amazon. Also added some door edge protection. The one I've used is mainly used for decorating/protecting alloy wheels but has worked well for me. However, I did use my own double-sided 3M tape for this and removed the one that came with it. Bought this too from Amazon. I have washed the car a few times and both the tape and edge protection are holding well.
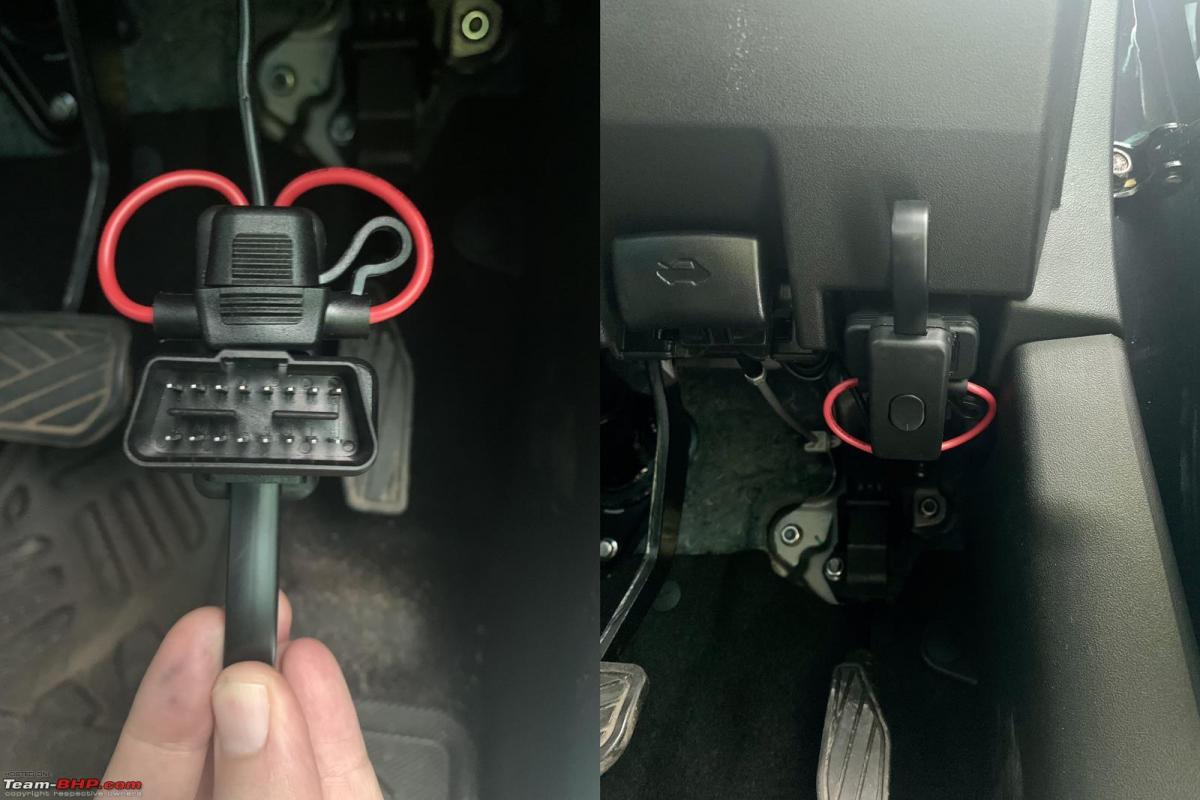
3. I fabricated an OBD II on/off switch with an inline fuse (2A) to use with my dashcam. I bought an OBD II connector with an on/off switch, chopped off one end and soldered an automotive inline fuse and the wiring of the dashcam. This has given the functionality to use the dashcam in its surveillance mode and the flexibility to turn it off when desired. You need some basic soldering skills a general knowledge about polarity to attempt this. A multimeter is a must to confirm - and + points on the OBDII connector. You can either chop into the original USB cable supplied with the dashcam or buy another specifically for hard wiring, both do the same job but the latter is more convenient. I have not hard-mounted my dashcam and used a suction cup. All the products were bought from Amazon India.
4. I modified an existing magnetic car phone holder to use the M8 bolt holes on the dashboard. Almost all dummy M8 (apart from the ones on the speedometer) plastic bolts come off and have a corresponding M8 nut underneath. I drove a 25MM M8 bolt through the magnetic head of the phone holder and mounted (used some medium strength thread locker too) that to the dashboard. The possibilities of these mods are endless and fairly easy. All were bought on Amazon India.

Most of the mods/products above could be bought off the shelf but I detest doing that and prefer to tinker first. Next on the DIY list is: making a roof rack, making underbody protection, swapping Zeta glass with Alpha glass, sound damping of interior and so on and so forth (as the confidence and knowledge grows). I believe that a product is not your own until you work on it yourself and Jimny is such a great (and forgiving) platform for that. Cheers
Check out BHPian comments for more insights and information.
- Tags:
- Indian
- Maruti jimny
- DIY
- Modifications
News
Aftermarket suspension for my Jimny: selection, purchase & installation

The suspension is now firm but not hard resulting in much better road handling and lesser body roll even if it is 40 mm taller than before.
BHPian ShivC recently shared this with other enthusiasts.
What I was looking for: An aftermarket suspension for the Jimny to help improve its overall ride quality, handling & off-road performance.
Buying Decision:
The factors considered were:
- Ride Comfort
- Handling and Stability
- Off-Road Performance
- Durability and Reliability
- User Feedback
- Local Warranty and Spares availability
Three brands were considered primarily: Iron Man, Old Man EMU & Tough Dog. All reputed Australian Brands with wide install bases in the 4X4 world.
All were almost identical in prices in Australia – all around AUD 1800 for similar configurations and a 40 mm lift kit.
The general feedback on multiple forums and Facebook groups for Jimny was that Iron Man was that it was stiff on tar/city riding so dropped it.
Between Old Man and Tough Dog was a divided house with Tough Dog having a slight edge as there was some feedback as well as feedback on Old Man EMU developing sag with time.
Also, Tough Dog has Foam Cell Technology, whereas Old Man EMU as well as Iron Man use Nitrogen Gas, charged shocks are a huge positive as it would most certainly affect the performance of the shock as foam cell shocks are developed for high-heat environments and they typically do better than Nitrogen Gas charged shocks.
Also, Tough Dog ticked all the boxes in the buying factors listed. Have dealt with Blue Garage in the past many years and the transaction was a pleasure. Had confidence on their support as well in times to come.
Purchase: Iron Man and Old Man EMU were both priced at around 1.40 lakhs whereas Tough Dog was at 96K. Really a no-brainer on which one to choose.
Promptly ordered a Togh Dog 40 mm lift kit with Blue Garage – the Official Exclusive Partner for Tough Dog in India. Avinash (the owner of Blue Garage and a fine gentleman) understood the urgency of the situation and promptly scheduled an installation the next day morning. Installation is another 8K - optional from them or your choice of installer, I chose to use their services.
We were all set to convert the “Little Jimny” to a not-so-looth anymore Jimny……
The Kit: 40mm lift and included the following:
- Front & rear foam cell shock absorbers
- Front raised coils
- Rear raised coils
- Headlight module kit
- Brake hose kit (rear left)
- ABS relocation kit
- Crossmember kit
- Caster Correction Bushes
Installation: A time-consuming but simple process – best explained in the photos below:


After the installation went to Madhus for a must-do alignment. The necessary corrections in alignment were made and we were all set. The ride is now heavenly. To misquote Kapil Dev's famous Palmolive advert with a twist: "Tough Dog da jawab nahi".
Result: The suspension is now firm but not hard resulting in much better road handling and lesser body roll even if it is 40 mm taller than before. Cornering has far less body roll and confidence-inspiring even at high speeds. Where it shines is at decent speeds on the highway - it just sticks to the road. Travelling on gravel roads is much much smoother even at high speeds. Off-road is to experience to believe the difference it has made. Getting the body a bit further away from the ground made clearing rocky obstacles much easier and less harsh on radial cups and side sills. It’s made the mountain goat now the one that a better goat than most – a pro if there was ever one.
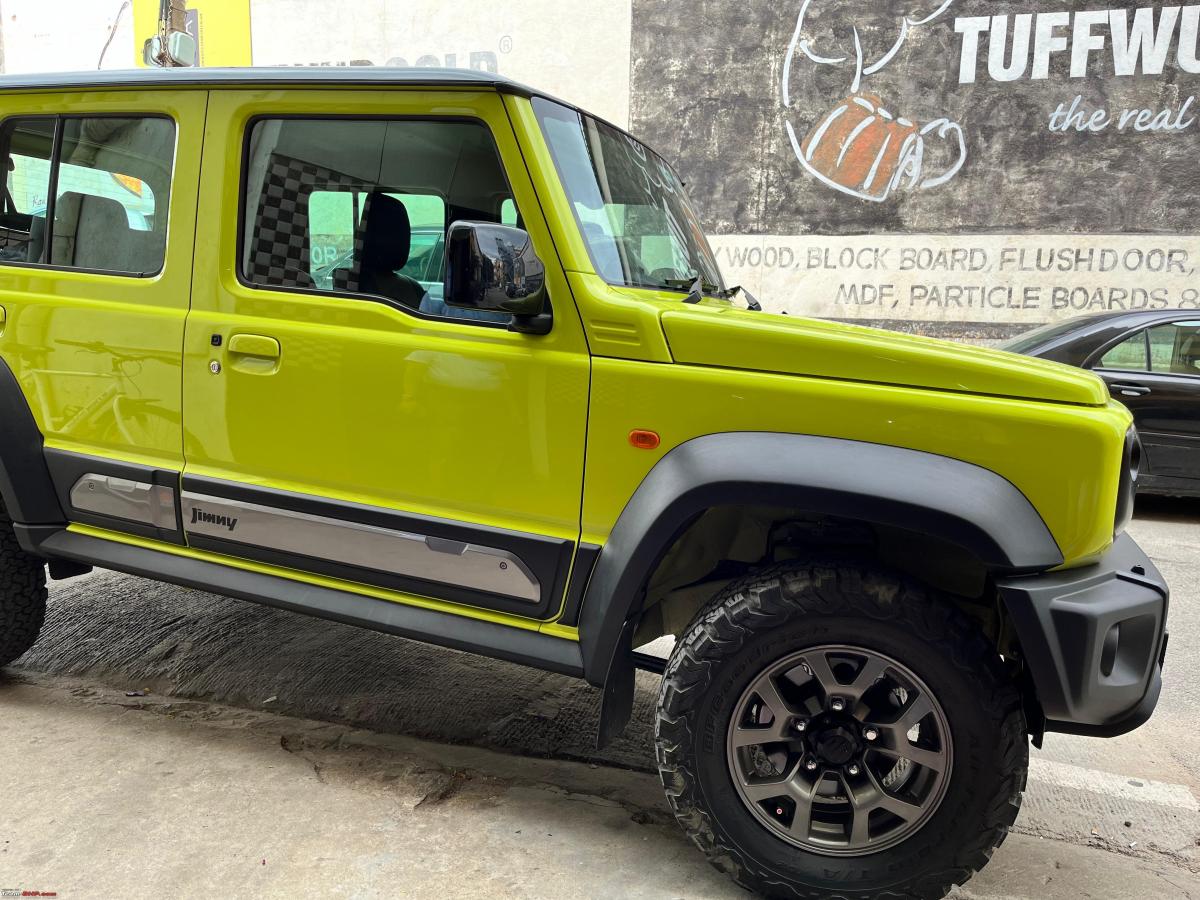
Looks now: Jimny: Will let the photos do the talking - and did hear my Jimny whisper to me: "I'm no longer just a Jimny; I'm a Tough Jimny!"


Check out BHPian comments for more insights and information.
Pages
About Us