News
Did a DIY and replaced the ORVM indicator on my Hyundai Verna


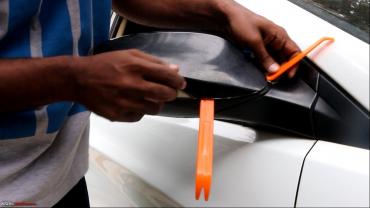
With the help of the prying tool, gently pry out the mirror. Make sure that your electric mirror is in the center position.
BHPian starjohn123 recently shared this with other enthusiasts.
I just replaced my ORVM's Indicator Strip on the Verna. This is the second time that I am replacing it. First time it was done by my FNG, who did not do a perfect job, I will tell the reason a little later. This time I did it myself, so thought of sharing a step by step guide for everyone's benefit. I also have made a video tutorial for those who like video.
The rest can follow the procedure I have shared below.
Tools required:


- Star head screwdriver.
Steps:
Removing the side view mirror:
With the help of the prying tool, gently pry out the mirror. Make sure that your electric mirror is in the center position. Meaning, the mirror should not be pointing towards the extreme left or extreme right. You need to have enough gap to allow the pry tool to enter and dislodge the mirror from its clips.
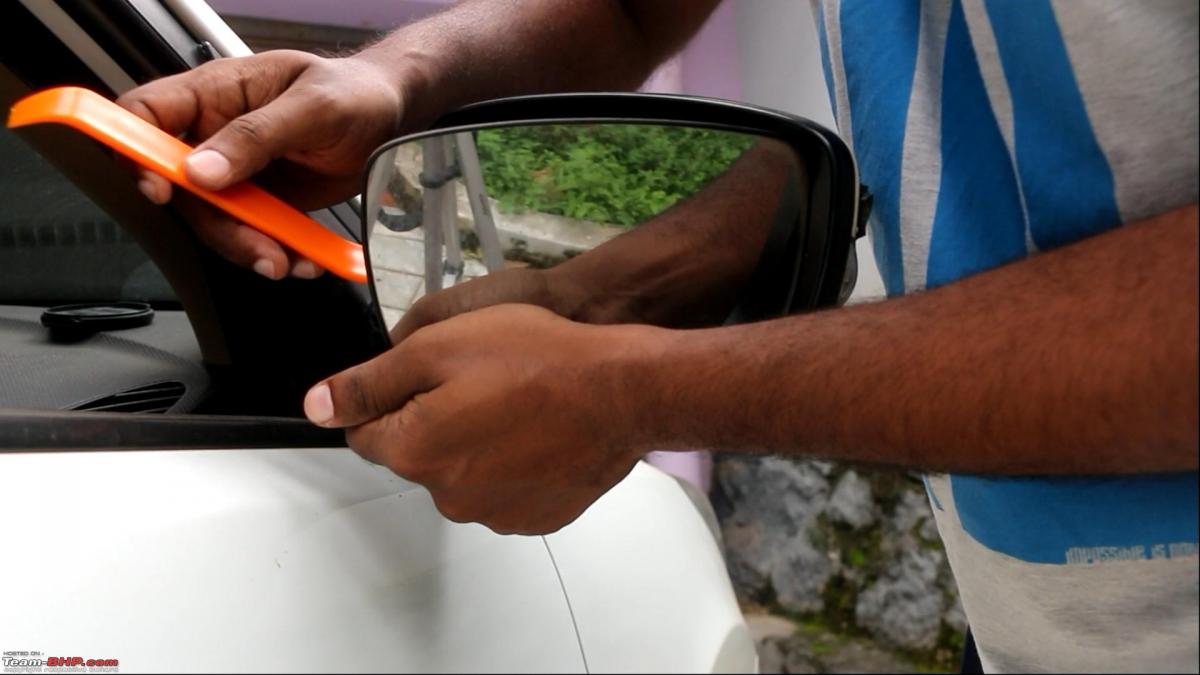
ORVM plastic shroud removal:
Again with the help of the prying tool, remove the plastic shroud from the ORVM. This may require you to use 2 or 3 prying tools at a time to remove it. Be gentle as you do not want to break any of the plastic tabs holding it in place.

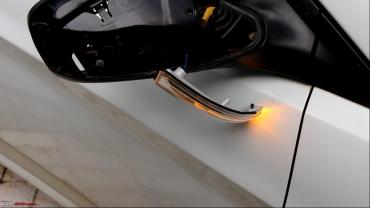
Remove star screw holding the Indicator:
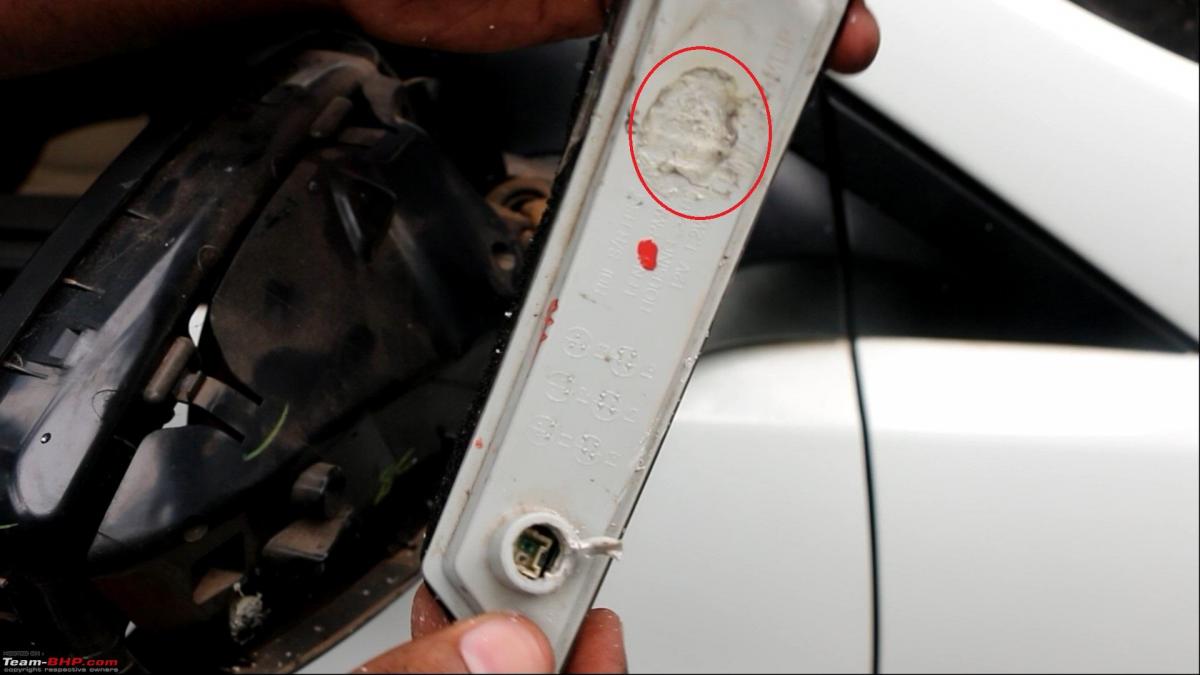
Just behind the mirror that you removed in step 1 will be 2 star screws. Remove the screw on the right side. This will release the Indicator.
This is the step which my FNG forgot to do previously, so they just pulled the old indicator out without unscrewing, thereby breaking the plastic part around the screw area and Indicator. They fit the new indicator by again breaking the plastic part of the new indicator and melted the plastic with some heat so that there is no hole in it. Was really disappointed with this work done by my FNGH. There is no way of seeing this until we remove it ourselves.
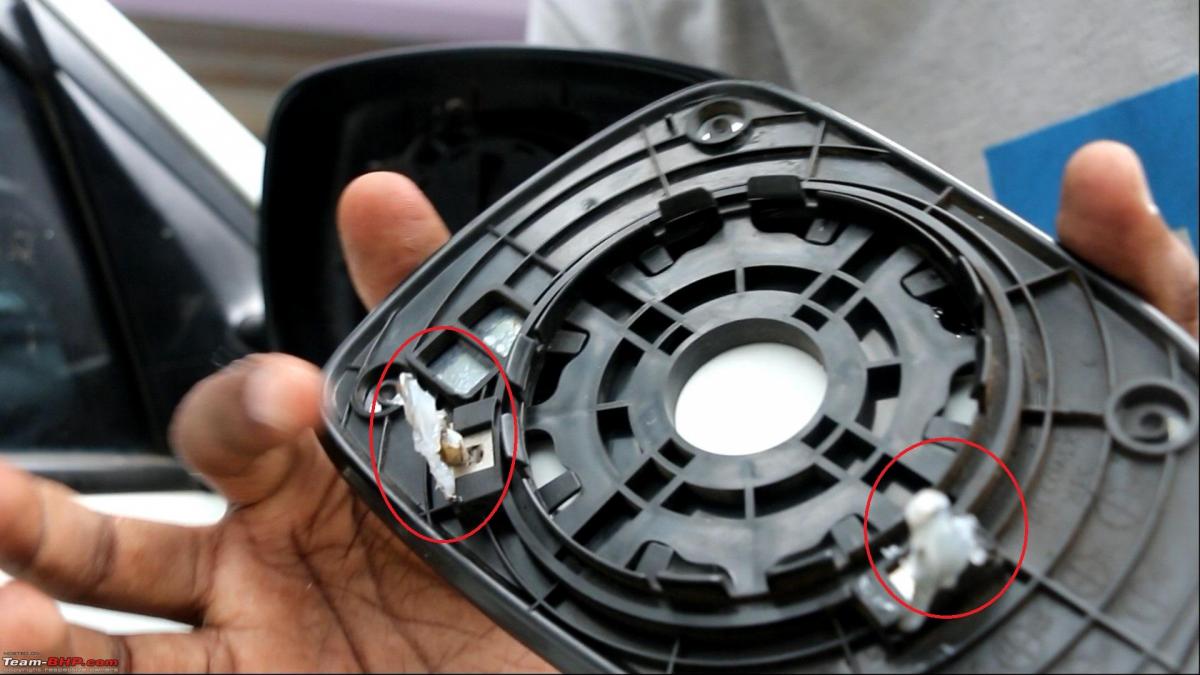
This is how the old indicator backside looks like:
This is how the new Indicator backside looks like:

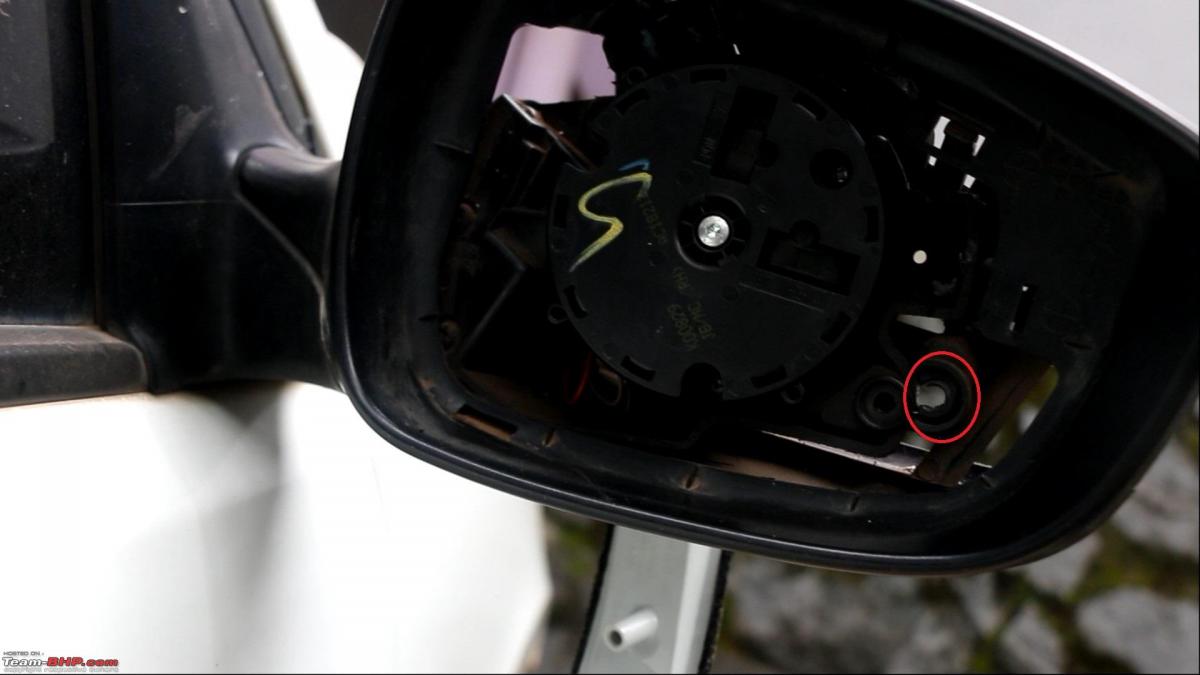
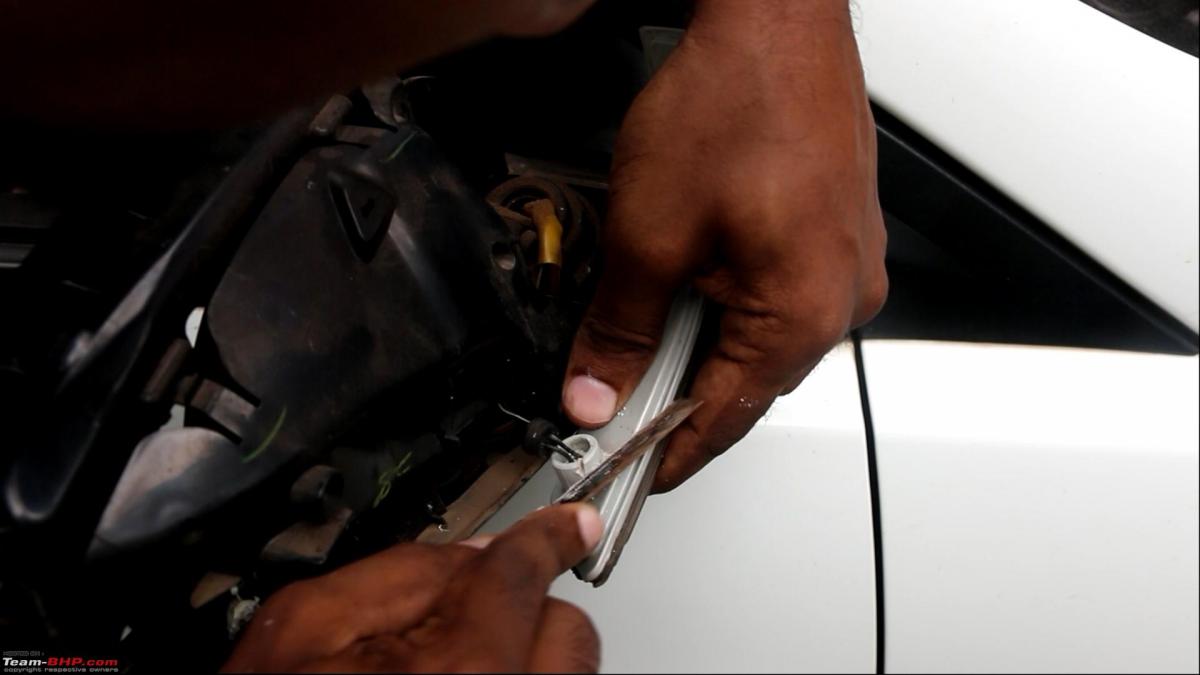
Remove the indicator connector:
With the help of a thin flat head electric screw driver or any thin screw driver, try to remove the indicator wire from the socket. There is small clip at the very bottom, so you really need to go deep down to unhook it. It will come out with some wiggling with the screw driver. But be gently in this step because if you pull the indicator wire hard and the socket damages , it will be very difficult to get a replacement.

I admit it was a bit difficult for me to unhook it with my electric tester, so I used an hacksaw blade to cut a small plastic portion of the indicator to give me more access deep down for my electric tester and it did the trick.
Connect the new Indicator:
Connect the wire into the socket in Indicator and test if it's working. If it's working fine, then just do the remaining steps in the reverse order to complete.

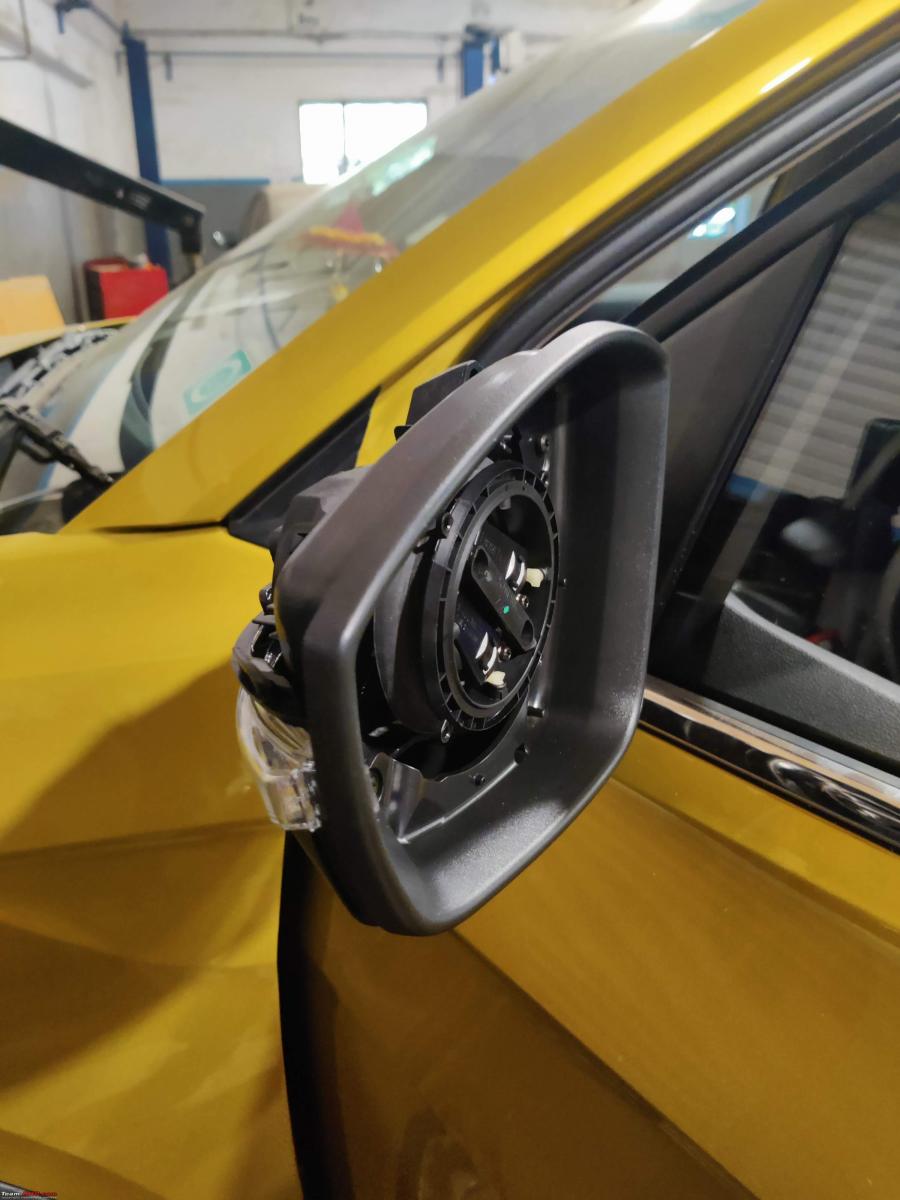
When you fit the mirror black in place, just remember to grease the metal portions a little bit as shown below.
Also make sure the mirror is functioning fine electronically as well. That's all and I hope you enjoyed this DIY.
Check out BHPian comments for more insights and information.
- Tags:
- Indian
- Hyundai Verna
- ORVM
- DIY
- Indicators
News
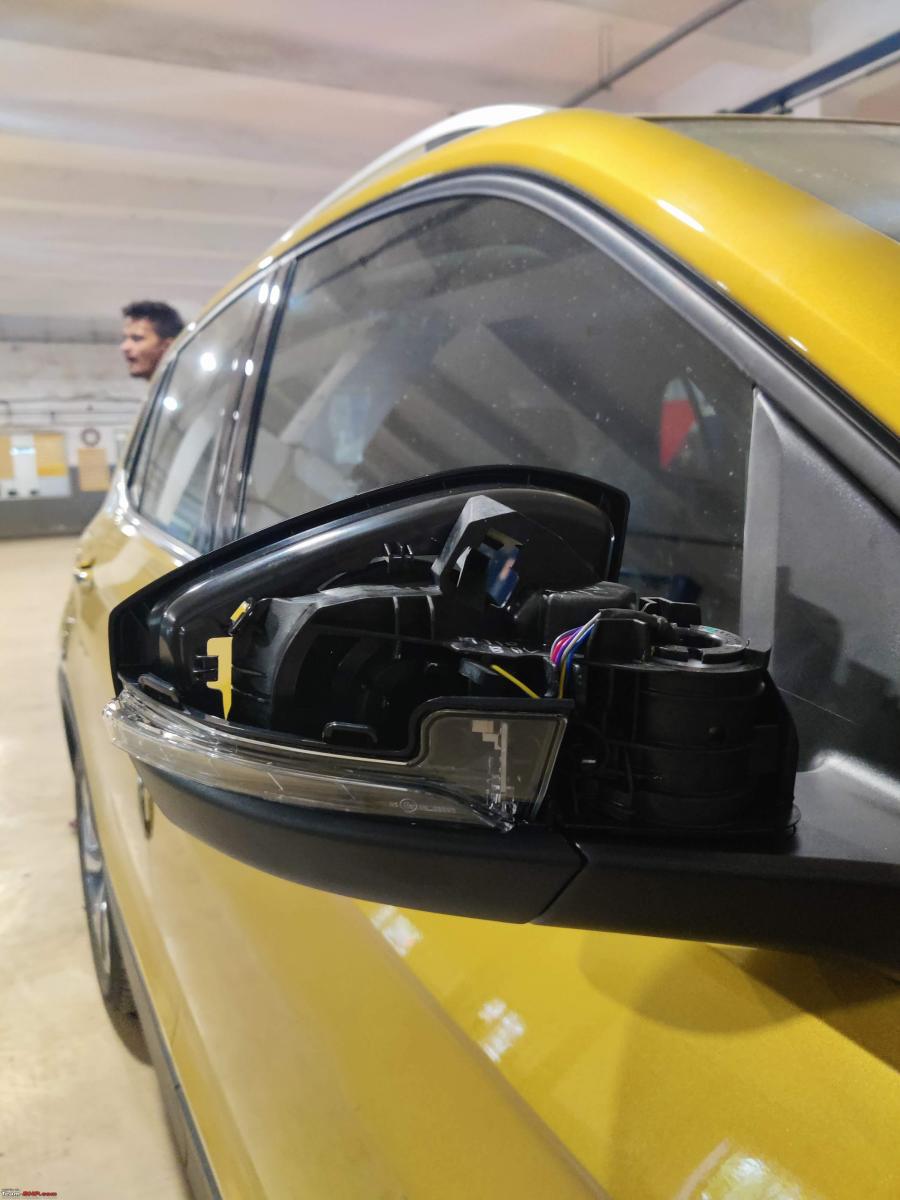
Got auto folding mirrors retrofitted on my Volkswagen Taigun Topline MT

Affected by the chip shortage, my Jan 22 registered Taigun did not come with auto fold mirrors.
BHPian Atharva14 recently shared this with other enthusiasts.
Retro-fitting Auto folding ORVMs on my Taigun Topline MT:
Alright, so we all know about the chip shortage scene and due to this VW didn't provide auto-fold mirrors in the Taigun for a particular period of time. My car (JAN 22 regd.) was affected by this. Anyways recently they started providing customers with the same. I mailed VW India and got a prompt reply from a service center. They placed the part order under my confirmation and received it within a week's time. Took an appointment today and got it done.
Cost- Rs.15000/- (I was provided a flat discount of the same amount while purchasing the car hence had to pay it now.)
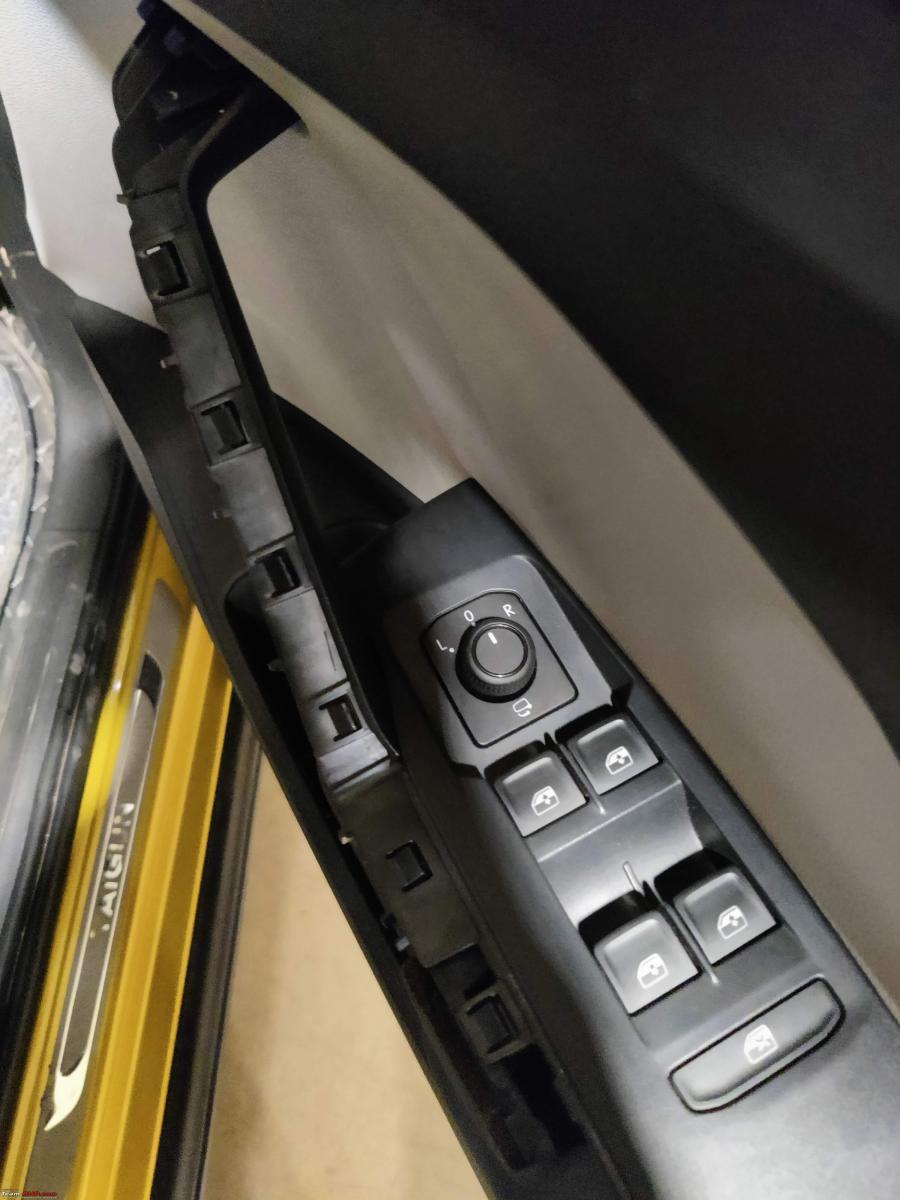
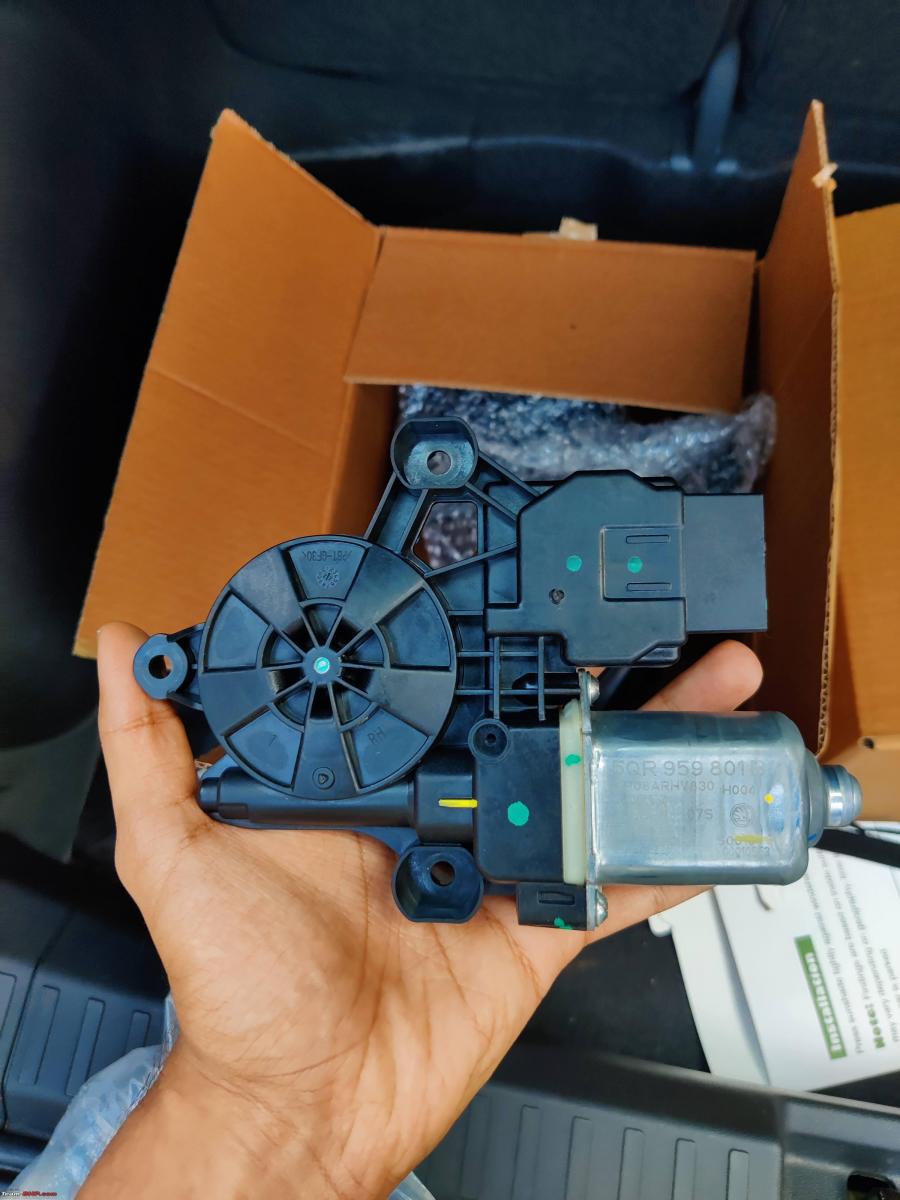
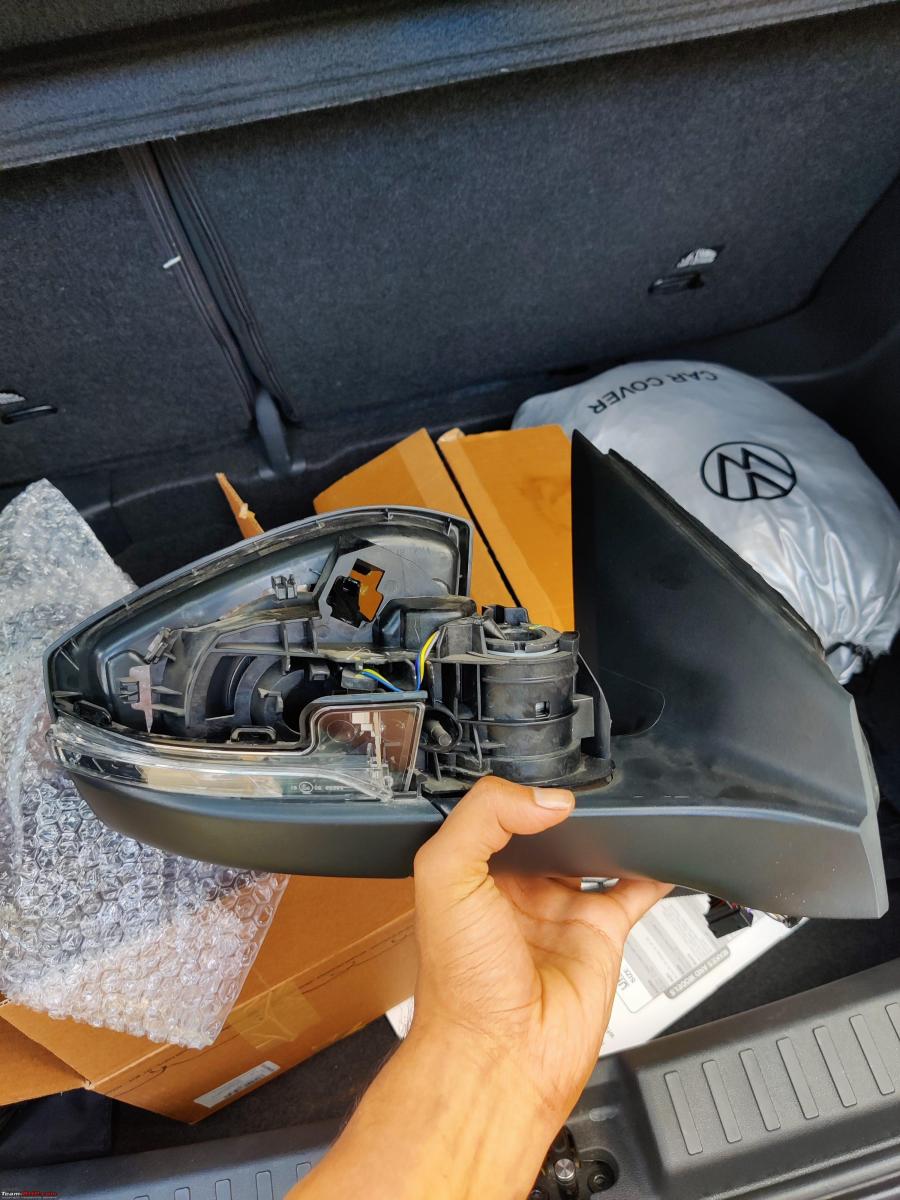
What does the Auto-folding kit comprise of?
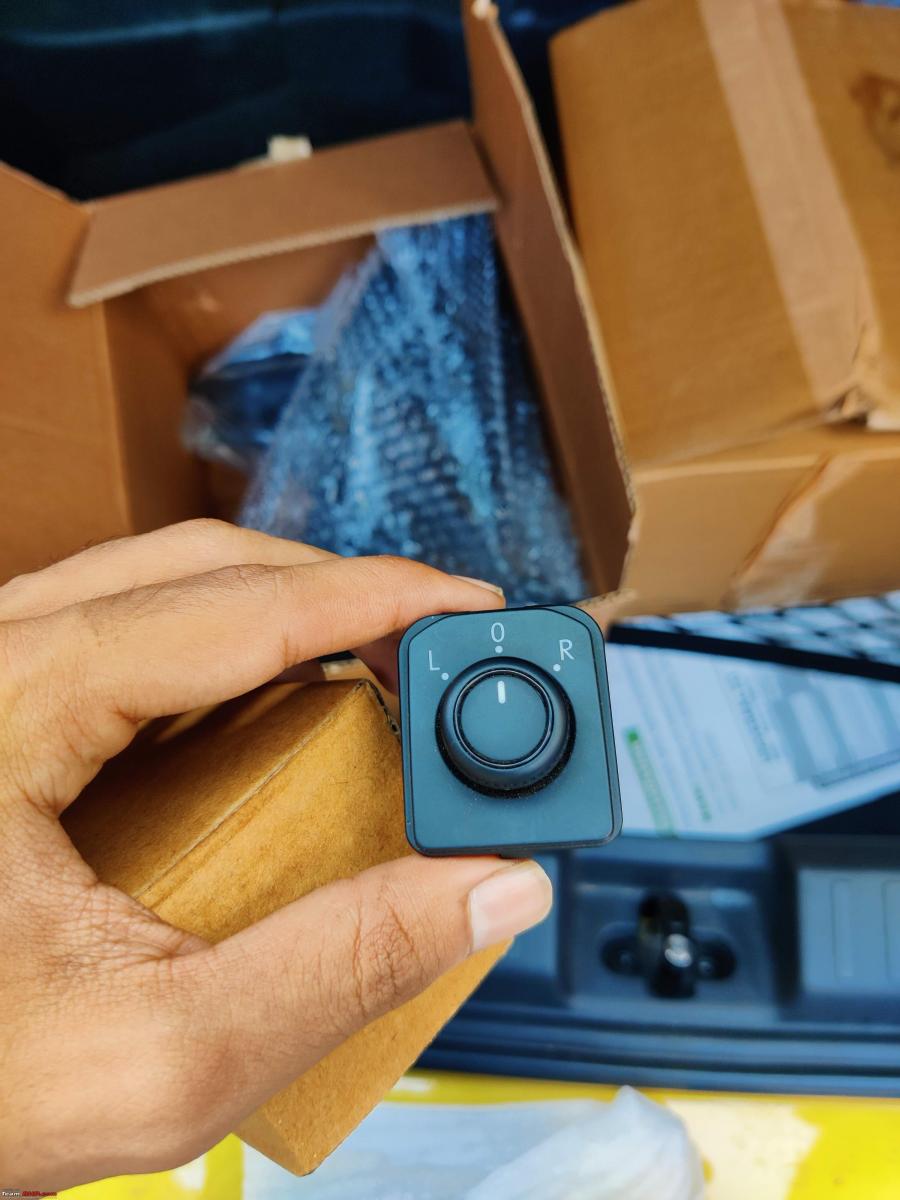
Well at first I thought it would just be the rotary knob that needs to be changed but to my surprise, the kit consisted of:
- 2 Mirrors(Without glass and without the mirror cover. This is used from the current mirror setup).
- Rotary switch(See picture).
- New window winder motor(Yes, this needs to be changed too, probably this is the electrical source for folding unfolding of mirrors).
The process was smooth. Old mirror covers were removed with the mirror and replaced with new ones. The glass was used from the old mirror as well.
The new switch was connected with the new window motor. Auto up-down of the window wasn't functioning after this because the system wasn't coded to the new motor. After doing the same, everything worked perfectly.
Now the mirrors open/close automatically while Locking/unlocking and through the switch. The old mirrors, switch, and window motor was provided back with the car. I don't know what to do with it now, lets's see.
Attaching pictures for reference:

Check out BHPian comments for more insights and information.
- Tags:
- Indian
- Volkswagen
- Volkswagen Taigun
- TSI
- ORVM
News
Installed a digital side-view mirror on my old Maruti Gypsy


I bought the camera from Amazon & fitted it on the left side of my car. I connected it to the rear camera screen with a changeover switch.
BHPian SnakemanJohny recently shared this with other enthusiasts.
I do not really like to depend on electronic gadgets much. I am scared of the replacement costs. Even the standard motorised mirrors in modern cars are very costly to replace and are prone to damage mostly by two-wheelers trying to squeeze through two lanes of traffic at a red light.
But my Maruti Gypsy does not come with a left ORVM, though one can be bought at a very low price (the right mirror cost was Rs. 80/- when I bought one in 1987 to fit on my Nissan Jonga, and still costs that!).
But I fixed a camera bought from Amazon on the left (see pic) and connected it to the rear camera screen with a changeover switch. It can be rotated to adjust. Now, if I need to see the left rear (most of the time the IRVM is good enough), I simply flip the switch and look at the screen just below my straight line of sight through the windshield.
Advantages
- Do not have to look far left, taking my eyes off the road in front.
- The tiny camera does not jut out of the sideline of the car and cannot be bashed up even if some other vehicle brushes past.
I certainly would not want a digital mirror or its stalk to jut out as much as a normal mirror does.


Check out BHPian comments for more insights and information.
- Tags:
- Indian
- ORVM
- Maruti Gypsy
- Modifications
News
Electric folding ORVMs missing in my new Skoda Kushaq


The auto-folding function is enabled by a software setting and ironically, Skoda still has the option.
Thanks to the Team-BHP fan (he prefers to remain anonymous) who sent this information in. Heartfelt gratitude for sharing it with other enthusiasts via this Team-BHP share page!
I took delivery of a 2022 Skoda Kushaq Ambition TSI MT on 27 January. I read the thread on the feature deletion on Team-BHP and wanted to put these to rest with the picture of my car’s front door mirror adjuster.
The electric folding function has been completely removed. See the picture of the driver’s door pad where it has been removed (the knob needs to be moved 180 degrees from the base position for the folding function, which you can compare with the official review picture):

The auto-folding function is enabled by a software setting and ironically, Skoda still has the option in the settings screen:

I have also written to Zac about the Rs. 20,000 discount not being applicable to the Ambition variant, which really makes me feel short-changed. It’s an inferior treatment compared to higher variants.
My hunch is that the other variants saw a price hike and hence, the discount of Rs. 20,000 is being given after the feature deletion. The Ambition variant has not had a price hike yet and hence, the savings are being realized fully by Skoda.
Check out BHPian comments for more insights and information.
About Us