News
DIY: Convert car audio system into wooden home audio system


The sound emanating is of decent quality & pleasant for a bedroom. Each speaker is a dual-speaker & hence covers a wider range of frequencies.
BHPian jkrkrish recently shared this with other enthusiasts.
DIY: Carpentry for converting Car Audio to Home Audio System
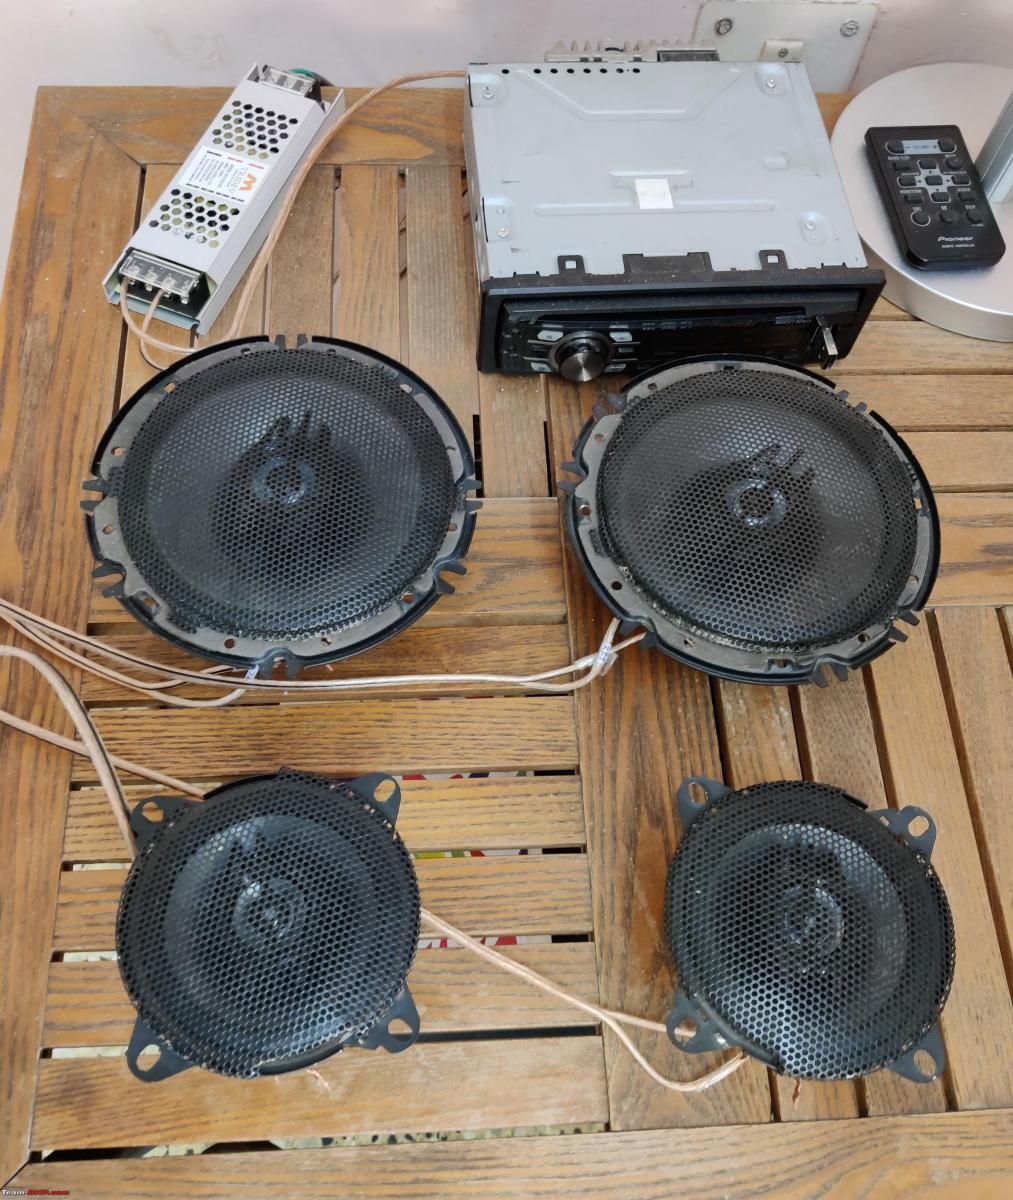
A few months ago while selling my old car, I had removed the Pioneer head unit and four Sony X-plod speakers which I had installed in it. With some interest in carpentry, I decided to make the enclosures for them and build a DIY home sound system. The work was done basically on weekends, half-day each on Saturday and Sunday, stretching over many weeks.
Photo: Pioneer head unit and four Sony X-plod dual-speakers.
Decided on the following essential requirements for the home audio:
- Four separate small boxes for the 4 speakers, instead of combining a pair of speakers in a single box.
- The speaker boxes are to be made of wood, with the wood pattern showing out, and not plywood or MDF.
- Provide a projecting rim on the front side of the speaker boxes, instead of a flat front.
- Mount/fix the audio connectors on a support at the base of the speaker box/ head-unit, and not directly on the back panel, (v) Not to buy expensive woodwork tools, like electric-saw, vice, electric-sander, etc, and manage with simple tools, hand-saw, plane, chisel, sandpaper-holder, etc.
Gathered information from 2 sites:
- For speaker box design: After reading this, I decided not to follow many of the described guiding principles, to avoid ending up with very large-sized enclosures. Besides, the speakers I am planning to use may not be of such quality to warrant these designs.
- For woodworking tips: YouTube videos by Steve Ramsey
Then the process started
- The standard wooden planks available in sawmills are thick, large in size and expensive. Hence purchased 7mm thick, 8cm x 30cm pinewood planks from Amazon.
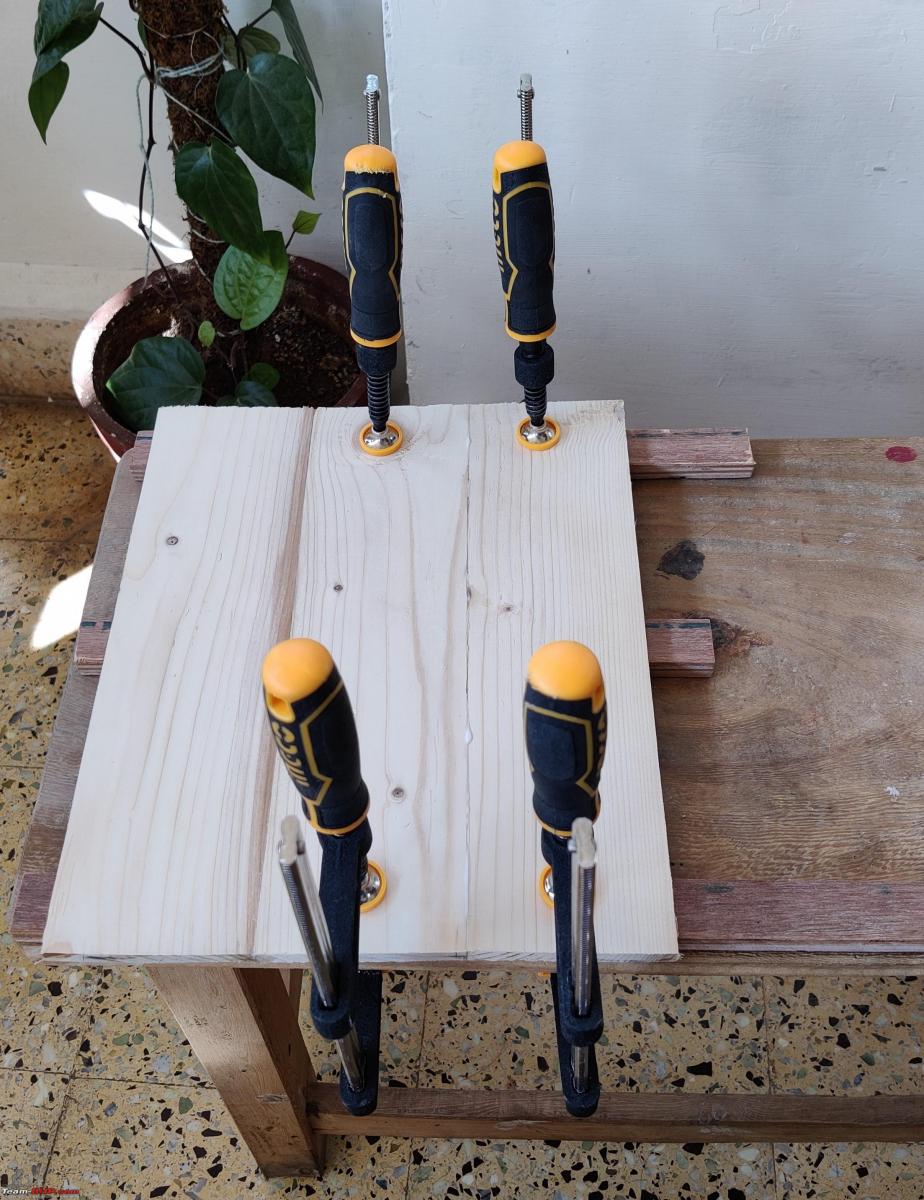
- These pine planks can be joined together with wood glue to make larger size planks. All that is needed is a flat platform (a wooden stool), a few flat bars (plywood strips), and a minimum of 4 clamps. The strength of the wood glue is such that, when you break a joint, the wood will not separate along the joint, but rather cleave along the wood fibres away from the joint.
Photo: Pine wood planks, Glue and Clamps
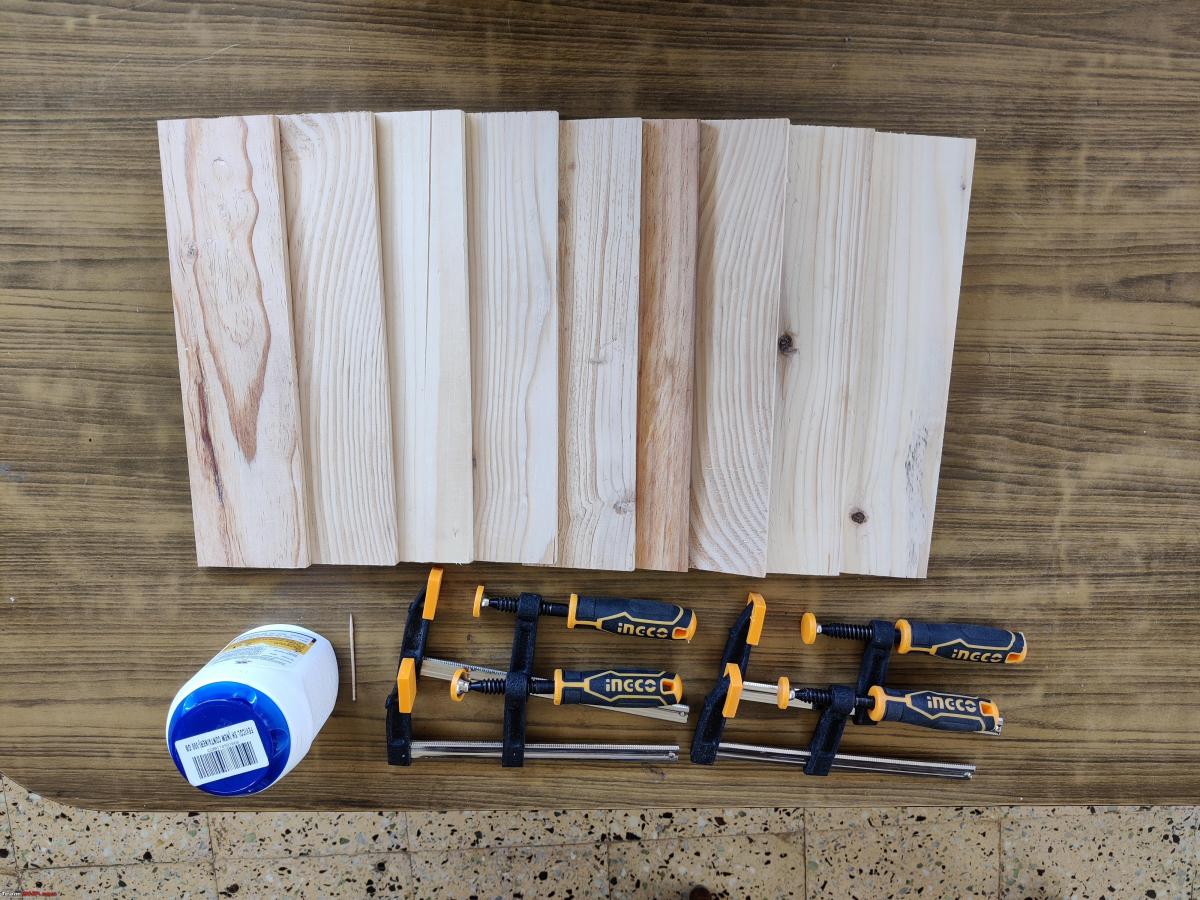
Photo: Clamps holding the pinewood planks joined with glue.
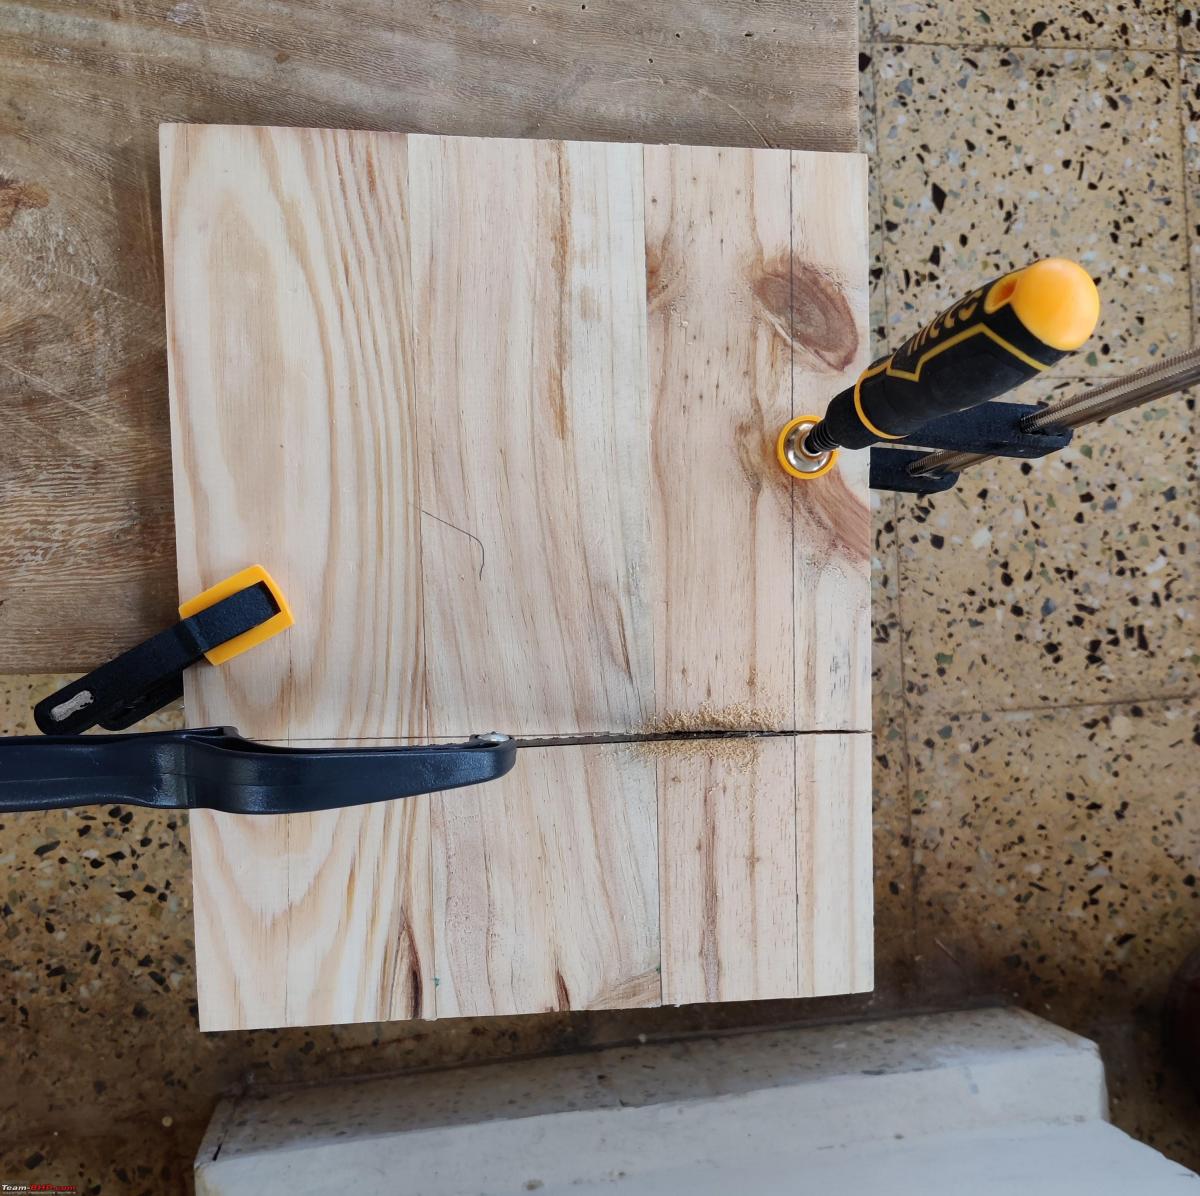
- The joined pinewood planks can be cut into the required sizes necessary for the speaker box, using a simple hand-saw. Mark lines on the plank with pencil, mount on a flat platform/stool, hold them to the platform/stool with clamps, and cut with a handsaw along the pencil mark. It is reasonably quick, and you get near-perfect cuts. While I could manage all the straight cuts, for the final circular opening for the speaker front, I went to a neighbourhood carpenter.
Photo: Cutting the pine plank with hand-saw
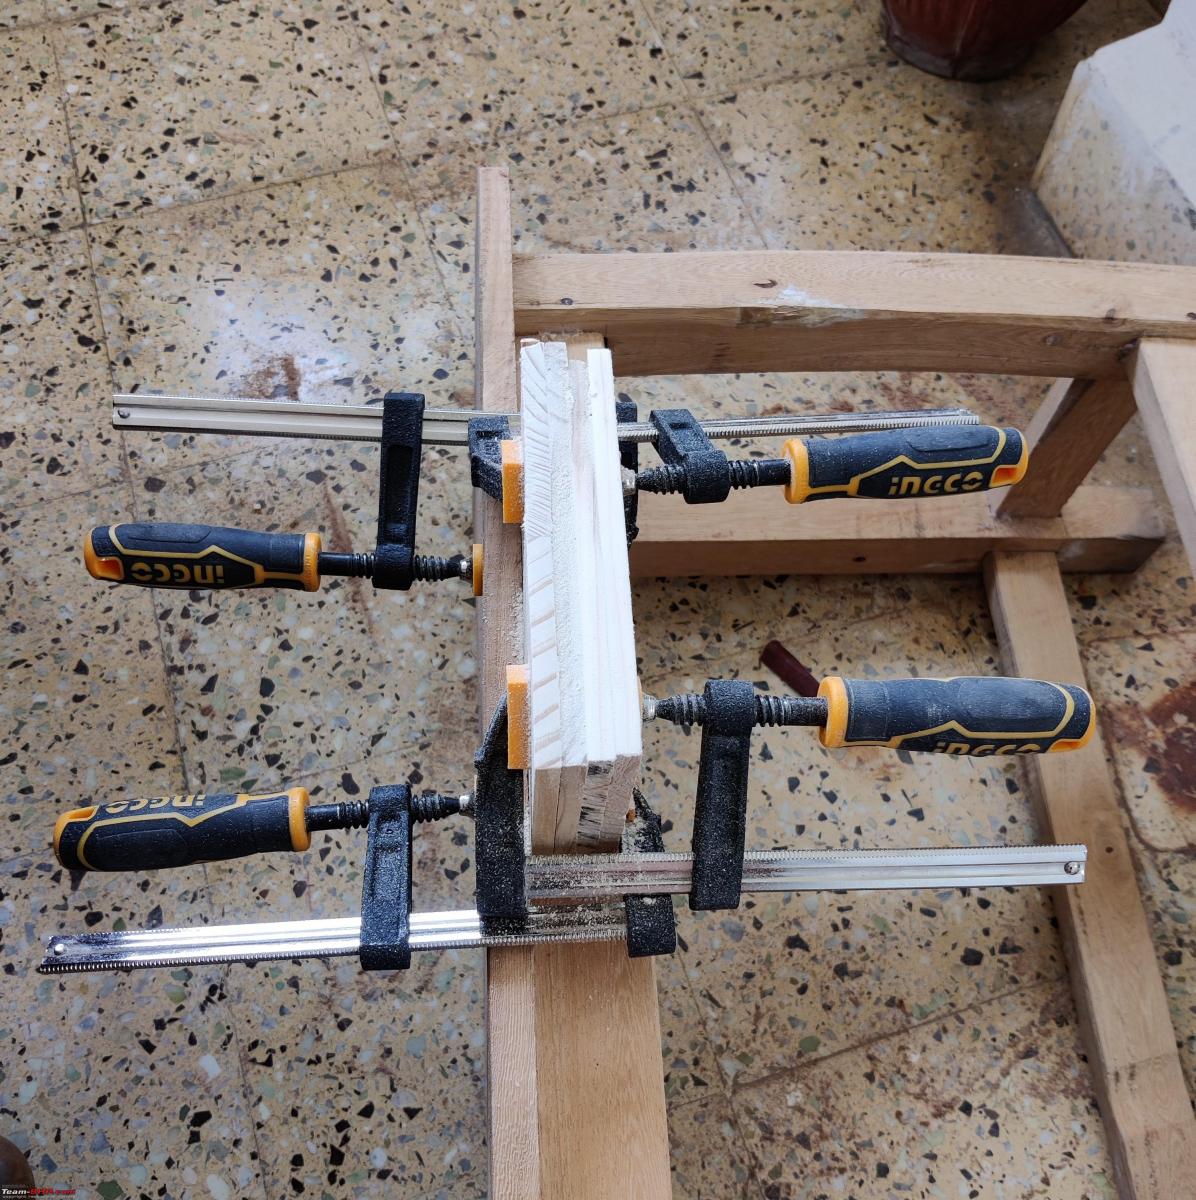
- The cut pieces can be further fine-sized again to the final size, using a plane or sandpaper. Mount the cut wood pieces on a platform with clamp, and use a plane or sandpaper-mounted on a holder, and size them (mount multiple pieces together, if they require identical dimensions). I found it easier to do this using sandpaper (100grit) mounted on a holder. The reason for this was; a plane can easily remove material from wood in the direction of wood fibre, but in the perpendicular direction it has no use, while emery paper mounted on a sandpaper holder works nicely in both orientations.
Photo: Final sizing of the wood planks with sand-paper holder
- Now sand the surface of the final sized wooden planks with 180grit sandpaper, the wood patterns will become visible. Finish finally with 240grit sand paper. This part of the process takes time and tests patience.
Photo: Sized wooden pieces for the head unit
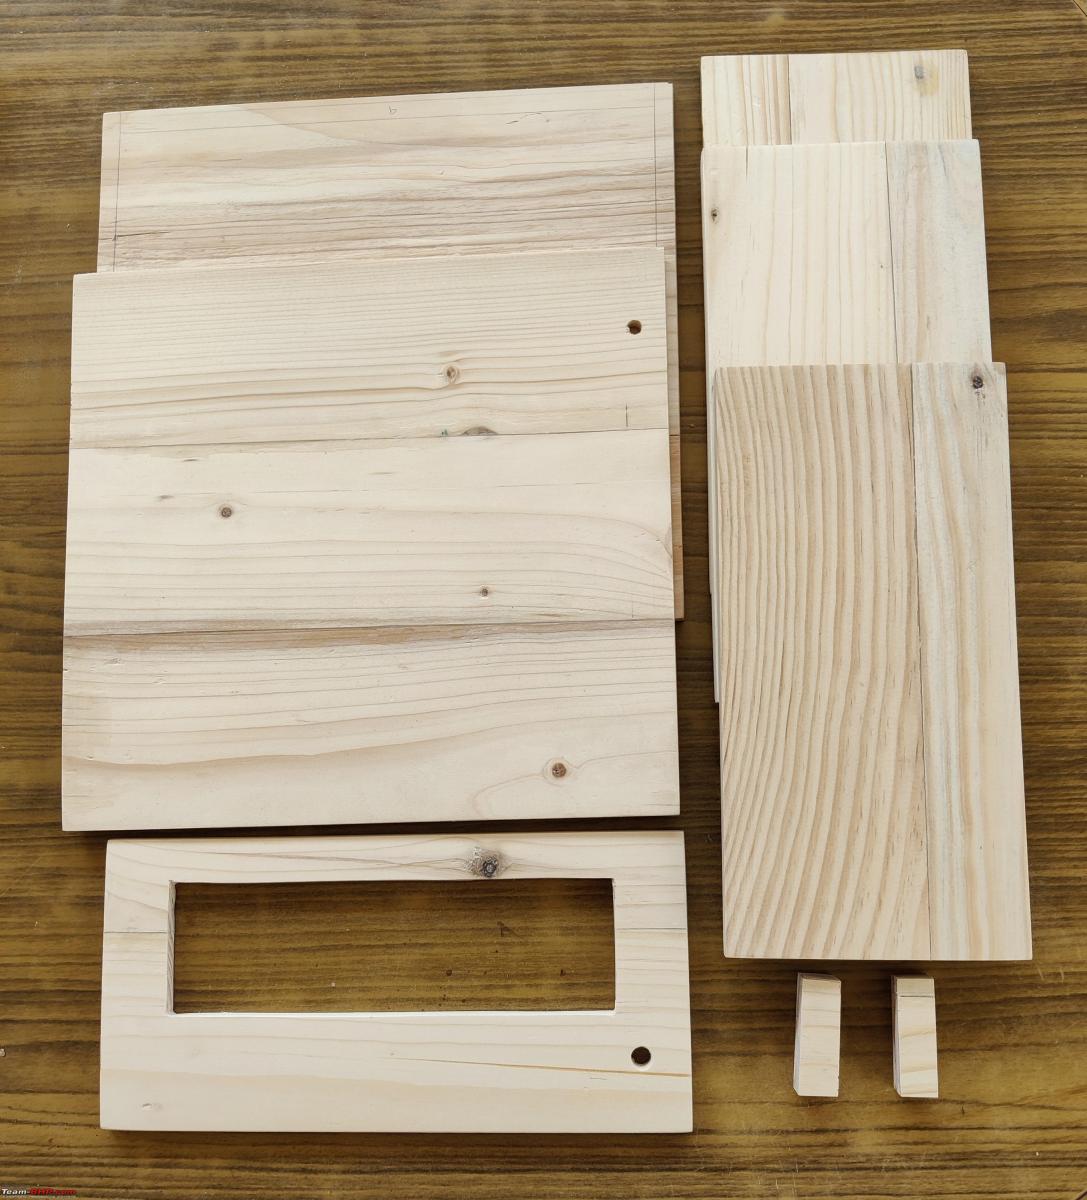
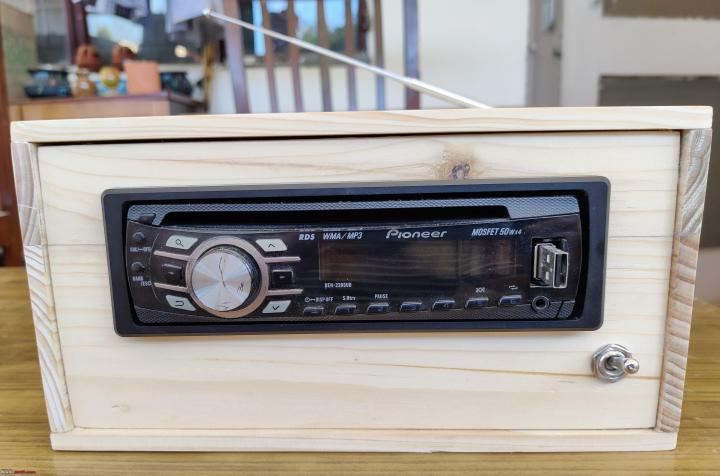
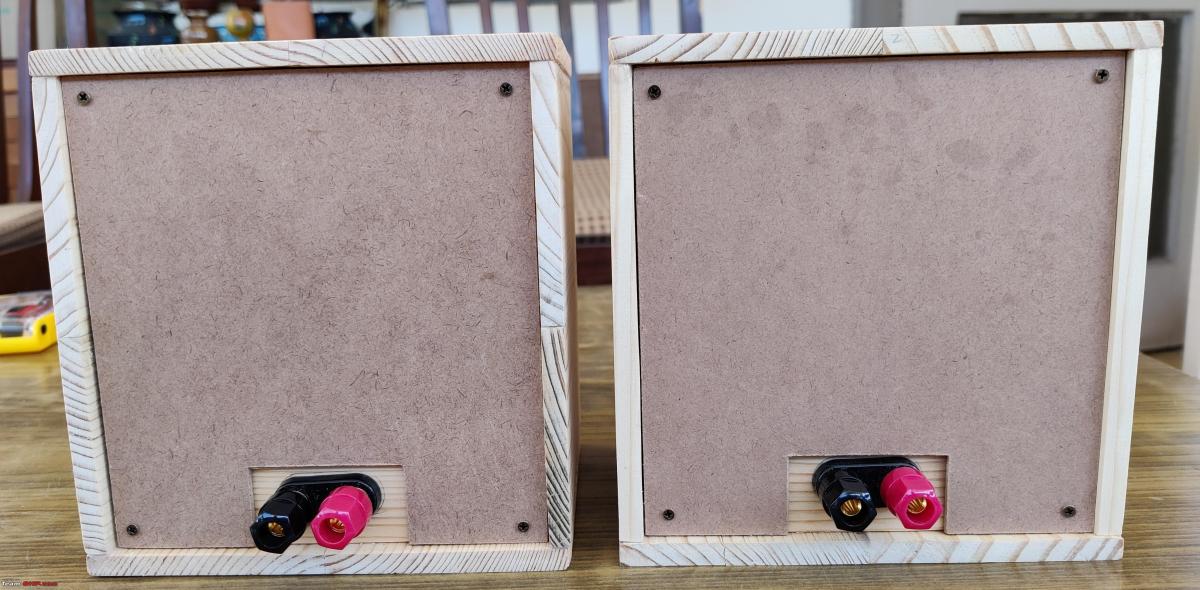
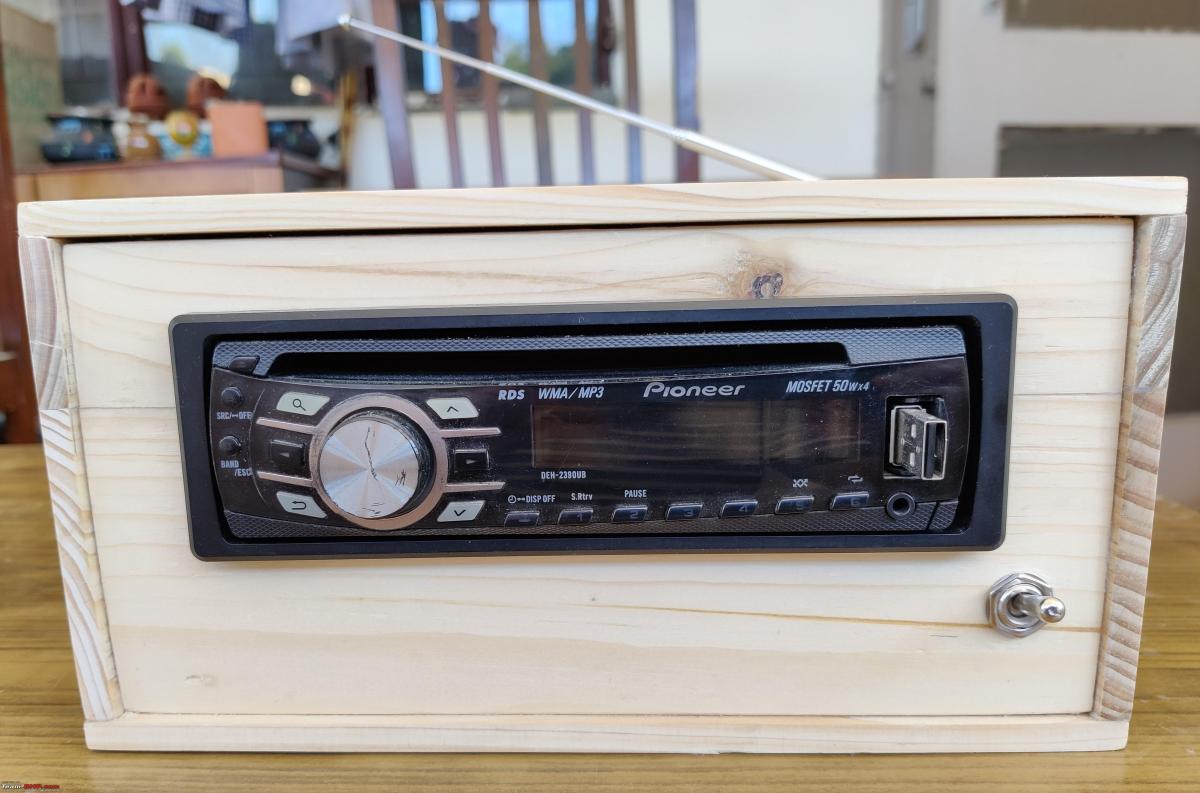
- Join the finished planks together with glue to make the boxes. I did not use nails/screws for joining these, since they will be visible on the sides. (The 8mm thick pinewood was good for all the other sides of the speaker box, except for the front face of the speaker box which has to hold the weight of the speaker, and also cannot accommodate a 10mm length screw. Hence, pasted a 2.5mm thick mdf-sheet over the wood on inner-side using glue, to create a 10mm thick front panel). Finally fix small cubes of wood on the corners, on the back-end of the box, so that the back-panel can be fixed using screws.
- Tried staining sample pieces of the wood with Sheenlac wood-stainer, available in hardware stores. It left dark brown colors on the wood pattern, and also darkening the exposed wood glue. Tried linseed oil, which leaves a lighter yellowish shade on the wood. But, finally decided not to use these, just cleaned the polished wood with turpentine oil (which was old and had acquired brownish in color because of some dirt there).
- Ordered the posts and banana plugs for a speaker from an Indian battery accessory manufacturer at site robiu.in. These parts seem to be of excellent quality. Ordered a Switch, RCA male & female connectors from site called Wish. They were of Chinese origin, and while the switch was sturdy, the RCA connectors were flimsy. The AC to DC converter was the most difficult to choose. The power rating written on the Pioneer head unit was 14V, 20Amp(max). Though the conventional lap-top power adapters supply 12V, the current rating is always less than 5amp. After many iterations finalized on 12V, 15Amp, SMPS from Tridev. It gives a mild hissing audible sound (seems the reason is its switching frequency is the audio range), but that was the best I could find.
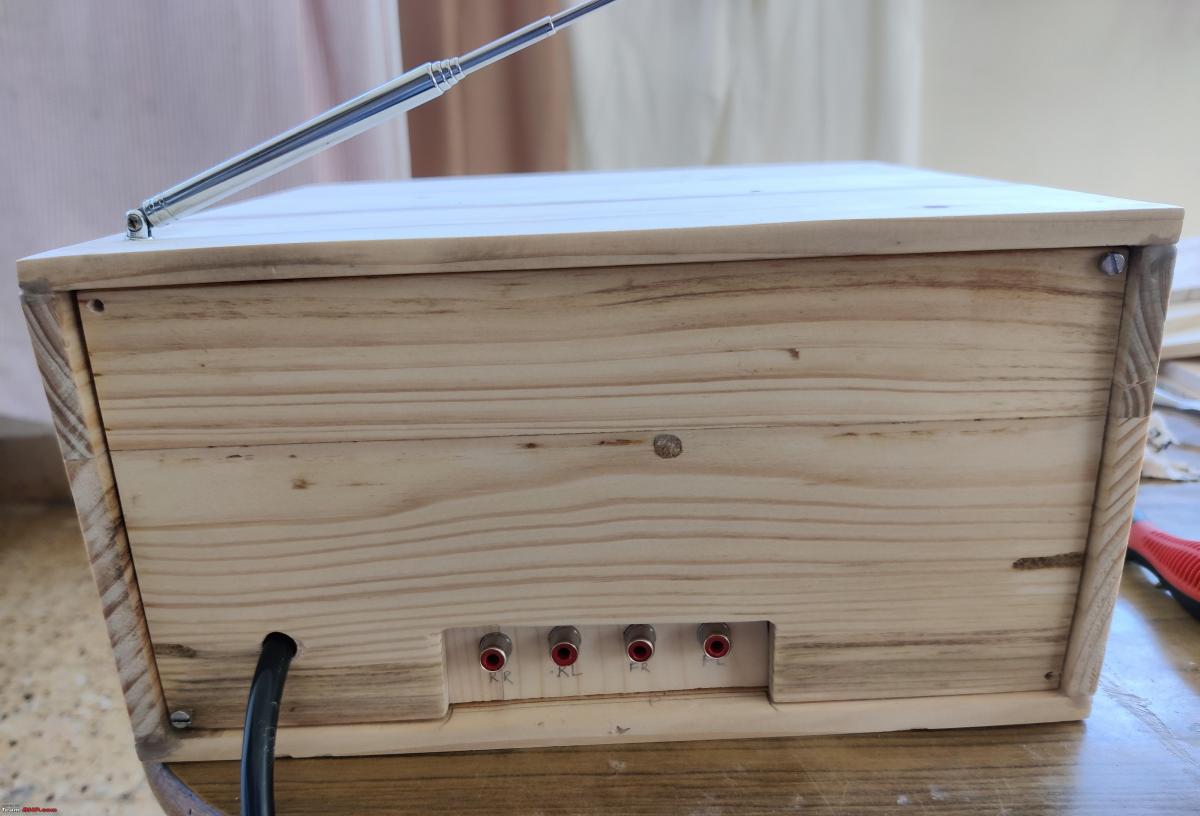
- Fixed the audio connectors on a small L-shaped base and then mounted them on the base pane of the boxes. Also added, an old antenna removed an old transistor, to the head unit. And then covered the rear sides with the back panel.
Photo: The rear-side of the boxes for speaker and head-unit, with audio connectors fixed.
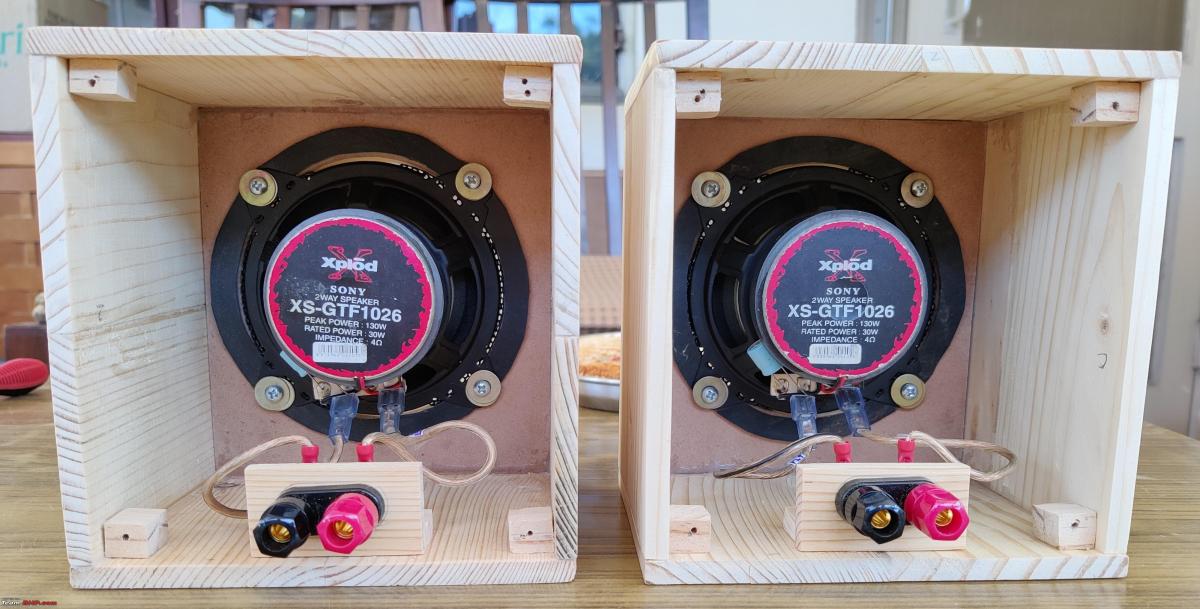
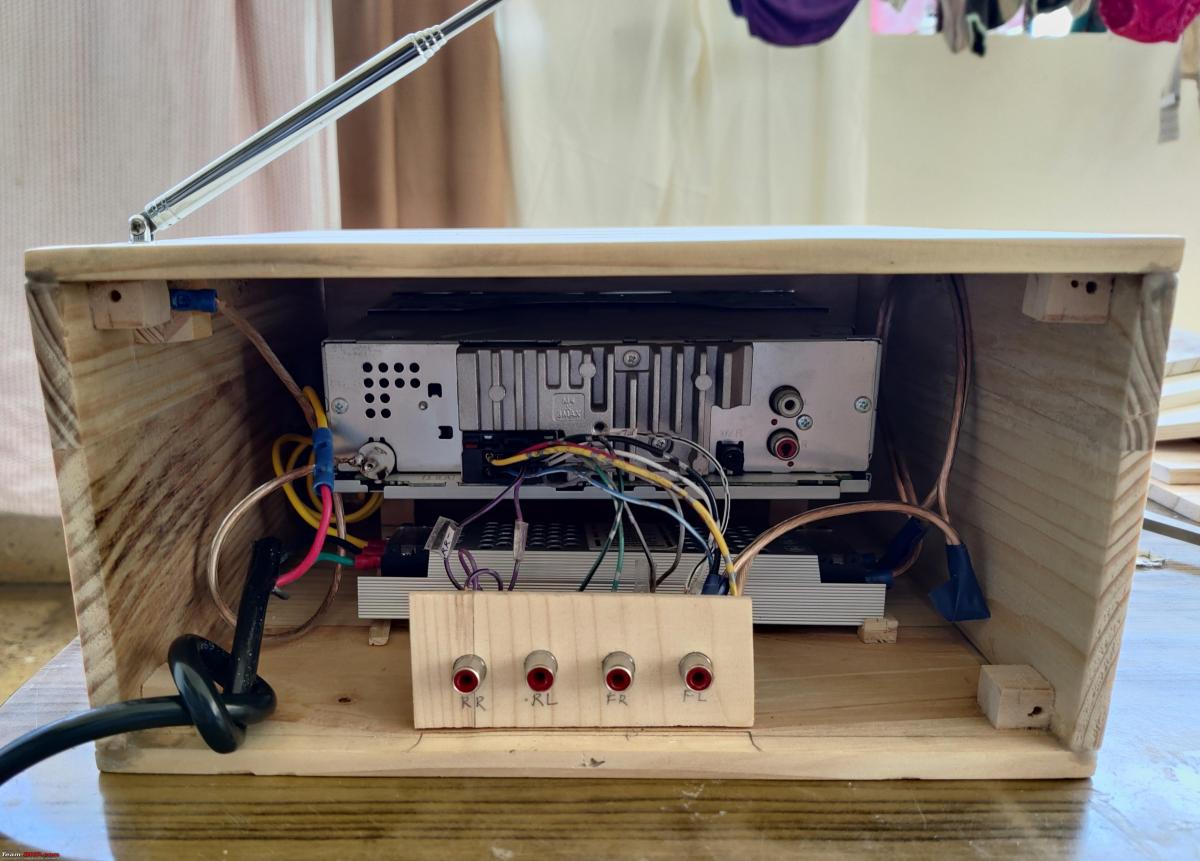
Photo: The back-panel and front-face of the speakers and head-unit.

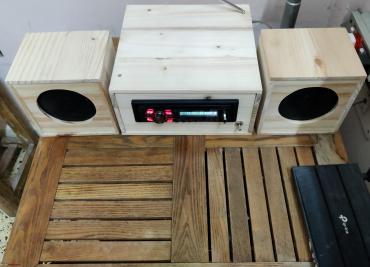
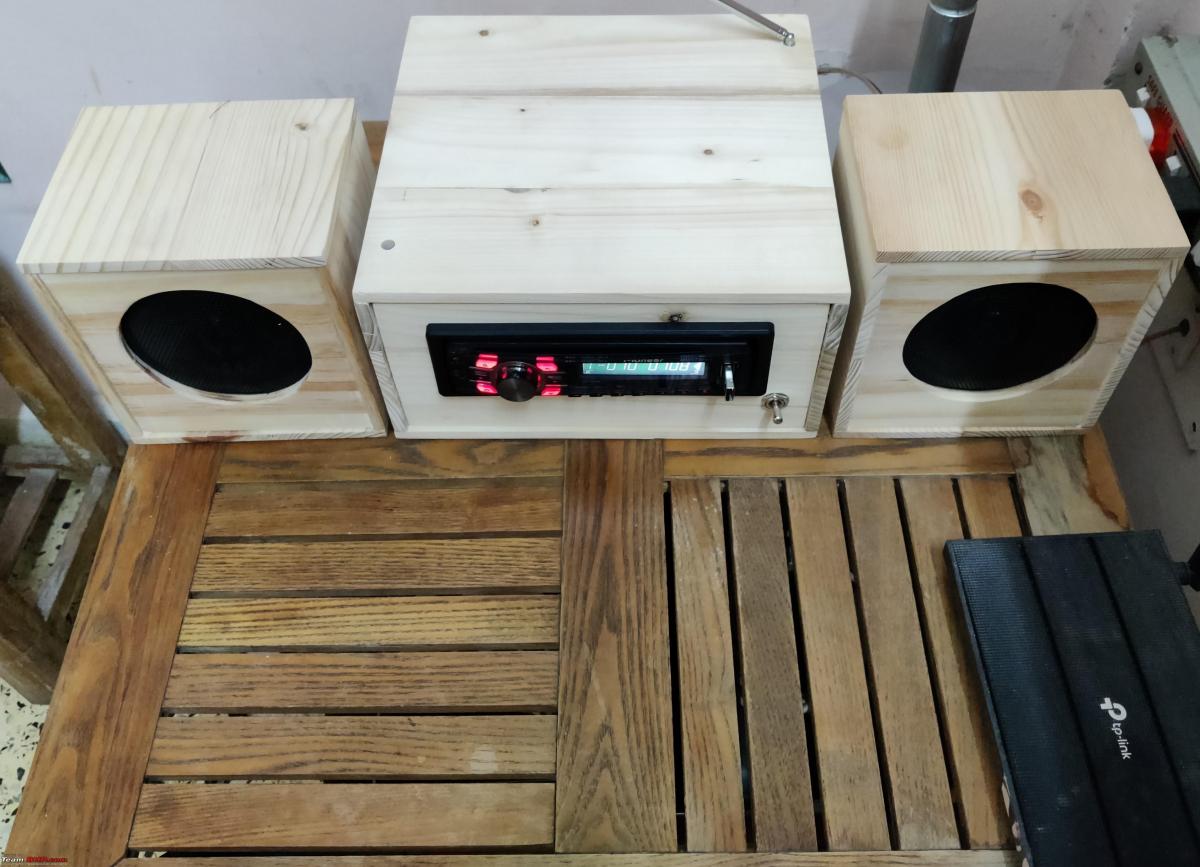
Finally, the home audio system done, giving out the melody; ‘Mayakkama Kalakkama’ by PB.Srinivas. The sound emanating is of decent quality, and pleasant for a bedroom. Each speaker being a dual-speaker covers a wider range of frequencies.
And, the happiness of creating something and seeing it perform.
Photo: The home audio system
P.S. - I will update again, with one more picture, after completing the boxes for the rear speakers. Also, will try filling the inside of speaker boxes with polyfill to reduce the resonance. Ideally, the speaker rim should have been mounted on the front side of the front panel, and may try that for the rear speakers. The speakers feel very light, maybe I will add some weight at the base.
Check out BHPian comments for more insights and information.
- Tags:
- Indian
- Member Content
- DIY
- car audio
- Pioneer
Find Car News
Just News


About Us


Buy & Sell
USED CARS