News
DIY: Restoring my Maruti Swift's headlights for just Rs 400
A new set of OEM headlights from Maruti Suzuki would have set me back by over Rs 5000.
BHPian Ashtoncastelino recently shared this with other enthusiasts.
For those who have oxidized and hazy headlights which reduce your light output and make your night drives difficult, hope this DIY guide helps you freshen up your headlights. An OEM new Swift headlight will cost you about ₹2525 per side, So in total ₹5050 for a pair.
I for long had the itch to restore my headlights ever since I got the car in June last year because they started yellowing, had scratches, were oxidized, had hard water spots and while the previous owner had the car re-painted, the painter didn’t cover the headlights leading to overspray of clear coat over them.
Friend and fellow BHPian yuv3447 guided me while doing this DIY. Huge thanks to you brother!
Condition of the headlights before restoring


Things you need:
- 800 grit sandpaper
- 1500 grit sandpaper
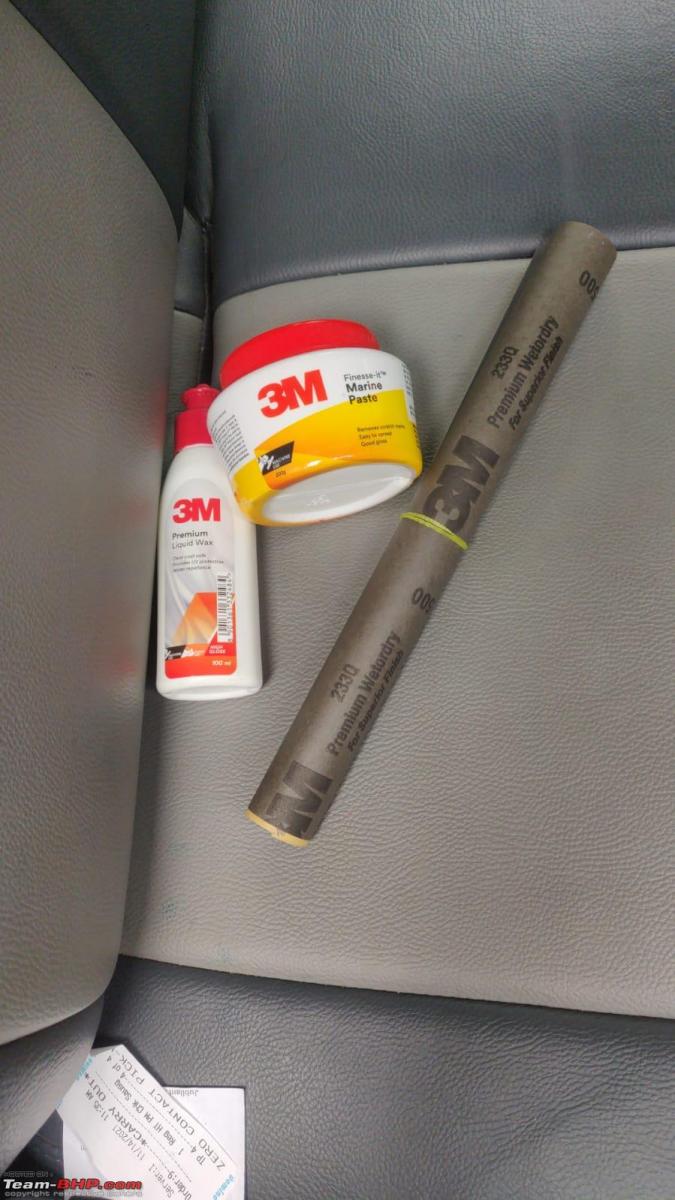
- 3M Marine Paste (Rubbing compound)
- 3M Premium Liquid Wax
- Orbital Polishing Machine
- Elbow grease (trust me)
- Lots of Patience
Price for this sweet DIY?
- 800 grit sandpaper - ₹25
- 1500 grit sandpaper - ₹35
- 3M Marine Paste (Rubbing compound) - ₹193
- 3M Premium Liquid Wax -₹156
- Orbital Polishing Machine (I had borrowed the orbital polishing machine from a good friend.)
Total: ₹409
Procedure:
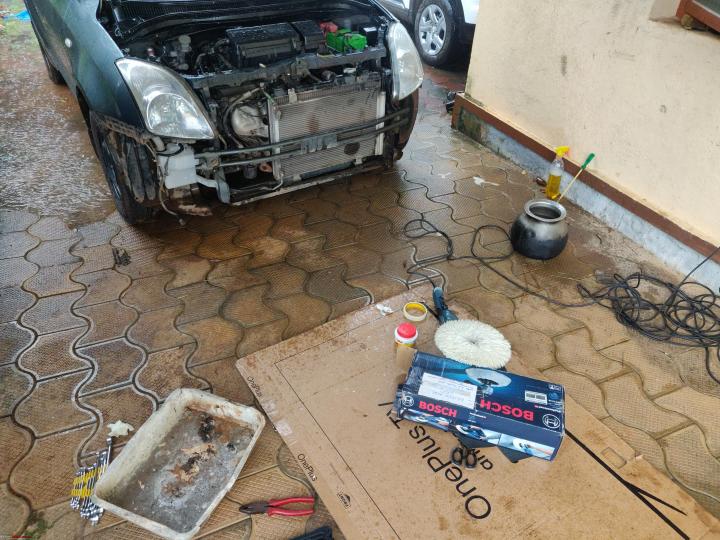
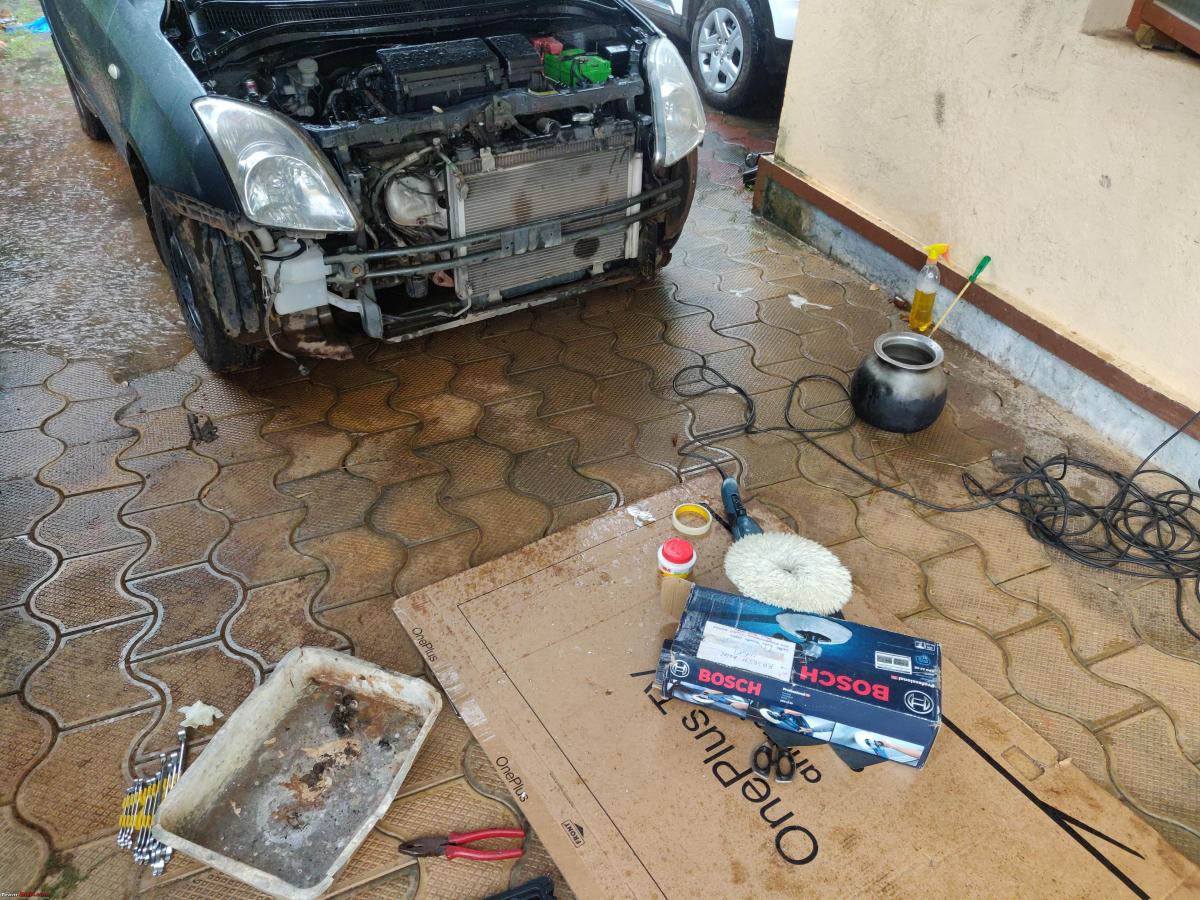
1) Remove the bumper: To make things easier, I removed the front bumper. Removing the bumper is a fairly easy process. I asked my younger cousin to assist me in removing the bumper.
I have marked the positions of all the screws, clips and bolts which hold the bumper to the body. The screws are marked in green arrows, clips by orange arrows and bolts by yellow arrows.

Once you remove all of them, lift the bumper from the top carefully and it will come off.
Unfortunately, while I was performing this DIY, it unexpectedly started raining all of a sudden. Bummer!
2) Wipe the headlight using a clean cloth.
3) Mask the edges of the fender panel so as to not scratch it when sanding.
4) Once done with masking, spray water on your sandpaper and plenty on your headlight too .
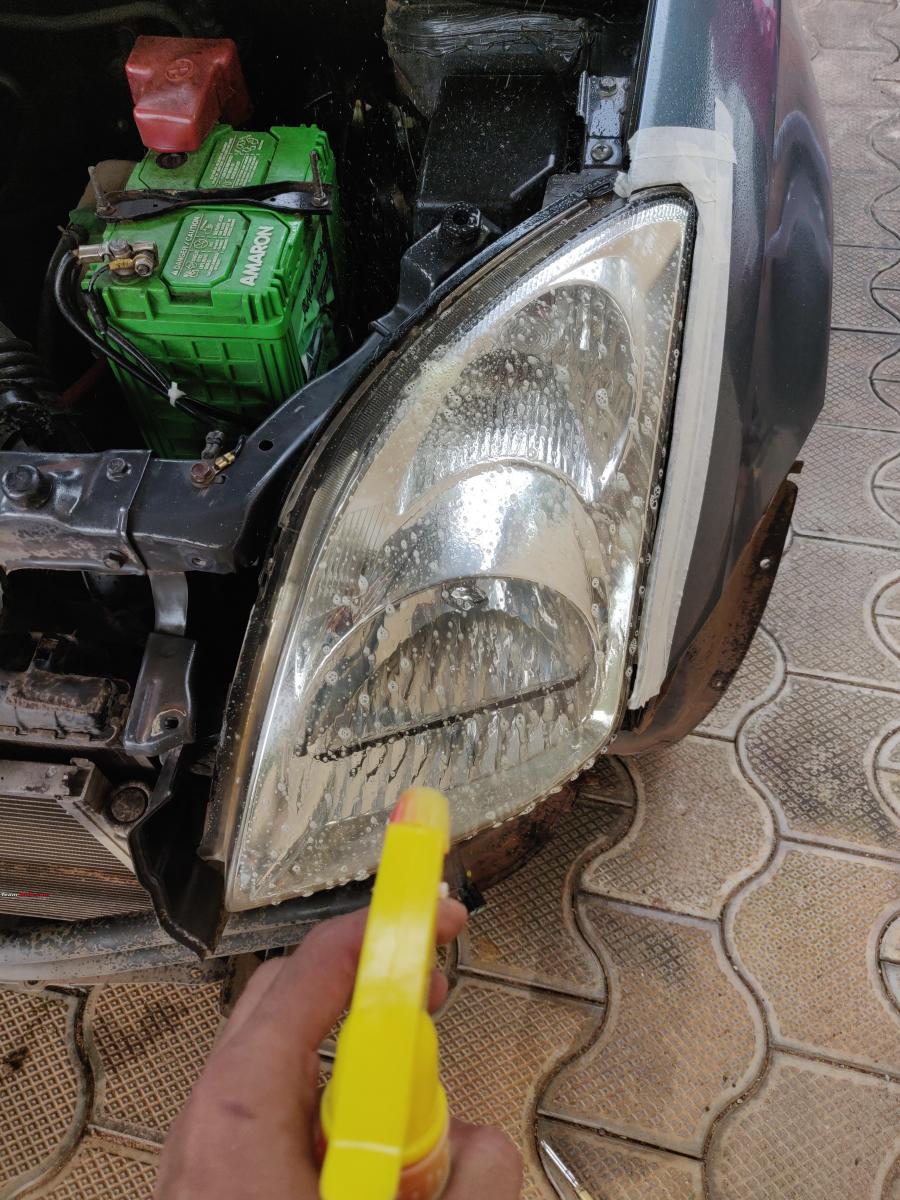
5) Wet sand it evenly with the 800 grit paper first. Do not sand in a circular motion and make sure to constantly spray your sandpaper and headlight with water. Wipe down all the residue from the headlight by pouring a mug of water on it. Yes, you will require a lot of elbow grease for the sanding.

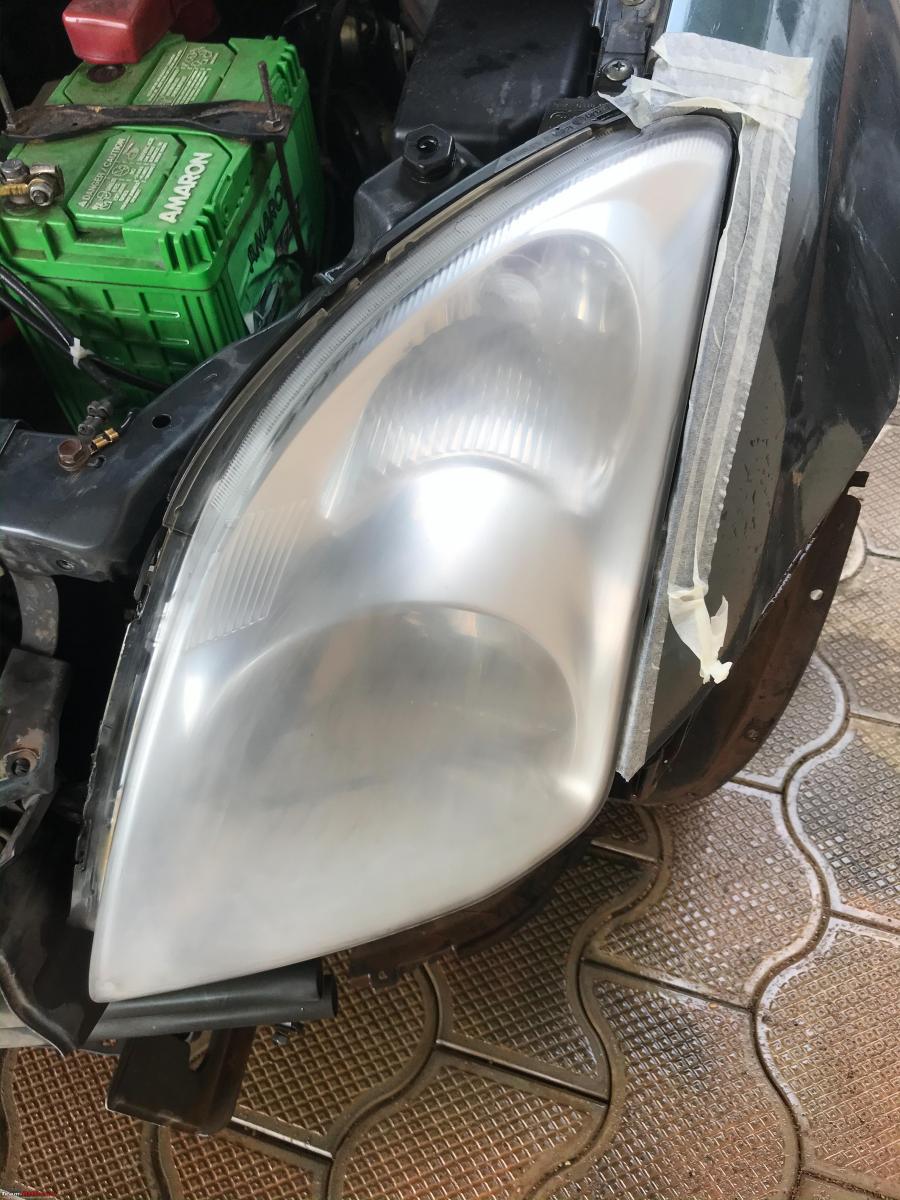
6) Make sure you sand it till you get an even finish on your headlights and all the yellowness and oxidization has gone. I had to sand my headlight with 800 grit for about 4 passes because the overspray clear coat was still present in some areas of the headlight. It will look even hazier but trust me the outcome at the end will be worth it.


7) Proceed to 1500 grit wet sanding once an even finish is obtained and you’re happy with the 800 grit sanding. The 1500 grit sandpaper is smoother so it will even out all those scratches put by the 800 grit sandpaper.

8) Wet sand it for about two passes and you should be getting an even and smooth finish.
9) Pour water on the headlight again with water and clean with a microfiber cloth.
10) Now we can move on to the Rubbing compound. Take a generous amount of it and smudge it on the headlight evenly. Yes I think I was a bit too generous. Sprinkle few drops of water on it. Set the speed of the machine to low speed. Make sure the wool pad of the orbital polisher is clean.

11) Now you want to make sure that you take your time with the Polisher and not rush. Do wear an apron or something similar to it so as to not get rubbing compound splashed on your clothing. Tilt the polisher and use only the side of the Polisher. Start from one part of the headlight and work your way through. You should see the headlight clearing up in a while. Make sure to sprinkle a few drops of water on your headlights so that the heat won't melt the headlight.

12) Once you’re satisfied with polishing the headlight, Time to apply the liquid wax, it would act as a sealant. Wipe the headlight with a microfiber cloth and apply liquid wax to the headlights. Again with the polisher, work your way through just like how you did with the rubbing compound.
Voila! Your headlights should be looking crystal clear now.
NOTE: Now applying the liquid wax, again and again, every month would be irritating so applying PPF a good transparent film on the headlight would maintain its condition and protect it further.
Result After Restoring the Headlights
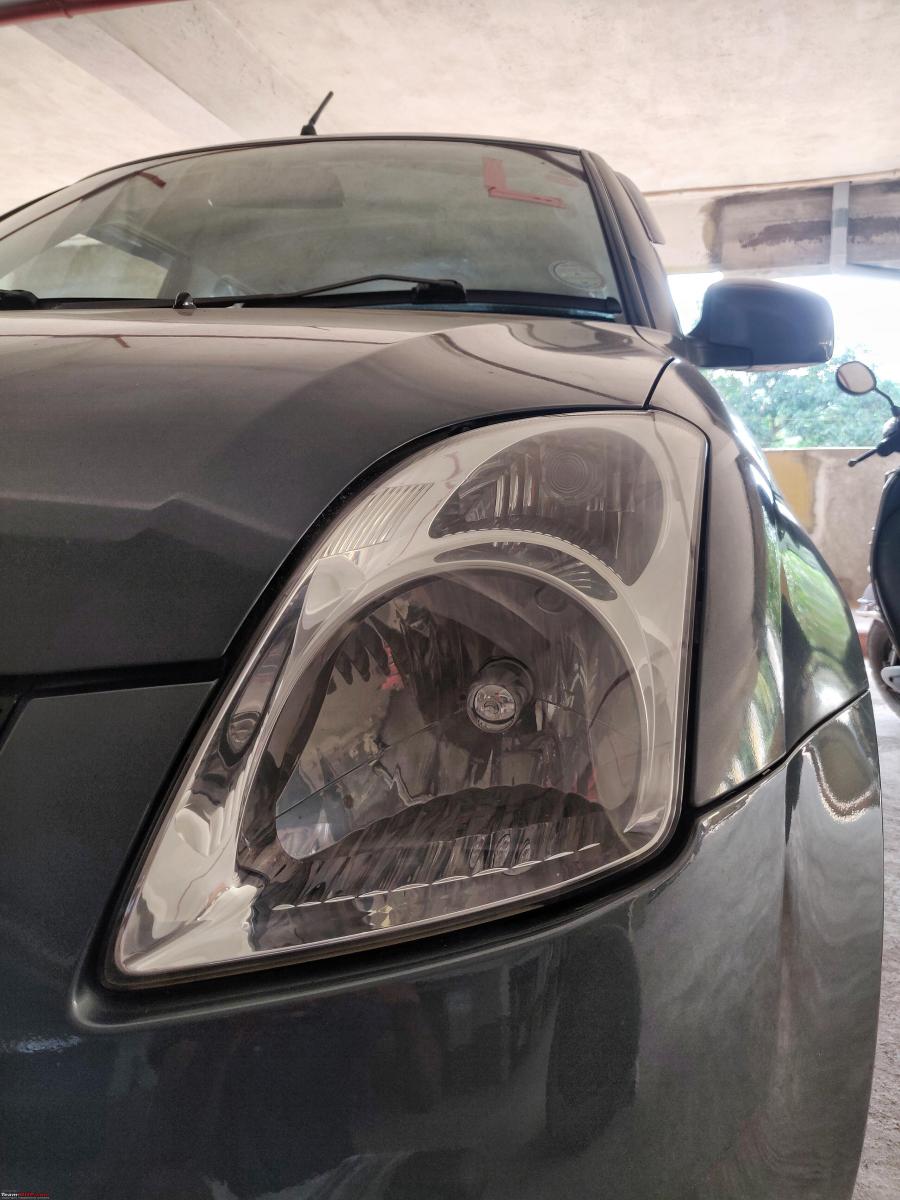
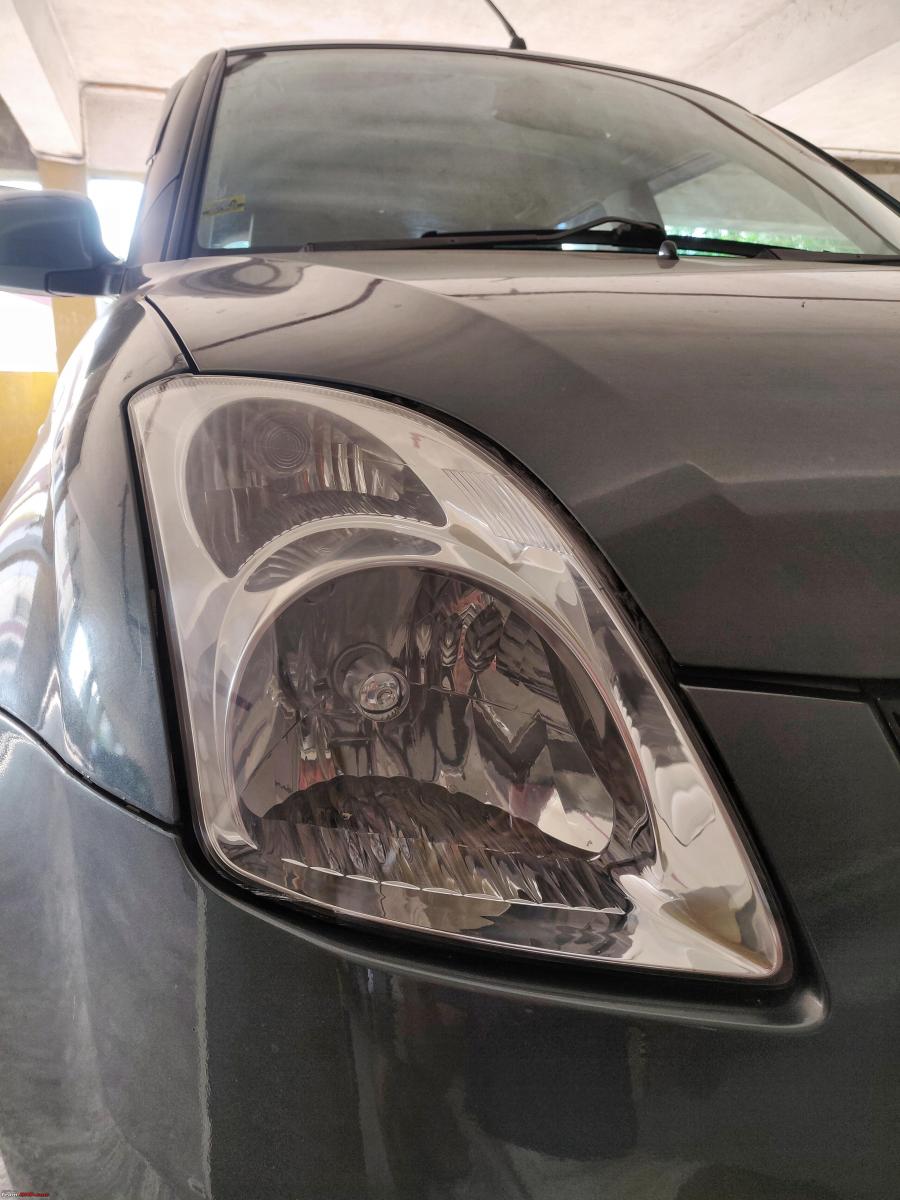
There has been a significant increase in light output post the restoration and I'm loving it. Finally, I'm getting the full output of the 90/100-watt setup installed in my car and easier night drives henceforth.
Hope this DIY helped and I'm waiting to see the before/after photos of your headlight restorations.
Check out BHPian comments for more insights and information.
Find Car News
Just News


About Us


Buy & Sell
USED CARS