News
My Volkswagen Jetta 2.0 TDI: 92,000 km update


All in all, the car is a treat to drive on all sorts of roads. The only thing I would change in a suspension setup like this is to probably put stiffer dampers.
BHPian vishy76 recently shared this with other enthusiasts.
92,000 km update
It hasn't been very long since I updated this thread. As they say in German car ownership, no news means good news. Unfortunately, I have a lot of news to share. However, I will share the minor updates first before moving on to the major ones.
LED DRLs
I have always found the idea of halogen DRLs to be lame. Of course, something is better than nothing, but when you are equipping a car with DRLs; lights that only serve to be fancy (majorly), then why not go the whole hog and put LEDs. In fact, I recently discovered that a close friend's US-spec Jetta comes with LED DRLs integrated into the double barrel halogen setup! Us Indians only got the LED DRLs on the Highline with the bi-xenons.
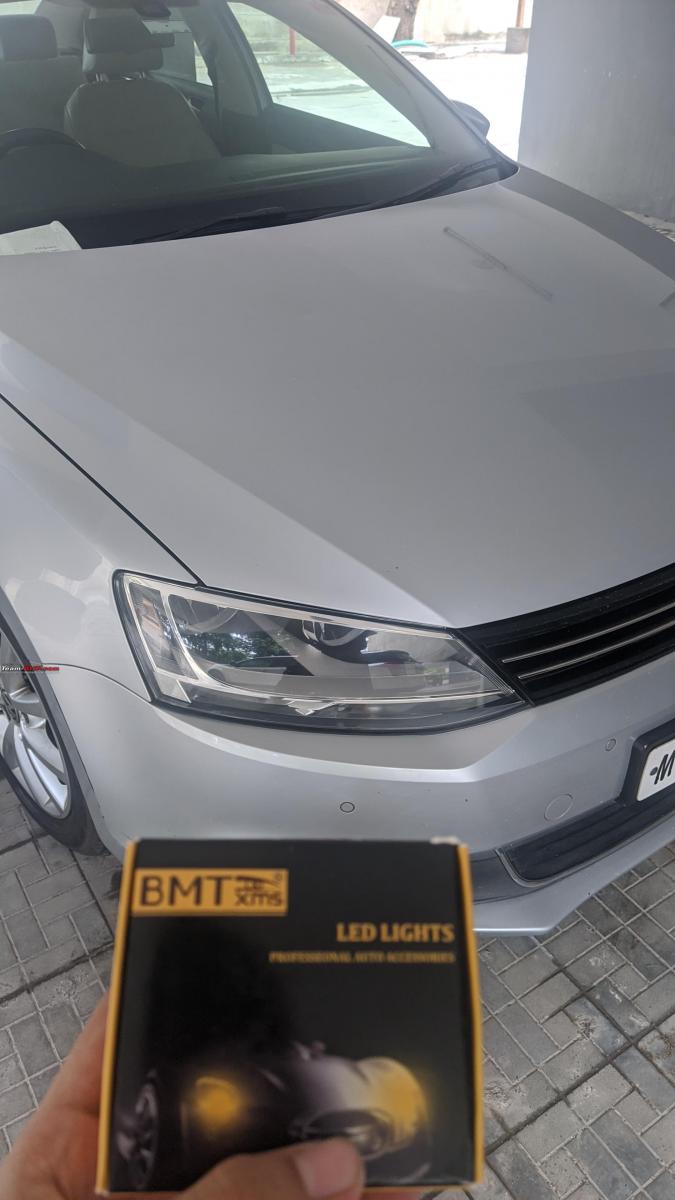
With the intent to spruce the car up a bit, I decided to explore the idea of putting LED DRLs. I only had two criteria:
- Shouldn't be the cheaper variety which has a whitish tinge to a blue shade rather than being icy white with a hint of blue.
- Should be having an inbuilt resistor so that the bulb monitoring system of the car doesn't cry foul.
The second point needs some explanation for those lucky few who don't have to contend with this feature. Most cars have the ability to monitor all electronics including bulbs and whether they are fused using the CANBUS (essentially a communication line for all electronic modules and components on the car). This makes it easier to find electronic faults instead of testing them manually. A simple DTC scan will tell you what bulb has fused.
Many cars like the Jetta and above take it one step further. If a bulb has fused, an orange error light comes up on the instrument cluster with a corresponding message on the MID stating "check XYZ bulb" or "XYZ bulb fused". How does the car know the bulb is fused? Using internal resistance! If the resistance of the bulb is zero or less than what the system knows it should be, it's assumed the bulb has an issue.
For an LED bulb, the internal resistance is far lesser than a halogen bulb (also the reason why it produces far less heat for the same amount of current and running time). This means the CAN will always throw up an error on start-up as it will think the DRL has fused due to the almost negligible internal resistance of the LED bulb. Hence, it is paramount that the replacement LED has an inbuilt resistor (some resellers call it a chipset too). As the name suggests, the resistor is added in series to the LED so that the final resistance is the same as the halogen it is replacing. The CAN this way will not throw errors. Do note that this applies to all types of factory fitted halogen bulbs on the car.
I casually posted this want of getting LED DRLs on the Jetta owners group, and a member gladly offered his spare set that was lying around unused (he had originally ordered it from the USA, but had ended up putting locally sourced DRLs from Amazon). It turned out later that he was a BHPian too and we ended up chatting about a tonne of Jetta related things. You never know when you get to make some great friends while bonding over cars. Thanks a tonne for the DRLs Akshay. They look smashing!
Fitting the DRLs
Procuring the DRLs was a piece of cake. Fitting them not so much. I knew how tough it would be so I went down to the car, popped the hood open and got to work.
These were sourced by Akshay from desertcart.
The first order of business is to get the dust cover off. The dust cover on the outer side of the headlamp is made of plastic. It simply needs to be rotated like a jar lid and it comes off. I started with the driver side first. The dust cap came off easily:
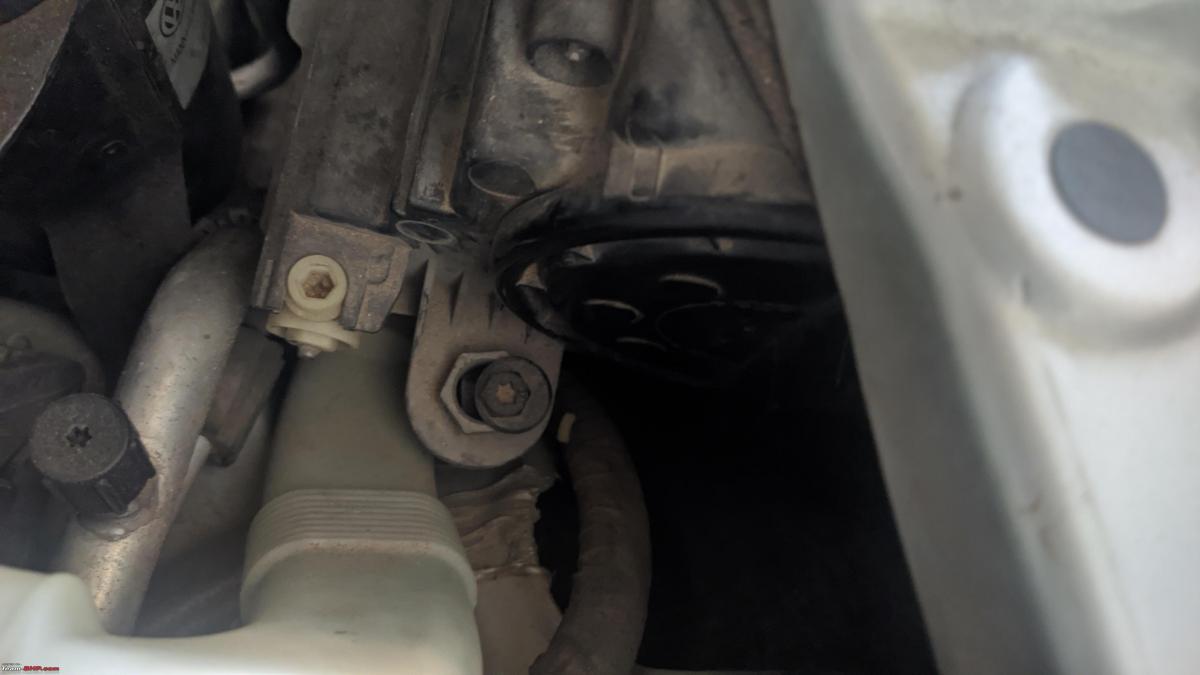
The next step is tricky. Insert two fingers into the hole where the low beam and DRLs sit. You will have to feel for the DRL connector and shake it a bit while looking at the headlamp from the front. Once you have ascertained it is the DRL connector you have gripped, you will have to twist the connector anti-clockwise. Once it rotates by about 120 degrees, it will come free and you can pull the holder out.
With this done, simply twist and remove the old halogen bulb and install the new LED in the same fashion. Before putting it back in, flick the key to 'on' and check if it lights up. If it doesn't, you might need to reverse polarity and try again. Fortunately, it worked well for me on the first try:

The CANBUS gods were also quite pleased with no errors on the cluster:
Installing everything back is easier than taking it apart. Just seat the connector in its slot and rotate it about 120 degrees clockwise till it clicks into place. DO NOT force the connector in or misalign and twist it. In my case, the VW ASC had done the exact same mistake while changing the passenger side DRL. The holder just wouldn't come off. In the end, I had to take it to an FNG who resorted to brute force and finally retrieved the bulb holder the next day. This is how the car looked with one LED and a halogen DRL.

Driver's side LED DRL in place. Was a 5-minute job at best. The passenger side was 2x more difficult. Firstly the lack of space, and secondly the wrongly installed bulb holder made life hell for me.

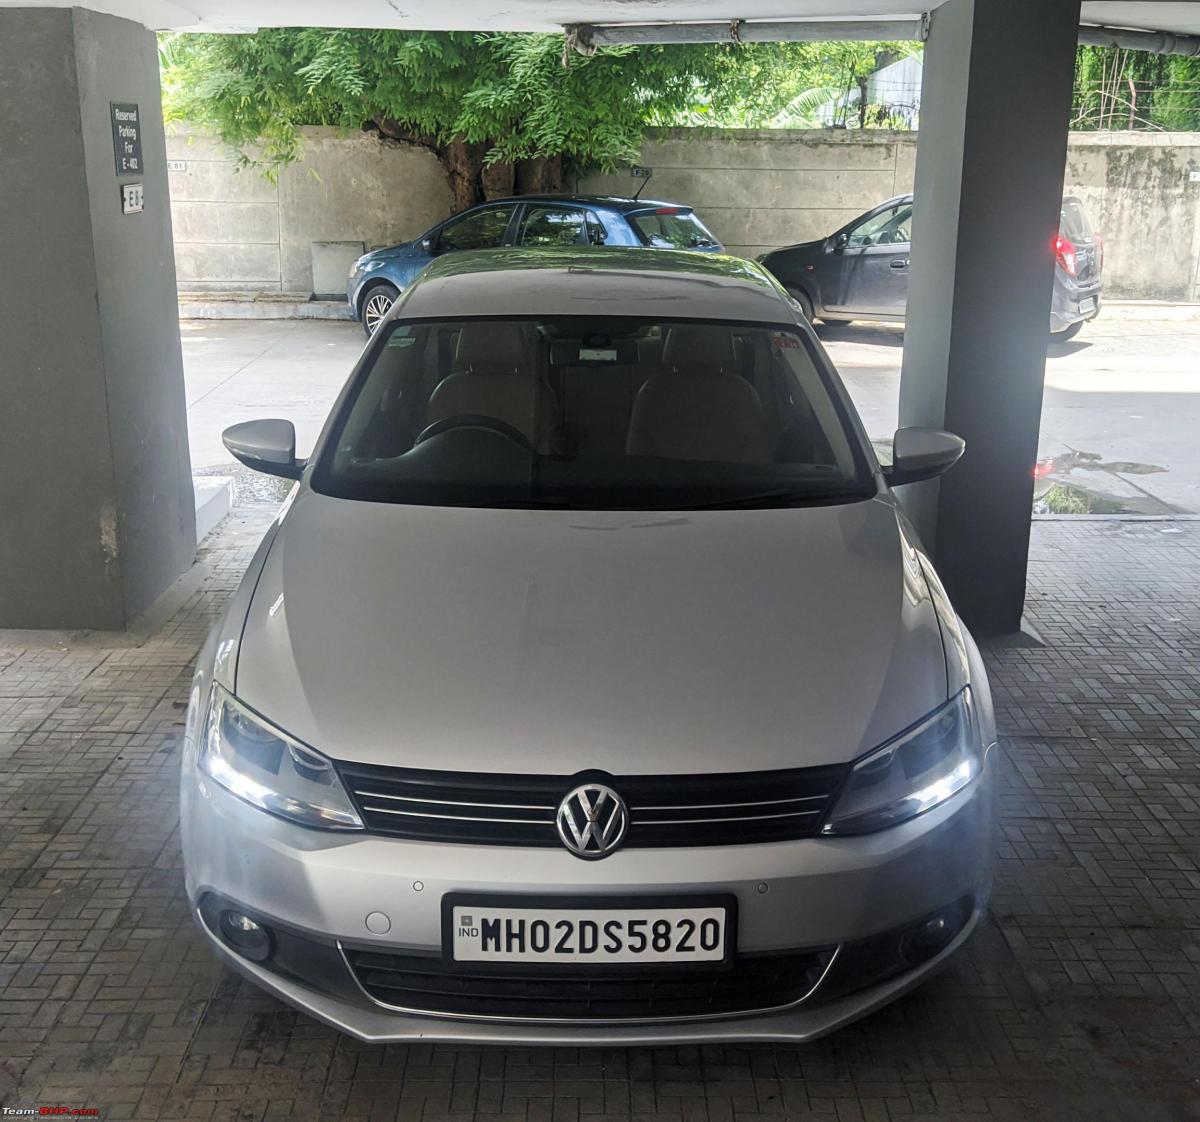
With the LED DRLs finally in place. One step closer to being an Audi A4:

I did have apprehensions on how blue DRLs would look on the silver. Though they don't stand out as much as yellow DRLs on a very sunny day (basic physics at play here, unfortunately), they do outsmart the halogens in every other scenario! All in all, these are available on Amazon for around 2.5K and are a worthy investment in my opinion.
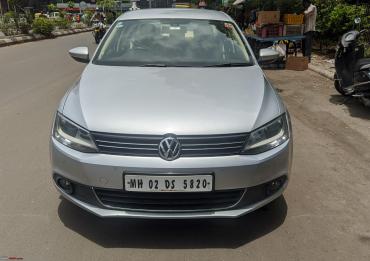
IND Style Number Plates

The stock number plates on my car were dealer supplied ones. VW Downtown, Mumbai had a rather chic looking font selection for its number plates which polarized opinions. I was expectedly the only person who got used to seeing them. Nobody else liked them.
That was until a very kind friend and fellow Jetta owner Parth Ahuja decided to have a set made for me in Nashik and send them down. Fitting the plates was a very simple procedure, but it had transformed the overall aesthetics and how! The front and rear end now look the business. The font gels in perfectly with the clean lines of the car. I thought this would be the end of updates to the car, but I couldn't have been more wrong.
RCD 330G HU Upgrade
Those who have religiously followed this thread will know I have shared somewhat of a love-hate (more of hate no doubt) relationship with my car's head unit. Sure, it goes about doing its job without a single complaint, has "acceptable" sound quality and of course, as my dad says, is a good no-nonsense stock HU that doesn't need to be fidgeted with.
However, I just couldn't contend with the way it looked. The dated monochrome LCD screen, the button layout etc. gave it a very mid-2000s vibe. Mind you, I do like my songs to be from the mid-2000s, but my HU? Nope.
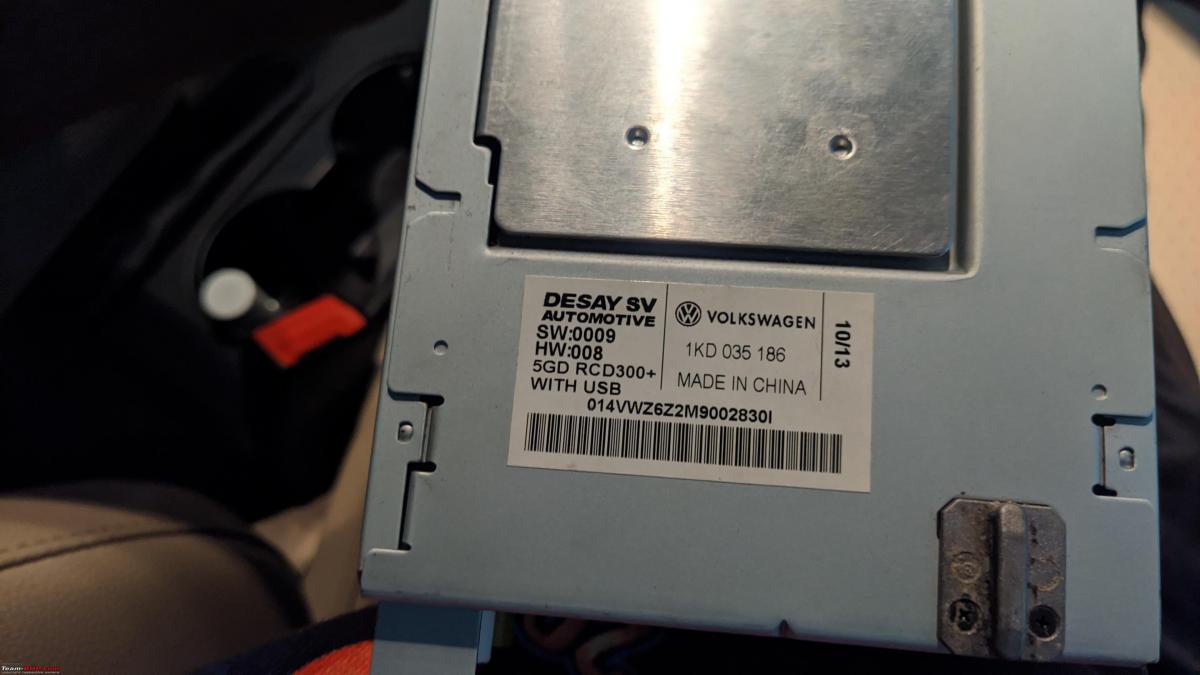
Old Desay SV Automotive RCD 300+ HU. No USB or Bluetooth. AUX, SD Card, CD and FM/AM. Was a letdown in terms of aesthetics:

Some more digging reveals this HU does support USB (via an adapter). VW being the cheapskates they are never offered it:
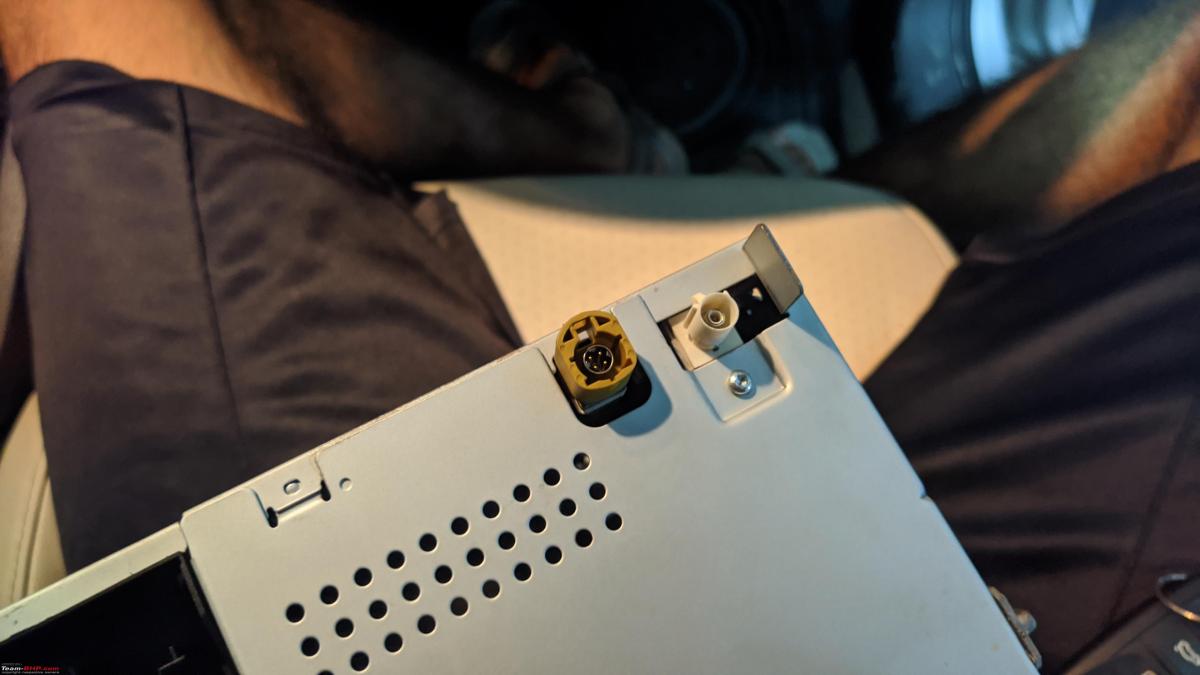
The input to the left (yellow plug) is for the USB adapter. One on the right is the radio antenna input. Coming to the radio antenna, an interesting piece of information is that the Jetta's sharkfin antenna is fake. There are no cables that run to it. The antenna is built into the rear windscreen (the vertical lines you see on the rear windscreen are not for the defogger. They are the radio antenna bands):
HU Quadlock connector at the back:

Managed to fire this unit up at home. Takes in around 15-16A of current on a 12V line so had to use a salvaged PSU from an old PC to do so:

Akshay once again offered his RCD 510. His HU had been swapped out for a Blaupunkt Key Largo and was lying unused. He is one of the fortunate souls who doesn't have an OCD with retaining stock looks, but unfortunately, I am not. I was dead sure that I would only replace this HU with another RCD. I had always shied away from swapping to a 510 or 340G because I was under the impression that my car came with the ancient ISO harness rather than the Quadlock connector that the 510, 310, 340G and even the 330G use. The RCD 030 (The very first HU seen in the Vento/Polo), the RCD 320 (Seen around 2013 and up to 2016 on almost all variants of the Polo/Vento) use the ISO harness. Getting an adapter to convert from ISO to Quadlock isn't a huge deal, but there's always the proverbial if that comes up, especially when you have been asked NOT to fidget with the stock wiring.
I still decided to have a look at the harness aboard my Comfortline. Went down, removed the centre fascia trim, removed the 3 T20 Torx screws (yes one was misplaced by the FNG or ASC who worked on the car) and pulled the HU out slightly. A peek at the rear of the HU revealed something quite surprising. As basic as this RCD 300+ looked, it used a Quadlock harness! I wanted to take the deal forward with Akshay but was forced to weigh my options once again.
RCD 510
Pic Source: Gannu_1's RCD 510 thread
Pros
- Stock HU for the Highline and looks far better than the 300+ any day.
- Colour screen with a touchscreen.
- Should have slightly better sound quality (300+ was a Chinese Desay. 510 was by Bosch Portugal).
- Adds USB functionality (albeit with an adapter).
- Supports OPS functionality (at least that's what I assumed).
Cons
- Bluetooth isn't built-in. An entire Bluetooth kit including a mic would have to be sourced, wired and attached.
- No Apple Carplay or Android Auto. Does show its age in that regard quite badly.
- No reverse camera support.
- Would need a double to single antenna connector adapter.
In the end, it might seem the 510 has pros outweighing the cons (by a very small margin), but I concluded it wouldn't be worth the hassle. All I would gain after installing the 510 is a touchscreen and USB.
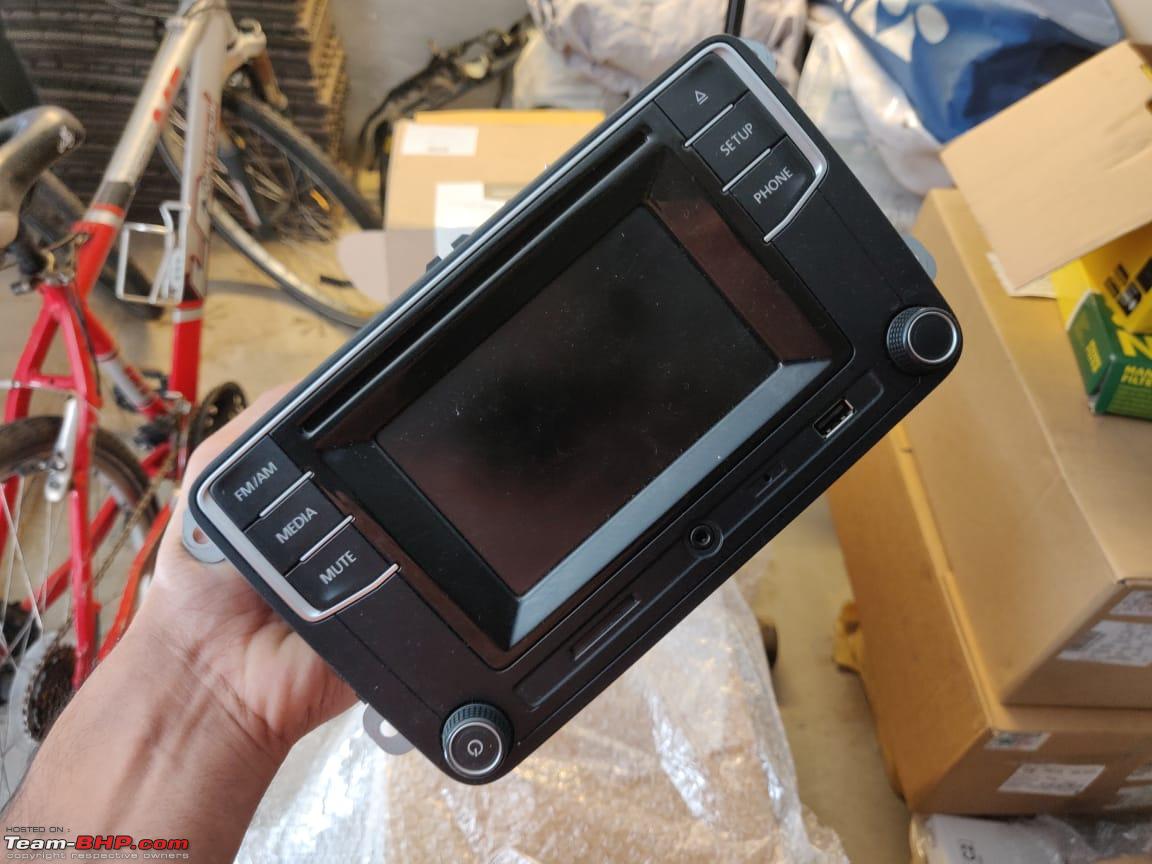
RCD 330G
The 340G is an HU I have always loved. I have had my eyes set on it for quite some time (I do even now in all honesty). It's got everything I need, has Apple CarPlay and Android auto and even a sleek user interface. If there's one thing I don't like about it, it has to be the price. Used units retail for as high as 17-20K, while brand new ones are quoted by local resellers for around 27-30K. I wasn't allowed to spend this much money on an HU upgrade.
I was almost about to drop the entire idea when BHPian fluidicjoy mentioned he had a 330G lying with him. It once did duty in his friend's Polo which now had a 340G. The price of the HU was pegged at around 6K. I made an offer of 5K + shipping and he agreed!
Before moving to the installation, here are the pros and cons of the 330G.
Pros
- Stock and contemporary looking HU
- Has a touchscreen with physical buttons as a bonus
- Has very good sound quality since it's built by Harman India
- Supports a reverse camera and OPS*
- Supports USB, AUX, Bluetooth telephony and streaming music, SD card and even CD
- Priced quite attractively in the used market thanks to the hype around the 340G
Cons
- Lacks Android Auto and Apple CarPlay
- Touchscreen is one size too small for my liking
- Not a very well known unit on RCD forums. No software updates are available
- Is known to be a bit buggy at times
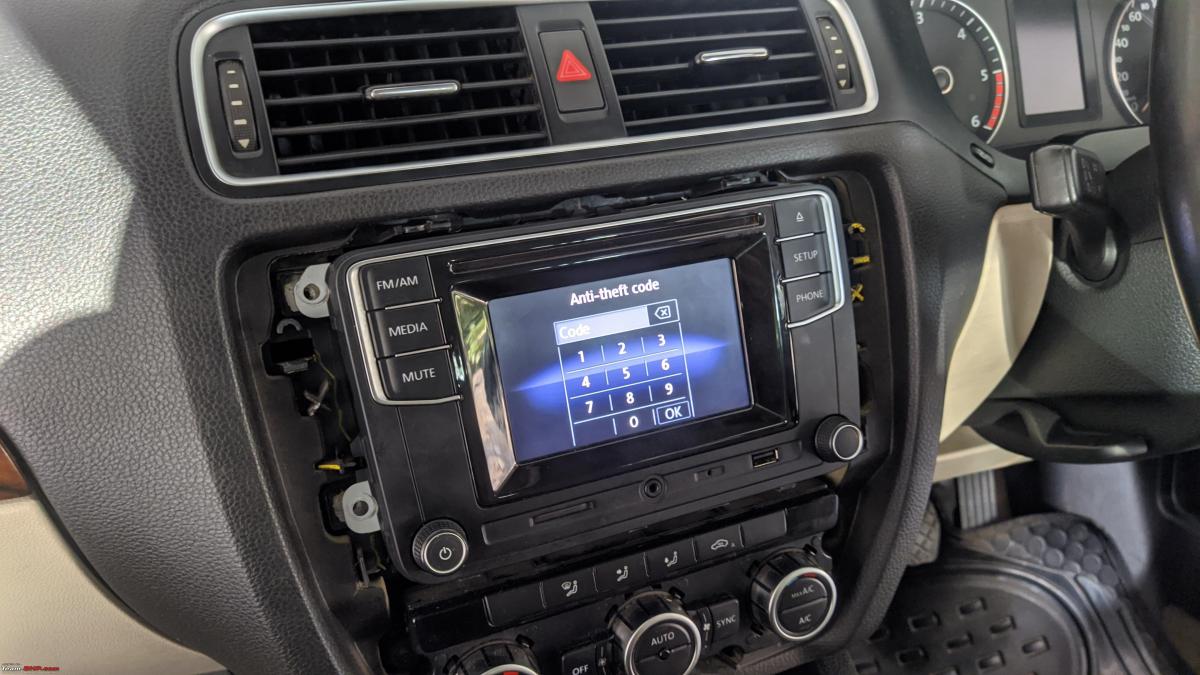
Fluidicjoy sent me plenty of images before packing the HU and sending it over to Vadodara. He also made it a point to give me the security code without which the HU is virtually useless.
Unfortunately, when the unit arrived, the antenna connector had damage to it. The courier guys had thrown it around undoubtedly, and HU had hit something. Anyways, I was assured it wouldn't affect the functionality and I decided to go down and see if it worked.
Installation
Installation is fairly straightforward but one thing is to be kept in mind. The centre console trim houses the airbag deactivation light at the bottom. The light itself is held onto the console by two clips. Just pry the clips gently and separate the light console from the centre console trim WITHOUT disconnecting the coupler to it. The reason for not disconnecting the light entirely is to prevent the airbag warning light from popping up which can only be cleared using a scanner.
The rest of the steps are fairly simple and I had no hiccups. Here is a video for reference.
HU fired up for the first time and asked for the security code:
Playing songs. Did face an issue with speakers not working on some corners. Found out I hadn't seated the Quadlock perfectly:

Gets this classy looking clock as well. Comes on when the HU is shut off. Can be disabled as well if you so wish:

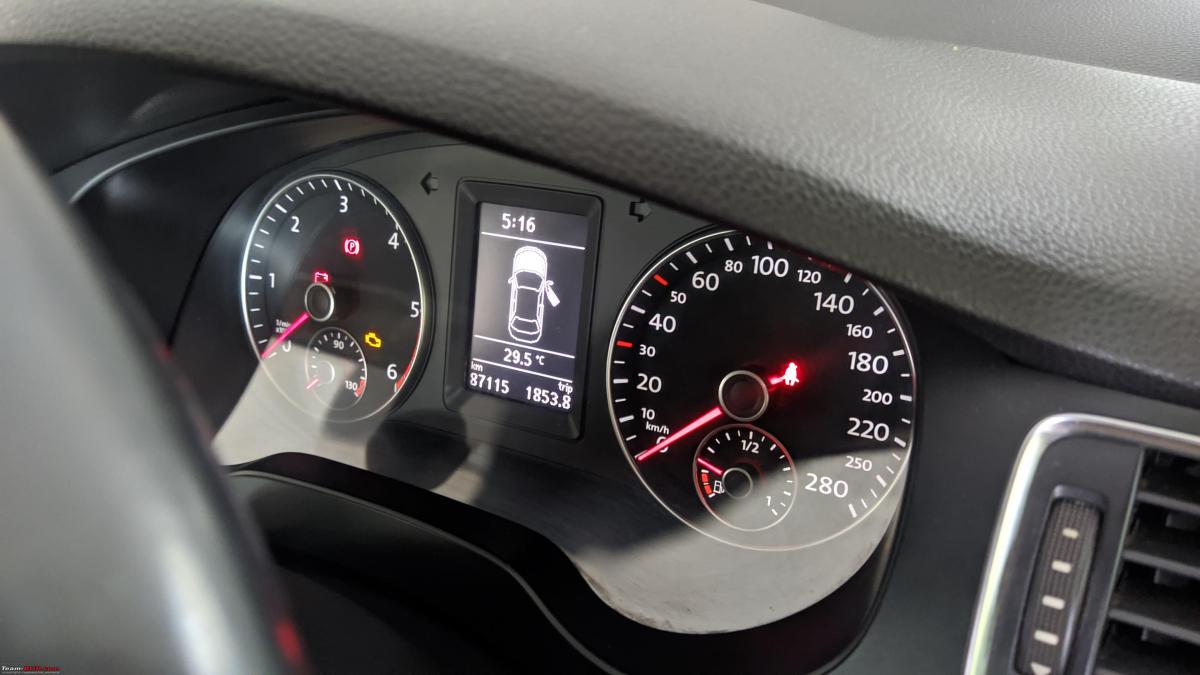
The time displayed here is synchronised with the MID. The music volume also decreases when you engage in reverse or switch on the parking sensors manually.
Sound quality was a pleasant surprise! This is a Harman built unit and it shows. The inbuilt amp is far more capable than the one onboard the older Desay 300+. There are two very minor issues I faced with the HU.
- The volume knob is imprecise. Overall button quality isn't as good as the 300+. The knobs and buttons on the 300+ are very well weighted and damped. Won't call the 330G cheap, but it isn't as good as the Desay. The volume knob has a very light feel to it and rotating it by X clicks doesn't always increase volume by X levels. It is a bit imprecise and you will have to rotate the knob a fair bit to reach the desired volume. Not a huge bother since I generally use the steering mounted controls.
- There was this one instance where I went down to the car and found the music system on in spite of the car being locked. The HU always goes off once the key comes out of the ignition slot. In this case, it had frozen. Only the screen was on. It wasn't playing music. No matter what button I tried to press, it wouldn't respond. Had to do a hard reset and power it down, post which it started working. This only occurred once in almost 5 months of usage and hasn't repeated. Hopefully, it won't happen again.
Barring these two minor setbacks, I found the HU to be very snappy and the touchscreen to be very responsive. Overall UI is also excellent with everything laid out neatly and easy to find. It also has mirror link, but I am sure it's useless considering how many phone makers support it and the advent of AA and AC. I don't use it. The inbuilt microphone has a very good reception, and I have had no complaints wrt call quality. Having said that, phone book integration with the MID, or track name display is something that is missing with this HU (More on that later).
Conclusion
For 5200 bucks, I don't think I could have bought a better HU (OE or aftermarket). Yes, the lack of AA and AC does pinch me sometimes, but I go back to the first sentence again and convince myself that I at least now have a contemporary looking HU with Bluetooth streaming and calling with USB if the need arises.
An added bonus is the superior inbuilt amp aboard this HU, which even the 340G (Made by Visteon India) cannot boast of. I still toy with the idea of getting a 340G, but I would say it's more of a want than a need in all honesty at this stage.
Suspension, mounts & clutch + flywheel overhaul
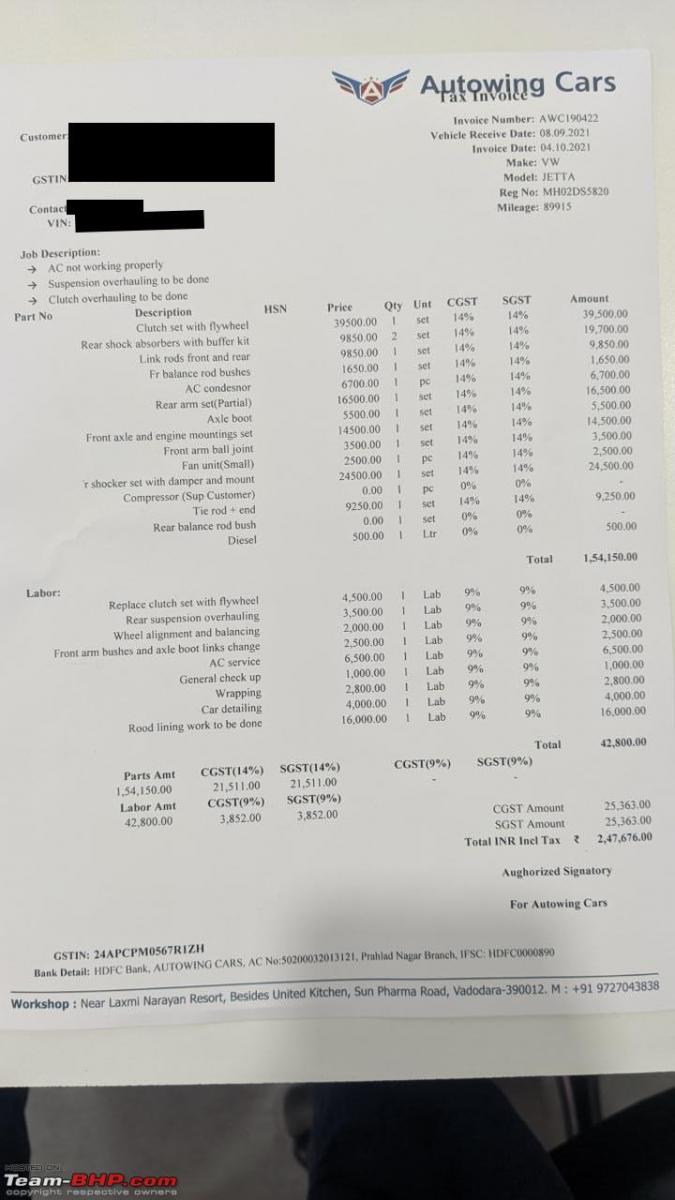
I am in the mood to create a separate thread for this so I will just leave the bill here for the job and buzz off. If I start typing out the specifics, I will need another 8-10 posts.
To sum things up, a lot of cash went in, a lot of work was done but the output wasn't what I would call very satisfying. A few niggles still remain. The new flywheel has developed what I believe is an abnormal shudder, the clutch and the GB input shaft seem misaligned to me and there are two to three other loose ends that I will have to sit and correct. Last but not the least, I do believe I have been overcharged heavily.
VCDS cable & tweaks

I have always wanted a VCDS cable but kept delaying it for some reason or the other. Once again, Akshay offered to buy it and lend it to me so that I could do all sorts of experimentation on it. I did agree but then came the question of where to procure the cable from. After a lot of back and forth, we zeroed down on N2 Autotech Pune after a recommendation from a friend. Another Jetta owner also decided to get one for himself and even offered to lend it to me first before he even had a chance to use it! Mr Vakku Joseph, if you are reading this, thanks a lot for the offer. It's things like these that really make the Jetta owner's group an awesome place to be. In the end, I decided to borrow Akshay's cable since he was located closer to me (Pune) and his laptop had issues with the USB port meaning he couldn't use it for the time being at least.
With this, I pinged Nikhil Patil from N2 Autotech and placed an order for 2 VCDS cables. Each cable came to about 6500 bucks incl. shipping which although higher than Chinese resellers, is still reasonable considering it was being sold by (who I believed) was a reputed reseller with good ratings. The cable reached me within the next 3 days. Nikhil also installed the VCDS software on my laptop using TeamViewer. All in all, the purchase experience so far was very smooth.
Here's what I activated using the VCDS cable on the Jetta:
- Needle sweep: Success. It's under the "indicator_celebration" option in adaptations in the instrument cluster. Have attached a video of it.
- Auto folding/unfolding on lock/unlock: Success. This is one feature I missed terribly on the Jetta and so did many others. Most said the door control modules would need to be changed to enable this setting until BHPian sarfraz1997 posted a proper solution on the official Jetta review thread. I will link his post below for reference. There are zilch hardware changes needed for this to work.
Sarfraz1997's post (Volkswagen Jetta : Test Drive & Review) on the same.
A video showing the feature at work. After closing all doors, press and hold the lock button. This will fold the mirrors automatically. After unlocking, opening the driver door will unfold the ORVMs. Perfect!
- Indirect TPMS: Success. BHPian fluidicjoy helped me with enabling the indirect TPMS on my car using TeamViewer. First, he enabled a module named TPMS-II in the CAN gateway installation list. He then enabled the TPMS installed option in the ABS control module long coding helper and that's it.
Do note that this isn't the more conventional direct TPMS found on most modern-day cars, which has a separate sensor monitoring the pressure on each wheel and displaying the exact pressure rating. The indirect TPMS we activated uses the rolling circumference of the wheel to judge whether a given tyre is flat or not. It's not the most accurate system out there, but again, something is better than nothing, especially when it's not even coming at the cost of any hardware changes.
The system has thrown an error in my car though probably because I didn't calibrate it. I will update the thread once I flush out all the errors and calibrate it after pumping the tyres up to the appropriate pressures.
OPS functionality on the Comfortline
There are numerous reasons for having a VCDS cable but one of the major reasons why I wanted it was to enable OPS on my HU. I thought it would be a fairly straightforward job since even the connector on the Comfortline and Highline was the exact same. What could possibly go wrong?
I went to the Park assist module and also discovered it's the superior module which supports visual feedback along with audible beeps (some modules only support the latter). I went to adaptations again and enabled the module to display the OPS screen visually too. I then fired the HU up and slotted reverse. Nothing! I tried several permutations and combinations but nothing would work.
Fluidicjoy once again came to the rescue. First off he noticed that 56-radio didn't exist in the gateway installation list at all. Manually enabling it would throw up an error saying the radio wasn't communicating. For some reason, the 330G wasn't able to communicate perfectly over CANBUS. I checked with BHPian sangam_mm93 who is running the same HU on his Comfortline. His efforts to have the HU display the OPS or even the camera failed due to the same reason. After consulting Nikhil again, it was concluded that the Comfortline variant has different wiring to the Highline. He also said he would have to look at the car in person to gauge what was wrong, which was fair enough. I decided to give up on this idea altogether. It's very unfortunate, but it is what it is. No matter what HU I install, it's going to behave the same until I figure out what the wiring anomaly is and fix it.
My driving impressions

I managed to finally (properly) get my hands on the Jetta! The large bill and the amount of trouble (and incompetency) I had to deal with while overhauling the Jetta had really taken its toll on me mentally. I didn't like going down to even see the car. I had left it alone.
That was however until I was handed the keys and finally given permission to drive her. I will list down my driving impressions below. Do note that she's running (what I think) is a Quantum Stage 1 Blue remap.
Engine
Slot the key in, depress the clutch pedal (which BTW, has gotten very light after the clutch overhaul) and fire the TDI up. You will notice it settles into a fairly silent idle. Even on a cold start, there's little to no vibration on the steering wheel. Having said that, there is always a very feeble thrum audible inside the cabin at all times. It's not intrusive, but it's there.
Slot the shifter to first and slowly let your foot off the clutch. Don't be surprised if you stall the car. The presence of a heavier dual mass flywheel means the engine does need some extra revs to keep up the momentum. The same applies while lifting off of speed breakers in second gear too. You either baby the clutch pedal out slowly, or you give it a few extra revs and lift off. Failure to do either will again lead to the car stalling. Once you get used to it though, it's not a huge deal.
Within the city, the TDI is a fairly tractable motor, typical of large displacement diesels. She won't mind if you try lifting off of speed breakers from speeds as low as 5 kmhr in second. Throttle response is crisp with the motor responding well to part-throttle inputs without acting overtly jerky or sluggish. 3rd gear is also extremely versatile, with speeds as low as 25-30 kmhr possible without a downshift. It's a vital tool while commuting in moving traffic. Coupled with the light EPS (not one finger light like some of the Koreans and Japs), fairly tight turning radius and acceptable visibility (barring the ORVMs which are two sizes smaller than expected), the Jetta TDI is a fairly easy car to drive in traffic. As said before, the sensitive clutch and small ORVMs are two things that one needs to mind while piloting it in traffic.
Out on the open road is where she comes into her own. Floor the A-pedal in 2nd and the tyres beg for mercy with the traction control wanting to intervene ever so slightly. The motor starts coming into its stride post 1700rpm with a strong surge. Performance is healthy, with the 2.0 TDI revving almost all the way till 4700rpm post which power tapers off gradually. The explosive mid-range means overtakes are a piece of cake if you are in the right gear. Before you know it, the Jetta is doing silly speeds. The outstanding chassis behaviour (more on this later) and the punchy TDI motor are a tantalising temptation or a menacing paradox. The Jetta is a car that can play the Dr. Jekyl or Mr. Hyde card to perfection. 6th gear is a proper overdrive ratio with 100 kmhr coming in at a relaxed 1650rpm. The upside is excellent fuel economy. The downside is that you can't let speeds drop below 80, else a downshift is the only way to get a quick move on.
The gear shifter housing bushes in my car are running a bit dry (will need replacement a year or two down the line), but the GB has a very sure slotting feel to it with fairly short throws. It's not Japanese gearbox smooth (I would rate the Suzuki and Honda petrols to still have the best gearbox feel), but it isn't a letdown for an enthusiast in any way either.
Coming to the proverbial Indian question, the TDI on an average manages to deliver somewhere around 13-14 km/L in the city and easily delivers up to 20 Km/L or beyond on highways depending on the duration of the journey and even driving style. Do note these are indicated figures. Subtracting around 1-1.5 km/L from these figures in my experience is what the real world fuel economy looks like. Plenty good for a 180hp and 400nm car!
Overall NVH levels are what I would call above average. The motor is well insulated from the cabin with only a thrum being audible inside at all times. Even as the revs climb, the thrum assumes the form of a muted growl, but never does the engine sound harsh or clattery. On the other hand, wind noise could have been controlled better even at legal speeds of 100-120 kmhr. You can hear the wind cutting through the pillars at these speeds distinctly, not something one would expect from a D-Segment sedan. Road noise control is above average with only the roughest of tarmac leading to some intrusion of tyre noise into the cabin.
Suspension, ride and handling
The Jetta uses a McPherson strut suspension for the front coupled with a multilink suspension for the back with twin-charged dampers on all corners. The multilink suspension at the back allows for independent movement of one wheel from the other on the same axle as opposed to a torsion beam where they are both connected. An anti-roll bar is also used at the back (just like the front) with link rods to keep wheel articulation in check during hard cornering and prevent body roll.
Low-speed ride quality is typically European. Set on the stiffer side. It's not jarring or too discomfoting, but larger potholes (especially ones with a sharp edge) will filter in at speeds below 30-40 kmhr. Pick up the speed though, and the ride improves drastically. The suspension dismisses off all road imperfections with the only bother being the fact that it doesn't go about its work in the most silent manner. It can give out discomforting thuds above speeds of 30-40 kmhr.
The handling is yet another Jetta trademark. The EPS might not be the most feel-some (doesn't have any feel at all frankly) but it weighs up quite consistently and inspires a lot of confidence. Most importantly, it's pinpoint accurate. Point the nose into a corner and the Jetta dives in with aplomb. The stiffly sprung suspension now pays dividends. Outright grip is superb with the car feeling composed all throughout. Bodyroll is minimal and what adds to the sense of security is the multilink suspension at the back, which ensures the rear end always remains composed, even when the Jetta encounters potholes in the middle of a corner. High-speed stability is solid and leaves no room for complaint at all. Long sweeping corners or even tight bends are both a speciality for the Jetta. The presence of EDL and ASR means you can simply pick a line through a corner and power through it. It's also reassuring to know that ESP is watching over you as you go about all this.
All in all, it's not only the amount of power the Jetta puts down that impressed. It's also the way the chassis puts it down and holds its own that really makes the car a treat to drive on all sorts of roads. The only thing I would change in a suspension setup like this is to probably put stiffer dampers, though I personally think the stock Sachs dampers offer the best balance of comfort and handling on the sort of roads I do daily.
And on that note, it's time to end this update. The next thread by me in all probability will be documenting the midlife overhaul and unsuccessfully trying to justify the 2L bill attached in the post above. Until then, stay safe folks.
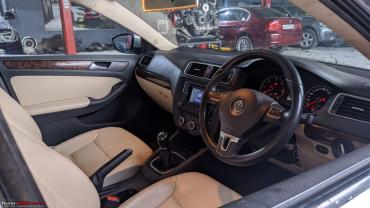
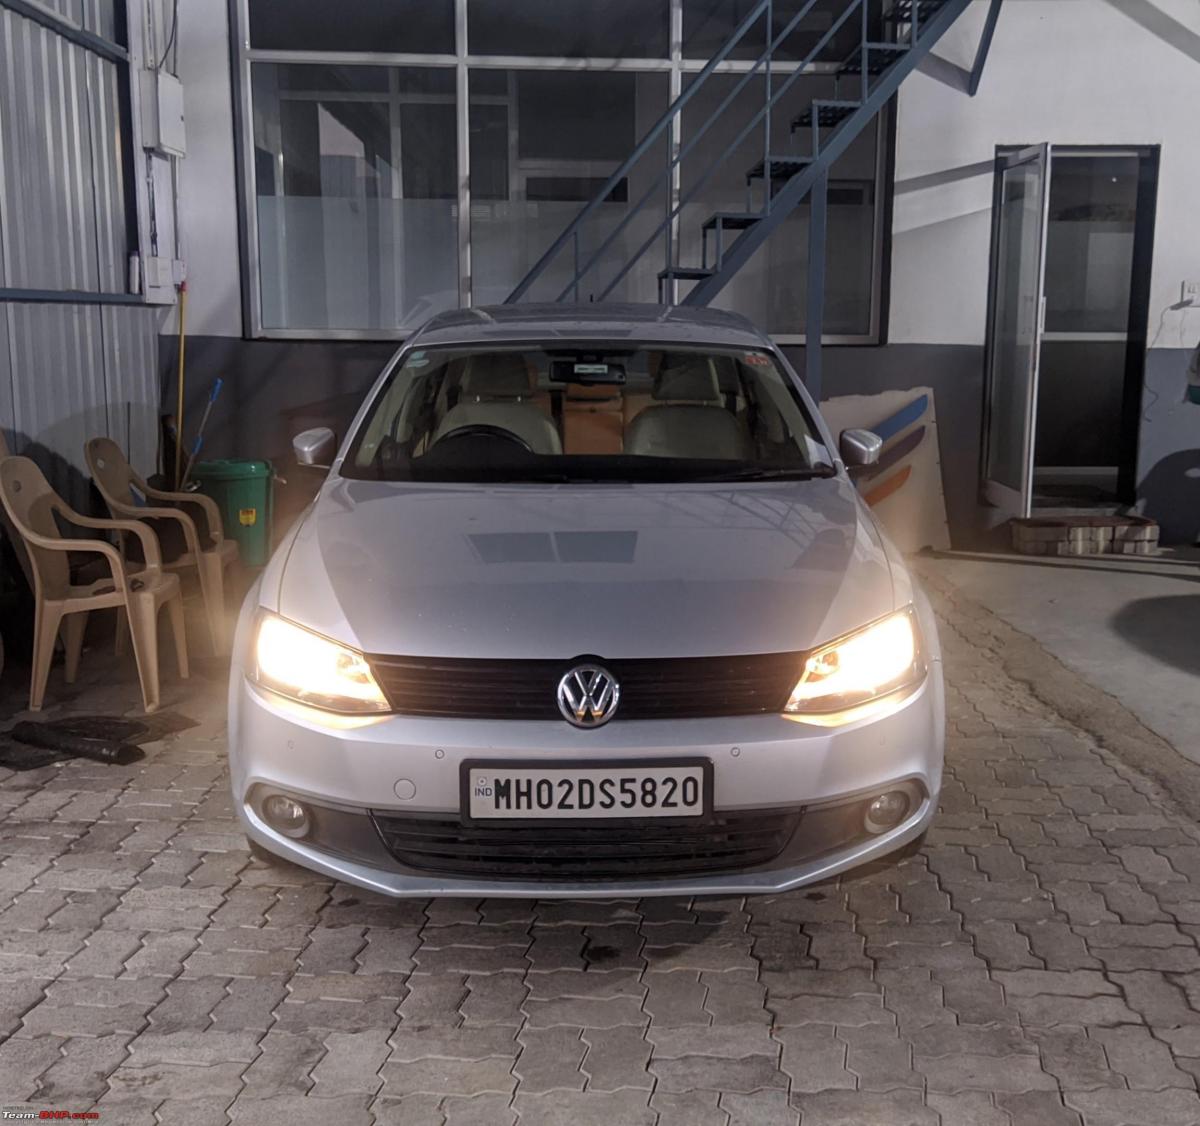
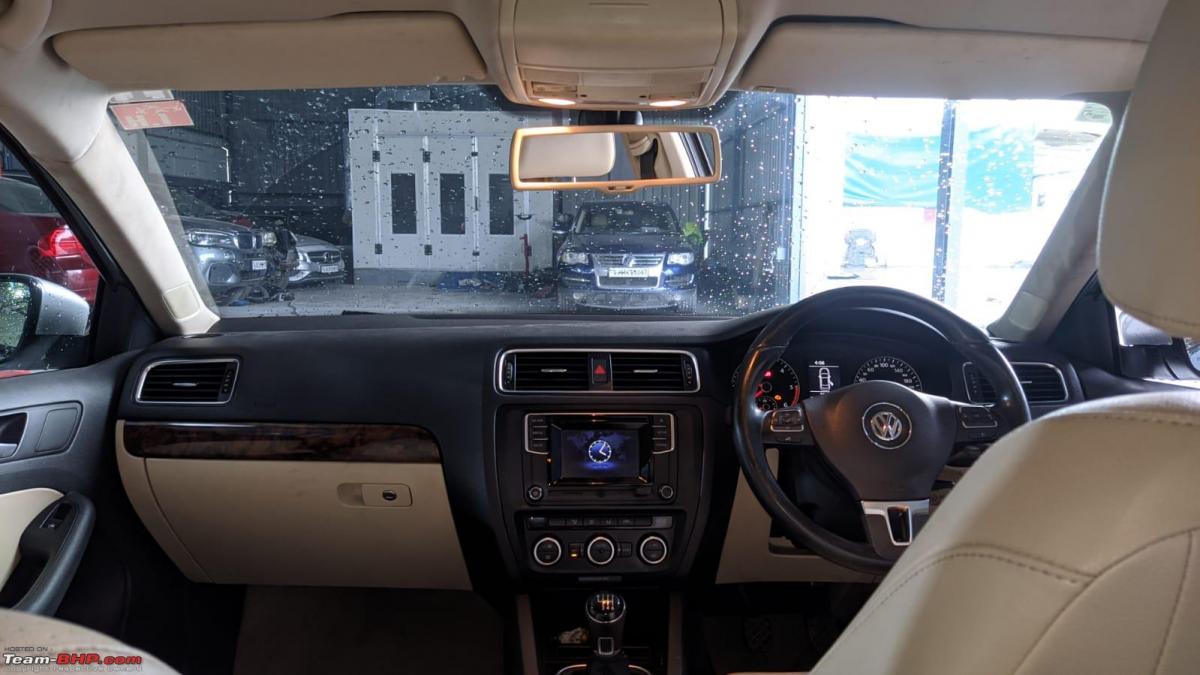
A few parting shots of the car (all chrome deleted) for your viewing pleasure. Do excuse the dusty interiors. This was immediately after work was done and before detailing.


Check out BHPian comments for more insights and information.
- Tags:
- Indian
- Member Content
- Volkswagen
- Jetta
Find Car News
Just News


_0_0.jpeg)
About Us

Buy & Sell
USED CARS


