| |||||||

| Search Forums |
| Advanced Search |
| Go to Page... |
 |
| Search this Thread |  962,368 views |
 21st January 2023, 23:45
| #1036 |
| Distinguished - BHPian  | Re: My Car Hobby: A lot of fiddling, and some driving too! Jaguar XJR, Mercedes W123 & Alfa Romeo Sp Would you believe it:   The one day we have quite a bit of frost and about 4 centimeters of snow, meaning I really could use a four wheel drive to drive up the dike>  But unfortunately, my Jeep is still out of commission!! No wheels, no front axles, no front ball joints, no front nothing!!  As I could not go out, at least I could work on the Jeep some more. Made some excellent progress! In general putting things back together tends to go quicker than taking things apart I find. Primarily because you don’t always know how things were put together. But mostly because on old cars, things tend to get very very very stuck. First thing I wanted to do is fit the ball studs back on. Which means pressing them back in!! It was fairly easy getting them out. But getting them back in requires a little bit more finesse. You have to make sure they go in exactly straight. Jeep has some special tools that cater for the shape of the steering knuckle.  I just have a general C-clamp set, so it requires a bit of improvisation as you will see. Of course, everything needs to be properly cleaned, all rust needs to be gone. I use my pneumatic tools with various steel/Brass brushes.  Because I used a non-standard tool, the sequence of pressing in the ball studs is different from the Jeep procedure too. I start on the lower one.  It went in very nicely. I used a nail underneath the clamp so it would compensate for the peculiar angle as mentioned above. One ball stud done!! Notice I left the protective plastic cover on to protect the thread, also the rubber sleeve is removed as it would get damaged by the pressing in.  Once you have tightened the C-clamp I undo it, give the rim of the knuckle a couple of whacks with a hammer and reset the clamp. That will ensure I get a good even pressure across the ball studs and it will seat properly. I use a 0,05 feeler gauge around the rim to check it is properly seated. Rubber sleeve put back on. One done, three more to go!  The upper one went it smoothly as well. Notice the nail!! Very low tech, but perfectly adequate! And very cheap too!!  With both ball studs in place it was time to reconnect the steering knuckle back to the ball studs. It just slides on, put the two castle nuts on and tighten them with the torque wrench to the correct setting.   Next thing I did was to take the wheel bearing hub assembly apart. As I mentioned earlier, Jeep specialist Martin had managed to undo the nut.  Next a lot of cleaning and brushing of the various parts where the Universal joints will be installed.   In order to install an U-joint you need to take the four end caps off and put the spider as it is known inside the two yokes. When you take the end caps off, best check each and every single one very carefully. I am very glad I did, because as you will see, in one of them, two bearing needles had come undone. They are just held in place by the grease!   I just press the endcaps in manually so I know the bearing needles are locked and can’t fall out.  Then it is just a question of using the C-clamp to push all four of them in. Some people use a vice, but you need to be careful. It does require quite a bit of force and you might damage your vice. These C-clamps are ideal for these jobs. You need to position the endcaps so that you put the little C-clip on the inside. Which might mean going back and forth a couple of times. As you are pressing on the Yoke it actually deforms ever so slightly. So you need to give it a couple of good whacks with a hammer as you are repositioning the end caps. That will ensure any tension will be released.  With the universal joint back in place the next thing is to install the complete hub and bearing assembly. Again, lots of cleaning.  There is no seal or anything between the steering knuckle and the hub and bearing assembly. So Jeep relies on the seal of the bearing to do all the sealing!!  I also cleaned the spline very carefully, this is where the complete force from the axle is transmitted to the wheel. So it needs to be clean and I added some high pressure grease too.  The complete hub and bearing assembly is held in place by three bolts, clean the bolts!!! And put some ceramic paste on them.   Here the complete re-assembled front axle with hub and bearing assembly, ready to be installed. It just slides in, you need to be a bit careful and the rear spline goes through a seal which sits deep inside the front differential.  With the whole thing slid back in, all you need to do is tighten up the three bolts holding it all together and re-install the brake calliper. Also, remember to install the brake dust shield. I forgot and had to pull everything apart again! But this is how it all looks, properly assembled once again! You will notice that the upper ball stud has a grease nipple. I put a little grease on both with my grease gun as well. Just a bit as there was quite a bit of grease in it already   That is the complete left side done! With the exception of torquing the central nut. I checked my Jeep manuals and that nut needs 237Nm of torque!! That is a lot of torques, believe me. I have four torque wrenches, but none will go over 200Nm. So I checked with my AC Specialist neighbour Jack and luckily he has one I can borrow. I can’t tighten them now. Because the two front axles are connected with the front differential I need to have the wheels back in place, in order to lock the axles, or rather hold them in place. Will do so on Monday. First complete the right side. Last edited by Jeroen : 22nd January 2023 at 00:13. |

|  (13)
Thanks (13)
Thanks
 |
| The following 13 BHPians Thank Jeroen for this useful post: | anivy, deerhunter, IcarusMan, KrisTvpm, Prowler, rrsteer, Samfromindia, Siva Prakash, Thad E Ginathom, vaasu, VijayAnand1, VivekCherian, zavegur |
| |
|
22nd January 2023, 00:08
| #1037 |
| Distinguished - BHPian | Re: My Car Hobby: A lot of fiddling, and some driving too! Jaguar XJR, Mercedes W123 & Alfa Romeo Sp As you would imagine, the right side is near identical to the left side. Remarkably pressing the ball studs back in was a bit more tricky, but in the end I managed to get everything back in place. To be honest, I found that installing the universal joints took the longest. Very fiddly. Also, on the left side, again, I forgot to install the dust brake shield initially!! Practice doesn’t always makes perfect apparently. Just a couple of things I had not shown or mentioned before. The three bolts holding the hub and bearing assembly in the steering knuckle are these special 12 point bolts. You need a special socket. I do have such a set, but I did not have the correct size 21. So initially I just hammered a size 20 on, which does work. But in order to install everything correctly I looked for the correct size socket. Luckily my friend Berndt had one, so I popped over to him to pick it up. Note to self: buy one of these sockets E21 to complete my set!  Just to keep everything tightly together I did use my pneumatic impact wrench on the wheel nuts. But I found out later I had forgotten to put back a locking ring. So they have to come off again before I tighten them with Jack’s torque wrench.  When working on things like brakes and suspension I always, always use a torque wrench. As shown in the above post, I copy the relevant pages from the workshop manuals that specific the torque for each bolt and nut I am working on.  Before I put the brake discs back on, I cleaned them, removed the rust on the mating surface and put a little vaseline on it. I find vaseline works well for this particular application.  Two important items when working on the brakes, vaseline and brake cleaning fluid. Before final assembly make sure the disc is clean and free of all oil, grease etc!!   As you might recall one of the first jobs I did on this Jeep was to replace the various brake components, including new calipers. Even so, the little rubber protection covers of the sliding pins were torn already!! I will need to replace those. Because once the sliding pins locks up due to dirt build up, the brake will start to wear unevenly, worse lock up!  Also this morning I picked up my rims. They have been sand blasted and powder coated. I am very very pleased with the end result. Absolutely gorgeous!! 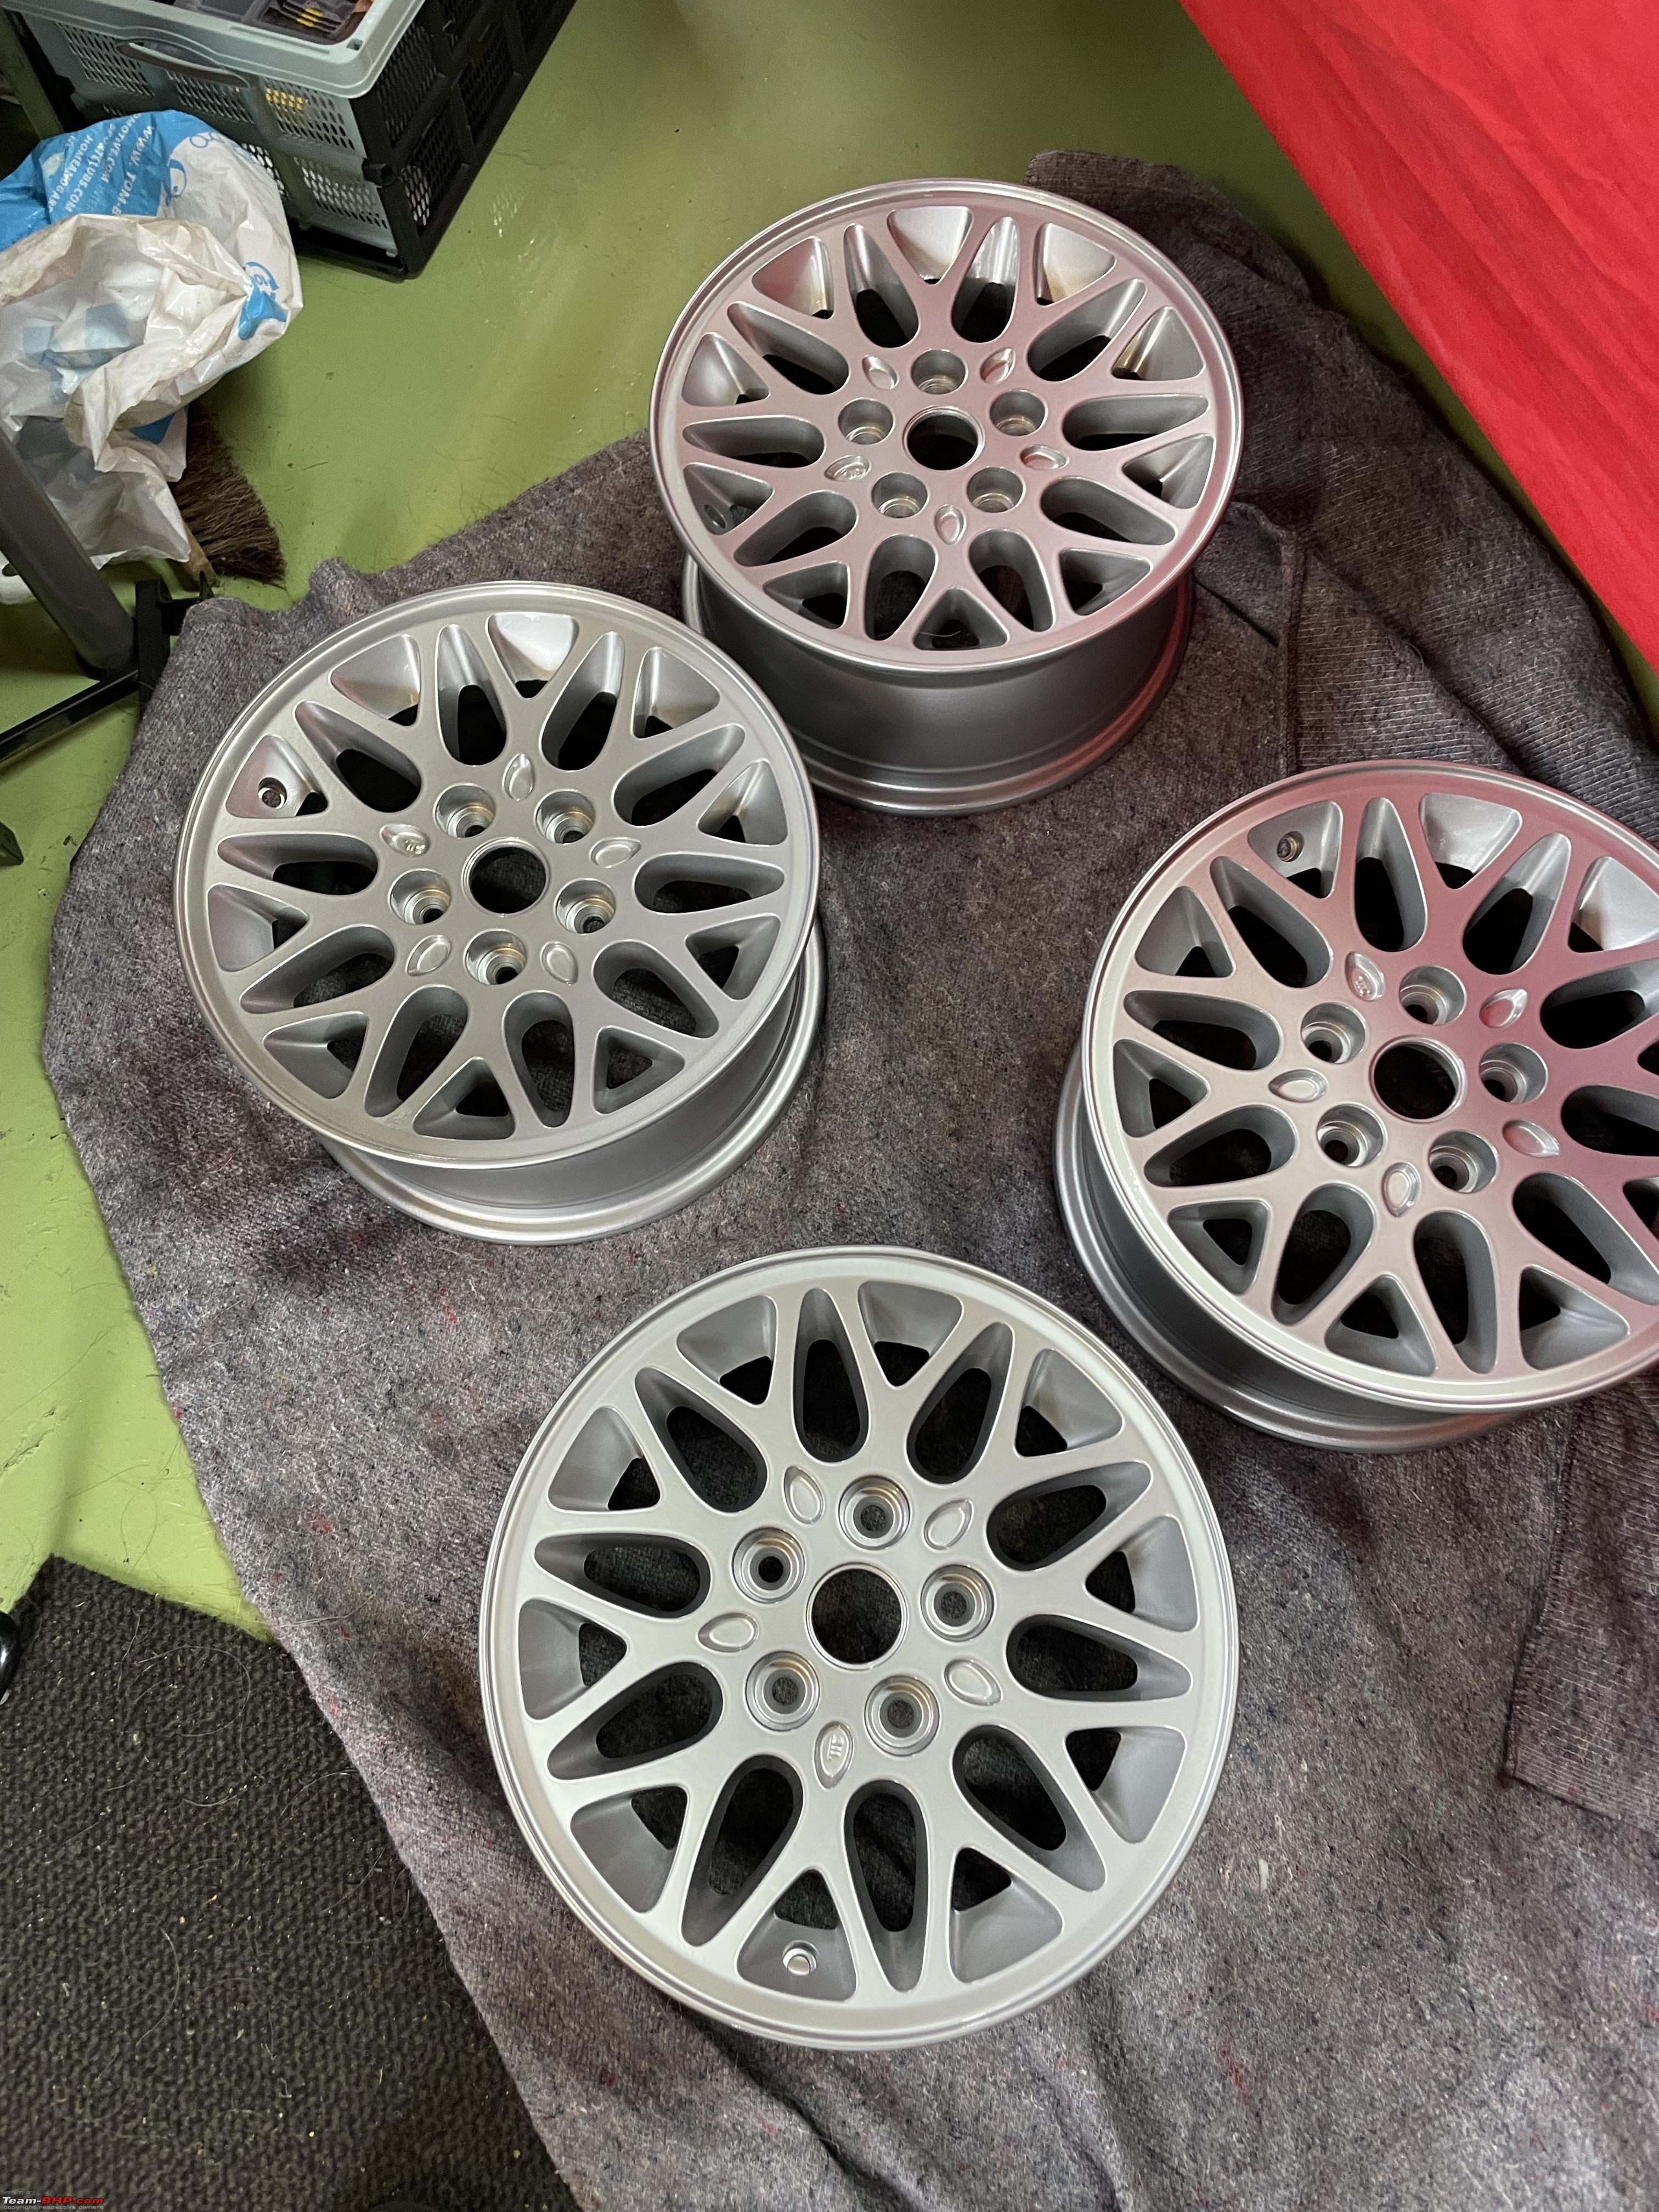    The plastic centre piece needs a respray as well. So I drove over to my usual and trusted car paint place in Breda. https://www.mermansverf.nl The lady was very helpful. She spend almost 25 minutes with me, comparing endless colour samples to get the best match. I have shown this shop before in an earlier post. Normally they can just measure the colour, but the instruments needs a flat surface, so it won’t work on rim.  We finally narrowed it down to a final colour and she made the matching paint by mixing about 7 different colours.  Belief it or not, but it so happens to be an official VW colour, apparently!!  Tomorrow I am going to re-spray the rim center pieces. I have also thought of using the same colour as the body of the Jeep. I might make two sample piece to see what looks best. Jeroen Last edited by Jeroen : 22nd January 2023 at 00:15. |
|
| (10)
Thanks
|
| The following 10 BHPians Thank Jeroen for this useful post: | anivy, dailydriver, IcarusMan, keroo1099, Prowler, Samfromindia, SS-Traveller, Thad E Ginathom, vaasu, VivekCherian |
|
24th January 2023, 12:25
| #1038 |
| Distinguished - BHPian | Re: My Car Hobby: A lot of fiddling, and some driving too! Jaguar XJR, Mercedes W123 & Alfa Romeo Sp In the end I decided not to paint spray the center caps for my rims yet. It is just to cold, about 2-3oC during the day. Mrs. D vetoed my idea of spraying inside the house for some reason. So it will have to wait a few weeks. I need at least 10-12oC to do a good job. Yesterday morning Berndt rocked up in his Rover 600 estate and took the rims to our local tire shop. They quickly installed and balanced all four tires.  Loaded up the wheels again and drove home:  I had really wanted to fix those torn rubber boots on the brakes. But I could not get the parts immediately. So I decided to install the wheels anyway. When I get the parts I will have to take both front wheels off again and take the callipers off as well. Not a huge job, but it would have been nice to do it prior to installing the wheels. Here is what it looks like  First I went over to my neighbour Jack to borrow his torque wrench. As you would expect from a former professional car mechanic Jack has a fantastic torque wrench. It has a range of 200-1000Nm!! Jack told me he regularly used it whilst he still had his own shop. These central locking nuts always need a lot of torque. He was surprised mine was only 240Nm. He has come across cars requiring upwards of 600Nm!! For reference I have put two of my torque wrenches next to it. The smallest one is 12-60NM and the middle one is 40-200Nm.   Definitely a more manly torque wrench than my toy-ones!! That thing measures almost 1,40m. First thing I did was to torque those wheel nuts to 240Nm. Had my wife sit in my Jeep and push the brake pedal with all her might. That was sufficient to stop the axles from turning. Popped the nut and retainer back on and put the cotter pin.  Of course, both the flange on the brake disc and the inside of the rims got cleaned and I added a dab of vaseline on the mating surface. Then all what was left is to put the wheel/rim back on, put my new lug nuts on and torque them to 102Nm.  Looks good!!   Next I took the Jeep for a testdrive. I drove for around 25 minutes, including some 10 minutes on the motorway. The new tires have really transformed the performance. Much more comfortable, a lot less tire and bearing noise!! The Jeep drives and tracks beautifully.   All in all, I am very happy with this job. It took me a long time, about four days of working 4-6 hours a day. But it was well worth it. All that is left is to get the alignment checked. I did not notice anything out of the ordinary during the test drive. But with four new tires and so much of the front suspension being replaced and or being loosened and re-fastened it is well worth getting it checked. Of course, after such a mega operation a bit of cleaning and mopping up is in order.   Whilst my garage floor was drying from the mopping I did a couple of quick jobs on my wife’s Fiesta. Swapped the wheels front rear to prevent cupping. These Fiesta’s are notorious cupping cars.  Also checked the tire pressure on all tires, including the spare and reset the tire pressure monitor.    The wipers on the Fiesta are making a lot of noise on the windscreen. Cleaning did not help, so I had a good look at them. They needed a bit of adjusting. Best explained with this little video. Very simple, very effective. Berndt had also brought me some old brochures from my Jaguar and Mercedes. He has been cleaning out his attic and he has hundreds and hundreds of brochures of English cars. He also came across these measuring devices:  He had no idea what they were. So I checked them for him. Looks like they are original Austin Rover test instruments. It allows you to test various sensors, ignition and so on. All prior OBD era I dare say. Interesting collection. We are going to try them out some time later this year. The next job has already announced itself. As I parked my Jaguar inside my garage I noticed the right hand corner of the car dropped more than the left on braking. I have a suspicion the shock is leaking. As you might recall I replaced the left one some time ago. I managed to get a second hand one from my Jaguar specialist friend Raymond. New this shocks are difficult to procure and also enormously expensive. First things first. In about an hour I will set off to get the Jeep’s allignement checked. My Jeep specialist friend Martin gave me an address of what he considers the best alignment shop in the area. When I come back I will jack up the Jaguar, take of the right front wheel and inspect the shock. I am planning to go to Dusseldorf this week to visit the Boat show. An immensely large boat and yacht show. I was hoping to take the Jaguar. We will see Jeroen Last edited by Jeroen : 24th January 2023 at 12:39. |
|
| (23)
Thanks
|
| The following 23 BHPians Thank Jeroen for this useful post: | anivy, aravindb_0711, Blooming Flower, carthick1000, IcarusMan, keroo1099, Keynote, knp, mugen_pinaki27, ohaak, Prowler, shivs2003, SS-Traveller, Tgo, Thad E Ginathom, TorqMaster, vaasu, VaibhaoT, vb-saan, VijayAnand1, VivekCherian, wbd8779, zavegur |
|
25th January 2023, 20:03
| #1039 |
| Distinguished - BHPian | Re: My Car Hobby: A lot of fiddling, and some driving too! Jaguar XJR, Mercedes W123 & Alfa Romeo Sp With this much work done on the front axles and suspension I wanted to get the Jeeps alignment checked. I was not expecting any major deviations, but with four new tires fitted, better safe than sorry. So I took it to the alignment center recommended by my Jeep Specialist Martin. Put the Jeep on their lift.  Would you believe it, everything within specification! I can honestly say, I have never ever had a car checked on its alignment without needing some tweaking! Very happy with the result, of course.  Back home I also took the right front wheel of the Jaguar to inspect the shock absorber. If there is anything wrong with it, if anything it certainly is not leaking. So I am going to drive it some more and pay special attention. I have just purchased online tickets for the Boat Show in Dusseldorf, Germany. About 185km one way from our home. So the Jaguar will get a good workout tomorrow!  I also managed to get hold of the special boots for the sliding pins on the brake callipers. I will be replacing the old, torn, ones in the next couple of days I hope.  |
|
| (11)
Thanks
|
| The following 11 BHPians Thank Jeroen for this useful post: | Aman2438, carthick1000, dailydriver, IcarusMan, Prowler, Reinhard, sagarpadaki, Thad E Ginathom, vaasu, VivekCherian, zavegur |
|
28th January 2023, 12:18
| #1040 |
| Distinguished - BHPian | Re: My Car Hobby: A lot of fiddling, and some driving too! Jaguar XJR, Mercedes W123 & Alfa Romeo Sp Earlier this week I took a trip to Dusseldorf in the Jaguar to visit the annual Boat Show. An absolute massive event, spread across 17 halls in the Dusseldorf Messe building. It is about 180 km one way from our home, just about all motorway. Driving conditions were far from ideal, rain, sleet, wet snow and fog, so I drove a very sedate 100 km/h only. But that is ok, my TomTom and its fantastic Traffic Information feature guided me around the congested bits of motorway. I do enjoy these motorway runs now and then. I put on some good music and just cruise enjoying being by myself and driving one of my cars. I usually stop every hour or so for a quick leg stretcher and a cup of coffee. The Dusseldorf Messe (Exhibition Centre) has a hugely efficient parking lot, as one would expect from ze Germans. Cars drive up on this absolute humongous parking lot and park behind one another, whilst leaving the middle lane free. You pay when you leave, so there is virtually no queuing at all. You just keep following the car in front of you. When it stops, you stop behind it and get out!!  I am a huge fan of this German Boat show. So much to see and do. Also, it focusses more on motor boats than on sailing yachts, which these days has my preference. Just a few piccies for reference. This was the stand of one of my all time favourite boat builders, the Finnish Targa. Their boats are known as the 4x4 of the seas. Extremely well build boats. Love them.  This was in another hall with the super yachts. Yes, there are bigger yachts, but they would not fit in this hall. I always have a look and I always have a few invites to come and see these builders. But truth be told, for some reason yachts over 15-20 meter very quickly start loosing their visual appeal to me. To be bold, I dont like any of these huge yachts. They look ridiculous, just my opinion.  On my way home I took the Jaguar through the car wash. There is a lot of dirt and grit on the roads, due to the winter conditions we have had here for the last couple of weeks. Next, I decided to finish the work on the Jeep. I had to replace the rubber boots on the sliding pins. A very simple job on a very important part. 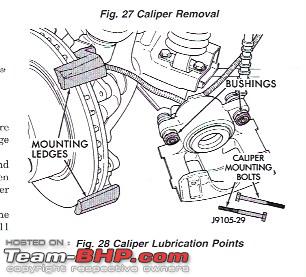 So I jacked up one side of the Jeep, axle stand underneath it and took off the wheel.  Used my C-clamp to press the brake pads inwards, so I could easily remove the caliper, by undoing the two calliper mounting bolts. That is all!  next, you just push out the pins and extract the torn rubber boots 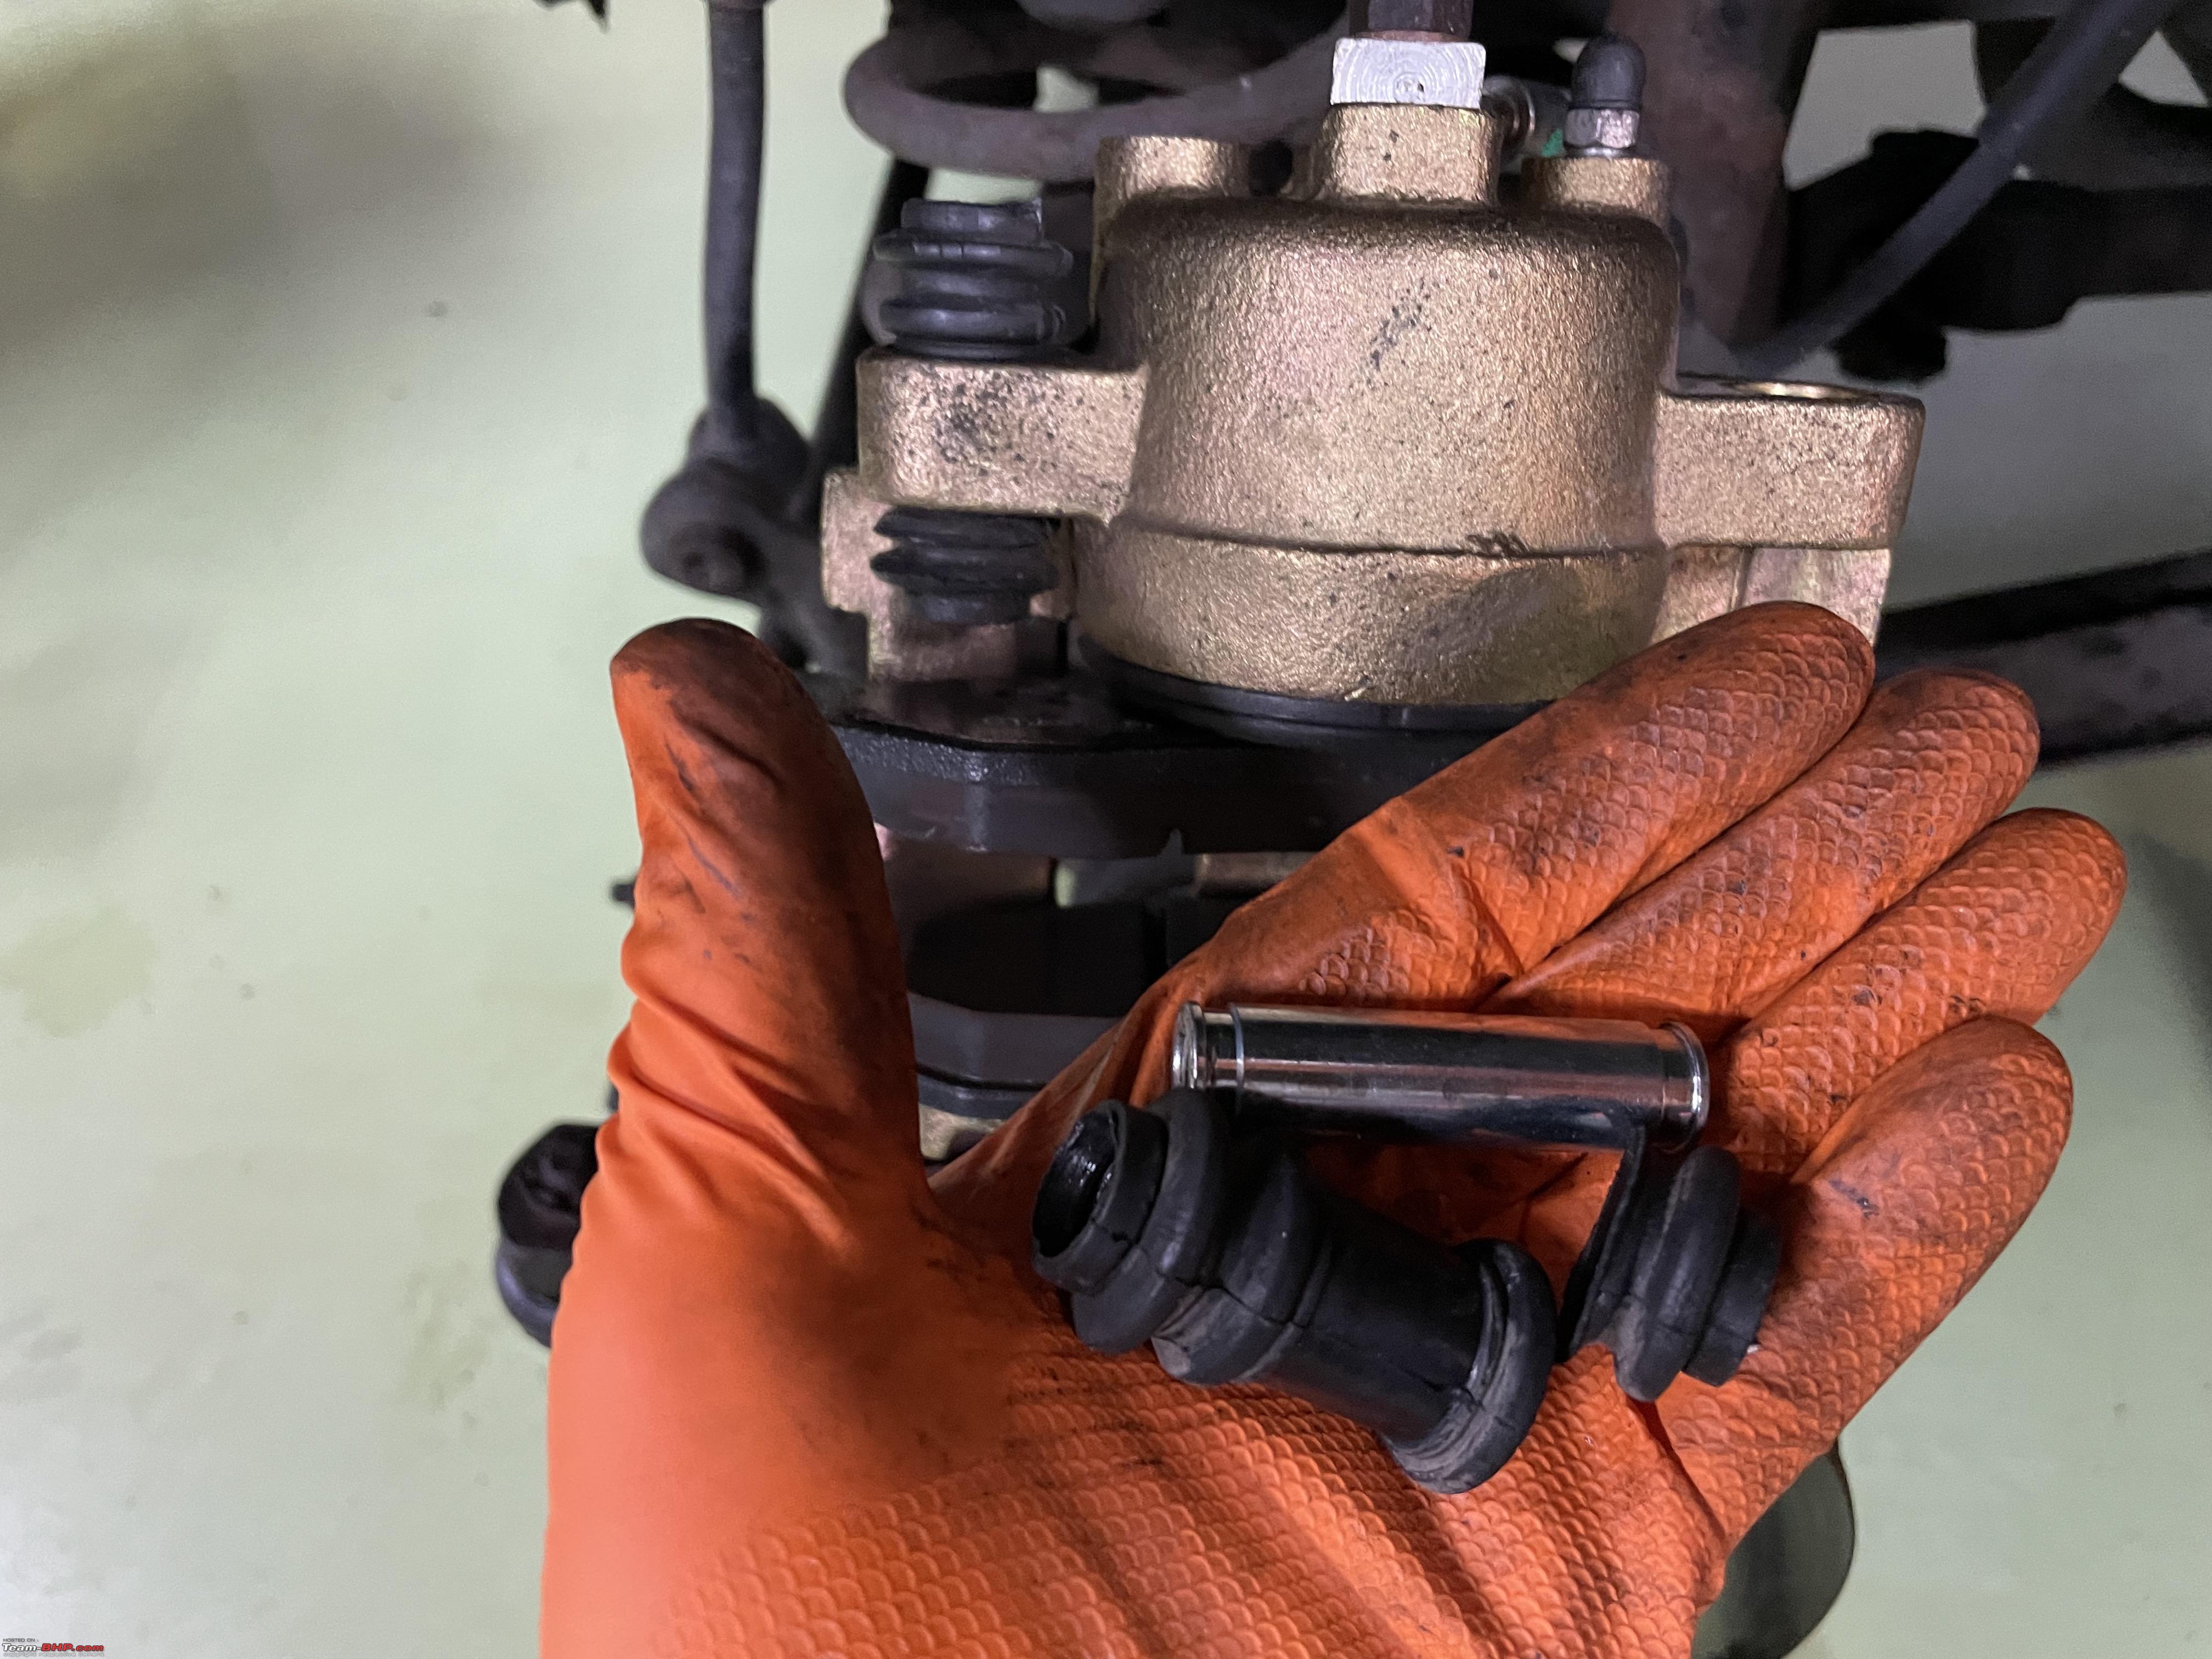 I added silicone grease liberally to the new parts. Sillicone grease is best here, as it is resistant to water. And there tends to be a lot of water spray around the wheels and the brake of course.  New parts installed, looking good!  Repeat on the other side.  Finally with the wheels back on and the jack and axle stands removed, torque the lug nuts to 102Nm.  The Jeep was pretty dirty as well, so I took it to the DIY Car wash. I can’t take the Jeep through a car wash, due to its permanent roof rack. I usually hose it down at home in my yard, but in the winter I have the outside tap shut off and drained due to frost. At the same place as where I use the automatic car wash they also have 8 of these DIY car wash bays. Very well equipped. This one is for large cars and small vans. It is very convenient as you can stand on the little platform and easily reach and hose down the top of your car. I love the foaming up!!  Very easy to use, everything is kept in good order and the water used is warm too. Cheap too, it takes me about ten minutes to foam up the car, pressure wash it, rinse it, spray it with wax coating and a final hose down with de-mineralised water. All for about 2 euro’s. A cup of coffee will cost you more. Recently they kitted out the machines with these, so no coins, just your bank card. Mrs. D has banned me from using this place. It is owned by Lukeoil, which is part of Vagit Alekperov empire. Of course, anything to support the Ukraine. But this is the only local petrol station and has excellent car wash facilities too. As they say, the flesh is weak.  Back home, all clean and shiny looking!!  I should be done with all the work on the Jeep for now. In a few weeks I am having some of the body work resprayed. Next week I am taking my Mercedes W123 over to my Alfa Specialist Goos. I am allowed to use his CO-analyser. I just want to tweak the CO a bit more. I should be getting my overhauled steering box back soon too. That will be a big two man job to re-install it. Spanner mate Peter to the rescue! The Mercedes W123 will also require new disc brakes and pads on all four corners, still to be planned for later this spring. Next big classic car event for Peter and me is going to be the Practical Car and Classic Show in the NEC in Birmingham, UK. We booked our flight from Amsterdam about six months ago. Looking forward to it. Jeroen Last edited by Jeroen : 28th January 2023 at 12:23. |
|
| (9)
Thanks
|
| The following 9 BHPians Thank Jeroen for this useful post: | anivy, Freespirit27, IcarusMan, keroo1099, Prowler, Thad E Ginathom, vaasu, VivekCherian, zavegur |
|
1st February 2023, 19:13
| #1041 |
| Distinguished - BHPian | Re: My Car Hobby: A lot of fiddling, and some driving too! Jaguar XJR, Mercedes W123 & Alfa Romeo Sp Earlier this week I drove over to see how my new friendly Spider specialist Marc was getting on with the overhaul of the Spider Steering Box. I had phoned him earlier and he told me he had taken the box apart. I spend about an hour and a half with Marc is his workshop. Incredible knowledge and a real craftsman. There might be other reasons, but the main reason I had play on the steering wheel is that the actual steering house itself had cracked in 5-6 different places!!   It is a known weak point on these boxes. At some point in time it will develop cracks. It is just not a very good design. Marc has worked with a machine shop and they are now producing excellent new houses. 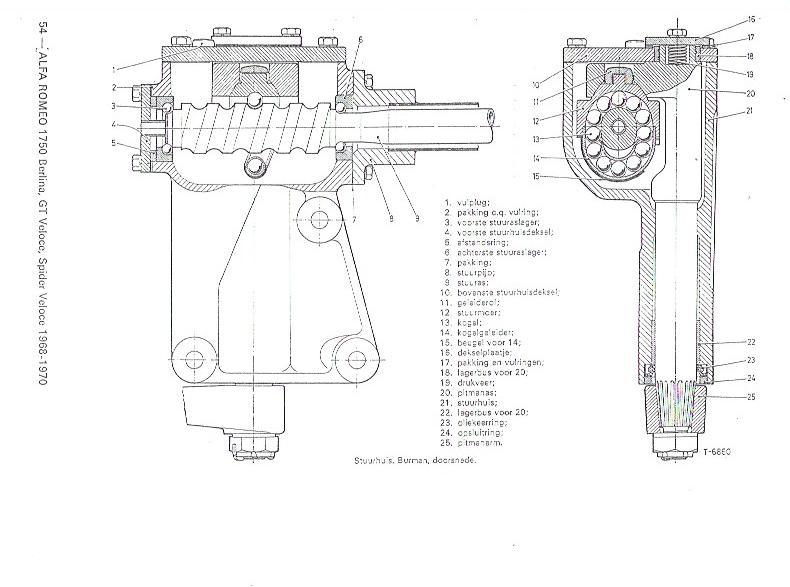 Marc showed me how everything goes together and what other overhaul and replacement activities he will perform on my steering box.    Some of the overhauled parts, all freshly painted, all ready.  Marc produces the various bushings himself. He has two lathes in his workshop.  My steering box should be ready by the end of the week. I have already agreed with spanner mate Peter we will spend next week Thursday putting it back into the Spider. So today I decided to do some prep work on the Spider and the parts that need to go back in. First thing, clean out the cockpit, left before, right after.  Next I spend quite a bit of time on the engine bay, trying to clear out some of the much that has accumulated here in the last 40 years. Before:   After:  Some of this dirt is really stuck to the metal. I dont want to brush to vigorously, I have also used some degreaser. i brushed the tube for the dipstick. Next I sprayed it with lacquer, but that was not very successful. I have to redo it.  Trying to find a replacement for the grommet that holds the dipstick tube in place.  Cleaning the three flanges of the outlet manifold. I already have the new gaskets.  Here is a mystery part. Neither Peter or me could recall where this part goes. I will be checking some drawing. Last resort will be to show it to Marc. Maybe he knows.  These two plates took a lot of effort. They are mounted on the inside and outside of the chassis where the steering box is fastened. They are to strengthen the chassis and make the whole assembly more stiff. I will check with Marc what he recommends, re-install one, both or none.   Finally, I also sold my old personalised chair from my company car. I had to return my company car a while ago. In order to return it to the lease company I had to swap the original seat back in. So now I am left with this. I have no use for it. Managed to flock it on a Dutch market website. It was snapped up within two hours of me posting it.  There is one other job I might want to do before we re-install the steering box. The throttle mechanism needs its rubber bushing replacing, but the rubber boot/grommet in the firewall is damaged too.  I can replace the rubber bushings without too much problem. But I am not so sure about the one in the firewall. It looks like I need to take off the gas pedal and even then I am not sure if I can manoeuvre that whole linkage out of the fire wall? I will check on a Spider forum if anybody knows. Peter and I have also decided to visit the Techno Classica in Essen, Germany, later this year, april 2023. http://www.siha.de/tce_uk.php?m=1&ms=1 It is one of the largest classic car shows in the world. We have been there before, but it has been a while. We will be staying the night, so we can relax after having walked for miles on this event, as you tend to do. Looking forward to it Jeroen Jeroen |
|
| (8)
Thanks
|
| The following 8 BHPians Thank Jeroen for this useful post: | carthick1000, IcarusMan, keroo1099, Prowler, Thad E Ginathom, vaasu, VivekCherian, zavegur |
|
3rd February 2023, 17:48
| #1042 |
| Distinguished - BHPian | Re: My Car Hobby: A lot of fiddling, and some driving too! Jaguar XJR, Mercedes W123 & Alfa Romeo Sp I have been working on the Spider over the last couple of days. With the steering box out of the way it was also a good time to change out various rubber parts in the throttle linkage system. Here you see a diagram. Although it says carburator it is the same for my injection version. Not shown here are the rubber boots in the firewall. 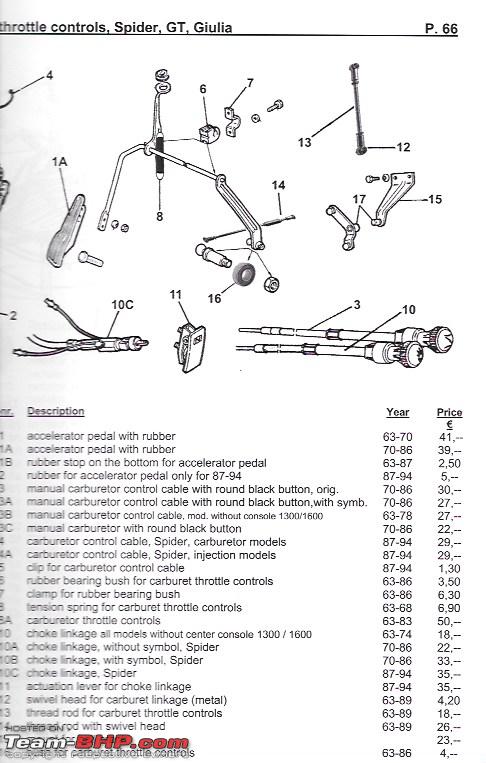 As you might recall I had bought all the various parts some time ago, but was just waiting for a good moment to tackle this job.  It is not very difficult, just quite tedious as it can be tricky to reach the various bolts. Especially on the right hand side. In order to get a bit better acces I also removed the window washer reservoir. First thing is to take off the throttle pedal. Two bolts and two nuts.  I did not take any images when I was removing it, but I did take images installing it. So removing is literally just the same thing in reverse order. After lots of fiddling and working on a number of bolts/nuts by feel only, I managed to extract the whole shebang.  Here you see the whole in the firewall through which the linkage wit the throttle pedal attached goes.  I had to pry of that little plate and its two rubber mounts/boots were completely stuck.  High time these get replaced!!    As usual I spend a lot of time cleaning and prepping everything prior to re-assembly. Got my special rinse tank out again, works a treat on this sort of stuff.  All clean!!  Underneath the Inlet manifold there is another part of the linkage. It hooks up to this larger part by means of a ball joint. The ball joint itself sits in a rubber/metal bush. Did not in very good shape. I had to pop over to my friendly Spider specialist Goos anyway. Goos was going to let me use his CO analyser, so I could fine tune the carburator on my W123. So I drove over in the W123, fixed the CO content and brought home a new bushing. More on the finetuning and adjustment on the W123 later.  Next job was to get the old one out of the linkage.  Got a couple of sockets of the correct size, lined it all up and gave it a good whack!! Came out easily!  Putting the new one in, requires a bit more finesse. First I used the vice to push it in a little bit. 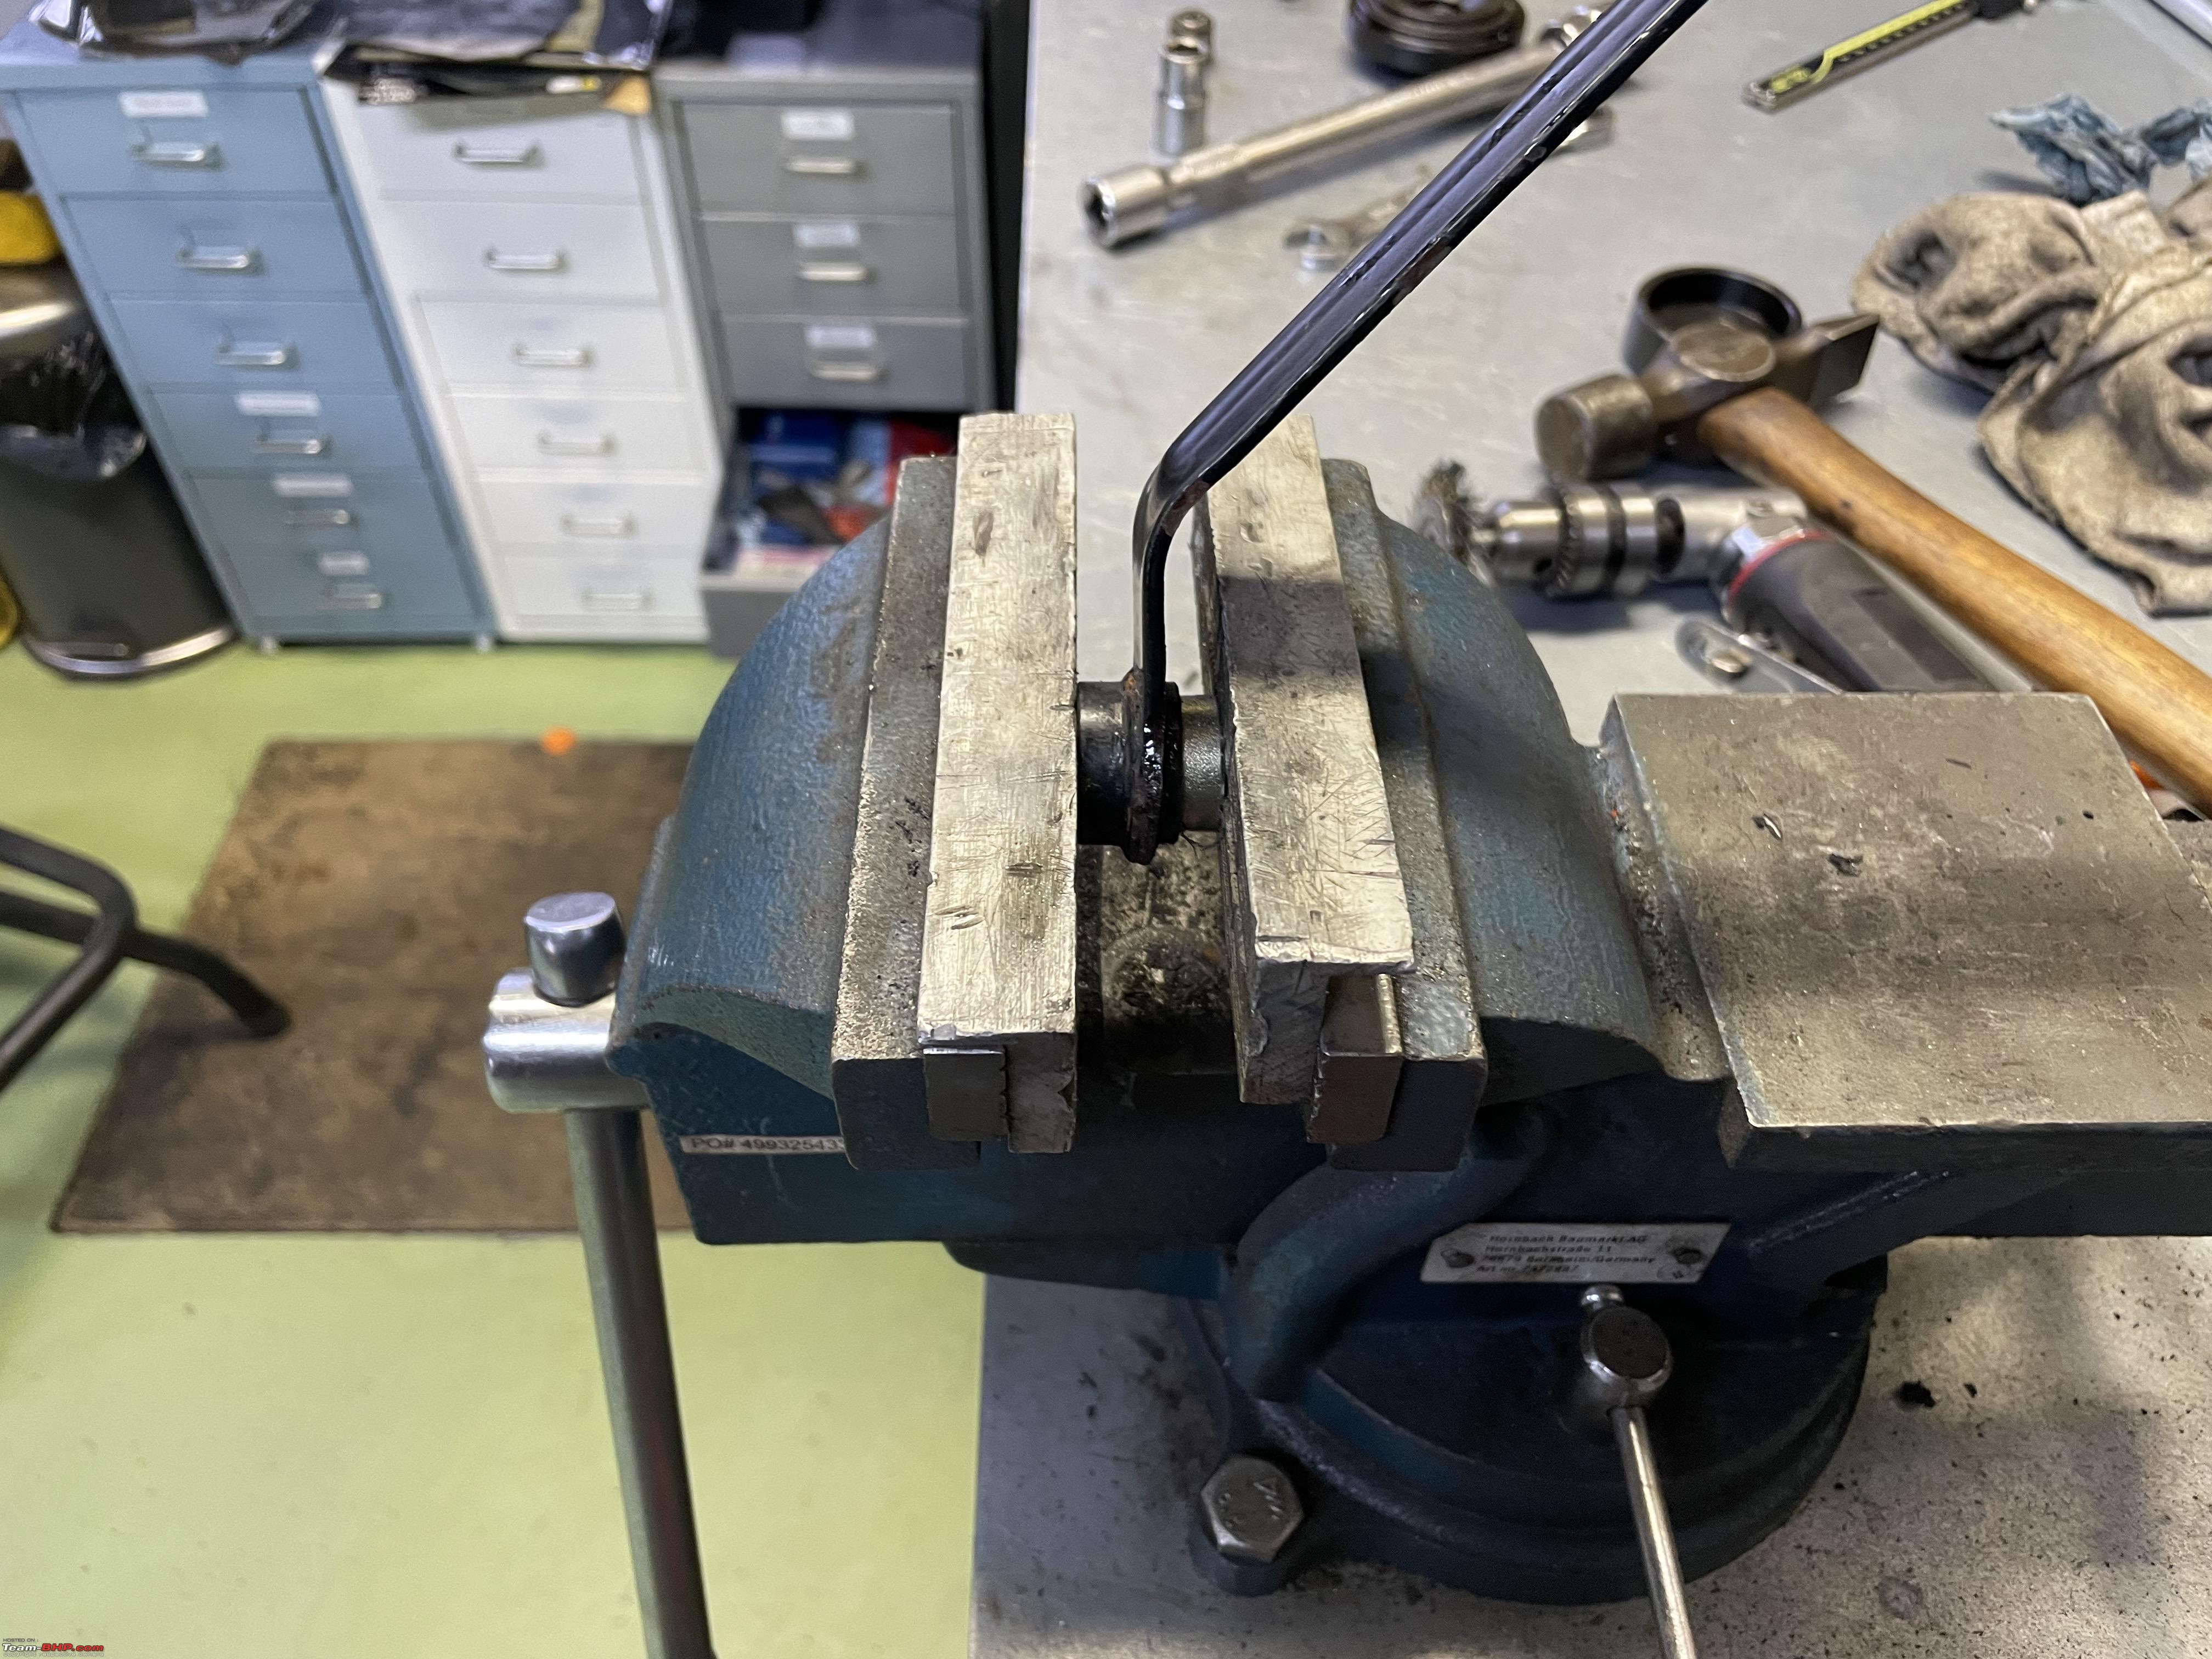 Next, I broke out my trusted C-clamp and various accessoires to press it home!!  Easy peasy, nice fit!!  I also cleaned everything very thoroughly and repainted some parts as well. I wire brushed the places on the rod of the linkage where the rubber bushes will hold it.  here you see one of the new rubber bushings in which the linkage totals. It is split on the side, so you can mount it easily.   I applied some generous amounts of silicone grease to the inside of the rubber bushes. The clamp fits across tightly. 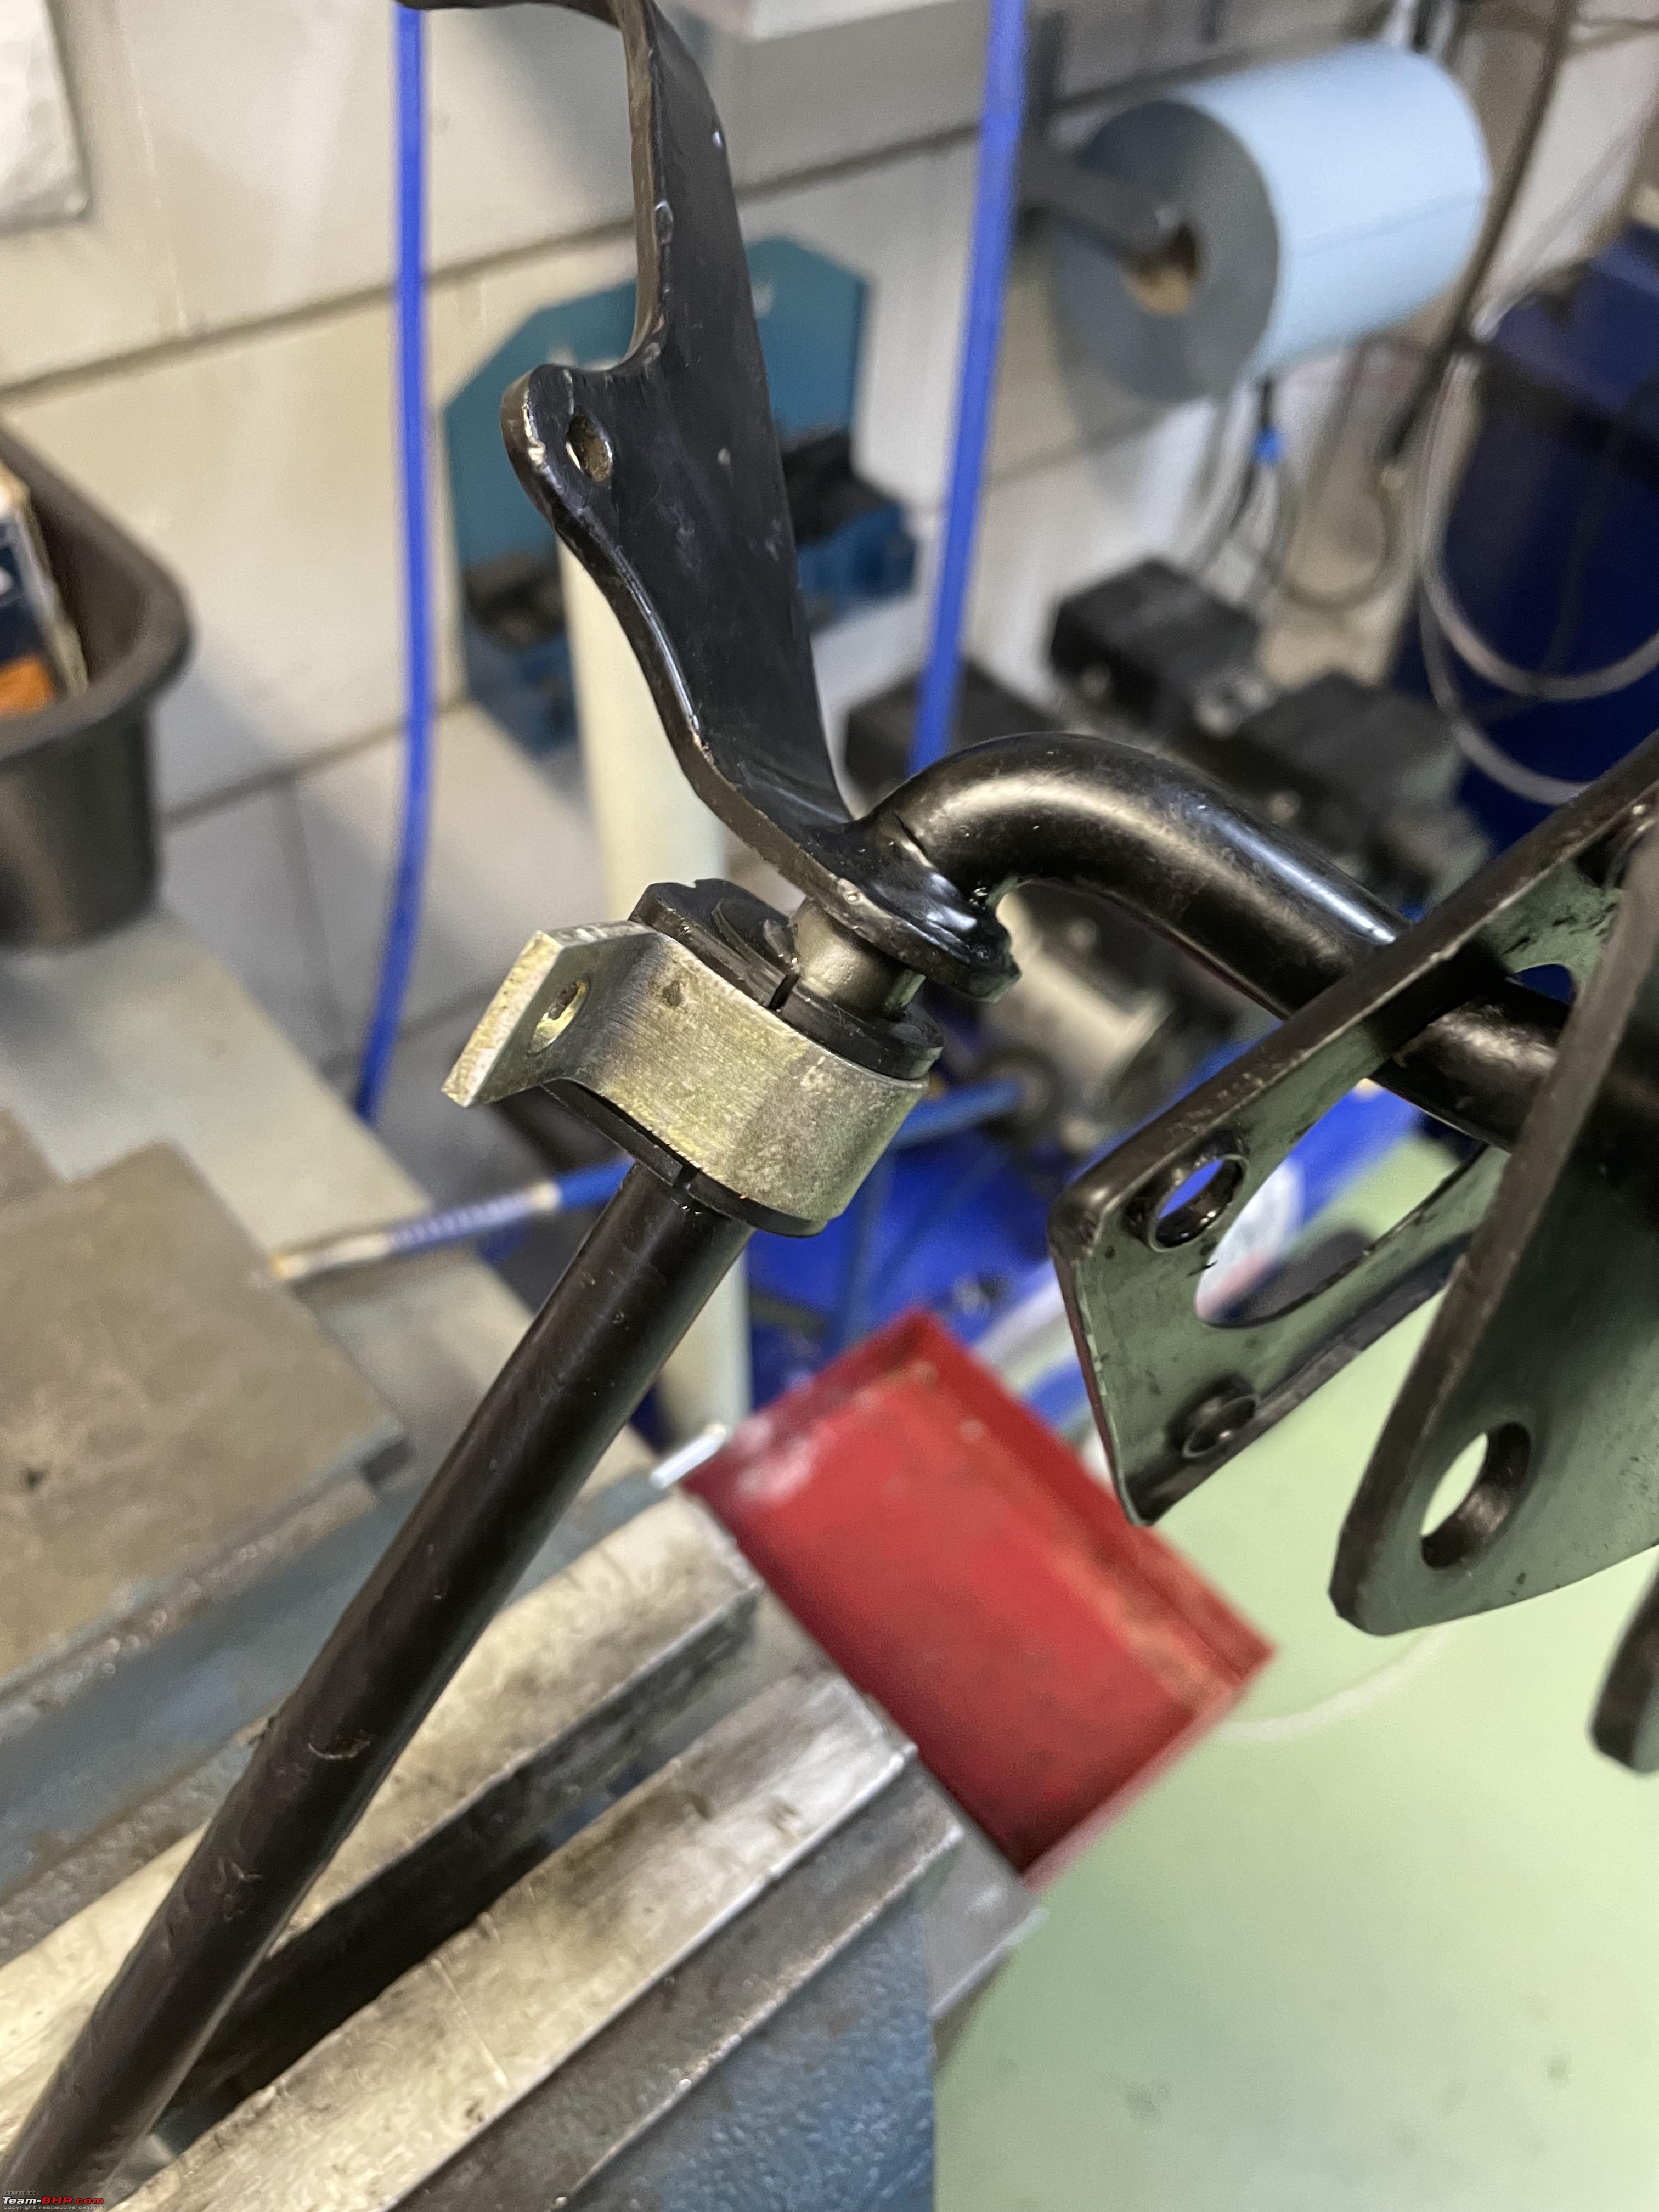 The complete linkage assembly, cleaned, repainted, new bushes and new mounts etc. Ready to be installed.  Here is the trick of installing it. It needs to go into the engine bay vertically, and you poke the end for the throttle pedal through the firewall. Like thus:  Next you rotate it between the engine and the firewall.  You need to push and pull various wires, connectors and hoses out of the way. Carefully in order not to damage anything. I disconnected the temperature and pressure sensor wire as they were in the way. Eventually it sort of drops behind the engine and you can reattach the bolts. Here you see it all done. The little rope was used to pull up and install the spring.   The one thing left to do is to check the functioning of the microswitches on the throttle body. I have a feeling it is not switching. I assume with the new bushes and everything the length of one or two of the connecting rods need adjusting. We will do that next Thursday after Peter and I have installed the steering box. Jeroen Last edited by Jeroen : 3rd February 2023 at 18:04. |
|
| (6)
Thanks
|
| The following 6 BHPians Thank Jeroen for this useful post: | Freespirit27, IcarusMan, Prowler, Thad E Ginathom, vaasu, VivekCherian |
|
3rd February 2023, 22:41
| #1043 |
| Distinguished - BHPian Join Date: Jun 2007 Location: Chennai
Posts: 11,005
Thanked: 26,447 Times
| Re: My Car Hobby: A lot of fiddling, and some driving too! Jaguar XJR, Mercedes W123 & Alfa Romeo Sp Side note: a "blast from the past!" Your Spider has a choke. Gosh, I'd forgotten those!  |

| ()
Thanks
|
|
4th February 2023, 00:28
| #1044 | |
| Distinguished - BHPian | Re: My Car Hobby: A lot of fiddling, and some driving too! Jaguar XJR, Mercedes W123 & Alfa Romeo Sp Quote:
My spider does not have a traditional choke. My Spider has the Bosch L tropic motor management system. Two computers managing fuel injection and ignition. Not closed loop. When the engine is cold, a temperature sensor sends a signal to a couple of solenoids. The engine will get a bit of extra air and fuel, so it idles a bit higher. As the temperature increases it will turn this off. Completely separated from both computers. (Hence not closed loop). Effectively an automatic choke. You cant control it. All based on engine temperature (cooling liquid). What you can see in one of the images if you know what to look for. A linkage where in older Spiders the hand throttle would be attached! Jeroen | |
|
| (2)
Thanks
|

| The following 2 BHPians Thank Jeroen for this useful post: | Thad E Ginathom, VivekCherian |
|
4th February 2023, 13:57
| #1045 | ||
| Distinguished - BHPian | Re: My Car Hobby: A lot of fiddling, and some driving too! Jaguar XJR, Mercedes W123 & Alfa Romeo Sp Quote:
Quote:
Jeroen | ||
|
| (2)
Thanks
|
| The following 2 BHPians Thank Jeroen for this useful post: | Thad E Ginathom, VivekCherian |
|
4th February 2023, 15:09
| #1046 | |
| Distinguished - BHPian Join Date: Jun 2007 Location: Chennai
Posts: 11,005
Thanked: 26,447 Times
| Re: My Car Hobby: A lot of fiddling, and some driving too! Jaguar XJR, Mercedes W123 & Alfa Romeo Sp Quote:
Anyway, it brought memories of having to use choke control to start engine. And of often forgetting to push it back. | |
|
| (3)
Thanks
|
| The following 3 BHPians Thank Thad E Ginathom for this useful post: | Freespirit27, Jeroen, Prowler |
| |
|
5th February 2023, 14:35
| #1047 |
| Distinguished - BHPian | Re: My Car Hobby: A lot of fiddling, and some driving too! Jaguar XJR, Mercedes W123 & Alfa Romeo Sp I had a call with Marc last Friday. He wasnt quite sure he would be able to finish my Steering box that Friday. I told him not to worry. He will most likely finish it on Monday. I will pick it up on Tuesday. Monday, Mrs. D and I are on a cultural outing, visiting a very nice exhibition in one of the Netherlands best museums, The Singer Museum in Laren. https://www.singerlaren.nl/en/ There is a special exhibition of Kees van Dongen, a Dutch painter and we were given complimentary tickets by our bank. We will take any free ticket, as everybody does, specially the Dutch. But really, it is a very nice museum in a nice part of the Netherlands, so we are going to have a nice day out. Taking the W123 to do some touring in that area. On the W123, although the engine is running so much better than before it is still not 100% perfect. When it comes to my cars, I am completely anal. Everything has to be perfect. Nothing less will do, no matter what amount of time/money it takes. So I decided to fiddle about with the ignition and carburator some more. As I wrote earlier my friendly Alfa specialist Goos allowed me the use of his CO analyser on my W123. Raised the CO a bit as that usually means smoother running on these old carburated engines. And it did improve the running. But still not 100% perfect. I will say that at this point my W123 was probably running better than 99% of the W123 worldwide, but that is simply not good enough for me. So decided to try a few other things as well. I went through all my W123 manuals again, and visited a number of W123 forums around the world. Funnily enough I get conflicting information with regards to how or even whether you can measure the ignition timing on my W123 with the electronic ignition. Some manuals and people claim you can only do this with the original W123 diagnostic equipment. My W123 friend Cor has it, but I did not want to bother him again.  So I had a go with my generic diagnostic tools. The thing I wanted to verify was the amount of static timing. According to my manual and also there is a little specification plate mounted under the bonnet, saying it should be around 13o +/- 3o. I checked it with two different measurements. I used this old Ford diagnostic tool you have seen my using before.  It measures various things, including RPM and the dwell angle. Dwell angle is not the same as static timing. Dwell angle is the angle of rotation that the ignition contacts are closed. Static timing is the angle at which the contacts close. But as this is a electronic ignition you cant measure dwell with this tool. However, from what I can figure out it will actually measure static timing! I also verified this with my strobe tool. Point it at the front pulley and read the amount of degrees!  Sure enough both tools gave me the same value! Around 13o. I experimented with a bit more and a bit less. Took it for test drives. Ultimately I found at 15o the engine runs almost perfect, lets say 99,7%. Good enough for now. One thing though, you do need to disconnect the vacuum advance on the distributor. Initially I had not bothered as I thought it would not make a big difference at idle. But it did, almost 3-4o! Whilst I was fiddling with the engine I notice a wire hanging loose from the carburator.  This is the wire from the electromagnetic stop valve at the bottom of the carburator. The connector was still attached to the carbuartor so I pulled it off. 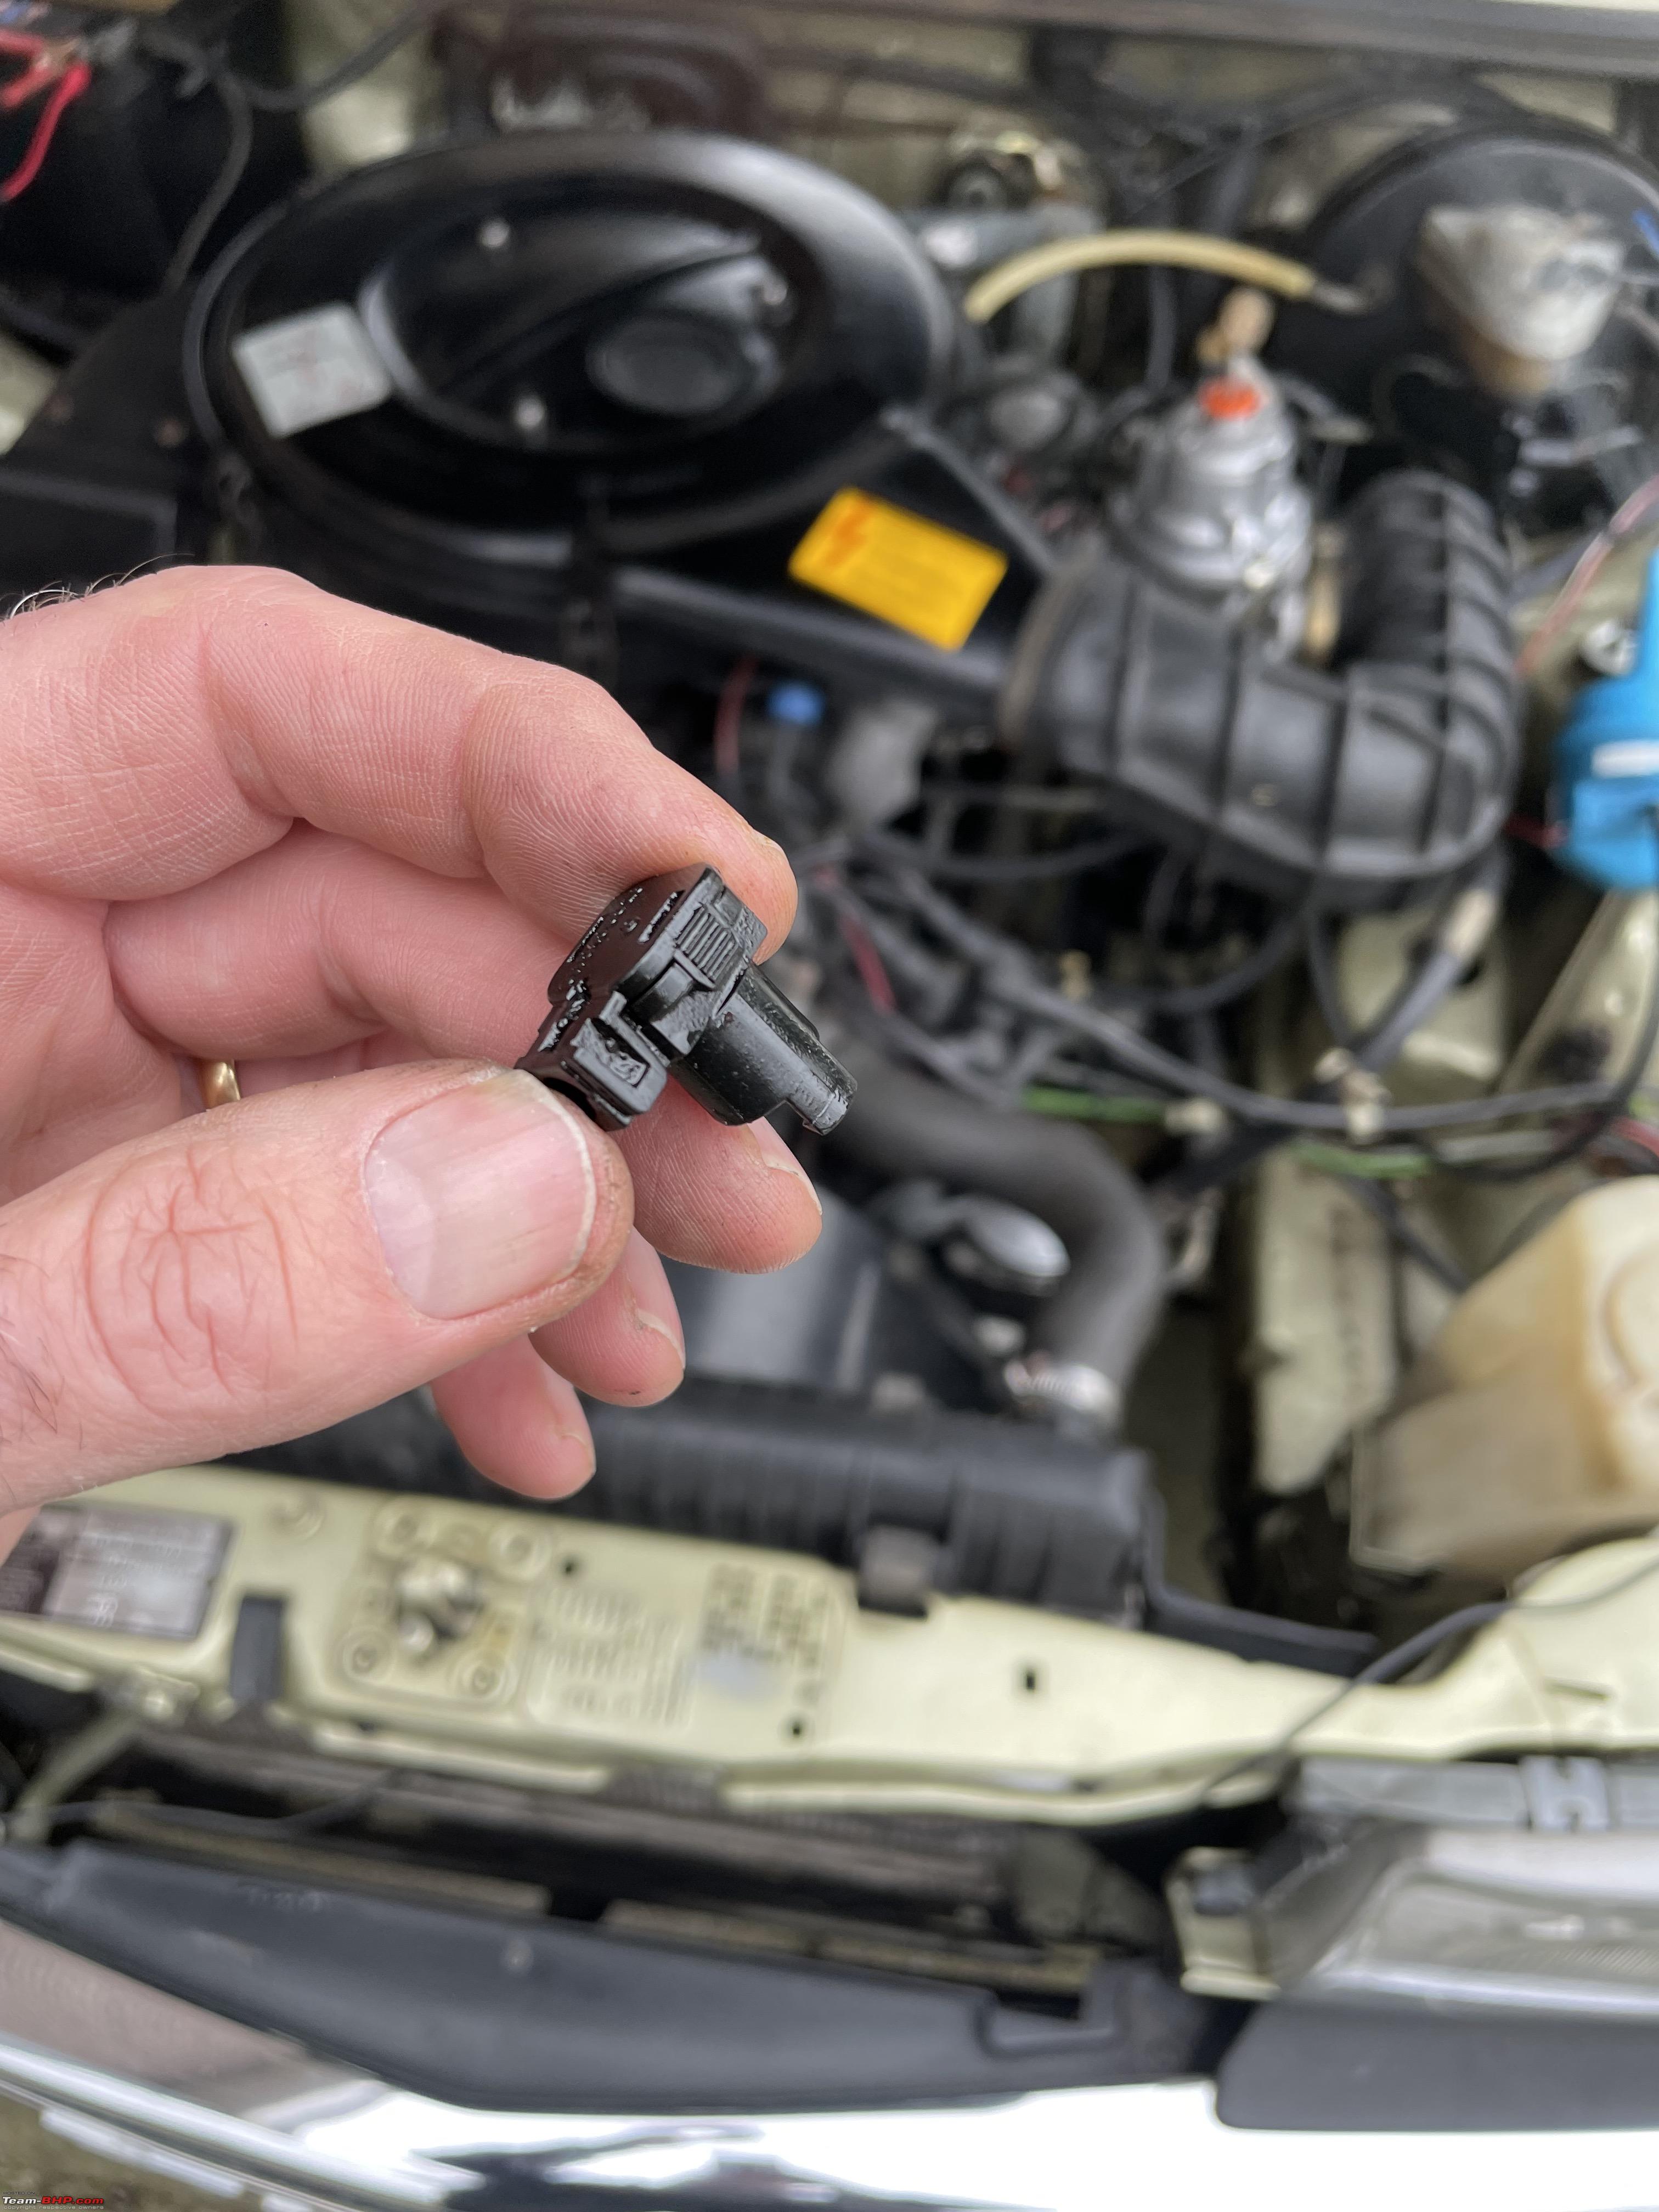 Opened it up and the wire had just broken. It was soldered into the pin.  I must have knocked it off whilst I was adjusting the CO content. Which is done by turning the stop valve, but it does mean loosening up the locking nut with a big wrench size 22. Even so, it looks like this wire connection was a bit iffy to start with. I drilled out the solder in the little hole. Made a simple set up in the engine bay so I could solder it back on. The wire was pretty short so I had no other option.  The trick with soldering is to heat up the metal pin to the point where the solder melts. If you just touch the solder to the soldering gun, it will melt, but it will not be a good solid joint.  Everything back together again.  Two more little jobs: I fixed my broken nose-pliers. I broke them a few weeks ago working on the Jeep.  I saw off the longer piece and then used my grinder wheel to get it sort of back into a half decent shape. It will do, but I will buy a new one too! (As if I need a reason to buy more tools)  The last little job was on the hood of the Spider. As I have shown before the little plastic window has a tear in it. It happens to all of these, mine is well over 25 years old. Now, I do want my cars to be perfect. But this is actually one defect that doesnt bother me really. Because I always drive top down anyway. And replacing the hood is not something I want to do myself. I know a guy that specialises in this kind of work. It will cost upwards of Euro 1500. So that is a lot of money. However, I have noticed Mrs D. doesnt like it. So I am waiting for her to tell me to get it fixed properly. So she is responsible for this outlay!! Till then a bit of transparant tape will have to do!  Looking forward to Thursday when spanner mate Peter and I will be re-installing the steering box on the Spider. Jeroen Last edited by Jeroen : 5th February 2023 at 14:37. |
|
| (11)
Thanks
|
| The following 11 BHPians Thank Jeroen for this useful post: | bikertillidie, dailydriver, IcarusMan, keroo1099, Prowler, rj22, Thad E Ginathom, vaasu, vb-saan, VivekCherian, zavegur |
|
10th February 2023, 16:23
| #1048 |
| Distinguished - BHPian | Re: My Car Hobby: A lot of fiddling, and some driving too! Jaguar XJR, Mercedes W123 & Alfa Romeo Sp I picked up my overhauled Burman Steering box from Alfa Spider specialist Marc a couple of days ago. When I arrived at his workshop this was the sight that I walked into.  Marc always does a batch of these steering boxes together. Mine is the one with the pitman arm installed. I thought it looked odd, but Marc confirmed he only loosely attached the pitman arm in this 180o incorrect position, for transportation. I am glad he left the pitman arm off as it will be easier to re-install the steering box without it. Here it is in all its renewed glory on my workbench.  Spanner mate Peter and I spend the whole day yesterday re-installing it back into my Spider. It took a lot longer re-installing it, than taking it out. The reason for it is the alignment of the steering box with the support tube underneath the dashboard. Marc had warned me that it is pretty critical. Without proper alignment the bearings might get damaged quickly. The old steering box had special shim support plates on the in- and outside of the engine bay. It took us many hours to get it all properly sorted. Part of the problem being that the bolts and nuts that hold the steering box in place are difficult to reach at the best of time. So we had to install it a couple of times with different shims to find the most optimal position. Peter elbow deep into the bowels of the Spider Engine Bay.  As usual, I had the installation instructions from the workshop manual printed out. Imported to get the correct torques for the various bolts and nuts.  With the steering box bolted back onto the chassis, there was a lot of work needed to get everything sorted and back together under the dashboard. Literally back breaking work. Especially at my age!!  Aluminium support tube all alligned underneath the dashboard. 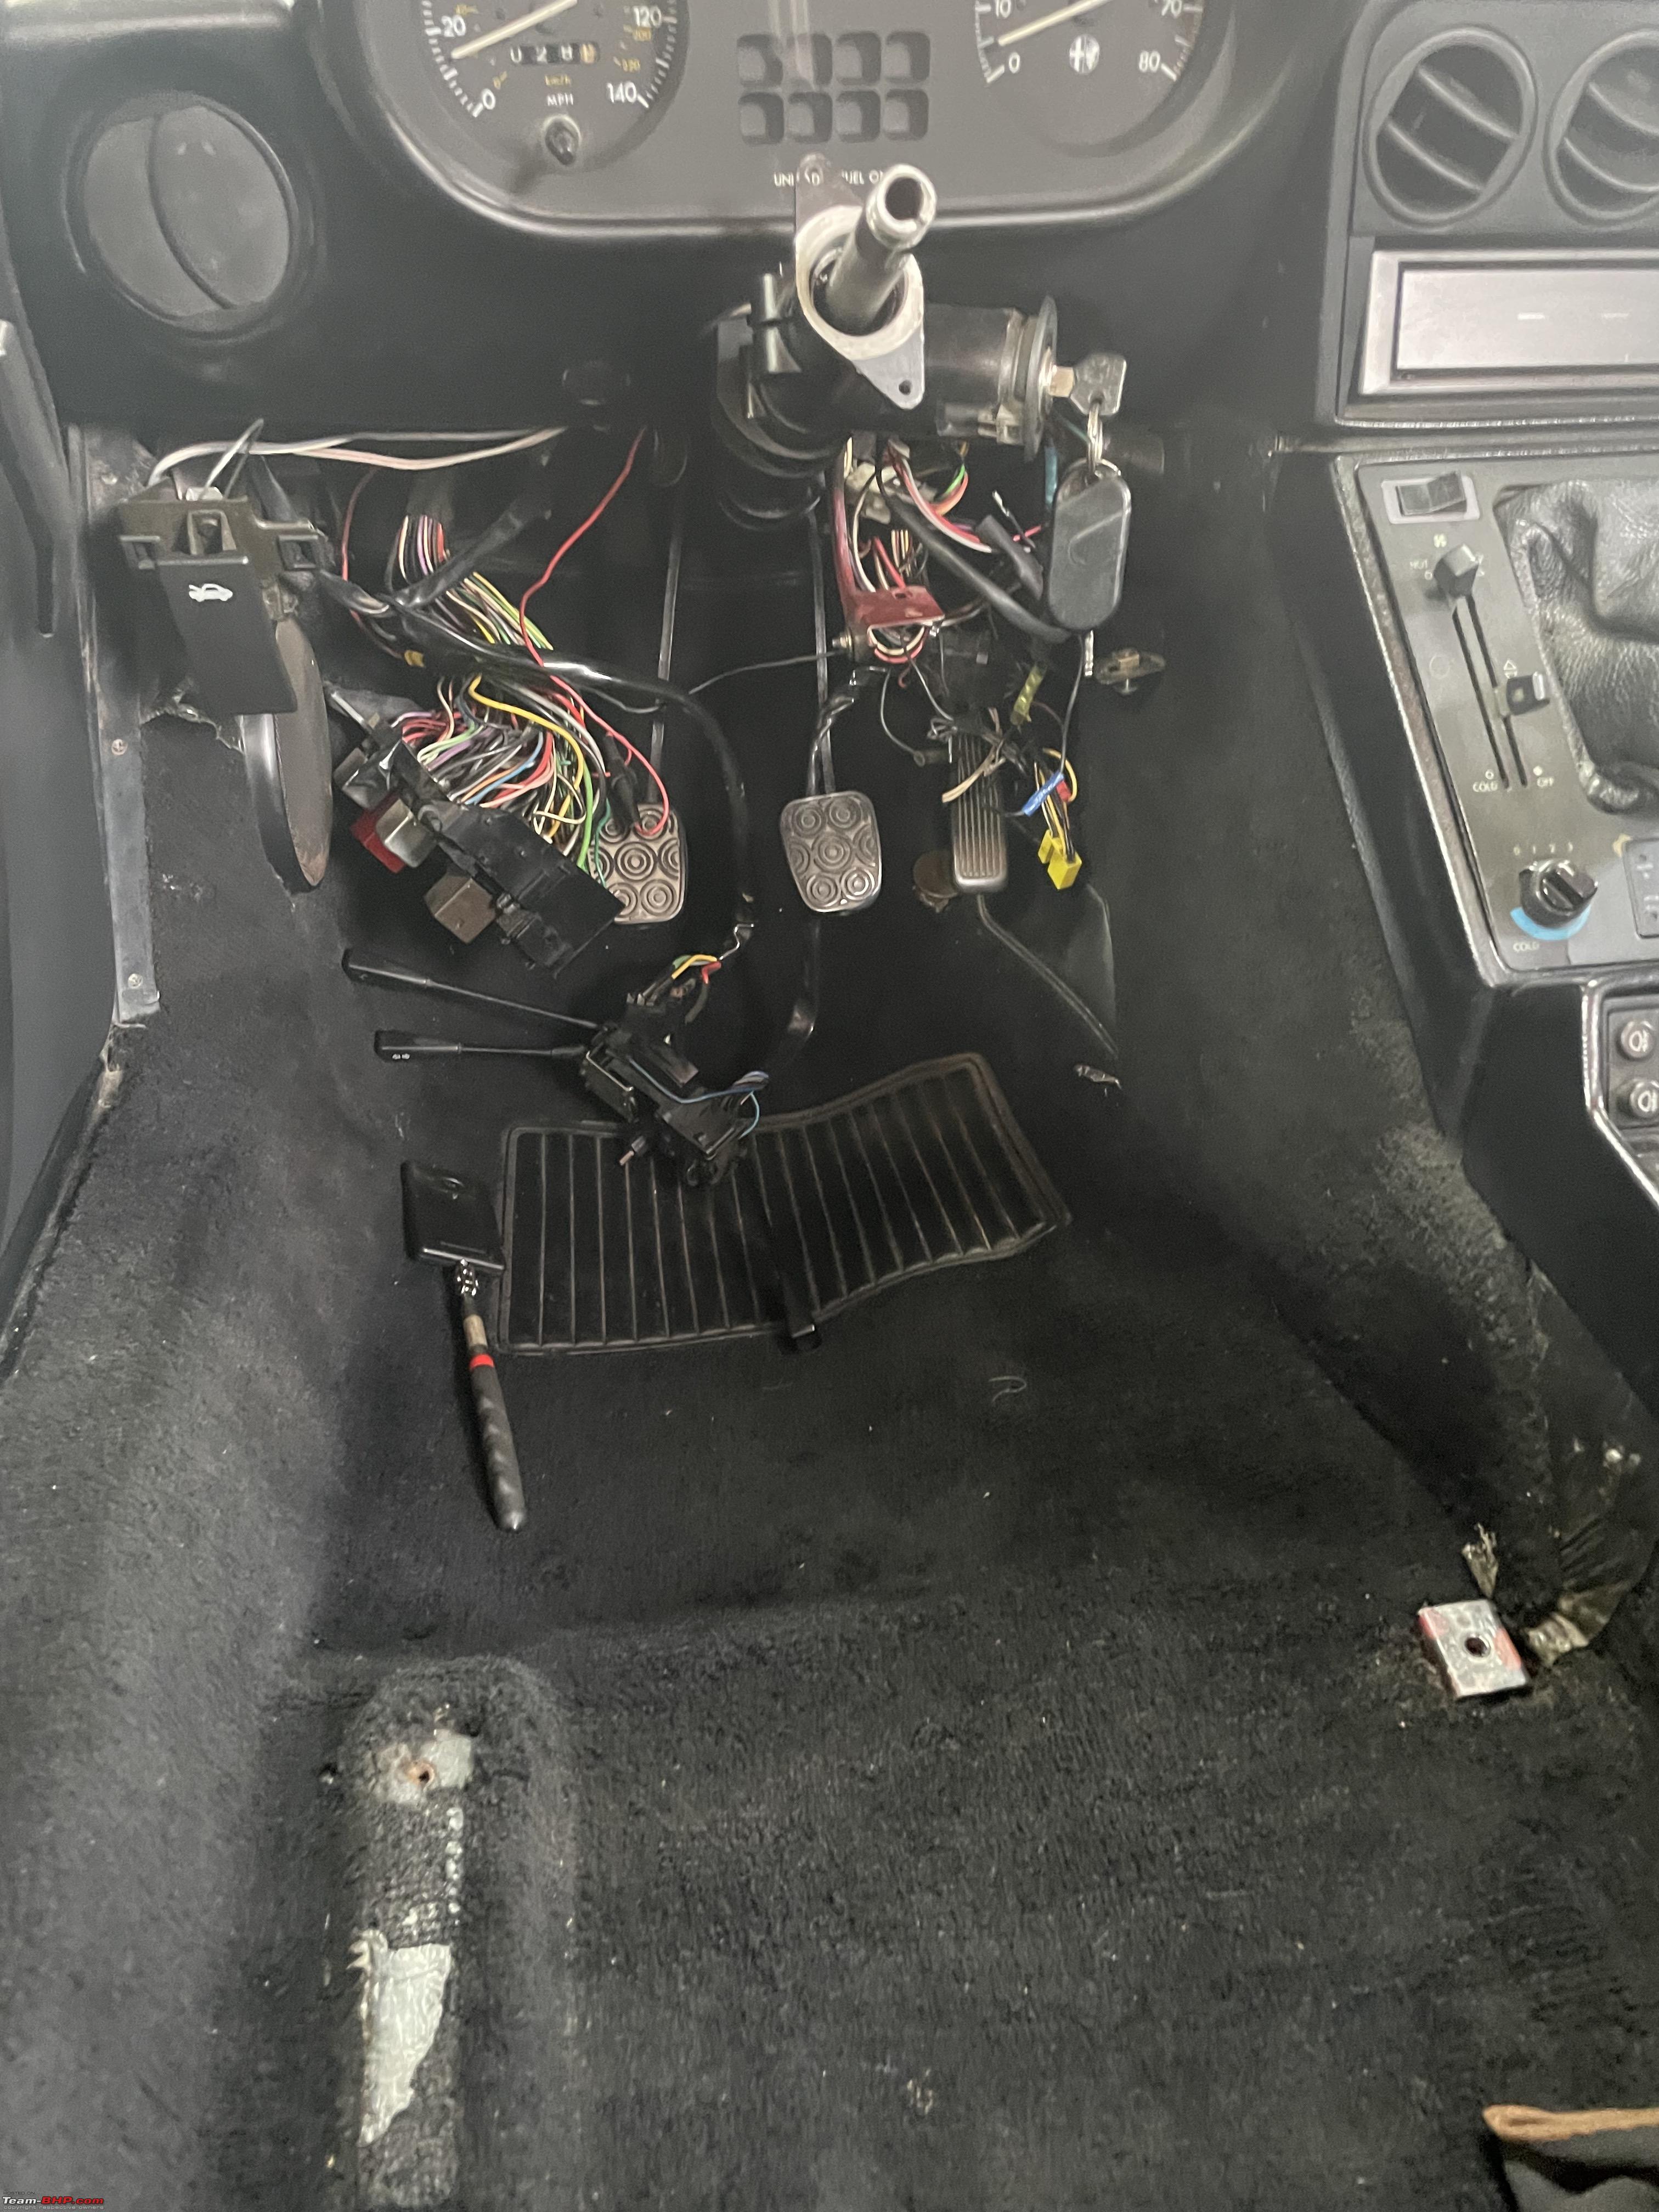 We were beginning to run out of time. Peter had to pop over to Jeep specialist Martin for a classic car valuation. I fiddles on whilst he was away for about 45 minutes. When he got back we decided to attach the steering rods to the pitman arm. 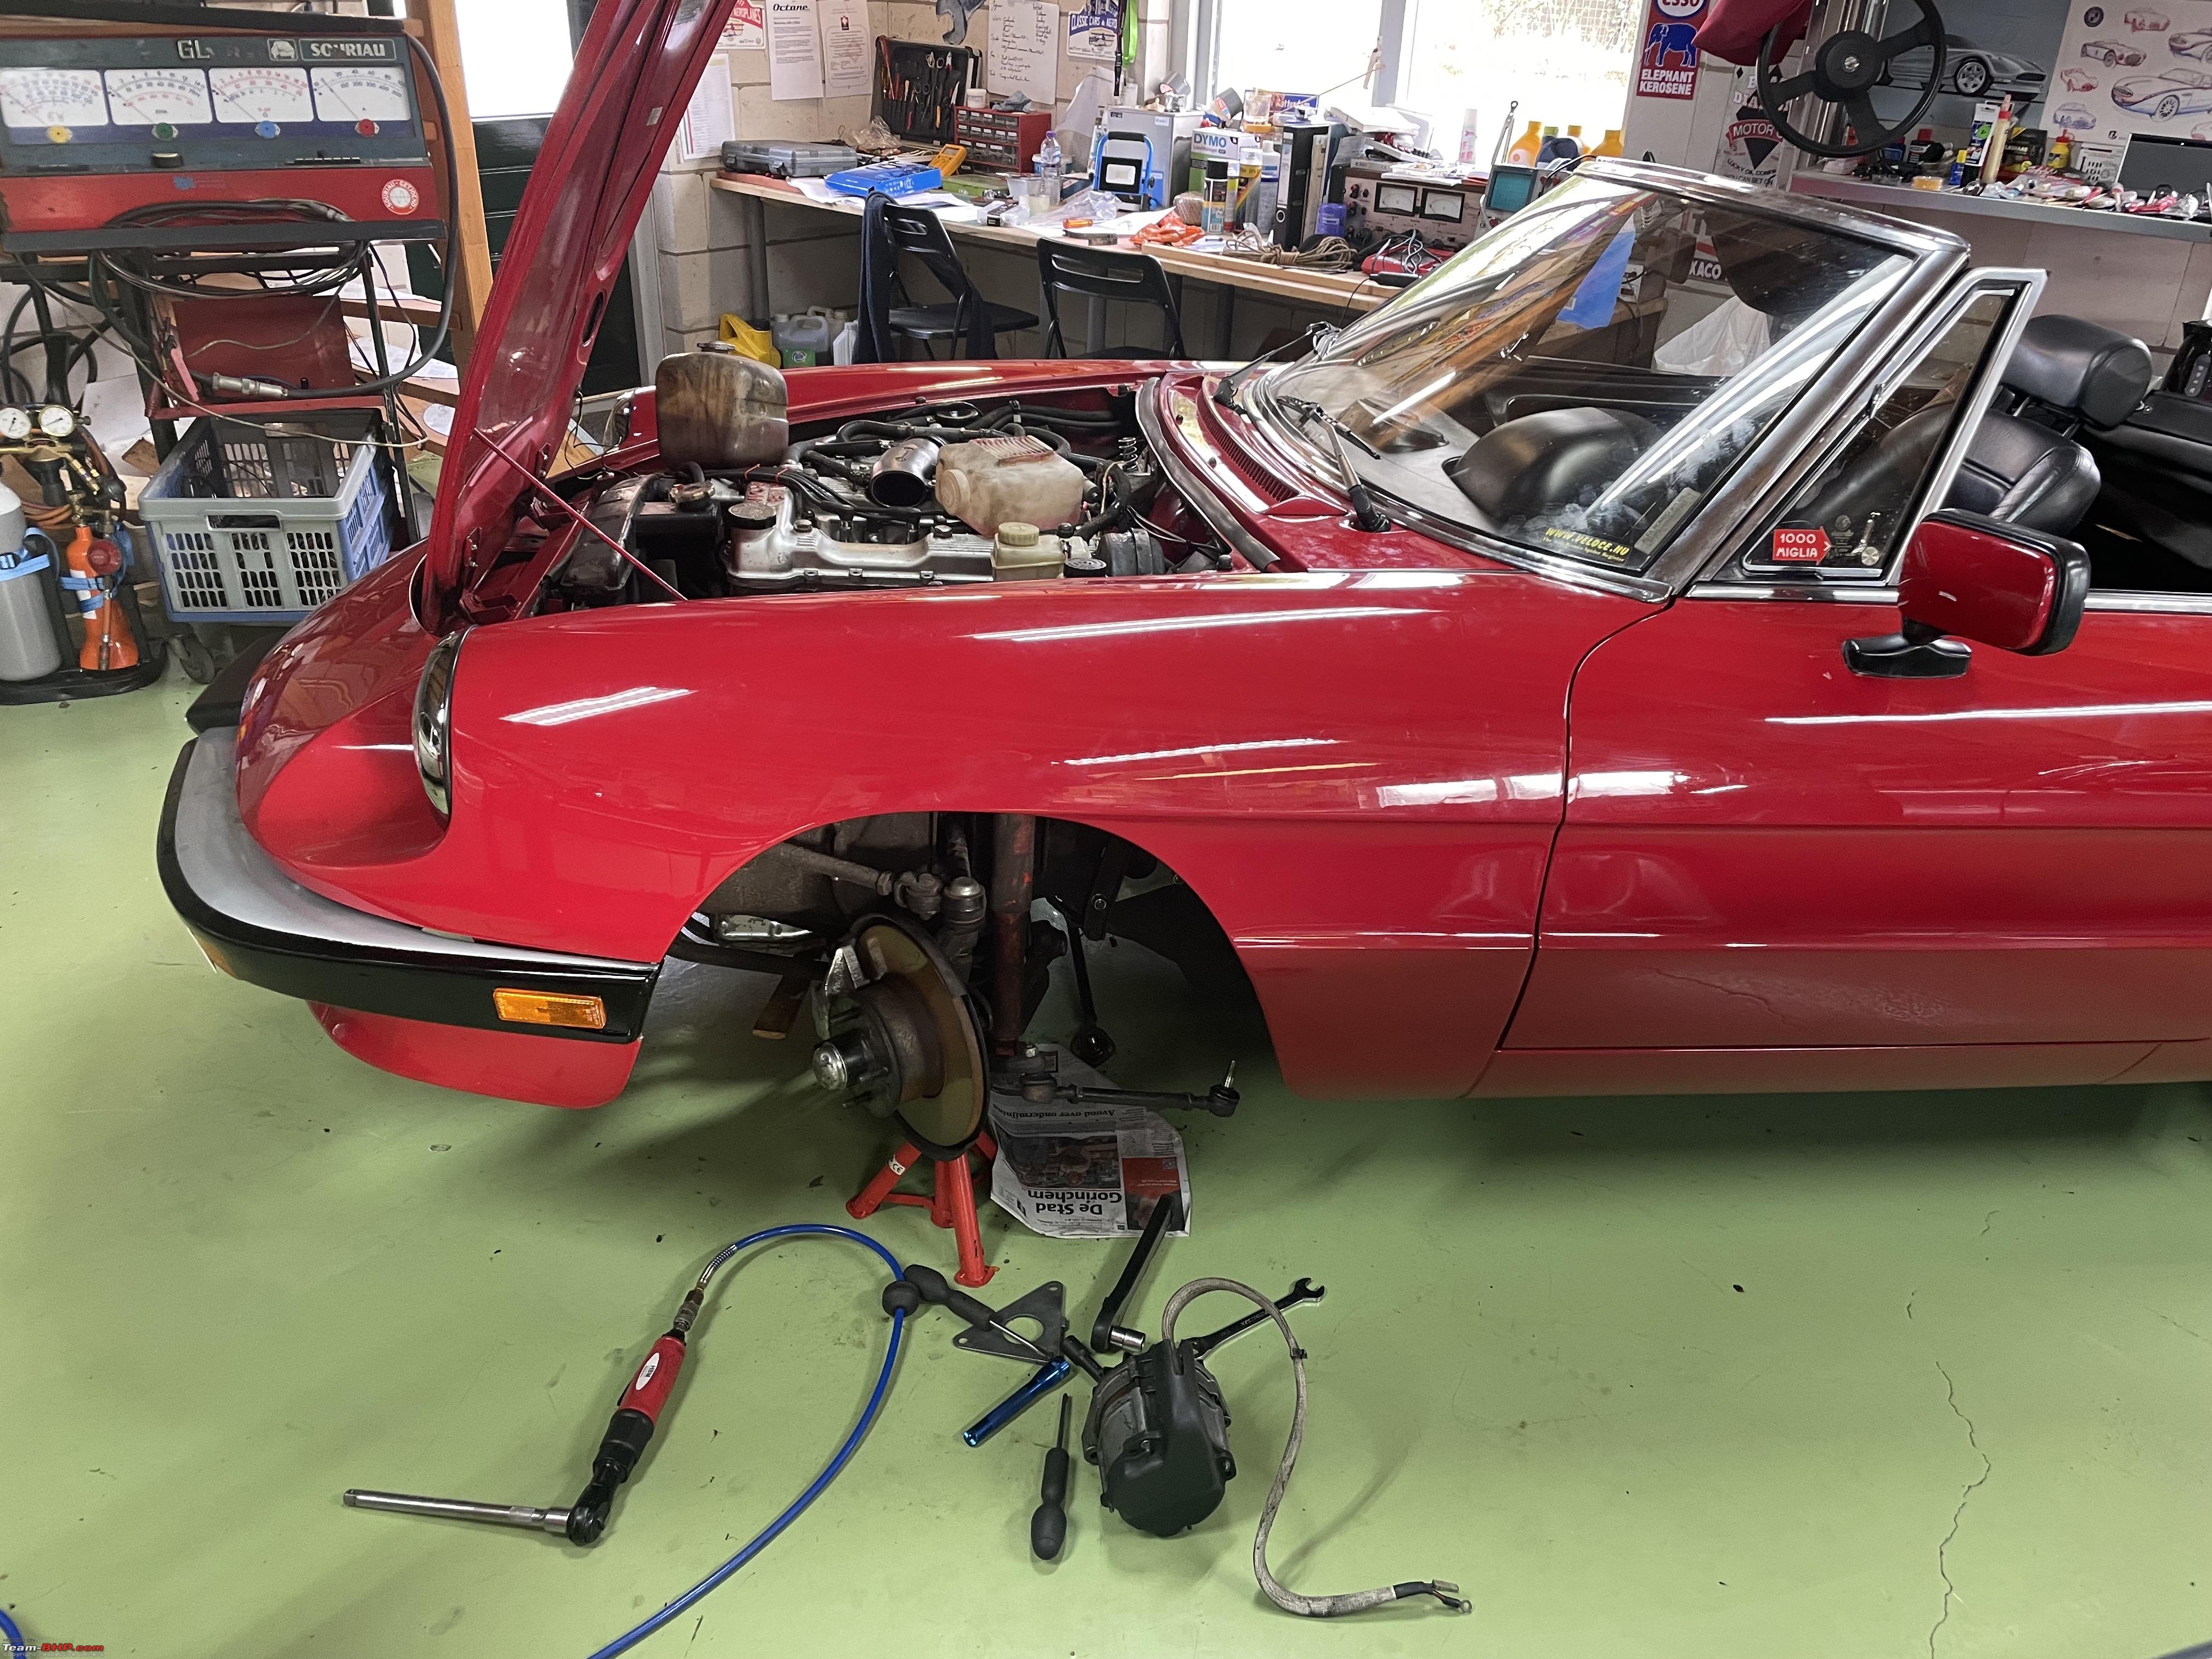 Luckily you have easy access from above to the self locking nuts off the ball joints. But I needed three extenders on the socket to reach.  Still a lot more tidying up to do over the next couple of days. No problem as its all fairly straight forward from here. But getting the steering box in or out of the Spider for that matter is really a two man job, especially if you dont have a lift.  I will take the Spider to Marc on the 11th of March to get it properly aligned. We will also most likely replace the ball joints on the steering rods. They did not feel correct at all. Earlier this week, I also took my Jeep to a local paint shop. I am picking it up later today. Looking forward to it!! Jeroen |
|
| (23)
Thanks
|
| The following 23 BHPians Thank Jeroen for this useful post: | bikertillidie, carthick1000, dailydriver, fluidicjoy, govindremesh, IcarusMan, keroo1099, Kpzonwheels, mugen_pinaki27, Nature&Me, Prowler, Reinhard, rrsteer, shaheenazk, SILVER-ARROW, sridhar-v, tchsvy, Thad E Ginathom, TurboGuy, vaasu, vb-saan, VivekCherian, zavegur |
|
12th February 2023, 22:04
| #1049 |
| BHPian | Re: My Car Hobby: A lot of fiddling, and some driving too! Jaguar XJR, Mercedes W123 & Alfa Romeo Sp Looks rather cramped indeed... Hope you enjoy driving the Alfa for years to come.. |
|
| (1)
Thanks
|
| The following BHPian Thanks bikertillidie for this useful post: | Jeroen |
|
13th February 2023, 23:33
| #1050 |
| Distinguished - BHPian | Re: My Car Hobby: A lot of fiddling, and some driving too! Jaguar XJR, Mercedes W123 & Alfa Romeo Sp Today I managed to put the Spider back together again. It took me longer than I thought it would. That is almost always the case though. Especially when you work on older cars, there are always unexpected problems to be sorted. Spanner mate Peter had brought me a new LED rechargeable flood light which can in very handy!  A lot of the work was inside the cockpit of the Spider. My new floodlight came in handy as I had to do a lot work deep down below the dash and into the footwell.  Getting the various bits of trim back in place is quite the challenge. I had to redo several bits several times. One of the shrouds around the steering assembly would not fit properly.   In the end I noticed that a couple of bosses on the inside were bend/broken so I had to repair those first. Glued them back into place no problem. 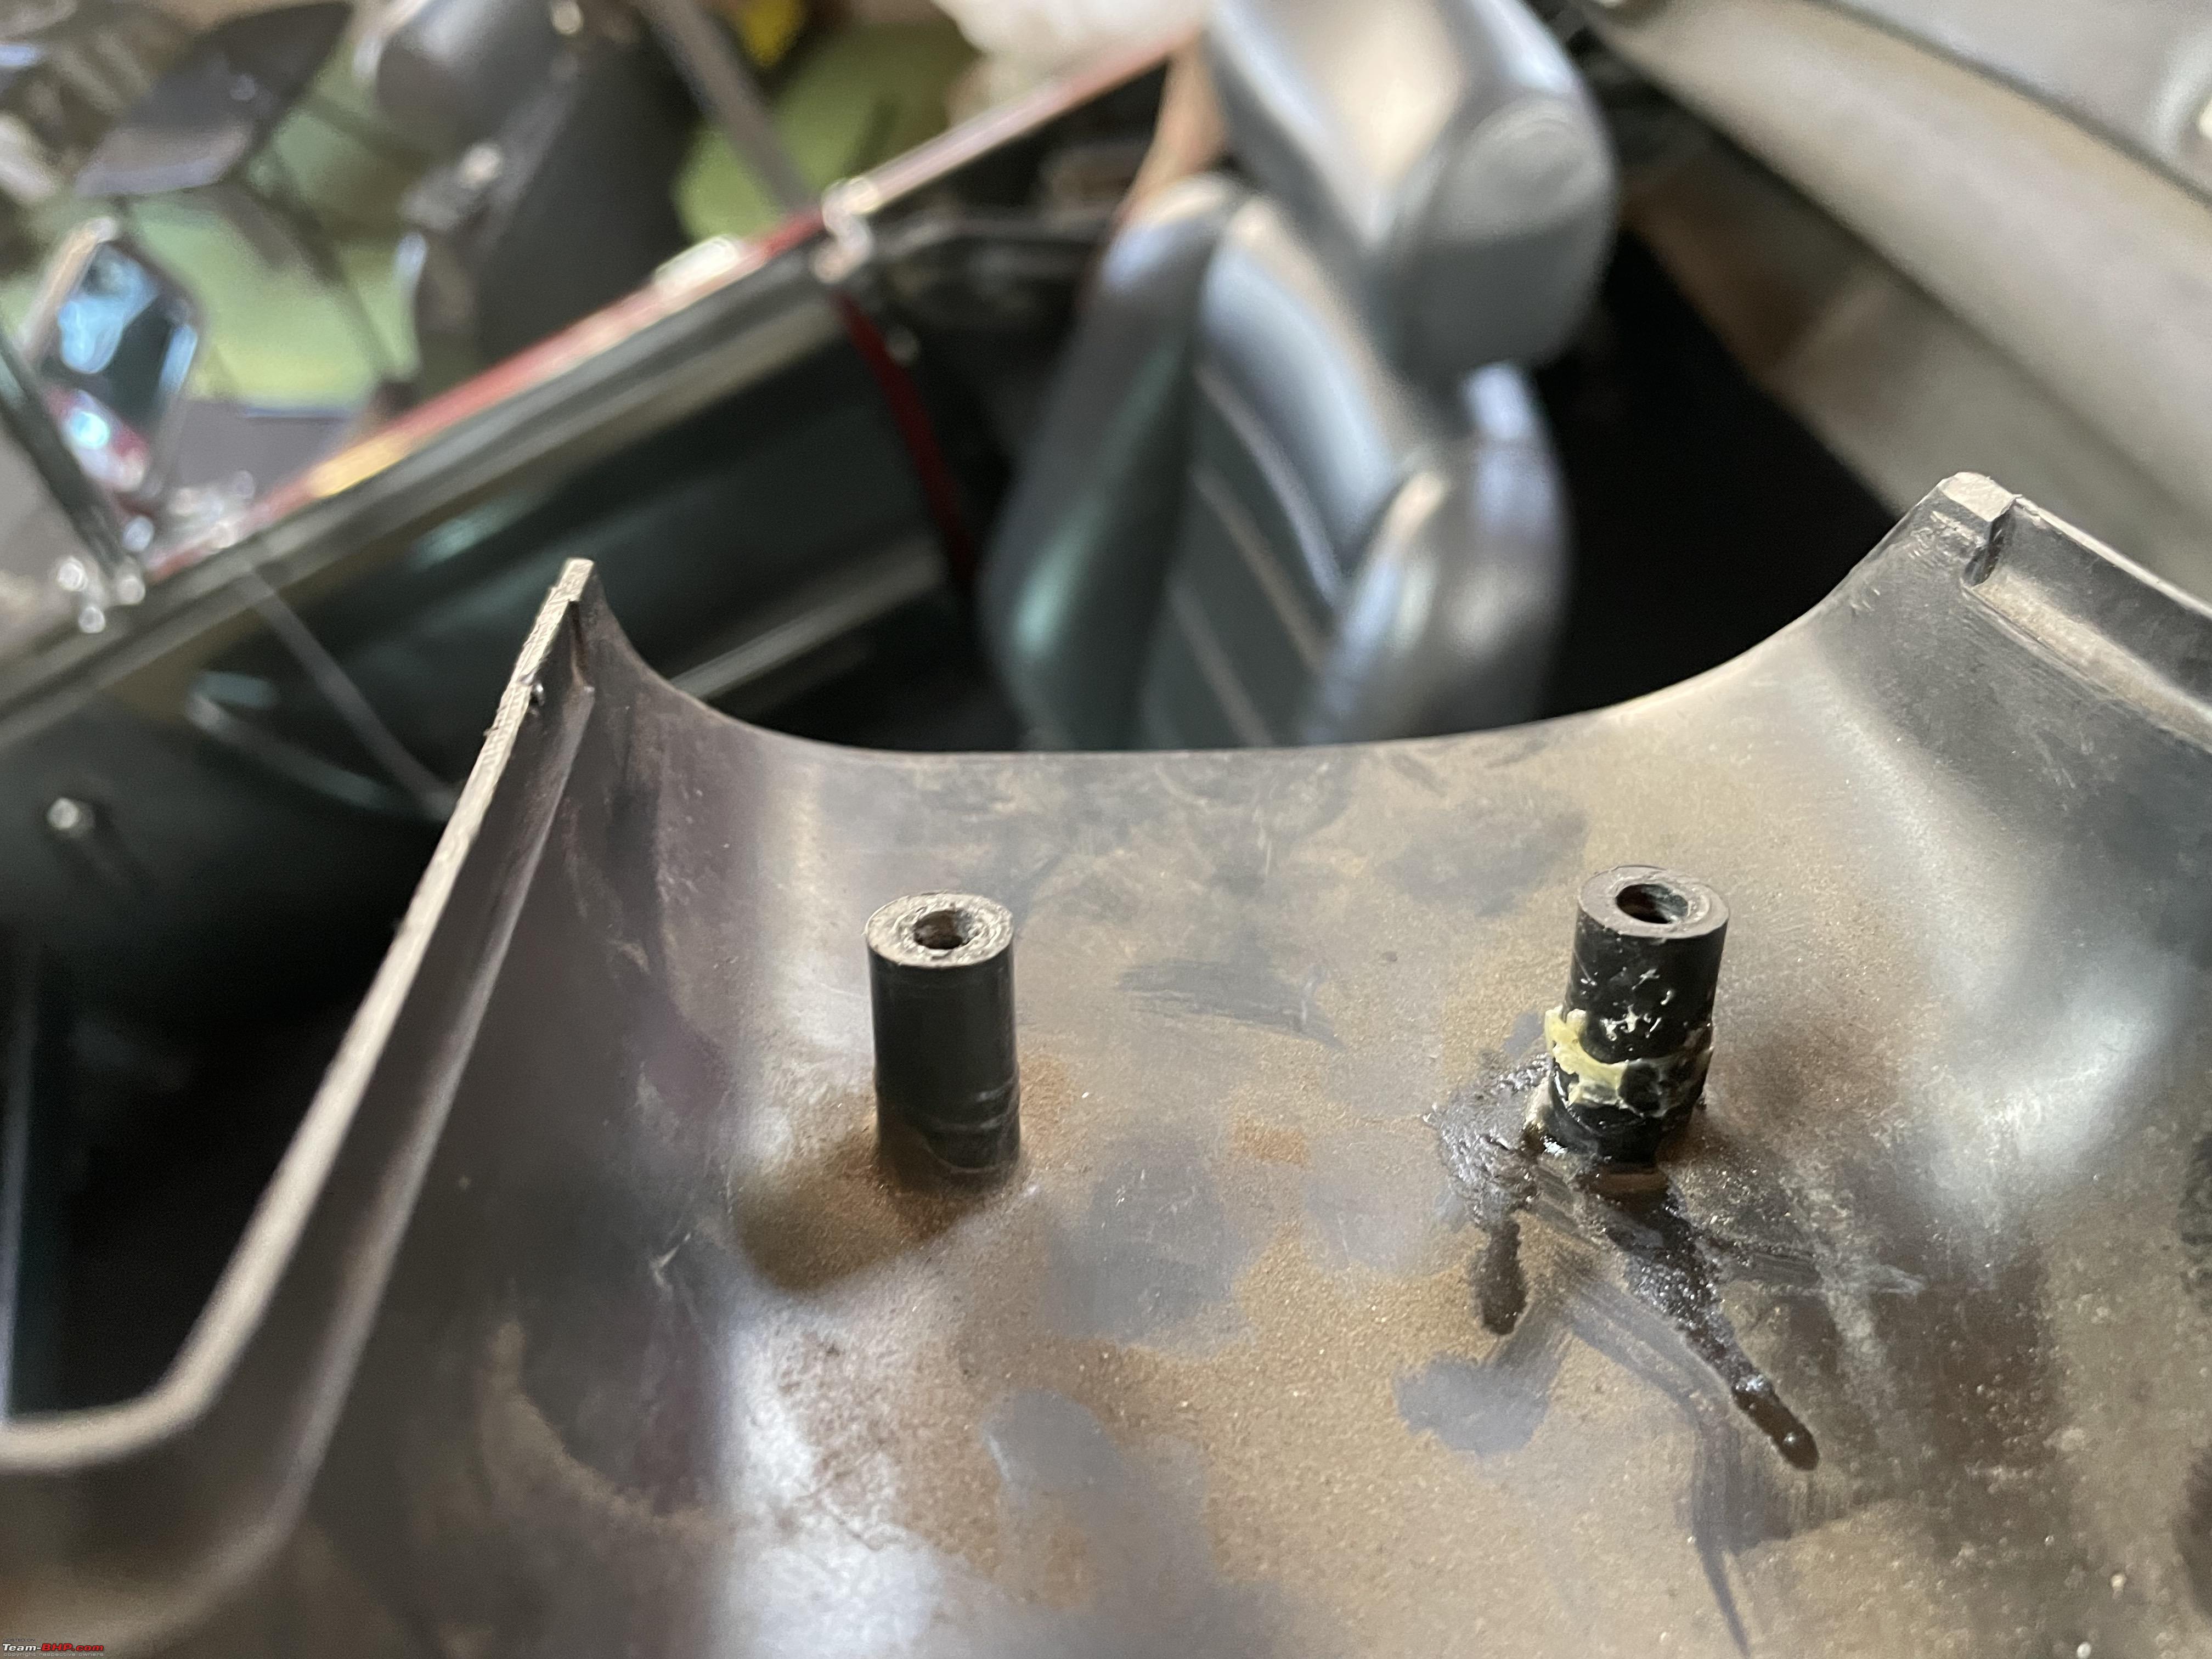 The Spider has a footwell light for the passenger and the driver in the knee board trim. Also, the rheostat for the dashboard lights is fit into the drivers knee board trim as well. Here you see it how it looks on the inside. A bit mucky and rundown but that is alright, because it is way out of sight. But I could not get any of the two footwell lights to work. I will look into this another time. I cant be to bothered. In fact, accidentally tripping the switch with your leg for these footwell lights is a well known cause for overnight dead batteries!!  First bit of knee board trim back in place. Also managed to get the fuse box back into its original position.  Second part of the knee board back in place!  This one swivels downwards so you can get at the fuses. Also notice on the left the handle to pull open the bonnet and next to it the wire string which is the back up bonnet release I installed some years ago.  I was beginning to get to the last few bits and pieces that still needed to be installed. This is all part of how the drivers seat is fastened to the car. Initially I could not remember what that plate was for, so I asked a question on the AlfaBB forum. Within hours I had my answer!! https://www.alfabb.com/threads/where.../#post-8795034  So this is where the plate goes. Once it was pointed out to me, I still could not recall it being there, but the passenger seat has the same arrangement. Totally unclear what this plate is for? Remarkably, the drawings in either the spare parts catalogue or workshop manual do not show this plate, or the two large thick spacer you see in the above image.  Re-fitting the seat was pretty straightforward.  With all the trim back in place and the seat in its place, I started the engine. I had been starting the engine a couple of times earlier. The reason is just to make sure all the electrical connections are still working. When you mess with these old cars and their electrical wiring it is easy to knock a connector off, or something will break. With the engine started I torqued up the nut of the steering wheel. I had to remove the steering boss several times due to problems with fitting the various bits of trim. So I had left the final nut loose until I was 100% sure everything was fitted correctly and working again.  Finally the piece de resistance!! The center piece of the steering wheel, which is also the horn switch!!   Done!!  With everything in the cabin back together I still had to adjust the length of the fuel linkage mechanism. I dont have any images, because it is a job that is done more or less by feel only. Because the particular link that needs adjusting is right below the air inlet manifold which also has the throttle body, injectors and various other bits and pieces, lots of wiring and hoses in the way. Took me several hours, but I managed in the end. Re-installed the window washer reservoir and the cooling liquid reservoir.  Peter and I noticed last week that the spark plug connector 3 is actually pressing into the air inlet going across it. I had not noticed this before. Its something i will need to look into. Cant do anything about it, other than finding a different spark plug lead and connector.  Finally, I re-attached the two battery leads and put the trickle charge back on. Job well done!!  I will still have make a special O-ring for the nut holding the pitman arm. Its not urgent, but I will do that in the next couple of weeks, before I take my Spider back to Marc for the replacement of the ball joints and the wheel allignement. I will probably do a bit more work on the wheels of the Jeep during the next two days. Weather looks good, so I can do a bit of paint spraying outside! I have also enrolled in a workshop car polishing. I have never used a proper polishing machine yet, so this is hopefully a good start to doing some more DIY work on the paint of the Jeep. Jeroen |
|
| (8)
Thanks
|
| The following 8 BHPians Thank Jeroen for this useful post: | ashis89, carthick1000, dailydriver, IcarusMan, Prowler, Thad E Ginathom, vaasu, VivekCherian |
|