Team-BHP > Motorbikes > Superbikes & Imports


Reply
  Search this Thread
150,391 views
Old 4th April 2016, 19:11   #106
BHPian
 
Join Date: Feb 2015
Location: Noida
Posts: 70
Thanked: 102 Times
Re: Harley-Davidson Heritage Softail Classic FLSTC: The Comprehensive Review

I can totally understand that, anyways I did not inquire so that I could get one made, just was so so impressed by the workmanship of that linkage rod. I was more interested in the knowledge of the riding boots not the customization but what brand/make they are.

Thanks
Vikram_agg is offline  
Old 4th April 2016, 19:48   #107
Senior - BHPian
 
dkaile's Avatar
 
Join Date: May 2011
Location: Meerut, India
Posts: 3,352
Thanked: 7,435 Times
Re: Harley-Davidson Heritage Softail Classic FLSTC: The Comprehensive Review

Quote:
Originally Posted by Vikram_agg View Post
I was more interested in the knowledge of the riding boots not the customization but what brand/make they are
These are made in a Agra export house and the person is a OE supplier to Harley USA. They retail there at about 10~15k. Pure leather, breathable inner, YKK zippers, original Harley spec imported sole, stainless steel studds and then that one in a million 'Heritage Rules' custom embroidery with your name. Have also ordered one more in Tan.

Cheers...

Last edited by dkaile : 4th April 2016 at 19:49.
dkaile is offline  
Old 5th April 2016, 17:11   #108
BHPian
 
Join Date: Feb 2015
Location: Noida
Posts: 70
Thanked: 102 Times
Re: Harley-Davidson Heritage Softail Classic FLSTC: The Comprehensive Review

So I suppose getting to order a pair or two for one's self is out of the question, even without the embroidery and customization or even branding?
Vikram_agg is offline  
Old 11th April 2016, 09:44   #109
Senior - BHPian
 
dkaile's Avatar
 
Join Date: May 2011
Location: Meerut, India
Posts: 3,352
Thanked: 7,435 Times
Re: Harley-Davidson Heritage Softail Classic FLSTC: The Comprehensive Review

New Highway Sunday Ride to Karnal 280kms

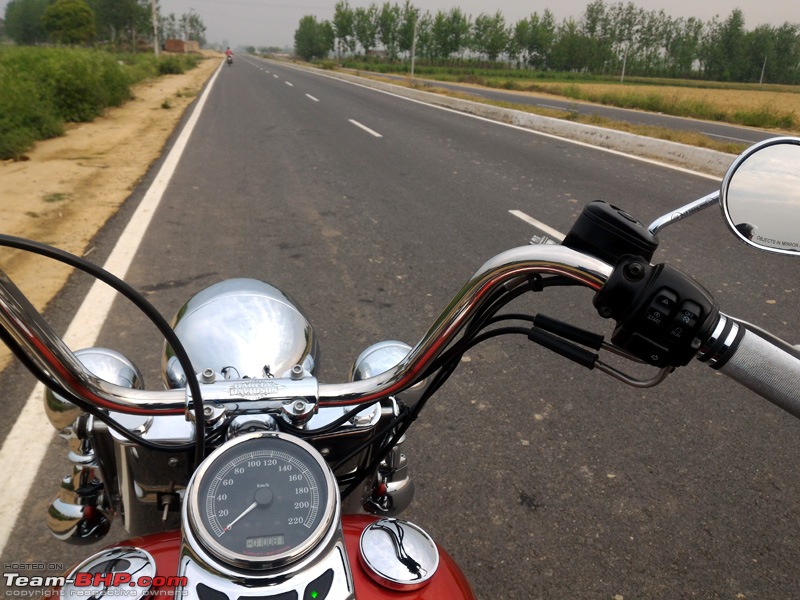
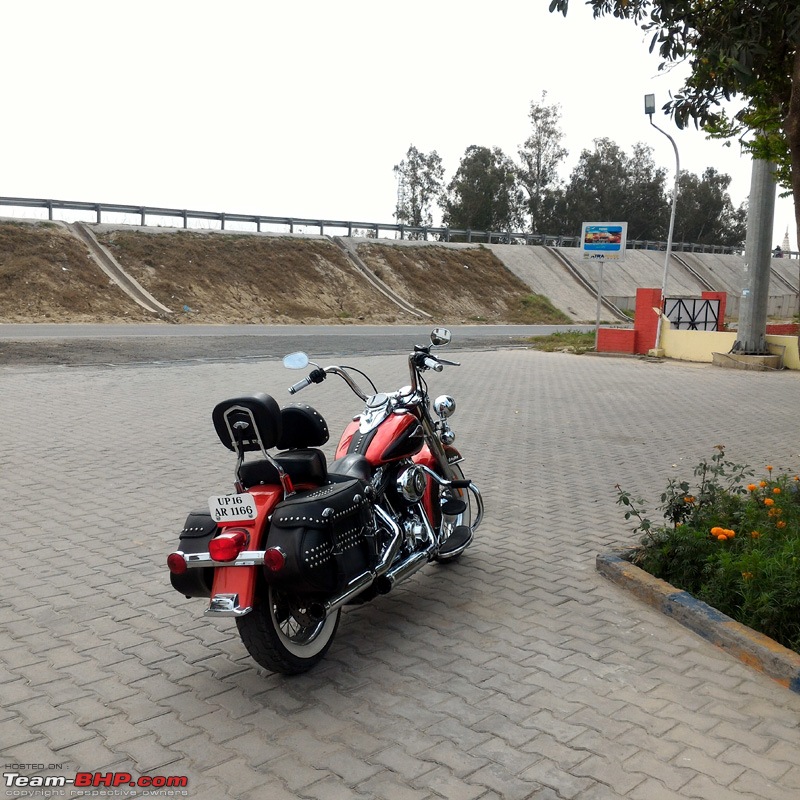
So a new highway had just been completed between Meerut and Karnal shortening the travel time by at least a hour. Earlier this road was in a very bad shape and we had to take detour through Baghpat-Sonepat to go on that route. But now it has been declared a integral highway for troop movement and Meerut has a very big cantonment.

Harley-Davidson Heritage Softail Classic FLSTC: The Comprehensive Review-karnal-ride-10042016_9.jpg

Nice and clean highway
Harley-Davidson Heritage Softail Classic FLSTC: The Comprehensive Review-karnal-ride-10042016_1.jpg

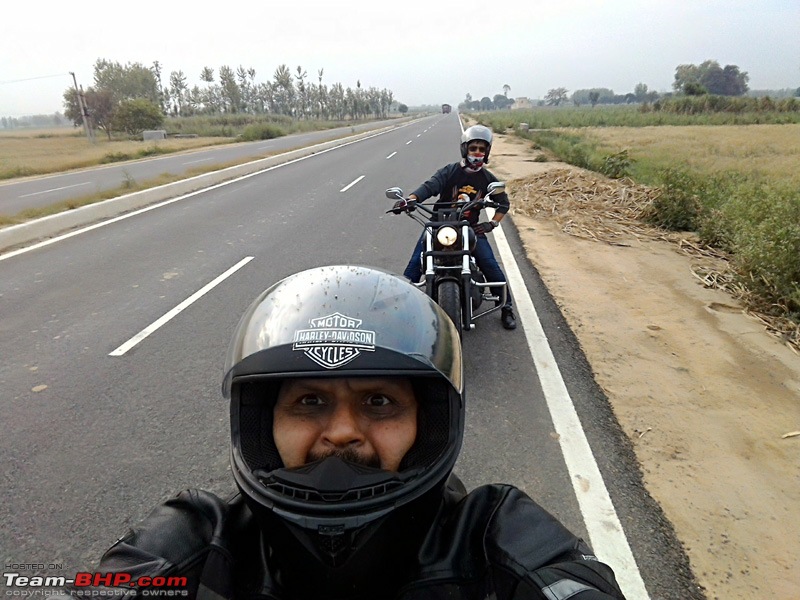
Some stretches are even adept for drag racing not that I advocate one in the least, as truck movement is still restricted due to a few single bridges. There are even 2~3 nice Gata loops. But there are some 3~4 100~200m stretches in some villages which need total rebuilding. And the biggest bottleneck is crossing Shamli for which a bye-pass is under construction. We did a 6am start so as to avoid being stuck there.
Harley-Davidson Heritage Softail Classic FLSTC: The Comprehensive Review-karnal-ride-10042016_2.jpg

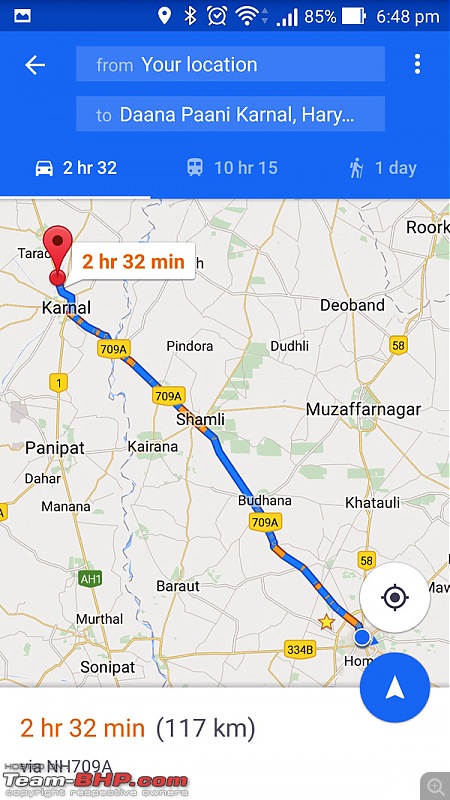
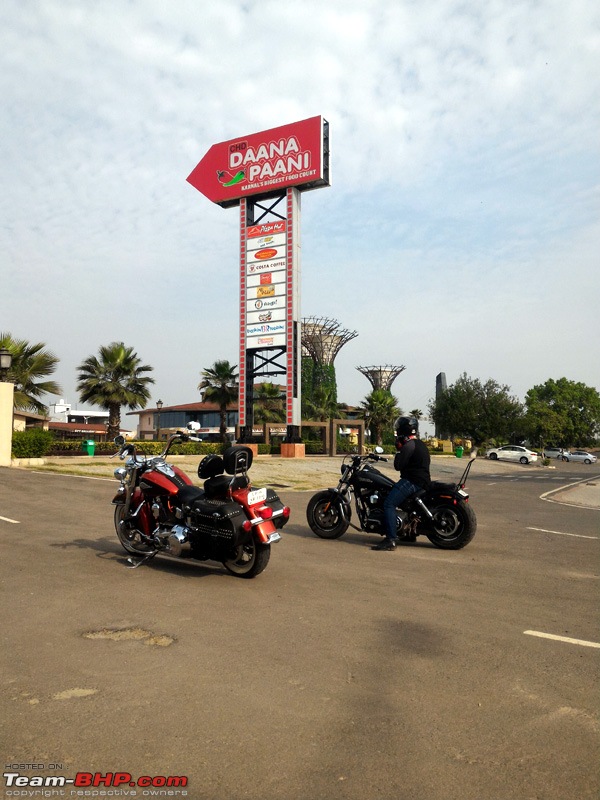
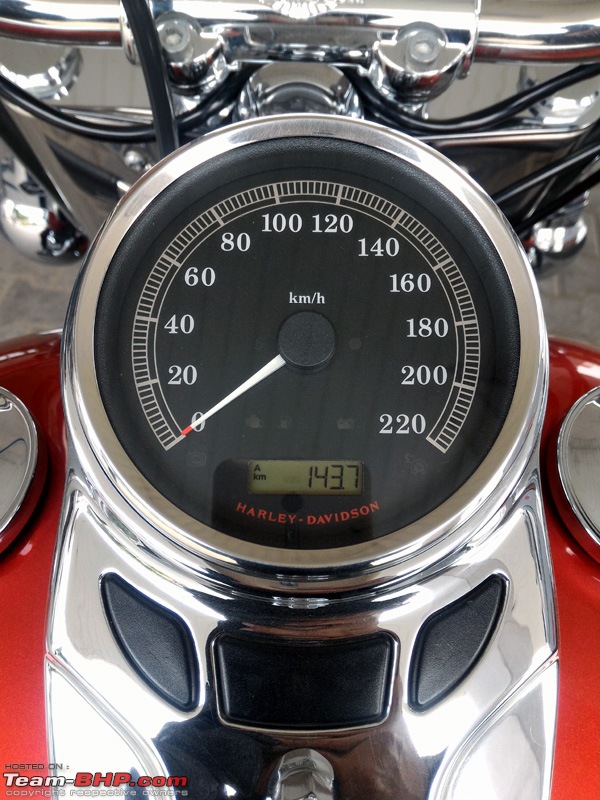
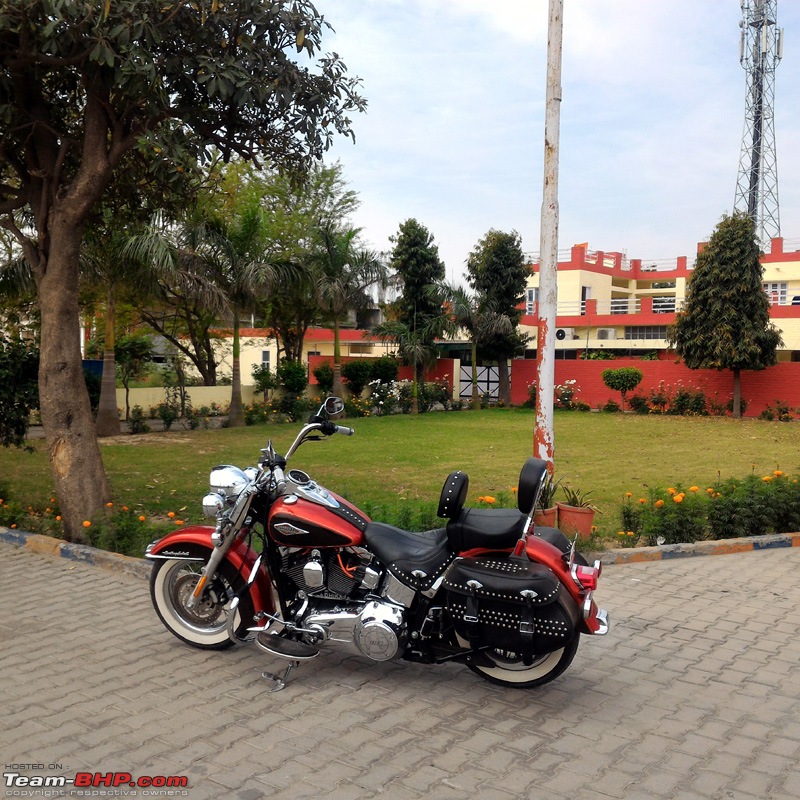
Reached the 143km distance to Daana Paani, Karnal in less than 2 hours
Harley-Davidson Heritage Softail Classic FLSTC: The Comprehensive Review-karnal-ride-10042016_3.jpg

Harley-Davidson Heritage Softail Classic FLSTC: The Comprehensive Review-karnal-ride-10042016_11.jpg

Refilling on the way back
Harley-Davidson Heritage Softail Classic FLSTC: The Comprehensive Review-karnal-ride-10042016_4.jpg

Harley-Davidson Heritage Softail Classic FLSTC: The Comprehensive Review-karnal-ride-10042016_5.jpg

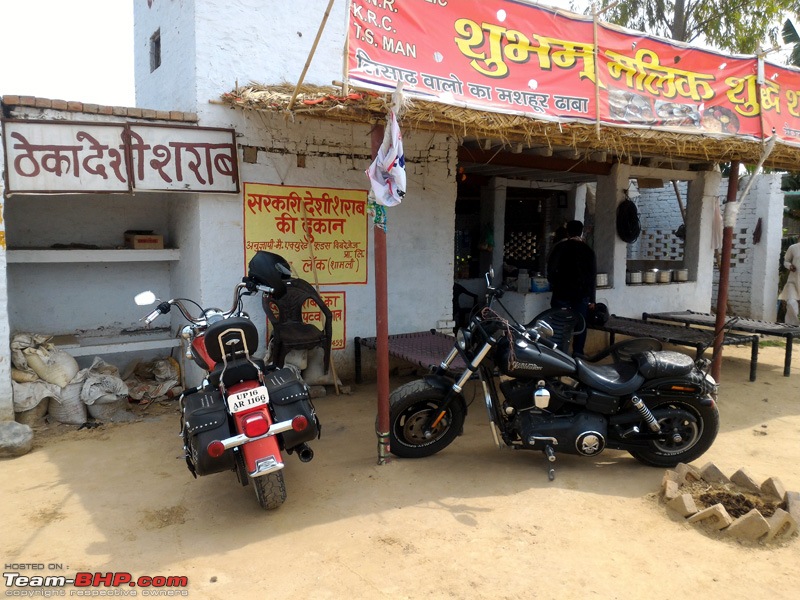
Stopped after Shamli for a cuppa tea. Noticed this interesting sign later, as to where we had stopped...lolz
Harley-Davidson Heritage Softail Classic FLSTC: The Comprehensive Review-karnal-ride-10042016_6.jpg

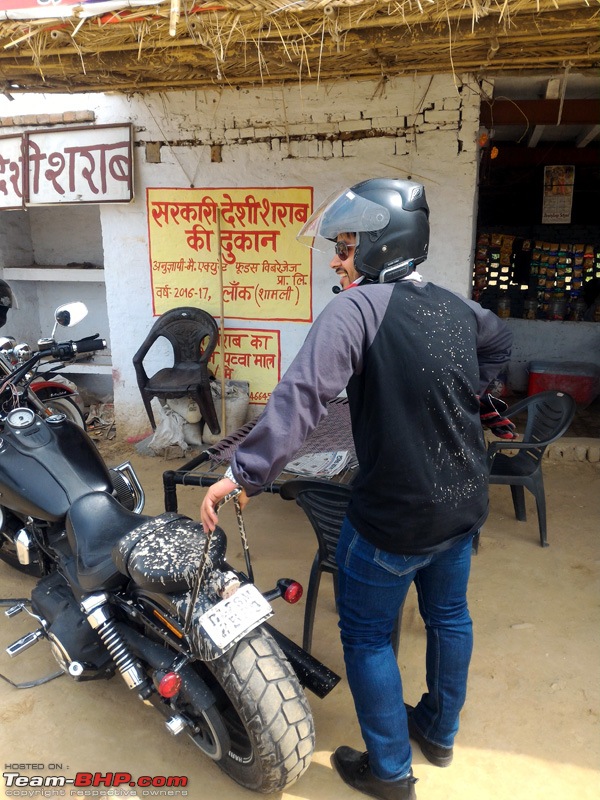
This pattern was not printed on the T-shirt...lolz
Harley-Davidson Heritage Softail Classic FLSTC: The Comprehensive Review-karnal-ride-10042016_7.jpg

Nice cuppa with some nice village folks
Harley-Davidson Heritage Softail Classic FLSTC: The Comprehensive Review-karnal-ride-10042016_8.jpg

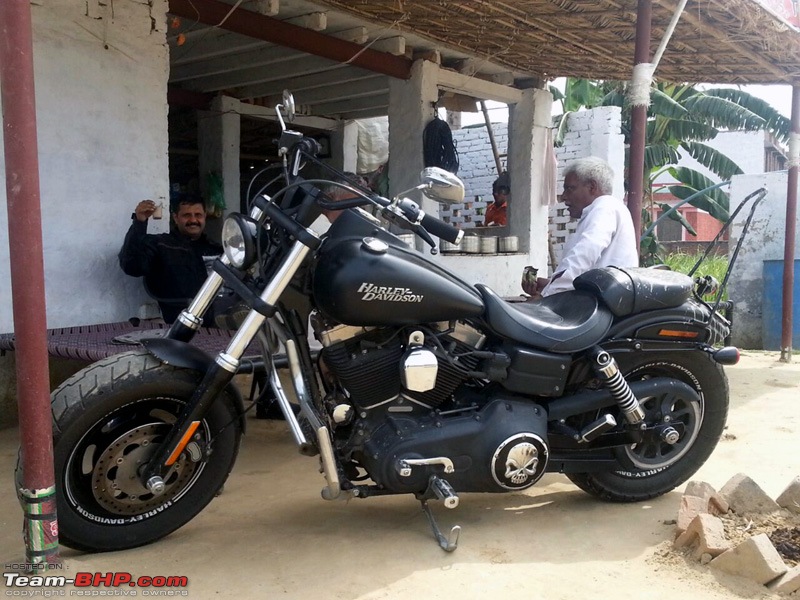
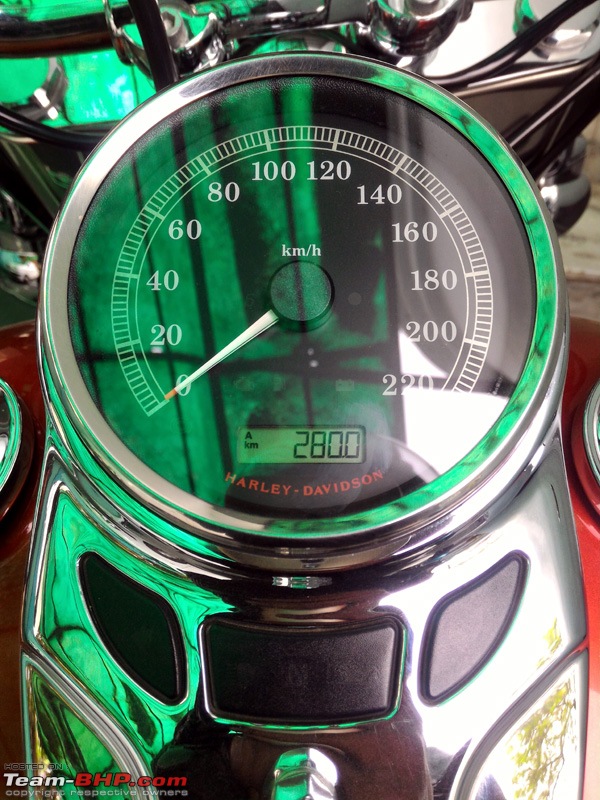
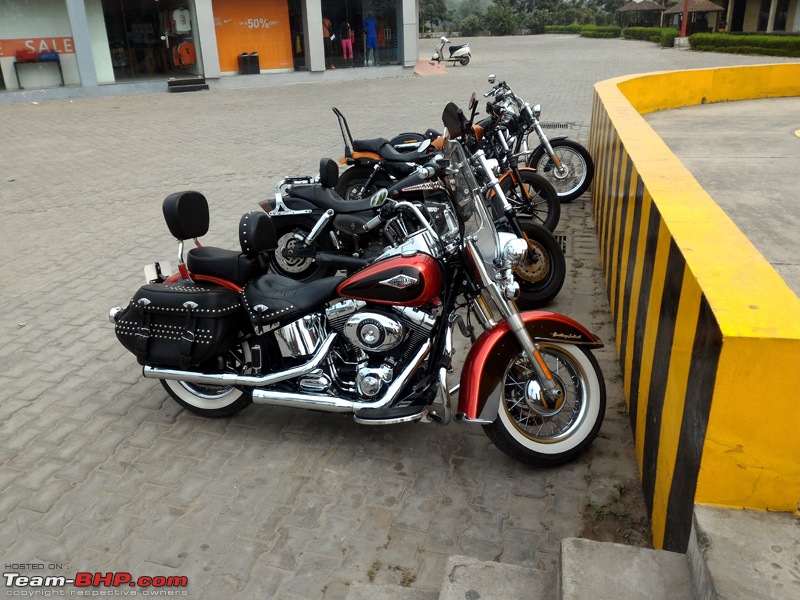
Total distance covered was 280kms and we were back before lunch. Service Technicians from Harley were in Meerut to service some bikes, so took the opportunity to adjust the clutch which was not done to my satisfaction earlier. The bike picks up quite well after this adjustment which is a must every 8k kms.
Harley-Davidson Heritage Softail Classic FLSTC: The Comprehensive Review-karnal-ride-10042016_10.jpg

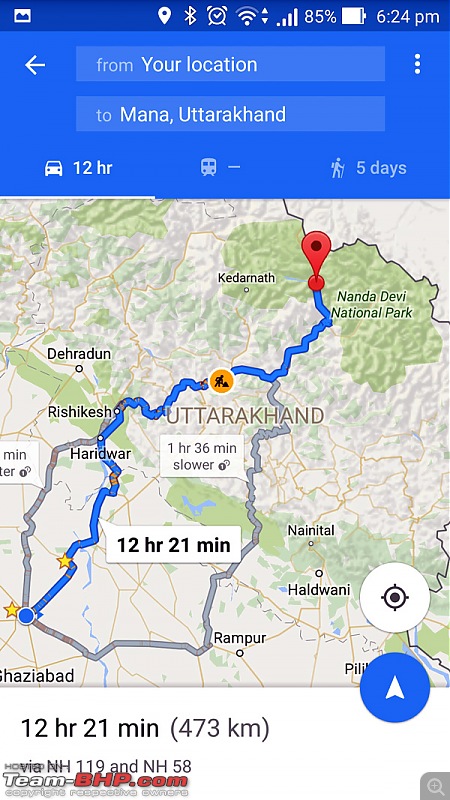
Planning to do Mana (the last Indian Village soon)
Harley-Davidson Heritage Softail Classic FLSTC: The Comprehensive Review-screenshot_20160407182435.jpg

Cheers...

Last edited by dkaile : 11th April 2016 at 09:53.
dkaile is offline   (6) Thanks
Old 11th April 2016, 12:13   #110
Team-BHP Support
 
Turbanator's Avatar
 
Join Date: Mar 2011
Location: Gurgaon
Posts: 6,681
Thanked: 28,121 Times
Re: Harley-Davidson Heritage Softail Classic FLSTC: The Comprehensive Review

Quote:
a new highway had just been completed between Meerut and Karnal shortening the travel time by at least a hour.
that looks good , will be useful for travelling to Muzaffarnagar ( work related - from Chandigarh)

So how is this Shamli bypass planed - will this be good only for going towards meerut or a complete circular road ?
Turbanator is offline   (1) Thanks
Old 11th April 2016, 12:25   #111
Senior - BHPian
 
dkaile's Avatar
 
Join Date: May 2011
Location: Meerut, India
Posts: 3,352
Thanked: 7,435 Times

Quote:
Originally Posted by Turbanator View Post
that looks good , will be useful for travelling to Muzaffarnagar ( work related - from Chandigarh)

So how is this Shamli bypass planed - will this be good only for going e towards meerut or a complete circular road ?
The main highway has been created after Shamli towards Meerut which was non existent earlier. The road between Karnal to Shamli is already in OK state though about half of the 40 odd kms is still not 4 lane but should happen eventually. I have no idea whether that Shamli by-pass will be circular or only for the Meerut section. Things should clarify in another month or two.

Cheers...
dkaile is offline  
Old 17th April 2016, 22:05   #112
Senior - BHPian
 
dkaile's Avatar
 
Join Date: May 2011
Location: Meerut, India
Posts: 3,352
Thanked: 7,435 Times
Re: Harley-Davidson Heritage Softail Classic FLSTC: The Comprehensive Review

Sunday Ride in memoriam of our HOG sister Veenu Paliwal. May her soul rest in peace.

Harley-Davidson Heritage Softail Classic FLSTC: The Comprehensive Review-veenu_paliwal.jpg

Somebody was asking on FB as to why we are riding for Veenu? I answered that we are celebrating her zest for life and spirit of freedom. I think she would have liked us to remember her in this way. I also liked another answer some buddy gave -
Quote:
well the way I see it, we are riders, we are hogs, this is our language, this is how we express. If we were musicians we would have organized a concert
Harley-Davidson Heritage Softail Classic FLSTC: The Comprehensive Review-veenu-paliwal-memorial-ride-17042016_1.jpg

Ride was to Gajraula. About 194 kms.
Harley-Davidson Heritage Softail Classic FLSTC: The Comprehensive Review-veenu-paliwal-memorial-ride-17042016_2.jpg

Harley-Davidson Heritage Softail Classic FLSTC: The Comprehensive Review-veenu-paliwal-memorial-ride-17042016_3.jpg

Cheers...
dkaile is offline   (8) Thanks
Old 22nd April 2016, 21:20   #113
Senior - BHPian
 
dkaile's Avatar
 
Join Date: May 2011
Location: Meerut, India
Posts: 3,352
Thanked: 7,435 Times
Re: Harley-Davidson Heritage Softail Classic FLSTC: The Comprehensive Review

PROJECT : Add Rear & Front Fender Tip Lights to the Heritage

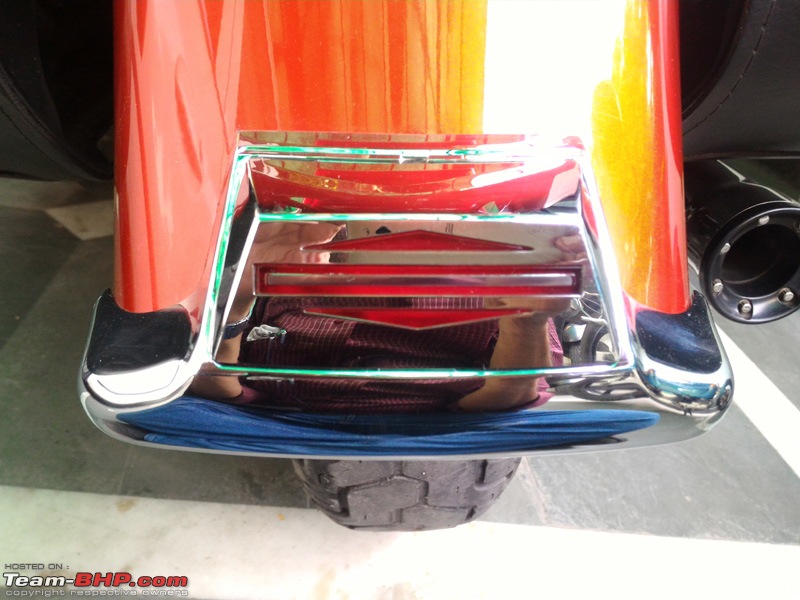
Now my 2013 model Heritage Softail has in-built fender Tip ornaments on both the front and rear fenders.

Harley-Davidson Heritage Softail Classic FLSTC: The Comprehensive Review-rear-fender-tip-light_1.jpg

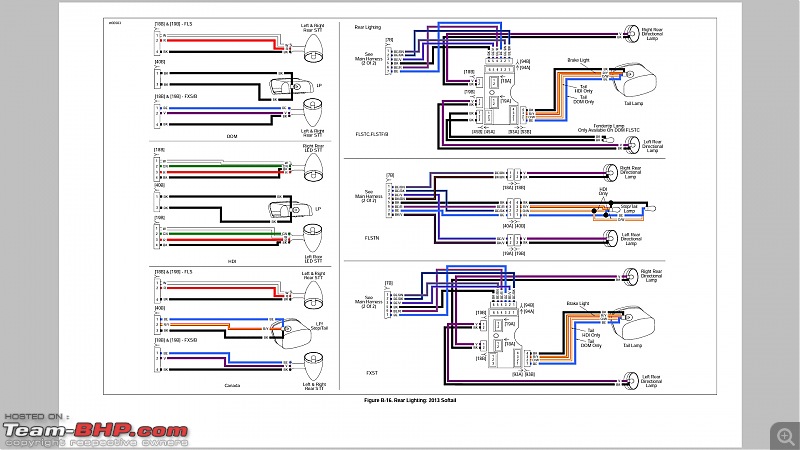
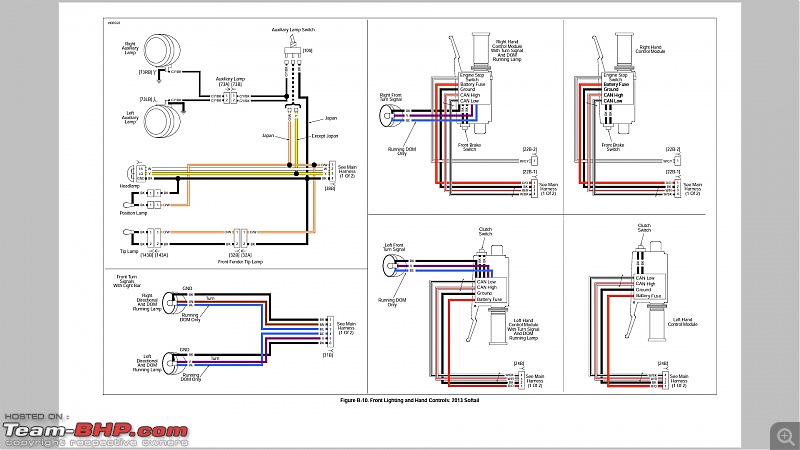
But unlike the pre-2006 models they come without any lights in them. Don't know why Harley decided to remove them when they add so much character as well as increased safety and visibility to the bike. So contacted Capital Harley and their current parts bin did not have them. Inquired around and found out that these could be imported from the US (from the older model stocks) but could not guarantee that they would work. Also the cost was prohibitive at around 25k! Looked around for aftermarket one's from Custom Dynamics and they also were in the 10k+ range plus the hassles of importing. So researched and read the Service Manuals (that I have incidentally officially purchased online in pdf form for around 500 bucks) and found out that the electrical ports for both the fender tips are present and they are also available as a option in the US market.

Harley-Davidson Heritage Softail Classic FLSTC: The Comprehensive Review-rear-lighting-wiring-diagram.jpg

Harley-Davidson Heritage Softail Classic FLSTC: The Comprehensive Review-front-lighting-wiring-diagram.jpg

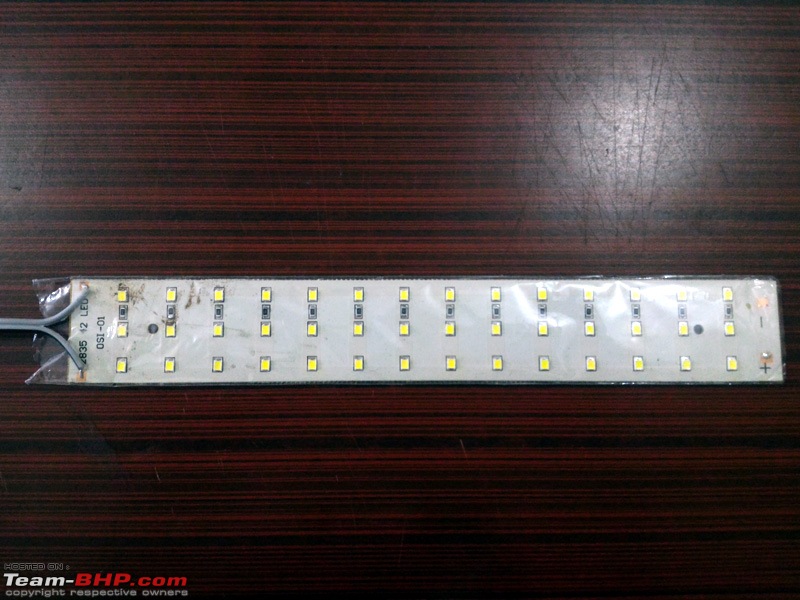
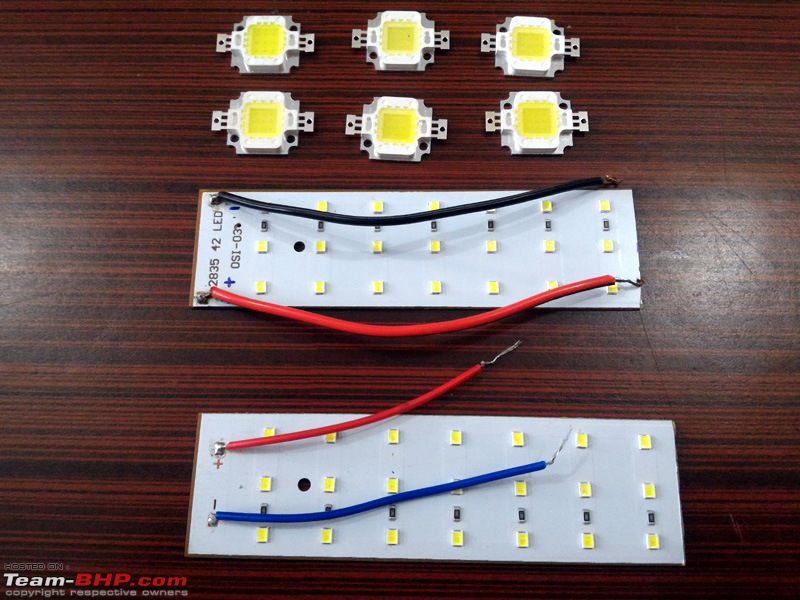
So that's where I started from. And this 40 bucks plate (mica base) with 42 LED (0.2W each afaik) is all that was needed!!

Harley-Davidson Heritage Softail Classic FLSTC: The Comprehensive Review-rear-fender-tip-light_15.jpg

I did try some other aluminum base LED's too which were much brighter but they got too hot and were hence discarded keeping long term use in mind.

Harley-Davidson Heritage Softail Classic FLSTC: The Comprehensive Review-rear-fender-tip-light_2.jpg

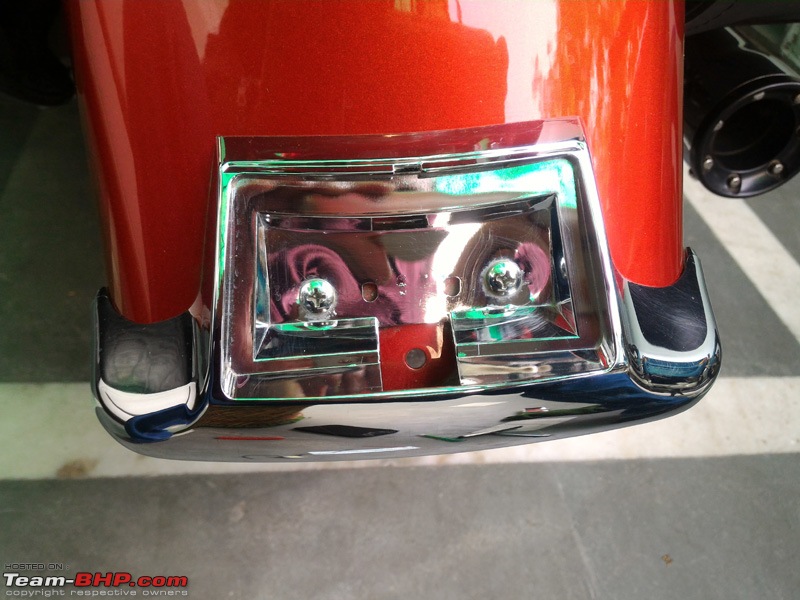
So the fender tip was easily removed by just a small philips head which revealed all blank inside

Harley-Davidson Heritage Softail Classic FLSTC: The Comprehensive Review-rear-fender-tip-light_3.jpg

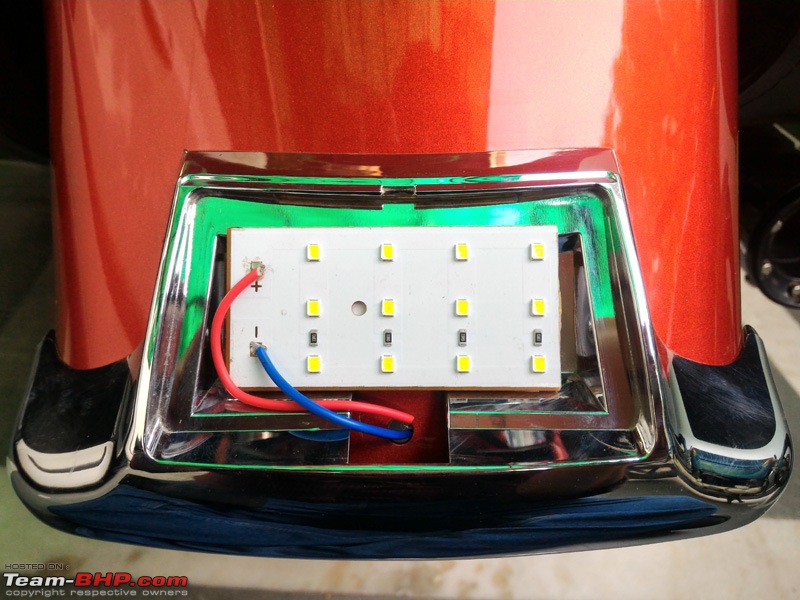
Approximate look of what I wanted on the inside, not actual, as I went for 3x5 LED size (which I cut to size from the bigger plate) and replaced all local soldering and wires with OE stuff that I got from Harley.

Harley-Davidson Heritage Softail Classic FLSTC: The Comprehensive Review-rear-fender-tip-light_4.jpg

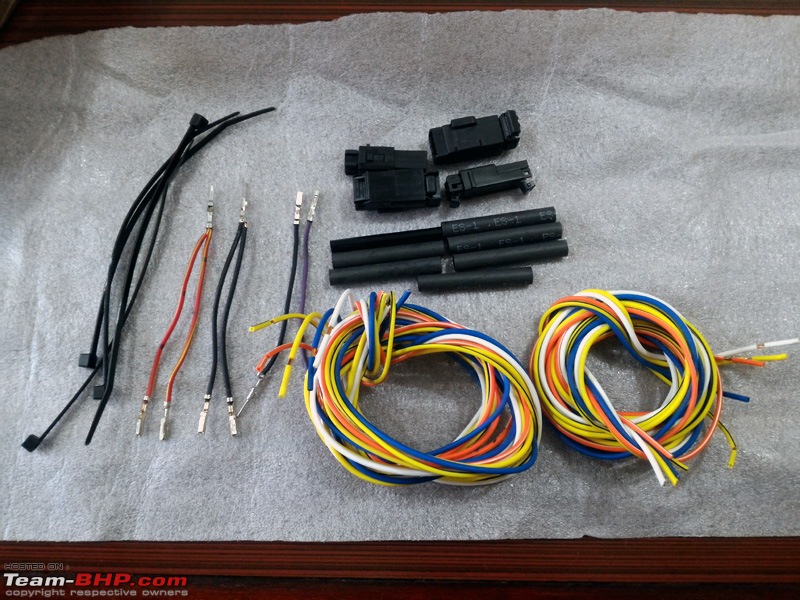
Thanks so much to service department at Capital Harley which just encourages DIY jobs unlike other companies/dealerships which will always throw a 'warranty over' clause at you. They sent me all original wires and sockets required along with heat shrinkable plastic seals to be put over any joints/soldering and that too free of cost! I never needed to CUT any original wiring in the entire project. Any cuts (which were duly soldered) were made to these extra wiring only.

Harley-Davidson Heritage Softail Classic FLSTC: The Comprehensive Review-rear-fender-tip-light_5.jpg

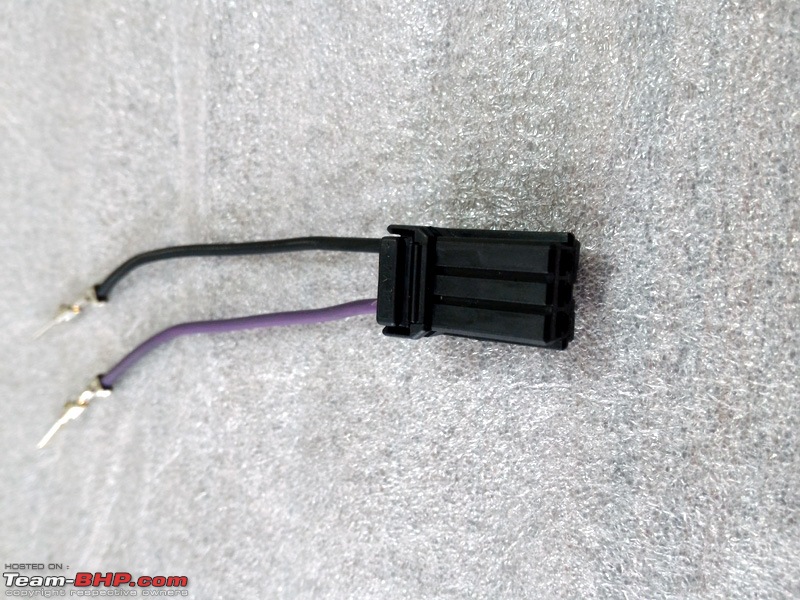
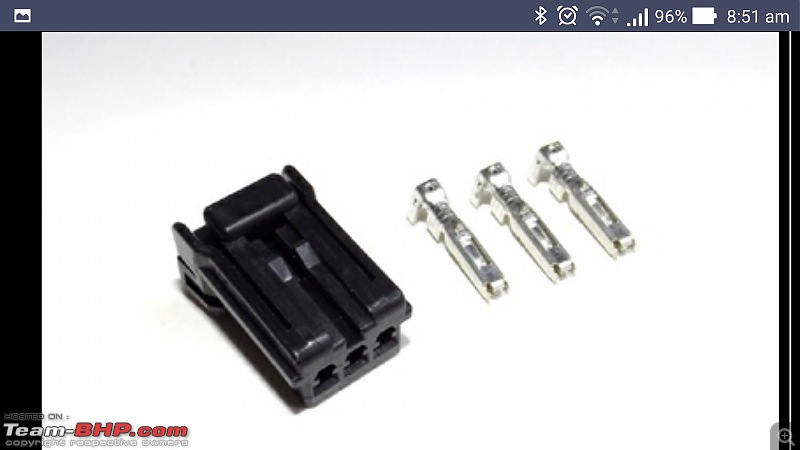
The 3 pin AMP Multilock socket needed (but with only 2 wires, the middle one is free) with pins

Harley-Davidson Heritage Softail Classic FLSTC: The Comprehensive Review-rear-fener-tip-light_6.jpg

Harley-Davidson Heritage Softail Classic FLSTC: The Comprehensive Review-amp-multilock-socket-3-way.jpg

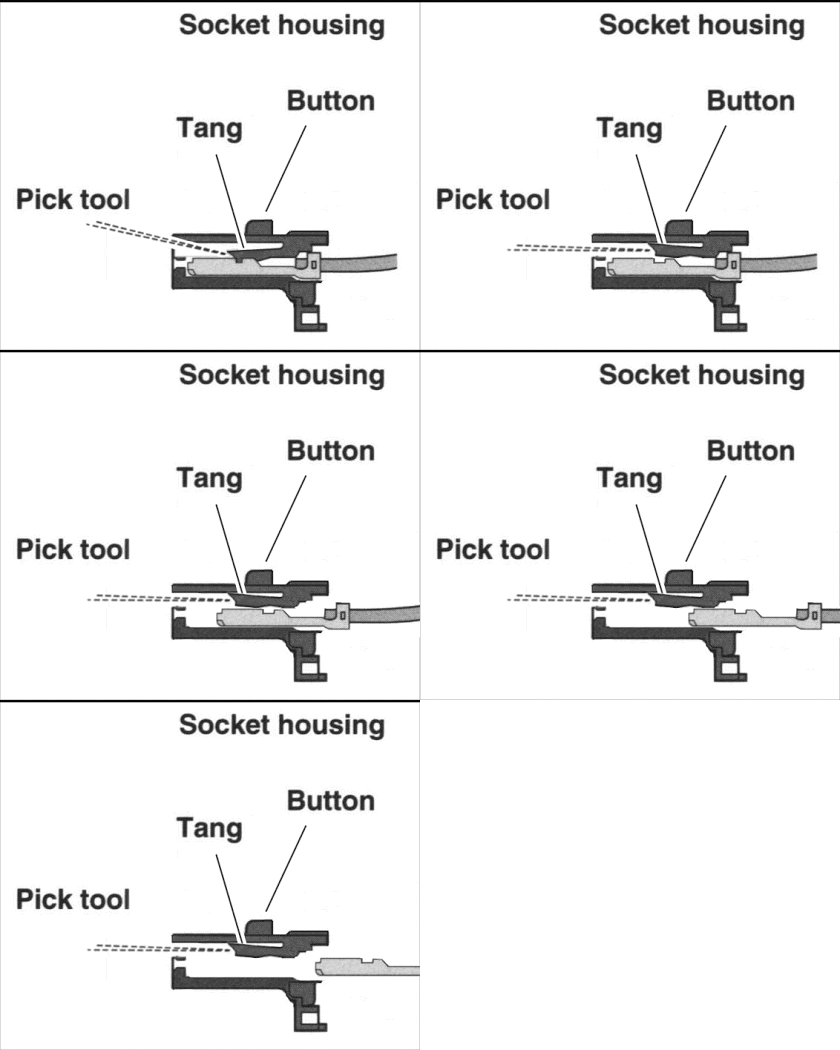
How the pin is removed (gif)

Name:  AMP Multilock Pin Removal gif.gif
Views: 3426
Size:  29.4 KB

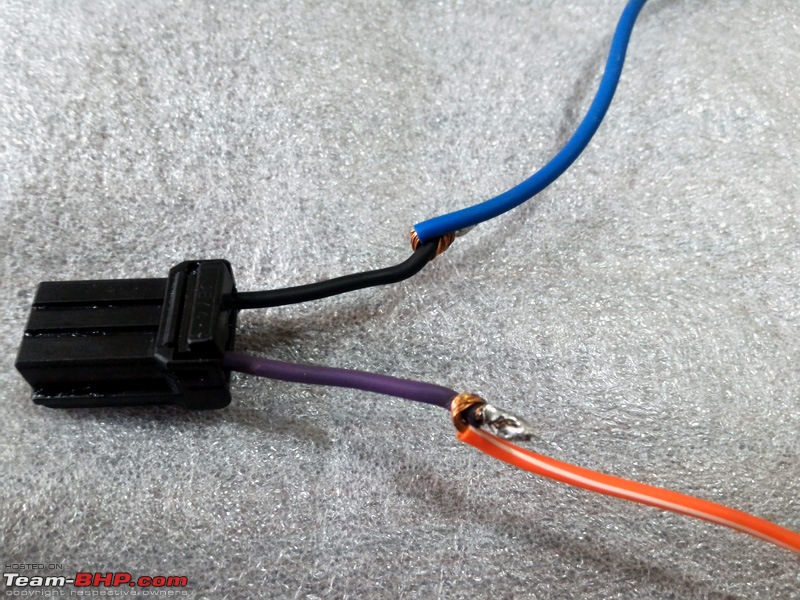
All joints I personally soldered

Harley-Davidson Heritage Softail Classic FLSTC: The Comprehensive Review-rear-fender-tip-light_7.jpg

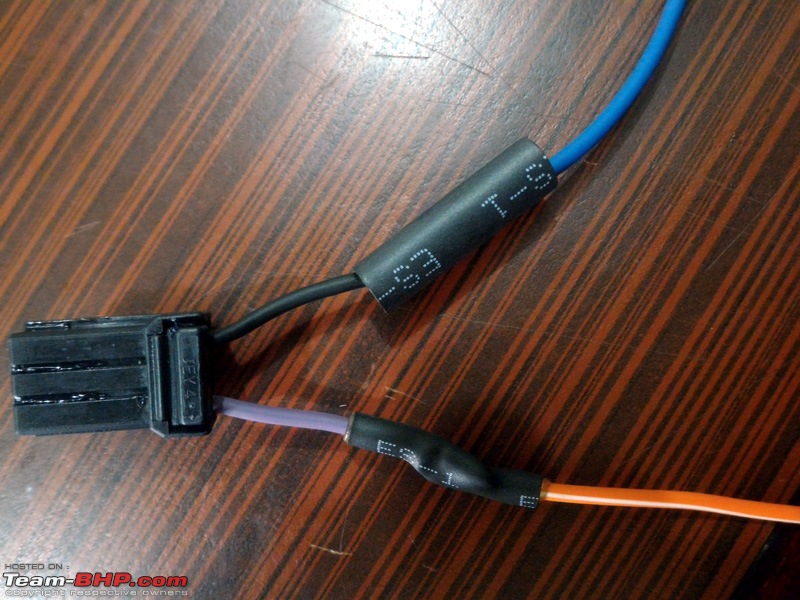
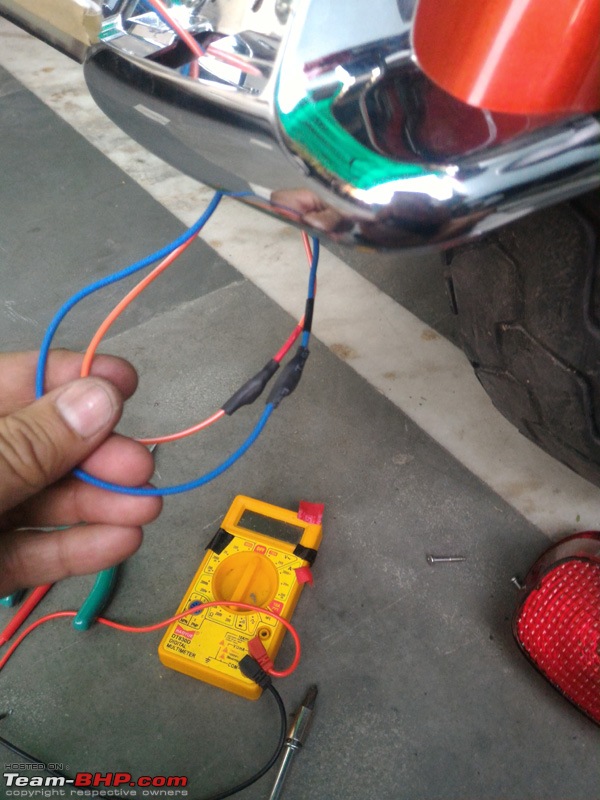
And then I put on the heat shrinkable sleeves for a permanent joint unlike the electrical tape that is normally used. Here you can see how this sleeve works as one is heat shrinked while the other is not.

Harley-Davidson Heritage Softail Classic FLSTC: The Comprehensive Review-rear-fender-tip-light_8.jpg

Wiring being routed in the rear fender after duly testing all contact points by a multimeter (which I learned to use recently... Hail Youtube...lolz)

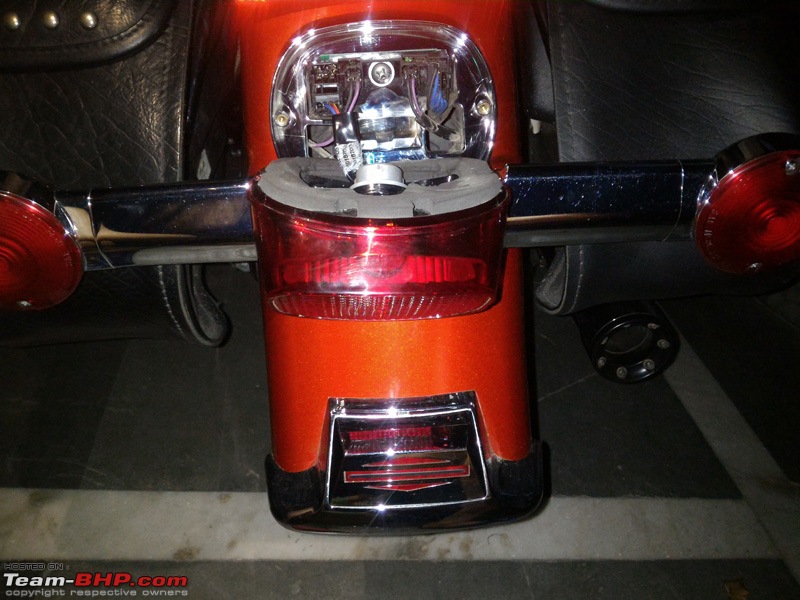
Harley-Davidson Heritage Softail Classic FLSTC: The Comprehensive Review-rear-fender-tip-light_11.jpg

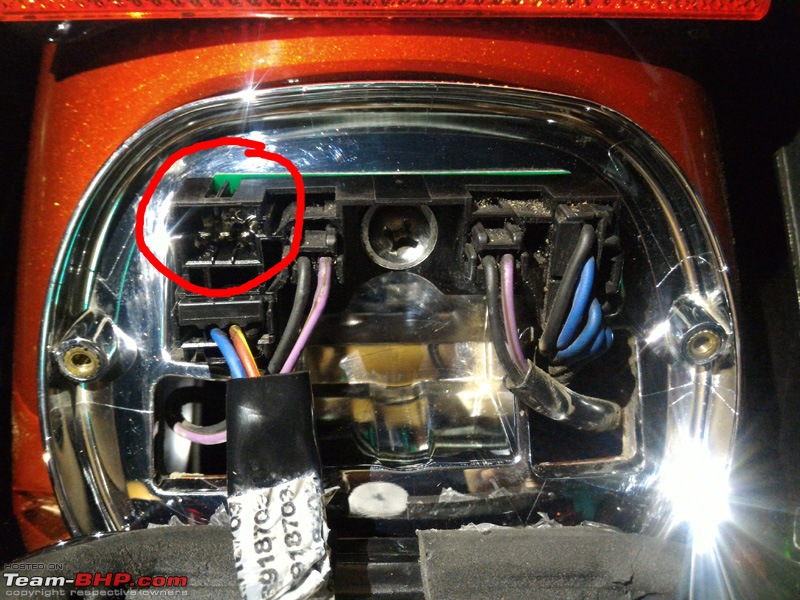
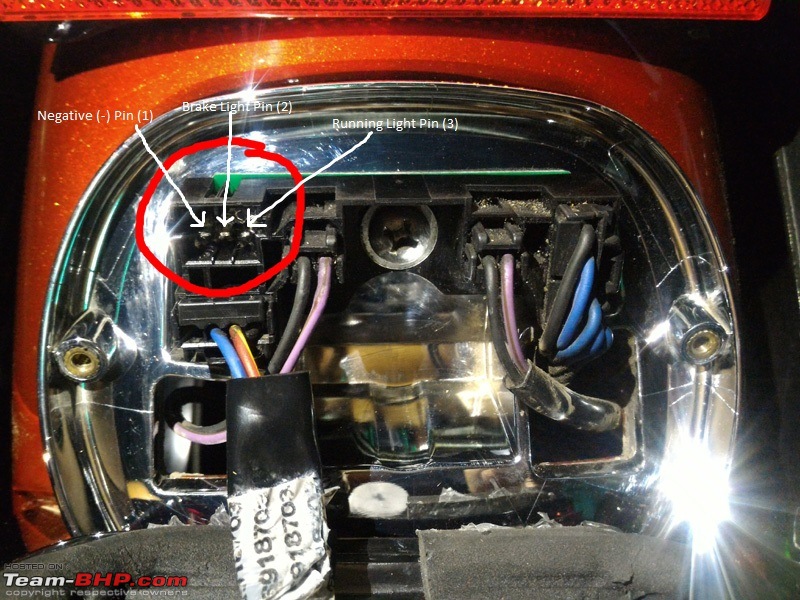
The connector for the Rear Fender Tip is already present inside the Tail Light console

Harley-Davidson Heritage Softail Classic FLSTC: The Comprehensive Review-rear-fender-tip-light_9.jpg

Here it is circled in red

Harley-Davidson Heritage Softail Classic FLSTC: The Comprehensive Review-rear-fender-tip-light_10.jpg

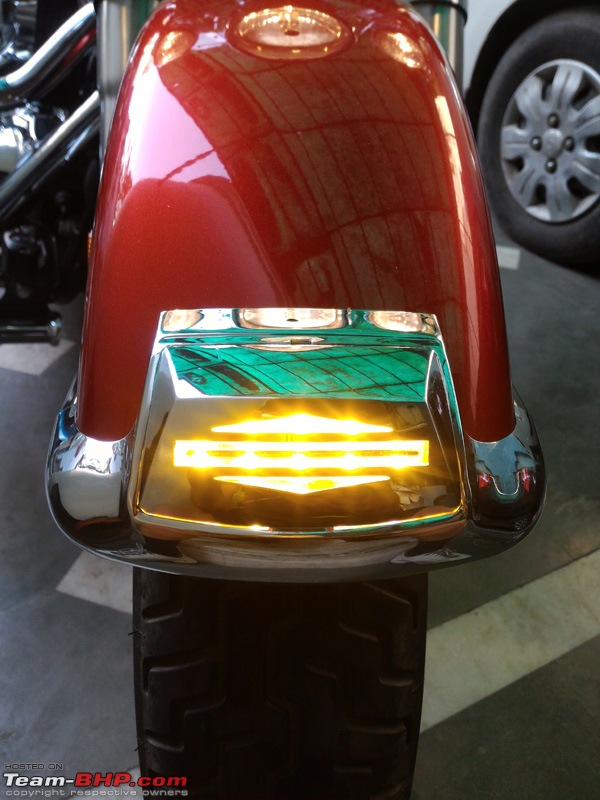
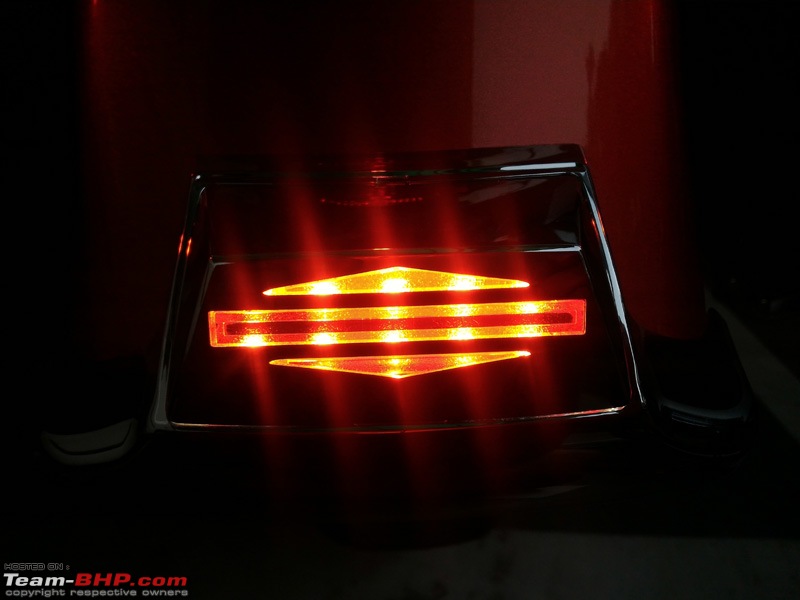
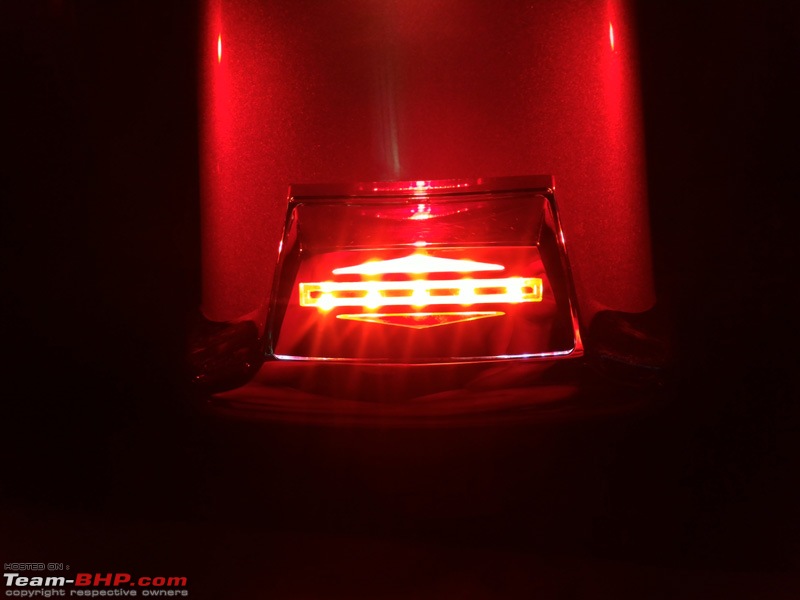
Here it is now complete -

Harley-Davidson Heritage Softail Classic FLSTC: The Comprehensive Review-rear-fender-tip-light_12.jpg

Harley-Davidson Heritage Softail Classic FLSTC: The Comprehensive Review-rear-fender-tip-light_13.jpg

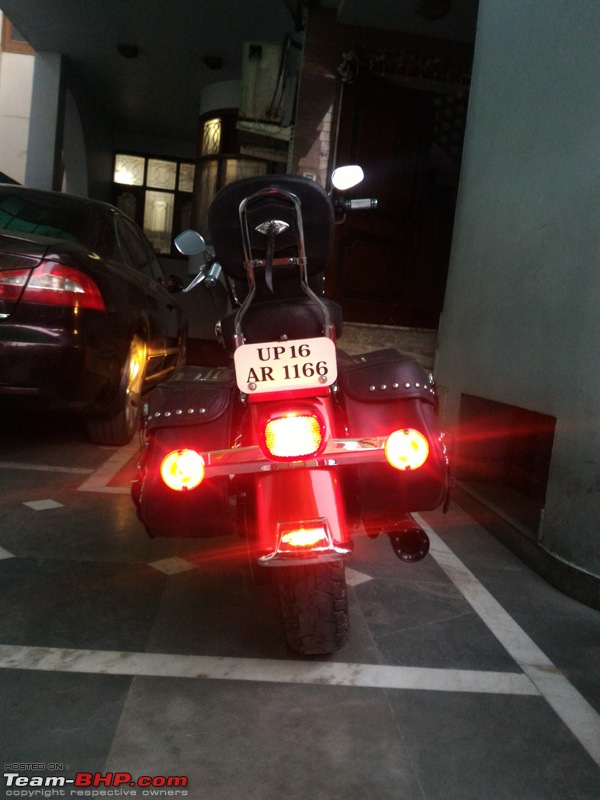
Adds flair and added visibility and hence safety to the rear

Harley-Davidson Heritage Softail Classic FLSTC: The Comprehensive Review-rear-fender-tip-light_14.jpg

To follow - Front Fender Tip Light installation.

Cheers...

Last edited by dkaile : 22nd April 2016 at 21:26.
dkaile is offline   (10) Thanks
Old 22nd April 2016, 22:10   #114
Senior - BHPian
 
dkaile's Avatar
 
Join Date: May 2011
Location: Meerut, India
Posts: 3,352
Thanked: 7,435 Times
Re: Harley-Davidson Heritage Softail Classic FLSTC: The Comprehensive Review

Fender Tip Lights (cont.) - Front Fender Tip

Now the front fender tip light turned out to be a different animal all together. Gave me a headache. It was shown in the service manual that the front fender tip light socket is present under the fuel tank!!
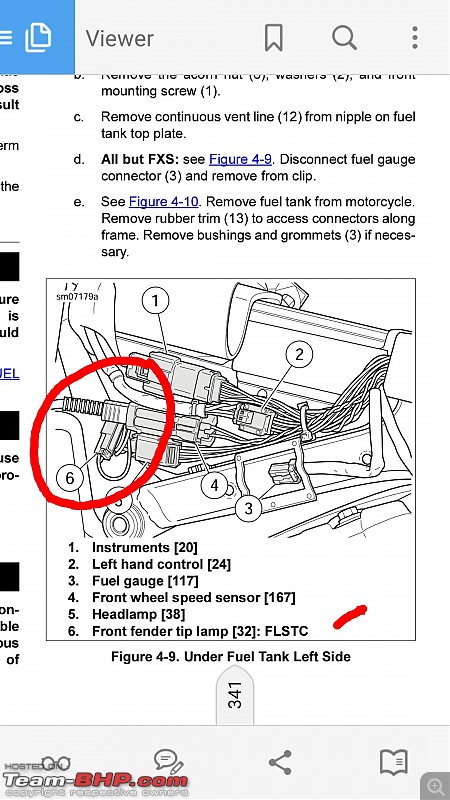
Harley-Davidson Heritage Softail Classic FLSTC: The Comprehensive Review-under-fuel-tank-left-side-sockets.jpg

And requires a 2 way AMP Multilock socket
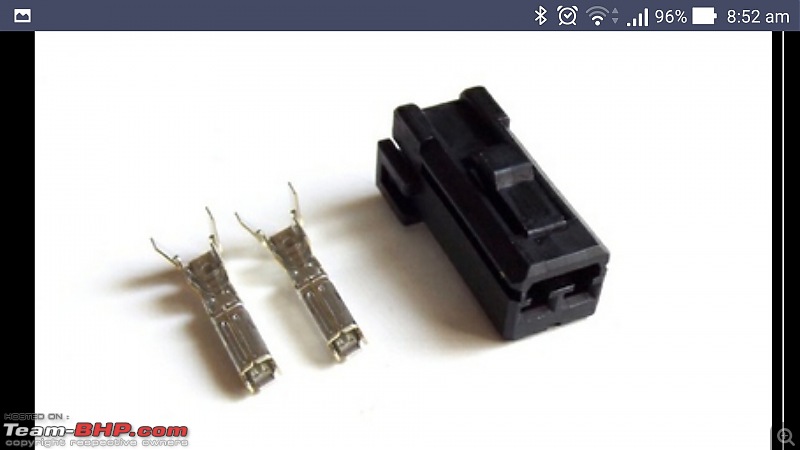
Harley-Davidson Heritage Softail Classic FLSTC: The Comprehensive Review-amp-multilock-socket-2-way.jpg

BUT, no such socket turned out to be present when I removed/slid back the fuel tank. But I learned how to remove/slide back the fuel tank in the process...lolz. So here it is -

How to Remove/Slide Back a Harley Softail Fuel Tank -


So the first step is to remove the seat/s
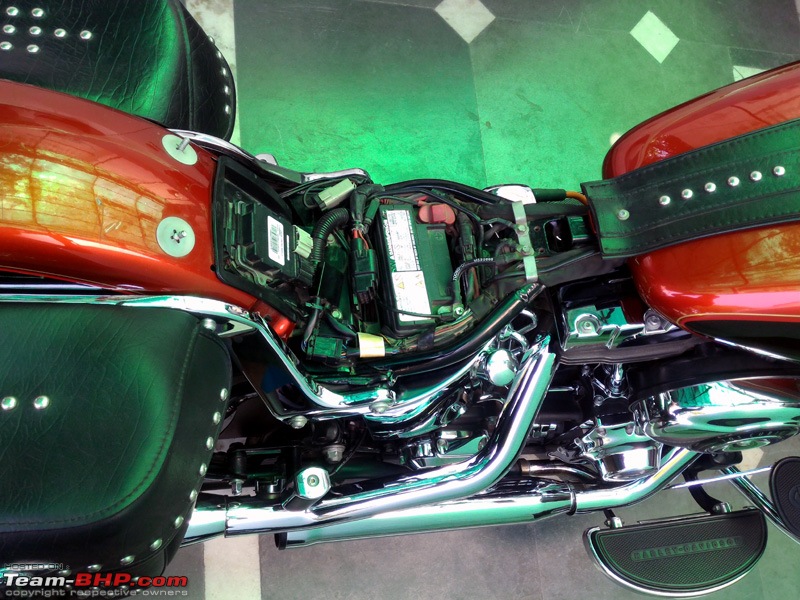
Harley-Davidson Heritage Softail Classic FLSTC: The Comprehensive Review-front-fender-tip-light_1.jpg

Then the Leather Tank Bib screw (Torx 25) is removed
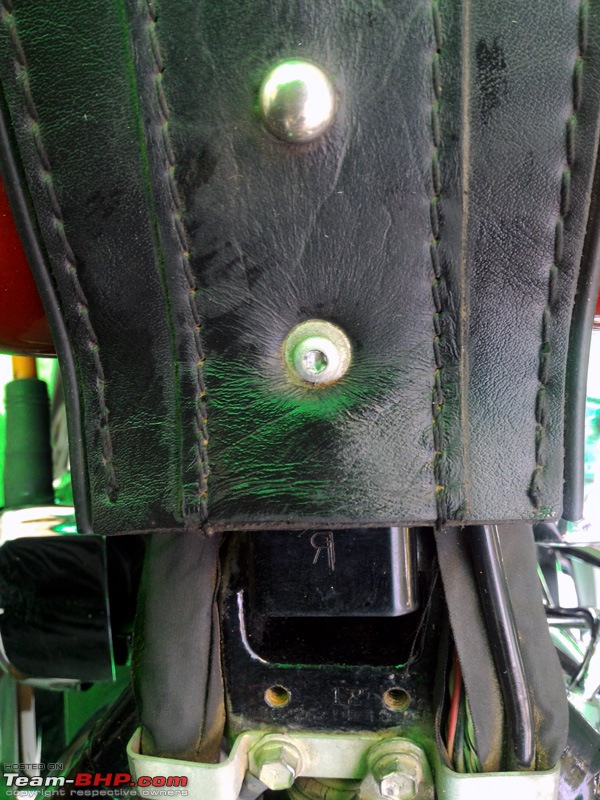
Harley-Davidson Heritage Softail Classic FLSTC: The Comprehensive Review-front-fender-tip-light_2.jpg

Which reveals the main Fuel Tank (Rear) bolt which is to be removed (Torx 40)
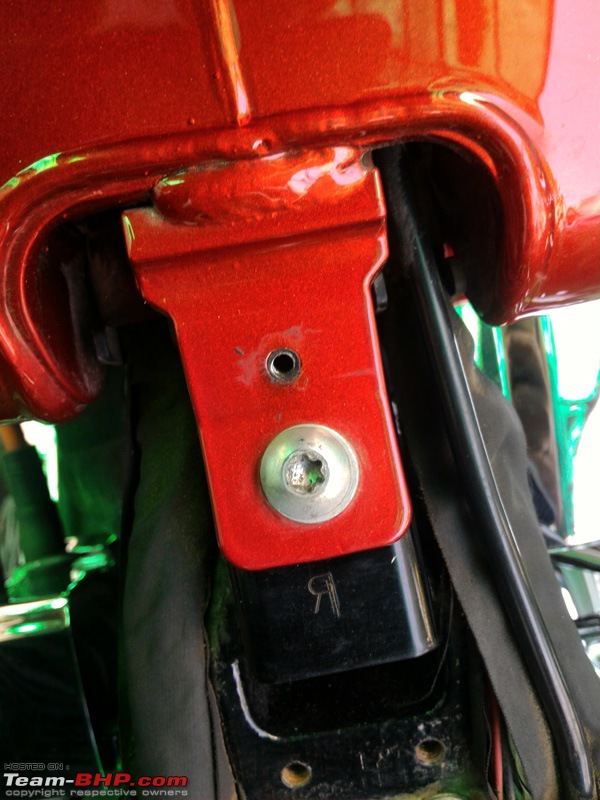
Harley-Davidson Heritage Softail Classic FLSTC: The Comprehensive Review-front-fender-tip-light_5.jpg

Then we move to the front of the fuel tank which is held in place by this long bolt

Harley-Davidson Heritage Softail Classic FLSTC: The Comprehensive Review-front-fender-tip-light_3.jpg

and the acorn nut on the other side

Harley-Davidson Heritage Softail Classic FLSTC: The Comprehensive Review-front-fender-tip-light_4.jpg

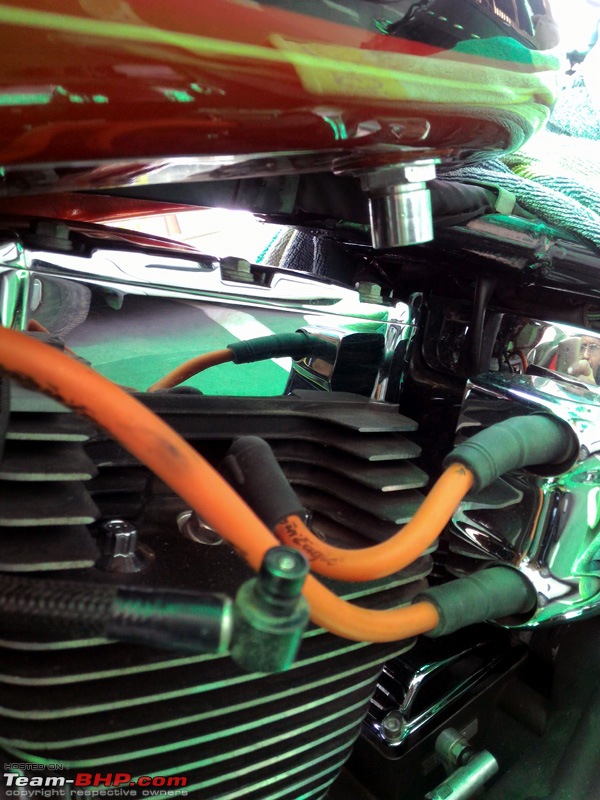
Then the fuel line is removed. Very simple tech. Just push the steel lock up and pull the fuel line from below (like a compressed air line).
Harley-Davidson Heritage Softail Classic FLSTC: The Comprehensive Review-front-fender-tip-light_6.jpg

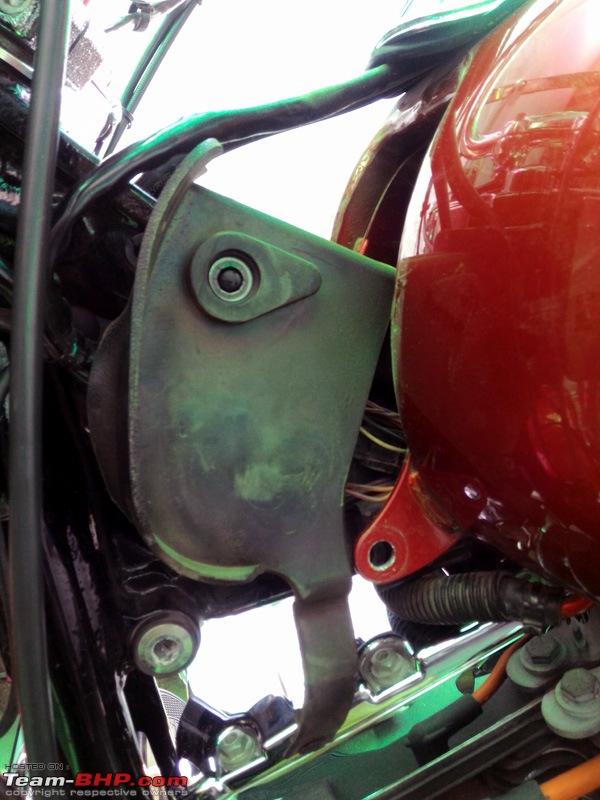
And then the tank can be slid back to reveal the electrical connectors which are under this rubber boot
Harley-Davidson Heritage Softail Classic FLSTC: The Comprehensive Review-front-fender-tip-light_7.jpg

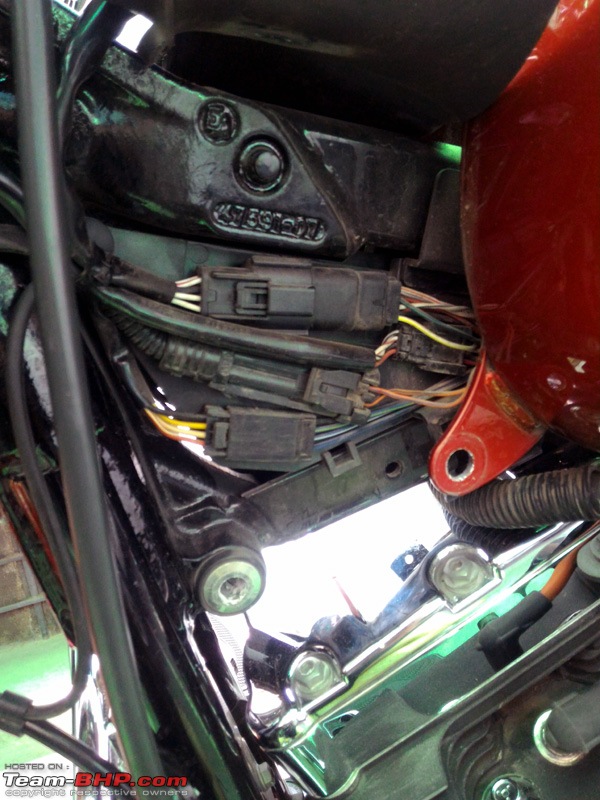
BUT surprise surprise, the front fender tip socket was missing. Perhaps because they have not provisioned for it in the India spec models. The left hand side sockets -
Harley-Davidson Heritage Softail Classic FLSTC: The Comprehensive Review-front-fender-tip-light_8.jpg

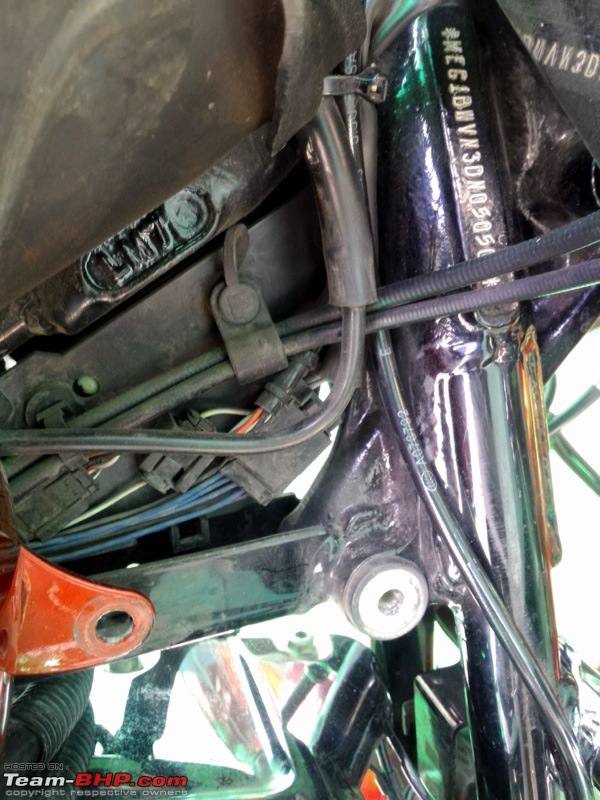
So searched the right side sockets. No fender tip socket there either
Harley-Davidson Heritage Softail Classic FLSTC: The Comprehensive Review-front-fender-tip-light_9.jpg

So now I WAS STUCK. Where do I provision the 12V current without cutting or disturbing any original wiring? So a distress call was made to the friendly Capital Harley Technician and problem explained. He suggested to me that the current can be drawn from the accessory wiring that powers the Front Fog/Auxiliary lights. So that was uncovered -
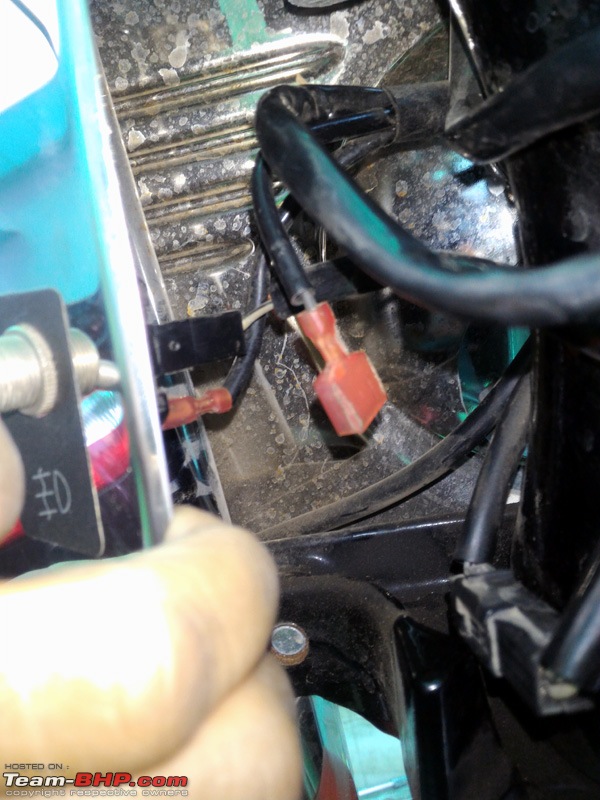
Harley-Davidson Heritage Softail Classic FLSTC: The Comprehensive Review-front-fender-tip-light_10.jpg

In the above picture you can make out that one wire socket is hanging free (orange socket) which according to him is the negative terminal and the positive terminal (also in orange cover) is attached to the fog light switch.

So I disconnected the positive terminal from the switch and took it out and also marked the already free negative terminal so I don't mix them up -
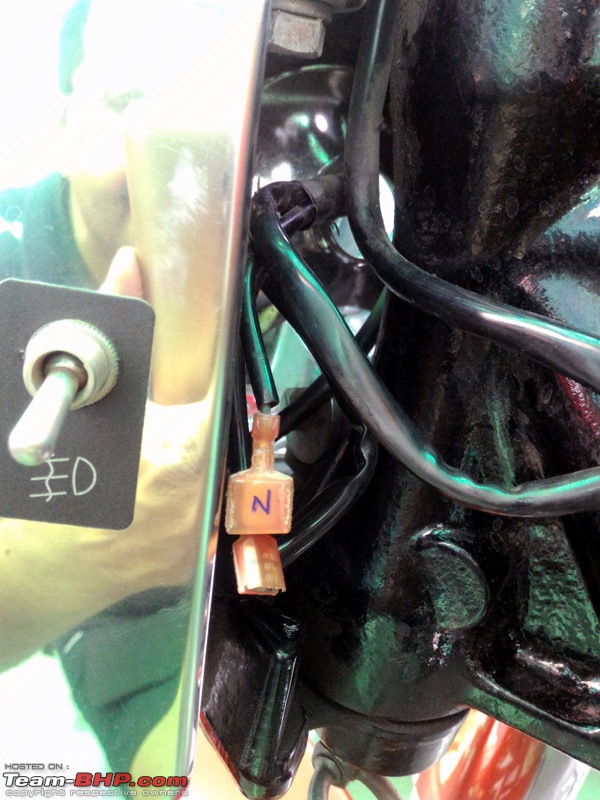
Harley-Davidson Heritage Softail Classic FLSTC: The Comprehensive Review-front-fender-tip-light_11.jpg

But NOW the problem was that according to him, the positive wire had to be cut and a extra wire soldered there to provide current to the front fender tip light. But I NEVER wanted to cut or touch the original wiring. So what to do?
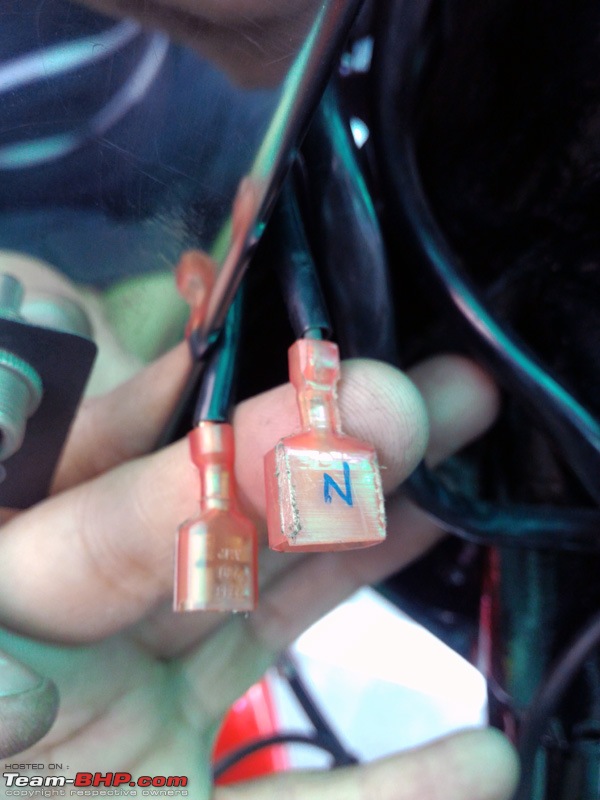
Harley-Davidson Heritage Softail Classic FLSTC: The Comprehensive Review-front-fender-tip-light_12.jpg

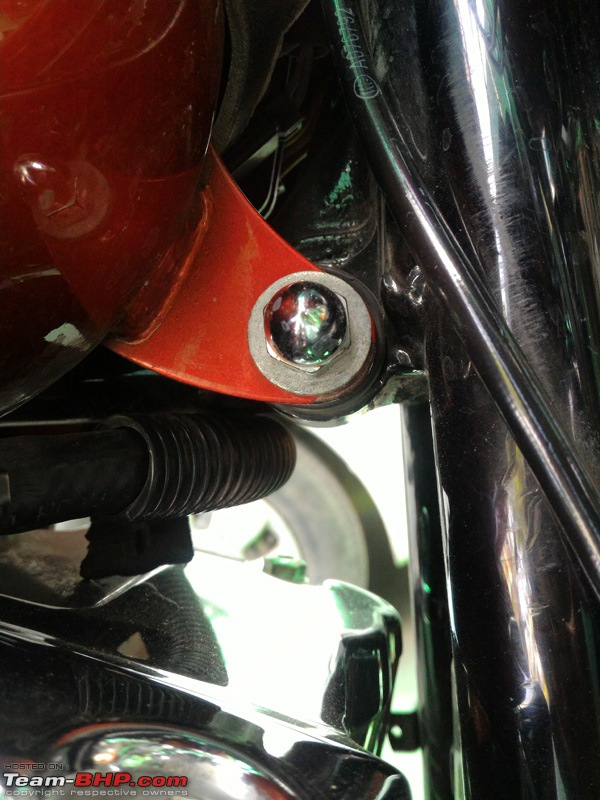
The difference in the sockets can be seen clearly here and that is what gave me a IDEA! Bazingaa...
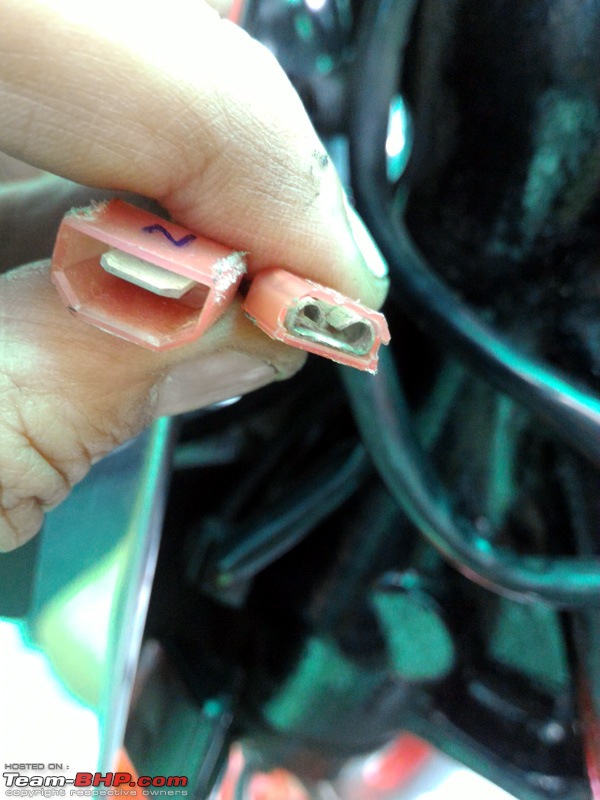
Harley-Davidson Heritage Softail Classic FLSTC: The Comprehensive Review-front-fender-tip-light_13.jpg

Why not to use, an easily available in the market, a One horn x 2 wire which comes with nearly every dual horn kit, to fit in all automobiles with a single horn -
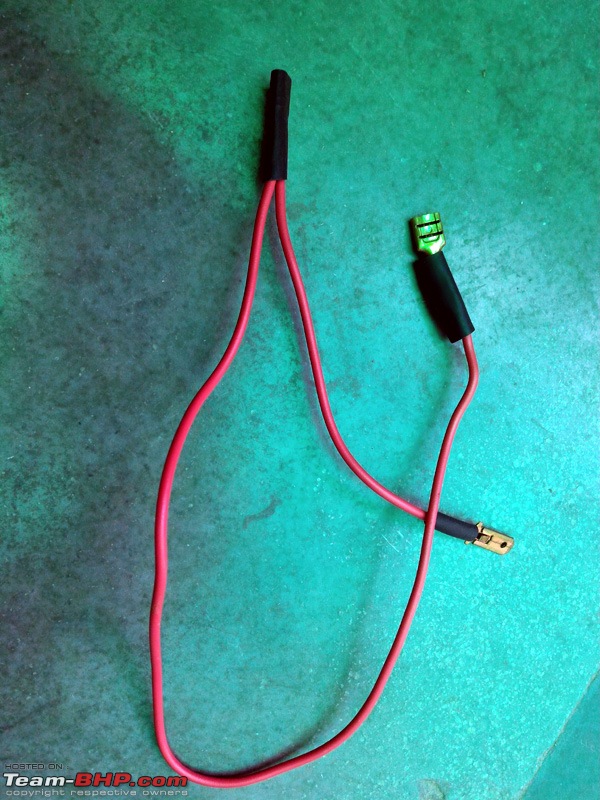
Harley-Davidson Heritage Softail Classic FLSTC: The Comprehensive Review-front-fender-tip-light_14.jpg

So 2 of these kits were procured @20 bucks each. Checked the wire specs and they were a good quality 0.5mm multi-strand wire with IS standards, so should be good to go
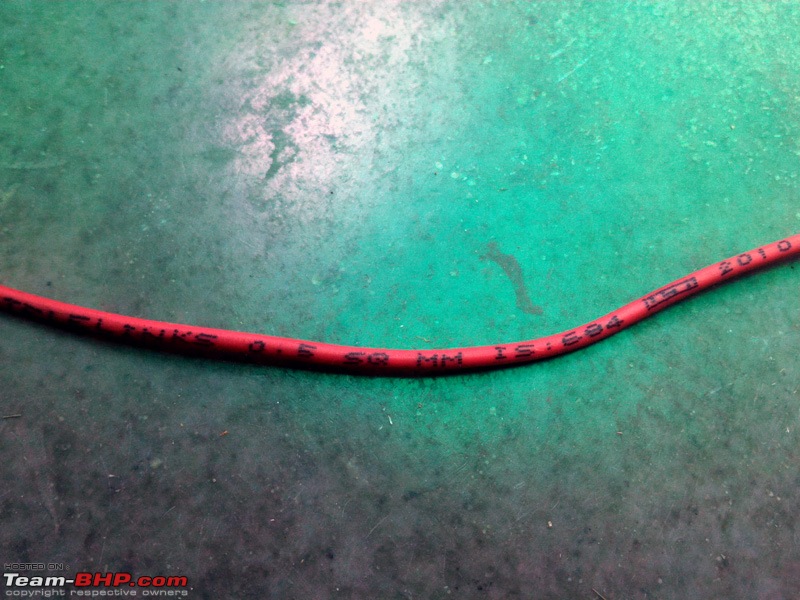
Harley-Davidson Heritage Softail Classic FLSTC: The Comprehensive Review-front-fender-tip-light_15.jpg

Now the next PROBLEM was as to how to route the wire from the front fender to this switch near the headlight? So I checked some posts and opened up the entire front fender tip to look for clues (eventually this too was not needed)
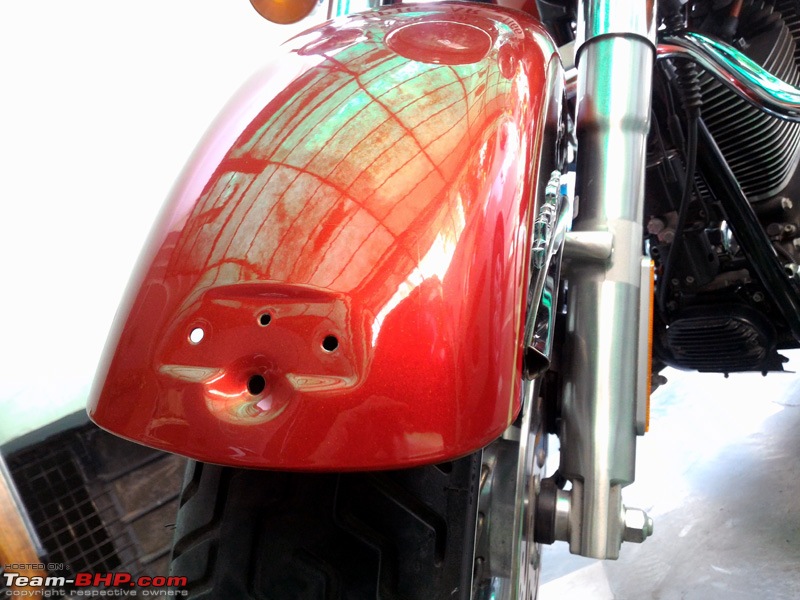
Harley-Davidson Heritage Softail Classic FLSTC: The Comprehensive Review-front-fender-tip-light_16.jpg

The wire was eventually routed from inside the fender, there was a clip there, and also 2 zip ties were also used to tie the wire securely near the shocker bolts
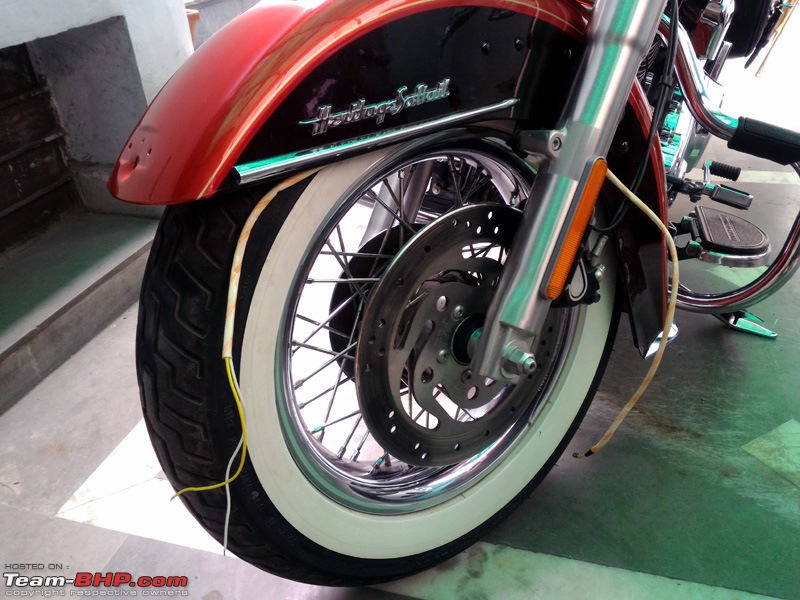
Harley-Davidson Heritage Softail Classic FLSTC: The Comprehensive Review-front-fender-tip-light_17.jpg

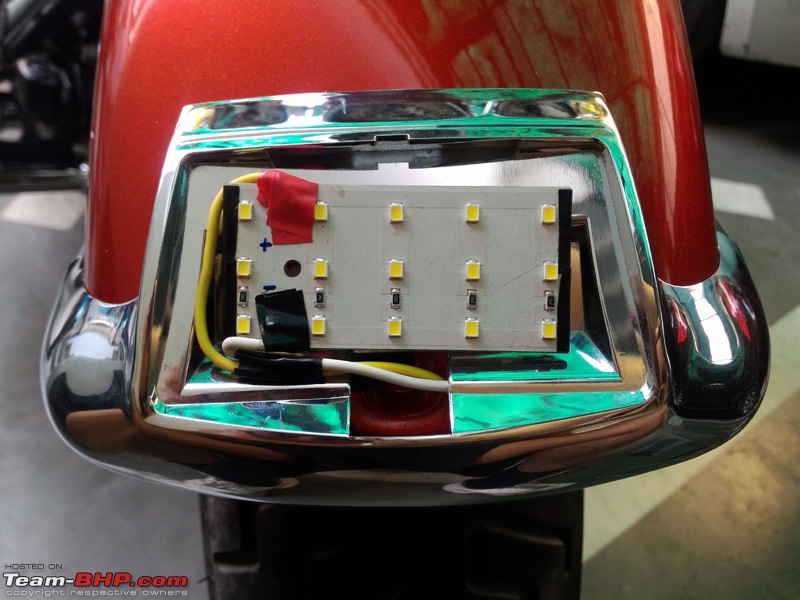
Eventually the wire was routed along with the existing brake and ABS lines with plenty more zip ties. This is how the innards looked stuck with 3M tape (creepy, yeah)
Harley-Davidson Heritage Softail Classic FLSTC: The Comprehensive Review-front-fender-tip-light_18.jpg

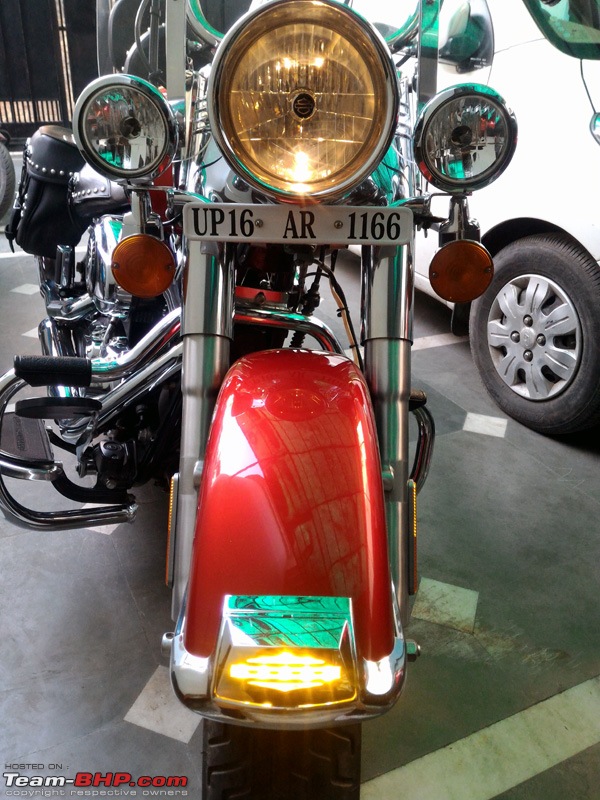
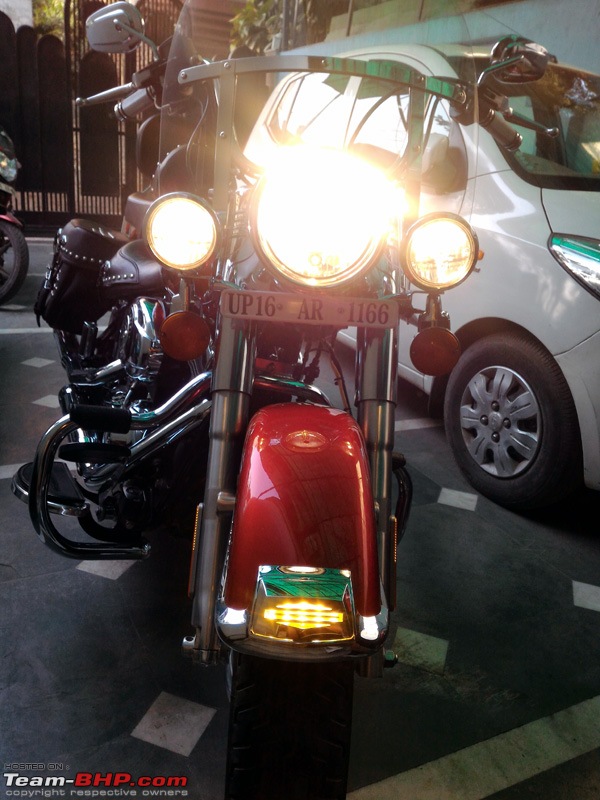
But once covered, the results were fantastic. Better than OE, I would say
Harley-Davidson Heritage Softail Classic FLSTC: The Comprehensive Review-front-fender-tip-light_19.jpg

Harley-Davidson Heritage Softail Classic FLSTC: The Comprehensive Review-front-fender-tip-light_20.jpg

Harley-Davidson Heritage Softail Classic FLSTC: The Comprehensive Review-front-fender-tip-light_21.jpg

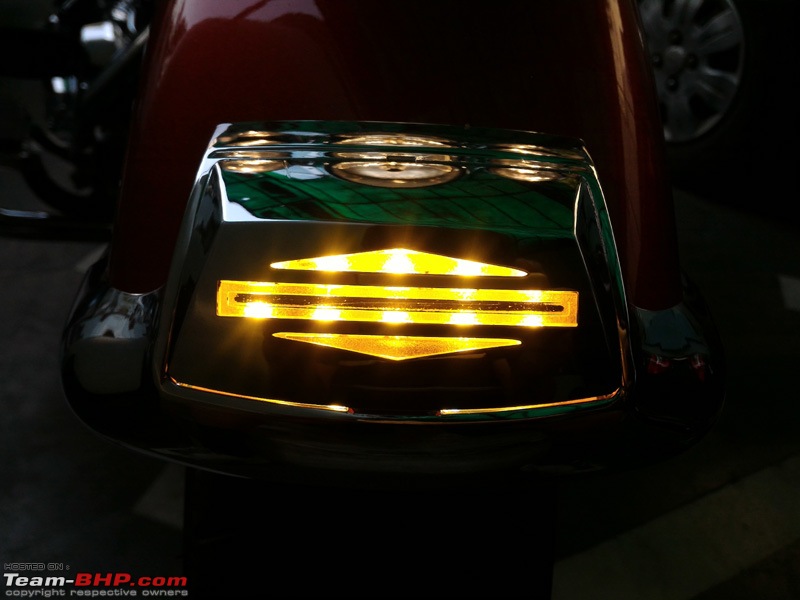
Here the middle row of the 5 LEDs is clearly visible
Harley-Davidson Heritage Softail Classic FLSTC: The Comprehensive Review-front-fender-tip-light_22.jpg

That's all folks, for now!

Cheers...

Last edited by dkaile : 22nd April 2016 at 22:20.
dkaile is offline   (12) Thanks
Old 24th April 2016, 16:34   #115
BANNED
 
Join Date: Aug 2009
Location: Coimbatore
Posts: 805
Thanked: 1,346 Times
Re: Harley-Davidson Heritage Softail Classic FLSTC: The Comprehensive Review

Quote:
Originally Posted by dkaile View Post
Fender Tip Lights (cont.) - Front Fender Tip


That's all folks, for now!

Cheers...
Dkaile Saab,

Truly admire your Love To Ride, and the Love For Your Ride.

Excellent job on the fender lights.

I was in the process of researching some options for my friend's Heritage, and your solution has added one more to the list

Just a tip, Dunno if you have taken care of it already.

Is the LED board free standing the cavity? If so, consider making some legs for them with some RTV clear silicone. You can dab a bit on any exposed solder to prevent oxidation as well.

Easily available online:
http://www.amazon.in/ANABOND-666-SIL...=sr_1_1&sr=8-1

I recommend the same because:

1. I love the stuff and suggest it to all.
2. Just in case there is some truth to the nasty rumor going around that Harleys vibrate, it might save a few LED's.

Cheers

Ride Safe.
gthang is offline   (2) Thanks
Old 24th April 2016, 17:14   #116
Senior - BHPian
 
dkaile's Avatar
 
Join Date: May 2011
Location: Meerut, India
Posts: 3,352
Thanked: 7,435 Times

Quote:
Originally Posted by gthang View Post
Is the LED board free standing the cavity? If so, consider making some legs for them with some RTV clear silicone. You can dab a bit on any exposed solder to prevent oxidation as well.

Easily available online:
http://www.amazon.in/ANABOND-666-SIL...=sr_1_1&sr=8-1

I recommend the same
Thanks gthang.

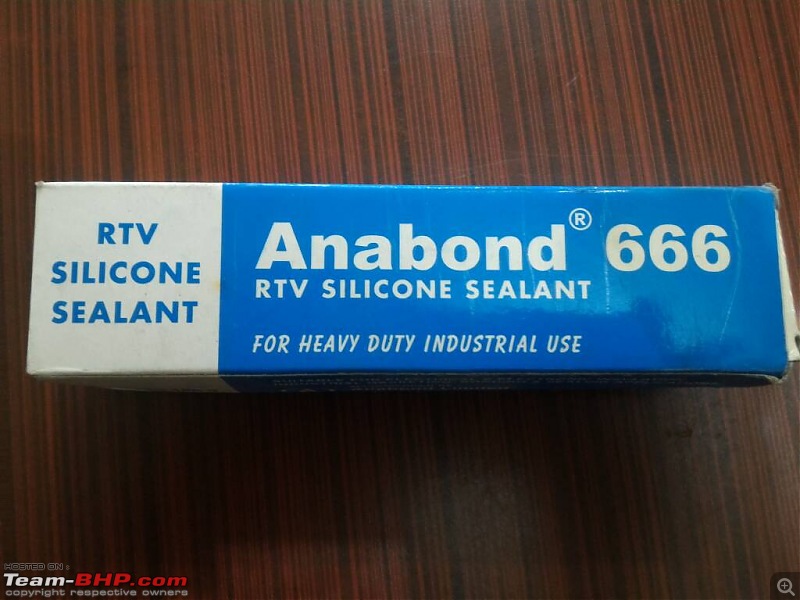
In fact I already have that sealant at home.

Harley-Davidson Heritage Softail Classic FLSTC: The Comprehensive Review-1461497766280.jpg

Though I would advice against using the same inside the fender tip cavity as that would make it difficult to remove in case of any changes or a fused led. I have used 3M double sided tape for that purpose. Though your idea to dab it on the soldering joint is excellent and will be implemented. Thanks for that.

Already thoughts to change this plane jane rear fender tip light to a brake + running light has taken birth as I just found out and confirmed by testing through multimeter, that the central pin of the 3 way socket provides current when brakes are pressed. So next is to add the 3rd missing pin to that rear fender tip socket, and make this LED into a dual intensity light for running as well as brake. Already sourced for this project are 2 diodes (IN 4007) and one 380 ohm resistance. Keep tuned for details about how to. Original dual intensity fender tip light from Harley is 10k plus, this project should cost about 25 bucks with some Indian ingenuity aka 'jugaad' ... Lolz.

Cheers...
dkaile is offline   (1) Thanks
Old 24th April 2016, 22:10   #117
Senior - BHPian
 
dkaile's Avatar
 
Join Date: May 2011
Location: Meerut, India
Posts: 3,352
Thanked: 7,435 Times
Re: Harley-Davidson Heritage Softail Classic FLSTC: The Comprehensive Review

Extended Project - Make the Rear Fender Tip Light into Dual Intensity Running+Brake Light

So encouraged by the ease of adding the Rear Fender Tip Light, watched some further YouTube videos to convert that added fender tip light into a dual intensity one with running+brake light. Now as this fender light was connected by a 3 Way socket and in which the central pin was free, there was a inkling that surely that empty central pin must have some capability. Removed the socket and checked the central pin and VOILA, there was 12V supply when the brakes were engaged. So a separate brake light supply was available without cutting any existing wires.

Harley-Davidson Heritage Softail Classic FLSTC: The Comprehensive Review-rear-fender-tip-light_10.jpg

Saw these videos which helped me source the parts required to convert the existing LED Panel that I had attached to a Dual Intensity one for this purpose -


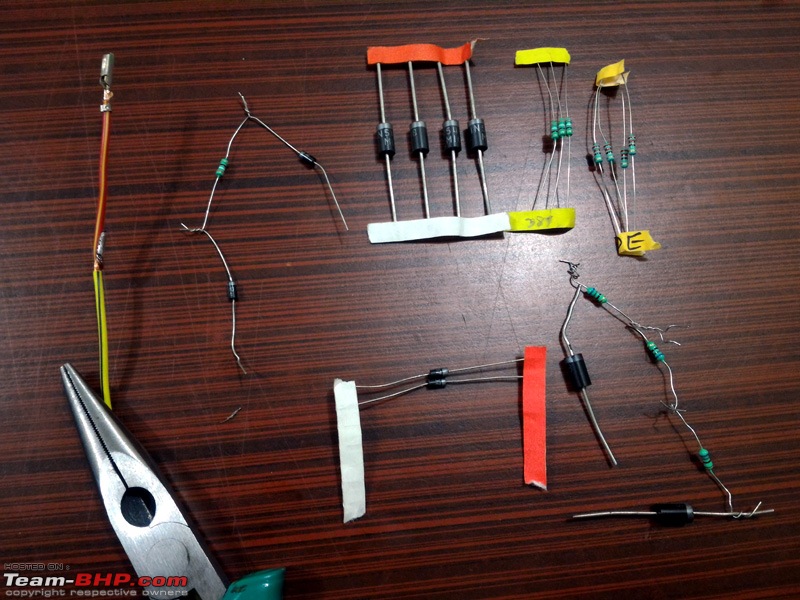
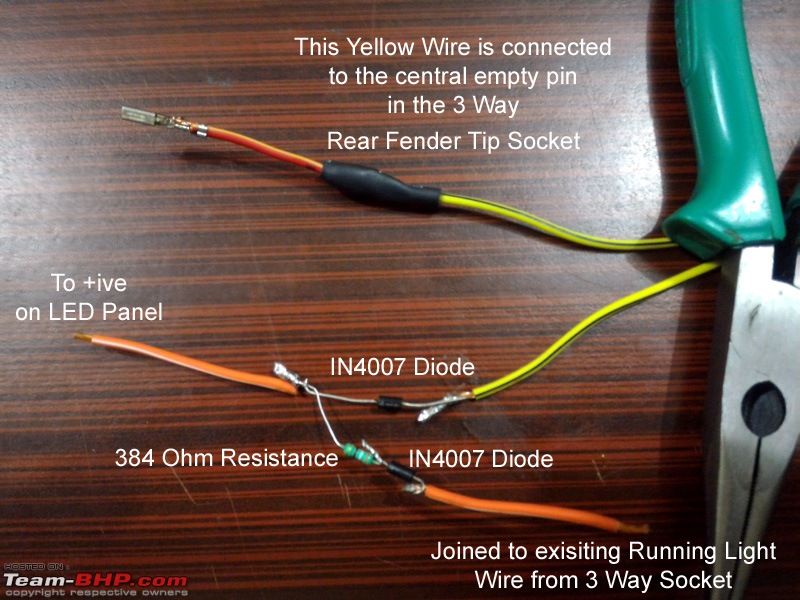
So proceeded to procure the parts from the local friendly electronic shop, the same one that supplied me the LED panel etc. Got an array of diodes (1N4007 & 1N5408) and different Resistances (in the 200, 300 and 400 ohm range). Used a single 384 ohm resistance eventually along with the 2x IN4007 diodes. Total cost of all these were just 25 bucks! So the actual parts used is just costing 3 bucks!!

Harley-Davidson Heritage Softail Classic FLSTC: The Comprehensive Review-rear-fender-dual-intensity-light_1.jpg

Here is the actual circuit made according to those YouTube tutorials

Harley-Davidson Heritage Softail Classic FLSTC: The Comprehensive Review-rear-fender-dual-intensity-light_2.jpg

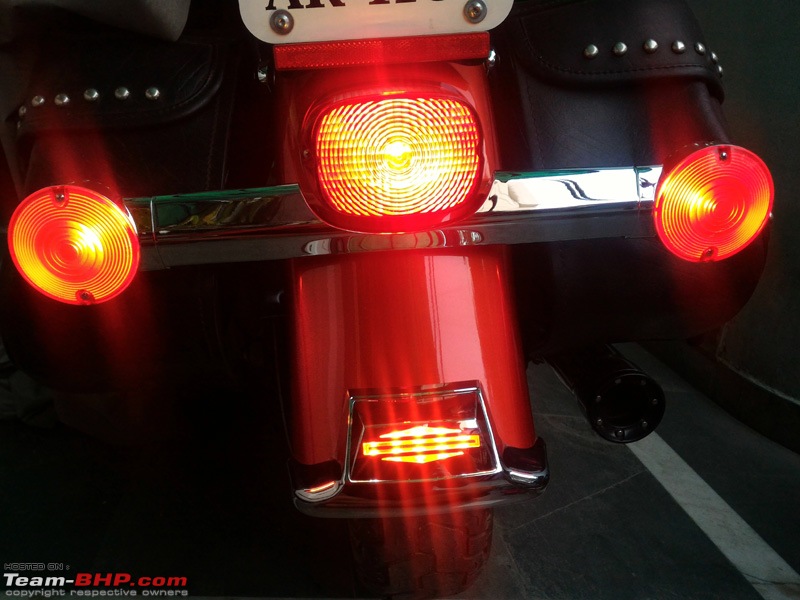
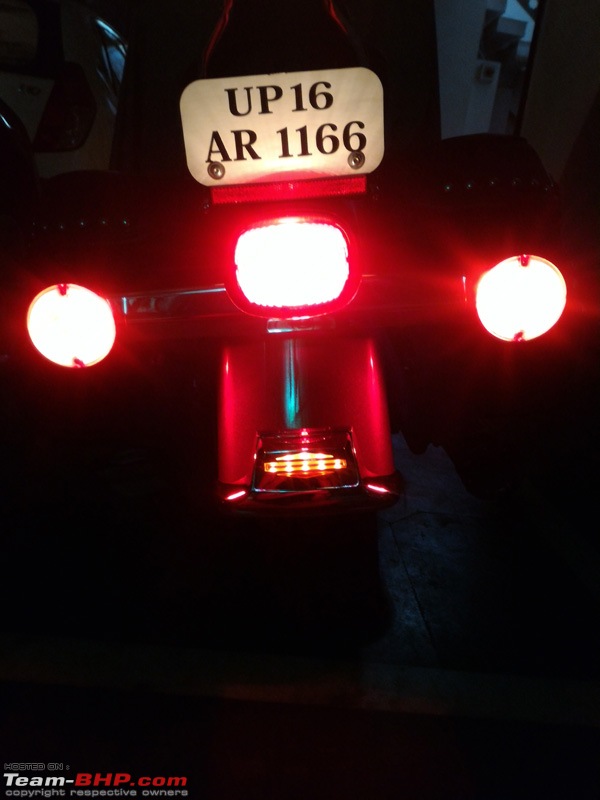
The finished project. On Running Light Mode -

Harley-Davidson Heritage Softail Classic FLSTC: The Comprehensive Review-rear-fender-dual-intensity-light_3.jpg

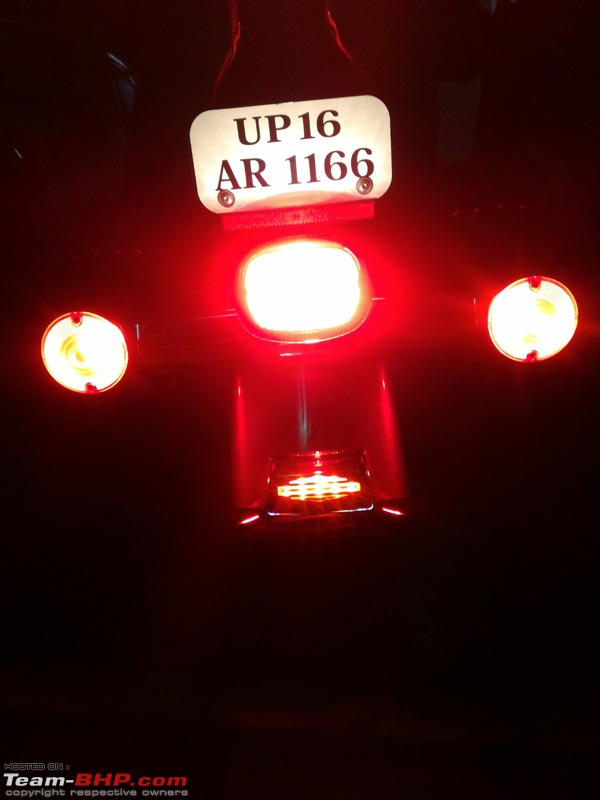
With the Brakes engaged -

Harley-Davidson Heritage Softail Classic FLSTC: The Comprehensive Review-rear-fender-dual-intensity-light_4.jpg

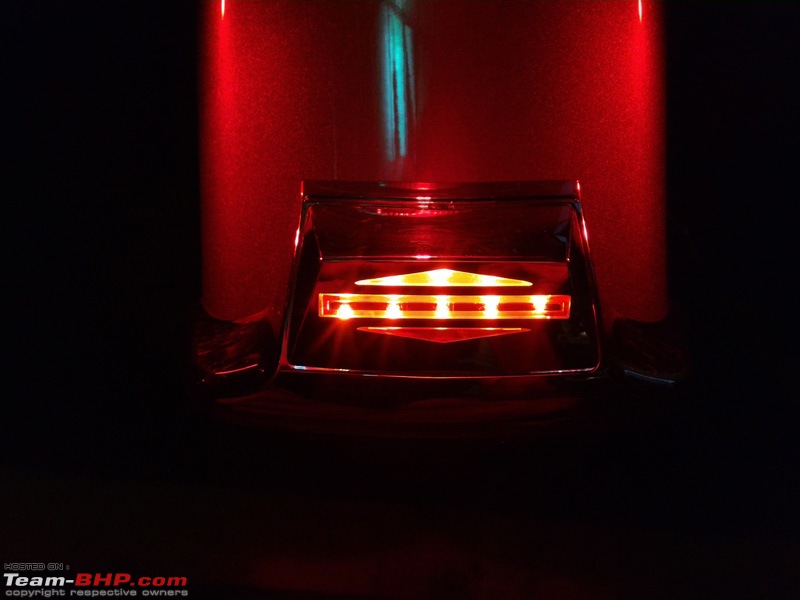
Close Up of the Rear Fender Tip Light. Running Light -

Harley-Davidson Heritage Softail Classic FLSTC: The Comprehensive Review-rear-fender-dual-intensity-light_5.jpg

Brake Light -

Harley-Davidson Heritage Softail Classic FLSTC: The Comprehensive Review-rear-fender-dual-intensity-light_6.jpg

The OE Harley Part is about a 100$+Duties (10K). This cost less than 25 bucks.

Cheers...

Last edited by dkaile : 24th April 2016 at 22:19.
dkaile is offline   (4) Thanks
Old 27th April 2016, 18:32   #118
Senior - BHPian
 
dkaile's Avatar
 
Join Date: May 2011
Location: Meerut, India
Posts: 3,352
Thanked: 7,435 Times
Re: Harley-Davidson Heritage Softail Classic FLSTC: The Comprehensive Review

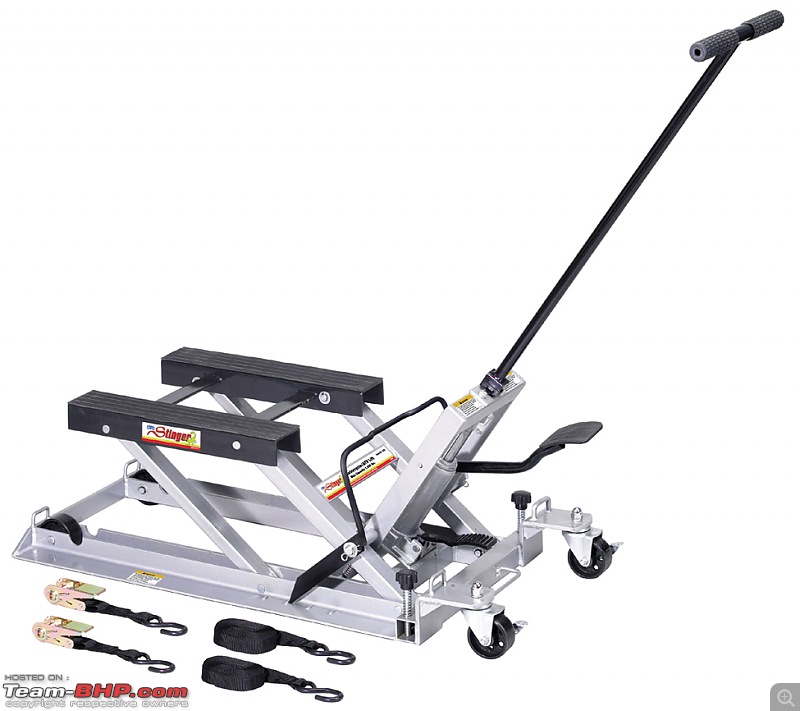
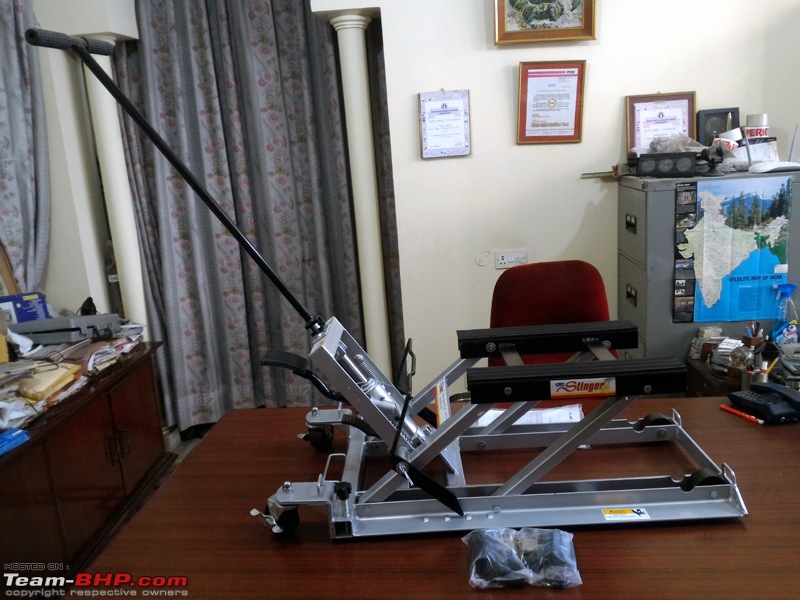
Mini Review - OTC Motorcycle Lift, Model 1545, 1500 lbs (680 kgs) capacity

So as we have 14~15 Harley and Superbikes in our group here in Meerut, we decided to procure a good motorcycle lift to do routine maintenance, servicing and puncture repair etc. I shortlisted the OTC 1545 for this purpose. OTC, USA is a subsidiary of Bosch Automotives, USA and here their products are sold and serviced by Bosch India.

Harley-Davidson Heritage Softail Classic FLSTC: The Comprehensive Review-otc-motorcycle-lift-1545_1.jpg

The same lift is being sold by Triumph India for its cruisers @28.5k. Harley has a similar product by OTC in its catalog for 300$+duties. We procured it from Bosch, India at a final price of 21.5k through their Lucknow dealer.

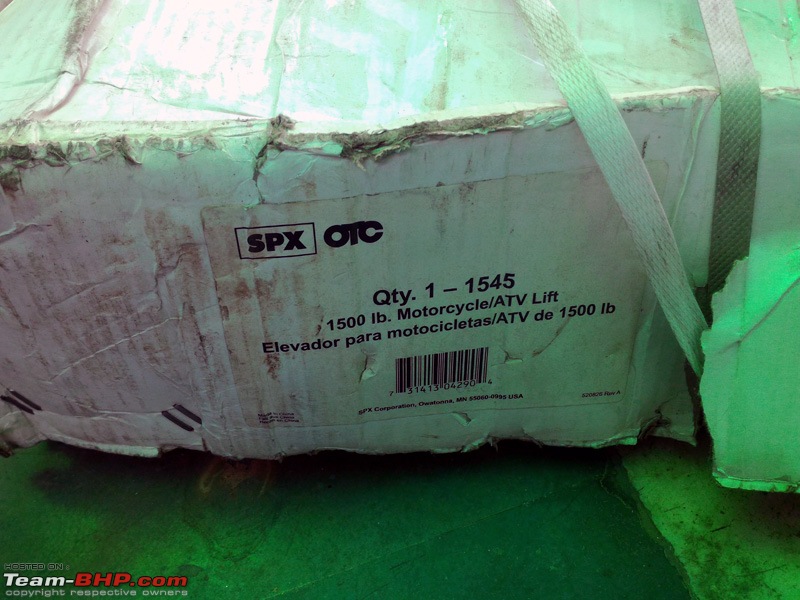
It arrived today. But though imported from USA, the product was Made in China. The Apple effect... lolz.

Harley-Davidson Heritage Softail Classic FLSTC: The Comprehensive Review-otc-usa-motorcycle-lift-27042016_2.jpg

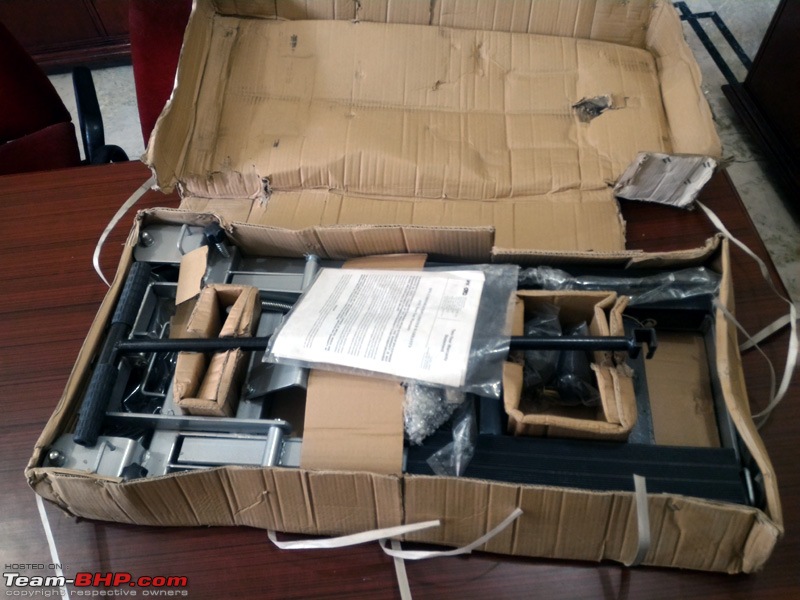
Opened it up to find it in a disassembled state

Harley-Davidson Heritage Softail Classic FLSTC: The Comprehensive Review-otc-usa-motorcycle-lift-27042016_3.jpg

The assembly was not very tough. Here it is fully assembled in about 15 minutes

Harley-Davidson Heritage Softail Classic FLSTC: The Comprehensive Review-otc-usa-motorcycle-lift-27042016_6.jpg

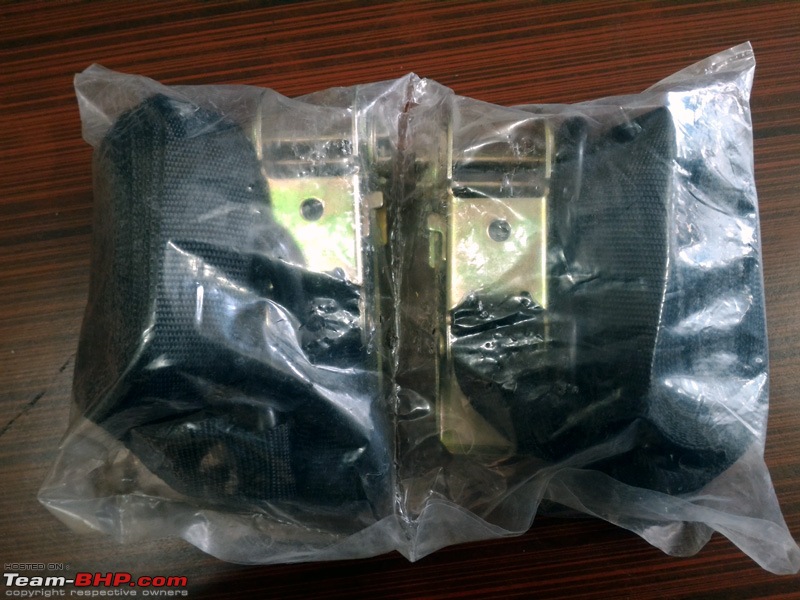
Comes with 2 Tie Down Straps. Very useful to keep the bike stable

Harley-Davidson Heritage Softail Classic FLSTC: The Comprehensive Review-otc-usa-motorcycle-lift-27042016_7.jpg

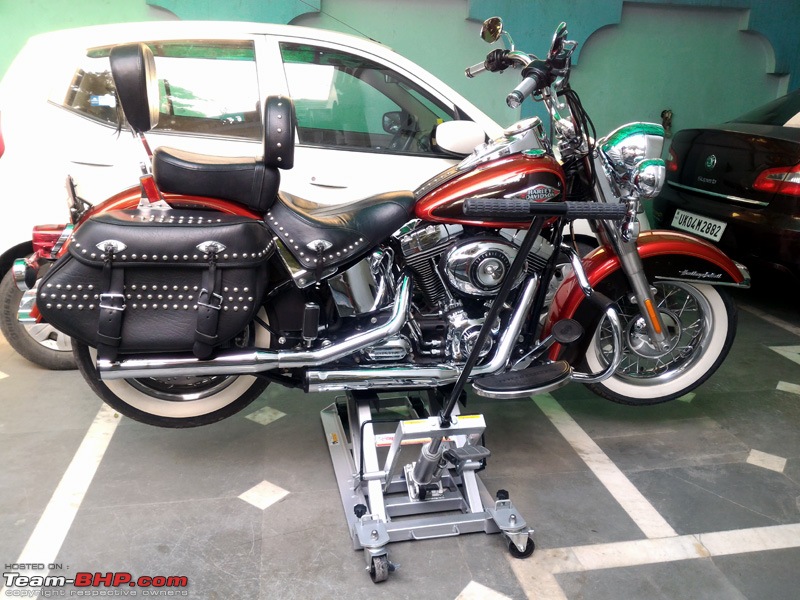
Here is my 360kg Goliath on top of it

Harley-Davidson Heritage Softail Classic FLSTC: The Comprehensive Review-otc-usa-motorcycle-lift-27042016_9.jpg

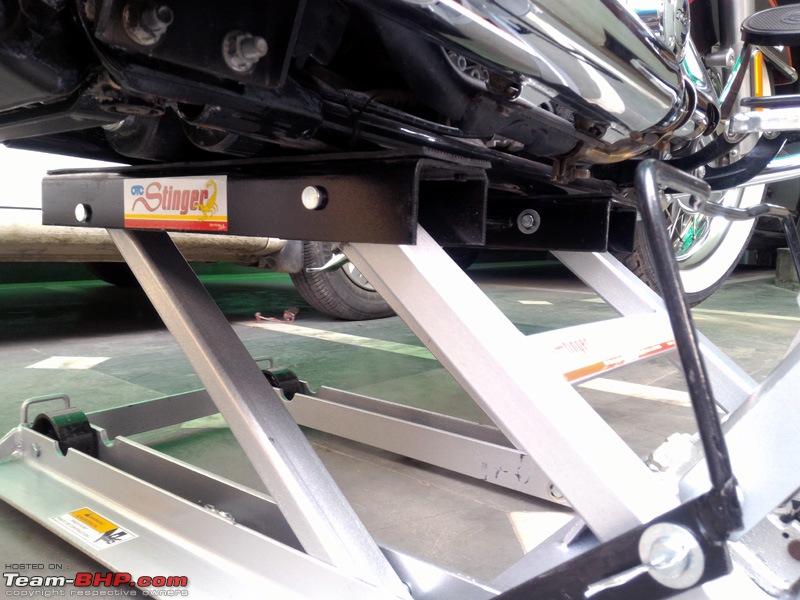
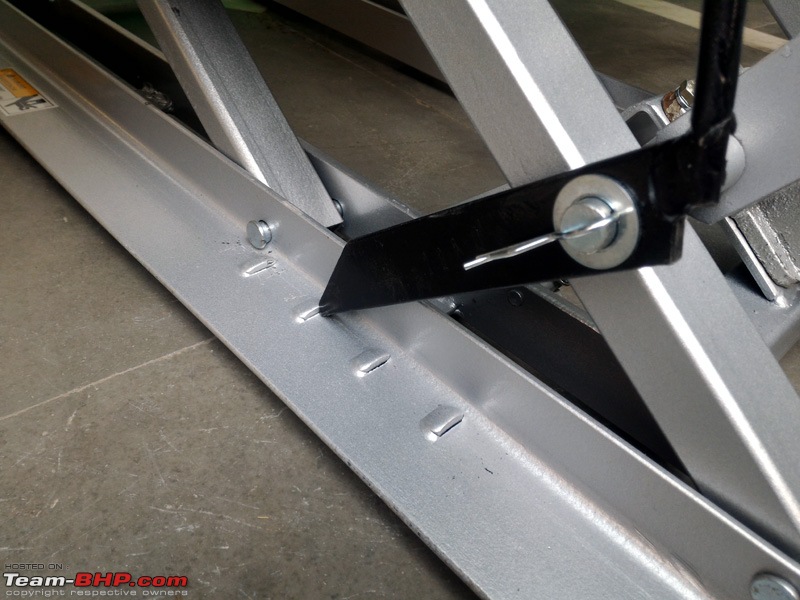
The underbelly view. Very well constructed

Harley-Davidson Heritage Softail Classic FLSTC: The Comprehensive Review-otc-usa-motorcycle-lift-27042016_10.jpg

Here it is half raised with locking clasps

Harley-Davidson Heritage Softail Classic FLSTC: The Comprehensive Review-otc-usa-motorcycle-lift-27042016_11.jpg

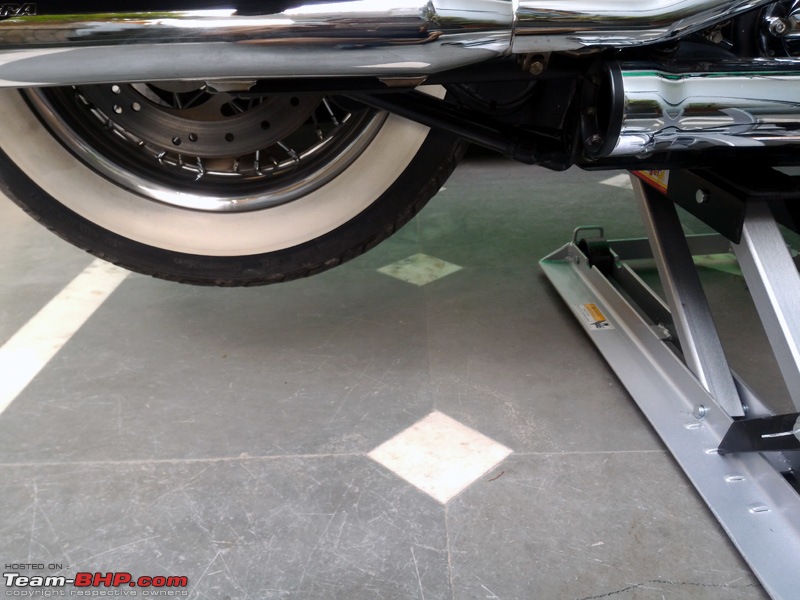
The rear tyre at half raised position. Very easy to do all kinds of maintenance jobs now

Harley-Davidson Heritage Softail Classic FLSTC: The Comprehensive Review-otc-usa-motorcycle-lift-27042016_12.jpg

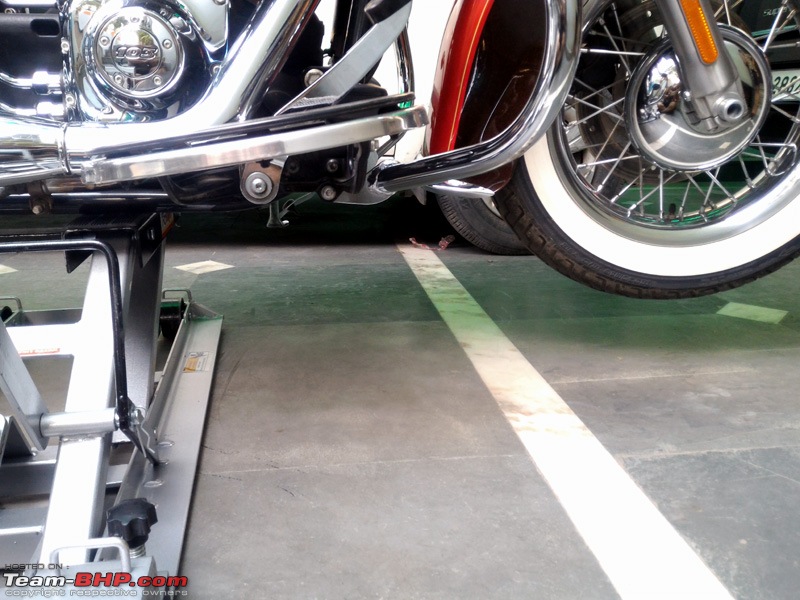
The front tyre

Harley-Davidson Heritage Softail Classic FLSTC: The Comprehensive Review-otc-usa-motorcycle-lift-27042016_13.jpg

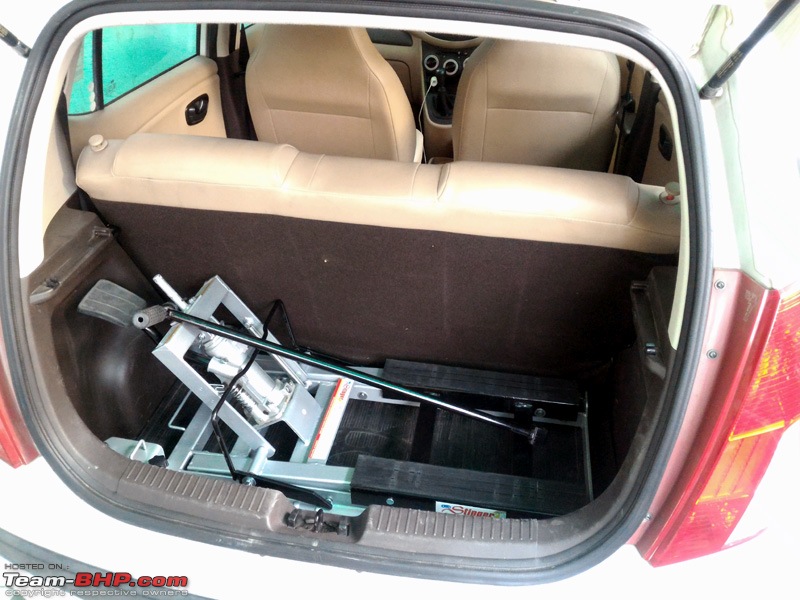
Easily fits into my i10 boot. The long handle removes in a jiffy with a half turn

Harley-Davidson Heritage Softail Classic FLSTC: The Comprehensive Review-otc-usa-motorcycle-lift-27042016_15.jpg

--------------

Planning to leave for 600kms solo ride to Mukteshwar on Saturday. So did a few pending jobs on the bike.

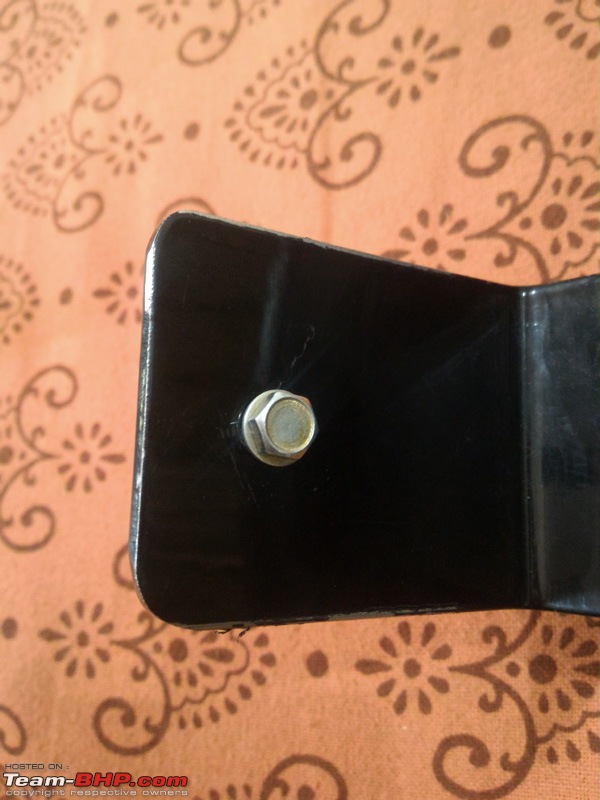
Fitted a locking bolt on the Rider Backrest so it does not slip forward. Took me a good half and hour and 2 HSS drill bits to drill this hole!! Never seen that with normal Indian steel plates that I have encountered. Man, these Americans do know how to build their steel.

Harley-Davidson Heritage Softail Classic FLSTC: The Comprehensive Review-rider-backrest-locking-nut.jpg

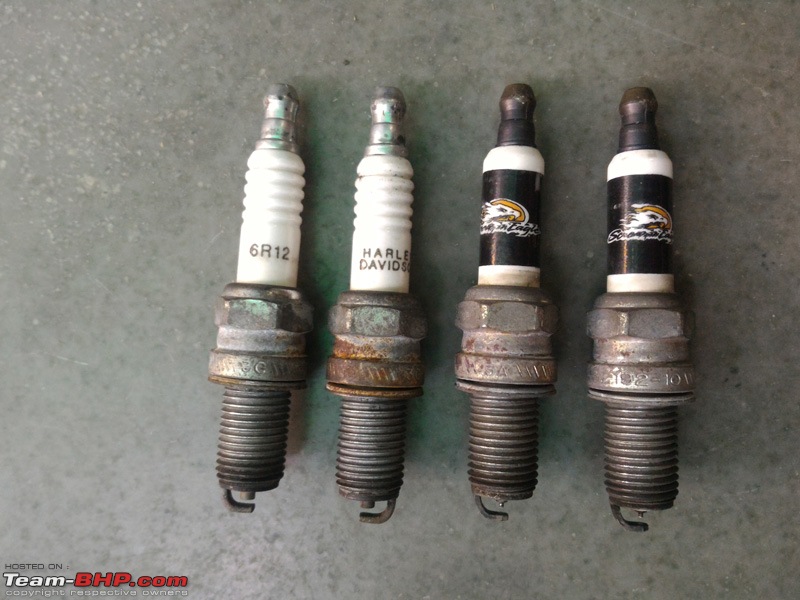
Also serviced the spark plugs and cleaned the air filter

Harley-Davidson Heritage Softail Classic FLSTC: The Comprehensive Review-harley-spark-plugs-25_04_2016.jpg

BTW the Harley 6R12 plug is a direct fit from our Maruti Alto's plug...lolz. We can easily use the Alto/all major Marutis NGK equivalent DCPR7E or in Iridium DCPR7EIR as a replacement at a fraction of the cost of the Harley OE product.

Cheers...

Last edited by dkaile : 27th April 2016 at 18:38.
dkaile is offline   (7) Thanks
Old 28th April 2016, 21:45   #119
Senior - BHPian
 
dkaile's Avatar
 
Join Date: May 2011
Location: Meerut, India
Posts: 3,352
Thanked: 7,435 Times
Re: Harley-Davidson Heritage Softail Classic FLSTC: The Comprehensive Review

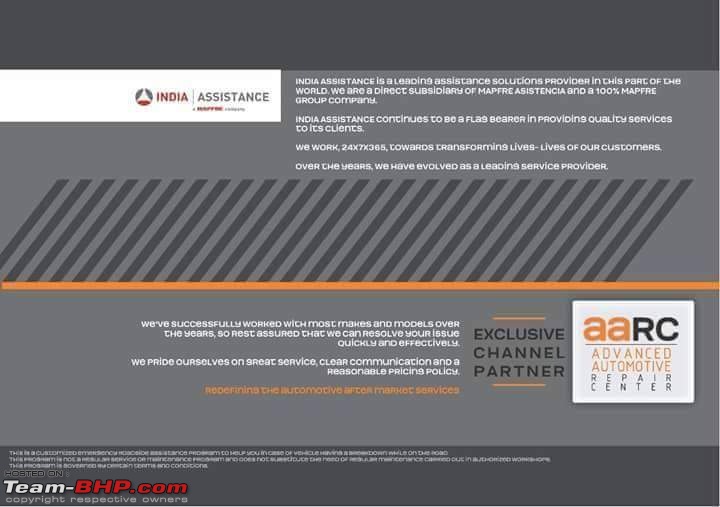
India Assistance - 24x7 Pan India Road Side Assistance by Flat Bed (a Mapfre Esentia Group Co.)

I am not advertising the same in any way, just sharing some information I found useful. So going on a long solo trip is always fraught with uncertainty. I decided to have Road Side Assistance and came across this India Assistance program by Mapfre Asistencia Company. This is what they offer -

Harley-Davidson Heritage Softail Classic FLSTC: The Comprehensive Review-india-assistance-24x7-road-side-assistance_1.jpg

Harley-Davidson Heritage Softail Classic FLSTC: The Comprehensive Review-india-assistance-24x7-road-side-assistance_2.jpg

Harley-Davidson Heritage Softail Classic FLSTC: The Comprehensive Review-india-assistance-24x7-road-side-assistance_3.jpg

Harley-Davidson Heritage Softail Classic FLSTC: The Comprehensive Review-india-assistance-24x7-road-side-assistance_4.jpg

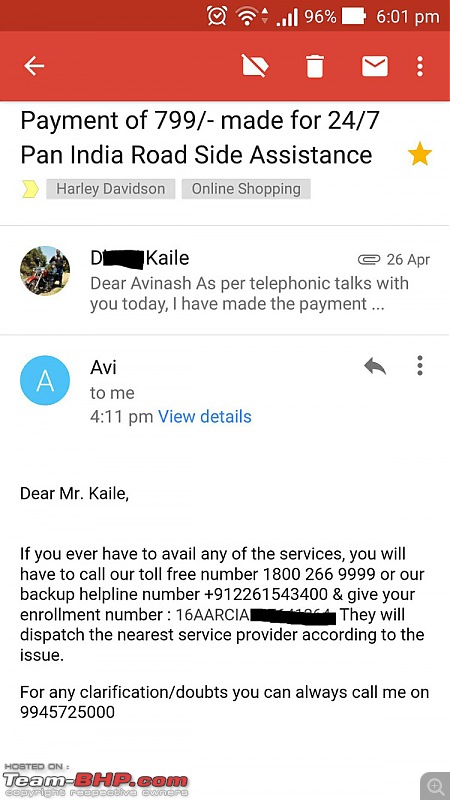
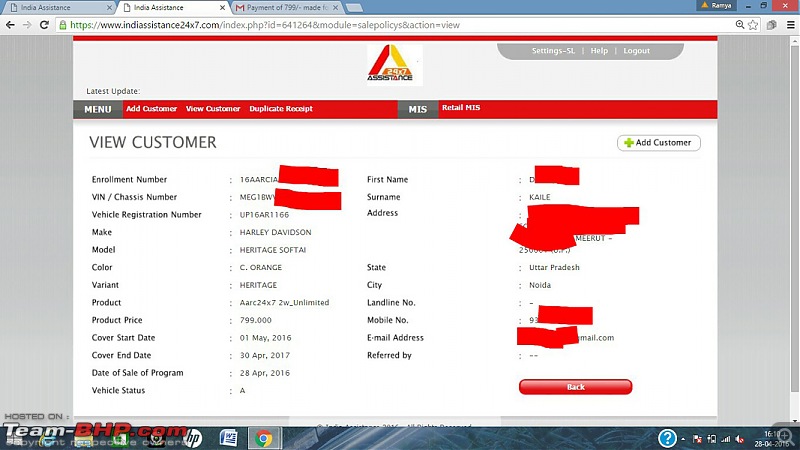
As I had read some bad feedback about this Mr. Avinash on his Facebook posts, I called up the India Assistance Toll Free number and asked for his genuineness. They in turn gave me the number of their RM at Bangalore and told me to speak to him for any sales queries who in turn confirmed that the same person is their authorised channel partner. So I went ahead and paid him this paltry figure of 799/- by bank transfer and was pleased to receive all genuine confirmations of this service -

Harley-Davidson Heritage Softail Classic FLSTC: The Comprehensive Review-india-assistance-24x7-road-side-assistance_5.jpg

Harley-Davidson Heritage Softail Classic FLSTC: The Comprehensive Review-india-assistance-24x7-road-side-assistance_6.jpg

I confirmed from their RM that they are the official company providing Road Side Assistance to Harley Davidson directly with total Flat Bed Support. Harley Dealers were charging 3.5k for the same till recently and now I came to know that they have stopped that also and bundled this service with their HOG membership @7k per year and most HOGs take that just to avail just the road side assistance!!

So this same service @ just 799/- for 2 wheelers and 1799 for 4 wheelers seems a boon especially for us heavy bike owners which cannot be repaired easily on road.

-----------

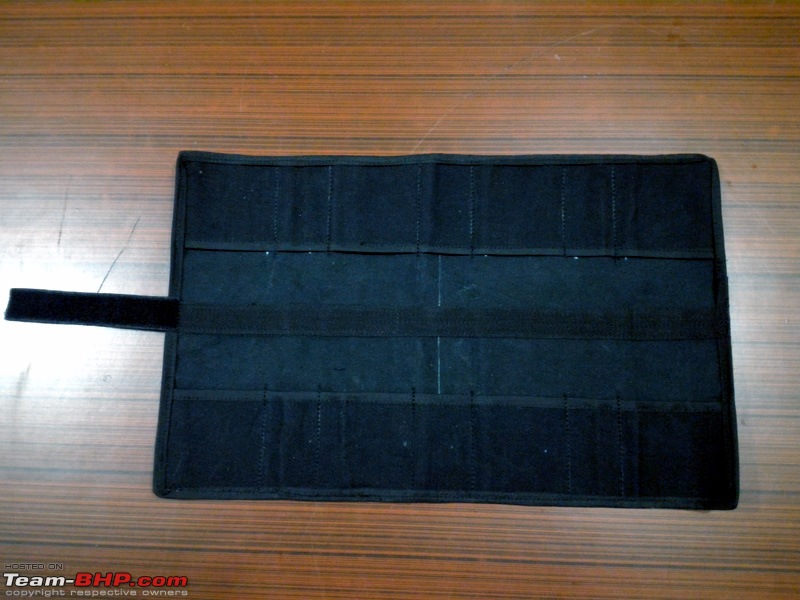
Got a basic custom made Tool Kit bag sewn from heavy canvas @200 bucks

Harley-Davidson Heritage Softail Classic FLSTC: The Comprehensive Review-tool-kit_1.jpg

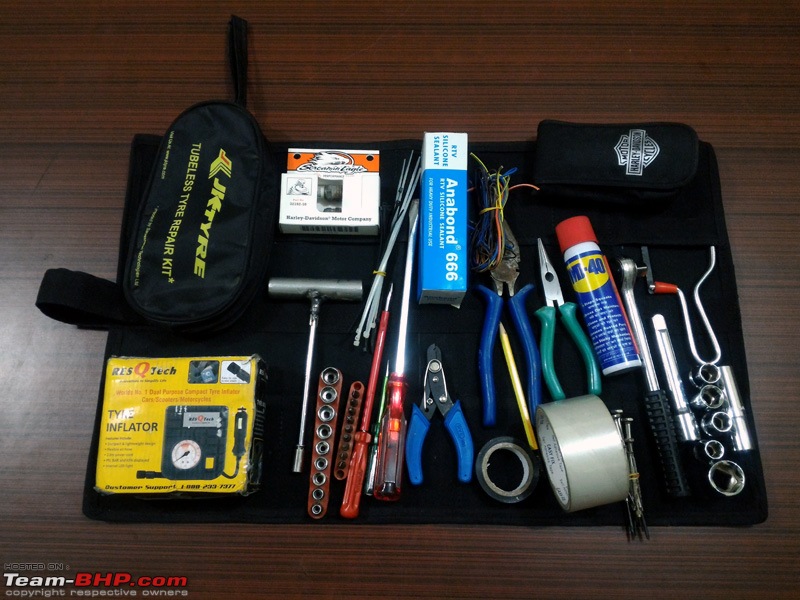
This is a basic Tool Kit that one should always carry on long rides especially if solo -

Harley-Davidson Heritage Softail Classic FLSTC: The Comprehensive Review-tool-kit_2.jpg

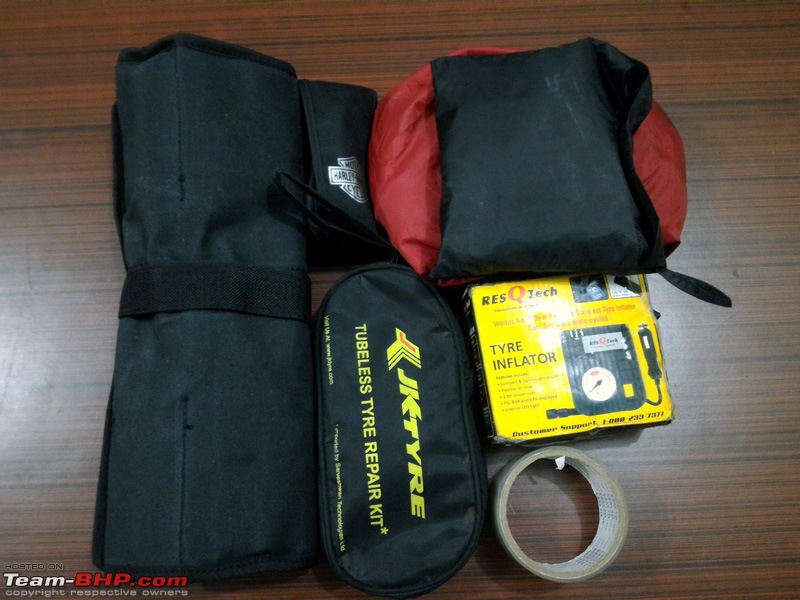
All ready. The Red and Black kit on top right is a Wildcraft Rain Pants and Waterproof Wind Cheater

Harley-Davidson Heritage Softail Classic FLSTC: The Comprehensive Review-tool-kit_3.jpg

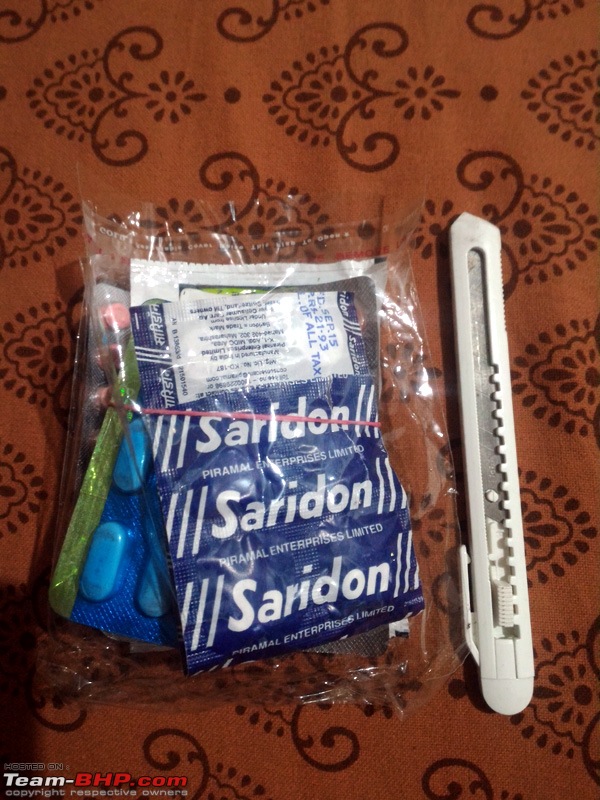
Some Basic Medicines

Harley-Davidson Heritage Softail Classic FLSTC: The Comprehensive Review-tool-kit_4.jpg

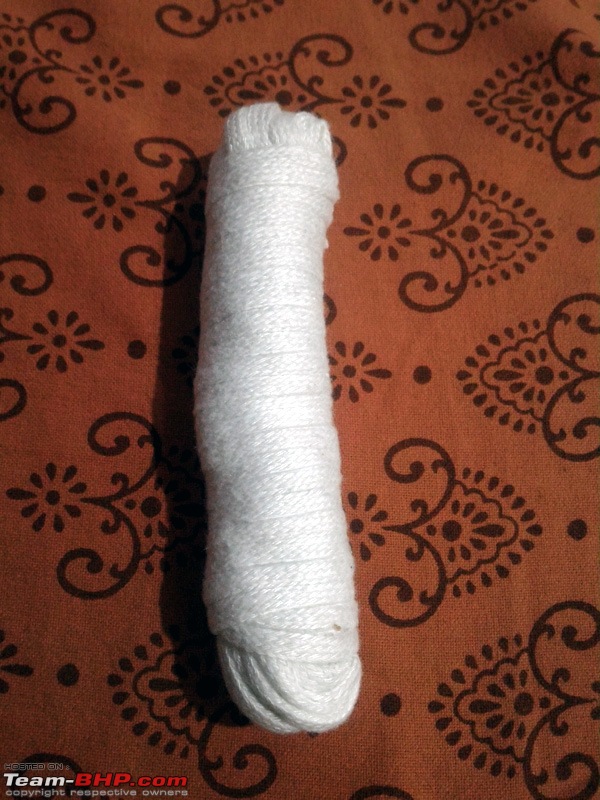
The only thing left to add is some नाड़ा... It can be a life saver in all kinds of emergencies... ROFL

Harley-Davidson Heritage Softail Classic FLSTC: The Comprehensive Review-tool-kit_5.jpg

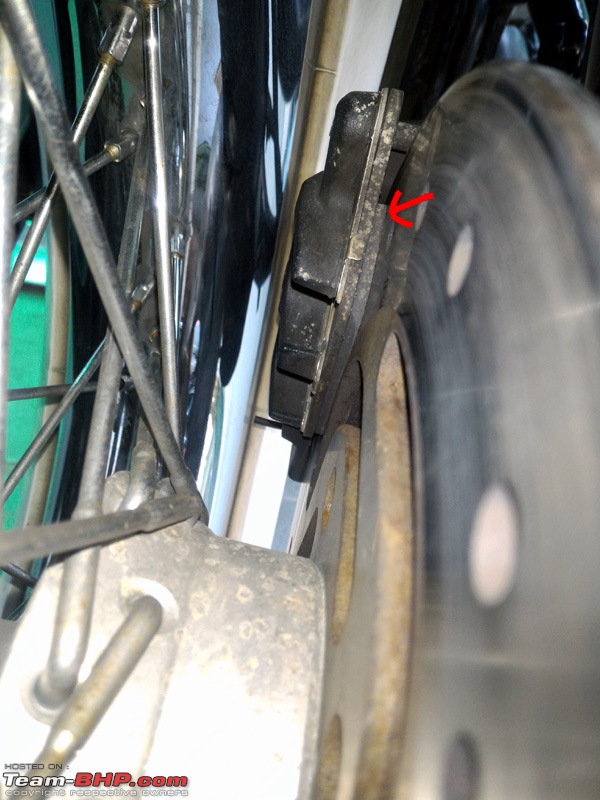
Both the brake pads for also checked and had sufficient life still left in them

Harley-Davidson Heritage Softail Classic FLSTC: The Comprehensive Review-brake-pad-check-28042016.jpg

Cheers...

Last edited by dkaile : 28th April 2016 at 21:49.
dkaile is offline   (7) Thanks
Old 29th April 2016, 03:01   #120
v12
Distinguished - BHPian
 
v12's Avatar
 
Join Date: Feb 2004
Location: Mumbai
Posts: 6,737
Thanked: 7,200 Times
Re: Harley-Davidson Heritage Softail Classic FLSTC: The Comprehensive Review

I am starting to love this thread Dkaile. Keep the DIYs coming - it's really interesting to know all the stuff that can be done at a fraction of the original cost.

Coming to the India Assistance details that you posted above, I am keen to understand the RSA process.
  • How does the Road Side Assistance program work?
  • Do they have a tie up with the dealer to offer this facility? Or is it available for all bikes irrespective of whether the dealer offers it or not.
  • Is there a way to enroll and make an online payment or does it have to happen through the Toll Free number only?
  • Since the program is valid for a year - how many times in a year can you avail of these services?
v12 is offline   (1) Thanks
Reply

Most Viewed
Thread Tools Search this Thread
Search this Thread:

Advanced Search

Copyright ©2000 - 2024, Team-BHP.com
Proudly powered by E2E Networks