Team-BHP > In-Car Entertainment


Reply
  Search this Thread
70,029 views
Old 16th August 2009, 13:44   #61
Senior - BHPian
 
ST7677's Avatar
 
Join Date: Feb 2005
Location: Bangalore
Posts: 1,054
Thanked: 73 Times

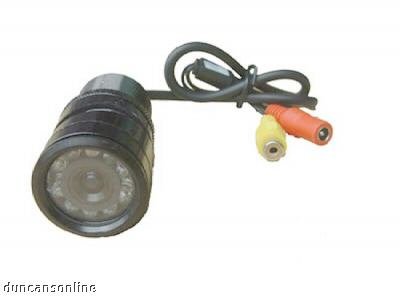
I am thinking of this... as it has IR LEDs.
Backup "Wide Angle" Rear View CCD Camera w/Night Vision:eBay Motors (item 270327816352 end time Sep-05-09 14:40:14 PDT)


otherwise, this one also looks interesting - 170 deg without
170° WIDE ANGLE COLOR REAR VIEW BACKUP CCD CAMERA*MS1:eBay Motors (item 180394635198 end time Aug-17-09 18:41:42 PDT)

ST7677 is offline  
Old 25th November 2009, 00:01   #62
BHPian
 
jocreative's Avatar
 
Join Date: Sep 2009
Location: Dubai, UAE
Posts: 179
Thanked: 11 Times

Hey ST, great post. Eager to see how it works out for you. Any luck with the 2Din ?
jocreative is offline  
Old 25th November 2009, 00:58   #63
Awaiting Email Confirmation
 
Join Date: Jun 2009
Location: Mumbai
Posts: 311
Thanked: 67 Times

Hey
Do let us know when it's all done!
Make sure to add in some pictures.
BTW, aware of anybody having installed a carputer in an Octavia?
cheers!
Akki_5 is offline  
Old 25th November 2009, 03:21   #64
BHPian
 
nisarg86's Avatar
 
Join Date: Mar 2005
Location: Ahmedabad
Posts: 392
Thanked: 13 Times

ST. where are you man ? we are eagerly waiting for this project.
Let us know on updates.
nisarg86 is offline  
Old 16th December 2009, 17:48   #65
Senior - BHPian
 
ST7677's Avatar
 
Join Date: Feb 2005
Location: Bangalore
Posts: 1,054
Thanked: 73 Times

Ah, had gone under hibernation, too much work. Am back now.
Will resume work on this project in about two weeks time.

Last weekend took the dashboard apart and realized that the LCD screen fitting will be a major challenge. While the visible screen fits the opening the rest of the case does not fit the available clearance. There is only 13 cm Vertical clearance available, where as the LCD case height is 14.5cms.

So looks like I will need to
1. Open the LCD panel to remove the case apart
2. Cut the lower panel of LCD case where buttons are located and
3. Mount the LCD in inverted position (so that the LCD aligns with the opening)
4. Mount the LCD buttons somewhere else from where it can still be operated
ST7677 is offline  
Old 16th December 2009, 21:15   #66
Senior - BHPian
 
ST7677's Avatar
 
Join Date: Feb 2005
Location: Bangalore
Posts: 1,054
Thanked: 73 Times

Two Pictures...
First one showing screen fitment.

Second one showing the vertical size problem. The block in my hand is AC control (which will be below the screen). The screen is kept upside down.
Attached Thumbnails
ICEing the Honda Civic - Part II (Carputer)-img_2132.jpg  

ICEing the Honda Civic - Part II (Carputer)-img_2129.jpg  

ST7677 is offline  
Old 17th December 2009, 20:40   #67
BHPian
 
kingofmyworld's Avatar
 
Join Date: Nov 2009
Location: Hyderabad / pensylvania.
Posts: 816
Thanked: 535 Times

Looks like a complicated install but nothing is impossible
Mount your monitor upside down if possible and using your display drivers set the output to 180degrees. That wil ldo he job i believe. I suggest not to openup the entire monitor case and messup with things. Try mounting it upside down and changing setting in the cpu itself. If that doesnt work then we will think of osme other option.
kingofmyworld is offline  
Old 17th December 2009, 21:01   #68
Senior - BHPian
 
ST7677's Avatar
 
Join Date: Feb 2005
Location: Bangalore
Posts: 1,054
Thanked: 73 Times

Unfortunately, even upside down does not fit. If you see in the second image the case is stuck and not going in... So the case has to be opened and screen chopped.
ST7677 is offline  
Old 25th December 2009, 13:19   #69
Senior - BHPian
 
ST7677's Avatar
 
Join Date: Feb 2005
Location: Bangalore
Posts: 1,054
Thanked: 73 Times

Decided to utilize the long weekend to fix the dash panel.

First taped the double din panel to avoid scratches, as this will be a long process...
Pic 1 & 2
1. The entire border of the double din opening was cut, as this is not required
2. The top side edge of the panel was cut, to place LCD button controls

Pic 3
3. Lcd screen taken apart and the front bezel hacked into relevant pieces

Pic 4
4. Test fitting the button frame part of the LCD bezel into the dash panel.
Also notice the 4 screwing points in the panel. Parallel holes have been drilled into the LCD bezel (pic 3) to provide additional strength.
Attached Thumbnails
ICEing the Honda Civic - Part II (Carputer)-img_2340.jpg  

ICEing the Honda Civic - Part II (Carputer)-img_2341.jpg  

ICEing the Honda Civic - Part II (Carputer)-img_2342.jpg  

ICEing the Honda Civic - Part II (Carputer)-img_2344.jpg  


Last edited by ST7677 : 25th December 2009 at 13:21.
ST7677 is offline  
Old 25th December 2009, 13:55   #70
Senior - BHPian
 
ST7677's Avatar
 
Join Date: Feb 2005
Location: Bangalore
Posts: 1,054
Thanked: 73 Times

Pic1: LCD front bezel test fitted along with button panel

Pic2: A/C Control from the car which has to be installed in the lower portion. This was intruding with the case and hence the LCD panel had to be chopped

Pic3: Buttons, button panel, and LCD bezel fixed with Araldite.
Attached Thumbnails
ICEing the Honda Civic - Part II (Carputer)-img_2345.jpg  

ICEing the Honda Civic - Part II (Carputer)-img_2349.jpg  

ICEing the Honda Civic - Part II (Carputer)-img_2358.jpg  

ST7677 is offline  
Old 28th December 2009, 12:30   #71
Senior - BHPian
 
ST7677's Avatar
 
Join Date: Feb 2005
Location: Bangalore
Posts: 1,054
Thanked: 73 Times

Dash Panel fabrication work completed yesterday. The LCD was assembled back and tested. All functions were working fine. After doing so much playing around with it (including cutting the protruding Circuit board) I was really worried if I will be able to get this thing working again. But thank God, it did.

It turned out to be much more time consuming and difficult than what I had anticipated. This is not for faint hearted, one needs lots & lots of patience and need to read a lot, even one mistake and the LCD/touchscreen can become pretty much useless.

Finally, here is the picture of LCD installed in the dash panel and powered up…
Attached Thumbnails
ICEing the Honda Civic - Part II (Carputer)-img_2374.jpg  

ST7677 is offline  
Old 28th December 2009, 13:21   #72
BHPian
 
kingofmyworld's Avatar
 
Join Date: Nov 2009
Location: Hyderabad / pensylvania.
Posts: 816
Thanked: 535 Times

congos mate
That looks like a lot of effort. It's true that you need laods of patience while working on such things. Good work.
kingofmyworld is offline  
Old 28th December 2009, 17:41   #73
BANNED
 
Join Date: Oct 2007
Location: Ludhiana
Posts: 706
Thanked: 42 Times

nice man. it was long time from you since we hear about your DIY carputer in civic and now its taking its shape.
keep going good.
monty9991 is offline  
Old 30th December 2009, 02:36   #74
Senior - BHPian
 
aparth's Avatar
 
Join Date: Sep 2009
Location: New Delhi
Posts: 1,341
Thanked: 1,708 Times

Nice work ST7677 !

Good to see the carputer finally coming into shape.

It looks even more complicated than it sounds !
aparth is offline  
Old 1st January 2010, 12:10   #75
Senior - BHPian
 
ST7677's Avatar
 
Join Date: Feb 2005
Location: Bangalore
Posts: 1,054
Thanked: 73 Times

Hey Guys, Thanks KOW, Monty and Aparth.
A carputer is always more complicated than it sounds or what you expect...
My journey has just started. I have to identify and buy a suitable processor next.

Any ideas on what the best place to pick up an Intel C2D Processor from in Bangalore?
I am looking at E7400 / E8400.
ST7677 is offline  
Reply

Most Viewed
Thread Tools Search this Thread
Search this Thread:

Advanced Search

Copyright ©2000 - 2024, Team-BHP.com
Proudly powered by E2E Networks