Last month, i accidentally put the AC air circulation to exhaust when the blower was in 2, and i heard some major activity inside the blower. Immediately switched to recirculation mode and the sound settled down to a slow drone. Had posted here for service manual guidance for blower assembly, but didnt get response, and when i did the Pondy trip the next weekend the sound mysteriously disappeared also. Left it at that.
Last wednesday while coming back from office, the pungent smell from nala beside the road was coming in and i again fiddled with air recirculation/exhaust control thinking that the flap would be stuck in between letting in the smell. Unfortunately the fan was running and the obvious happened, and drone with some clatter came back! This time more intense orchestra.

Meanwhile i saw the rat attack post and got some idea on how to approach this DIY, the snaps really helped!! Had a look under the dash on the passenger side of the dash and i could see the round fan assembly, the connector and could identify that it was held in place by 3 screws (more details with pic later in the post).
So armed with (call it as tools required for this DIY)
- Vacuum clener
- Tool set, straight head screw driver (medium size) and OR size 8 spanner
I decided to go ahead with the DIY of AC blower clean up job for Vdi, yes this should be applicable to Swift series me guess.
Thumb rule while doing and DIY, switch off and remove key from ignition.
To start off, you need to remove the glove box. This is not mandatory but really will make life easy for you, with better visibility and access.
First step: is to release the locks on top which hold the box in place when open. There are two stopper clips on the side, which can be pushed in (one at a time) to release the top of the glove box. Dont use brute force, strong and gentle push sideways is required.
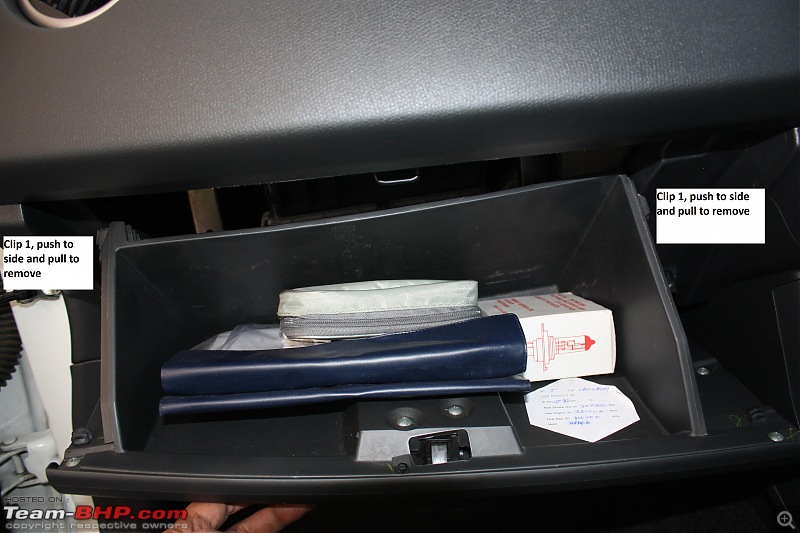
Ok i forgot to take the contents inside off, lazy me! If you remove can avoid the risk of things falling off on the floor lol
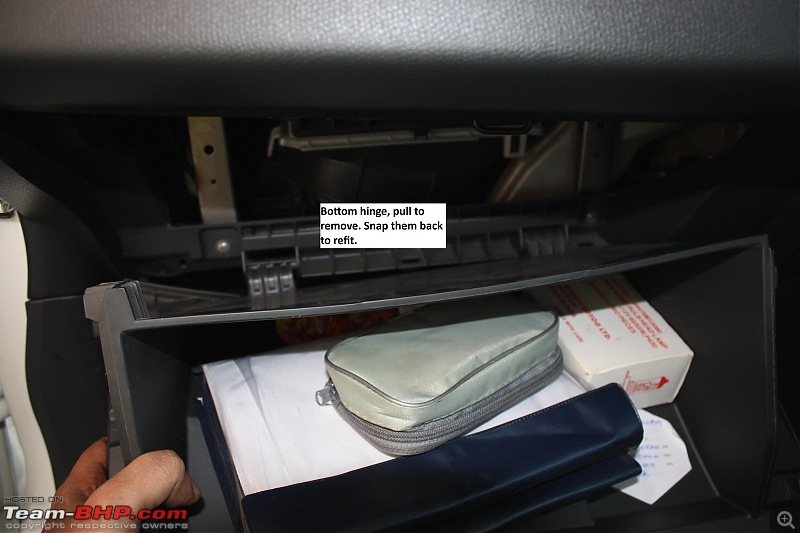
Step two: The glove box is held at bottom on 2 hinges, which are snap fit. They can be pulled out without much effort. Again dont use brute force on these since they are all made off plastic and can break.
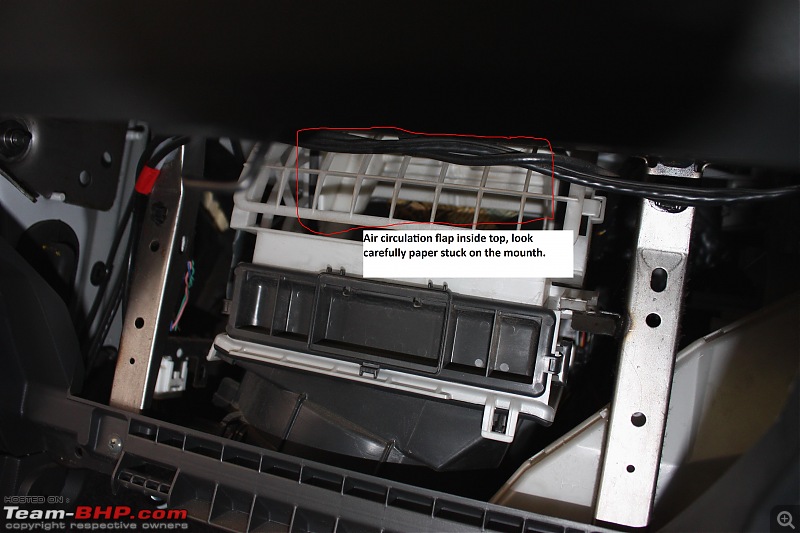
I peeped in to understand better the system, could see a plastic grill and also see the exhaust air flap. This is a flexible plastic, ribbed kinds.
What do we have here, already spotted some news paper inside, well i knew rats had visited the engine bay last year and this year in winter, but didnt know that they really had plans of building a house. Look closely behind the plastic grill and you can see what i mean. Yes this paper was stopping the flap from closing completely and hence outside air was still coming in, remember mention of nala smell earlier??
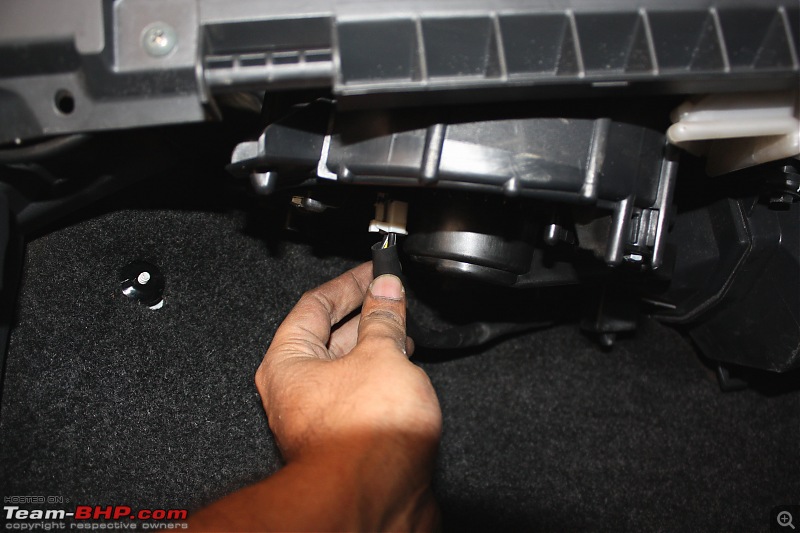
Now we need to remove the fan assembly, first step is to remove the connector clip, there is a small push and release tab which when pressed, one can easily remove the coupler out. Dont pull the wire (iam holding the wire just for the picture sake)
Now is the time to take the screw driver, or you can use number 8 spanner. Spanner comes handy for the 3 screw which sits close to the firewall.
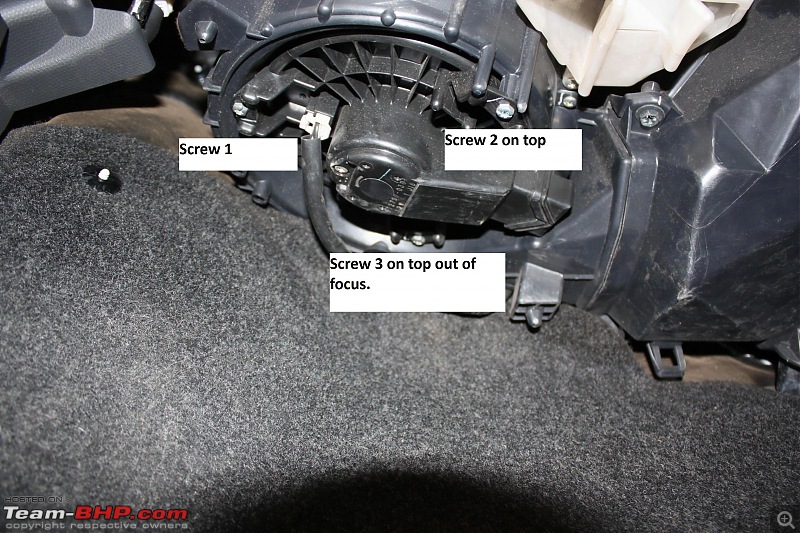 Caution:
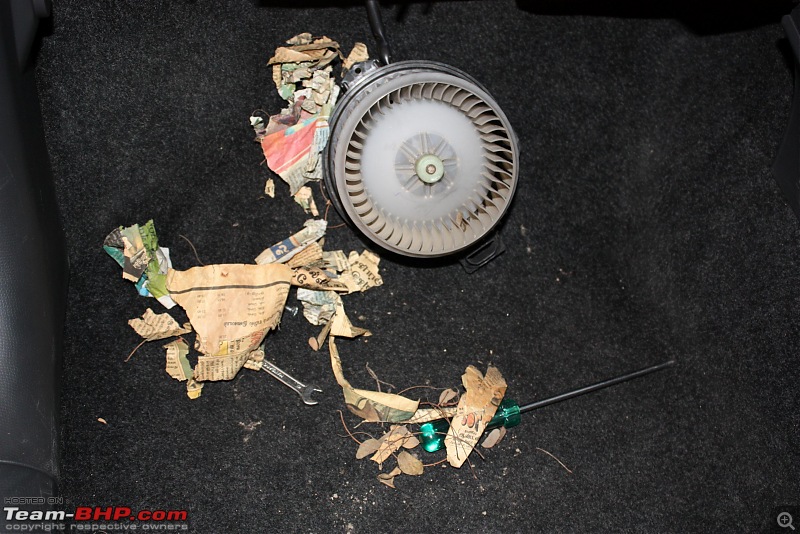
 Fan is held in place with these 3 screws and if you dont hold the fan, it will fall off, like what happened to me. Also leave a news paper or the rubber mat below so that your carpet is not messed up like this :P

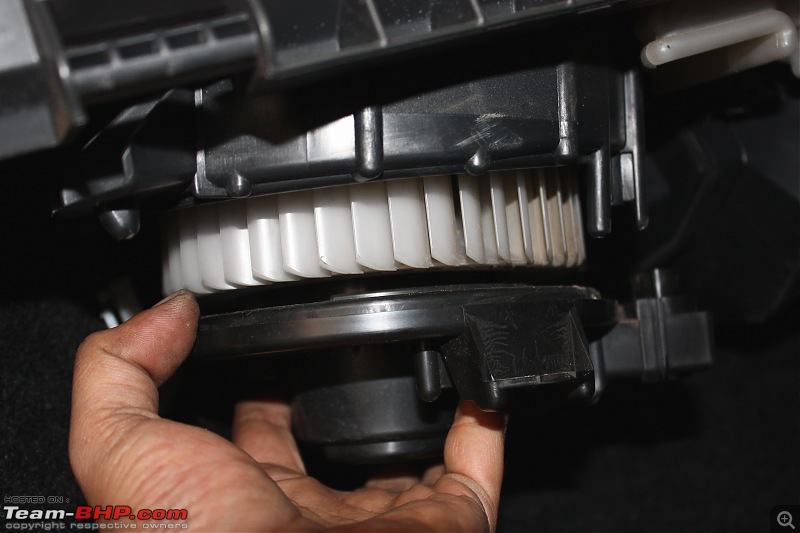
Ideally you need to hold on to the fan and release the fan like this:
Now comes the cleaning bit, first i put the hands inside and pulled out as much of paper and muck as possible. Then i connected the fan to the connector (just to avoid any error code).
With fan in off mode, moved the air circulation between exhaust and recirculate 2-3 times. I could see more stuff falling down. Switched the ignition off, in the middle of the flap moving process to hold the flap in half open position.
Used vacuum cleaner first in suction mode and then in blower mode to remove as much as leaf, paper, twigs and other muck from the flap and the duct. Glimpse of what i ended with, before cleaning flap. Hands were dirty to hold camera so couldnt get more accurate details of muck that came later

 Caution:
 There are sharp edges, both plastic and metal, so careful and dont get scratched.
Used vacum cleaner to suck out as much as dust, leafs etc from the fan assembly as well as the duct towards cooling coils (black duct towards driver side). Finally brushed the dust from fan blades and wiped the assembly clean.
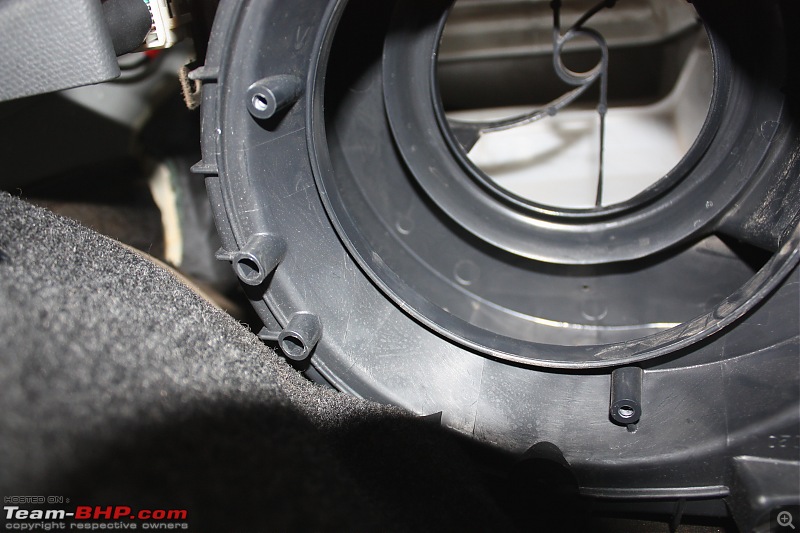
Washed the hands and with camera back in hand, this is how the blower assembly looked.
First assembled the fan back with the 3 screws, connected the connector and then switched ON the fan and ac, voila no sound and even the blower efficiency improved by a bit.
My car never runs with air flap in exhaust air mode, rarely down the windows and is regularly vacuumed, inspite of this the dust and muck was remarkable.
Which made me realize 2 very important thing about Swift HVAC.- It doesnt have any kind of filter in the exhaust mode
- The recirculation mode is held in place (open or close) once the ignition is switched Off.
Point 1 is bad, so planning to get a foam filter made along with metal mesh grill which can be screwed at the exhaust end of the assembly. Similar to what was done in the rodent attack thread. Difference will be i plan to add a filter behind the grill facing inside

Point 2 is good, so if you leave the flap in recirculation mode (closed) muck will not come in.
Hope this was helpful.
cheers
Jaggu


 23rd February 2009, 18:45


 ehm i didnt put it as a new thread, just updated my long term thread with a DIY, any issues?

 (5)
Thanks
(5)
Thanks


