News
We purchased over 15 car accessories for our Honda Elevate CVT
The list includes a dashcam, external TPMS, car duster, phone charger, ventilated seat cover and much more.
BHPian amandal1810 recently shared this with other enthusiasts.
Hi, I wanted to share the accessories that we got for our Honda Elevate ZX CVT over the last couple of months. The list turned out to be quite long.
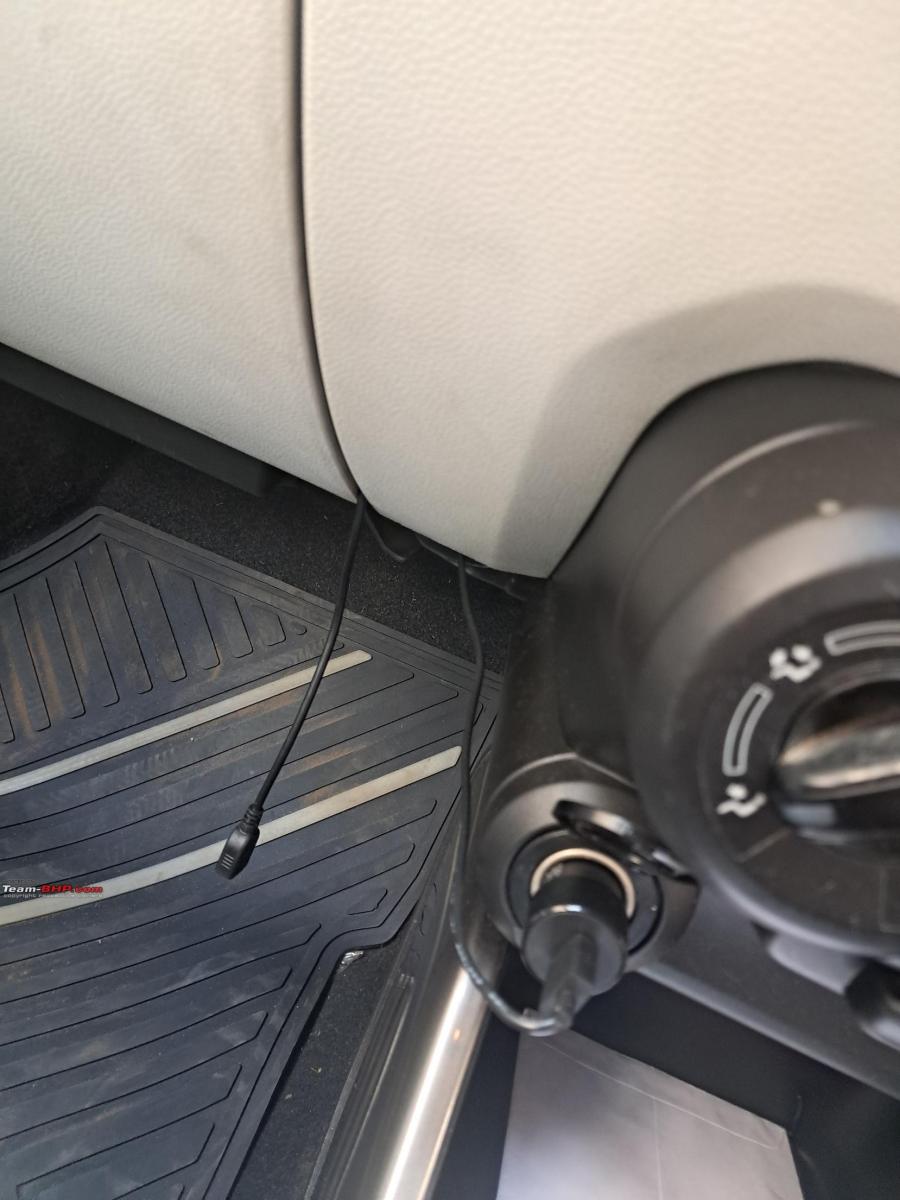
- Ventilated seat accessory: This is from Riggear. Ventilated seat was high on the list of our requirements but we still decided to go ahead with the Elevate. Thanks to BHPian @krishnakumar for his comprehensive and long-term review of the Riggear ventilated seat accessory. Bought it from the official site, where it's cheaper than Amazon. I am satisfied with its effectiveness. There is a mild noise when it's in operation, but only the driver can hear it. Moreover, it does not compromise the seat comfort. I have attached this to the rear lighter port and the power adapter juts out a bit too much for my liking.
- Rear window sun shade: This is a must-buy. It's sad that Elevate does not get this from the factory. It attaches magnetically to the window frame. But the door needs to be opened in order to attach or detach it. Cannot use it on the driver-side window because it obstructs the view of the ORVM. It blocks a tiny part of the left ORVM when fixed on the co-driver side window; but this will depend on your seating position. For me, I have kept it attached only to the rear windows. Amazon link.
- Screen guard for the infotainment display: Fits well and does not create glares.
- Charger for phone: It goes into the lighter port. It has one USB-C and one USB-A. The type-C port supports 33W PD charging, so it can fast charge devices which support PD. It's quite small in size and stays out of the way. Amazon link.
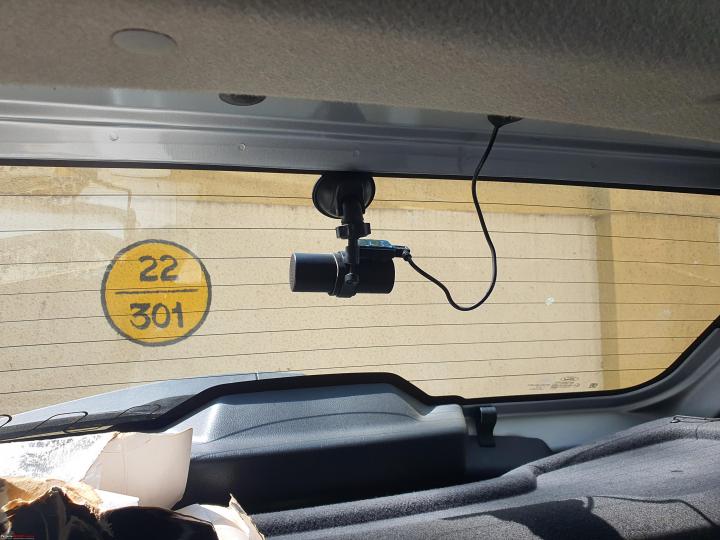
- Dual channel dash cam: Did some market research and found this to be the best option when considering price and video quality. Interestingly, 70mai pushes out firmware upgrades for this dashcam, which can be flashed using the app. However, the dashcam gets reset after a firmware upgrade, which is super annoying. Amazon link.
- Micro SD card for the dash cam: It's important to use an SD card that is meant for frequent writes. This is ideal for usage in surveillance cameras and dashcams. SanDisk uses the term "High Endurance" for this. Other brands will have other monikers. Amazon link.
- Car fragrance from Bath and Body Works: The perfume cartridge holder is affixed to the sun visor and stays out of the way. The ones that hang from the internal rear-view mirror (such as this one) obstruct visibility. There are many fragrances to choose from but here is an example. You will need a holder for it, such as this one (many designs available).
- 90-degree short USB-A to USB-C cable: For wired Android Auto (because wireless Android Auto is buggy in Elevate). I got this thinking that a long cable would create a mess. Unfortunately, this was a bad purchase. The cable got yanked multiple times when I reached out to pick up the phone without realizing that the short cable was attached. And the 90-degree bend is towards the other side (away from the center). Amazon link.
- External TPMS: yet another important thing that the Elevate misses out on. Got an external TPMS because fixing it was DIY. Bought the one with the highest ratings on Amazon. Works well so far. I am not using the anti-theft locks. The solar charging does not work well for me because I have got sun film installed on the windshield. Thankfully, it can be charged with a micro USB cable. I did not want one that is app-based, since it might drain the phone battery and obtain unnecessary permissions such as location data.
- Tyre inflator: There are too many options out there. Did some market research and went with this.
- Neck pillow: Wife needed one; usefulness is subjective. Amazon link.
- Napkin holder: Affixed to the sun visor. Blends well with the interior (roof) color. Amazon link.
- Jopasu car duster: Super highly rated and does what it promises. This is my go-to option when dry dusting the car. Amazon link.
- Mini trash can for car: Fits perfectly in the cup holder and does not block access to the phone tray. Amazon link.
- Heavy duty micro fiber cloth: It does work quite effectively in drying the exterior surface. Amazon link.
- Key cover: Feels and looks premium. The silicon adds a nice grippy texture to the key. Amazon link.
- Carabiner key chain: For placing the key on the belt loop. Solid built and feels built to last. Comes in pairs. Amazon link.
- Ganesh Idol for dashboard: There are 29 options to choose from. Elevate has a floating infotainment display, so any religious idol would be partially blocked from view. Amazon link.
Check out BHPian comments for more insights and information.
News
Imported a high-quality downpipe for my Abarth Punto: 53,000 km update
I feel that the mid-range grunt of the car has improved. The vehicle feels more addictive with more consistent torque delivery throughout the torque band.
BHPian sidindica recently shared this with other enthusiasts.
Update | 5.4 years | 53500 kms | Stage 2

I always like to add things patiently and slowly, so as to keep interest in the car. Since this car is meant to be kept for a long time, maintenance, periodic replacement of parts and incremental upgrades is the best way to not get bored of it.
Changing the brakes
The car crossed 51,500 kms and the factory discs were nearing the end of their life, of course, this is not a car to be driven with light foot so it's always better to check and perform designated replacements along with pads. Replaced all 4 discs with OE replacement Brembo rotors (INR 12,500) and EBC Yellow stuff pads (INR 20k). Still feel this is the best balanced combination for my car.
Changing the tyres:
The earlier Pilot Sport 4s too were beginning to deteriorate so replaced them with a new set of PS4s (freshly available now) of 205/55 R16 size. Not cheap though at INR 11.4k/tyre.
Service with fluids change:
52,500 kms service was performed at Landmark, Okhla. Changed the oil (Selenia K), all filters (except air), brake oil, transmission oil with brakes being bled and serviced after my recent trip.
Going for Stage 2:
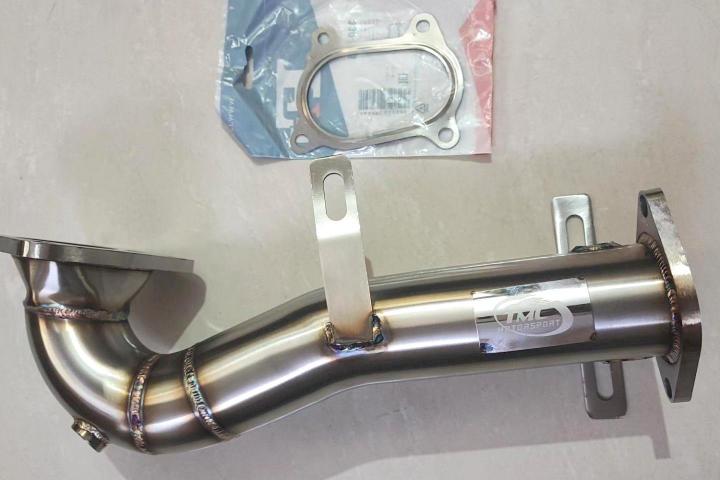
For a long time, I have been doing research on the pros and cons of adding a catless downpipe. Since all my parts on the car are international branded which are certified for this very car and platform, I had to take the same route with the downpipe. This was anyways my first car and first experiment with adding a catless downpipe, so TMC Motorsport UK launched their downpipe for IHI 60mm turbo (2.25" diameter) back in December 2023. Their appearance, build and overall quality looked top-class, so ordered the same in the beginning of April.
The parcel came, and here was what it looked like: Quality does come at a price, which costed approx INR 34k (cost of DP+shipping+duties).

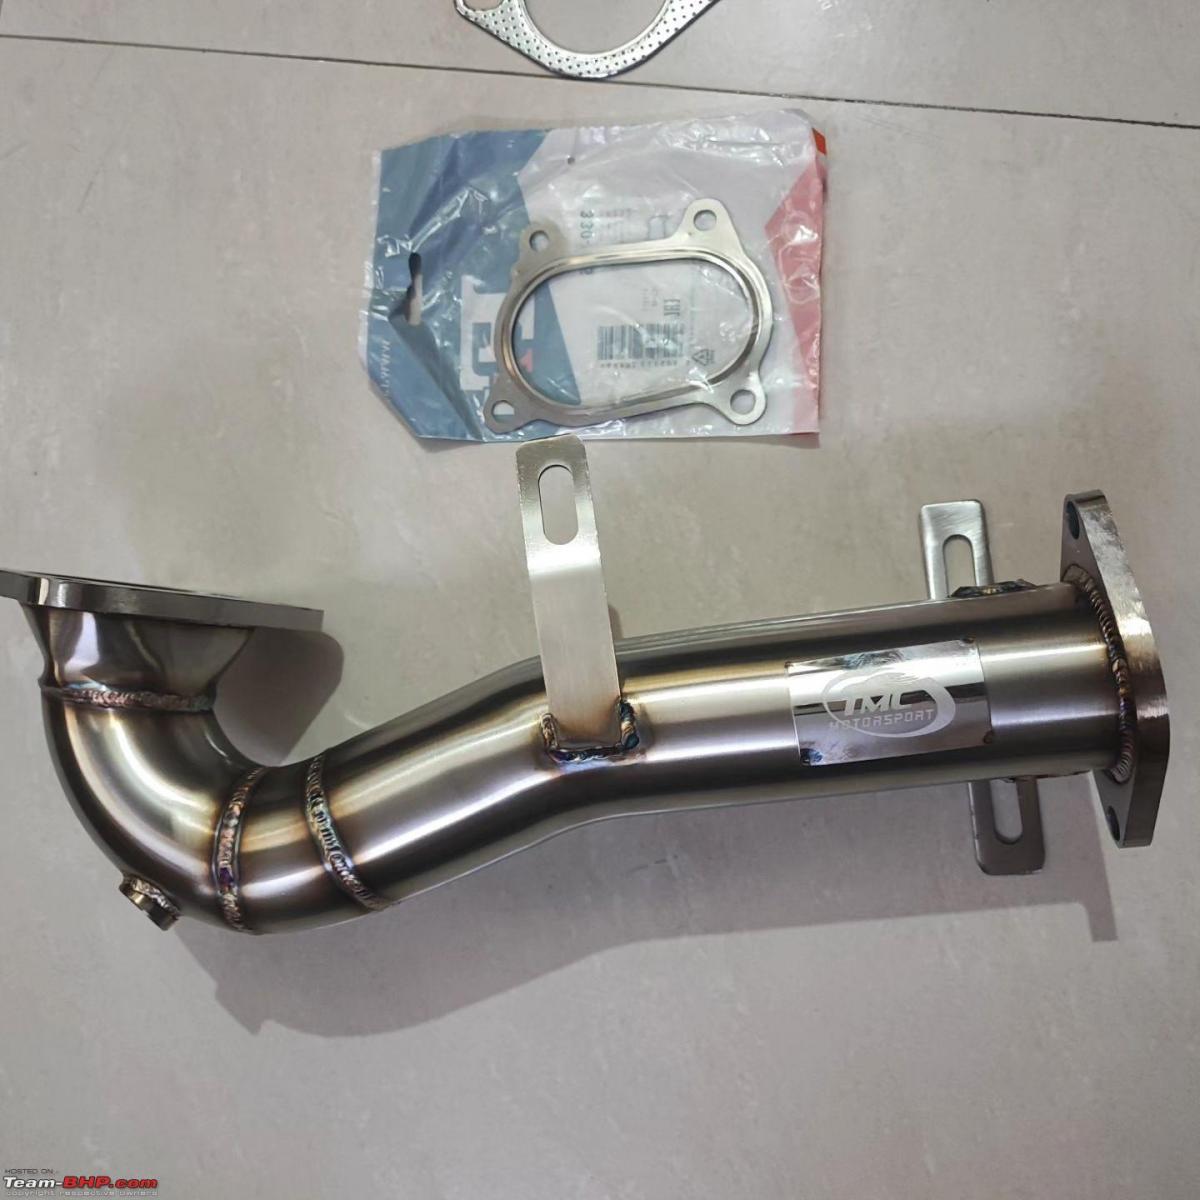
Impressed with the high quality of construction of T304 grade SS, with proper weld marks and excellent finish, this was just what I was looking for. Installation was done at Fiat FNG (Jhalak) and it took 2 hours to do a neat installation by the mechs. As expected, this is a reversible bolt-on mod.
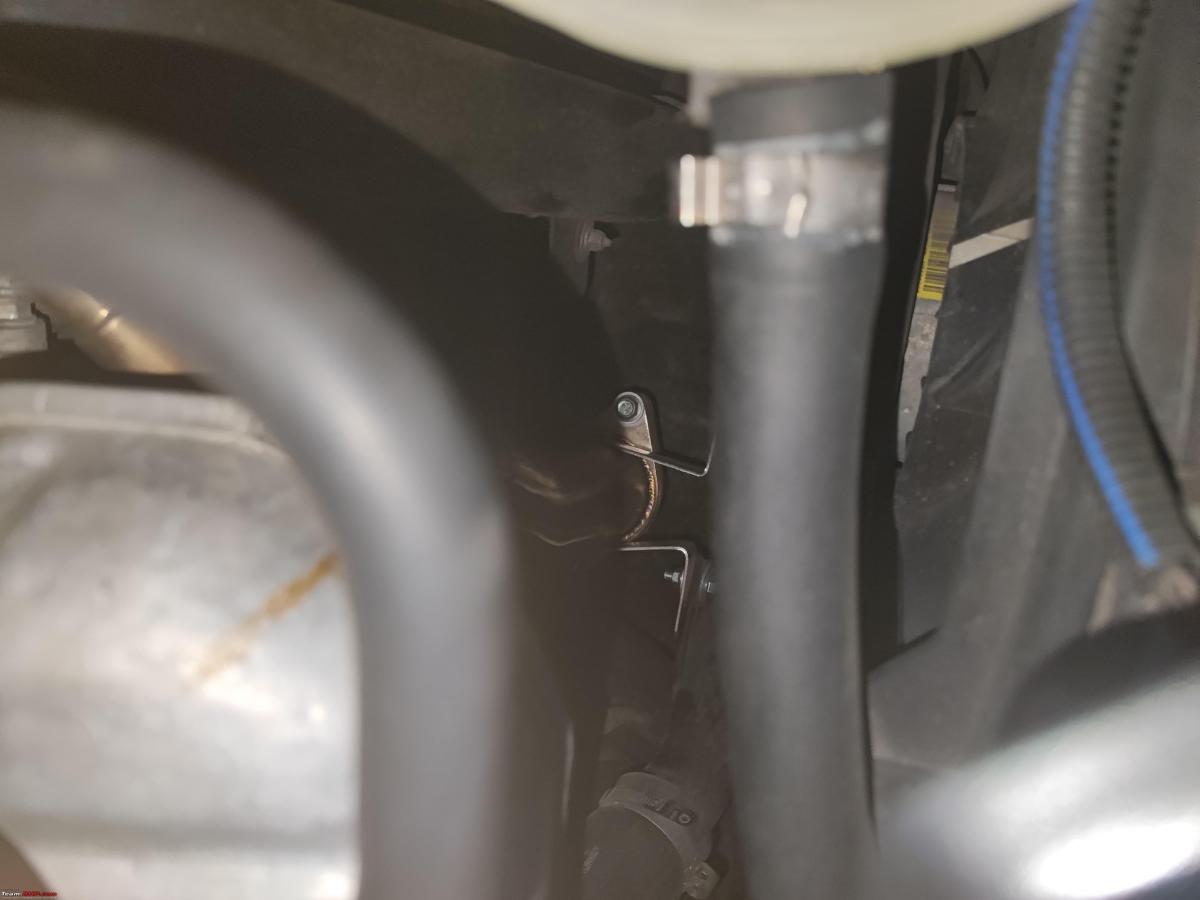
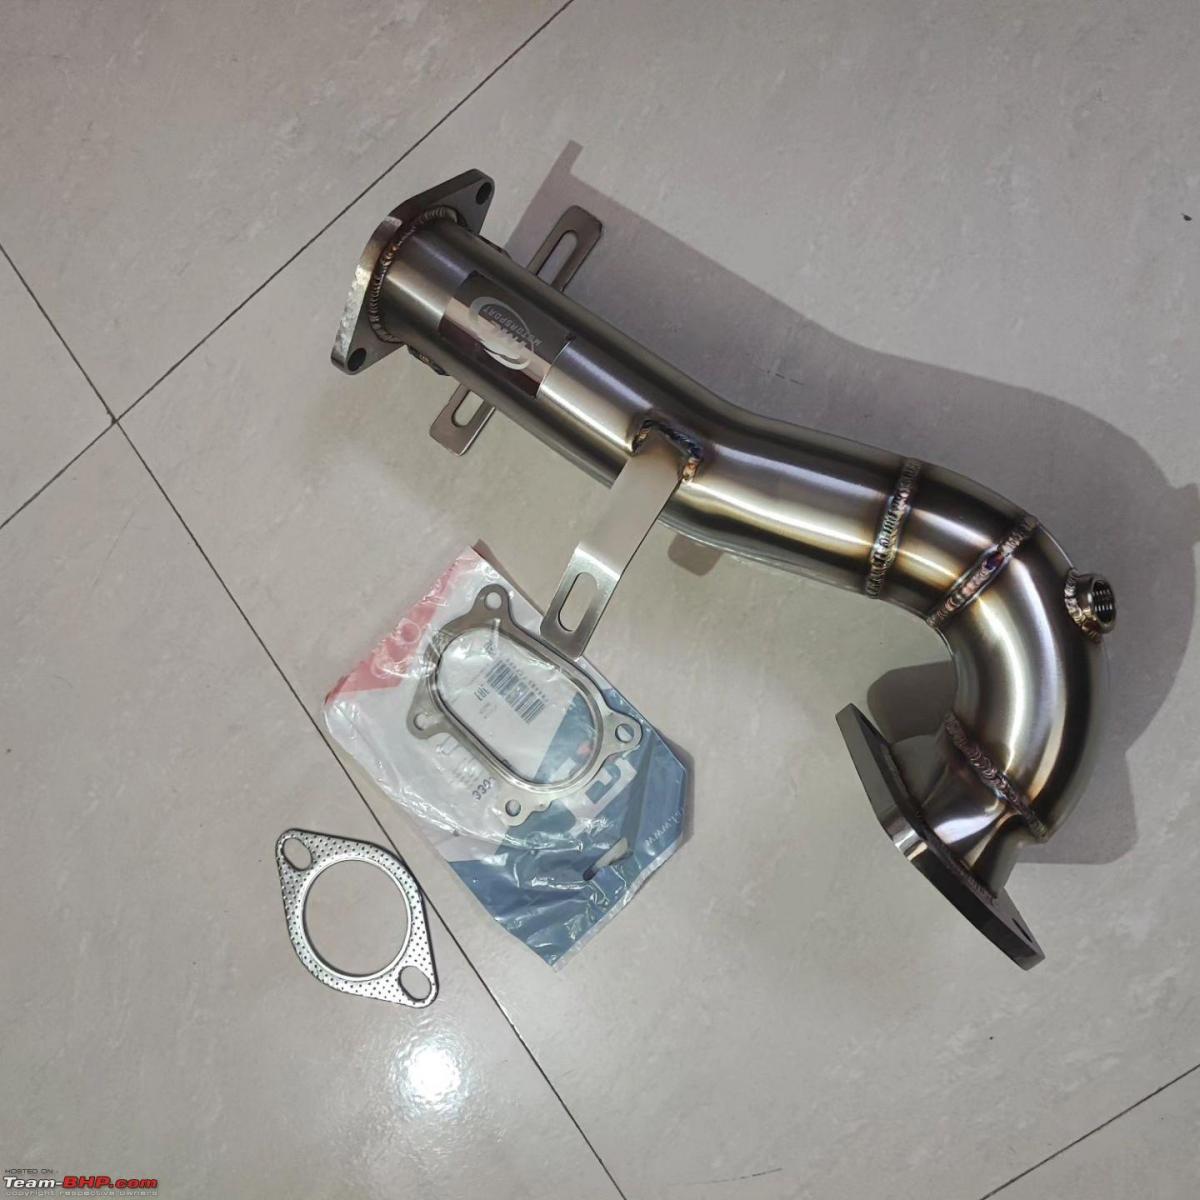
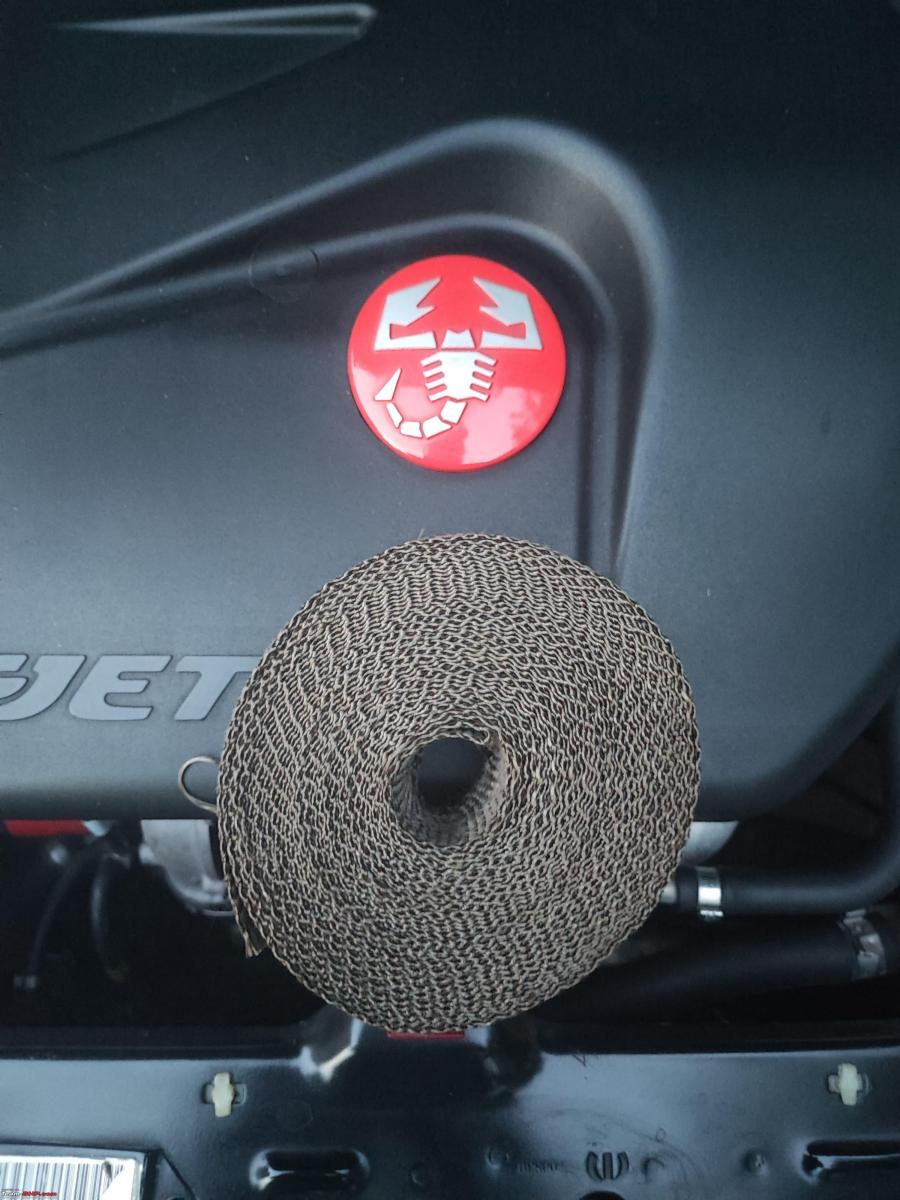
The OE heat shield (bottom one) cannot be fitted as there is no provision so I had to go with Kool Wraps Australia Sourced Heat wrapping strip (Photo below)
As expected, the O2 sensor error (P0420-CEL) appeared after 50 kms of driving, and I got it cleared by the scanner, though a proper map update by Wolf Moto is pending which will be done once they arrive next in Delhi.
I got coolant changed as well since summers are at their peak also.
Initial Impressions
The ECU took time to adapt to the DP and altered O2 parameters, once it adapted, the mid range grunt of the car improved, and the car felt more addictive with more consistent torque delivery throughout the torque band. Already the car was never meant to be driven with light foot, this will further add to the addiction. Haven't seen much difference in FE, have to do proper logging in days to come for this.
I think overall the car feels more complete, just like what it should be, not gunning for just straight line acceleration and numbers, but better driveability, torque, and catalogued high-quality build.
Check out BHPian comments for more insights and information.
News
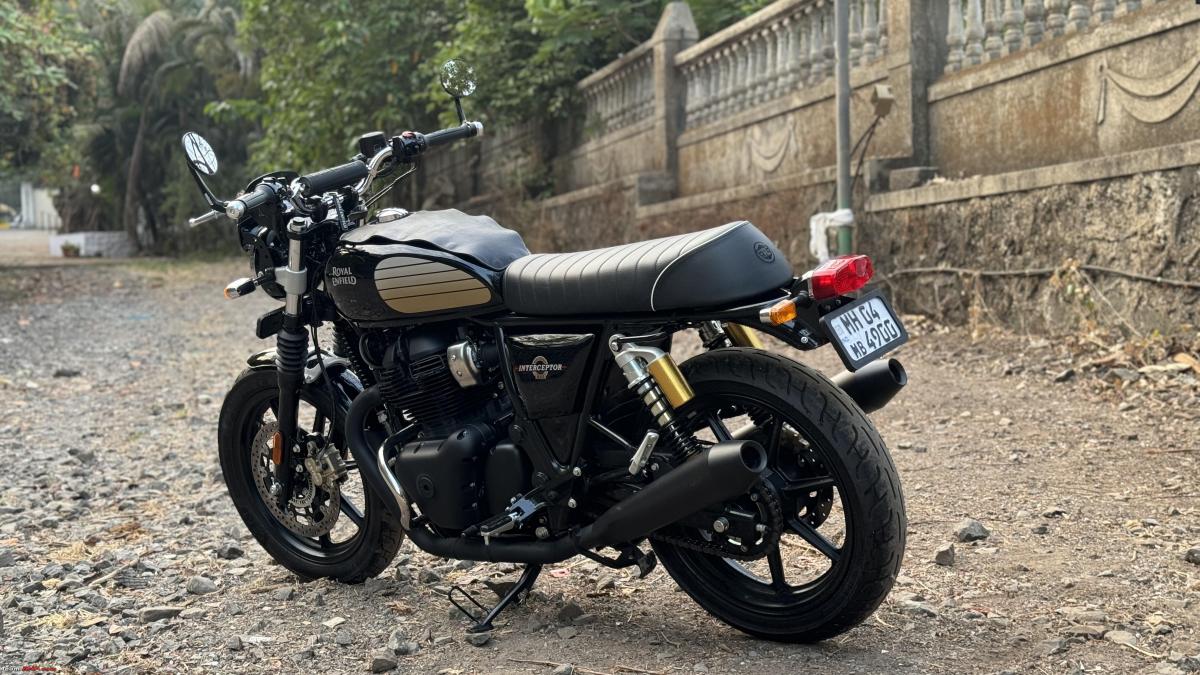
Custom magnetic leather tank protector for my Interceptor 650

The leather will eventually take the shape of the tank in a few weeks. Also, it can easily be removed for washing / detailing purposes.
BHPian parrys recently shared this with other enthusiasts.
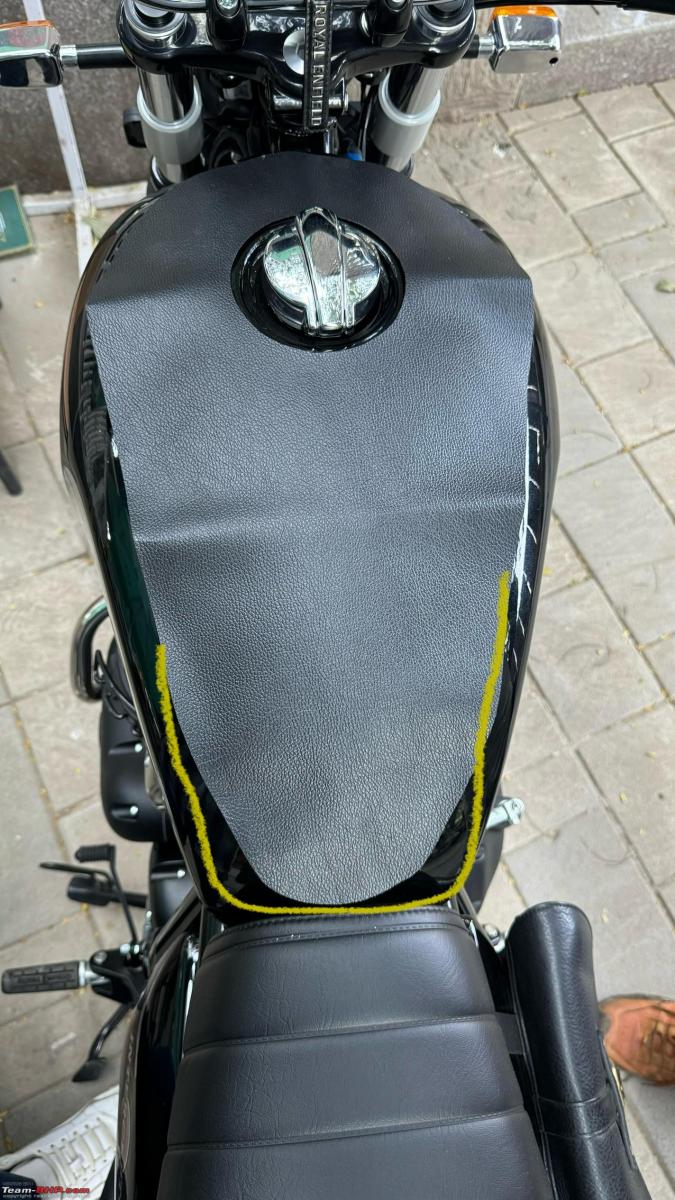
So Tanners Pride is working on a custom piece for the Interceptor 650 tank.
This is how the first rough draft was. This was cut only for measurements, so we could decide what needs to be tweaked.

My suggestion was the yellow line. That area also needs to be covered / protected. This would be placed on the tank using magnets, so we can wash the tank / bike effortlessly by simply getting this protector off. I am hoping the final output will be ready by or before mid-next week.
I have ordered 2 pieces. One black, one in a shade of brown. Will share images once I receive the product.
I did order the Sahara Seats tank cover, just to try it out. While it was soft to the touch, I just could not get around to tying it, as the seat would not lock in place (where the seat meets the tank, it was taking too much space).
Update
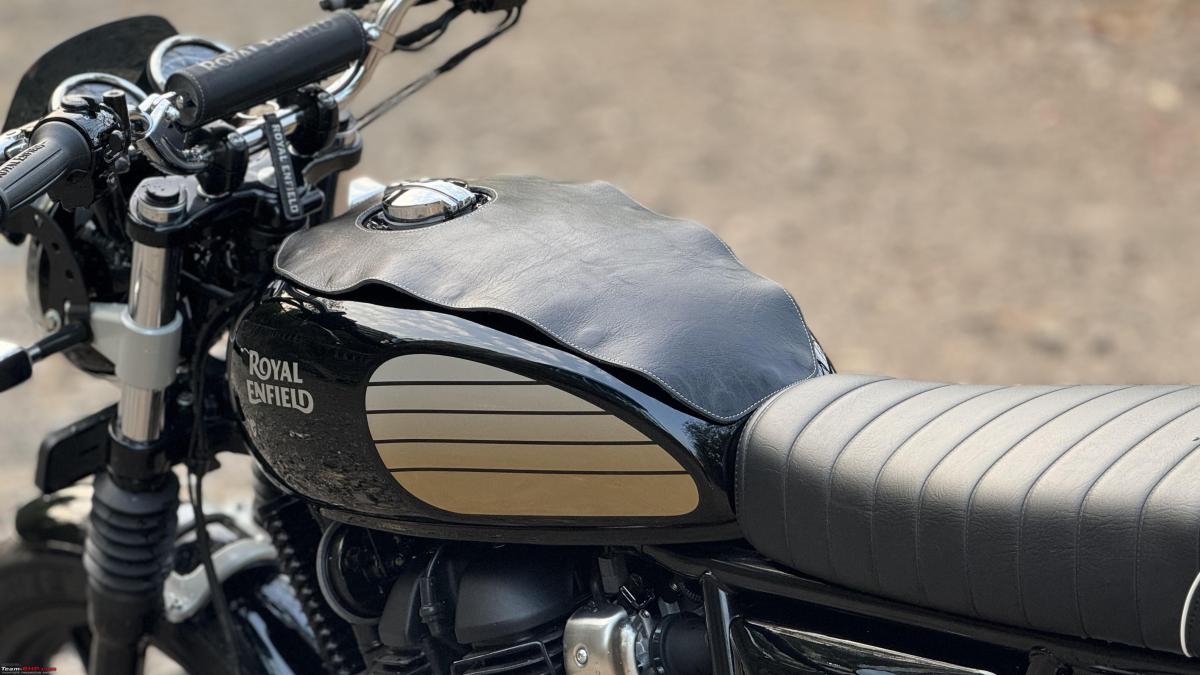
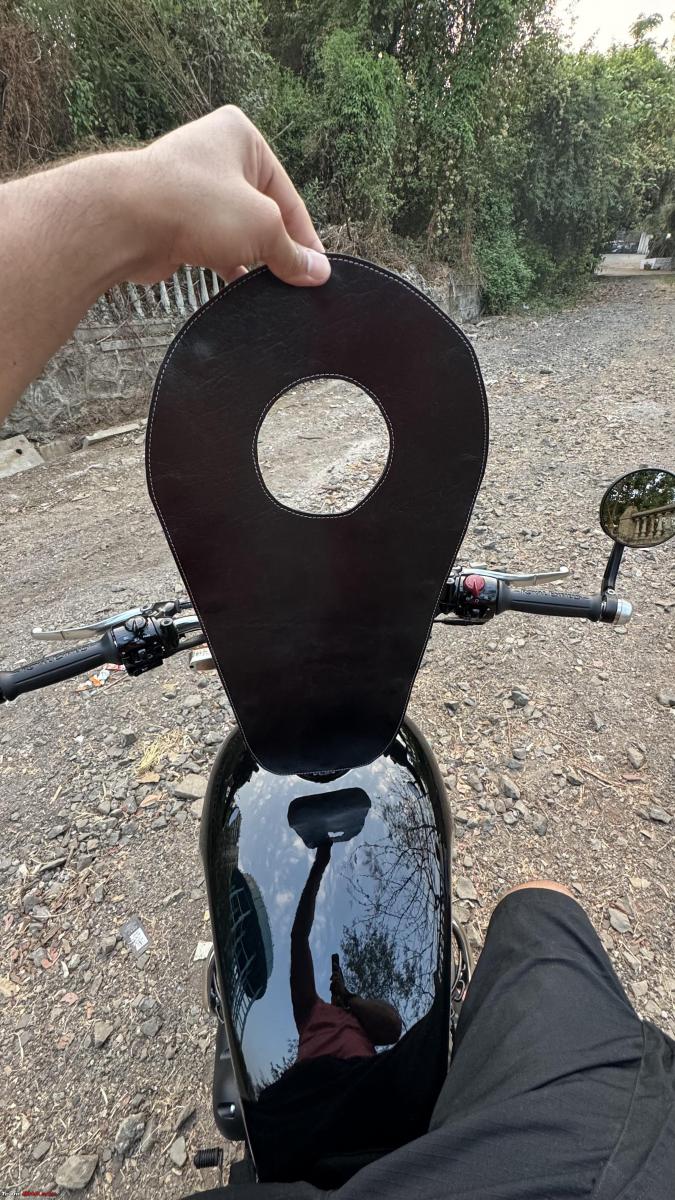
So finally received my custom magnetic tank protector from Tanners Pride.
This is genuine leather, with a suede finish at the back. There are multiple magnets at the back to keep it in place. The leather will eventually take the shape of the tank in a few weeks.
Have also ordered a brown unit with contrast stitching.
This should serve my purpose, of protecting the paint from scratches while on the go. Also, it can easily be removed for washing / detailing purposes. It was crucial to have a straight cut at the bottom so that it meets / matches the seat line.
Here are some pictures:


Check out BHPian comments for more insights and information.
News
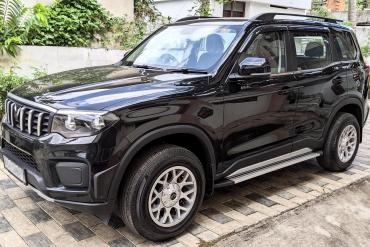
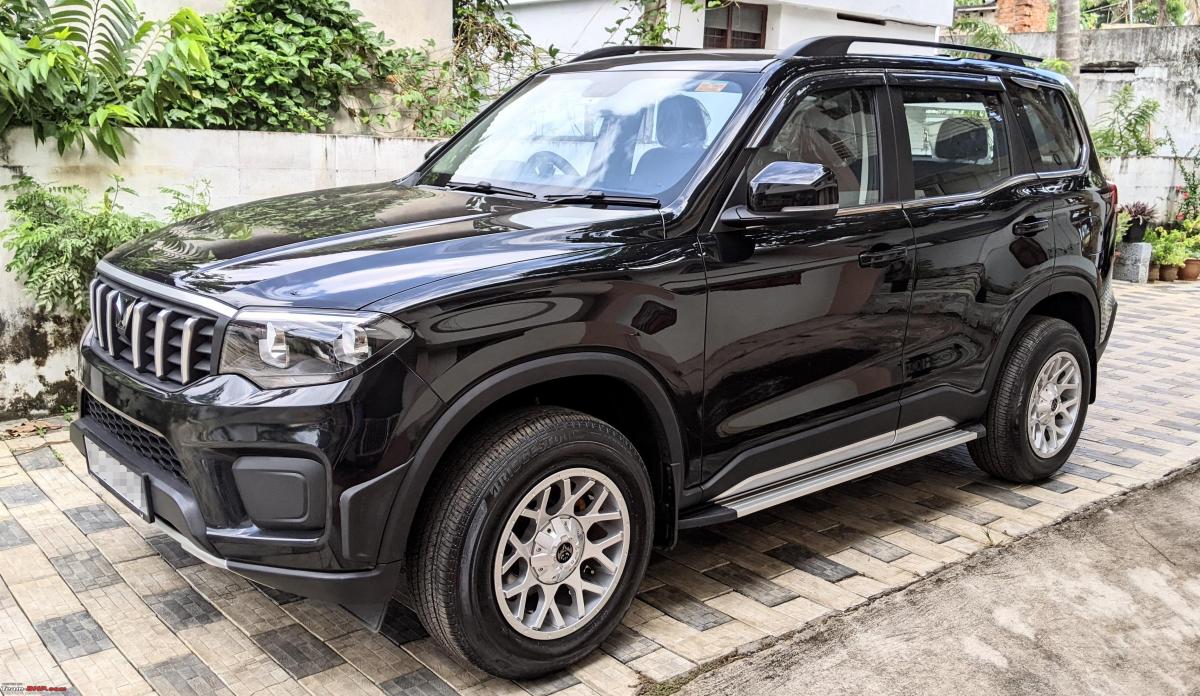
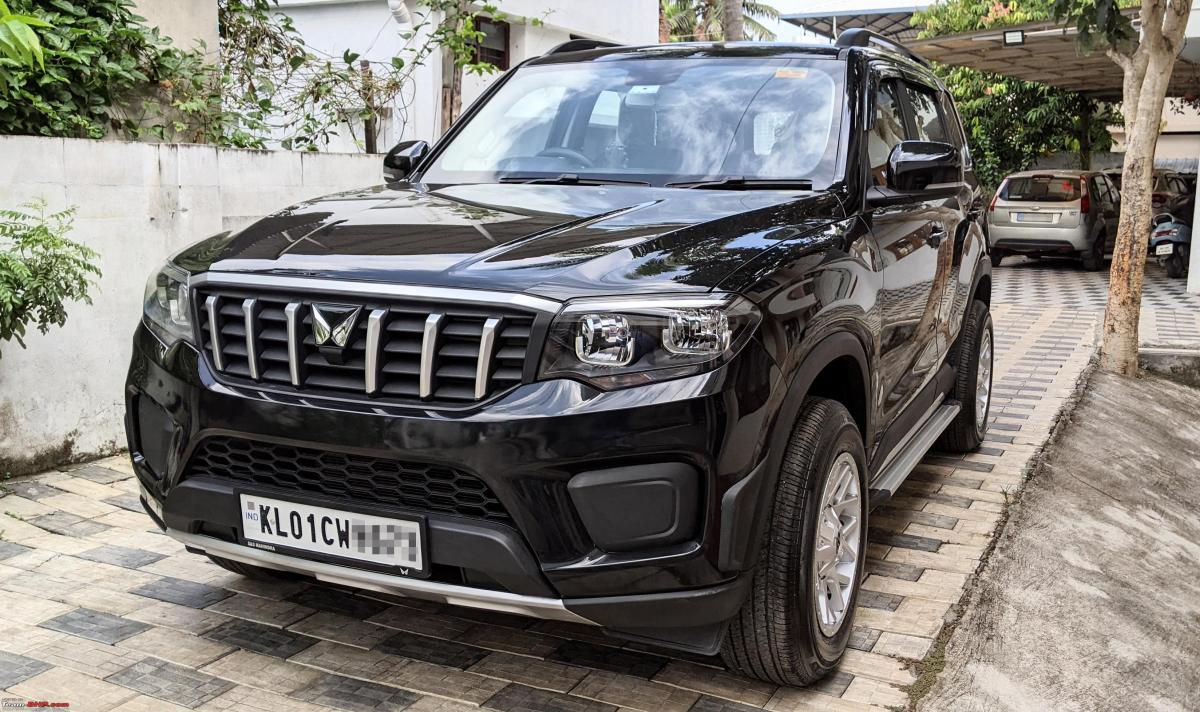
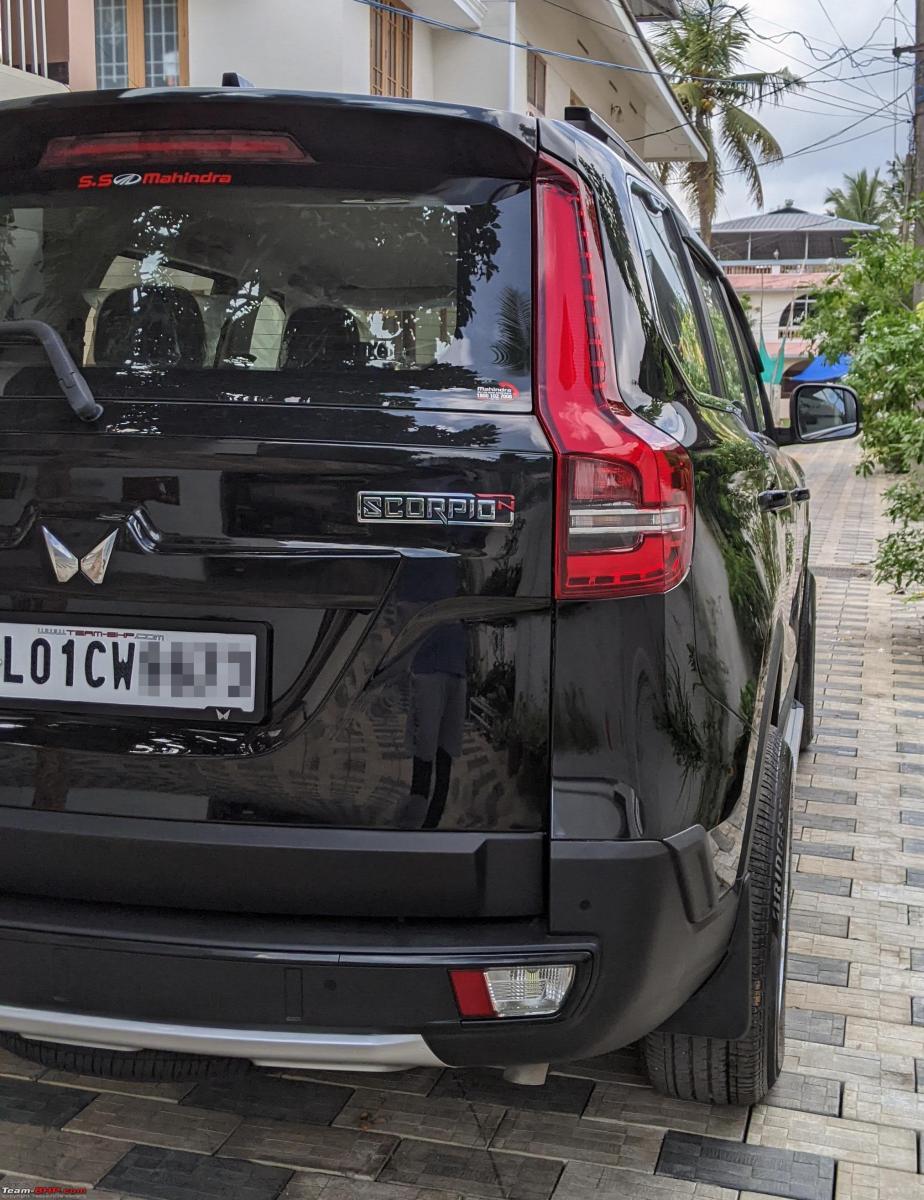
Finally found compatible aftermarket alloy wheels for my Scorpio N
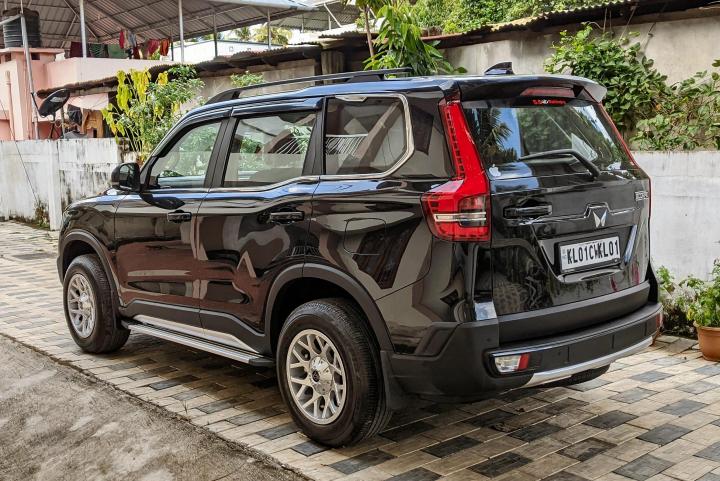


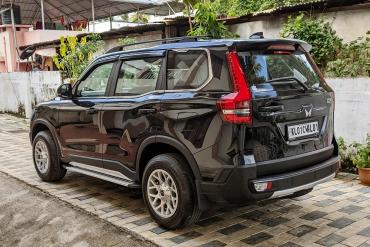
They were previously being used on a Mahindra XUV500 but since getting a good set of used rims in this size and PCD was a rare thing, I went ahead with them.
BHPian vivekgk recently shared this with other enthusiasts.
Hi,
As I have already lamented on the tyre/wheel section, Mahindra "cruelly" chose to outfit the Scorpio-N with an odd PCD/wheel size/Tyre size combo, restricting the mod potential of the Scorpio rather badly. The PCD is 5 x 139.7. The tyre size is 245/65 on R17 wheels which is unique to the Scorpio-N, AFAIK. Why did they put this odd PCD on the Scorpio-N, when every other vehicle, even their Off-road focused Thar has a 5x114.3 PCD?
Why is this a problem? While 5x139.7 is a very common PCD, used by the older Jeeps, the Gypsy and the Jimny and also the erstwhile XUV5OO, the problem is that commonly available off-road wheels usually use a 15-inch or 16-inch rim, with tall sidewall tyres. 17-inch and above sizes commonly come with a 6x139.7 PCD, used by the Fortuner/Hilux/D-Max/Endy and such.
Scorpio-N is thus caught in a no-man's land in between these two common sizes. Most of the options in the 17-inch come in the 5x114.3 PCD, due to it being the most common in this price range. It's used in the Creta, Seltos, Vitara, and even the XUV700, Scorpio Classic and the Thar, which makes it easier to find a design that you like.
I didn't want to use a PCD adapter except as a last resort, as it adds another failure point, and is supposed to cause instability and wobbling+vibes at higher speeds. At the time, there were very few options available, and I didn't like most of them. I was calling up dealers all over Kerala, and scouring through OLX/FB market for used options, with limited success.
Then, I got a lead from Kottayam, where one of my friends had gotten alloys fitted for his Bolero. While we were admiring the ones he had got, he told me that the dealer had a variety of options in stock. The Dealer was Parappally Tyres, Kottayam. I got in touch with them, and they sent me several options, all priced around 40-60k, none of which really appealed to me, esp at the prices quoted. Then, he sent me this pic of a used set taken off an XUV5OO.
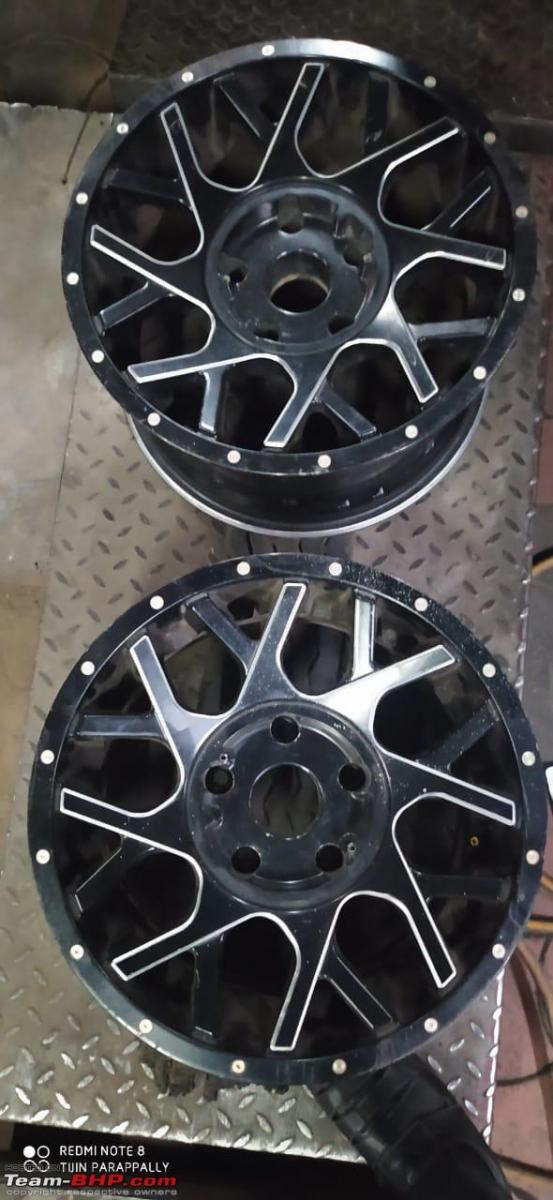
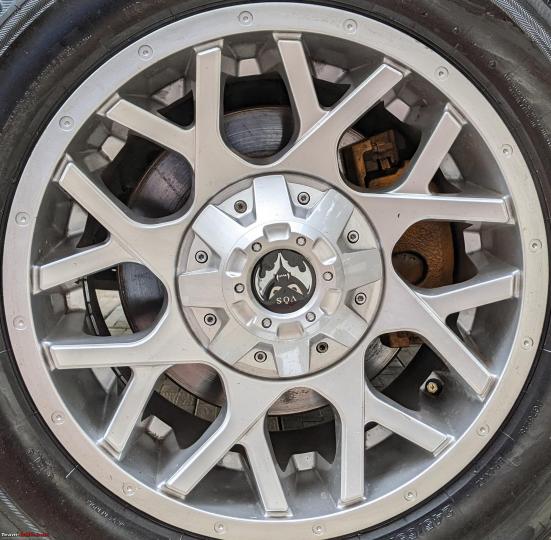
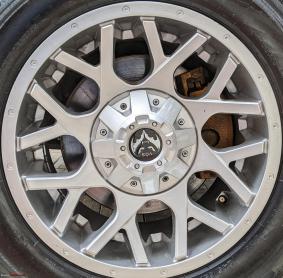
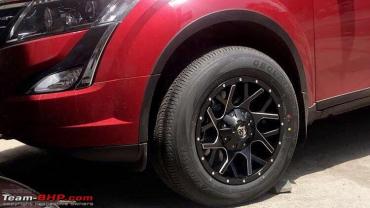
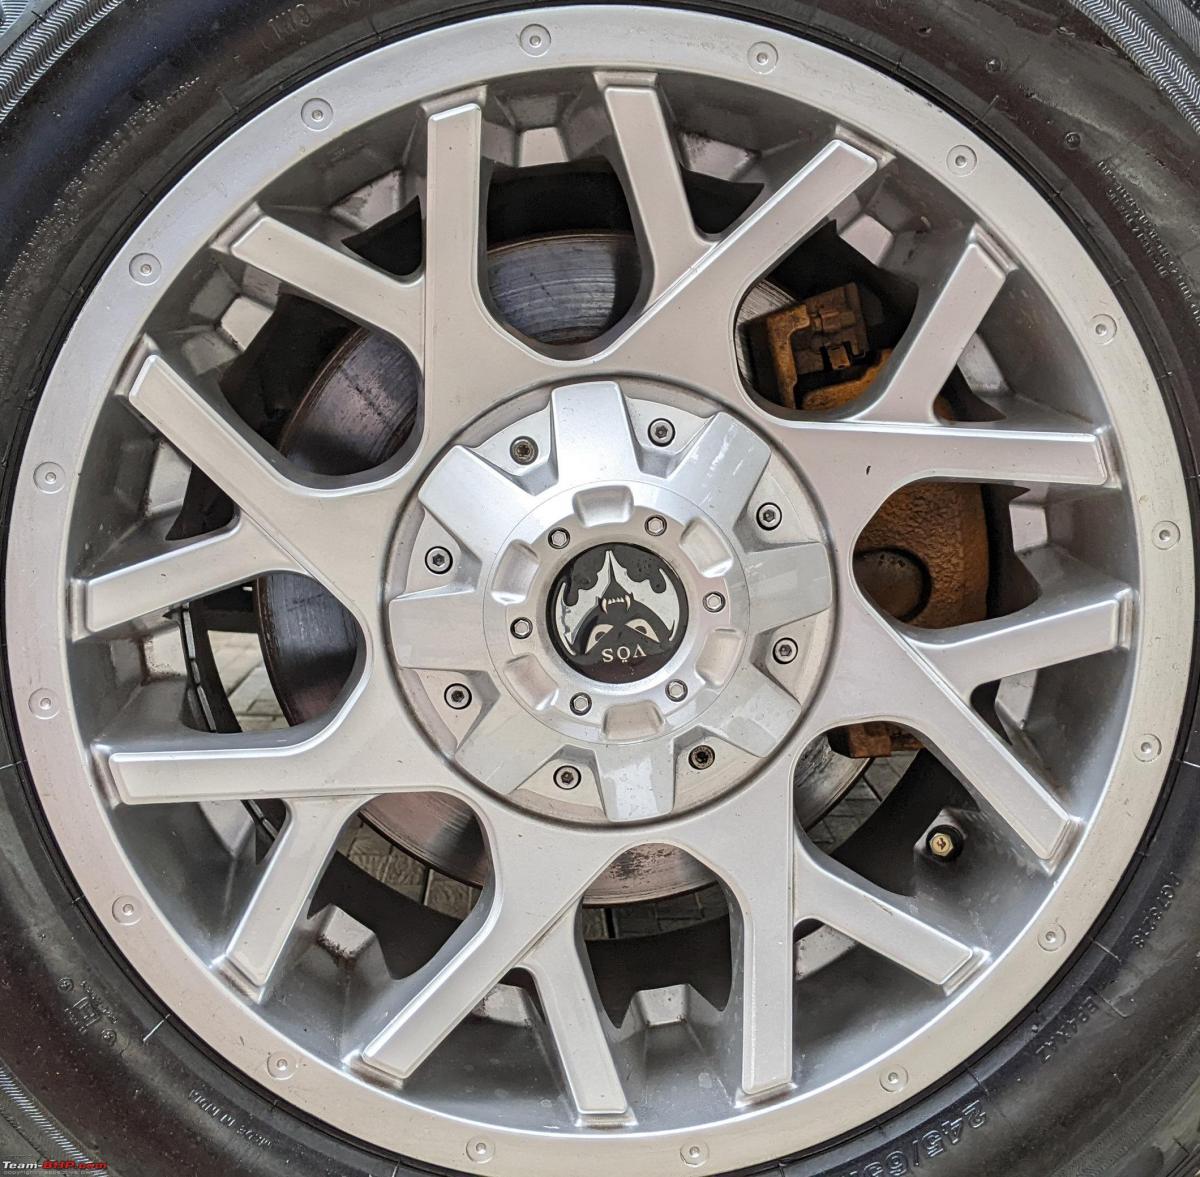
I immediately liked the design and did a reverse image search on Google, and came up with the make and the model, as well as some more pics. It's from a brand called VOS, not sure about the model. Originally, it came with a really cool gloss black finish with diamond cut accents, as seen here.

However, the pics forwarded by the dealer showed a fair amount of scratches. it would definitely need to be retouched or repainted.
Here's what they are supposed to look like. Pics taken off Facebook.


I had planned to restore it to its original finish, but my go-to detailer said it was a no-go. There were scratches all over, and the diamond-cut finish could not be retained by him. It would have to be one shade. After some deliberation, I decided to go for a full bright silver finish, which I thought would go well with the silver accents on the Beast, and would also give a more classic SUV look.
My cousin from Kottayam helped me out by checking out the rims in person and sent me his own set of pics. He said there were no major scratches and no dents. They were also really wide at 8J. I had another chat with the dealer and settled on the price, which was a bit more than I had planned.
Still, getting a good set of used rims in this size and PCD was a rare thing, and I had seen higher prices in OLX and FB marketplace. Plus, I liked the pattern, especially up close. I paid an advance immediately and paid the balance after they had sent me the Waybill, and it was confirmed. Even considering the additional cost of painting, I felt it wasn't a bad deal, all things considered.
The wheels reached me in a couple of days by parcel service. I immediately took them to the painter. As he was busy, it took about a week to get them painted. I went to pick them up and I was impressed by the quality of the finish. They looked absolutely brand new. Unfortunately, I lost the pics that I'd taken immediately after painting due to a screw-up on my part. These pics were taken after the wheels had been dirtied a bit after a trip.

The rims stayed in the back seat of the Beast for a week before I found the time to get them fitted. However, once I got them to the tyre store, there was a problem. The 245/65 R17 tyres were a bit too narrow for the 8J rims. The factory steel rims were 7J which seemed a bit too narrow for the 245s. So, the tyres were pinched on the stock rims, which made the gap even larger on the alloys. But these guys were experienced in fitting narrow rims on wide wheels since that is the current trend here for hot hatches and sedans. They simply stuffed the gap with old tubes, and once the tyre started filling up, pulled out the tubes.
Getting the alignment done...

The wheels fitted very well on the hub, and there were no issues with clearance. They did tell me that the OEM wheel spanner was no longer usable due to the large -ve offset of the rims and the deep holes for the wheel studs. I got a universal cross-shaped TAPARIA wheel spanner from Amazon which solved the issue.
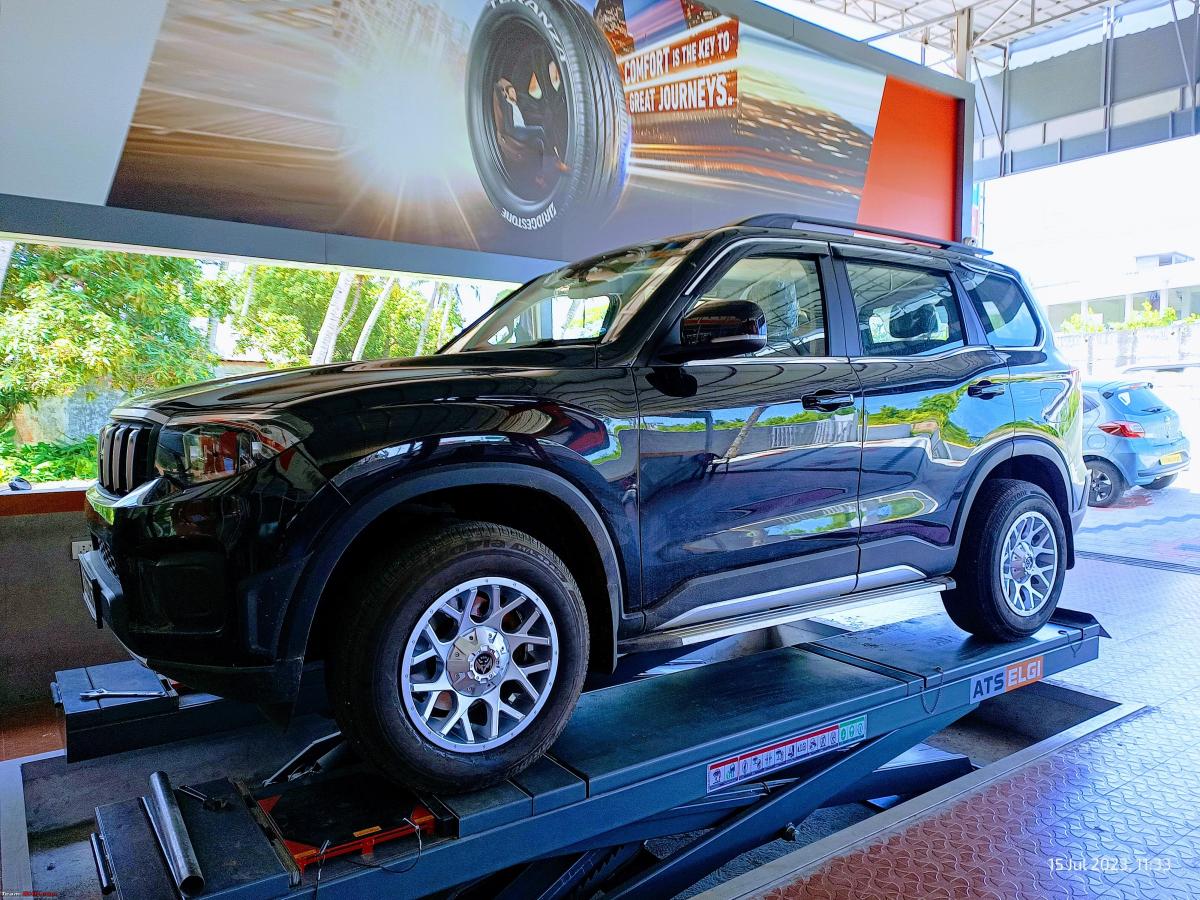
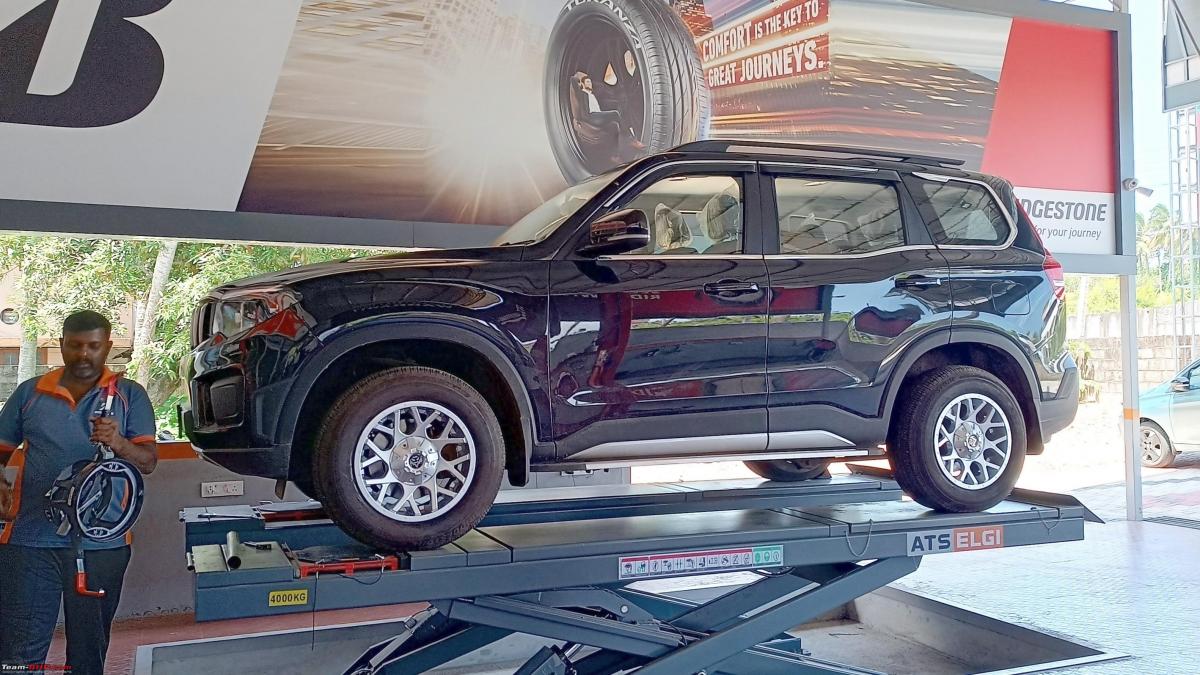
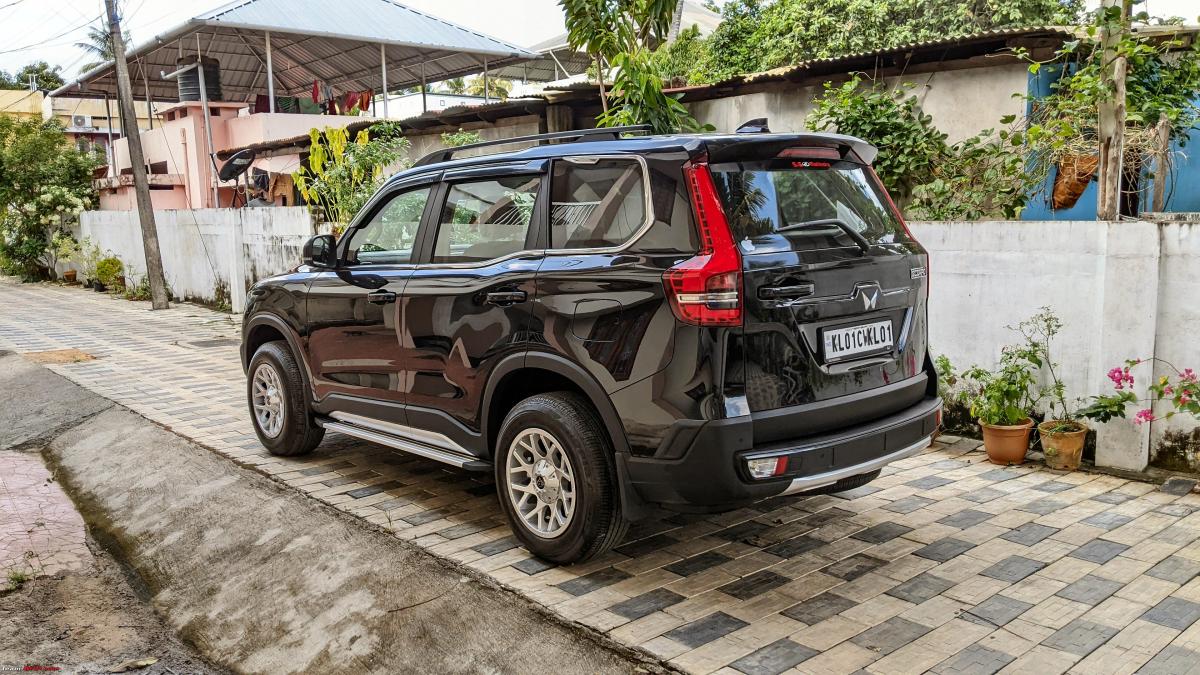
So, here's what the Beast looks like with the new rims. I think that the stance has improved vastly. My concerns are with the tyres protruding out of the wheel well, which might cause issues with the authorities. I feel that the turning circle has also increased due to the increased track. The ride quality has improved, and the handling at low and high speeds has not been affected.


Please post your valuable comments and suggestions.
On another note, I also had a chance to compare the Beast with a friend's Fortuner. It was a 2020 2WD AT model. While the interiors were far more plush feeling than my Z4, I felt that it was noticeably harder to drive in the city due to the tight steering, and I also felt that there was more lag in the TC. The Sport mode felt a lot more powerful than the Scorpio. The Beast also rode a lot better, in both our opinions.
Check out BHPian comments for more insights and information.
News
Bought a CarPlay AI Box for my Seltos facelift: Review with pros & cons


It's called the iHeyLinkit CP908 for which I paid around $380 (+duties) via AliExpress and I am very happy with the device and its performance.
BHPian MadrasTurbo recently shared this with other enthusiasts.
Background
In-car HU user experience, for me, is one of the very important aspects of a car, and though I was mostly satisfied with the OE HU on my Kia Seltos facelift, one thing that I was not a big fan of was the inbuilt Here Maps. It is not terrible but I have been so used to Live Google Maps on my previous car’s Android HU, that I really missed it on the new car. Changing the HU was out of the question, and was not even considered, but I started looking at the available options to integrate live Google Maps to the HU.
Options Considered
- Wired CarPlay/AA - This is the most straightforward way to get Google Maps and I am sure it would fit the bill for most of the users. I was also using this, but always missed the convenience, that I was used to, of just being able to use the application without a phone.
- Wireless CarPlay/AA with a dongle - Costs anywhere from ₹6,500 and goes all the way up to ₹9,000 for some models. Has the same issues as the wired counterpart, but on top, it takes a hit on the phone's battery, and if charged wirelessly, the phone heats up sometimes. I know many Kia/Hyundai users use such dongles and have a lot of positive feedback, so this option is also worth looking into.
- Side loading .apk by accessing the engineering mode - While I was reading online, I came across an interesting thread on xda-developers where someone got access to the engineering mode and could sideload apks directly to the OEM HU. Though I badly wanted to do this, it was not that straightforward, and Kia has been making it harder and harder to access the engineering mode from what I am able to read. But also, with an OTA update, the side loaded apps most likely have to be reloaded. Also, there were other concerns like keeping the application updated, warranty woes, etc. So I dropped this idea.
- Plug and Play Android Car Box a.k.a. CarPlay AI Box - Basically, an external device that uses the wired AA/CarPlay protocol to run a full-fledged Android OS. Interestingly it also supports wireless CarPlay/AA through an application. Now this was the option that could potentially give me the same experience that I had with a proper Android HU, without having to tamper with anything in the car. So I decided to buy one.
What to buy and from where?
There are a good number of options, and I am also seeing more local brands that generally rebrand and sell Android HUs, offering this product under various names - Smart AI Box, AI Car Box, Android Box, etc. But the problem was the pricing. In India, the local distributors seem to have a good markup (understandable as they have to extend warranty, support), and the prices for known brands like Carlinkit and Ottocast sometimes can even be close to ₹30,000.
Honestly, I do not mind spending money on accessories like this which I would not be changing often, and buying an inferior specced product would ruin the experience, and in the end, I may end up not using it at all. I try not to regret buying something. I paid around ₹25,000 including duties for an Android Head Unit 5 years back for my old car, as at that time, there was no one selling an OE fit for my car which was not so popular but also did not have high specs for the generic units. The product was expensive but it never gave any trouble till the day we had to part with our car.
When I was looking at the various products offered I noticed that the specs for a lot of them were identical, but they looked different and had a different name. It became clear that this is very similar to Android HUs, where brands procure from a handful of manufacturers with their custom branding or casing. So I now just needed to find the right product and buy it from the right seller who offers good support and pricing.
I started looking through AliExpress and Alibaba for these products and there were so many options to choose from at prices as low as $50 all the way up to $400. After talking to multiple sellers and watching multiple videos and reviews online, I could generalize the products based on the processor used. There can be other products out there but the majority of them use the following chipsets.
Snapdragon-based
- QCM6490 - Expensive but one of the best available options today, supports 5G, for EU and Asia. Also supports Wifi6E.
- SD662(6125) - Best VFM Chipset, supports 4G and should be the choice of most buyers.
- SD665(6115) - Good performance, supports 4G and slightly cheaper than QM6125.
All the chipsets mentioned above are octa-core processors, There are other Mediatek and Rockchip based boxes that are slightly cheaper but might offer a different UI, or functionality.
Based on information available online, I was very impressed by the performance and features that the QM6490 based boxes offered and I was convinced that this was the one that I wanted to buy. No seller in India offered this product, so I had to import it directly from China. I have good experience with ordering stuff from China in the past, but that was all through AliExpress. Now, it is a little more challenging to order from China as most sellers do not want to ship single items on their own and the buyers as well have little to no protection.
I got in touch with a company called “iHeylinkit”, and what I really liked about them was the support that they offered. I had a lot of questions and was always given a detailed and polite answer to all my questions. I ordered the QM6490 based box from the same seller, which is called the “iHeyLinkit CP908” for about $380 (+duties) via AliExpress to my EU residence. I believe it is also sold by other companies and you can find the product as “Exploter ApplePie Rocket”, “Navlynx ApplePie Rocket” etc.
The seller informed me that they would be willing to ship directly to India, so if anyone is interested, please take a look at their product line-up. You can reach them at +86 158 7619 4110 on WhatsApp.
Disclaimer
I am not linked to the company/seller in any way. I fully paid for my goods, and my review of the product is solely based on my personal experience. Also important to note, I did not order directly and used AliExpress and had full buyer protection. So if anyone happens to buy directly, please be aware of all the possible risks and if possible, share your experience in this thread.
iHeylinkit CP 908
I will start with the overall pros and cons and then go into the details for those interested.
PROS
- Full Android 13 based OS
- Outstanding performance with zero lags
- 8GB RAM with 128GB UFS2.1 storage with the ability to add a micro-SD card up to 128GB
- Dual BT 5.2
- Super quick boot time (less than 15 seconds)
- Built in GPS
- Wireless Android Auto/Apple Carplay
- 5G connectivity
- Wi-Fi 6E
- HDMI Output which is capable of outputting different content for the HU and the rear entertainment unit
- In-Car Wi-Fi Hotspot
- Supports use of OEM GPS data (for supported cars)
- Integrates well with steering controls including the voice commands
- Full access to Google Play Store
- Supports accessories like an air remote(+$20), which can enable the rear seat passengers to control volume, change tracks, and also use the voice commands from the remote. I found this useful
- Split screen support to have more than one apps open
CONS
- $$$. Costs over ₹30,000. With shipping and duties, it can be significantly higher
- UI/UX. The hardware is so capable but the implemented UI/UX out of the box is very poor. System navigation, bloatware, old security patch with an OS that is already almost 2 years old now
- SIM card is not used only for data but also has messaging and calls like a normal phone. Maybe this is useful for someone but I cannot wrap my head around getting calls in the car from the sim I installed for data. No way to uninstall the phone and messaging app. I have now resorted to call-barring and removed messaging permissions for the applications
- Hotspot has to be turned on every time manually, and there is not even a quick toggle. I resorted to using Tasker to trigger on boot
- Device can heat up quite a bit, so it is important to place it in a well-ventilated area
- By default, while using wired Android Auto, pressing the voice command button on the steering once, opens Kia’s voice command, and long pressing opens the assistant, but for some reason both actions only trigger the assistant with this box. Maybe I am missing some configuration, but I was not able to find a way to make this work properly
Unboxing
The product came well-packed with an external cardboard box and bubble wrap. The product box is relatively small and was surprisingly well made. The box contained the following items.
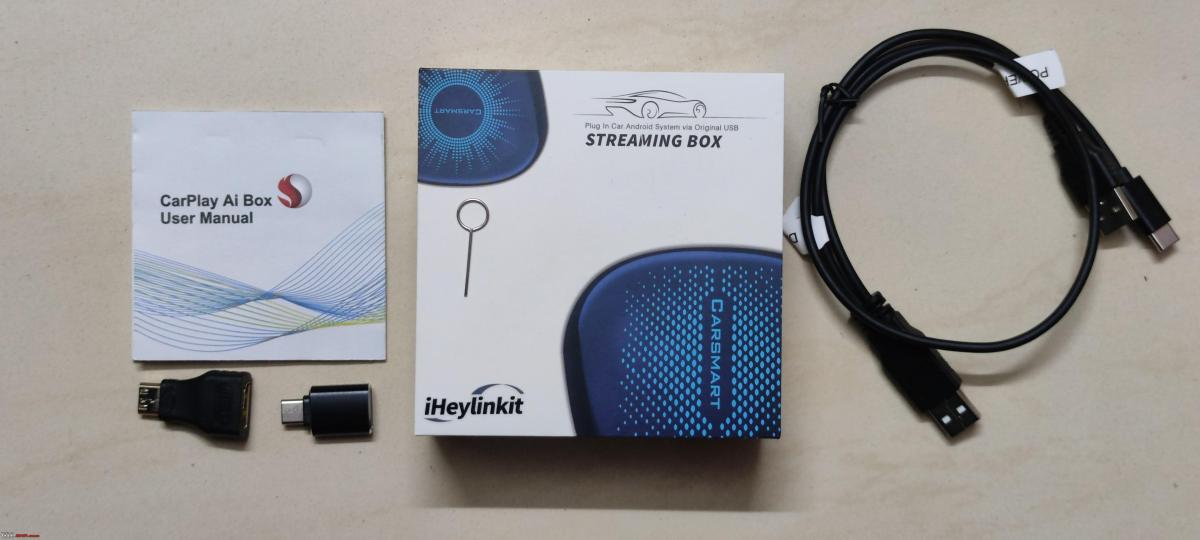
- The device itself
- USB Type A to Type C cable - Used to connect to the car's wired Apple CarPlay port
- USB Type A+Type A to Type C Y Cable - Some cars do not have sufficient power output to power this device, and in this case, additional power needs to be supplied through the Y cable
- USB Type A to USB Type C Adaptor - For cars with type-c input for CarPlay
- Mini HDMI to HDMI - To connect an external monitor like a rear entertainment unit using a full sized HDMI port
- SIM Ejector Pin - To remove the SIM and memory card tray
Boot, Setup, Tweaks and pre-installed apps removal
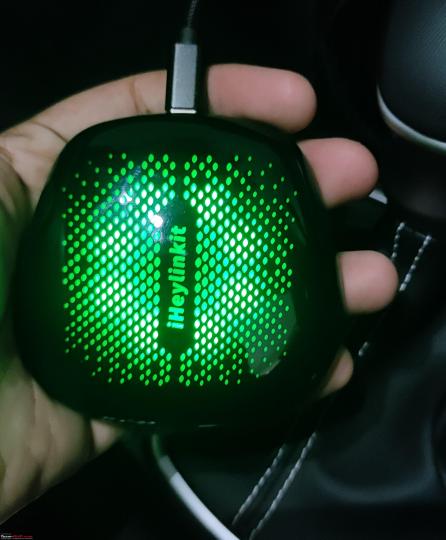
I used the USB A to USB C cable to connect to the CarPlay port. I was a little worried because many of the users had reported that they had to use the Y cable for additional power to power the device. I wanted to avoid this as first it then takes two USB ports but also it becomes a little too clumsy. But luckily, the power output was sufficient. The device lit up with colors changing from green to red to blue and it was really bright as well. Good thing is there is an option to change the LED color mode, and most importantly it allows you to completely turn the LED off.
It took about 25 seconds for the first boot because it automatically detects the device's resolution and restarts the device. Once it rebooted, I noticed that the resolution was too high, and it was not very usable as the fonts and the icons were small. There were also three big static widgets that were ugly and really was not looking good on the HU. There were also a lot of pre-installed applications.

I quickly realized the implemented UI was very archaic and needed a lot of tweaks. Since I have good experience with Android and customization in general, thanks to my Xda days, I started by seeing what options I had out of the box before deciding the need to root the device. Though I was still limited to how much I could customize, I could get to a point where I was happy without needing to root. A short list of the things that I did.
- Updated to the latest firmware. The firmware updates are done through an app and not the official Android system. But was surprising to see multiple updates as I expected none. The updates were mostly some minor fixes and updates, nothing major.
- Added an Airtel SIM Card and a 128GB SanDisk SD Extreme Pro SD Card.
- Removed all pre-installed applications like HBO Max, Waze etc.
- Turned off the ugly widgets.
- Increased the Magnification/Icon Size and Font Size.
- Turned off Right Hand Drive Mode - Because this aligns the applications in the app drawer to the right which is not very intuitive to use for me.
- Installed Tasker and added a profile to turn on the Wi-Fi Hotspot on boot.
- Enabled Call Barring to ensure that the SIM installed in the device does not get any incoming calls.
- Removed Calls and SMS permissions from all applications.
- Set default assistant to Google Assistant.
- Set default navigation to Google Maps.
- Setup Wireless AndroidAuto/Apple CarPlay through the ZLink app just in case.


Overall Performance and Initial Impressions
Hardware wise the device is impressive inside out. I have mentioned enough about the specs, but I must also mention that the casing feels very well made, light and easy to carry around if needed. Once I set everything up to my liking, it is a breeze to use the device. I just get in the car, use the voice command button on the steering to navigate to my destination and it works flawlessly. My phone is connected to the device’s Bluetooth normally for music and calls.
Performance-wise, the device is a lot quicker than I expected, in the sense, it boots up in parallel with the car's infotainment and in about 10-15 seconds, it fully boots up.
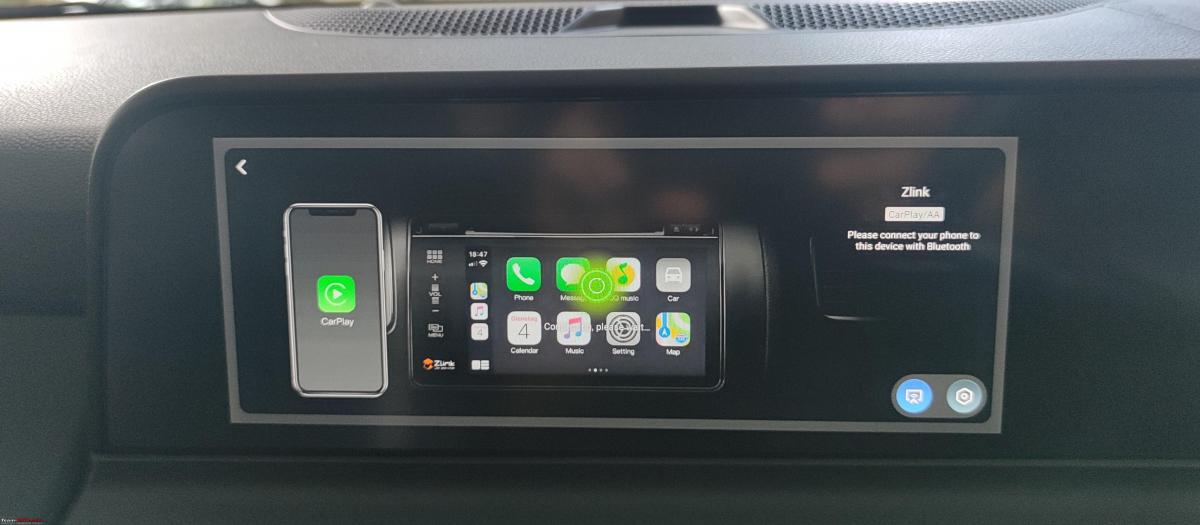

If you setup wireless android auto or Apple CarPlay with ZLink, then post boot up of the device it also automatically connects to AA/CarPlay all under 30 seconds. Another thing I noticed was that when played directly from the device the audio output is much better than any other input modes that I have tried. I am not able to figure out why this might be the case, as the box at the end of the day uses the same CarPlay port as my phone.

The 5G performance is exceptional, I consistently get over 150Mbps, and sometimes even recorded 500+Mbps. The hotspot also is WiFi6 so the connected devices also get access to good speeds.
All other android based car applications can be used, for example, I was able to install my dashcam app, making it easier to offload files to the SD card on board, change settings and view feed. One can also add a CANBUS-based device to connect with the device via Bluetooth, etc. Thinking slightly out of the box, the device also has some other out-of-car use cases, especially while travelling.
- Wi-Fi Hotspot.
- Can connect to any HDMI port in say a hotel TV/Airbnb to access all your content.
- Can also be paired with a mini projector.
- It can also handle some games like Asphalt and supports controllers too.
I am very happy with the device and its performance. I will consider rooting in the long run as that would open up a whole lot of options.
Conclusion and Recommendations
Good hardware, let down by mediocre software.
I am happy with the device but I cannot imagine an average user having to do all these tweaks to have an acceptable experience. The other problem is also powering the device itself, from what I read online, many of the older and some of the newer cars need the Y cable to provide sufficient power. If you want something that is the best available that money can buy, then do go ahead and buy it, but what I would recommend for others is the SD662 based box (called as iHeylinkit CP608 Ultra) for around $150-$170, which features the same UI, casing with HDMI out, and offers good acceptable performance, with 4G connectivity, which should be more than sufficient for all major use cases, I would also suggest talking to the vendor over WhatsApp to better understand the differences between all the available models, to select the one that would suit your needs best.
If you need only Wireless CarPlay/Android Auto stick with well-known adapters like Carlinkit as they are affordable and offer a no-nonsense experience out of the box. Autokit-based wireless AA/Carplay implementations generally perform better than ZLink. Ottocast and Carlinkit also have their own custom skin on the UI which in my opinion is better than the generic ones. You will be paying more for these brands, but it may be worth it as it can save a lot of hassle.
Check out BHPian comments for more insights and information.
News
Spent Rs 950 on a louder & better-sounding horn for my Maruti S-Presso

The stock horn is disappointingly low but the new one is fantastic and reminiscent of a Skoda horn but with a sporty twist.
BHPian raptor_diwan recently shared this with other enthusiasts.
Enhanced Horn Upgrade to the S-Presso
I had been considering upgrading the horn for quite some time now, as the horn on the S-Presso is disappointingly low, hardly commanding any attention.
It lacks the necessary power for highway use. Managed to purchase a replacement for 950 /- at GP Road and got it fitted.
The sound is fantastic, reminiscent of a Skoda horn but with a sporty twist.


Check out BHPian comments for more insights and information.
News
Adding multiple car accessories to my tuned Ford Figo 1.5 TDCi


I installed a rear dashcam, wireless mobile charger and 12V splitter. I also upgraded my car's head unit.
BHPian AYP recently shared this with other enthusiasts.
A few minor upgrades, and a major one
Upgraded the HU of my car to the Pioneer Z6350BT


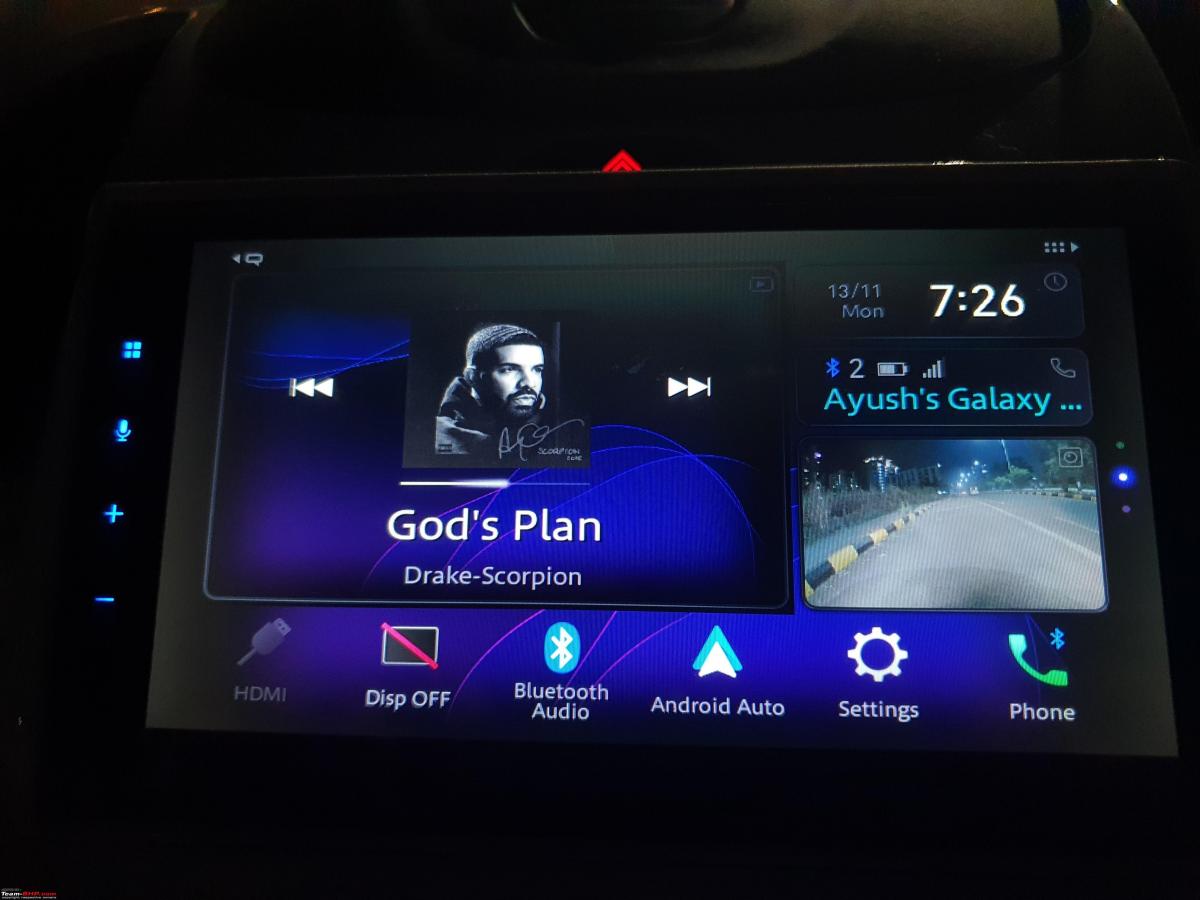
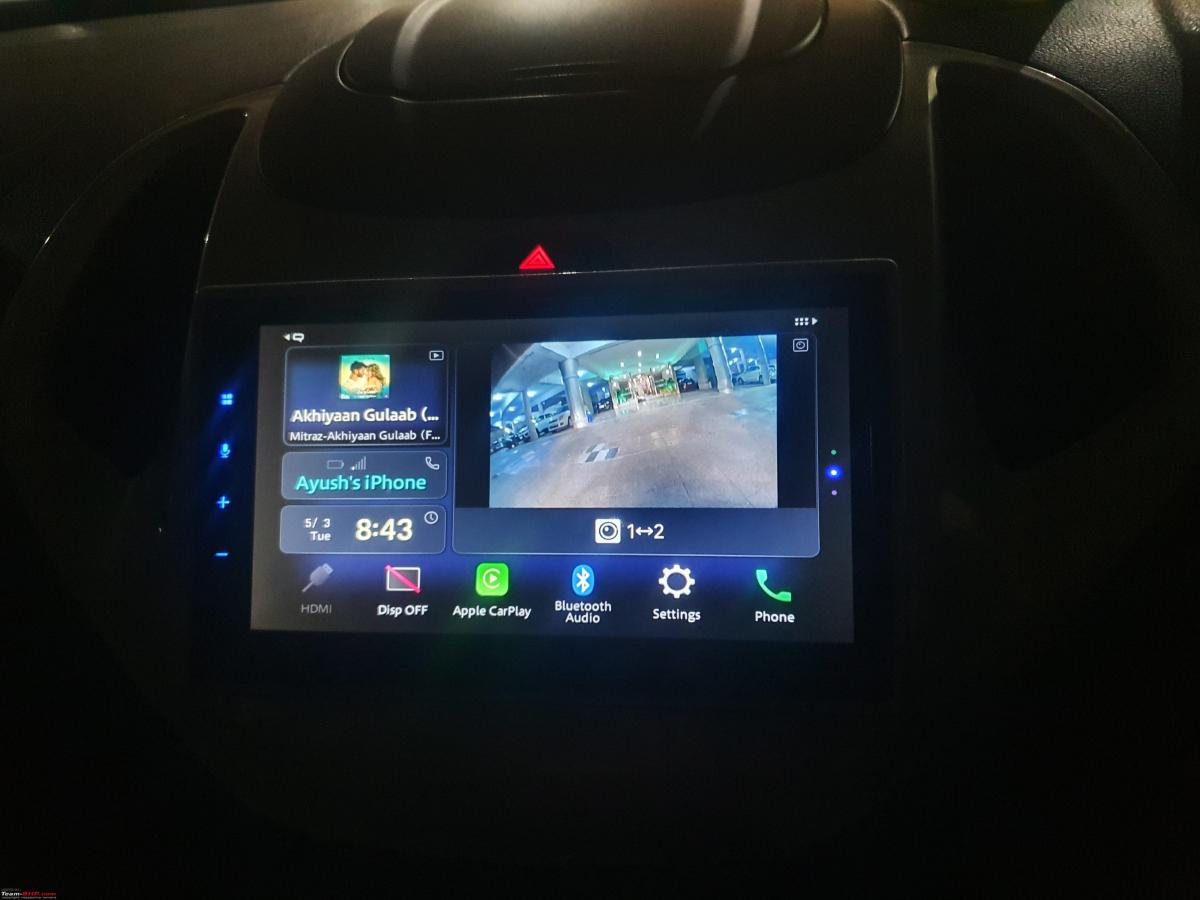
Rear dashcam
While I had installed the front dashcam way back in 2019, the lack of a rear dashcam was always there at the back of my mind. While a dual-channel dashcam would have been the ideal solution, getting a system with the same quality as my front dashcam would have cost me at least 10k. An upgrade in real terms would have cost around 20k. Hence decided to go for a standalone rear dashcam while saving that extra money for a Viofo triple channel in the future. Went for the DDPAI Mini Pro-
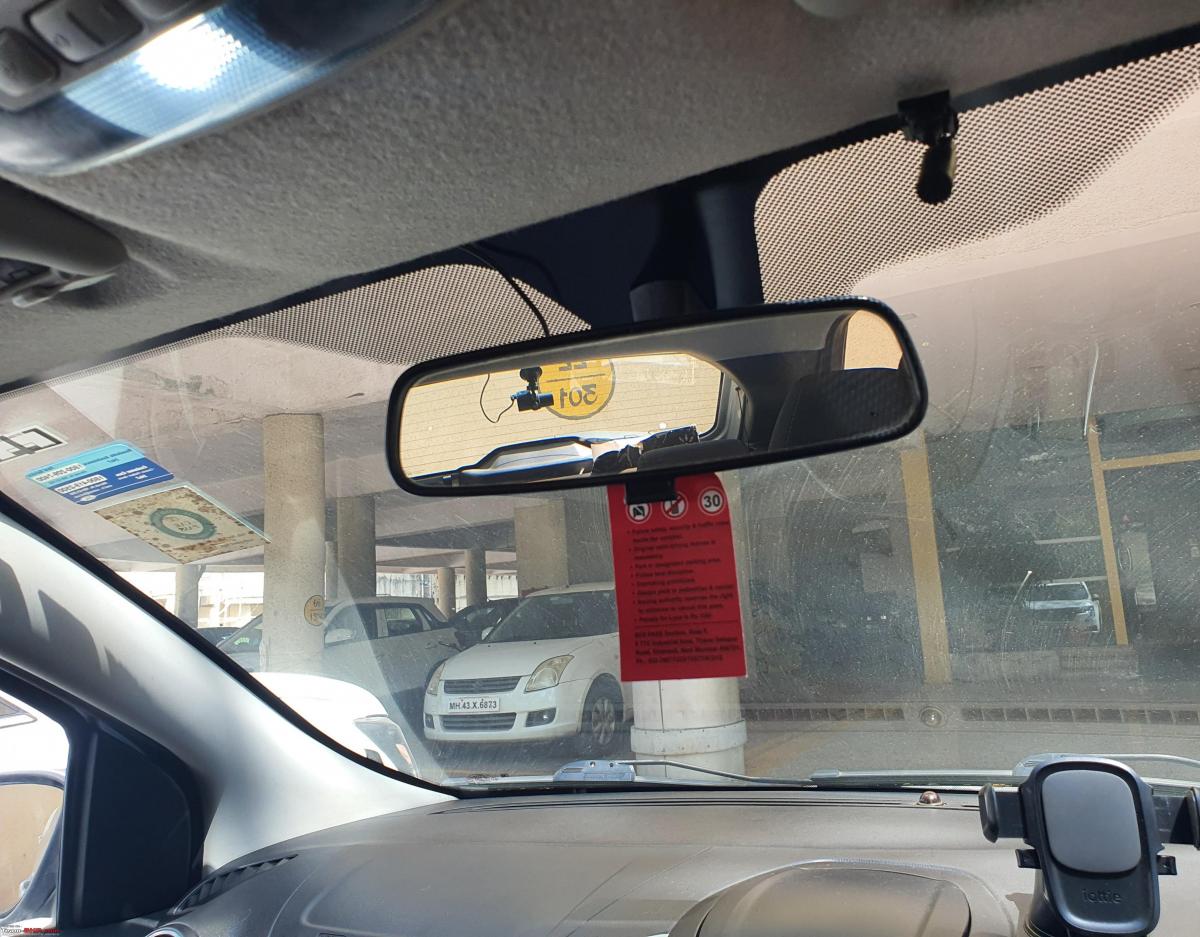
This is how it looks from the outside-

This is how it looks from the inside-

Wireless charger
I wanted to complete the wireless trio, i.e. wireless AA, wireless CP and wireless charger.


I ordered it from Alibaba. Can charge a phone with a max speed of 15W. Total cost was 14 USD (inclusive of shipping).
Cupholder with wireless charger
Ever since I had installed the front armrest, my cupholders had become redundant. I tried a couple of cupholders over the last few years but none of them worked until this one.
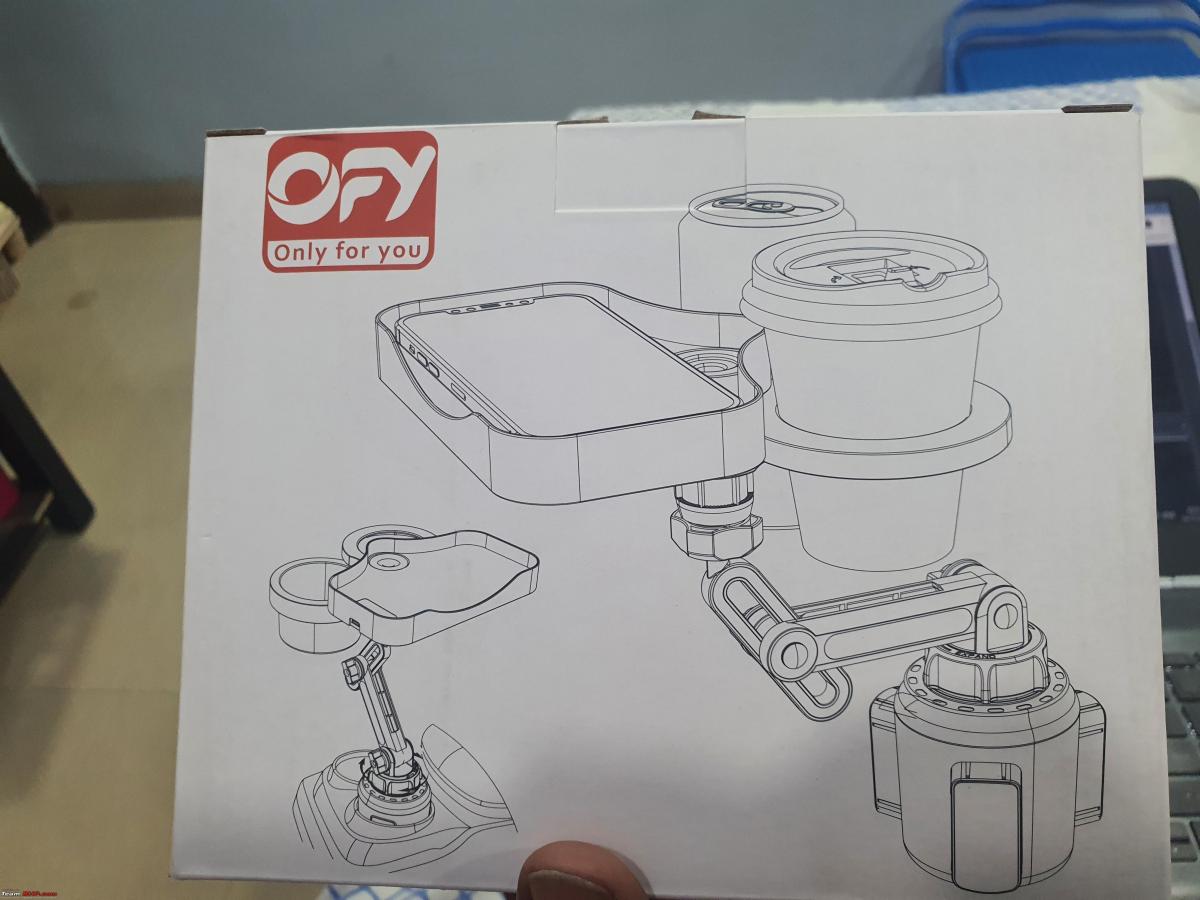

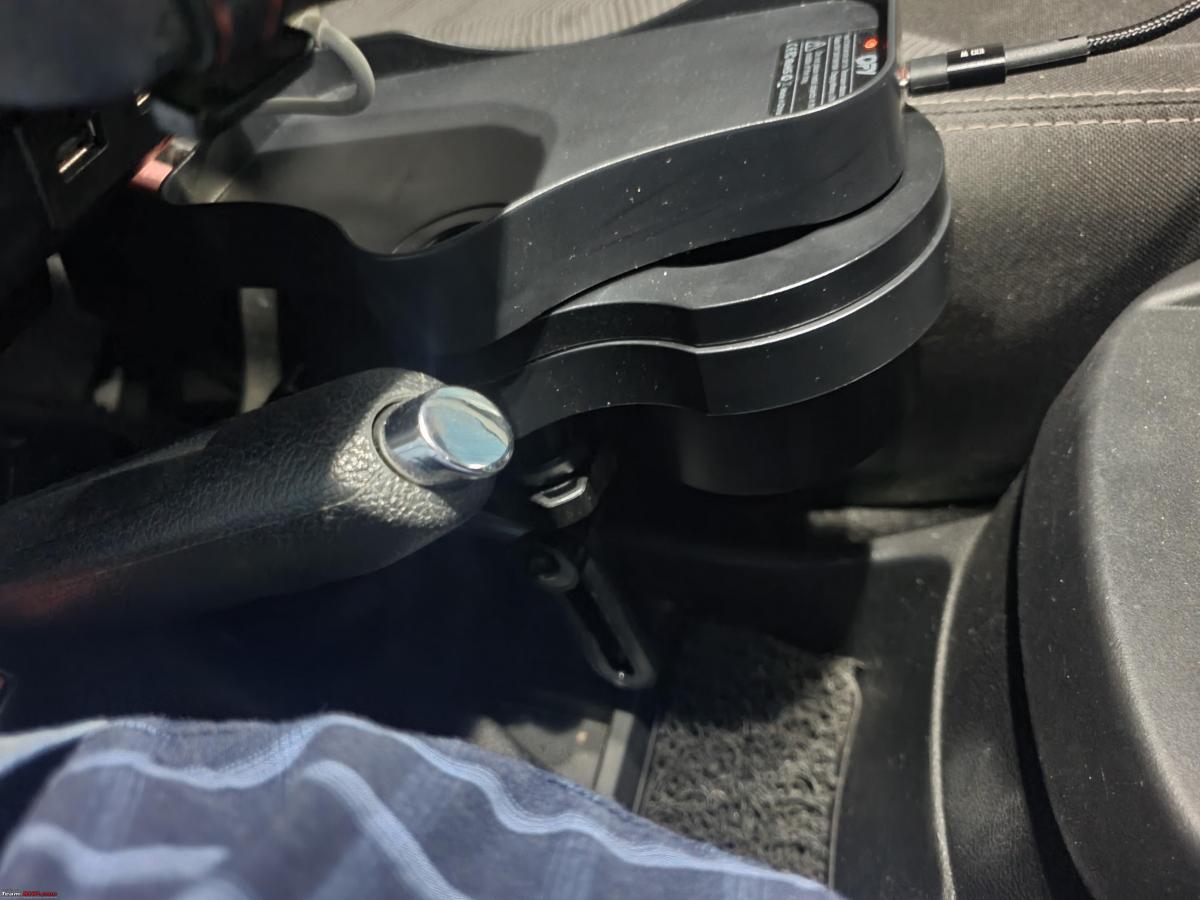


While I don't sip on a beverage too often in my car but when I did, I had to use the bottle holder which was quite inconvenient and unergonomic. This cup holder has finally solved that problem. The base of it fits in the 1st cupholder and is then tightened. It fits perfectly ahead of the armrest.
It has its cons though. While using the cupholder, the handbrake lever gets too close to it. Also, while having long-sized cups like Starbucks Venti, for instance, the gears have to be slotted meticulously. So while this is not an ideal solution, it is definitely the best I have come across given my situation with the armrest.
The idea of getting a cupholder like this came to my mind after I got myself a wireless charger. If this idea had come to my mind before getting the stand-alone wireless charger, I may not have ordered it. However, I have very recently started using 2 phones- an iPhone and an Android. So it all worked out in the end.
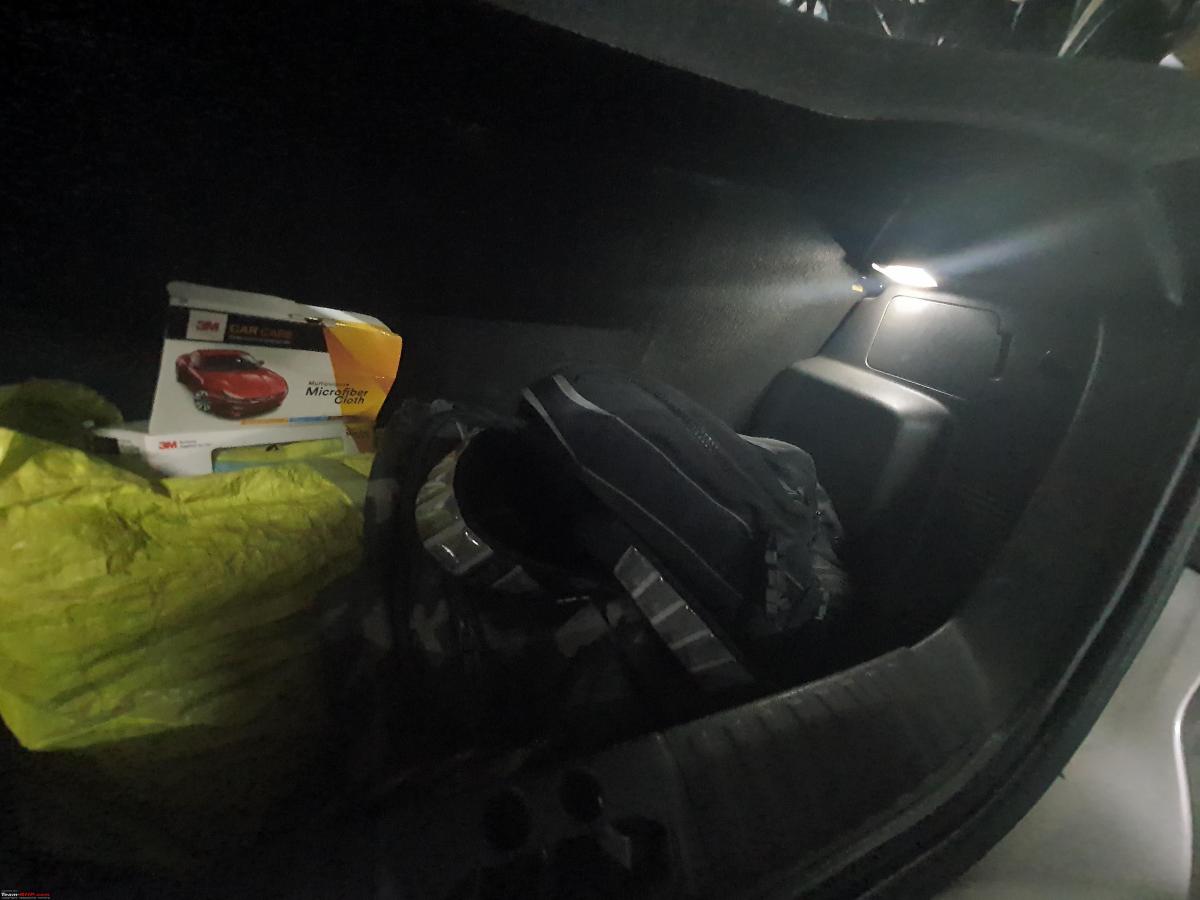
LED Light for rear cabin
The Figo does not come with a light at the rear and this made using the phone's flash a must many times. I went through this thread by Reinhard.
But neither do I have the technical skill nor the heart to take the steps that he took. During my research, I came across this Baseus option.

I ordered it but had to return it for 3 reasons-
- The magnetic adhesion wasn't very strong.
- There was no way to hang it.
- Even if I was able to stick it permanently, the switch to turn it off or on is at the back of it, making it quite inconvenient.
I came across some other light options similar to Baseus but poor reviews kept me away. I also came across some battery-operated options but was apprehensive about having batteries in the car. I finally came across this option:


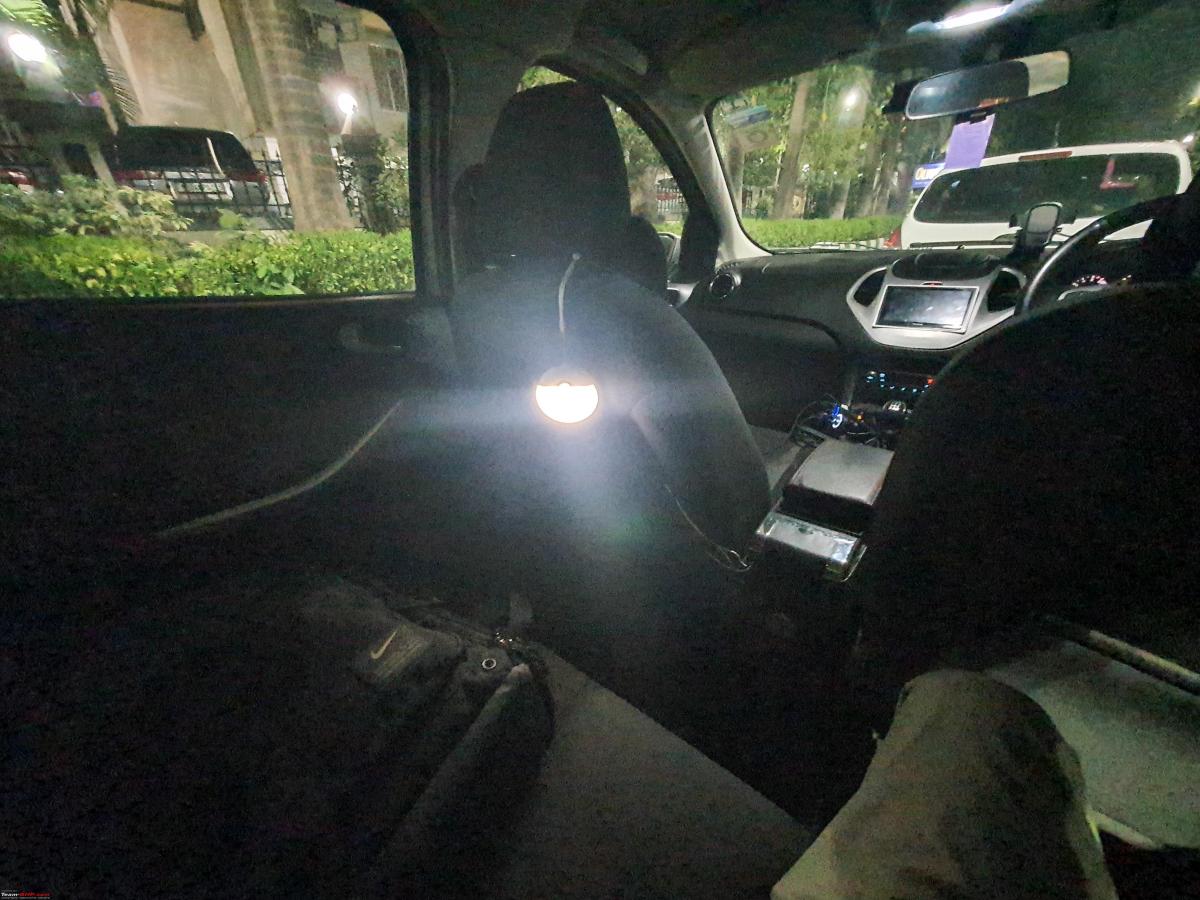
I had earlier tried to keep it at a fixed place but it gave more of a footwell lighting vibes.
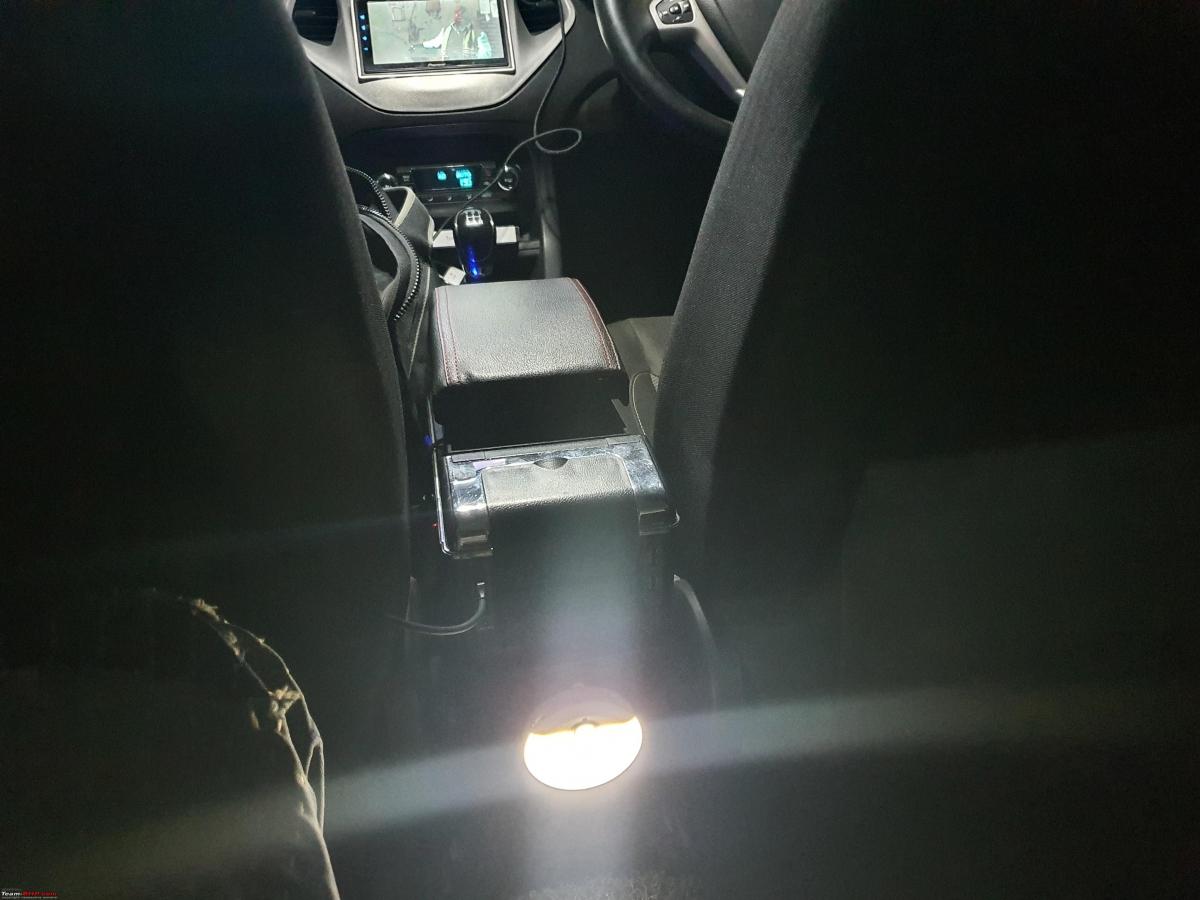
I keep it on auto(it detects motion) and as per my usage, I get around 2 weeks of usable life out of it before it needs to be charged.
12V Splitter
Due to my increasing power demands, I decided to order a 12v Splitter. The reasonably priced ones on Amazon had terrible reviews. Finally decided to order one from Alibaba. Costed me 18 USD but had to pay another INR 744 in addition to customs. The same is available on Amazon for 5k and on Amazon USA for around 20$.
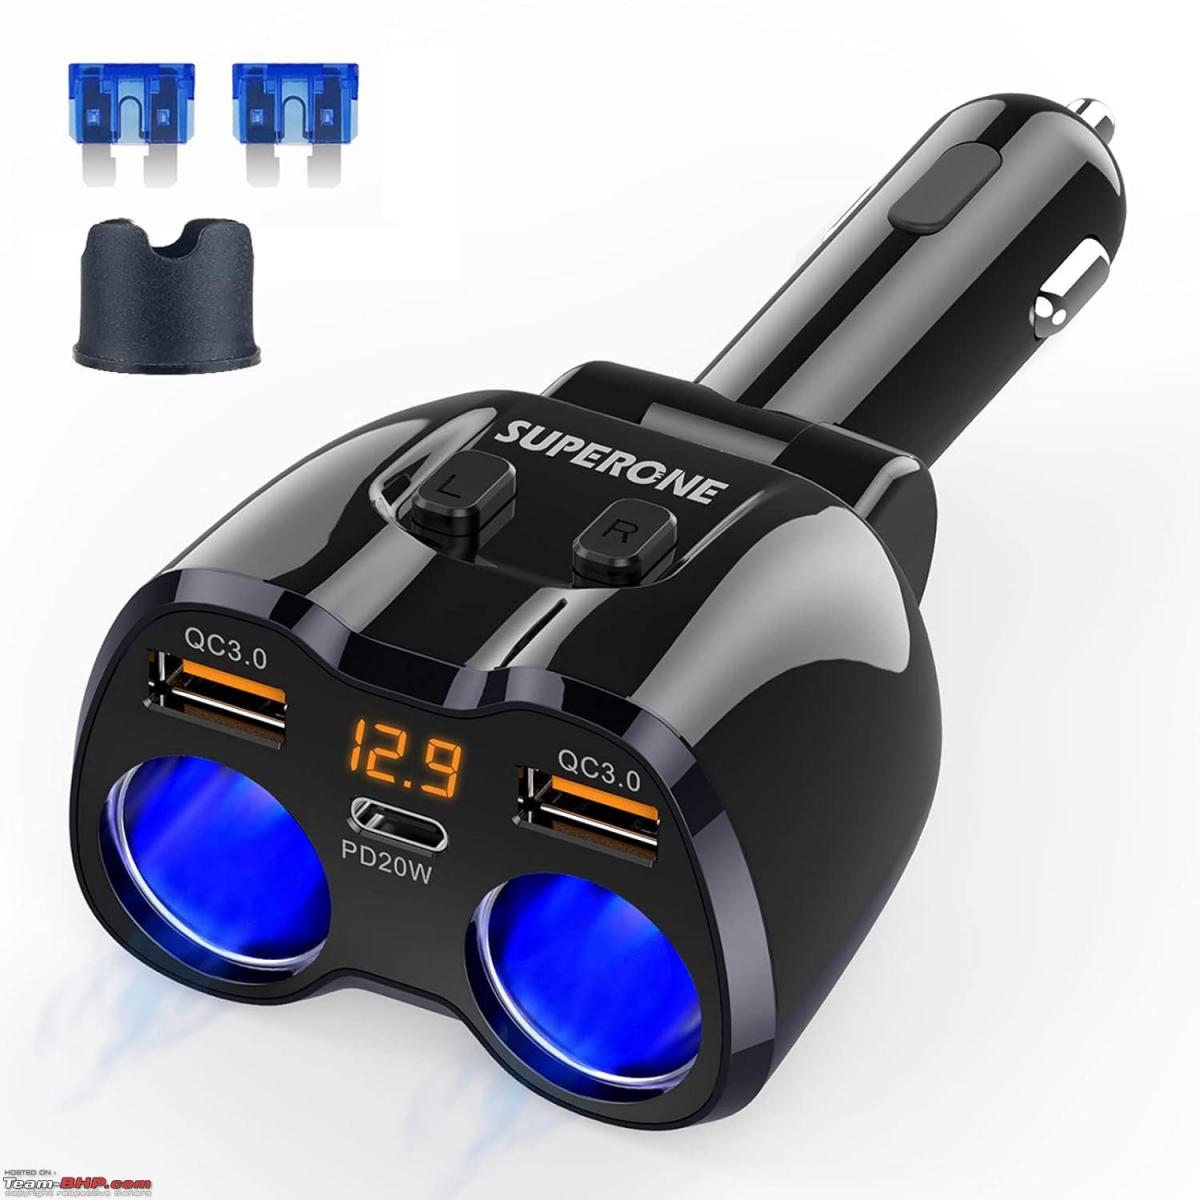
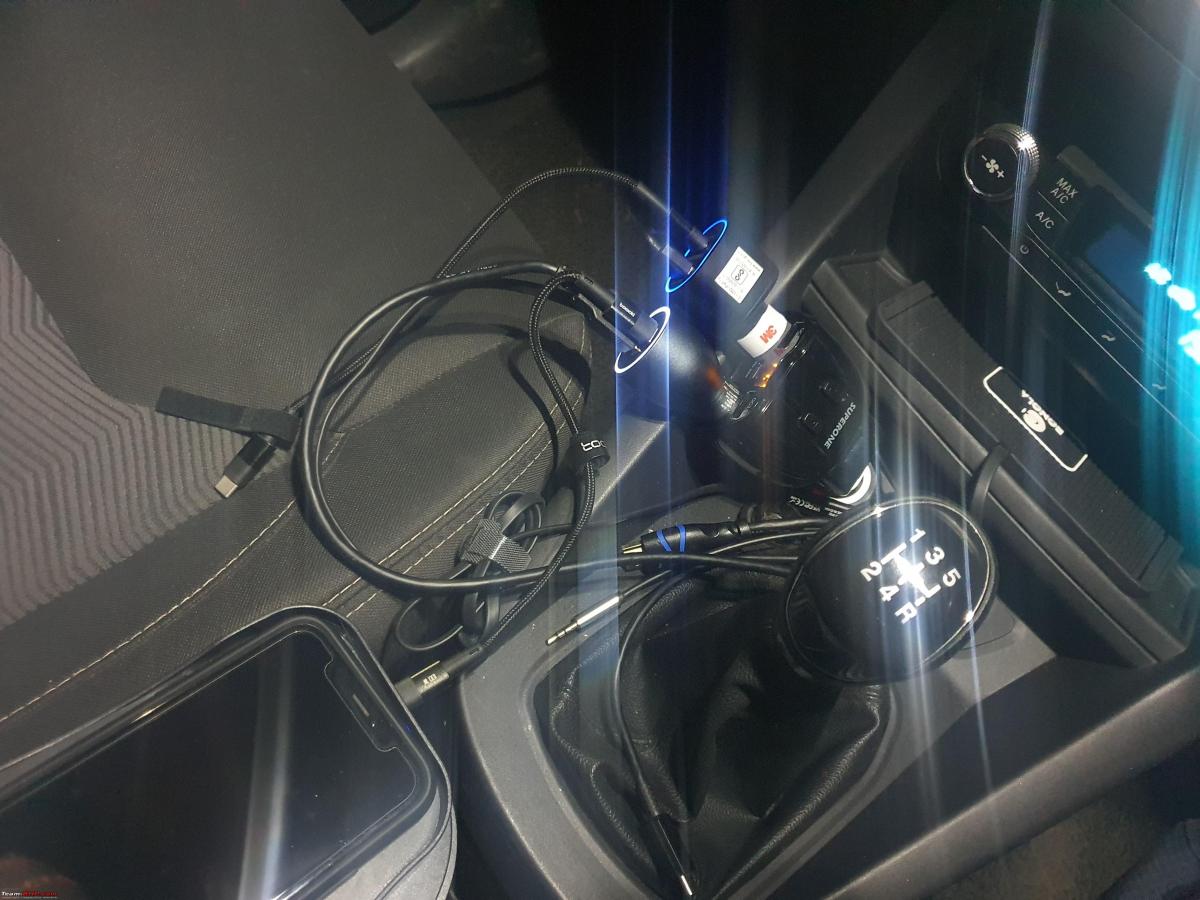
There are 2 ports in the first charger. 1 is connected to the front dashcam whereas the 2nd one has a short USB C cable for charging my phone. The 2nd charger has 3 slots, one of which powers the rear dashcam while the others power the wireless chargers. In addition, the splitter itself has 2 more USB A ports and 1 USB C port. It has a total rated output of 200W.
One other major reason why I went for a splitter is to cut off the power to the dashcams and any accessories when the car is switched off. In typical Ford fashion, the 12V outlet stays alive even after the car is turned off. The splitter has 2 switches on the sides which allow me to cut off the power to either of the chargers which is a boon. While it's still not as convenient as the power switching off automatically, it is much better than having to remove the whole thing after turning off the car and fitting it back in later.
I can't deny that installing the splitter along with the other accessories has resulted in a busy look. There are also the wires which are connected to the HU- USB C, Aux and HDMI. I did choose function over form.
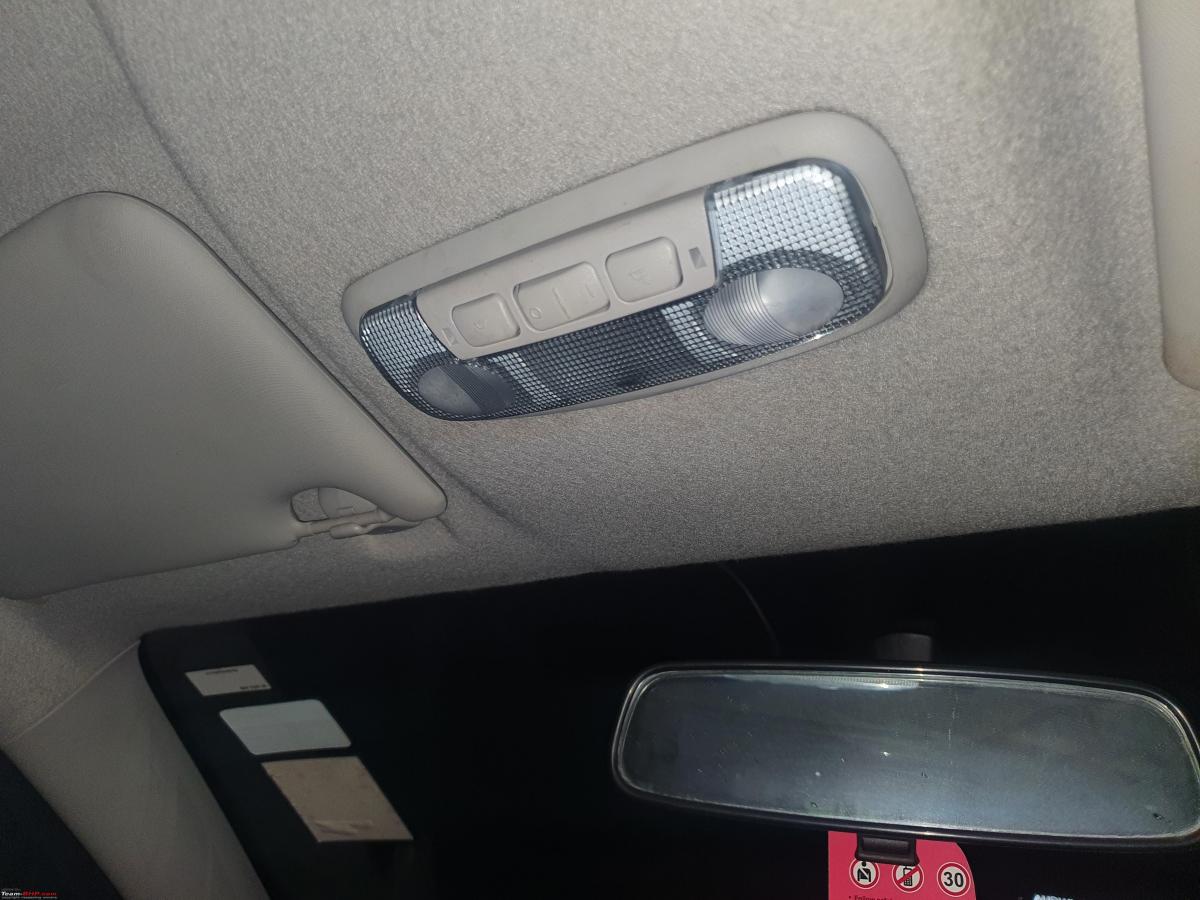
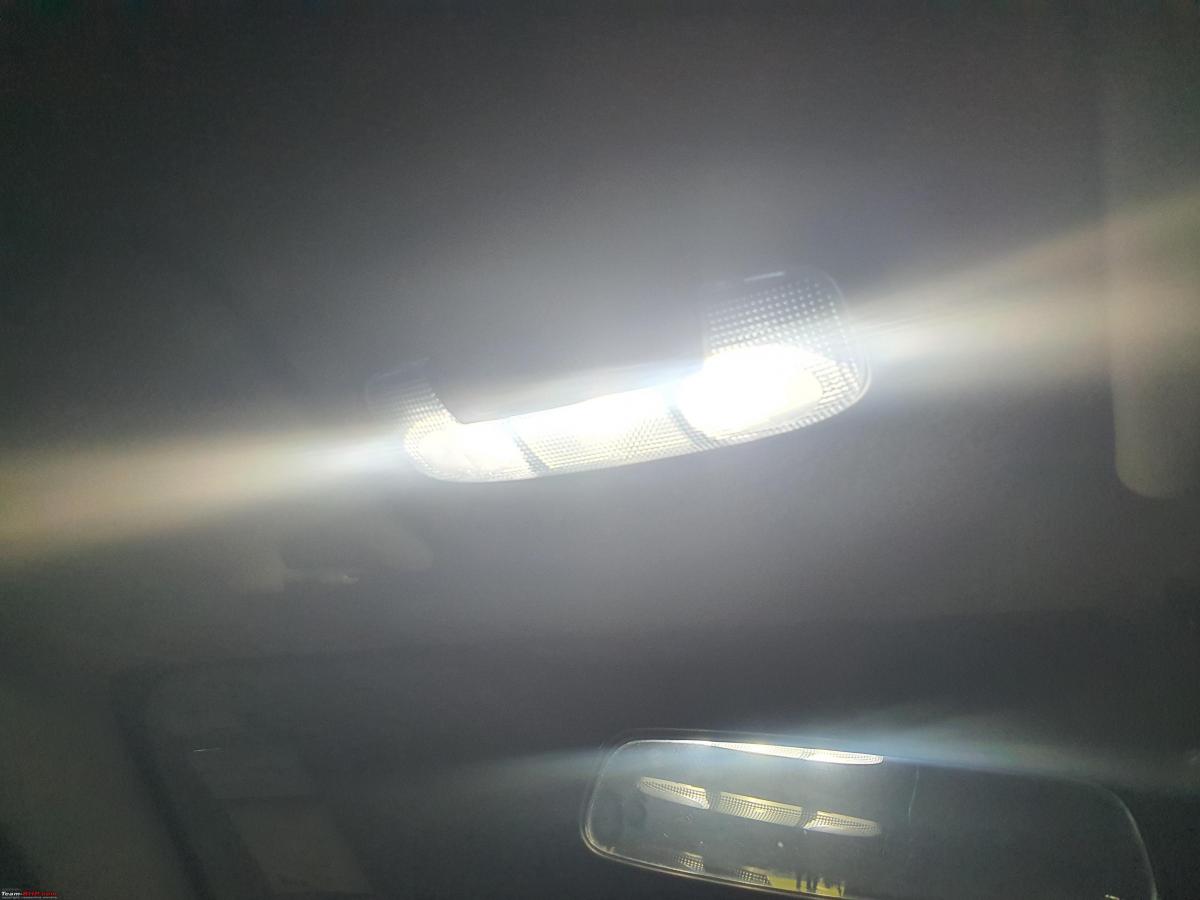
Centre roof lamp
Installed the lights from the Fiesta
LED Lights
No, I am not talking about using LEDs in the reflectors. I am using the good old Osram Night Breaker 200 which is supposed to be Osram's best halogens. I did upgrade the front parking lamps, rear number plate lamps, boot light and the centre roof lights to Osram T10 LEDs. Costs Rs. 387 a pair.

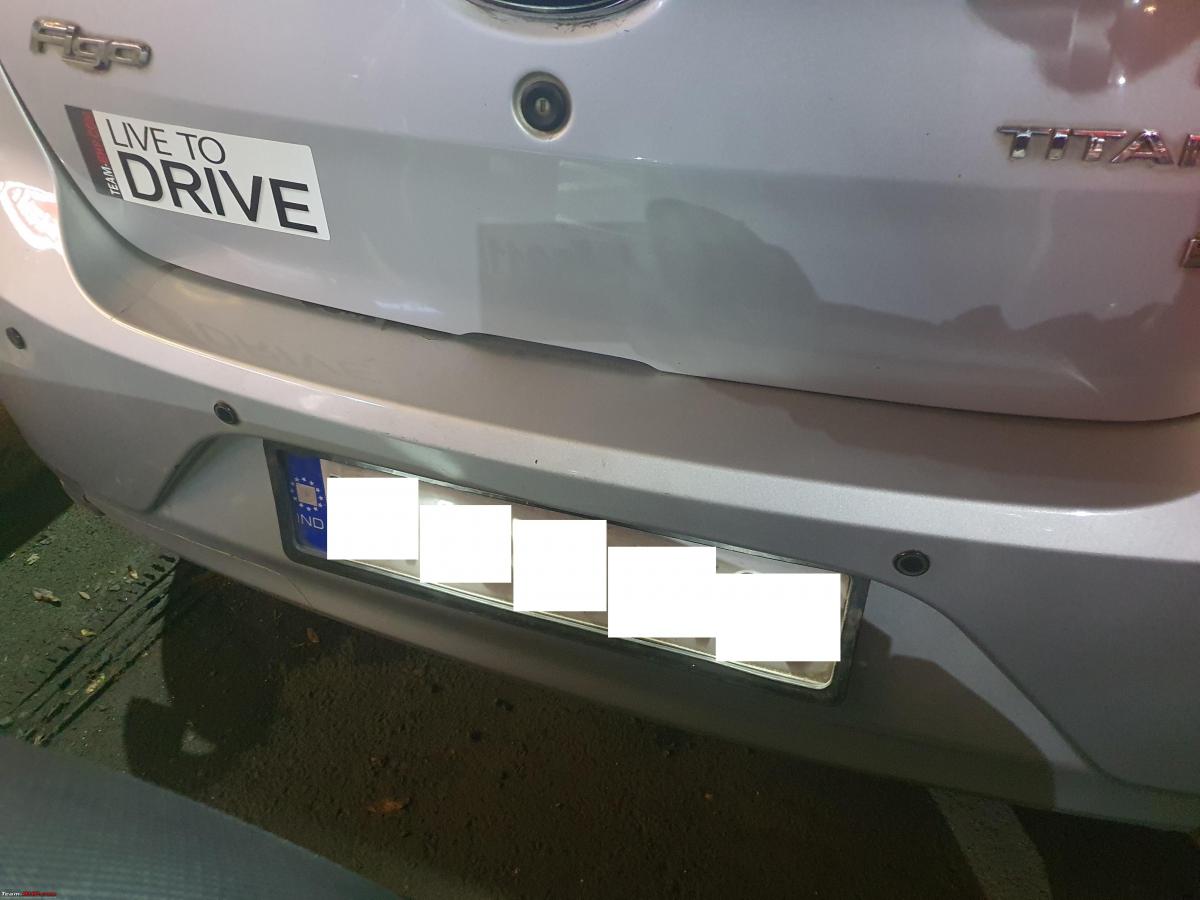

Protective sleeve for camera wire
The power for the rear camera has been taken from the left tail lamp. However, a small bit of the wire was exposed and was getting squished. I also noticed that water was also passing through this while passing from the channel at the rear. Hence, I decided to get a protective sleeve for this exposed bit of wire.

So, this completes the facelift of my car. Let's see what the future holds.
Check out BHPian comments for more insights and information.
News
Fuss-free experience using an aftermarket Wireless Android Auto Adaptor

I bought the MSXTTLY U2A-AIR Wireless Android Auto Stick for my Toyota Innova Crysta for around Rs 6,500.
BHPian poloman recently shared this with other enthusiasts.
Short review of MSXTTLY U2A-AIR Wireless Android Auto Stick 2024
My Innova Crysta comes with only wired Android Auto and Apple Carplay. The data USB port is located near the front armrest and the dangling cable was inconvenient. So I was looking for a wireless AA adapter and came across this product on Amazon.
Got the product and here are my observations.
Pros
- Extremely small in size. Same as the size of a USB stick 6.6 x 2.7 x 1.2 Centimeters.
- Direct plugs into the USB A port as shown in the below picture. Most other adapters need a cable.
- Come with multiple cable adapters for hard-to-reach USB ports. Type C adapter is also included.
- Very fast setup. In my Crysta, the set up was completed in 30s. This was for Bluetooth pairing with the phone.
- Relatively fast seamless Android Auto connection. Approx 15 seconds after the car powers on, Android Auto is up and running.
- Good performance. I did not observe any lag in the interface or audio. Audio quality also I did not perceive any difference with respect to wired AA.
Cons
- Relatively high pricing. Got it for around 6500.
- Supports only one wireless car tech. Either AA or Carplay. You will have to buy 2 adapters if you want to switch.
- Relatively new product of Chinese origin. But available on Amazon across the world and has got good reviews even in the US.
Overall I feel this is a good investment if you want a fuss-free wireless Android Auto experience. Can't vouch for the longevity since I got it recently.


Here's what BHPian swarnava.ch had to say about the matter:
Thanks for your review.
Two points:
- I just wanted to double-check on this - from the Amazon link, looks like this device is only for wireless Android Auto. It will not work for Apple Car play - which will require something completely different.
- Looks like the price has already increased on Amazon - currently listed at 7999 with a coupon discount of 1100 + Credit Card discount of 750 if the total purchase is above 7k.
Keep us posted once you have used it for a month or so.
Here's what BHPian M_Poweredd_ had to say about the matter:
It would be useful for people who have older cars but don't want to upgrade their system to those huge Chinese screens for stuff like maps. I had 'upgraded' my XUV500's stereo because the OEM one died. Repairing it would cost 10k. So I decided to go with a Chinese 10-inch system with climate controls included in it, bad decision.
The screen is too bright, have to connect a hotspot every time I need maps. BT started acting up after a month and couldn't play songs without lagging. In the end, I decided to just download all the songs in a pen drive and play that. It feels like I have paid for a downgrade.
More than the system, my dashboard's panel gaps are all messed up during the installation and are an eyesore. This would be a better option for those whose system supports it.
Here's what BHPian SuvidC had to say about the matter:
I got the CarPlay version for my Vento just last month. Apart from its L-type connector accessory not being able to supply enough data/power to the RCD340G unit for the latter to stream wirelessly, the stick by itself works seamlessly.
The best thing is that the system fires up upon car unlock and by the time I am in and switch the ignition, my phone is all connected to the car and is ready to go.
Money well spent (for now)!
Check out BHPian comments for more insights and information.
News
How I fixed a GPS issue of my new aftermarket Android car head unit


I got it installed in my Maruti Ignis and it would either take too long to update my position or there would be a sign stating "Searching for GPS".
BHPian mm_shen recently shared this with other enthusiasts.
Hi everyone!
Had bought a 2018 Suzuki Ignis Delta AMT in the year 2022. The car had run just for 11k and odd and was in pristine condition. Wanted to switch over to AMT due to the notorious Bangalore Traffic.
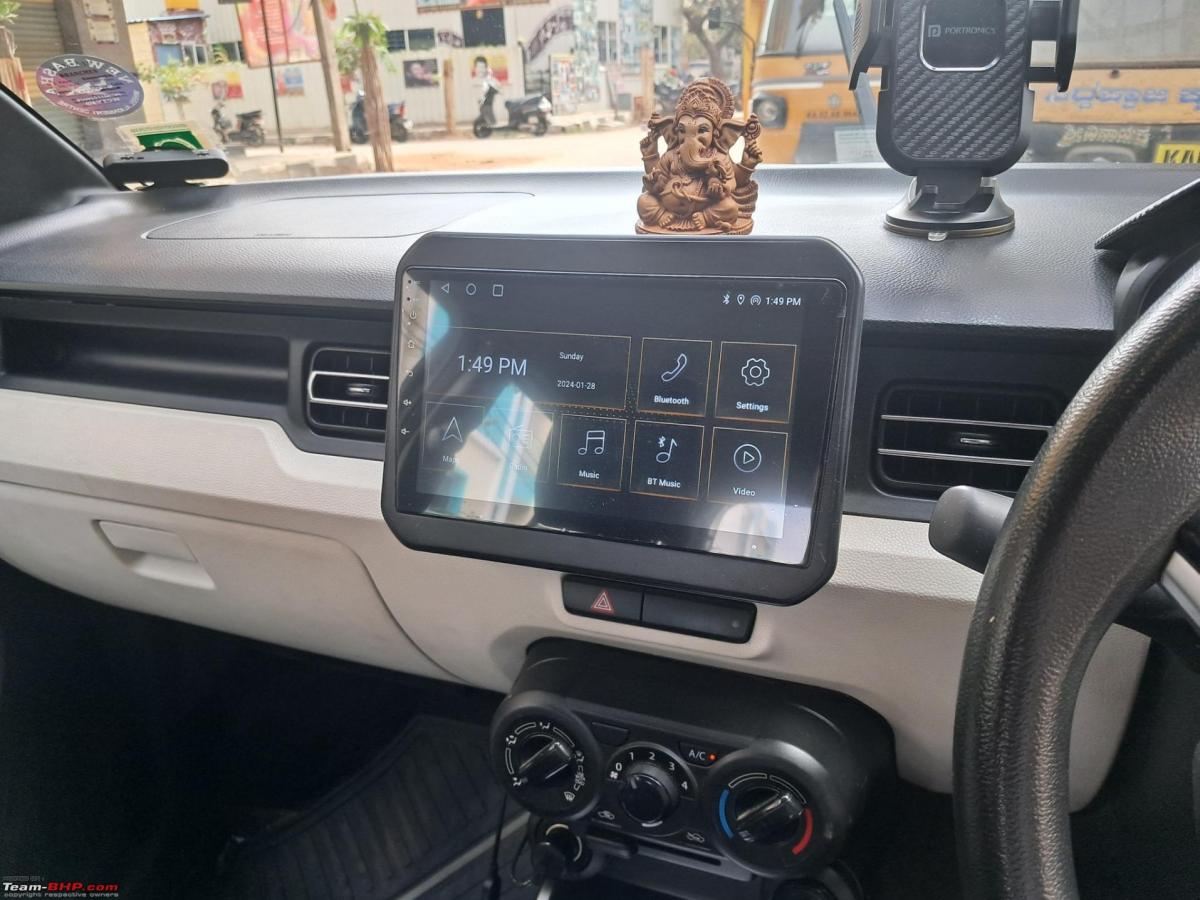
The car came with steering-mounted audio, and call buttons, but the music system was the old LED type, like the one shown below:

I used a mobile holder to view Google Maps while travelling out of town.

The holder had to be mounted on the dashboard. Could not find any other place where I would be comfortable or it would not obstruct my view. When I was travelling to Goa in November 2023, the phone got heated due to the Goa Sun and the phone switched off. The phone would get warm while using navigation. Add the hot goa sun, the phone could not handle it.
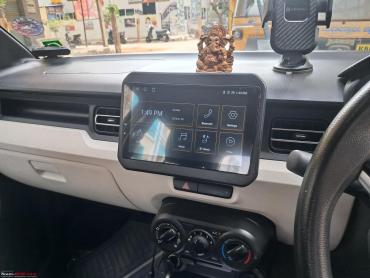
I decided to upgrade the old music system to an aftermarket Android Screen. I bought a Tesha 9" Android Screen from Amazon. It set me back by ₹8.5k and also bought a cheap aftermarket rearview parking camera for ₹650. The local garage near my home asked for ₹800 for an Android frame and another ₹800 for labour.
The Android screen came with all the necessary plug-and-play wires for sound, an additional microphone and a GPS unit. I could train the system to my steering-mounted switches. I listened to my favorite songs using the Music app with Android Auto on my drive back home. The rear camera view was grainy as expected. But it was an important utility to park in tight spots.


I was a happy man until...
My home minister had an office function somewhere in Koramangala. Orders were issued that I was to drive her and her colleague to the venue. I have not frequented that area, so thought this is a good opportunity to test the new screen and maps on Android Auto.
To my utter dismay, the navigation was not functioning properly. It would either take too long to update my position or there would be a sign stating "Searching for GPS". I was disappointed. Had to resort to the mobile and holder.
I had a doubt about the GPS unit and its position. The garage fellow installed it inside the dashboard. Doesn't the GPS antennae need to be exposed to get a signal?
Came back home and scoured through videos and blogs about these screens. Could not get a proper answer. All videos made by Indian content creators showed the GPS antenna mounted inside the dash. My brother also got the same screen installed on his VW Polo and his antenna was also inside the dash. Working perfectly fine. I was contemplating returning the unit for an exchange. But deep down, I did not want to return it. Did not want to go through the process of waiting for the exchange, return etc. Something told me, the GPS antenna was not getting a signal. I came across a South Asian content creator's video, which showed that the Android screen had a preloaded app, which could show the GPS signal strength.
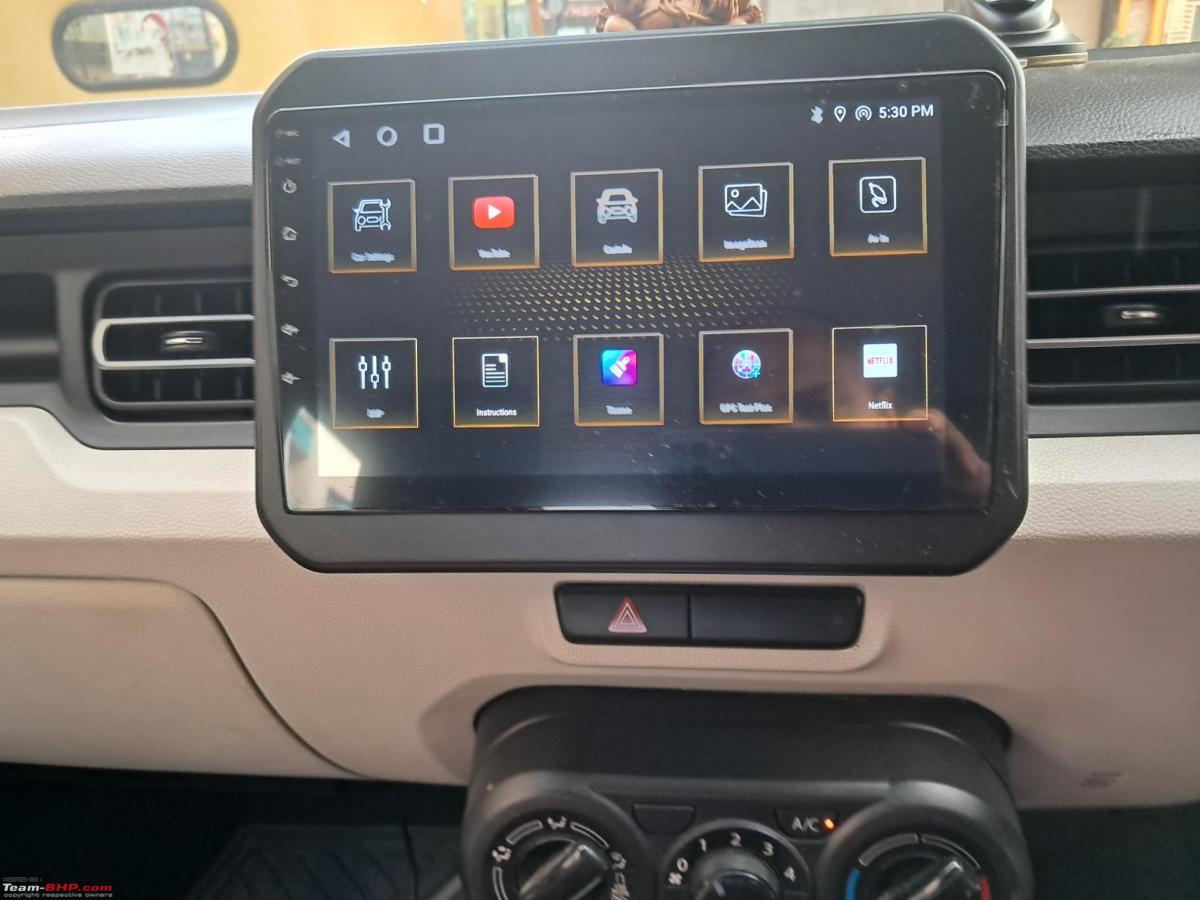
App Name: GPS Track Plus
It showed around 4 GPS satellites and no strength bars. I straight away popped open the Android screen out of the dash. Removed the antenna and held it outside. The Satellite count increased to 10-12 and had a full bar of signal strength when I held it in my hand. But this immediately came down, when I kept the antenna on the dash.

I had a hunch! Maybe the antennae is weak and needs a better conductor to receive signals. Something metallic! I removed the beading on the driver side A pillar. Removed the plastic cover of the A-pillar. Stuck the GPS antenna on the A-pillar so that it comes in contact with the metal. Routed the GPS antenna wire inside the dash. Took extra care that the wire does not touch any other wire of the Android screen to avoid picking up noise.

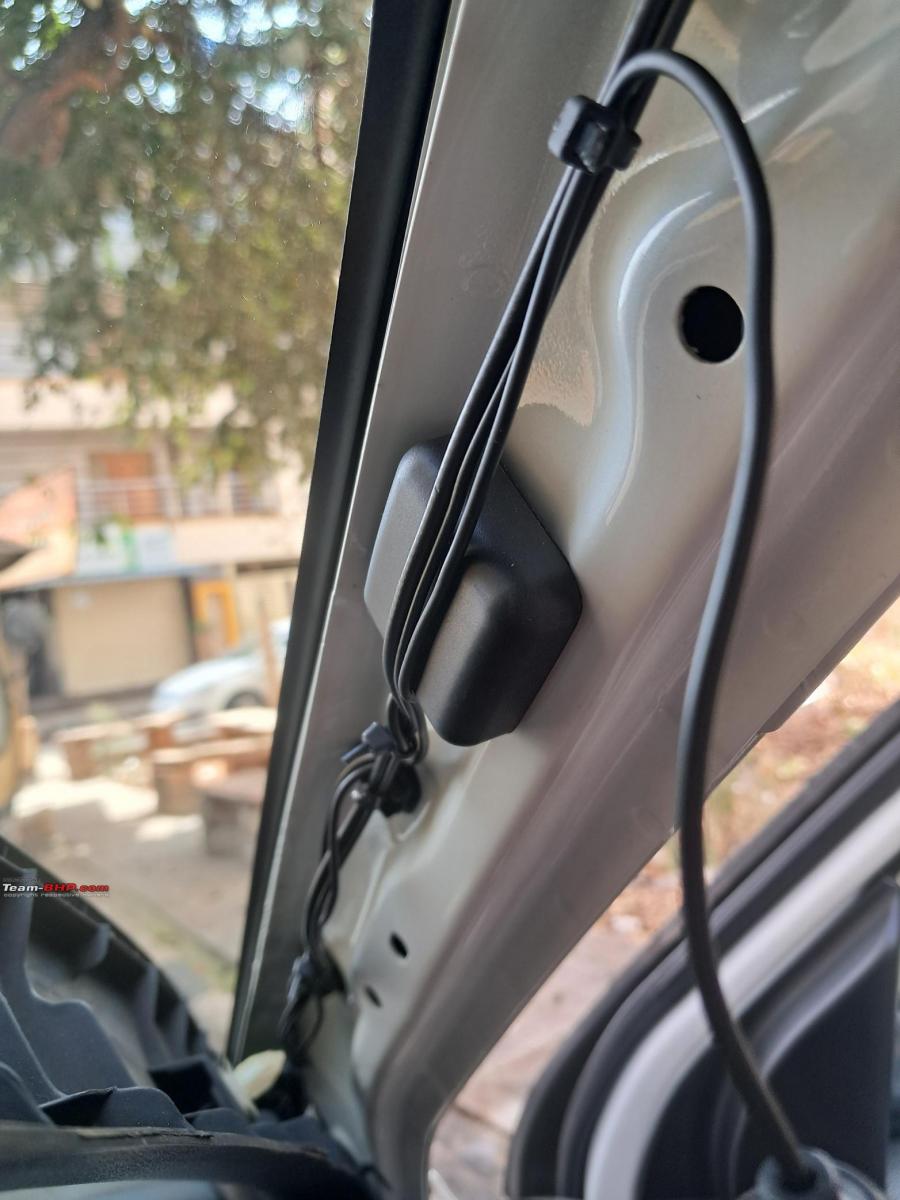
With bated breath, opened the GPS signal APP. And Voila! The GPS worked. Full strength. Put back the cover and beading.
A special thanks to my home minister who helped me with my experiment.
After a week, needed to drive down to Trichy for work. Thought of visiting Thanjavur also on the way. The GPS worked flawlessly and was a happy man again.
My mobile did not heat and I did not have to miss my turn due to the lack of navigation. Music and my home minister kept me company during the drive.
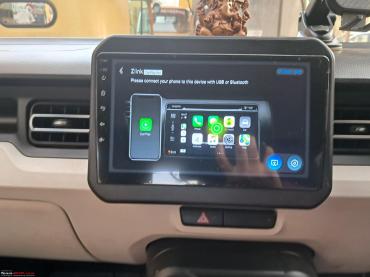
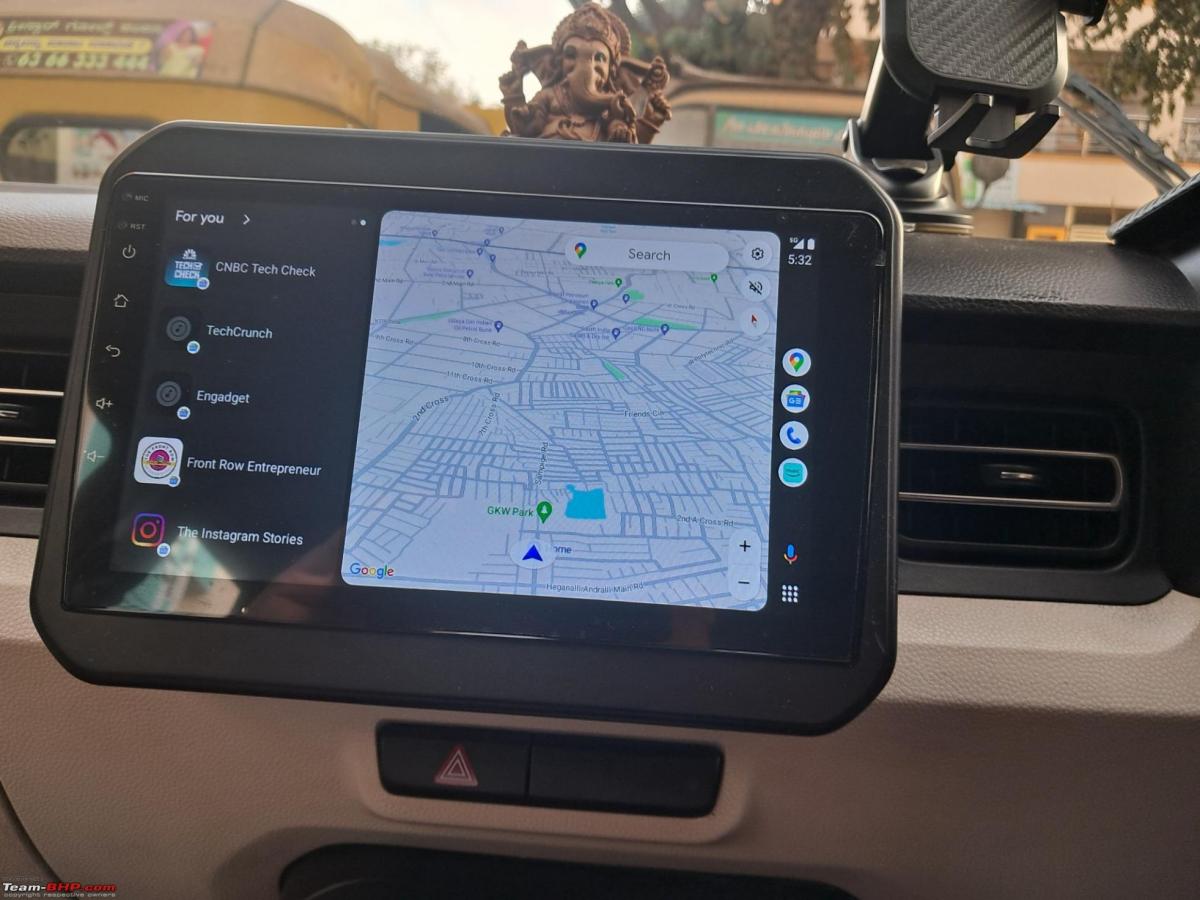
By the way, the Android screen supports wireless Android Auto and Apple Car Play.
An App called "Z-link" connects to your mobile automatically when you switch on the car. I am finding it very useful.

Found a few "Danger-seekers" on the road while travelling to Trichy and had a couple of close calls with one-way rule breakers on the highway. Decided to go for a DashCam. Chose 70Mai M300. Got it on Flipkart for 4.1k including a Samsung Evo 128 GB SD card. Fixed the Cam and routed the wire with a helping hand from my home minister. The videos are ok. It is a basic cam installed for emergency use. Will give my 2 cents on it after a few more days of use.

If all the learned members of Team-BHP have any advice, I am all ears.

Check out BHPian comments for more insights and information.
News
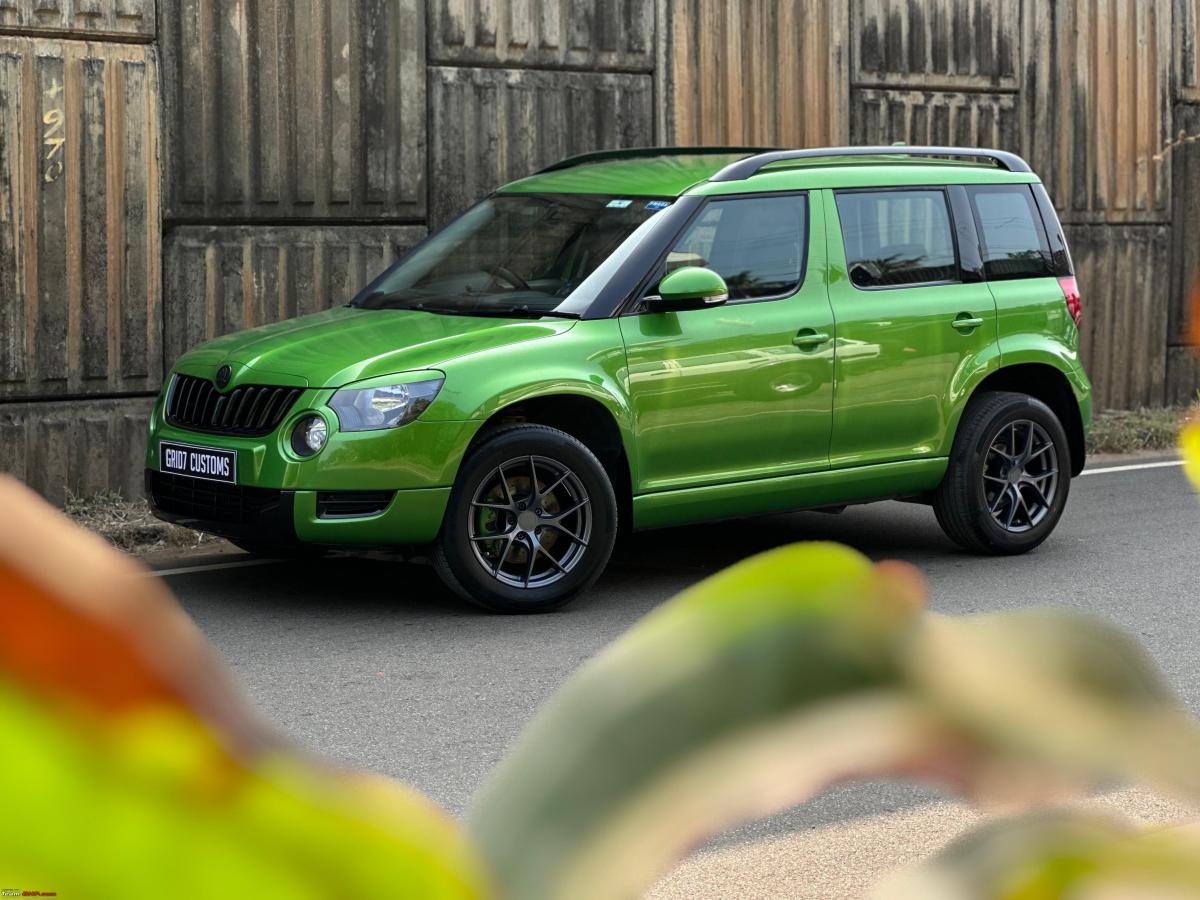
Probably India's only Stage 3 Skoda Yeti finished in hot Java Green


I haven't come across any car south of Rs 30 lakh (no offence to any other vehicles/owners) that can handle as well as my tuned and modified Yeti.
BHPian M35 recently shared this with other enthusiasts.
I have a thread on the ownership of my Yeti but I think she deserves a separate thread for the extensive modifications she has received recently, both in terms of performance and aesthetics. My Yeti is probably the only one in India (if not the world) with a Stage-3 map and the beautiful and hot Java Green colour makeover.
The Skoda Yeti can be an ideal project car, provided that money is not a limiting factor. By ensuring regular preventive maintenance and paying close attention to details during the upkeep and services, my Yeti has been a reliable and dependable companion throughout my ownership. Yes, I did have to replace the ABS module once and the notorious ABS sensors a few times.
I have always believed that the Skoda Yeti was a concept ahead of its time. Even today, I have not come across any car in the south of the 30 lac price bracket (no offence to any other cars/owners) that can handle as well as my Stage-3 Yeti. With its hot Java Green outfit and aesthetics, the bar has only been raised higher!
The build in brief:
Performance:
- Bilstein B6 shocks on the OE spring (@Pete’s Kochi)
- 312mm upgraded brake kit (Brembo Xtra) – including rotors, shackles, carriers, pads and associated hardware(@Engineering Exponents, Bangalore)
- Headlights and Fog lights upgraded to LED (@Automall Kochi)
- Custom seats bolstered with added under-thigh and lumbar support (@ LeatherMan, Palakkad)
- Lenso Jager alloy wheels- 17” with Continental SportContact rubbers (235/55/R17) (@Automall Kochi)
- Downpipe (@Grid7 in Thrissur)
- Intercooler upgrade (Garrett)- (@Engineering Exponents, Bangalore)
- Turbo upgrade (@Engineering Exponents, Bangalore)
- K & N filter
- Stage-3 ECU map – Wolf Moto/Kochi
Aesthetic:
- Android HU upgrade with Apple CarPlay and Android auto and reverse camera and a host of other features yet to explore! (@Galaxy Car accessories Kochi)
- Spare tyre powered Sub-woofer- MQB (Import)
- Custom front grill – DIY and finished by Grid7, Thrissur
- Full Body Paint- Java Green (@Grid7 Thrissur)
- Headlights, Taillights, reflectors, fog lights – blackening around the edges (@Grid7 Thrissur)
- Ful body Graphene coating -3-year package (@Grid7 Thrissur)
Two major upgrades have been recently completed on the Yeti: the Stage-3 hardware and a full paint job in Java Green, along with detailing. These upgrades took approximately a month each and were performed by two exceptional experts in the automotive industry: Jayanth of Engineering Exponents in Bangalore and Robin of Grid7 in Thrissur. Without their expertise, the Yeti would not have undergone these upgrades.
The Big Brake Kit Saga!
I have documented the details of the Stage-3 build in my ownership thread.
The most challenging part of the process was installing the brake kit. The B6 on my Yeti is the 50mm version, while the imported brake kit required the 55mm version. The engineering team was able to source most of the necessary hardware, but the 5mm mismatch needed to be addressed. Eventually, they created a custom converter sleeve (50mm to 55mm) to fit around the B6 shock absorber. Due to this issue, the brake kit remained idle for 4-5 months back in Kochi as FNGs out there were unable to install it.

The Java Green story!
I was looking for a Decat-downpipe for the Stage-2 map when I stumbled upon Grid7@Thrissur. Impressed with their attention to detail, I contacted them about a possible makeover. Due to their busy schedule, getting an appointment was tough. Choosing the right colour was also a challenge. I was fascinated by Nardo Gray, Mocha Latte, and Python Green, the latter being very sporty yet a bit flashy. After several discussions, Robin suggested Java Green, which I found on the Audi R8, and it suited Yeti better. The next day, I got the car to Grid7, and the work began a week later.
The Grid7 charges a premium compared to others that specialize in painting. If you can afford it, you should choose the best, as you don't do these every day.

The subtle black touches
The detailing done on the headlight, fog light, tail light assemblies and also rear reflectors etc has been impressive cosmetically. The front headlight assembly had to be opened up followed by subtle black painting around the reflectors before putting them back together. The rear lights had inner edges finished in black. The result is that those dull-looking glass areas and those reds now blend well with the green.

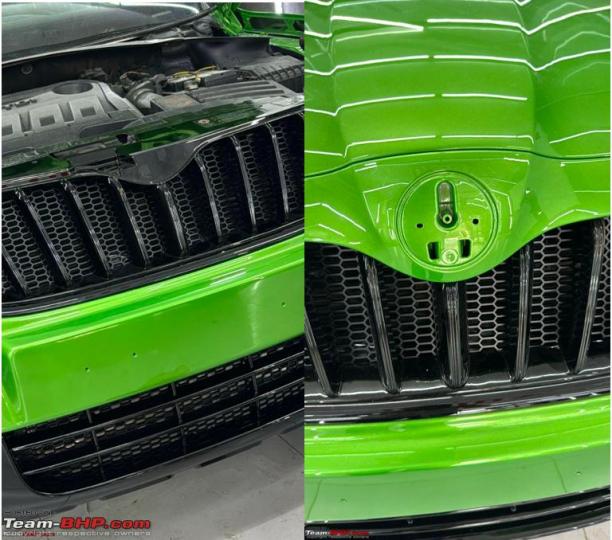
The front grills
I had the slots on the upper front grill widened by cutting alternate spikes. That needed to be finished with the ABS-based mesh attached behind. The same mesh has been fixed in front of the newly installed intercooler too.

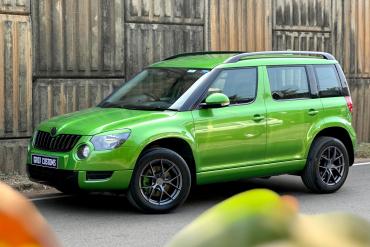
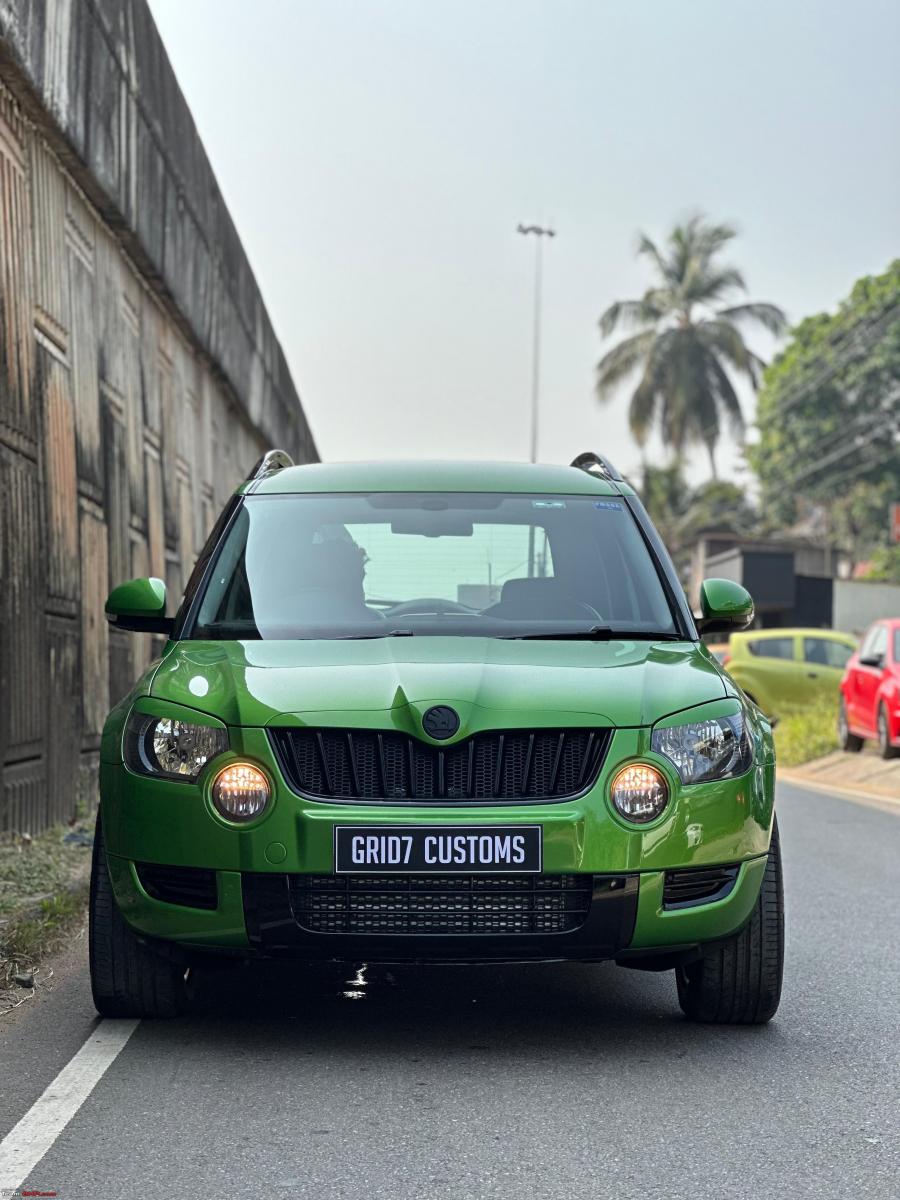
The finished Yeti in VRS Green
Let the pictures speak for themselves!


The legal will have to be done this week at the local RTO. Enough green for now. It will be very tough to maintain this for sure!
Here's what GTO had to say about the matter:
You got taste, man! Love the choice of model, wheels, colour & your clearly meticulous approach. Still no car like the Skoda Yeti on our roads & I am a big fan of driving old, timeless machines.
Congratulations on an incredible makeover.
Here's what BHPian gururajrv had to say about the matter:
Your Yeti looks epic, definitely one of the coolest Yeti I have seen in a long time. The Java green makes the timeless design pop. Great taste and kudos to the patience to ensure she gets the best of treatment.
This is giving me a lot of ideas for my Slavia sometime down the line.
Cheers and wishing you loads more fun with your upgraded Yeti.
Here's what BHPian ssjr0498 had to say about the matter:
Congratulations on the upgrade, the car looks really nice!
That said, you mean to say any other "SUV"ish car south of 30L price bracket right? If not, I guess you got carried away a bit too much.
Check out BHPian comments for more insights and information.
Pages
About Us