News
Delhi-Goa-Delhi on my Super Meteor 650 with a pillion and 25 kg luggage


This Royal Enfield is a gem to ride on well-made highways. The motorcycle never felt as if it was running out of breath.
BHPian Abh1nav recently shared this with other enthusiasts.
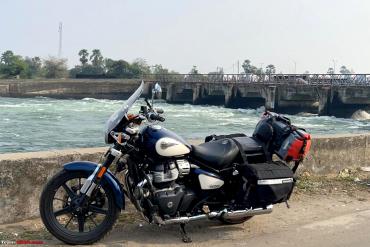
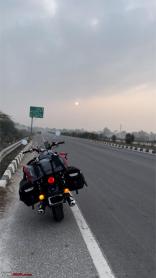
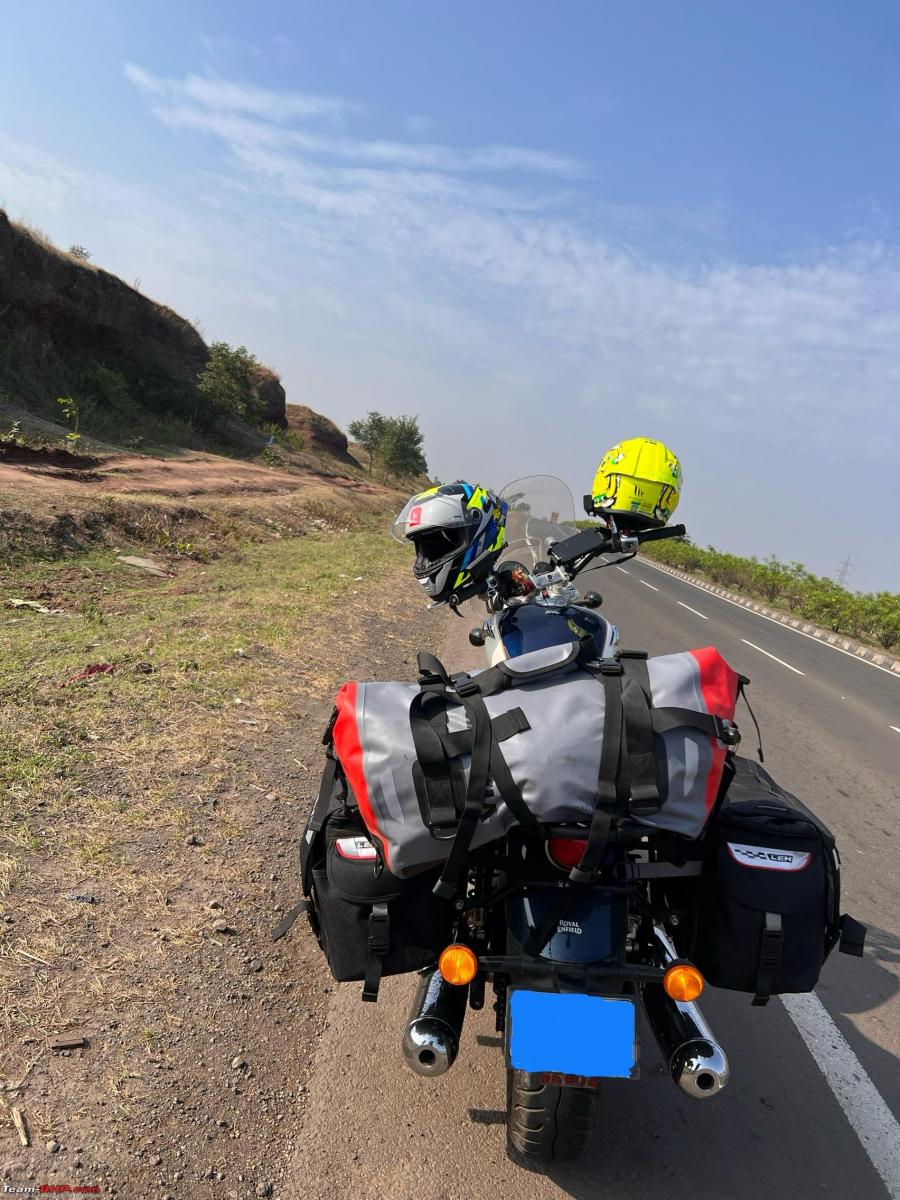
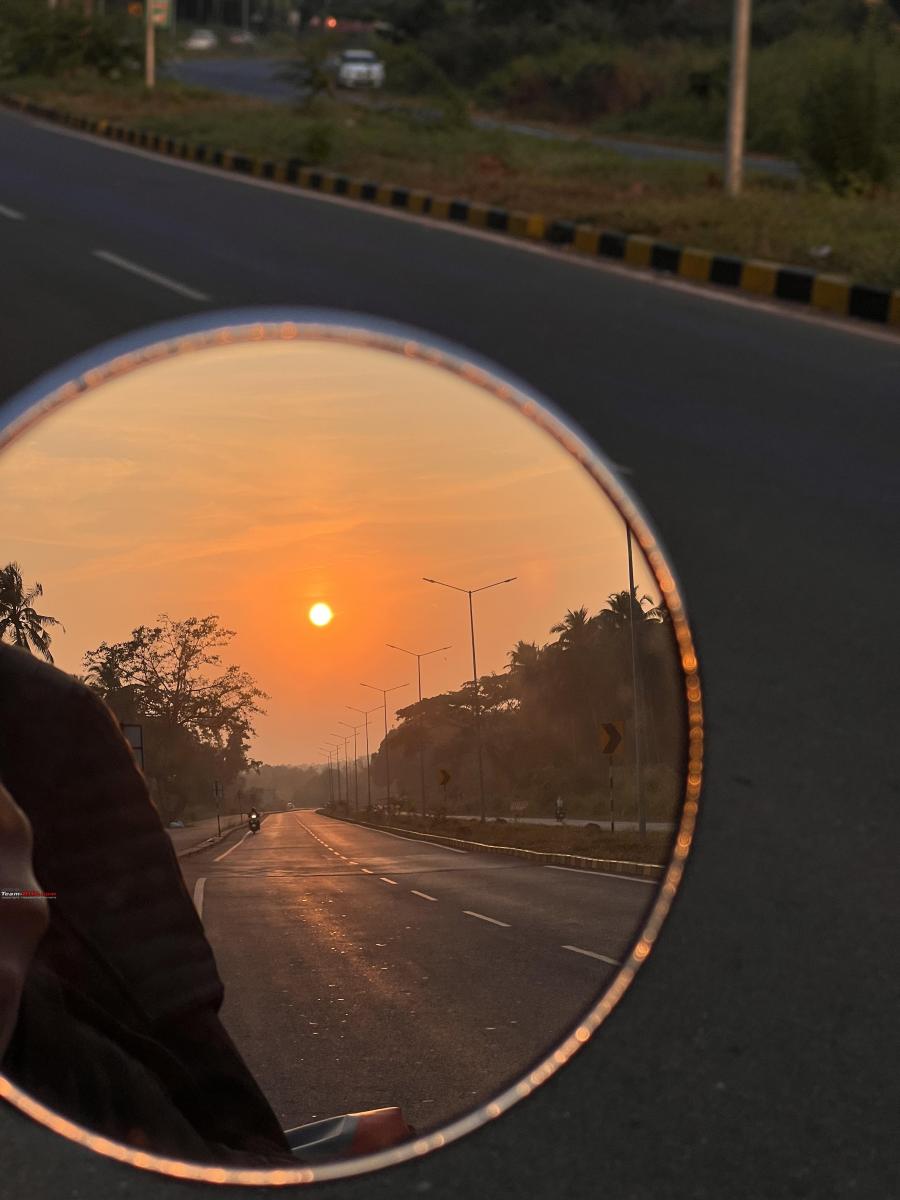
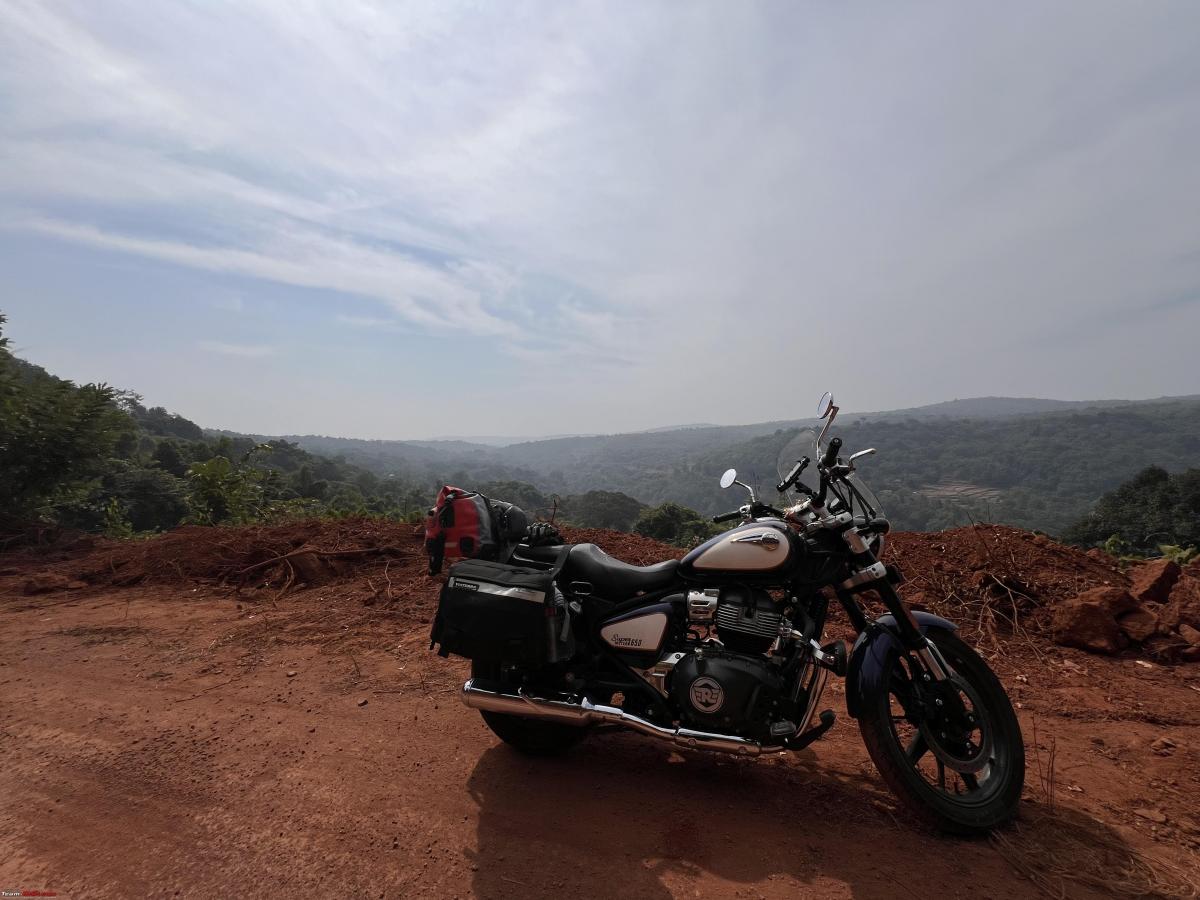
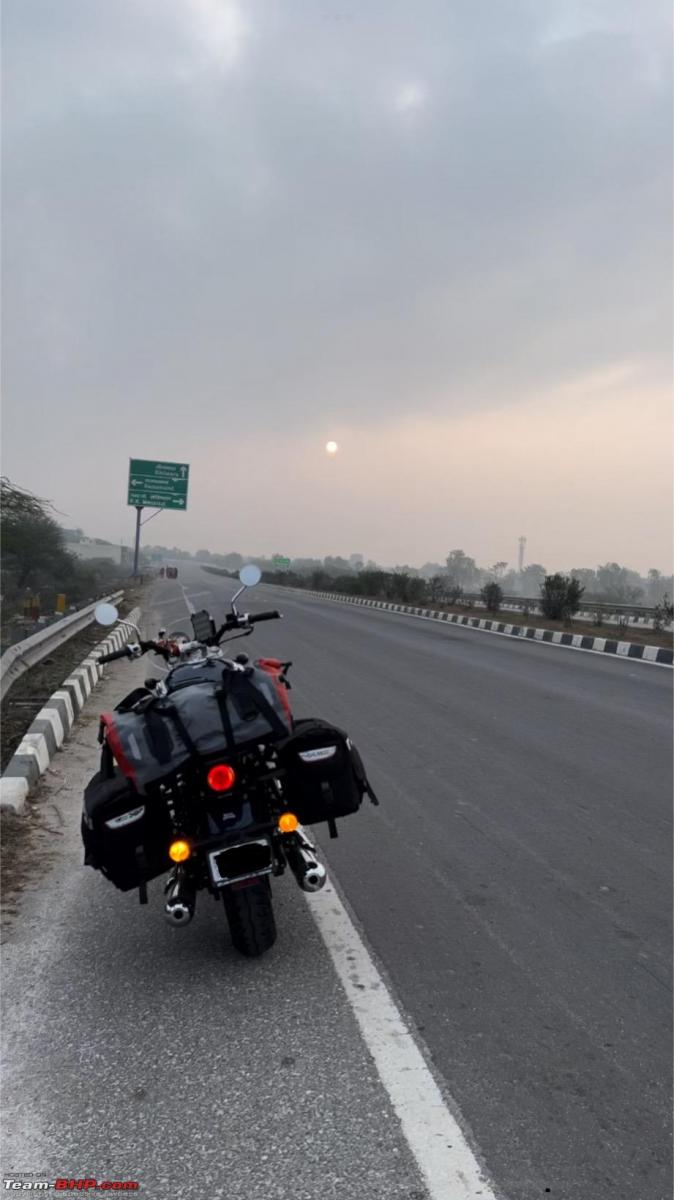
Recently completed my longest road trip till date on the Super Meteor! A 14-day trip to Goa and back from Delhi. Took the Delhi-Kota-Indore-Nashik-Kolhapur-Goa route while going towards Goa, with overnight stops in each of the mentioned cities. Being the first long road trip on the bike, didn't want to stretch much so took slightly longer than one would take to cover this.
The roads were great for the most part, with the sore point being the ongoing construction on NH48 from Pune to Kolhapur.
The journey back home was faster, as I took the Goa-Mumbai-Udaipur-Delhi route. Took NH66 from Goa to Mumbai, and while the road is serene for the first 400kms, the last 150-200 kms are an absolute mess with non-existent roads! However, it’ll be a hoot to drive on once this is complete. Rest of the journey from Mumbai to Delhi via Surat and Udaipur was a breeze with great roads throughout.
Coming to the bike, oh boy! It’s a gem to ride on well-made highways! Even with a pillion, and roughly 25KGs of luggage, the bike never felt as if it was running out of breath. Was able to easily cruise between 100-130 wherever the roads allowed. The engine never felt stressed, and even while doing triple-digit speeds, the bike had more than enough punch for the occasional overtakes! The ride felt planted at all times.
Being the celestial variant, we had the touring seat on the bike. While I got used to the stock cushioning through the ride, the missus started feeling the need for an air seat post riding for 5-6 hours a day! Will probably get one from Grand Pitstop before our next ride.
The only negative point that I felt during the trip - the suspension! While it has been spoken about at length across multiple forums, there’s no denying that it’s stiff and makes you uneasy in case the bad patch of the road extends beyond 30kms or so. However, it’s something you learn to live with. Honestly, it’s easy to do so, as the bike ticks all the right boxes apart from this.
Finally, Sharing some images from the trip


Check out BHPian comments for more insights and information.
News
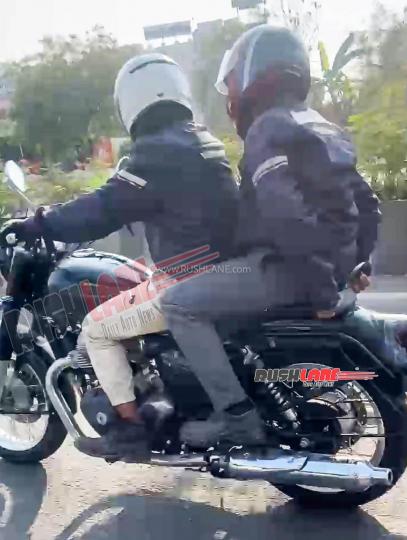
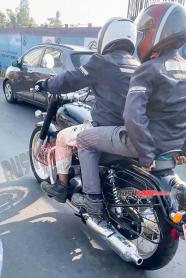
Royal Enfield Bullet 650 spotted testing for the first time


The Bullet 650 looks similar to the Classic 650, which is also in the works.
One of Royal Enfield's most iconic models, the Bullet, is getting a bigger engine. Based on the brand's 650cc platform, the new Bullet 650 has just been spotted testing for the first time.
The Bullet 650 looks similar to the Classic 650, which is also in the works. The bike has a round headlamp with the signature position lamps on either side, a teardrop-shaped fuel tank, a single-piece seat and dual exhausts.
The Bullet 650 is expected to use the familiar 650cc twin-cylinder engine that produces 47 BHP and 52 Nm. The engine is likely to be paired with a 6-speed gearbox.
Currently, Royal Enfield's 650cc range includes four models - Shotgun, Super Meteor, Interceptor and Continental GT.
Source: Rushlane
News
Rode the Triumph 400 X: Comparison with rivals from KTM & Royal Enfield

This engine has completely different characteristics to the other 390 and Himalayan.
BHPian VW2010 recently shared this with other enthusiasts.
A short review after riding the Scambler 400. Reference bikes compared include KTM 390, ADV 390, Int 650, Himalayan new.
The good:
- Excellent engine and has very good torque in all gears
- Comfortable seating and riding position
- Wider handlebar makes it easy to ride around
- Excellent power that most won't need or use it
- Throaty exhaust note. Liked this exhaust note over all the above bikes
- Good front brakes.
- Decent or similar to KTM like rear brakes. Himalayan has the best brakes.
- Can keep up with most bikes in this segment when riding as a group
- Far more comfortable than the speed 400.
The so-so:
- Engine vibrations are high at higher RPM making it difficult to cruise above 100 comfortably
- The most comfortable zone is 85-95kmph where the bike excels
- Lacks outright top end of the Ninja or R3 or acceleration of the KTM.
- Seats are a bit narrow for long rides.
- Tall people may need some handlebar risers
Overall:
This was a pleasant surprise and this engine has completely different characteristics to the other 390 and Himalayan. The bike can be run in 4th gear at any speed inside the city making it very comfortable. Even in highways slowing down in highway in 6th and continuing is not a problem. Excellent balance and can hit triple-digit speeds in a short time. Extremely poised at speeds between 85-95 and can keep up with most of this segment bike. Top speed comparable to the ADV but slower than KTM and Himalayan.
Feels like a perfect balance between the Duke and Himalayan.
KTM needs to be revved like you want to remove the engine casing bolts. Himalayan has a laziness as well as a vibration that makes it no different to the KTM. This engine balances both at the right RPM.
Loved the bike overall and would recommend this for first-time buyers if they are considering this segment as a no-brainer.
Check out BHPian comments for more insights and information.
News
Loved the Super Meteor 650 but there are 3 deal-breaker issues for me

I am not sure whether Royal Enfield is keen on solving this problem as the motorcycle has been out for a year now.
BHPian Theron_blr recently shared this with other enthusiasts.
I took a 500 km test drive of this monster a while back which helped me figure out if I should buy this beast or not.
Here are my main problems with this bike
- Suspension: So far, I have not heard of any viable replacement options for the suspension. I'm not sure if RE is keen on correcting this part since it has been out for a year.
- Front heavy: Compared to my Avenger, I can feel the heavy front, especially when making U-turns. I think if the angle of the front wheel can be changed (red line), it may help reduce the front weight. Is it possible to change this angle?
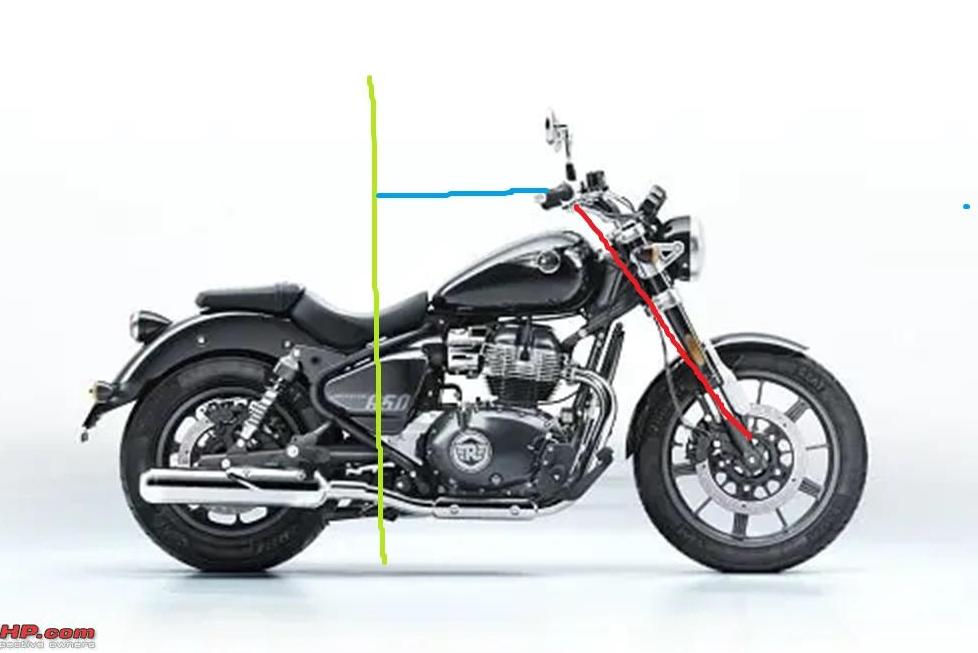
- Handlebar is far: The standard handlebar is wide and forward, so I have to stretch forward and my upper back has to open up, putting some strain on it. The blue line represents the reach. Is there a way to bring the handlebars a little closer up by a few inches and maybe reduce their span?
I loved the bike except for these 3 deal-breaker issues.
Here's what BHPian Waspune had to say about the matter:
The stiff rear suspension of the Super Meteor is a well-known fact. However, I have read that setting the pre-load by 1/2 steps makes it more compliant. It might sound counter intuitive, but it seems to work as per a lot of YouTube reviews of Super Meteor in the western market.
So I would urge SM owners to try doing this before thinking of an aftermarket suspension. Would help other prospective buyers as well!
Check out BHPian comments for more insights and information.
News
Royal Enfield Roadster 450 spotted testing in India


The Roadster 450 is expected to be powered by the same 450cc engine that debuted on the new Himalayan.
Royal Enfield’s new 450cc platform that underpins the Himalayan is expected to spawn multiple models. One of the upcoming bikes based on the same platform was recently spotted testing.
According to the latest spy images, Royal Enfield is working on a new 450cc roadster. The test bike boasts a sporty look with a muscular fuel tank, flat and wide handlebars and rear set foot pegs. It has a round headlamp, a stepped seat and a short tail section.
The Roadster 450 is expected to be powered by the same 450cc engine that debuted on the new Himalayan. The single-cylinder unit puts out 40 BHP and 40 Nm, but the Roadster could get a different tune and tweaked gearing.
The bike is likely to be equipped with a telescopic front fork and an adjustable mono-shock at the rear, while braking will be handled by a set of discs supported by dual-channel ABS. The Roadster 450 could ride on alloy wheels, shod with beefy road tyres.
Source: Bikerlp46
- Tags:
- Indian
- Royal Enfield
- spy shots
News
How I installed TVS Ronin's USB charger on my Interceptor 650

The charger feels well built and looks very sturdy. It seems that it can sustain the vibrations without breaking.
BHPian iamgyan recently shared this with other enthusiasts.
DIY - USB Charger installation using Aux Connector
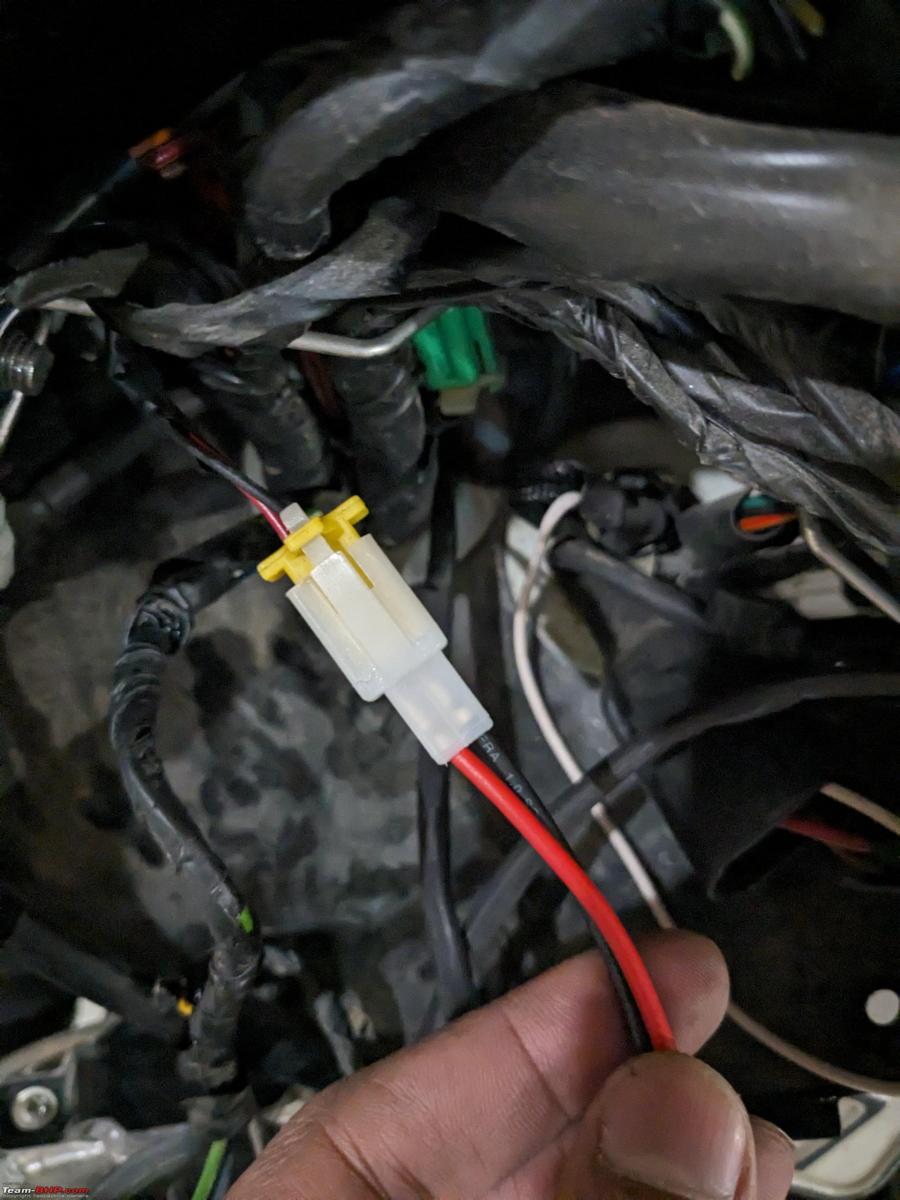
I really wanted to make use of the aux power terminal inside the headlight ever since I came to know of its existence 3 years ago. However, the only plug-and-play accessory I found was from Hitchcock and at a price I wasn't willing to pay.
Finally, I came across the USB charger sold by TVS for Ronin for Rs.850 and thought of getting this done.

Ordered it from the TVS accessories website, however, the connector on it is Anderson type (really good stuff but doesn't match the one on Inty.) Took the charger to work and checked if I could find any matching connector to replace but no luck.
Finally found a matching connector (to the female connector on the bike end) on Amazon for 250 bucks (Set of 5 male & female connectors with relevant crimps).
Got the connectors, took help from a colleague at work to do the crimping and make the cable longer and Voila! we had a good-looking accessory!


Further installation was pretty straightforward (pics should be self-explanatory)


About the charger
The charger itself is on a feel-good kinda heavy side with the mounting made of thick sheet metal, moulded along with the rest of the charger, very sturdy and looks like it can take the vibrations without breaking. It has a single USB A port and no light indication. I expected the charger to be fast charging type but seems it's not. It was charging my Pixel 6a at a max of 1550mA but the phone didn't display "Charging Rapidly". On the bike, it turns on with Ignition on AND Kill switch ON.
Note: I overdid the cable length, you only need about 200-250mm extra length of wire over the stock TVS charger length. Also, note the color of wires on the female and male connector sides, you need to maintain the same polarity
Check out BHPian comments for more insights and information.
News
My 1990 Bullet 350 looks "Royal" after electroplating multiple parts

A bonus of getting the silencer plated was that 30 years' worth of carbon and soot had been cleaned out and the sound became a more Bullet-like thump.
BHPian Vaastav recently shared this with other enthusiasts.
In December, my college winter vacation started, and I was back home for a month. This of course meant that the Bullet would be getting some work done.
At the forefront of the list of things to be done was electroplating. The bike had caught rust on its silencer, bend pipe, handlebar, etc., due to having been standing for a long time, and thus these issues went unattended.
After some asking around, I was told that Meerut was the place to get this done. So I got on the bike and rode to Meerut one morning. Upon reaching there, I found a recommended mechanic who then pointed me towards a plating shop. I was told that the owner was out and I would have to wait for him to return. He turned up after about half an hour, and I told him the requirements. After some back and forth about the price, we agreed to 1200 for the following items:
- Silencer and bend pipe
- Kick, neutral lever and gear lever
- Handlebar, along with its clamps, nuts etc.
- Fuel Cap (the original Enfield one)
The next order of business was to get all these parts opened up. There was a mechanic nearby who agreed to do it for 400, on the condition that he would wait for the work to be done and then fit the parts back on since it was already 1230, and I had been given an estimated time of 1830-1900 for completion.
So, the parts were opened up.

Then they were all taken and dipped in acid after which they were polished using wire brushes, a time-consuming process that actually took up a large part of the time.

After this process was done, they were then plated and then wiped down properly.


By this time, it was about 1845, and by the time they were all fitted and I had paid for it, it was close to 1930. Thankfully my father had arranged for a guestroom in Meerut Cantt, so I reached there, and after some lovely hot dinner, went to sleep.
The next day I was immediately able to see the change in the look of the Bullet. When I reached home, various other people also commented on it, and my mechanic said "Ab lag rahi hai Royal".
To give some idea:
Before

After

A bonus of getting the silencer plated was that 30 years' worth of carbon and soot had been cleaned out of the silencer, and the sound became a more Bullet-like thump, and it didn't feel as choked at higher speeds.
I enjoyed riding it around on my holiday (despite the cold and the fog) and I plan to get it repainted when I have summer holidays.

Somewhere between Deoband and Muzaffarnagar on the way to Delhi...
Check out BHPian comments for more insights and information.
News
DIY: Fitting Marsh preload adjusters on a Royal Enfield Interceptor 650

I recently installed handlebar risers and that made the bike ready for the front fork preload adjuster upgrade.
BHPian jomson13 recently shared this with other enthusiasts.
DIY Sunday - Fitting of Marsh preload adjusters
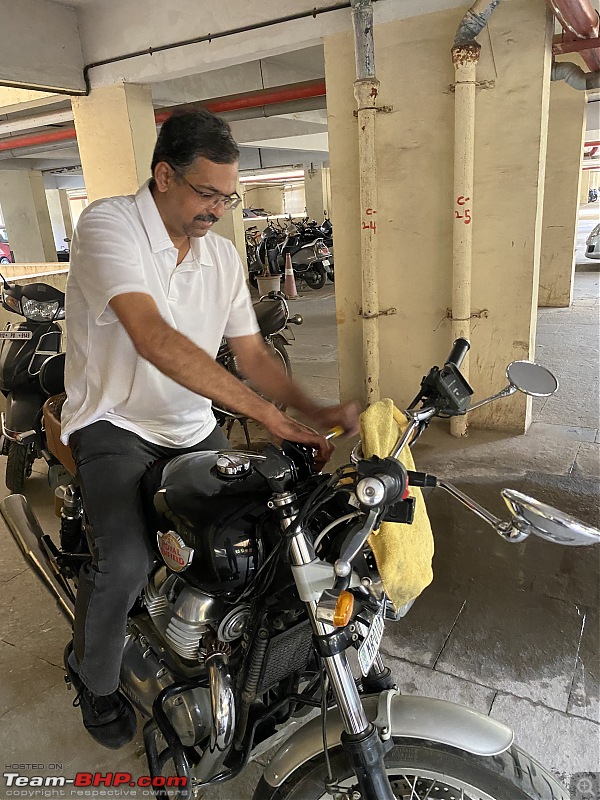
Big shout out to Bhpian Sukiwa; Not only did he order the preload adjusters (way back in October 2022) but also came down to my place, fully prepared with the necessary tools, and installed them over the weekend.
Here's the man in his element!
I recently installed handlebar risers and that made the bike ready for the front fork preload adjuster upgrade.
After some planning and rescheduling, we decided to undertake the DIY on Sunday 4th Feb.
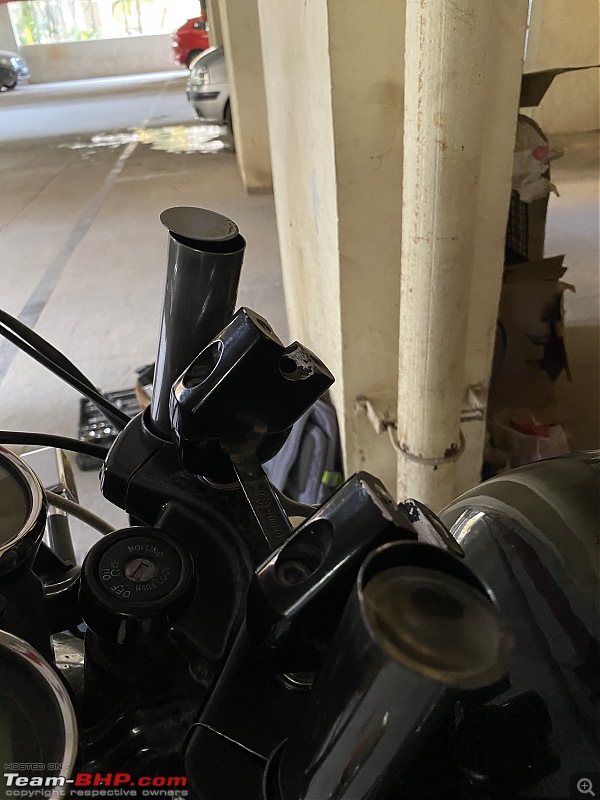
Step 1 - The handlebar was removed and flipped over to rest on the fly screen.
Here you can see the risers and the stock fork cap

The cleaning cloth proved to be a good packing material to keep the handlebar in place

Step 2 - Remove the stock fork covers.
This proved to be a bit difficult as the stock fork covers were a bit over-tightened. I had the fork oil replaced during the last service and I'm guessing that my mechanic went overboard while tightening the fork covers.
We took turns but the nut would not budge.
Eventually, some WD40 was sprayed at the right places, and the steering was turned to the lock position in such a way that the steering stop would provide support while we tried to undo the fork cap.
It needed a fair bit of pushing and heaving but finally, we managed to get it off.
Caution - We undid both fork covers one after the other. This caused the forks to compress fully under the weight of the front end. This can be avoided by working on one fork at a time.
The fork has fully compressed under the weight of the front, notice the difference in the position of the triple clamp
Clearer picture, you can see the spacer jutting out from the fork

Step 3 - Fitting the fork adjusters
Since the fork was fully compressed, we had to push down the back end of the bike to extend the fork. Owing to the front-heavy weight distribution of the interceptor, this is not an easy task.Sukiwa managed to push and hold the back end down while I fitted the adjuster on the RHS fork. It's a fairly easy process - you need to push down against the spring and rotate the adjuster in the fork tube until it latches onto the internal threads. Once this was done sukiwa could let go of the rear end of the bike and I continued to tighten the adjuster by hand. The spring does not offer much resistance - I could tighten more than half of the travel by hand.
Stock vs Aftermarket


The LHS fork proved to be a menace!
I could screw the adjuster onto the RHS fork very easily but on the LHS it would not turn more than a quarter turn. It behaved as if there was something jamming the threads.
After taking turns in trying to fix the adjuster, we decided to inspect the threading. The spacer was removed and kept aside and the threads were checked. I could see some metal shavings stuck in between the threads. On the adjuster, we found that the black paint on the threads was coming off. Both threads were cleaned - first by a toothbrush and then by a cloth and then we tried fitting it onto the fork tube again.
This time we were able to get it to latch on but it was not screwing on freely like the RHS.
Nevertheless, we tightened it with a socket (M21) and proceeded.
Step 4 - Rework!!
After tightening both adjusters we realized that the LHS spacer was not put back in! So we had to redo the left-hand side and this meant another 10 minutes of fighting with the fork and the adjuster. Ultimately we managed to screw it in.
The LHS spacer (on the right of the image) was removed and forgotten.

To tighten the adjusters fully we had to screw in the preload adjusting nut (M14) to make space for the M21 socket which was used to tighten the adjuster onto the fork tube.
In doing so we disturbed the stock setting of the adjusters and had to spend some time in bringing both adjusters back to somewhat nearer to their stock positions. There are 6 markings on the adjusters which can be used as a reference to ensure that both sides are equally adjusted.
Step 5 - Setting the sag for my weight
I had no clue how this was to be done, Sukiwa took the lead on this one and explained the process.
3 measurements were taken (Fork height was measured between the front axle nut and bottom clamp)
- Bike on the main stand, front wheel off the ground - 500mm
- Bike off the main stand, the rider sitting on the seat with both legs on the footpegs, forks compressed and allowed to rebound - 460mm
- Repeat 2 but instead of compressing forks pull the forks upwards - this was missed
- Bike off main stand, no rider - 495mm.
Sag = 1 - Avg(2,3) (Formula sourced from the internet)
Since 3 was not done, we can approximate the sag to be 40 mm
This is too much sag for a road-based bike (again, based on internet reading) and it definitely needed to be reduced. The adjusting nuts were tightened so as to have 5 lines visible. The stock setting has 6 lines and some space under the 6th line visible.
This increased reading # 2 from 460 to 465mm which meant the sag had reduced to 35mm.
Current position - 5 rings visible (5th is flush with the bottom surface)


We decided to leave it at that and for me to make further adjustments after trying out the bike over varying road conditions.
I use the bike for my daily commute to the office and find the following changes:
- The front feels tighter, the very persistant khat khat sound from the front end has reduced quite a bit
- I feel that the front wheel is staying in contact with the road surface much better now. Extremely sharp speed bumps taken at moderate speed do not feel as scary as earlier.
Further adjustments will be made over the weekend (Sunday morning ride) Will update this thread from time to time.
Suggestions if any are welcome.
Check out BHPian comments for more insights and information
News
Why an ex-KTM Duke 200 owner chose Yezdi over Royal Enfield

Royal Enfield has some great products with one important element lacking
BHPian cityscrambler recently shared this with other enthusiasts.
Helloooo,
I was the owner of a 2022 Scrambler as soon as it came out. I bought the red and silver as soon as it came out.
The only other motorcycle I have owned before this is the KTM Duke 200, the very first version. But I thought it was time to buy something that has history, and heritage and is not a modern plastic (no offense against them they are amazing as well). Basically, something you hand down in your family, a traditional motorcycle.
Royal Enfield has some great products with one important element lacking: A quick take-off. I have driven every RE known to man and none of them take off. The low-end rpm is weak so I gave up.
The Interceptor was the closest choice but in the 20 minutes of bumper-to-bumper test driving the heat was scalding my leg. 650 cc might have been too much for me.
When the scrambler came out, it was an instant yes for me because it ticked the following boxes:
Absolutely quick take off
Great maneuverability despite its weight
Looks! an aggressive looking traditional modern retro
A history and heritage
My daily usage is weaving through Mumbai traffic, quickly. I do not go on tours and I do not go offroading as much as I would like to.
But when the rest of the motorcycles take off at the light, I am kind of gone already. (I do not street race it's just the uptake of the bike)
I did a very preliminary review a while ago I am posting the link below, but am also posting a few more pros and cons
Pros:
- Extremely mischievous engine
- Looks are not common
- A heritage-looking bike
- Fairly modern. Different riding modes plus can switch off ABS
- The Yezdi emblem
- An already blacked-out bike body
- Really good accessories, I got the headlight grill too
- The good responsive service team
- No breakdowns or serious issues that put me in crisis at all.
- Ample pillion rider space
Cons:
- It's a young brand after a revamp, so I wouldn't say the engine is super refined. My needs are different but I don't know anyone else's
- The mirrors undergo a lot of NVH
- The suspension could have been much better for a scrambler
- Some auxiliary parts start rusting but they're more like footpegs etc. Also, I live right next to the sea.
After spending a year and a half I felt like the colour scheme could do some refreshing and I have always been a fan of the Baker Express colour scheme so I JUST got it repainted. Enjoy the pictures!


Check out BHPian comments for more insights and information.
- Tags:
- Indian
- Royal Enfield
- KTM
- Yezdi
News
Zana 45L Top Box review & DIY installation on my Himalayan
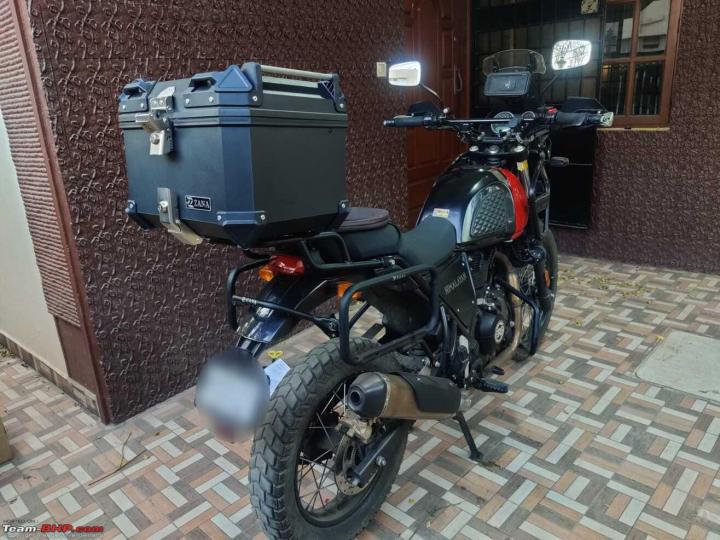
"My primary requirements for a top box was that it must be able to take a full face helmet with an intercom, my gloves and have some space for other small items."
BHPian WhiskeyTangoFox recently shared this with other enthusiasts.
Update: Review of the Zana 45L Top Box
Getting a Top Box/Case for the bike was always on the cards for me, as I’d mentioned earlier on this thread somewhere. Lugging my helmet around everywhere was inconvenient, especially during day rides, and even in the city. I needed lockable storage on the bike, and a top box seemed like the perfect solution. While a Cycle Lock from Decathlon could secure the helmet, leaving the intercom outside wasn't practical. Constantly unplugging and re-plugging it could damage the port over time. Additionally, I often carry my rain gear, so having it on the bike would be much more convenient than carrying it around. Considering all these factors, getting a top box was the logical choice for me.
I was well aware of the possible disadvantages of the top box, and the possible effect it may have on the handling dynamics of a motorcycle, which I’ll address in this post a little later. The decision to finally take the plunge and get one was after a lot of information extraction from Shyam, who has traversed the entire country pretty much with a top case from Shad and/or Givi by his side (Or should I say on the back)
Whilst I’m not too bothered about adding weight to the bike, in general, I still wanted to keep the box as light as possible due to the area on which the box is mounted, high and well away from the bike’s centre of gravity. Hence I decided against aluminum boxes. If I had to pick an aluminium box however, it would have been Auto Engina’s 42L Top Case as it comes with support braces that attach to the saddle stays, albeit only the RE OEM Stays. Since I have Saddle Stays from Zana, that idea went out of the window
Top Rack Change
Shyam further said that for the Himalayan, it's best to change the rear rack to something sturdier even if I was mounting a Plastic Box, hence I decided to pick up a rack from Zana.
The rack in itself is sturdy and well-made, and not too heavy, frankly. The Stock Rack with the Aftermarket Plate I had on the bike weighed 3.4Kgs whereas the Zana Rack weighed just 2.4 Kgs, All whilst being much thicker and reinforced at better positions. Shyam has been running a Zana rack for his Himalayan for a while now, and it has held up pretty well.
The Contenders
My primary requirements for a top box were that it must be able to take a full-face helmet with an intercom, my gloves and have some space for other small items like a cloth and zip ties and whatnot. Further, it had to be reasonably sturdy and mustn’t break the bank. I wasn’t looking to spend more than Rs 10,000 for the whole affair and the rack in itself cost me Rs 3,000.
- Givi B32 Bold -

I had a look at this box earlier when I’d been to Let’s Gear Up in HSR about a year ago, however it was a little too compact. It probably could take a full-face helmet, but that’s about it. Plus it was also out of stock at Bikenbiker, where it was listed for a reasonable price (around 5.5k) and was retailing at almost 8k everywhere else which was not reasonable considering that it didn’t come with an Inner Liner to muffle the noise that is inevitable from things rattling around, which I personally cannot stand.
- JB Racing 45L ABS -

This was really cheap at 3200Rs, but I just wasn’t a fan of the way it looked (Although Top Cases, in General, aren’t great lookers, but I’m trying to minimize the damage here). Reminds me of those old-timey suitcases that my grandparents used to load on a bus when they came to visit. No inner lining on this one either, but hey at the price I can’t really complain about that.
- JB Racing 45L Economy -

Weird name, but it looks like case. Looks like an Aluminium Box with the carry handles on top and luggage routing loops, but is completely made of ABS. Was priced at 7499, which was reasonable. Shortlisted this.
- Zana 45L ABS Top Box - Little did I know that Zana themselves had also started selling top boxes, both Aluminium and Plastic Variants. I couldn’t find any reviews on YouTube, but one look at them, and I realized it's all the same Chinese(?) Boxes that JB Racing, TreknRide, and other similar manufacturers are rebadging and selling here, so I figured why not try this. Was priced at 6200 Rs. Comes with a 6-month warranty and also has a soft inner liner. Here are some pictures of the Box and its accompaniments.


Installation
Delivery was fairly straightforward, as is the usual case now (Only Bikester Global hasn’t been able to sort this to date). The Rack and Box came in about 4-5 days from Haryana to Bangalore. The Box and the plate combined weigh a mere 4.2 Kgs. The Installation procedure is fairly straightforward and the plate is a direct bolt-on to the Zana Rack. Installation of the rack, however, phew, that was a task. I’m not sure whether it is Royal Enfield’s inconsistent welds or Zana’s (I think RE cause of past instances) but the rack was a bit too tight to fit on when using the rubber washers provided. Furthermore, replacing the rack at home proved challenging. While I managed to remove three of the four screws holding the rack, the fourth screw seemed to be stuck with an excessive amount of locktite, causing the screw head to strip. I had to take it to a welding shop to have it removed and had the rack and plate installed at my local FNG as it was nearby.

Stripped Screw Head
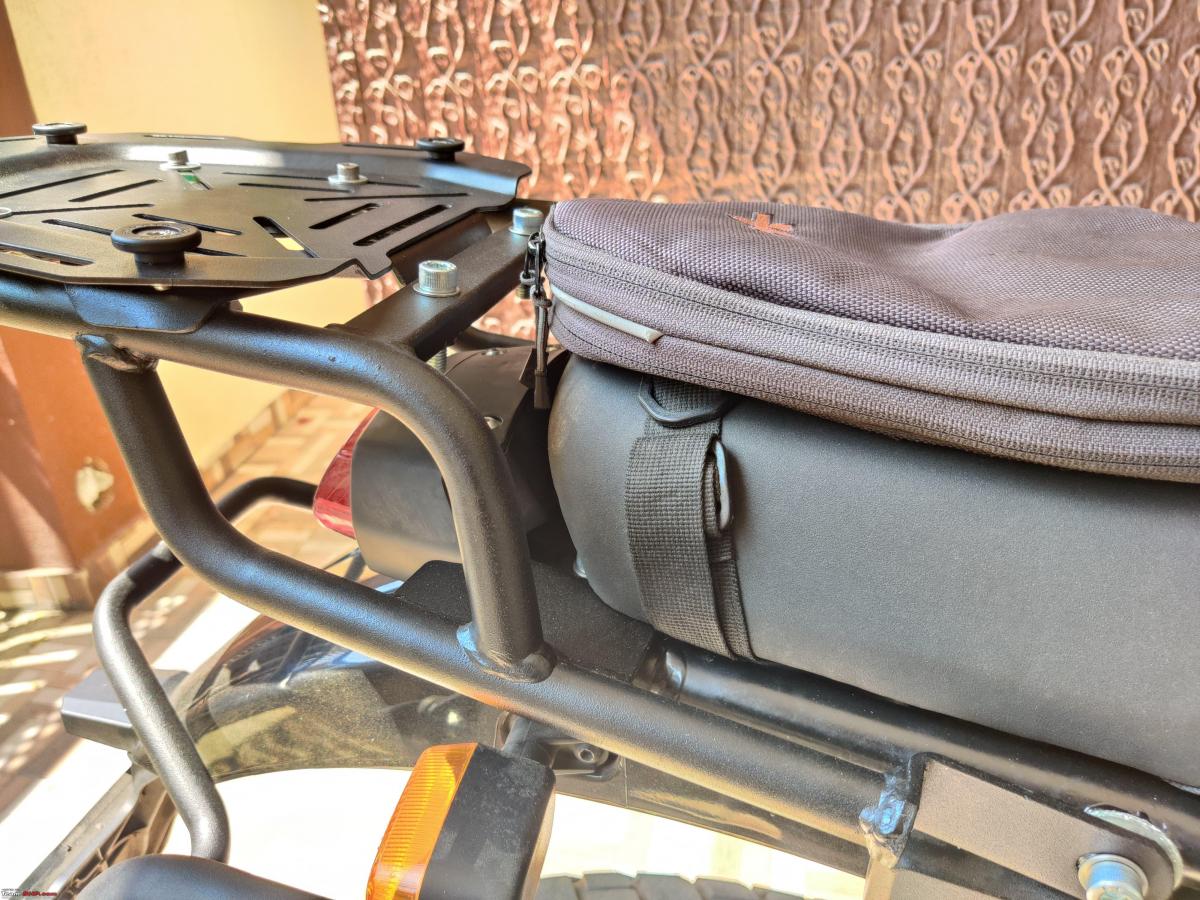
Then came another issue (definitely an issue with RE) is that the rack plate just wasn’t straight and was tilted to the left, This I was aware of earlier but was too prominent to ignore with the box mounted, so I used the two Rubber Washers from the Pillion Backrest Holes that this rack can accommodate and added it on the left side (Notice a small green object) to balance the rack.

Uneven Rack


Other than these issues, however, I guess you could say everything went well. I wasn’t a big fan of the lime green reflectors that Zana provides, so I picked up a few Red ones from Amazon.


Storage
Overall, the storage is sufficient for my usage. It can accommodate a full-face helmet with an intercom and a few other knick-knacks, although this can vary based on your helmet shape. It has some detachable soft lining all around the inside (Including under the Lid) and also has a little zipper compartment on the Lid. I carry around a few essentials every day in the box, namely a cloth, zip ties, insulation tape, a 12V USB Adapter for the charging port, Aux Light Filters, etc. Whenever I park my bike, I leave my helmet and gloves in the box. During the rainy season, I might pack my rain gear in there as well.
Riding Dynamics
As Red Liner once said on this forum, "The Top Box isn't going to affect the Himalayan's Moto GP*Aerodynamics" and boy was he right. I honestly felt no difference (Have Ridden Only Solo with the Box So Far). I tested the box at varying speeds (up to 100 Kmph) on varying surfaces and varying gradients. I even took it on washboard gravel for about 4 kms at 50kmph continuously which rattled the mobile holder loose but the box was still solid. You definitely are aware of the box’s presence when there is a crosswind but it's nothing major. I plan to get the Autoengina crash guards either way in the future, which I believe will add some ballast to offset the effect of the box if any (Weight towards the front, down low). There is some amount of rattling noise present when you go over bumps, but nothing major really. The key really is to fill the box that occupies space but doesn’t weigh a lot, and it shouldn’t be a big issue.
Overall seems like a good product for the price, and I hope it holds up well. Cheers!
Check out BHPian comments for more insights and information.
Pages
About Us