News
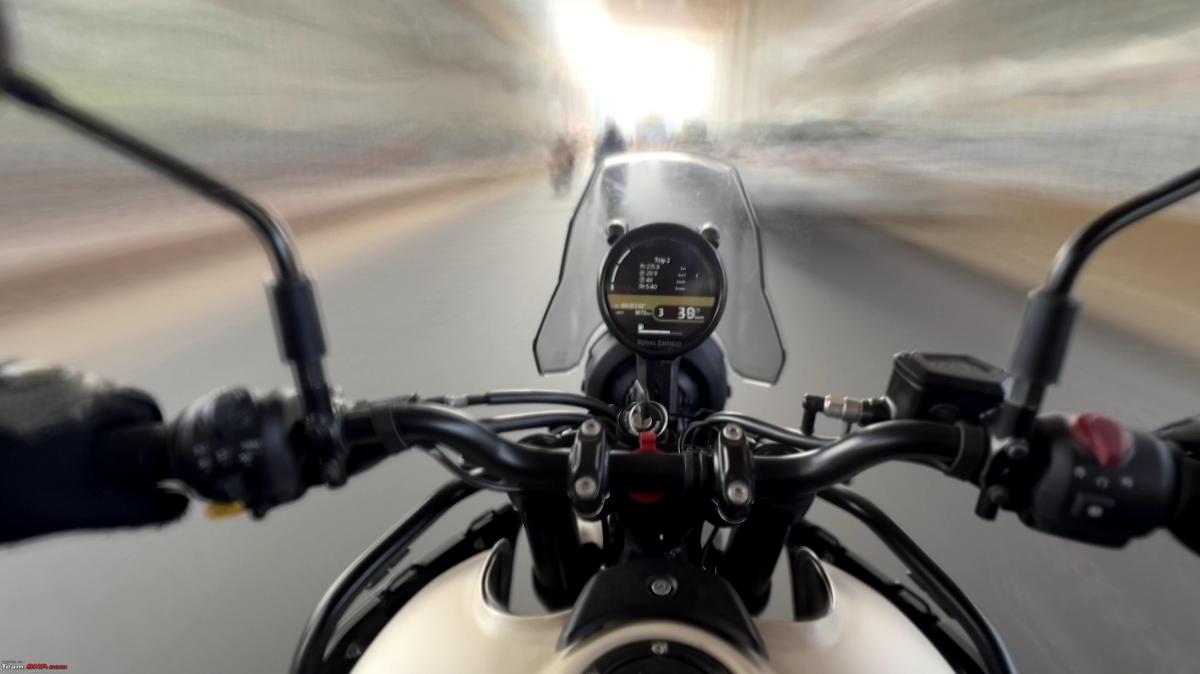
Suzuki Gixxer SF 250 goes in for 4th service

The billing took quite some time to get done with, but that is down to Suzuki's laborious processes and IT systems. There is little that the service advisors can do to speed that aspect up.
BHPian neil.jericho recently shared this with other enthusiasts.
To keep the Suzuki GSXRRRRR's warranty intact, I stuck to the recommended service intervals for the initial year. The first service was completed in July 2022. The second service was completed in September 2022. The third service was completed in January 2023. After that, I decided to stick to a 12 month / 6,000 km interval (whichever came earlier), instead of the recommended 6 months / 5,000 km interval.

Last month, I took the Suzuki GSXRRR 250 for its fourth service to the Bike Zone, Vytilla. The service advisor asked me to bring it by 09:00 but to nobody's surprise, the showroom and the adjoining SVC were still to be opened well after that time. Outside of the regular service, there were 2 things which I wanted to be done
- replace the clutch cable (I tend to replace it within 10K kms on my motorcycles, plus the VStrom 250's clutch cable is infamous for inopportunistically snapping well within 10K kms)
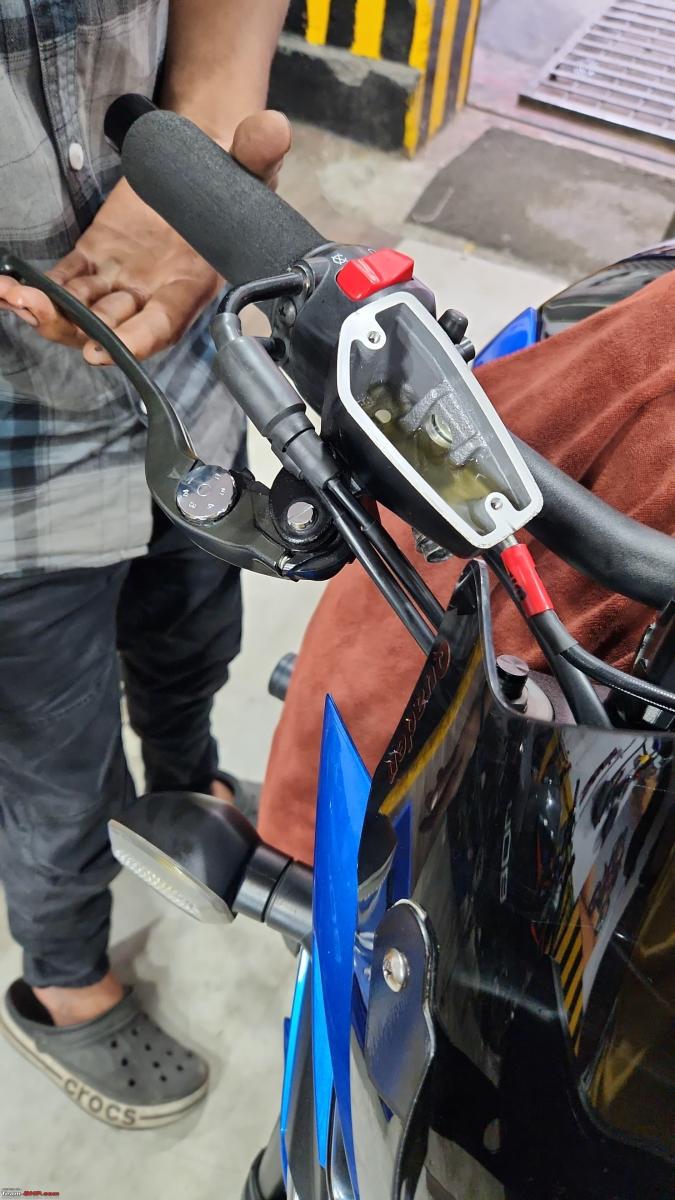
- replace a rubber caliper bush (I believe that is what it is called) from the front disc

The service advisor offered me a choice of engine oils. The Suzuki Ecstar oils have been tried and tested. The fully synthetic Motul 300 V2 is an excellent oil but is dreadfully expensive. The fully synthetic Motul 7100 was the third option. My friends have reported excellent results after pouring it in the KTM 390 engines, so I was keen to see what it would do in the tamer Suzuki 250 powerplant.

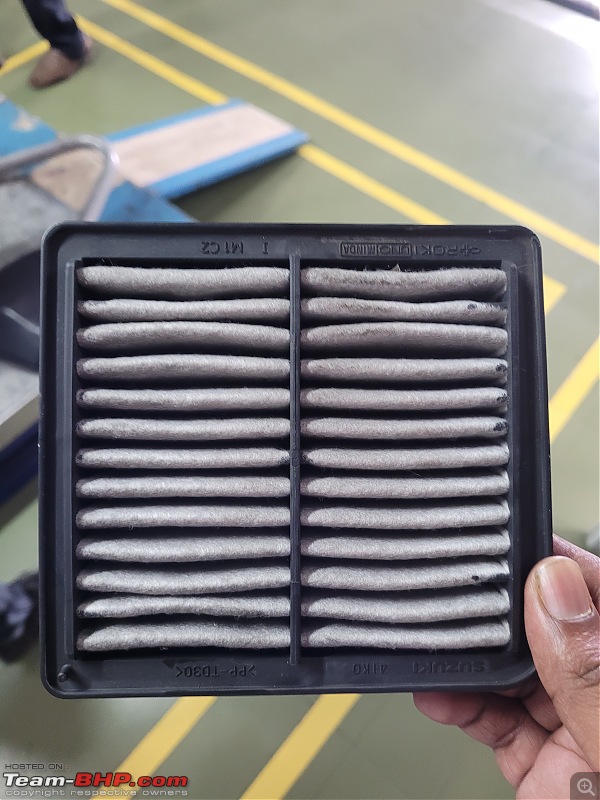
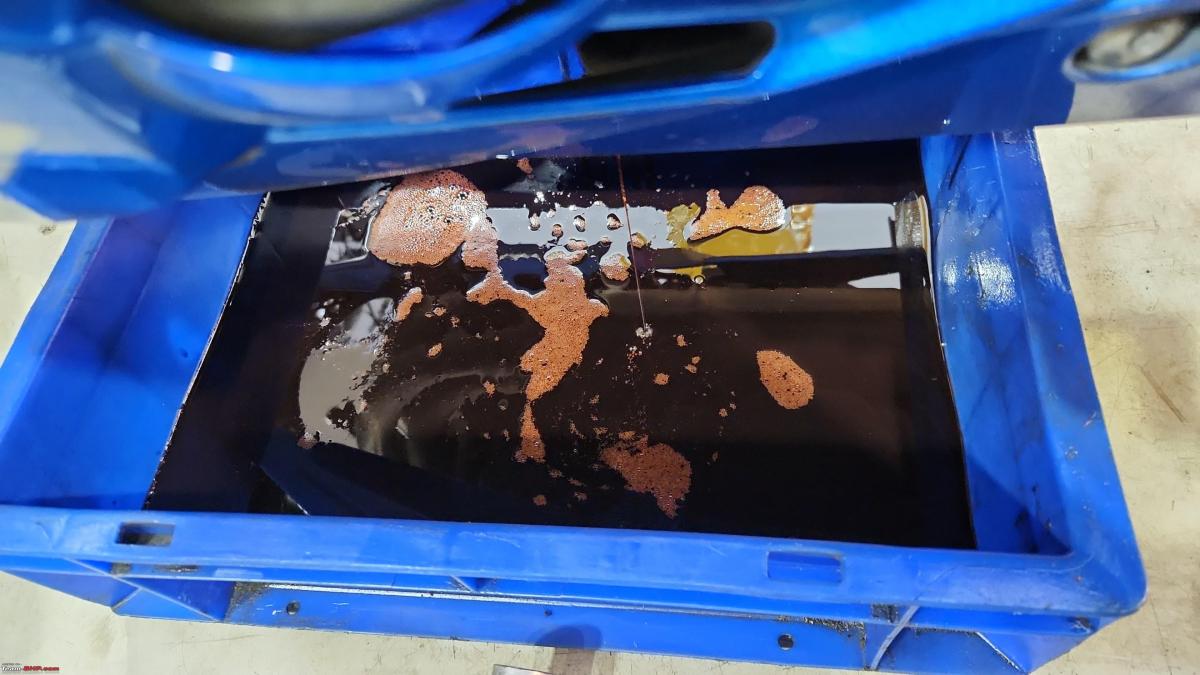
After removing and checking the air filter, the service advisor suggested that I replace it, as the previous one had gotten dirty. As for the rubber bush, I was told that Suzuki didnt offer the part as a spare. Only the full braking unit was offered by the company. All it took was a quick phone call to F Motors, who confirmed that they had it in stock. So, there was nothing to worry about.
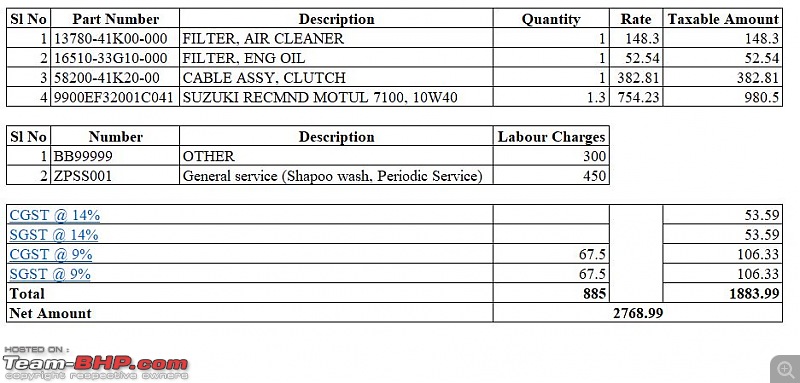
Below is the breakup of the service bill. If the GST numbers dont immediately make sense, it is because the clutch cable was billed at 14% GST, while everything else was billed at 9% GST.
The cost of the first service was Rs 814 (Ecstar fully synthetic oil & no labour charges)
The cost of the second service was Rs 936 (Ecstar fully synthetic oil & no labour charges. The cost of spares had gone up a little).
The cost of the third service was Rs 1,146.96 (Ecstar fully synthetic oil & air filter was replaced. No labour charges) .
The cost of the fourth service was Rs 2,769 (Motul 7100 fully synthetic oil & air filter was replaced. Labour charges included).
Since I was last at the Bike Zone, the lead mechanic has changed. So too has the showroom manager and the main service advisor! The new mechanic took his time but the work was done carefully. The service costs are quite reasonable as well. Only the billing took quite some time to get done with, but that is down to Suzuki's laborious processes and IT systems. There is little that the service advisors can do to speed that aspect up. Overall, this was another positive service experience with a Suzuki dealership.
Click here to read BHPian comments & insights.
- Tags:
- Indian
- Suzuki
- Gixxer SF 250
News
DIY: Retrofitting a TVS Apache RTR 200 windscreen on my Suzuki Gixxer

When I bought the bike it already came with a retrofitted Burgman windscreen that was quite big.
BHPian b16h22 recently shared this with other enthusiasts.
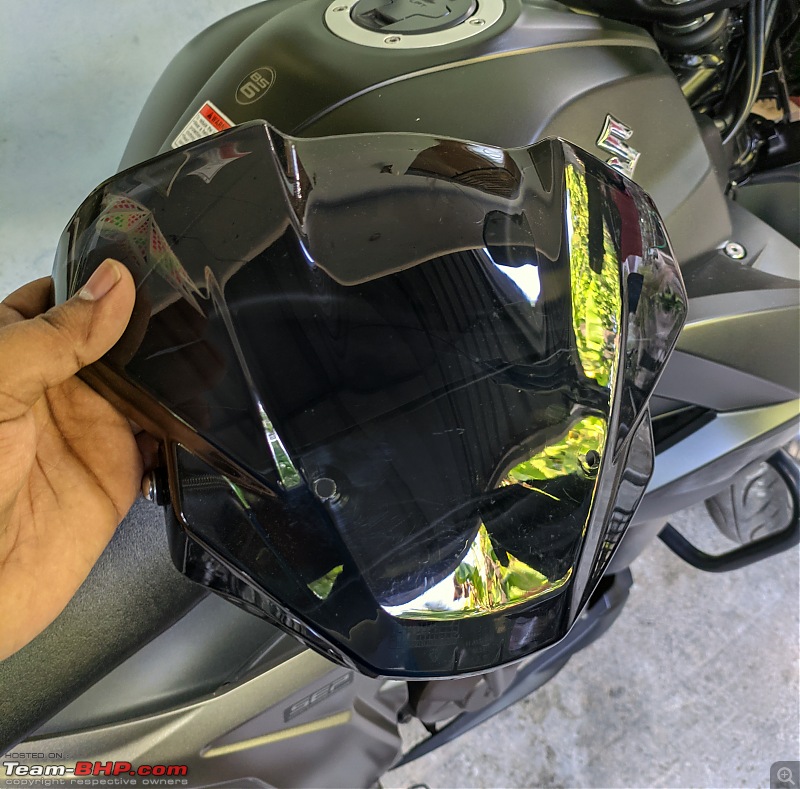
I was looking for a short windscreen for my Gixxer naked, purely for aesthetic purposes. When I bought the bike it already came with a retrofitted Burgman windscreen that was quite big. It was a clean install and I rode with it for a while. But it was creating quite a bit of buffeting due to the size and the rather flat shape. It was never made for a naked motorcycle's airflow.

The Burgman screen
I was looking for possible solutions to replace the big screen with a smaller one so that the buffeting and dirty air were reduced and the front of the Gixxer didn't look so bare and boring. Came across this TVS OE screen for RTR 200s on Amazon. Made some blind calculations on the size and ordered it. It was very affordable at 190INR and it was really well made.
www.amazon.in/gp/product/B08...?ie=UTF8&psc=1
Had to make two extra holes that aligned with the holes on the number plate holder of the Gixxer.
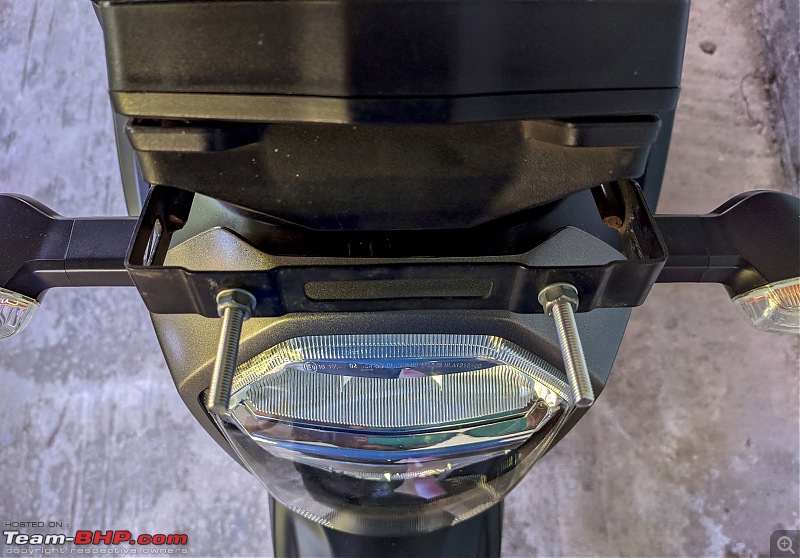
Two long 40MM m6 bolts for extra support and holding the number plate.
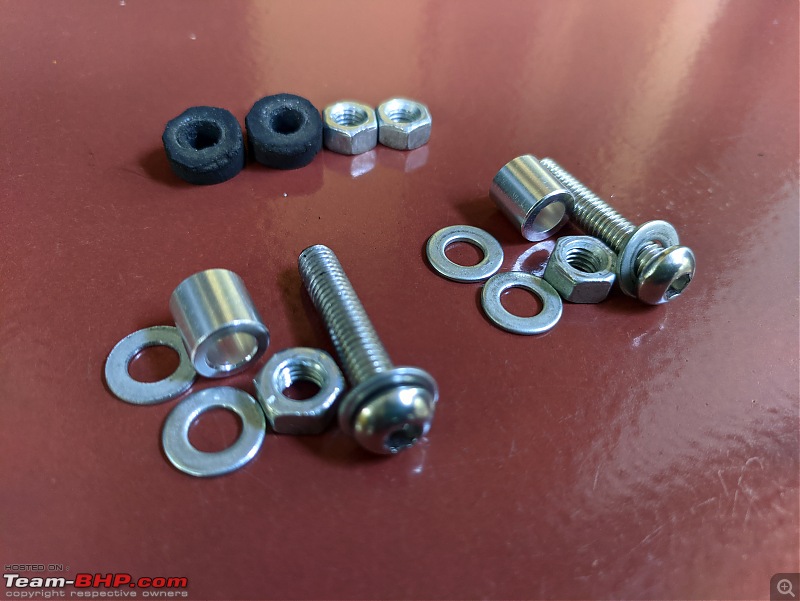
Initially tried to piece the mounting hardware together with the stuff that came with the screen but later changed to these. Two M6 30mm SS bolts and nuts with two M6 10mm aluminium spacers and a few washers. These mount the screen through the holes on the side of the number plate holder. Two rubber bushes that came with earlier windscreen installation to dampen the number plate vibrations.

How it fits. The spacers were necessary as the windscreen was wider than the number plate holder by about 20+mm. This however is a sturdy setup.
How the screen looks after the installation. I'm pretty happy with how it turned out. It looks like it was meant to be there and OE. I have been riding with it for two months now and it is very sturdy and has not vibrated loose. The only negative is the barely visible TVS branding that is noticeable in some lighting conditions.
Few more photos from different angles


Check out BHPian comments for more insights and information.
News
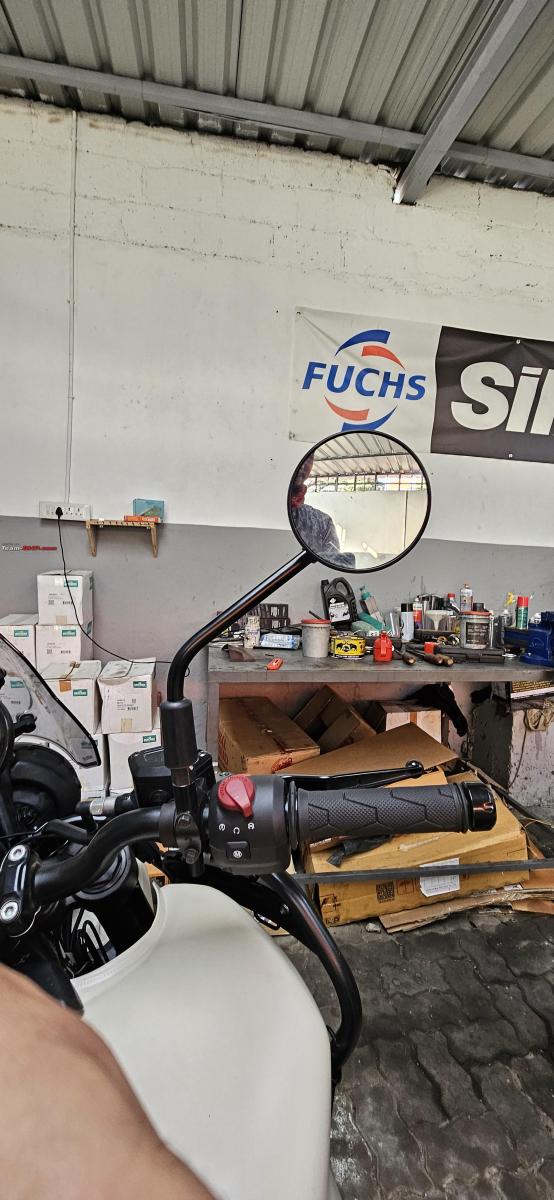
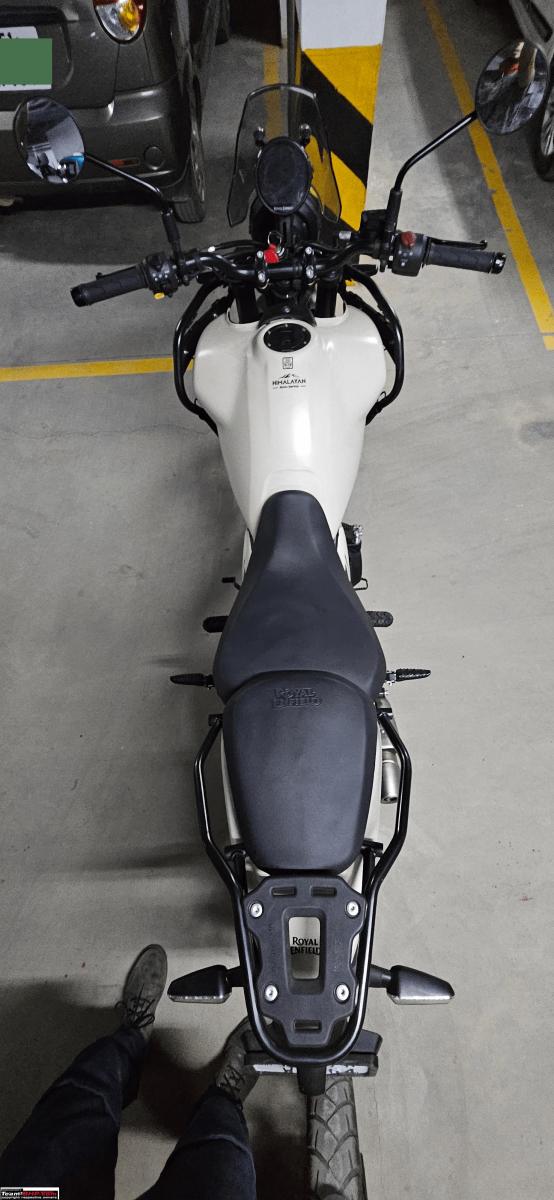
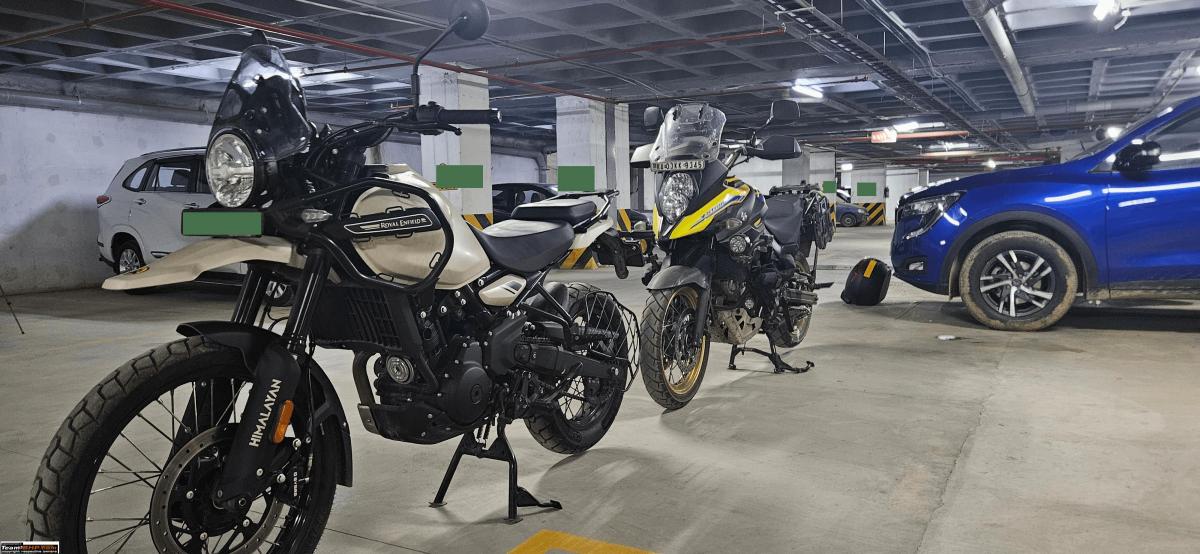
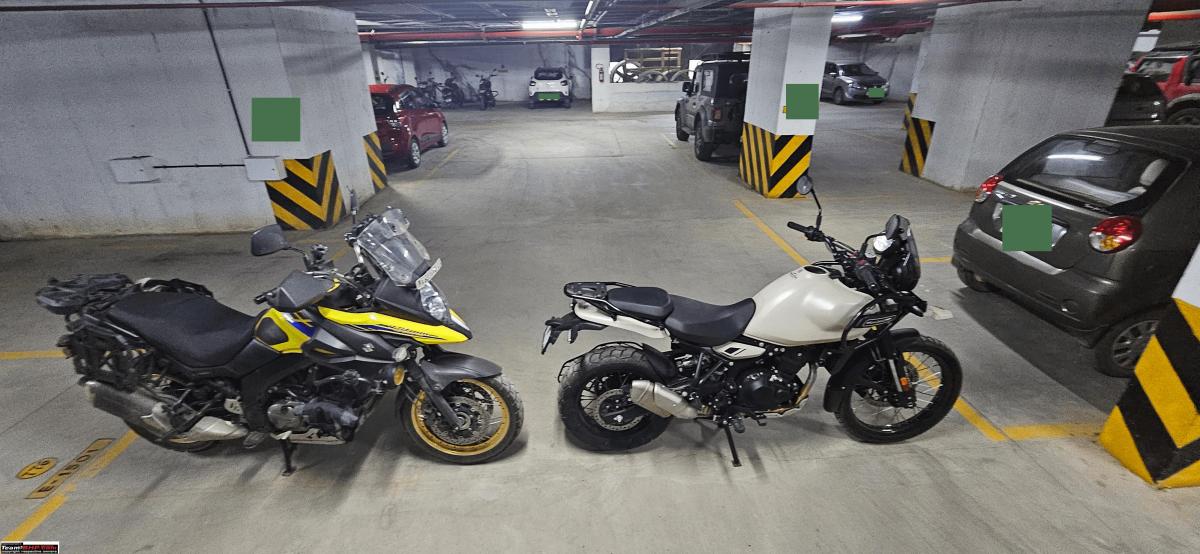
Himalayan 450 mirrors, rider ergos & size comparison with V-Strom 650


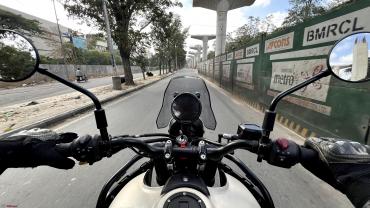
Royal Enfield has made the mirrors far more functional and properly adjustable than those of the Himalayan 411.
BHPian shyamg28 recently shared this with other enthusiasts.
Few observations from me
Mirrors
In general, I feel round mirrors, while they look good, aren't that functional.
But the 450 mirrors actually work well. They also have some sort of anti-reflection thing going on which really helps at night.
On my Himalayan 411, this was the first thing I changed, about 100kms into the ownership.
What I feel is the main difference between them, is how far out the mirrors are on the 450.
Maybe I'm reading into it a bit more than I should, but I feel the 450 ones being a little further out, actually makes it far more functional, in addition to it being properly adjustable now.
Himalayan 411 mirrors.

Himalayan (450) mirrors.
Brake lights/indicators
LEDs on the indicators.

Tail lights default.

With brake lights on.

Turn signals on.

Ergos for a person of height 5.10 and 32 inseam
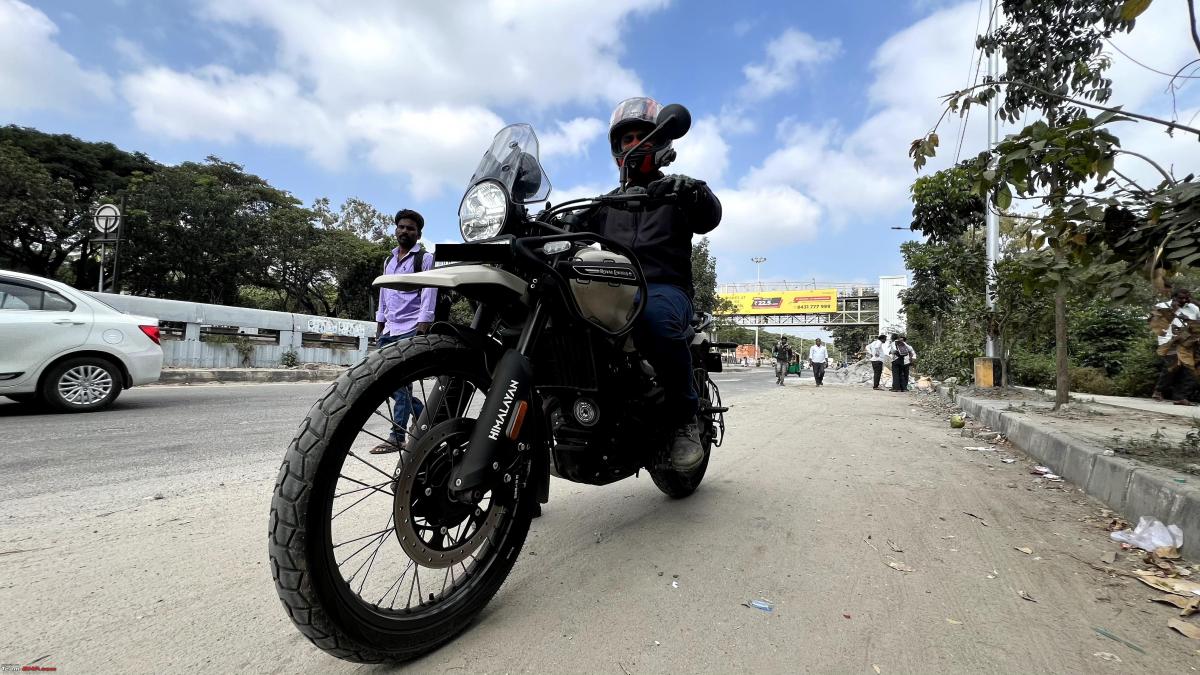
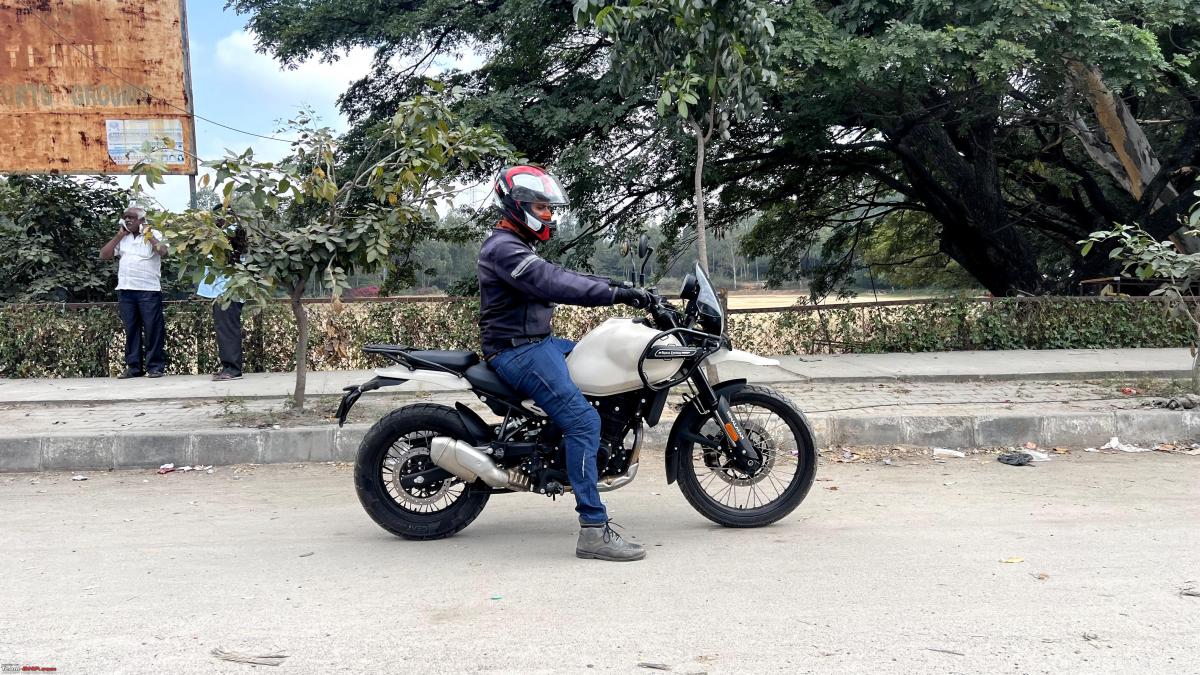


Himalayan vs V Strom 650 in size


Some cool shots my wife took.

Check out BHPian comments for more insights and information.
News
DIY experiments on my Gixxer 250: Suspension, brakes and more

So far I have done about 500kms after the change and I can confirm that the forks are much improved for my weight (90kgs).
BHPian b16h22 recently shared this with other enthusiasts.
Sorry for hijacking Neil's thread. Didn't want to create a separate ownership thread so I'm writing down some of my DIY experiments on my Gixxer 250 here. Thought it would be better if all the info about the 250 twins were available in one place.
O2 Sensor update
Removed the o2 sensor from the exhaust to have a look. Didn't look particularly dirty or damaged. Cleaning the tip was a futile exercise as it made no difference to the fuelling when I plugged it back. So I decided to run the bike without the sensor until I got a new one. It has been about 1000kms of running without the sensor and the bike feels nice to ride. It was a feeling I missed ever since I picked it up back on April 23. The bike still has a buzz when you get into the upper ranges of the revs but it's nothing like before. But it pulls so clean all the way to the top and I absolutely love the power delivery. In fact, I've been having a lot of fun with this thing inside the city premises. The only drawback is the constant check engine light and F1 error (or is it FI) warning on the dash not letting me see the ODO
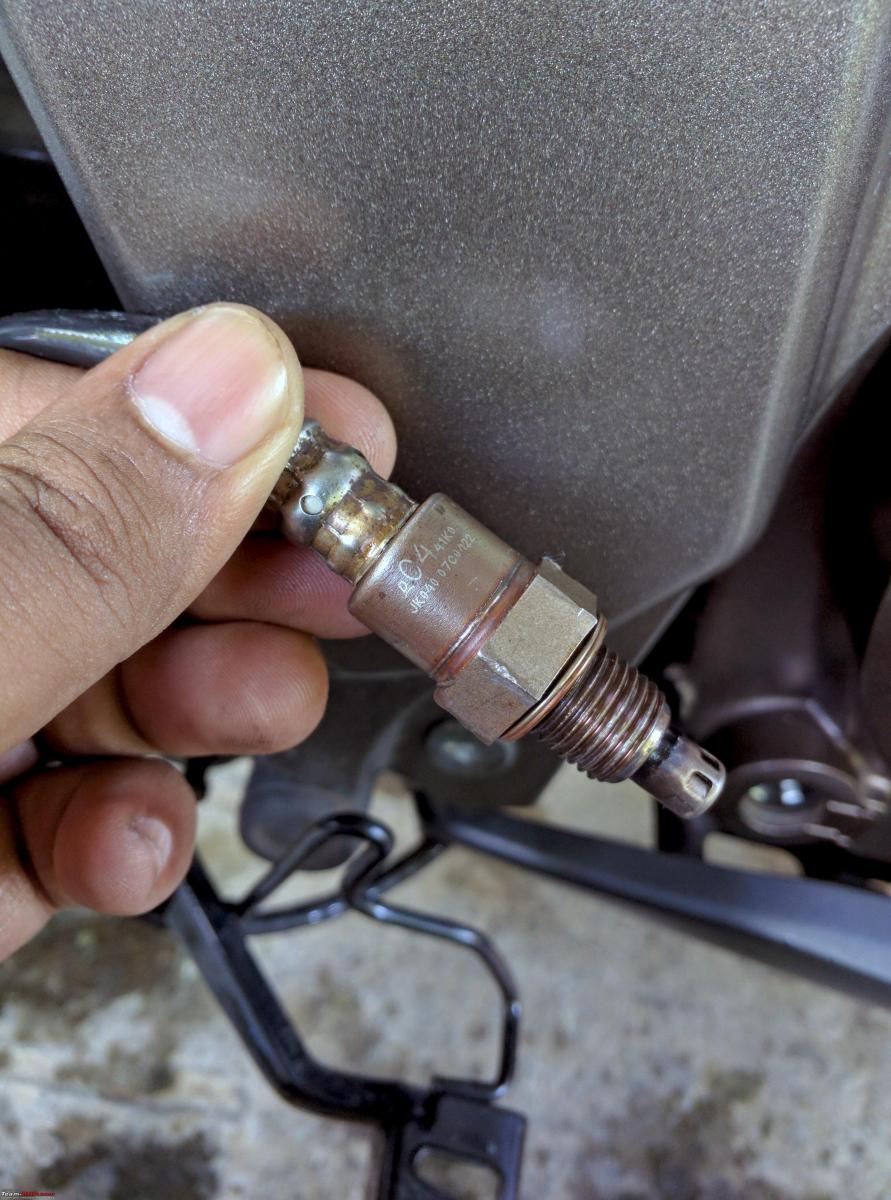
Is it made by Denso? Can't seem to find any manufacturer name on it except a logo that says D.
New brake pads and fluids
Went to the local dealer to pick up the Gixxer 250 front brake pads. They did not have it in stock as expected (250s are rare here). Got the V Strom 250 brake pads. 700 INR for them. They were not 100% identical and the parts number was also different. But it is a straight fit. There was a backing plate sort of thing missing on the Strom pads I bought. Initially, I thought these lacked the bite of the previous pads but they had matching bite after bedding in for a couple of 100kms.

Cleaned up the brake dust and pushed the pistons back with old pads as a spacer. Cleaned the sliding pins and greased them.

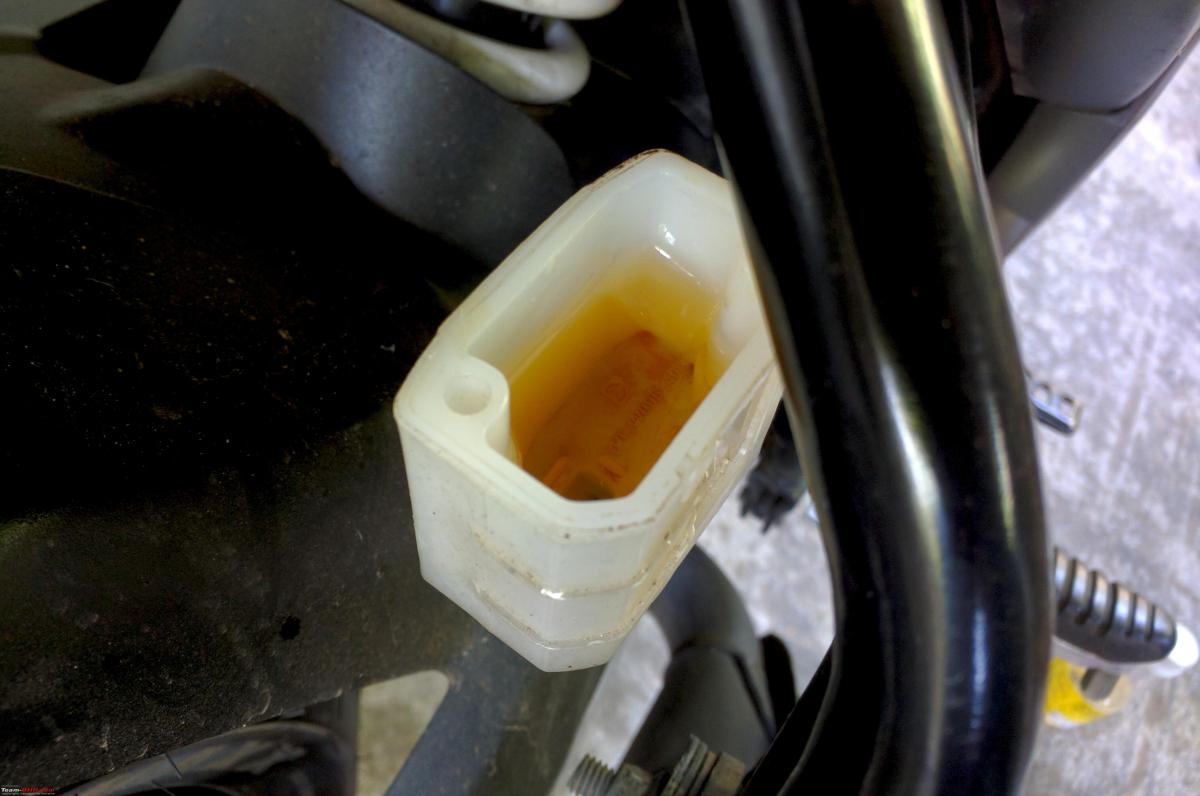
The front brakes were decent but the lever travel was too much. The rear brakes basically had no bite from the day I bought the bike from the previous owner. I don't use the rear a lot but it is nice to have it working properly. The fluid in the rear brake fluid reservoir started to smell bad as well. Bled both front and rear brakes with new Bajaj Dot4 fluid. Front brakes felt good for 4 days but the dreaded spongy feel came back again.
Fork oil replacement and dialing in the fork sag
Gixxers have good suspension from the factory. Not overly stiff and sporty but just enough to have good support for spirited street riding. The bike has run 18k and the forks were starting to feel a little soggy. And I had this long-standing issue of a misaligned front end which was robbing the fun of riding. It was the perfect opportunity to replace the fork oil and make some changes to dial the forks to my liking.
The initial travel of the forks always felt too soft to me and this didn't give me much confidence. There was too much sag. These forks are basic damper rod units and they don't have any kind of adjustability to them to set ideal preload at least. There are no specific preload adjustable fork caps available for these bikes. So I got these 35mm OD, 5mm thick washers to add more preload onto the stock preload spacers.

Taking apart the front end took longer than expected because somebody decided to go King Kong while tightening the right fork cap. His left cap looked pristine compared to the right one so someone was here before. In the end, used the lower clamp as a vice and put all my effort into it to get it off.

Suzuki recommends endurance fork oil in the Spanish service manual I have. There is no mention of any weight grade. The Suzuki Ecstar bottle doesn't have any weight grade on it either. However I found out from a Japanese blog that the G10 Ecstar fork oil they are using in the 250s is a 10w oil. I decided to stick with Suzuki's stuff as I didn't find the compression or rebound damping to be poor.
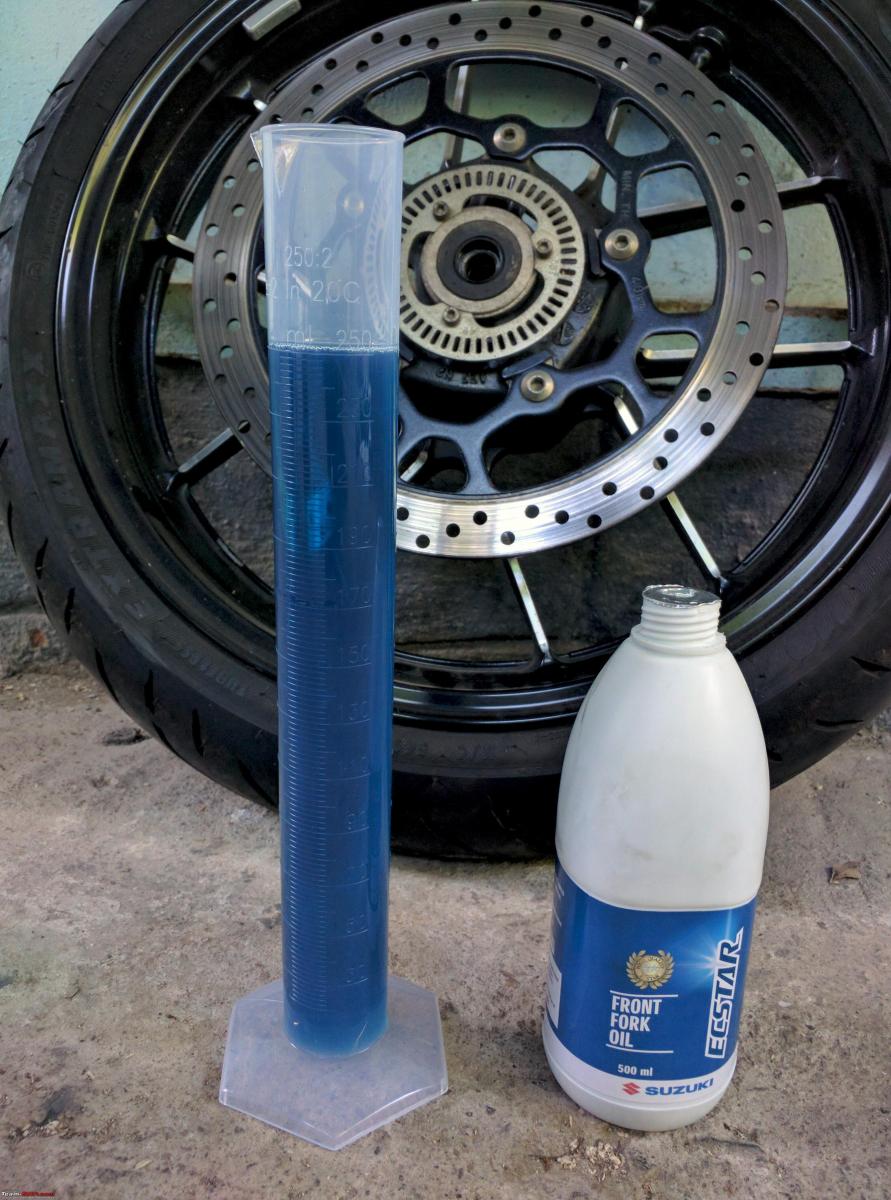
Pepsi blue aka Ecstar fork oil going in
Stock fork oil quantity for the Gixxer naked is 438ml
Stock fork oil quantity for the Gixxer SF is 463ml
Stock fork oil height for the Gixxer naked is 108mm
Stock fork oil height for the Gixxer SF is 112mm
This was news to me. I was under the impression that the forks were identical for the Naked and SF. It seems that there is a difference in tuning. It is probably due to the difference in fork tube length as the SF forks extend almost 2cms over the top clamp to fit the clipons. I had already decided to up the oil height in my forks.
Fork oil height determines the height of the air column inside the forks. The shorter the air column is, the stiffer the combined spring rate. It makes a non linear change in the effective stiffness of the forks (springs + air spring) especially in the second half of the stroke. Found a few articles and a neat graph that explained the effects of oil height.
Fork oil height is measured from the top with springs out and the inner fork tube fully compressed. I decided to increase the fork oil height by about 1.5 cm from stock as an experiment (108-15=93mm).

Made this contraption to measure the fork oil height. It worked pretty accurately for the use case. Measuring the height of the oil is a better method compared to measuring the quantity as the quantity of oil that comes out of each fork leg might not be identical when we drain it without full disassembly.
Springs, washers, and stock preload spacers were put back in. The 5mm extra preload spacer went in over the stock spacer. It was a snug fit inside the fork tube. I started out with a conservative 5mm spacer and might add another 5mm if necessary.

When you fit the forks back, the height on the clamps is different for both the SF and the Naked 250.
For the Naked - 2mm measured from the bottom of the fork cap.
For the SF - 21mm measured from the bottom of the fork cap.

Greasing the steering stem bearings aka cone set
This was not a planned job. While the forks were out to get the front-end alignment correct, I noticed the steering was heavy on both extremes of its sweep. And there was a notchy feeling in the center. Removed the clamps and to my surprise, 3-4 loose ball bearings fell down. I was not expecting Suzuki to use loose ball bearings in the cone set. The bikes I have owned before used a caged bearing setup. It is much easier to take apart and assemble. Anyway carefully collected the bearings that fell down and left inside the race. They were in okay condition. There was not enough grease and some rust was starting to settle. Ideally, I should've replaced the bearings but it was evening and the SVC was closed. And finding spares for the 250s can be a frustrating process. So I cleaned up everything and greased the bearings and then put it back. So far it seems to have fixed the notchy steering. I'll replace the bearings in the near future to be sure
Observations on the new fork setup
So far I have done about 500kms after the change and I can confirm that the forks are much improved for my weight (90kgs) They don't dive too much and I get increased feedback and support from the front end. They have stiffened up a bit more but not enough to make the ride any harsher
I measured the rider sag by Motorcyclistonline's method and it was 45mm. I weigh around 90 kgs. It is a little outside the ideal 30-40mm range but I'll take it. Penske shocks say 35-45mm for street riding but MCN and a few other sources say 30-40mm for a fork with almost 120mm travel. Unfortunately, I forgot to measure the sag before the mod. Probably was much worse before
A short ride to the twisties
Was my first 100+ km ride after a tailbone injury back in 2022 Jan. Bike worked flawlessly and I was able to ride 120-130kms with a heavy pillion after taking constant breaks. The pain didn't play spoilsport too much but it reared its head by the end of it. Gixxer handled the twisties very well with a pillion onboard. Rear preload was on 4th notch but it felt inadequate. The rear shock is a bit of a pogo stick with two heavy persons on it. But then I'm asking too much from a budget naked. It works well with a solo rider

Spongy brakes again
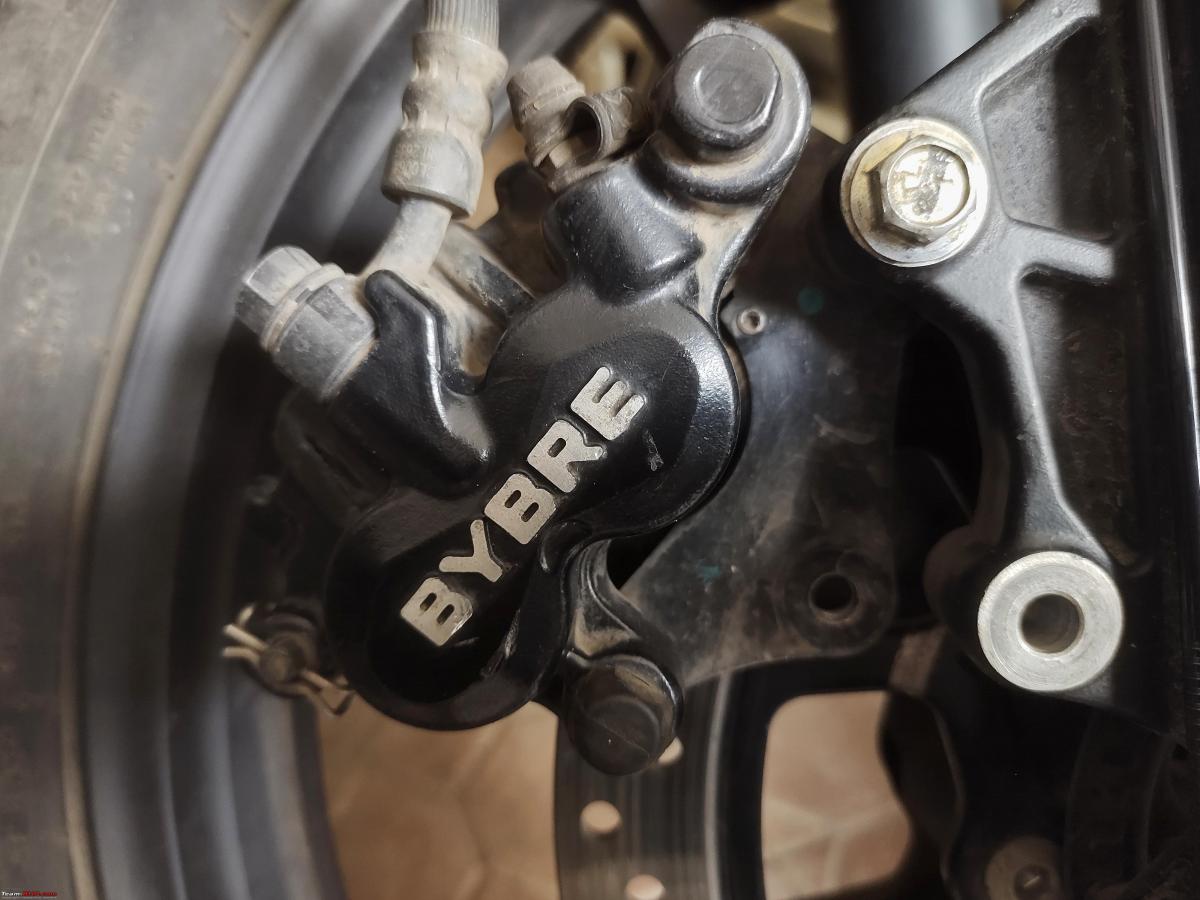
After the ride, the front brake got spongy again. The bike stopped adequately but there was too much lever travel and it felt spongy. I assumed that the air had gotten into the system somehow while taking apart the forks and handlebar. Bled the front brake again but this time with Bosch DOT4 fluid. Double-checked to make sure there was no air in the system. Worked fine for 2 days and the same story again. My friend who owns a V Strom 250 was complaining of the same issue after 4000kms. He bled the system and it felt good for 2-3 days. At this point, it reminds me of my first gen 390's master cylinder. It has probably gone weak which is a Bybre trait from my experience. I'll consider the options to improve or upgrade the stock MC in the future.
Check out BHPian comments for more insights and information.
- Tags:
- Indian
- DIY
- Suzuki
- Gixxer 250
News
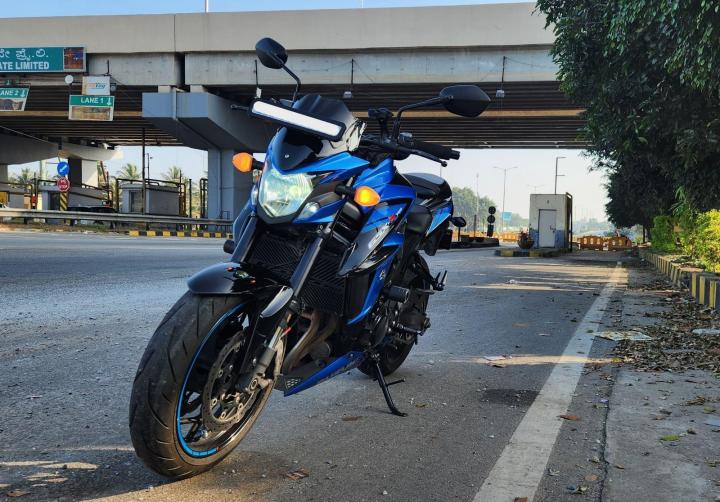
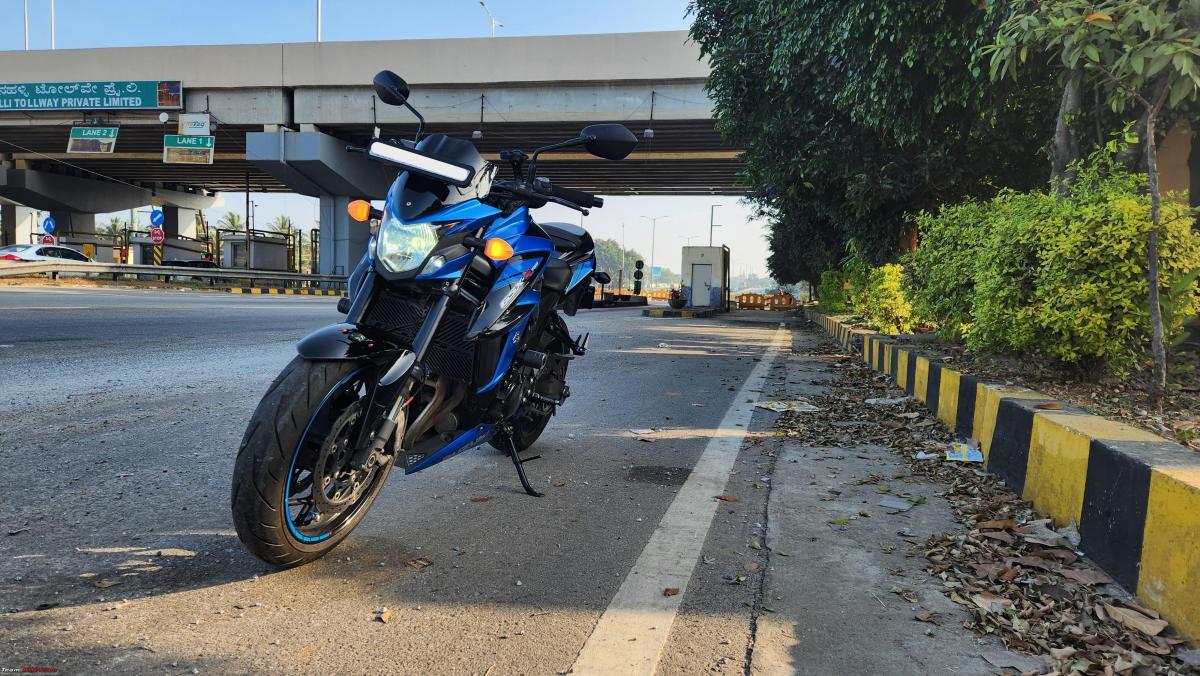
Suzuki GSX-S750 36,000 km update: Upgrading the brakes
Seeing my discomfort with the current spongy brake setup, Hafiz suggested fitting a Gen-3 Hayabusa master cylinder onto my bike.
BHPian TRR recently shared this with other enthusiasts.
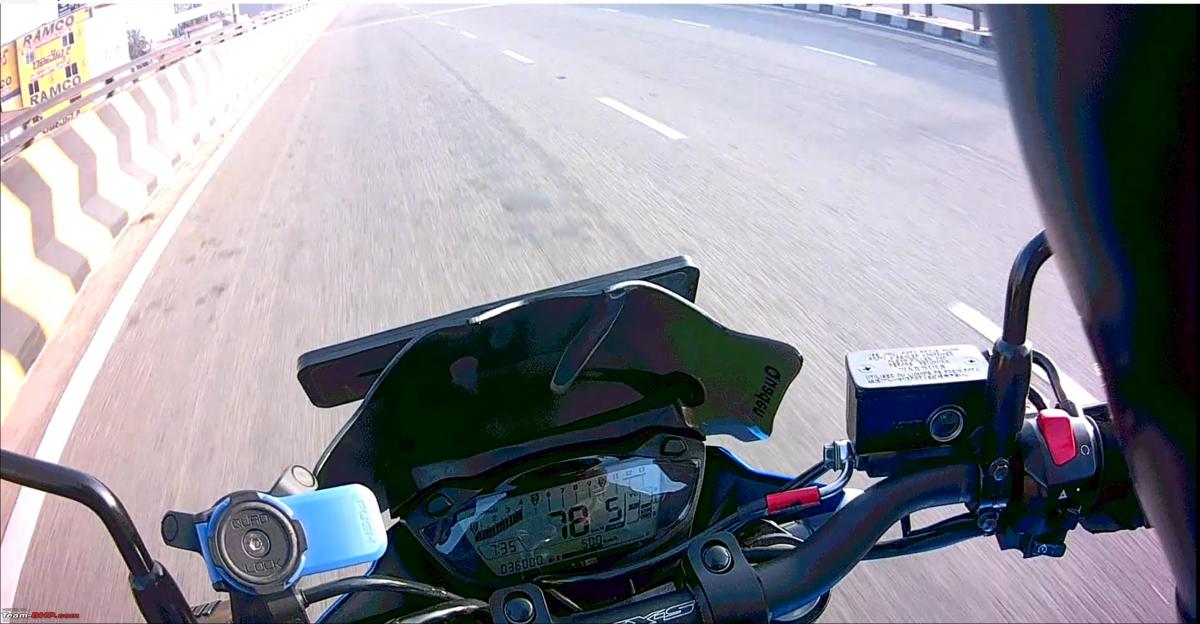
Been a long while since I last updated this thread. The Odo is at 36,000 kms now, so I’ve managed to put 24,000 kms on the GSX-S since I got it in August 2021. Not as much as I would have liked to, but it’s no garage queen at least.
Couldn't stop anywhere for the 36000 kms photo, but got this grab off my helmet cam.
The Odo is climbing up more slowly now since I don’t wish to subject the bike to the ORR traffic every day. My new workplace offers a cab facility and that’s the preferred commute option on most days. Still, the bike doesn’t complain. Must be that Japanese reliability in its blood, for it still starts without a fuss when wheeled out in those wintery cold Bangalore mornings. With work and personal commitments piling up, the GSX now lives the life of a stereotypical Indian superbike. Head out on weekends for a 150-200 km breakfast/coffee run, head back home, get washed, and sleep under the covers for the weekdays. Only when I know that traffic will be minimal or when I plan to return from work late in the night does the GSX get to do the office commute.

In the midst of it all, got the 6000 km oil change done recently. Took the bike to Hafiz and had a routine service done in under a couple of hours. Fresh oil and oil filter, brake cleaning, coolant top-up, and a thorough inspection all around. Nothing out of the ordinary to report on this front. Didn’t get many pictures of this. The old oil wasn’t fully degraded, surprisingly. Probably attributable to the fact that the bike now does a 40-60 ratio of commute-highway kilometres, with even those commutes being low-traffic, late-night runs.
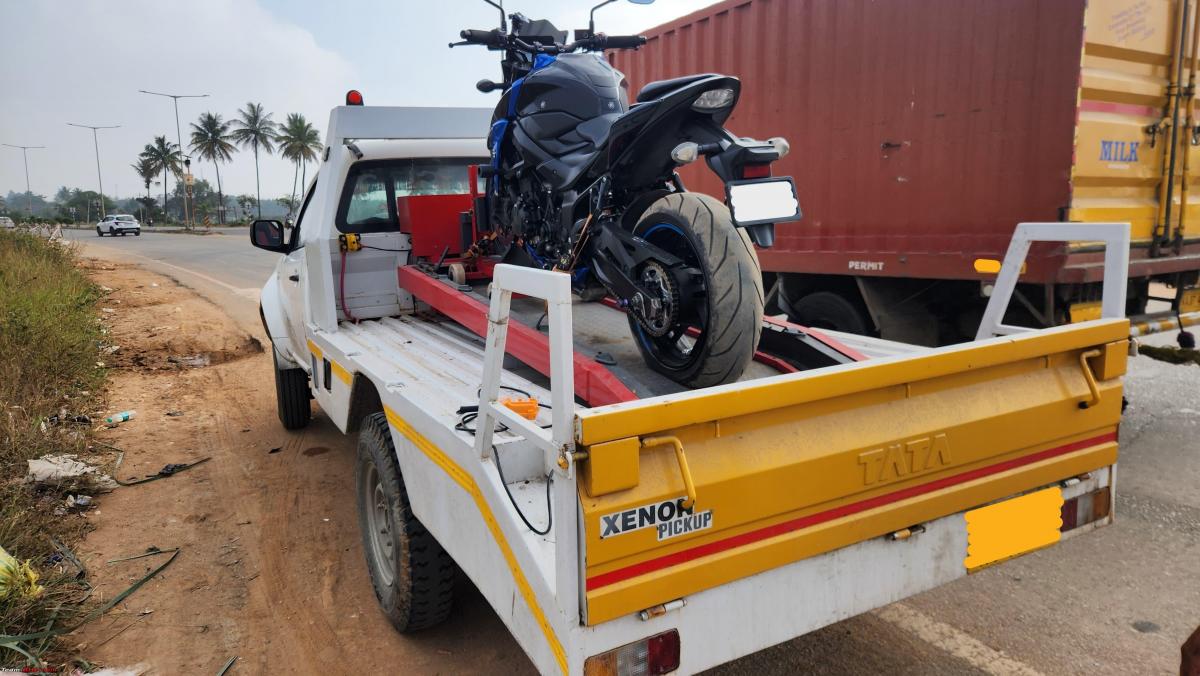
The Vredestein NSs suffered their second puncture this last weekend on a small jaunt out of town. Was stranded on the highway with no puncture repair guy around and had to call in a tow truck to get the bike back inside the city. Got it plugged in, but learned my lesson after this expensive tow truck ride and now have a puncture repair kit and air compressor handy with me to carry on any ride outside the city.
More goodies have been procured for the bike through my brother in the UK. These will be with me once he flies down this month's end.
Sintered front brake pads from Brembo. Found these on Omnia Racing Italy for the same price as a set of EBCs here in India. Had them shipped to my brother. The current EBCs on my bike will last for another 2000-3000 kms and the Brembos will go on once they’re done. With these being as cheap as they are, I plan to have them brought down with my brother once a year or so, whenever he visits.

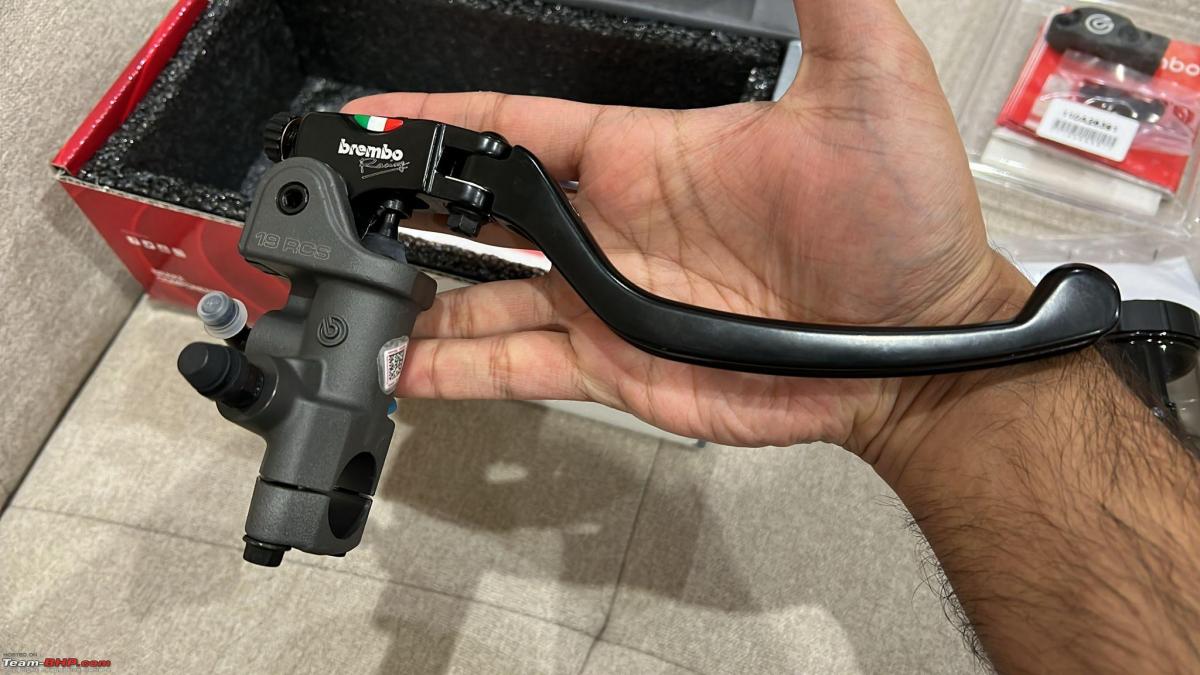
And the final component of my planned braking upgrades - the Brembo RCS19 brake master cylinder. Purchased these from Carpimoto along with the Brembo mirror mount clamp and again, had them shipped to my brother. These are the non-corsa Corta version and were purchased as a set with the brake fluid reservoir and mounting kit included.


This is one thing I consulted with Hafiz closely before pulling the trigger. Seeing my discomfort with the current spongy brake setup, Hafiz suggested fitting a Gen-3 Hayabusa master cylinder onto my bike. This would be a radial master cylinder and would allow me to gauge whether changing to a radial setup would give me the feedback I sought. He had a spare Gen-3 Hayabusa master cylinder with him and offered to let me borrow it for a while. Took the bike to him and had this master cylinder fixed, but the accelerator cables coming out of the right handlebar controls were fouling with the brake lever. He managed to angle the lever a little downward to avoid the cables, but, with the bleeder valve sticking towards the handlebar, there was no way for me to fix the right-side mirror with this setup. I was unwilling to continue with this, but Hafiz suggested I take the bike around the block for a small bit gauge the feedback, and then pull the trigger on the RCS19s.
The radial master cylinder from the Gen-3 Hayabusa

The stock axial master cylinder removed
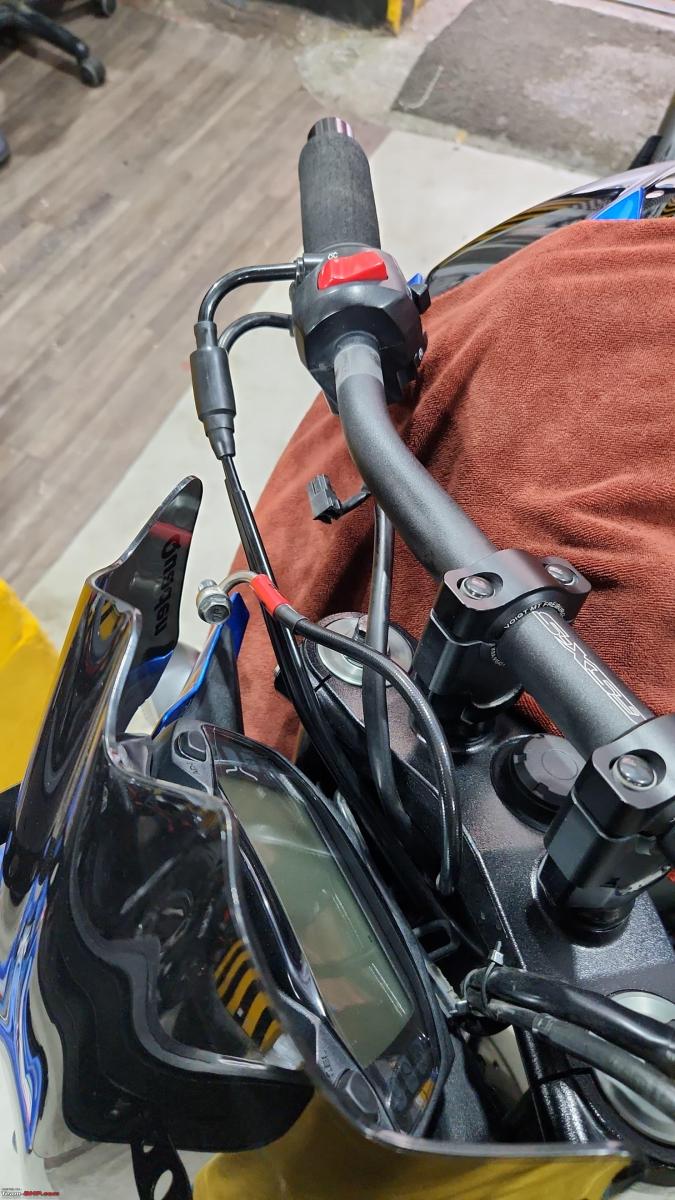
The radial master cylinder fitted
The difference in brake feel with this radial master cylinder was night and day. I suddenly had the instant, precise feedback that I had been searching for. It was incredible how precise the front brake felt with this new setup. Plus, I could easily do one-finger braking with full confidence now. Went back to his shop with the decision to buy the RCS19 now cemented. Hafiz fixed the stock master cylinder back along with the right-side mirror and from then, my wait had begun. Hopefully, the fitment of the RCS19 won't throw up any surprises
The next post will mostly be after all these parts go on the bike. This upgrade should close the chapter on the brakes front since the only thing left will be upgrading the rotors, which I have no intention of doing. In fact, with these parts fixed, I’ve decided to pause any further upgrades for a bit and enjoy the bike as it is.

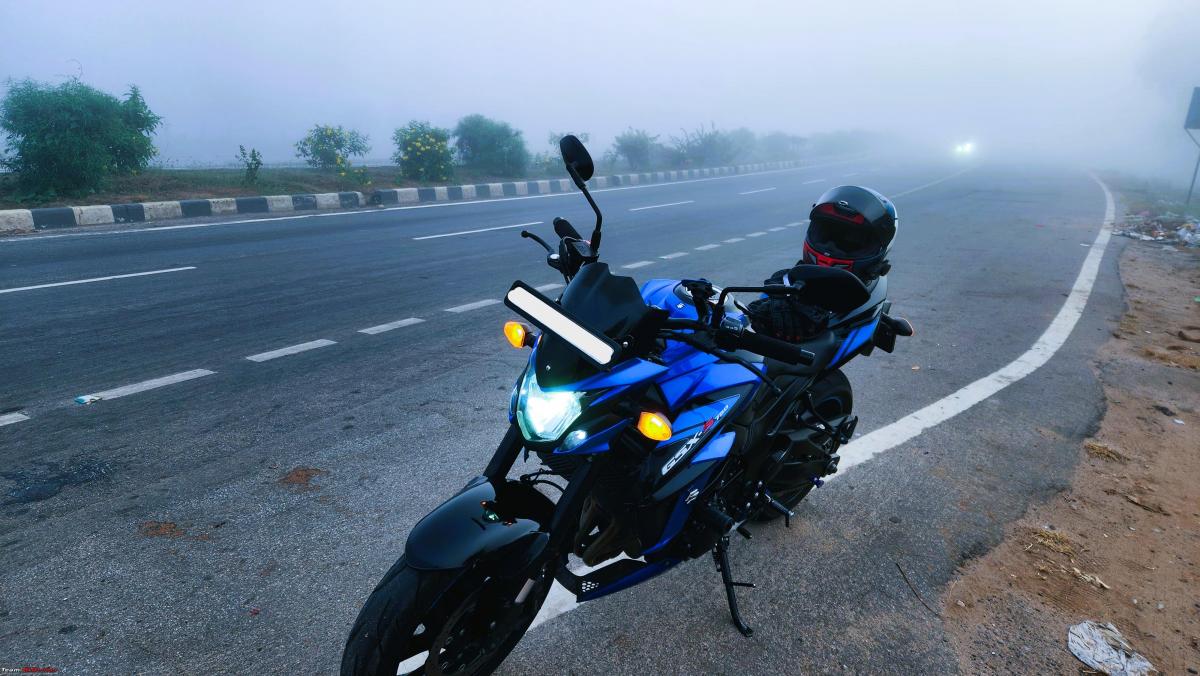
It’s been 2.5 years since coming into the ownership of the GSX-S now. I still pinch myself when going to the office parking lot and finding this machine waiting for me. There are many good things in life, but that inline-4 singing away to glory on the late-night sprints to home is something special. It plays the perfect stress-buster after those long days at work. And the weekend runs outside the city, while short, just make life so much better, especially with Bengaluru's current weather. Sure, the GSX-S isn’t the most advanced, most powerful nor the most expensive bike out there. But cutting through the winter fog on the outskirts of Bangalore with the music from the SC-Project reverberating inside my helmet, I am left pondering if there is any better way to immerse oneself into the superbike dream
Check out BHPian comments for more insights and information.
News
How a simple DIY on my Suzuki V-Strom 250 led to a visit to a mechanic

For a few seconds, I was clueless as to why the motorcycle kept shutting off. All I did was replace the air filter.
BHPian sukiwa recently shared this with other enthusiasts.
Sharing a few updates on bike maintenance; some unscheduled, some corrective and some proactive.
Front Brake:
While heading to nearby country roads for an outdoor shoot of a Ducati Multistrada, I noticed that the front brake wasn't that effective and the lever was going all the way in. Once I reached the shoot location, I realised the bottom bolt of the front caliper had gone mostly due to numerous speed breakers on the way or something else. BHPian abhi_tjet joined shortly and he rightly opined to find a nearby mechanic before heading to the photoshoot.
We could locate one quickly and I told him what needed to be done i.e. push back brake pistons and fix the caliper bolt. When he was fixing 2nd bolt, he noticed that the threads on the brake plate had gone away and that could be the reason the bolt was lost on the way. I asked him to tighten only the top bolt and I decided to keep the front brake as minimal as possible. All of this led to a delay of 20 minutes in a photoshoot.
We finished the outdoor shoot as planned and on the return journey back home used only the rear brake. That ride was a revelation in some ways. Many muscle memory actions had to be changed. Be it applying the front brake while getting onto the bike to not using the front brake at all or which foot to put down at a stop.
Sat evening traffic meant I had to be slow even on the NH48 bypass. Stopping the bike only on the rear brake was a challenge, also showed the difference between a single-piston caliper and a 2-piston caliper.
Switch over to the next working day and visit to Suzuki service center. As always, the brake plate wasn't in stock and it had to be ordered after checking the parts catalog with the spare parts person. After a gap of 2 weeks, I got the part, also picked up a set of front brake pads.
Amount paid, Brake plate/bracket(part: 59351-34J00-000) Rs. 329; brake pads (part:59140-34810-000): Rs. 584.

New Brake plate with new caliper bolts

Worn out threads of old brake plate due to oversized/untreated bolt
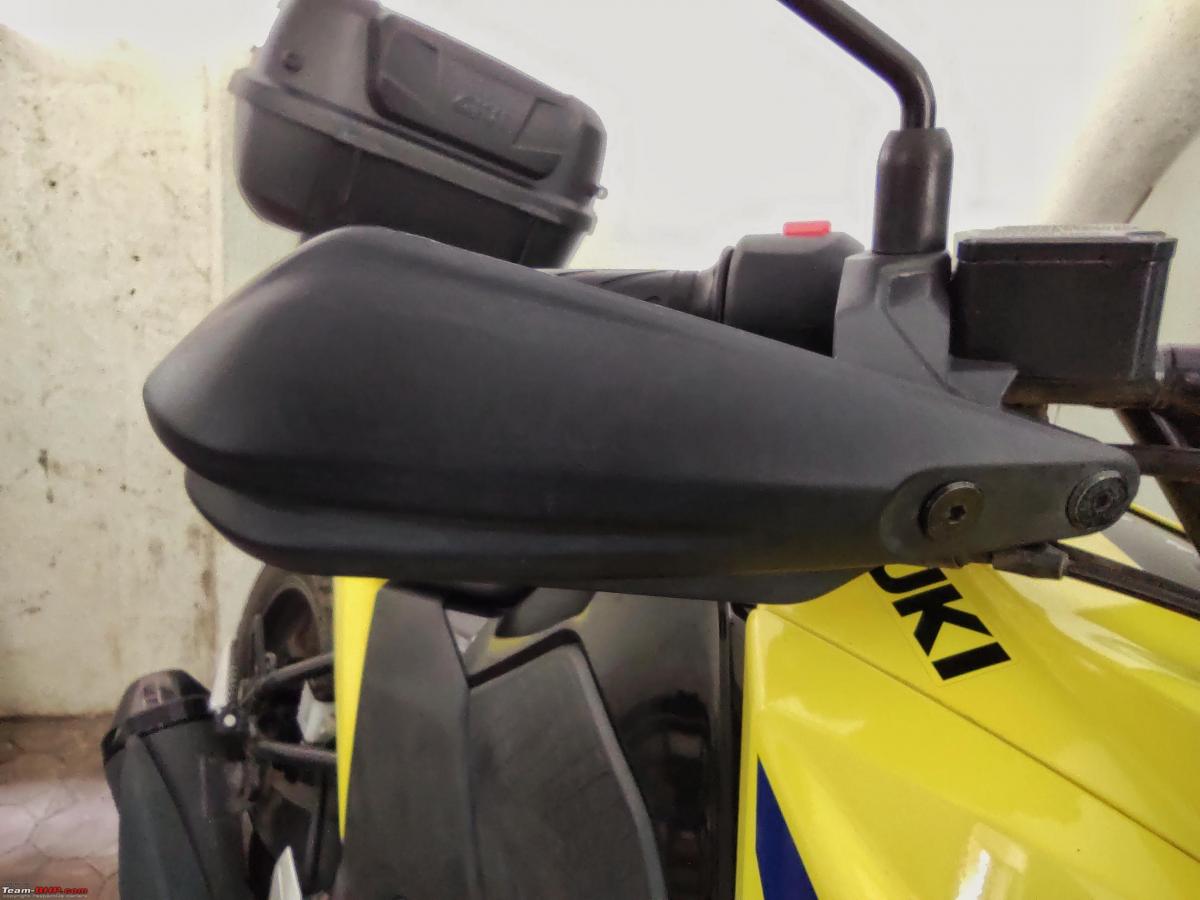
Knuckle guards:
After checking waspune's SX250, I realised that knuckle guards had been fitted upside down. Knuckle guards and mirrors are fitted at dealer level. When I started to remove the mirror and knuckle guards, I realised it wasn't a simple swap. 2 separate parts form a knuckle guard, one near the mirror can't be swapped, but the guard can be swapped. I had to use a 5 mm Allen key and a 10mm spanner to separate out these 2 parts.
Before

After


Knuckle guards have L & R markings similar to mirrors, wonder why the dealer person made this mistake. Luckily no such mistake on mirrors.


Air filter: Recommended change interval is 15,000 Kms, I thought it would be better to change a bit early. I had asked for an air filter(part no. 13780-41K00-000) when I visited the Suzuki service center for the Brake plate. The air filter is shared with Gixxer 250 and still, it wasn't in stock (shocking for a wear & tear part) and had to be back-ordered.
I picked it up after a couple of weeks for Rs. 165. The air filter is situated below the rider seat, so both seats need to be removed and then the left frame cover (refer to pages 3-13 of the user manual). The air filter cover has 5 screws (refer to pages 3-25 of the user manual), 3 inside a tubular frame, and 2 outside of the tubular frame. The wiring harness blocks the removal of the air filter cover and needs to be lifted.


New and old air filter, odo at 10,951 Kms.
Drama post air filter change: After changing the air filter, I switched on the ignition for no reason, it worked as usual. Next day morning while going to the office, bike was starting and switching off after slotting gear. I was a bit clueless for a couple of seconds, then I realised it was the gear position sensor.
Wire passes behind the left frame cover Allen bolt, I felt the wire got pinched while tightening the Allen bolt. I removed all riding gear and switched to Innova to go to the office. That evening opened the left frame cover again and checked the path of the gear position sensor wire. It wasn't pinched at Allen bolt, a good distance away from it. I went up the wire path and noticed this connector next to the battery was a bit loose.

Here is a photo that I clicked on the previous day while changing the air filter.

Removed it and pressed it hoping this would do the trick. Surprisingly, this connector doesn't produce a click sound. No luck, bike starts in neutral and switches off. Bit frustrated with myself and at another mess at a DIY air filter change, facepalm moment. I decided to wrap things up and left the frame cover the Allen bolt started slipping, further in addition to the frustration. I was using an Allen socket so no question of L L-shaped key not slotting correctly and making the bolt head slip.
Next couple of evenings went into trying to remove the Allen bolt, one of the unsuccessful attempts was cutting a slot into the bolt using a hack saw.
Finally, I decided to take the help of professional tools at nearby known centers. My initial choice was Excel Auto a couple of km away. Surja suggested trying MotoXcellence. I pushed the bike 50% of the distance and on inclines finally sought the help of a mechanic for pushing the bike with his leg. On reaching the service outlet, got to see that it's run by the son of late journalist Dilip Bam.
I explained to the mechanic what had happened, he was sure of using the impact driver to remove the Allen bolt. On the gear position sensor, I told him that while taking out the air filter cover, some wire got pulled and hence connector isn't getting the needed signal. I also asked him to remove the front sprocket cover and get it cleaned. 4 hours later, the mechanic called to say that the problem had been resolved. He even installed another Allen bolt and as suspected one of the wires had to be pushed back into the connector to make things work. Service amount Rs. 300.
Sigh of relief in the end. Surja warned me to avoid attempting DIY alone henceforth. Mostly I have been applying more torque than needed and breaking things.
Next post on accessories update.
Check out BHPian comments for more insights and information.
News
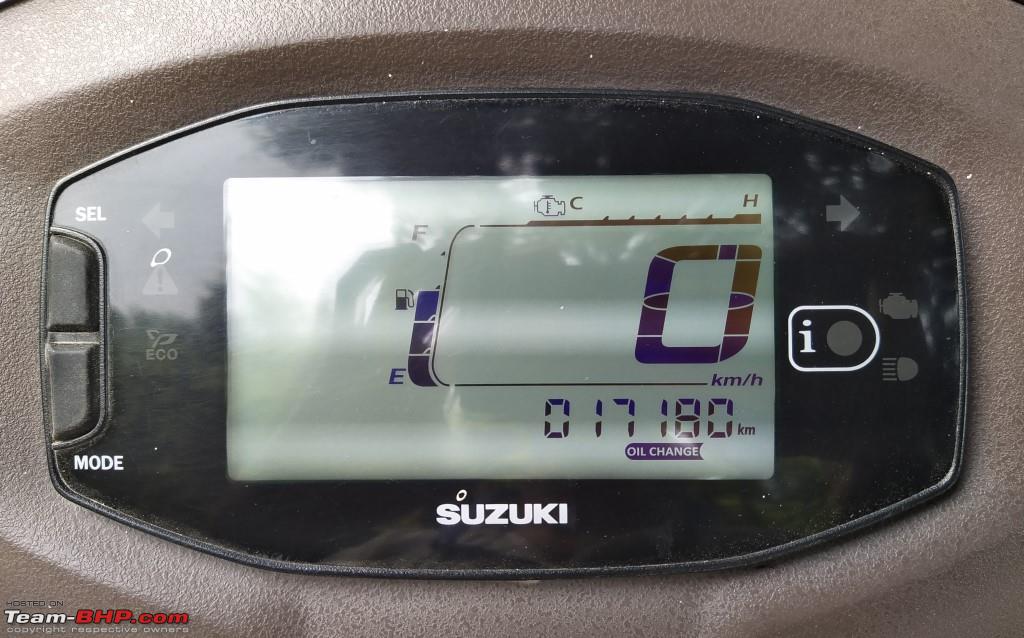
1.5 years with my Suzuki Access 125: Likes, dislikes and problems faced

During this time, I clocked over 17,000 km and the fuel efficiency has been around 50 km/l.
BHPian JDMBOI recently shared this with other enthusiasts.
Purchased
Purchased in May 2022. It has been 1.5 years. Cost- Rs 1,03,000 (Top model) in Sonipat, Haryana.
During Delivery

Recent picture

Other scooters considered
Activa and Jupiter. Selected Access as we have old generation access (2012) (Review link - LINK (11 Years with a Suzuki Access 125 | Ownership Review) ) trust factor, good service centre relation, good acceleration and smooth ride.
Odometer Reading
17180
- Daily Running - 50 KM ish
- Mileage 50 KMPL (Not tank to tank)
- Tyre
- Front - 90/90 - 12
- Rear - 90/100 – 10
- Engine - 4- Stroke, 1-Cylinder, Air Cooled.
- Brakes - Front - Disc. Rear - Drum.

Likes
- Acceleration - Less effort to get going from a complete stop and have good power throughout.
- Seat - The seat is wide and soft and provides a comfortable ride for both occupants.
- Suspension - Ride quality is good, not stiff as old generation access. It absorbs bumps and goes over speed breakers easily.
- Disk brake - Appreciate them over drum brakes.
- Lock - Love the locking mechanism of access plus they provided a button for shutter lock whereas in the old generation you have to do it manually.


- Ground Clearance - It's ample, no problem at all.
- LED headlight- Throw is good.

- Mobile Charging - Would come in handy when running low on power. Never used it though.

- Exhaust Cover - Exhaust pipe has a cover.

- Storage - It is wide and deep.

Dislikes
- LED Headlight - LED lights don't go well with Fog. I find it difficult to see with white LED light. (You see more when the light is OFF compared to when it's ON)
- Key - The key can only be inserted from one side only, not upside down.
- Combi Brake - Not a fan of them, I feel less confident with new access. (Maybe I am accustomed to old and use new access occasionally)
- Fuel cap - Hate the lock mechanism. Have faced problems many times. (more on that below)

- Button quality - The button quality (Horn, turn signal) provided is a downgrade from the old generation.
- Fuel pump - Fuel pump noise is high (when you turn on ignition it can be heard) but it goes away after 2-3 seconds.
- No headlight button - Can't turn off headlight.
- Poor design - Not a fan of new access prefer old design (Subjective)
- Protection bar - It protrudes more and covers the side footrest area plus the footrest is little inside to my liking.

- The small foot ride provides good comfort but I don't like this design.

- Useless side view mirrors - The Chrome mirrors provided (with the top variant) are useless, can't see a thing.
- Digital Cluster - Call me old school but I prefer analog over digital.
- Fuel - Total fuel bars are 5. As it is direct injection, you have to keep an eye on the fuel level (We were told to keep at least 3 bars of fuel and not to fill above 4 bars by the sales executive as a low level of fuel means the fuel pump has to work more and may lead to pump failure and then possible engine damage too) I wasn't happy, exchanged few words with the service and sales guy because this kind of thing should be told before purchase)
Things I want
- Pass button
- Headlight Button
- Fuel cap location under the seat
Service Cost
Always got it serviced at an authorized service centre. Applied for AMC card (Rs 950 ish) as daily use is more. It includes a discount on parts, labour charges, 4 extra washing and a few more items.
Problems faced
First
Have faced starting issue. Sometimes it won't start (battery is good) IMO it has to do something with the engine kill switch. Was testing the switch for educational purposes and it would not start. What I did?
- Started it using self-start.
- Pressed the engine kill switch (after waiting for 5 seconds)
- Tried to restart it with self start, it cranks but won't start.
- Turned off the ignition and waited a few seconds, turned the ignition to ON, tried starting it, still no luck. (Did this step 2 more times)
- Finally decided to use kick and it started after 2-3 kicks. weird eh! Lesson learned don't use engine kill switch.
Second
Fuel cap - Faced problem multiple times with the cap (not closing).
- Within a few months of purchase, encountered a problem (fuel cap not closing) went to the service centre and they said it working fine.
- After a few more months faced it again went to SC again, told them to change it under warranty, they said they are going to call a Suzuki engineer to take a look, he would come after a week and would decide whether to change it or not (was unable to go when engineer came)
- In September 2023 had a devastating experience closing the stupid cap at Petrol Station. Went again to SC and strictly advised them to do something (Was given an excuse, Sir we told you to come when an engineer was available but you didn't) I checked other Access scooters too at the SC and the same problem on them, looks like it is in all new Access. I asked them to change it but they said you will have to change the front lock too (Expense out of our pocket). After all WD40 was applied, now it's somewhat easier to close it. Looks like need to apply oil to the lock every month.
Parts that need replacement
- Tail light has developed cracks in 1.5 years.

- Turn signal switch needs replacement.
- Rear tyre will need replacement around 20K KM.
Ride was dirty, my apologies.
Check out BHPian comments for more insights and information.
- Tags:
- Indian
- suzuki access 125
- Suzuki
News
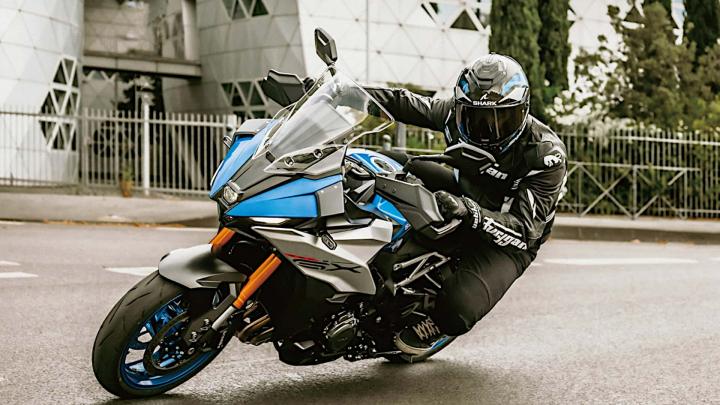
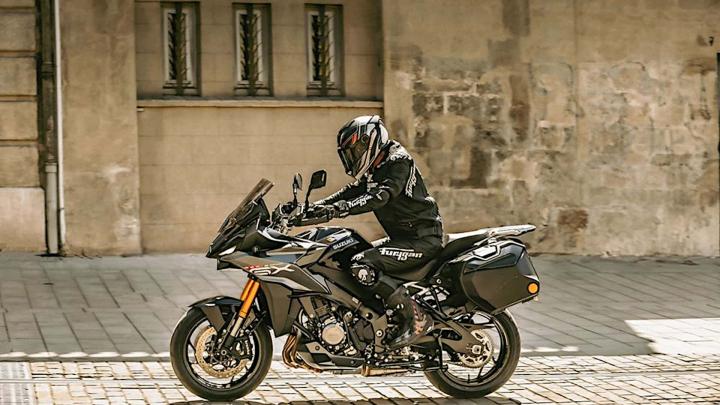
2024 Suzuki GSX-S1000GX globally unveiled


Pricing of the new Suzuki adv-tourer will be announced at the time of launch.
Suzuki has introduced the all-new GSX-S1000GX motorcycle. The new offering is said to combine the sporty character of the GSX-S1000 with adventure-touring capabilities.
The 2024 Suzuki GSX-S1000GX will first go on sale in the European and North American markets and is slated to launch in December 2023. Pricing of the new Suzuki adv-tourer will be announced at the time of launch.
The new GSX-S1000GX comes with a host of features and tech. It's also the first product from Suzuki to feature the company's Advanced Electronic Suspension (SAES) system - which adjusts damping based on inputs like vehicle speed, road surface and braking. The motorcycle also gets Suzuki Road Adaptive Stabilisation (SRAS), which adjusts SAES based on the road surface to give riders the confidence to take it on any surface.
Apart from the two main features, the motorcycle also comes with a host of rider assistance systems and equipment. Some of these include Drive Mode Selector Alpha, Ride-by-wire throttle, up and down quick-shifter, Suzuki easy start, smart cruise control, low RPM assist and plenty more.
The Suzuki GSX-S1000GX rides on 17-inch alloy wheels with tubeless tyres. The motorcycle tips the scale at 232 kg and has a ground clearance of 155 mm. The motorcycle is expected to borrow its engine from the GSX-S1000, although it could be tuned differently to suit the character of the bike. Suzuki is yet to announce the exact specifications of the GSX-S1000GX.
The new adventure-tourer from Suzuki will be available in three colour schemes: Metallic Triton Blue, Glass Sparkle Black and Pearl Mat Shadow Green.
- Tags:
- Indian
- Suzuki
- International
- GSX-S1000GX
News
Suzuki Motor Corp to raise its stake in Maruti to 58.19%
Maruti Suzuki to acquire 100% of equity shares of Suzuki Motor Gujarat for Rs 12,841.1 crore.
The Suzuki Motor Corporation (SMC) is increasing its stake in Maruti Suzuki from 56.48% to 58.19%. Maruti has also approved the deal to acquire a 100% stake in Suzuki Motor Gujarat (SMG).
According to a statement, the Board of Maruti Suzuki India has approved the issuance of 1.23 crore equity shares of face value of Rs 5 each to Suzuki Motor Corporation at a price of Rs 10,420.85 per share.
The board of Maruti Suzuki India has executed the share purchase and subscription agreement to acquire 100% of equity shares of SMG owned by Suzuki Motor Corporation for Rs 12,841.1 crore.
In August, the company’s board had approved the issuance of shares to SMC on a preferential basis for the acquisition of a 100% stake in SMG. With this acquisition, Maruti Suzuki aims to reduce complexity and consolidate all manufacturing-related activities under one entity.
Source: HT Auto
News
Broke my V-Strom 250's caliper bolt while changing the front brake pads

It snapped into two while I was tightening it down. Its bottom part got stuck in the caliper assembly.
BHPian sukiwa recently shared this with other enthusiasts.
Prior to the Saturday ride in July, I had checked the brake pad thickness and it looked more than 1mm without taking out the calipers. During the 200 odd kms ride, I didn't notice anything wrong with the front brakes. Just as I was getting back into the apartment parking lot, I could hear screeching front brakes. I quickly checked and the pads were thinner than the previous day. I parked the bike and later in the day took out TVS Jupiter to head to the Suzuki service center to buy front brake pads. Got the set (Part no. 59140-34810-000) for Rs. 584, manufactured in Mar '23.
On Sunday noon, decided to only check the brake pad thickness to decide if it could be ridden to the service center or not. In the morning, had checked out Ari Henning's video on brake pad change with no intention of changing pads on the same day.
Went down to the parking with most tools, 1/2" socket set, and new brake pads. Removed both axial bolts and this was the sight. It had gone beyond the limits, and should have replaced the brake pads even before the Sat ride.
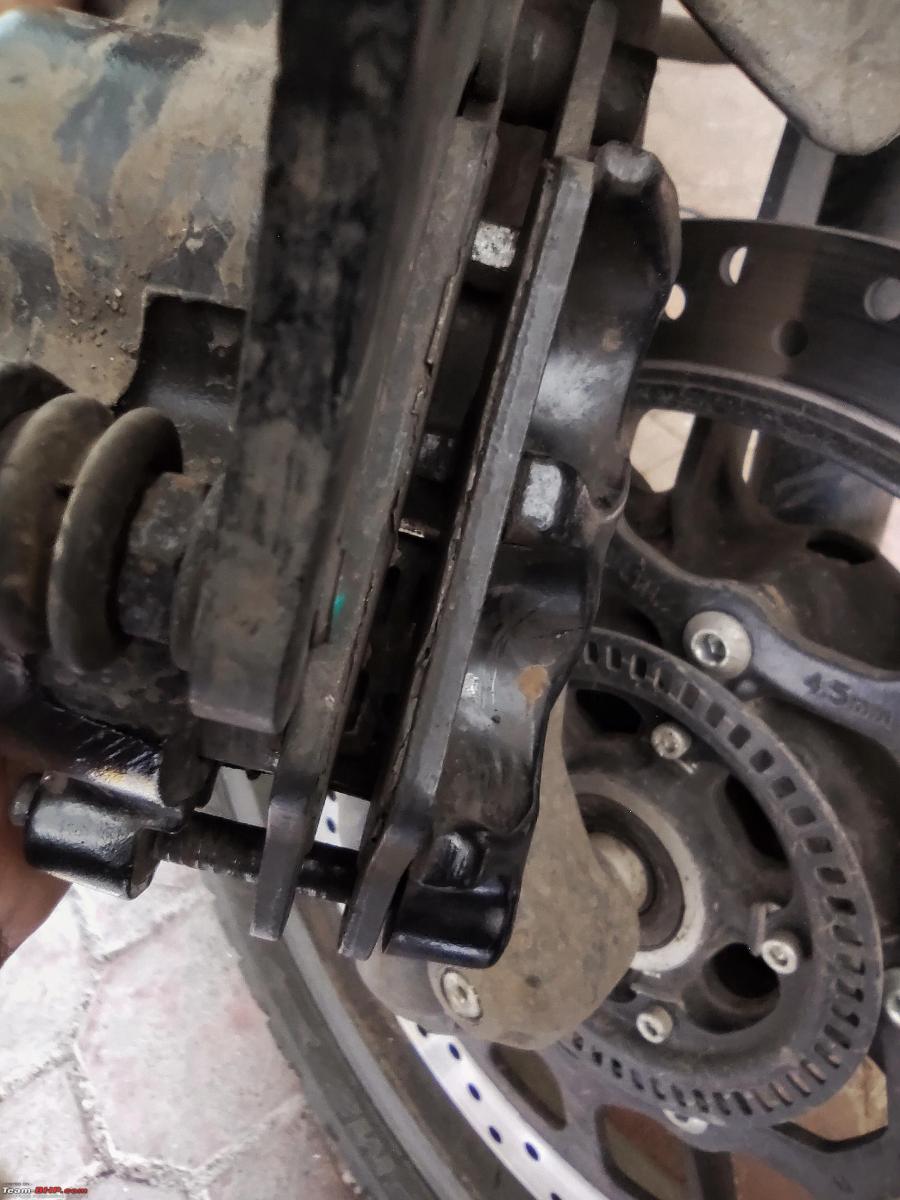
Removed both pins to take out old pads, here is a comparison of old with new. Pads thickness 0.9mm Vs 4.7mm.

At this point, I felt let's change brake pads, no need to visit the service center.
Next task was to push back pistons to make room for new pads. I started pushing piston one after the other only to reach the situation of one in, the other out.
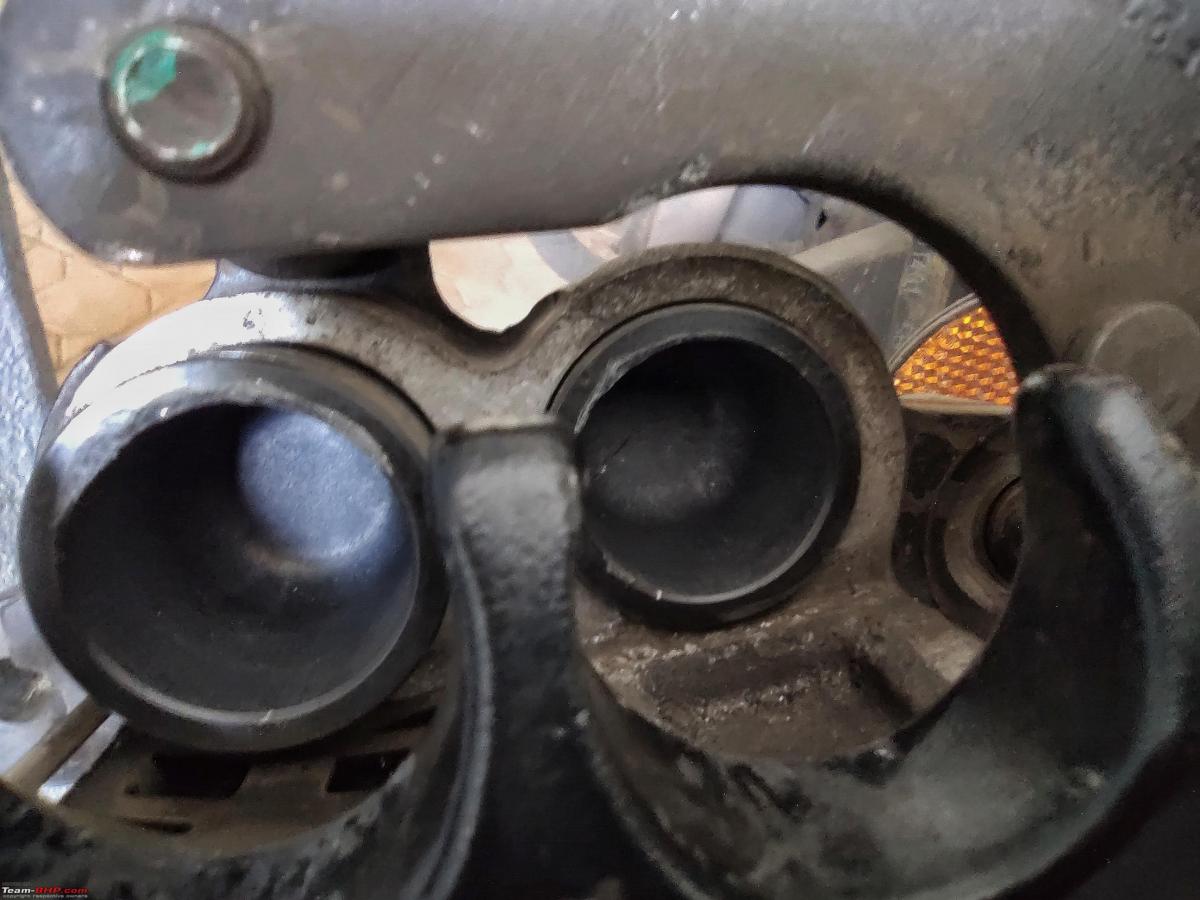
That made me realise Ari's mention of opening the brake fluid reservoir, had forgotten about it. Spread a rag for any unintentional brake fluid spill and went back to pushing back pistons.

New brake pads in place

Fixed brake fluid reservoir cap and last thing was to tighten axial bolts. Almost the entire DIY went well so far. Just as I was tightening 2nd bolt with a ratchet handle, more torque got applied (perils of not carrying a torque wrench) and the bolt snapped into two.

Next task was to remove the bottom part of the broken bolt.
Plenty of thoughts cropped up in my mind as I was picking up things in parking. What if:
- I would have stuck to the initial part of the DIY
- I would have used a small ratchet handle
- I would have used a torque wrench for the correct torque (26Nm)
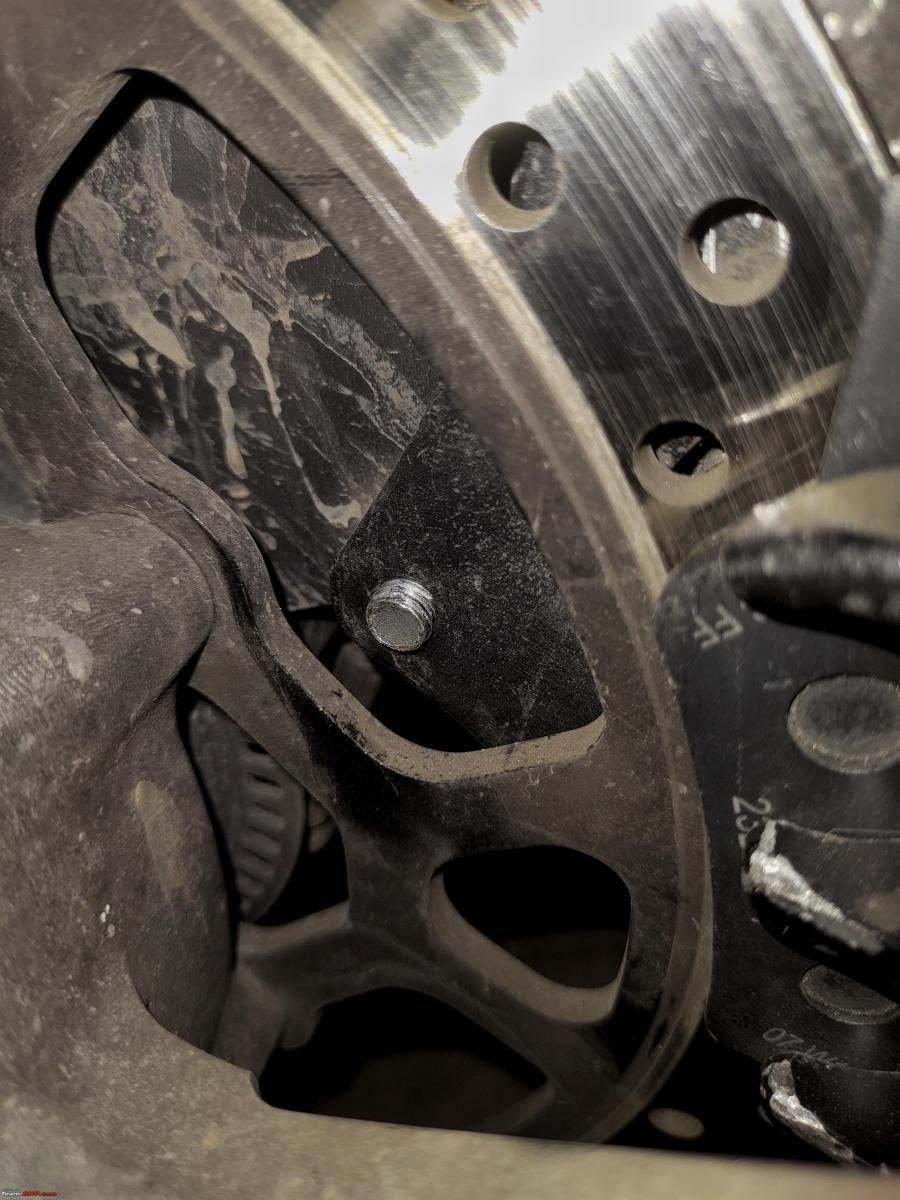
I couldn't spare time in the upcoming week to delve much other than trying to remove the bolt with different pliers. I decided to visit auto workshops in the suburbs. First I visited a welder and his suggestion was to get the braking system removed from a mechanic and then explore removing the bolt. Found a mechanic working on an RX100 two outlets away. Mechanic's idea was to remove the front wheel and slide out the brake system from the brake disc.

He put up a jack with a wooden block beneath the engine to lift up the front wheel and then the search started for the 12 mm Allen key. He didn't have it, he checked with nearby 4-5 workshops that also didn't have it.
The next thing was to use a 12mm bolt with a longer handle welded to it. Unfortunately, that didn't work either. Myself and mechanic decided to visit hardware shops in the suburb to get a 12mm Allen key. I tried at New Rekha Hardware, but his stock was over and promised to get it the next day. I picked up bolts from there, it was a black, unfinished one.
Luckily, the mechanic got it from another hardware store and we could proceed with removing the front wheel. Next things were easy, we were able to get enough space to remove the bolt with a plier, no need to go back to Welder.


Mechanic asked for Rs. 30 for his work. I wanted to pay and get the Allen key but he said he would need it for other work.
Cost of DIY blunder wasn't much, however, the anxiety it caused was priceless.
In the end, few learnings
- Check brake pad thickness often
- Carry ATTATT(All the tools all the time) just like ATGATT(All the gear all the time)
- Stick with DIY plan(even if it's in parts)
Check out BHPian comments for more insights and information.
- Tags:
- Indian
- Suzuki V-Strom 250 SX
- Suzuki
- DIY
Pages
About Us