Team-BHP > Motorbikes > Superbikes & Imports
Register New Topics New Posts Top Thanked Team-BHP FAQ


Reply
  Search this Thread
153,019 views
Old 21st July 2010, 21:16   #121
BHPian
 
Join Date: Nov 2008
Location: india
Posts: 209
Thanked: 5 Times

@luky13 : I have seen so many bike building progs on Discovery Turbo but its a delight to see one such making in my own country ! Go baby Go ... you will surely inspire a lot more to follow your footsetps to accomplish their dream buildoffs !
Jonny Bravo is offline   (1) Thanks
Old 21st July 2010, 21:38   #122
BHPian
 
luky_13's Avatar
 
Join Date: Nov 2008
Location: Bangalore
Posts: 580
Thanked: 156 Times

Quote:
Originally Posted by Jonny Bravo View Post
@luky13 : I have seen so many bike building progs on Discovery Turbo but its a delight to see one such making in my own country ! Go baby Go ... you will surely inspire a lot more to follow your footsetps to accomplish their dream buildoffs !
Thanks bud, i think this forum is full of motivation to pull off something like this
luky_13 is offline  
Old 22nd July 2010, 14:58   #123
BHPian
 
Slick's Avatar
 
Join Date: Nov 2007
Location: Mumbai
Posts: 384
Thanked: 611 Times

Wo! Lucky what effort dude, All the best for the bike, I sincerely think that it turns out to be one amazing machine.
And a very well documented thread with great pictures. You deserve 5 *s
Slick is offline  
Old 22nd July 2010, 16:38   #124
Senior - BHPian
 
Latheesh's Avatar
 
Join Date: Dec 2007
Location: CNN/BLR
Posts: 4,243
Thanked: 10,091 Times

How did I miss this thread?

Luky - We know the difficulty in doing such project where no detailed information available. Wish all the best and hope to spot you soon on Bangalore roads with a valid licence plate.

You deserve a special for that frame, most critical part in the project according to me.
Latheesh is offline  
Old 24th July 2010, 16:45   #125
BHPian
 
luky_13's Avatar
 
Join Date: Nov 2008
Location: Bangalore
Posts: 580
Thanked: 156 Times
Timken installation

The installation of the timken bearing went on smoothly, i must admit that it was almost an embarrassment ... designed a TOOL for installation, checked, re-checked, tested and after putting in all that effort Mr. Timken just slipped over the crankshaft without applying any force or use of tool. On close inspection we realized that the bearing was not sitting on the crank shoulder, we finally got the opportunity to use our tool to guide it to the designated spot.

Bearing heated to approx. 210 C
Dreamweaver build-off: HD Fatboy-timken_conv9.jpg

Placement
Dreamweaver build-off: HD Fatboy-screen-shot-20100724-4.32.59-pm.png

Job done
Name:  Screen shot 20100724 at 4.34.39 PM.png
Views: 2990
Size:  154.8 KB

Video of the act :-


Timken conversion is done. Next episode - End play setting on the left half of the crank case.
luky_13 is offline  
Old 25th July 2010, 11:20   #126
BHPian
 
luky_13's Avatar
 
Join Date: Nov 2008
Location: Bangalore
Posts: 580
Thanked: 156 Times
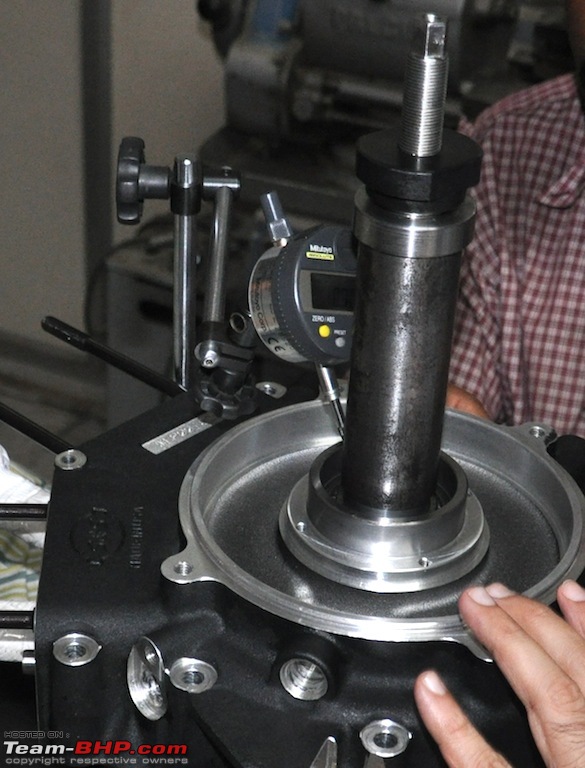
End play adjustment

With the flywheel transformed to generate some heavy duty power, time to move on.

A bit of harley history before that... Till 2002 all twin cam engines were factory fitted with a timken setup. The MoCo was facing productivity issues during the engine assembly because timken's specifically required end play adjustment which was time consuming and non-productive for a power train division that had to churn out huge numbers of units each day. A rather tough call was taken to move over to a cylindrical roller bearing as it did not require any end play adjustment during assembly saving valuable time, an inferior trade-off. Stock motors were offered with a timken setup only on purchase of a CVO bike (Custom vehicle operations) or Screamin' Eagle motor at a premium.

End play specification - .001" or 25 µm

Placed a washer of required thickness over the timken bearing then carefully guided the Left half of the crankcase over the flywheel and slide the other bearing cone over it and tightened to check end play
Dreamweaver build-off: HD Fatboy-tc_1.jpg

During our first check found out that the end play was over 100 µm ... off target
Dreamweaver build-off: HD Fatboy-tc_2.jpg

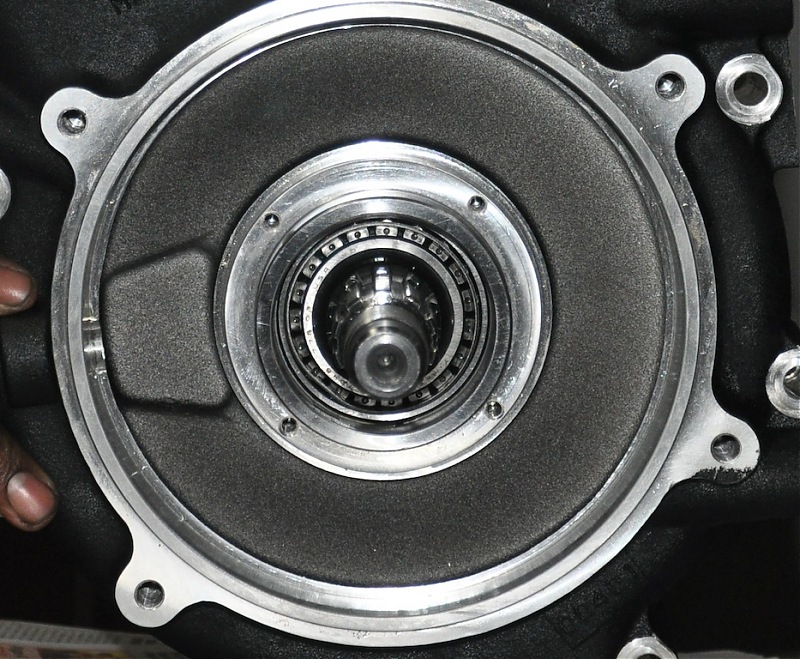
Stripped the setup again and replaced the washer with a slightly thinner one and assembled the setup back again. End play check - 60 µm ... still off. Using the bearing assembly tool tightened the bearing to the required torque specification and checked the end play again ... this time right on target 27 µm
Dreamweaver build-off: HD Fatboy-tc_3.jpg

Dreamweaver build-off: HD Fatboy-tc_4.jpg

A final check to see if everything was okay, rotating freely
Dreamweaver build-off: HD Fatboy-tc_5.jpg

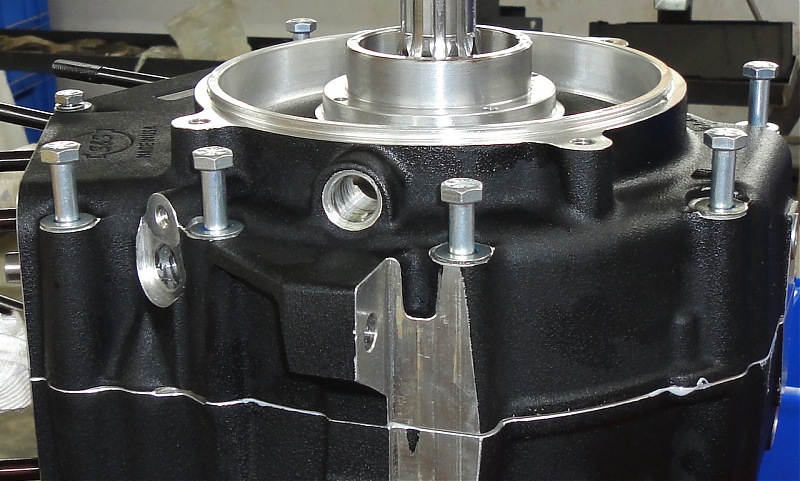
Some snaps after putting the two halves of the case together, trial fitting
Dreamweaver build-off: HD Fatboy-tc_6.jpg
Dreamweaver build-off: HD Fatboy-tc_7.jpg
Dreamweaver build-off: HD Fatboy-tc_8.jpg
luky_13 is offline  
Old 1st August 2010, 11:24   #127
BHPian
 
luky_13's Avatar
 
Join Date: Nov 2008
Location: Bangalore
Posts: 580
Thanked: 156 Times
Engine assembly plan

Trying to get my weird mind to plan the complete engine assembly, following the standard bottom up approach in typical harley tradition, bottom end followed by top end:-
  1. BOTTOM END
    • Put together two halves of the crankcase
    • Install breather and oil pump
    • Install cams
    • Install cam plate
    • Install gasket and chrome cover
  2. TOP END
    • Install cylinders and pistons
    • Install heads
    • Install rocker arm assy
    • Install lifters, push rods and covers
    • Install chrome rocker covers
    .. and on completion plug a few sensors here and there
luky_13 is offline  
Old 3rd August 2010, 20:59   #128
BHPian
 
luky_13's Avatar
 
Join Date: Nov 2008
Location: Bangalore
Posts: 580
Thanked: 156 Times
BOTTOM END: Put together two halves of the crankcase

Assembly of the two crank halves, the components and tool spread
  • RHS crank half
  • Piston jets
  • O-rings
  • Tools
  • 3bond Liquid gasket
Dreamweaver build-off: HD Fatboy-lower-end-spread.jpg

Piston Jets
Twin cam piston jets have a bit of history. Earlier Twin cam prototypes had considerable cooling problems which delayed its launch way back in 1997, the reason sited was the oil scavenging system. An acoustic phenomenon that caused pressurization of the scavenge passageway when the pistons were moving down. A more serious problem was that of overheating. Piston temperatures in particular were troubling. This was solved by installing oil jets in the crankcase, aimed so that they sprayed the piston crown from underneath.
Dreamweaver build-off: HD Fatboy-8.piston_jets1.jpg
Dreamweaver build-off: HD Fatboy-11.pistonjets_oiled.jpg
Dreamweaver build-off: HD Fatboy-12.pistonjets_placed.jpg

To be honest, i don't think harley's would have existed on this planet without Loctite. Harley's are addicted to Loctite, here is one example
Dreamweaver build-off: HD Fatboy-13.loctite243_pistonjet_scew.jpg
Dreamweaver build-off: HD Fatboy-14.pistonjets_bolton.jpg
Dreamweaver build-off: HD Fatboy-18.le_half_pistonjet_installed3.jpg

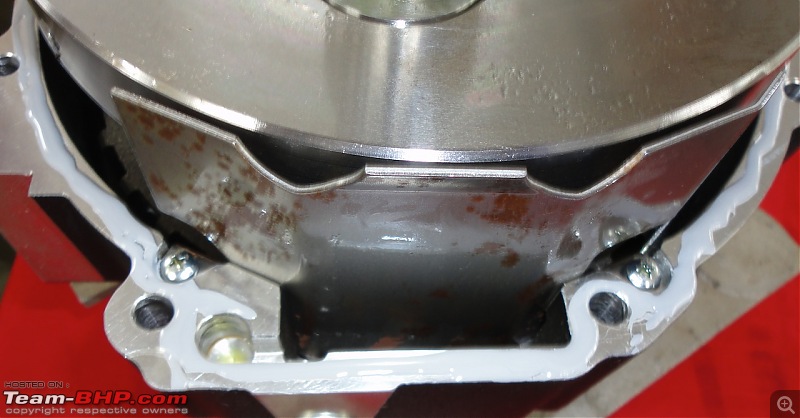
Baffle Plate
The virtual oil sump
Dreamweaver build-off: HD Fatboy-19.le_baffleplate1.jpg

Dowels
Dreamweaver build-off: HD Fatboy-22.le_dowel_oring2.jpg

Gasket
Dispensing the liquid gasket over the narrow crank terrain was a very tricky task, my hand was shaking like a leaf. After a couple of trials and heavy breathing I was able to sputter the slimy liquid. The gasket track resembles my ECG at that point in time.
Dreamweaver build-off: HD Fatboy-24.le_liq_gasket2.jpg
luky_13 is offline   (1) Thanks
Old 3rd August 2010, 21:23   #129
BHPian
 
luky_13's Avatar
 
Join Date: Nov 2008
Location: Bangalore
Posts: 580
Thanked: 156 Times

Next, the two long lost brothers meet. I mean the two halves. Carefully placing them over each other such that it does not disturb the gasket.
Dreamweaver build-off: HD Fatboy-26.le_close1.jpg
Dreamweaver build-off: HD Fatboy-27.le_close2.jpg

I suddenly realized that the bolts enter from the other half of the case, had to flip the complete assembly
Dreamweaver build-off: HD Fatboy-28.le_flip.jpg

Dreamweaver build-off: HD Fatboy-29.le_washer_before_bolton.jpg

Remember what i said about loctite and harley's, once again
Dreamweaver build-off: HD Fatboy-30.le_loctite_before_bolton.jpg

Dreamweaver build-off: HD Fatboy-31.le_drop_bolts1.jpg

All bolts in ready to bolt-in
Dreamweaver build-off: HD Fatboy-33.le_drop_bolts3.jpg

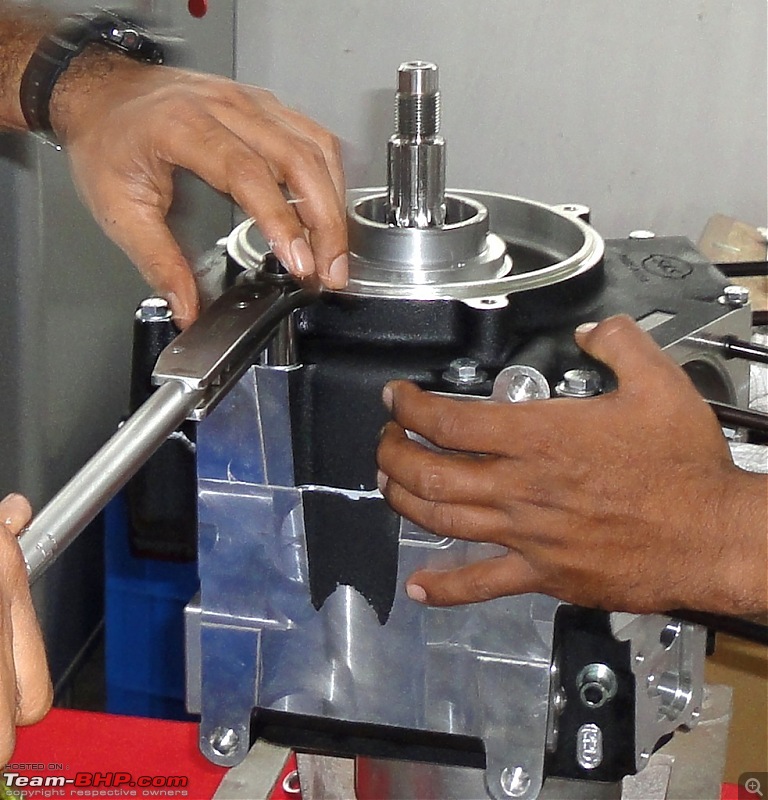
Torque the bolts to 14nm and then 24 nm in the specified pattern
Dreamweaver build-off: HD Fatboy-36.le_14nm_tighten2.jpg
Dreamweaver build-off: HD Fatboy-38.le_24nm_tighten2.jpg

Case assembly done.
Dreamweaver build-off: HD Fatboy-39.le_part1_over.jpg
luky_13 is offline   (1) Thanks
Old 5th August 2010, 12:42   #130
BHPian
 
luky_13's Avatar
 
Join Date: Nov 2008
Location: Bangalore
Posts: 580
Thanked: 156 Times
BOTTOM END: Tooling

Before we moved over to further assembly we needed a few specialized but pricey tools

1. Oil pump alignment pins, $ 28.00
2. Chain pre tensioner, $ 42.00
3. Gear locking tool, $ 49.00
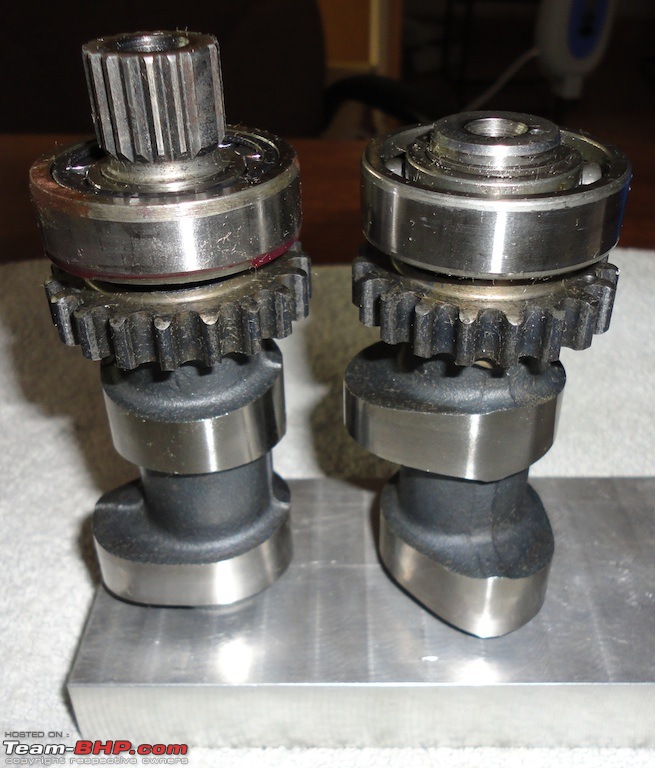
4. Cam holder, $ 155.00
--------------------------------------------------------------
Total, $ 274 + $ 150 (shipping) + $ 115 (customs duty)
Finally = Rs. 24,770.00
--------------------------------------------------------------

A unanimous decision taken to make them in house, God help us!

OIL PUMP ALIGNMENT PINS
Turned out of some spare EN-8 leftover
Dreamweaver build-off: HD Fatboy-al_pins_1.jpg

Sweet! Time taken 90 mins, cost Rs. 200 (considering the cost of the material + labour)
Dreamweaver build-off: HD Fatboy-alignment_pins.jpg

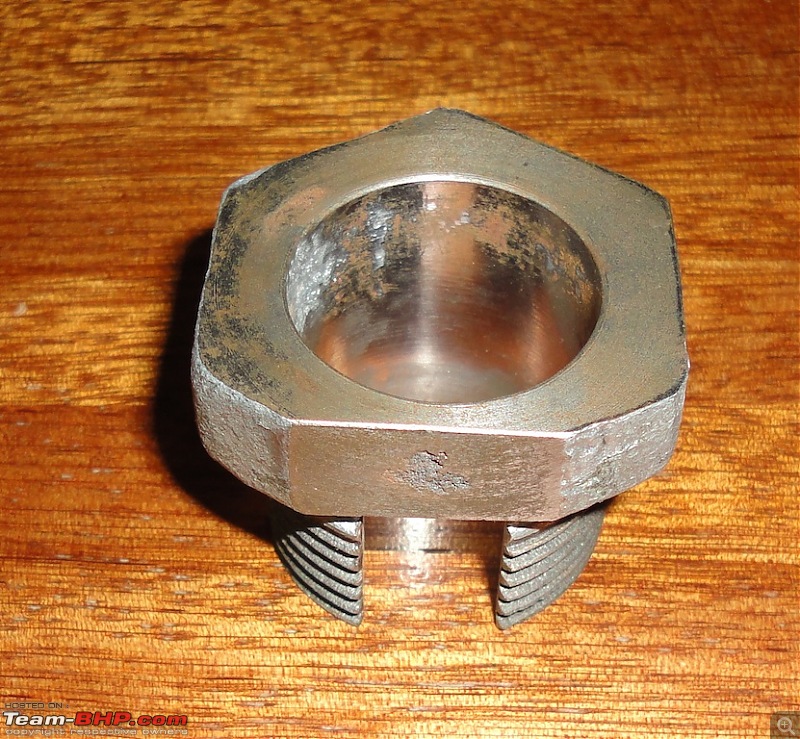
CHAIN PRE TENSIONER
Made out of locally procured plumbing hardware. First extra portion chopped
Dreamweaver build-off: HD Fatboy-pre_tren_1.jpg

Faced
Dreamweaver build-off: HD Fatboy-pre_ten_3.jpg

Slotted
Dreamweaver build-off: HD Fatboy-pre_ten_5.jpg

Done. Time taken 25 mins, cost Rs 82.00
Dreamweaver build-off: HD Fatboy-pre_ten.jpg

GEAR LOCKING TOOL
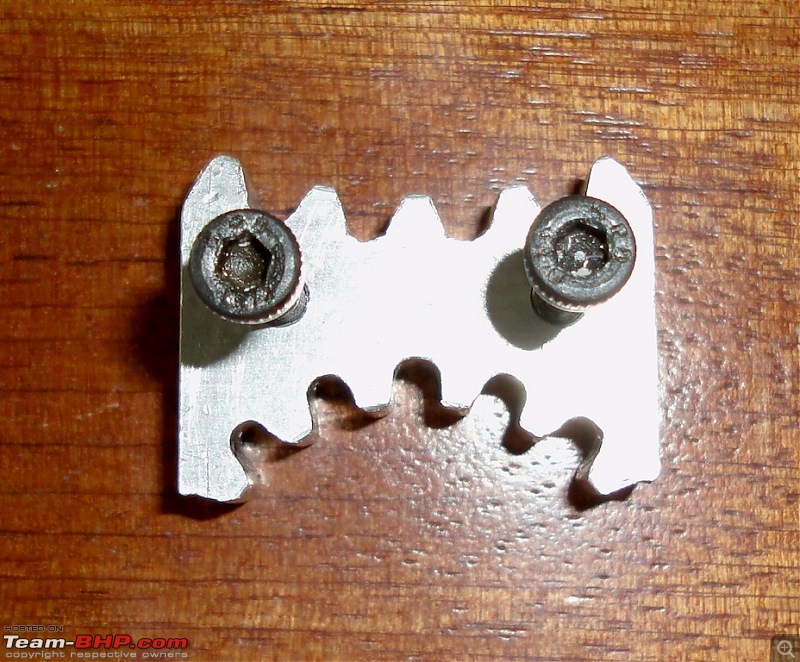
This was done by my partner Ajay, cutting gears without a gear hobber can be a nightmare but this is art ! I wont go into detail, we cut these gears over a milling machine using an indexer attachment. Time taken 6 hours, cost priceless !
Dreamweaver build-off: HD Fatboy-lock_tool.jpg

CAM HOLDER
This was the simplest, took the centre distance between the cams along with the diameter. Just machined out.
Dreamweaver build-off: HD Fatboy-cam_hold.jpg

Done. Time taken 50 mins, cost Rs. 350.00
Dreamweaver build-off: HD Fatboy-cah_hold2.jpg

Total time = approx 9 hrs, Total cost = Rs. 632.00. At the end of the day it was totally worth putting in all the effort, the savings were mind boggling.
luky_13 is offline   (1) Thanks
Old 5th August 2010, 13:01   #131
Senior - BHPian
 
aargee's Avatar
 
Join Date: Jan 2010
Location: TSTN
Posts: 6,236
Thanked: 9,643 Times

Beautiful!!! Probably my first comment now from a silent observer. Using Locite was a good piece of information that I didn't know. Any idea why?

I did a hand made RX at home & that made me realize the pains you're undergoing, which is atleast 1000 times more than what I experienced. Wish you a great success in your endeavour.
aargee is offline  
Old 5th August 2010, 13:16   #132
BHPian
 
luky_13's Avatar
 
Join Date: Nov 2008
Location: Bangalore
Posts: 580
Thanked: 156 Times

Quote:
Originally Posted by aargee View Post
Beautiful!!! Probably my first comment now from a silent observer. Using Locite was a good piece of information that I didn't know. Any idea why?

I did a hand made RX at home & that made me realize the pains you're undergoing, which is atleast 1000 times more than what I experienced. Wish you a great success in your endeavour.
Thanks.

Loctite is a very commonly used THREAD-LOCKER, prevents the bolts from getting loose when subjected to severe vibrations something that harleys are famous for.
luky_13 is offline  
Old 5th August 2010, 13:36   #133
Senior - BHPian
 
aargee's Avatar
 
Join Date: Jan 2010
Location: TSTN
Posts: 6,236
Thanked: 9,643 Times

Quote:
Originally Posted by luky_13 View Post
Loctite is a very commonly used THREAD-LOCKER, prevents the bolts from getting loose when subjected to severe vibrations something that harleys are famous for.
Thanks. I feel like stupid; I should've spoken to you before I carried out my work to take some good inputs. Thanks for the education.
aargee is offline  
Old 5th August 2010, 14:03   #134
Senior - BHPian
 
_raVan_'s Avatar
 
Join Date: Jul 2009
Location: Pune
Posts: 1,074
Thanked: 660 Times

Oh my God! What a thread! Please do keep updating the thread as always.

Am not much of a machine head, hence couldnt get most of the technical terms used but tried to keep up with some of it. But yes, a biker at heart. Wish you all the best in completing your project.
_raVan_ is offline  
Old 5th August 2010, 20:25   #135
Senior - BHPian
 
Join Date: Sep 2005
Location: Adelaide
Posts: 1,159
Thanked: 318 Times

Locktite also helps with the bullet i have used it on my new engine build
desideep is offline  
Reply

Most Viewed


Copyright ©2000 - 2024, Team-BHP.com
Proudly powered by E2E Networks