| |||||||

| Search Forums |
| Advanced Search |
| Go to Page... |
 |
| Search this Thread |  208,096 views |
 14th July 2023, 16:34
| #91 |
| BHPian Join Date: Aug 2021 Location: Manipal
Posts: 277
Thanked: 2,288 Times
| Re: Azure Grey 2006 Maruti-Suzuki Swift VXi | Ownership Review Cleaning the Intake Manifold, Fuel Injectors, EGR and Throttle BodyWhen cleaning the air filter, I opened the butterfly valve of the Throttle Body and saw found a lot of sticky carbon deposits , upon closer inspection I also noticed the inside of intake manifold looked rather oily and dark with carbon. Decided I will dismantle the entire intake manifold to clean it. Scared that I would break one or the other bolt , I rang up Vishu and decided on a Saturday to get this job done. Parts collected for the work: * Throttle body cleaner. Sourced from Amazon * New Throttle body gasket. Part Number: 13421M83B10 * New intake manifold gasket. Part Number: 13119M83F00 * New ISC Valve gasket. Part Number: 14139M70G30 * New EGR Gasket. Part Number: 18529M77E01 * New Fuel injector O-Rings and Rubber kit. Part number: 09320M09022 and 99000M24120-857 Started disconnecting the sensors, unplugging the harness clips, removed the throttle body, injectors and loosening the bolts of the manifold. The bolts gave not much struggle to loosen since I had sprayed them with MGP Rust smash generously. Out came the manifold and it was time to remove the EGR.   EGR assembly is mounted by two bolts. Even after spraying Rust Smash and letting them soak, One of the bolts while loosening started to squeak and Vishu hesitated to loosen it further fearing the worst “BROKEN BOLT” !! I told him since the manifold is out of the car, It’s easier to get it fixed now rather than later. So as expected the bolt broke off. You’re always one bolt away from making a 5 minute job into a day’s ordeal.  We welded a nut to the broken bolt which was stuck on the manifold for about 8-9 times, each time the nut would rotate a turn and then break off again. Vishu got frustrated and decided to drill through the bolt and create threads of the same size. So we did the same and it turned out pretty good, I got a sigh of relief ! By all of this saga it became 7pm and really dark so we had to end the day. Requested Vishu if he could come the next day (Sunday) to complete this work, fortunately he agreed. I took the manifold, Injectors, throttle body, EGR home to clean them myself. I made my own circuit to clean the Fuel Injectors. I used : * limit switch * fuel injector connector from scrapyard *wires * Small syringe 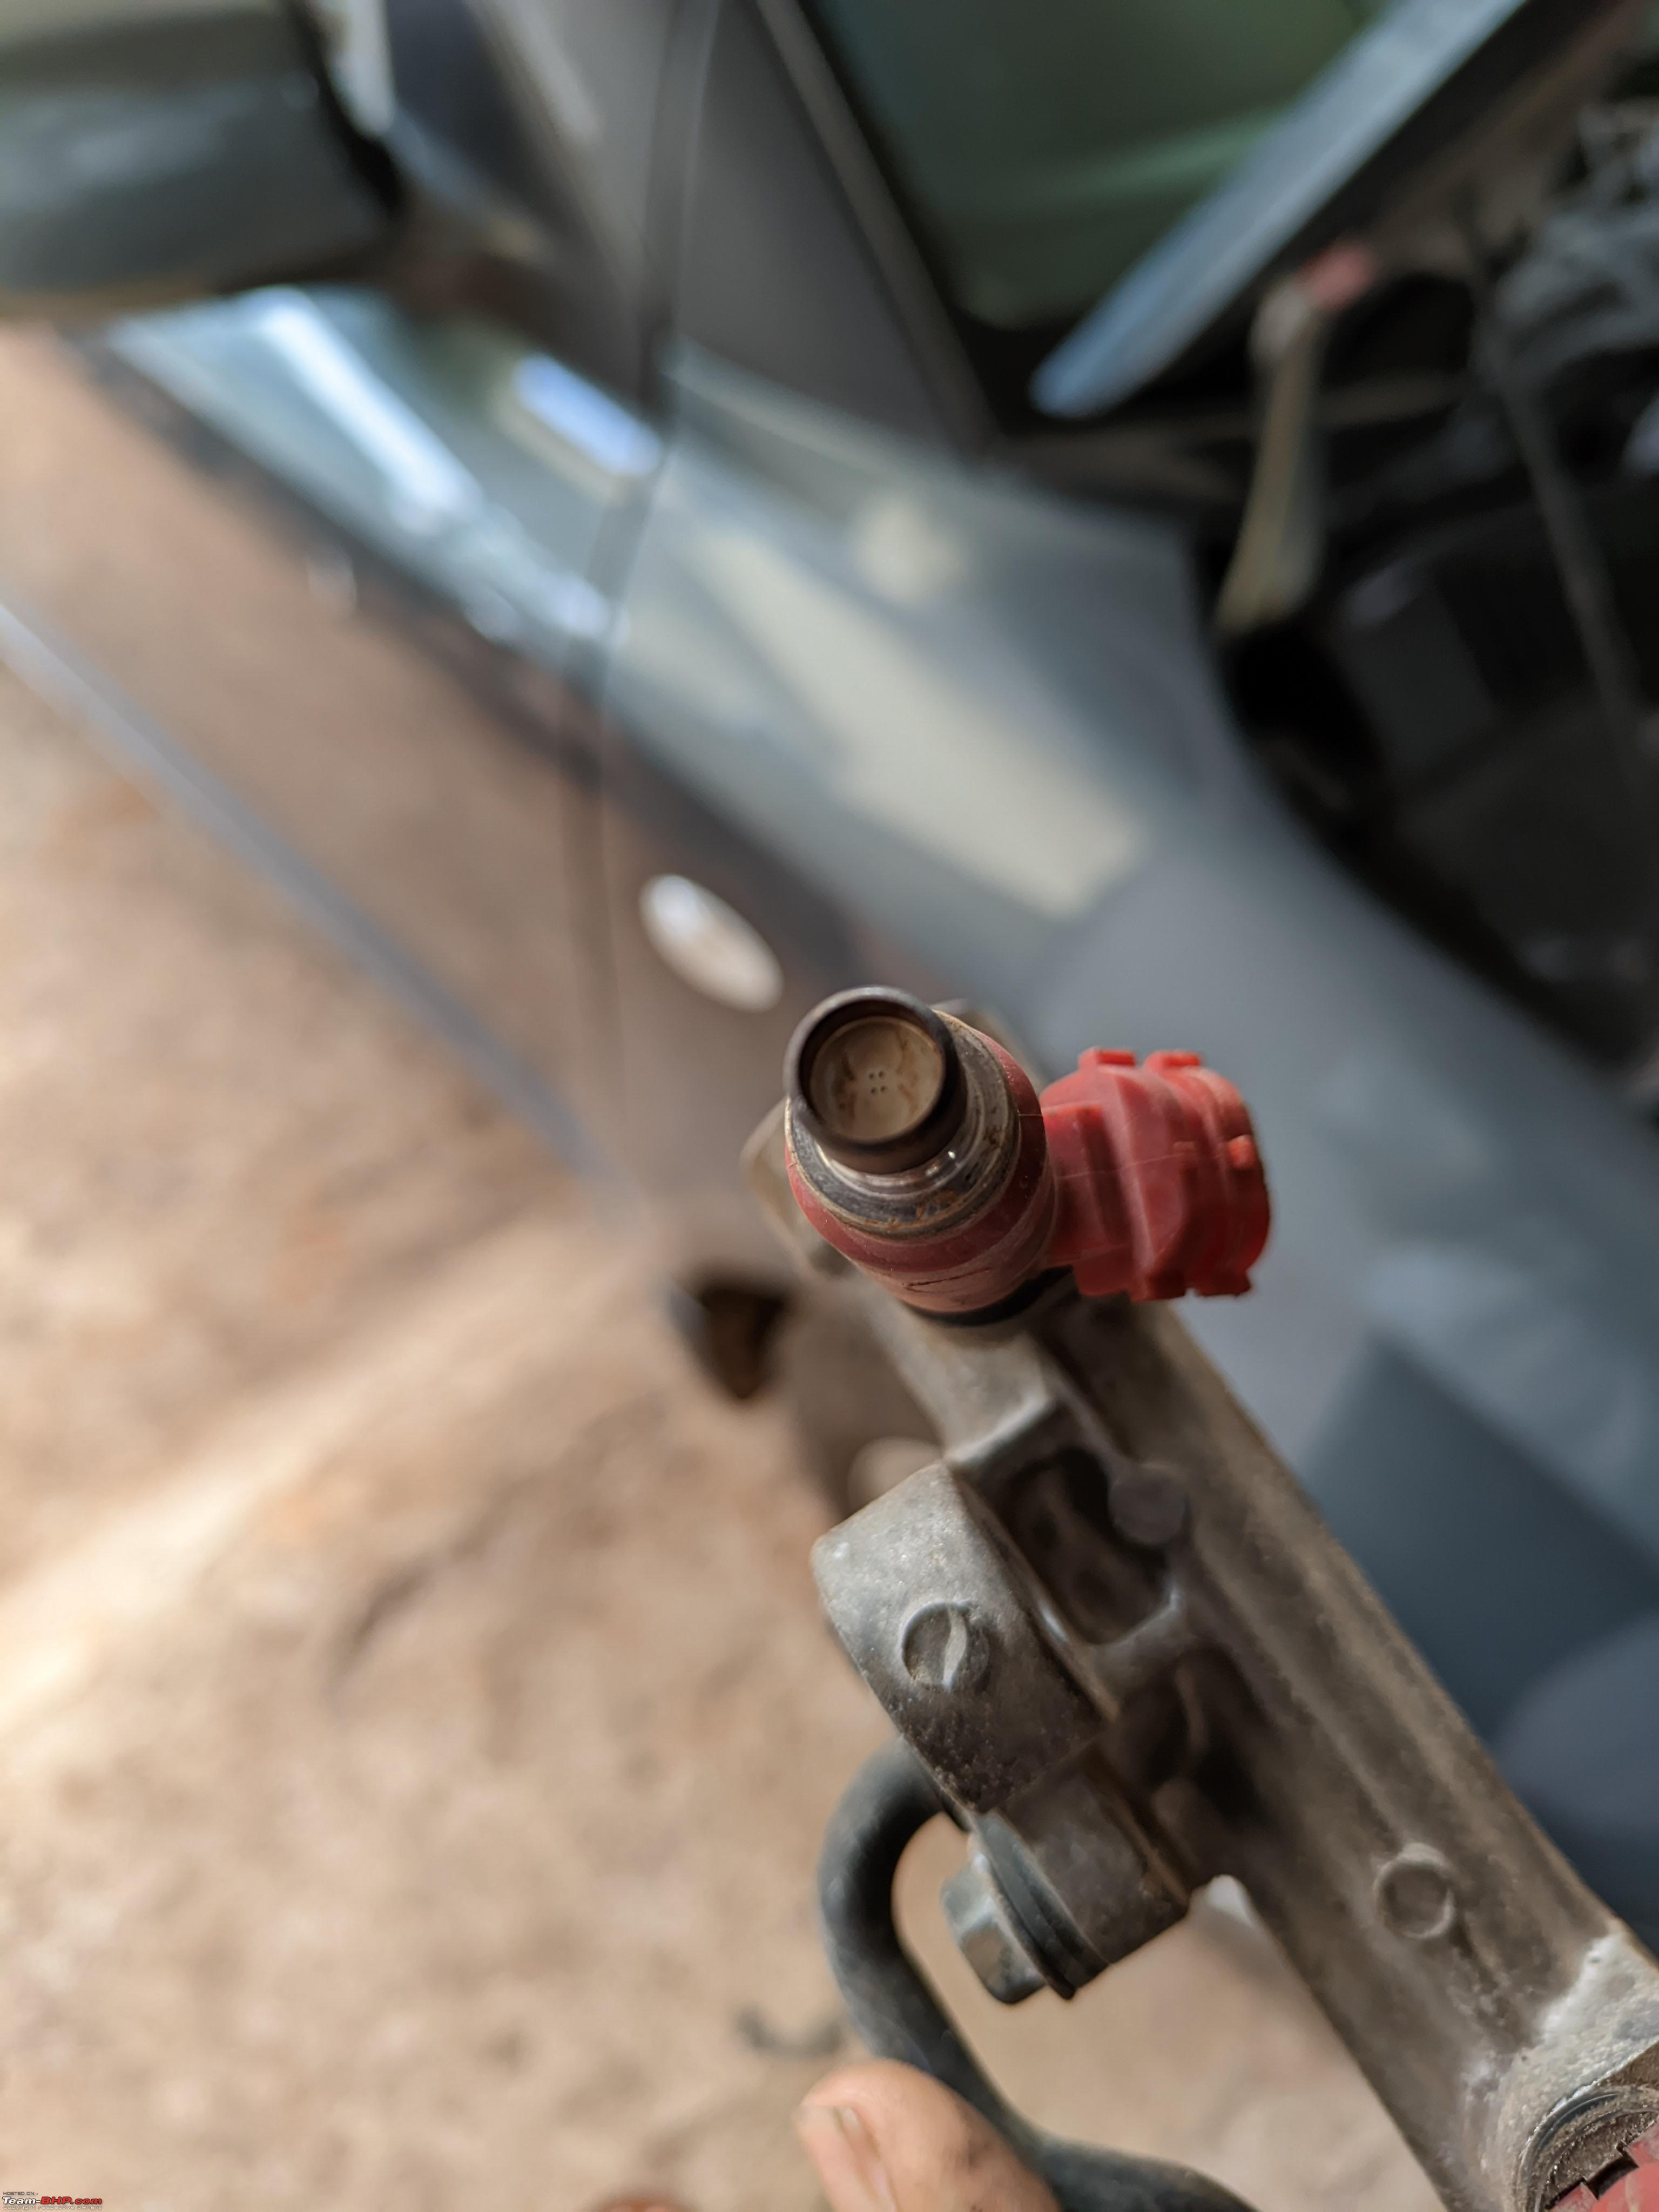 Fuel Injector before cleaning  Inserted the fuel injector in reverse to the syringe and made sure there are no leaks. The fuel injector O-rings created the perfect seal. While I started spraying the throttle body cleaner into the syringe, it built up pressure with the cleaner and dad pressed the limit switch which gave power to the fuel injector solenoid to open and release pressure. The same was done for all 4 injectors thoroughly. The spray pattern of the injector improved with every spray. The intake manifold was cleaned using diesel till it was spic and span. EGR and throttle body was sprayed with throttle body cleaner till it was shiny silver. The ISC valve was clogged with carbon deposits which was also cleaned. I soaked and kept all the studs and bolts in diesel overnight to remove any rust.  Dirty Throttle Body  Clogged ISC Valve The next day Vishu arrived around 8.30 morning, I got all the cleaned stuff and started assembling it all back. The Swift does not have direct fuel injection and uses port injection which keeps the valves cleaner than modern direct fuel injection. I made sure the deposits on the valves were loosened and cleared even though it was minimal and all the studs are greased and fit back tightened to spec. 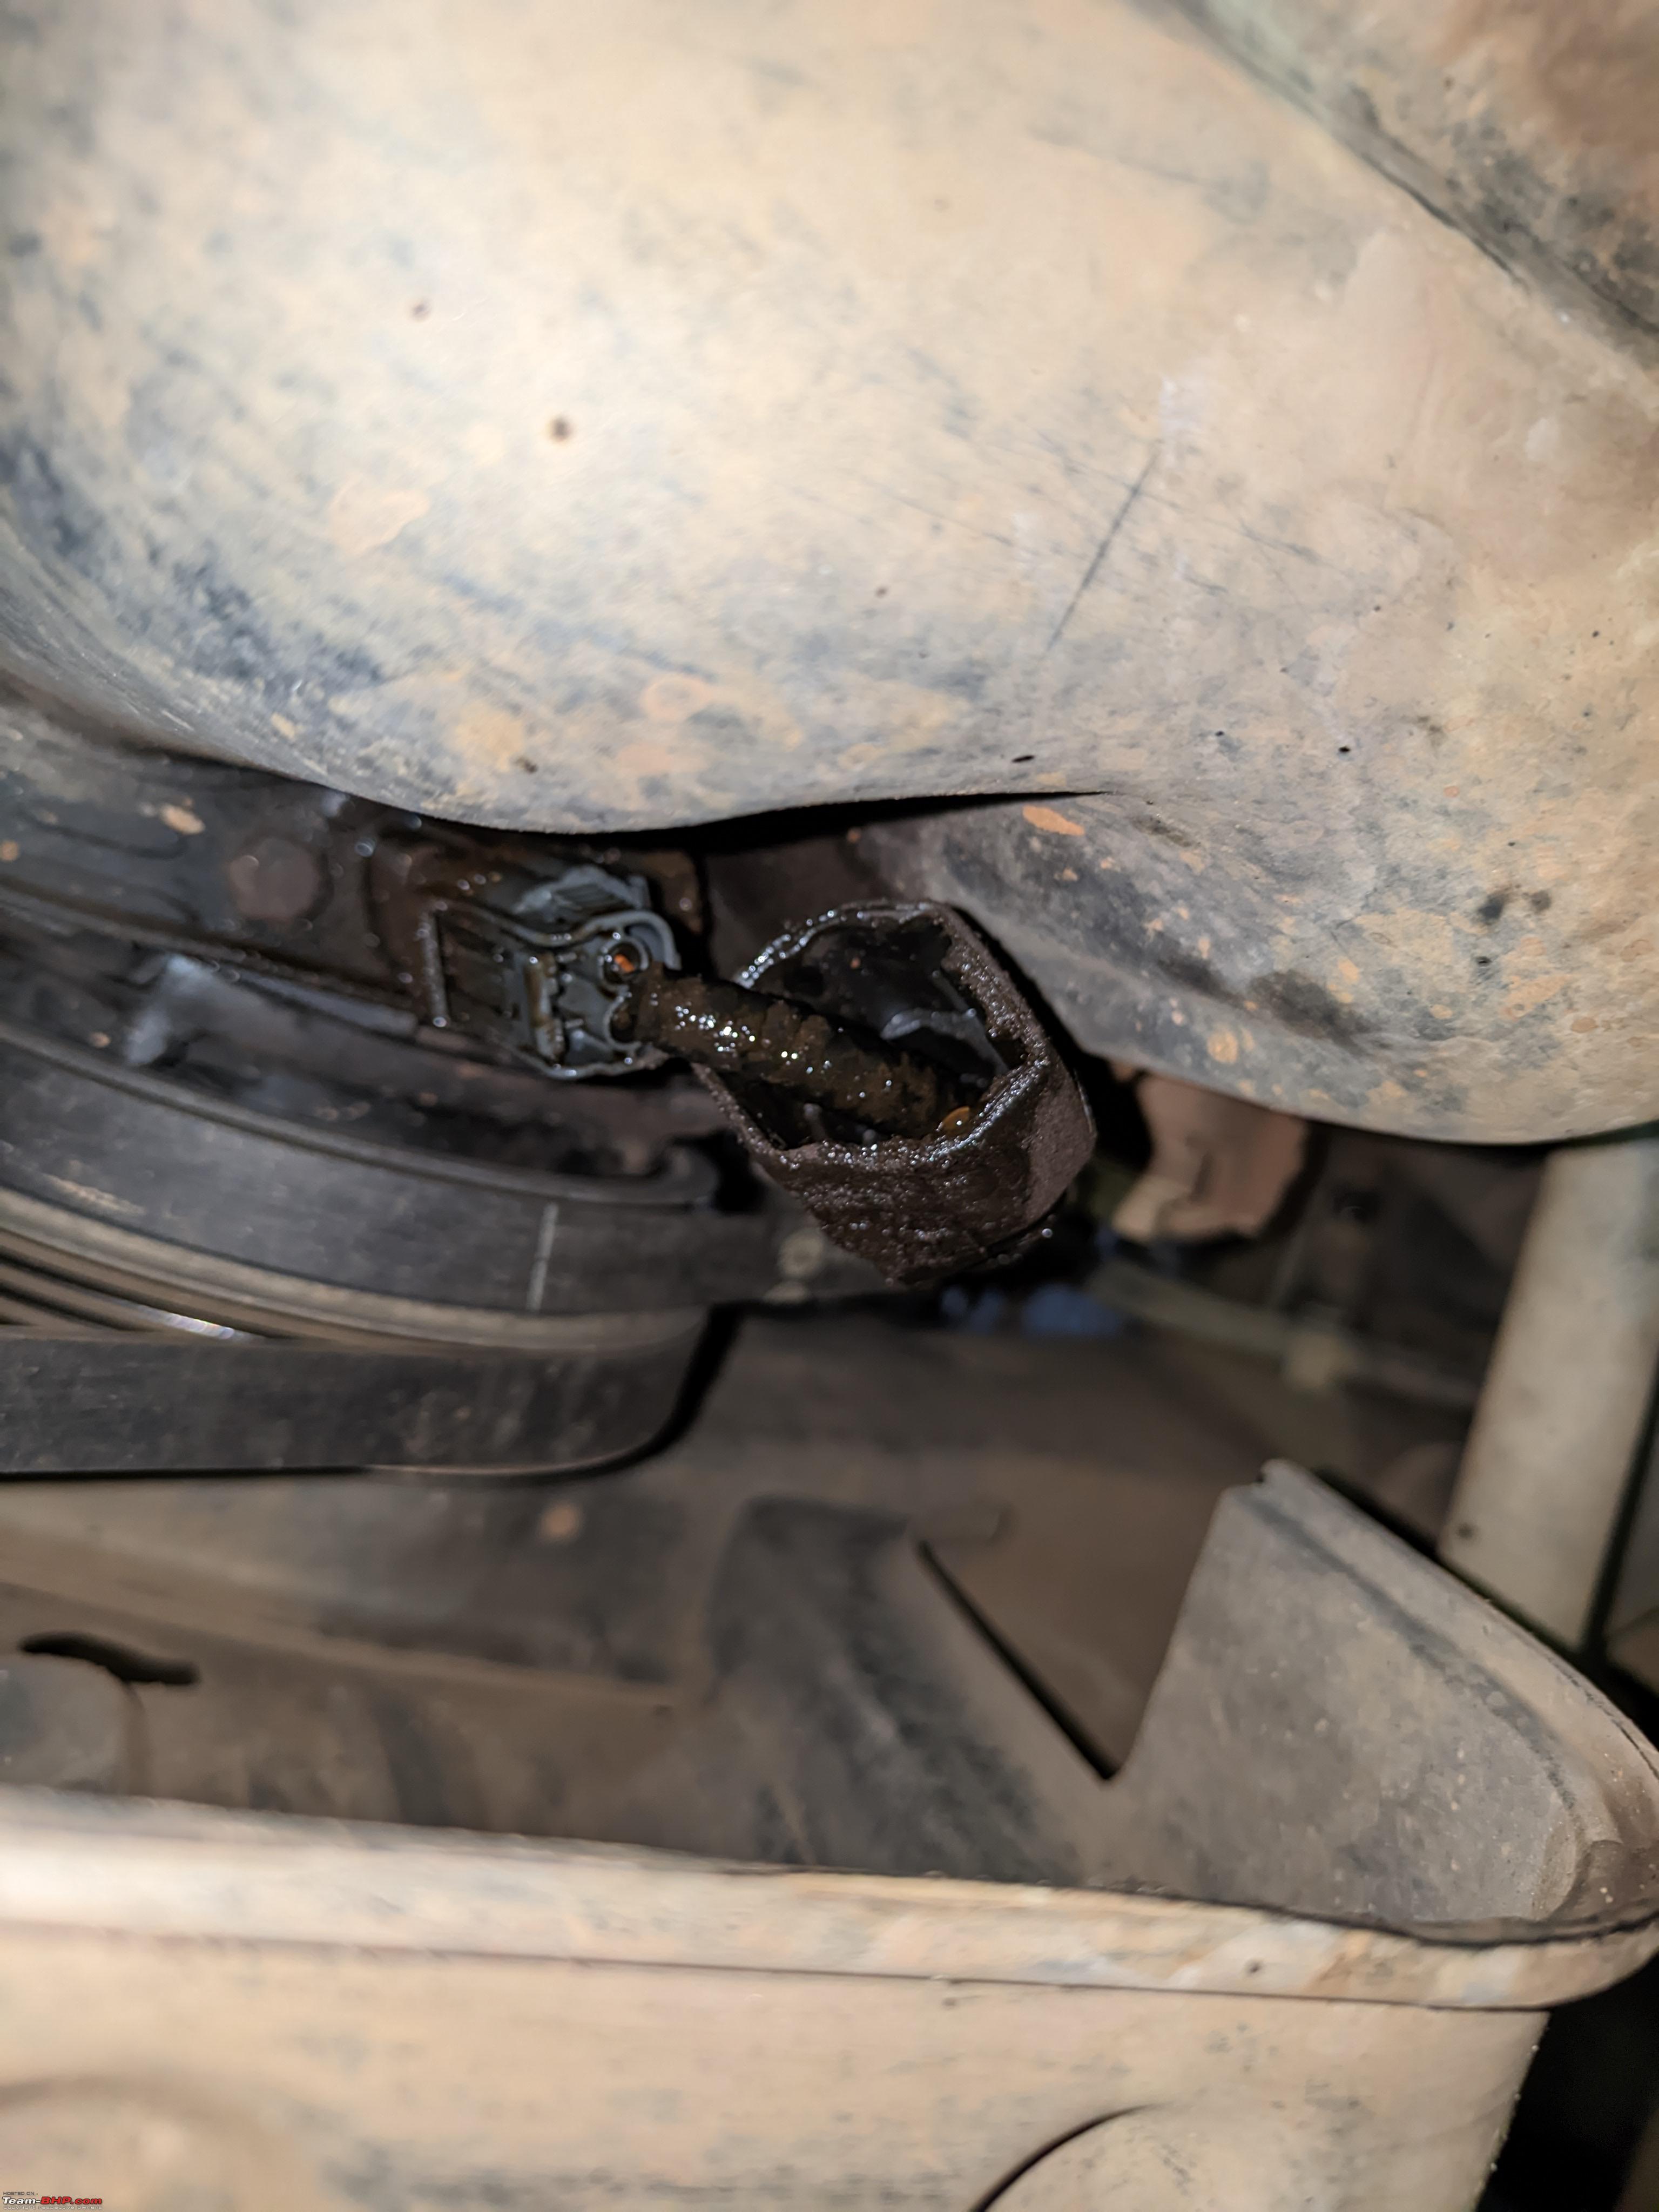 Leakage near Crank Sensor  Cleaned The crank sensor was also cleaned and fit back. All this took about 1.5 hours to fit back and it was time for the tappet adjustment. Tappet Adjustment / Valve Lash clearanceUsually the tappets need no adjustment unless there is a evident clicking noise, My known SA suggested checking the tappet clearances during the service. Now, my tappet cover gasket had given away and also started the infamous tappet cover leaking of the G Series Engine. The Camshaft Sensor Cover Gasket , Tappet cover gasket and Spark Plug O-Rings were ordered from Boodmo. The Camshaft Sensor cover gasket was SGP make, the MGP one is slightly thinner and larger in size. my mechanic Vishu started checking and adjusting the tappets. I had printed the values and made sure they were adjusted within the limits specified in the service manual. The clearances were off slightly than the specifications from the Service Manual.   Once the adjustment was done, I started assembling it back with new gaskets and made sure nothing was overlooked. Started the car and it sounded much better than before, Water sputtering out of the exhaust was a pleasant sight to see. Kept a close eye on the Fuel Efficiency and it had increased by about 1-1.5Km/L. The new Spark Plugs could also be playing a role for the increase in FE.  My mechanic Vishu was extremely happy with the car after a test run and I was even more because of the work done to my satisfaction and perfection. Vishu didn't charge me for the work but since he came on a Sunday, I made sure he didnt go empty handed. He is also searching for G13B Swift to replace his 2003 M800  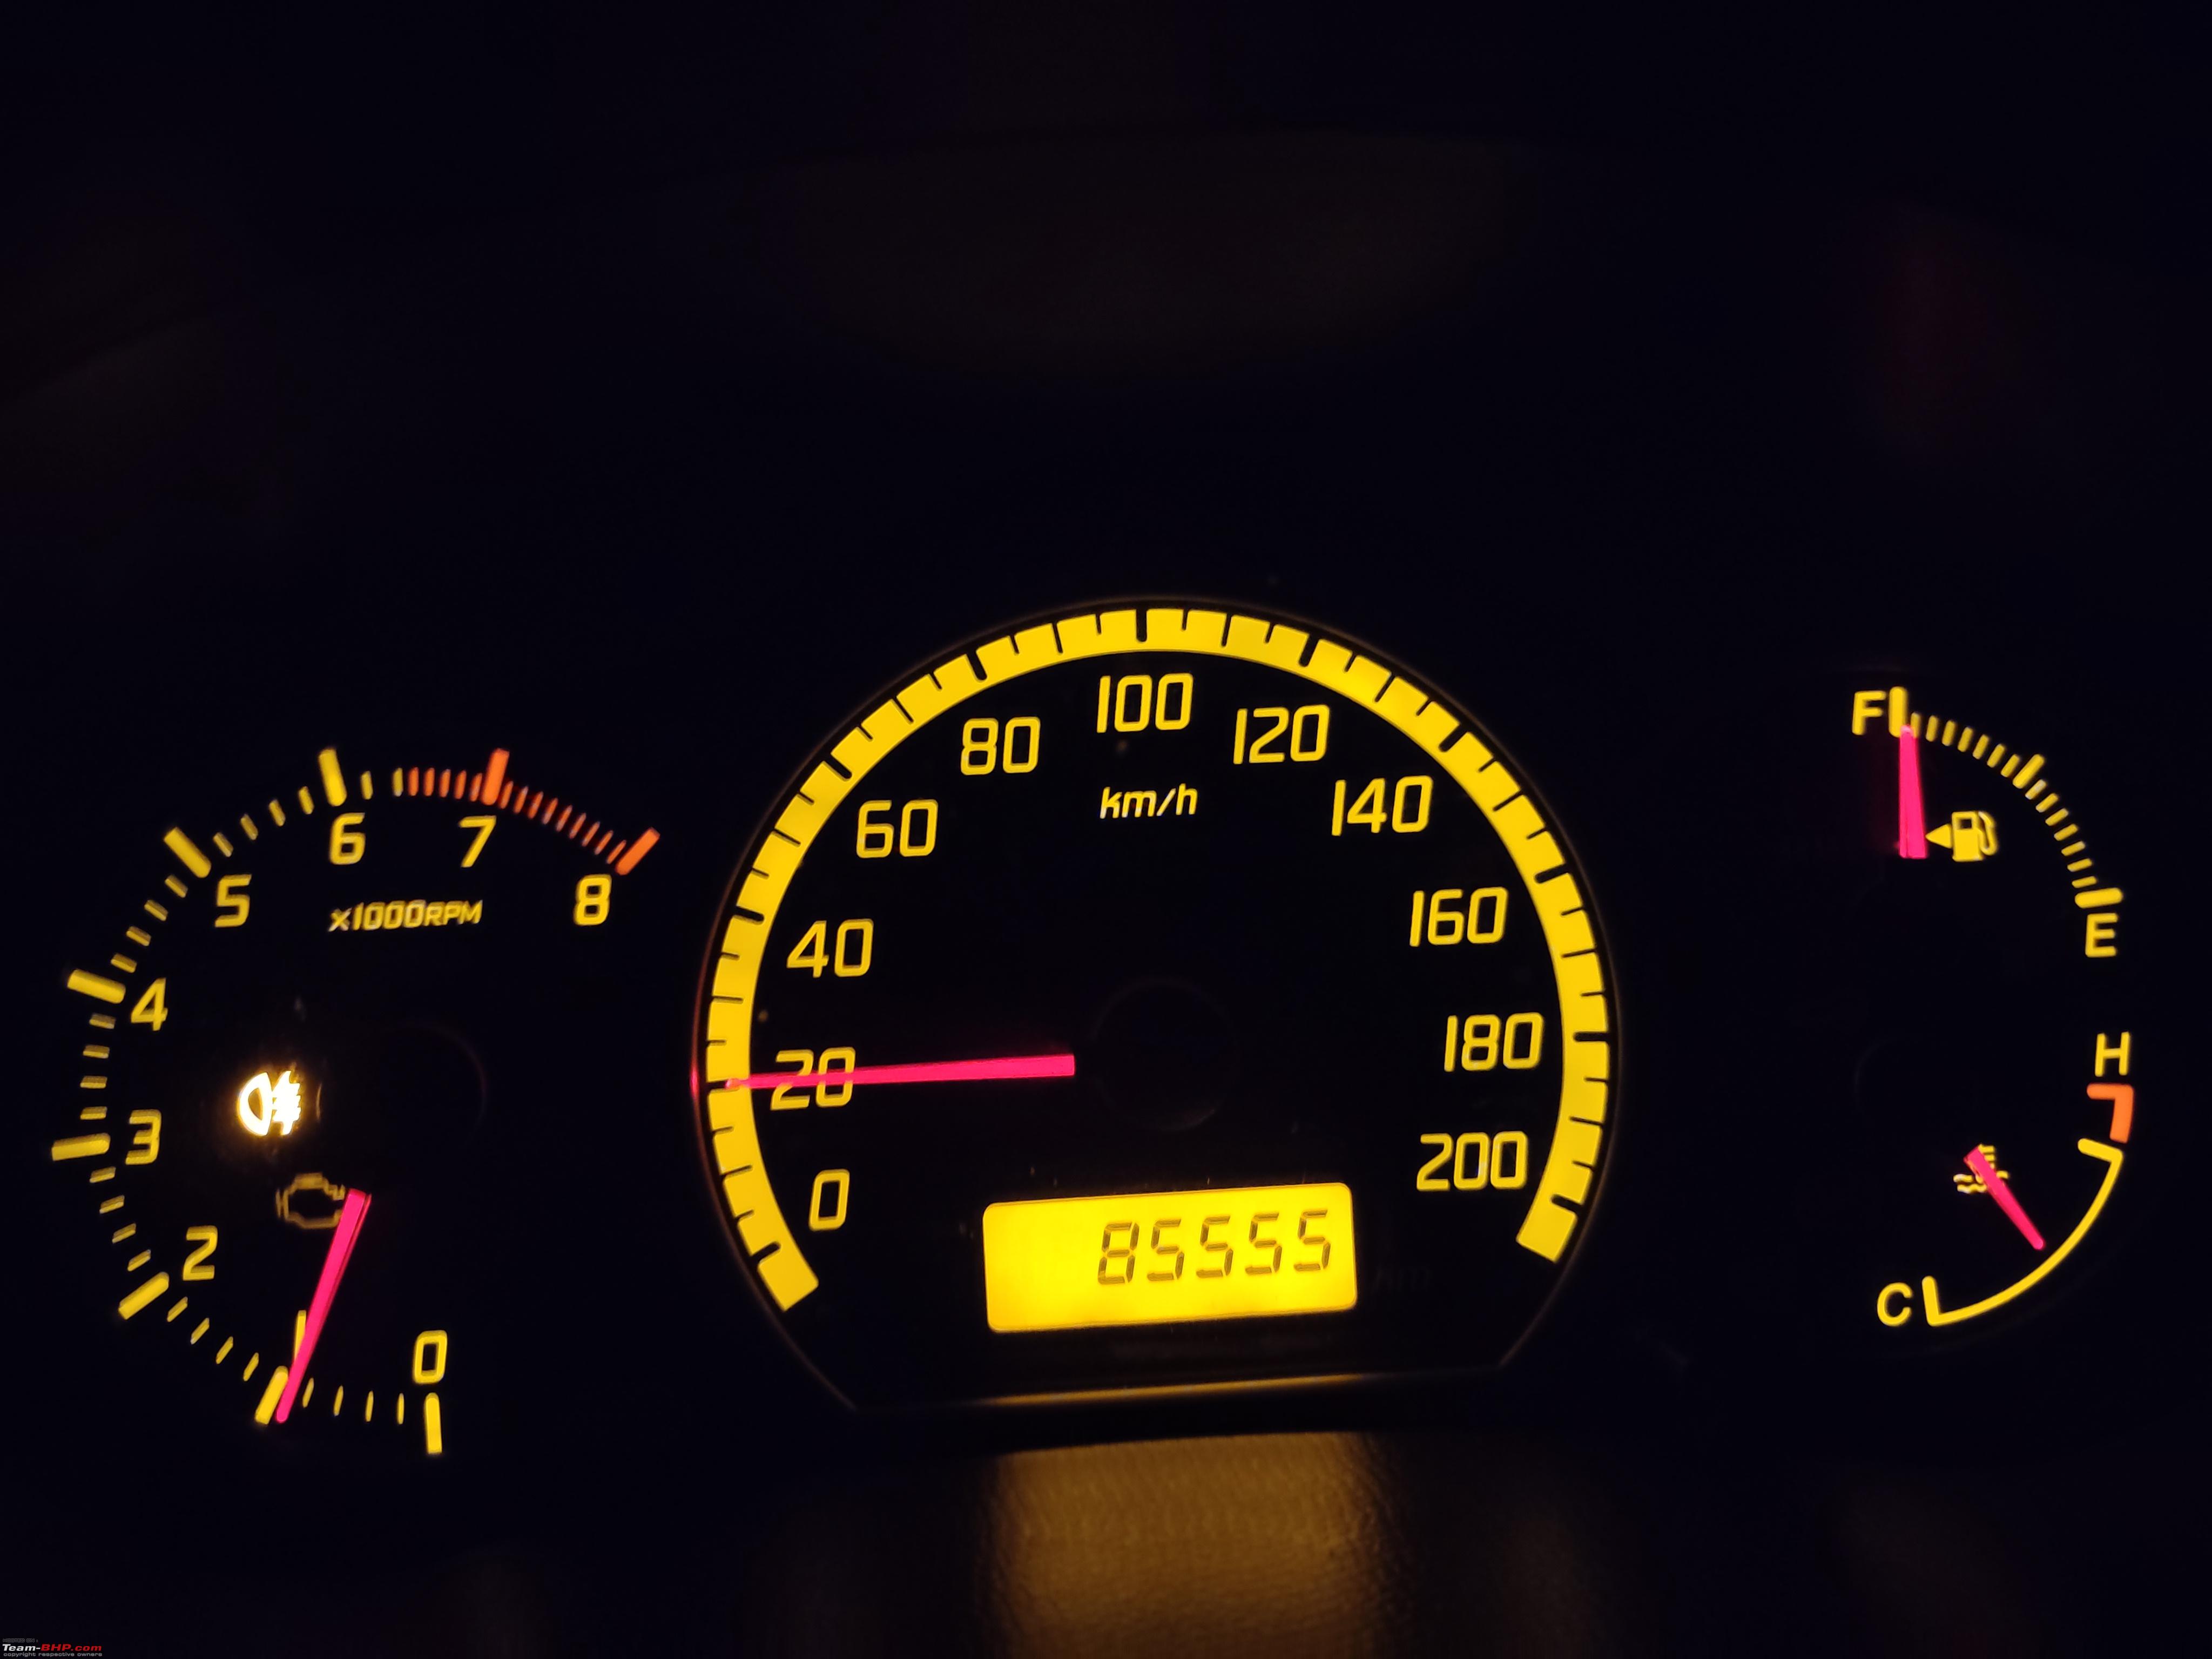 Odometer Regards Ashton Castelino Last edited by Ashtoncastelino : 14th July 2023 at 16:42. |

|  (57)
Thanks (57)
Thanks
|
| The following 57 BHPians Thank Ashtoncastelino for this useful post: | 1.2GT3GT, 2StrokeJunkie, A.K., abhi9044, Anuj 6227, ArijitGupte, arjab, audioholic, Boo, brownkaiser, cefiljoseph, chaksjr, chinmaypillay, dailydriver, digitalnirvana, eccentric, fluidicjoy, GaryTSI, gischethans, HappyWheels, Hemi6.2, HTC, keroo1099, Klub Class, lemedico, MinivanDriver, NitNac, Omkar, paragsachania, raptor_diwan, RijuC, Ritkon, sagarpadaki, Sangwan, shibujp, somspaple, sridhar-v, SS-Traveller, sudeepg, sukiwa, t3rm1n80r, Tanveer02, Taronish_E, Tgo, tharian, the.photosapien, TSI47, UMXR, vaasu, Varun_HexaGuy, vigsom, vinay5795, vishy76, Voodooblaster, WhiteSierra, whitewing, yogiii |
|
15th July 2023, 16:36
| #92 |
| BHPian Join Date: Oct 2011 Location: Bombay
Posts: 405
Thanked: 834 Times
| Re: Azure Grey 2006 Maruti-Suzuki Swift VXi | Ownership Review This ownership journey and wrenching on your own car has been fun to read, inspiring and makes me feel good about being a fellow Swift owner. In fact, I used to own the one with the different tail lamps youve fitted in silver and it was my first car that I ever drove. I have some questions - whether to the original creator of the thread or anyone else who could help me. 1. I currently own a 2018 Swift VXi. My cousin was in an accident in his Brio last week due to a lack of rear visibility and Ive seen several of these during the monsoon. I too wish to replace the rear glass with the ZXi model one. 2. If I do this, what are the pitfalls I should be worried about? My car is a 2018 so warranty is not a concern and Ive been getting it serviced by a garage of good repute owned by a friend. 3. How is the quality of parts available on Boodmo? Or is it better to purchase parts such as a rear windshield & other required wiper assemblies from MGA / MGP itself? 4. Lastly, the ZXI rear windshield also comes with defogger functionality. While the wiper control for the rear will probably need a new wiper stalk, can this be made functional as well? The defogger on a ZXi is mated to its climate control system that is completely different. What would it entail to make it all work? If anyone can help me out, that would be really great. I am currently gathering the money for this upgrade, so time is on my side. However I do hope someone can put my mind at ease soon that this upgrade is possible. Attaching some photos of my baby here for you guys as well. |
|
| (8)
Thanks
|
| The following 8 BHPians Thank Taronish_E for this useful post: | Ashtoncastelino, chinmaypillay, digitalnirvana, GaryTSI, sumeethaldankar, Varun_HexaGuy, wheelguy, yogiii |
|
17th July 2023, 13:48
| #93 | |||
| BHPian Join Date: Aug 2021 Location: Manipal
Posts: 277
Thanked: 2,288 Times
| Re: Azure Grey 2006 Maruti-Suzuki Swift VXi | Ownership Review Quote:
Quote:
Quote:
Regards Ashton Castelino Last edited by Ashtoncastelino : 17th July 2023 at 13:49. | |||
|
| (4)
Thanks
|

| The following 4 BHPians Thank Ashtoncastelino for this useful post: | digitalnirvana, subie_socal, Taronish_E, wheelguy |
|
18th July 2023, 11:58
| #94 |
| BHPian Join Date: Sep 2008 Location: Dehradun
Posts: 42
Thanked: 23 Times
| Re: Azure Grey 2006 Maruti-Suzuki Swift VXi | Ownership Review Now, my tappet cover gasket had given away and also started the infamous tappet cover leaking of the G Series Engine. Hi Ashton, I also own a Dzire 2008 with the same engine, I too replaced the tappet cover gasket but it started to seep again after a few kms on the left-hand side which I have highlighted in the picture, however, the seep is very less and it not dripping to the ground, not losing engine oil either, as you mentioned that the G series is known for tappet leakage/seepage, is it something one should be worried about? Thanks, Anuj Last edited by Anuj 6227 : 18th July 2023 at 12:00. |
|
| (3)
Thanks
|
| The following 3 BHPians Thank Anuj 6227 for this useful post: | Ashtoncastelino, NitNac, wheelguy |
|
18th July 2023, 13:47
| #95 | |
| BHPian Join Date: Aug 2021 Location: Manipal
Posts: 277
Thanked: 2,288 Times
| Re: Azure Grey 2006 Maruti-Suzuki Swift VXi | Ownership Review Quote:
Regards Ashton Castelino Last edited by Ashtoncastelino : 18th July 2023 at 13:48. | |
|
| (5)
Thanks
|
| The following 5 BHPians Thank Ashtoncastelino for this useful post: | Anuj 6227, chinmaypillay, digitalnirvana, vigsom, wheelguy |
|
18th July 2023, 18:07
| #96 |
| BHPian Join Date: Aug 2021 Location: Manipal
Posts: 277
Thanked: 2,288 Times
| Re: Azure Grey 2006 Maruti-Suzuki Swift VXi | Ownership Review Replacing the Defective Rear AxleThe new Earth 1 tyre’s were put at the 66,000kms mark in 2020 and Initially I did not pay much attention to the wear on the tyres. Every Wheel alignment and service I noticed the rear tyres were wearing slightly on the outside. I always get my tyres and alignment done at Jae’s Udupi who have one of the best equipment’s in this district. They told the tyre rotation would fix this wear evenly but still told me to keep a close eye. After doing almost 18,000kms with the Earth 1’s the rear tyres started showing more wear than the front. I started panicking and reached out to BHPians Dr.Naren, Leoshashi, Paragsachania and ChiranjitP for their thoughts and advice after sharing the reports from Jae’s. Naren had been facing a similar issue on his S-cross and in the end Maruti replaced his entire rear axle under warranty so he straight up told me to replace the rear axle. He also suggested if I did not want to replace the axle, I could try sourcing shims to be sandwiched between the axle and the spindle to get the correct balance. But even the shims were not cheap and not available here in India.  Right rear tyre 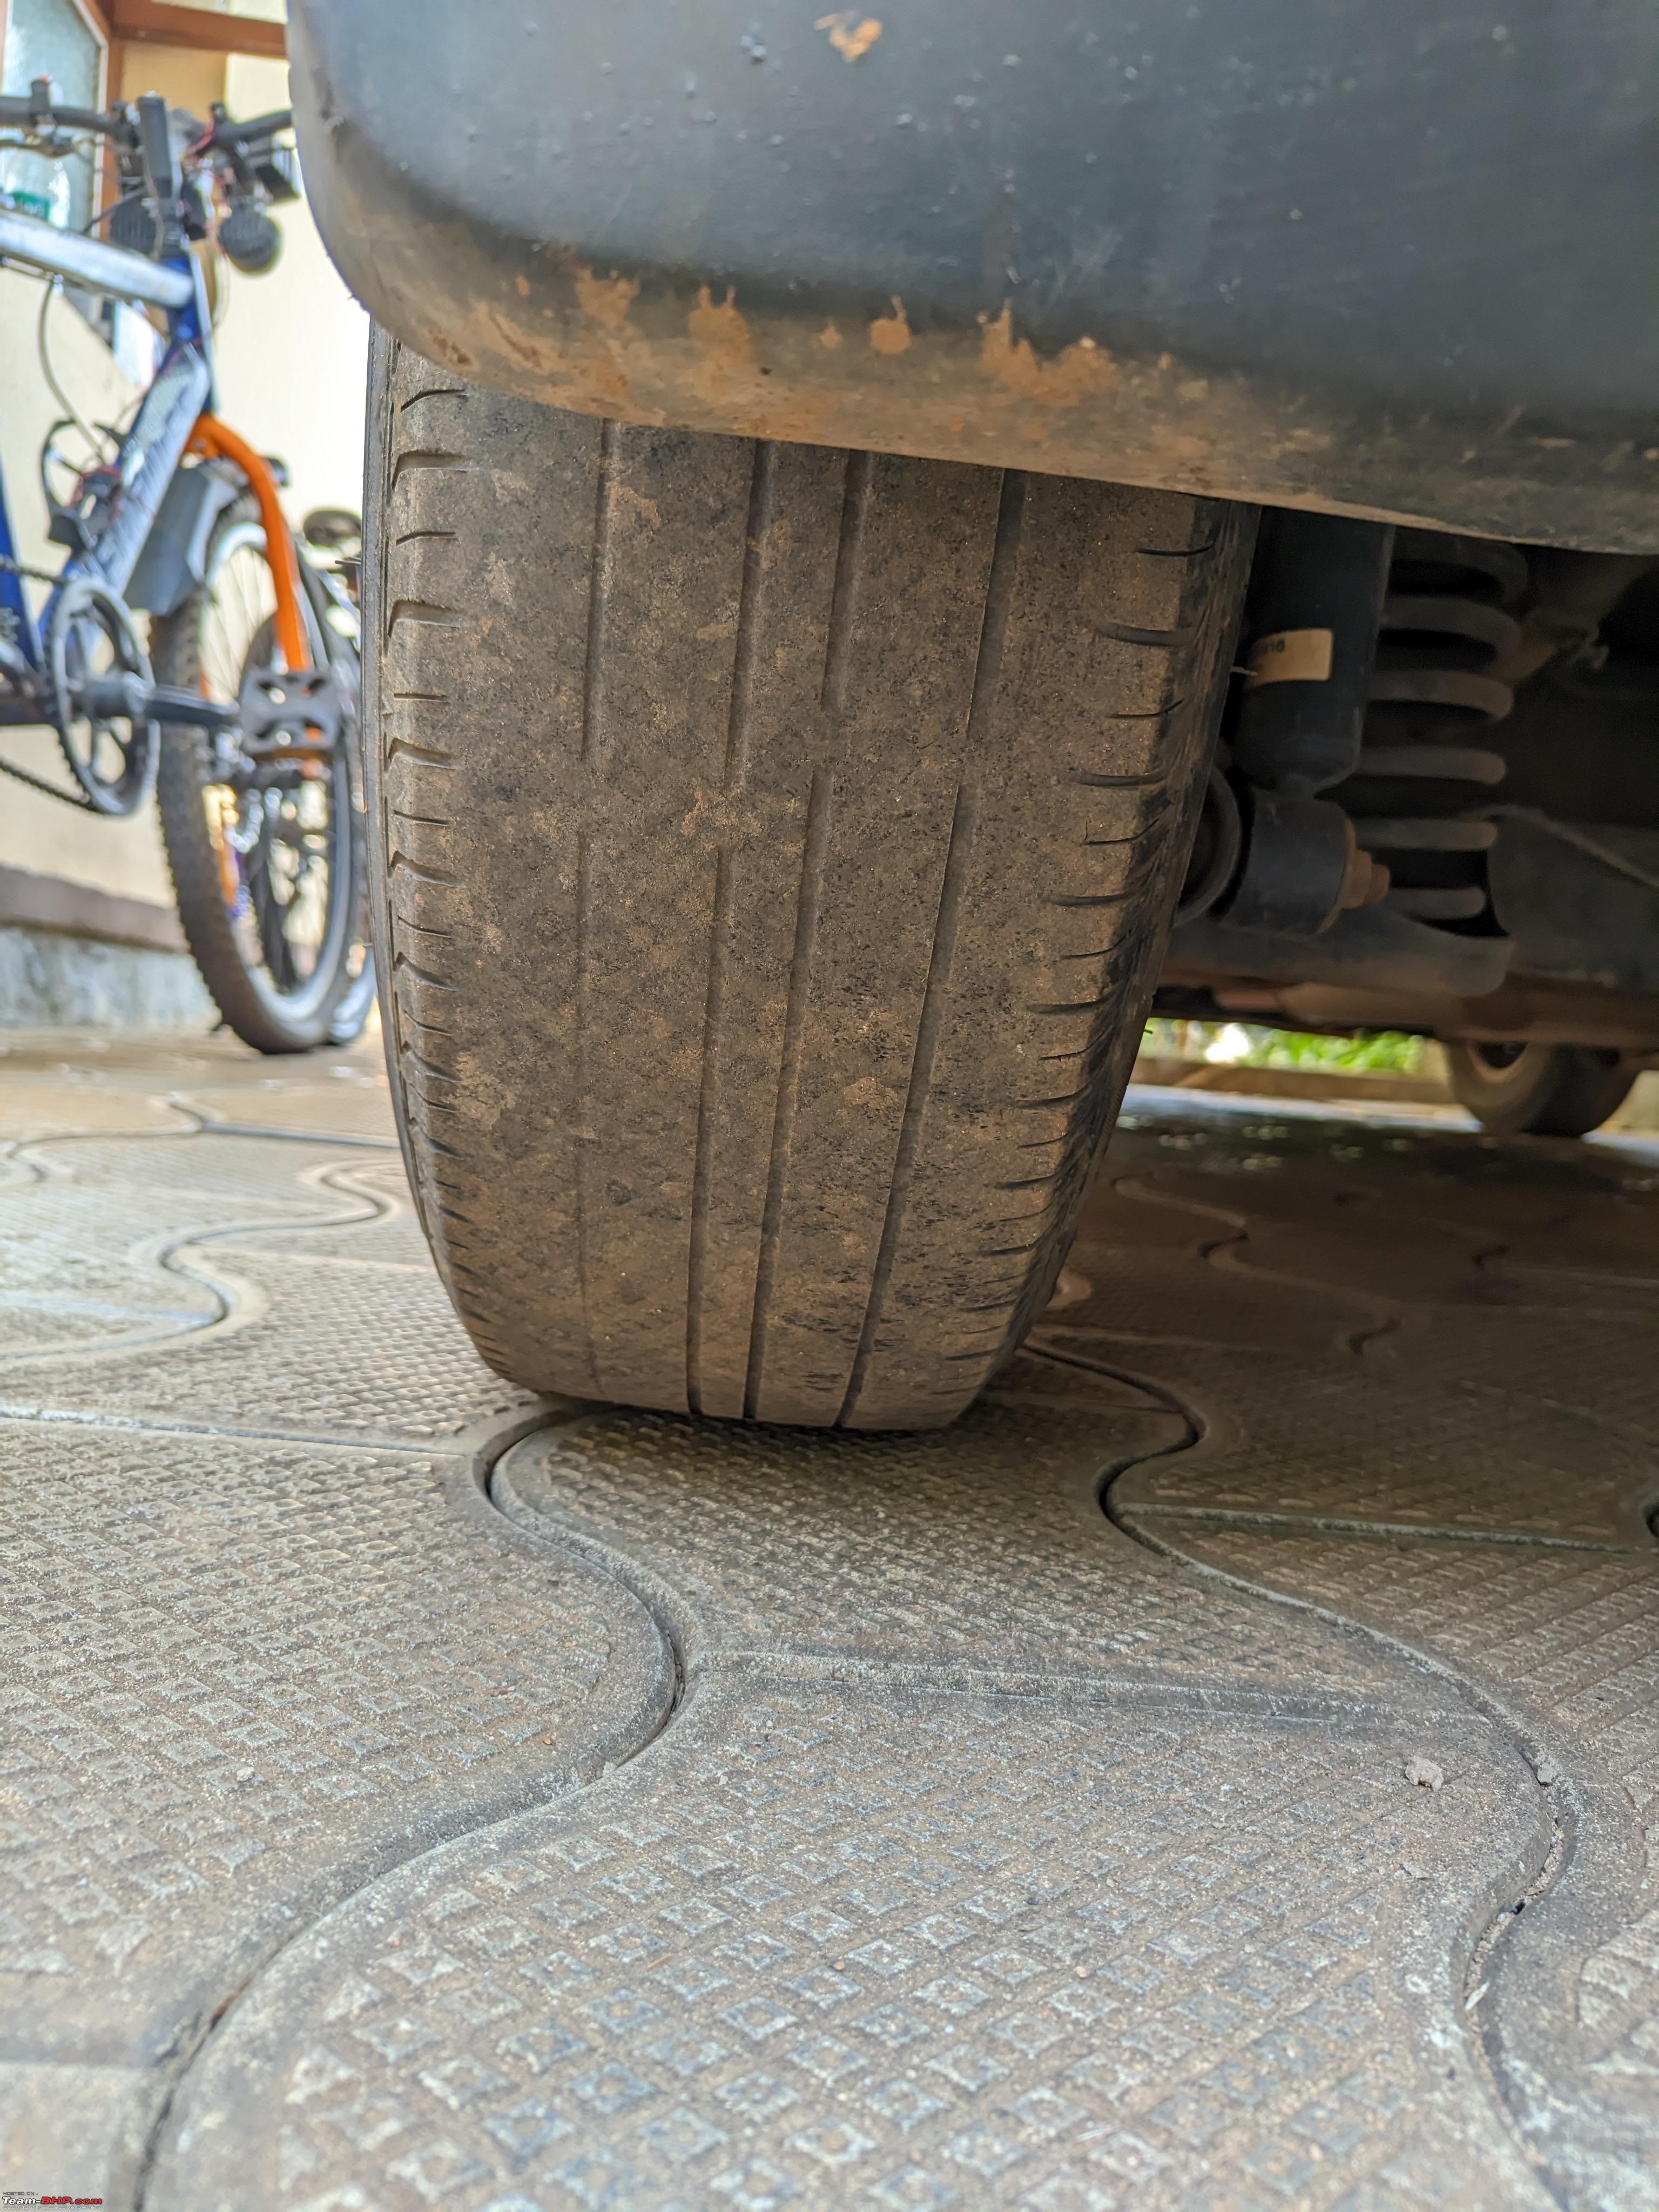 Left rear tyre  Since the Swift uses a Torsion Beam for the rear and not an independent suspension like other cars, there is absolutely no adjustment possible. My contact at MASS suggested changing the Spindles than the rear axle and check for wear. I again went to my mechanic Vishu and he had a tool to measure the distance between the wheels.  He took the measurement of the front part of the rear tyre, locked the tool measurement and compared it to the back part of the rear tyre. IT HAD A GAP OF ALMOST 1-1.5CM !! Upon closer inspection I also noticed the right side bush had huge cracks. I checked for the new bushes and to my bad luck they were expensive at ₹ 1910 each side because they are SGP. It would easily cost me more than ₹5000 for replacing the bushes and I wasn’t sure if that was the main cause of the tyres wearing out because usually when a bush is busted, there will be lot of play and also a clunking noise but I had none.  Notice the difference in gap  The right rear axle bush cracked Vishu suggested changing the rear axle as an assembly because the new rear axle comes pre-installed with bushes and moreover the lathe shops in my area would heat up the rear axle to put new bushes, this would reduce the strength of the metal and lead to further rusting issues. Now since I’m keeping the car till its EOL and also in the future the availability of new rear axle is unknown I started to save up for the parts. I prepared a list of items needed for this replacement and submitted it to my MGP. They managed to source all the parts from the list under 4 days and also cut a good deal for me. Since brake lines have to be disconnected and brake bleeding is to be done, I took this opportunity to replace the 4 rubber brake hoses because they had started showing their age and developed cracks. List of items procured were : • Rear Axle • Spindle X 2 • Wheel cylinder X 2 • Rear springs (K12M since it got a softer rear suspension) • Rear brake hose • Rear brake hose • Front brake hoses X 2 • Axle nut X 2 • Brake fluid 500ml X 2 To save on labour costs and also the itch for DIY’s me and dad took up this project on a weekend, Vishu was kind enough to lend me two jackstands for the work. Having read the instructions from the service manual and watching few YouTube videos I was ready to undertake the work.  Parts loaded  New rear axle  All the parts and tools ready to get to work !   Lifted the car and supported it on the jack, removed the rear wheels, unbolted the rear shock absorbers, Disconnected the brake lines, removed the rear springs and bought out the old rear axle.  Dad getting his hands dirty! Again me and dad took a tape to measure and compare the old rear axle with the new one and as expected there was a difference. Started assembling the brake lines to the new axle from the old along with new fasteners, cleaned the old backing plates and installed the new wheel cylinders along with new spindles on both sides while torquing them to spec.   It got late at night, so we resumed work next day around noon after attending prayers in the morning.  New wheel cylinders and Spindle in Place  Closer look at the broken axle bush  Home courtyard makeshift Workshop 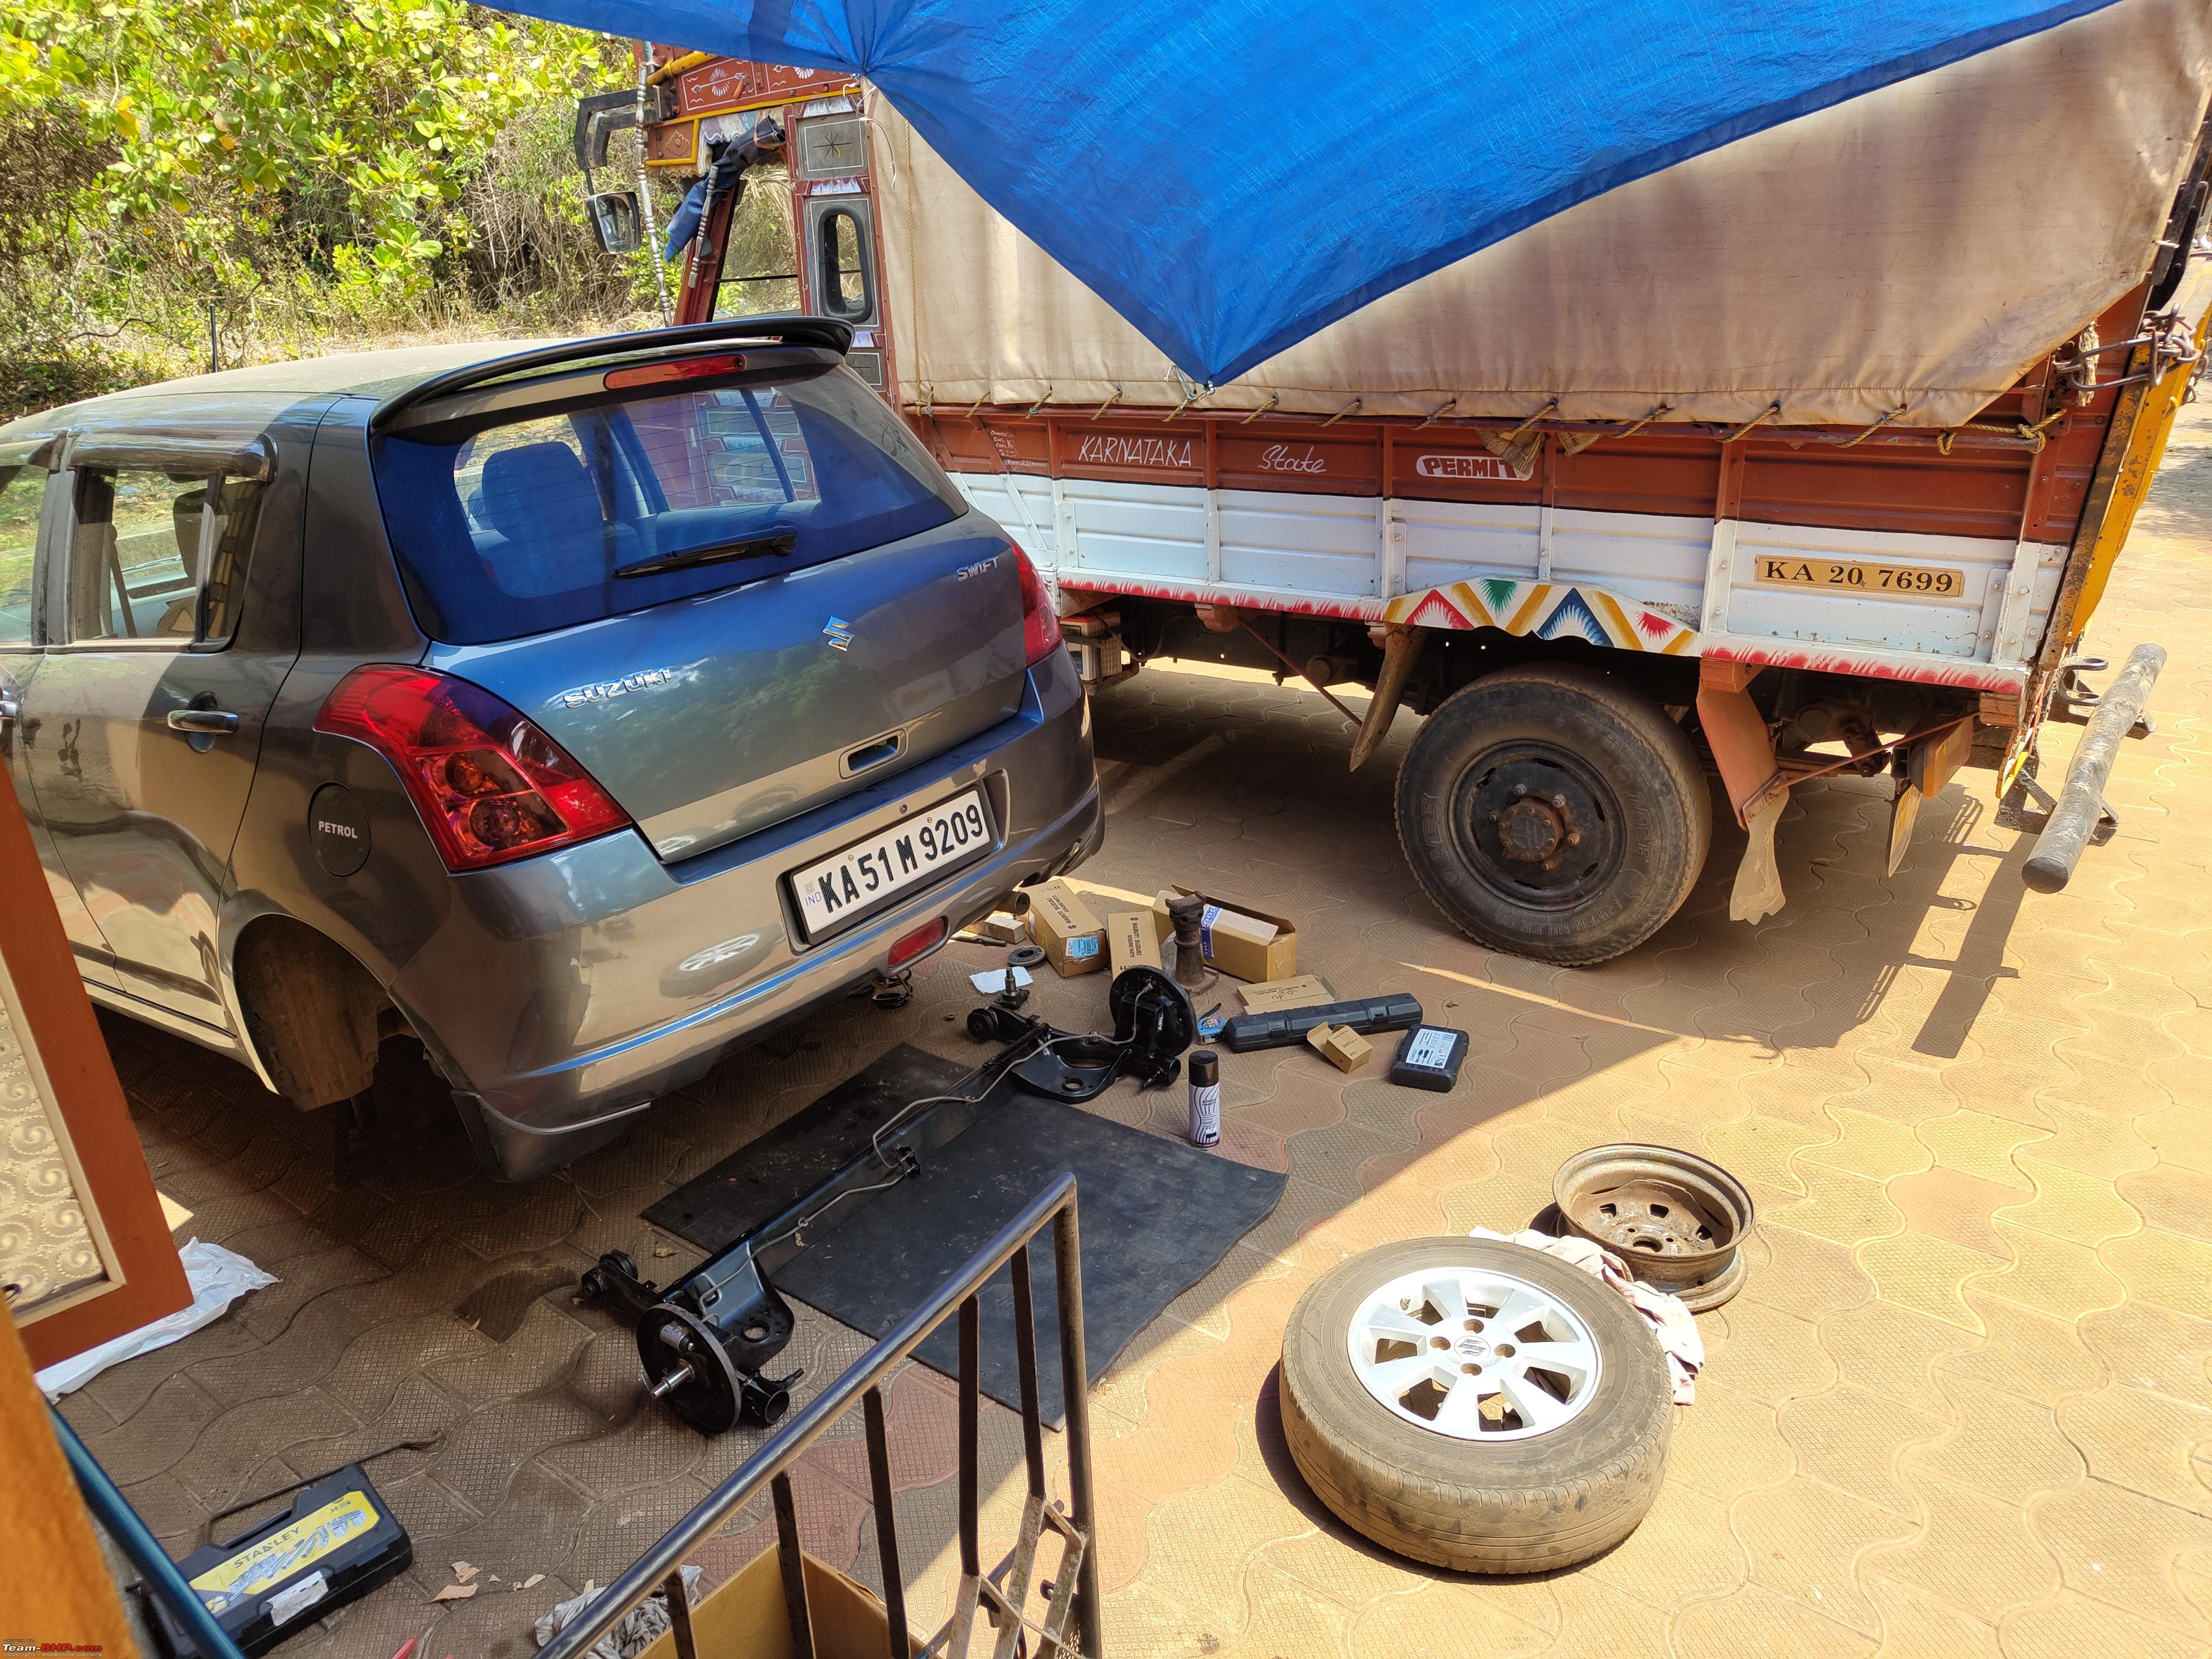 Got my uncle’s 407 to hold a tarpaulin and provide shade in the scorching heat and continue the work. We struggled for almost an hour to mount the new rear axle onto the chassis because the bolts were not aligning. I almost gave up at this point because I was benching the rear axle from underneath the car whilst dad trying to tighten the bolt. Alas it was done and we installed the springs, brake shoes, adjusted the handbrake and tightened the new axle nuts.  New axle in place !  Next day I took the car to Vishu to measure the gaps between the rear tyres exactly like he did the first time. Like expected the measurement was SPOT ON !   Since I had recently performed alignment at Jae’s just 700kms before the Axle change, I was eligible for a free alignment check. Checked the readings and there was huge difference in the values from before.   New Values with the new Axle While at Jae's I checked the vehicle alignment reports all the way back to 2015 and it seems that this old axle was out of shape since 2015. at least that is what is shown in the reports. Previous owner put 4 new Yokohoma Earth 1s at 40000km and by the time i took ownership in 2020 with 66,000kms it was bald completely depicting same amount of wear. I spoke to the previous owner and he too wasn't aware of this issue since the car was driven sparingly. Most of y'all might feel it doesn't make financial sense to have fixed this issue but this car is the one which has taught me whatever I know today and also since this is my family's first car it won't be seeing another owner on the papers till its EOL. Touchwood ! Moreover it would be eating out the tyres which are far more expensive than the axle cost. One thing I would like to share what BHPian Leoshashi conveyed is that Maruti specifically tells never to place jack right under the Rear axle. There is a sticker stuck on the axle alerting the same. 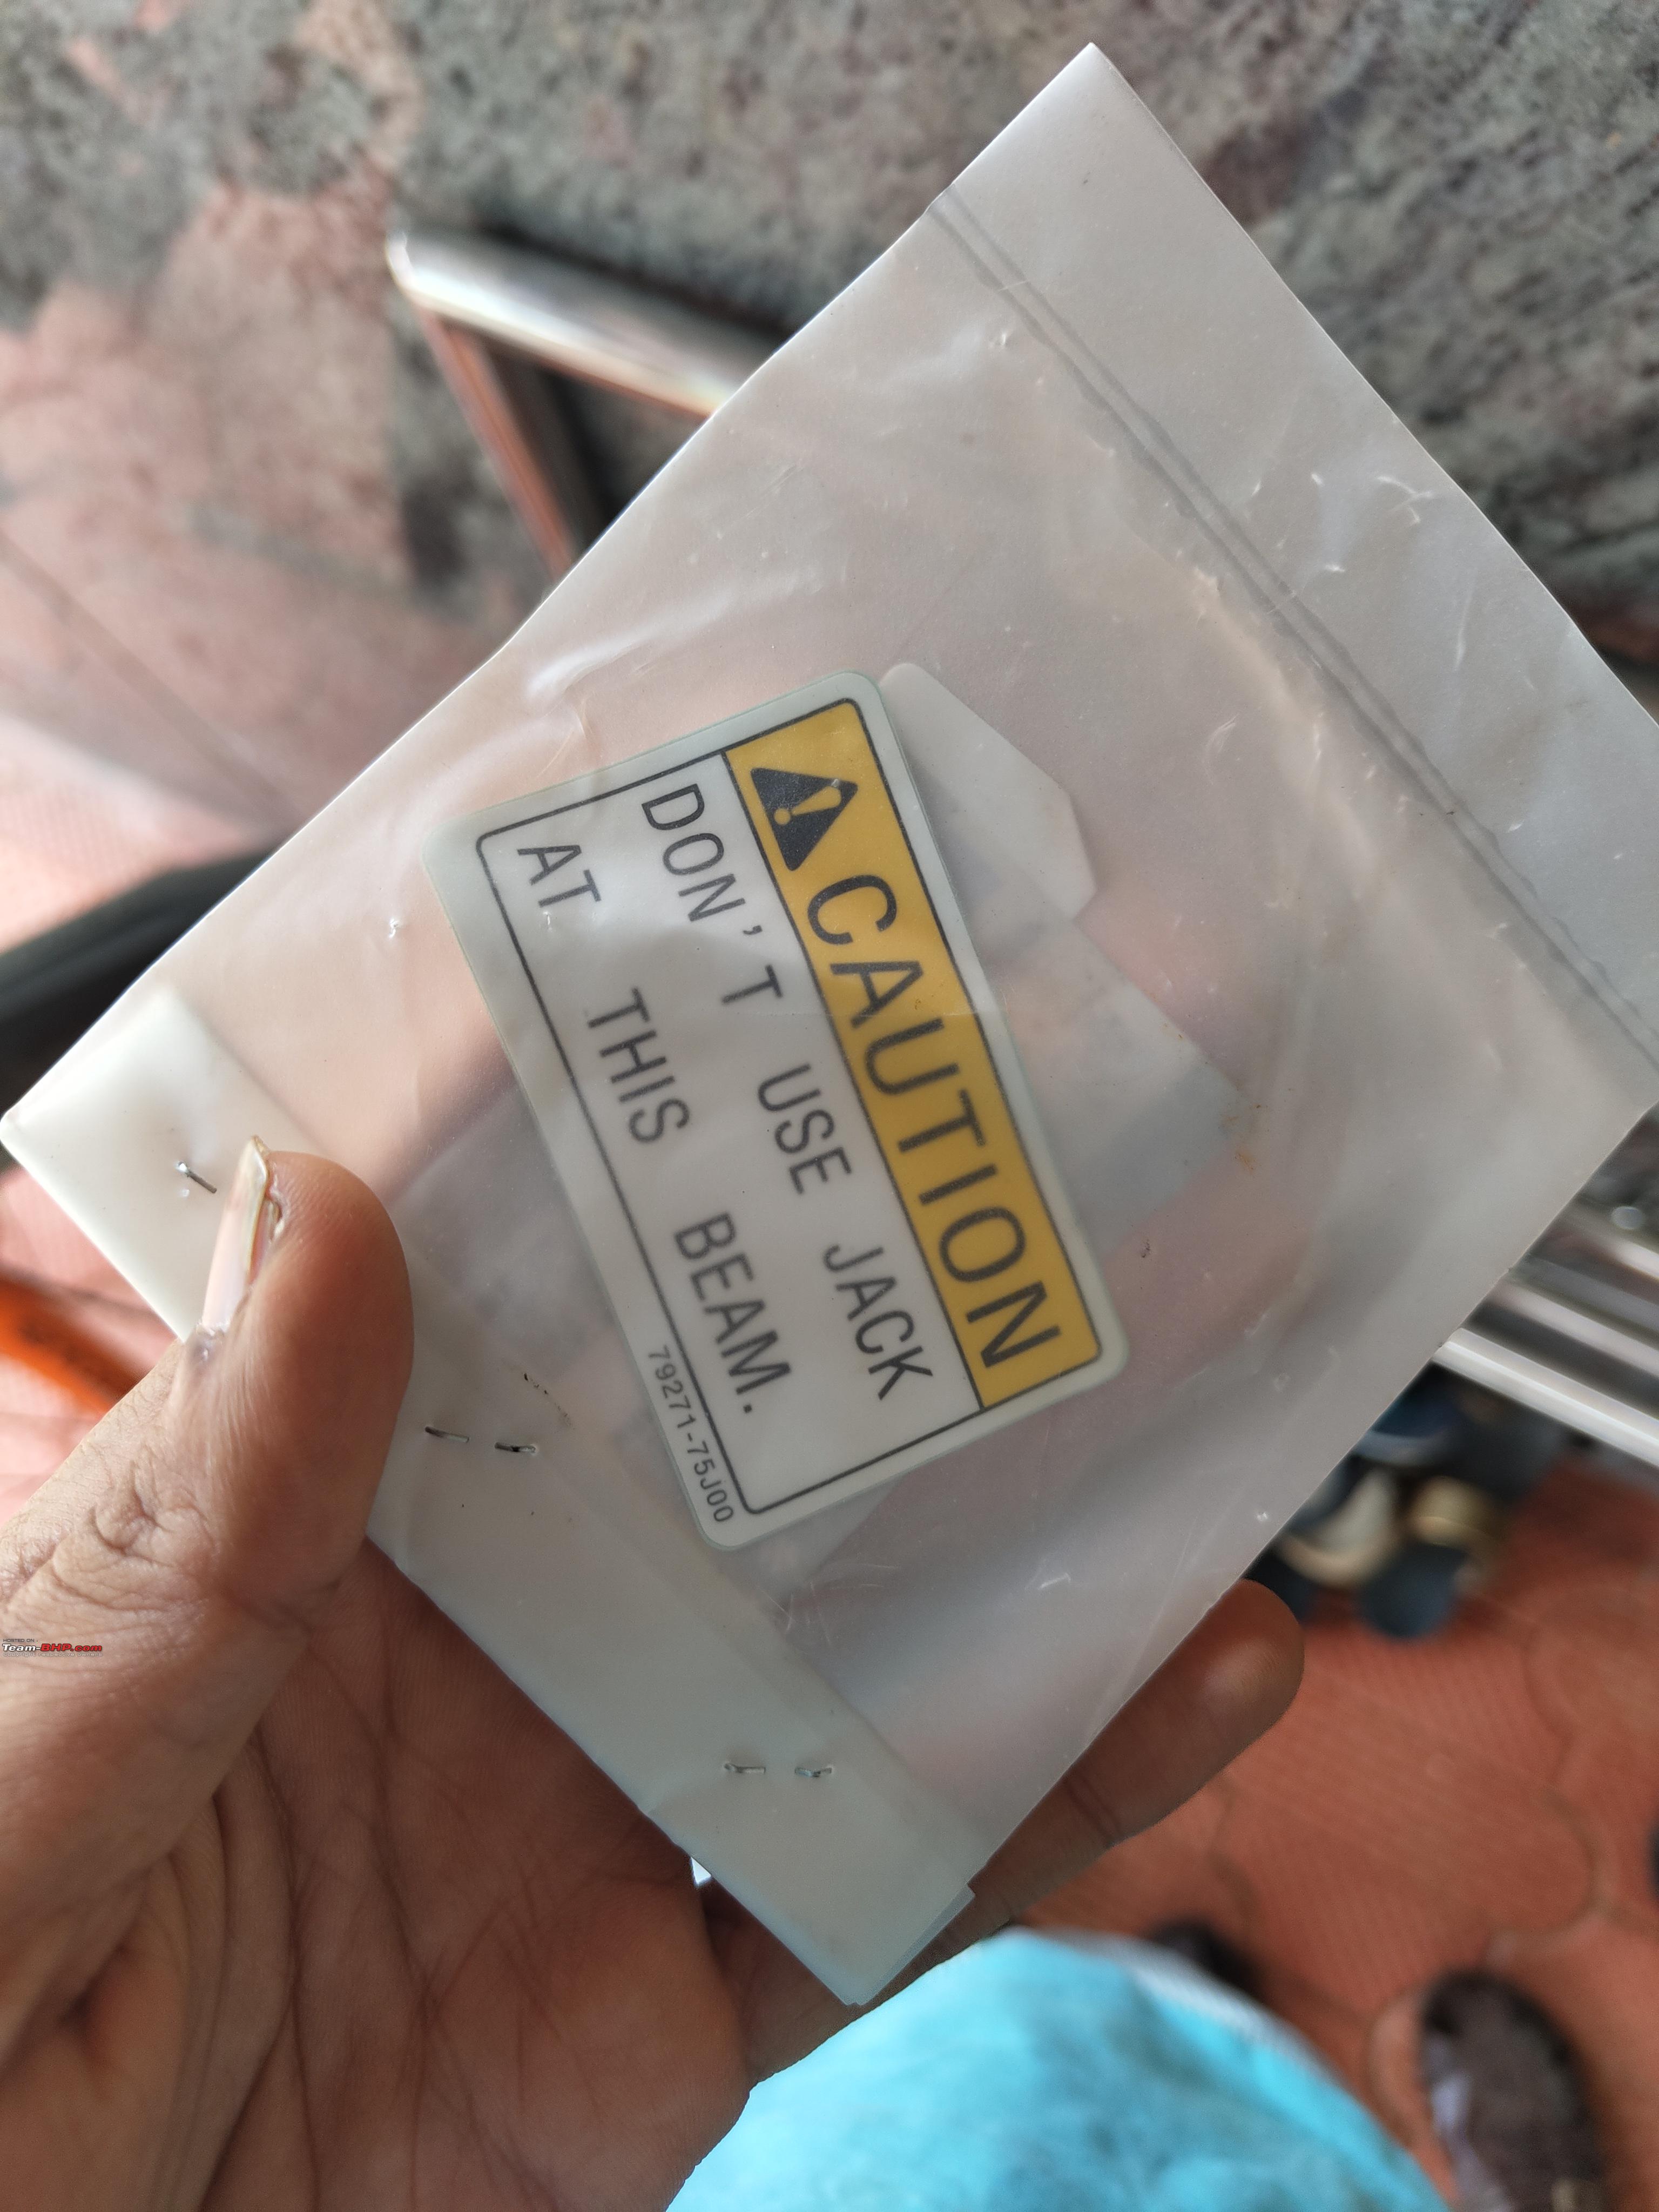 Signing off with two pictures of this steed   Regards Ashton Castelino Last edited by Ashtoncastelino : 18th July 2023 at 18:08. |
|
| (70)
Thanks
|
| The following 70 BHPians Thank Ashtoncastelino for this useful post: | 2StrokeJunkie, abaliga, adrift@life, aeroamit, ArijitGupte, arjunsatheesh, batterylow, bhphog, Bibendum90949, bikertillidie, catchjyoti, chaksjr, chinmaypillay, cityslicker86, CzechItaliaMoto, d3mon, dailydriver, Diezeeel, digitalnirvana, djay434, dkaile, Dry Ice, eccentric, fluidicjoy, funkykar, Geo_Ipe, giri1.8, gischethans, GwD, HappyWheels, HTC, InControl, KartAttack, ketan007, Klub Class, krish3, Kurrant, maddyg, MithunSathianat, Mundkaite, nettooran, Nitish B Shetty, NitNac, Omkar, Pennant1970, PM - B, raptor_diwan, Rshreyansh, samabhi, sanjayrozario, satrikon_454, Sen, sri2012, srvm, Strider24, sudeepg, sukiwa, sumeethaldankar, Tgo, tharian, thecarguy, thewhiteknight, UD17, vaasu, vigsom, vishy76, VivekCherian, voldemort, Voodooblaster, wheelguy |
|
19th July 2023, 13:26
| #97 | |
| BHPian Join Date: Sep 2008 Location: Dehradun
Posts: 42
Thanked: 23 Times
| Re: Azure Grey 2006 Maruti-Suzuki Swift VXi | Ownership Review Quote:
Thanks Anuj | |
|
| ()
Thanks
|
|
19th July 2023, 15:05
| #98 | |
| BHPian Join Date: Aug 2021 Location: Manipal
Posts: 277
Thanked: 2,288 Times
| Re: Azure Grey 2006 Maruti-Suzuki Swift VXi | Ownership Review Quote:
Keep observing this noise levels closely. If it is increasing after lots of kms then its better to lower the subframe and have a look. Peace of mind. Hope this helps. Regards Ashton Castelino | |
|
| (2)
Thanks
|
| The following 2 BHPians Thank Ashtoncastelino for this useful post: | Anuj 6227, digitalnirvana |
|
20th July 2023, 10:46
| #99 |
| Newbie Join Date: Jul 2020 Location: Chennai
Posts: 21
Thanked: 69 Times
| Re: Azure Grey 2006 Maruti-Suzuki Swift VXi | Ownership Review I faced a similar issue in our 2005 Corolla. The beam has a slight bend and this sets the alignment off by a few minutes. Since your bushes had worn out, it makes sense to replace the entire axle Assy. We used a small shim between the spindle and the beam to counter the bend in the beam and it solved the issue. Drives perfectly fine and the tyre wear is even now. |
|
| (4)
Thanks
|
| The following 4 BHPians Thank avsrihari for this useful post: | Ashtoncastelino, cefiljoseph, digitalnirvana, InControl |
|
20th July 2023, 23:24
| #100 |
| BHPian Join Date: Jun 2022 Location: hosur
Posts: 83
Thanked: 195 Times
| Re: Azure Grey 2006 Maruti-Suzuki Swift VXi | Ownership Review Great DIY, nice deduction finding the root cause and taking the trouble to fix it yourself. Hope you get to retain the car as you wish. Good luck. happy motoring. |
|
| (2)
Thanks
|
| The following 2 BHPians Thank adrift@life for this useful post: | Ashtoncastelino, digitalnirvana |
|
21st July 2023, 14:46
| #101 |
| Newbie Join Date: Aug 2021 Location: Delhi
Posts: 2
Thanked: 12 Times
| Re: Azure Grey 2006 Maruti-Suzuki Swift VXi | Ownership Review Hey, Ashton i am looking for a solution for my 06' swift zxi, ever since i got my timing belt changed at 1.50lakh kms,from the day itself i noticed fluctuating rpm. It further increased after ac was turned on, my SA suggested cleaning throttle body but it didn't work. Next step he suggested was to try a new throttle input sensor and throttle body sensor(whole assembly was swapped with a new one just to check), but that also didn't seem to solve the problem rpm still fluctuates but earlier it was below 1km now idling rpm has gone to 1.5k and it fluctuates. Now my SA has suggested checking the wiring which leads to ACM(i have no idea what ACM is), he just said it is located under the dashboard and if there is an issue with wiring we will get to know. But, i think issue is with something else which i or my SA or mechanic cannot pin point. Do you have any leads/ideas what it possibly can be? |
|
| ()
Thanks
|
| |
|
21st July 2023, 15:05
| #102 | |
| BHPian Join Date: Aug 2008 Location: bangalore
Posts: 613
Thanked: 1,815 Times
| Re: Azure Grey 2006 Maruti-Suzuki Swift VXi | Ownership Review Quote:
| |
|
| (2)
Thanks
|
| The following 2 BHPians Thank keroo1099 for this useful post: | Ashtoncastelino, Roodra |
|
21st July 2023, 17:22
| #103 | |
| BHPian Join Date: Aug 2021 Location: Manipal
Posts: 277
Thanked: 2,288 Times
| Re: Azure Grey 2006 Maruti-Suzuki Swift VXi | Ownership Review Quote:
*Timing check *Ignition coils *spark plugs with regards to what your SA told, There is BCM, ECM and EPS Controller under the dashboard not sure to which one he was referring to but since you mentioned the car was perfectly fine before the timing belt change it is better to get it checked once again. Regards Ashton Castelino | |
|
| (2)
Thanks
|
| The following 2 BHPians Thank Ashtoncastelino for this useful post: | digitalnirvana, Roodra |
|
22nd July 2023, 00:22
| #104 | |
| Newbie Join Date: Aug 2021 Location: Delhi
Posts: 2
Thanked: 12 Times
| Re: Azure Grey 2006 Maruti-Suzuki Swift VXi | Ownership Review Quote:
I'll get it checked for vaccum leak as keroo1099 suggested and ISC valve and next would be timing, spark plug, ignition coil. I suspect it has something to do with timing because immediately after timing belt it started to act up. Thank you, I'll post whatever is the diagnosis. | |
|
| (2)
Thanks
|
| The following 2 BHPians Thank Roodra for this useful post: | Ashtoncastelino, digitalnirvana |
|
23rd July 2023, 16:14
| #105 | |
| BHPian Join Date: Oct 2011 Location: Bombay
Posts: 405
Thanked: 834 Times
| Re: Azure Grey 2006 Maruti-Suzuki Swift VXi | Ownership Review Quote:
Thank you for your prompt reply. I shall be doing a bit more research on this topic and checking prices from MGP / MGA as well as Boodmo when sourcing the rear windshield. Will probably have to wire the defogger to a custom switch on the RHS of the dash, next to the headlight beam level adjuster. Let’s hope that is possible as a fully functional rear glass would be ideal in Mumbai weather conditions! Last edited by Taronish_E : 23rd July 2023 at 16:16. Reason: Edit due to spelling errors | |
|
| (2)
Thanks
|
| The following 2 BHPians Thank Taronish_E for this useful post: | Ashtoncastelino, digitalnirvana |
|