Team-BHP > Technical Stuff > DIY - Do it yourself
Register New Topics New Posts Top Thanked Team-BHP FAQ


Reply
  Search this Thread
1,050,283 views
Old 30th November 2019, 14:08   #2101
Distinguished - BHPian
 
Thad E Ginathom's Avatar
 
Join Date: Jun 2007
Location: Chennai
Posts: 11,005
Thanked: 26,447 Times
Re: Tools for a DIYer

The tool in the boot should easily undo wheel nuts. The most is should require is standing on it. How else are we supposed to handle a roadside wheel change by ourselves?

I've suffered from it not being so. Even the puncher guy across the road couldn't shift them. Being a 2-wheeler tyre guy, he didn't have pneumatic, but he did have bigger muscles than me. He could only pump in enough air to get me the km to the tyre shop.

Every driver needs to be able to change a wheel. It's a matter of safety of they can't, and of foolishness if they don't know how.

(I think I should start carrying a cheater pipe in the boot. For undoing, never for tightening)

Last edited by Thad E Ginathom : 30th November 2019 at 14:11.
Thad E Ginathom is offline  
Old 30th November 2019, 15:24   #2102
Senior - BHPian
 
Join Date: May 2005
Location: Location
Posts: 5,766
Thanked: 9,054 Times
Re: Tools for a DIYer

Quote:
Originally Posted by Thad E Ginathom View Post
The tool in the boot should easily undo wheel nuts. The most is should require is standing on it. How else are we supposed to handle a roadside wheel change by ourselves?

I've suffered from it not being so. Even the puncher guy across the road couldn't shift them. Being a 2-wheeler tyre guy, he didn't have pneumatic, but he did have bigger muscles than me. He could only pump in enough air to get me the km to the tyre shop.

Every driver needs to be able to change a wheel. It's a matter of safety of they can't, and of foolishness if they don't know how.

(I think I should start carrying a cheater pipe in the boot. For undoing, never for tightening)
The joy of impact is that it gets the job done with the least amount of time and least amount of exertion. Like you suffered you do not have to depend on external muscle or mess with cheater bar if the wheel nut does not move.

The ambient temperature on NH4 passing through TN on a sunny summer day ranges from 36C to 38C normally and I have seen it go till 42C on certain days and at certain places (I have a habit of watching/logging ambient temps). One some sections even a shade is pretty hard to come by. If its in the night then one will not be fryed in the sun but then there are other things to worry about depending on where it happens.

In both cases the best bet would be to get the job done as quick as possible and get back on the road.

In some vehicles where the spare is carried under and secured using chains it takes some time to get the tyre to the ground and even more time to get the bad tyre up and secured on the underbody. And then it takes a lot of turning to get the supplied screw bottle jack to lift the vehicle. I use impact for all functions - dropping the tyre, lifting the vehicle, dropping the vehicle and hoisting up the tyre and it works beautifully and saves a lot of time. The actual wheel change is also over in a matter of minutes.

This whole exercise can be done within 15 minutes with a power tool. I have done it both ways and I will never ever do it the hard way again, if given a choice. I do not torque the wheel nuts with a torque wrench either instead I use the electric impact for that also.

Power tools are good, cordless are even better. Because it works by the side of road also, unlike corded or air (if one does not drive a lorry or an offroad rig with air tank).

If one wants to feel manly one can always use the manual method over power assisted.

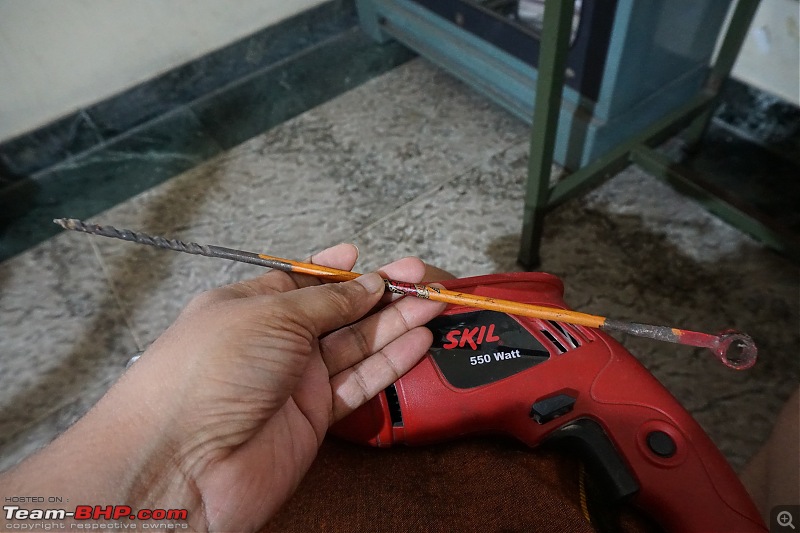
Drill drill drill,
Tools for a DIYer-prb00507.jpg

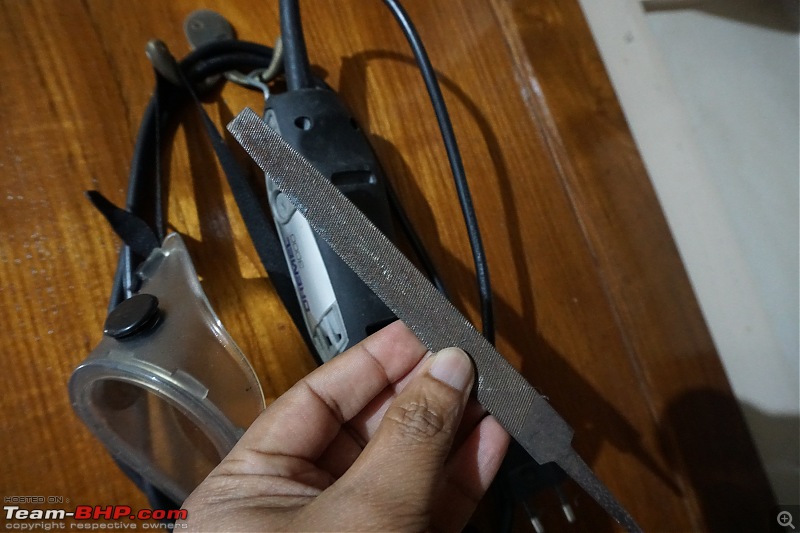
grind grind grind,
Tools for a DIYer-prb00508.jpg

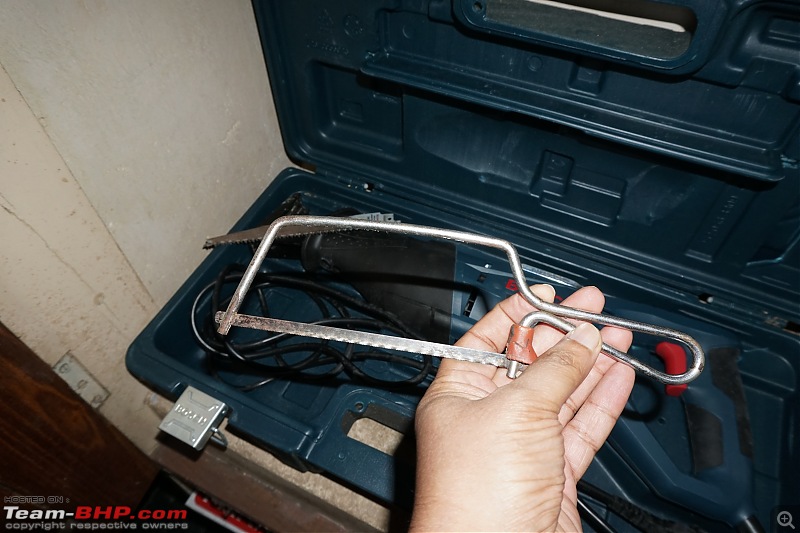
saw saw saw,
Tools for a DIYer-prb00509.jpg

and wrench wrench wrench.

At times when precision is required manual might be better if the power tool is not up to it.

Last edited by Sankar : 30th November 2019 at 15:35.
Sankar is offline   (1) Thanks
Old 30th November 2019, 23:11   #2103
Distinguished - BHPian
 
Thad E Ginathom's Avatar
 
Join Date: Jun 2007
Location: Chennai
Posts: 11,005
Thanked: 26,447 Times
Re: Tools for a DIYer

I have no muscle, and my manliness extends only as far as standing on the wheel wrench! But... I don't have to plug it in to anything. I don't have any cordless power tools. But it's a lovely idea to wind the jack up with one!

In reality, I barely remember the last time I changed a tyre for and by myself, and out on the road, but one should be prepared to.

Try putting that file in white vinegar for 24 hours. I tried that with one of mine recently, and was amazed at the rust and crud that came off it. And it feels so sharp too! I've heard of the trick, seen it in youtube, but never tried it before.
Thad E Ginathom is offline  
Old 1st December 2019, 09:26   #2104
BANNED
 
Join Date: Jan 2006
Location: Cochin
Posts: 2,195
Thanked: 268 Times
Re: Tools for a DIYer

Quote:
Originally Posted by Thad E Ginathom View Post
I vote for a socket. Socket sets often include an extension bar.
Quote:
Originally Posted by saket77 View Post
Try a ring spanner if there is space to turn the spanner. If not, a socket wrench should definitely too.
Tried a socket wrench, worked for the -ve terminal but not for the +ve terminal, because its in a tight spot. Don't have a ring spanner, will buy one.


Quote:
Originally Posted by R2D2 View Post
Safety first - that's the battery's +ve terminal. So make absolutely sure you do NOT touch any tool/spanner (whilst it's in contact with the battery post/terminal) to any other metal part of the car. That will cause a massive spark at the very least and at worst can cause an explosion. So to be safe remove the -ve cable from the battery post. Use a 10mm spanner to do this. Consult your car's owners manual for the correct spanner sizes to remove battery terminals. 10 mm is the most common size.

PS - Do consider cleaning that terminal. Only use petroleum jelly (Vaseline) to coat it.
Although I had removed the -ve terminal first, there was a small spark on two occasions when it touched a metal part. Don't know why.

I've always used petroleum jelly but this time I used: Battery Grease

In this article, it mentions to apply the grease to the terminal after you have connected and tightened the battery cable. I've always seen mechanics applying the grease before fixing the clamp!

When using a Battery Grease, should we apply it before or after fixing the battery clamp?

Last edited by mithun : 1st December 2019 at 09:28.
mithun is offline   (2) Thanks
Old 1st December 2019, 09:37   #2105
Distinguished - BHPian
 
R2D2's Avatar
 
Join Date: Oct 2008
Location: Pune
Posts: 3,231
Thanked: 5,742 Times
Re: Tools for a DIYer

Quote:
Originally Posted by mithun View Post
Although I had removed the -ve terminal first, there was a small spark on two occasions when it touched a metal part. Don't know why.

I've always used petroleum jelly but this time I used..In this it mentions to apply the grease to the terminal after you have connected and tightened the battery cable. I've always seen mechanics applying the grease before fixing the clamp!

When using a Battery Grease, should we apply it before or after fixing the battery clamp?
Well, the the idea is to coat the terminal and post with a light coat of grease to prevent corrosion. What I do is apply the grease after installing the battery clamp. There won't be much of a difference if you apply it to the battery post before installing the clamp. The idea is to apply only as much as is required and it is a tiny amount just enough to coat the entire terminal. Some use a felt washer under the clamp. The felt washer has absorbed anti corrosion material/petroleum jelly that protects the terminal.

That small spark is caused by the sudden power supply surge to the car's electronic systems. Don't worry about it. I assume you are referring to the spark that occurs when you reinstall the clamp? Because once the -ve terminal is removed the circuit is broken and there should be no sparks occuring whatsoever.

Last edited by R2D2 : 1st December 2019 at 09:51. Reason: added clarification
R2D2 is offline   (2) Thanks
Old 1st December 2019, 10:29   #2106
Distinguished - BHPian
 
saket77's Avatar
 
Join Date: Dec 2012
Location: Ranchi
Posts: 4,396
Thanked: 12,047 Times
Re: Tools for a DIYer

Quote:
Originally Posted by mithun View Post
When using a Battery Grease, should we apply it before or after fixing the battery clamp?
I would use it after tightening the terminals. If applied before, terminals might slip from the post given the lubricant nature of the grease.

Regards,
Saket.
saket77 is offline   (4) Thanks
Old 1st December 2019, 12:40   #2107
Senior - BHPian
 
Join Date: May 2005
Location: Location
Posts: 5,766
Thanked: 9,054 Times
Re: Tools for a DIYer

I have always believed that with the new brushless microprocessor controlled impact wrenches it should be possible to tighten close enough to a required torque levels. It should be theoretically possible to closely "estimate" the torque in each mode since the manufacturer has the weight of the hammer and the anvil system, the RPM of the motor and the selected mode, beats per minute.

Old impact wrenches/driver which are not microprocessor controlled and air impacts the tyre/workshops use also have torque settings but they cannot and will never be this precise. The microprocessor controlled brushless motor impacts are a different breed and should not be seen as just a motor upgrade on older impacts.

Quote:
Originally Posted by Sankar View Post
Totally agree, power tools is best used for unfastening and the final tightening/check should always be done by a torque wrench. That said these Makita tools and its three torque/power settings are accurate when compared against a calibrated torque wrench. Probably due to the fine control possible by microprocessor inside on these new gen brushless tools. If in a spot it should work.
The video demonstration below has the Milwaukee impact wrench which has a mode called "lug nut control" which can be selected through their app. This is one of the newer connected tools which have a bluetooth module in the tool and a phone app to customise torque settings and do other things like inventory management.


Again the torque settings and repeatability depends on the QC of the tool manufacturer and the quality of the software inside the motor controller. You can't expect a low priced impact to have good software although the hardware might look good. Anyway it matters only if its important to the buyer.

Like I said before I only use the BL impact for loosening and tightening lug nuts. Works good for me but I am not recommending anyone else do that.

Quote:
Originally Posted by Thad E Ginathom View Post
I have no muscle, and my manliness extends only as far as standing on the wheel wrench! But... I don't have to plug it in to anything. I don't have any cordless power tools. But it's a lovely idea to wind the jack up with one!

In reality, I barely remember the last time I changed a tyre for and by myself, and out on the road, but one should be prepared to.

Try putting that file in white vinegar for 24 hours. I tried that with one of mine recently, and was amazed at the rust and crud that came off it. And it feels so sharp too! I've heard of the trick, seen it in Youtube, but never tried it before.
It works very well. One needs to get a spare jack rod and weld a socket to the straight side which then goes on the impact's square drive. The other hook shaped side goes to jack's end. Innova the jack rod also raises and lowers the spare. I use DTW285 for this but any midsize impact should be able to do it.

Quote:
Originally Posted by mithun View Post
When using a Battery Grease, should we apply it before or after fixing the battery clamp?
You can use dielectric grease, 3M silicone, grease on the battery terminals. I apply the silicone grease on the battery post "before" putting the terminal on it and then tighten it. Terminal make metal to metal contact pushing the grease out and everywhere else where there is no metal to metal contact is protected by the silicone grease.

Last edited by Sankar : 1st December 2019 at 13:04.
Sankar is offline   (2) Thanks
Old 1st December 2019, 13:29   #2108
Senior - BHPian
 
Join Date: May 2005
Location: Location
Posts: 5,766
Thanked: 9,054 Times
Re: Tools for a DIYer

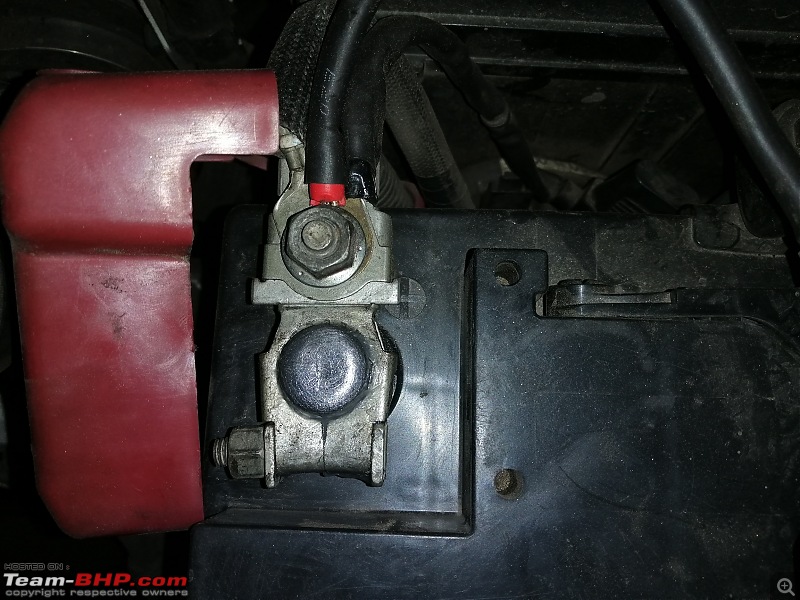
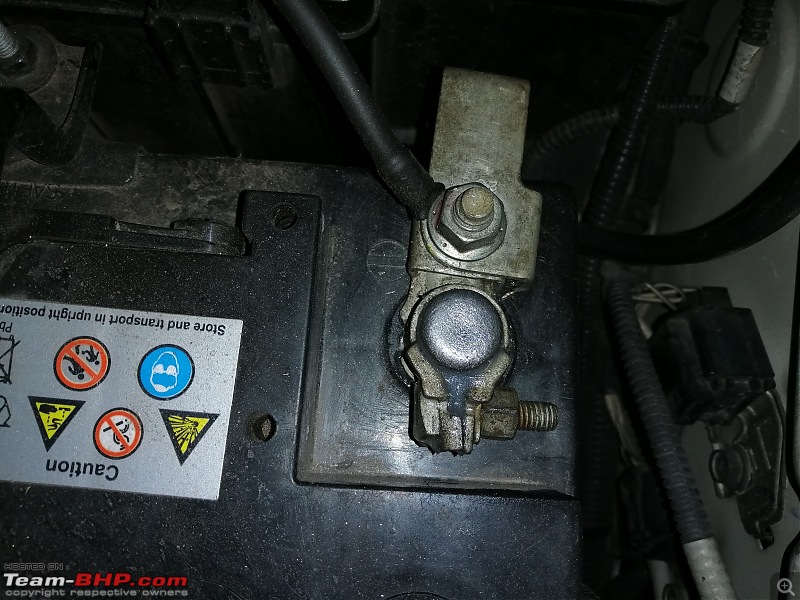
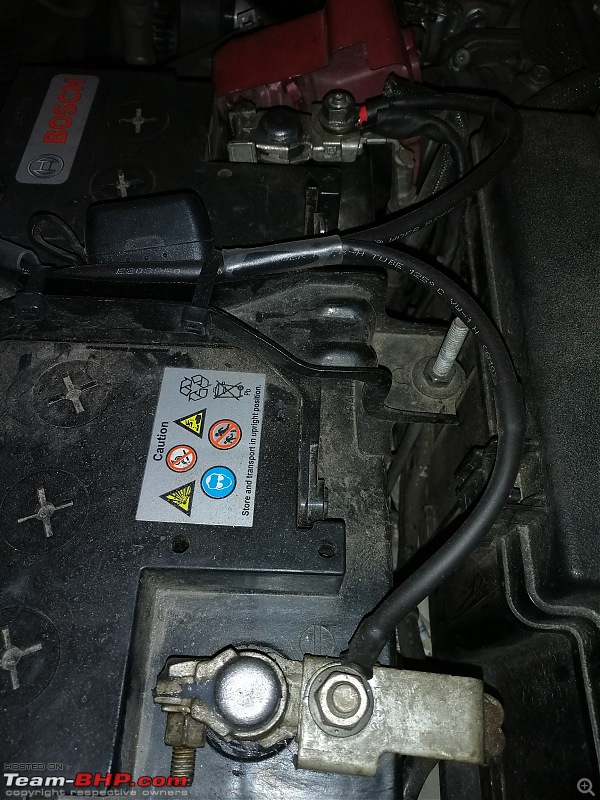
Too late to add the photos to the above post. Silicone grease on the battery post and terminal tightened over it. Now this has been like this ever since I got the new battery a year (iirc) ago, and no problems of loosening or bad contact. There is light coat on top of the post and thats all its required. Moisture does not get anywhere there is no metal to metal contact. The contacts in the picture below were cleaned when it was installed, haven't cleaned them since then.

Tools for a DIYer-img_20191201_130858.jpg

Tools for a DIYer-img_20191201_130912.jpg

Tools for a DIYer-img_20191201_130951.jpg

If you have to do the greasing after tightening the terminal then use the battery spray instead. It gets everywhere the metal to metal contact is not there and does not make a mess and collect dust and grime.

https://www.amazon.in/3M-Battery-Ter...dp/B015O56EO6/


Edit:
1) The fused line which goes over the top of the battery connects to Bosch C7 charger for battery tending. made it permanent to prevent messing with croco/gator clips.

2) All that grease in the cavity between terminal and post was squeezed to the front by terminal. I just leveled it to seal the cavity from top.

3) The red cap of positive terminal is cable tied to the terminal using a tie passing under the terminal as the cap does not lock itself due to the additional connections on top. I have cut the cable tie to take this photo. Need to set it again.

Last edited by Sankar : 1st December 2019 at 13:37.
Sankar is offline   (4) Thanks
Old 1st December 2019, 19:48   #2109
BHPian
 
adrian's Avatar
 
Join Date: Sep 2009
Location: Trivandrum
Posts: 932
Thanked: 1,215 Times
Re: Tools for a DIYer - Tool revival capsule

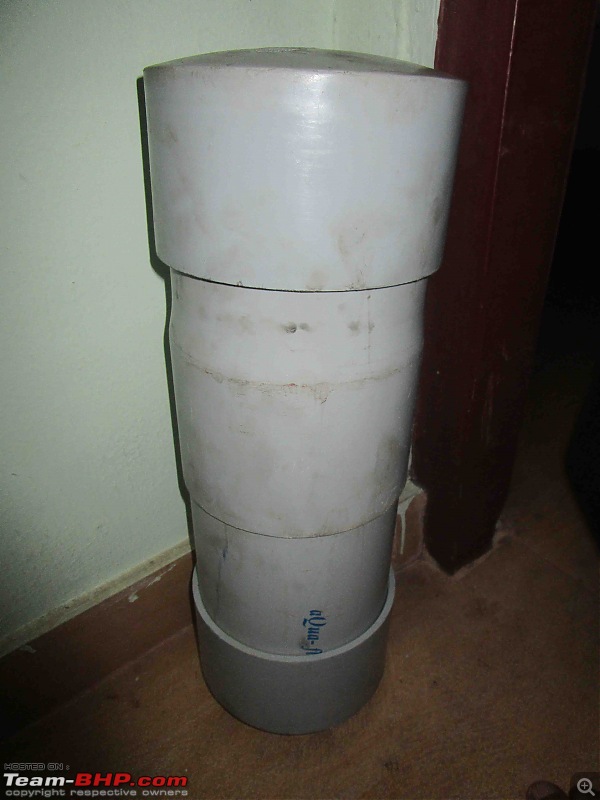
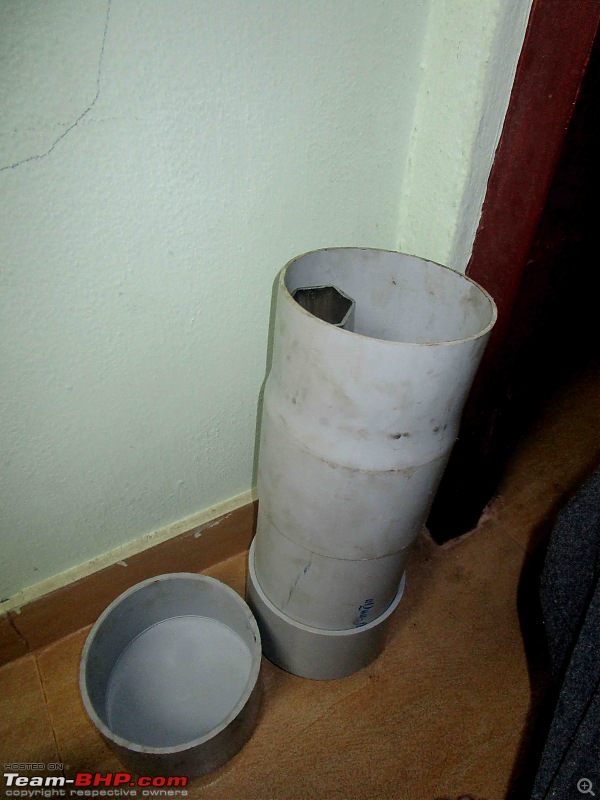
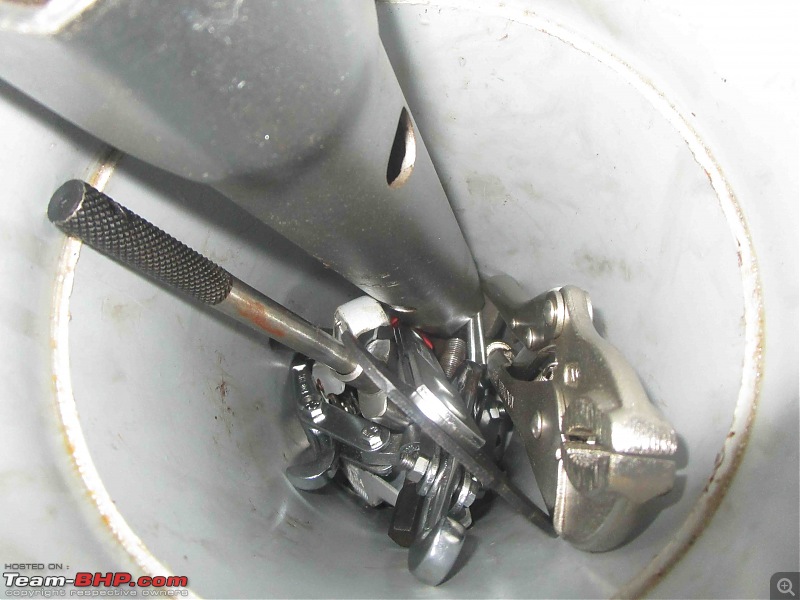
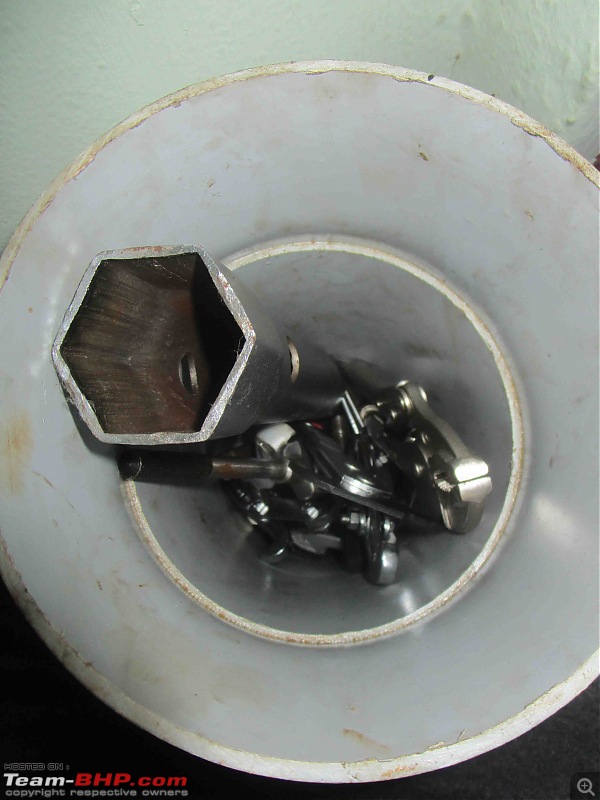
Some tools rust easily than others and are difficult remove the rust formation on them (for eg. flat files). So I have made a tool revival capsule for those tools that are not so frequently used and are prone to rust build up.

It is nothing more than a big pvc pipe with two end caps (one sealed and one removable), which is very air tight. All you have to do is put the tools in, spray adequate amount of WD-40 and close the lid

I have build this two years ago and so far the contraption has worked well for preventing rust build up on my tools.

Tools for a DIYer-toolcon.jpg

Tools for a DIYer-toolcon1.jpg

Tools for a DIYer-toolcon2.jpg

Tools for a DIYer-toolcon3.jpg
adrian is offline   (17) Thanks
Old 2nd December 2019, 11:00   #2110
BHPian
 
Join Date: Oct 2007
Location: Bangalore
Posts: 593
Thanked: 1,129 Times
Re: Tools for a DIYer

Quote:
Originally Posted by Sankar View Post
The ambient temperature on NH4 passing through TN on a sunny summer day ranges from 36C to 38C normally and I have seen it go till 42C on certain days and at certain places.
This whole exercise can be done within 15 minutes with a power tool. I have done it both ways and I will never ever do it the hard way again, if given a choice. I do not torque the wheel nuts with a torque wrench either instead I use the electric impact for that also.
Do you always carry your Impact wrench/batteries in your car?
Both my Dewalt and Milwaukee batteries have high temperature and voltage cut-outs built into the tool and no protection circuits are installed in the battery pack except for a battery guage. I don't feel safe leaving such a battery pack with "always on" terminals capable of outputting very high currents and heat in the car unattended. Despite driving an e2o filled with Li batteries under my seat, I don't feel that kind of safety with cordless tool batteries.
I carry my impact wrench in my car only for long journeys and ensure I take the batteries out if I have to park my car, especially if parking under sun.

Quote:
Originally Posted by Thad E Ginathom View Post
I don't have any cordless power tools. But it's a lovely idea to wind the jack up with one!

In reality, I barely remember the last time I changed a tyre for and by myself, and out on the road, but one should be prepared to.
With the tubeless tyres and TPMS, I was always able to drive home or to a tyre shop after getting alerted of air leakage. But one time, I went to a tyre shop in the outskirts of Bangalore on a Sunday afternoon and that shop guy refused to touch my car stating he works only on 2-wheelers. He was so adamant, He said if I remove and give him the tyre, he will fix it. Removing lug nuts manually was not a problem, but jacking up the car with a scissor jack under sun was time consuming and tiring. I now carry a trolley jack in my car.
Holyghost is offline   (1) Thanks
Old 2nd December 2019, 12:16   #2111
Senior - BHPian
 
Join Date: May 2005
Location: Location
Posts: 5,766
Thanked: 9,054 Times
Re: Tools for a DIYer

Quote:
Originally Posted by Holyghost View Post
Do you always carry your Impact wrench/batteries in your car?
Both my Dewalt and Milwaukee batteries have high temperature and voltage cut-outs built into the tool and no protection circuits are installed in the battery pack except for a battery guage. I don't feel safe leaving such a battery pack with "always on" terminals capable of outputting very high currents and heat in the car unattended. Despite driving an e2o filled with Li batteries under my seat, I don't feel that kind of safety with cordless tool batteries.
I carry my impact wrench in my car only for long journeys and ensure I take the batteries out if I have to park my car, especially if parking under sun.
Only when I am traveling out of town and I don't have any worries regarding tool battery safety. Liion cordless tools have been here for far longer than lion powered vehicles and they lead a rougher life - drops, bangs, liquids and are also used and stored in desert worksites.

I store the battery and the tool separate at home and also in the tool bag when inside vehicle. The battery cover is put over the terminals.

Apart from that there is a fusible link inside the battery which burns out if the terminals were to short out.

I would never put my ass over an e20 battery pack, i do not trust it when even teslas and konas explode charring the driver to death.
Sankar is offline   (4) Thanks
Old 2nd December 2019, 19:00   #2112
BHPian
 
Join Date: Oct 2007
Location: Bangalore
Posts: 593
Thanked: 1,129 Times
Re: Tools for a DIYer

Quote:
Originally Posted by Sankar View Post
Liion cordless tools have been here for far longer than lion powered vehicles and they lead a rougher life - drops, bangs, liquids and are also used and stored in desert worksites.
Apart from that there is a fusible link inside the battery which burns out if the terminals were to short out.
I would never put my ass over an e20 battery pack, i do not trust it when even teslas and konas explode charring the driver to death.
The main point here is the Li battery chemistry. The older batteries like Lithium Iron Phosphate (LiFePo4) were safer and do not explode when abused. The thermal runaway of these batteries do not produce enough heat or oxygen to self ignite.
The newer ones based on Cobalt/Manganese which are used in the current gen tools as well as the Teslas and Kona needs much more care due to its tendency to ignite and explode.
Holyghost is offline   (2) Thanks
Old 16th December 2019, 10:40   #2113
Senior - BHPian
 
Sebring's Avatar
 
Join Date: Apr 2011
Location: Dubai/Bengaluru
Posts: 3,590
Thanked: 11,096 Times
Re: Tools for a DIYer

Bought a sachet of LiquiMoly Battery Grease from Amazon paying 83 bucks. The petroleum jelly coating disintegrates in 3 month (OTC product, not industrial jelly), so hopefully this should last
Quote:
Originally Posted by mithun View Post
I've always used petroleum jelly but this time I used: Battery Grease. In this article, it mentions to apply the grease to the terminal after you have connected and tightened the battery cable. I've always seen mechanics applying the grease before fixing the clamp!
When using a Battery Grease, should we apply it before or after fixing the battery clamp?
Attached Thumbnails
Tools for a DIYer-img_9898.jpg  

Sebring is offline   (1) Thanks
Old 17th December 2019, 17:54   #2114
Senior - BHPian
 
Join Date: Jul 2009
Location: Calcutta
Posts: 4,668
Thanked: 6,217 Times
Re: Tools for a DIYer - Tool revival capsule

Quote:
Originally Posted by adrian View Post
spray adequate amount of WD-40 and close the lid
Try Rustlick 631 next time.

Regards
Sutripta
Sutripta is offline   (1) Thanks
Old 18th December 2019, 20:24   #2115
Distinguished - BHPian
 
condor's Avatar
 
Join Date: Jun 2006
Location: Speed-brkr City
Posts: 15,868
Thanked: 16,020 Times
Re: Tools for a DIYer

Any reviews of the Black & Decker HD5010va5 13mm Variable speed drill ?
condor is online now  
Reply

Most Viewed


Copyright ©2000 - 2024, Team-BHP.com
Proudly powered by E2E Networks